How to Sew Floating Rick Rack
I’ve really been having a great time playing with rick rack and discovering new and fashionable ways to embellish my home sewn wardrobe with it. I showed a couple of different ways to use it in my previous tutorial. For this one, I’m using a technique called “floating rick rack”. This is a clever way to use rick rack as a trim or insertion.
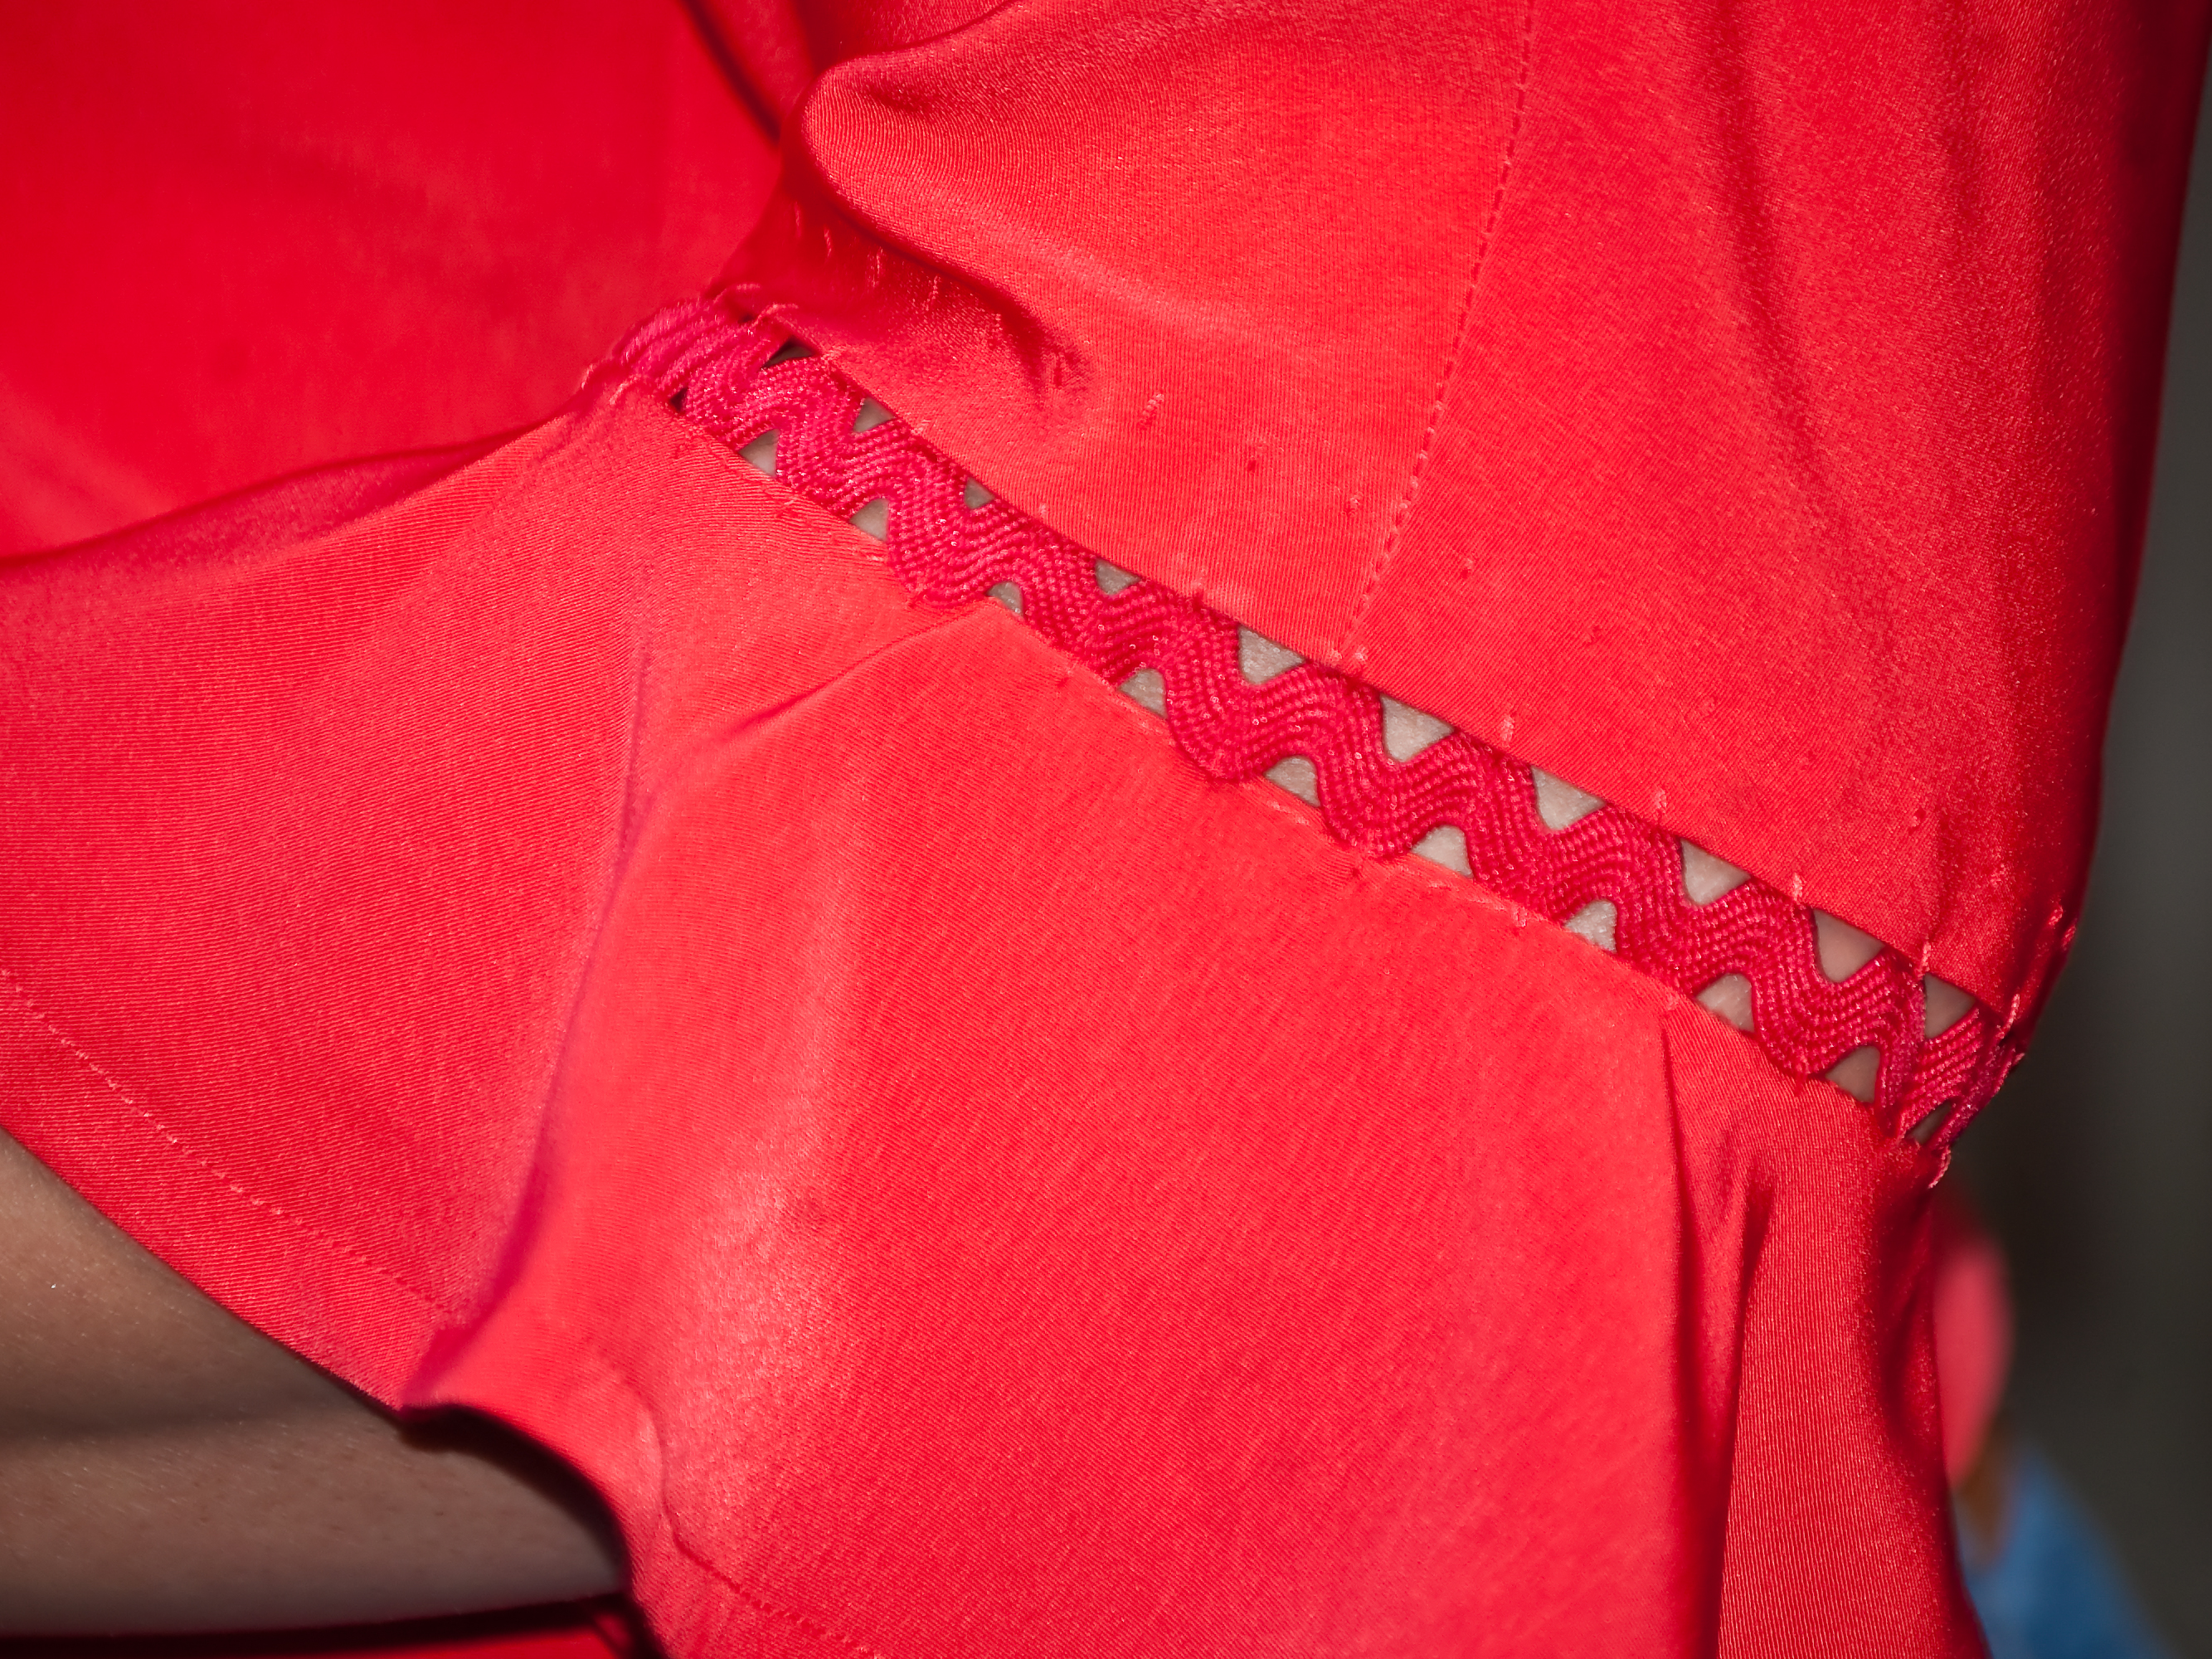
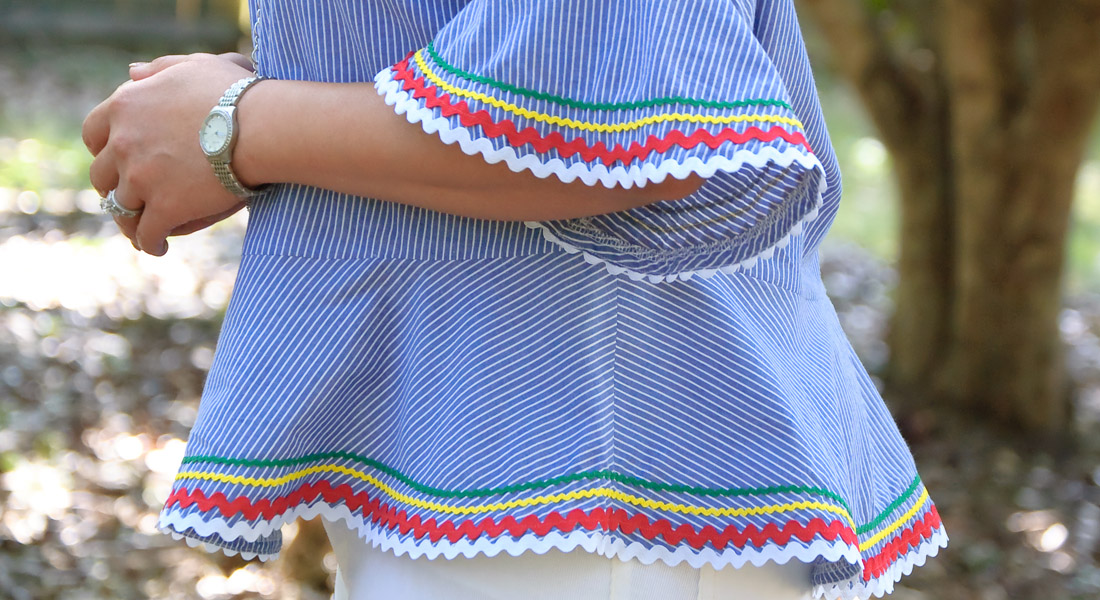
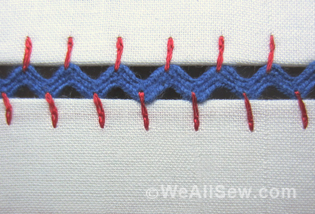
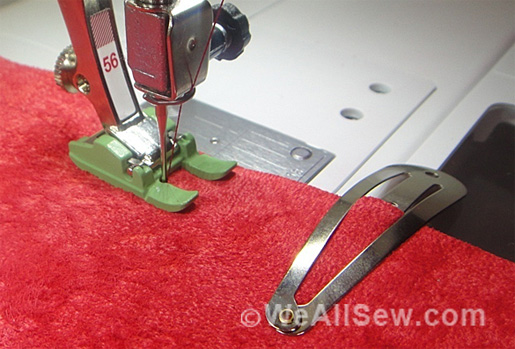
For this project, I will be using the floating rick rack insertion technique to join a flounce to a sleeve. I’m using Simplicity 8694 for my top. The rick rack is sewn to the fabric using a blindhem stitch. It’s the #7 stitch on the BERNINA 350 PE. The “zig” part of the stitch is used to catch the mountain part of the rick rack.
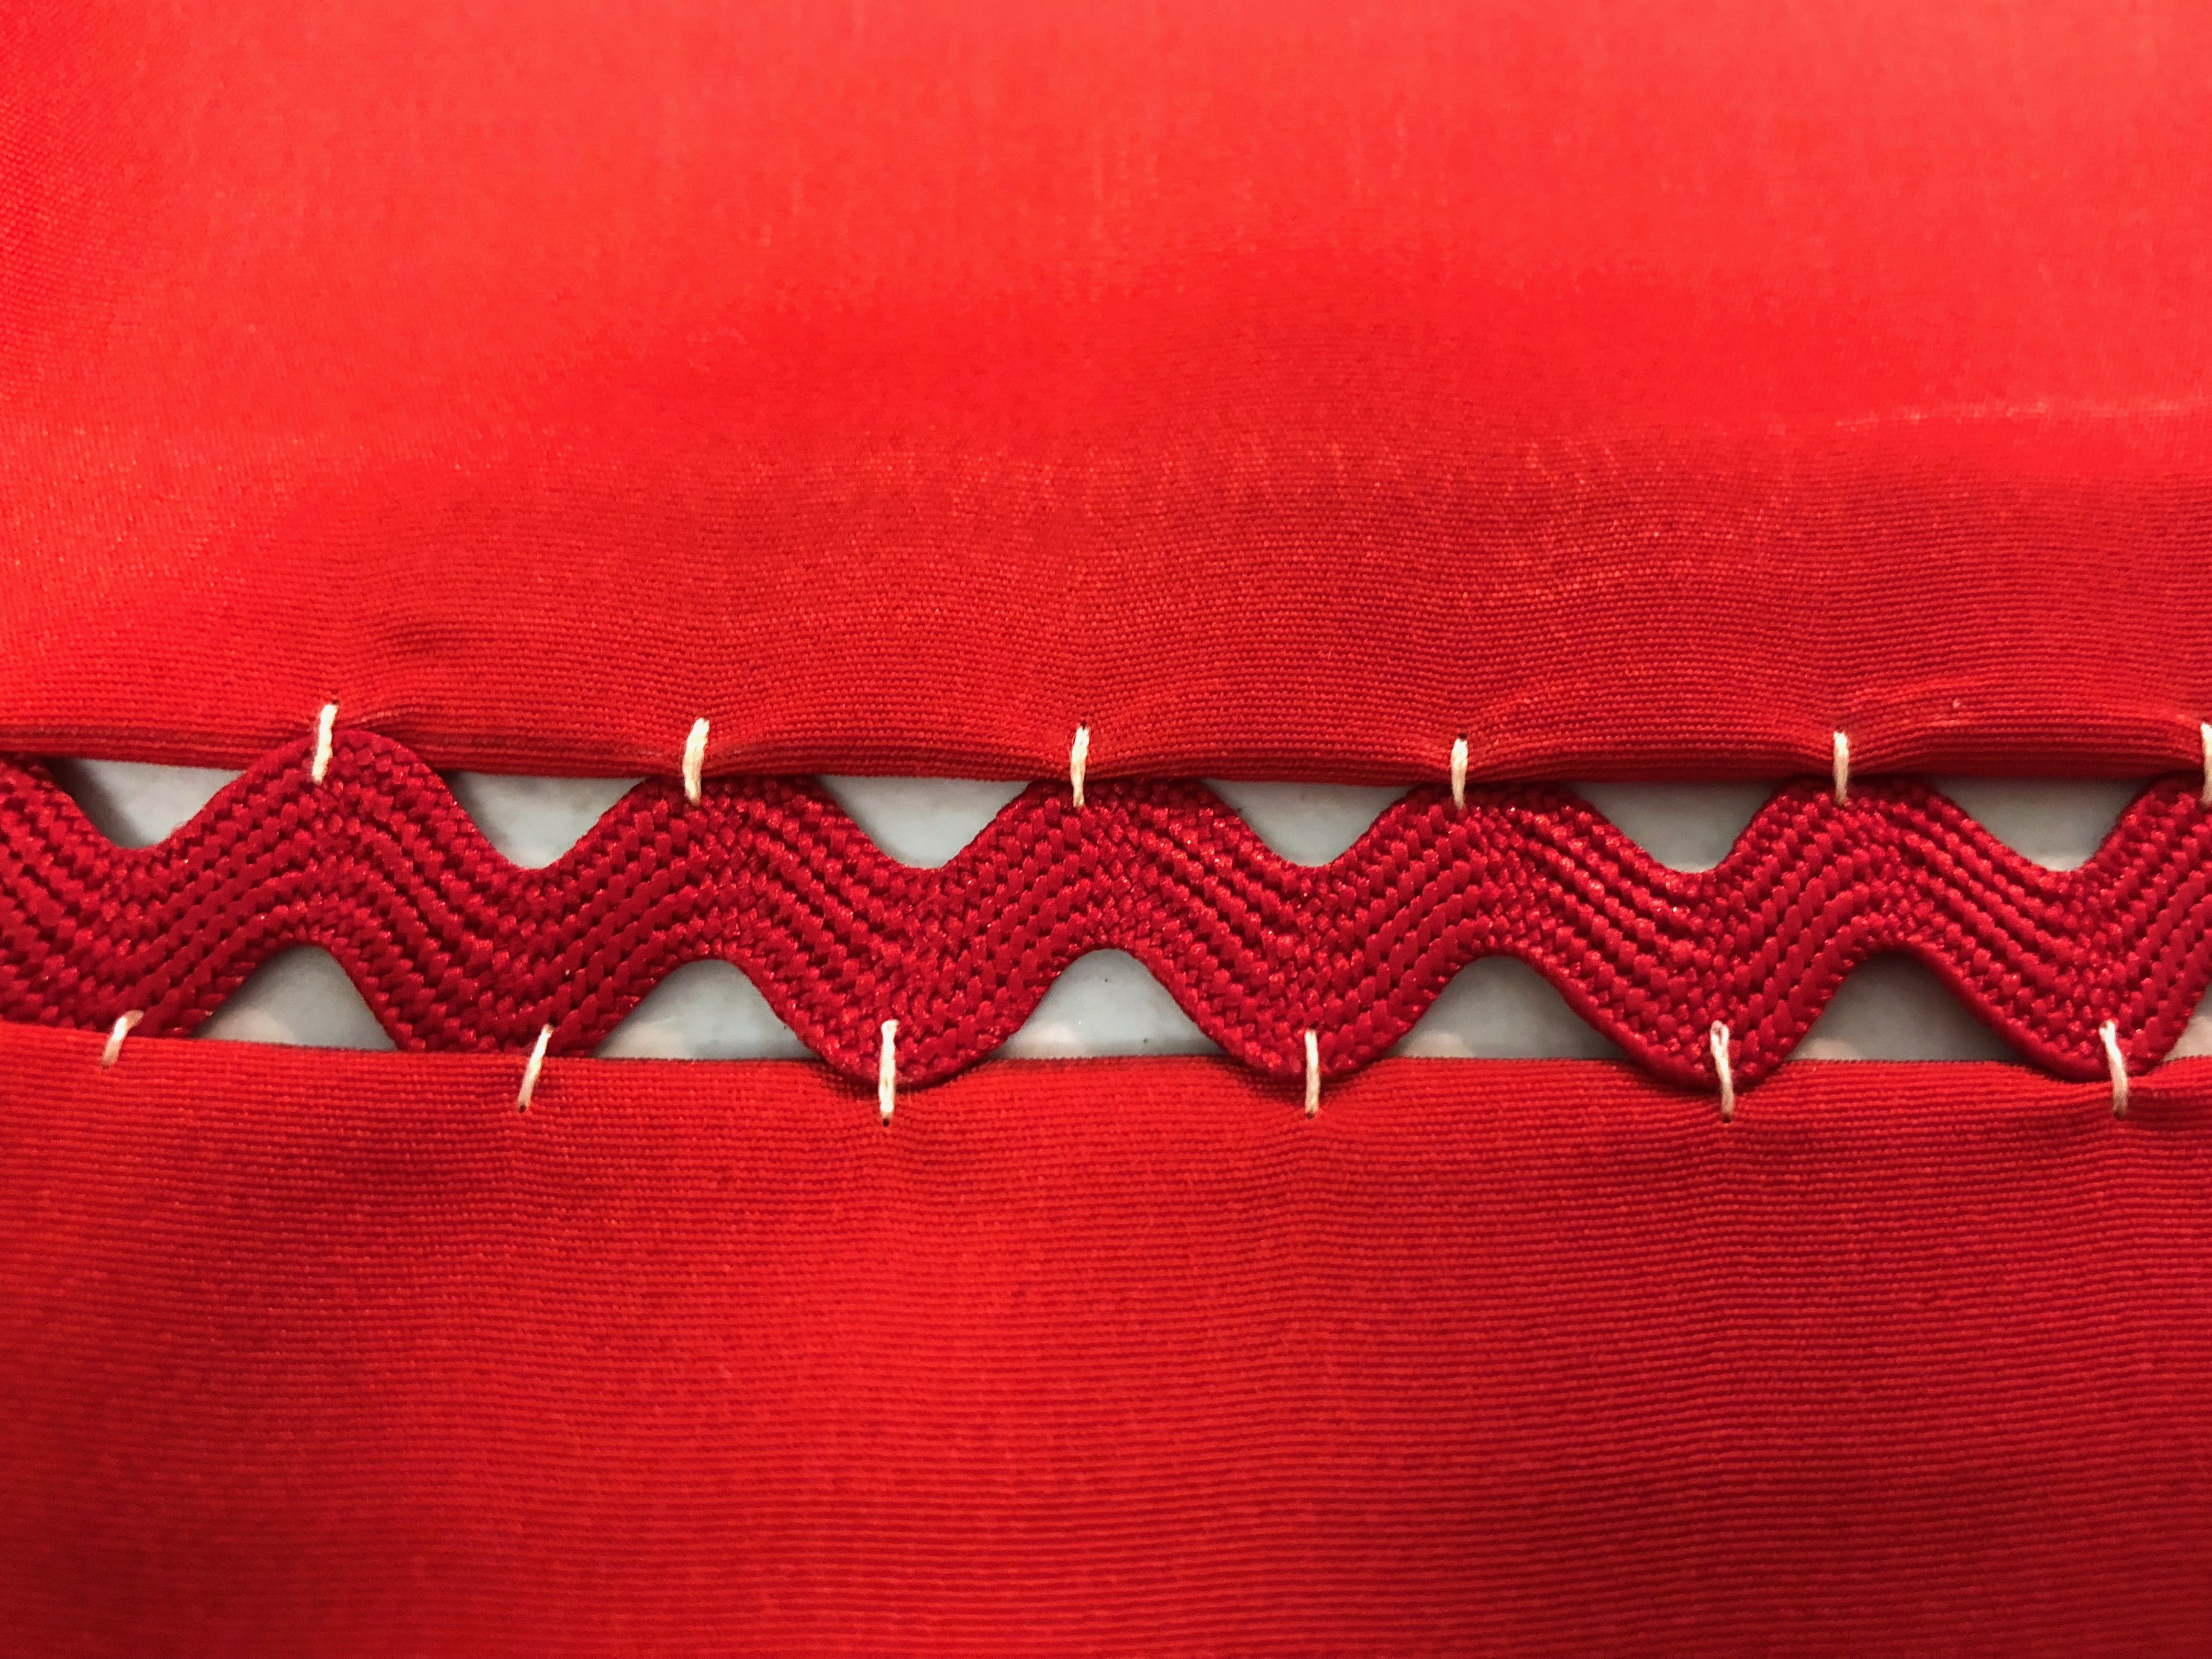
I’m using this example white thread so that you can see what it looks like.
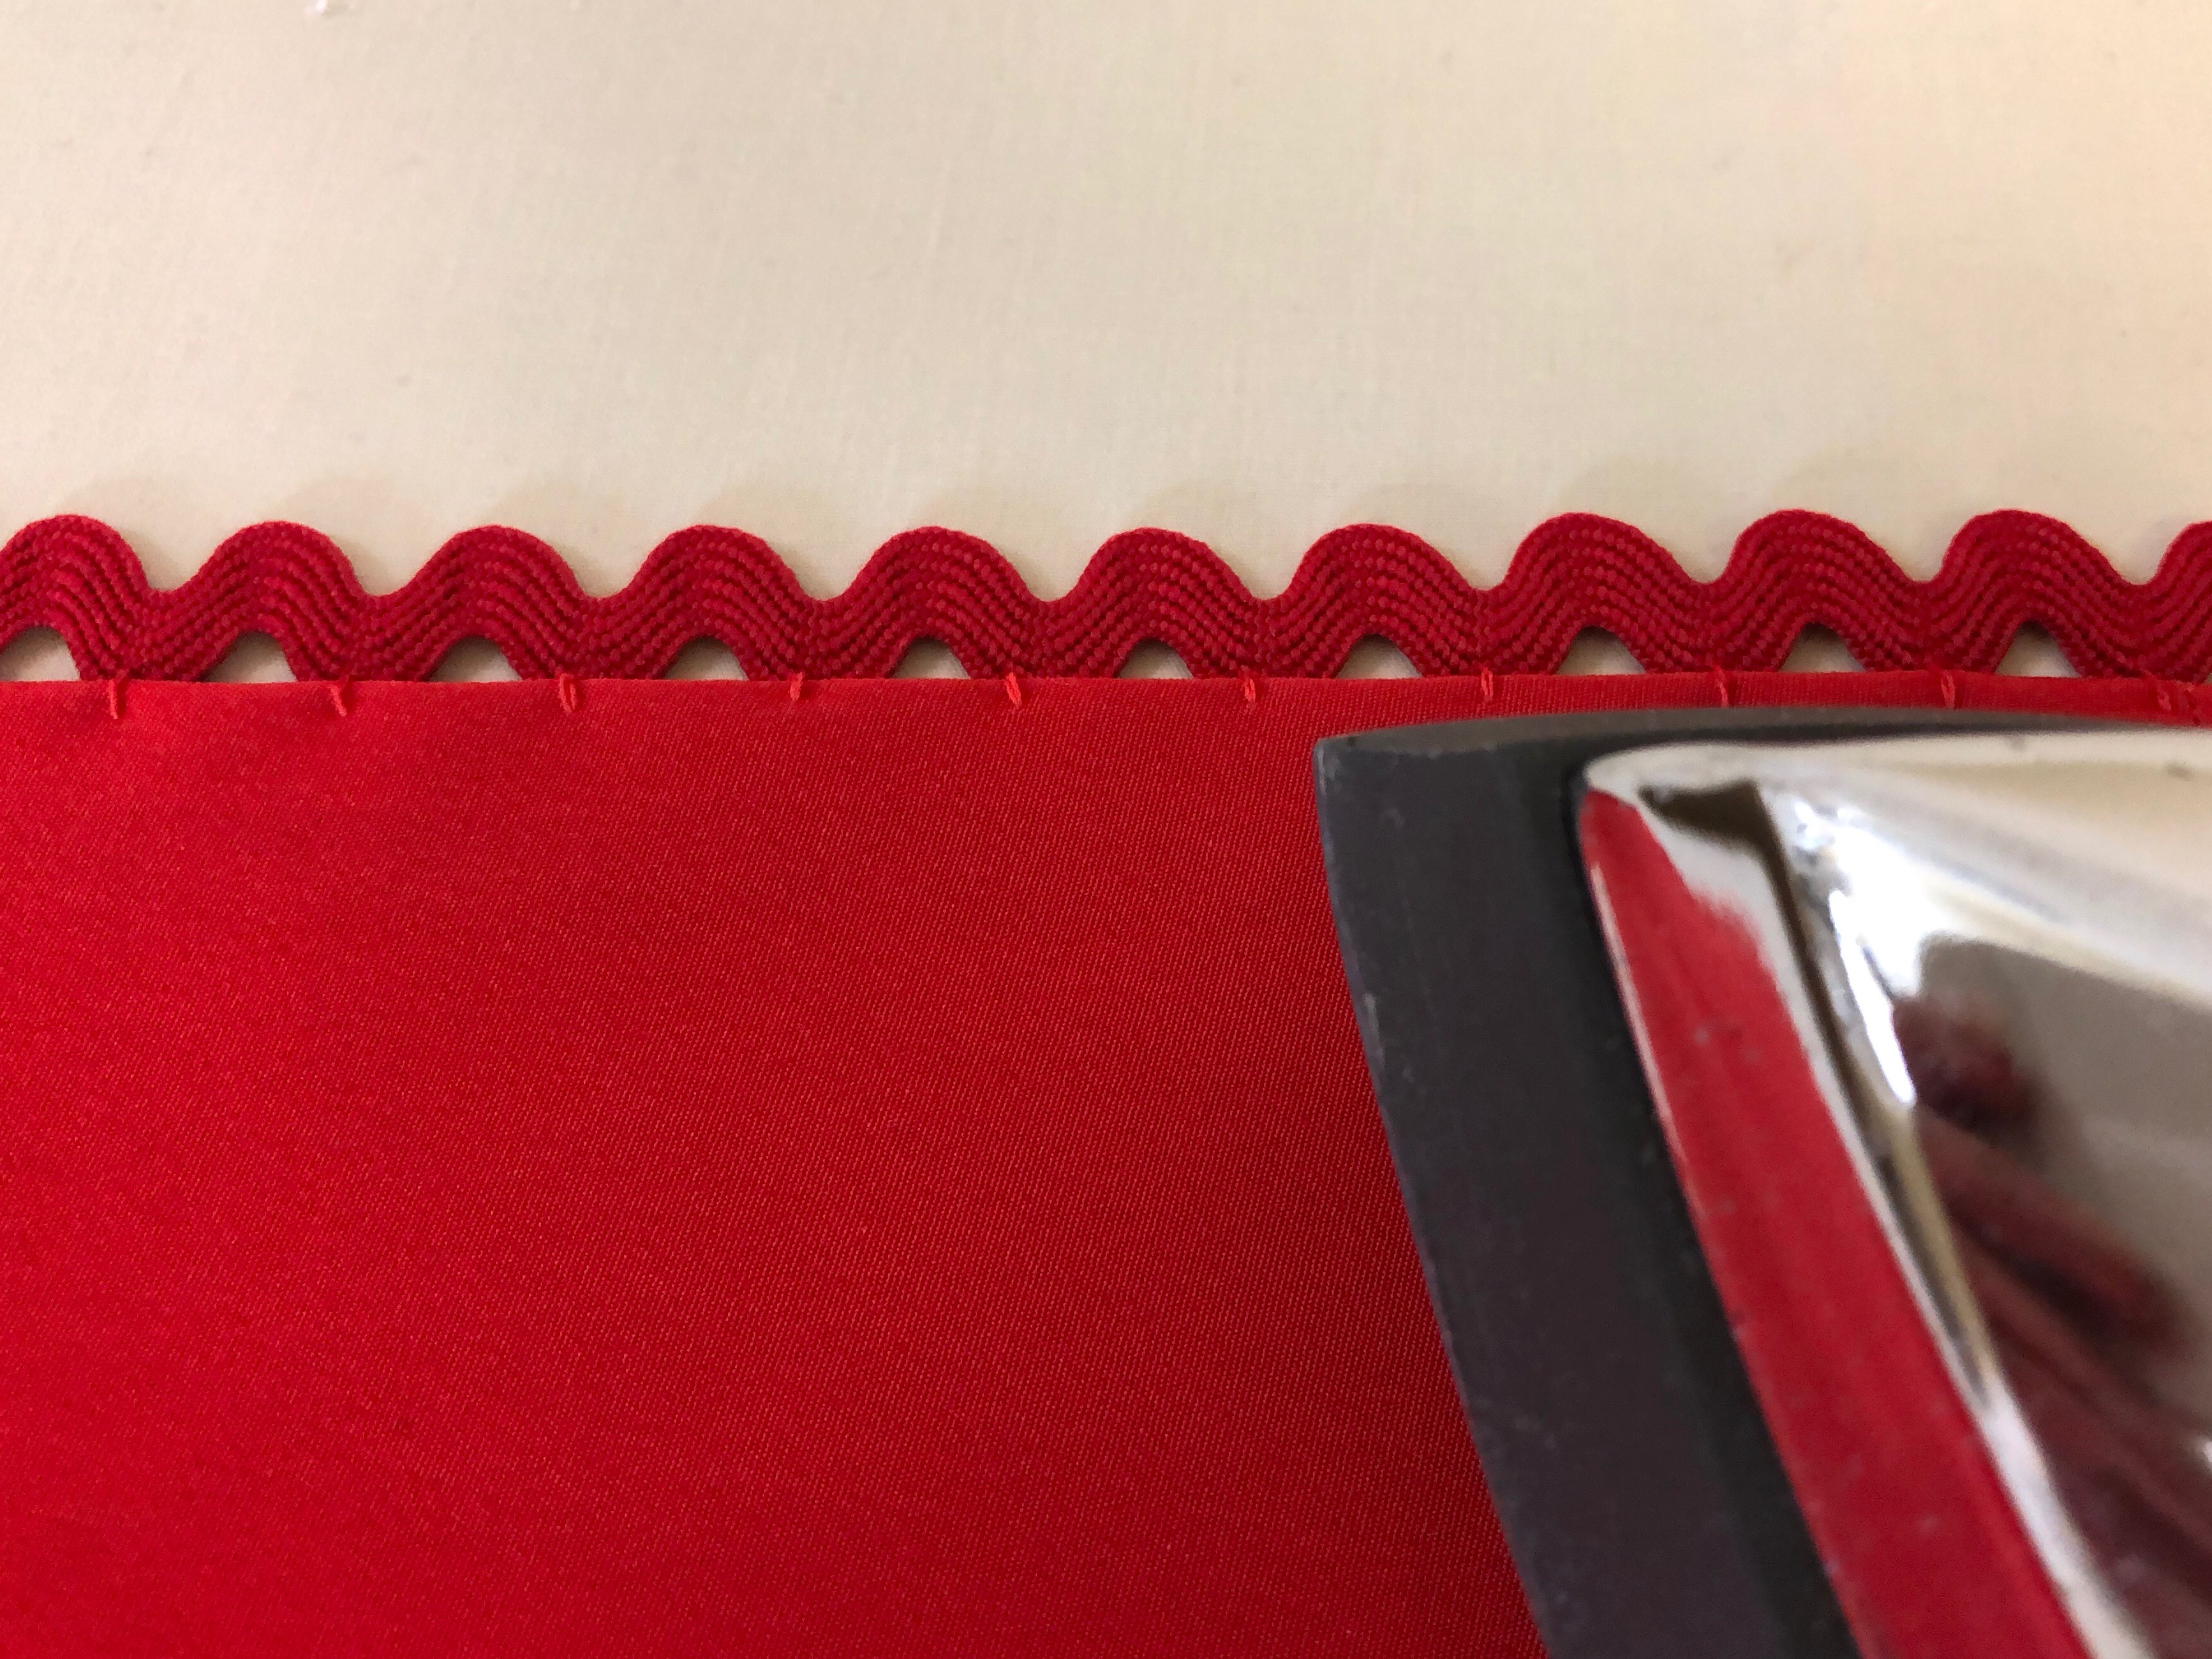
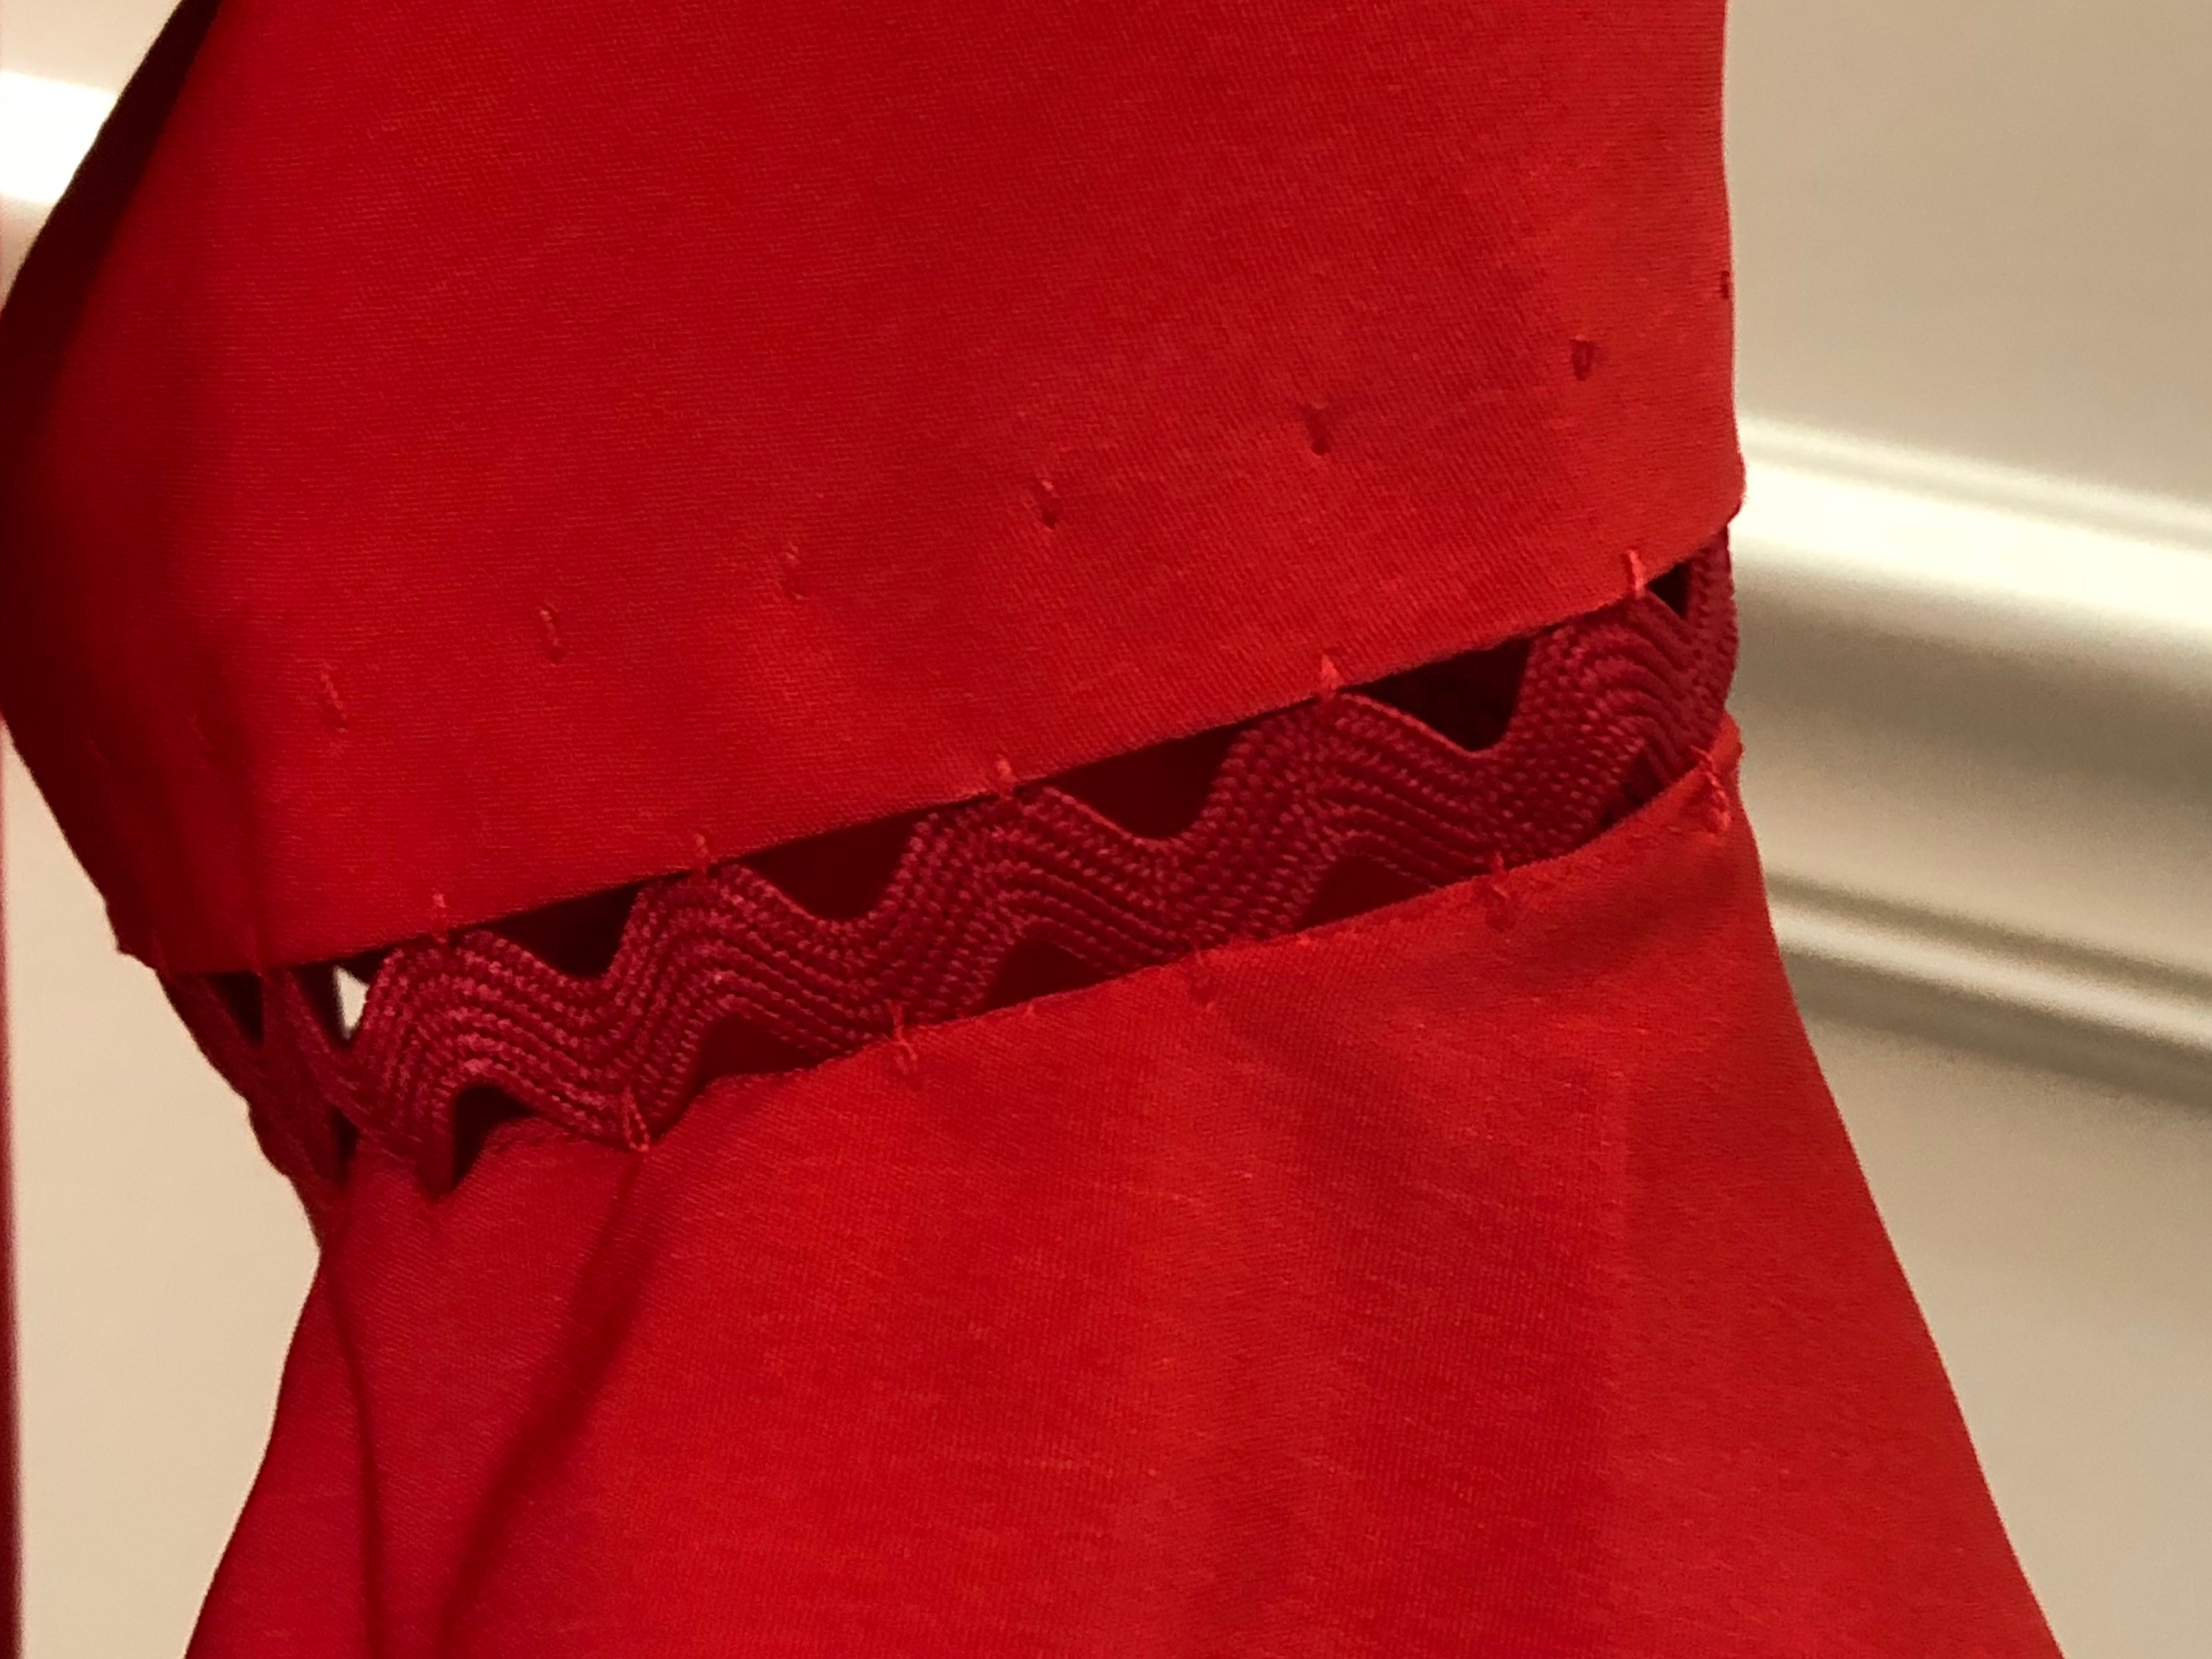
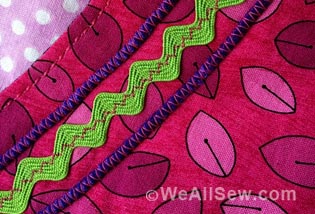
Once this is complete, the rick rack will slide on the threads giving the illusion that the width of the rick rack is floating along the folded edges of the fabric. This technique takes some practice because you need to determine the stitch length and width to match your rick rack size before you begin on your project.
Materials to Sew Floating Rick Rack
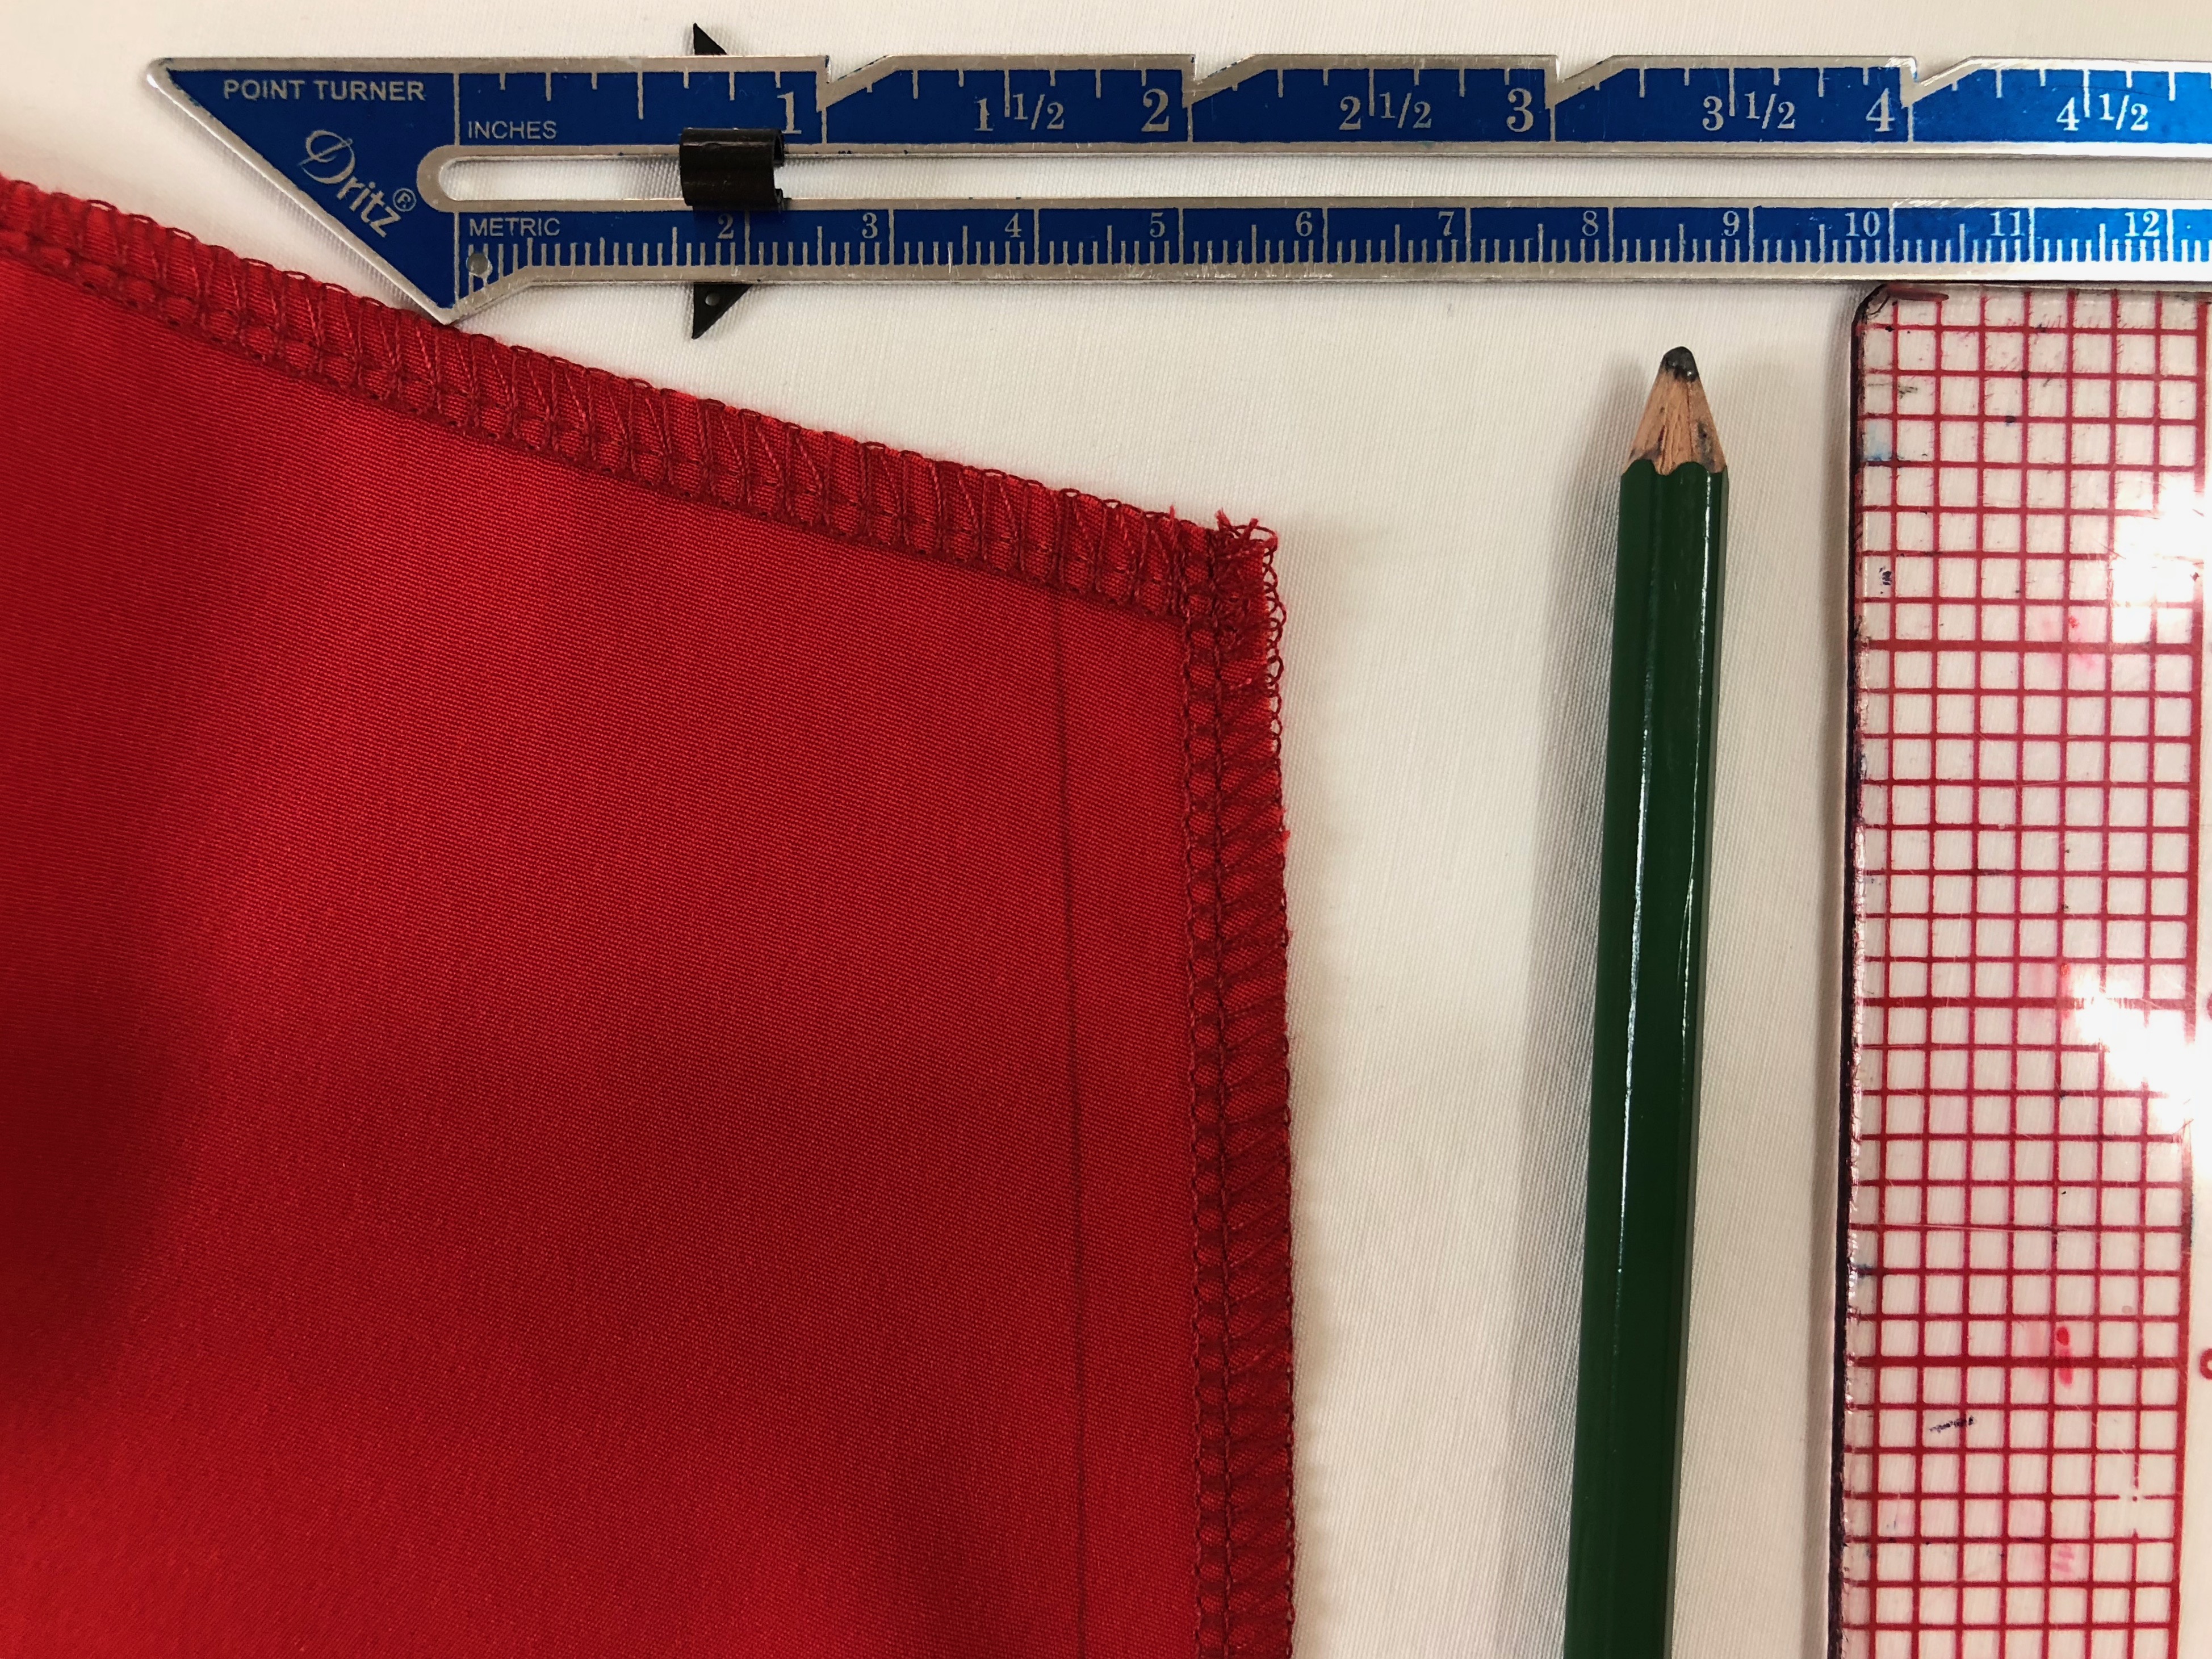
- Fabric
- Rick Rack trim
- All-purpose thread
- Fabric pen or pencil
- Seam gauge
- Scissors
- Iron and ironing board
- Straight pins
- Sewing Machine (I used aBERNINA 350 PE)
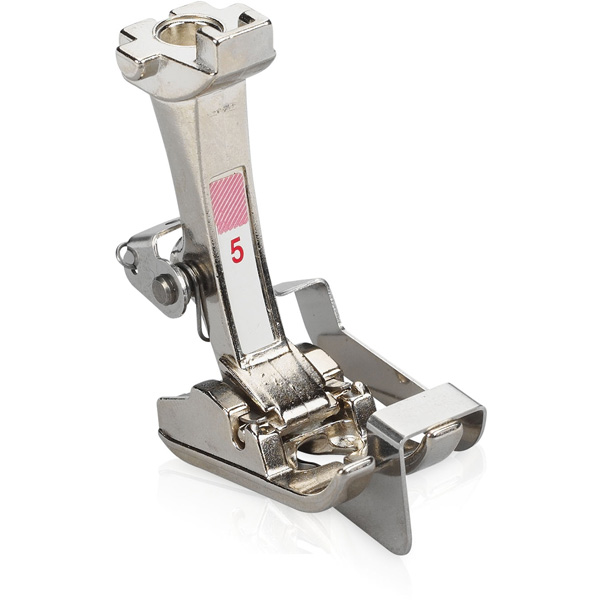
- BERNINA Blindstitch Foot #5
Step 1
When you get to the point where you want to place the rick rack, you need to leave a seam allowance. I’m using the standard 5/8″. Working on the right side of the fabric, give yourself a guide line. You can either mark a line directly onto the fabric, or use a straight stitch from your machine. Whichever one you like best. Once the seam is folded, it will be on the inside and you won’t see it.
Step 2
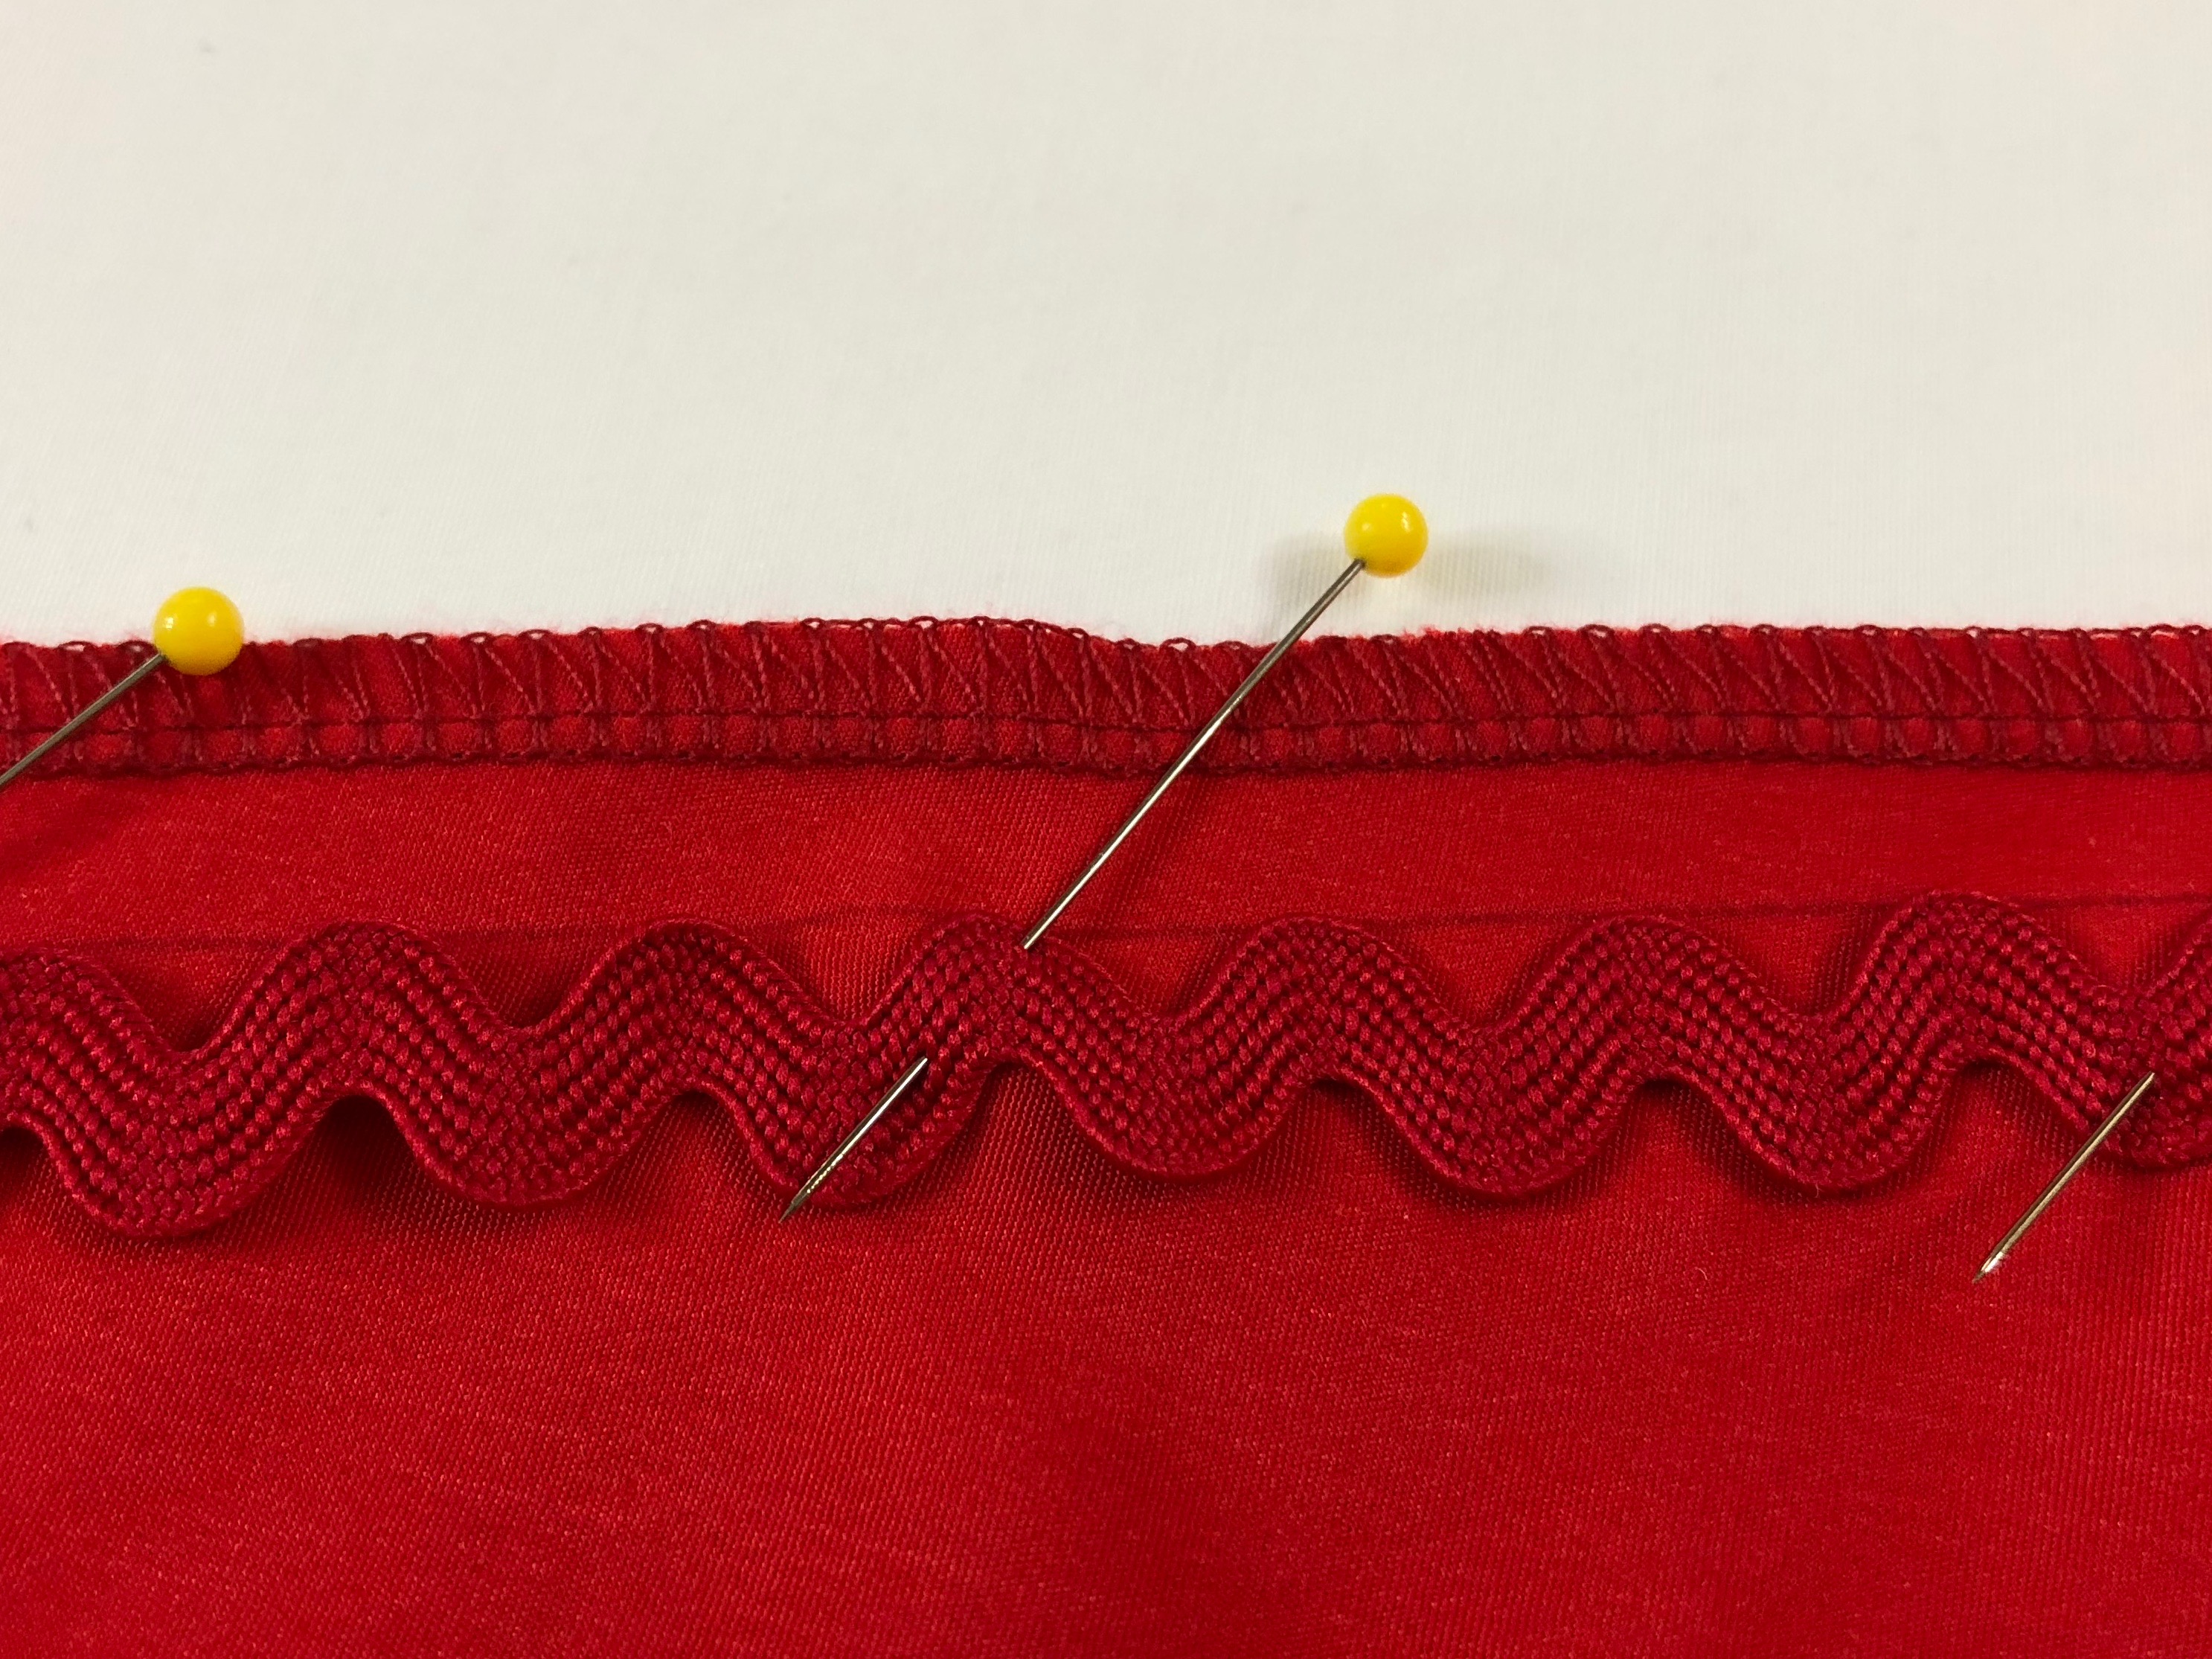
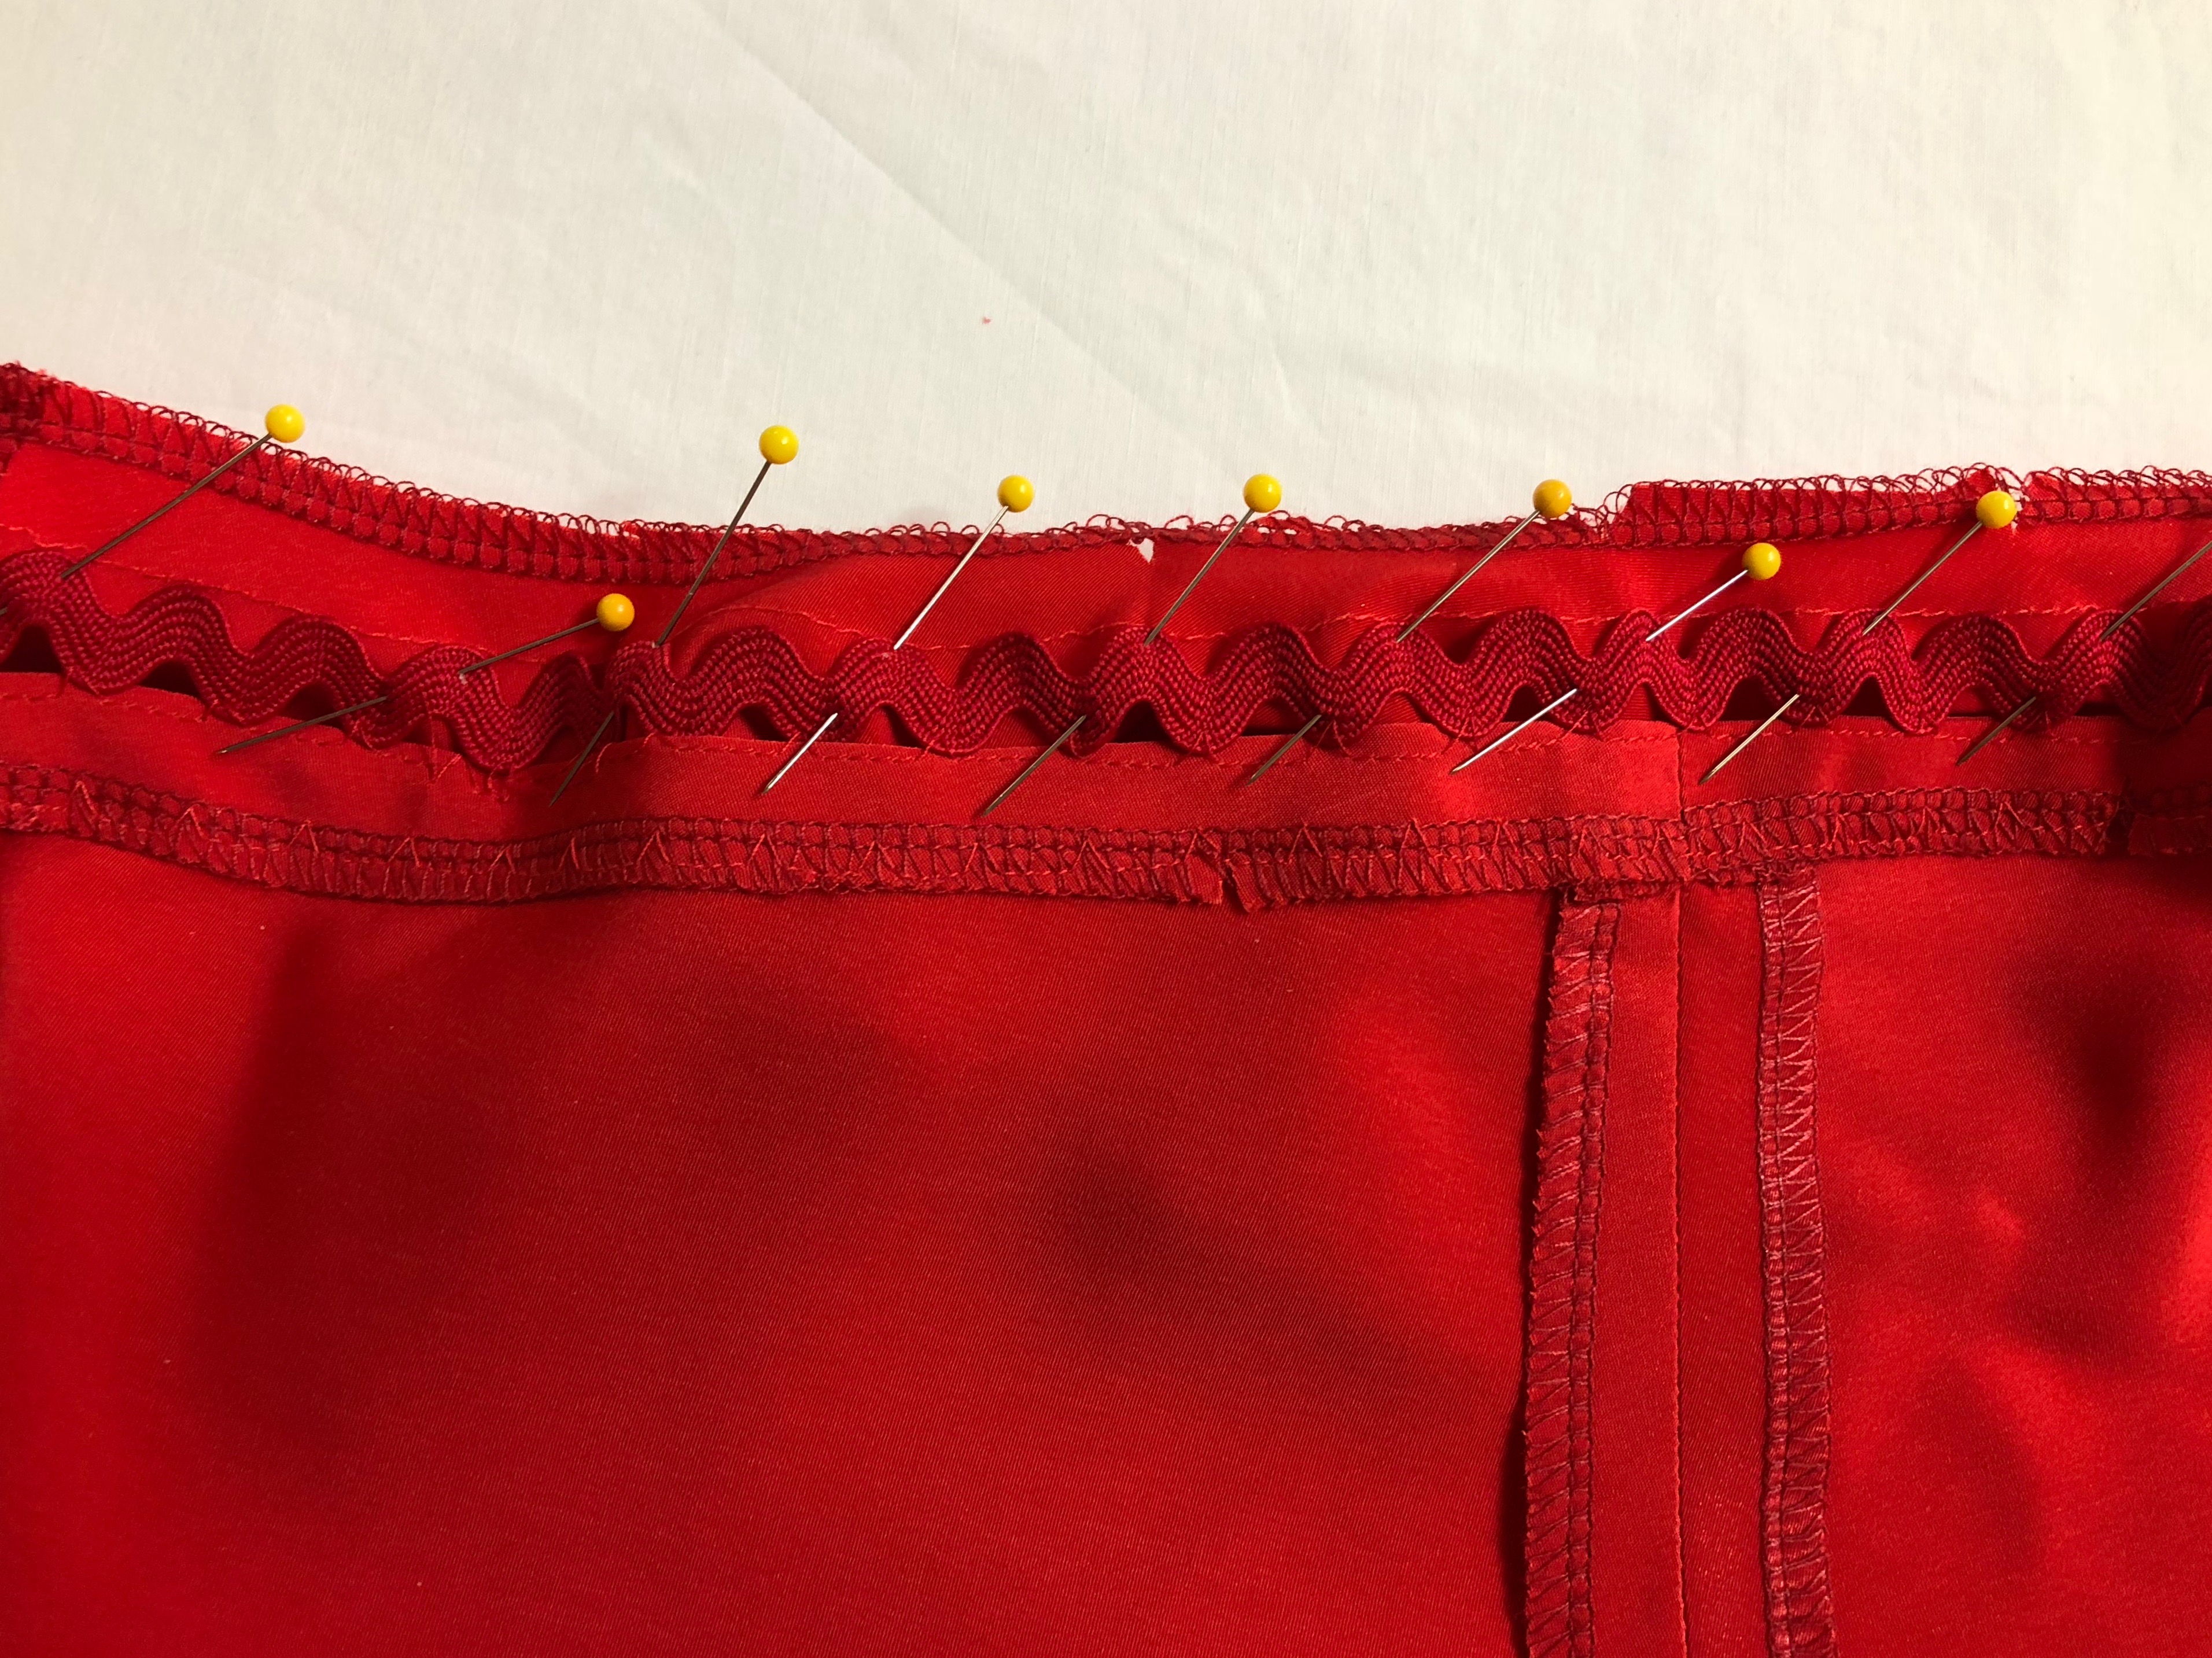
On the right side of the fabric, pin your rick rack below your guide line with the mountains of the rick rack resting right on the line as shown.
Step 3

Like I previously mentioned, you need to practice the stitch length and width to match your rick rack prior to sewing. I’m using regular/medium rick rack and this is my blindhem stitch setting.
Step 4
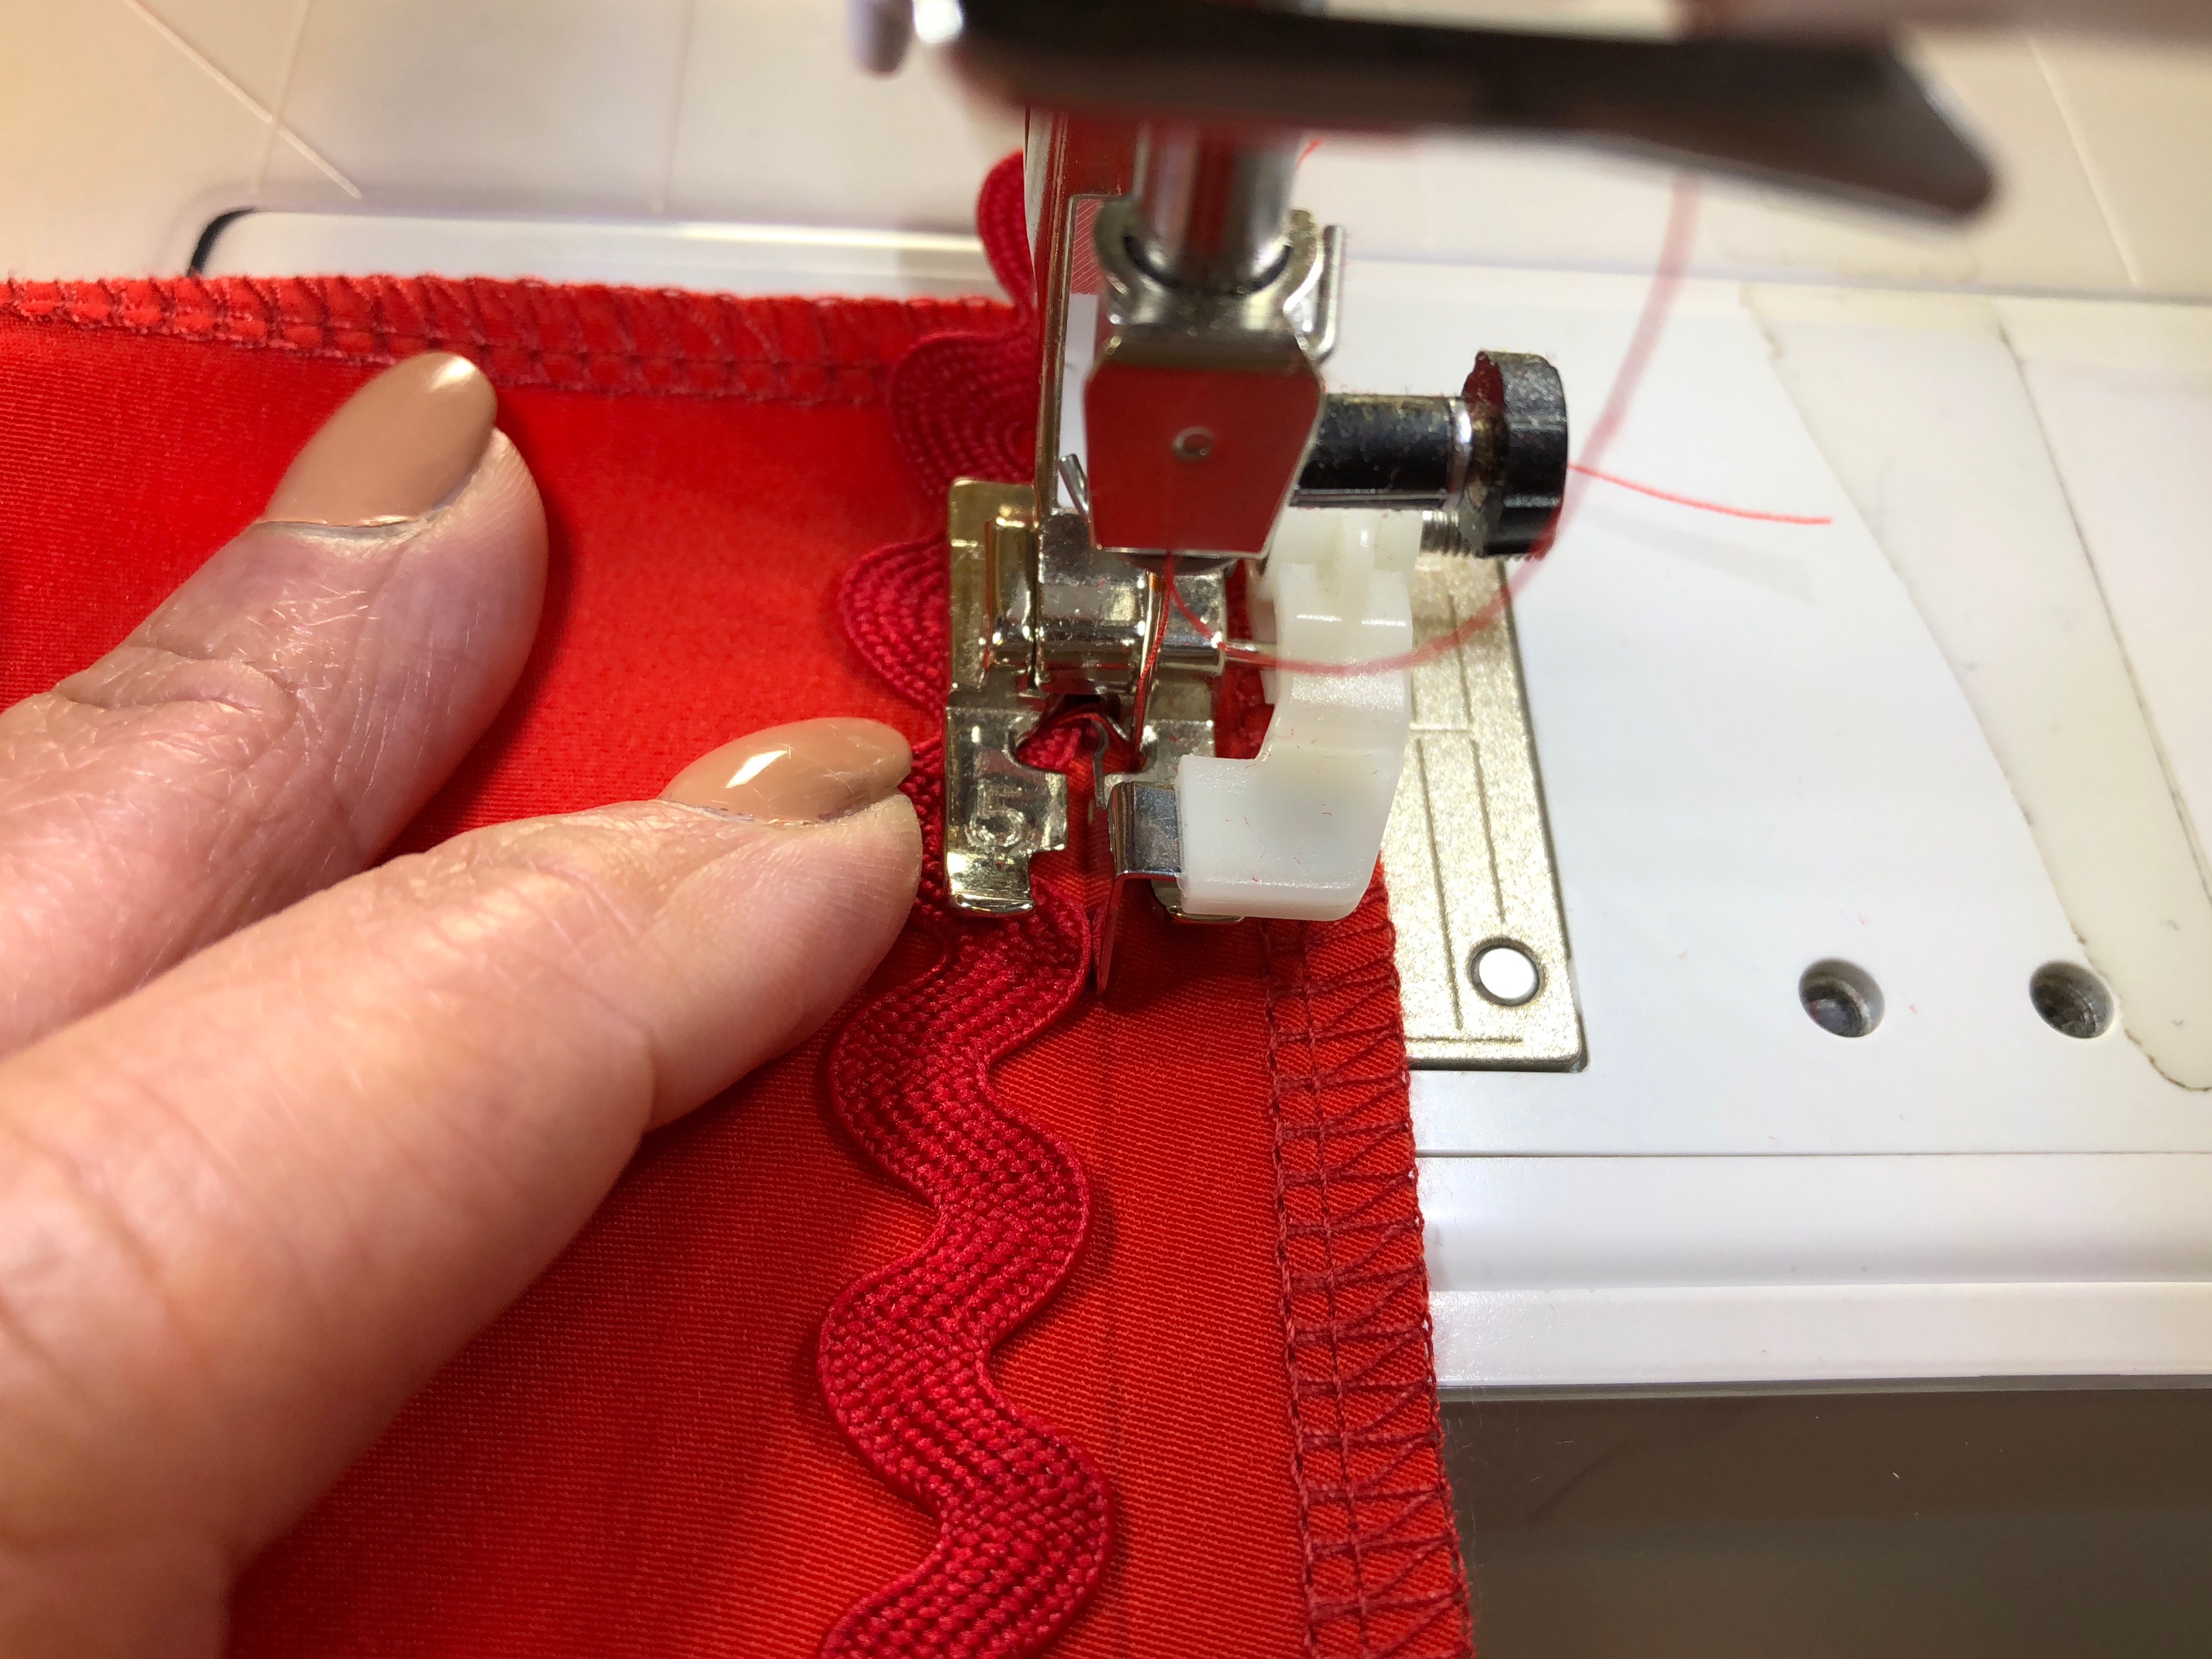
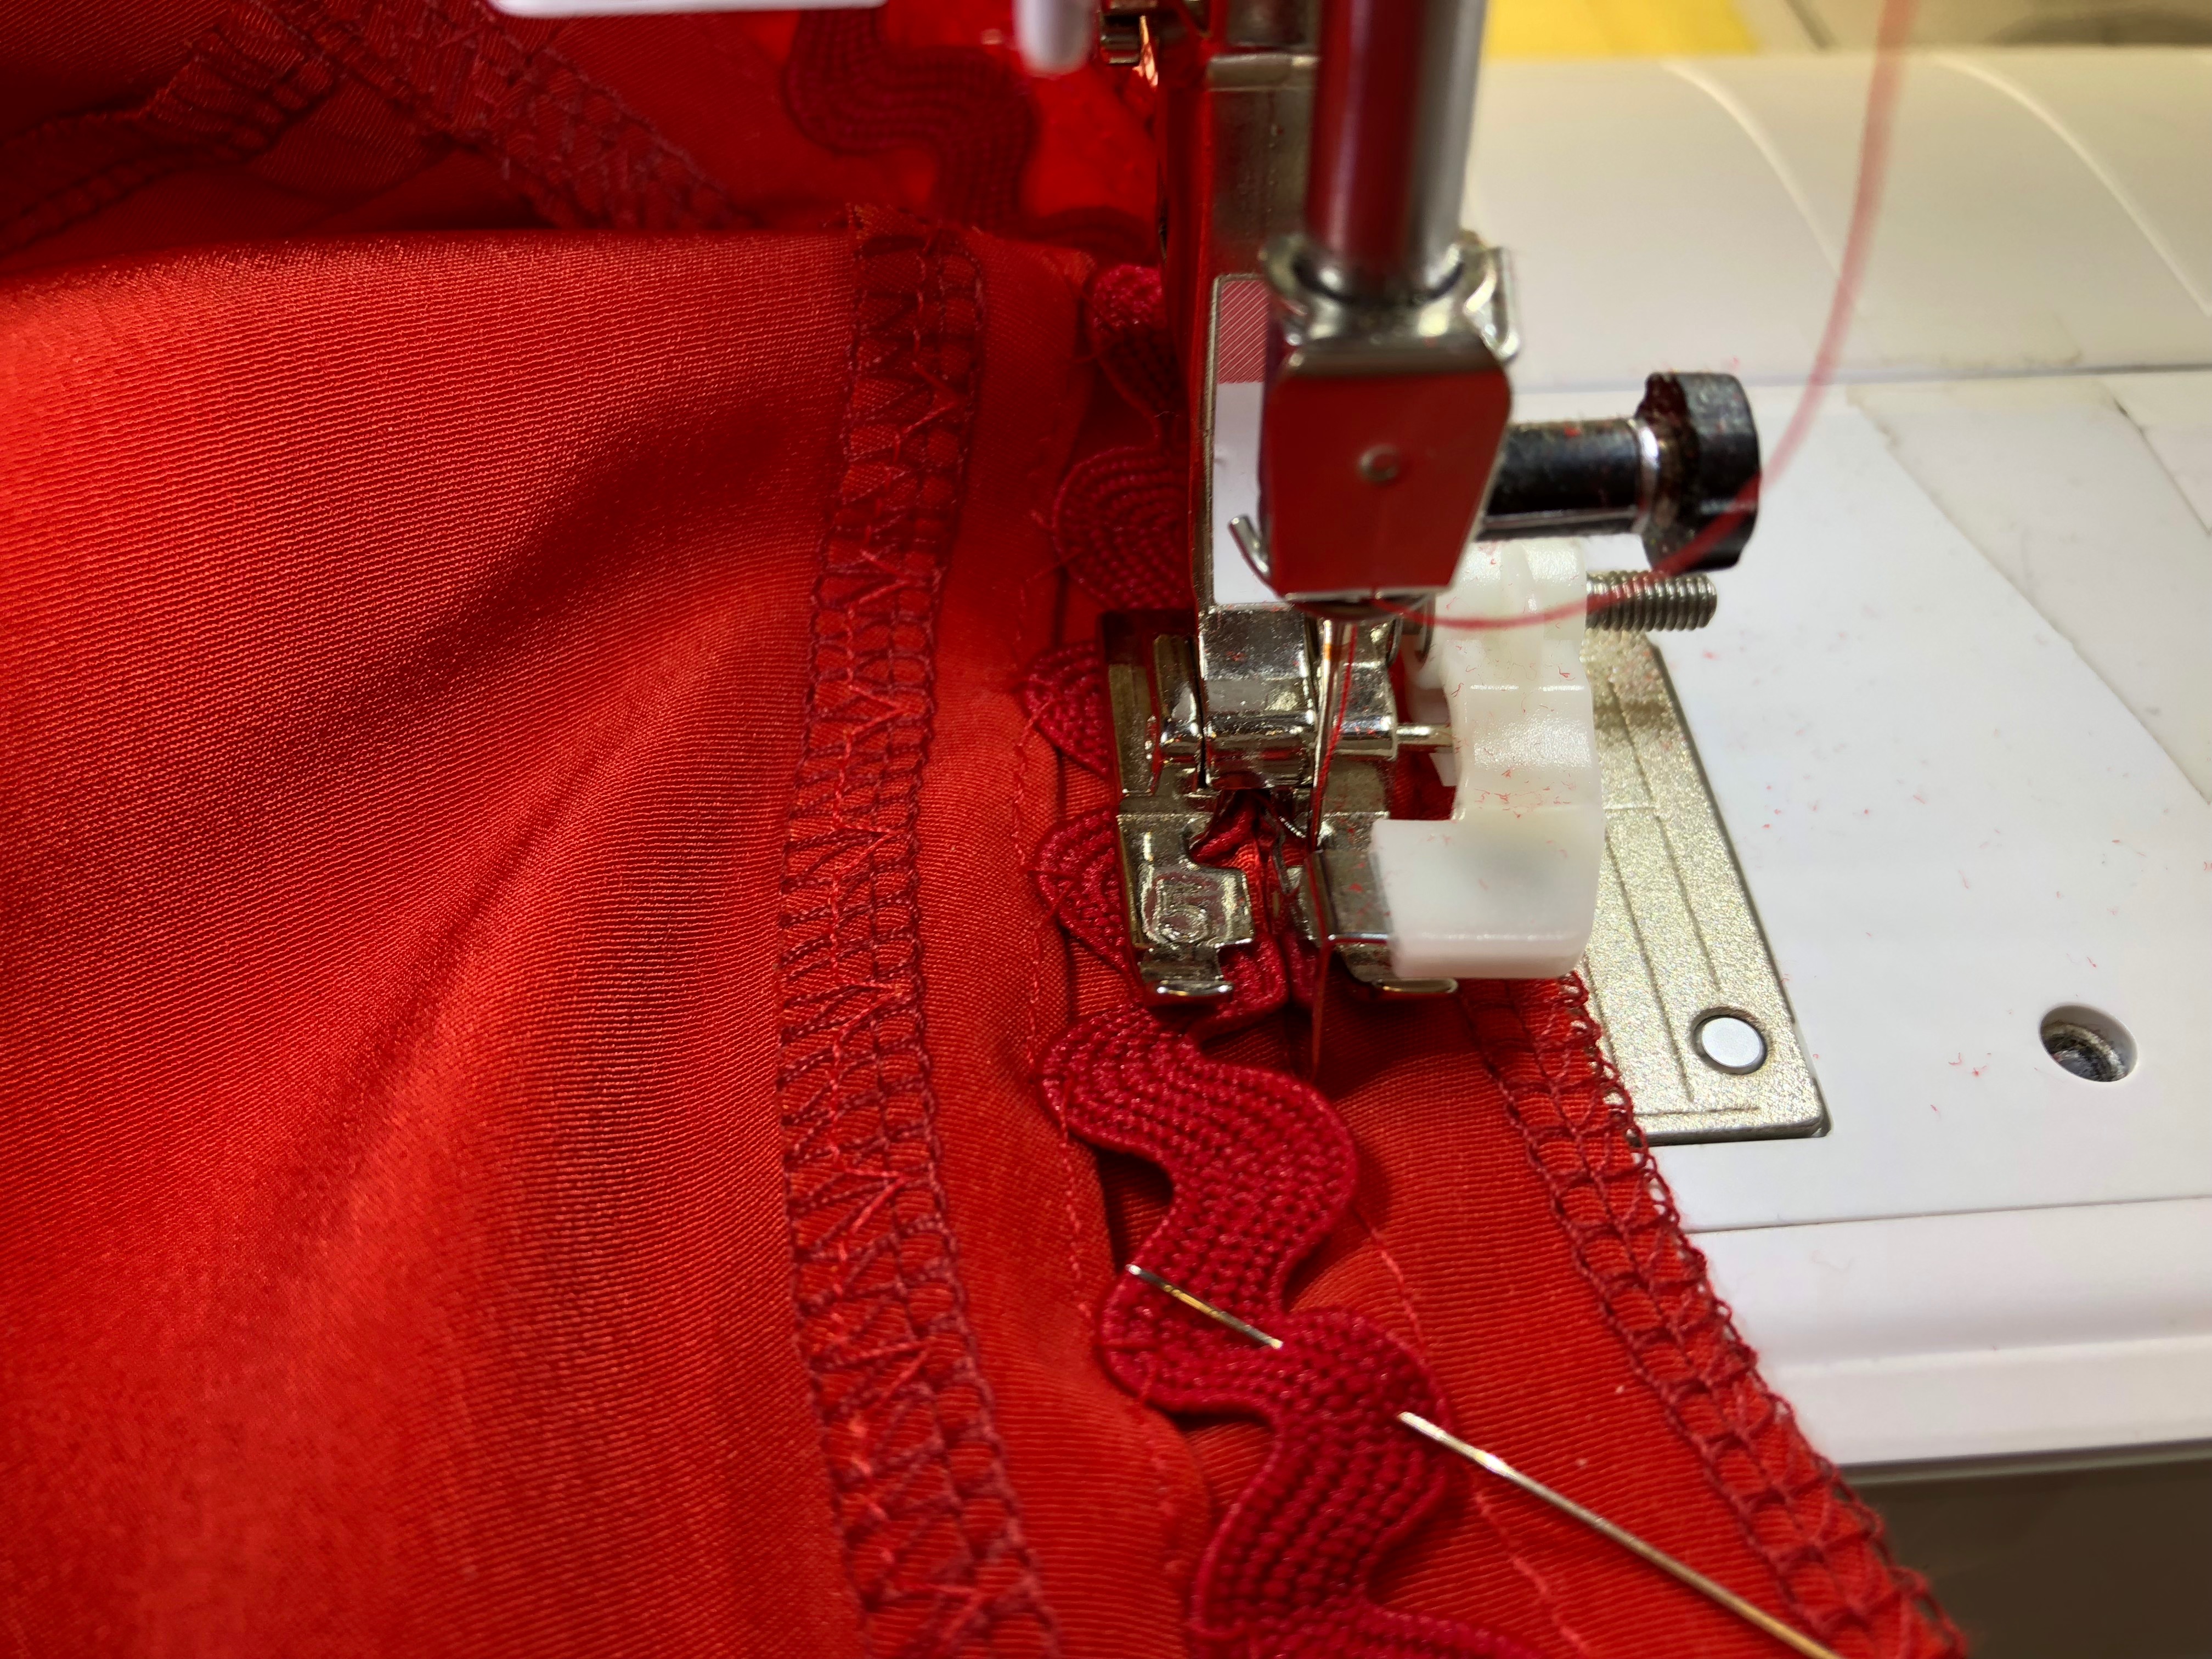
Once your fabric is under your blindhem presser foot, make sure that the guide is right on top of your guide line.
Your goal is to make sure that the “zig” part of the stitch is catching the mountain part of the rick rack each time.
Step 4
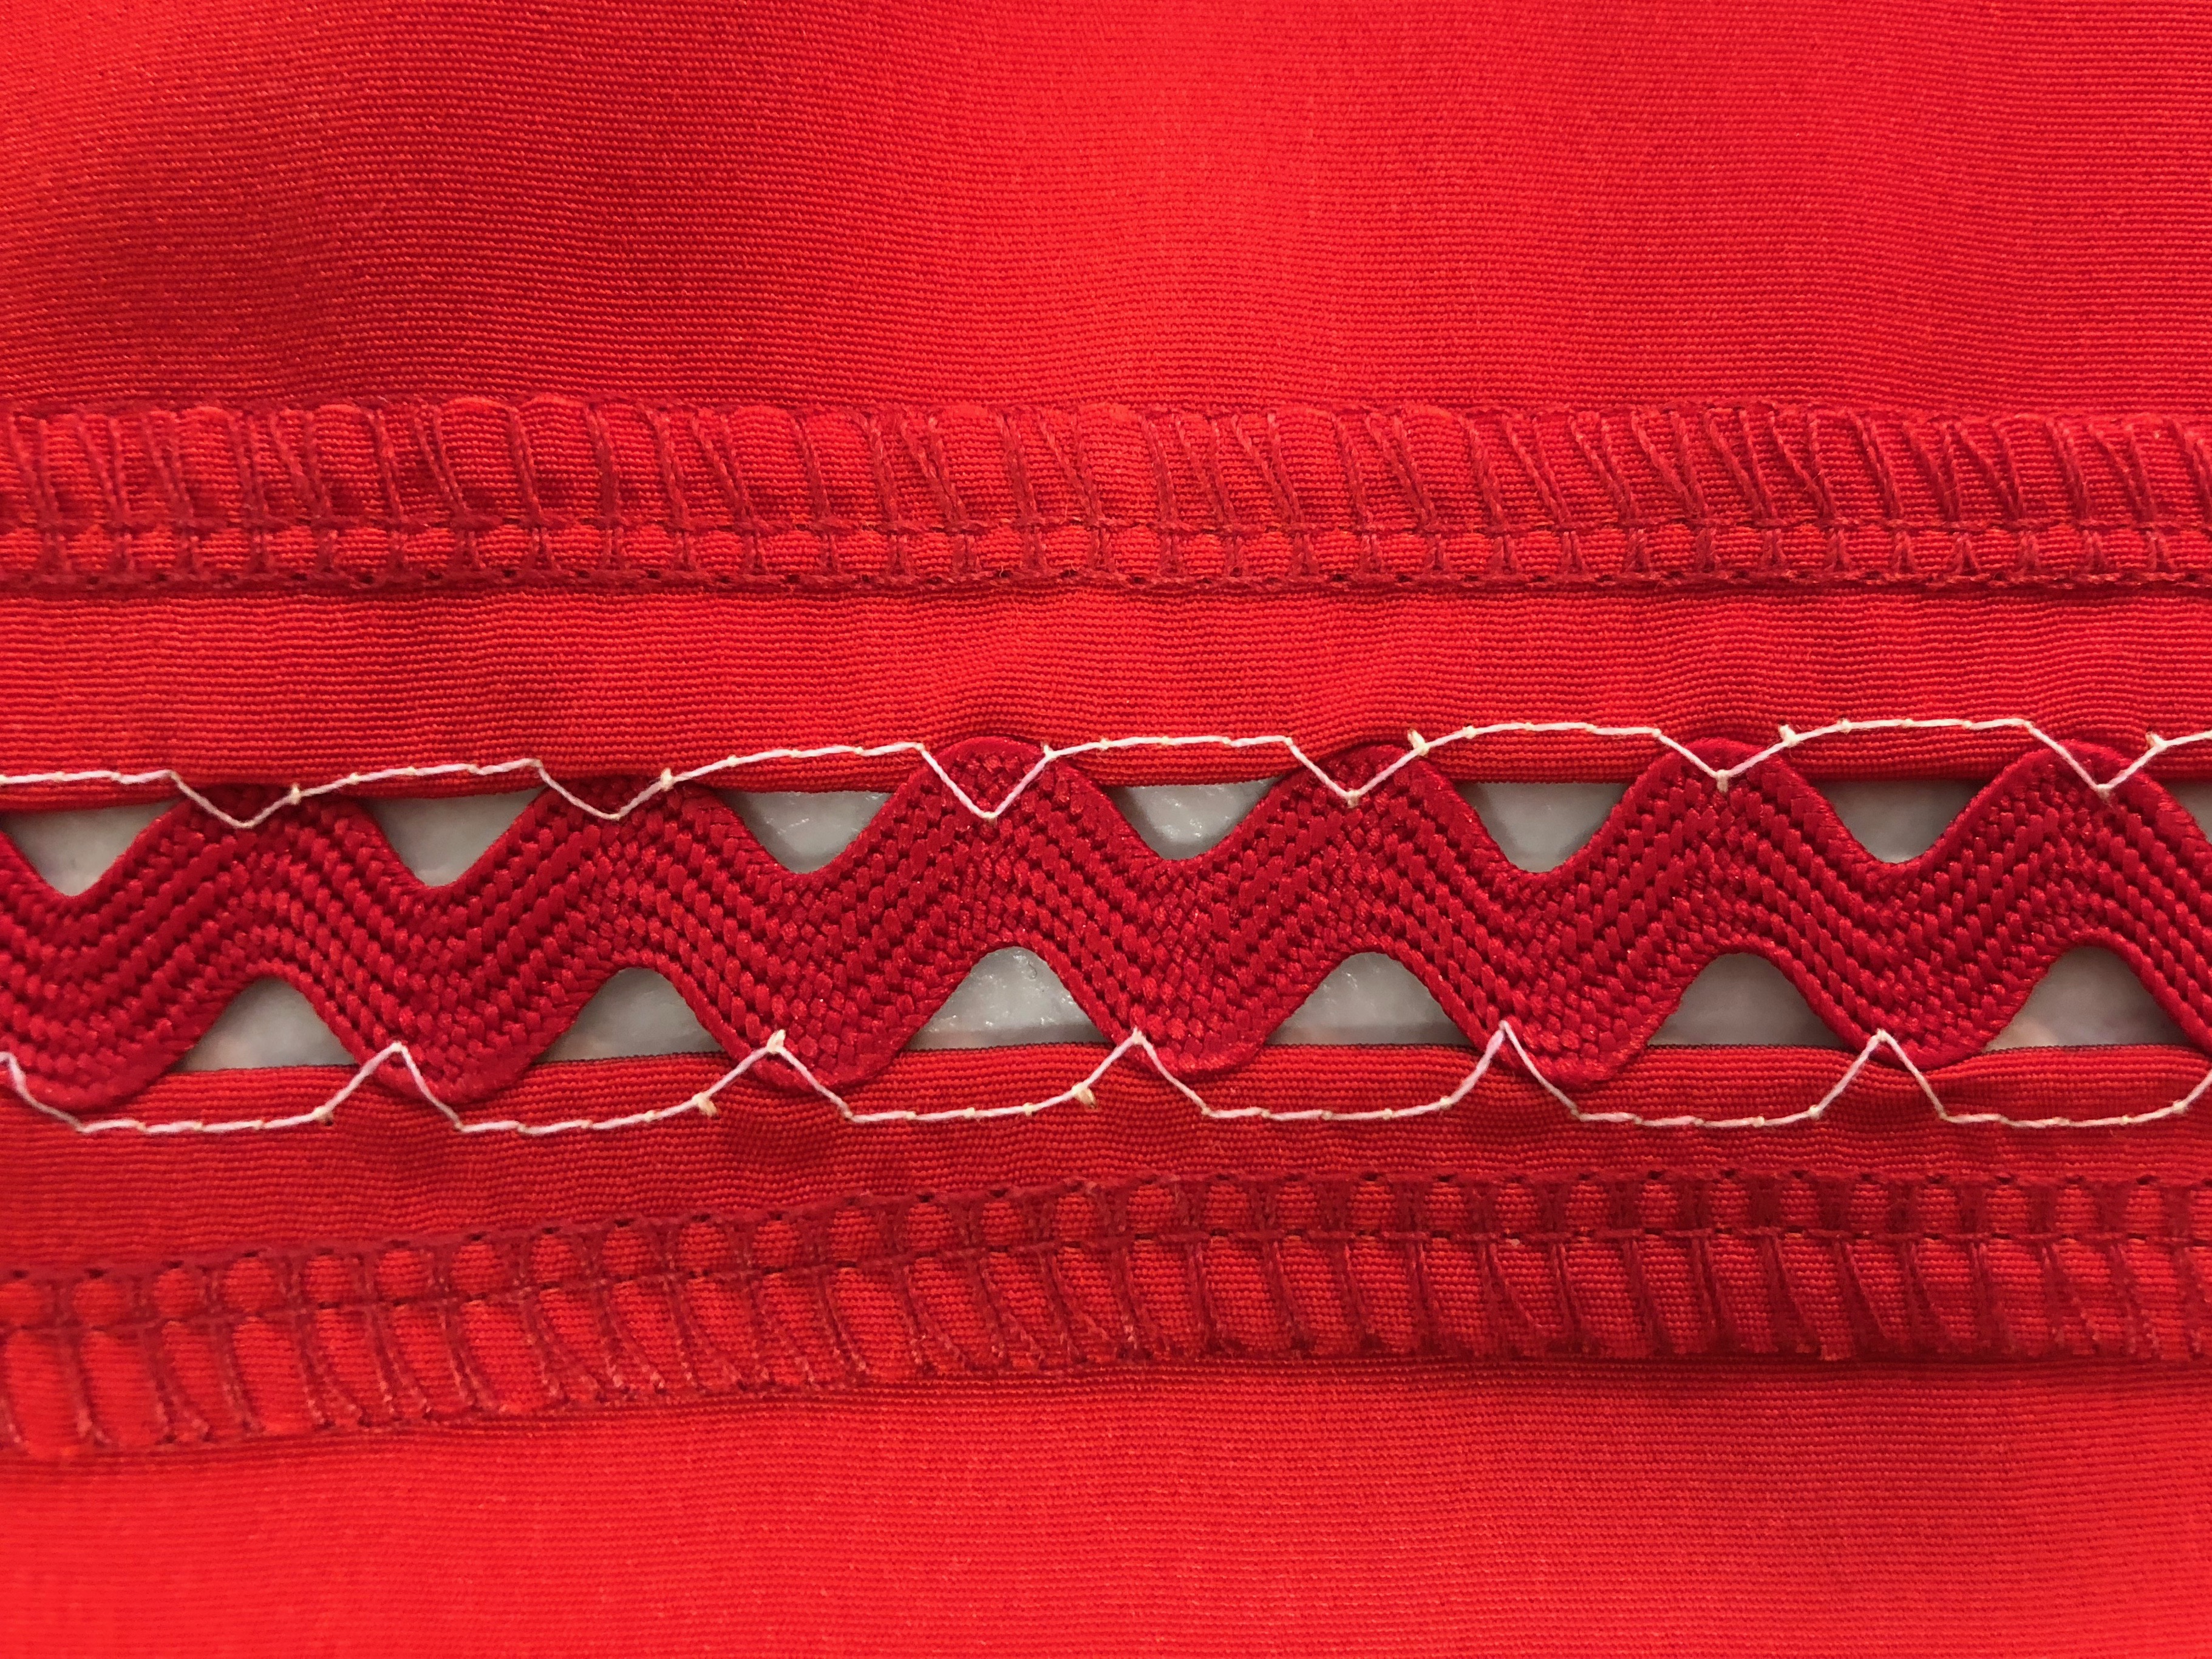
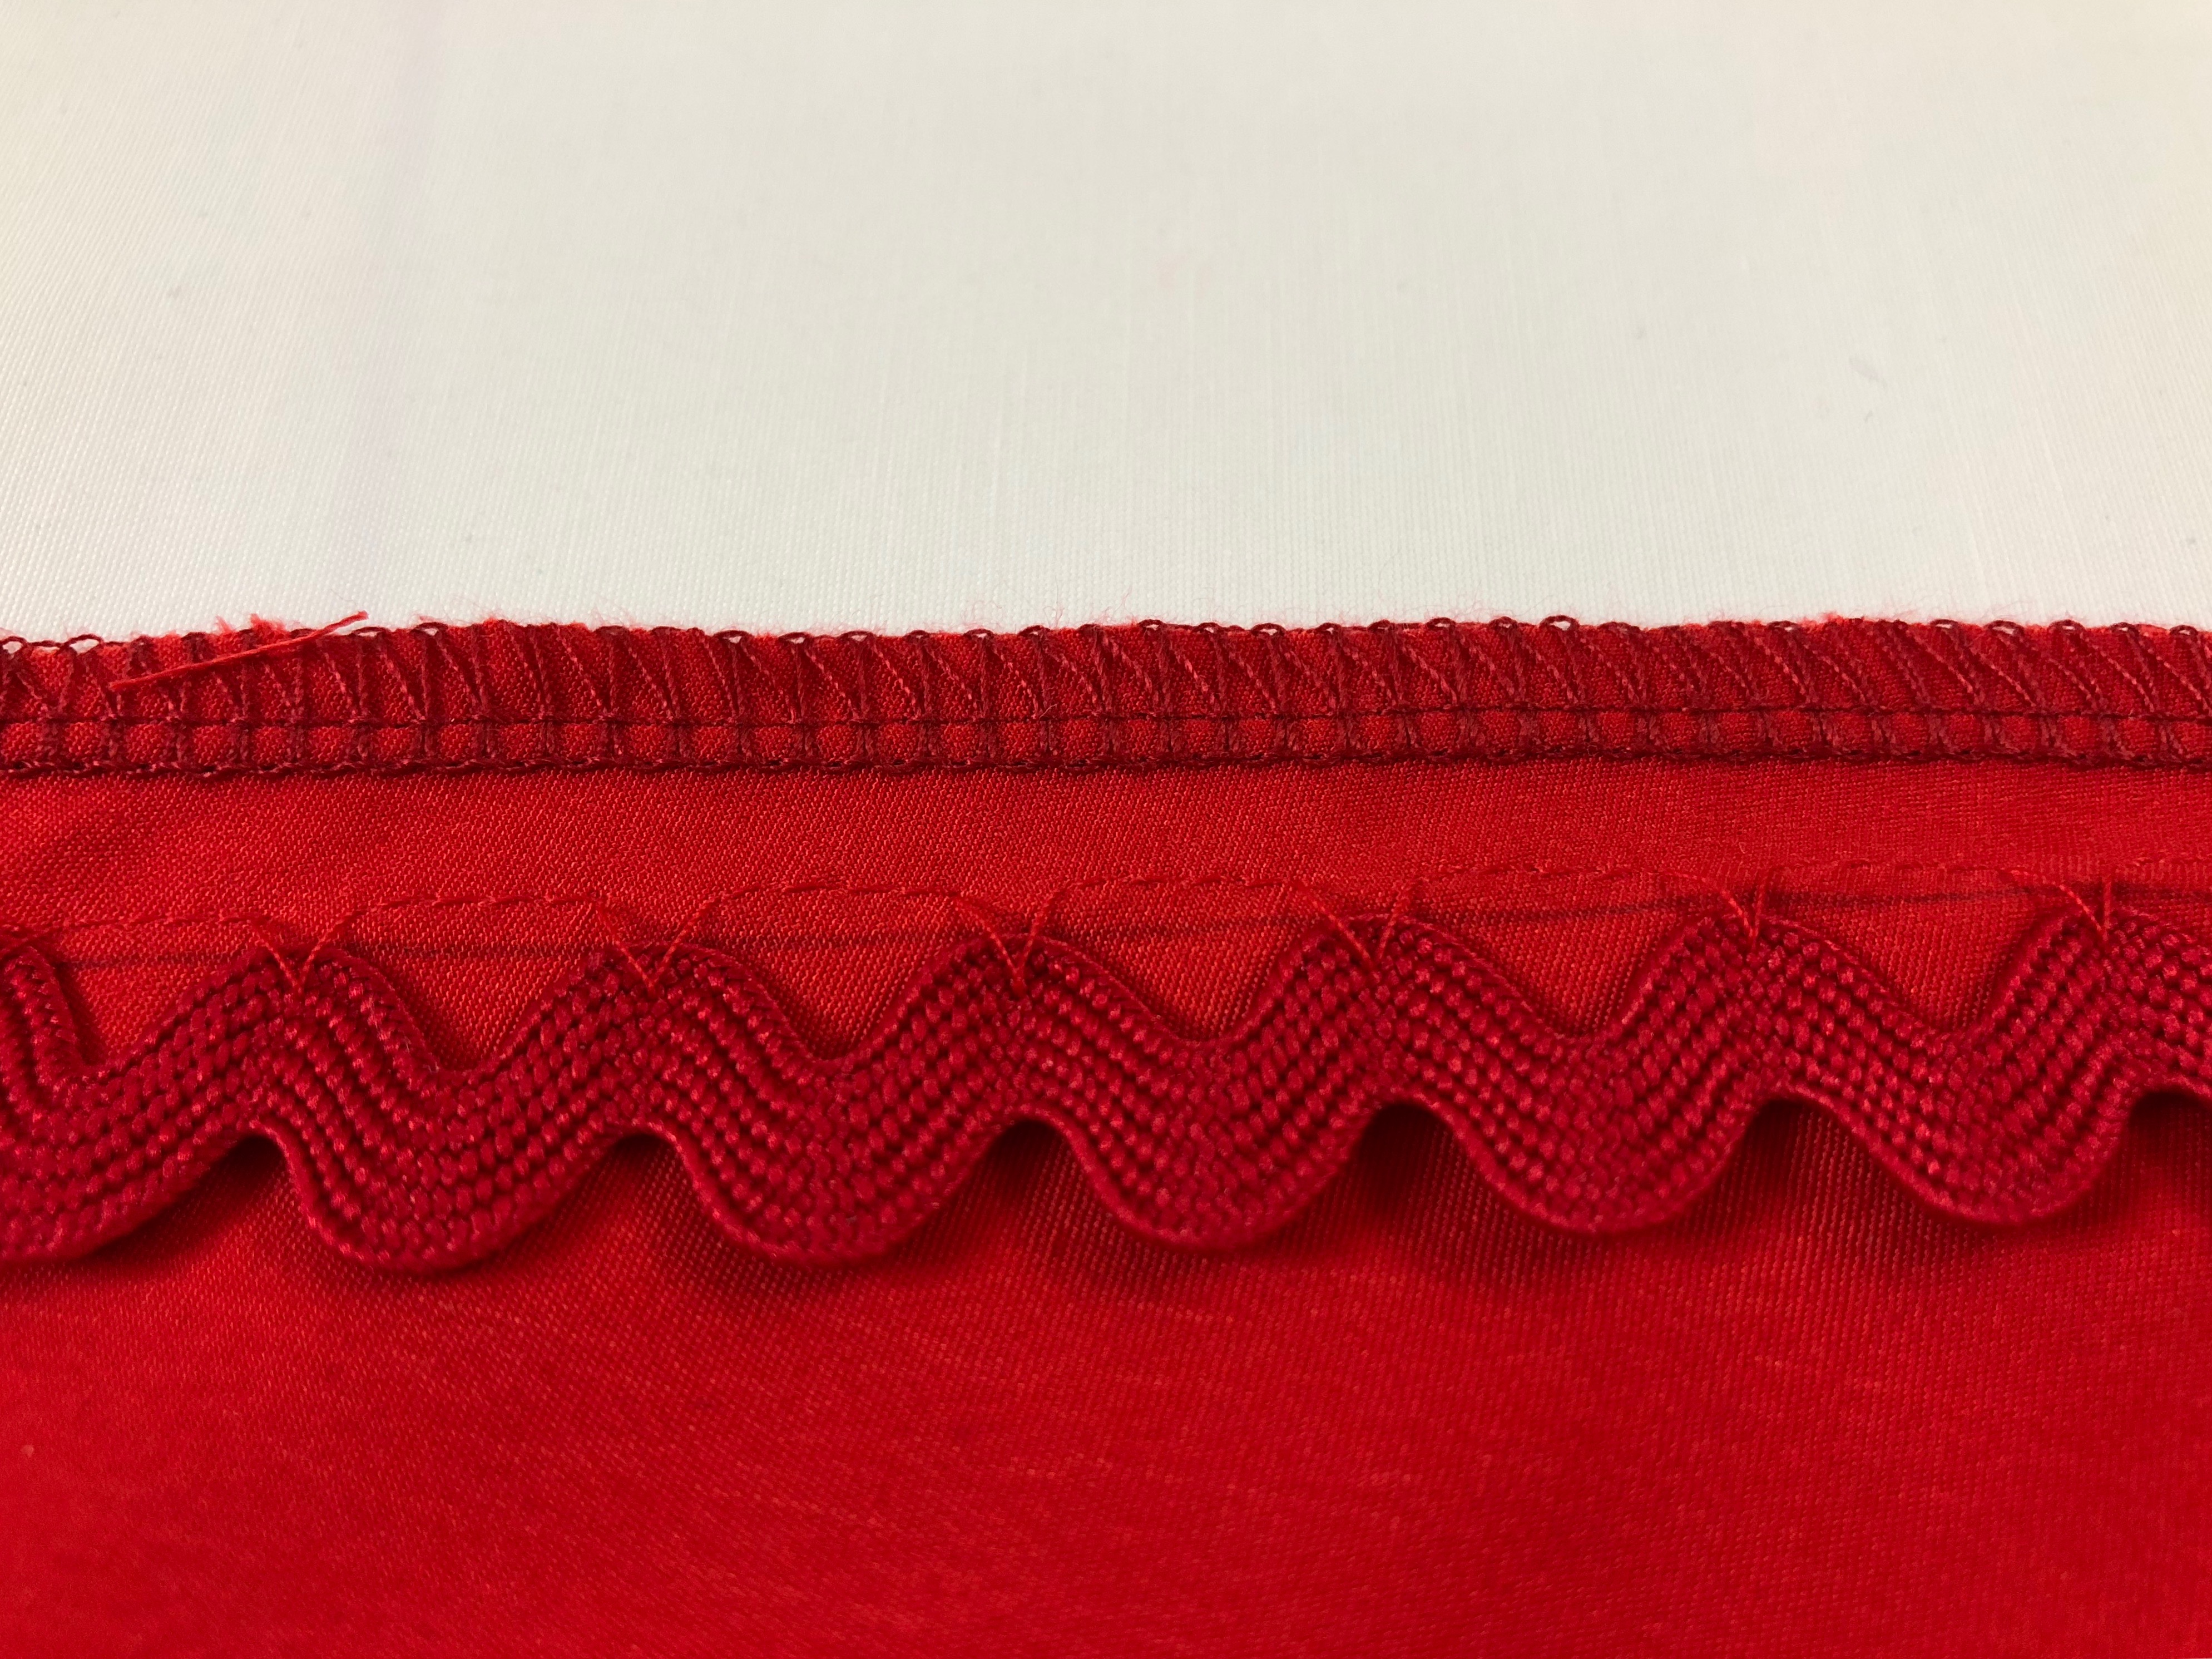
Next, turn your seam under and gently pull your rick rack away from the fabric while allowing it slide on the threads. And give the seam a good pressing.
Step 5
For the second piece of fabric, treat it the same way as step 1. And with right sides together, pin the rick rack below the guideline just like step 2.
Step 6
Again, just like in step 4, make sure that your guide is on top of your guide line and stitch the exact same way.
Press your hem. I finished my hems with a blindhem stitch since the foot was already installed.


The detail is subtle, but it adds a lot of interest.
Used Products

What you might also like


7 comments on “How to Sew Floating Rick Rack”
-
-
Yes Ellen, I think that would be awesome! Thank you!
-
-
Thanks for sharing Erica!!! Great idea that I look forward to trying soon!!!
-
Thank you Monica!
-
-
Takes the top to a whole new level, but subtly.
-
It sure does! Thank you Teri!
-
-
Wow! I never would have thought of that! Wish I had had that in my tool box when I was sewing for my girls.
Leave a Reply
You must be logged in to post a comment.

This looks like a great technique to add rick rack to the edge of garments or even a quilt. Thanks for the info!