How to Sew a Tiered Dress with Trim

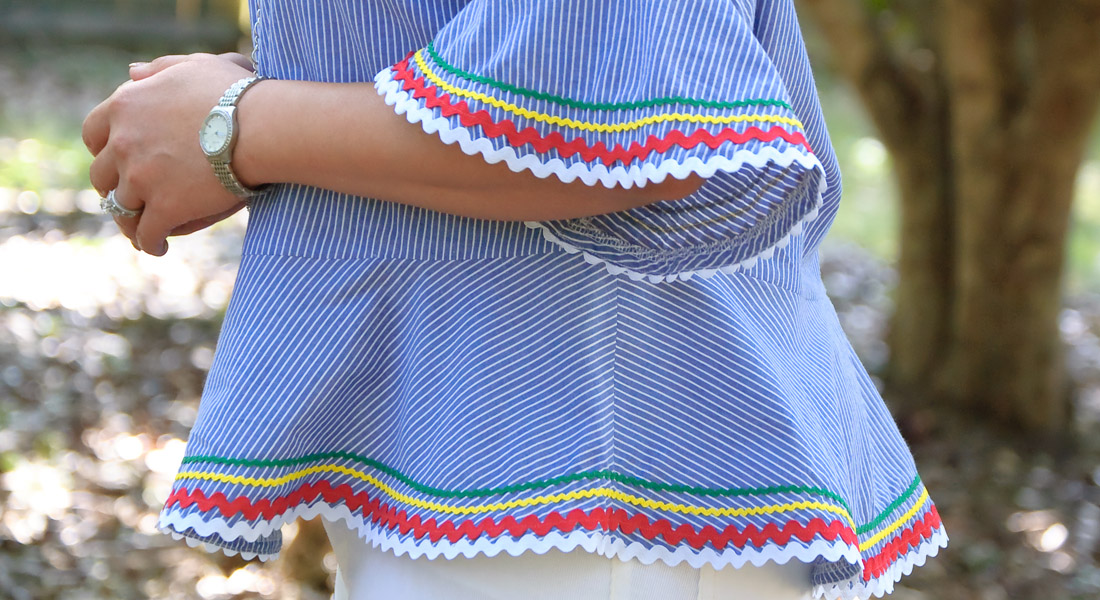
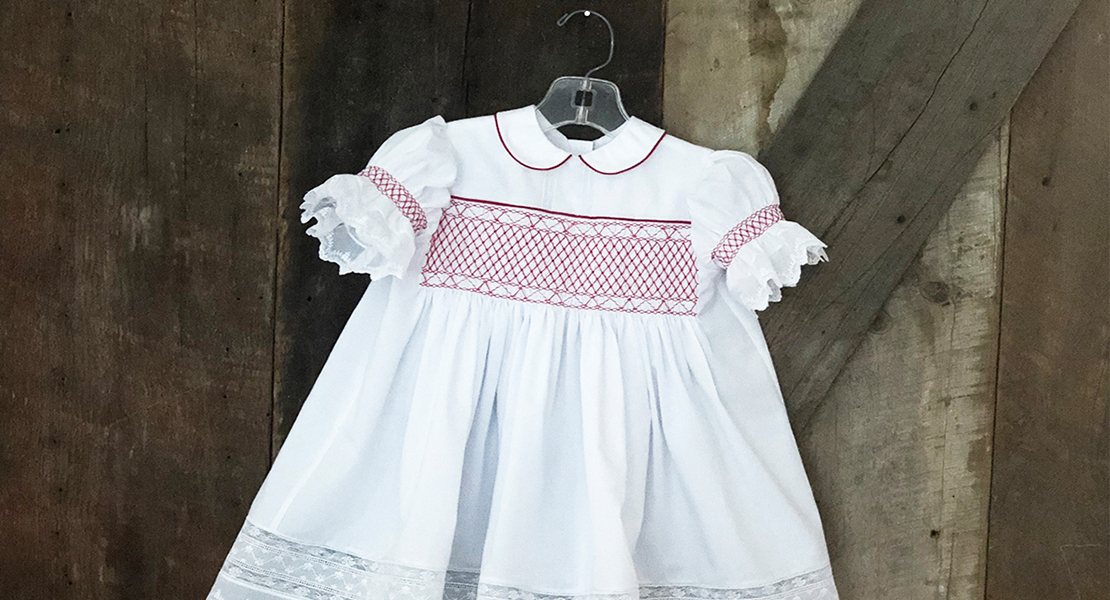
Hey everyone! Sara of The Sara Project here with another great fashion forward tutorial for you. I’ve been researching Fall Fashion Trends lately and one of my favorite categories is called “Americana.” This trend is full of tiered skirts (think little house on the prairie), and western accents. I recently came across this dress from Anthropologie, and fell in love with the tiers and added trim.

I recently purchased a lot of similar trim from a local shop here in Utah called Harmony Provo, and I knew I had to recreate this dress while making it my own. Today, I’m taking you along with me as we sew our own versions of this Americana–style dress. Let’s begin!
Materials to Sew a Tiered Dress
- Sewing machine (I use a BERNINA 350 PE)
- Edgestitch foot #10/#10C/#10D
- Fabric (I used just under 6 yards of Robert Kaufman Indigo Chambray)
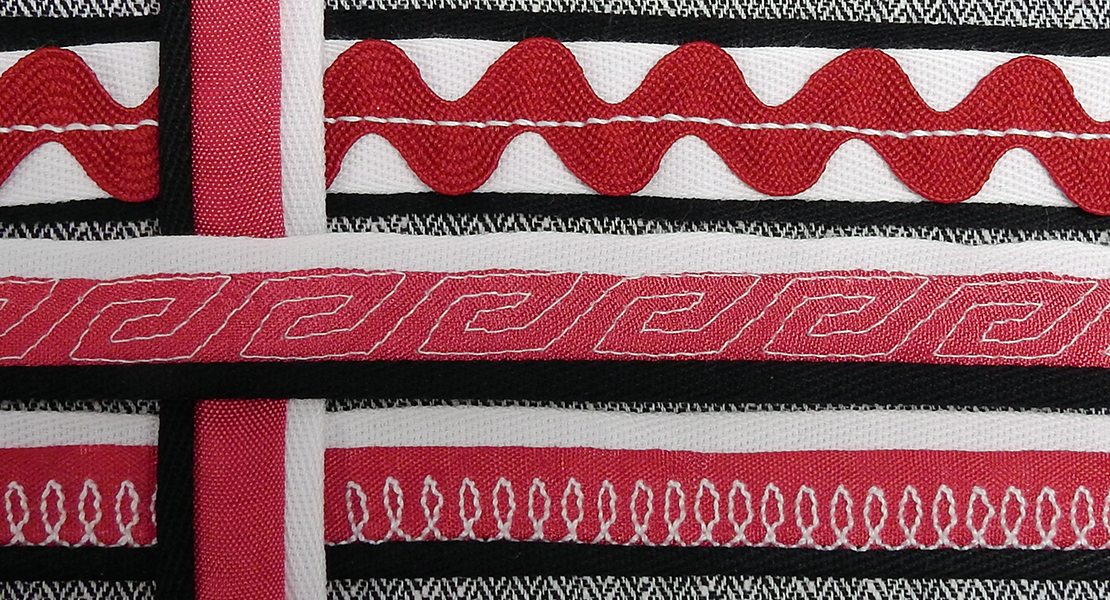
- Trim (I used about 40 yards of trim from Harmony Provo)
- Princess bodice dress pattern of your choice (I used a Simplicity New Look Pattern #6341)
- Coordinating thread
- Single-fold bias tape
- 20″ – 22″ invisible zipper
- Tracing paper
- Clear ruler
- Pins
Alter the Pattern
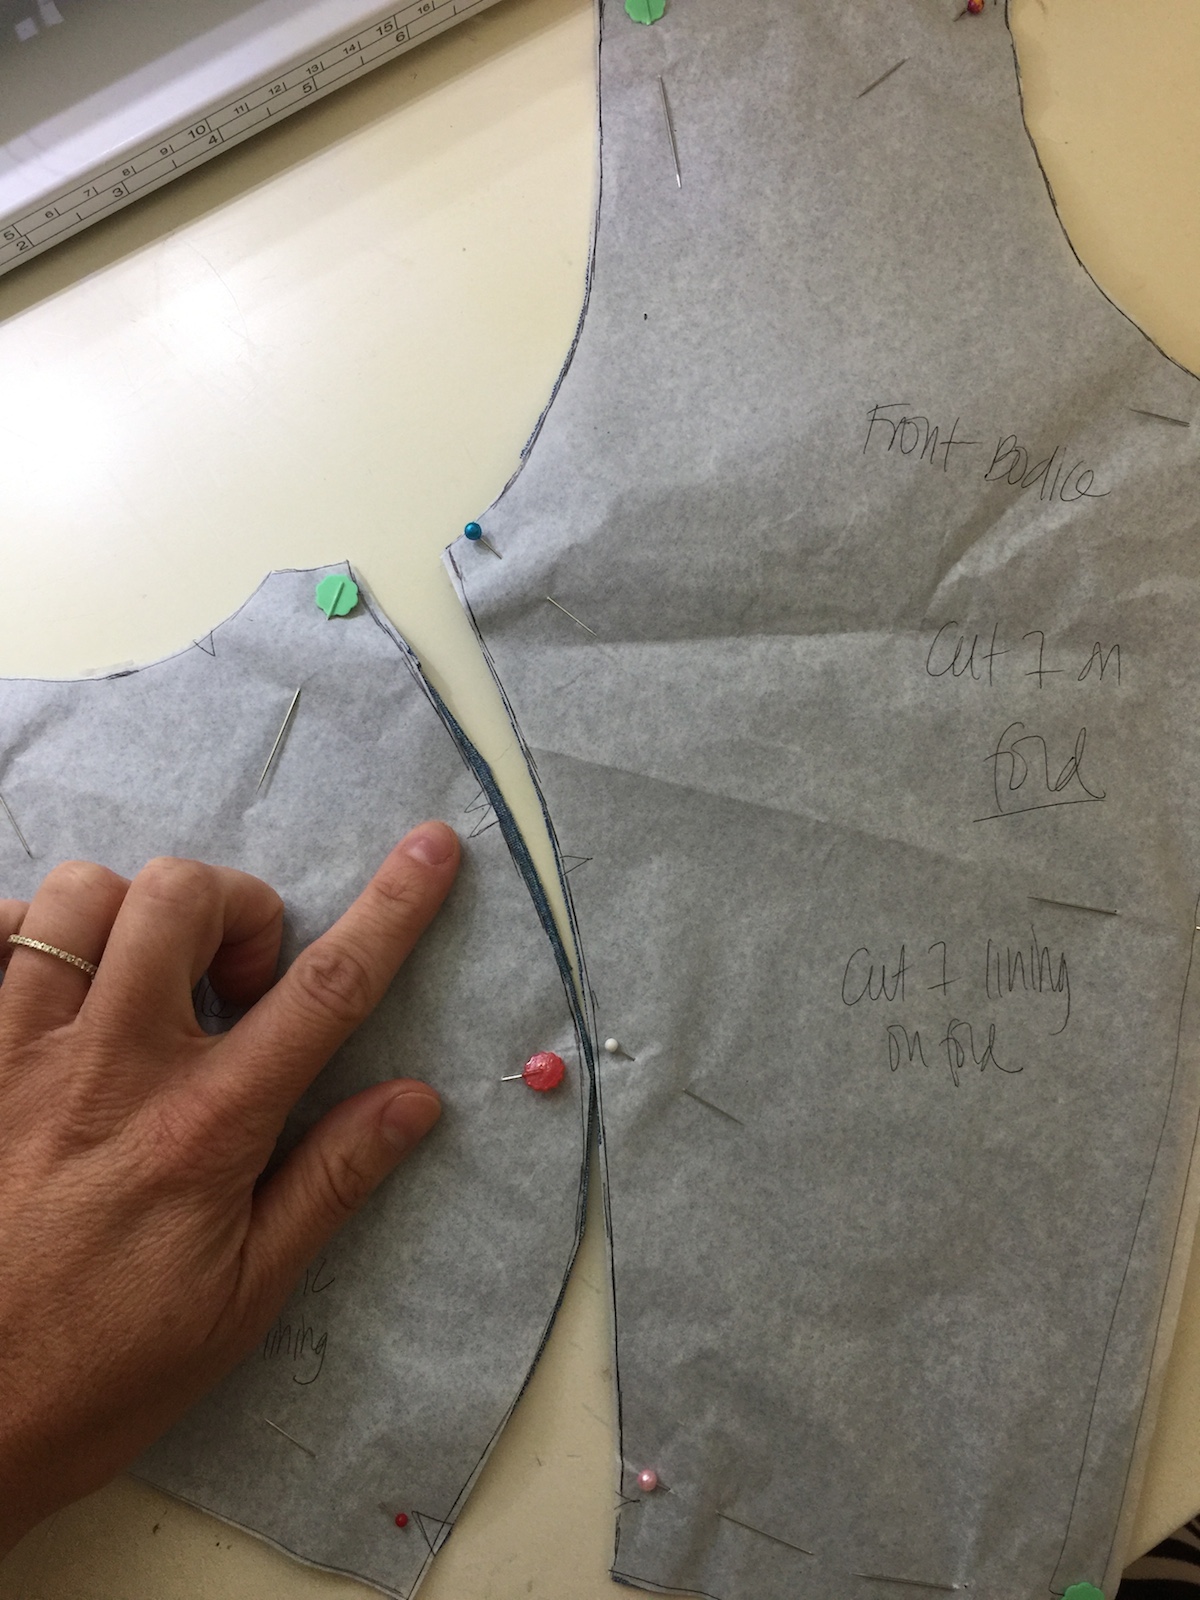
First things first, let’s get our pattern pieces prepped for cutting. For the bodice of my dress, I used Simplicity New Look Pattern 6341. It’s a princess seam dress, and instead of drafting it all myself I took a shortcut by using just the bodice pieces of this pattern.You will need the bodice front and back pieces, bodice front and back side pieces, and short sleeve. I took off 2″ in length from my bodice pieces because I wanted my dress to have a higher waistline. Hold the pattern piece up to your body to decipher where you would like the waistline of your dress to be and edit accordingly. The pattern says to cut 2 or 4 of each piece to create a bodice lining; I omitted the bodice lining. This pattern has a low dipped back bodice. I altered mine to have a covered back by drawing a straight line up from the center back line to where I wanted the back neckline to be.
The rest of the dress is 3 sectioned tiers, and we need to create our pattern pieces for them. Also, each tier gets longer in length. Here’s the formula I used:
Measure your natural waist, multiply it by 2, and divide by 2. For example: 28″ waist x 2 = 56 (total)/2 = 28.
- Tier one for me would measure 28″ wide x 9″ long.
- Tier two: (natural waist x 2.5/2 by 10″ long). Mine was 35″ wide x 10″ long.
- Tier three: (natural waist x 3.2/2 by 12″ long). Mine was 45″ wide x 12″ long.
- Using tracing paper, and a clear ruler, draw out these three rectangle pieces, remembering to add 1/2″ seam allowance around every edge.
Cut the Pattern Pieces
- Tier 1: cut 2 on fold, then cut just one piece in half along the fold-line.
- Tier 2: cut 4
- Tier 3: cut 4
- Sleeve: cut 2
- Bodice front: cut 1 on fold
- Bodice back: cut 2
- Bodice front and back side pieces: cut 2 of each

Sew the Tiered Dress
Sewing the bodice:
- Lining up the notches, sew front side bodice to front bodice, right sides together. Sew at 5/8″ (this is what the pattern calls for). Clip in along the bust curve, iron and finish as desired. (I used a serger to finish all seams). I used a ham to iron the princess seam curves.
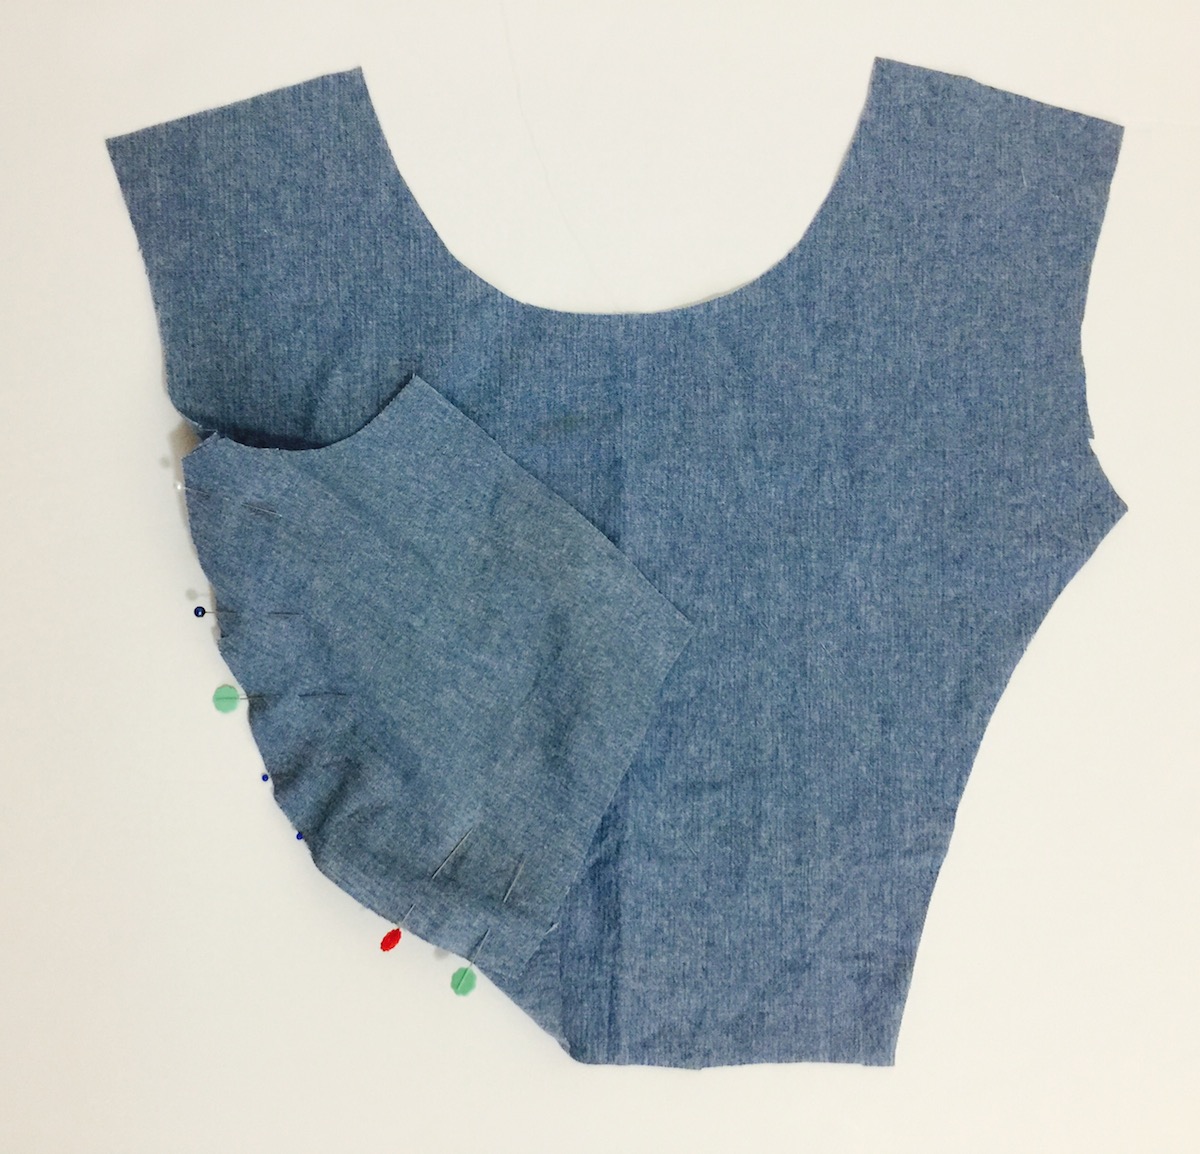
2. Repeat for the back side bodice and back bodice pieces.
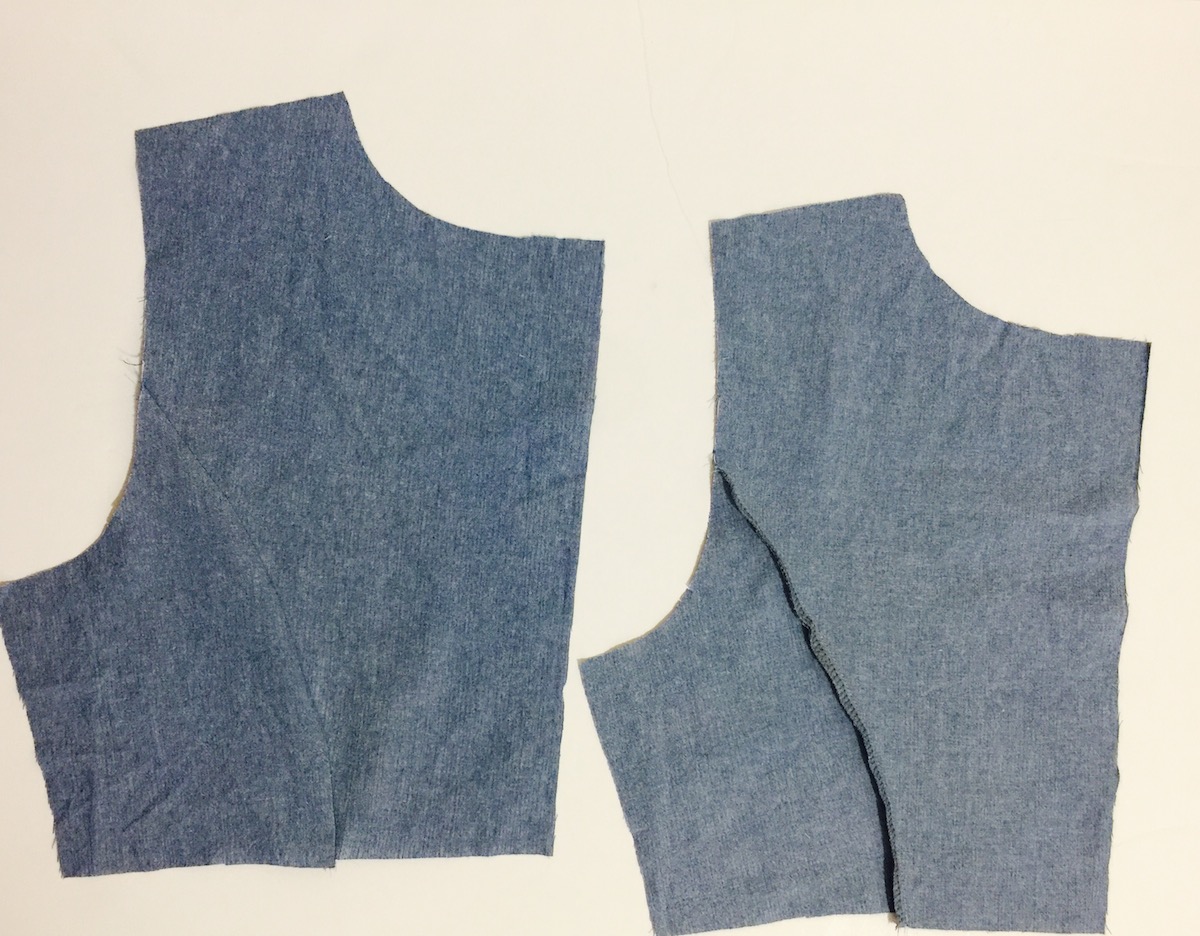
3. Pin the front bodice to the back bodice at the side seams. Sew, iron and finish as desired.
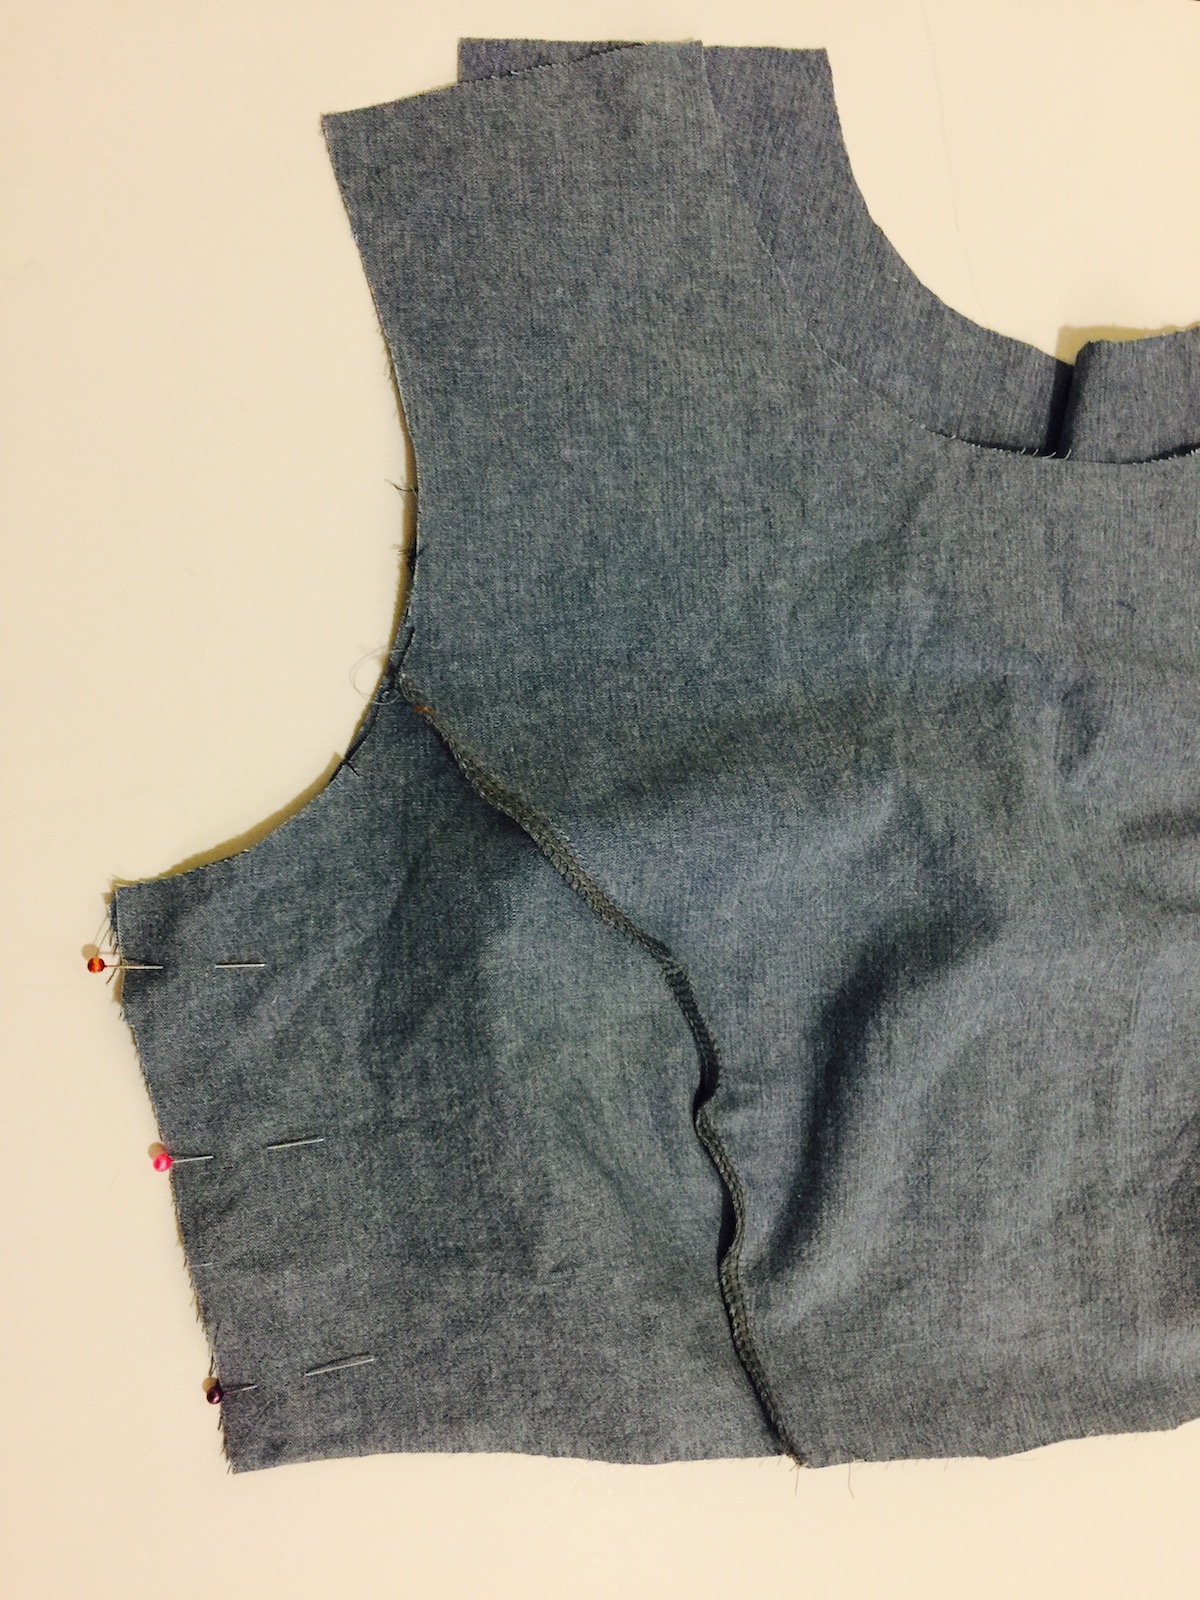
4. Pin front bodice to back bodice at shoulder seams. Sew, iron and finish as desired.

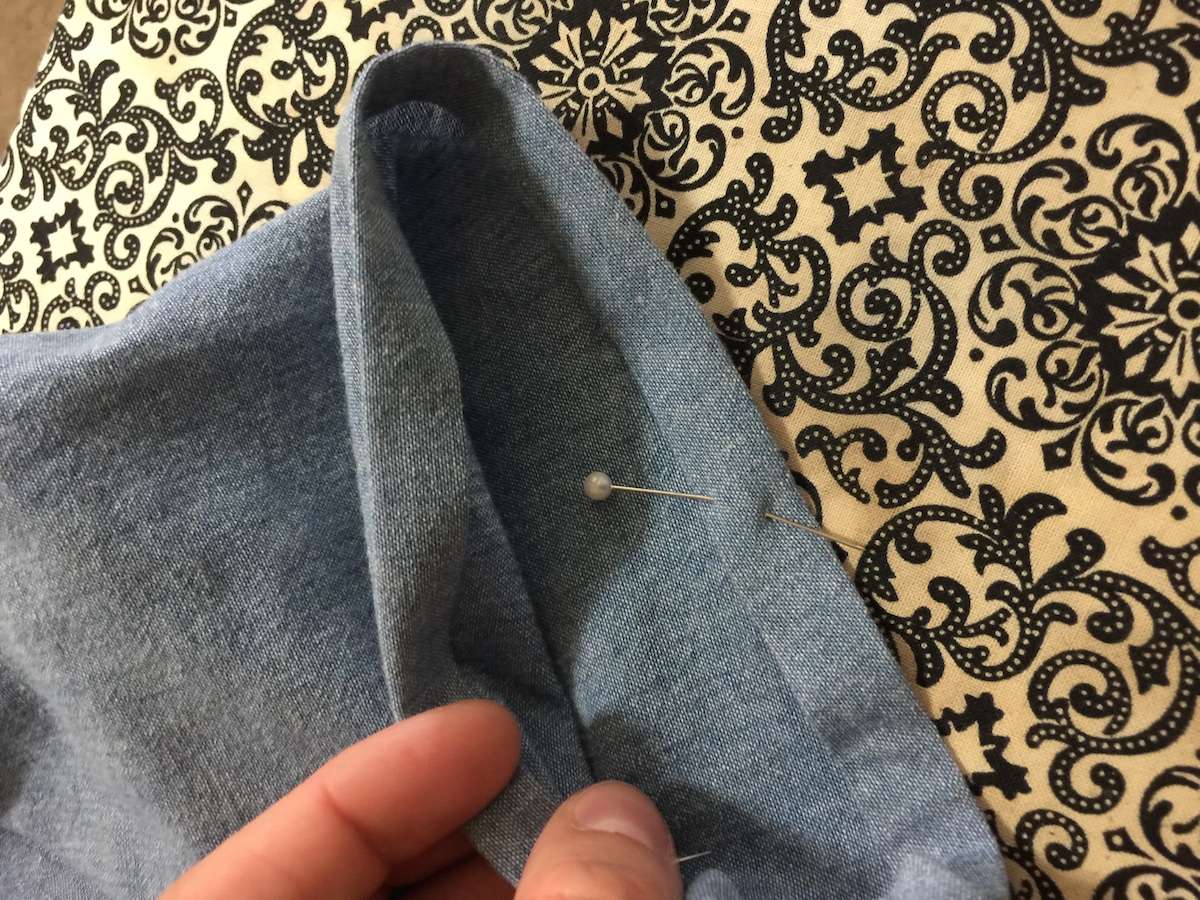
5. Instead of using a bodice lining to finish the neckline, I decided to keep it quick and easy by using pre-made single fold bias tape. Line up the bias tape along the neckline to figure out how much you’ll need, and cut. Now open up one side of the bias tape and pin the edge along the entire neckline.

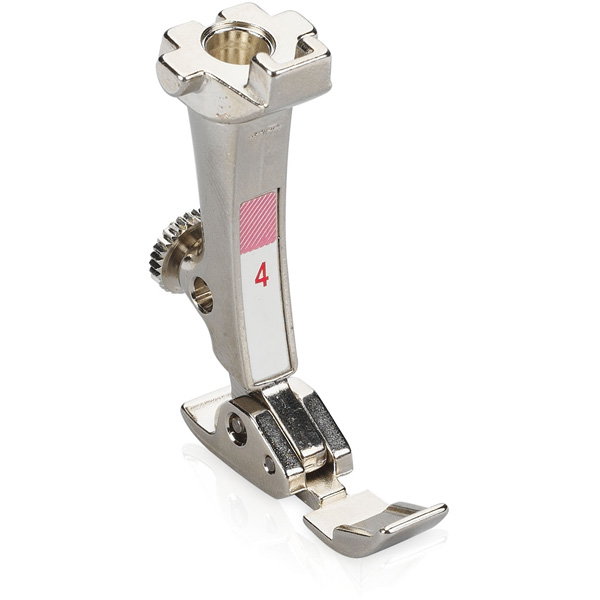
6. Now, sew right along the fold closest to your neckline. Remember to backstitch at the beginning and end. I used my Reverse pattern foot #1.
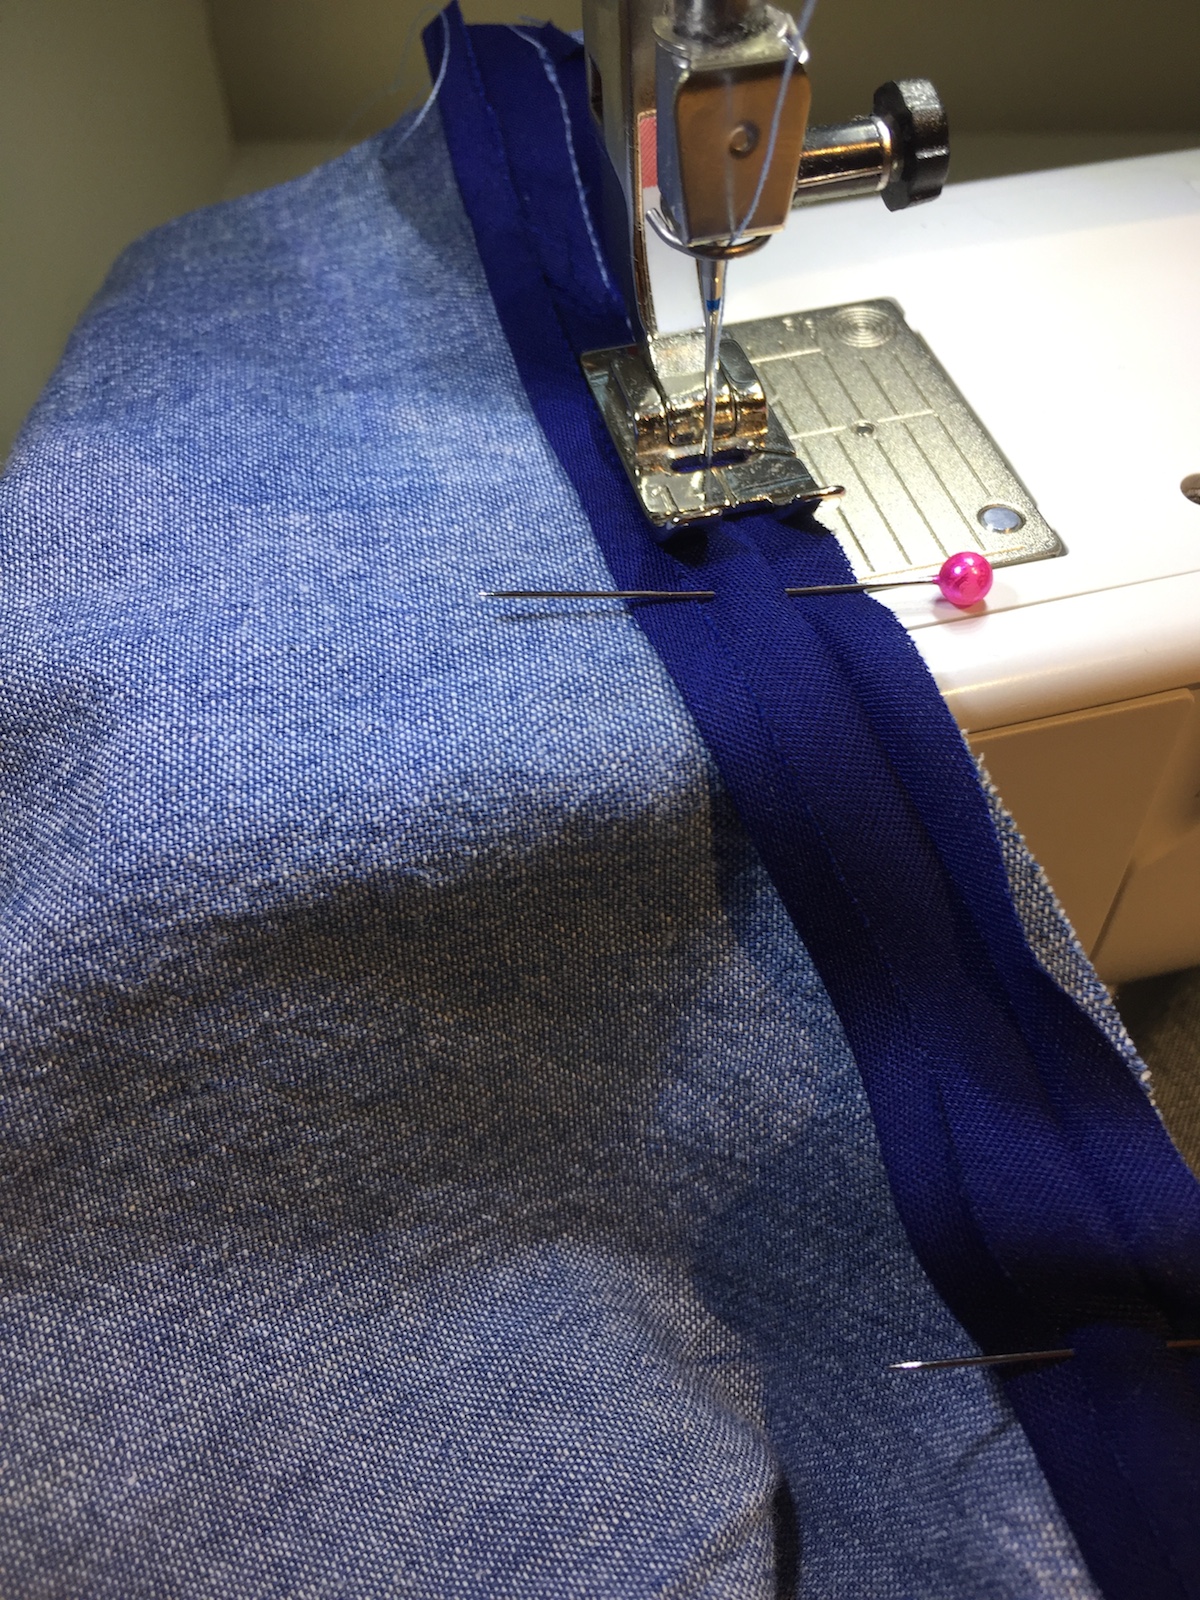
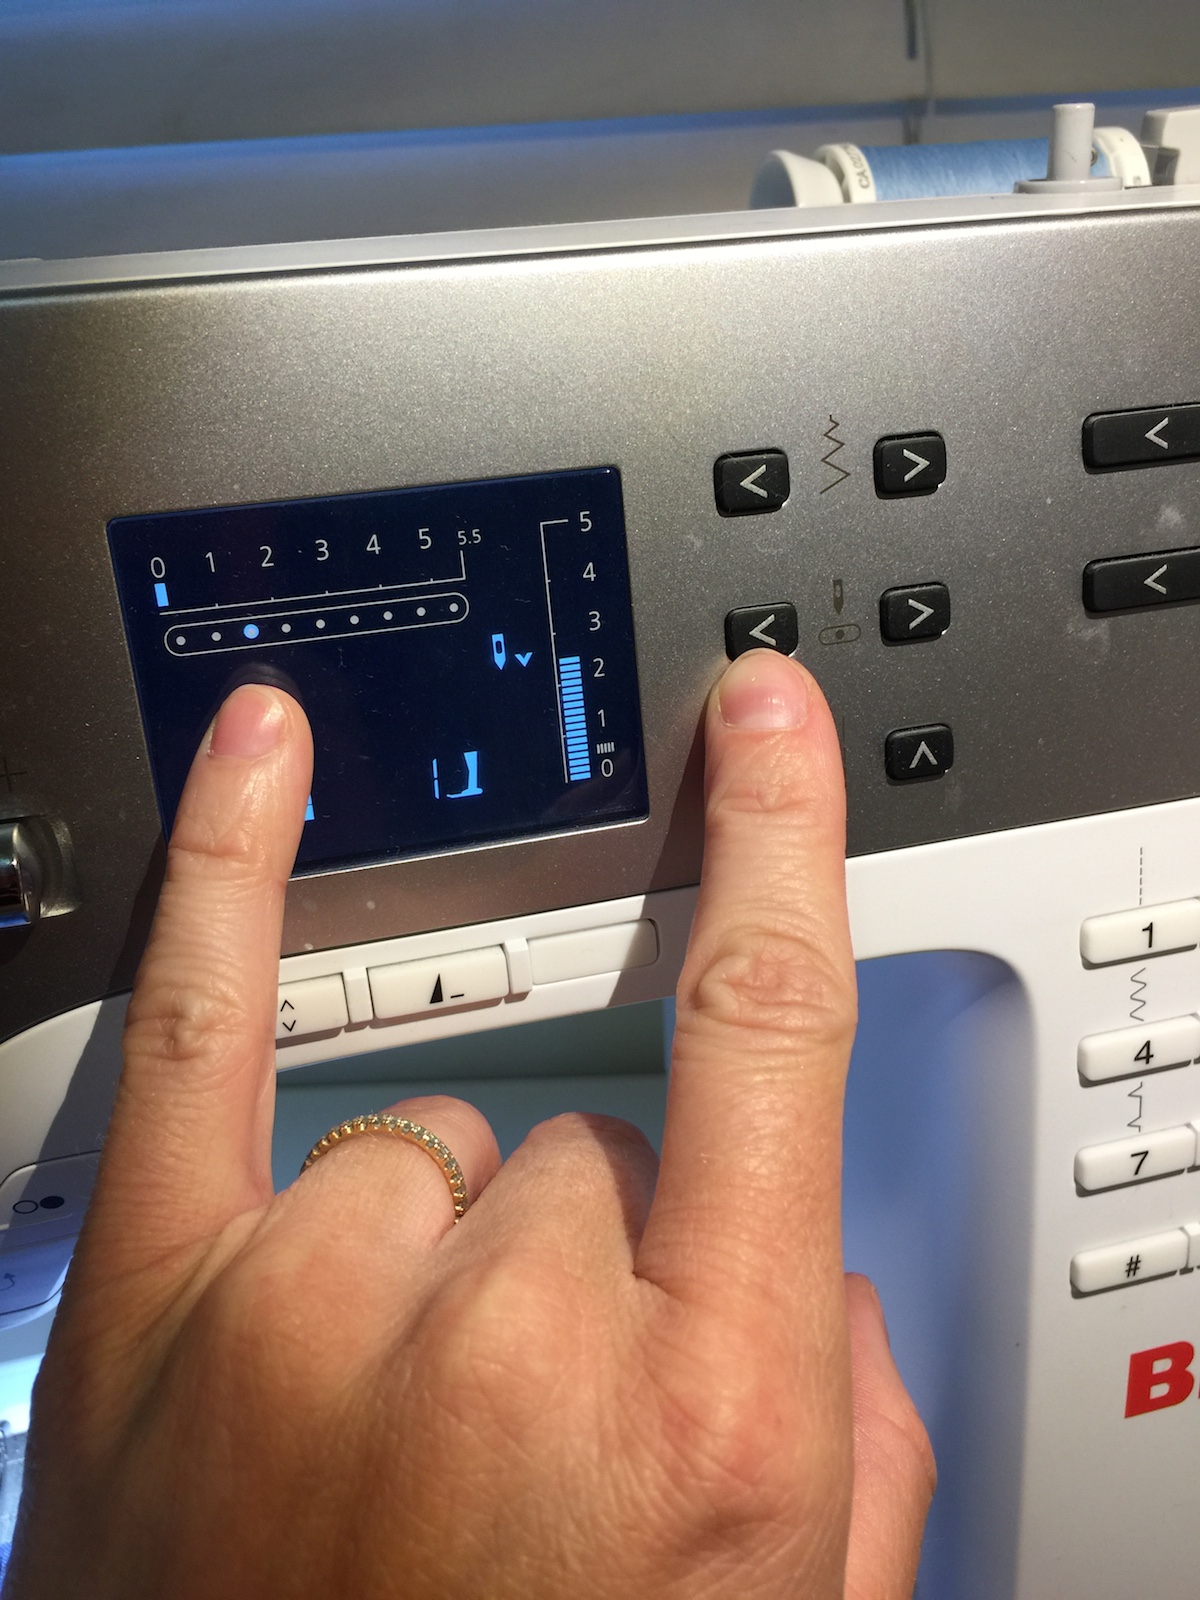
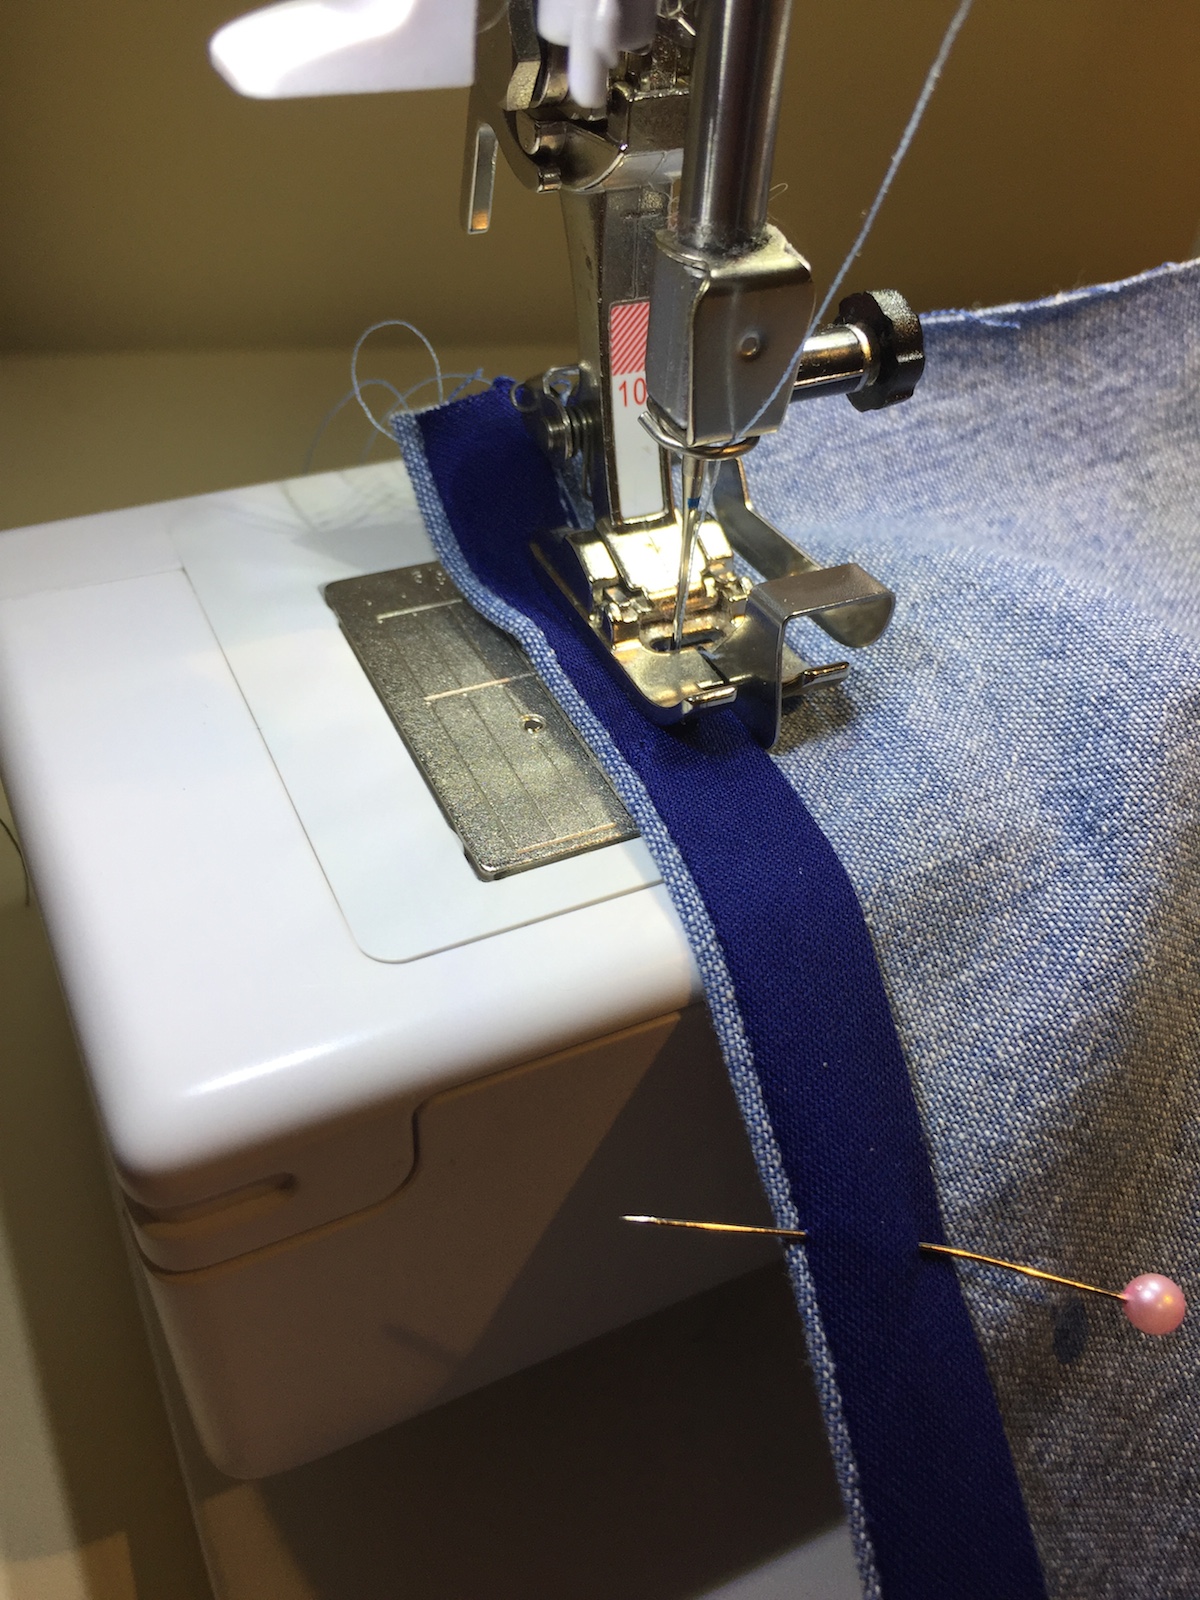
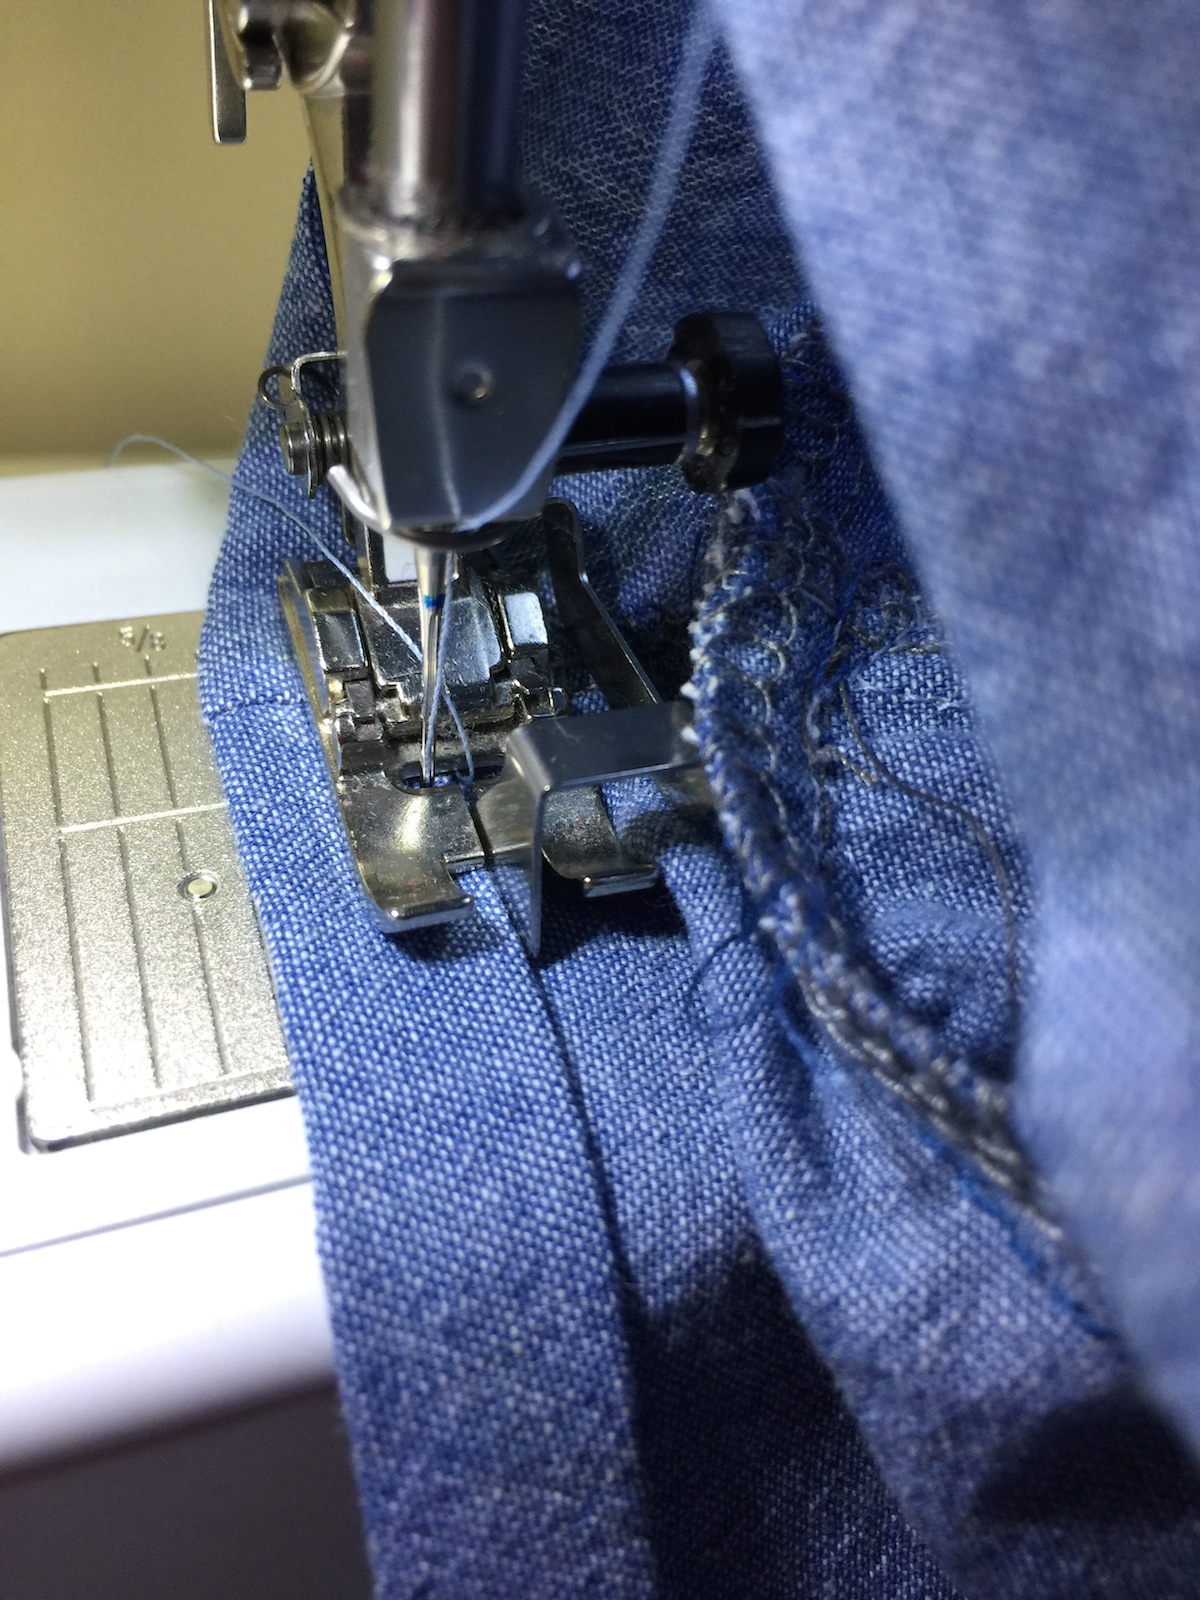
7. Now we need to flip the bias tape to the wrong side of the bodice. Using an iron, press it down about 1/8″ away from the neckline. Pin bias tape in place, and sew using the Edgestitch foot #10. Make sure to move your needle over a few times to the left before sewing. I really love using this foot for neat and even finishing. We’ll use it again in a few steps coming up. Make sure to backstitch at the beginning and end of your bias tape.
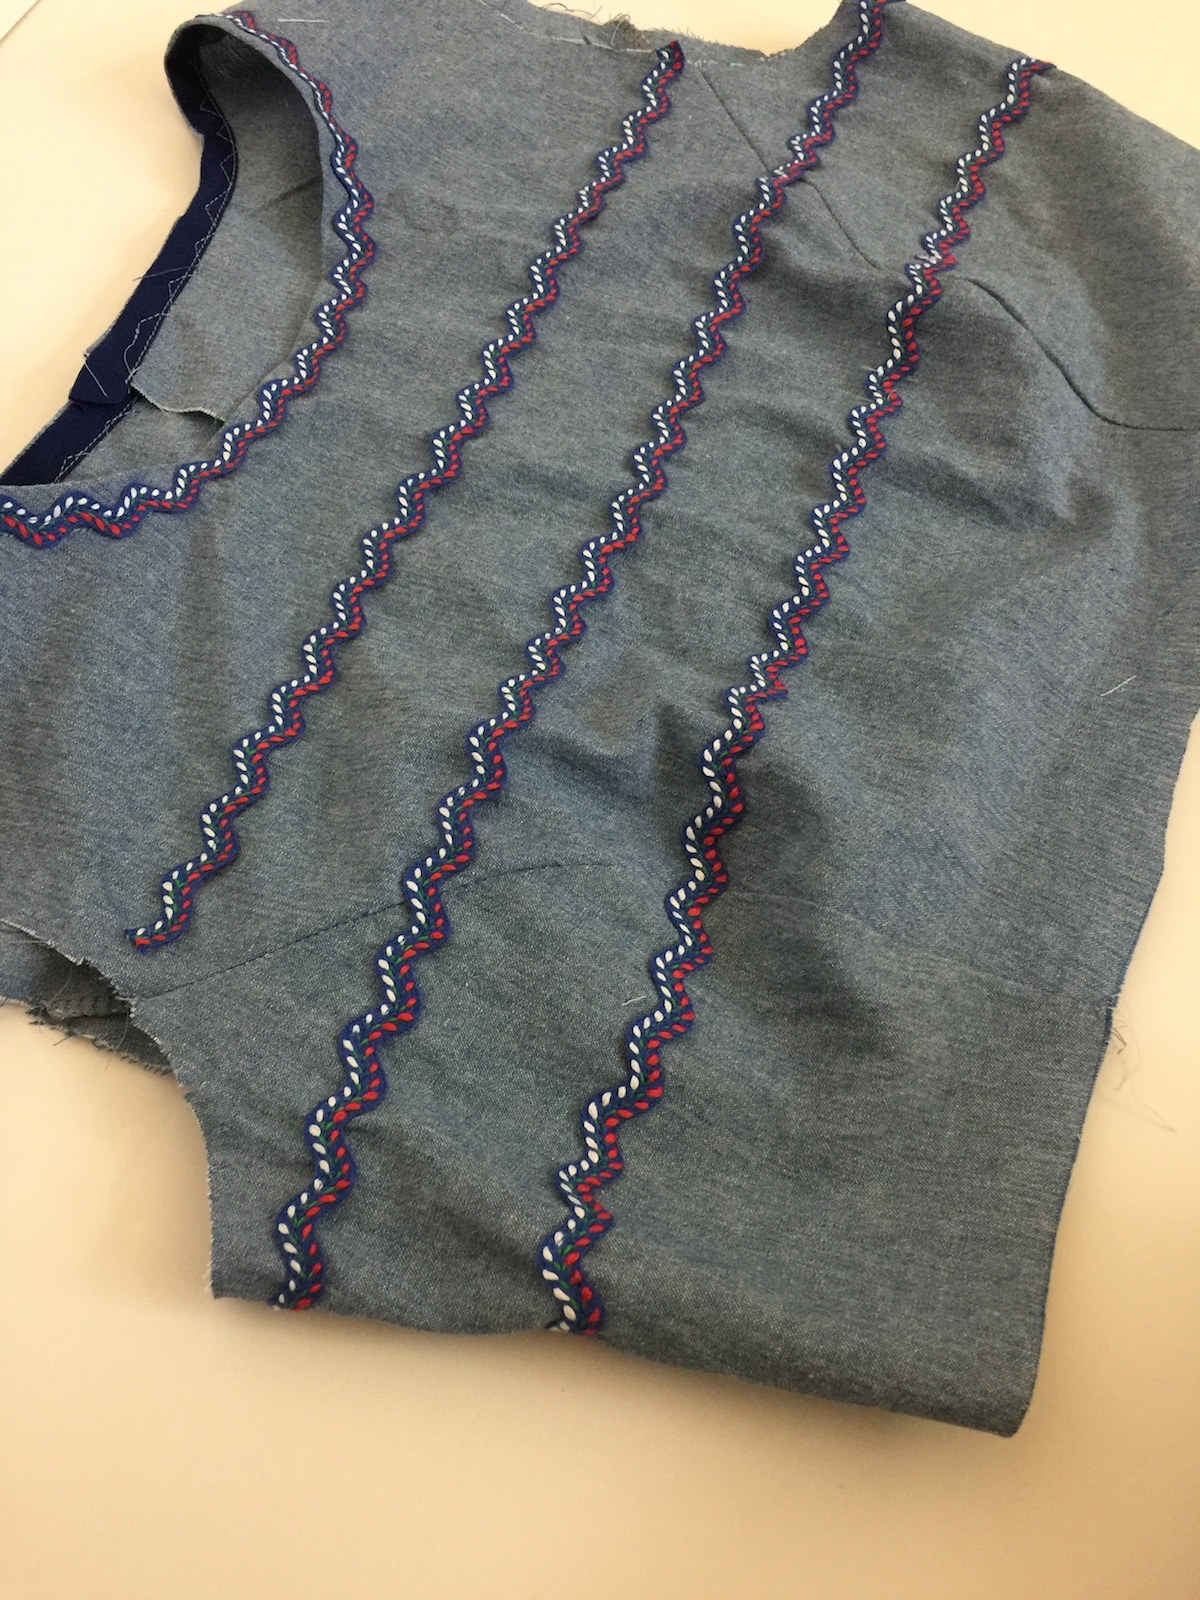
Adding the trim:
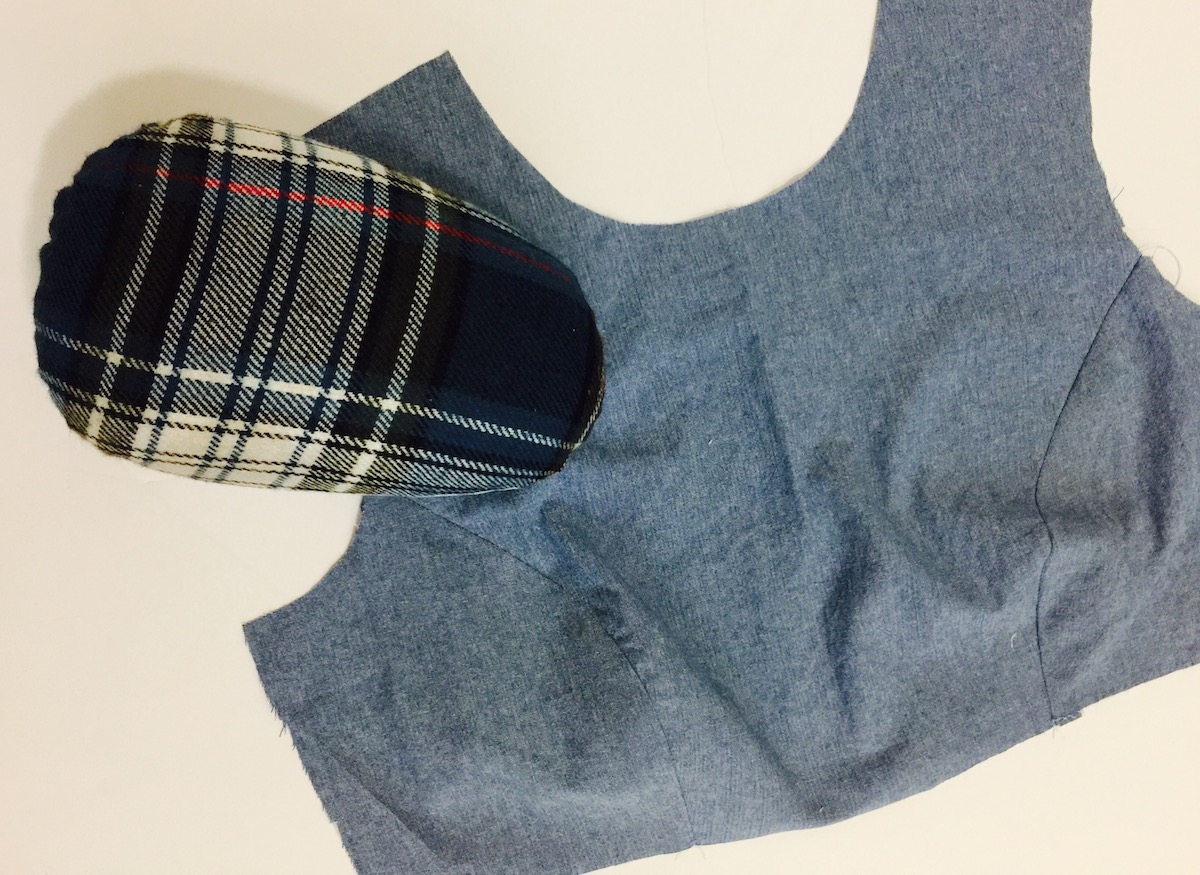
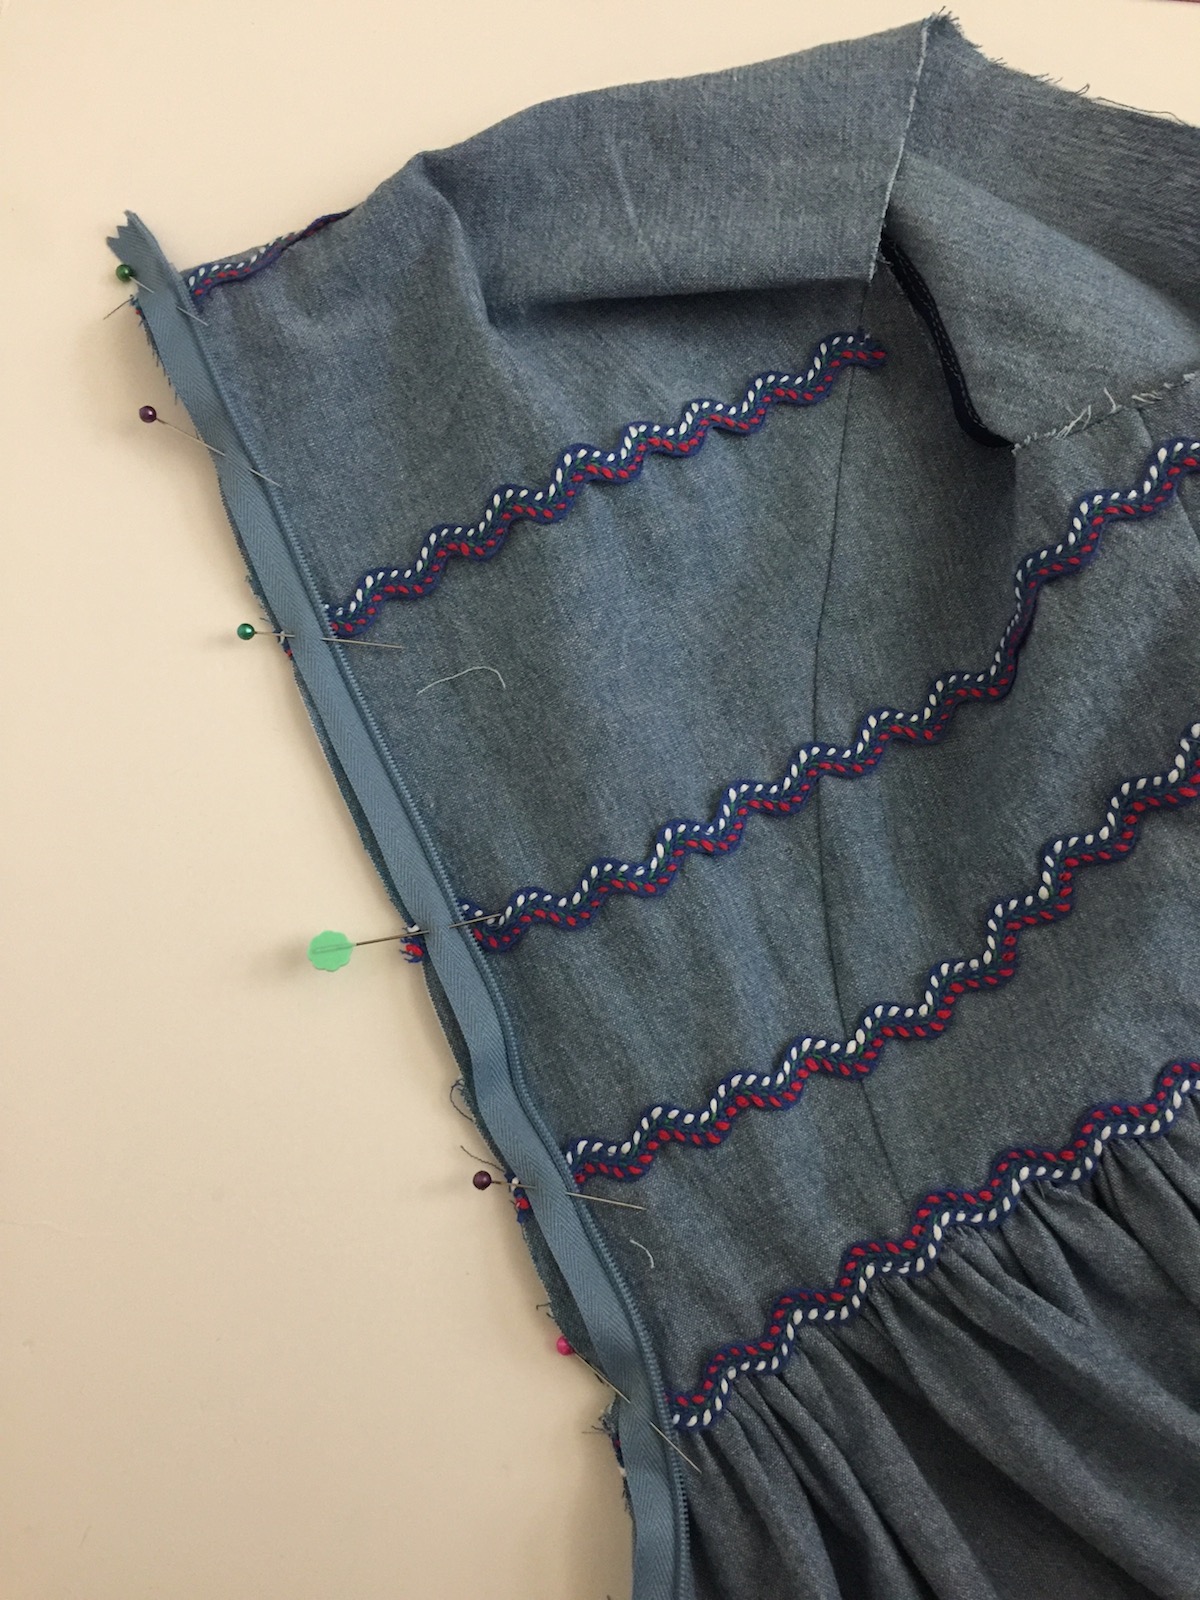
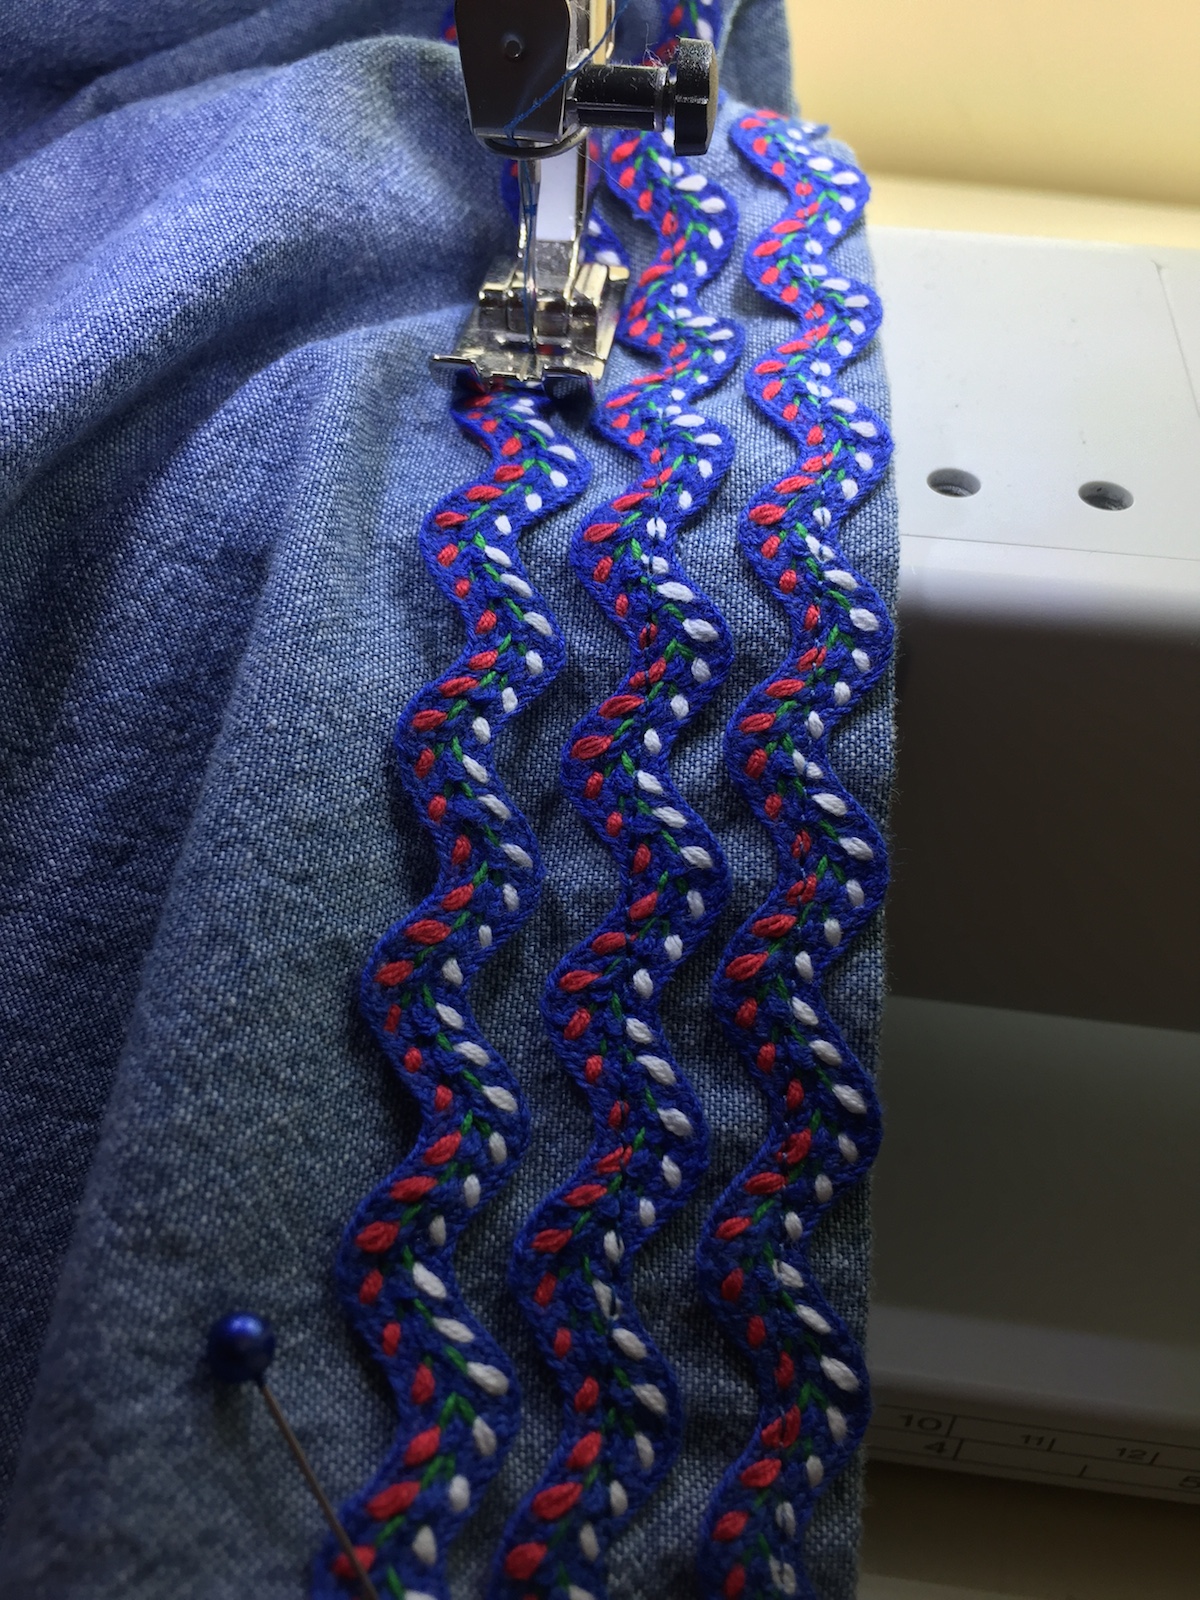
8. Next, start pinning your trim to the bodice of your dress. I pinned a line of trim around the neckline edge, and then every 1 3/4″ apart. (I also ended up adding one more row than what is shown below!). Have the trim end about 1/2″ away from the edge to create less bulk in your seam allowances.
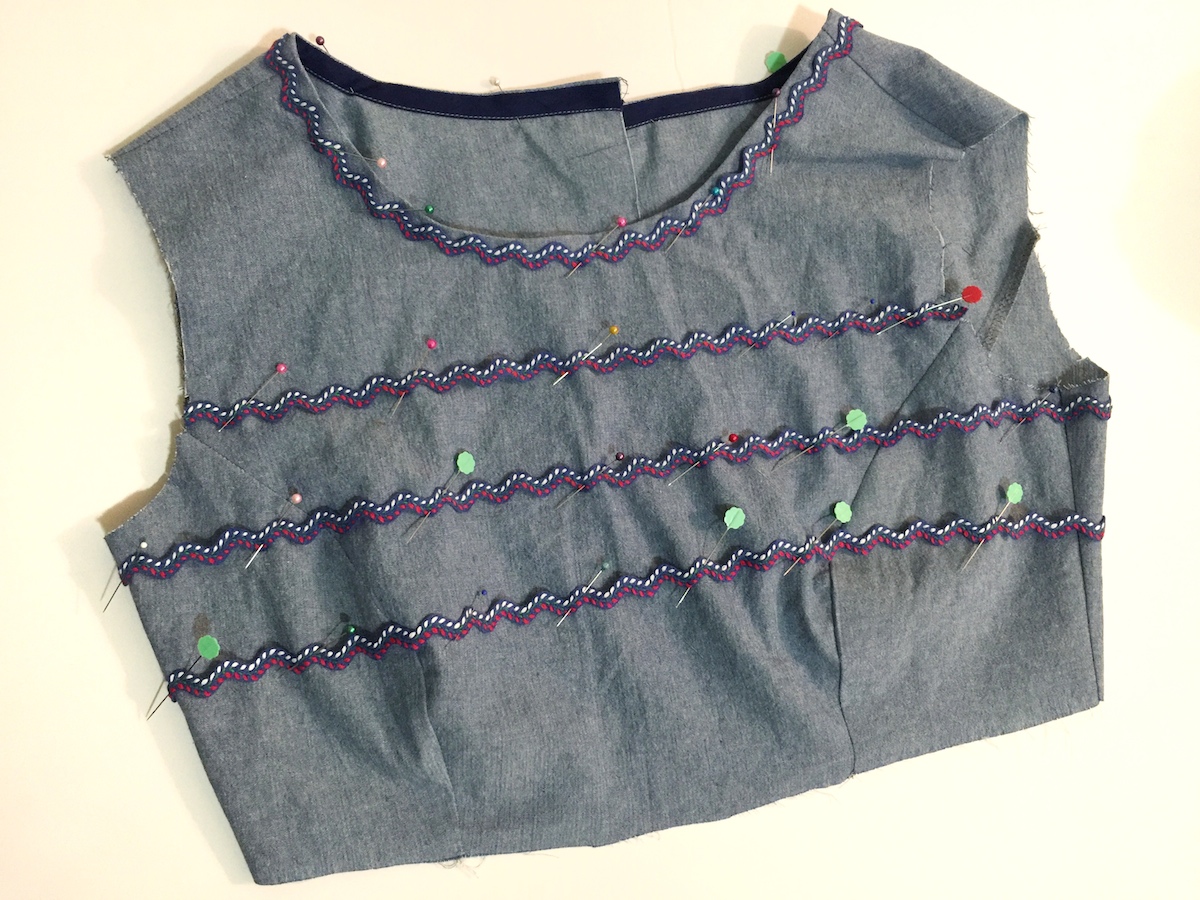

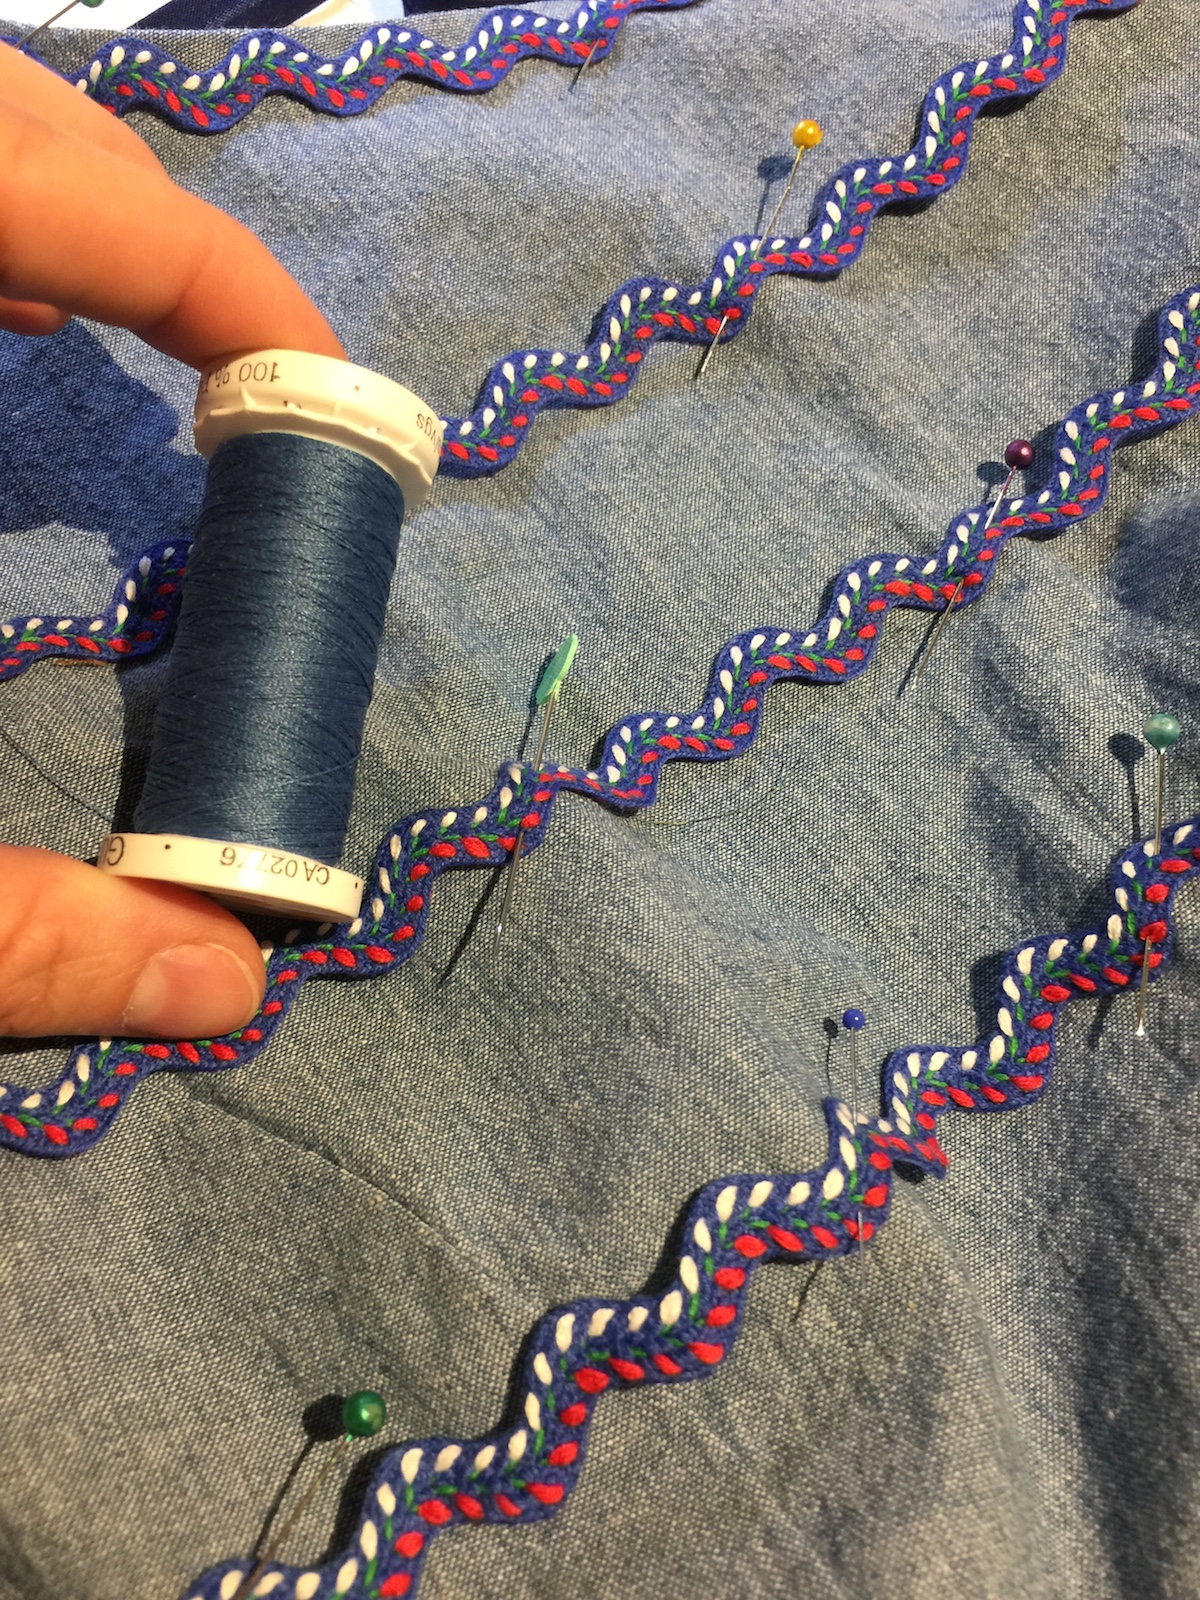
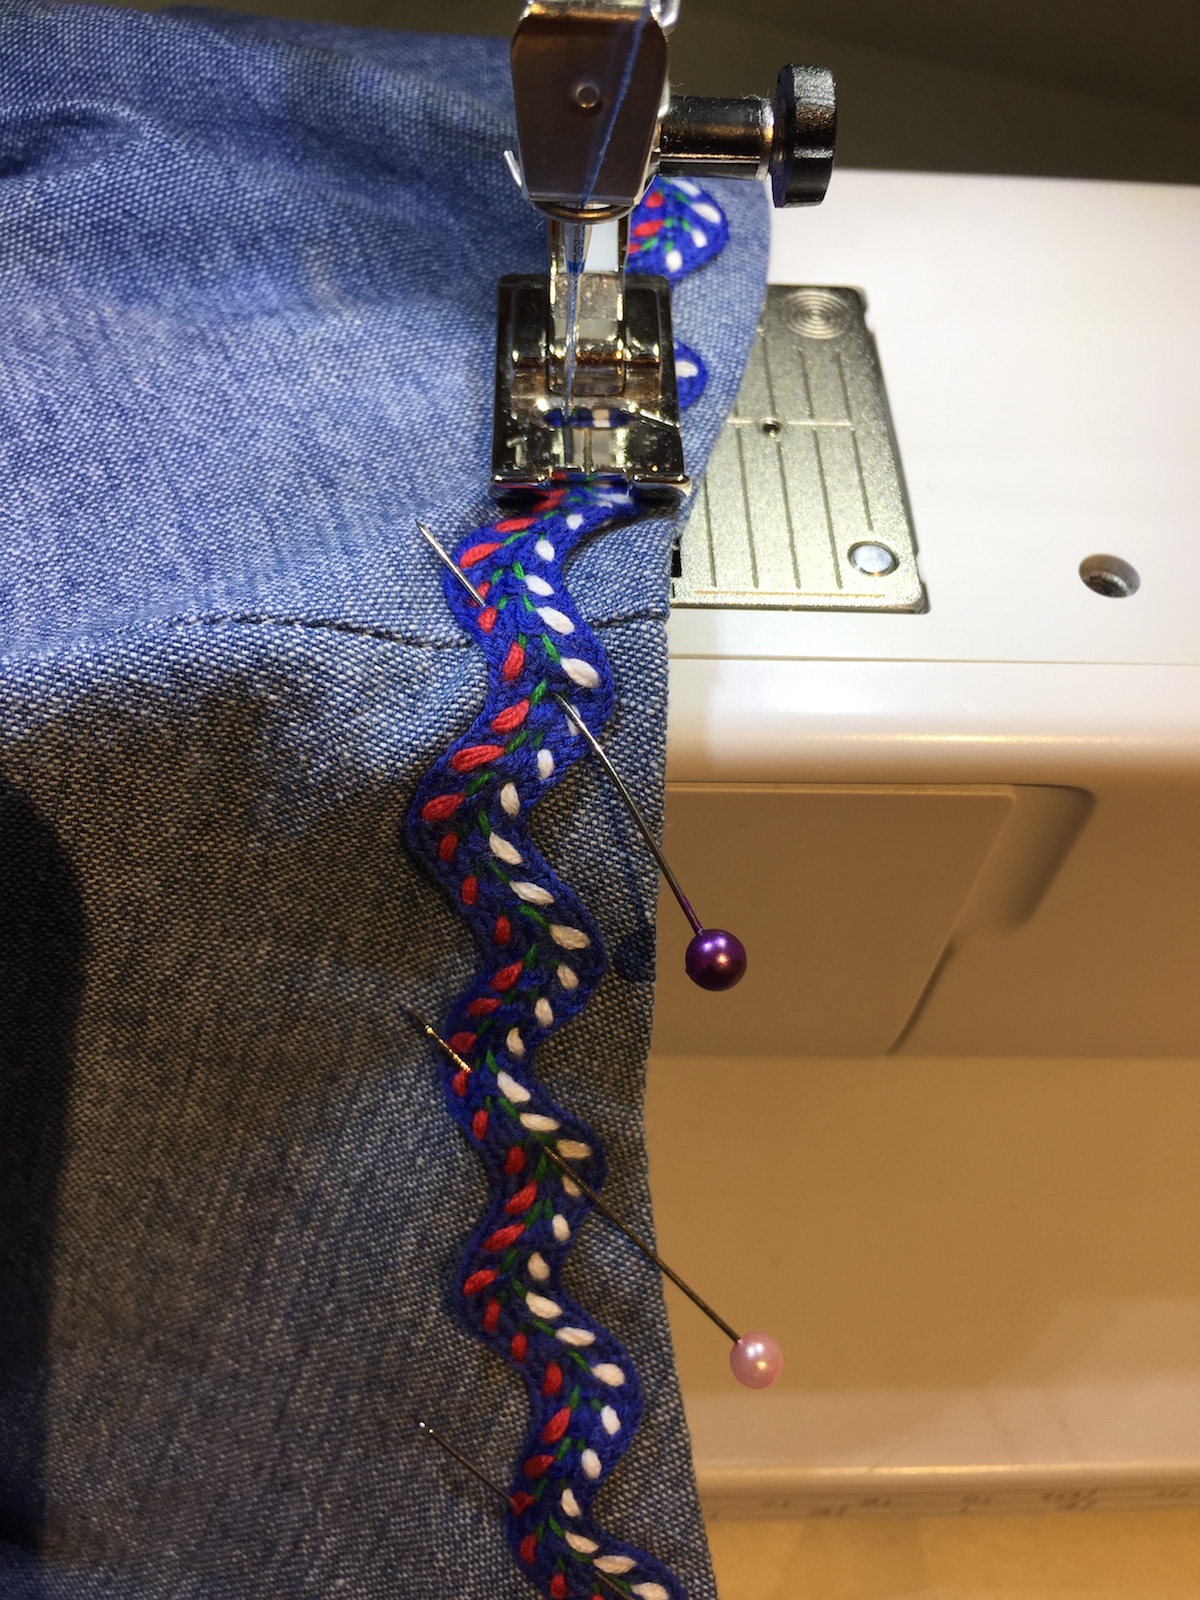
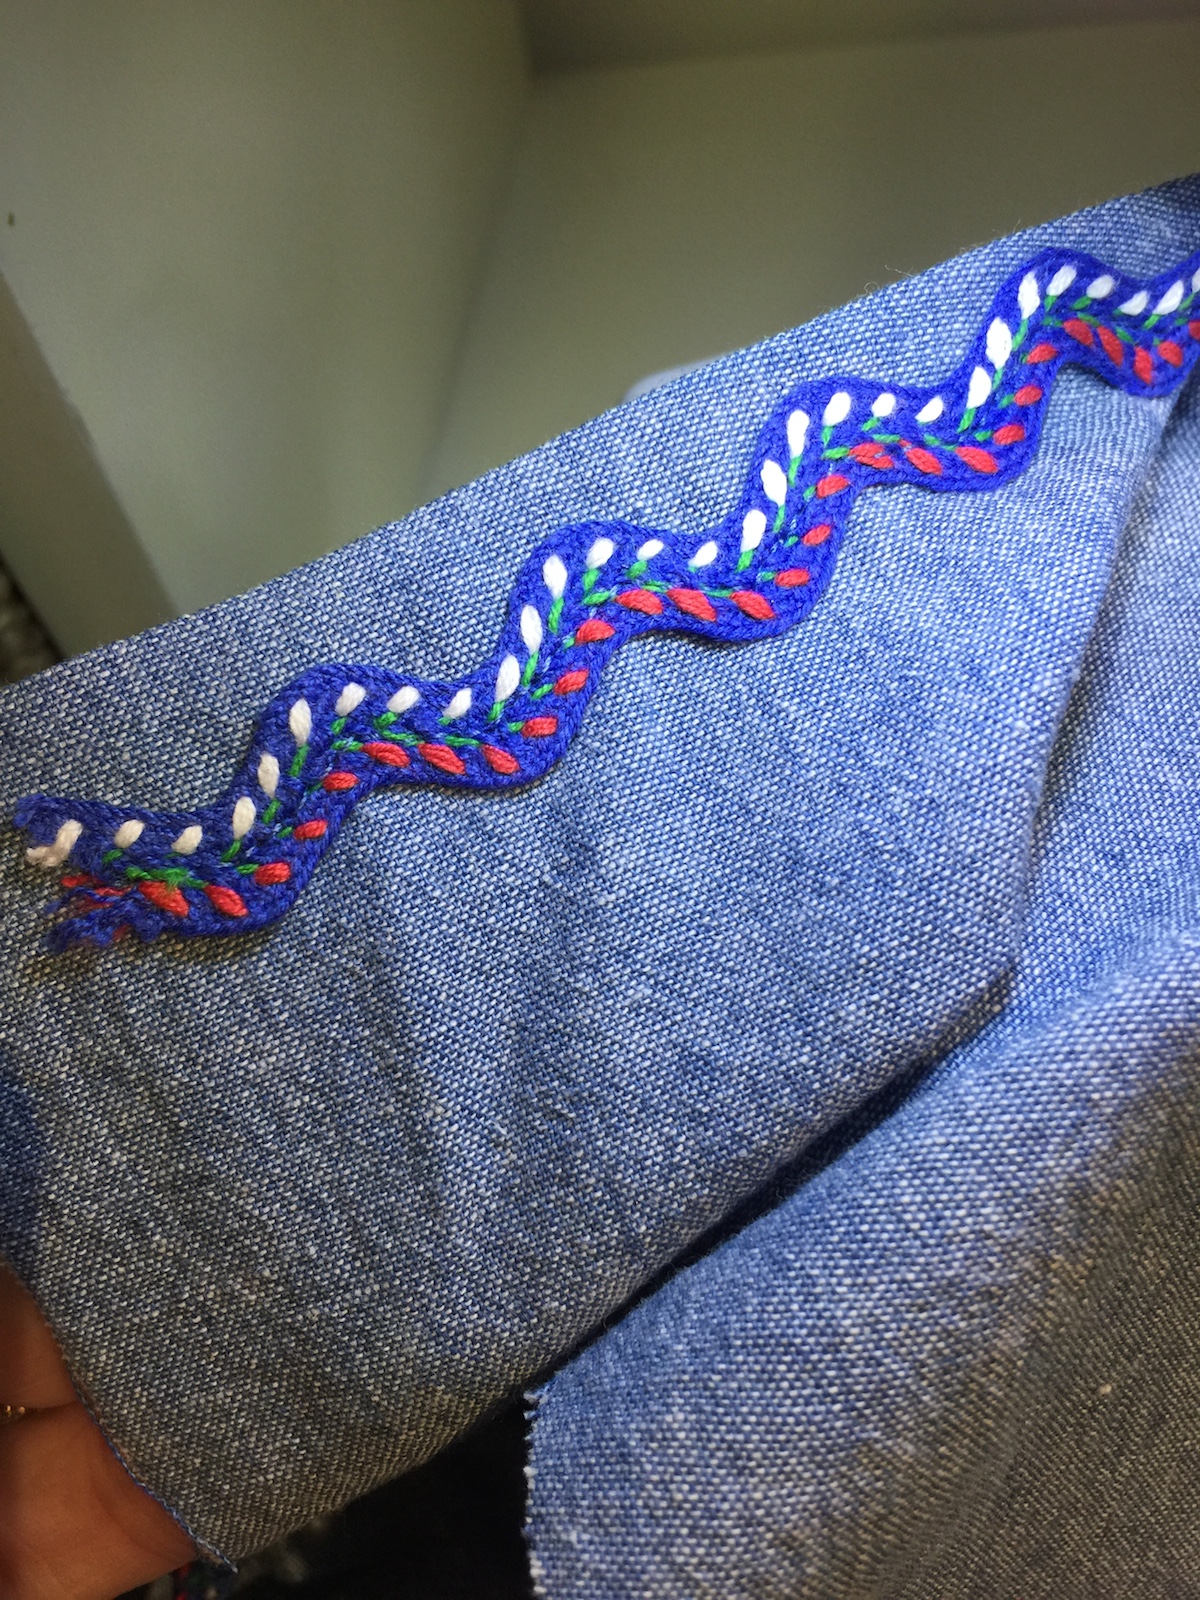
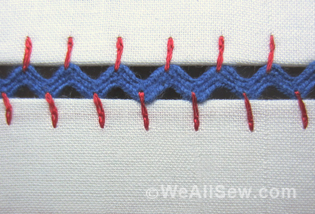
9. Switch back to your Reverse pattern foot #1. Using thread that matches the majority of your trim, begin sewing right down the middle of your trim. For a more hidden finish, try sewing in a zig zag pattern matching up with the trim. To save time, you can also just sew a straight line through the trim instead.
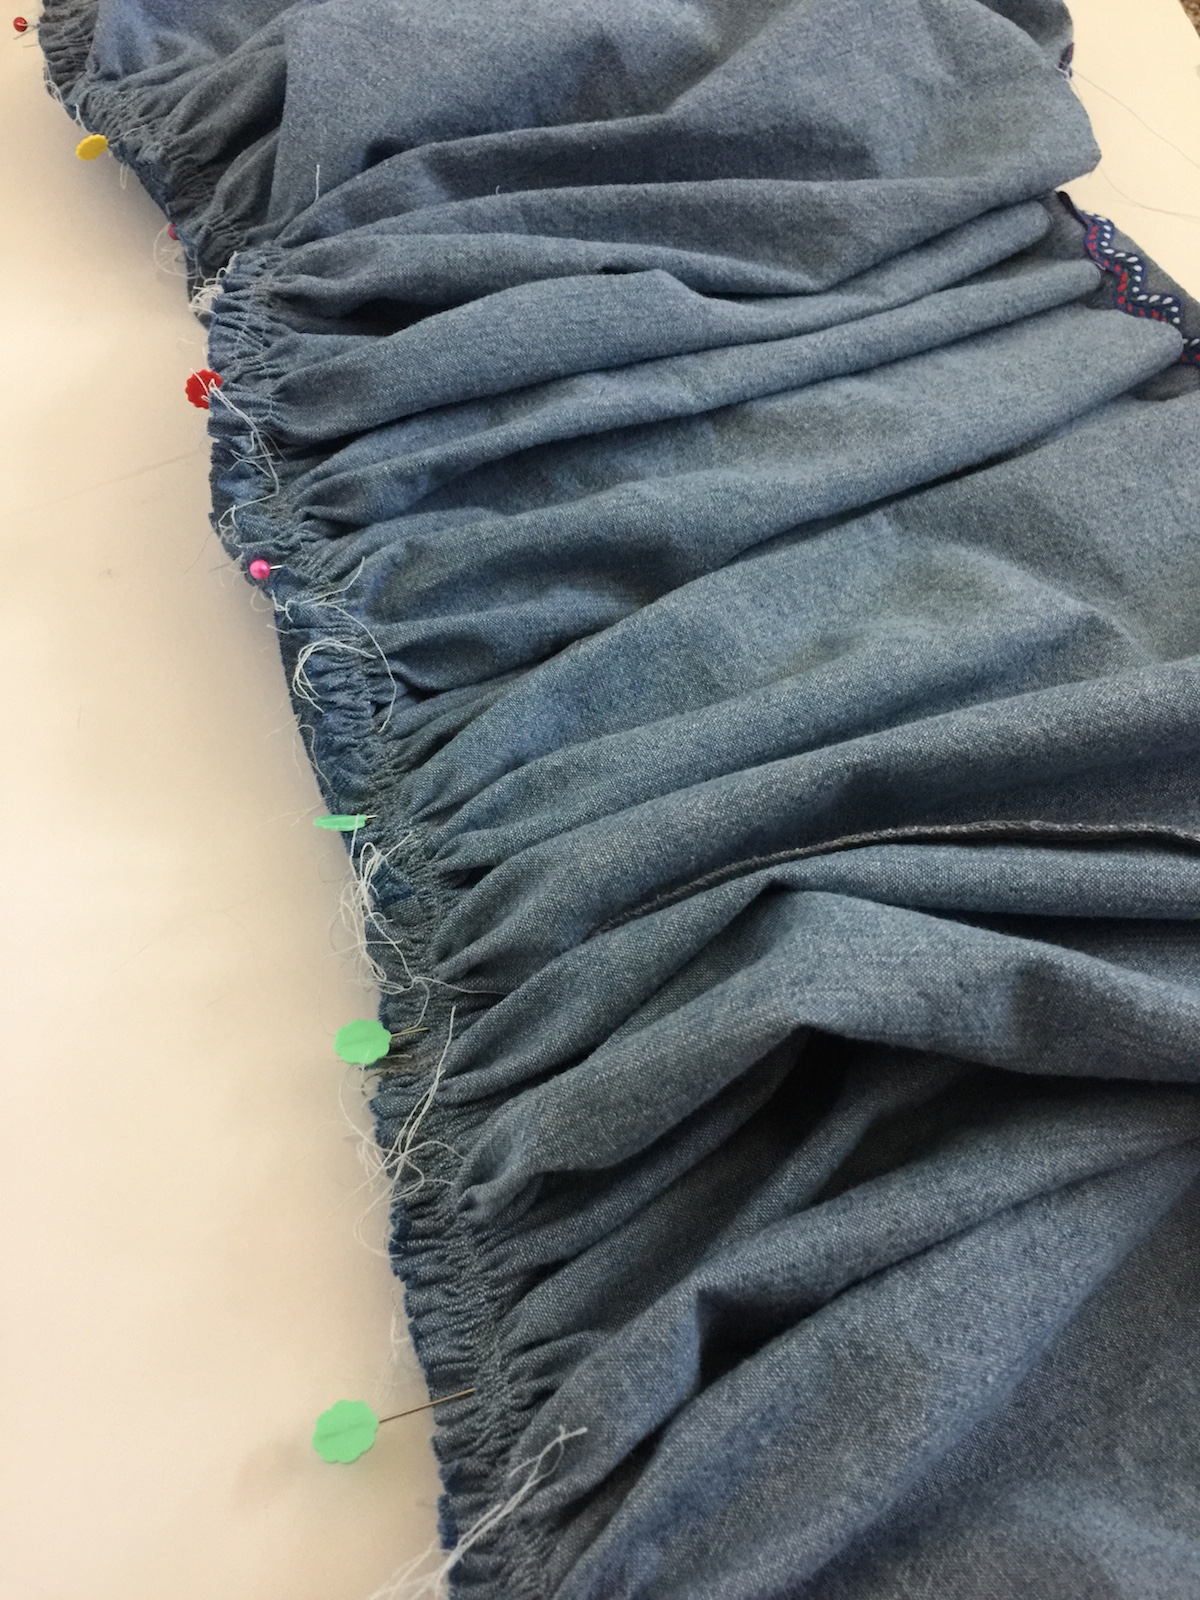
10. Once all the trim is sewn to the dress bodice begin prepping tier 1 to be gathered and sewn to the bodice. Sew the side seams of tier 1 right sides together. Iron and finish as desired. Along one edge, sew two rows of basting stitches at 1/4″ and 1/2″. (Remember, one of your two tier 1 pieces will be cut in half, this will be the center back).
11. Now pin tier 1 to the bodice right sides together at the side seams and center back. Gently pull threads to gather; evenly spread the gathers. Sew at 1/2″. Unpick any gathering stitches showing on the right side, iron the seam up toward the bodice, and finish as desired.
12. Now grab some trim, and pin directly along the waist seam. Sew in place.

Insert the Zipper:
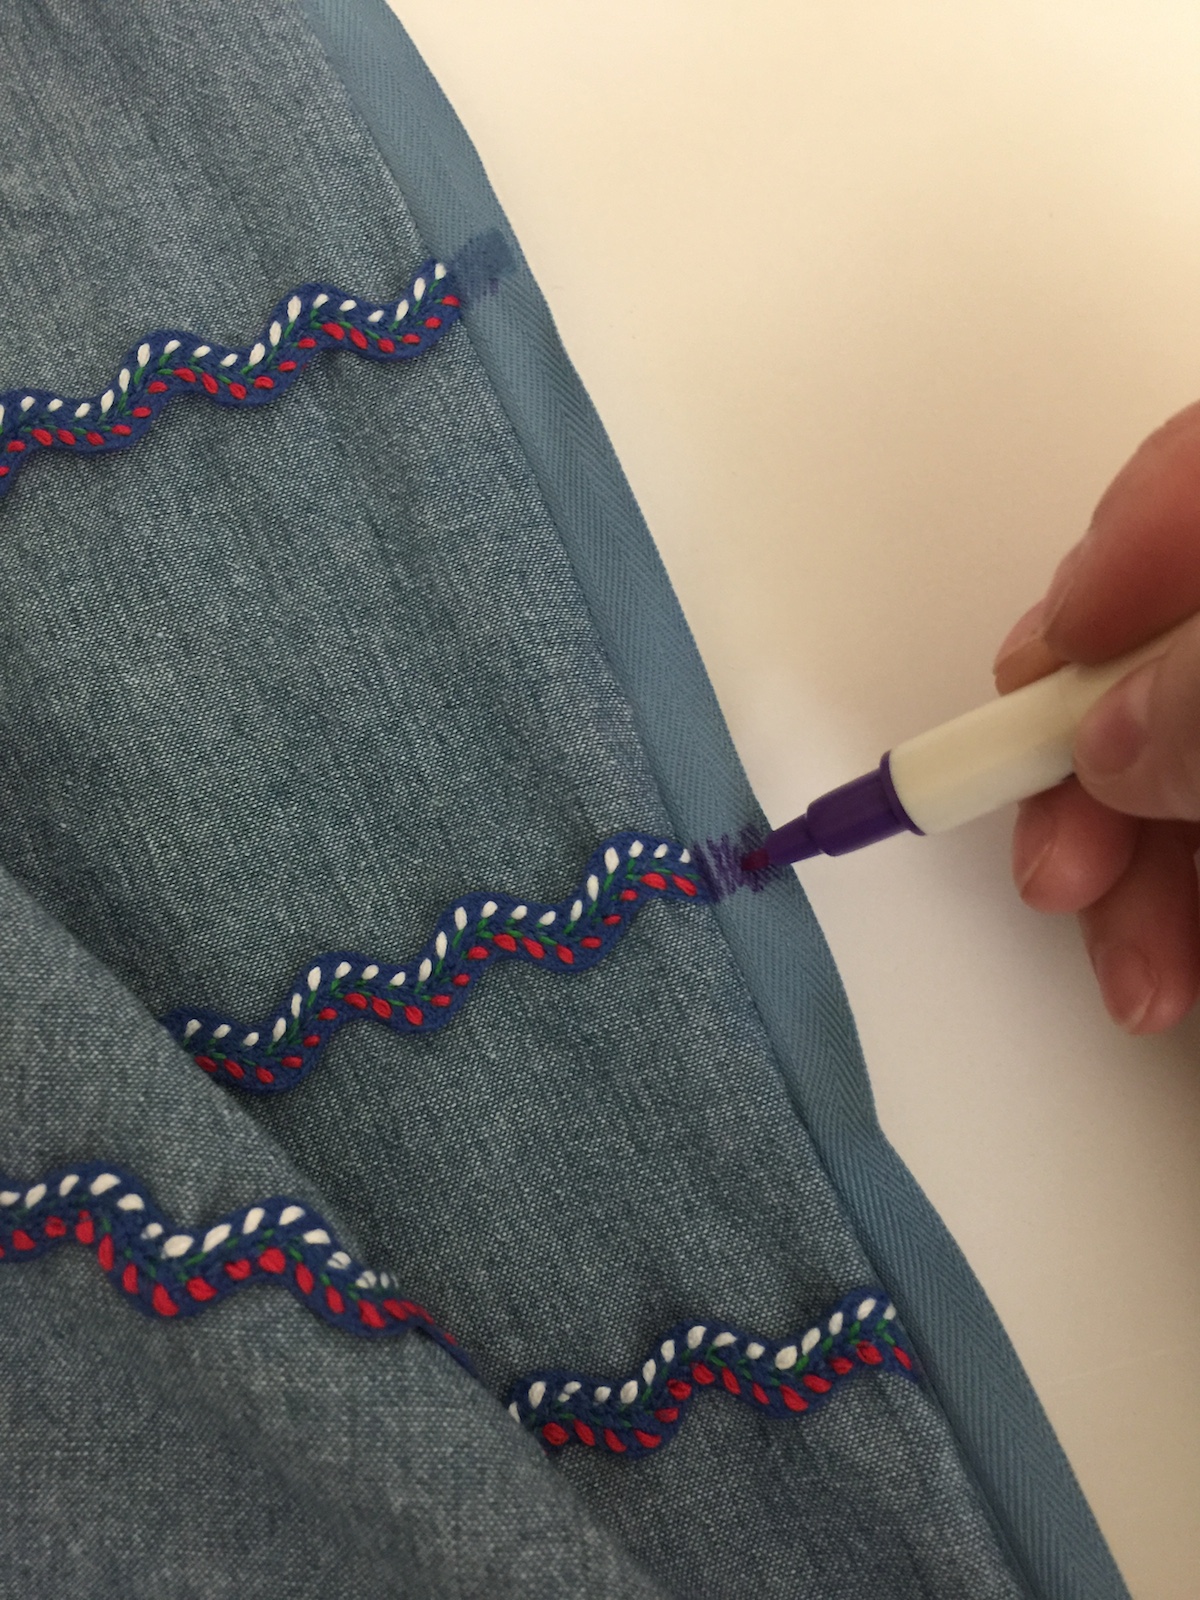
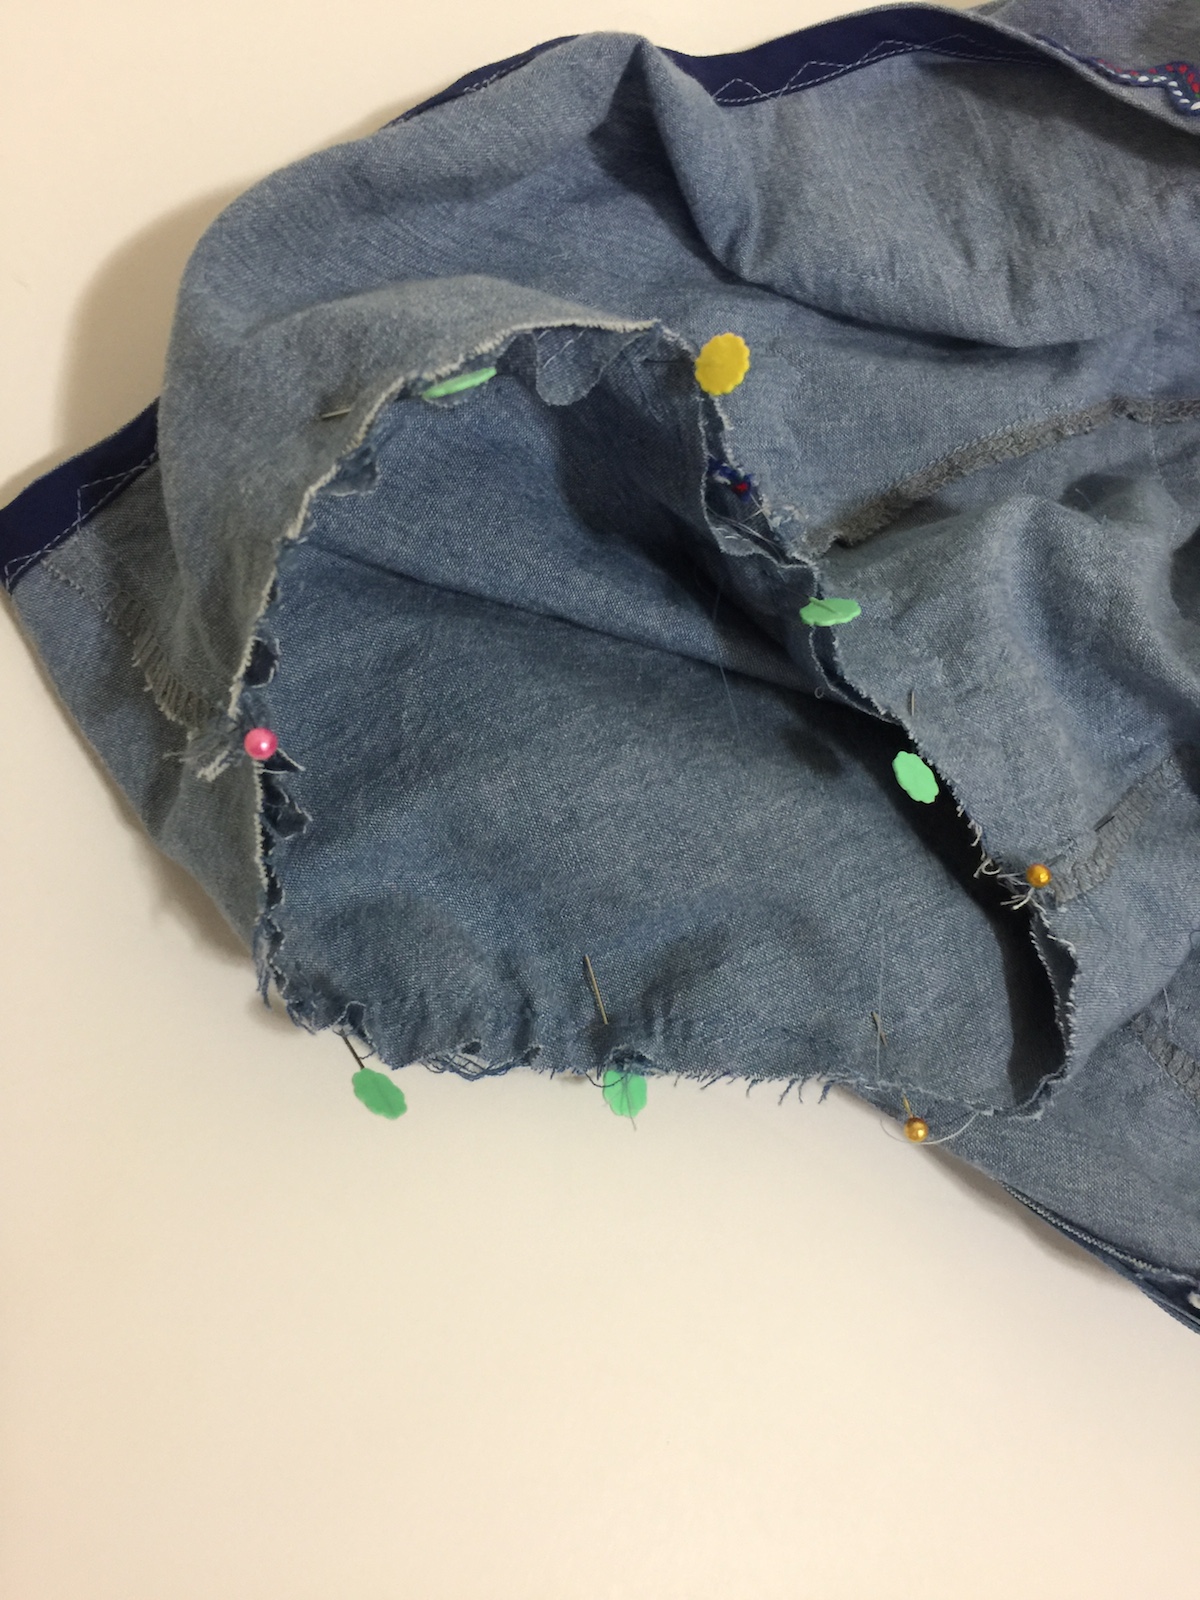
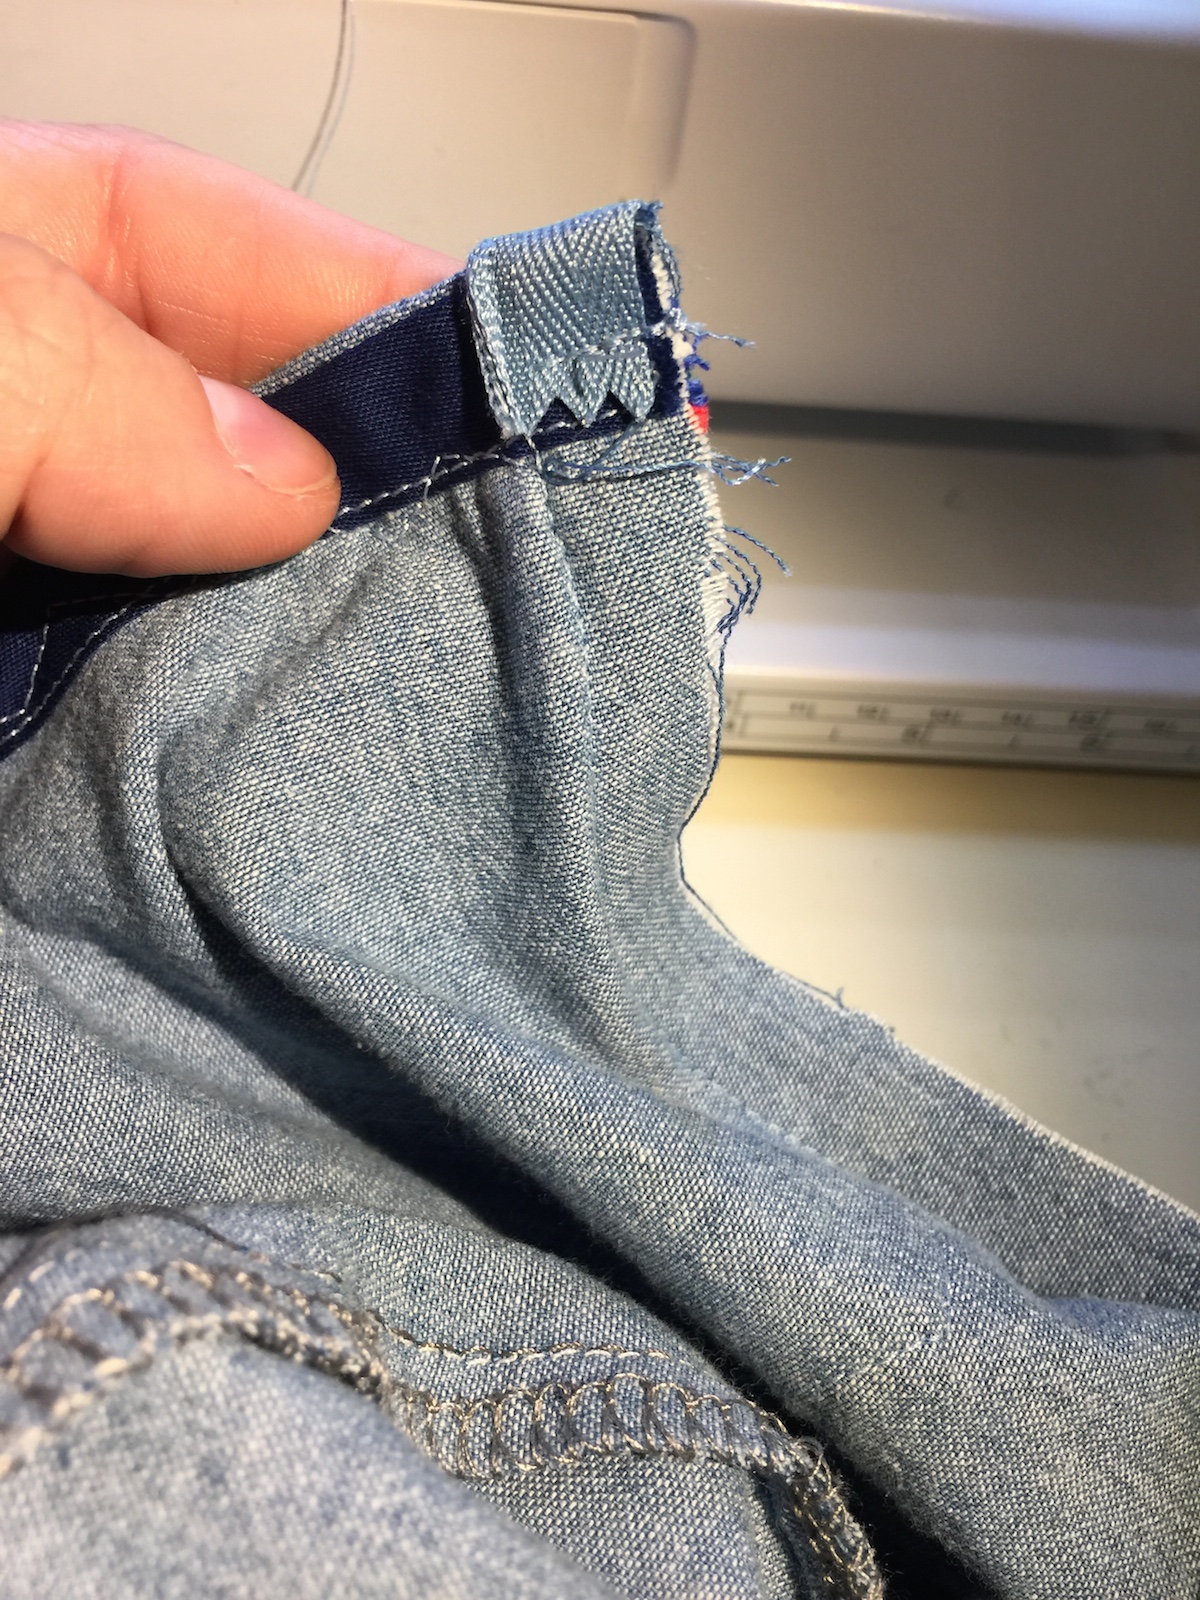
13. Next we are going to sew in the invisible zipper. Be sure you have the right fit before sewing in the zipper. (I ended up removing about 2″ from each side of my back bodice). First, finish the center back edges as desired. For this next step I would recommend using the Invisible zipper foot #35 or Zipper foot #4. Follow the instructions on your zipper packaging to install the zipper.
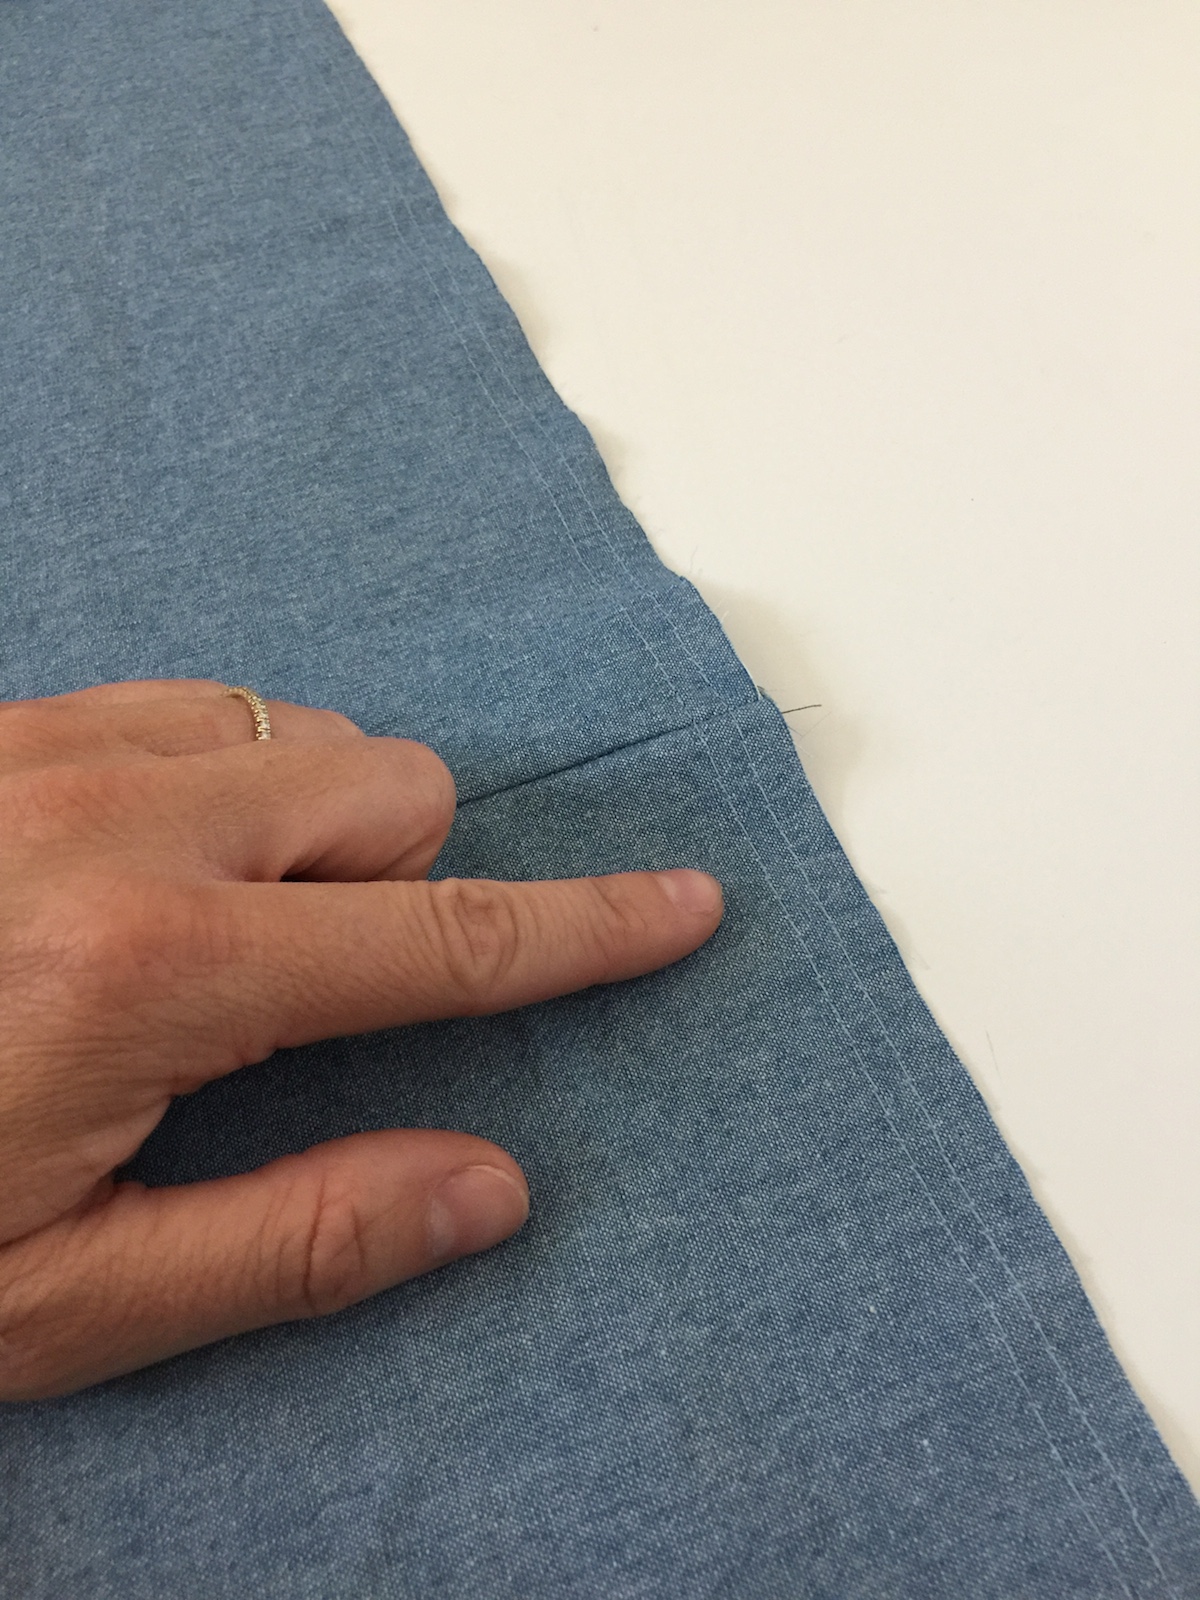
14. After sewing one side on, I found it helpful to mark where my trim ended along the center back seam to make sure all of the trim lined up straight on both sides.
15. Now sew up the very bottom edges of the center back seam to finish the zipper and center back seam. (Note: I have attached tier 2 in this image).
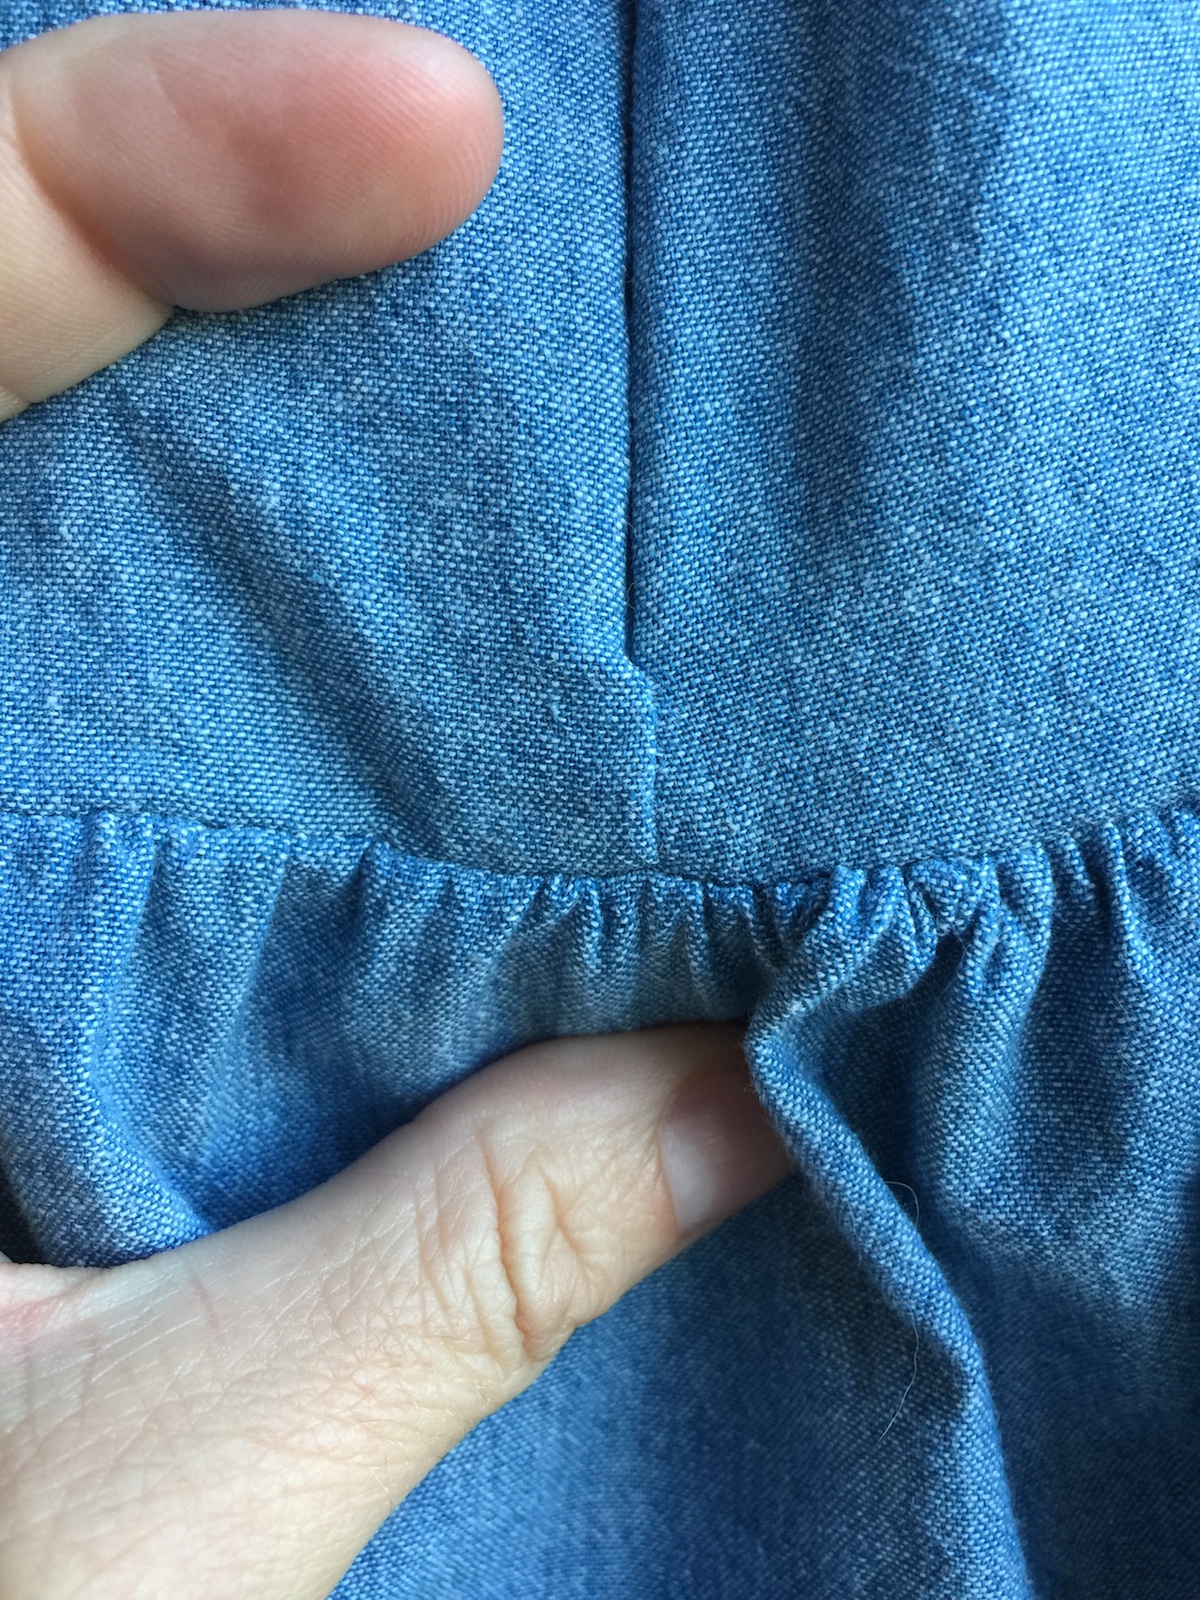
16. Now it’s time to prep tier 2. First we need to sew all four pieces together at the side seams. Iron and finish as desired. Prep for gathering by sewing two gathering stitches along one long edge of tier 2. I found it helpful to gather the whole tier 2 piece before pinning to tier 1. Once it’s gathered, line up the seams to offset the center front so when looking at the front bodice there will be two seams between the center front and side seams of tier 1, and the same for the back. This way there isn’t a seam going down the center front of the dress. Pin and sew. Iron the seam allowance up toward the bodice, and finish the seam as desired.

17. Repeat for tier 3.
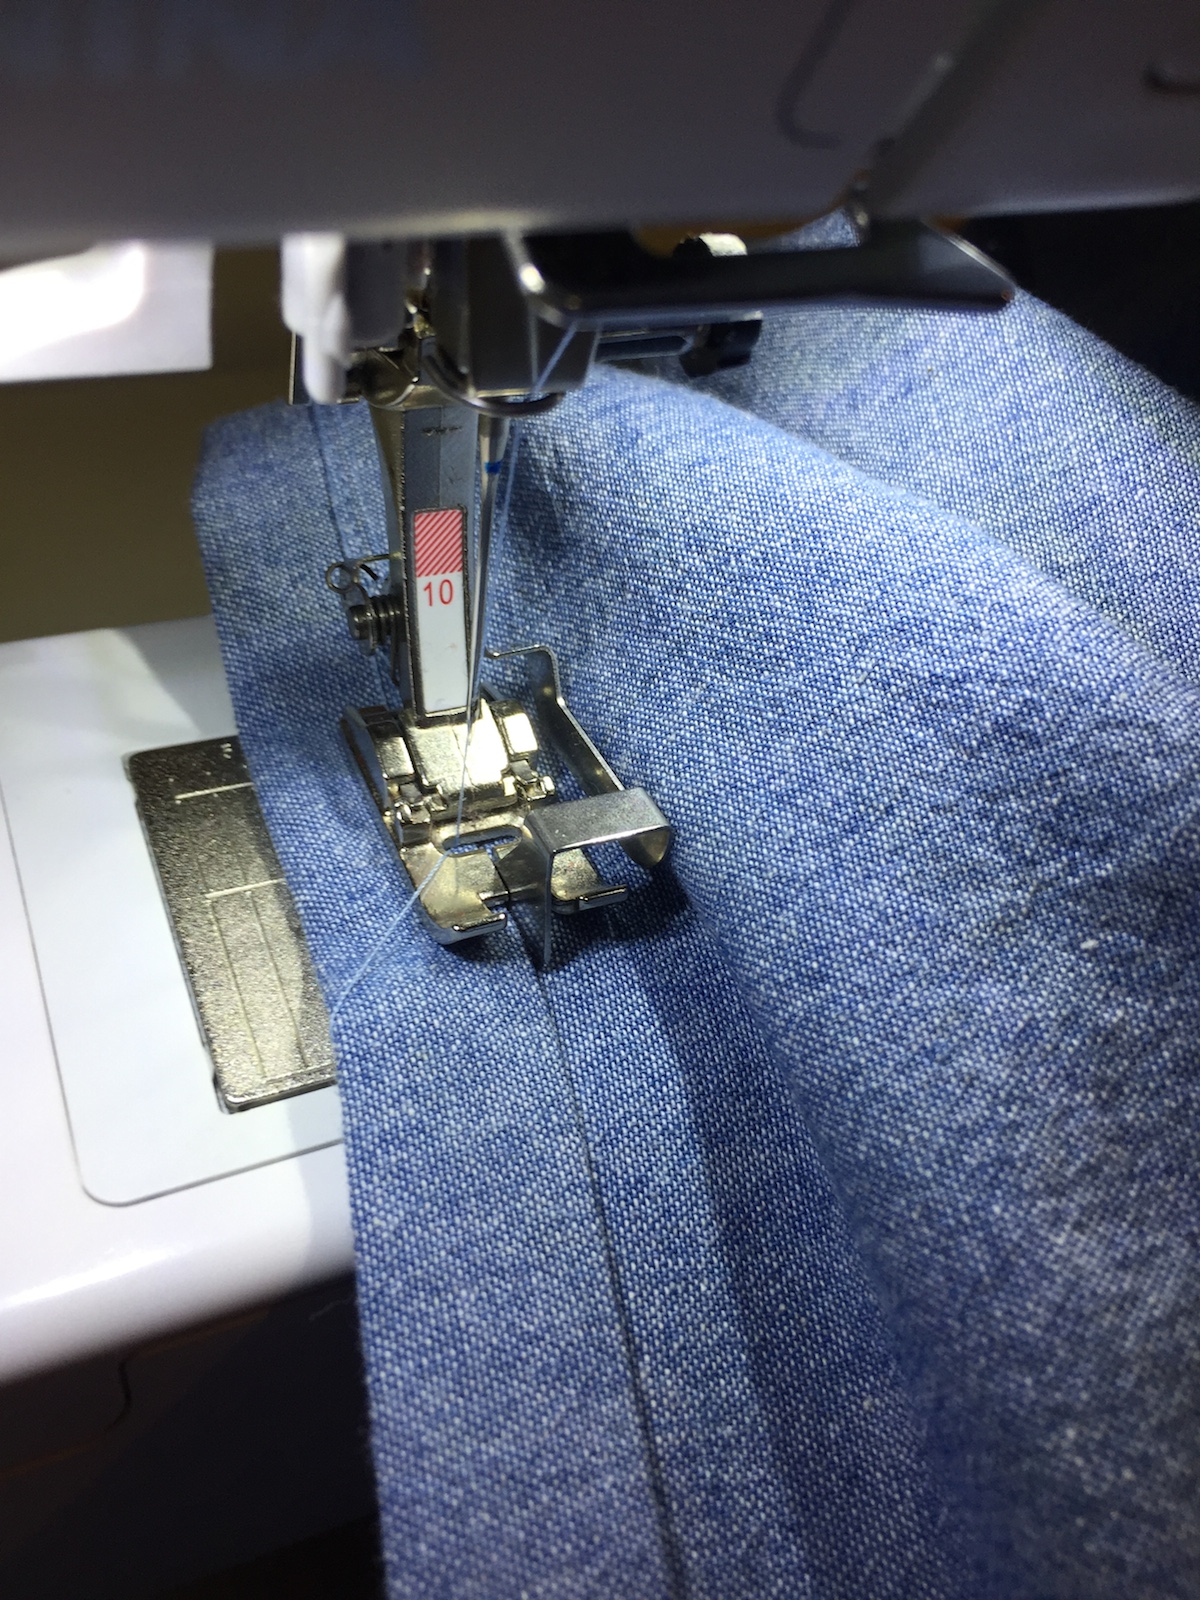
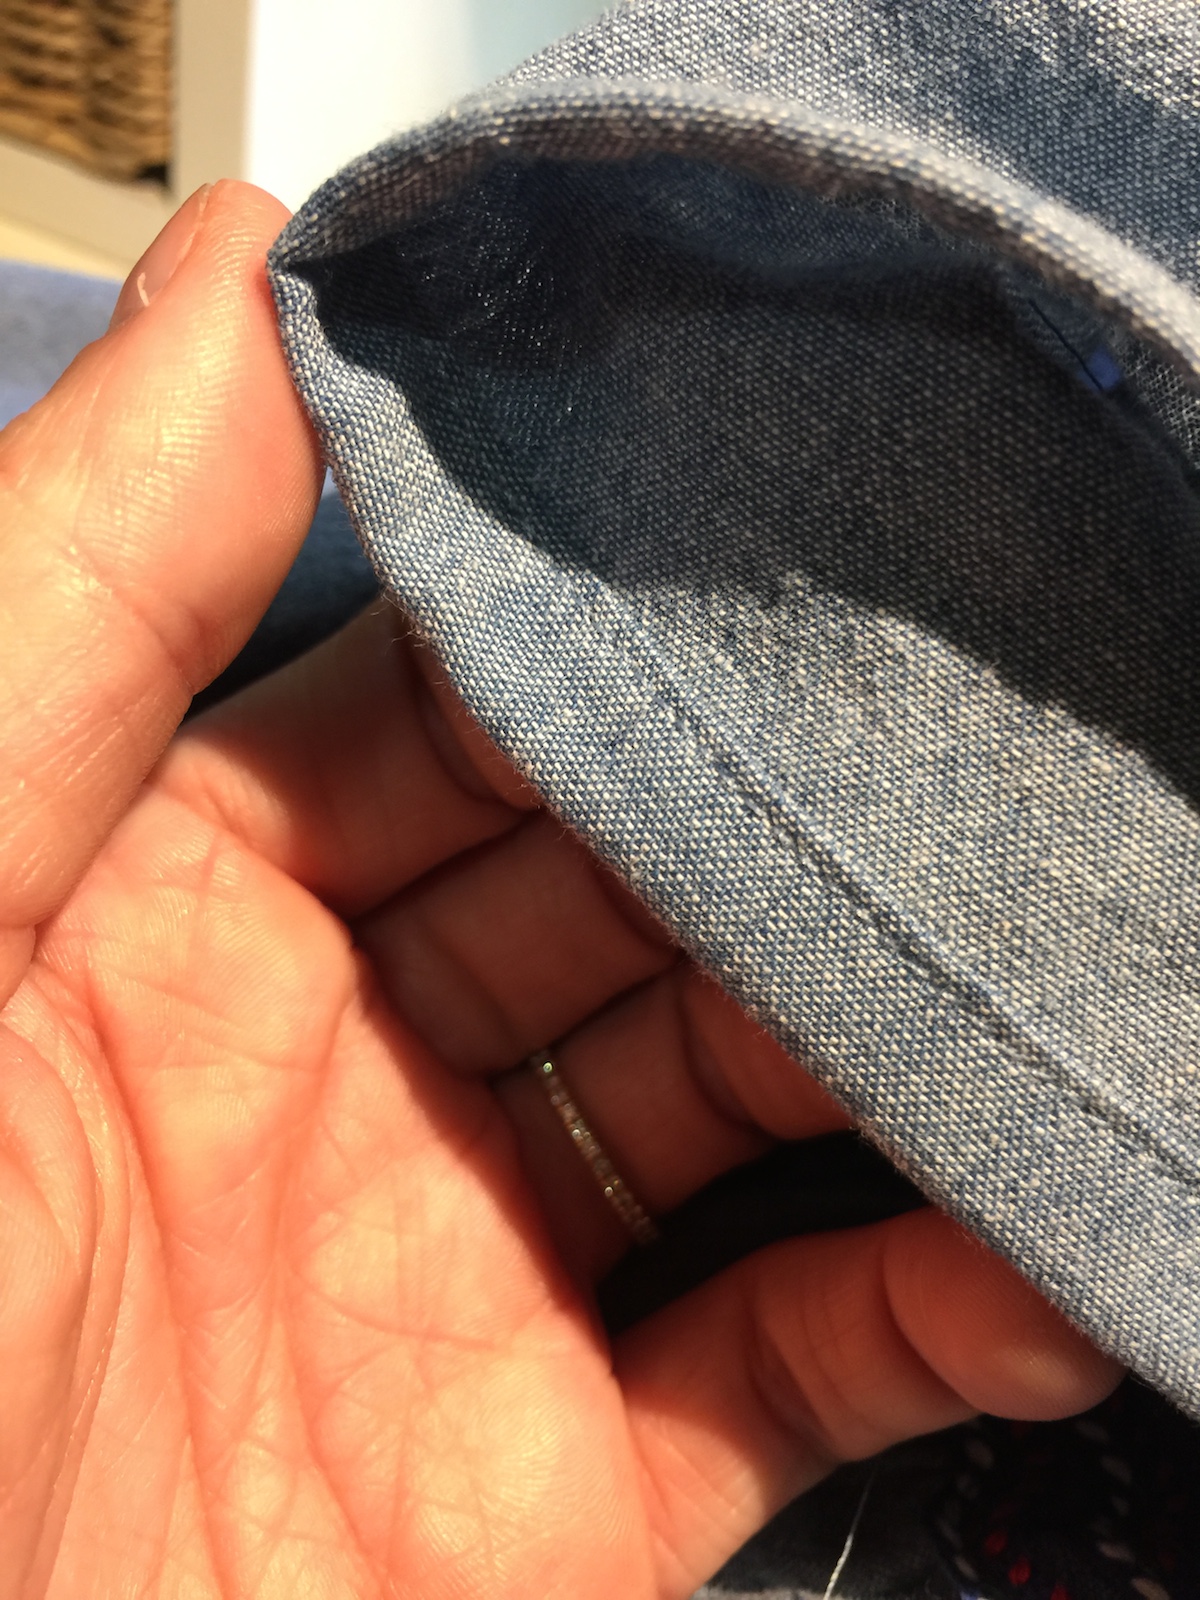
18. To finish off the dress before sewing on the rest of the trim, hem your dress to your desired finished length. This is where the Edgestitch foot #10 comes back into play. I love using this foot for hemming! You will use it just the same way as we did for sewing on the bias binding. Move the needle over to the left 3 times, and line up the bar of the foot against the edge of your prepped hem. Sew along the edge for a perfect finish.
Sew in Sleeves:
19. Next, let’s sew in the sleeves. To begin prepping your sleeves, sew two rows of basting stitches at 1/4″ and 1/2″ along the edge of your sleeve cap. Sew the side seams together. Finish as desired. Now, set in the sleeve to the bodice, right sides together. Make sure to line up the underarm seam of the sleeve and side seam of the bodice. Match center of sleeve cap to shoulder seam. Lightly gather the sleeve to fit in the armhole. Pin and sew at 5/8″. Make sure everything looks neat and flat on the right side of your sleeve. Finish the seam as desired.
20. Hem your sleeve. Fold in the unfinished edge of the sleeve at 1/4″ and again at 1/2″. Hem using the Edgefoot #10.
21. Tack down the zipper tape along the center back top of the bodice. Fold it over to the wrong side of the bodice and sew in place. You can do this by hand or with your machine.
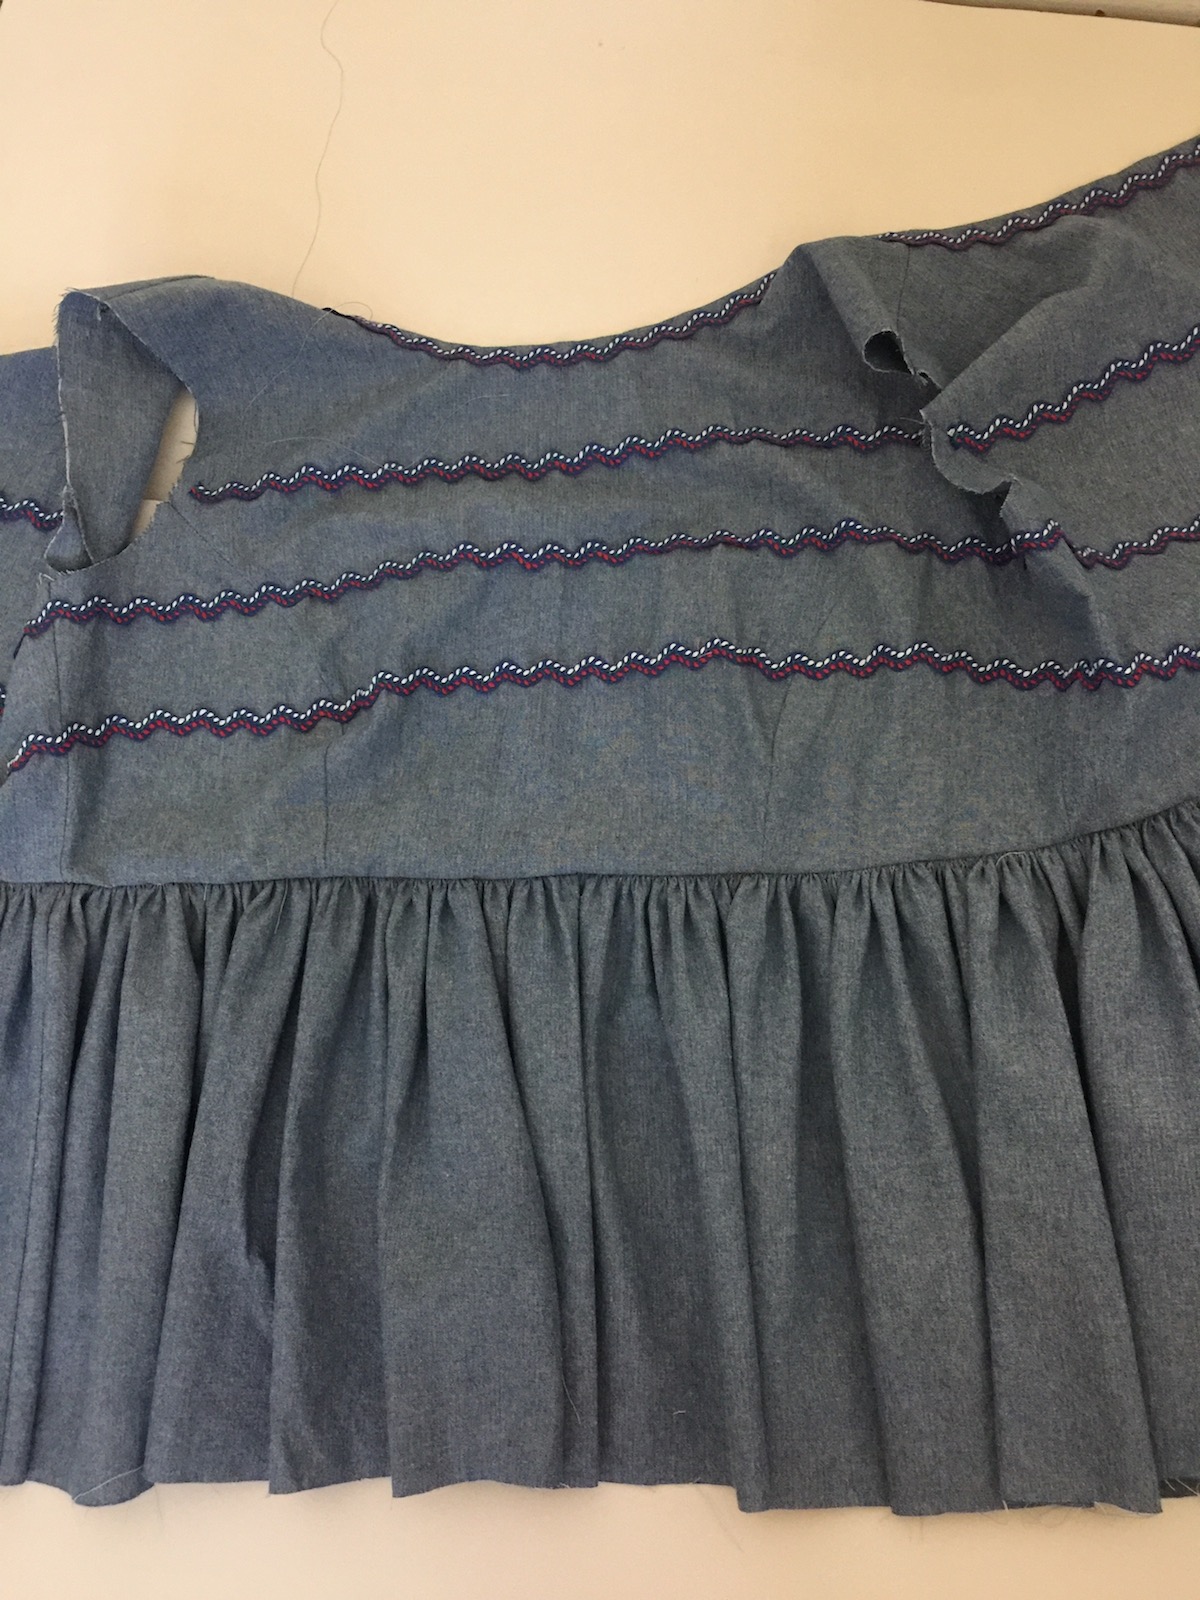
22. To finish off the dress, sew on the rest of the trim. I sewed one row on the seam of tier 1 and 2, and one more row on top if it on tier 1. Make sure to line up the pattern of your trim. Sew and pin one row at a time.

23. Repeat for tier 3 and 2 on the next seam line.
24. I decided to sew 3 rows of trim to the hemline of my dress, just as the inspired dress pictured at the beginning of this post.
Congratulations, you’re all finished! Thanks for following along, and happy sewing!


What you might also like


4 comments on “How to Sew a Tiered Dress with Trim”
-
-
Thank you
-
I am confused by the measurements of the tiers. You said start with waist measurement (in your case 28″) multiply by 2 and then divide by 2–and you are back to 28″. It seems to me the first tier must be wider than your waist so it has space to gather. Did I misunderstand something?
thanks!
-
The tier dimensions are confusing! How wide was the fabric you used? Can you post the total dimensions of each tier?
Leave a Reply
You must be logged in to post a comment.

40 yards of rick rack trim?