Sewing with Leather: Tips and Tricks
Fabric Characteristics of Leather
- A durable, flexible material
- Made from the skin of an animal
- Shade variation common from hide to hide and within each hide
- Natural markings are clearly visible (e.g. brands, healed scars)
- Natural grain of skin remains making grain variation visible
- Can water spot easily
- Will not fray
Care and Use of Leather
- Note: At the first sign of color bleeding or fading while utilizing the following techniques. you should stop what you’re doing and take your item to a pro.
- To make sure your cleaning products and method are a match with your leather, test it out on a hidden spot first—like inside the hand opening on a glove.
- To clean leather, carefully rub a mild soap or leather cleanser onto your item with a damp paper towel, let it sit for several seconds, then wipe it clean.
- Let it air dry afterward (away from direct heat) and use a leather conditioner to moisturize.
- The biggest mistake people make when caring for leather clothing is getting it too wet, then rubbing the material too hard.
- Leather is delicate, especially when wet and the color can come off easily, so don’t saturate or vigorously rub it while cleaning.
- Never immerse leather in water.
- Lapped seam is recommended for a strong sturdy seam when sewing leather.
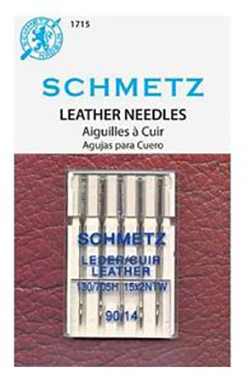
- Leather needles are recommended.
- Longer stitch length is recommended.
Recommended BERNINA Presser Feet for Sewing Leather
BERNINA has several different presser feet for sewing with leather. The Big Book of Feet is a great reference point for determining what sewing technique or presser foot to use. The following presser feet are recommended for sewing with leather:
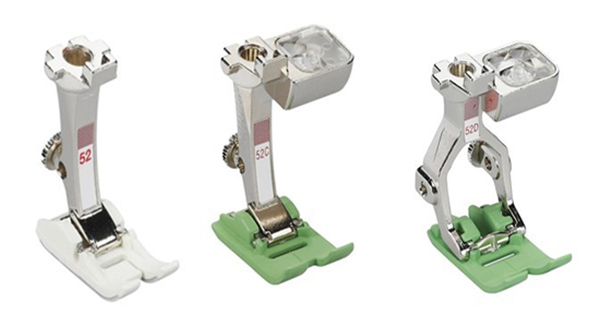
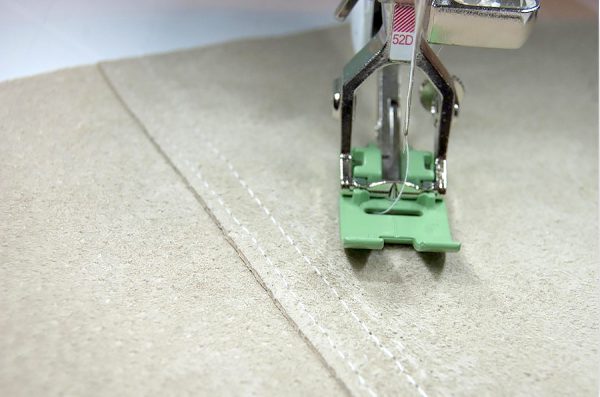
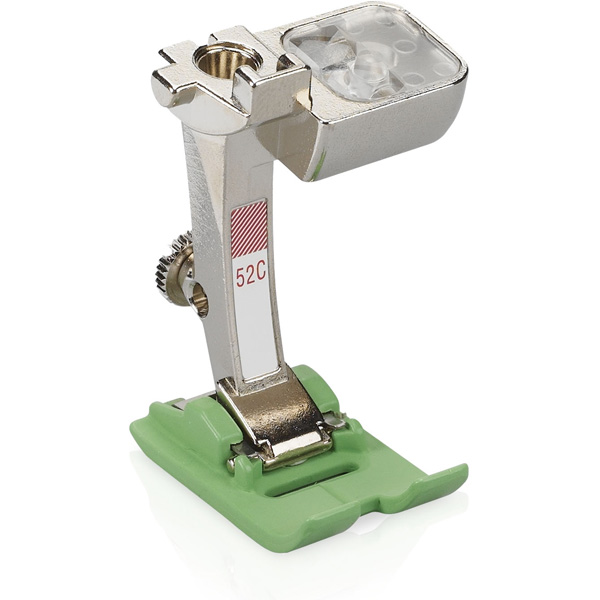
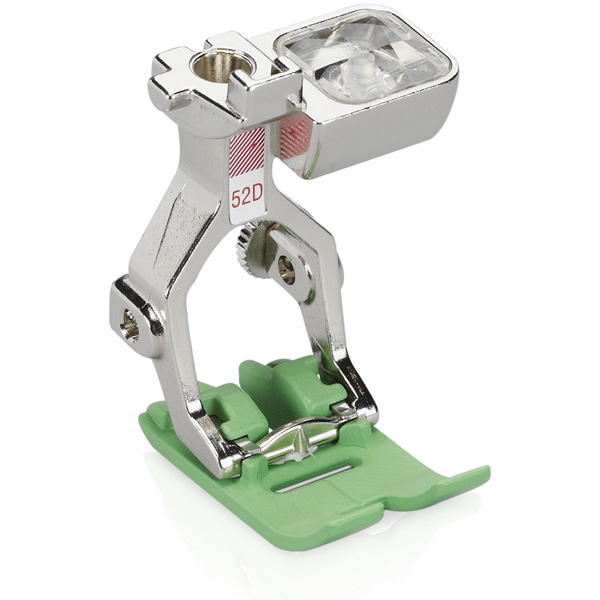
- Zigzag Foot with Non-stick Sole #52/52C/52D is a version of the Zigzag Foot #0 and good for general all-purpose sewing. This foot will work well for straight and zigzag stitching.
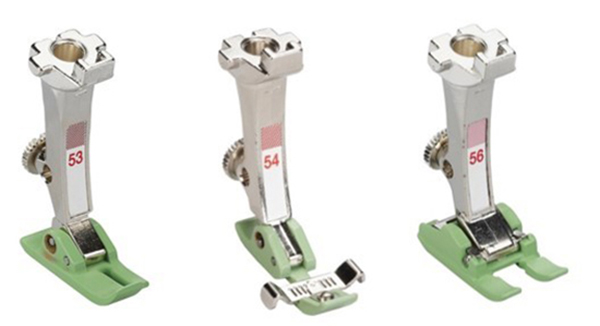
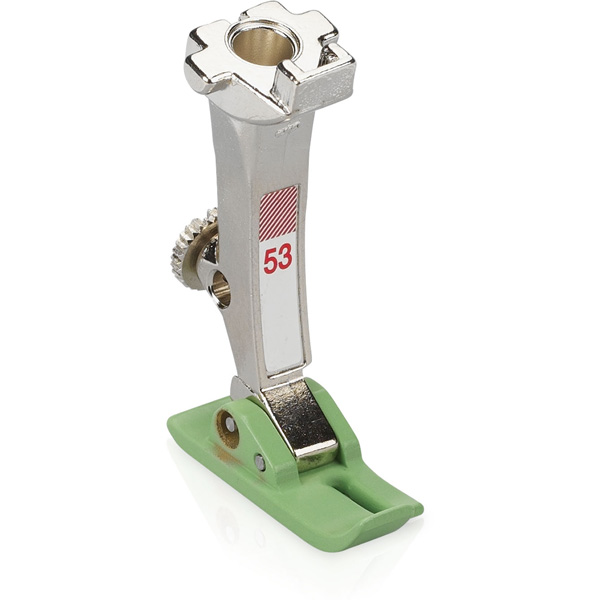
- Straight Stitch Foot with Non-stick Sole #53 is a precision straight stitch foot with a narrow toe for topstitching.
- Zipper Foot with Non-stick Sole #54 is a 5.5mm zipper foot with an adjustable guide and works with all BERNINA machine models regardless of the stitch width.
- Open Embroidery Foot with Non-stick Sole #56 is a version of Open Embroidery Foot #20 and good for sewing heavy decorative stitches. This foot will sew patterns up to 5.5 mm stitch width.
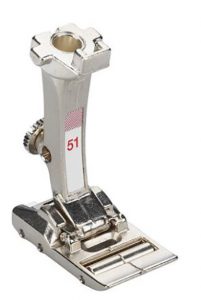
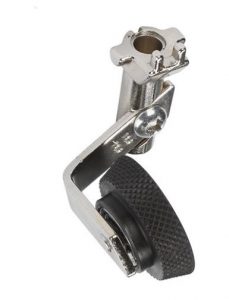
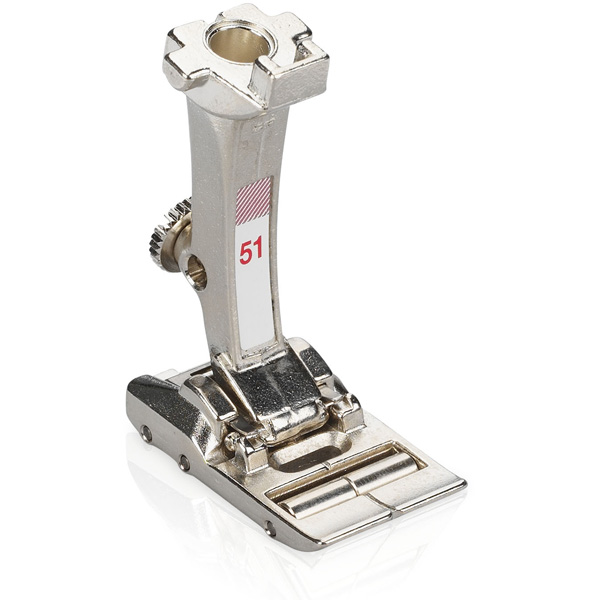
- Roller Foot #51 is designed especially for sewing fabrics that do not feed easily under ordinary presser feet, such as leather, plastic, vinyl and heavily textured surfaces. These types of materials tend to adhere to the flat soles of most presser feet, inhibiting movement. The Roller Foot #51 does not have toes as most presser feet do; rather, the foot is solid across the front, with a shallow groove etched into the top and front indicating the center of the foot.
- The wheel of Leather Roller Foot #55 glides over the surface of the leather without marring or scratching, and it easily maneuvers curves as well as straight lines.
Tips for Sewing on Leather
Starting with our needle, using a Leather Needle is important when sewing with leather. The Leather Needle has a slightly sharp cutting point for leather and other heavy non-woven synthetics including imitation leather. The large eye allows the thread to sew smoothly through thick, multiple layers. Leather Needles are available in sizes 8/60 through 18/110.
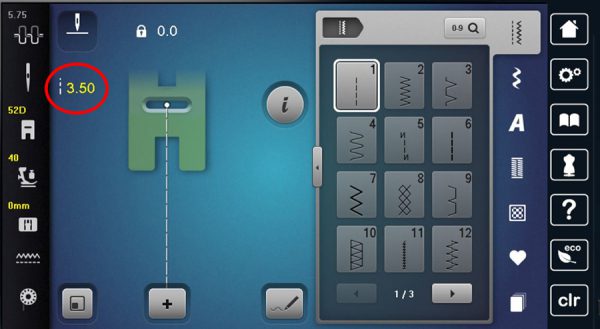
Increasing your stitch length is important. Stitch length is increased for leather so that the stitches are not too close together where they can perforate the leather, causing it to pull away from the stitched seam. I prefer to increase my stitch length to 3.50 mm.
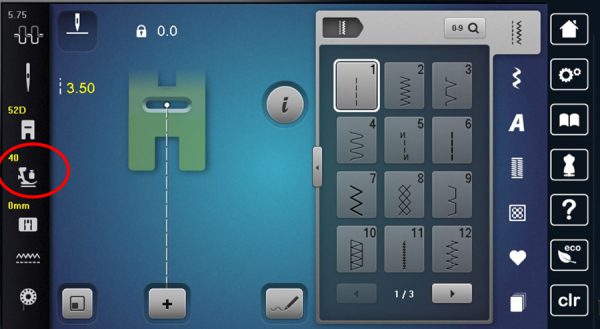
Reducing presser foot pressure to 40 on my B 790 PLUS will allow for the fabric to move easily. For thick or multi-layered fabric decrease the pressure (-) The presser foot is slightly raised, making it easier for the fabric to be moved by the feed dog on the machine.
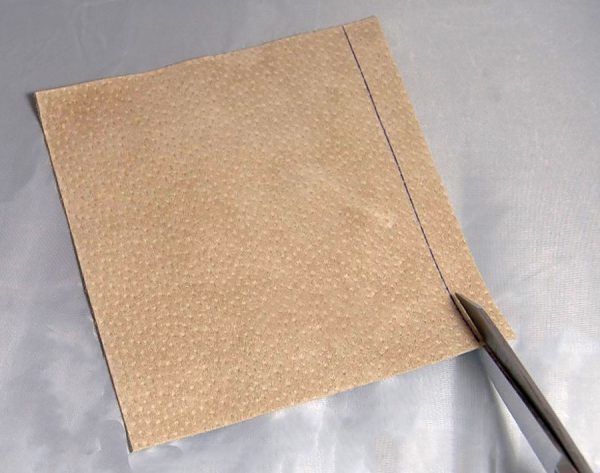
To create a Lapped Seam, draw your seam allowance on the wrong side of your Leather.
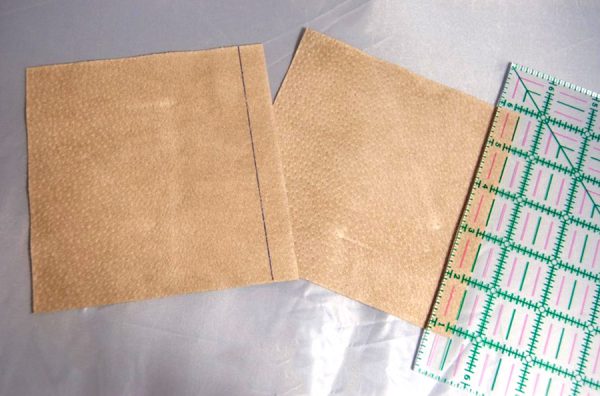
Trim the seam allowance off of one piece.
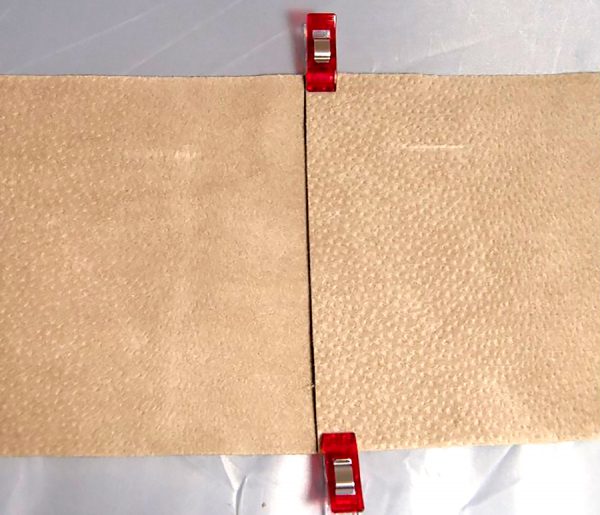
Then take the newly trimmed piece and align it to the drawn line, (seam allowance) on the second piece of fabric. Clip into place with Wonder Clips.
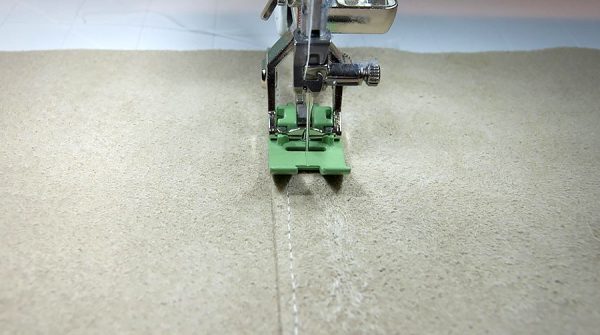
Align your presser foot and stitch your lapped seam into place. Stitch a second row parallel to the first row.
Leather can be a wonderful durable fabric to use in your sewing and crafting projects.
For more leather projects, check out these blog posts from WeAllSew:
- A Project Worth Waiting For – My Leather Jacket by Debbi Lashbrook
- How to Make a Leather-trimmed Laptop Case by Melissa Mortenson
- How to Make a Leather Sunglass Case by Erin Hogan-Braker
- How to Sew Leather Bracelets by Connie Fanders
- Leather Monogram Patch by Jaime David
- Make a Leather Tote Bag by Dani Miller
- Leather Belt Bag by Hayley Grzych
- How to Make a Leather Notebook Cover by Dani Miller
Happy Stitching!
Heather
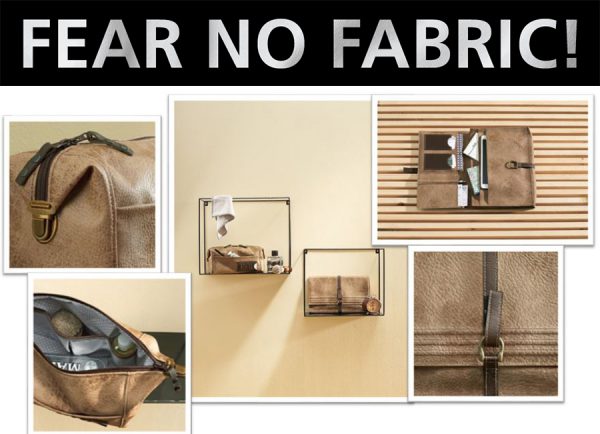
Fear No Fabric!
Used Products

What you might also like


5 comments on “Sewing with Leather: Tips and Tricks”
-
-
Thank you!
For your question on the maximum weight of leather you can sew, it would honestly depend on the technique you are doing. I have mostly used a light to medium weight leather, anything from 2-9 ounces. The heavy weight leather, such as leather used in horse tack or saddles, would require a special leather machine.Below is a link to a good article that I often use as a point of reference when working with Leather in my projects.
https://www.libertyleathergoods.com/leather-thickness-weightHappy Stitching!
Heather~
-
-
Great article. Can you please talk about the thread? I am not finding any information regarding which weight thread to use for leather.
-
Hello Lorraine,
In my experience, the thread type and weight will depend on what technique you are stitching, or what the end use with the Leather might be. I have used everything from a light weight machine embroidery thread, to a thicker outdoor UV thread with Leather. Most commonly I use a 100% Cotton thread. For my style of stitching this seems to give me the most success.
The best advice I can give is use a scrap piece of Leather, the same weight of what you will use in your end project, and test different types and weight of threads. See what works best for you and your stitching style.Happy Stitching!
Heather~ -
Good article. I am looking forward to sew leather. Hopefully these tricks will help me in sewing leather
Leave a Reply
You must be logged in to post a comment.

Good article. What would be the maximum weight of leather you could sew on my domestic machine?