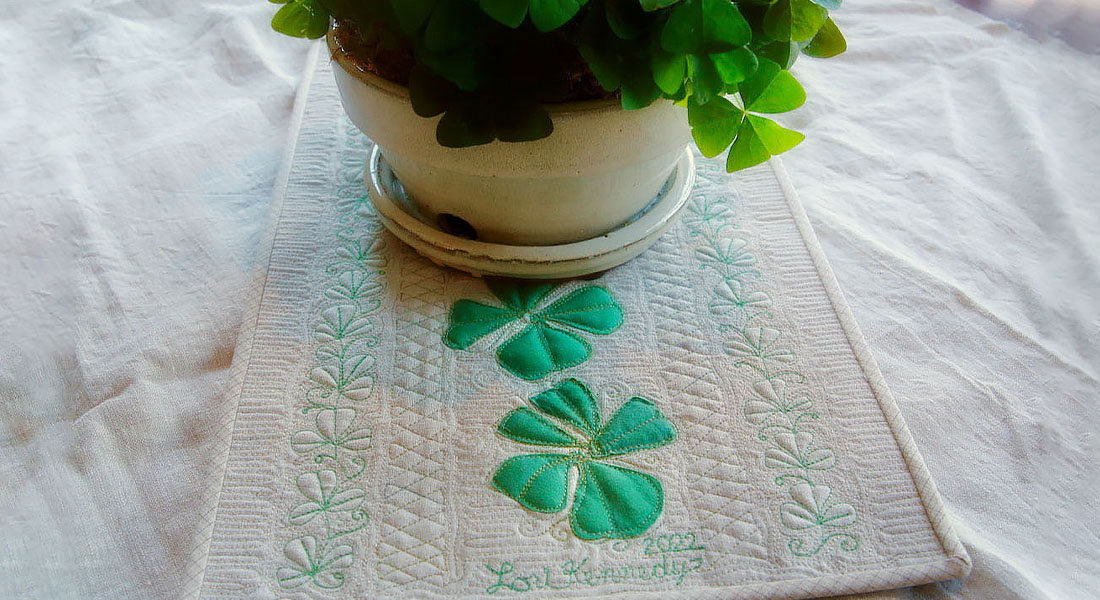
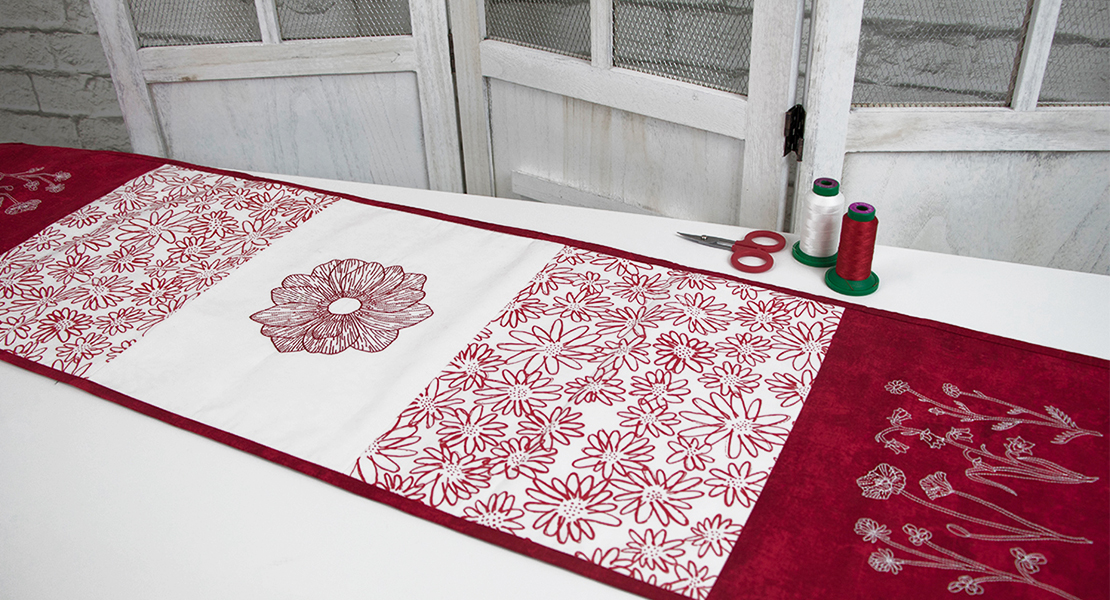
Shamrock Table Runner Quilt Along, Part Three
Welcome to part three of the Shamrock Table Runner Quilt Along. This series is designed to help you learn a variety of free-motion quilting techniques while creating a small art quilt or table runner. Many of the skills learned in this project can be applied to your larger quilting projects.
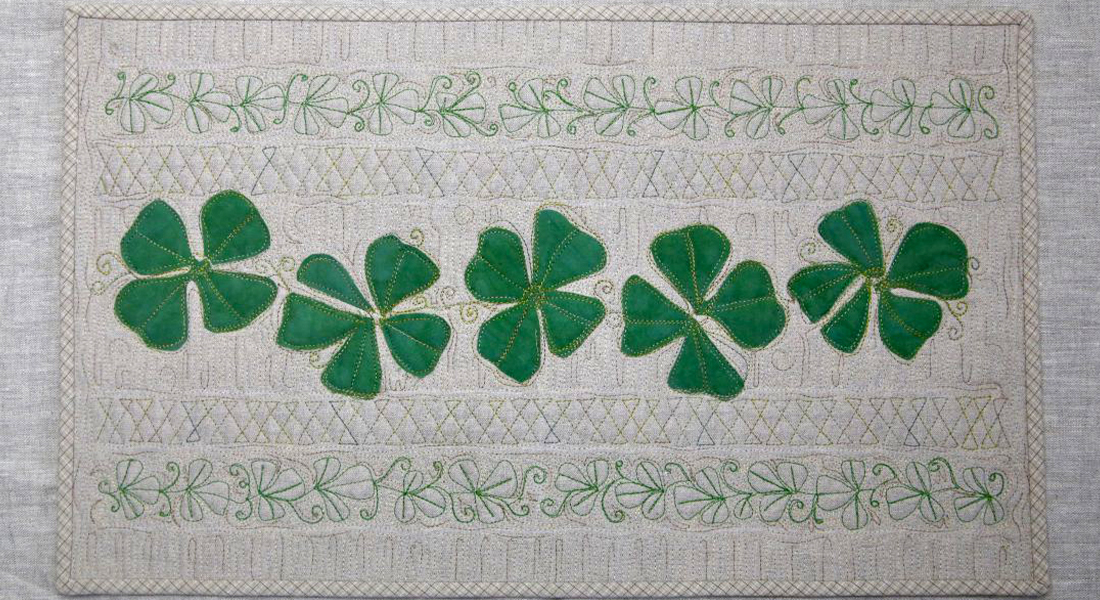
In part one, we created the basic framework for our quilt. First, we layered a quilt sandwich. Next, we marked the center lines and the quilting lines. Finally, we stitched the lines to divide our table runner into sections for further design.
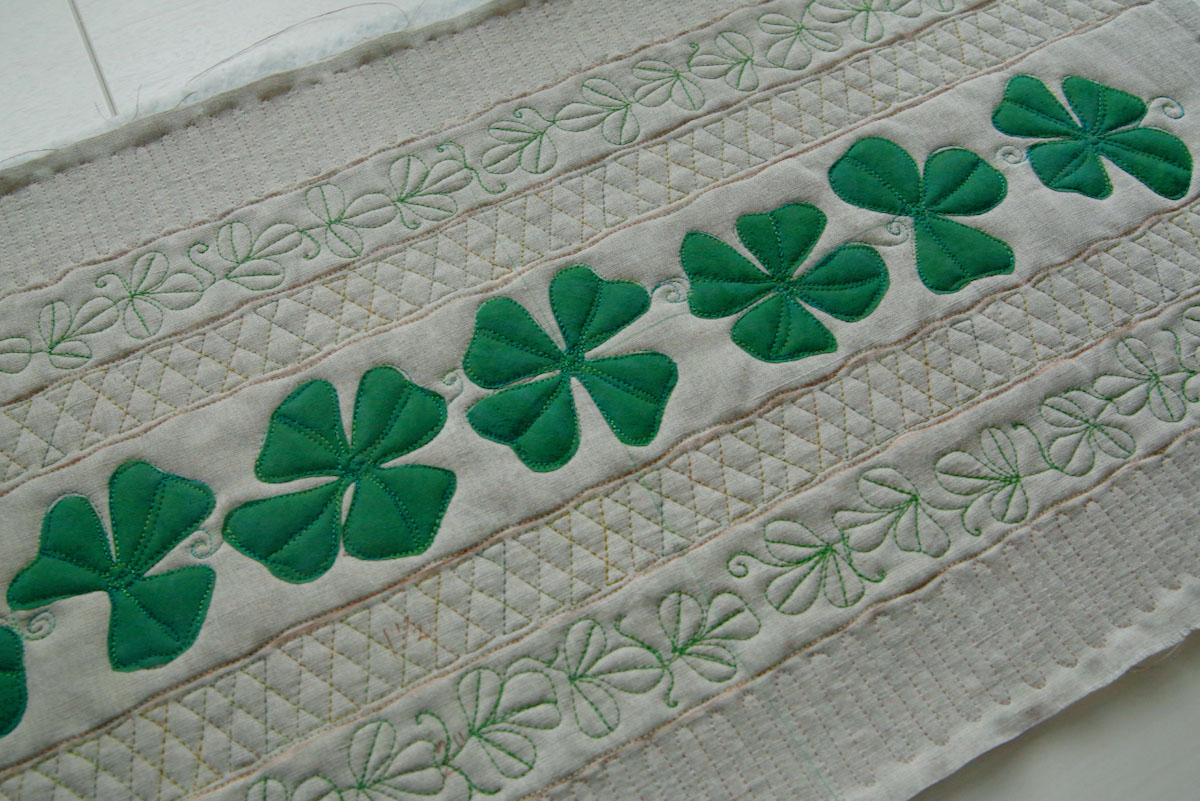
In part two, we added raw edge applique shamrocks to the center row of the quilt. We used fusible web to create the applique shapes and free motion quilted the edges and contours of the shamrocks.
In this lesson, we will add three rows of quilted motifs to further embellish the table runner.
Designing with Thread
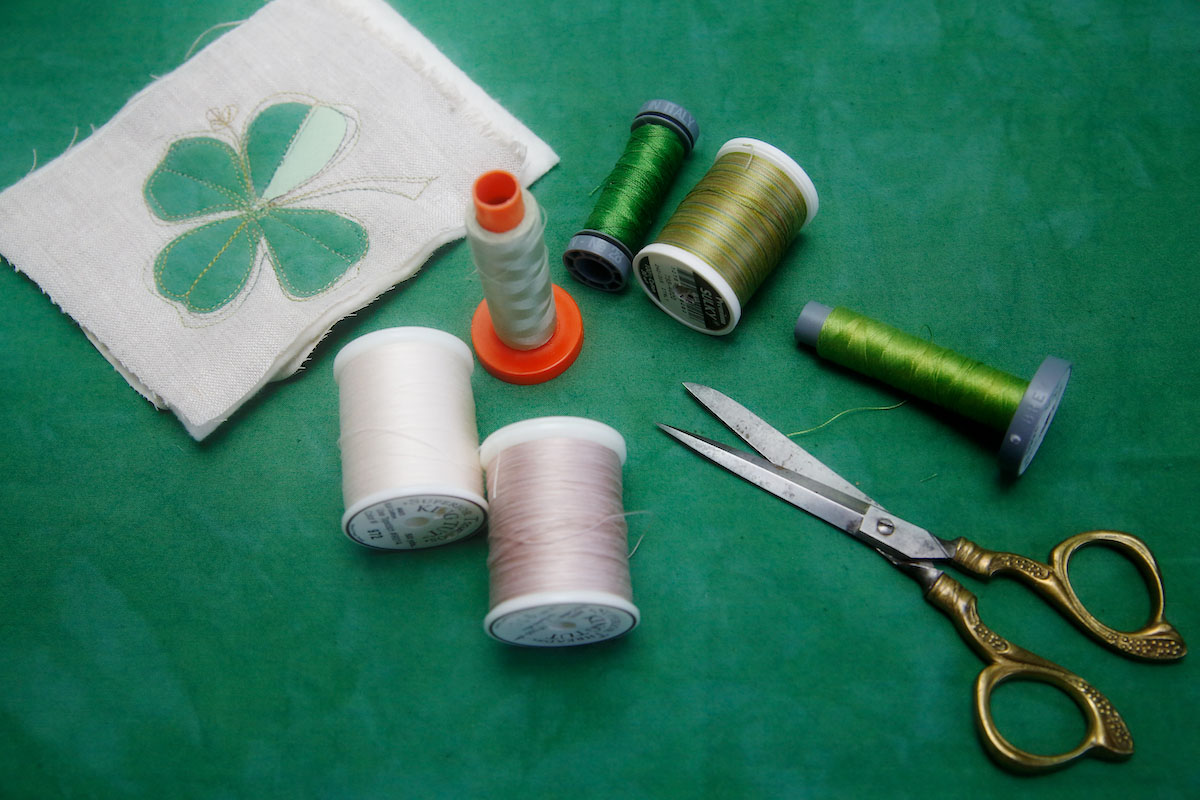
Choose thread to quilt the motifs on either side of the center applique. In this project, the free motion quilting shares the spotlight with the simple applique. In other words, we want to show off the quilting by choosing heavy-weight thread. At the same time, it is important to provide contrast between the quilted rows. Choose two or three colors of thread for the quilted rows. Be sure there is some contrast between the rows to provide visual interest.
For my shamrock table runner, I used a subtle variegated thread for the Twist row, green for the Shamrock motif and linen-colored thread for the final border. All of the threads were 40 or 28 wt (heavyweight) to really show off the quilting.
Read more on WeAllSew: How to Design with Thread
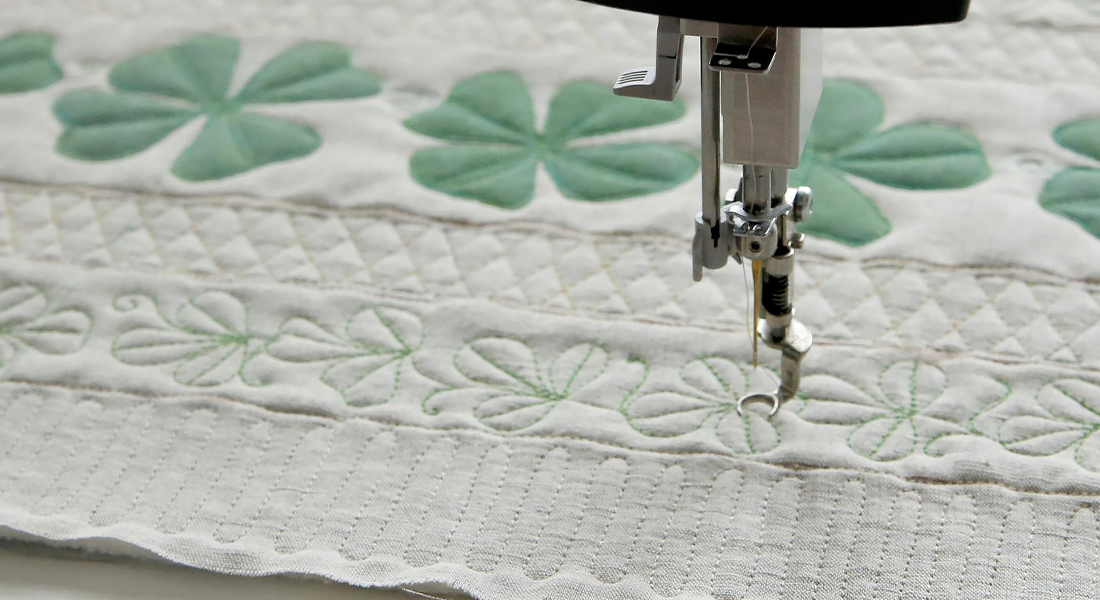
Quilt the Twist
The Twist is stitched in the rows on either side of the applique.
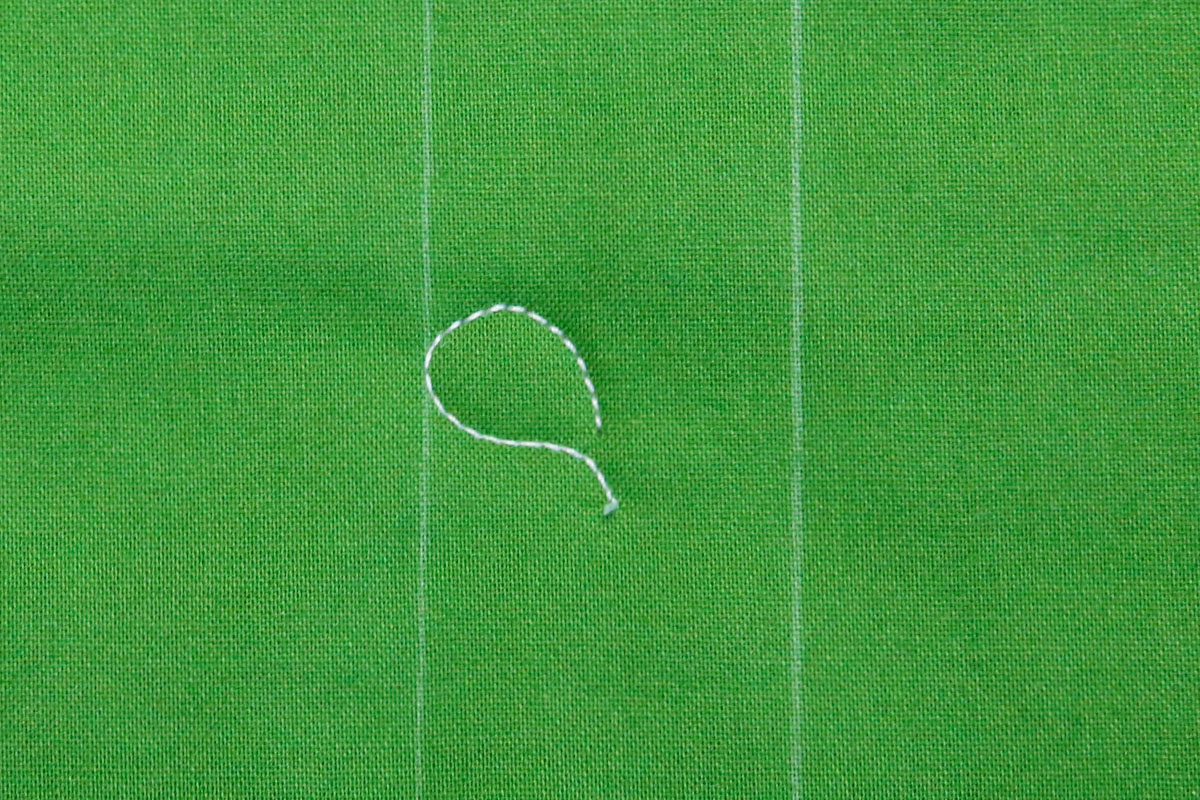
The Twist Motif
The well-defined lines of the Twist contrast well with curvy designs like shamrocks. Use this motif to fill borders quickly and provide a neat row of quilting. Be sure to doodle the design before you stitch. While it looks complicated, once you get the rhythm of this pattern, it is quick and easy!
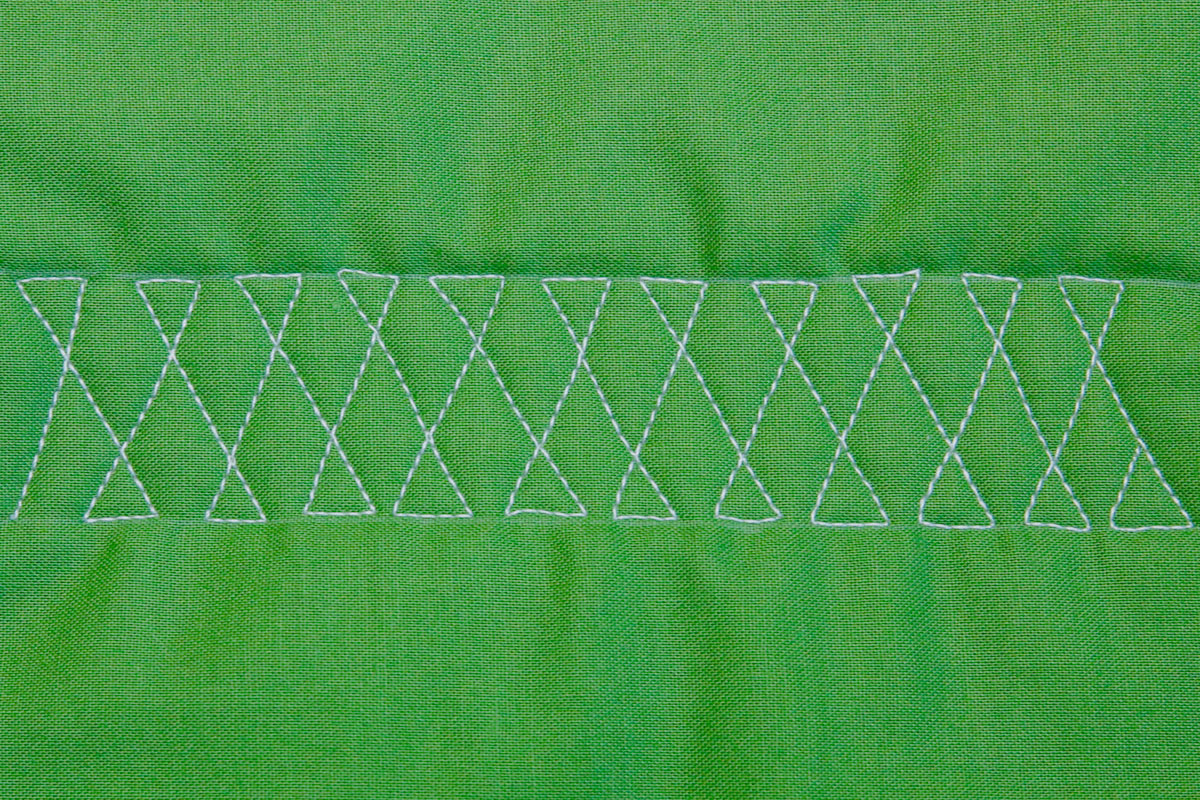
Begin by drawing two parallel lines. (In our project, stitch between the slightly wavy lines quilted in Part One.) Begin stitching on the lower line. Stitch a line angle to the right. Stitch a few stitches from right to left along the horizontal top line.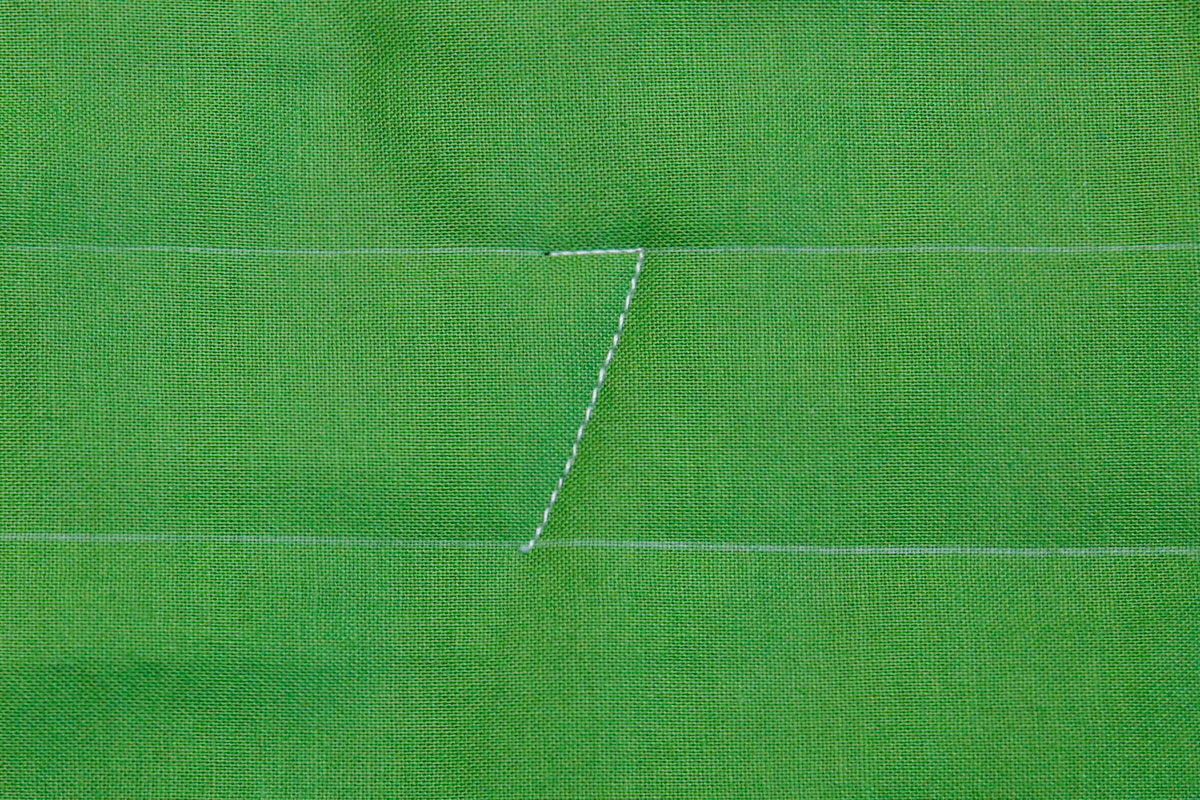
Next, stitch down and to the right.
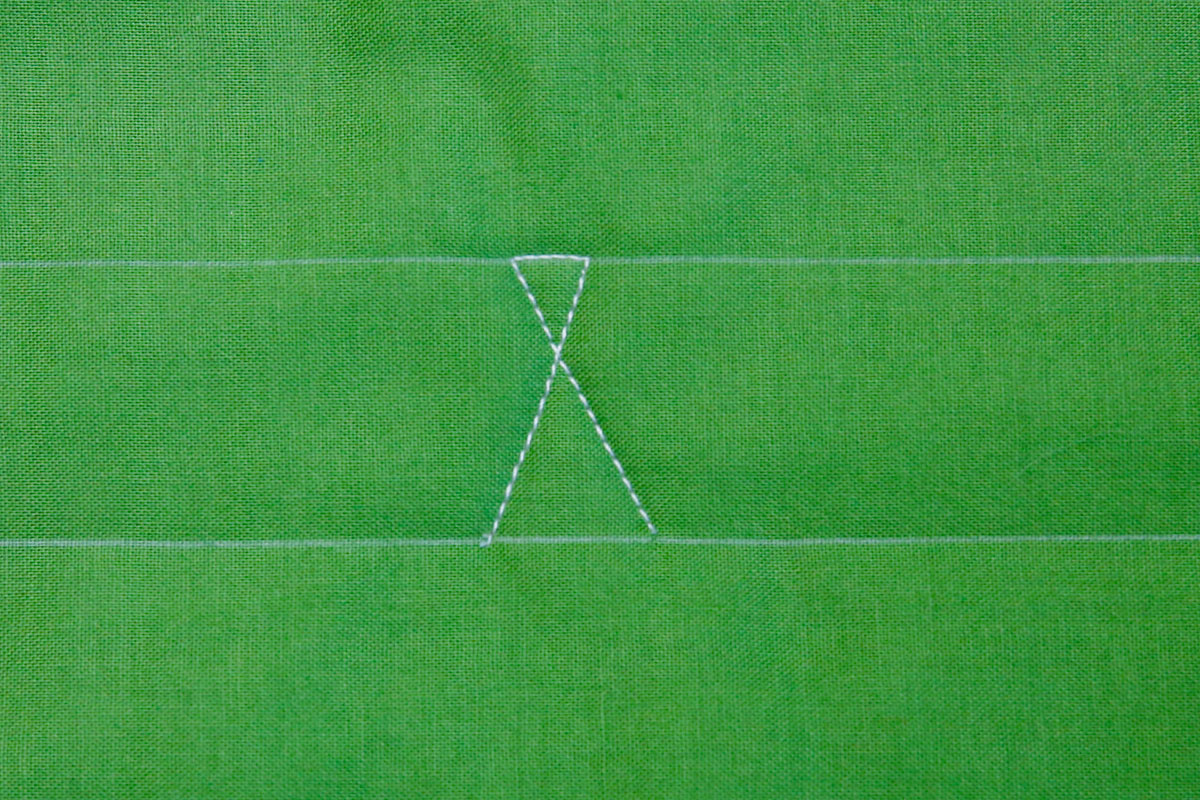
Stitch from right to left along the bottom horizontal line.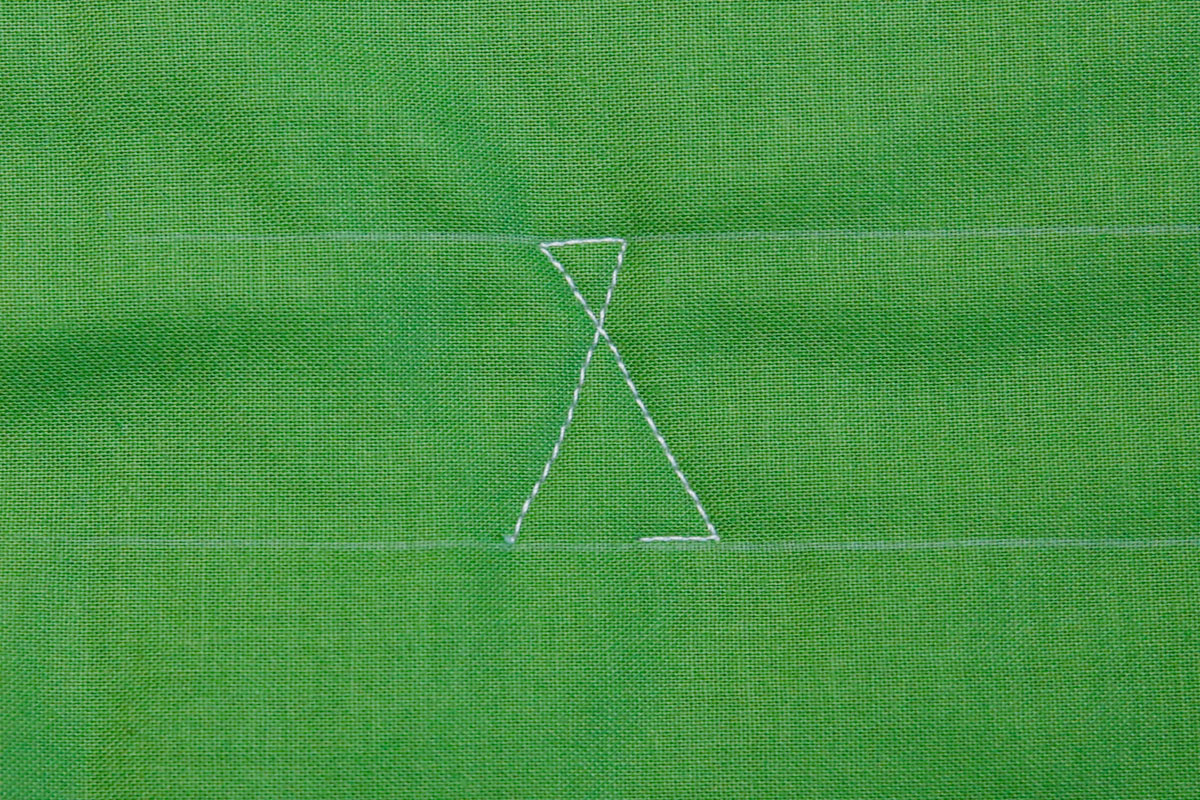
Stitch another line angled to the right.
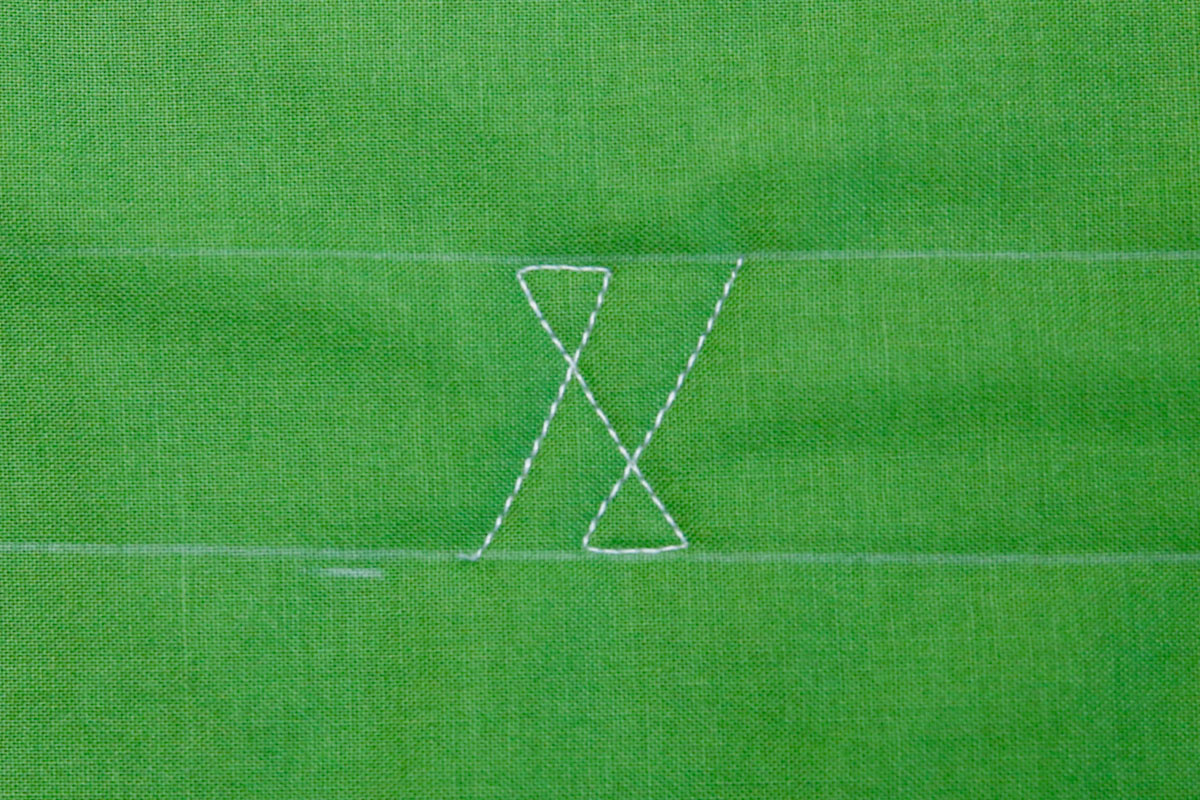
Stitch along the horizontal top line from right to left. Continue this sequence to create the Twist Border.
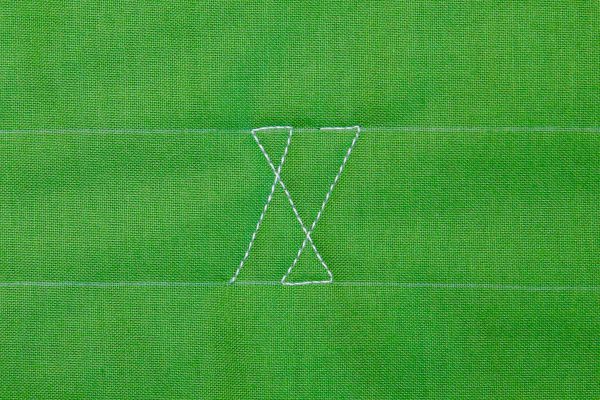
Hint: Whenever you are on the horizontal top or bottom line–always stitch from right to left. I think of it as going backward on the horizontals.
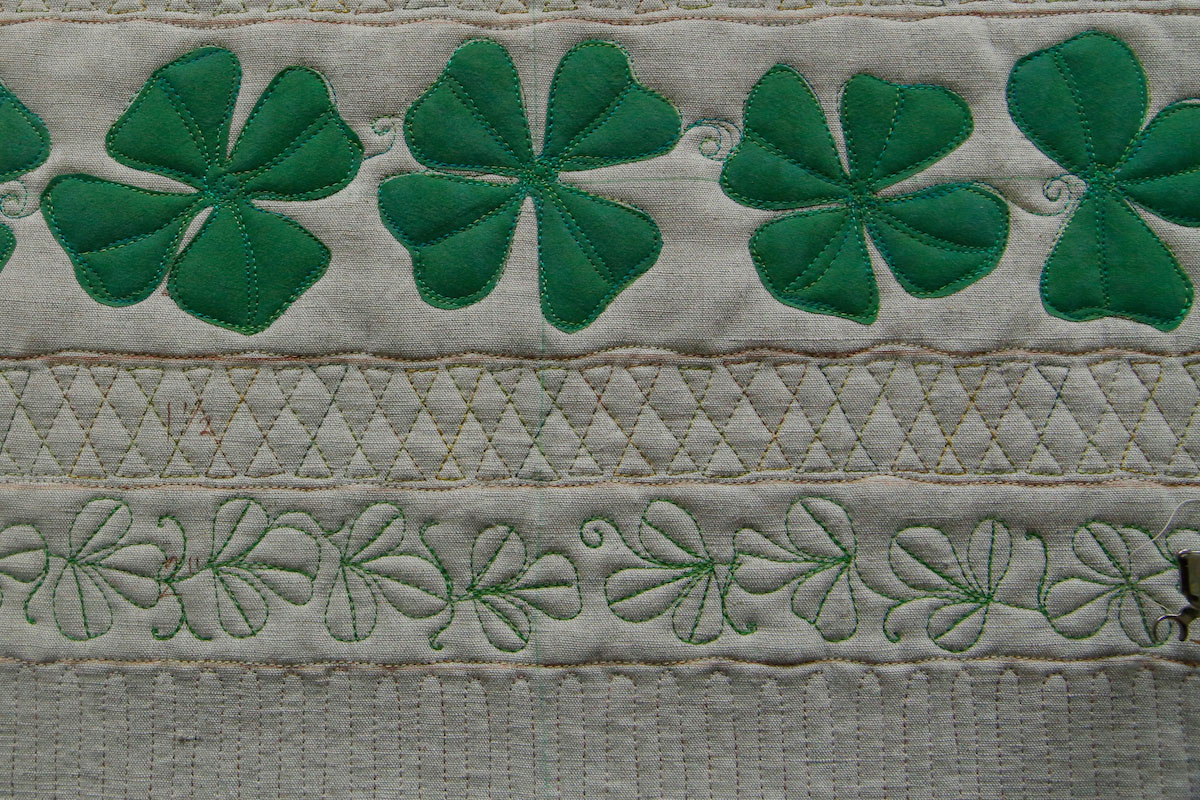
Quilt the Shamrock Row
Stitch the Shamrock motif in the rows next to the Twist. While stitching the leaves, avoid a messy-looking build-up of thread by maintaining a small gap in the petal.

Begin stitching in the center of the row. Working clockwise, stitch a rounded petal to the left. Leave a small opening or gap in the petal.
Next, stitch a straight line to the edge of the petal and overstitch back to center.

Add a counterclockwise petal to the right side. Again, leave a small gap.
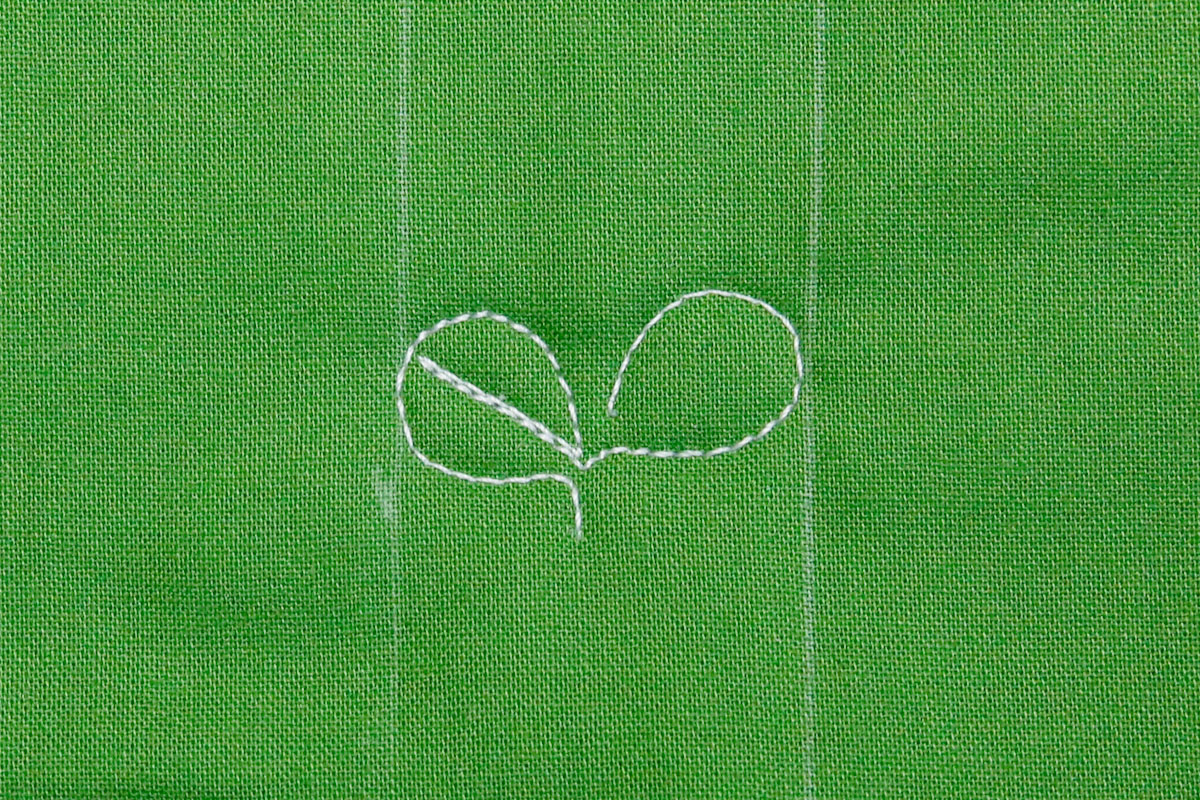
Stitch a straight line into the center of the leaf and back again.
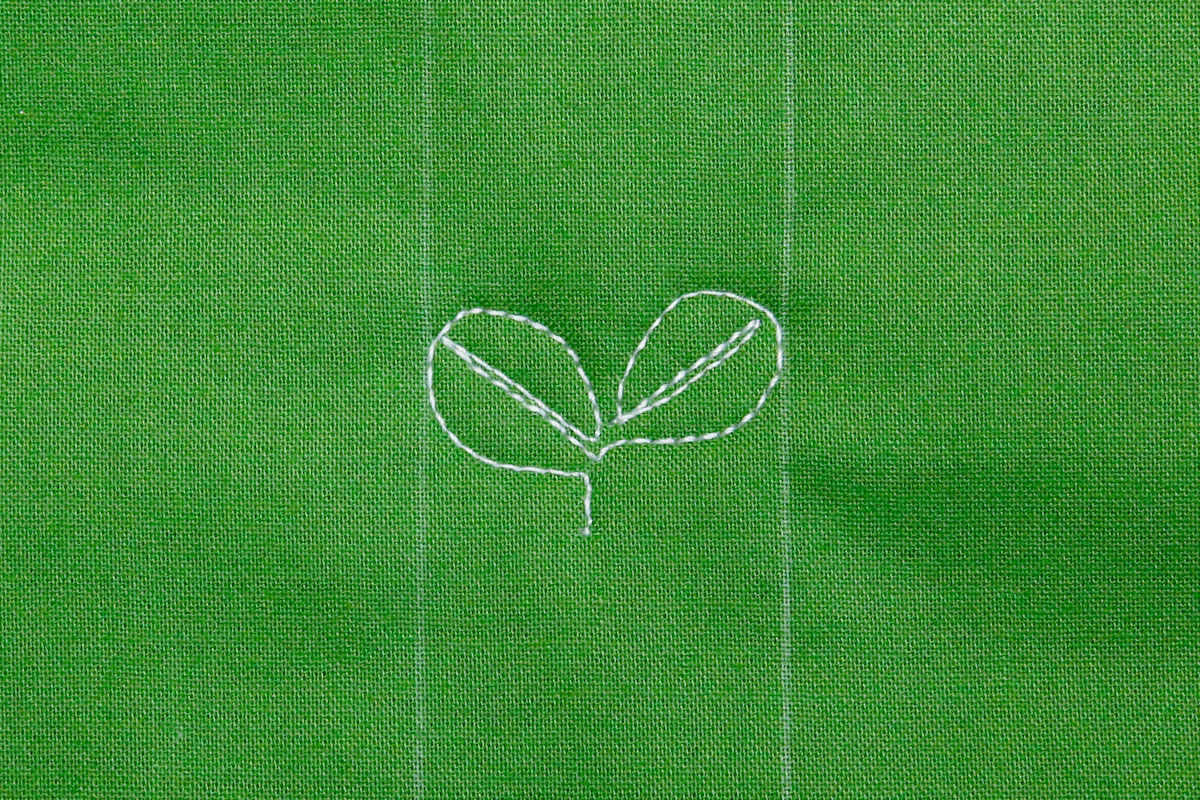
Carefully stitch out of the space between the petals and add a rounded petal in the center.

Stitch through the center of the petal and out of the top. Add a small curl –(optional).
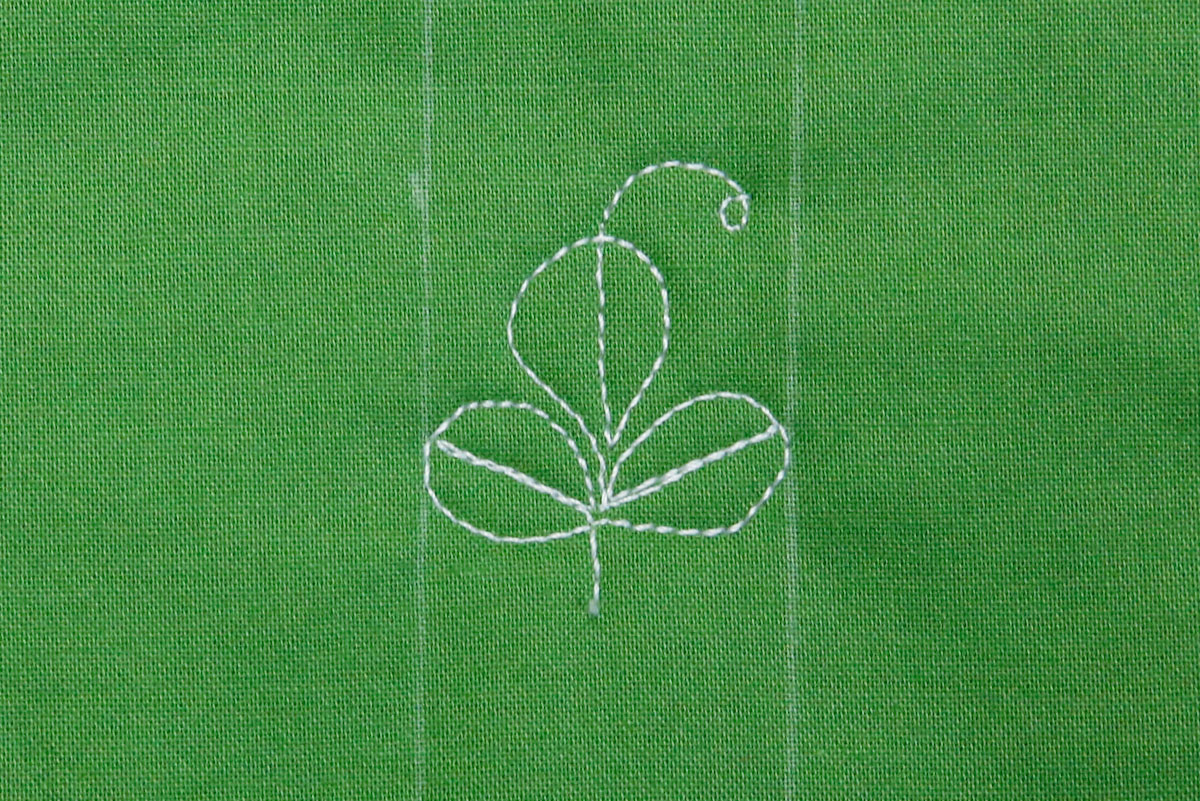
Stitch over the curl to begin the next shamrock in the row.

Stitch to the Center
To avoid creating a directional border, divide the shamrock row in half. Stitch toward the center of each row instead of stitching one continuous line. Notice how the quilted shamrocks meet in the center.
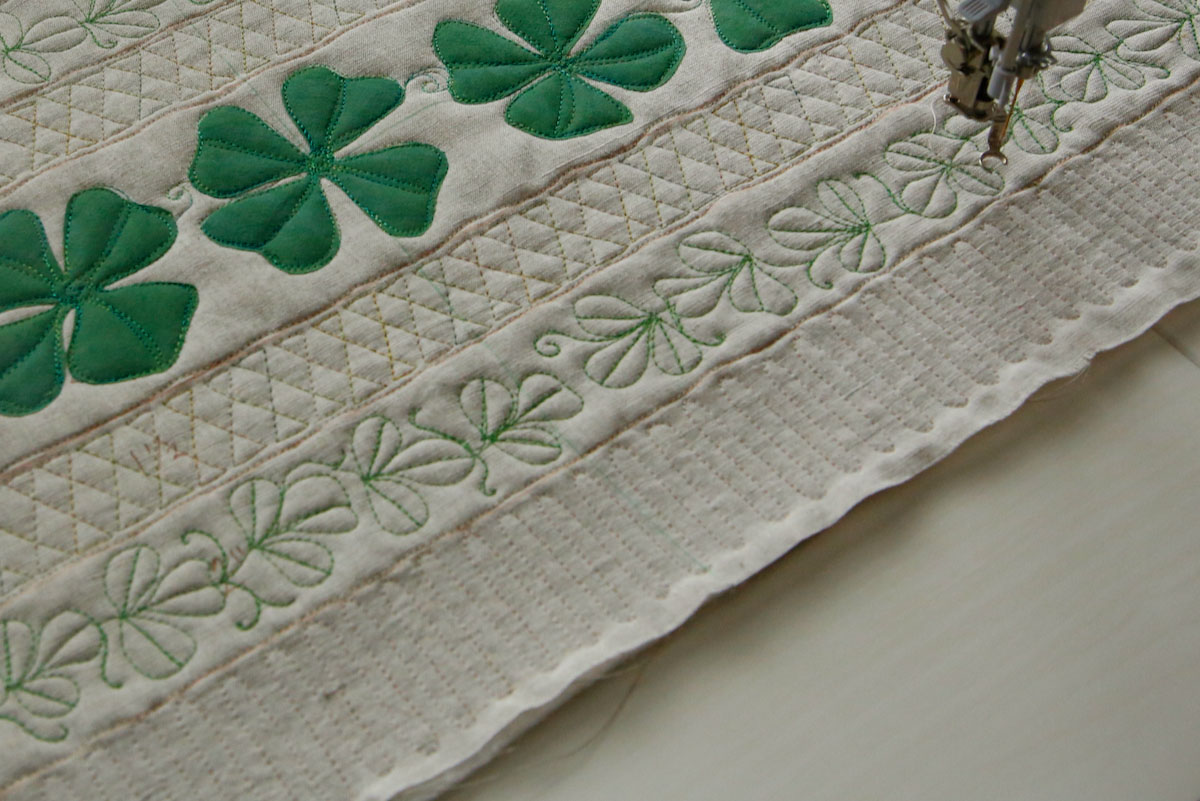
Quilt the Outer Border
Fill the outer border with evenly spaced lines. This quick border fill provides contrast to the curvy shamrocks.
Another option is to repeat the Twist in the outer border.

Directional Stitching
As you are stitching, consider which direction you prefer to quilt. In a small quilt like this, it is easy to rotate the quilt in any direction-so take advantage of your options. Quilting from left to right is comfortable for most quilters because it provides the greatest visibility and is how most of us have learned to read. On the other hand, some motifs seem more natural when stitched from bottom to top. For example, I prefer to stitch the Twist from left to right, while I almost always stitch leaf motifs from the bottom toward the top. Doodle the patterns first to determine which you like best! (See my book, 25 Days to Better Machine Quilting for more on directional stitching.)
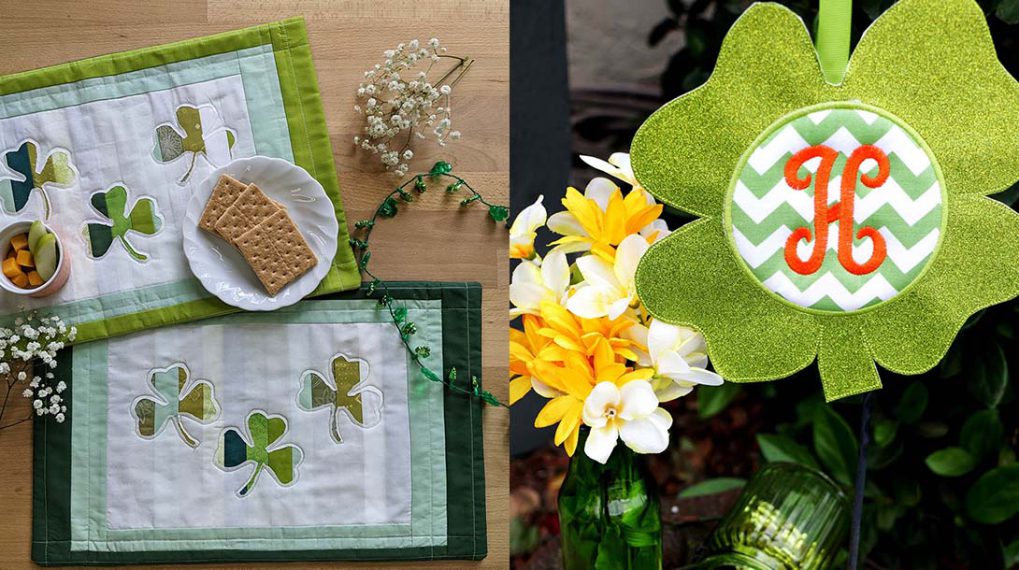
More St. Patrick’s Day Motifs
You might also like this version of a Shamrock motif. Or, try Paddy’s Hat!
Happy Stitching!
Lori O’Kennedy of LoriKennedyQuilts.com