Starry Night Clutch Tutorial

Learn how to make this stunning and unique clutch below!
Materials to sew the Starry Night Clutch:
- 1/3 yard of Sauvage Sky North fabric (PAT BRAVO ETNO 50051)
- 1/3 yard of Contempo Pyramids Ebony (PAT BRAVO ETNO50043)
- 1/3 yard of quilt batting
- Iron and ironing board/surface
- Universal needles, size 80/12
- SCHMETZ Metallic Needle, size 80/12
- Your sewing machine: I sew on a BERNINA 780
- All-purpose presser foot (BERNINA Reverse Pattern Foot # 1D)
- Zipper Presser foot (BERNINA Zipper foot # 4D)
- WonderFil Metallic color thread 8871
- AURIFIL thread 2311
- One (1) 10 ½ metallic zipper
STEP 1, CUT THE FABRIC
From the Sauvage Sky North fabric cut:
- Two (2) 15″ by 10 ½” rectangles
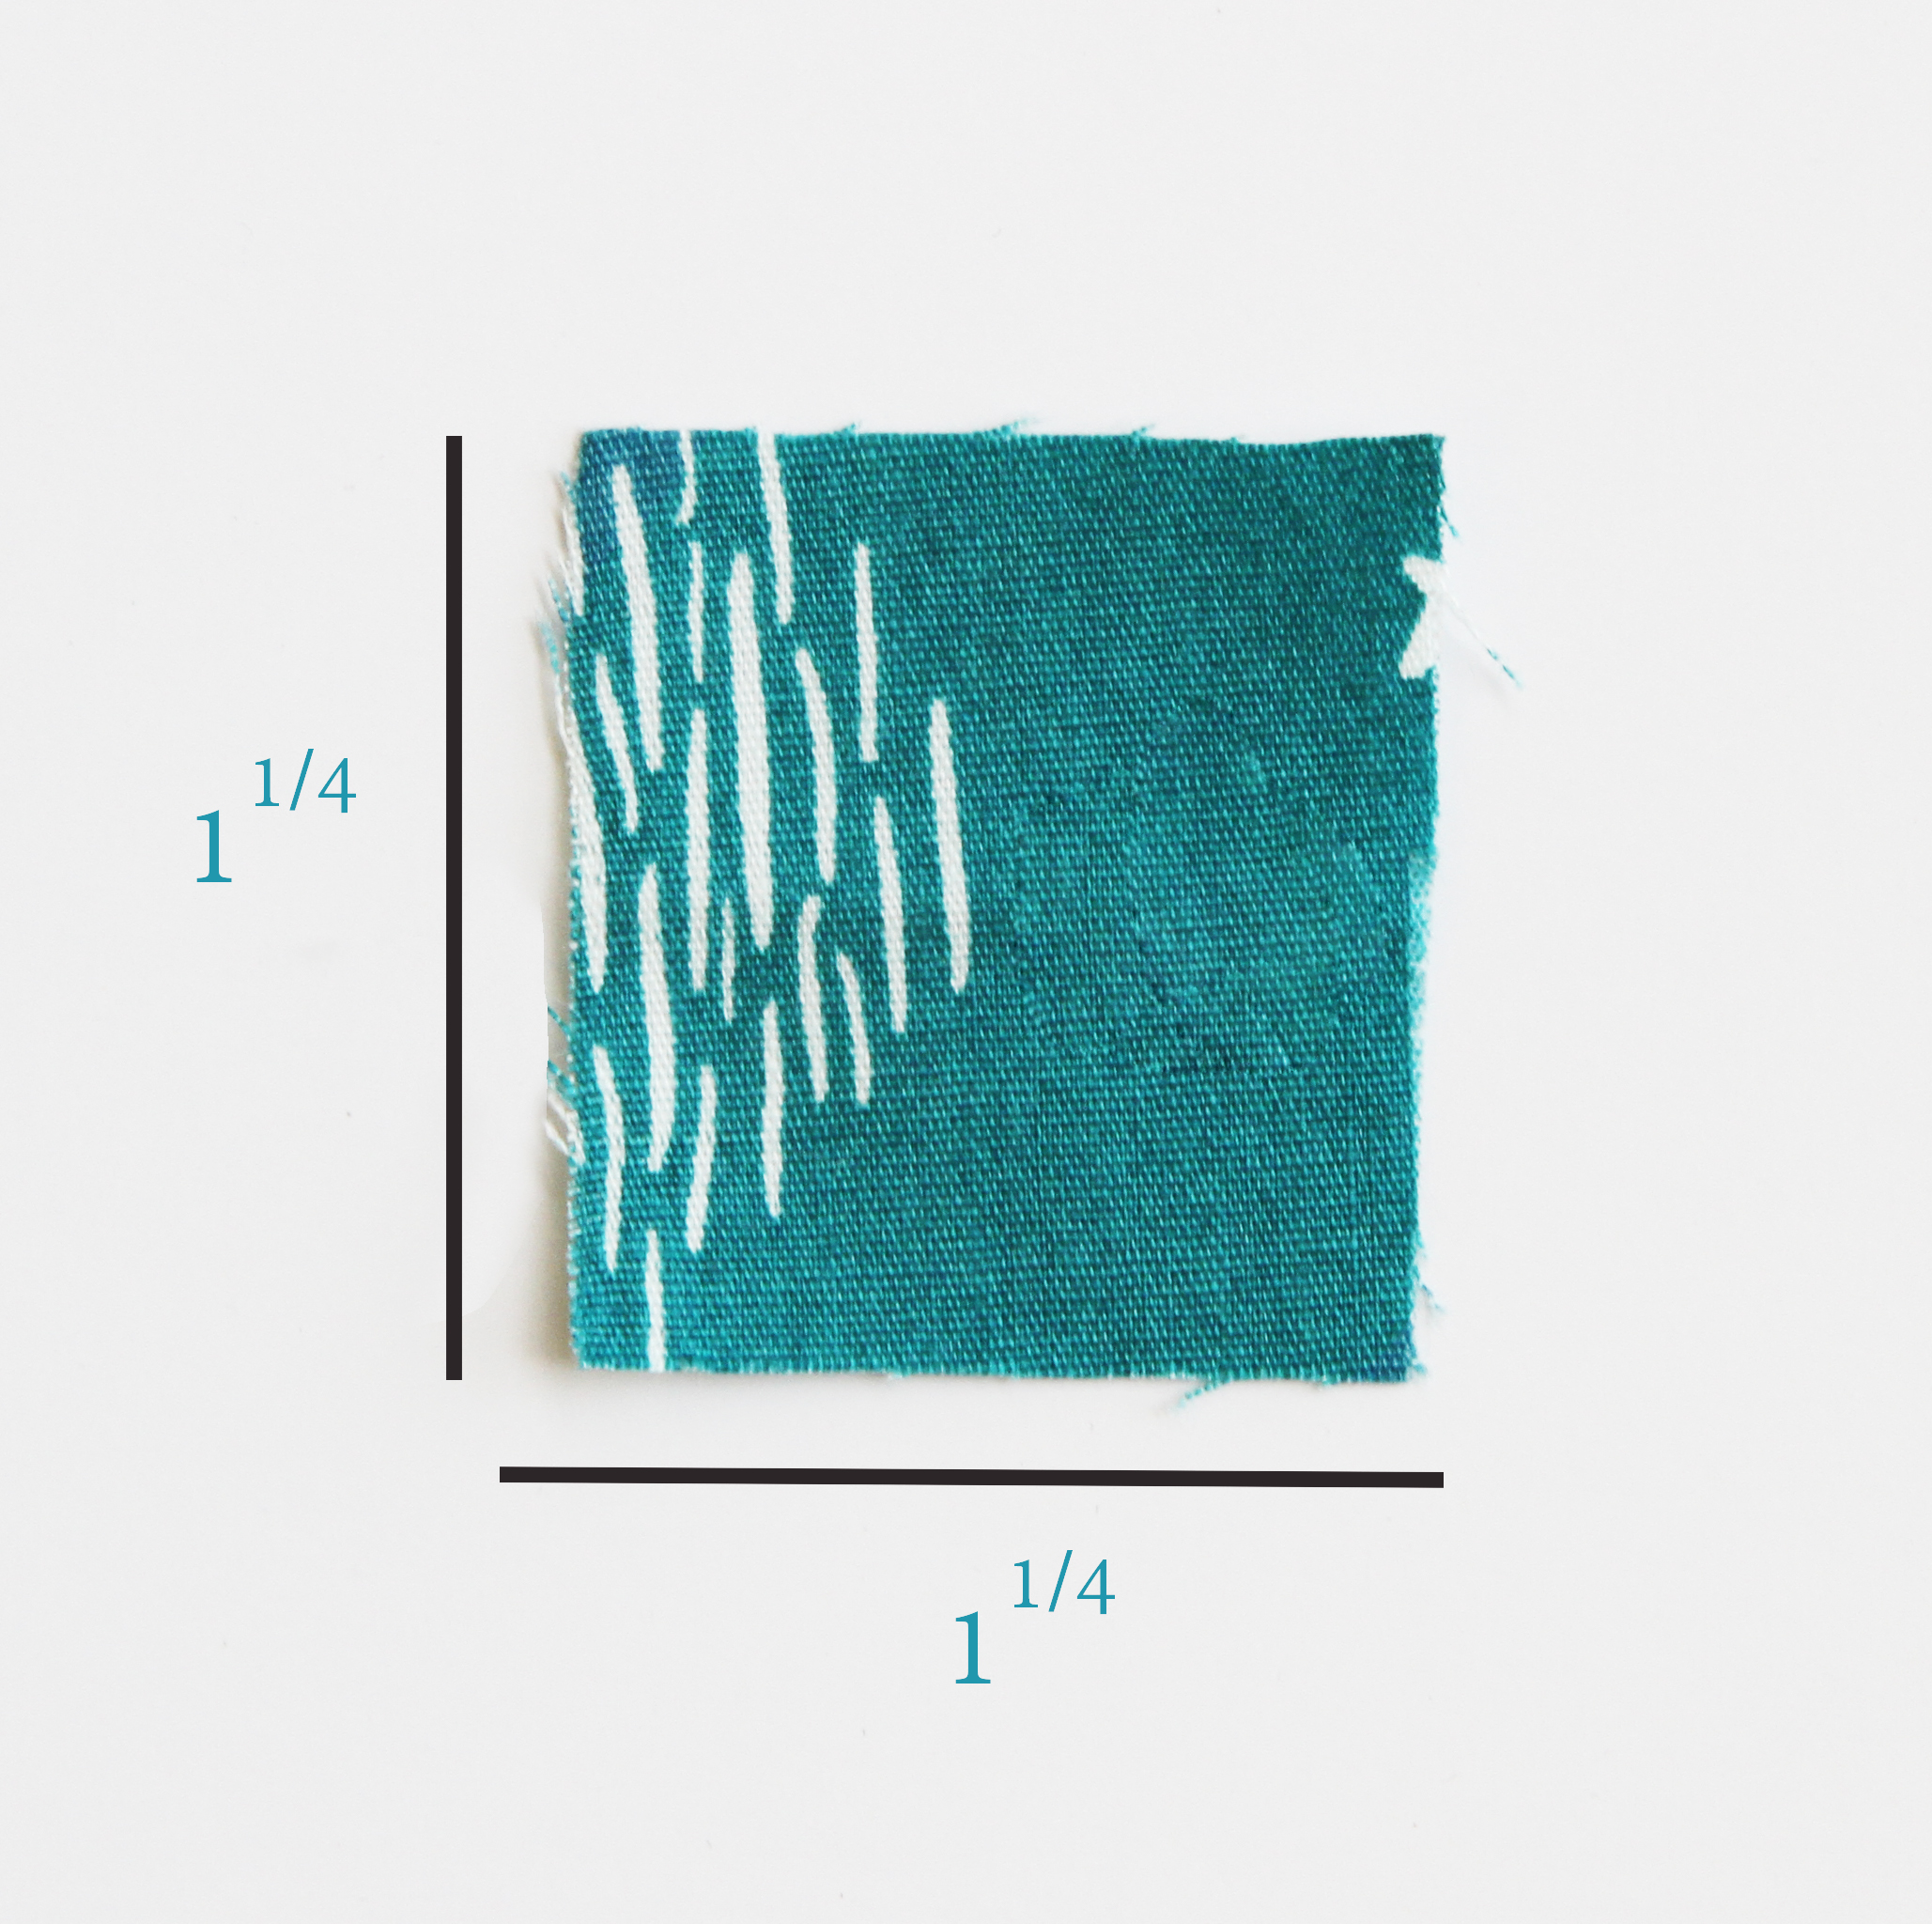
- Two (2) 1 ¼” by 1 ¼” squares for zipper assembly
From the Contempo Pyramids Ebony fabric cut:
- Two (2) 15″ by 10 ½” rectangles
From batting cut:
- Two (2) 16″ by 11 ½” rectangles
STEP 2, QUILT CLUTCH EXTERIOR
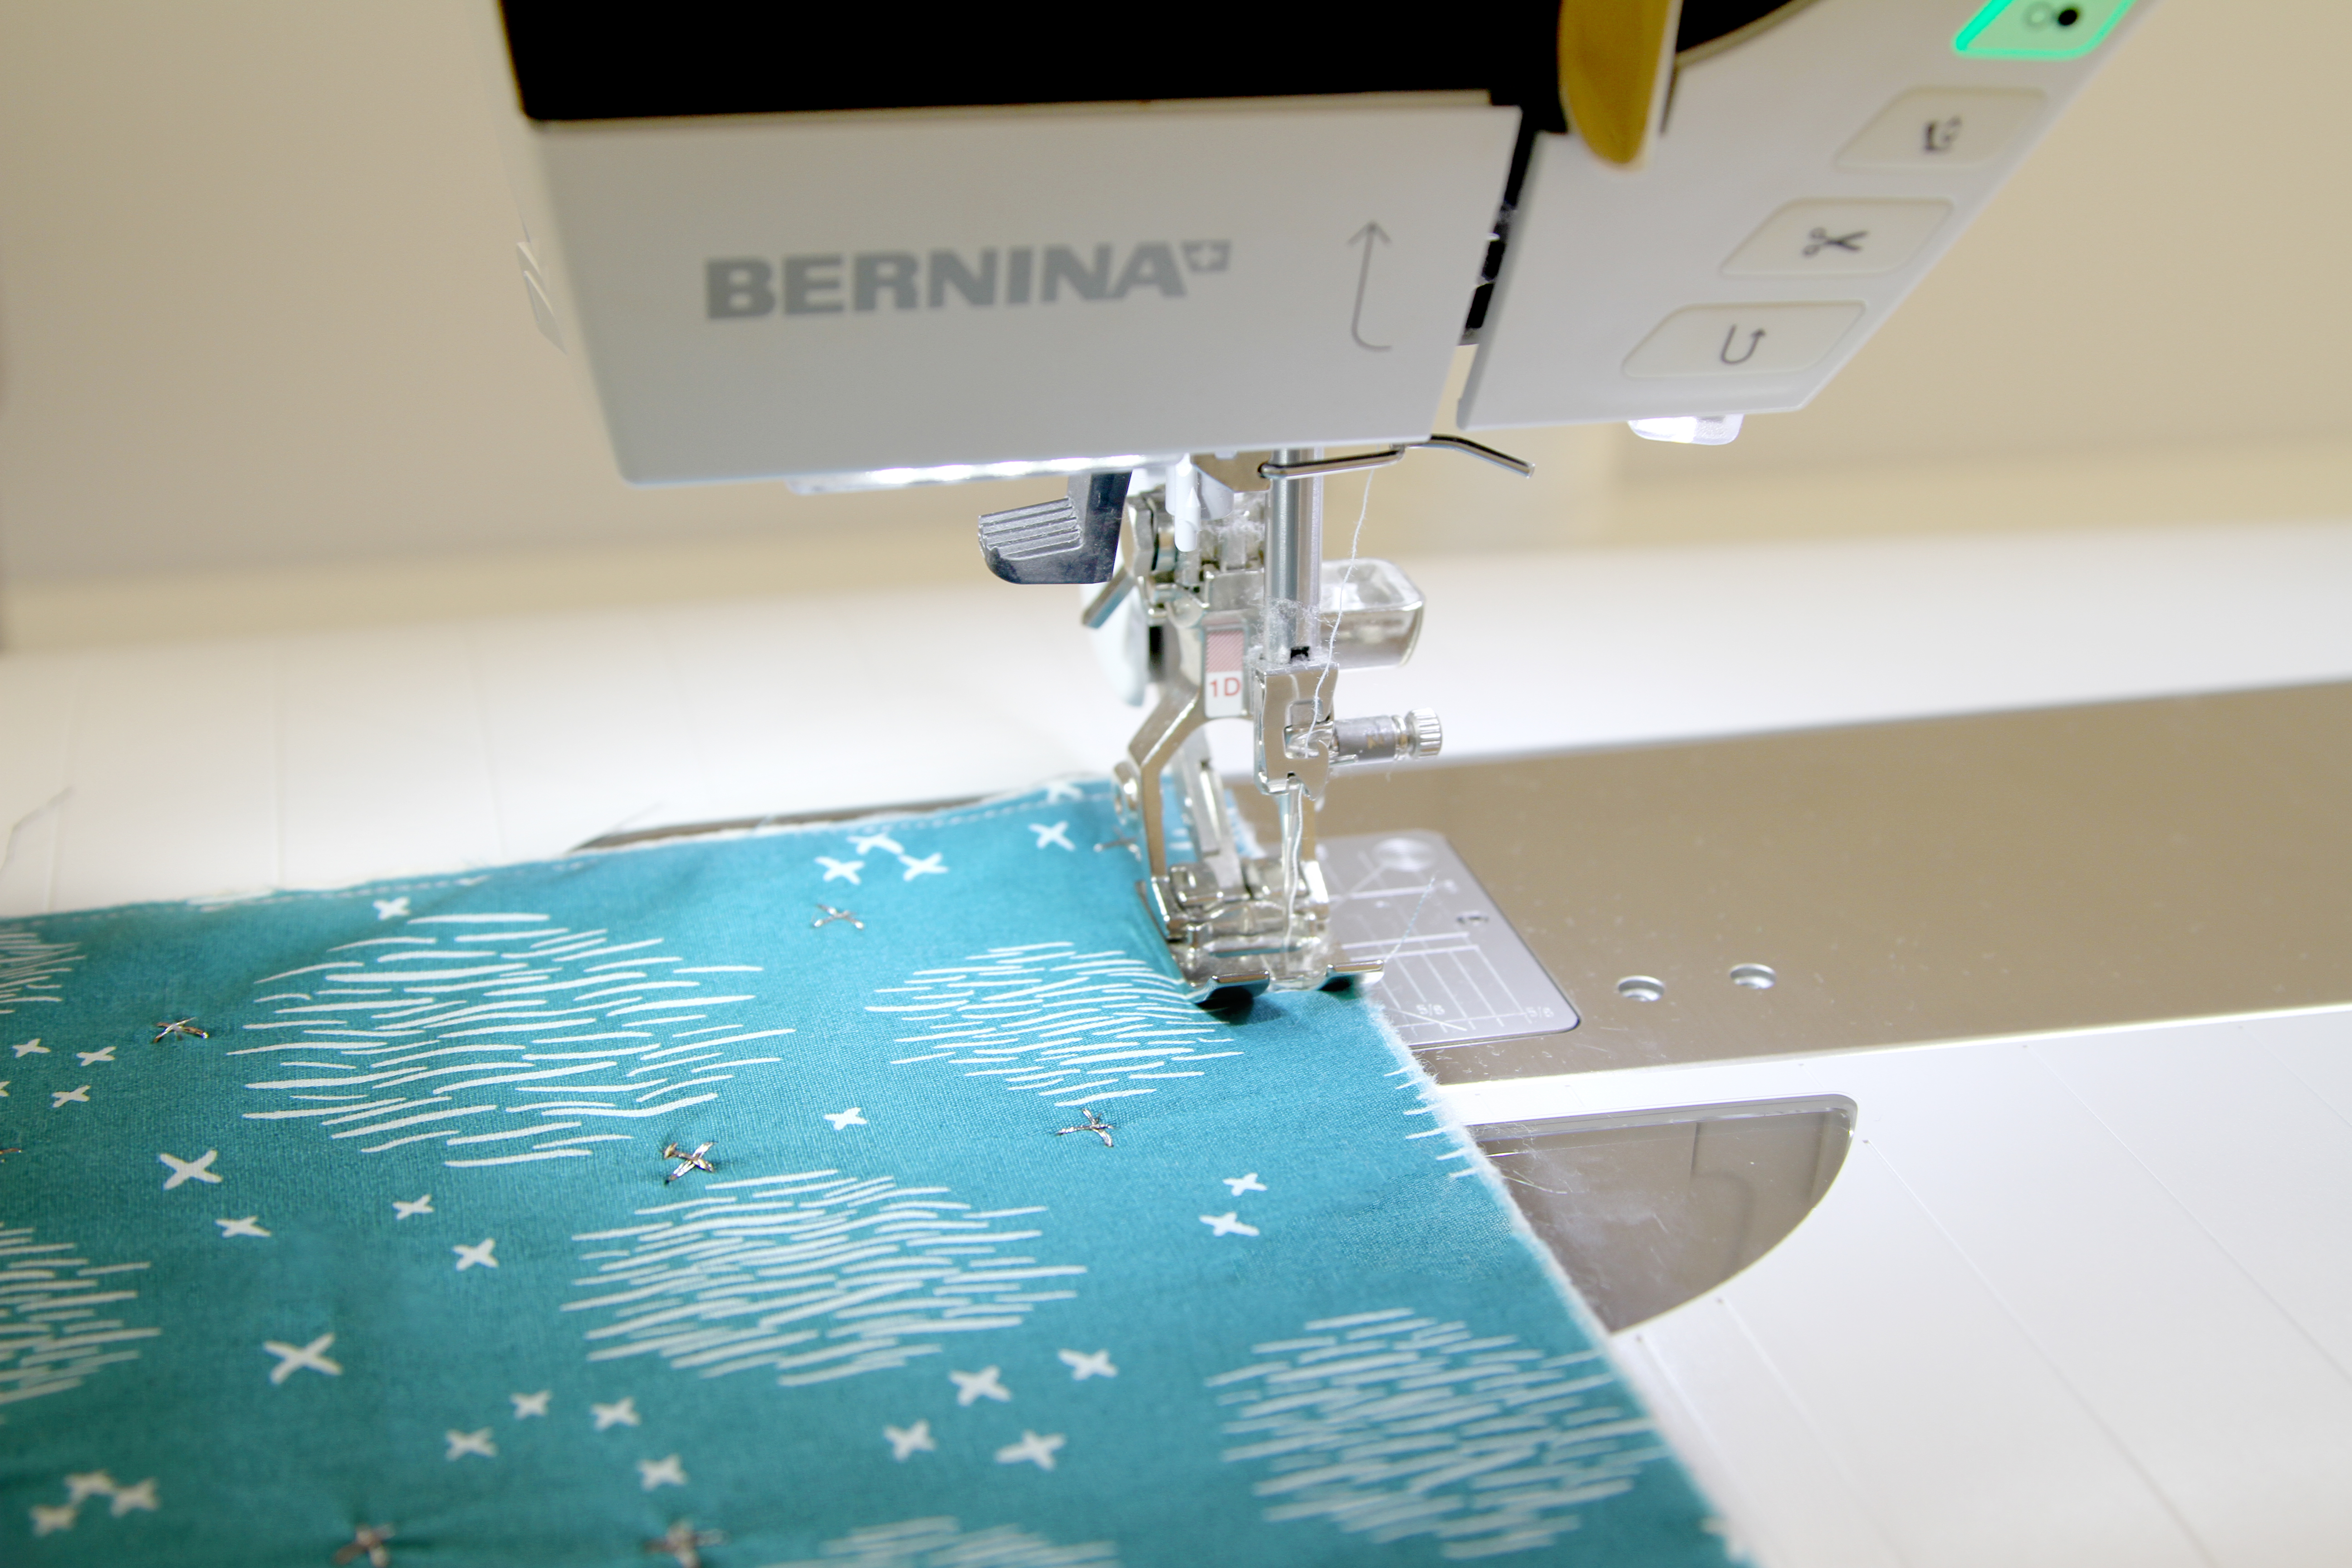
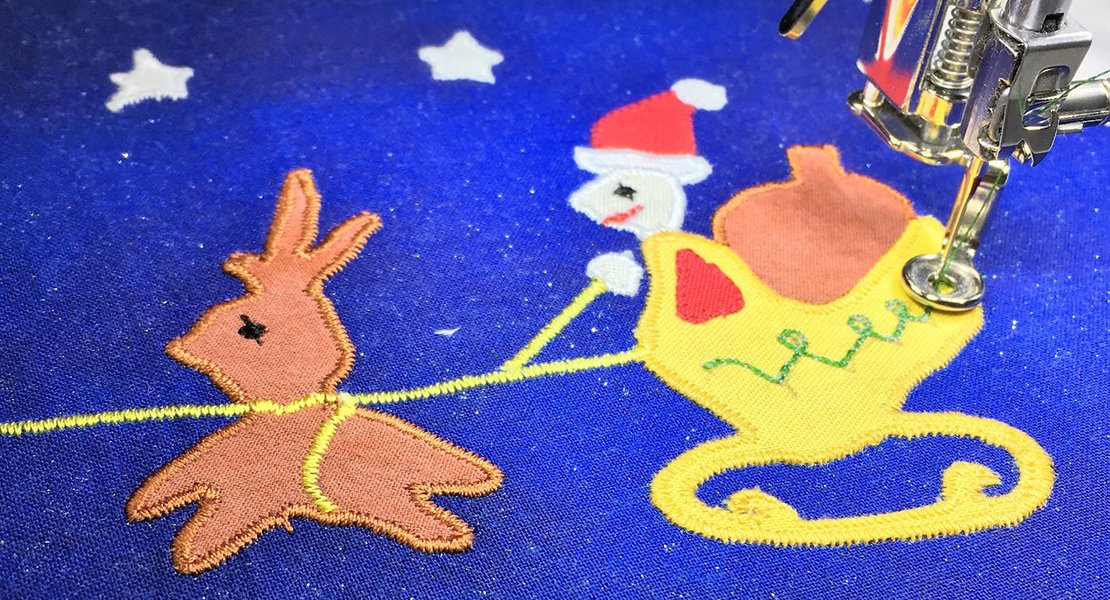
Thread your sewing machine with WonderFil metallic color thread 8871 and change universal needle to SCHMETZ Metallic Needle, size 80/12.
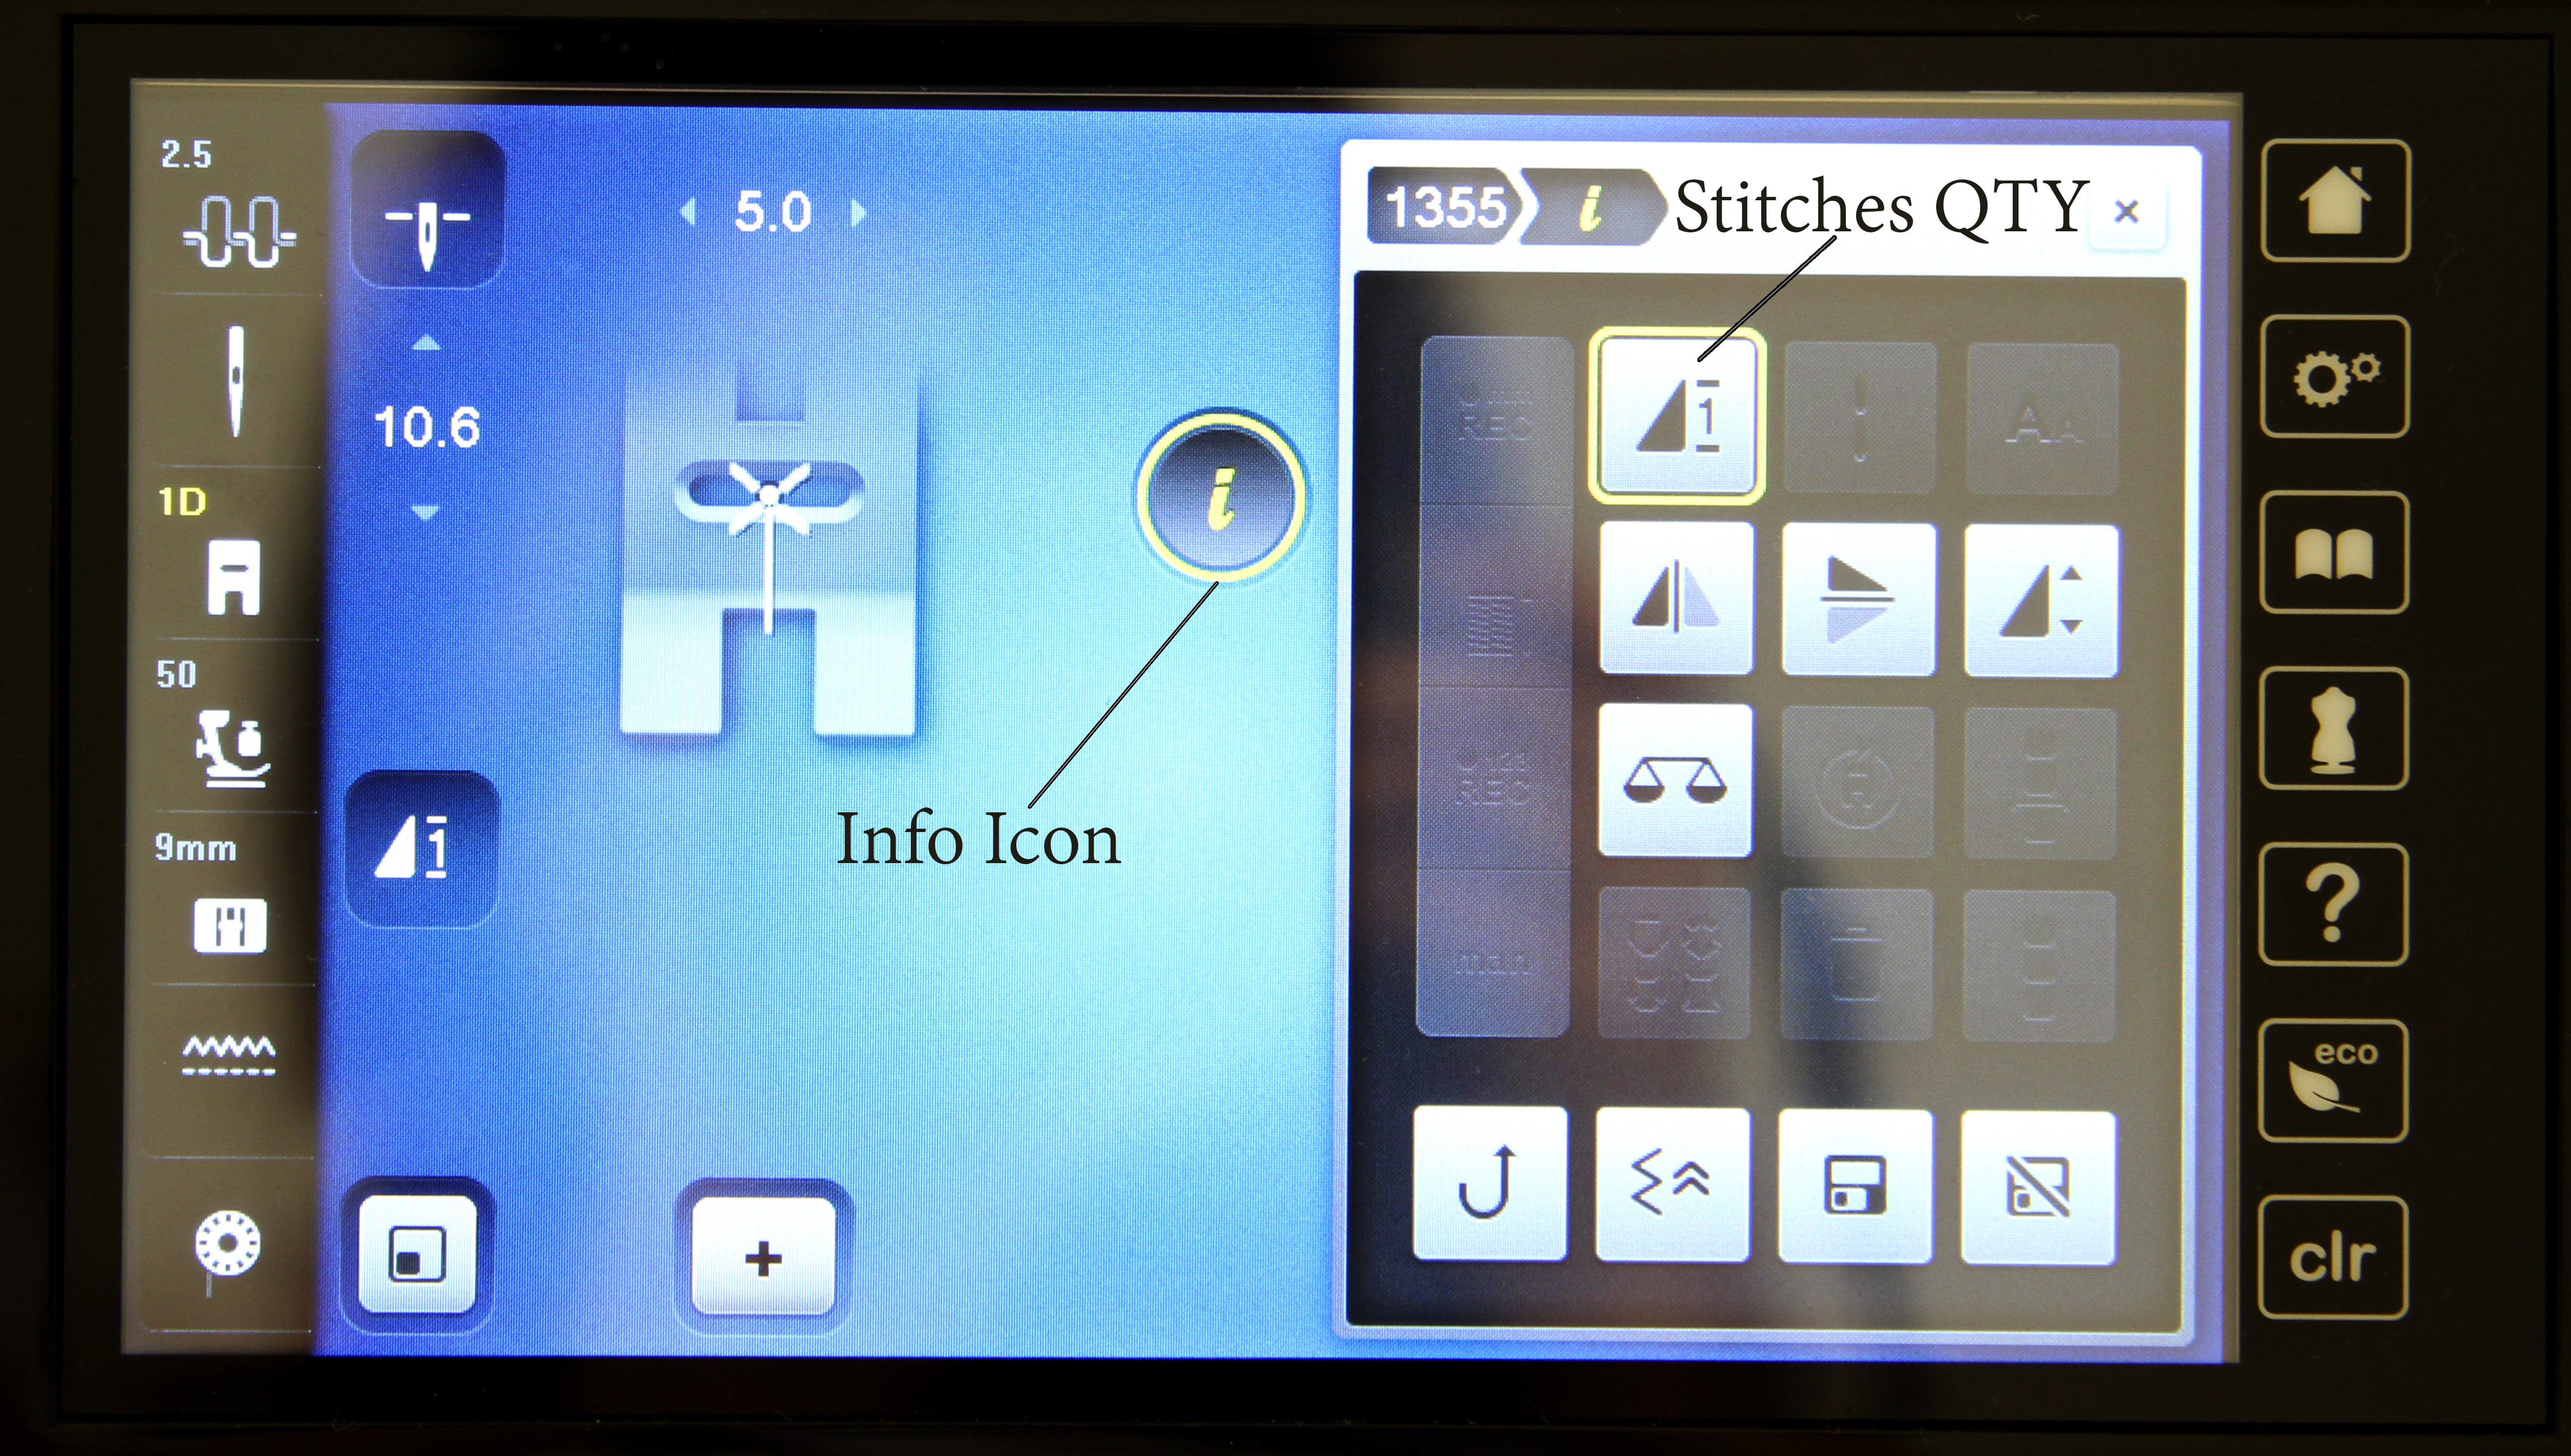
Select quilt stitches #1355 and change your BERNINA presser foot to Reverse pattern foot #1D.

Select “i” icon and change quilt stitches quantities to one (1).
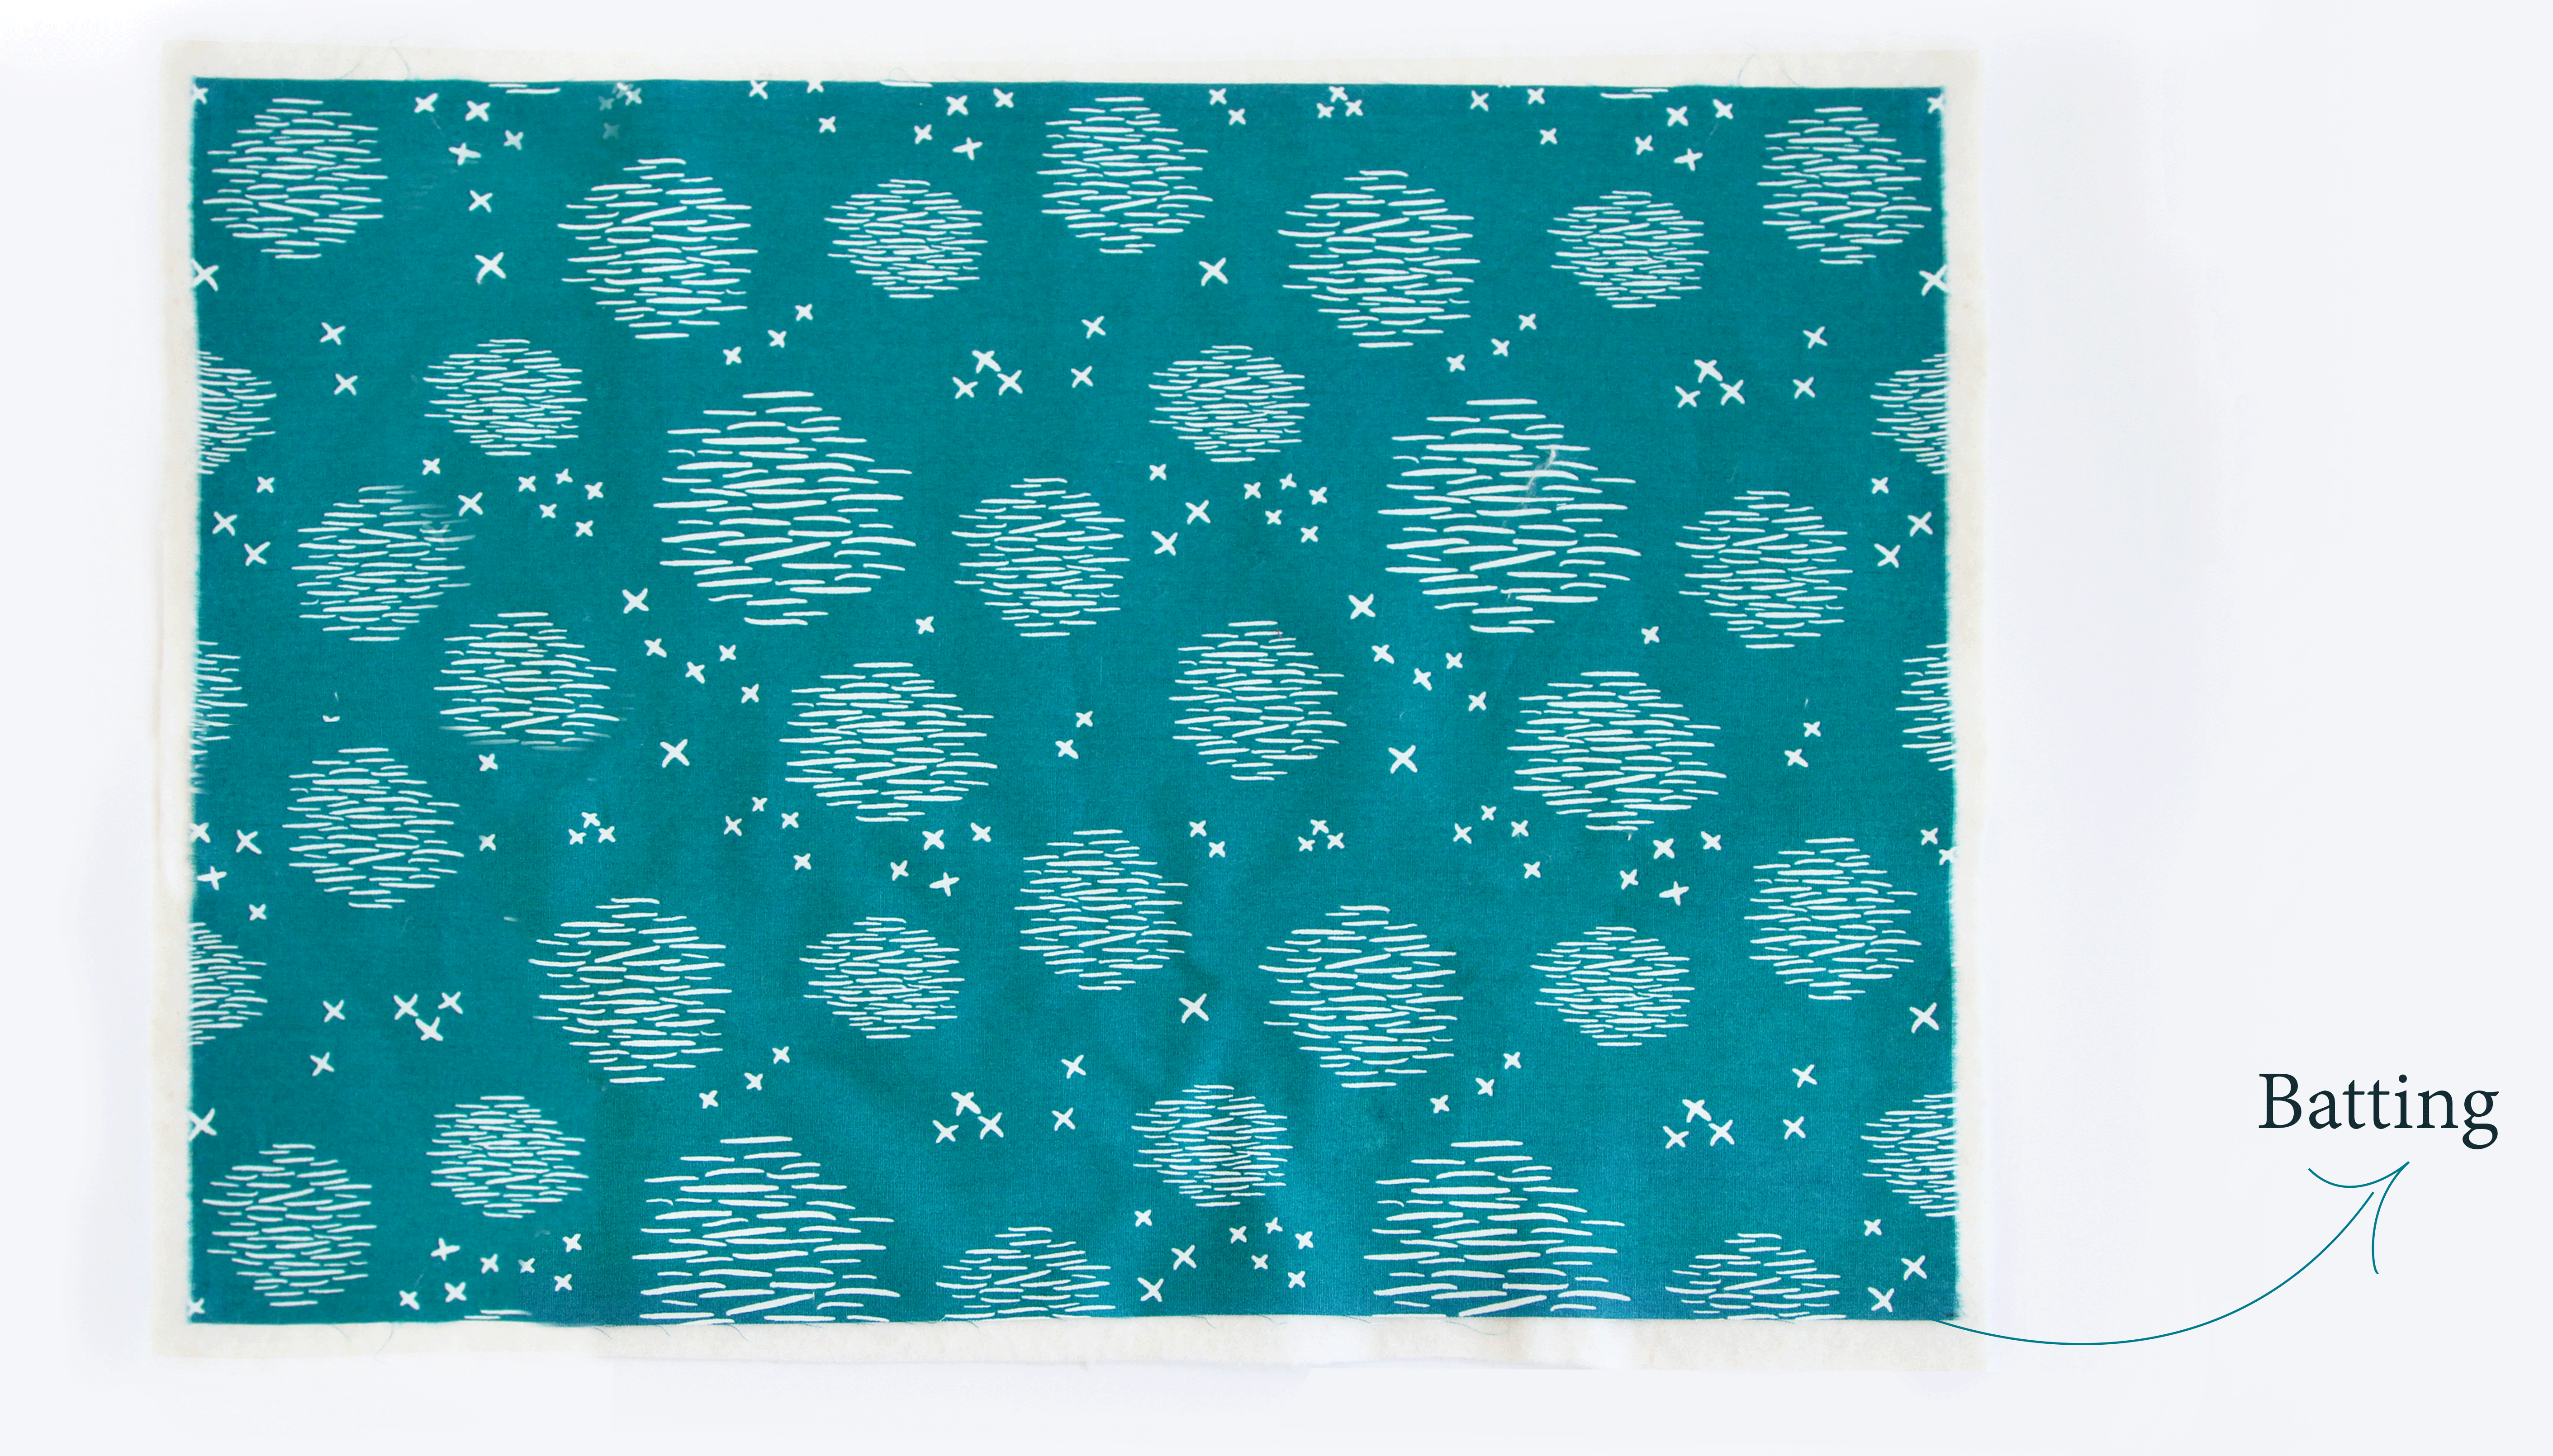
Take one (1) of the Sauvage Sky North Fabric rectangles and place on top of one (1) batting rectangle.
Begin quilting on the right side of the Sauvage Sky North fabric. Create the quilt stitch wherever you see fit. I tried providing a metallic accent of x’s in order to spread the quilting throughout the fabric.

Repeat this same process to the last 15″ by 10 ½” rectangle of Sauvage Sky North fabric.
STEP 3- ATTACH LINING
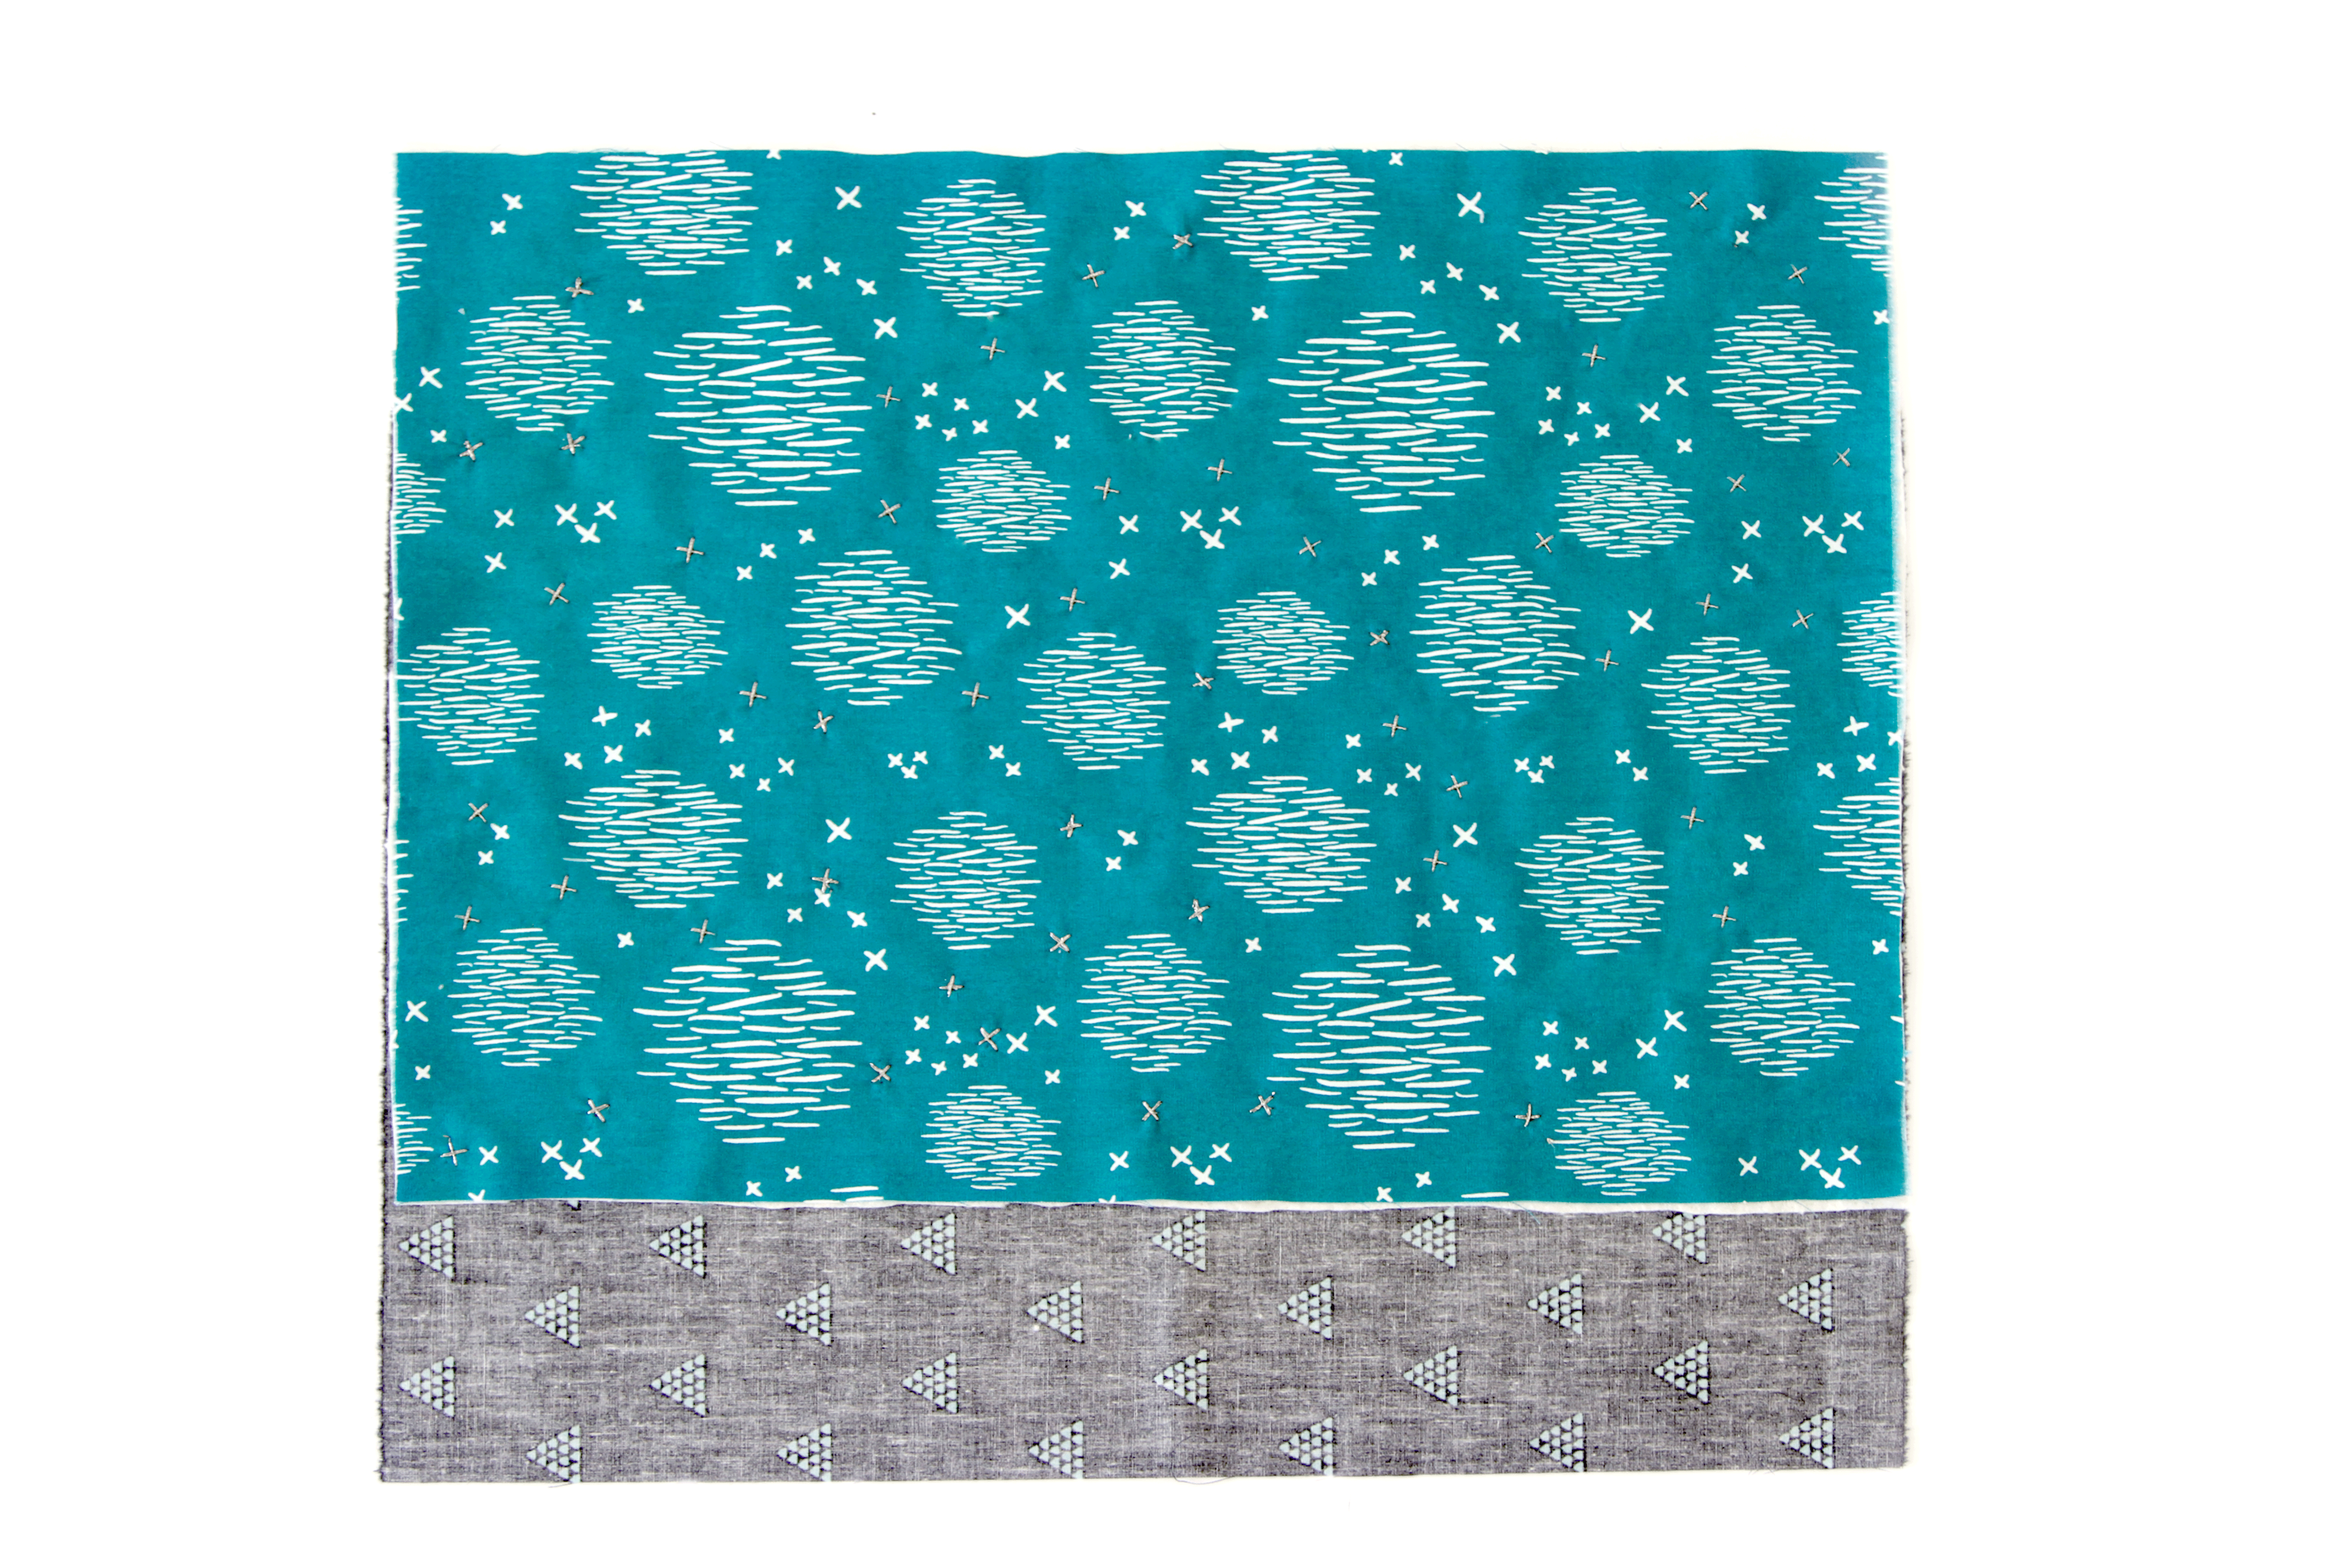
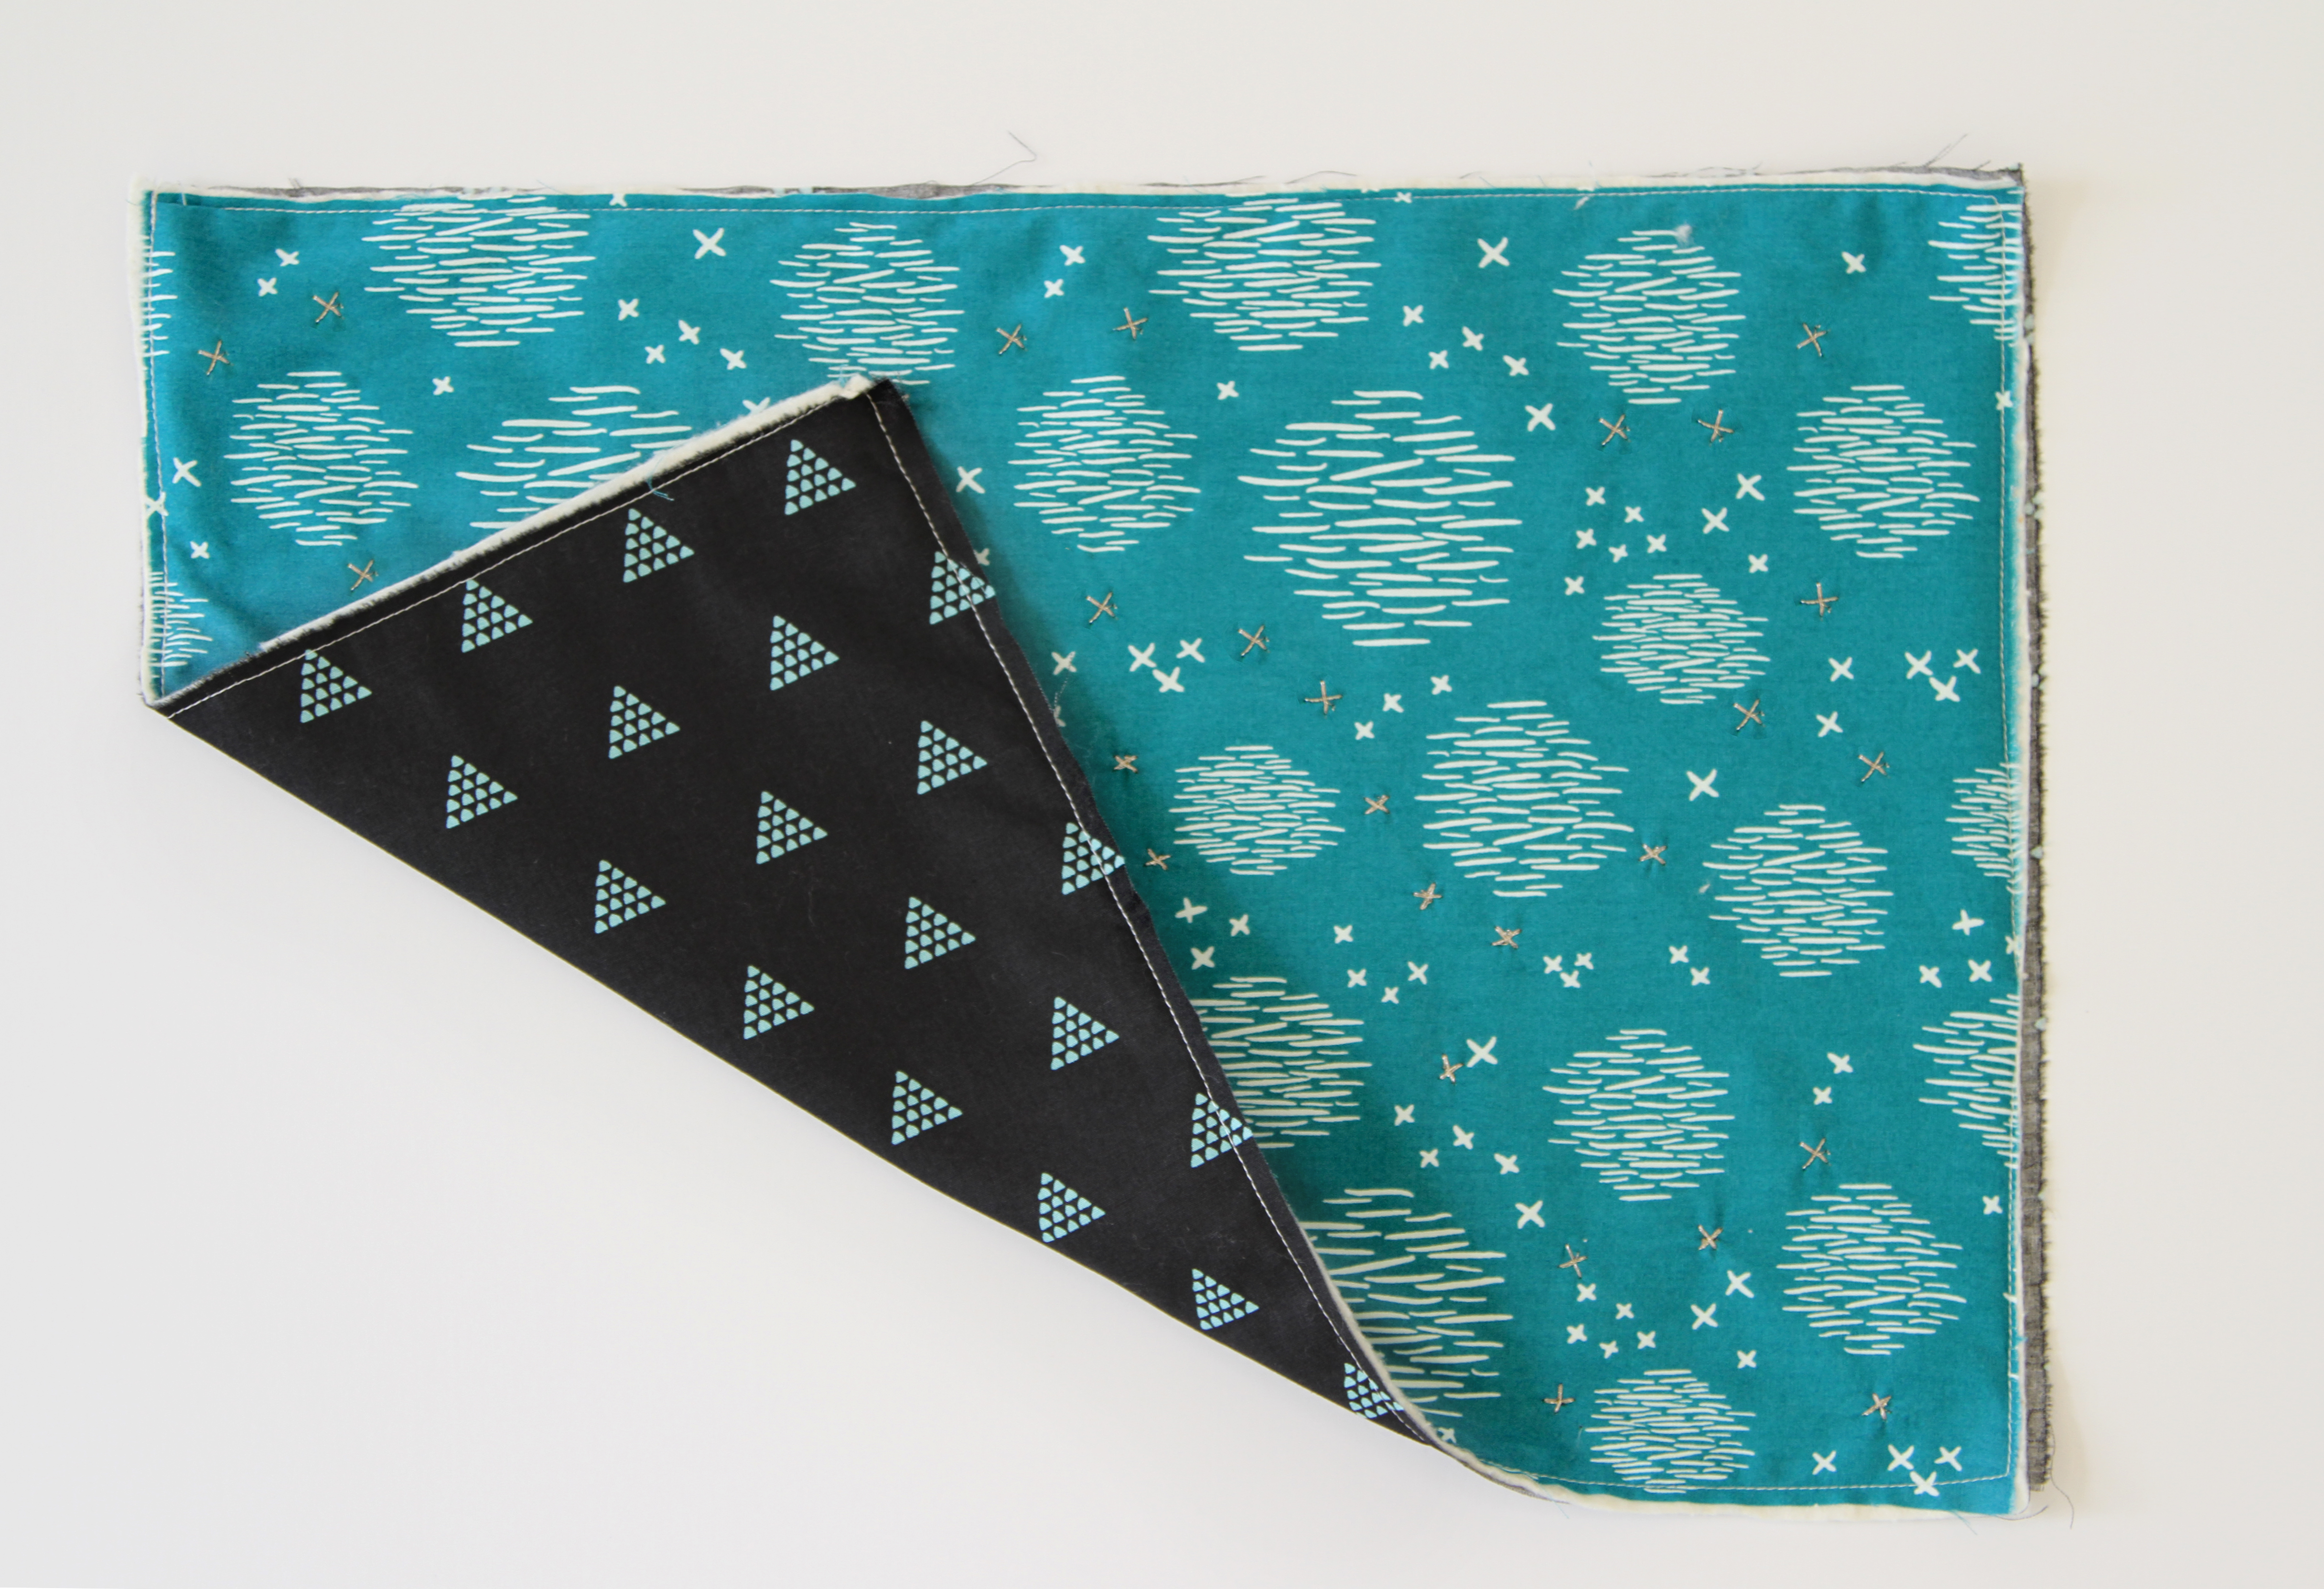
Take one (1) 15″ by 10 ½” rectangle of Contempo Pyramids Ebony and sew it to one (1) 15″ by 10 ½” quilted rectangle of Sauvage Sky North. Sew wrong sides together.
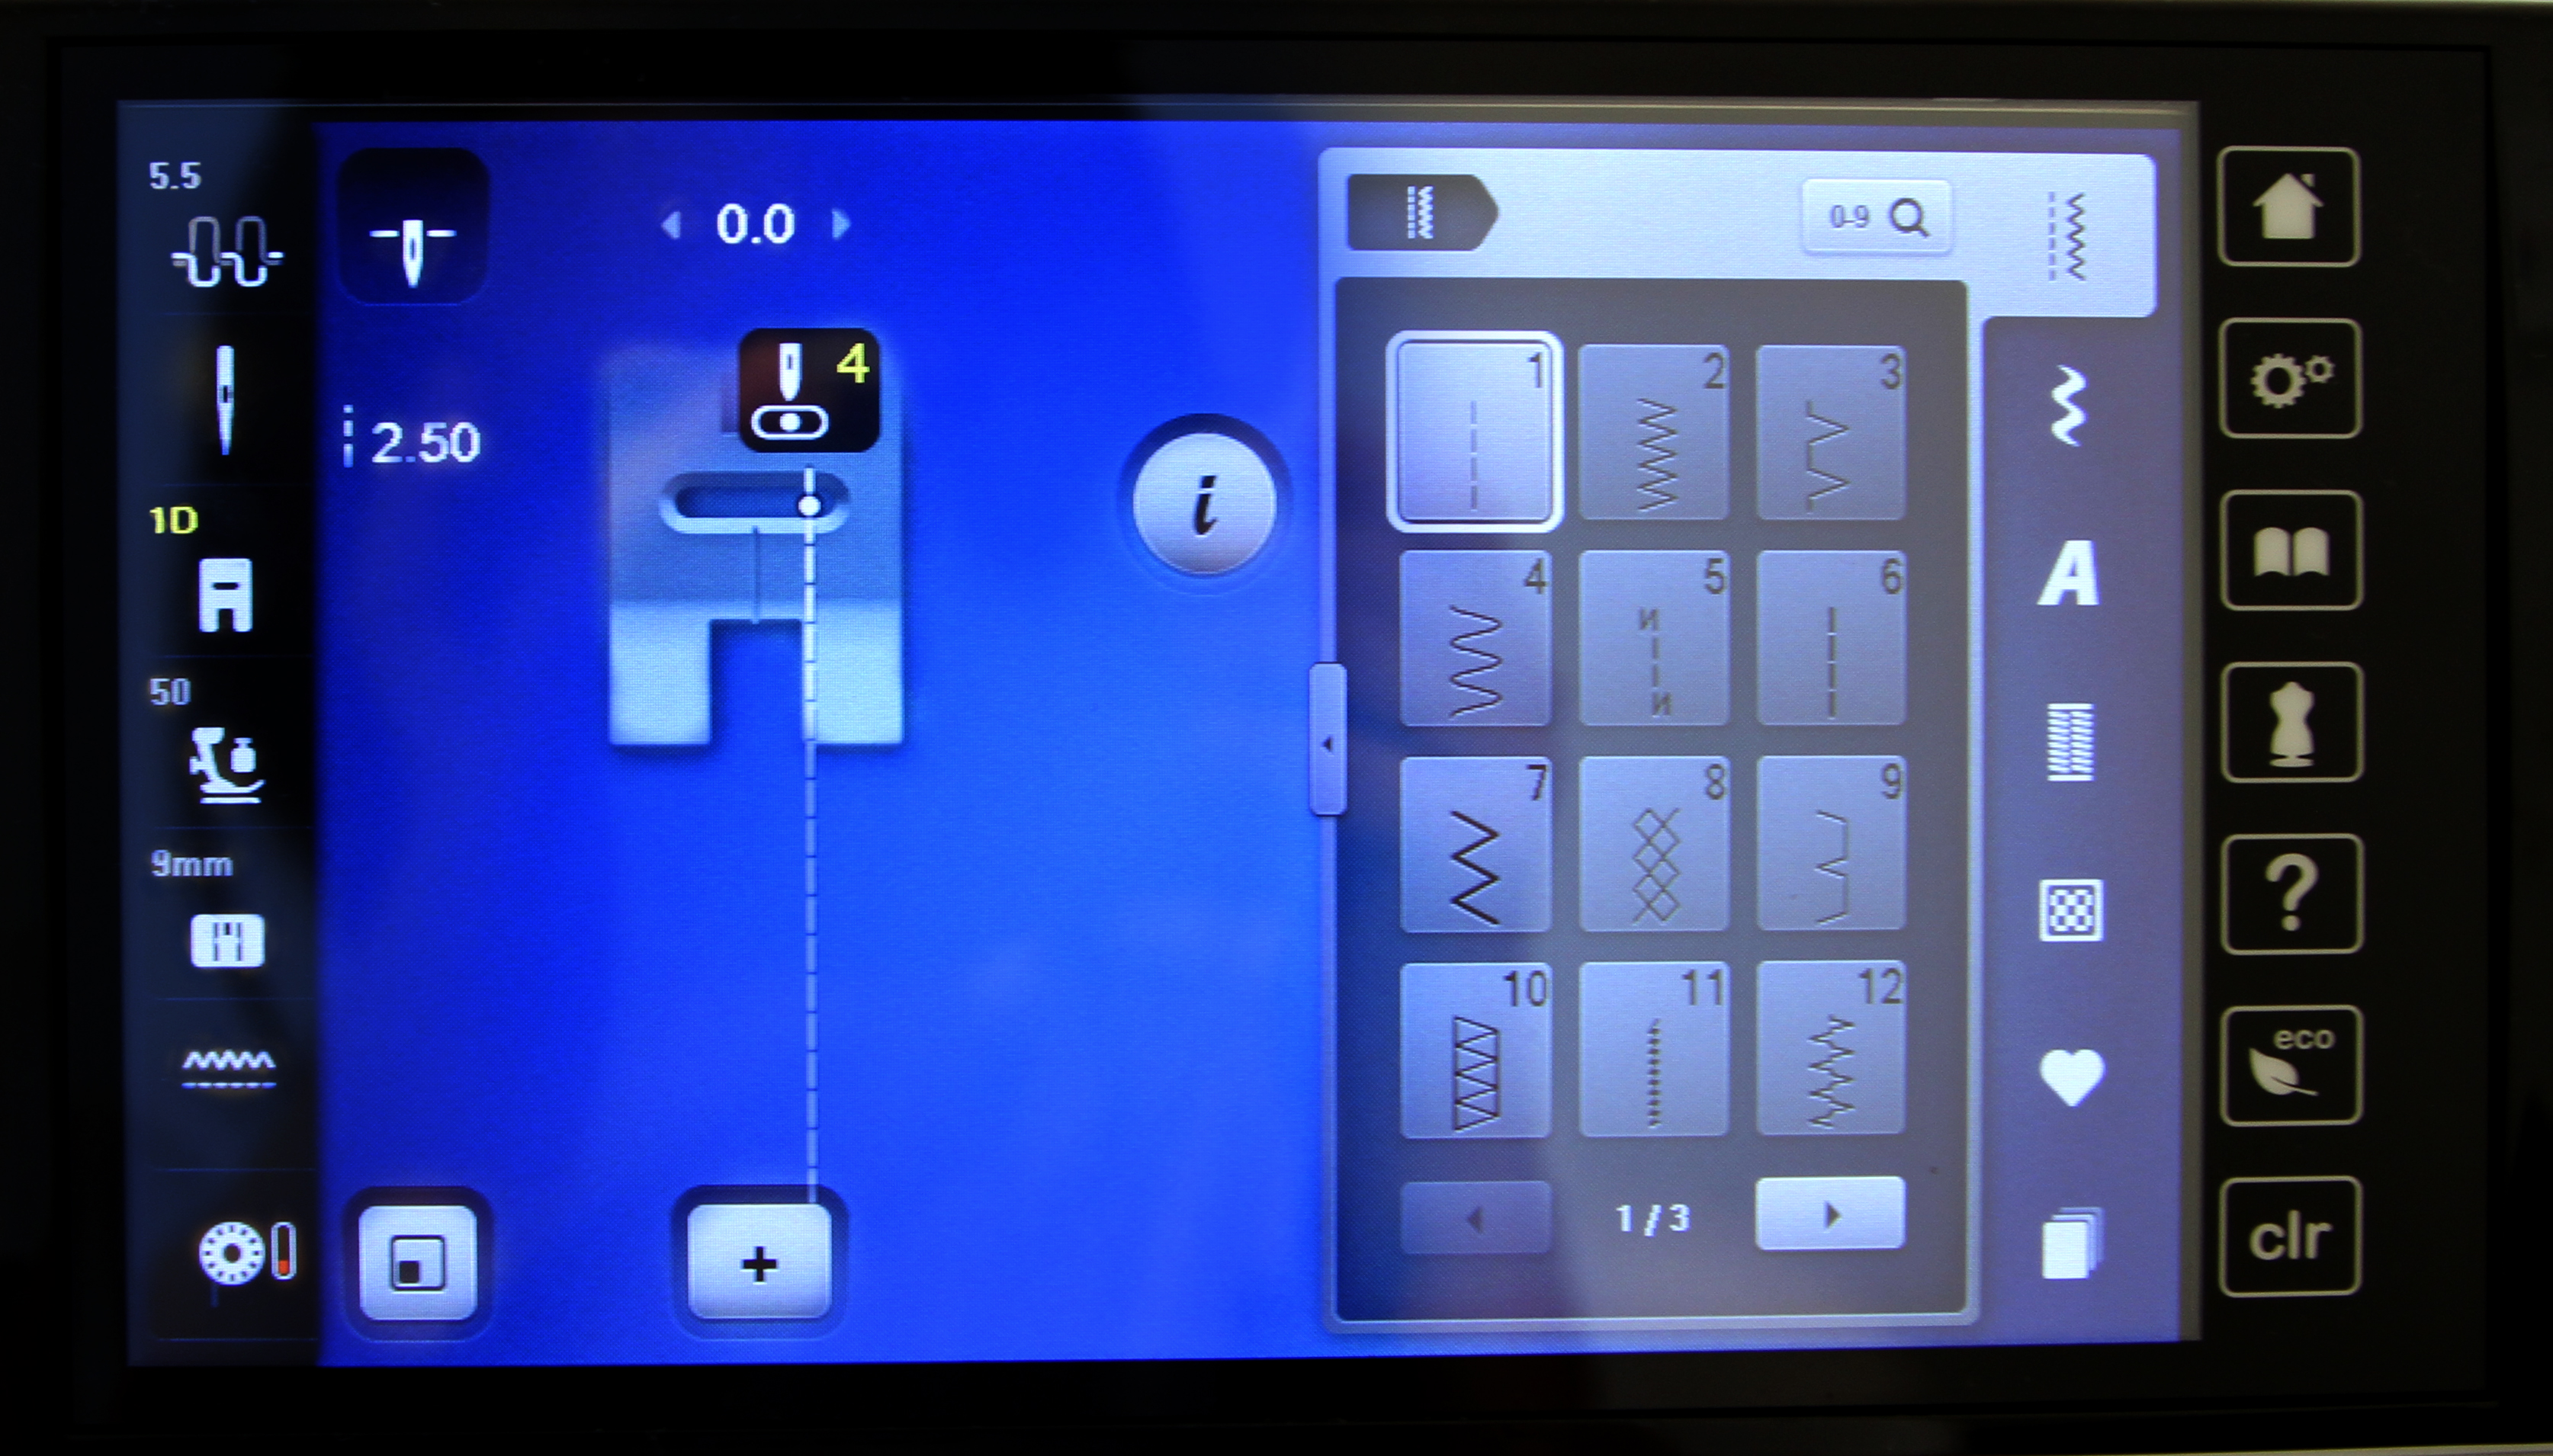
Change thread to AURIFIL 2311 and needle to Universal needle size 80/12. The setting should be on practical stitch #1 and 1/4 of an inch (or use the method of moving the needle position to create the seam allowance, directions to follow). Make sure wrong sides are facing each other and sew around the rectangle on the right side of the fabric.
To use presser foot and needle position for seam allowance: align fabric edge to presser foot edge for a more accurate seam allowance. Move the needle position to the position mentioned in the instructions. The needle will move according to the set seam allowance. For this step, align the fabric with the edge of the presser foot and move the needle position to #4.
This step will leave you with a rectangle looking like this.
Repeat this same process to the last 15″ by 10 ½” rectangle of Contempo Pyramids Ebony.
STEP 3- ATTACH ZIPPER
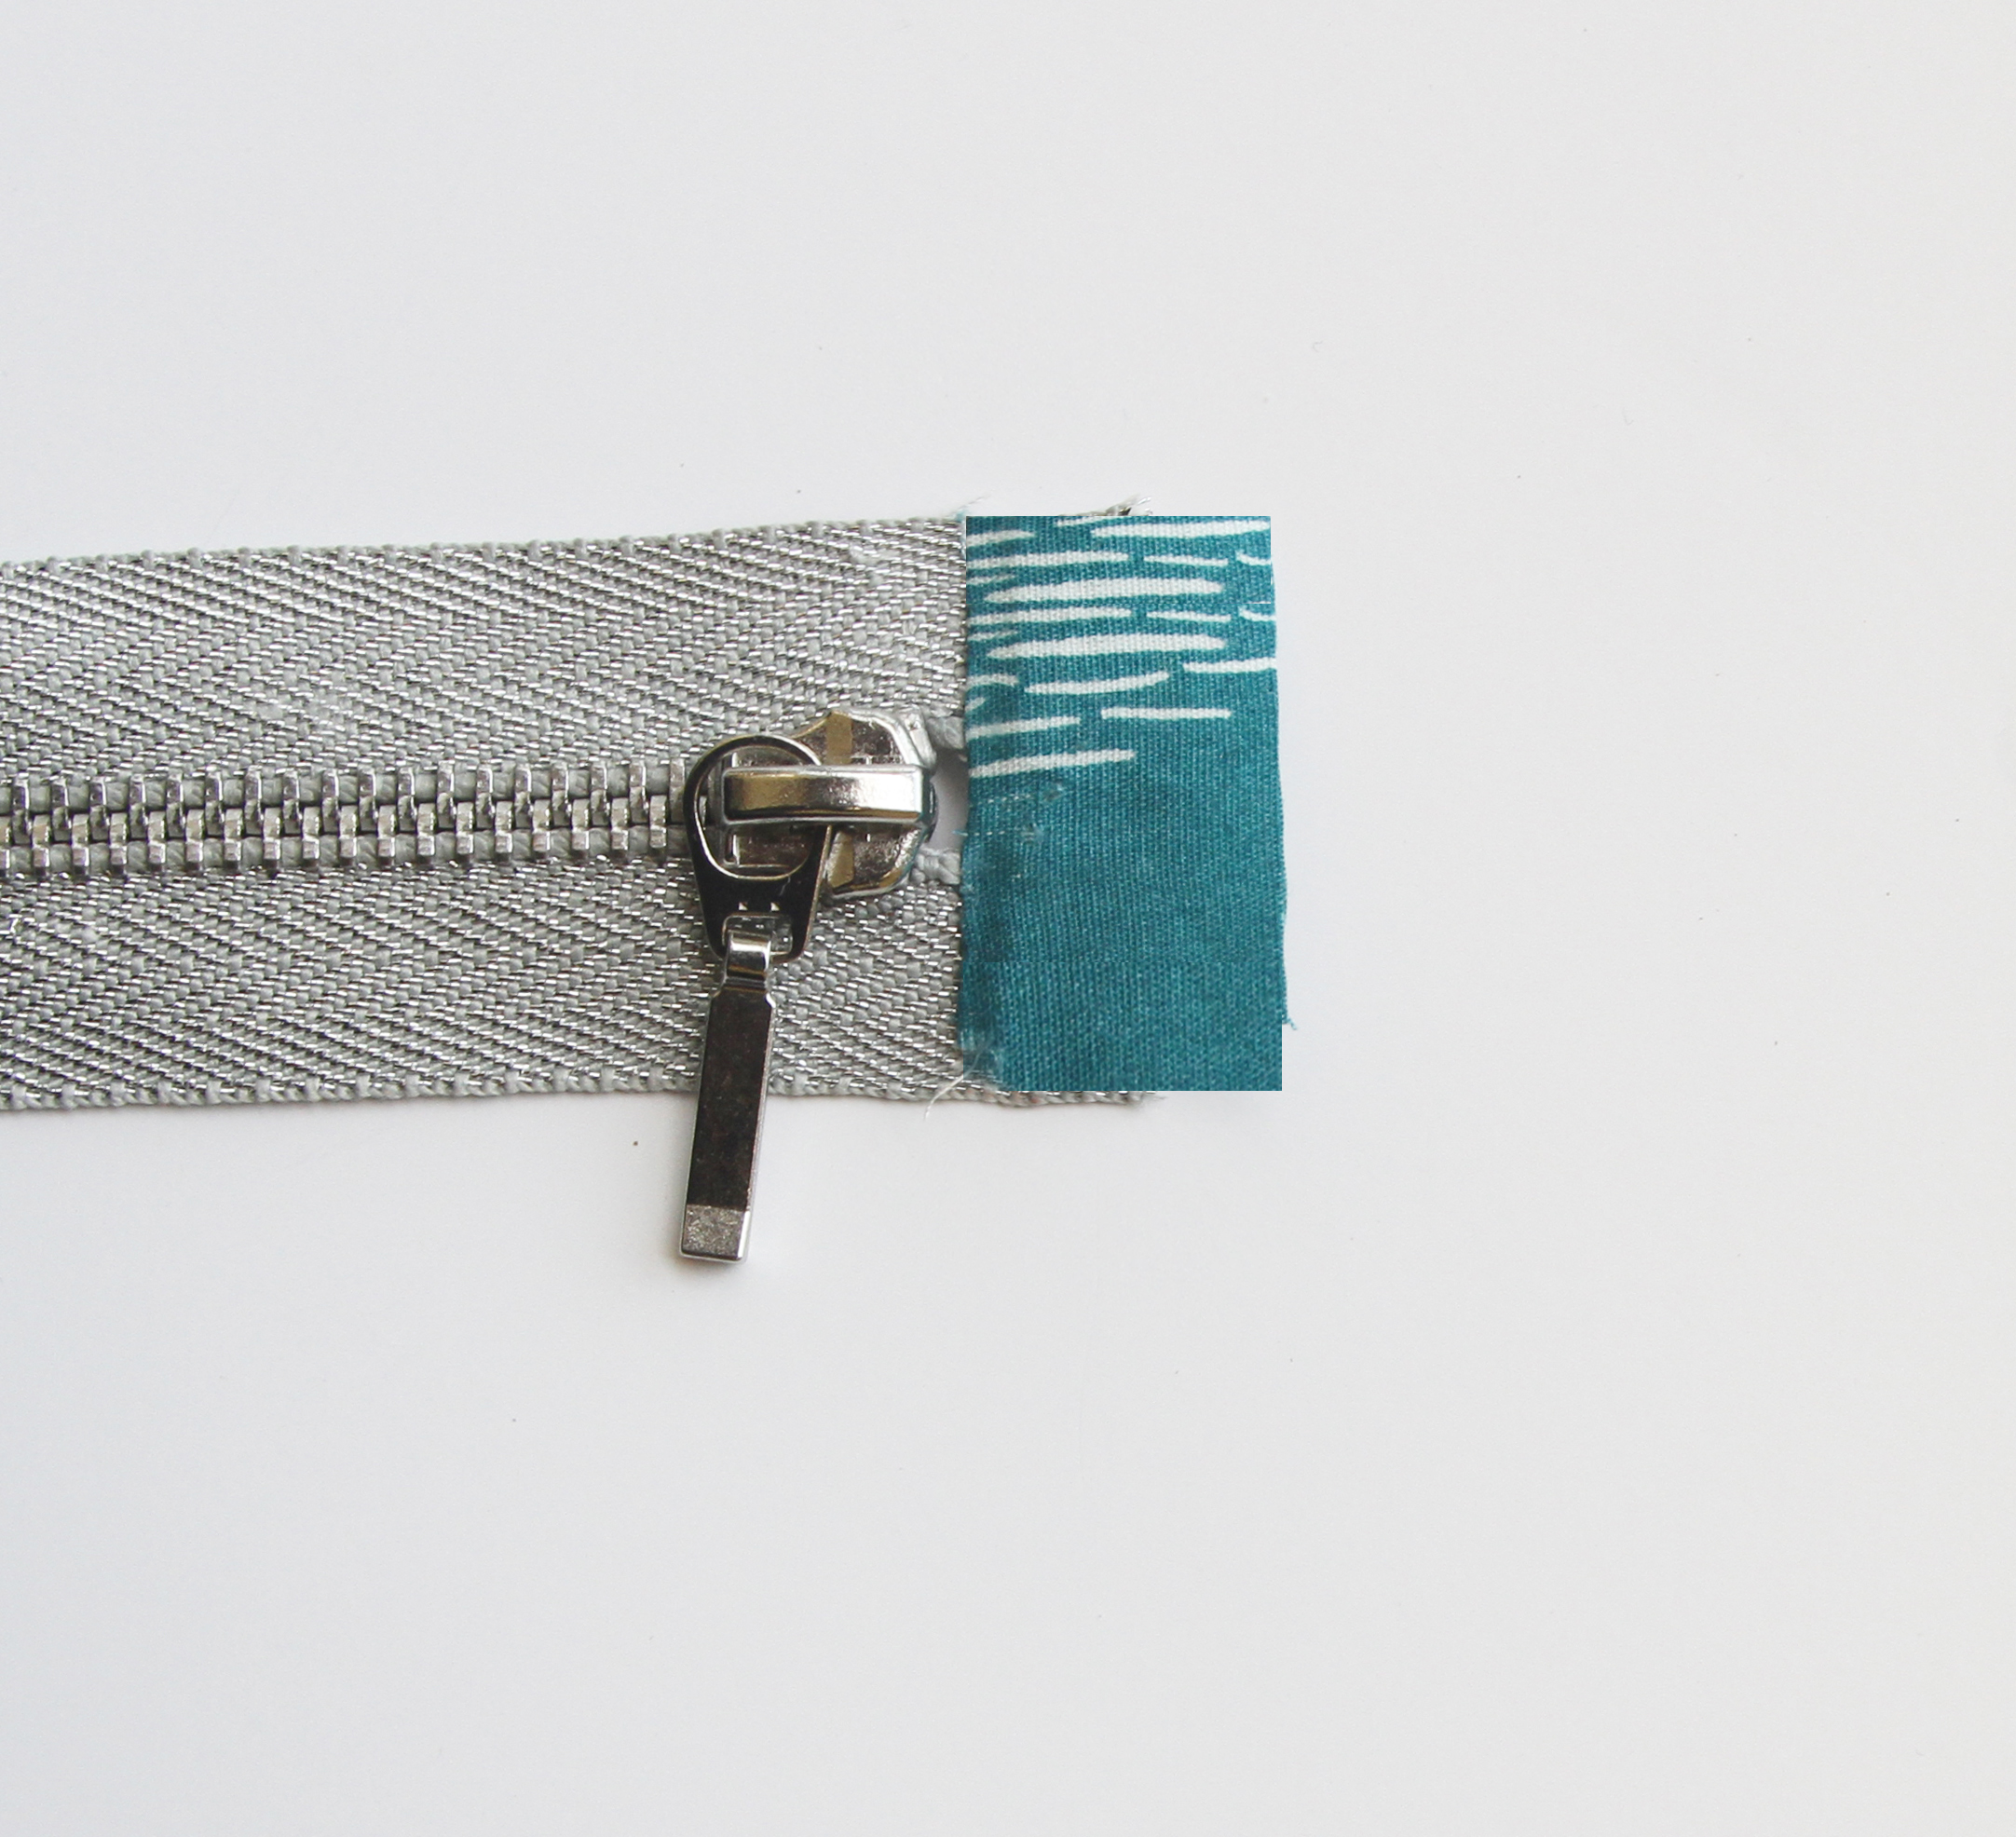
Take the two (2) 1 ¼” by 1 ¼” squares and folded in half and pin to each side of the zipper.
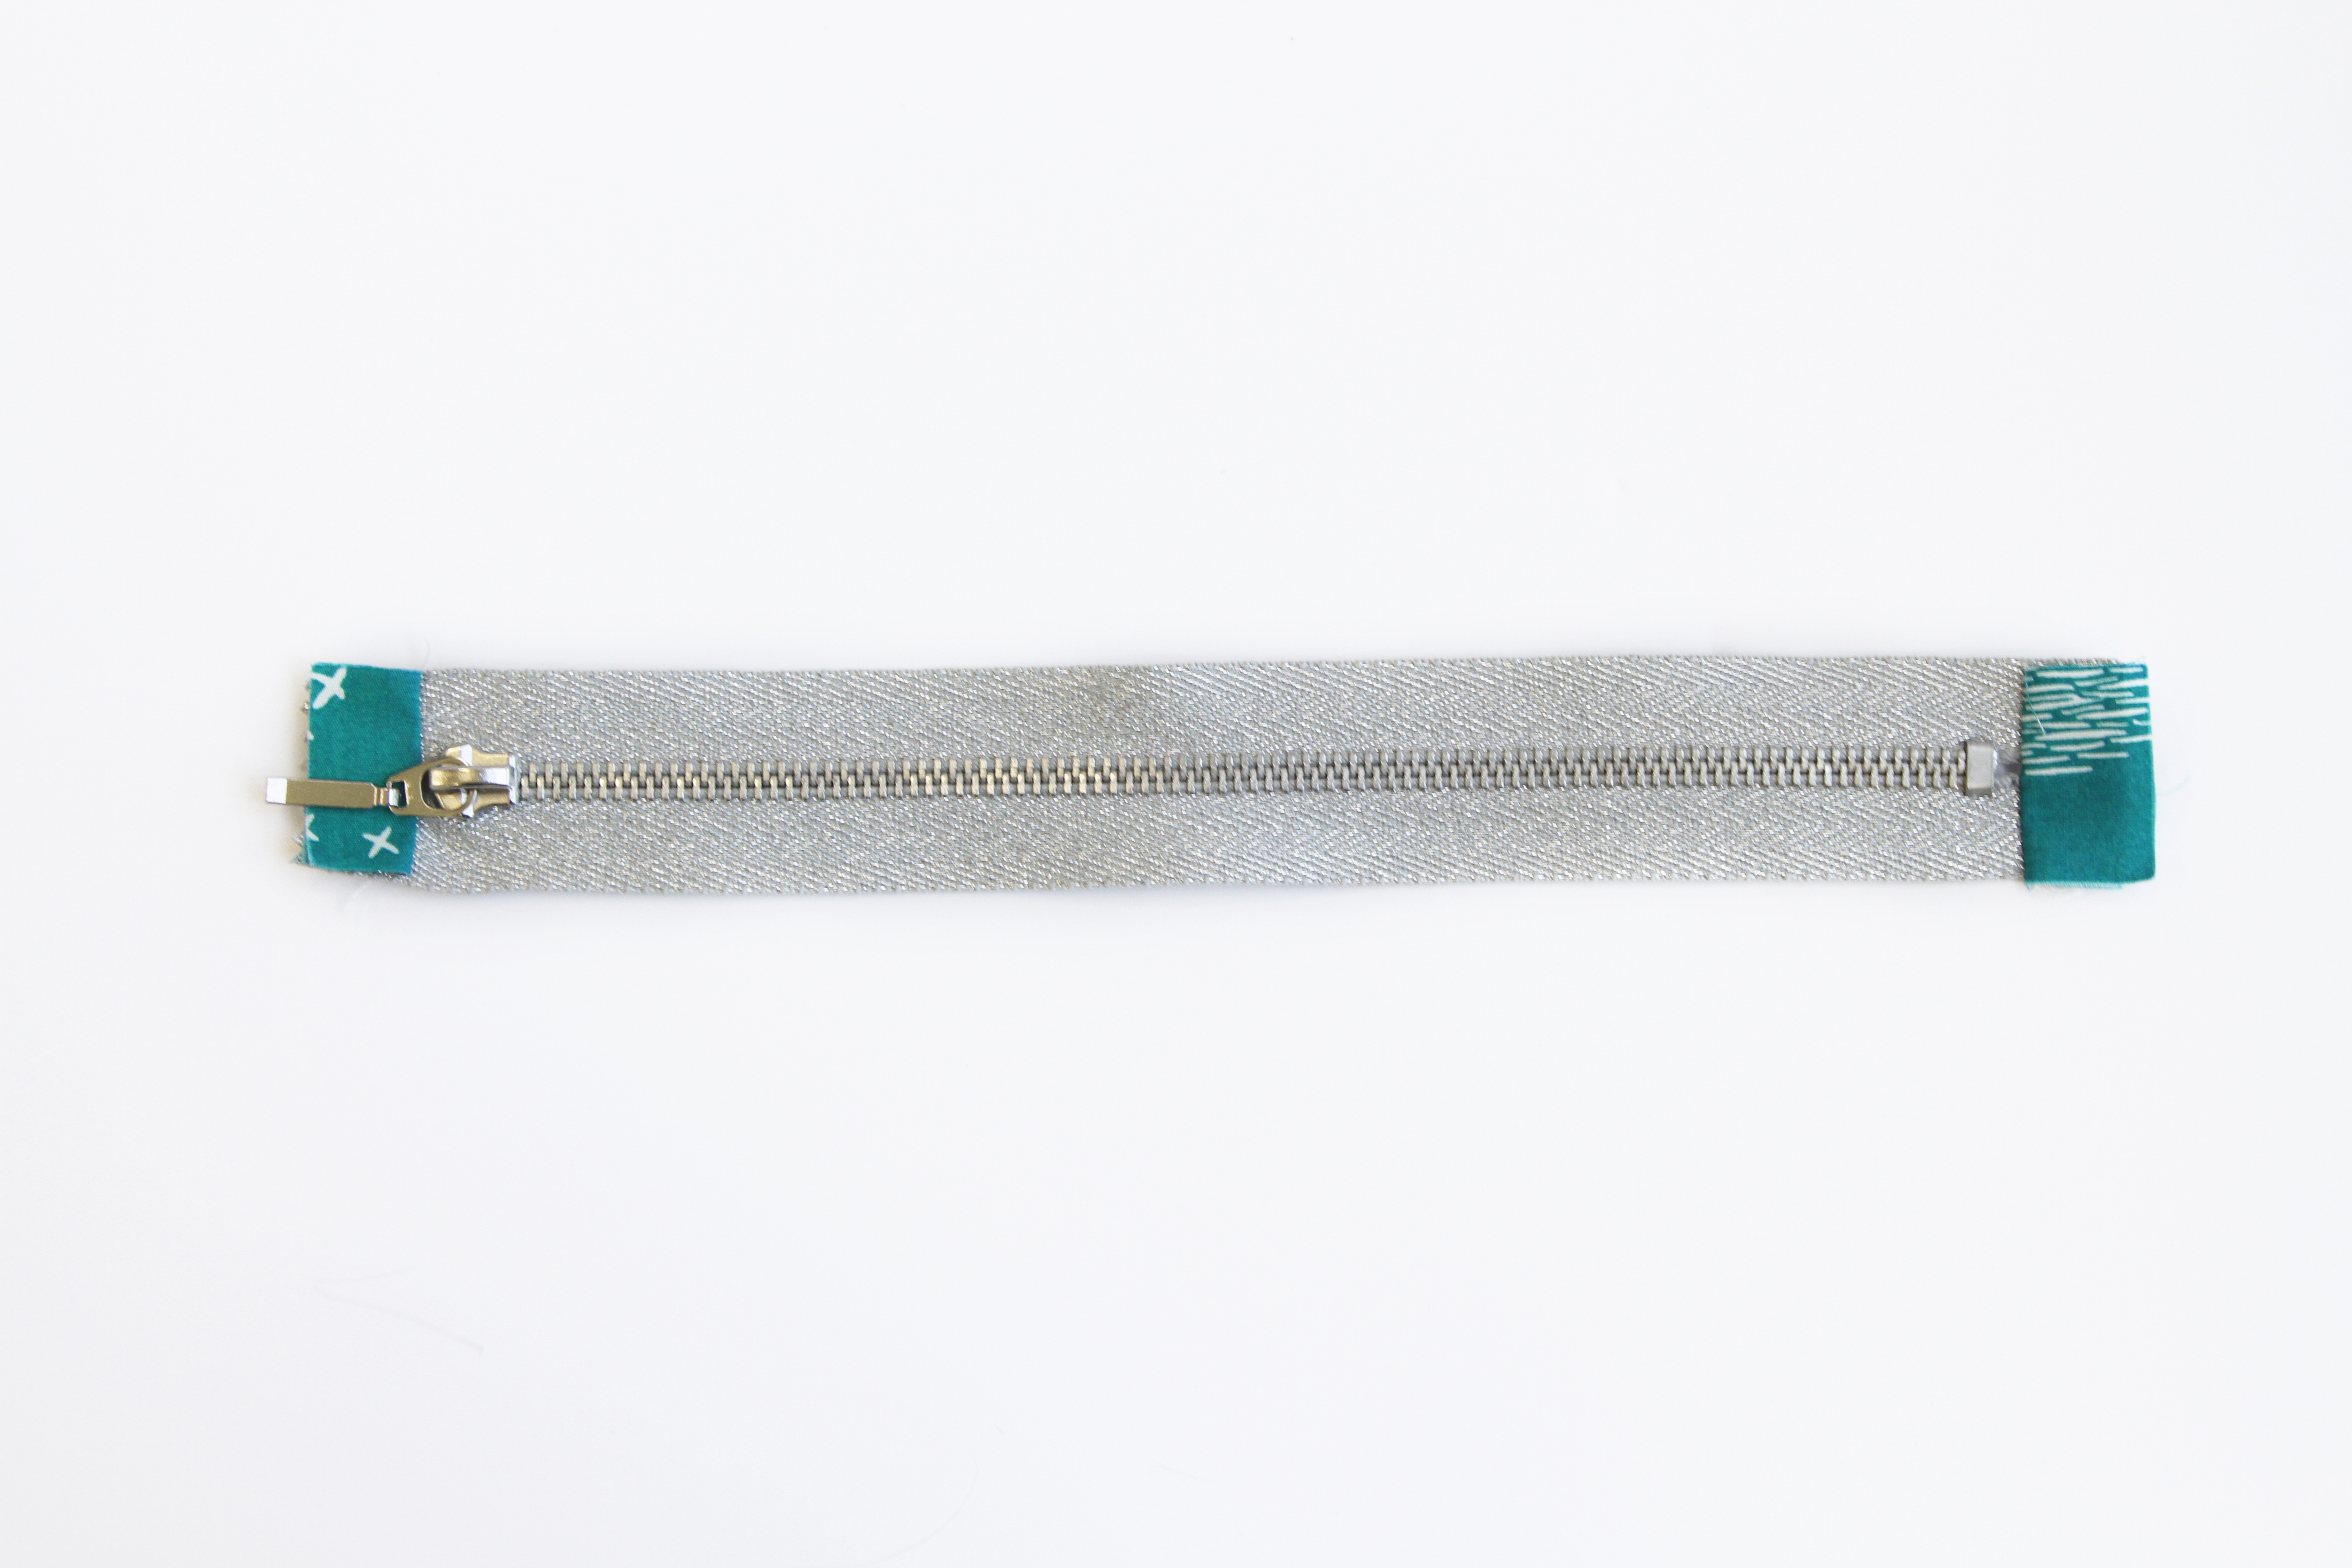
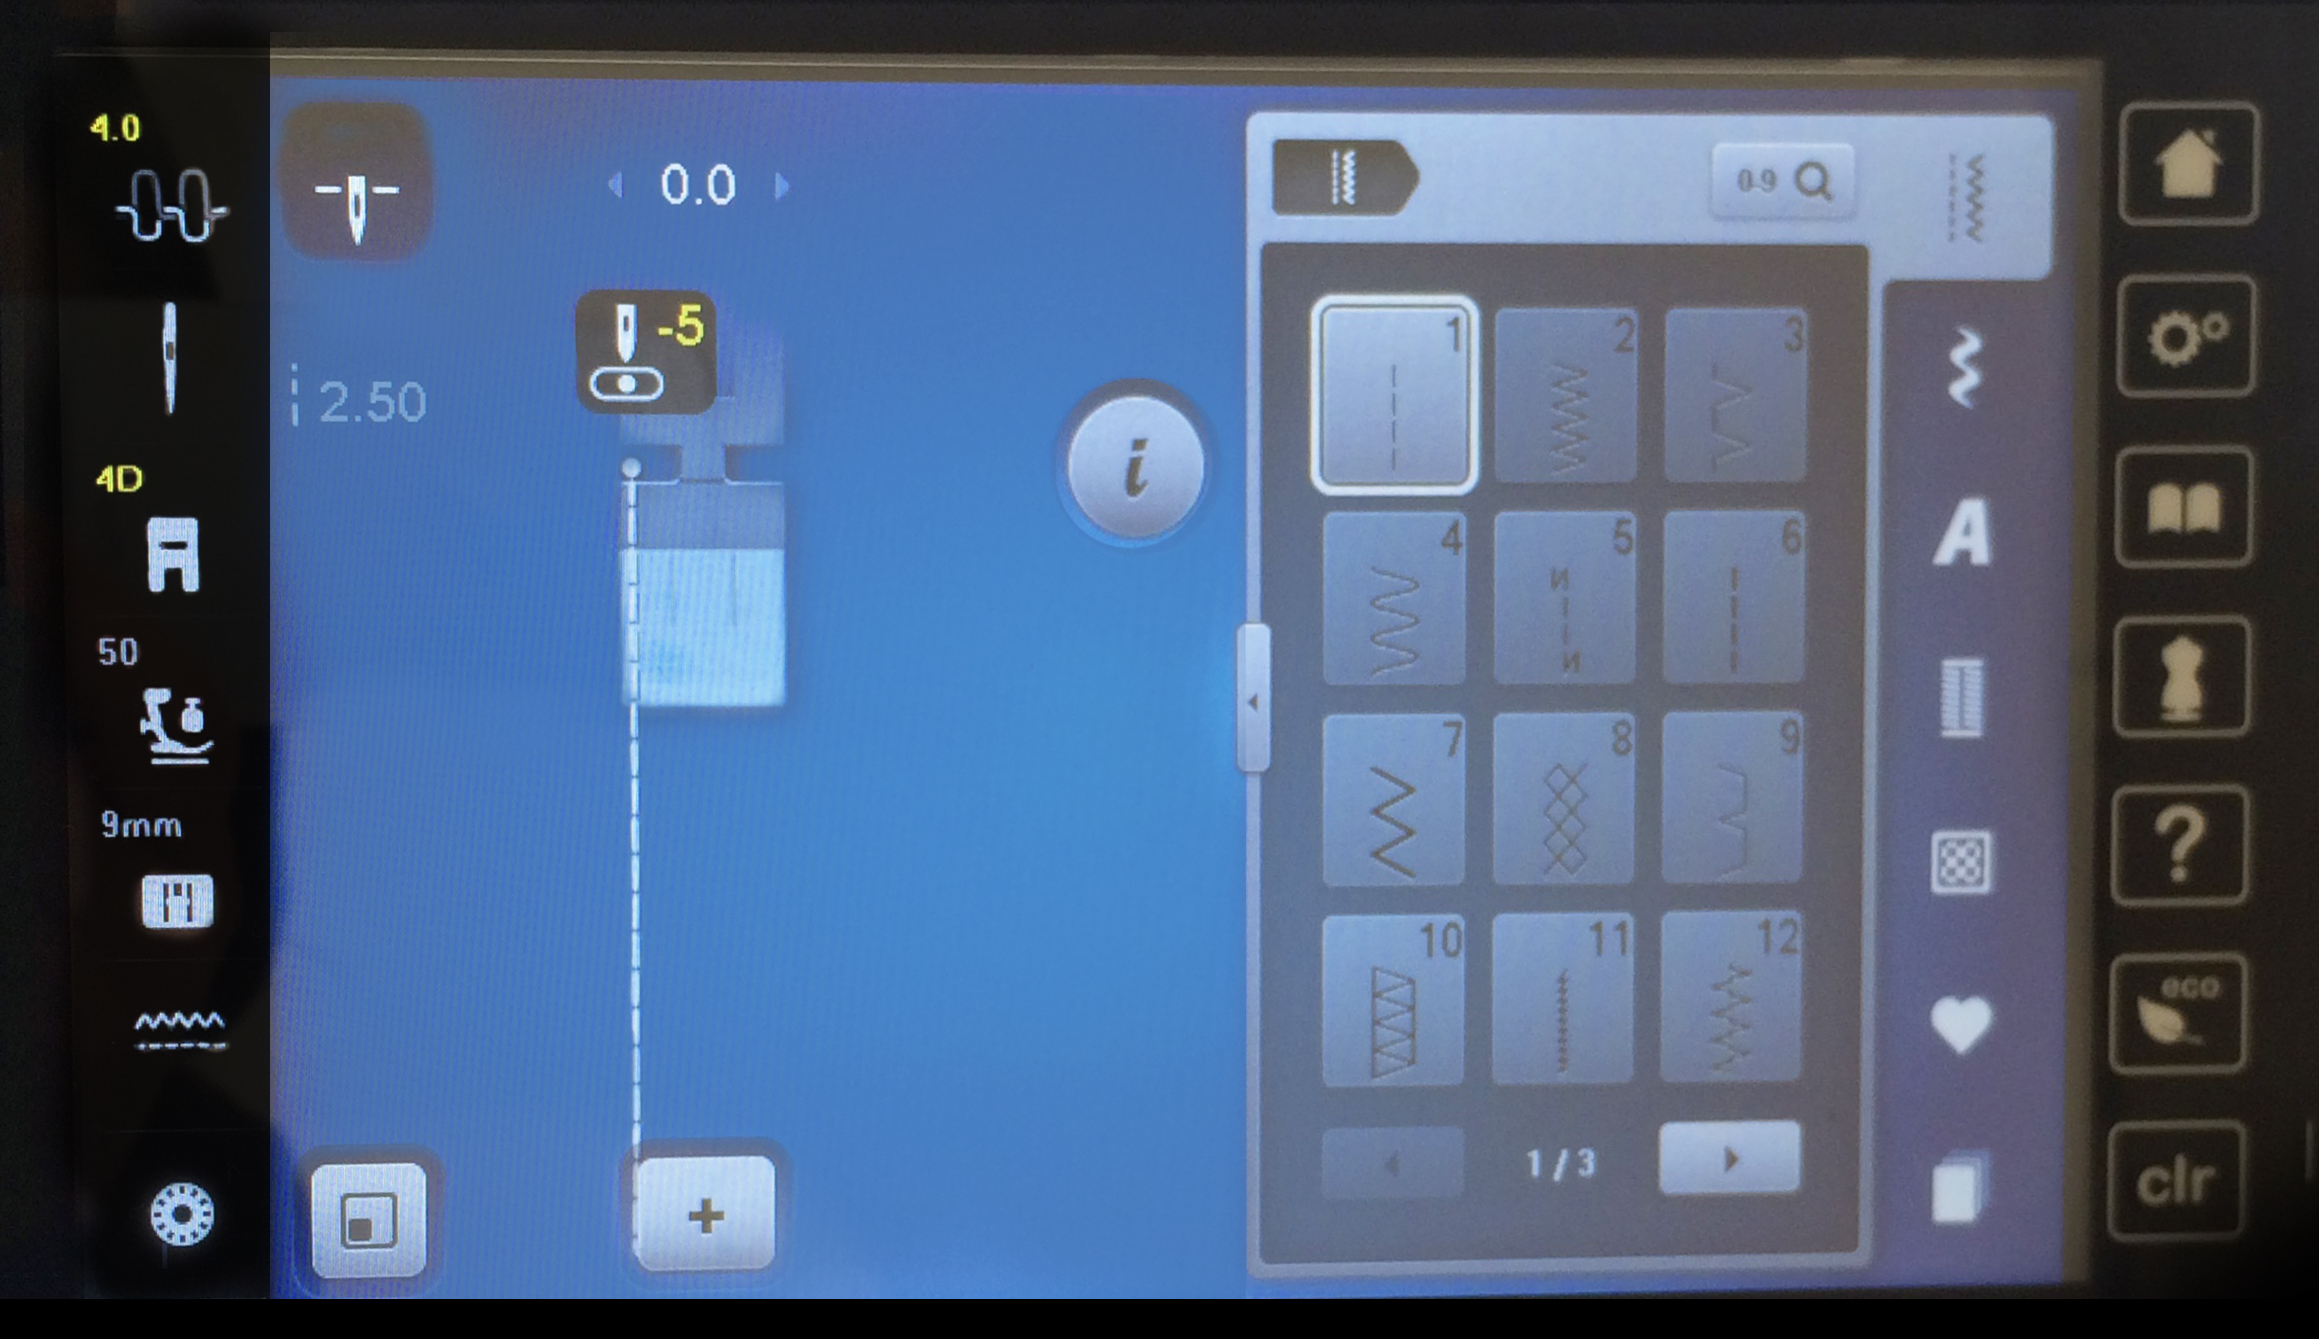
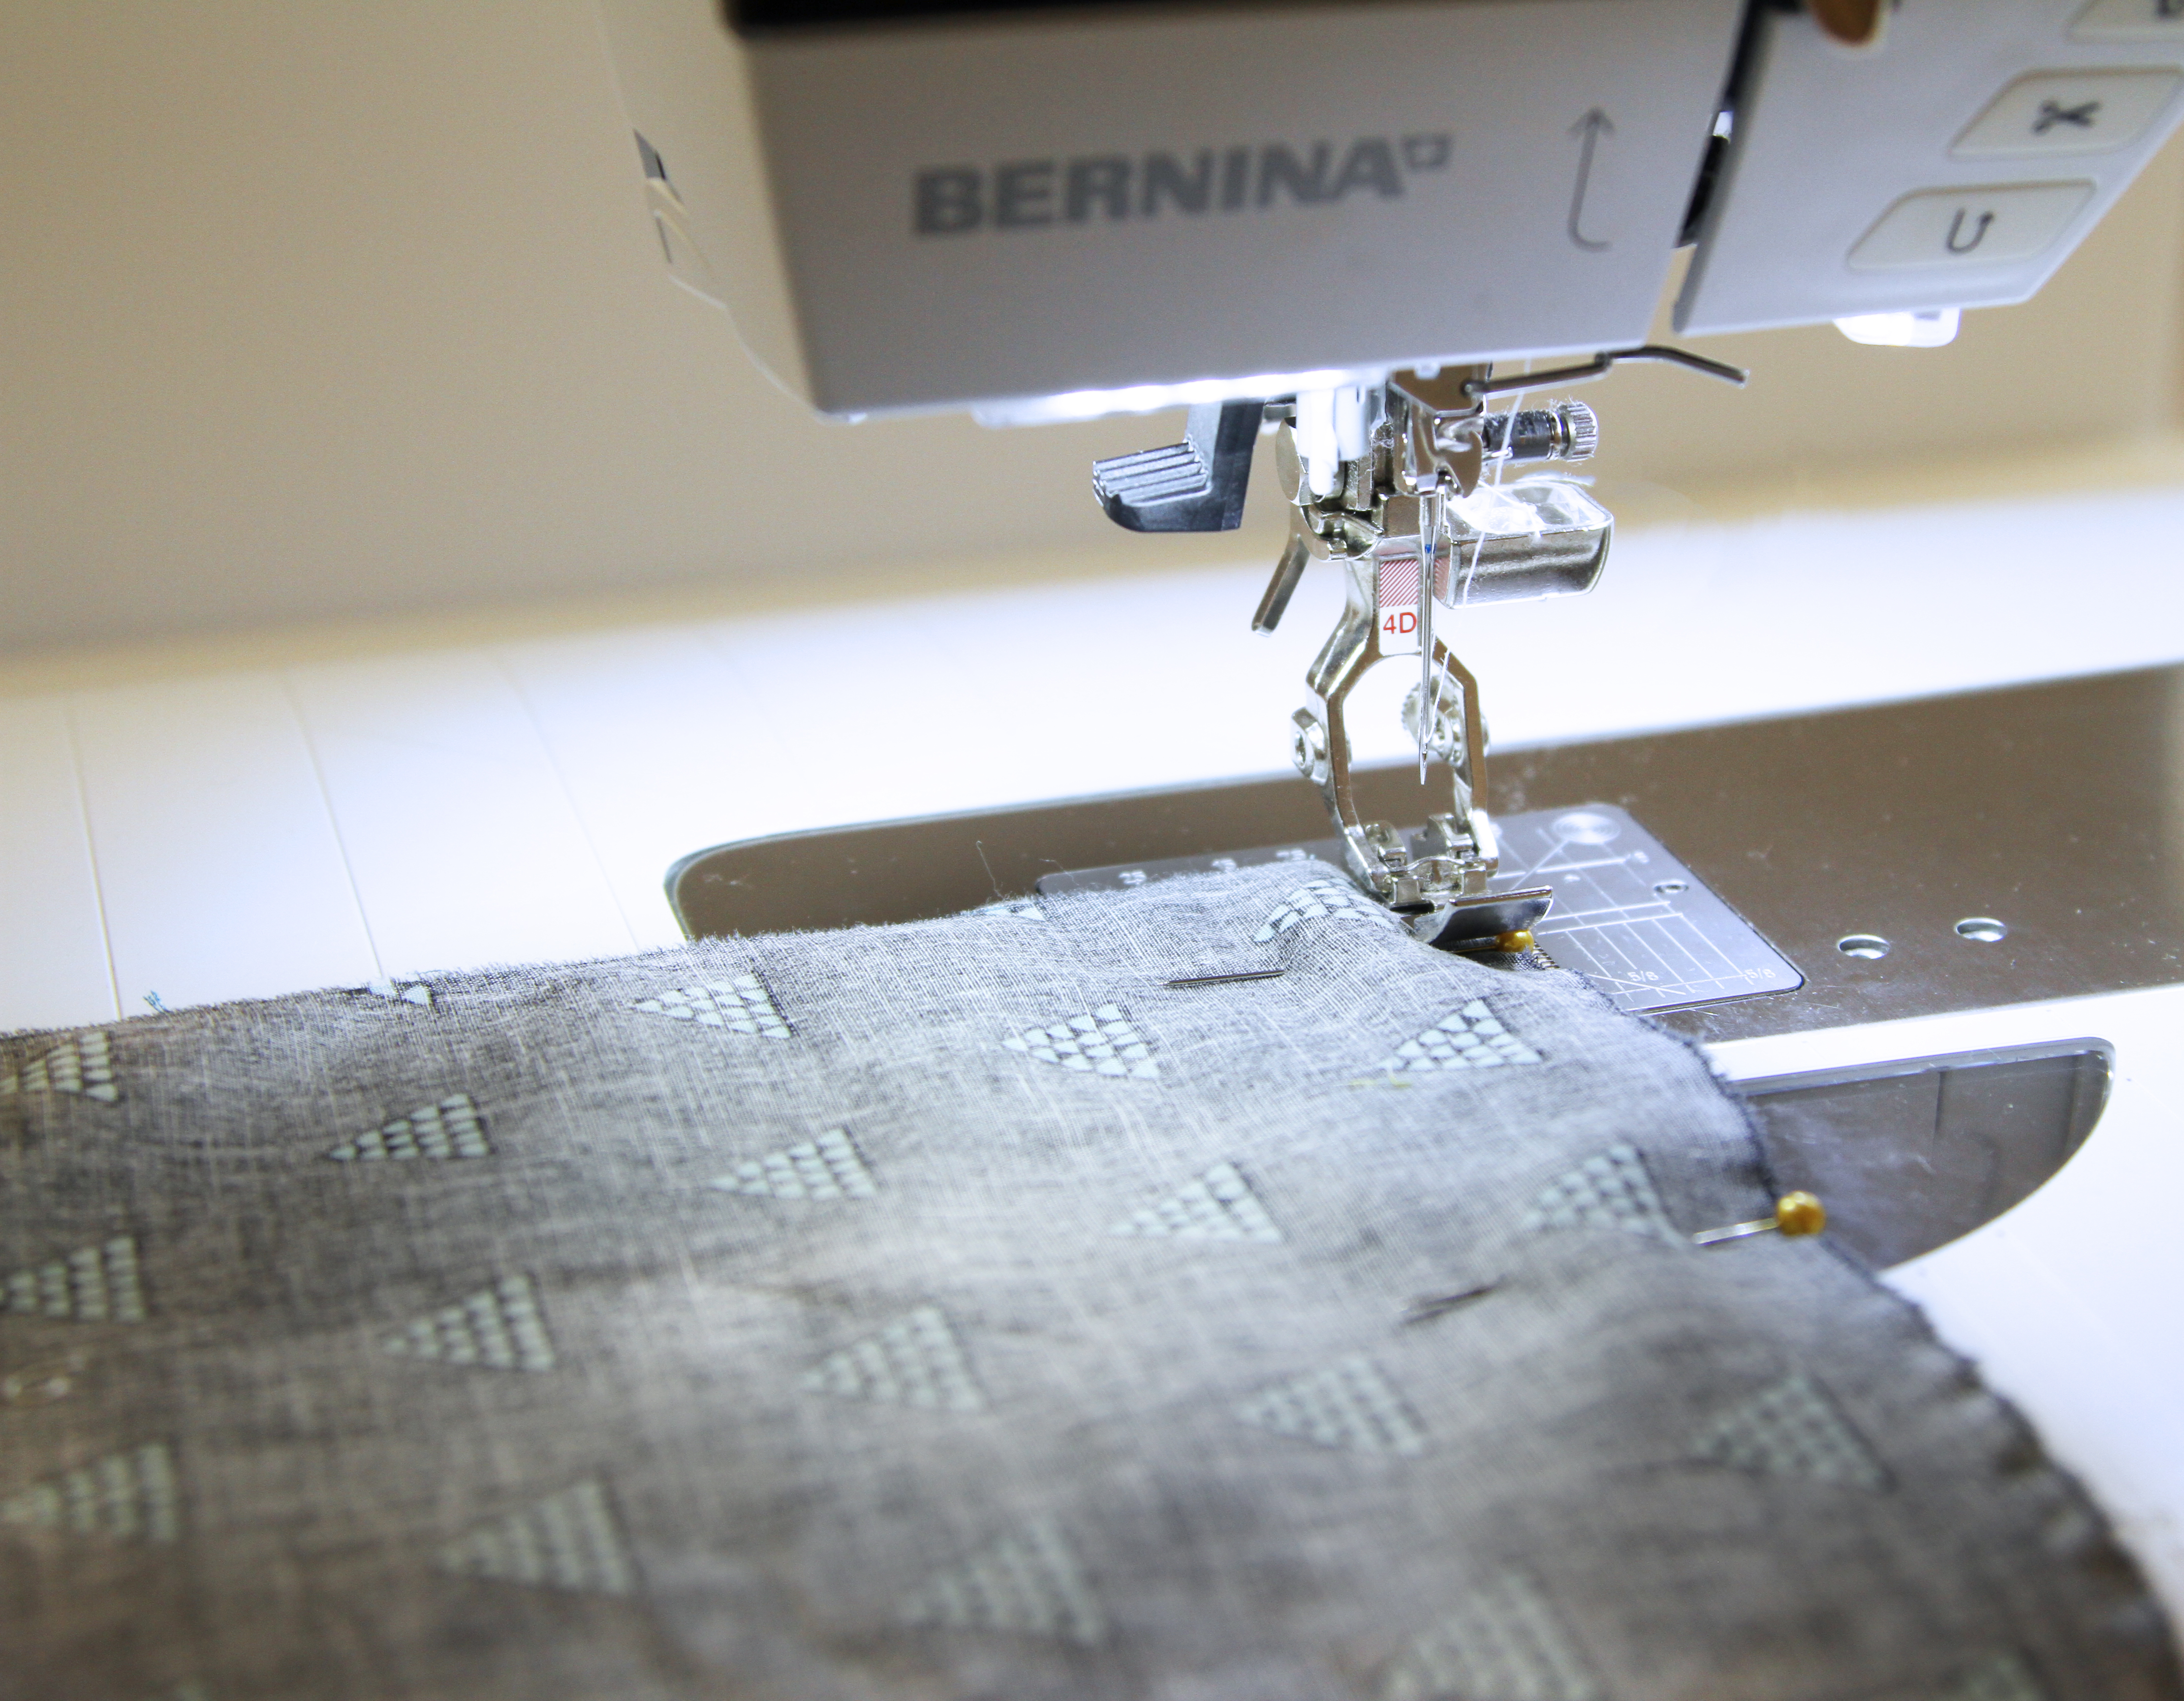
Using the BERNINA Zipper foot #4D, sew along the center of the square with a 1/2 inch seam allowance. Or, move the needle to the #-5 needle postion, aligning presser foot to zipper teeth edge.
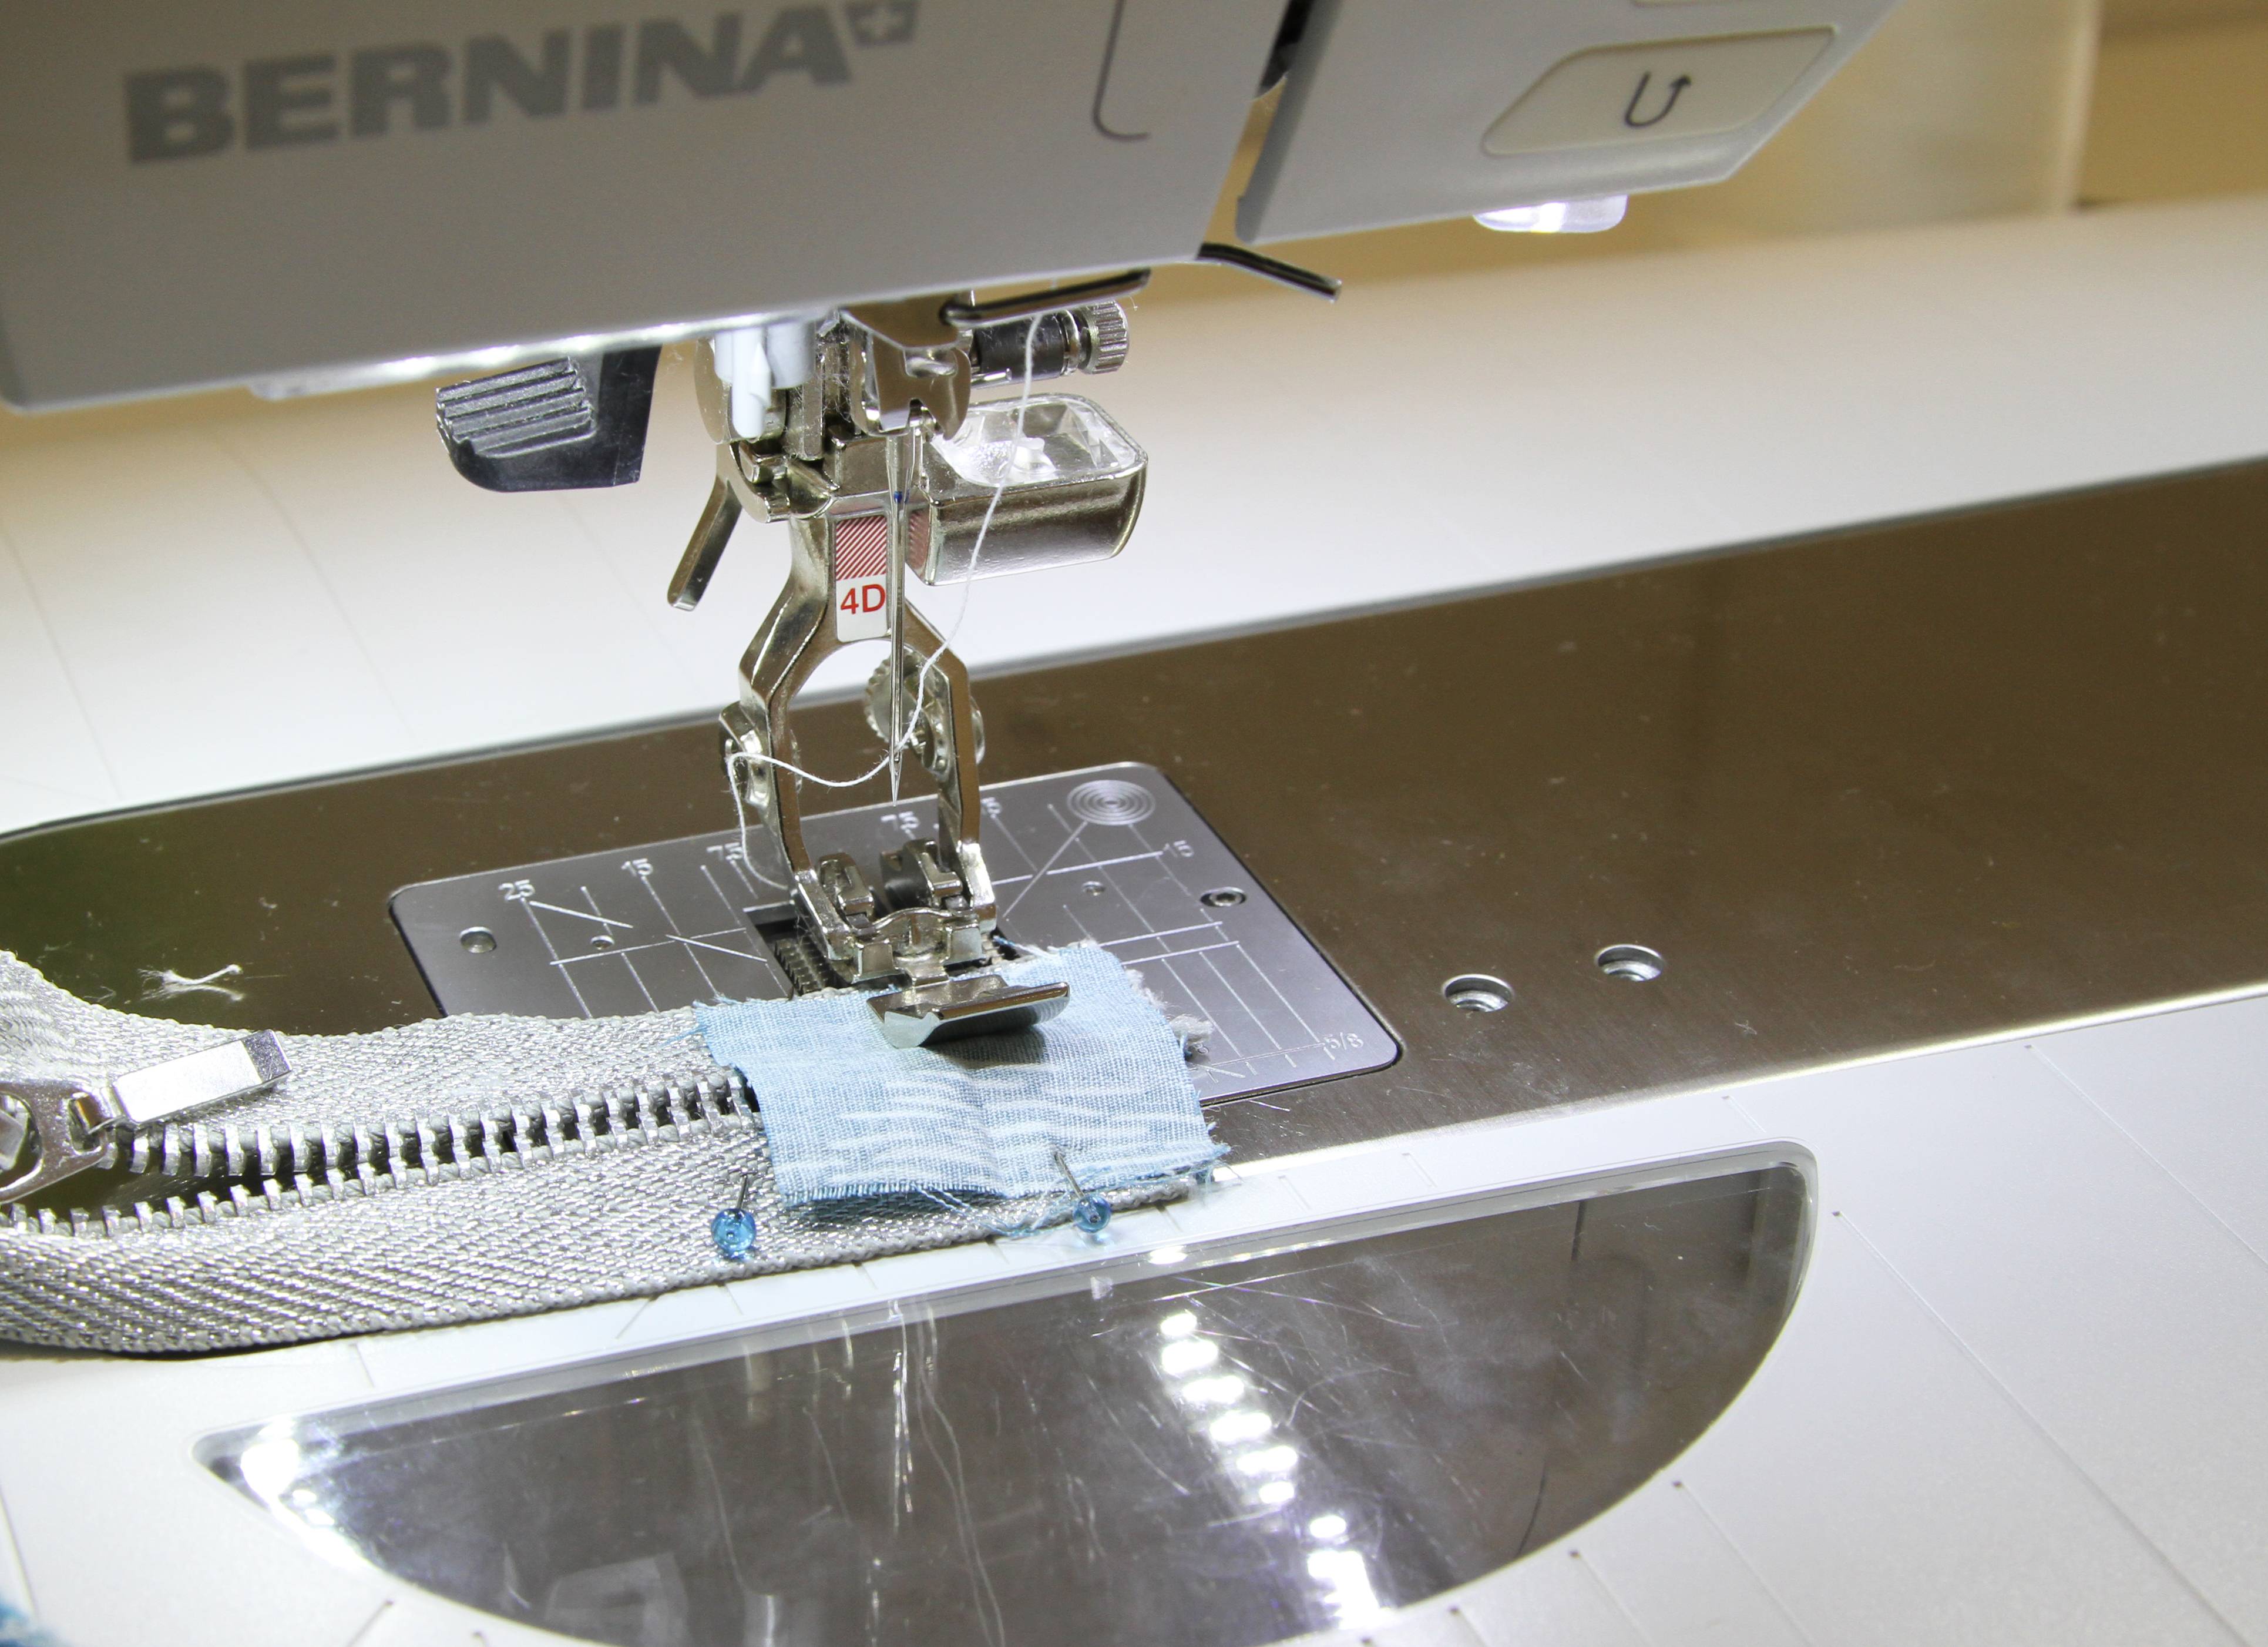
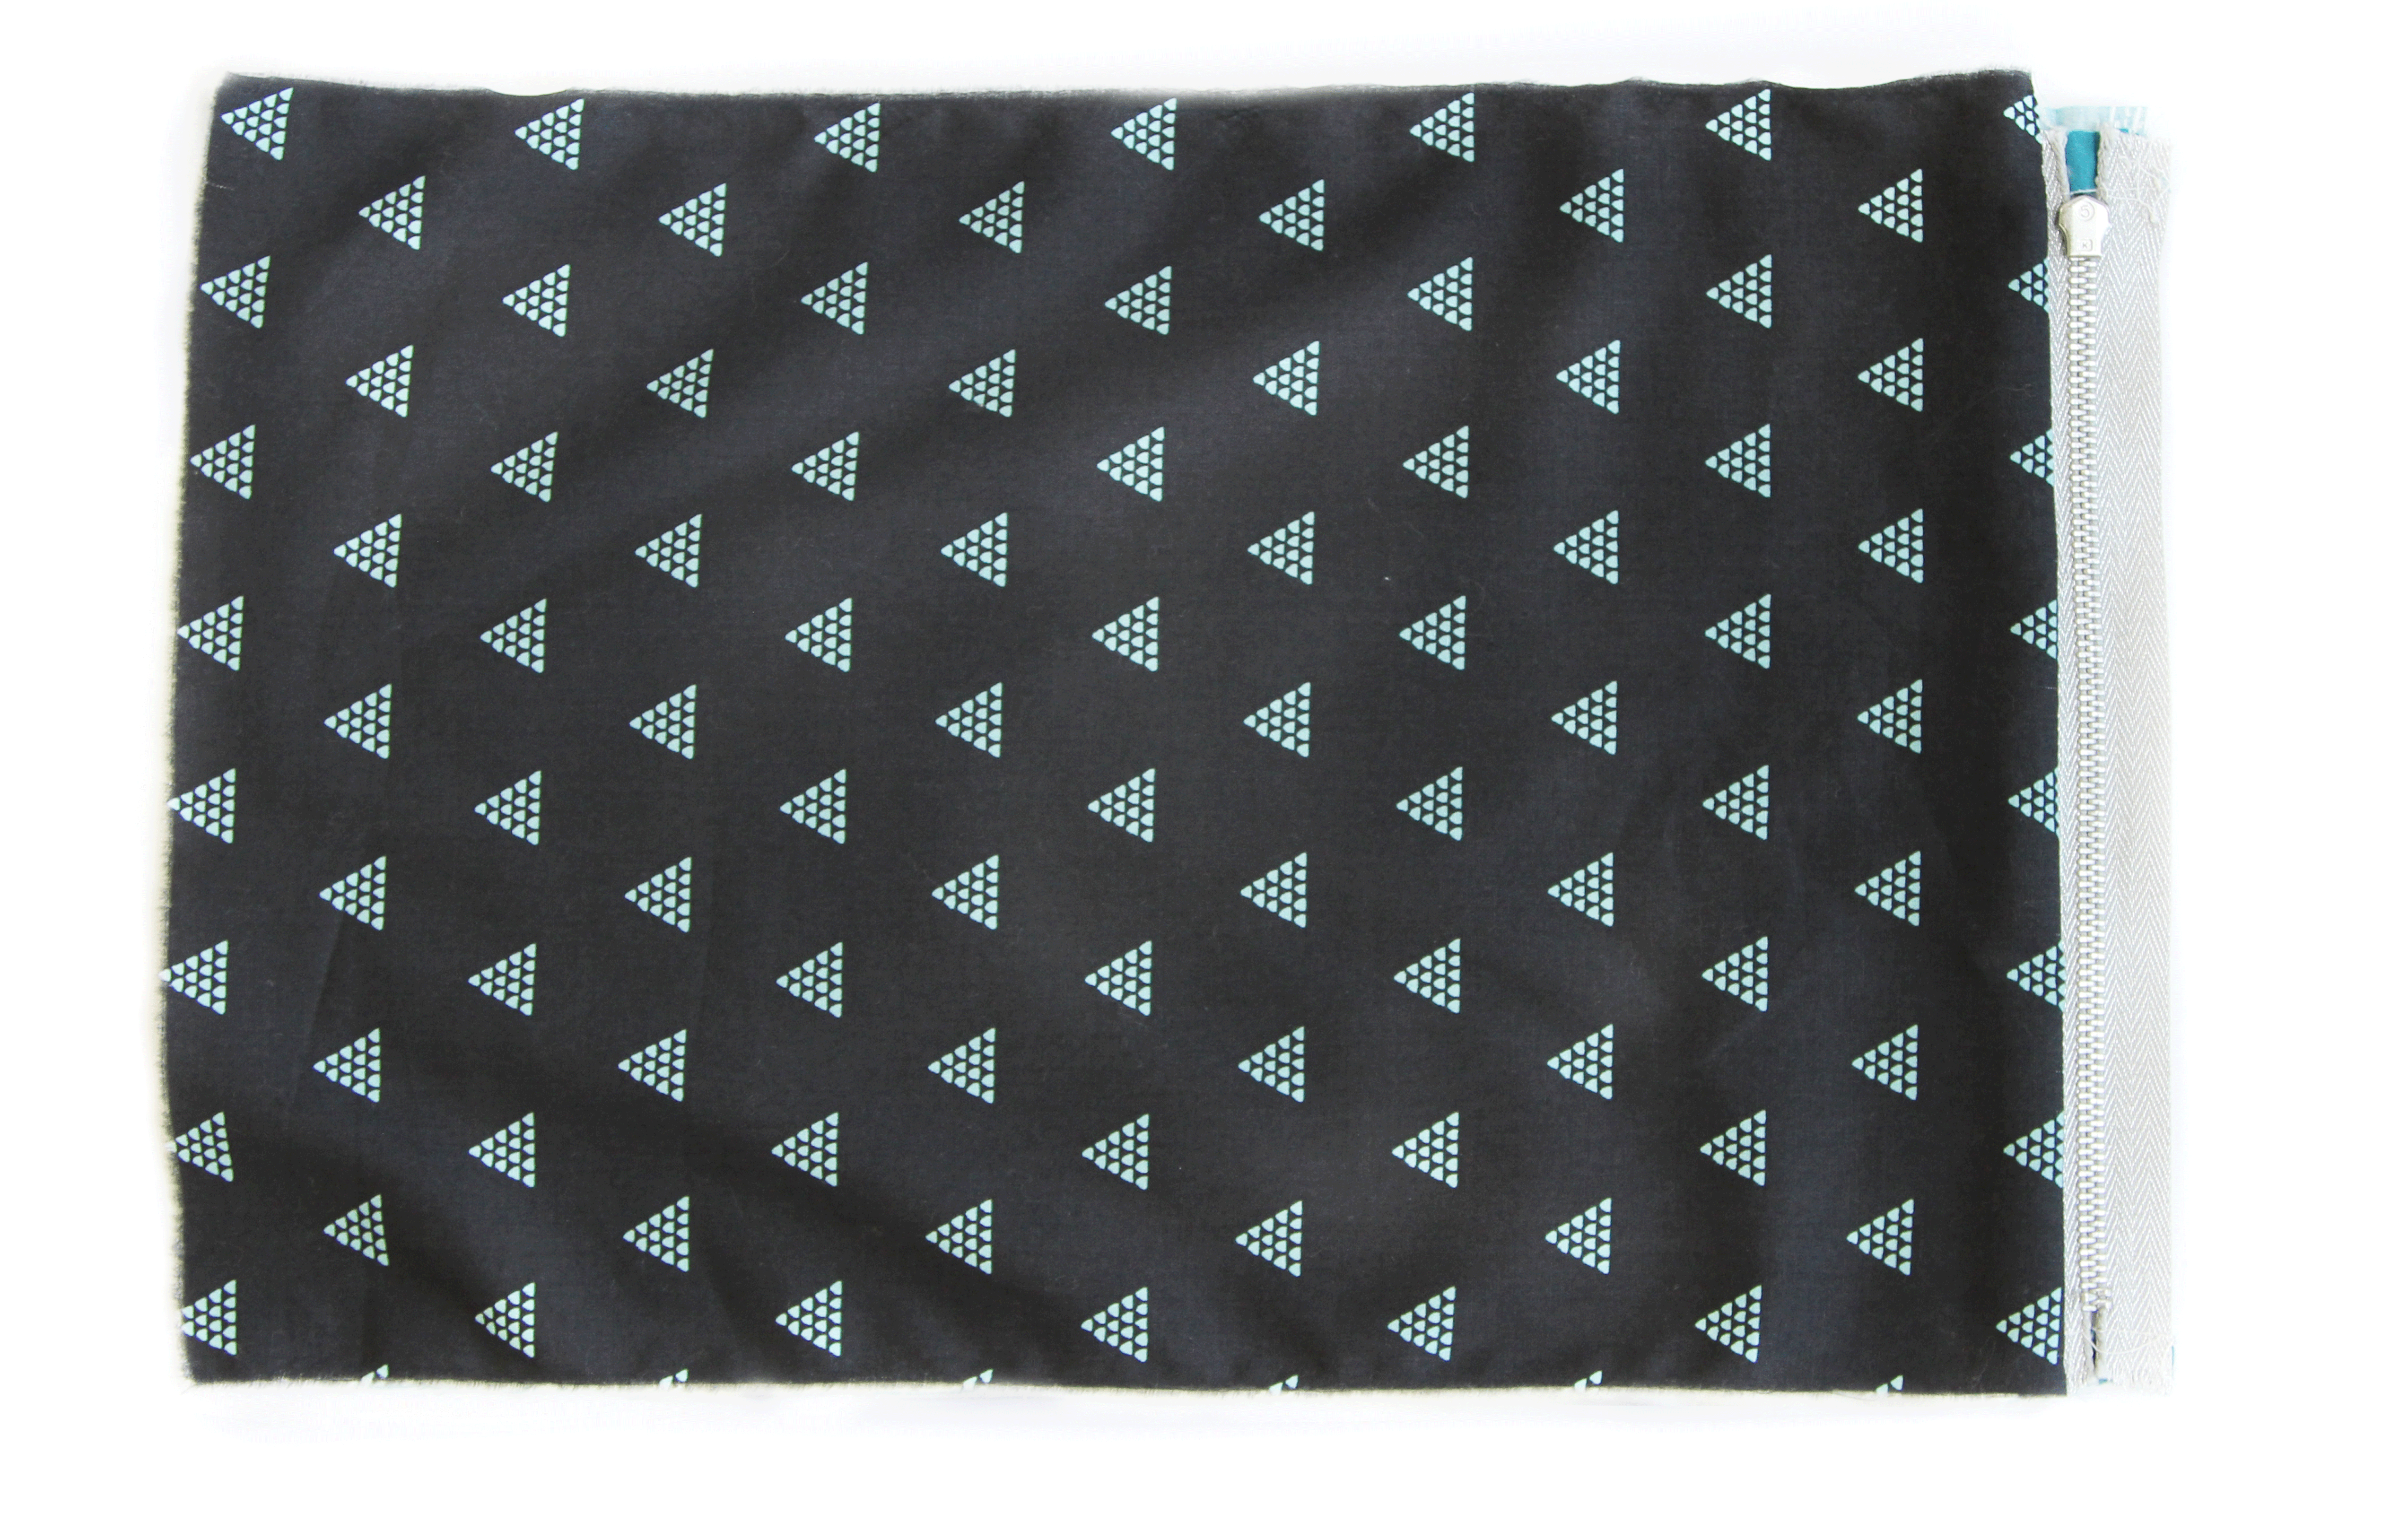
Repeat this same step to the other edge of the zipper. Once these steps are completed you will have each side looking exactly like this one.
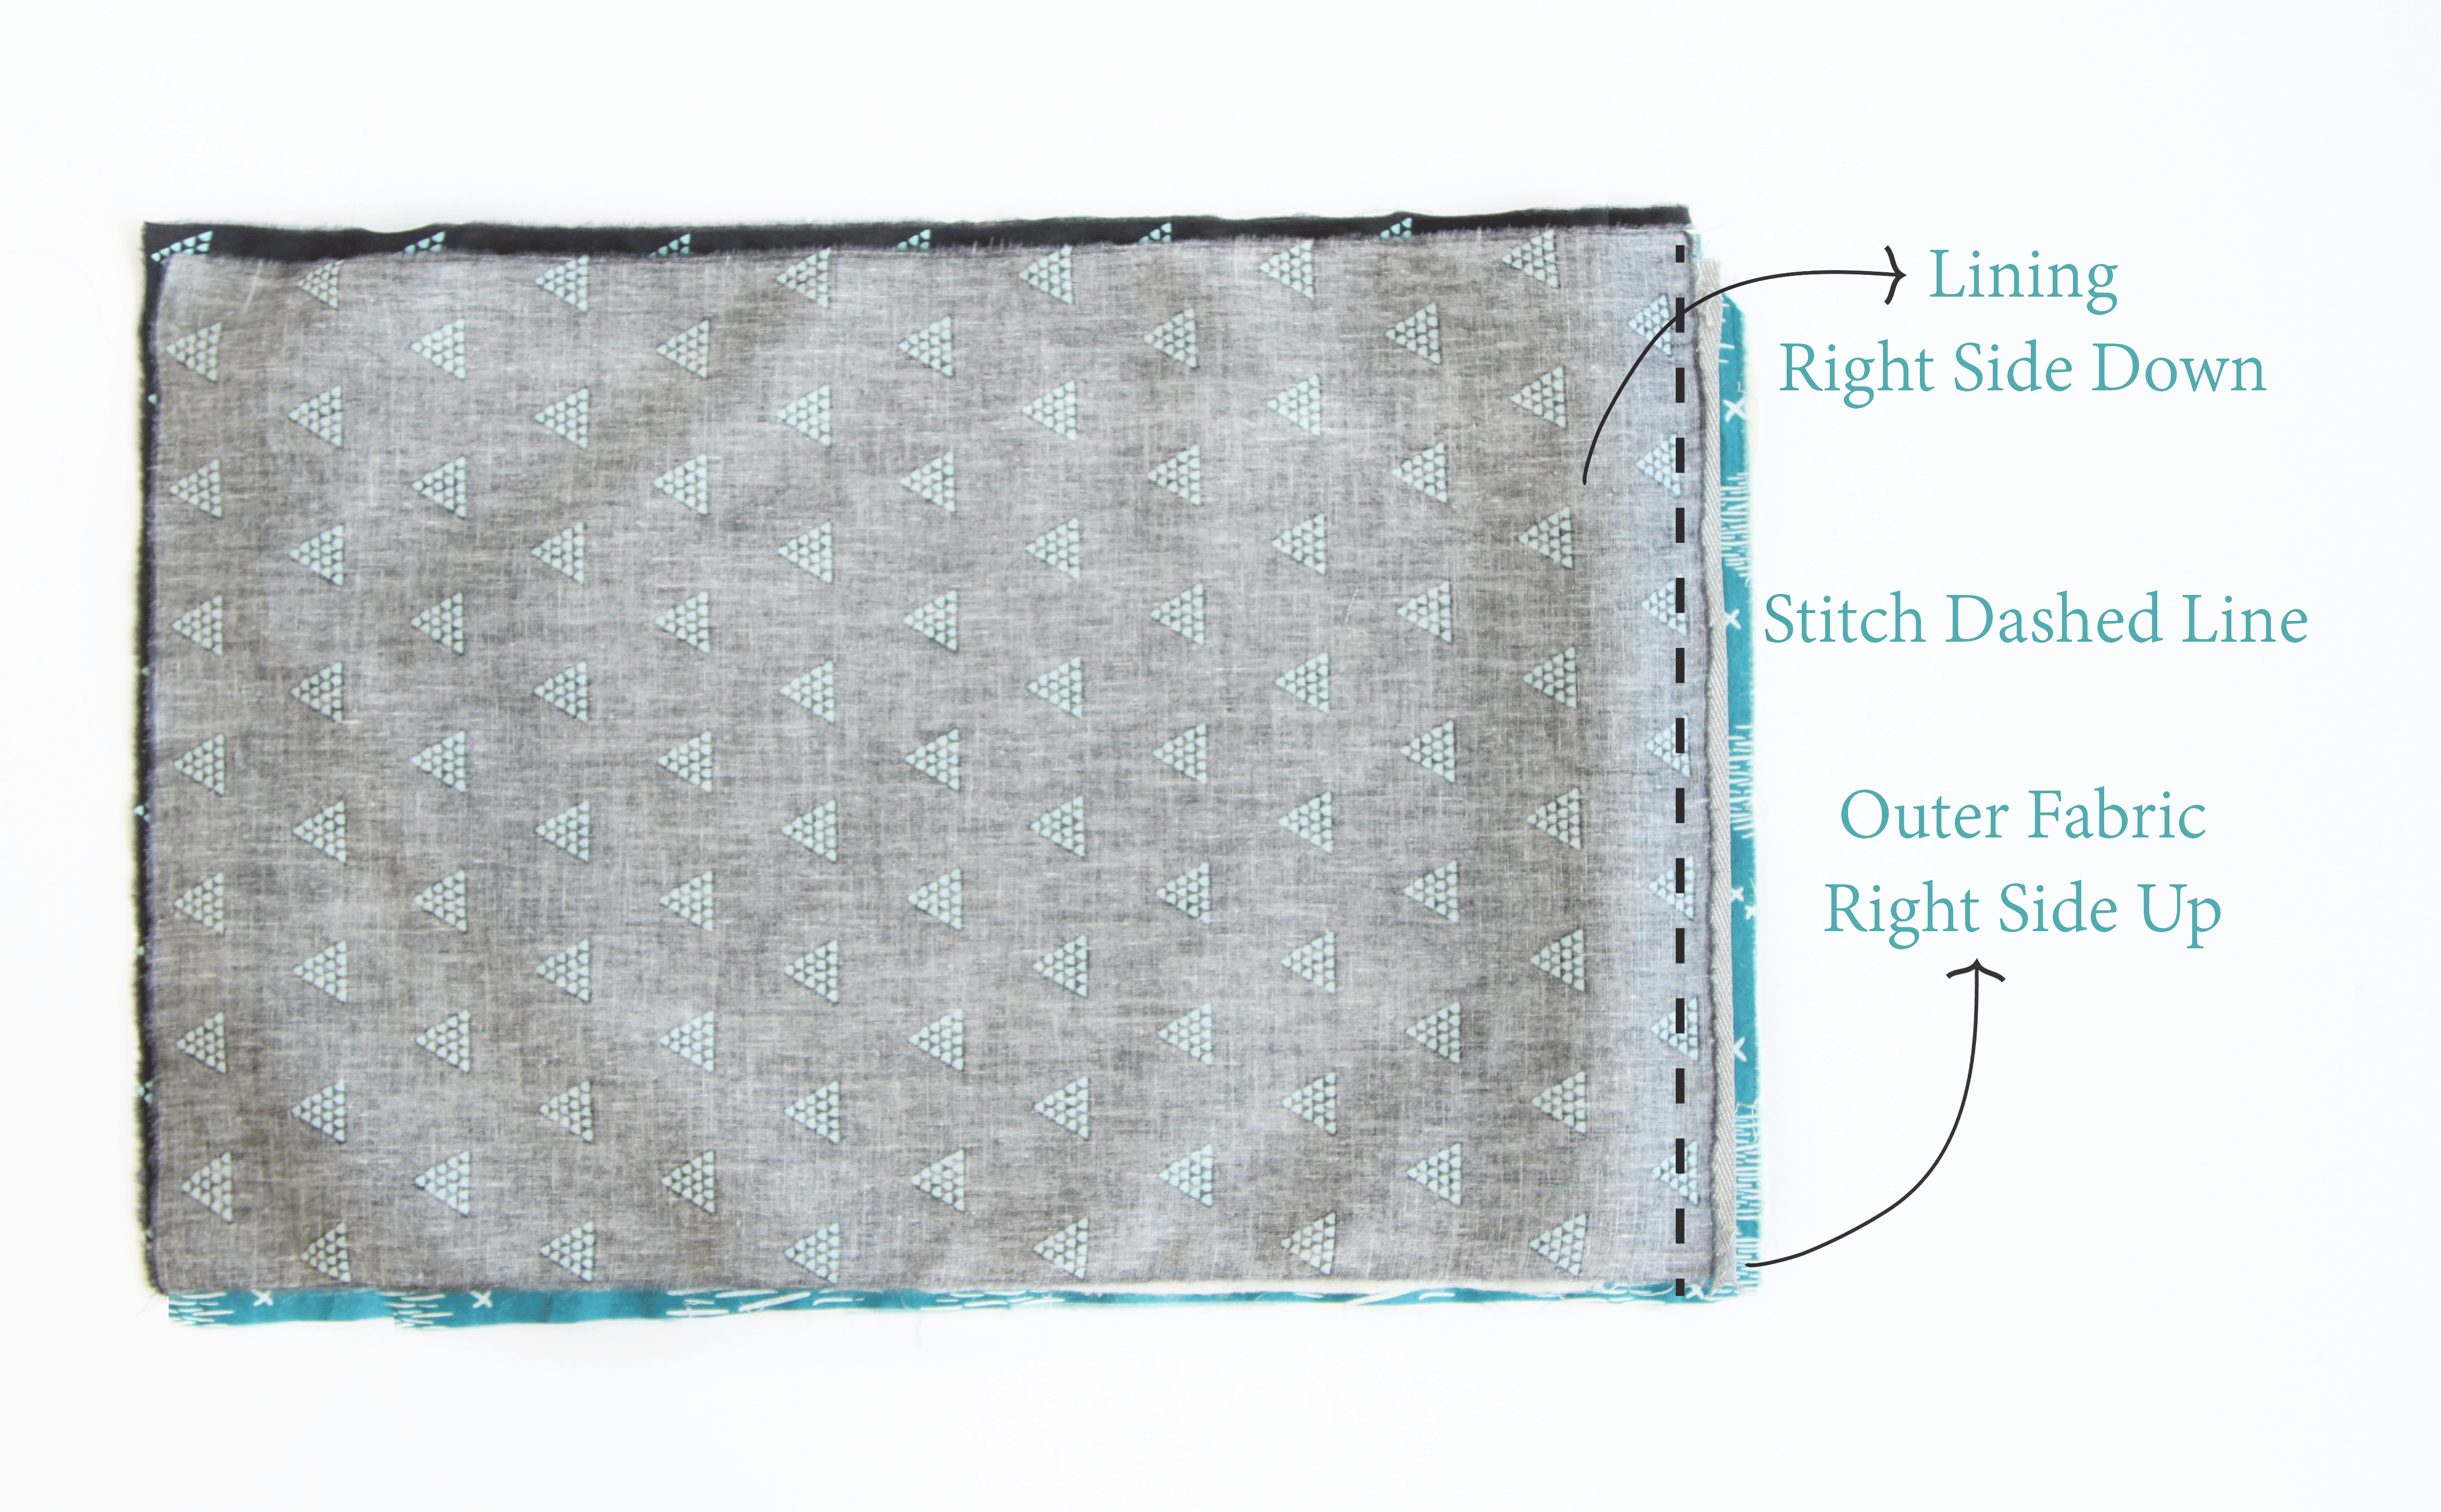
To begin attaching the zipper, place Sauvage Sky North (outer fabric) rectangle facing up and place zipper on to (wrong side of the zipper facing up).

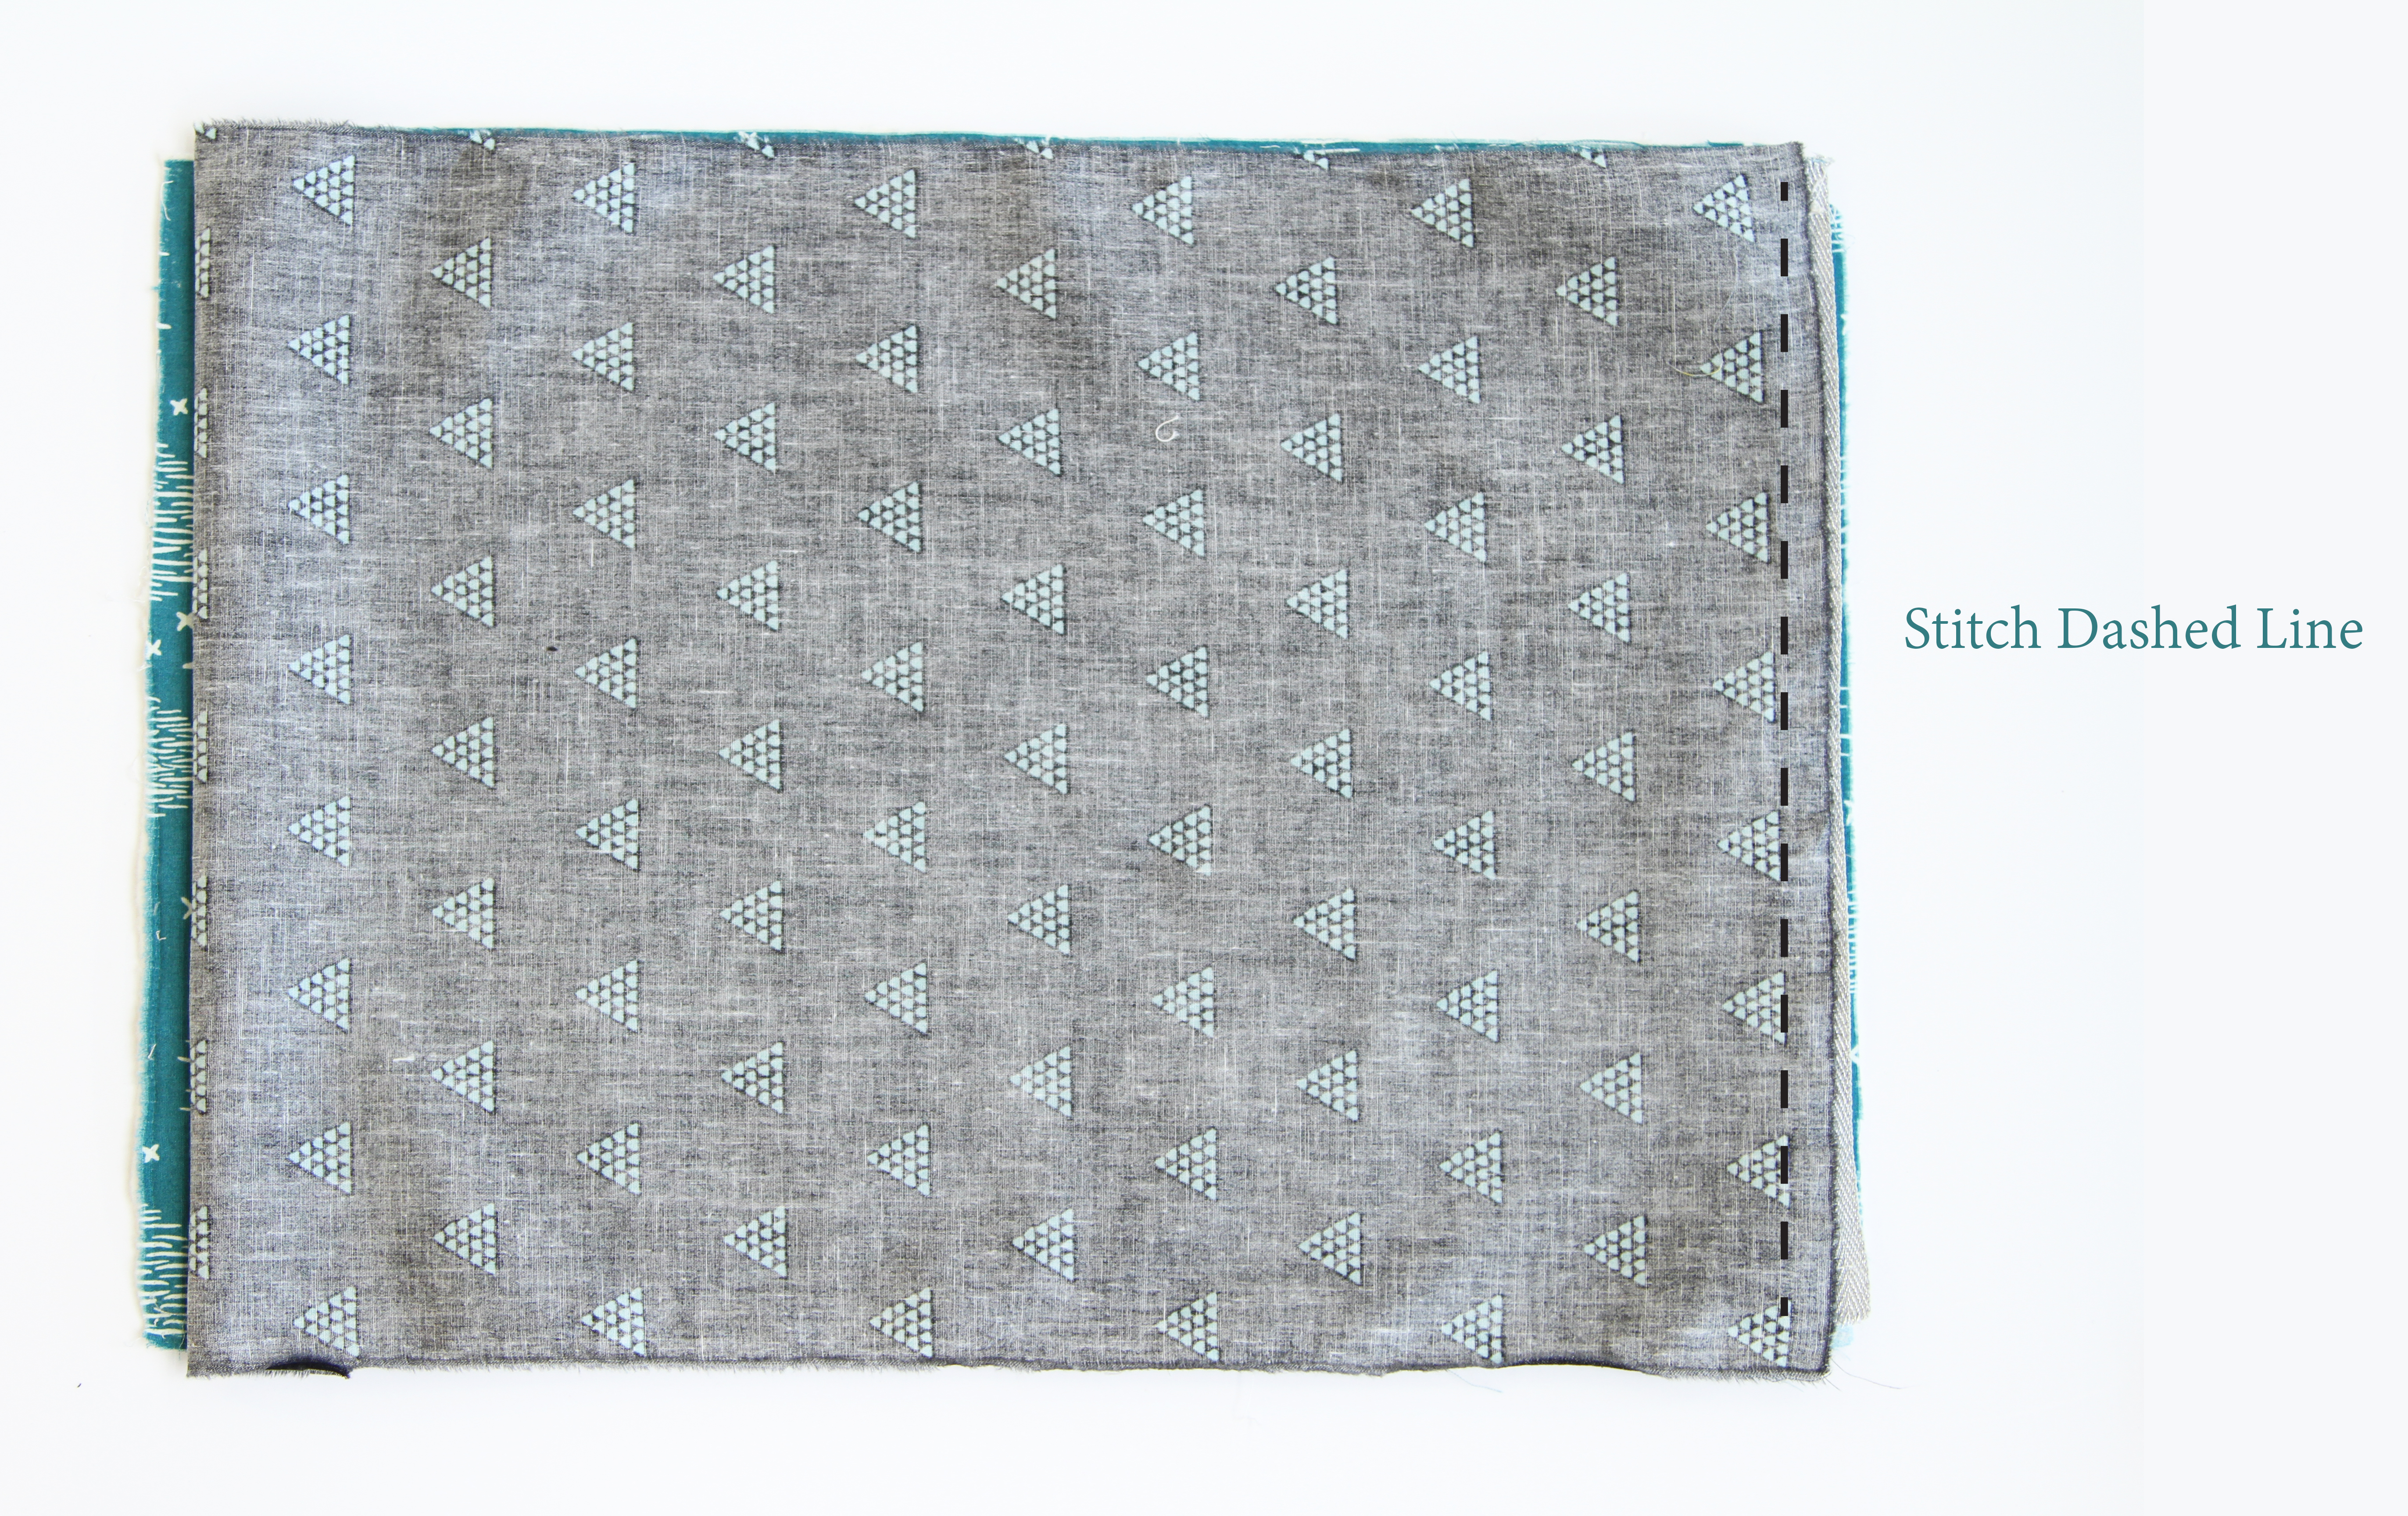
Place lining (Contempo Pyramids Ebony) piece right side down and machine stitch the dashed line.
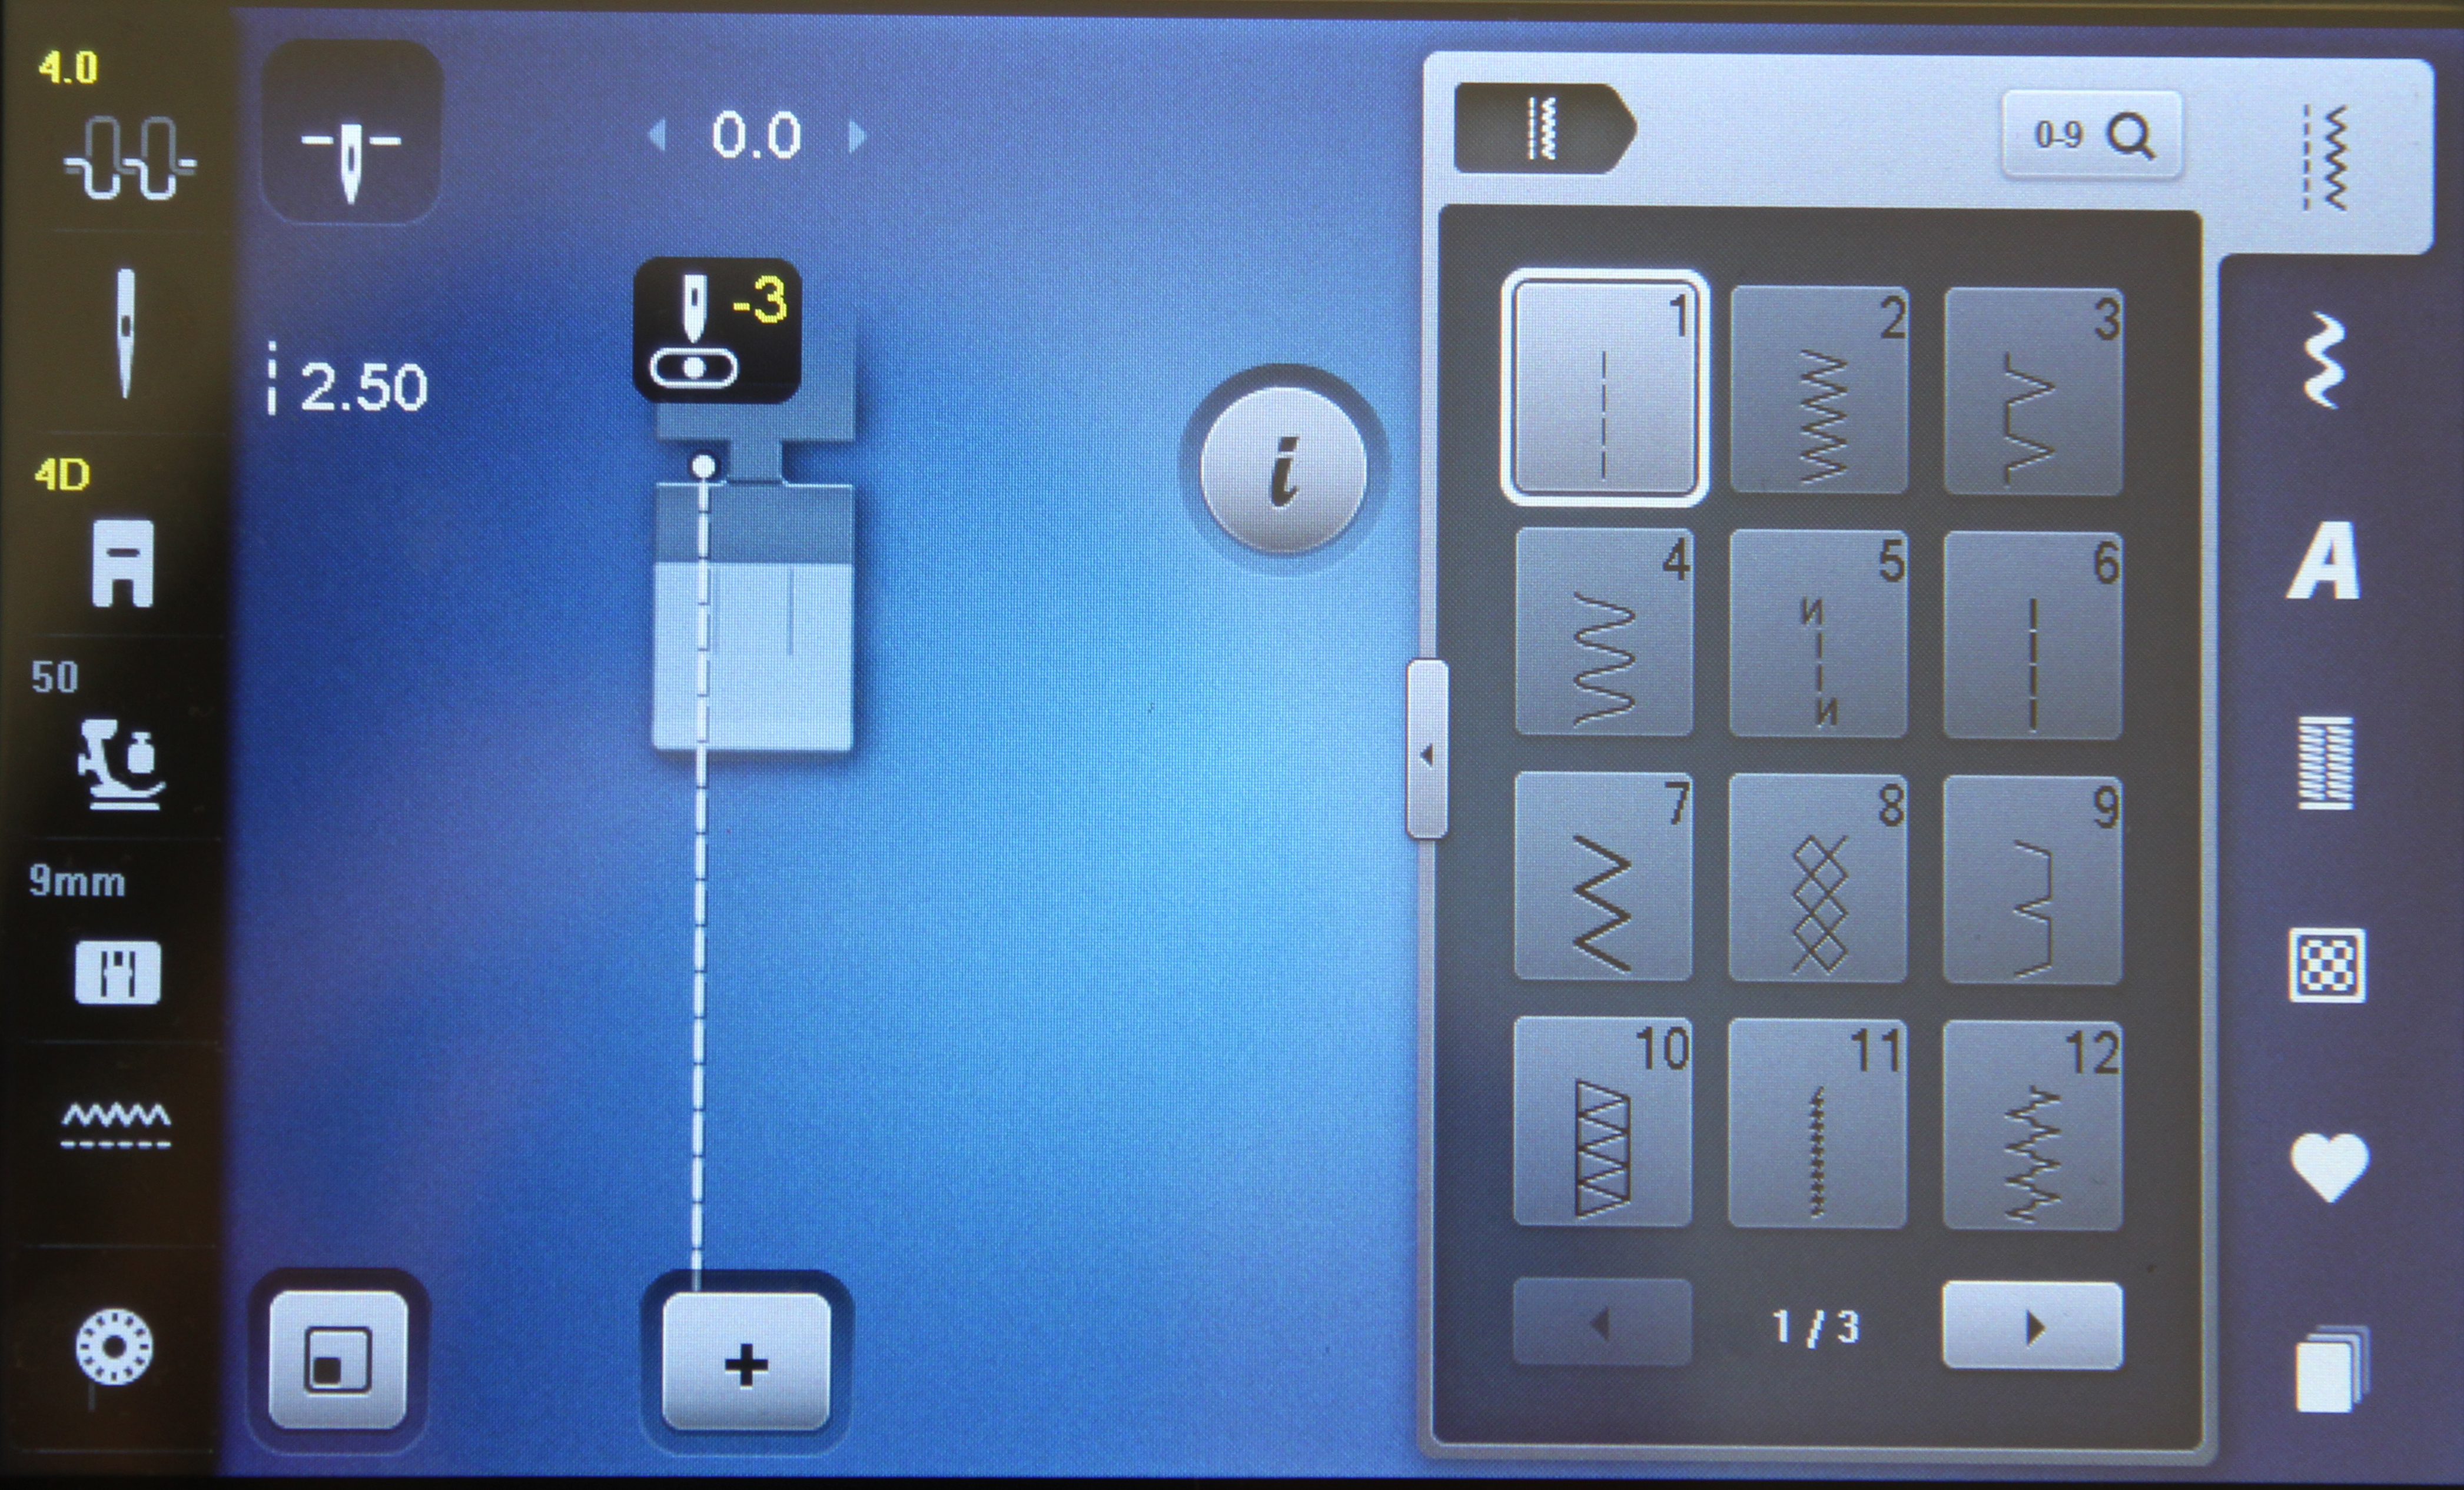
Sew zipper length using the Straight Stitch #1 and 3/8 of an inch seam allowance, or align the fabric with the edge of the presser foot and move the needle position to#-3.
NOTE: Always align fabric edge to the presser foot edge for a more accurate seam allowance. Needle will move according to the set seam allowance, shown in picture, and aligning fabric edge to presser foot is a nice trick to have in mind.
Fold it over to assemble the other side.
To attach the other side, sandwich fabrics following these steps:
Place the other outer fabric (quilted) right side up. Next, take the side with the zipper from the previous step, and layer the outer fabric face down, so both fabric pieces are layered right sides together. TIP: Aline tape of the zipper to the edge of outer fabric. This will leave you with the right side of the lining facing up.
Lastly, place last lining (Contempo Pyramids Ebony) right side facing down, both linings facing right sides together. TIP: Aline tape of the zipper to the edge of lining.
Finally, sew the length of the zipper.
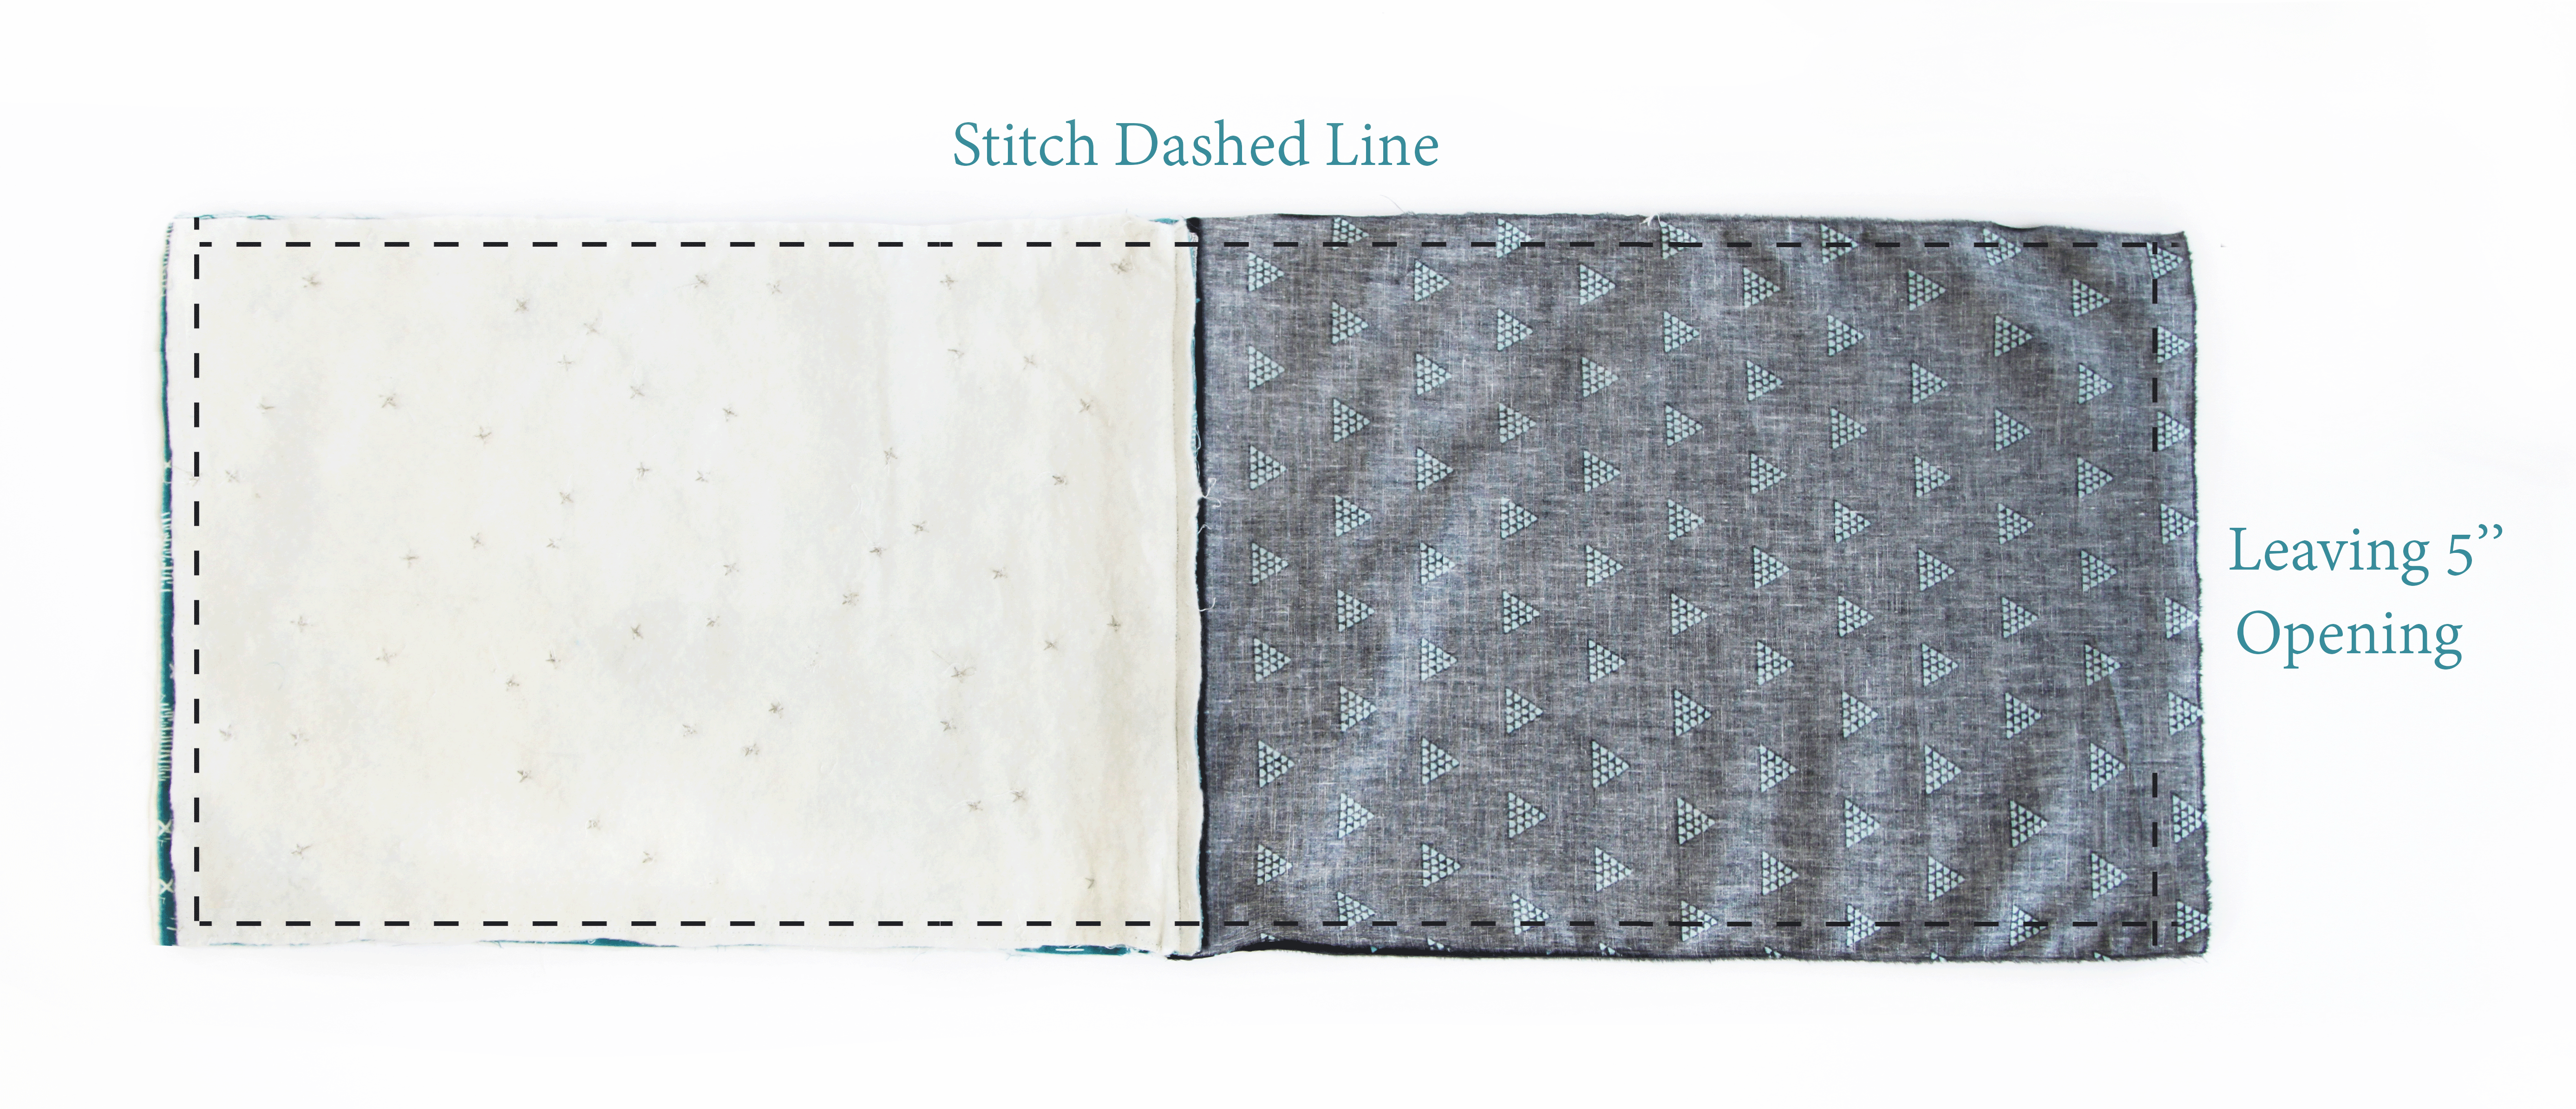
Lay out your pieces separating outer fabric and batting on the left and lining on the right.

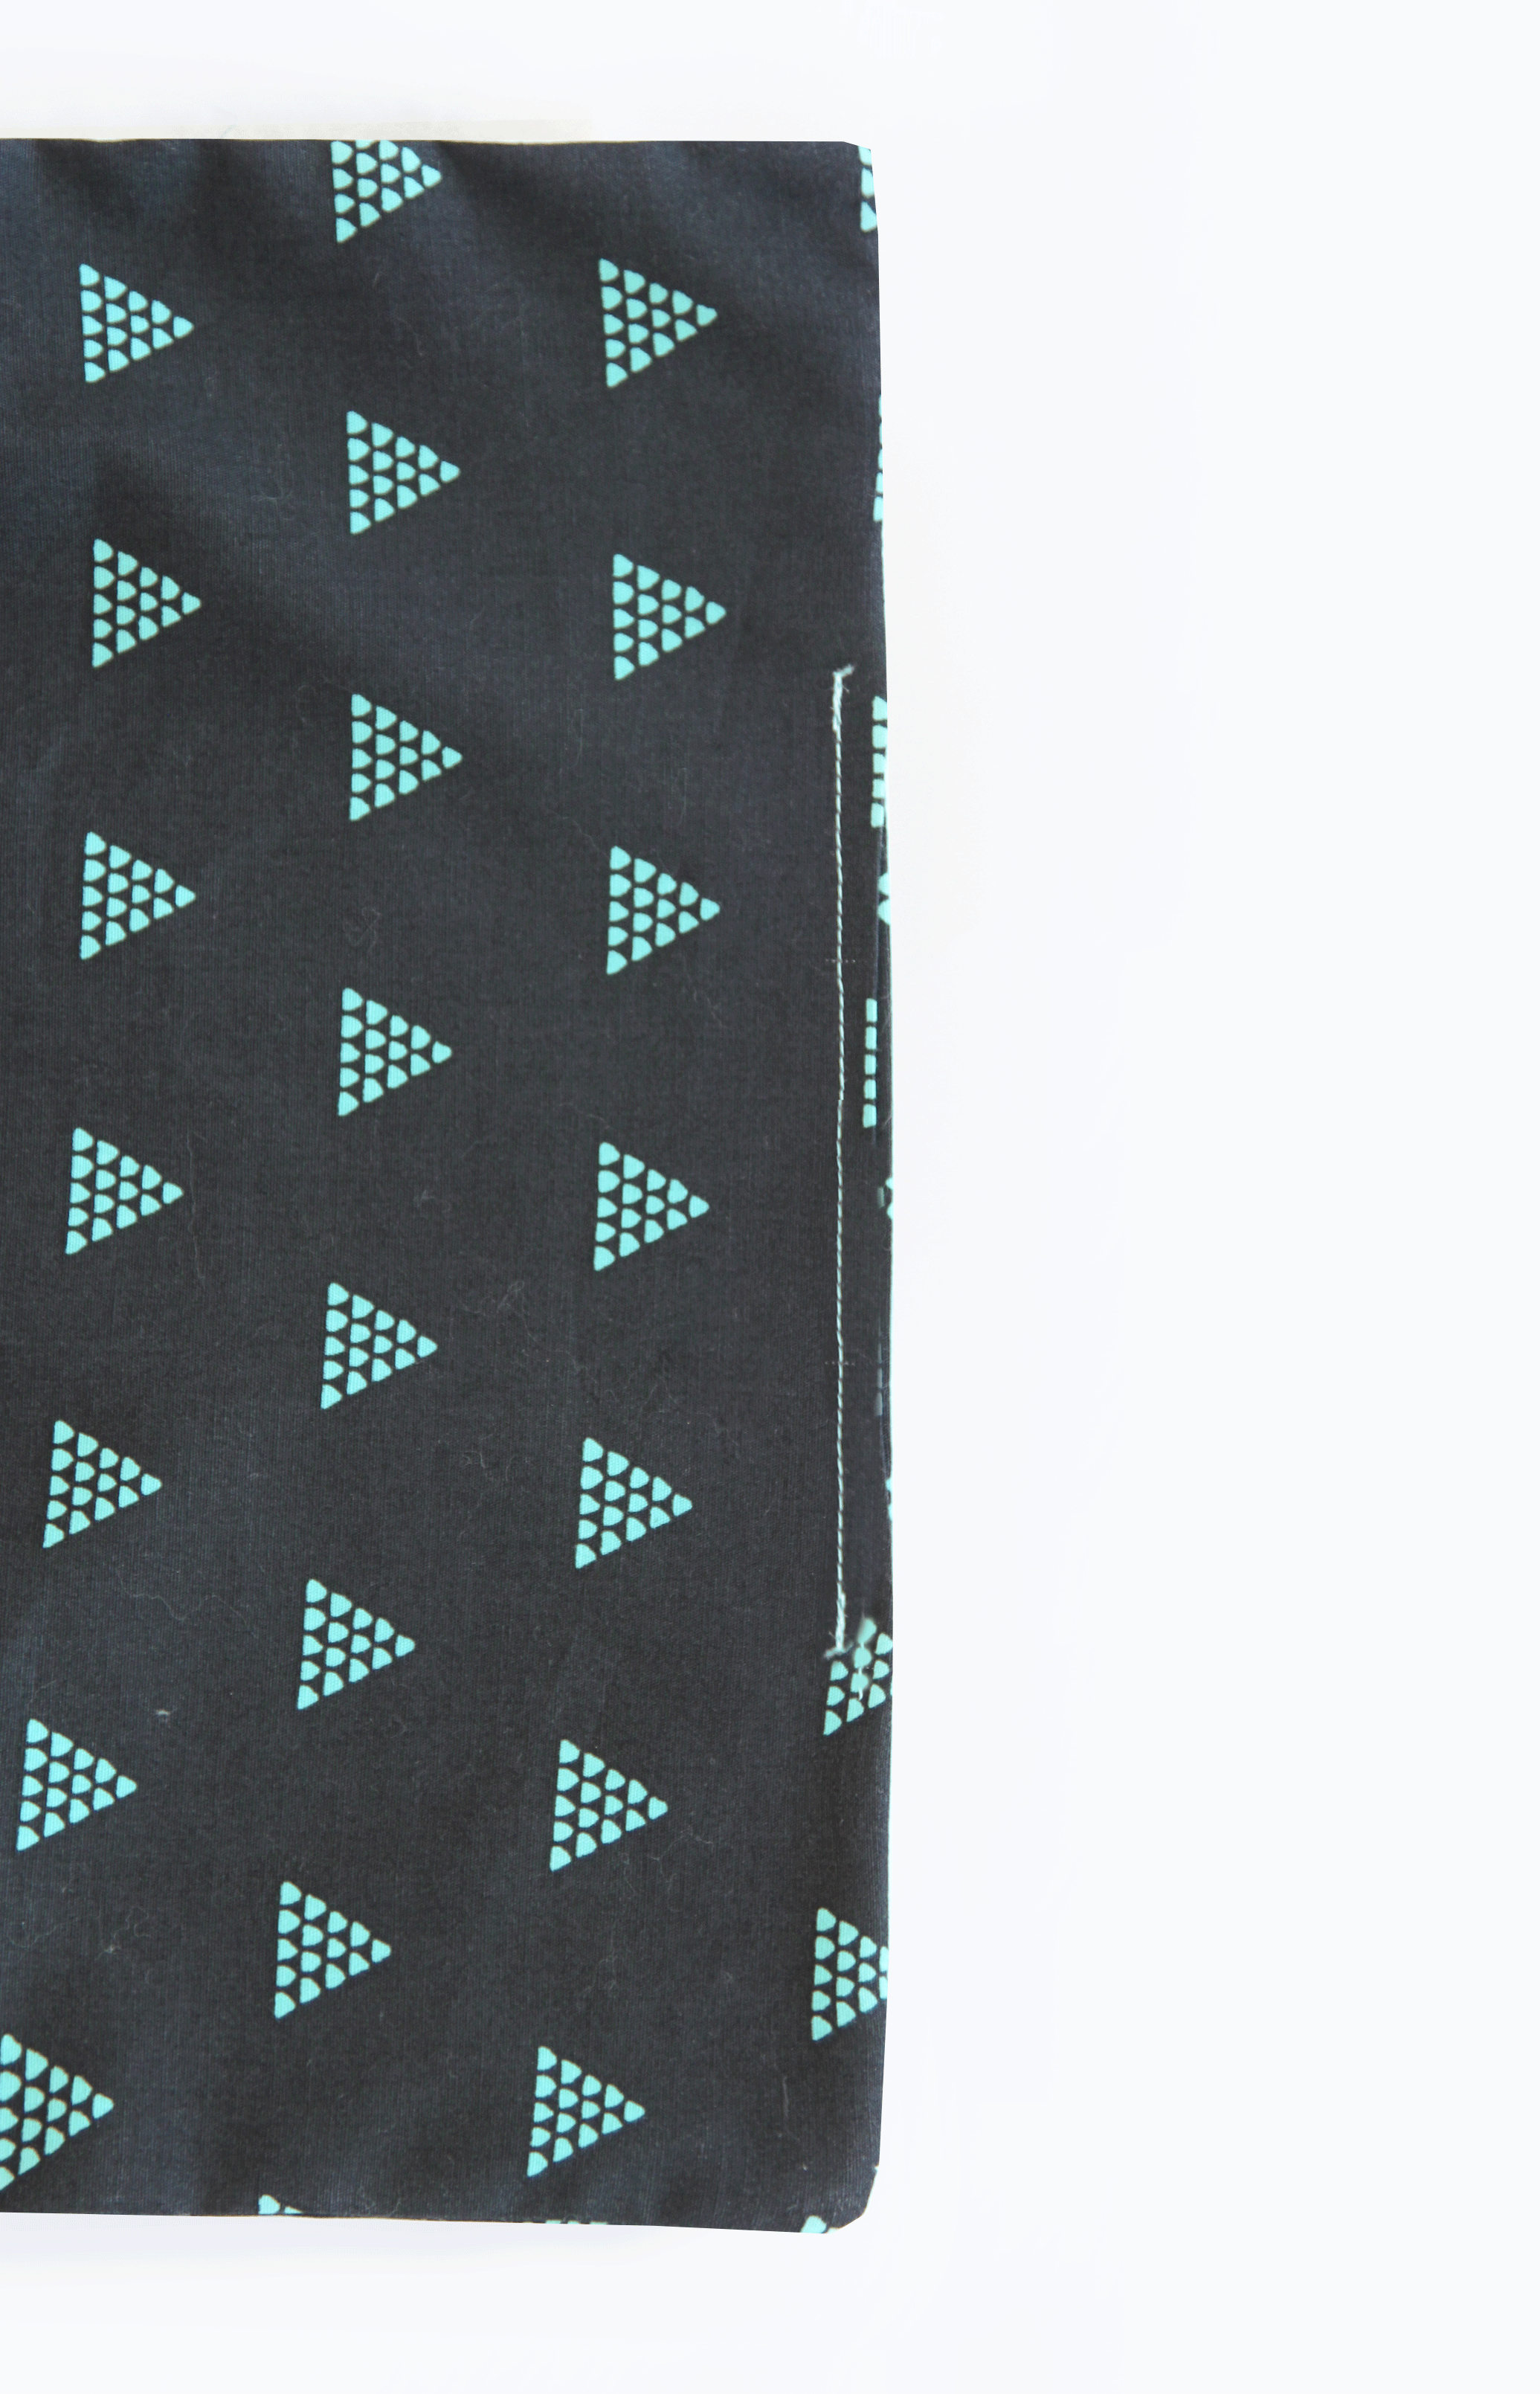
Changing your BERNINA Zipper foot 4D to the Reverse pattern foot #1D, stitch all around using straight stitch #1 leaving a 5″ opening at the lining. Make sure the zipper is open because when you pull the clutch through, you are going to come through the zipper. After this, clip all four (4) corners.
Once it’s stitched all around, pull the clutch through the zipper, pull the corners out and machine close 5″ opening. You can either hand stitch it or machine stitch it. For the purpose of this tutorial, I used white thread, but you can use matching black thread.
Complete this step by placing lining inside.
CONGRATULATIONS! YOU COMPLETED YOUR STARRY NIGHTS CLUTCH!

What you might also like


2 comments on “Starry Night Clutch Tutorial”
-
-
Hi gwenkeith600, I made a detailed update on the instructions for a better understanding. Sandwiching both parts to the zipper will be way easier now! Happy sewing 🙂
-
Leave a Reply
You must be logged in to post a comment.

Hmm … Is there an error in this pattern? It seems that if I attach the lining to the exterior in Step 3 that I would not be able to assemble the zipper as directed in Step 4.