Summer Floral Floor Cushion Tutorial
Hello Everyone,
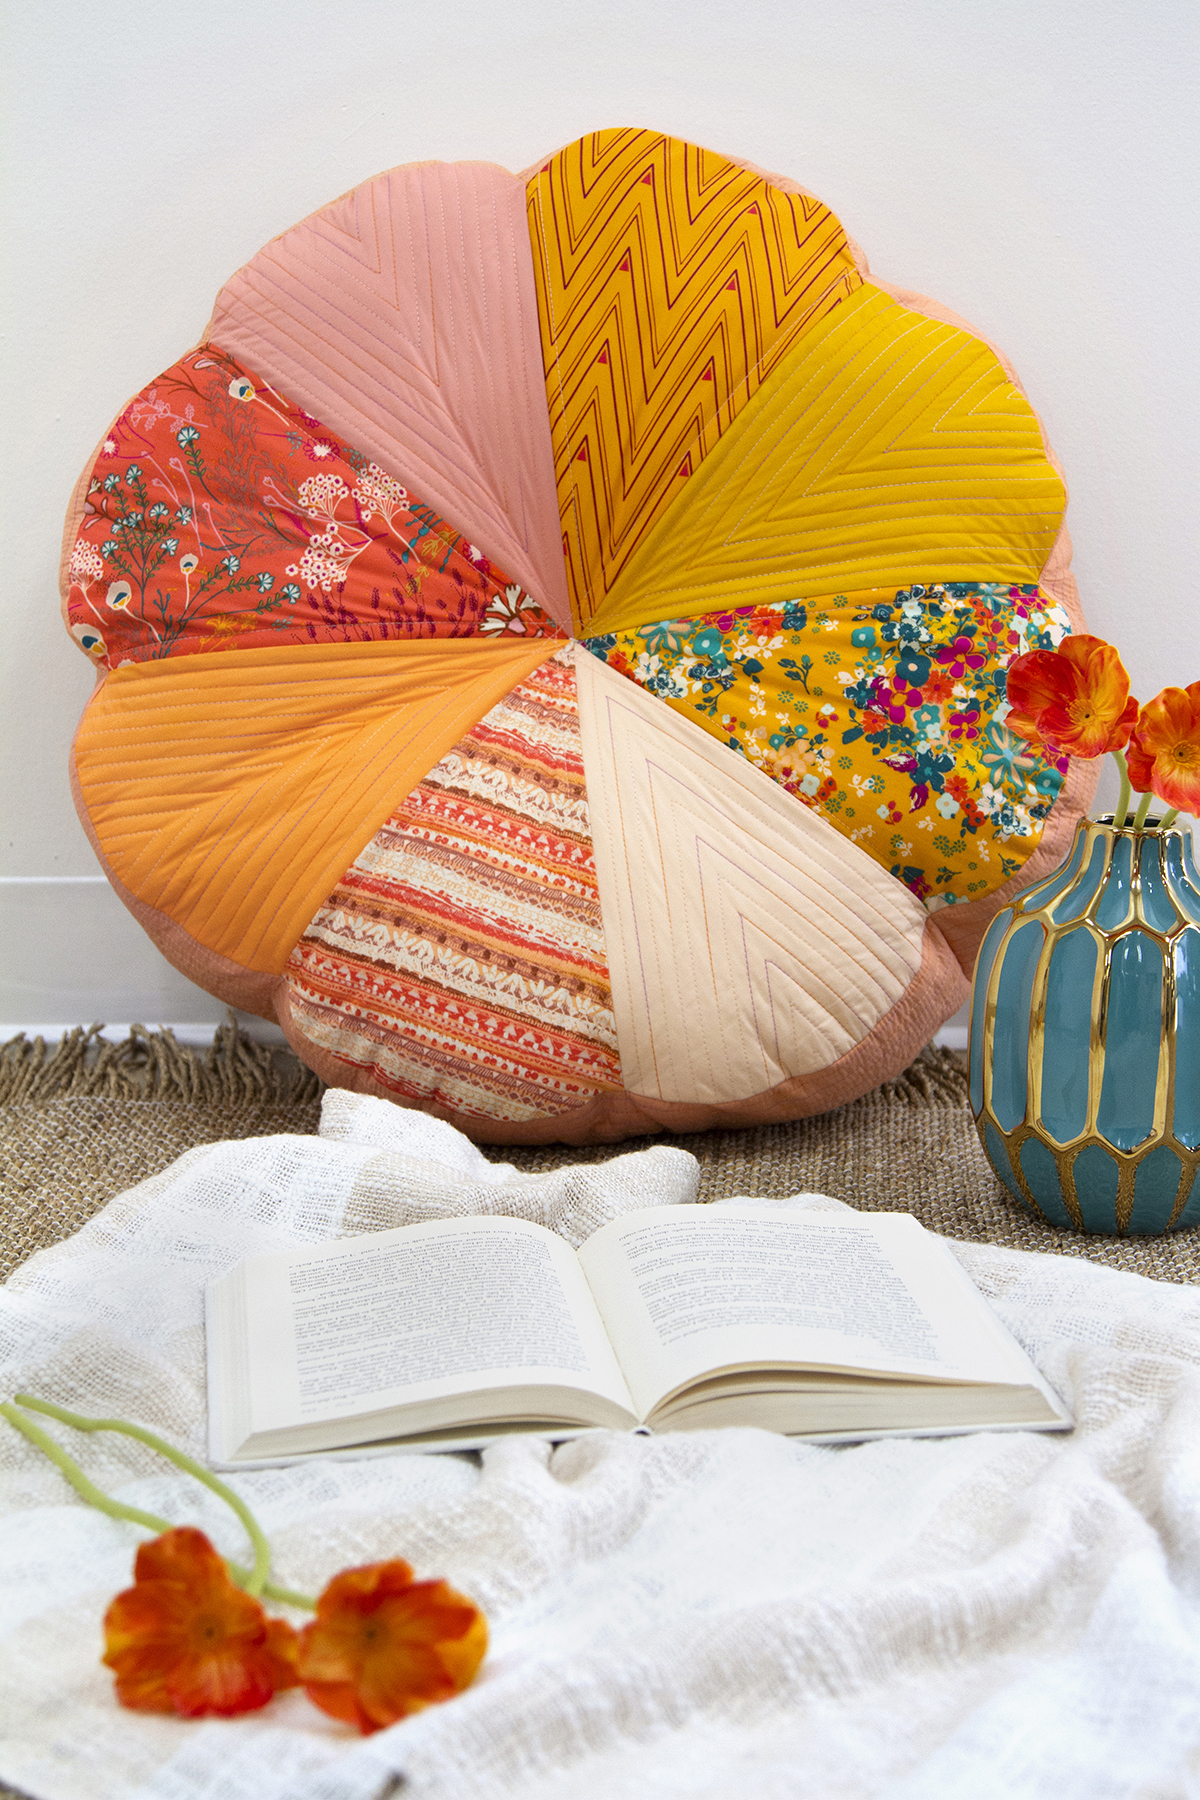
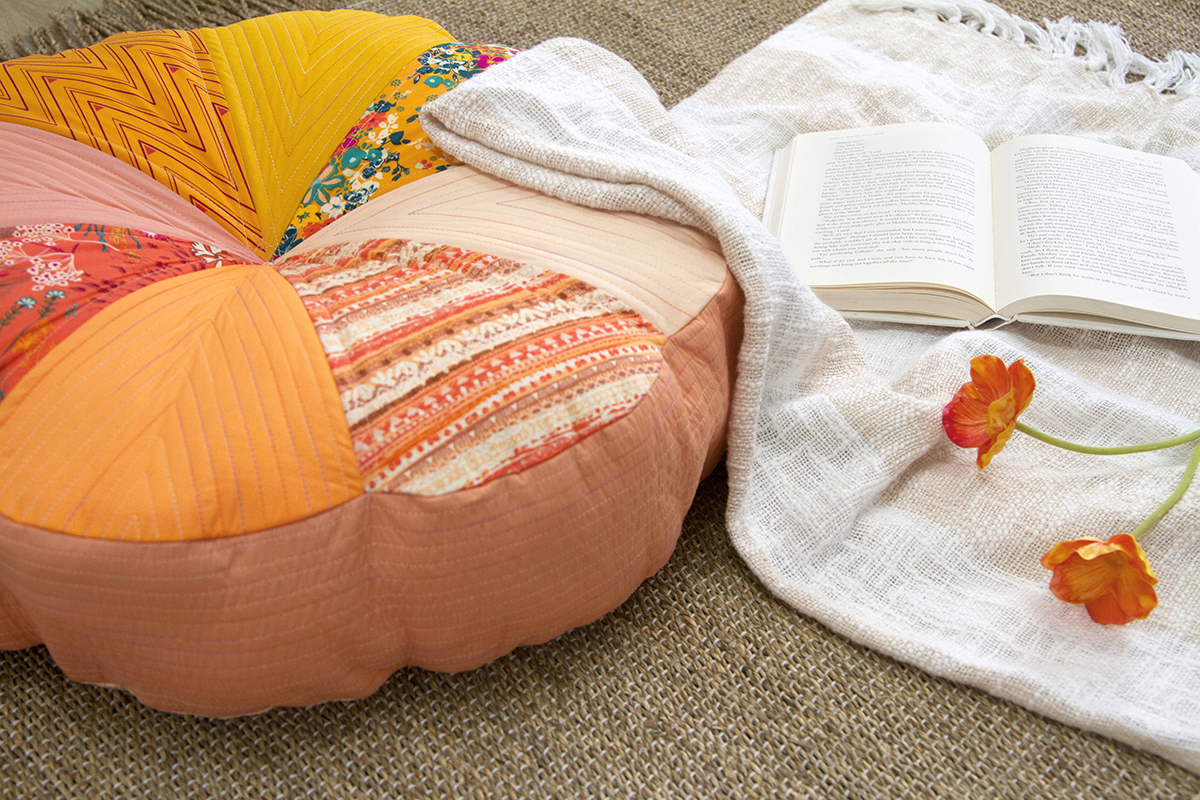
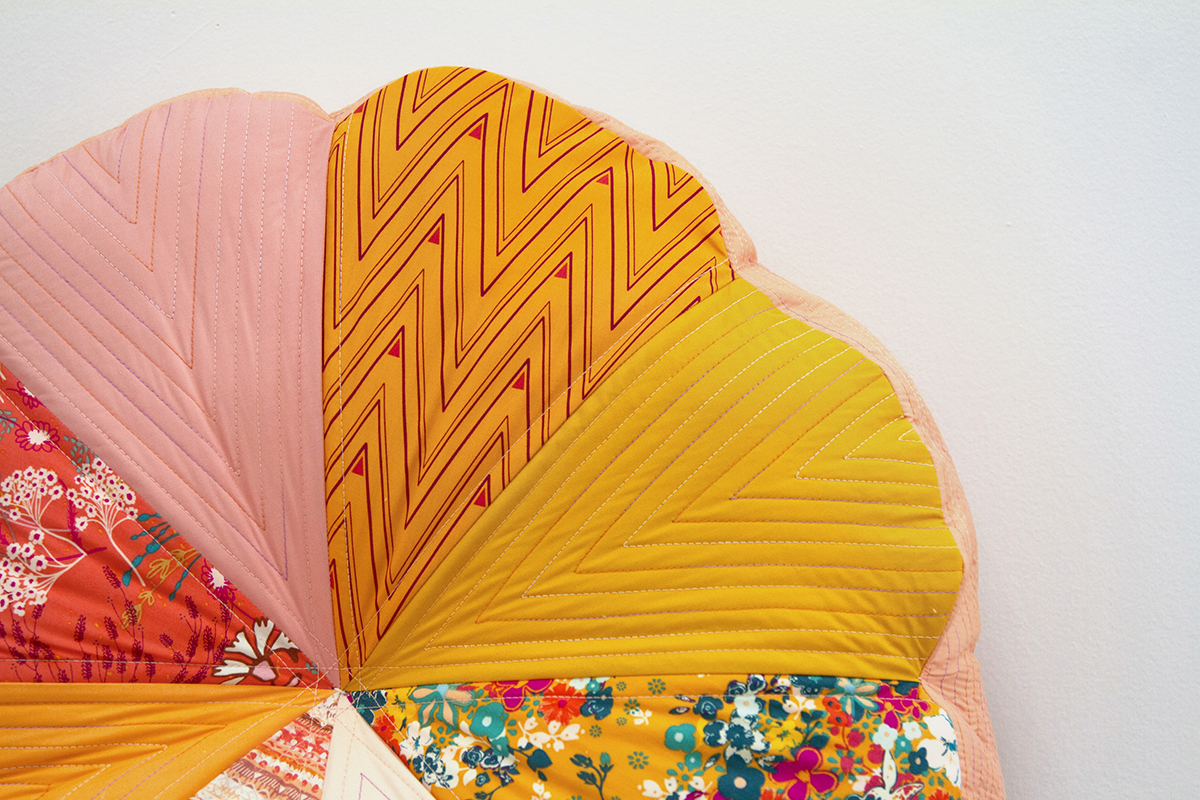
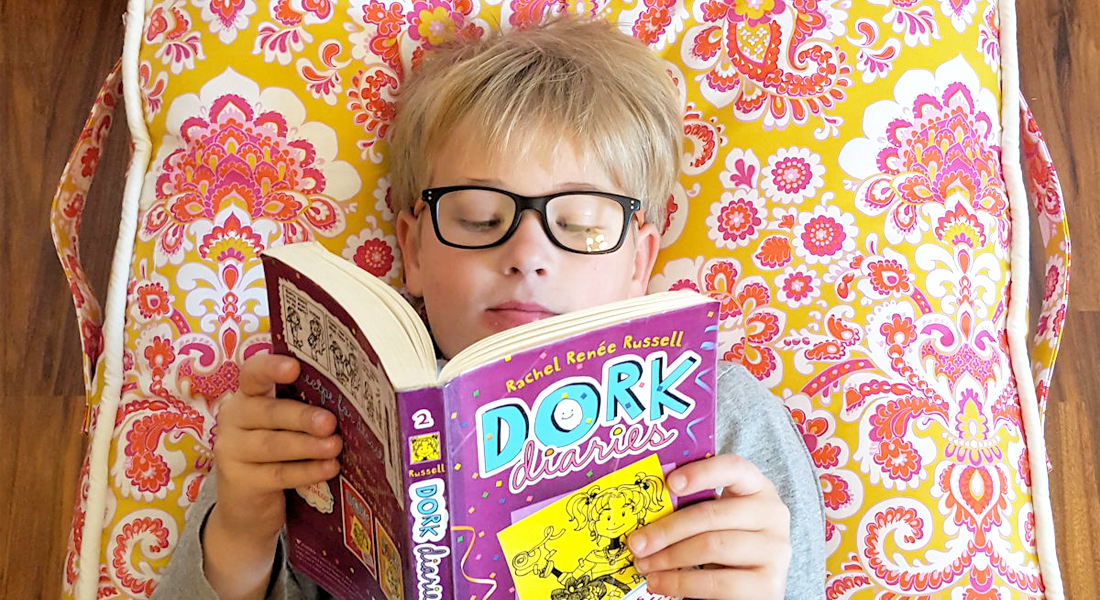
What’s your favorite thing about summer? For me, it’s relaxing on the porch with my favorite book and being out in the fresh summer air. Which is why I wanted to whip up a fun floral-inspired floor cushion to add to my outdoor decor. I used prints from my collection for Art Gallery Fabrics called Legendary. This collection is near and dear to my heart because it’s a compilation of my best-selling prints that work so well with one another! I paired it with coordinating PURE SOLIDS and I love the juicy summer feel! If you have an afternoon free this is a perfect project to add to your to sew list. Make sure to print your petal template below and let’s get busy piecing!
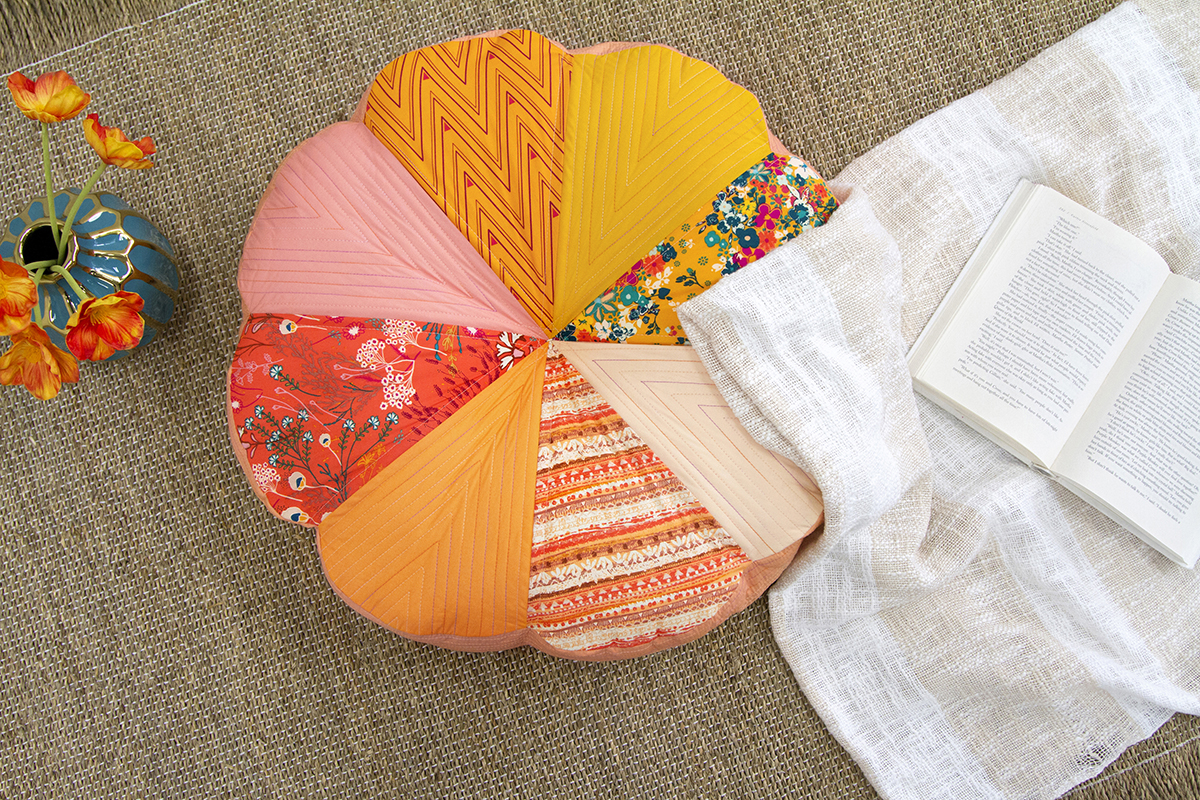
Who loves a fat-quarter-friendly project?! Me, me, me! You can almost make this entire project with fat quarters, but for the side panels, I did use yardage. If you wanted you could piece together your side panels for a scrappier look!
Materials to Make a Summer Floral Floor Cushion
- Sewing Machine (I use a BERNINA 790 PLUS)
- Download the Petal Templates
- Batting
- Quilting and Sewing thread
- Extra Long Needle
- Strong Embroidery thread
- Fabric Scissor
- Iron
- BERNINA Reverse pattern foot #1C/#1D
- Poly-Fil
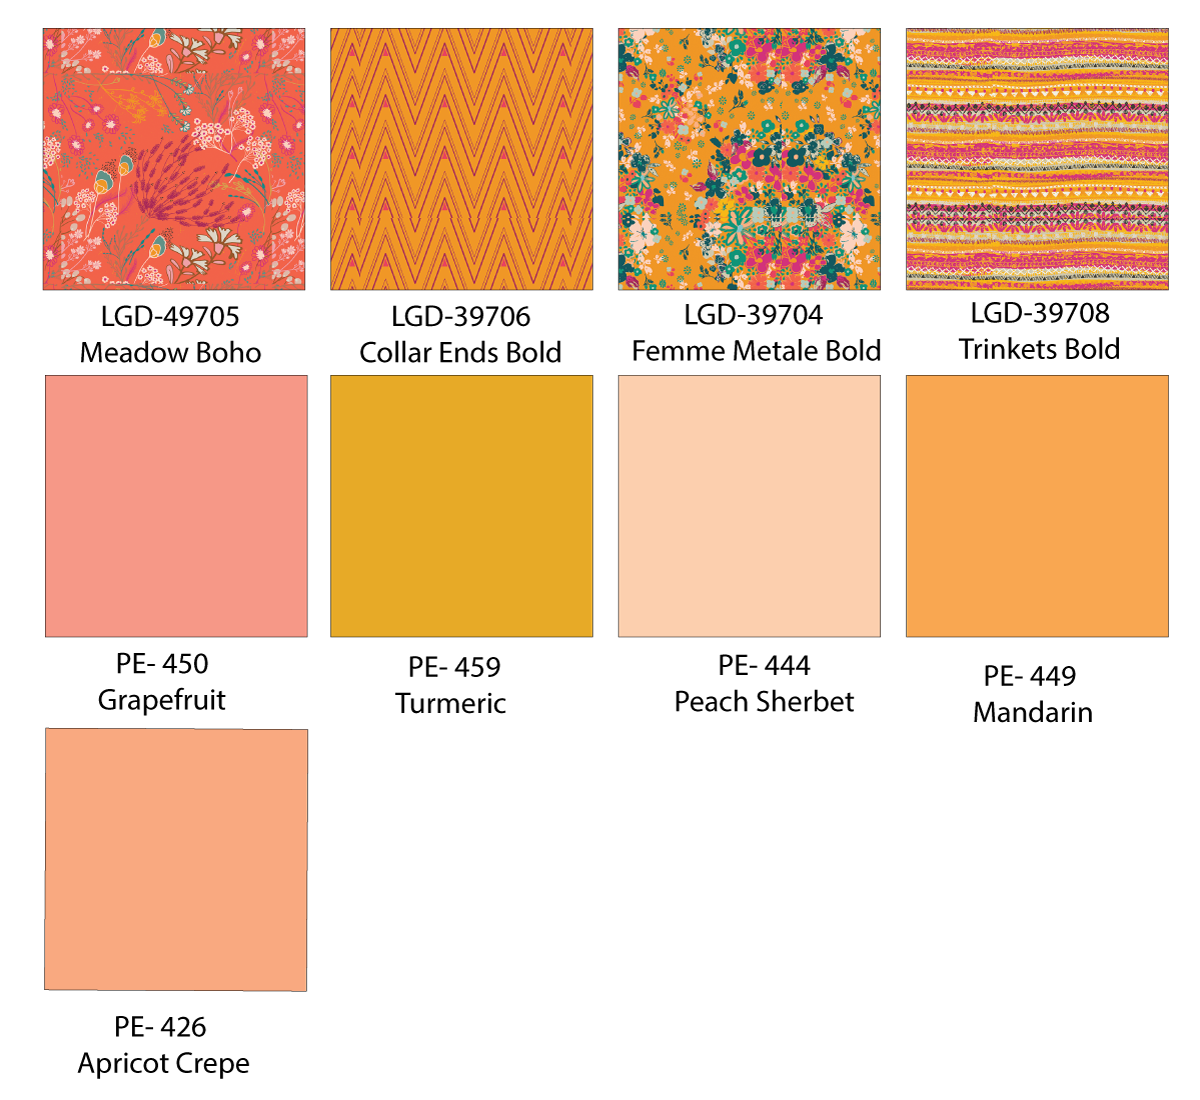
Fabrics Used:
Fabric A- LGD- 49705- 1 Fat Quarter
Fabric B- LGD-39706- 1 Fat Quarter
Fabric C- LGD-39704- 1 Fat Quarter
Fabric D- LGD-39708- 1 Fat Quarter
Fabric E-PE-450- 1 Fat Quarter
Fabric F- PE-459- 1 Fat Quarter
Fabric G-PE-444- 1 Fat Quarter
Fabric H- PE-449- 1 Fat Quarter
Fabric H- PE-426- 3/8 yd.

Cutting Directions
Cut two (2) petal templates from Fabrics A through H
Cut (2) 6″ x WOF strips from Fabric I
Step One: Cutting Fabric
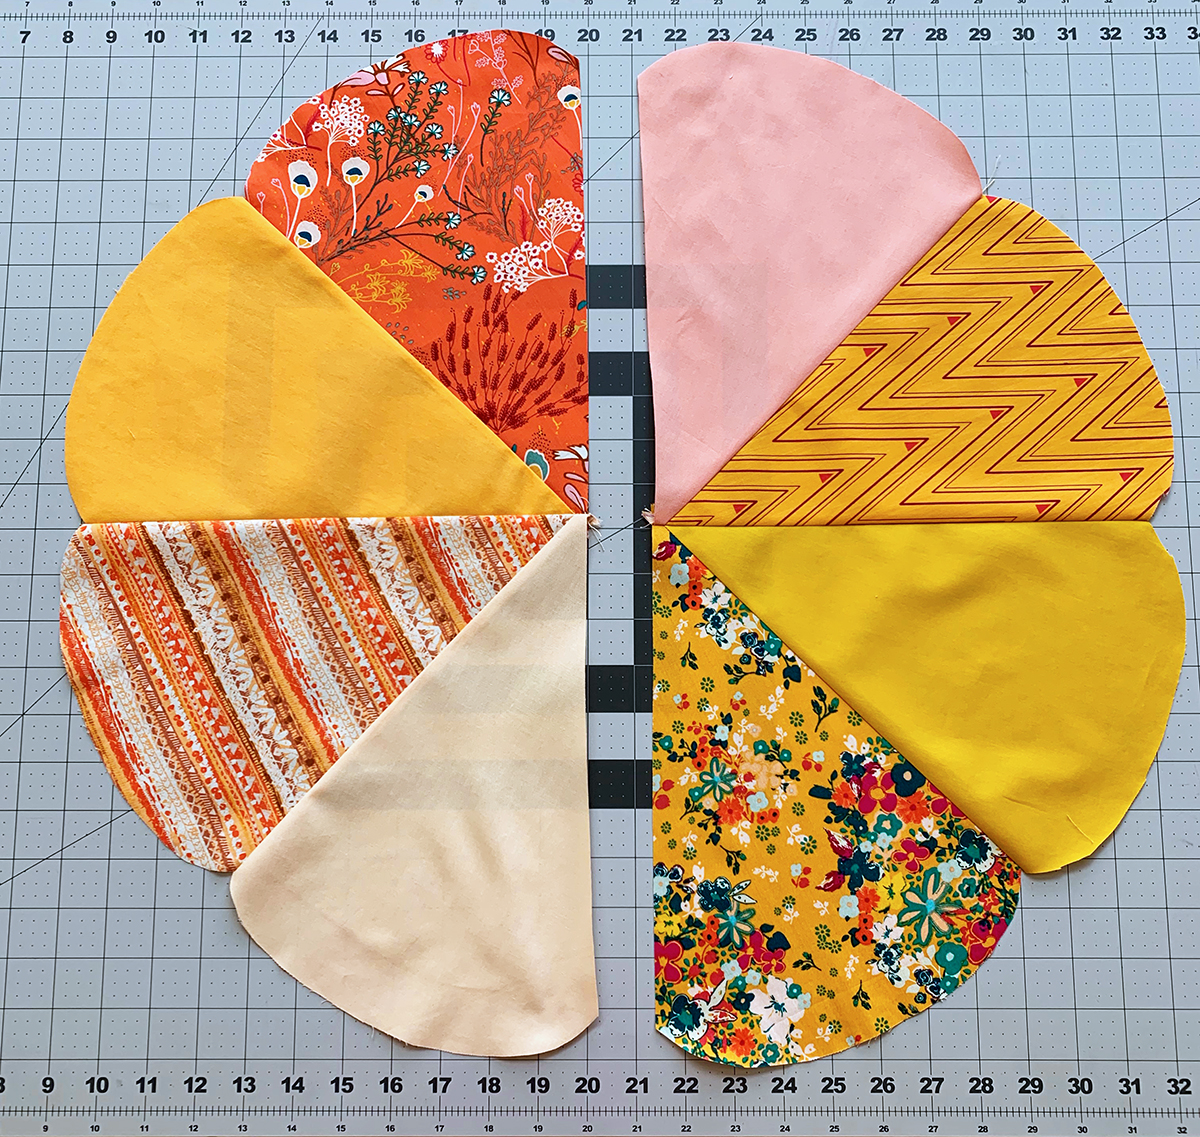
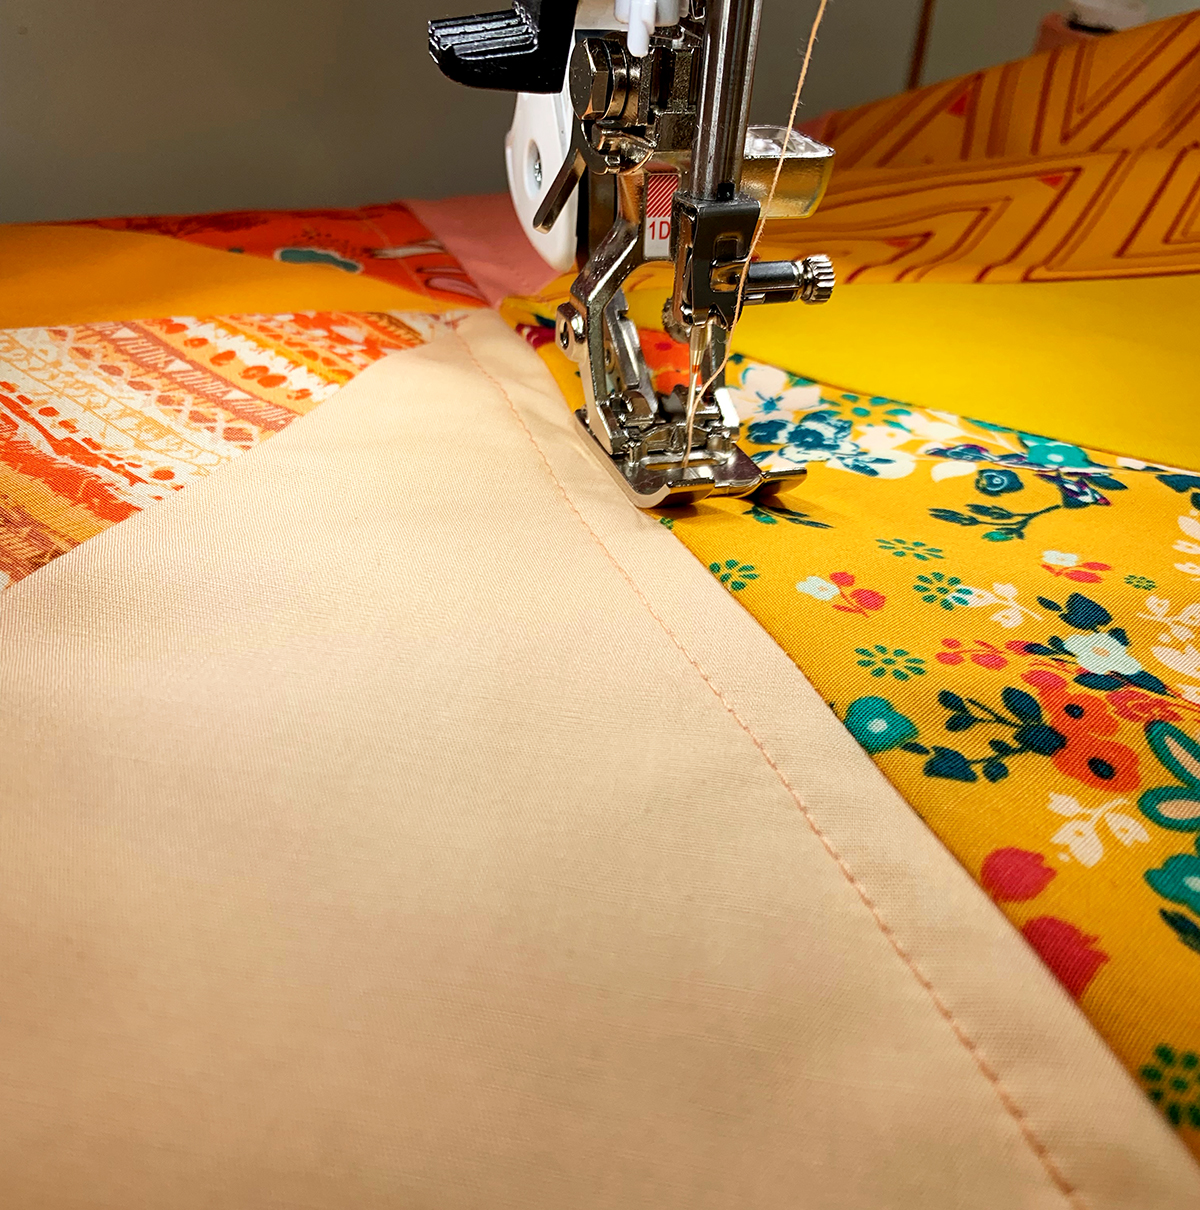
Print out your templates and cut them out and tape them together lining up the notches. Pin to your fabric and cut out your pieces following the cutting directions above. Cut your side panels out and sew them together to create one long strip.

Step Two: Sew your front and back cushion
Note: For all our piecing I am using my BERNINA Reverse pattern foot #1C. I will switch to my BERNINA Reverse Pattern foot#1D later in the tutorial for quilting which allows you to use the dual feed for perfectly even stitches.
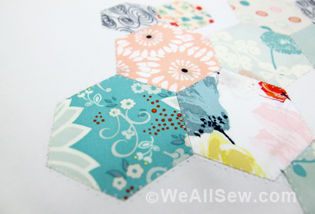
Lay your pieces out following the picture below. Sew your petals together to create two halves.
Sew your halves together. Repeat this process twice to get your front and back pieces.
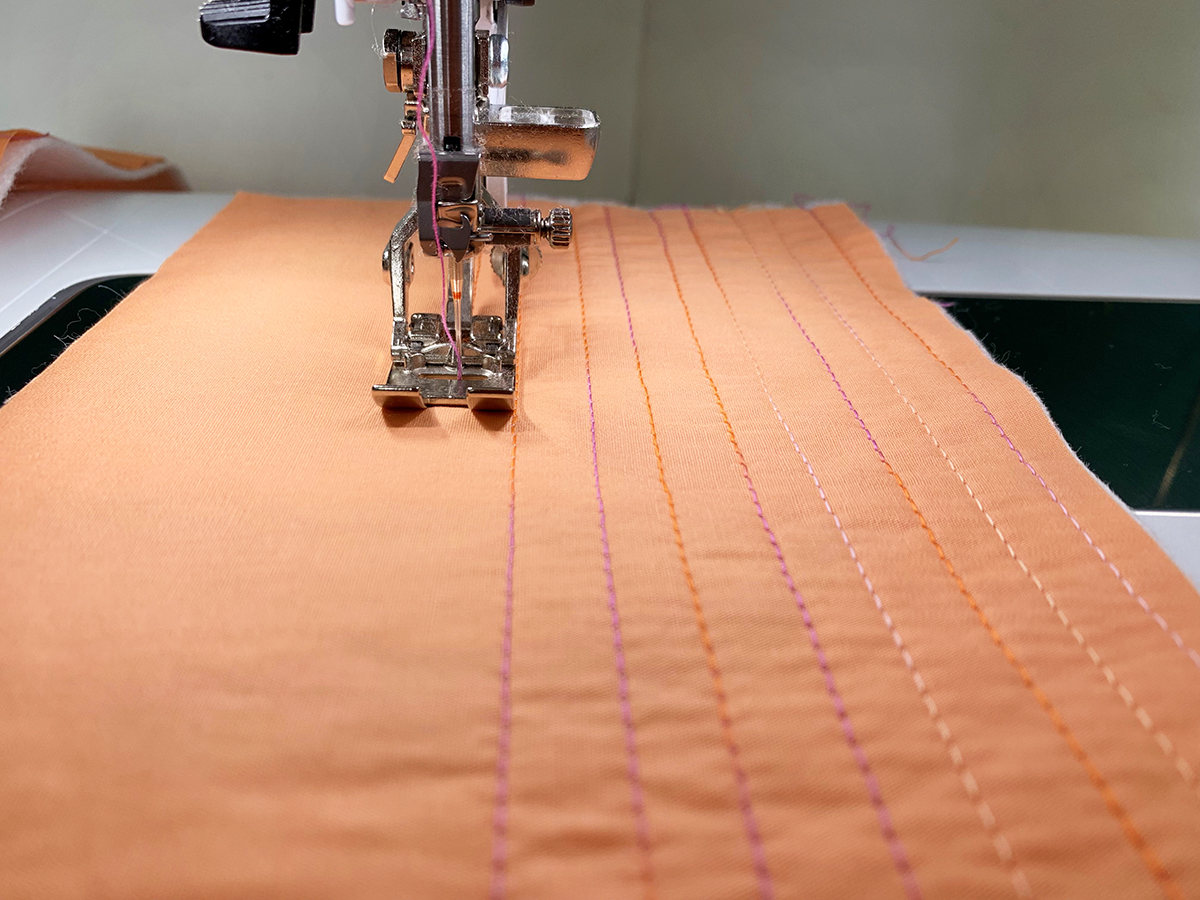
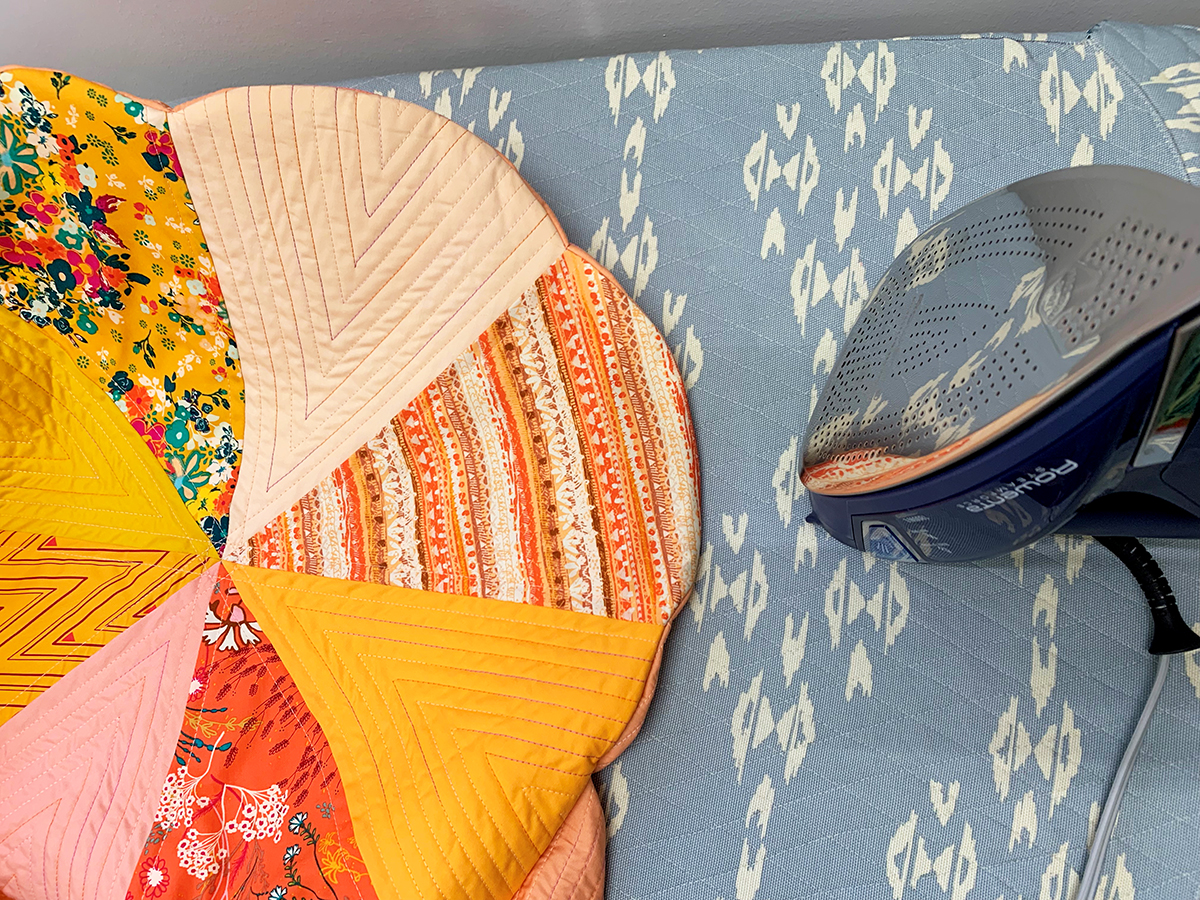
Now it’s time to pick your quilting threads. I tried to pick colors that complimented my project but would stand out. Place your front and back pieces on top of some batting and pin together. Quilt as desired!
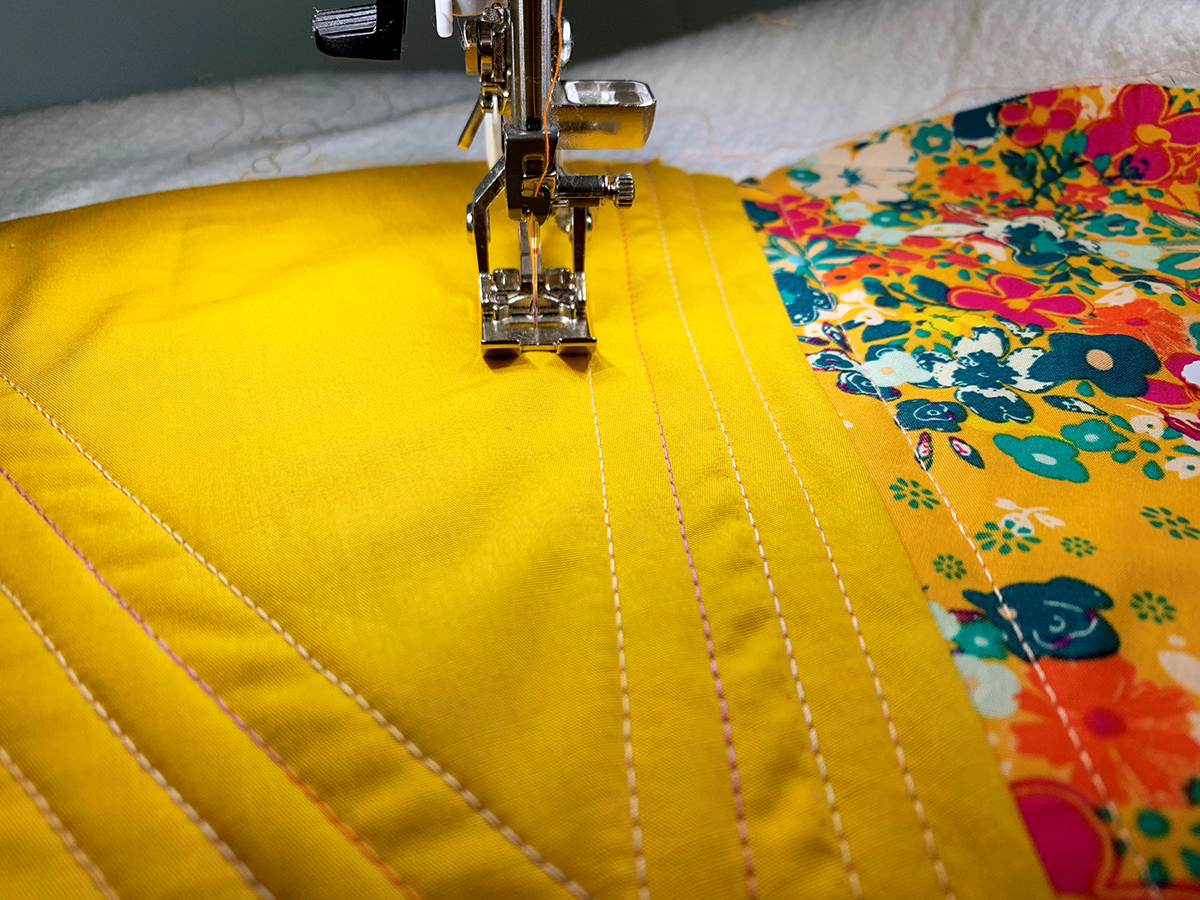
Step Three: Quilting
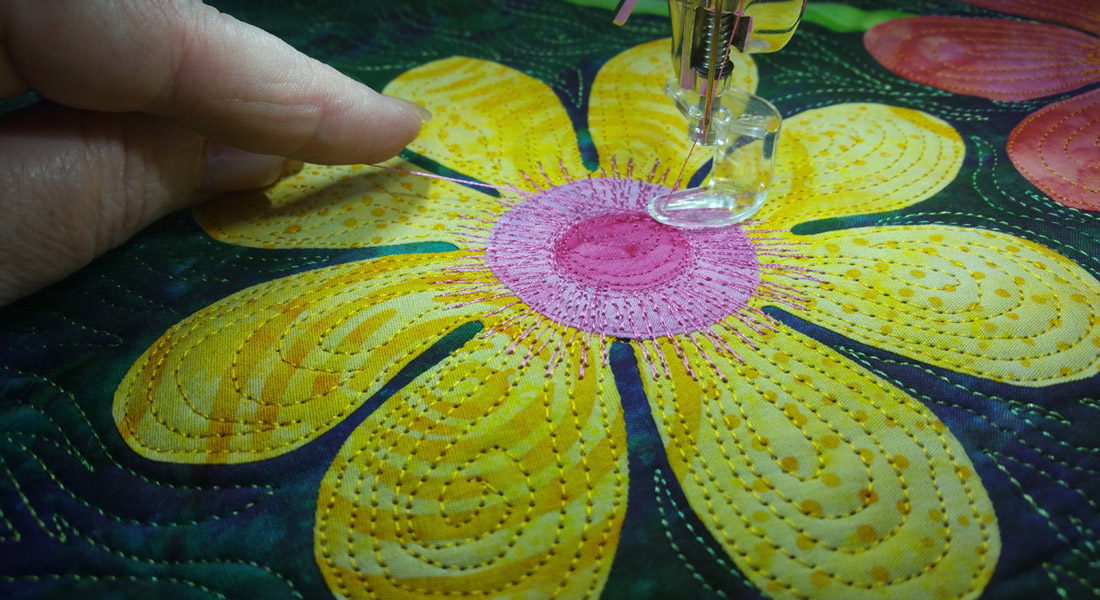
I changed my foot to my Reverse Pattern foot #1D and activated my Dual Feed by pulling down on the Dual Feed lever on the back of my machine. I kept my needle centered and used my seam line as guides for the first half of quilting. I lined the edge of my foot up with the seam line and stitched on each side of every seam line then I wanted to echo stitch in each one of the Pure Solid fabric petals. Using the BERNINA Free Hand System is such a blast when you are echo stitching because it allows you to pivot your work without having to take your hands off your project! It made quilting a breeze! Once I was finished echo stitching I sewed around my entire piece about ⅛ from the edge just to tack everything down to make it easier to attach my side panel.
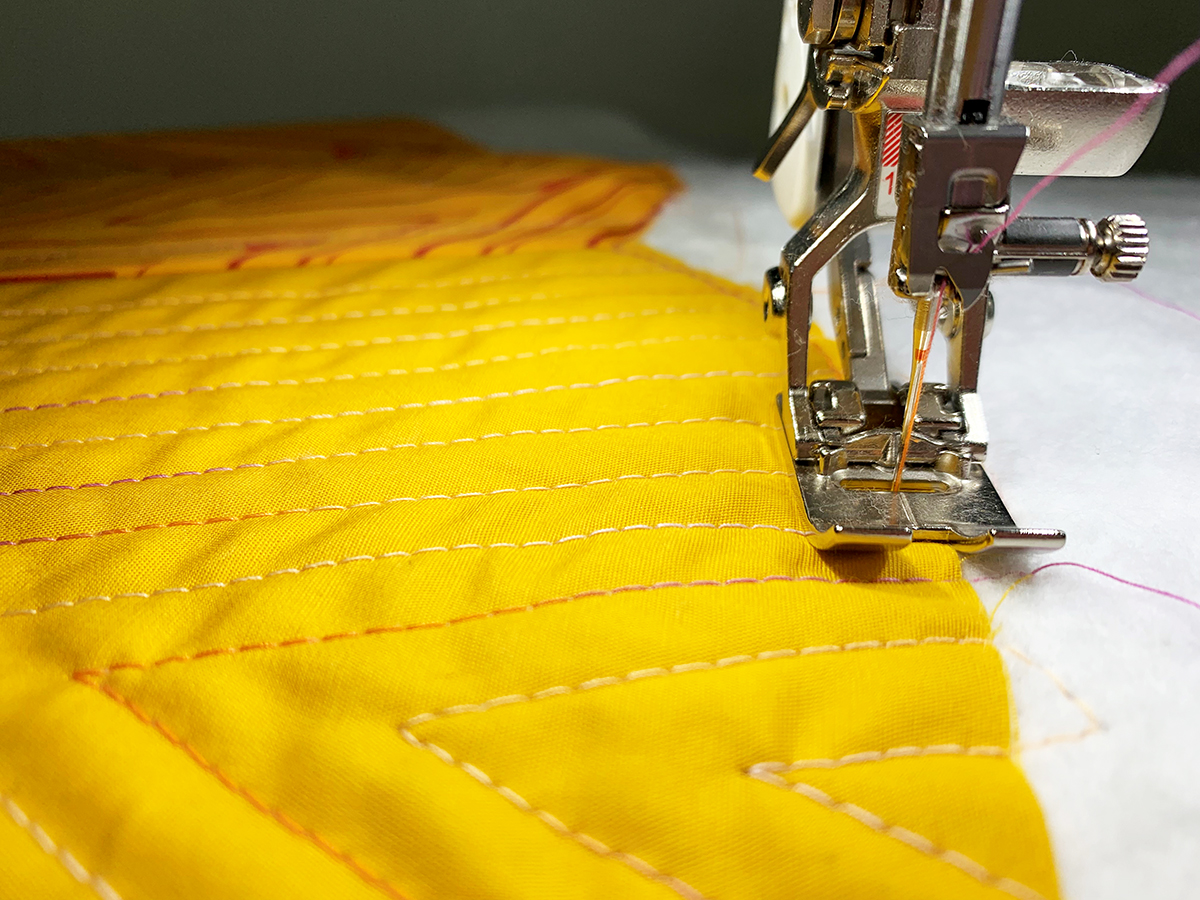
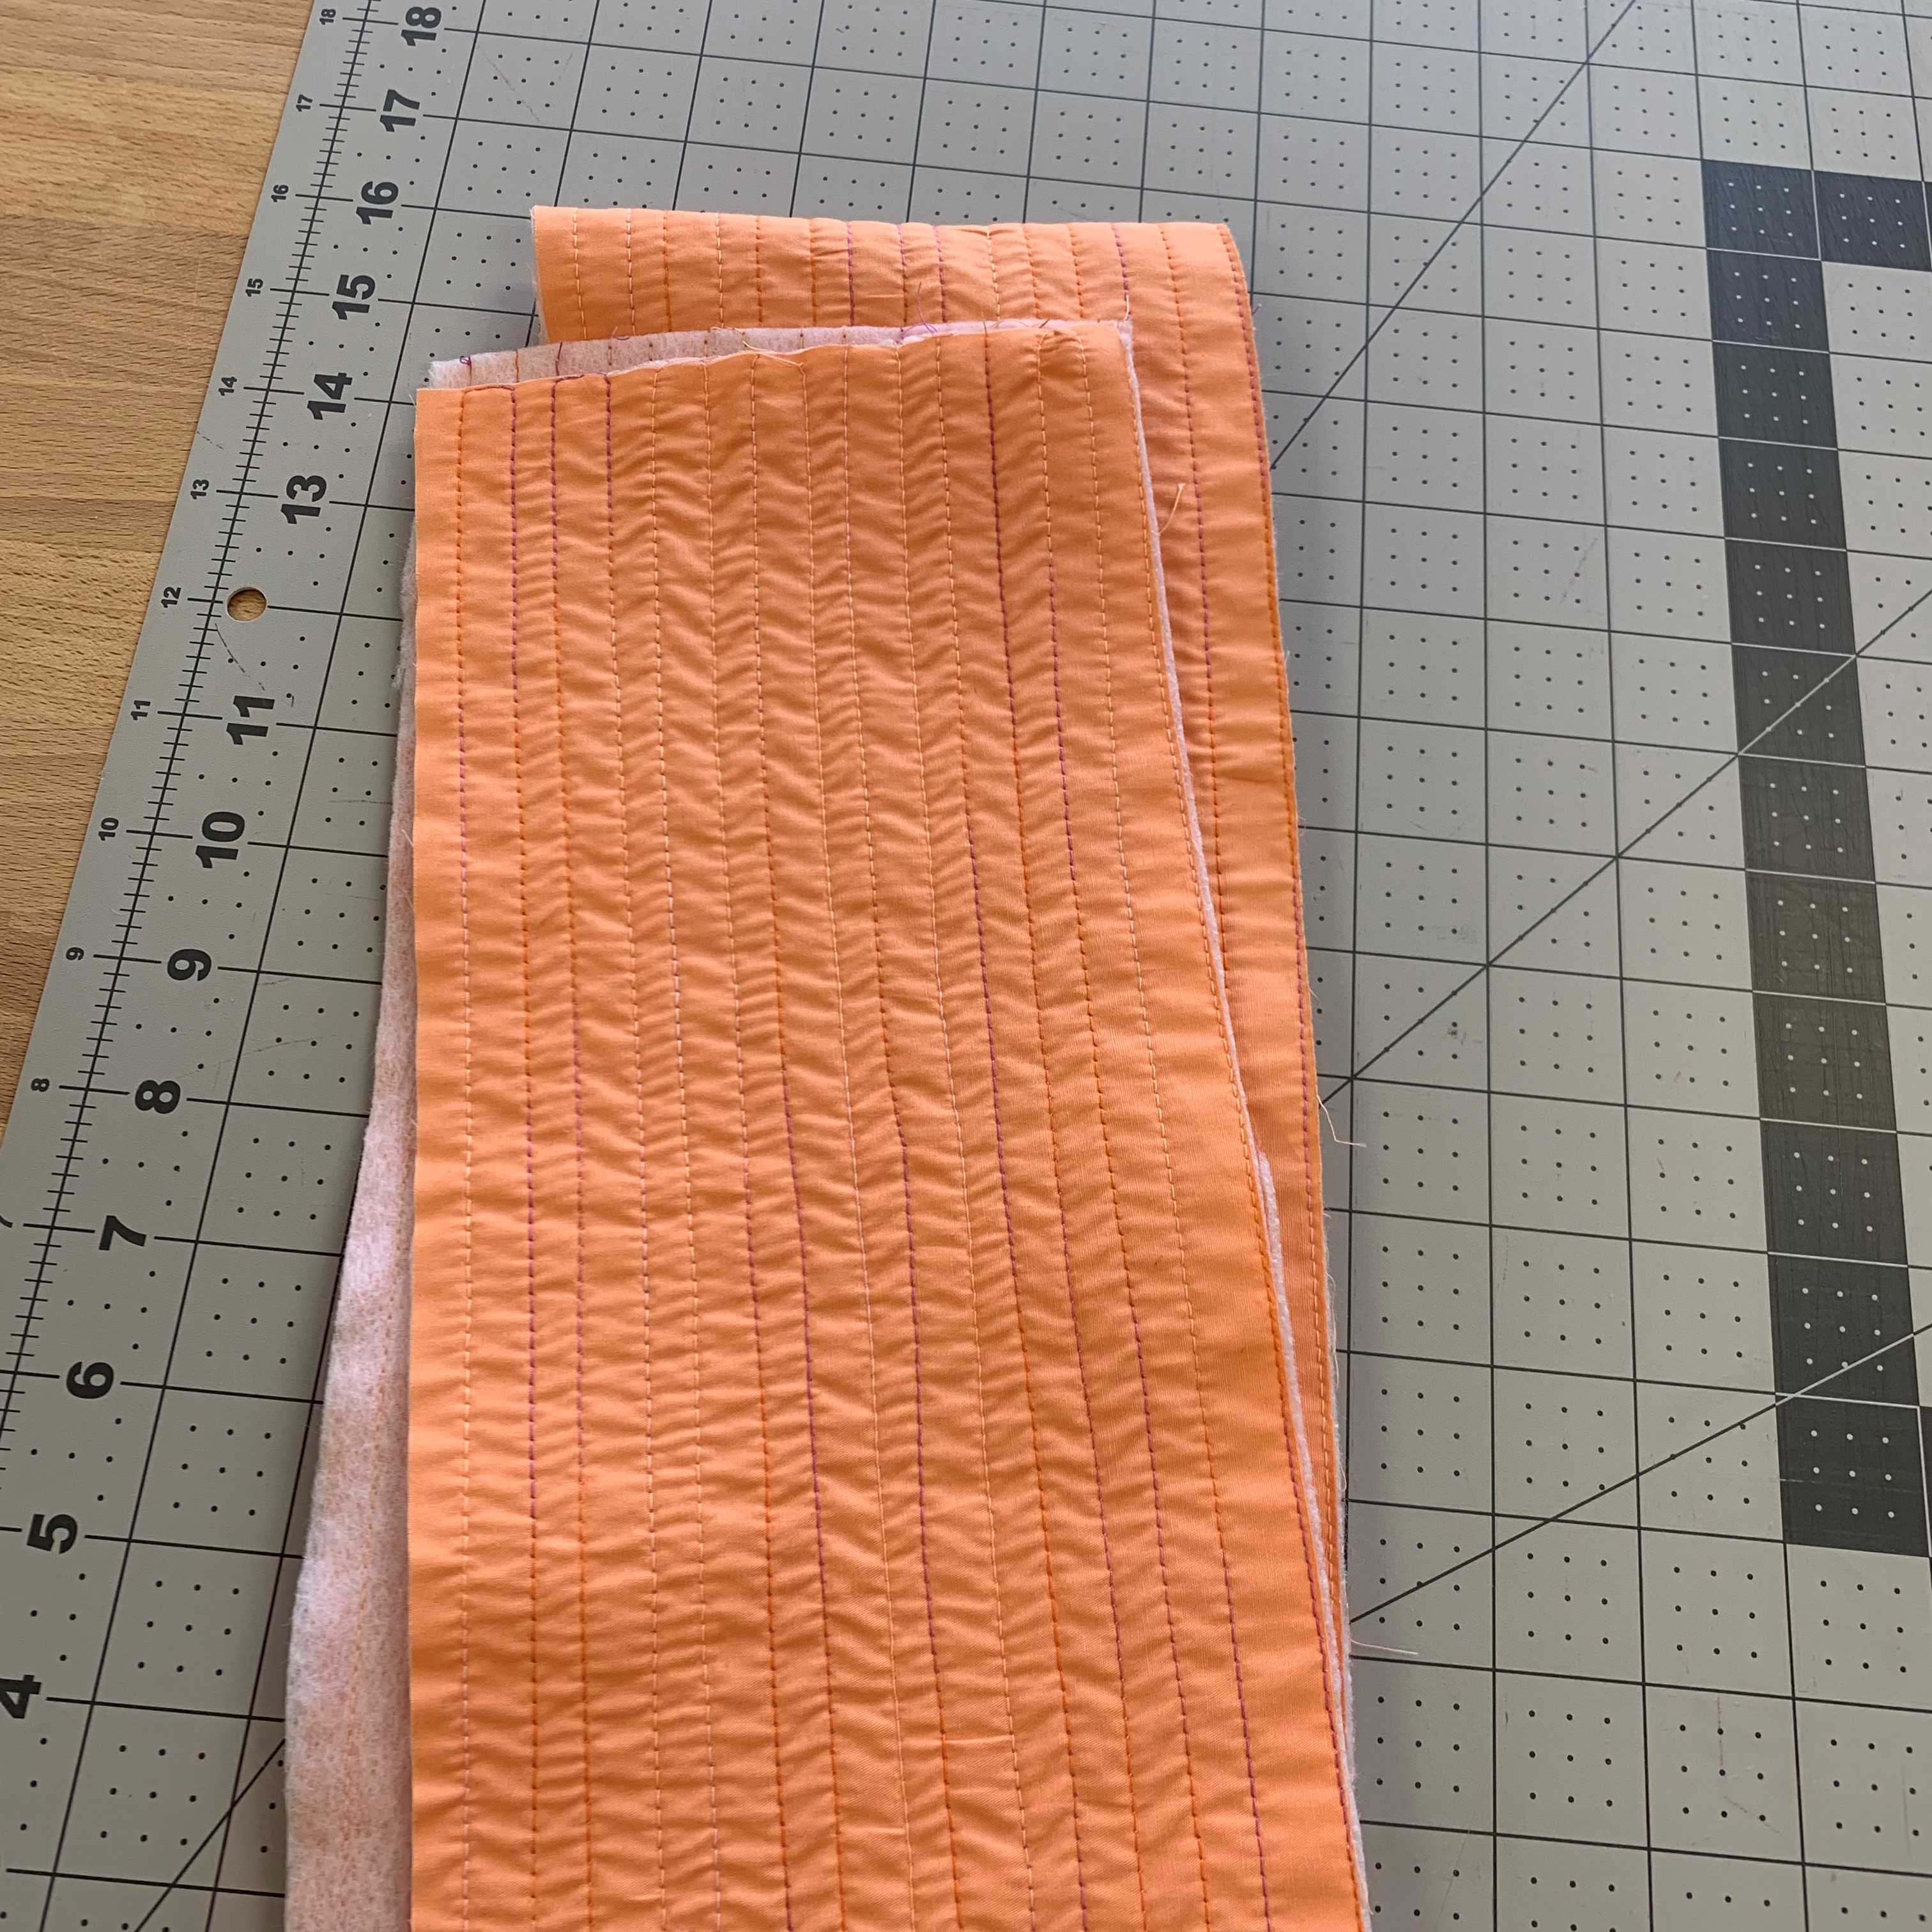
At this point, it’s time to quilt your side panel. Pin panel to batting and quilt as desired. I just did some match stick quilting to attach my batting to my side panel. Remove any excess batting my your front, back and side panel.
Step Four: Sewing your side panel
I measured the perimeter of my floral top and bottom pieces to be 74 1/2 inches. Measure yours and trim your side panels to size leaving a 1/2″ seam allowance. Clip to your top piece all the way around and sew with your duel feed engaged.

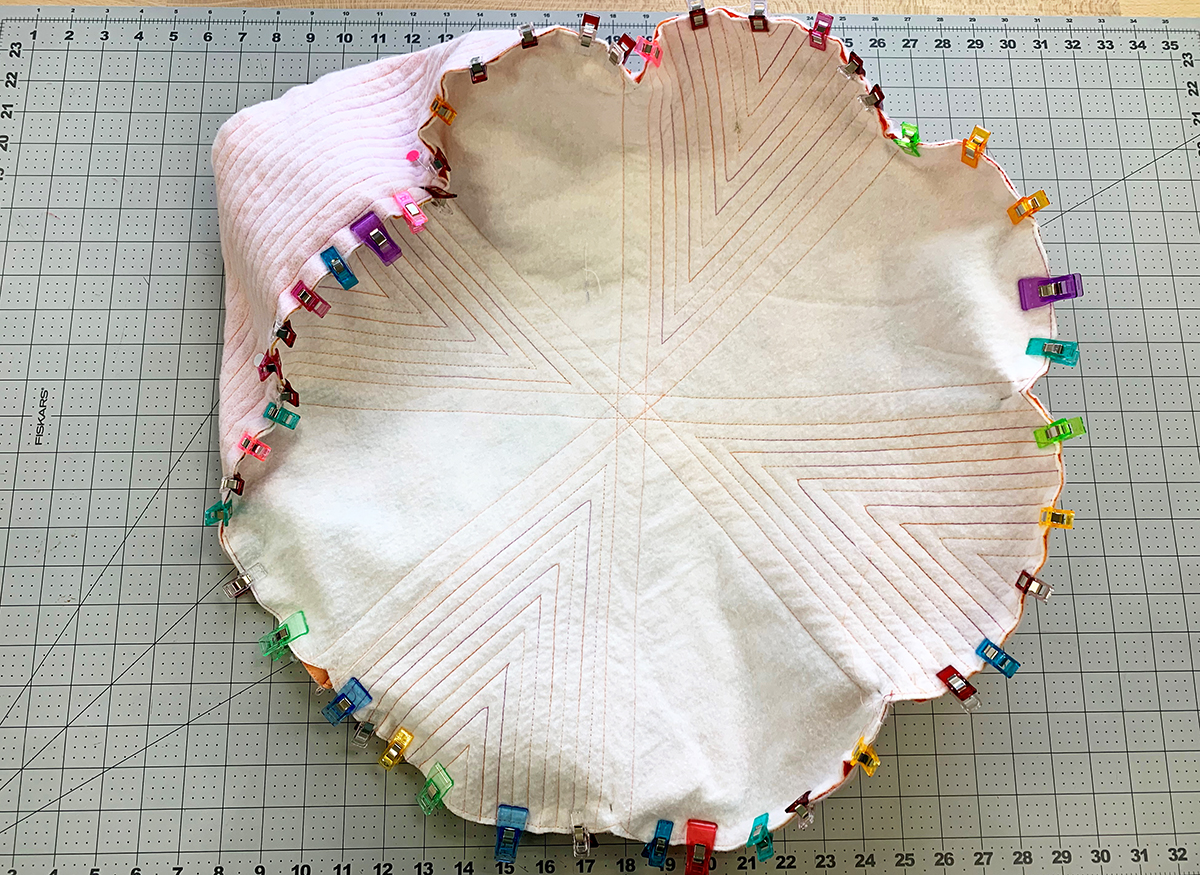
Press your seam to get a nice rounded edges.
Clip your seam allowance in between each petal to help create a nice curve.
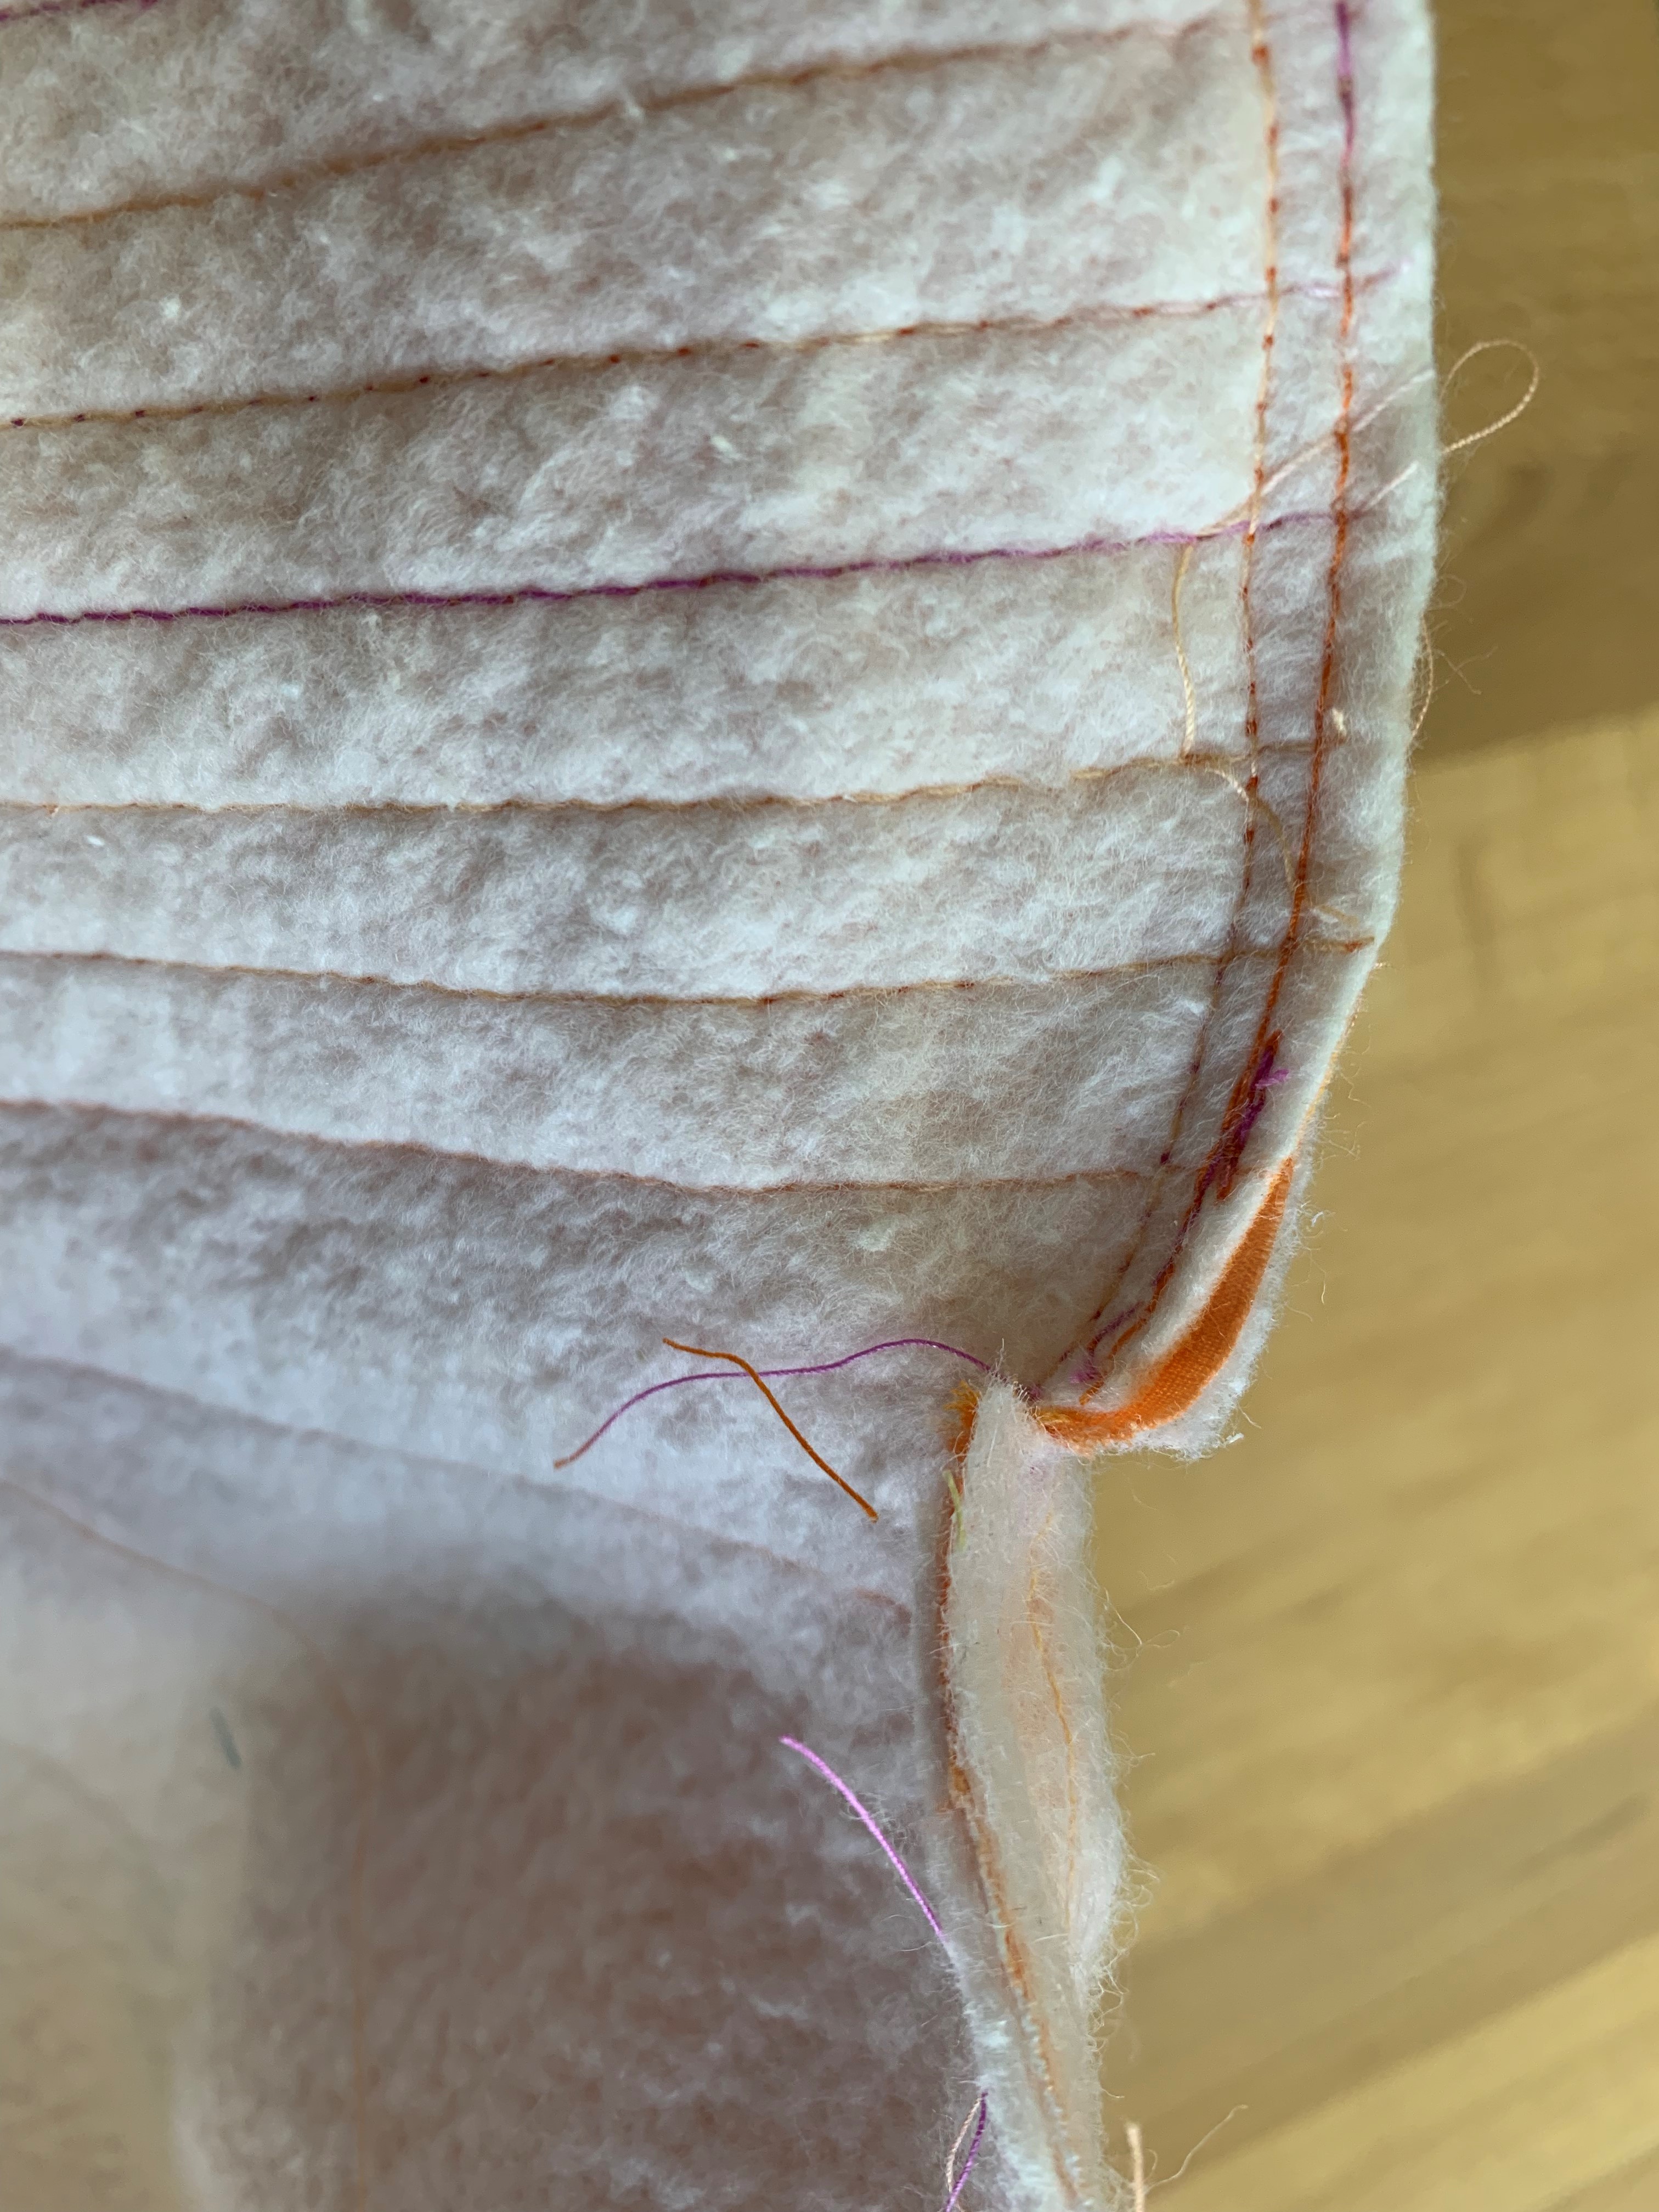
Repeat this same process to attach the other side of your panel to your bottom piece, making sure to leave a 3″ unsewn portion to flip your piece through.

Flip your piece through and stuff with poly-fil and sew the unsewn portion shut by hand.

Step Five: Finishing Up
To create the indent in the middle of your cushion you will need a long needle and strong embroidery thread. With a double strand pull your needle and thread through the bottom of your cushion and bring it through to the top.
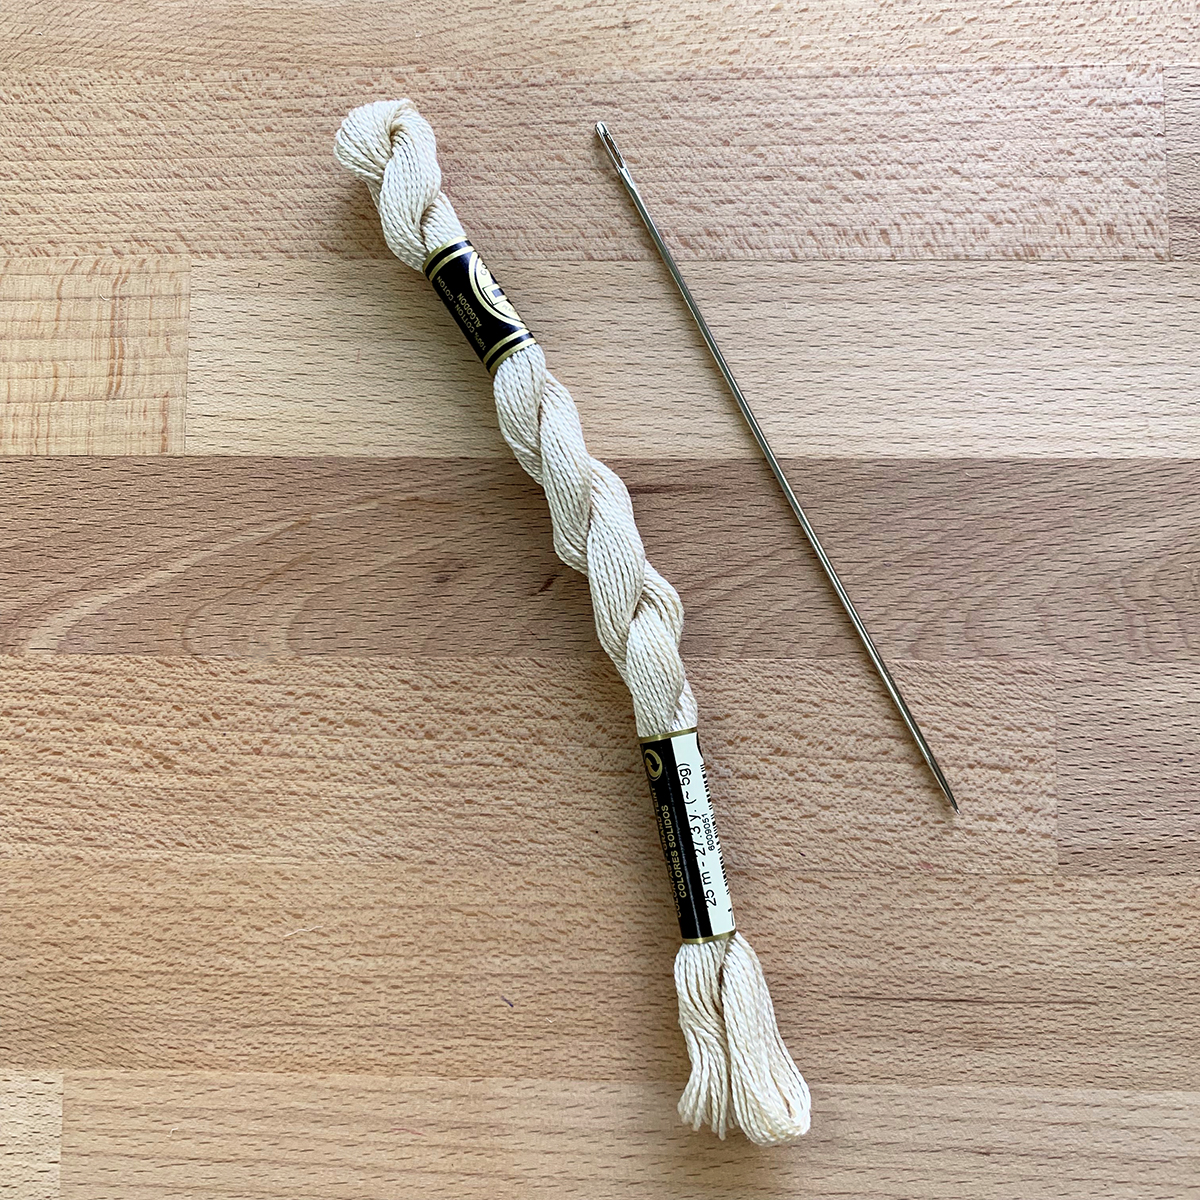
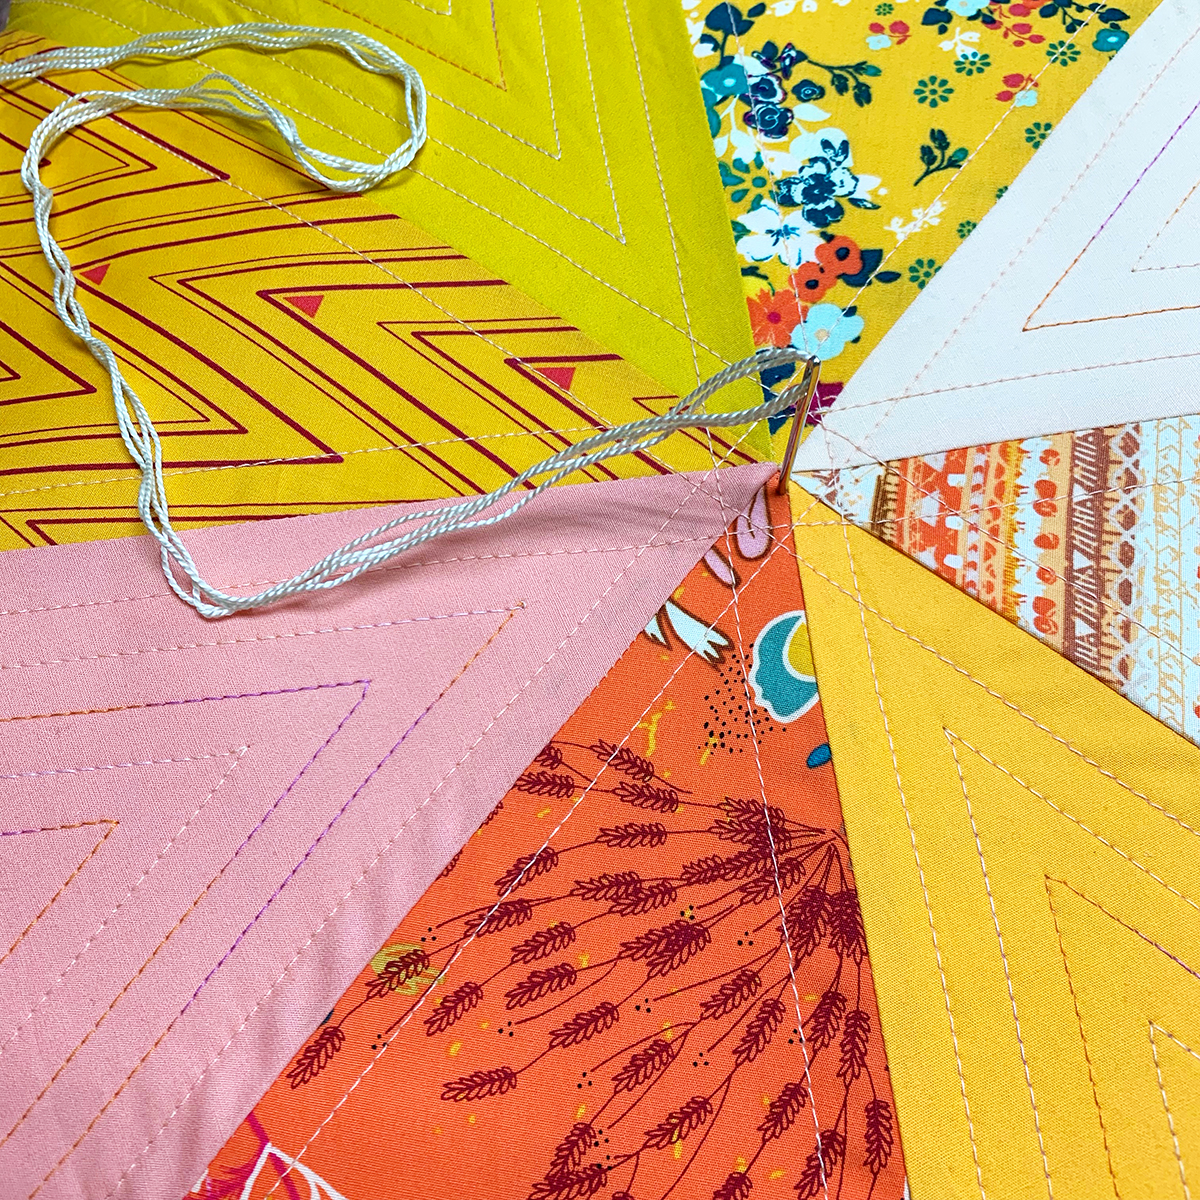
Then pull your needle through the cushion to the back. For this next part, grab a friend to help. Have them push down on the pillow and tie a knot with the right amount of indent you prefer.

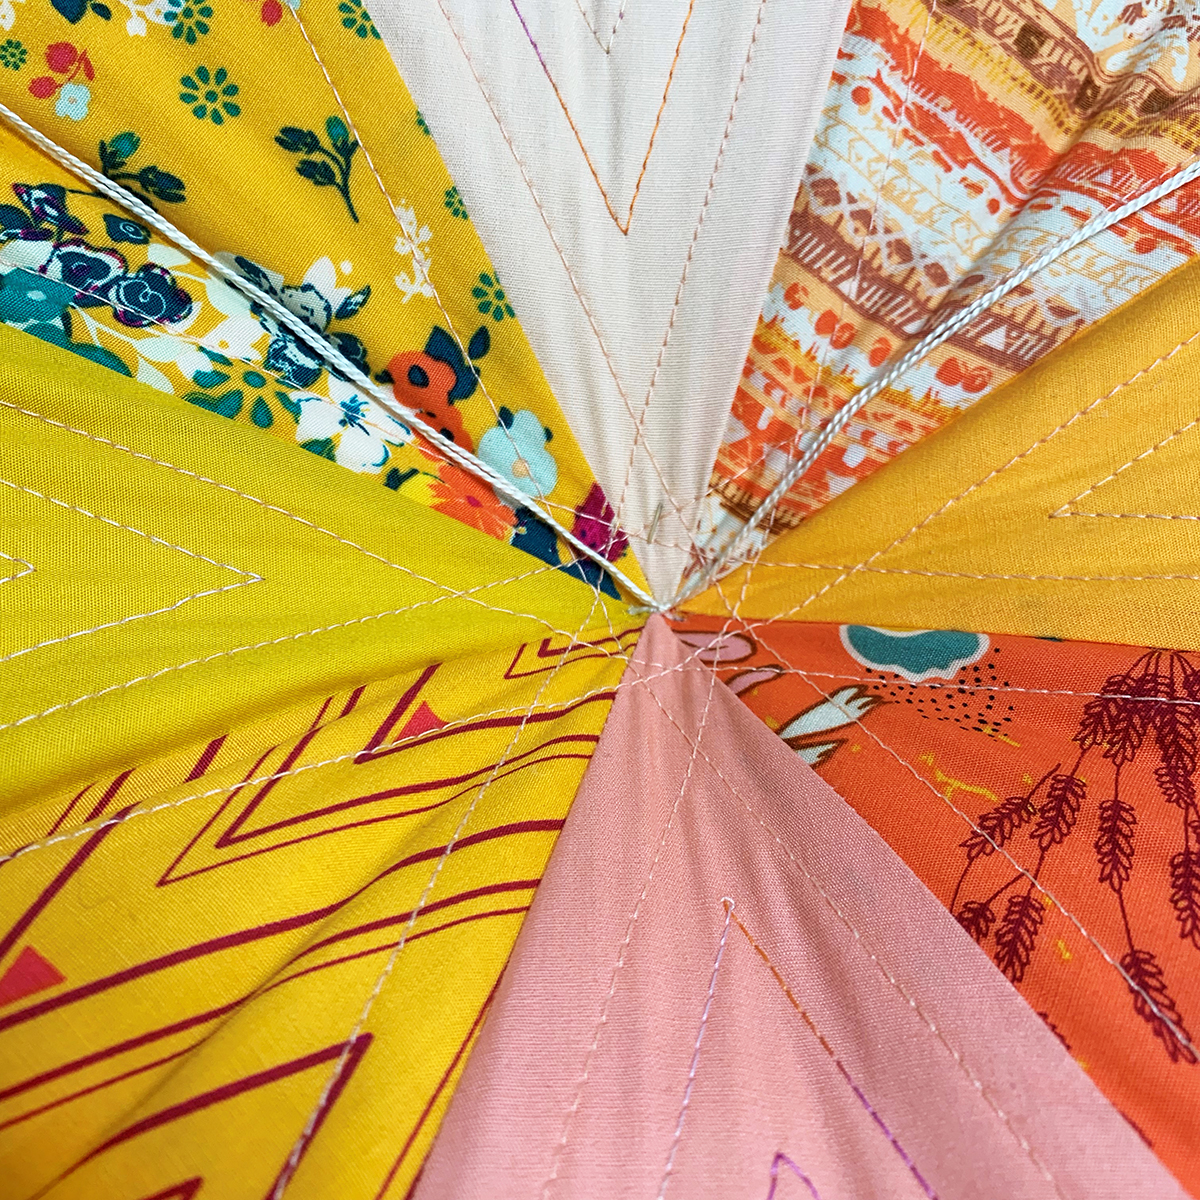
Once the knot is secure you can clip your threads and your floor cushion is ready to be used!
Used Products


What you might also like


10 comments on “Summer Floral Floor Cushion Tutorial”
-
-
Did the 1 inch square on the template measure out to be 1 inch? That will tell u if you need to print it again.
-
-
I’m really excited to do this pattern but wanted to ask you some questions before I start. With the exact fabric you used, did you wash it first? Also, for your topstitch/quilting, did you use the triple stitch? It looks very pronounced. I bought 28 wt thread and am loving my sample of the triple stitch, but don’t know if that’s overdone for this fabric.
-
Well I finally got it done and I’m so tickled. I installed a zipper so the stuffing can be removed for washing the cover if needed. So happy. Thanks, Bernina, for the inspiration!
-
-
Turned out really cute–although larger than I imagined it would be. Planning to make a few more!
-
Can someone tell me the actual size of this floor cushion?
One flaw in the directions – you do not say how big it is.
-
-
Pat, you are always inspiring. I love this pillow Now I want to make one!!
I love the fabrics you chose. This pillow is perfectly wonderful-
I forgot to add, I love the photo of the hands.
Those on the left remind me of my beloved momma❤️
-
-
No where can I find where to download the template for the petal pieces???
-
Look carefully in the materials list. The download is there. It doesn’t jump out at u.
-
Leave a Reply
You must be logged in to post a comment.

Your fabrics are lovely! When I download the templates, they come into the computer at 93%. Is this correct or should I raise the percent to 100%?