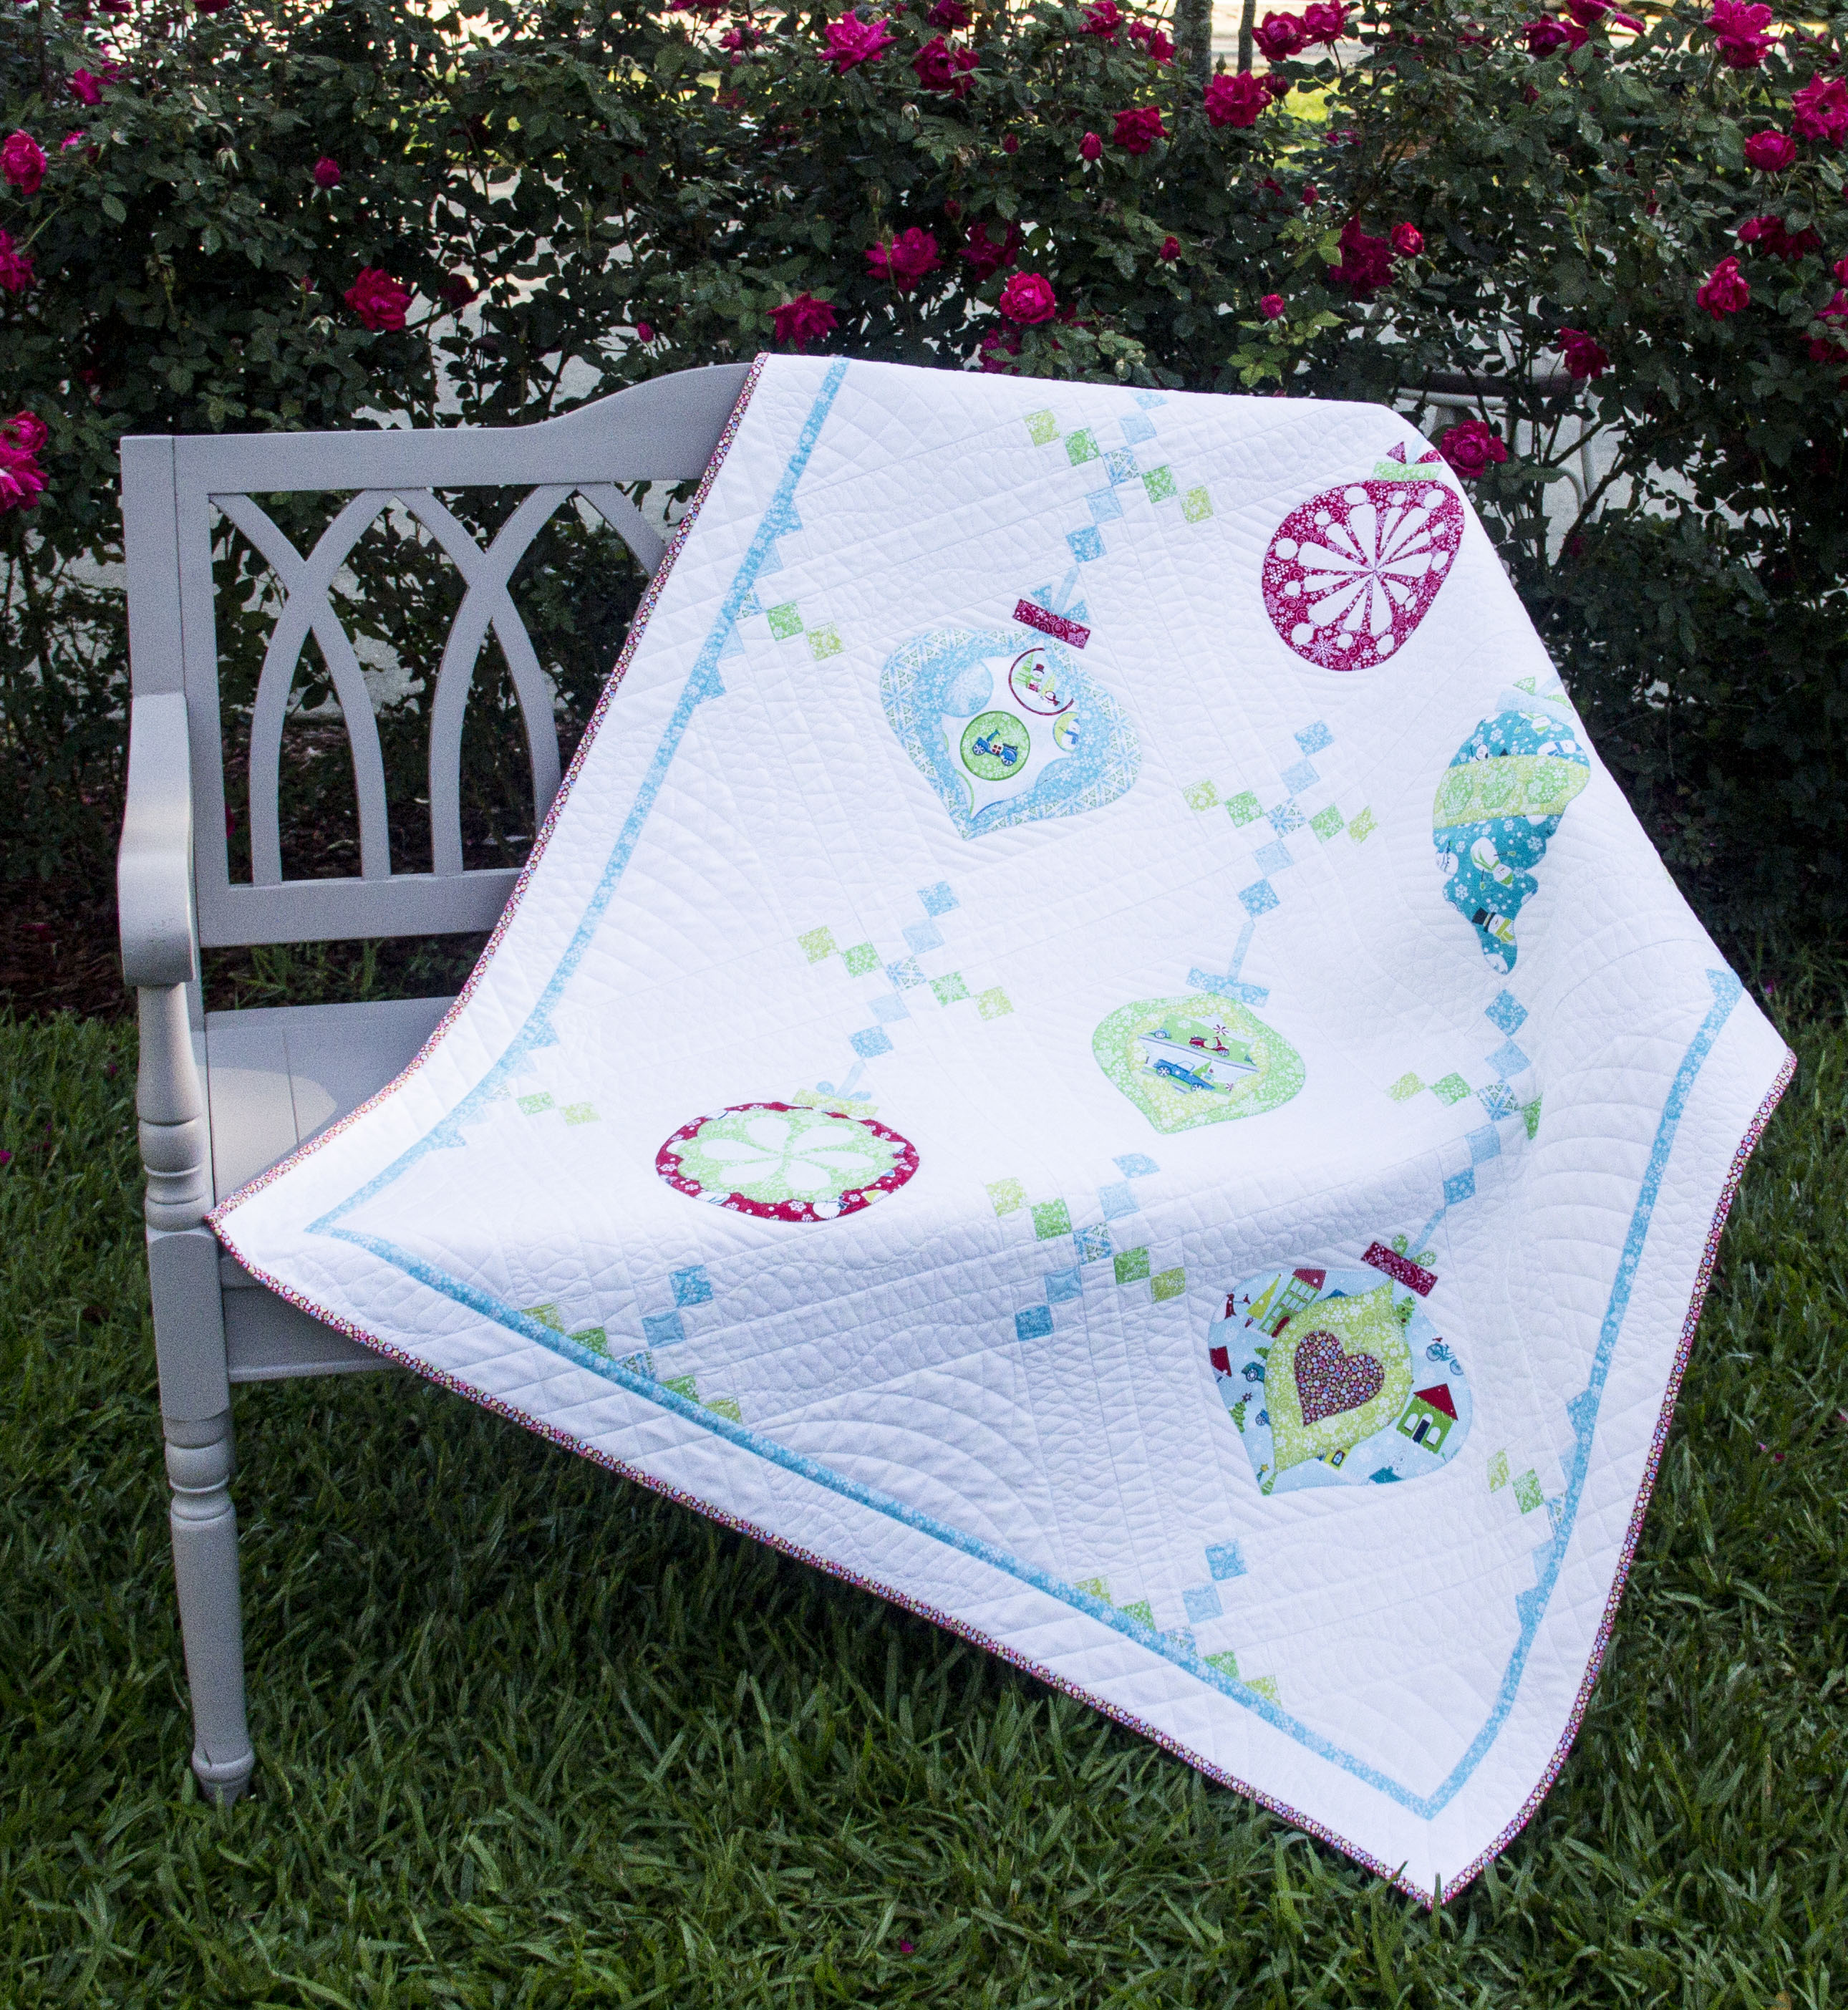
Vintage Ornaments Quilt-Along: Snowflake and Stripe Appliqué Blocks
Welcome to the first month in the Vintage Ornaments Quilt-Along!

This month we will cut the fabric for the quilt and stitch out the first two applique blocks in the project. If you’ve not gathered your supplies, read our first post to find the fabric requirements for Vintage Ornaments here.
Let’s get started!
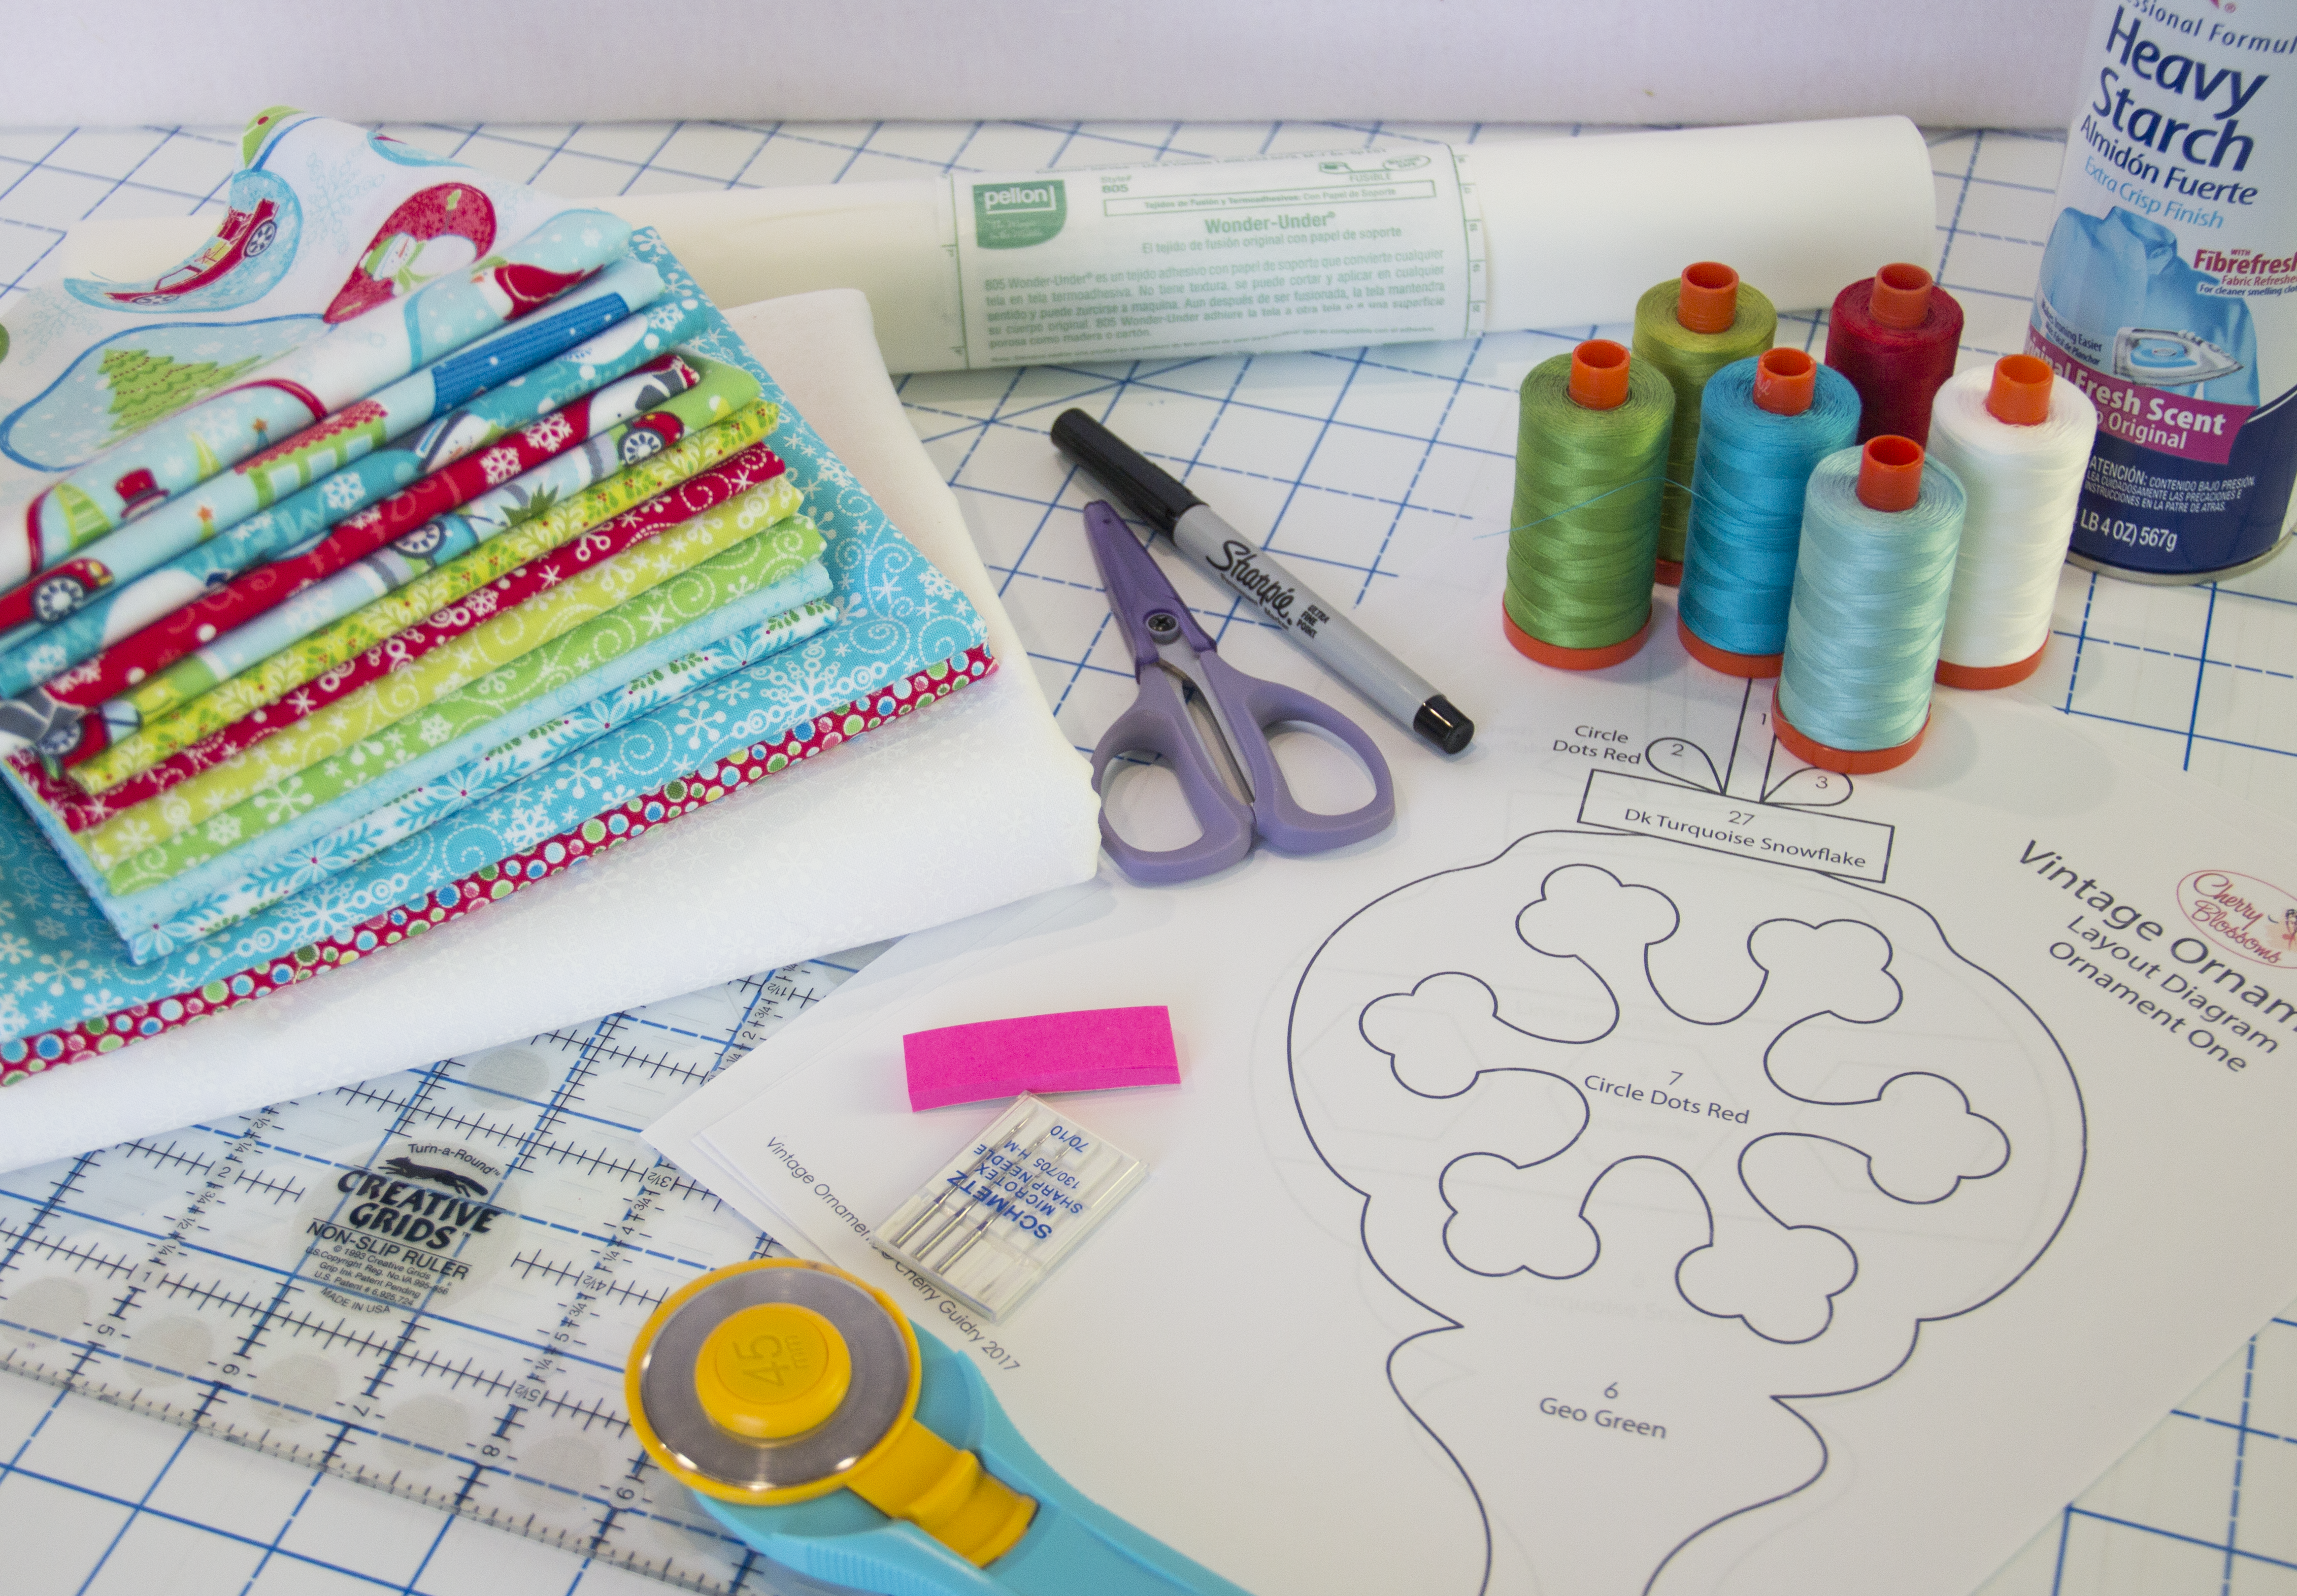
Materials to Make Ornament Appliqué Blocks
- Download the Vintage Ornaments Appliqué Template Month 1
- Rotary cutter, ruler and mat
- Labels or sticky notes paper to label cut fabrics
- 17″ Wide paper-backed fusible – 2 yds
- Heavy spray starch
- Fabric scissors
- Paper scissors
- Fine tip permanent pen (black Sharpie)
- Light box (optional)
- Coordinating Aurifil 50wt thread for the appliques
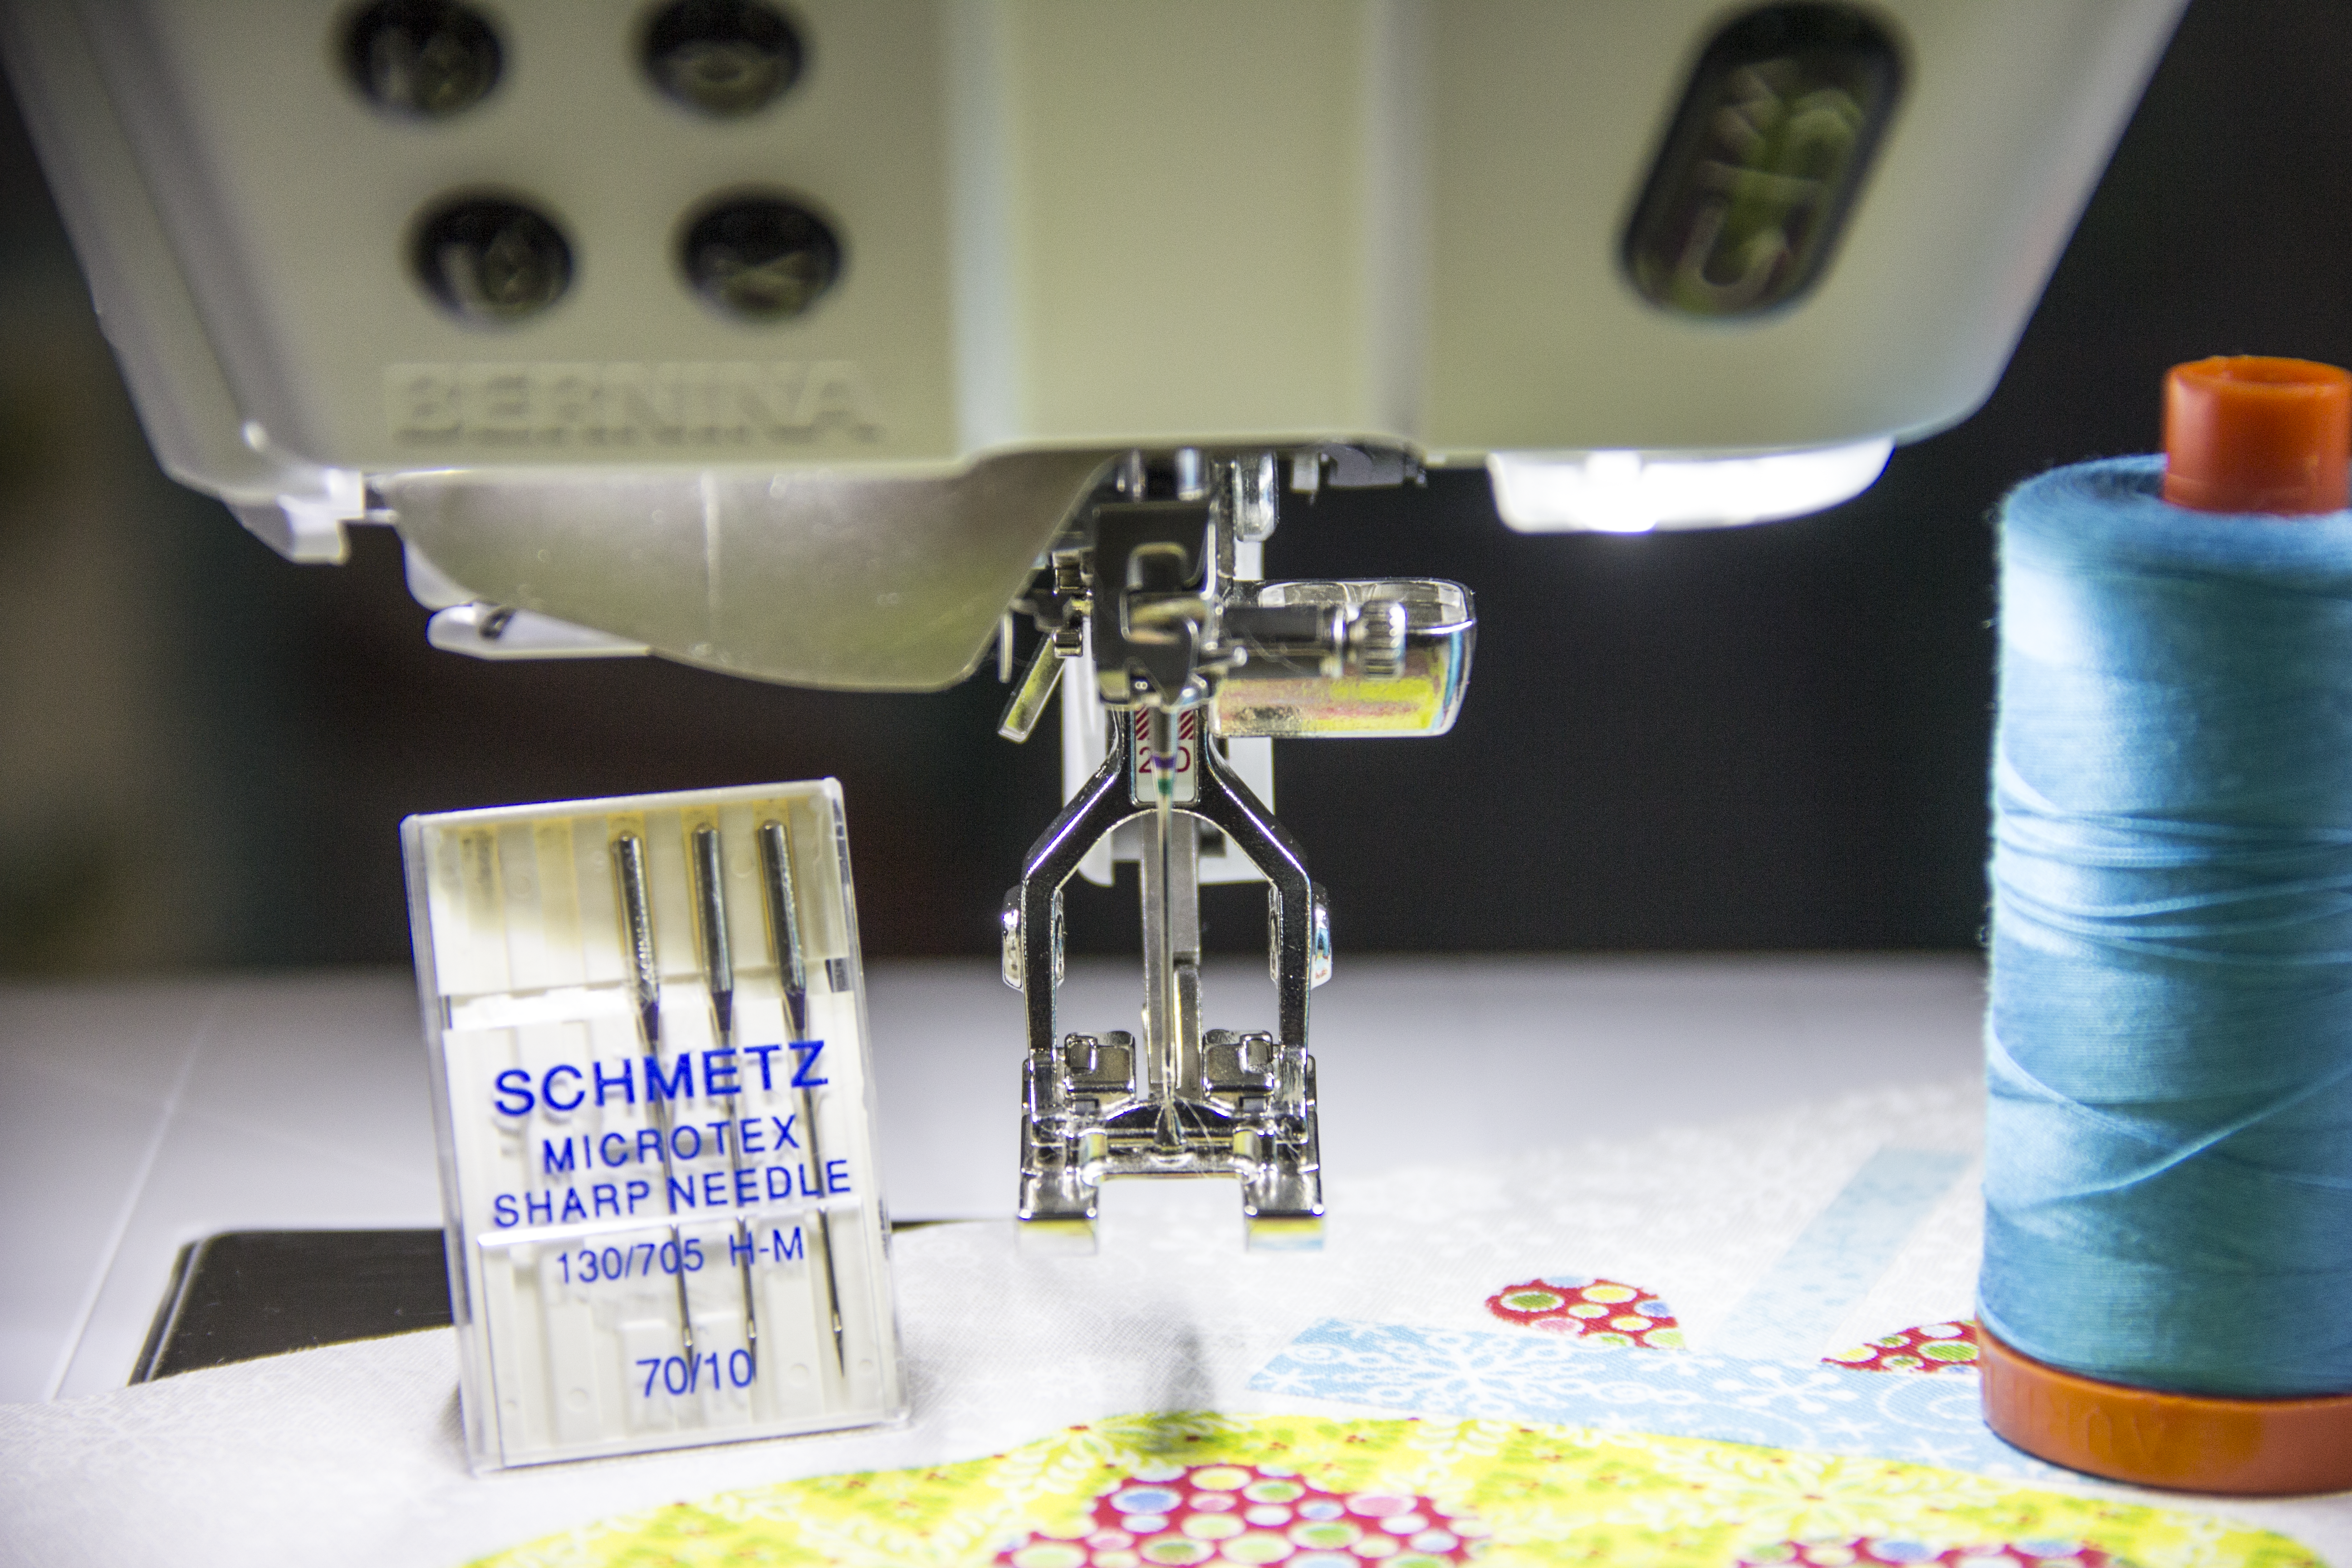
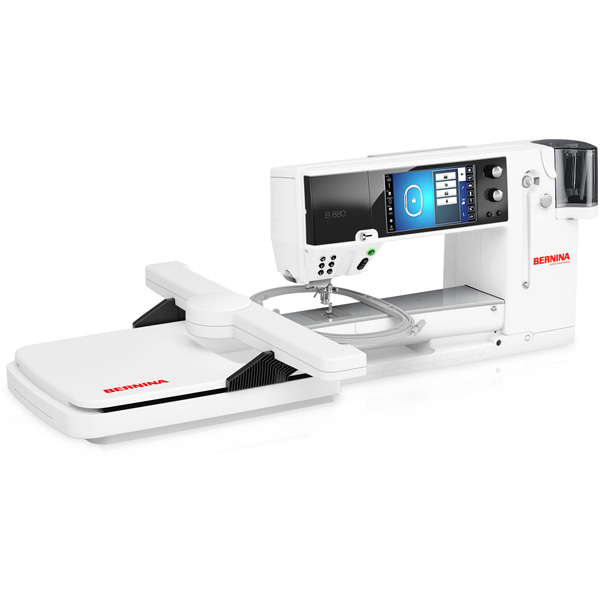
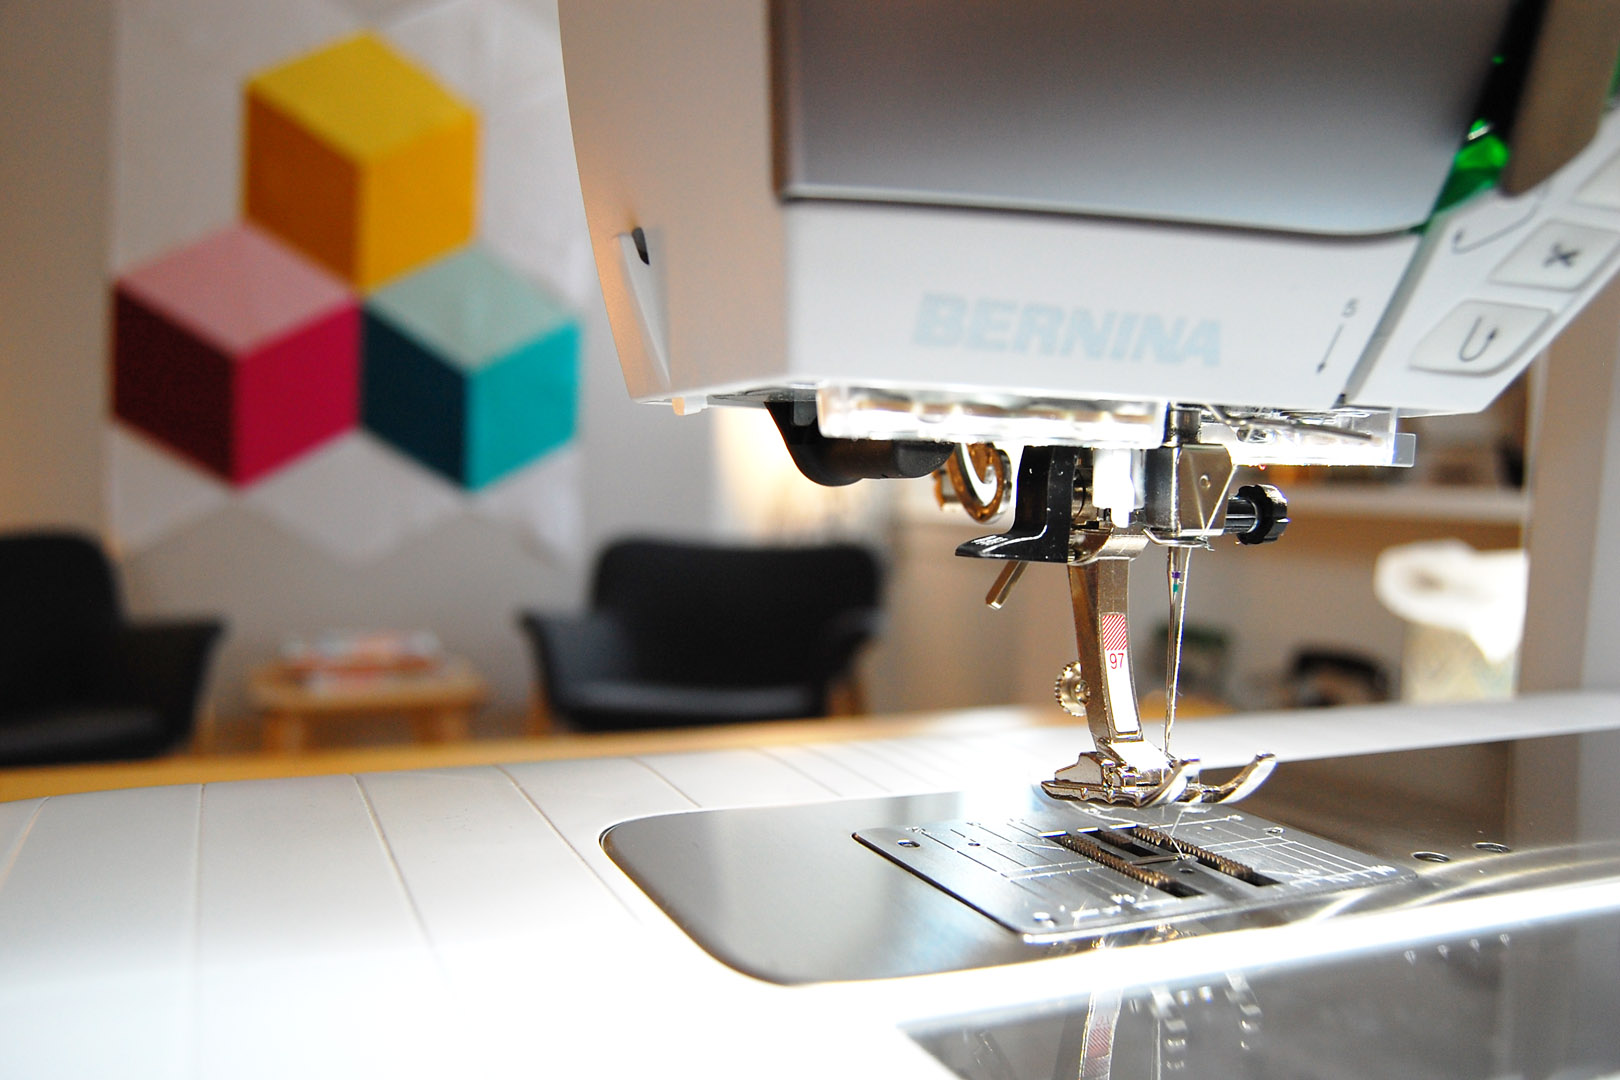
- Sewing machine (I use a BERNINA 880)
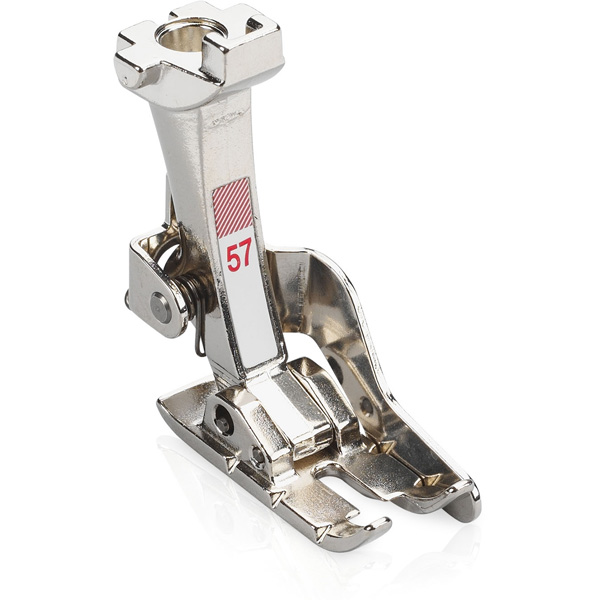
- Open embroidery foot #20/20C/20D
- Sewing machine needles: Microtex 70/10
Step 1: Cut and label your fabrics as follows, being mindful that some of the prints are used for the applique shapes:

White Snowflake
(1) 19″ x WOF strip – Background squares A
(1) 9 ½” x WOF strip sub-cut into
(3) 9½” x 9½” squares, cut diagonally – Set-in triangles J
(1) 7″ x WOF strips subcut into (2) 7″ x 7″ squares cut diagonally – Set-in triangles K
(17) 2½” x WOF sub-cut into (48) 2½” x 8½” – Block strips B (save remaining strips for Borders 3 & 4)
(13) 1½” x WOF strips subcut into (24) 1½” x 12½” Sashing strips I (save the remaining strips)

Star Geo Turquoise
(1) 1½” x WOF strip sub-cut into (17) 1½” x 1½” Cornerstones D
Lt Turquoise Snowflake
(2) 1½” x WOF strips – Four-Patch G squares

Turquoise Snowflake
(2) 1½” x WOF strips – Four-Patch H squares
(5) 1″ x WOF strips – Borders 4 & 5

Lime Snowflake
(1) 1½” x WOF strips – Four-Patch E squares

Green Snowflake
1½” x WOF strips – Four-Patch F squares

Red Snowflake
(6) 2 ¼” x WOF strips – Binding
Red Circle Dot (not pictured)
(6) 2 1/4″ x WOF strips – Binding
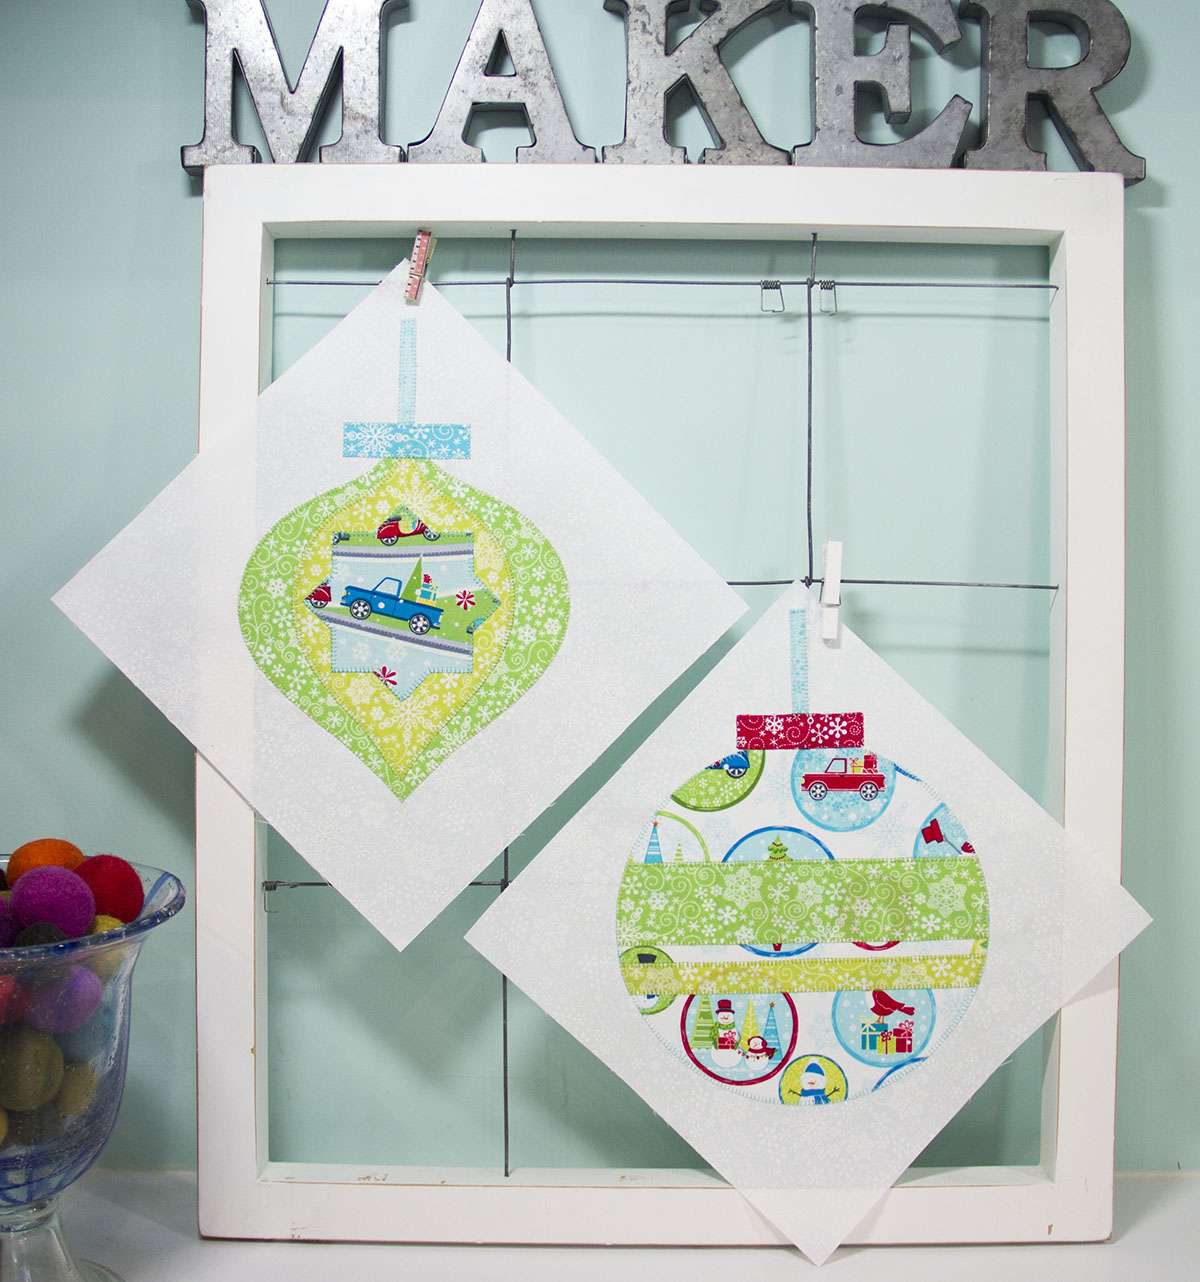
Step 2: Applique Blocks One & Two
I like to stabilize my fabrics with starch to avoid pulling of the background fabric when stitching the appliques down, so let’s begin by preparing the background fabric for applique:
Spray the 19″ x WOF white snowflake piece with a heavy spray starch until saturated, and set aside to dry; you may have to spray/dry the fabric several times until it is stiff as paper.
Press the starched fabric and cut into (8) 9 ½” x 9 ½” background squares – A.
Now on to the fun part…
Print out the Vintage Ornaments layout diagrams & reversed templates, making sure your printer is set to no scale. Using the reversed templates, trace the applique shapes onto the paper side of the paper-backed fusible, leaving a 1/2″ cut allowance between the traced shapes.
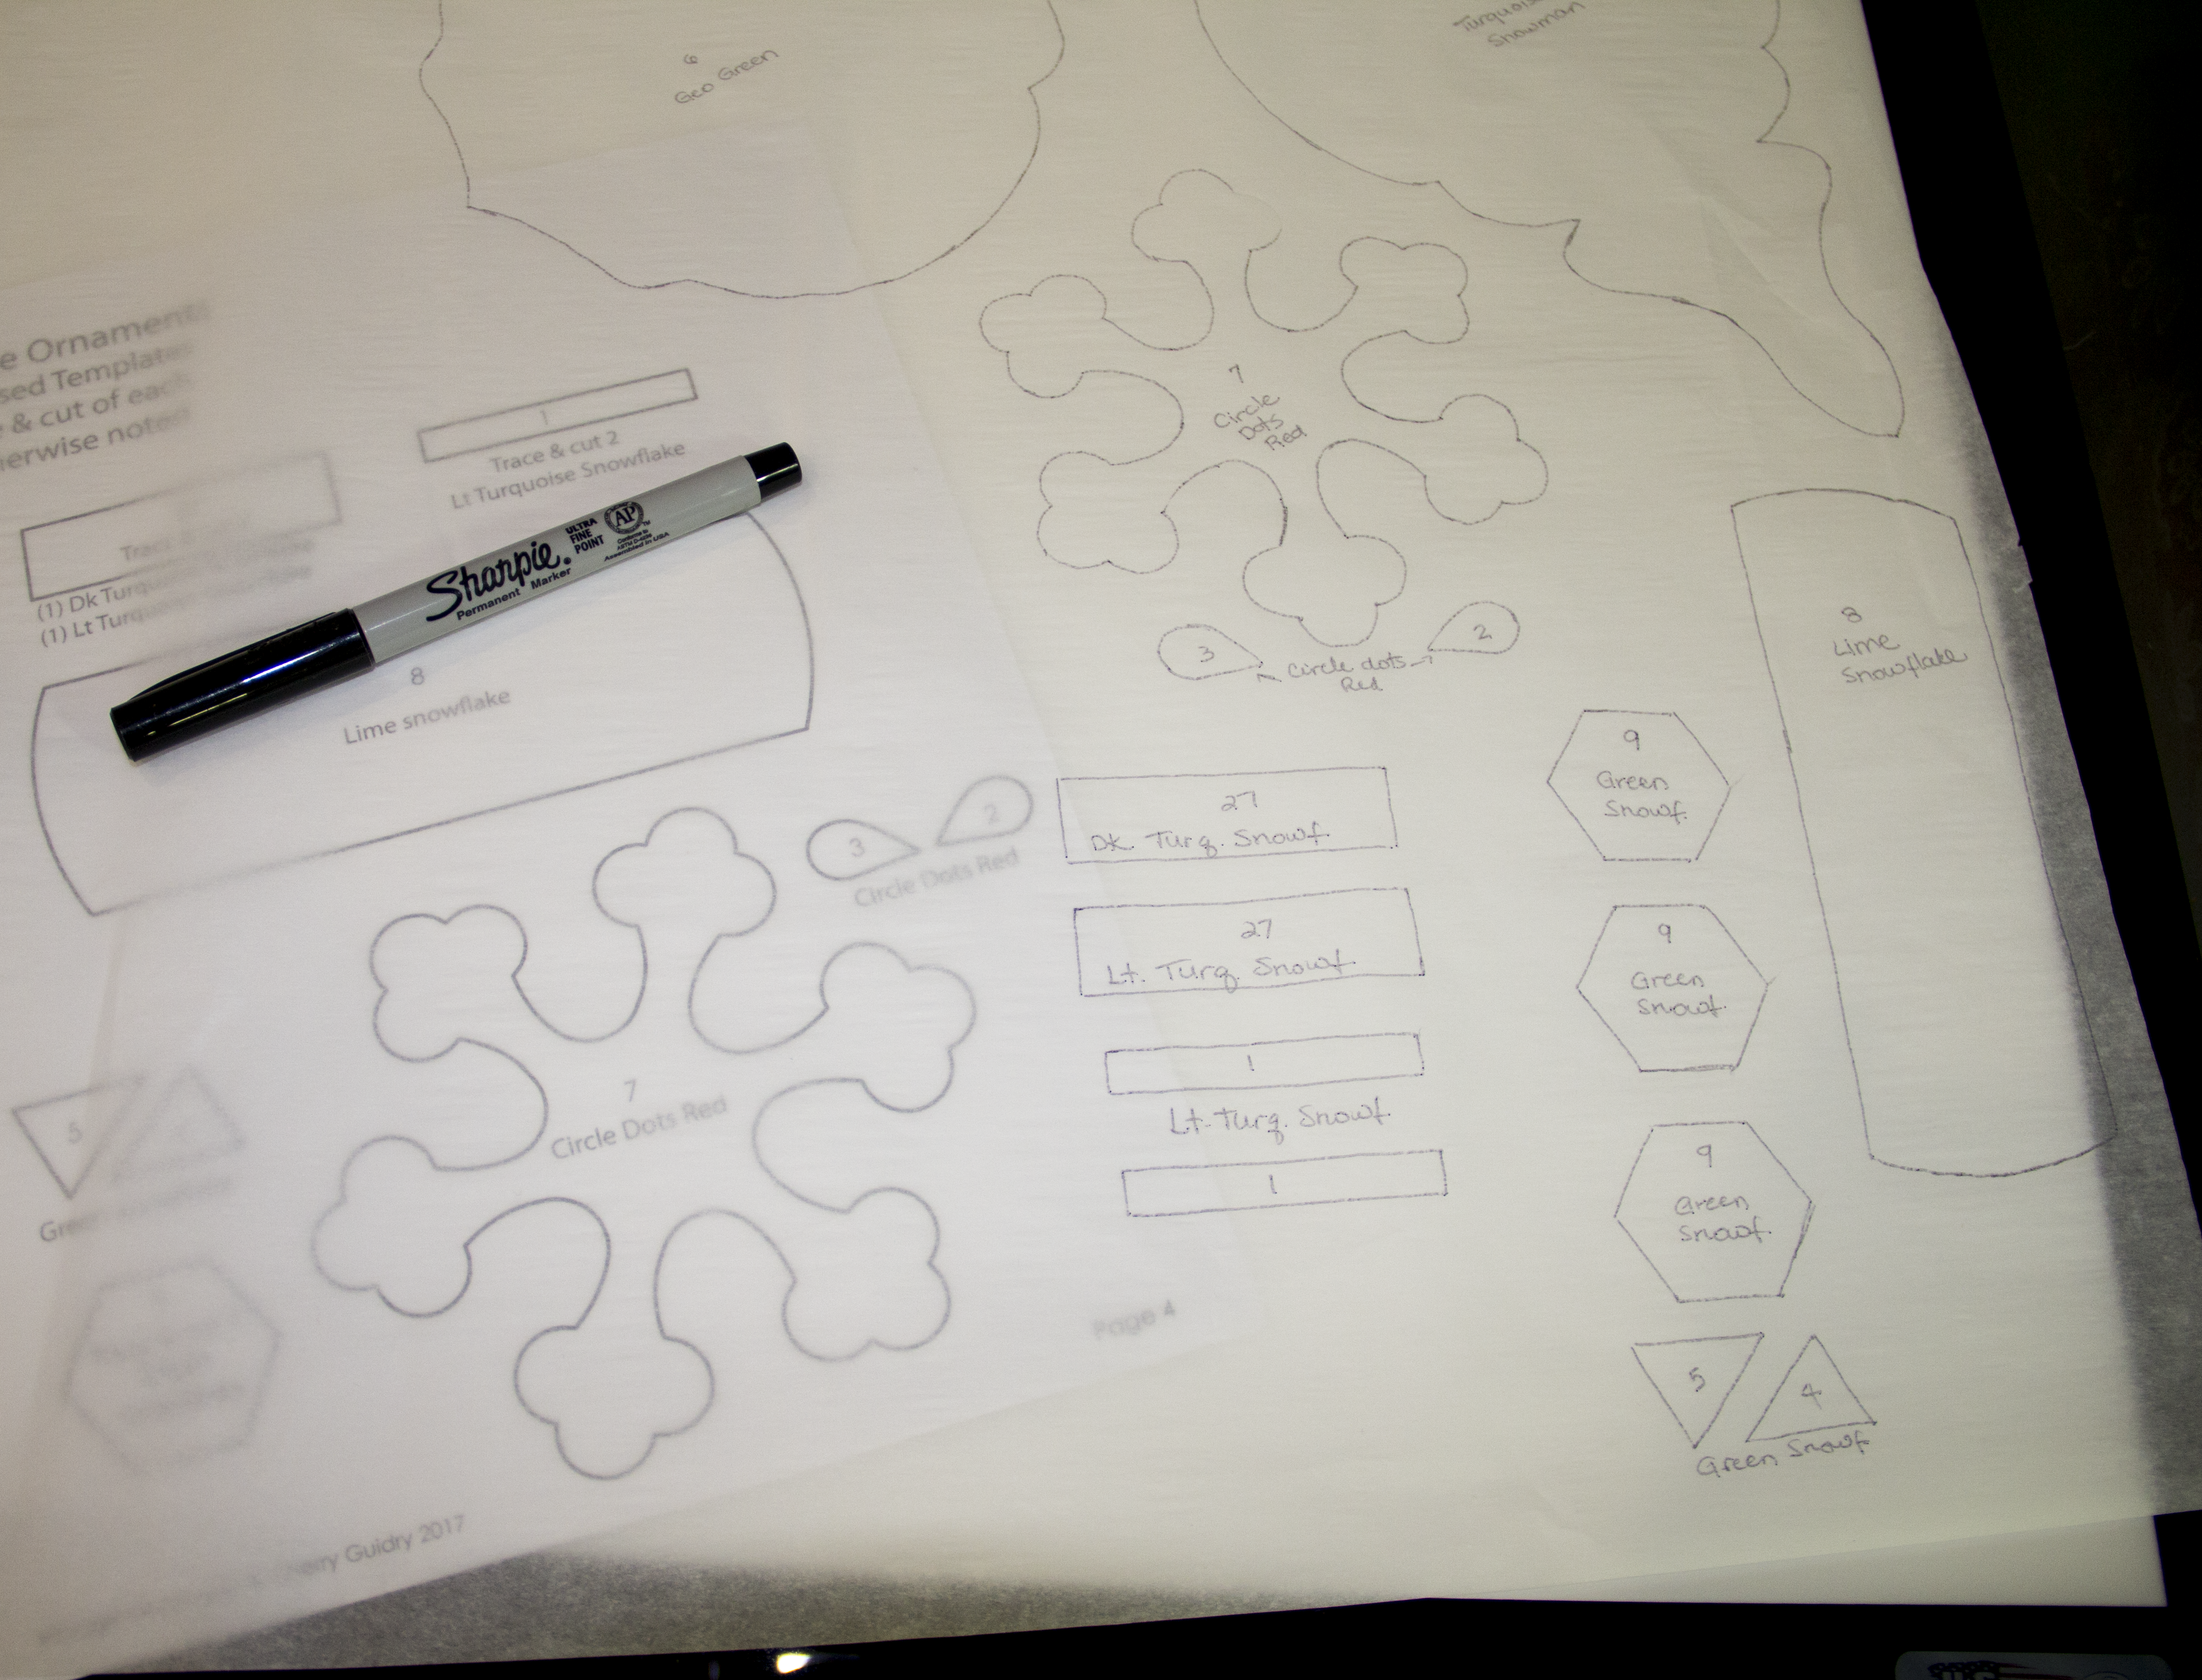
Cut the shapes out a 1/4″ away from the traced line.

Fuse the traced shapes onto the wrong side of the corresponding fabrics. For this project, I chose to use Pellon’s Wonder Under #805 paper-backed fusible, a lightweight product that’s easy to use and has a soft finish. Please follow the manufacturer’s instruction for your chosen fusible.
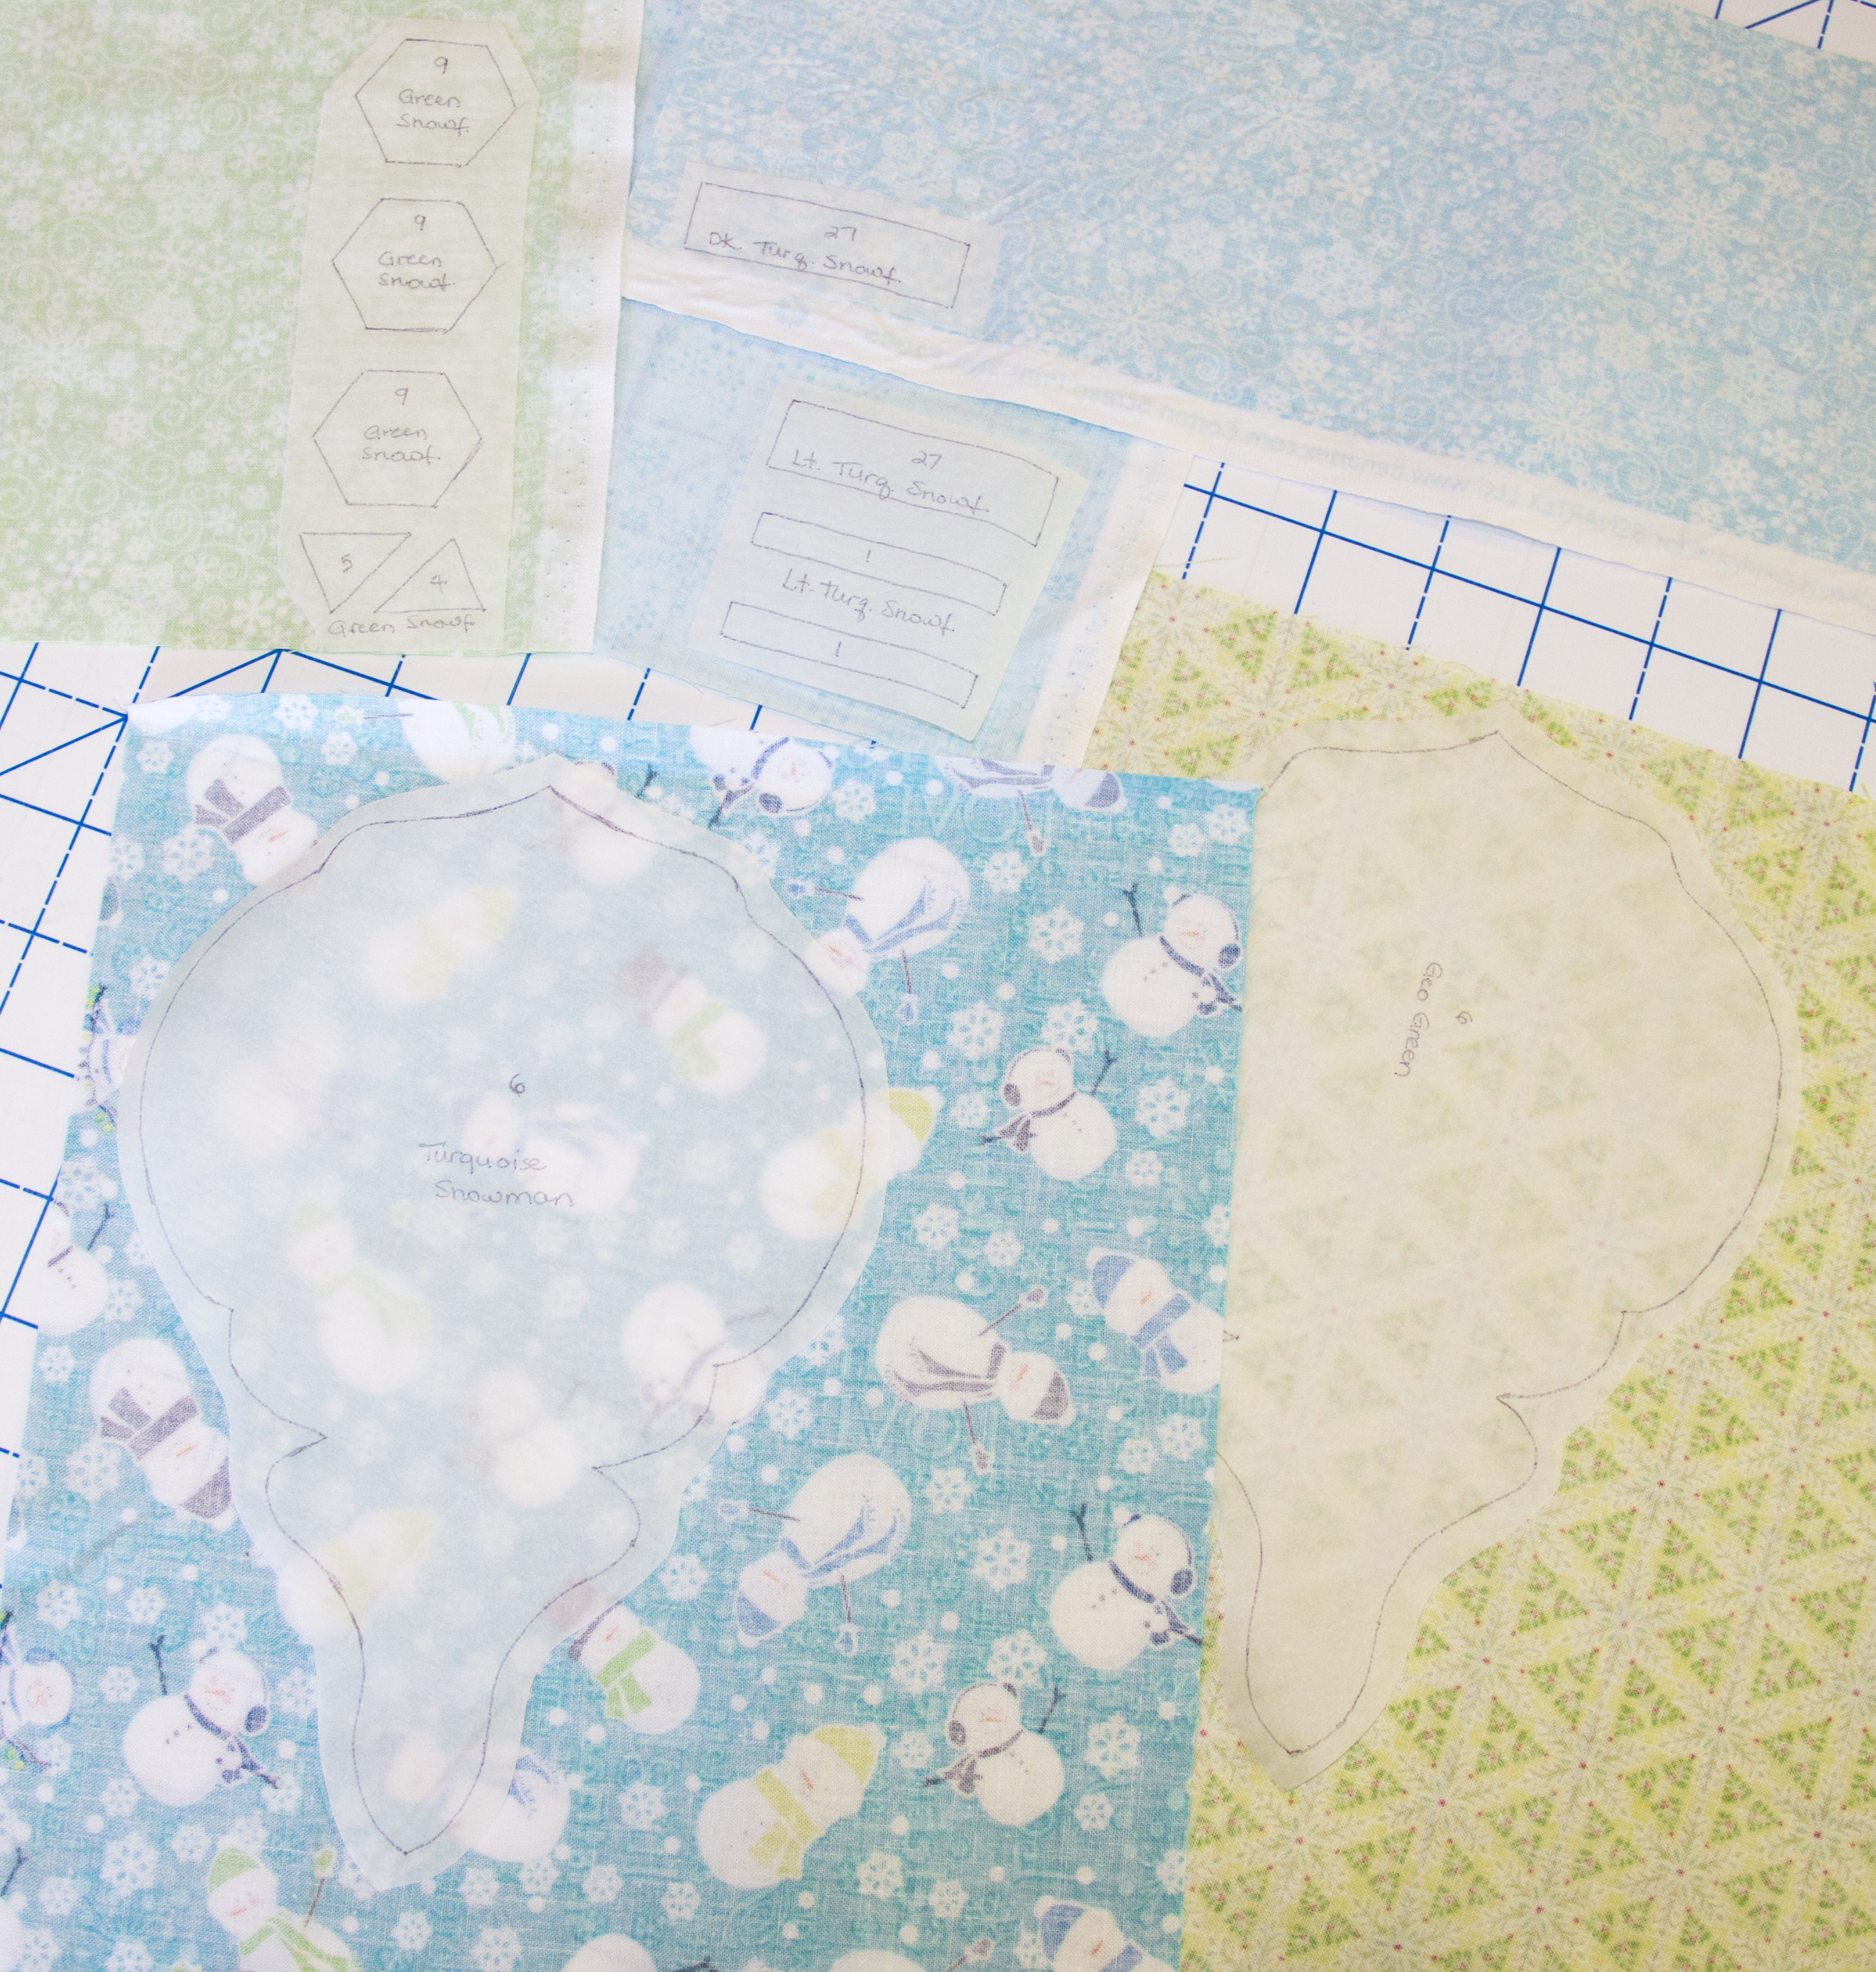
Cut the fused shapes on the traced line.
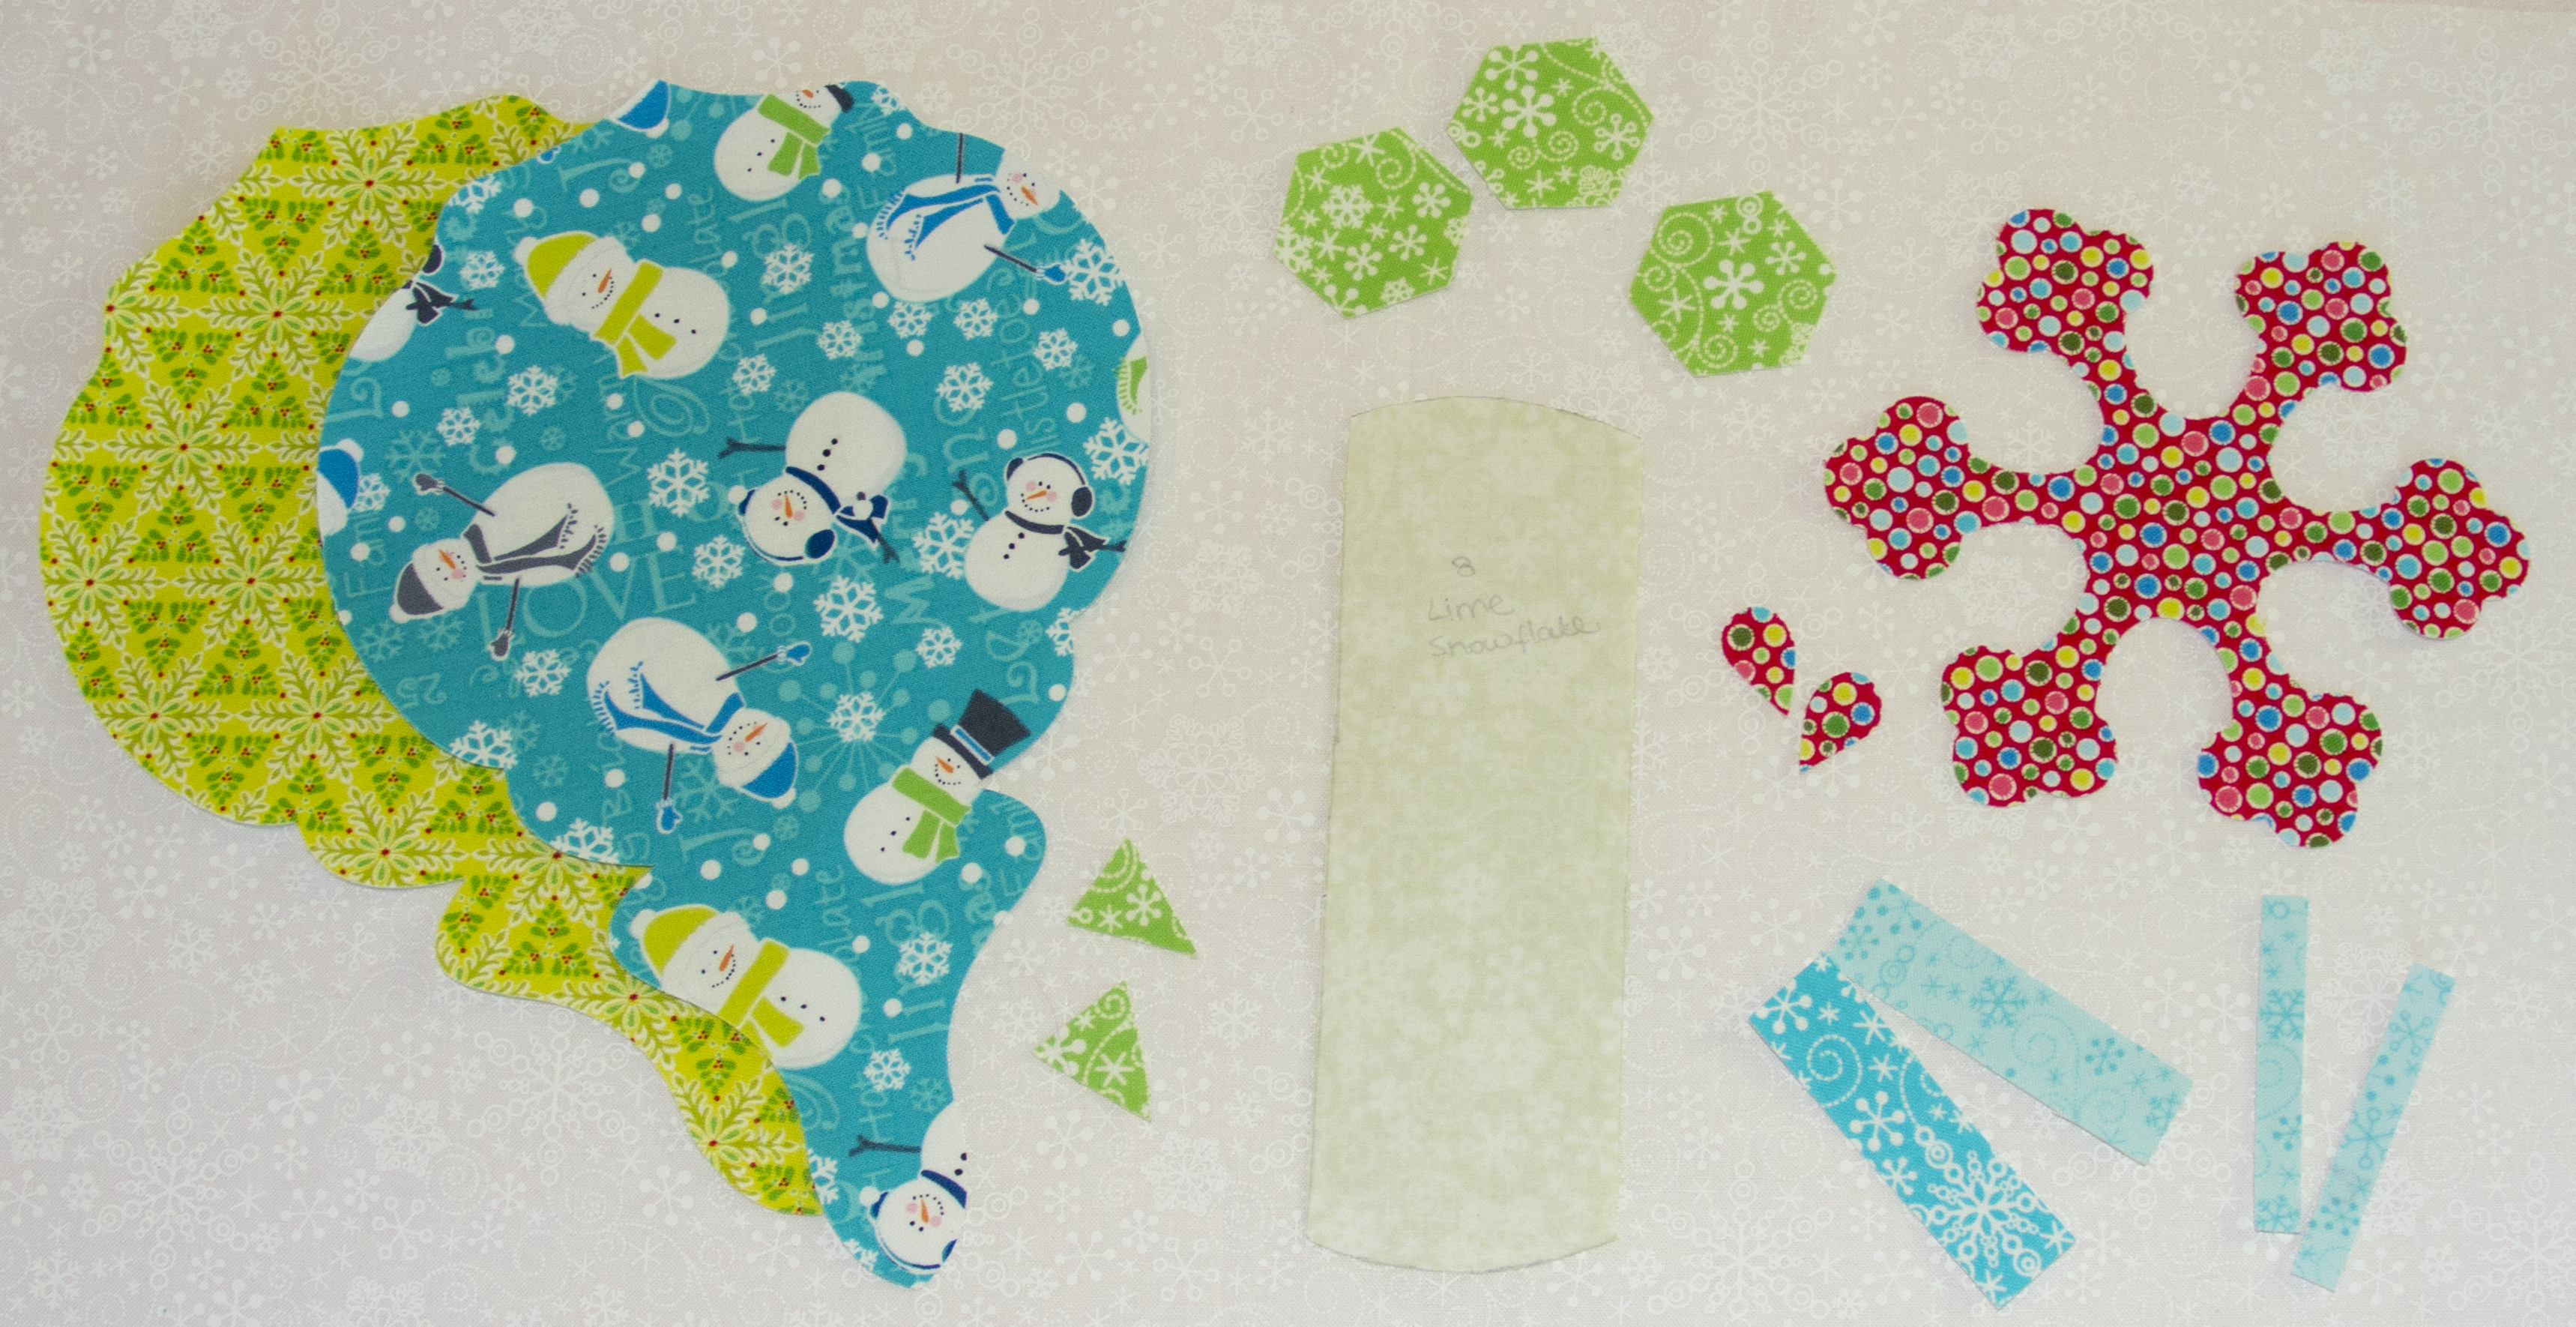
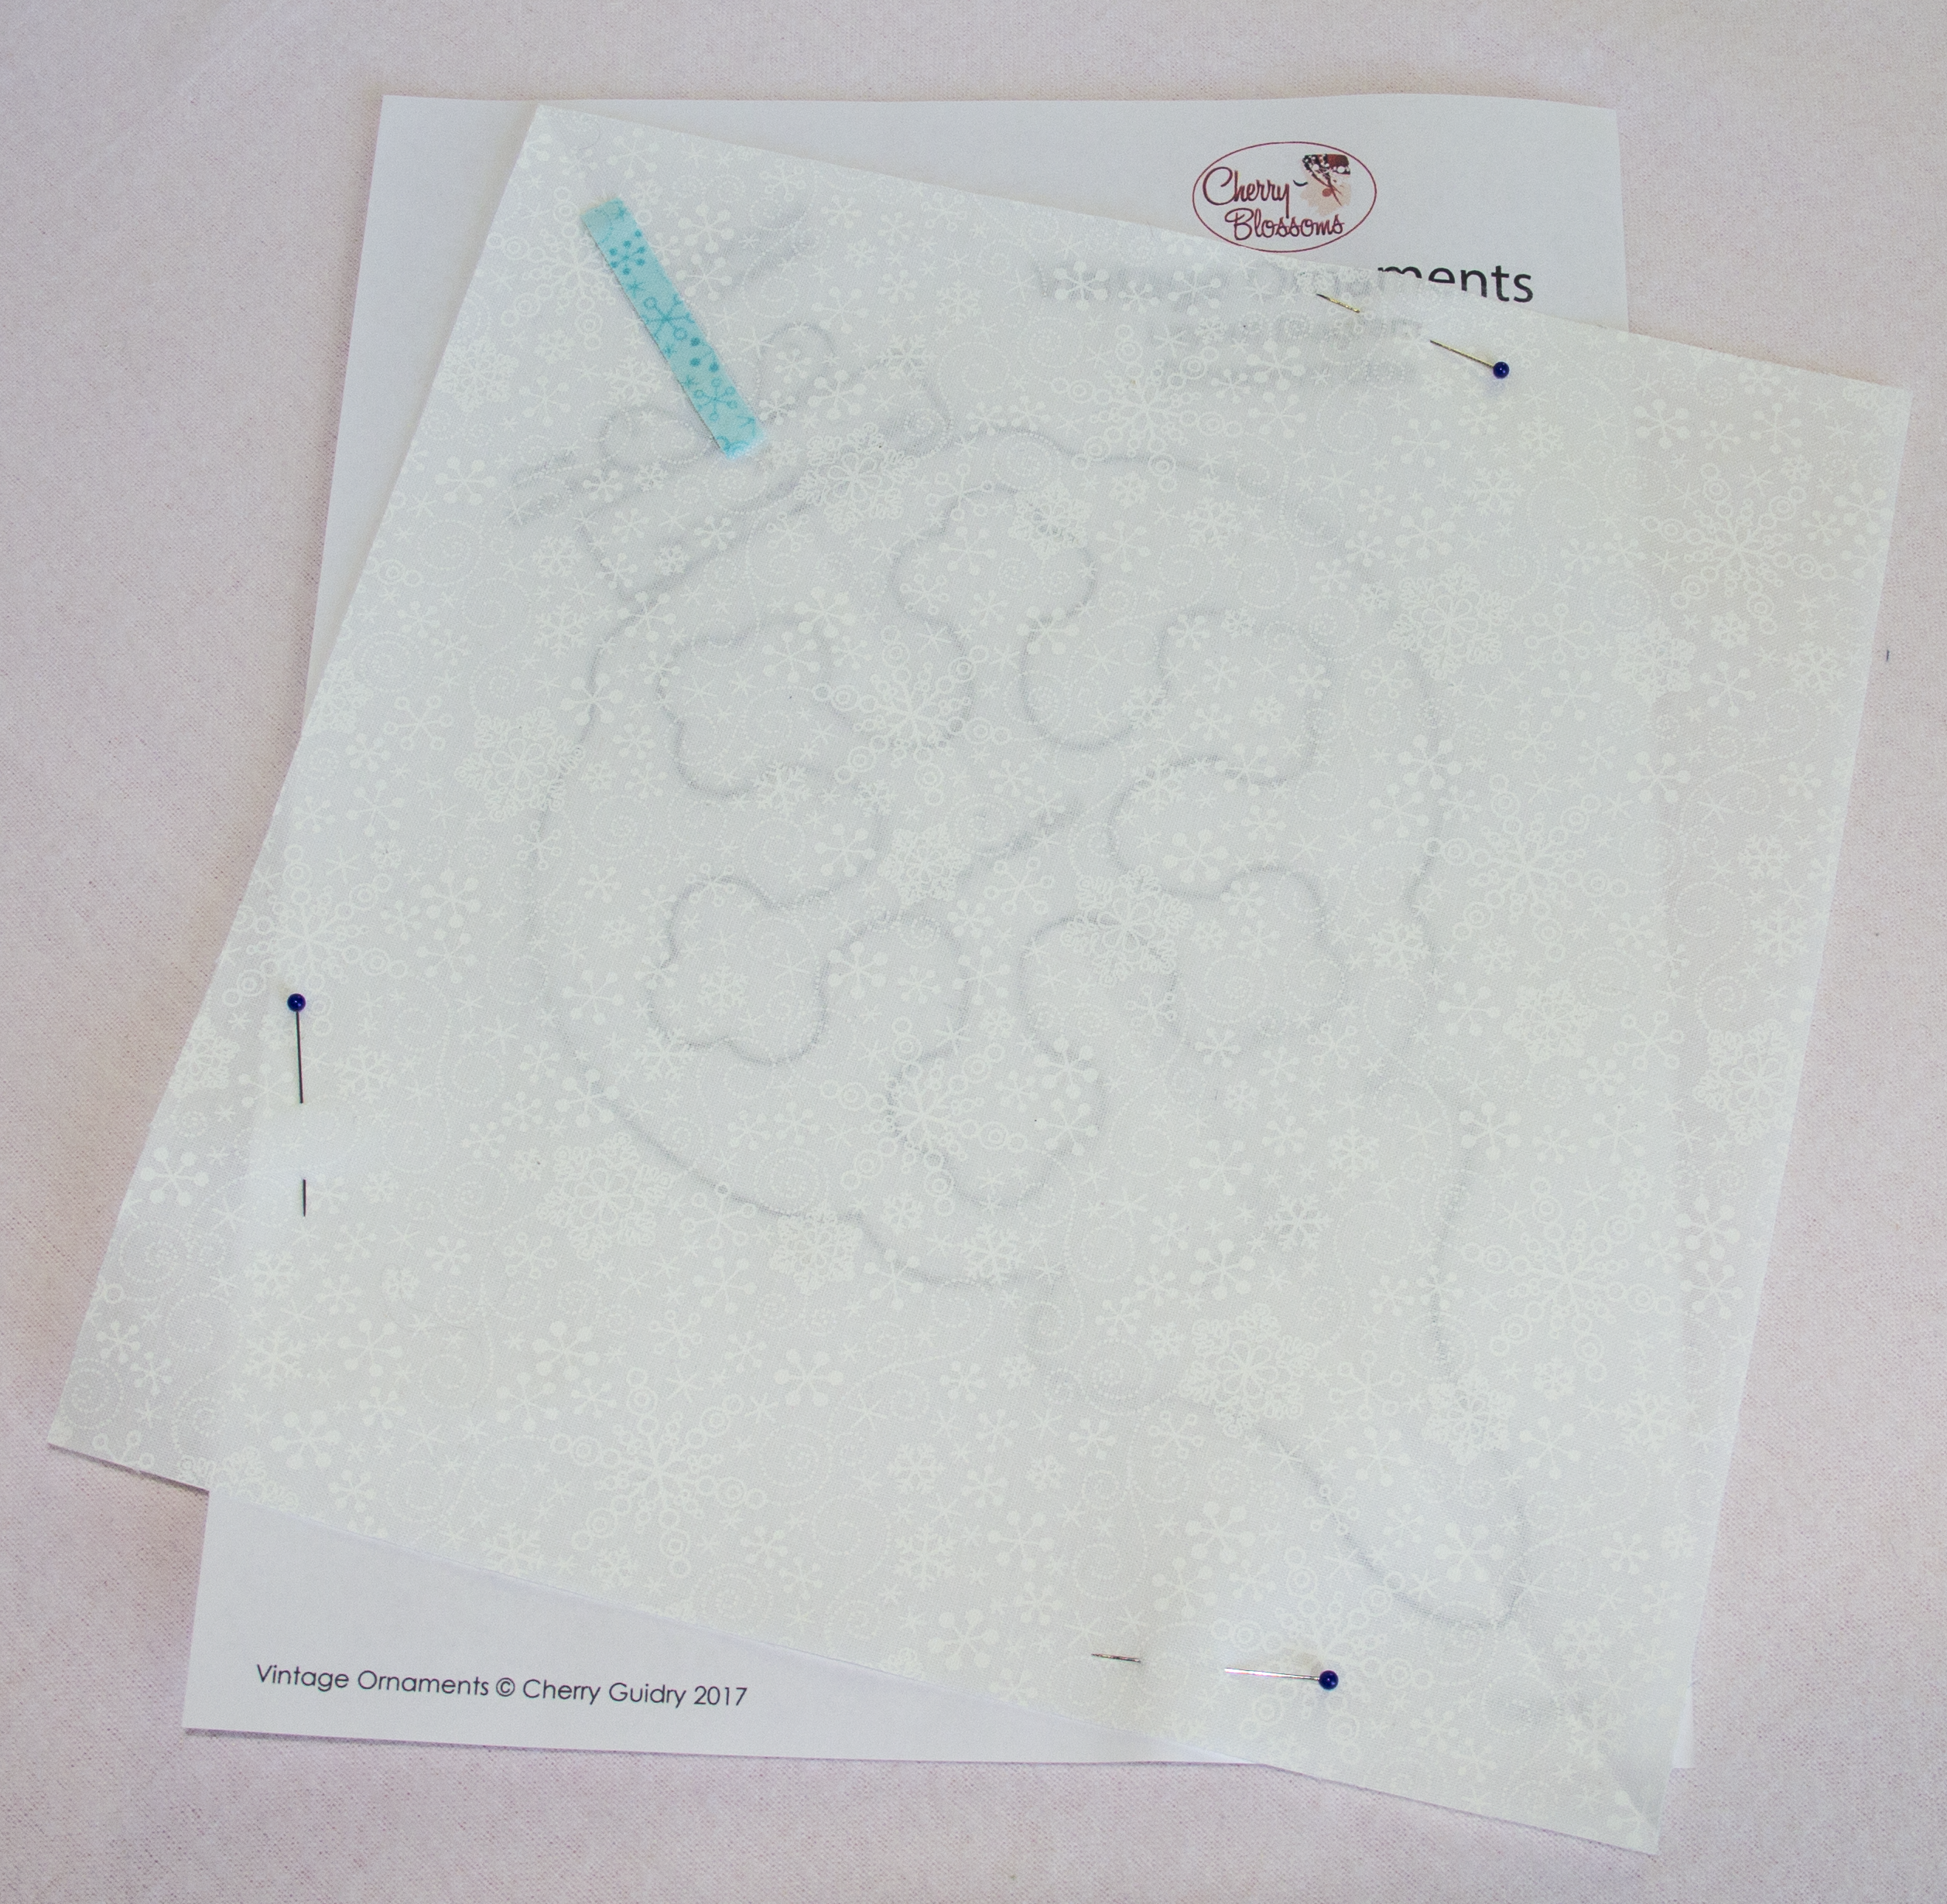
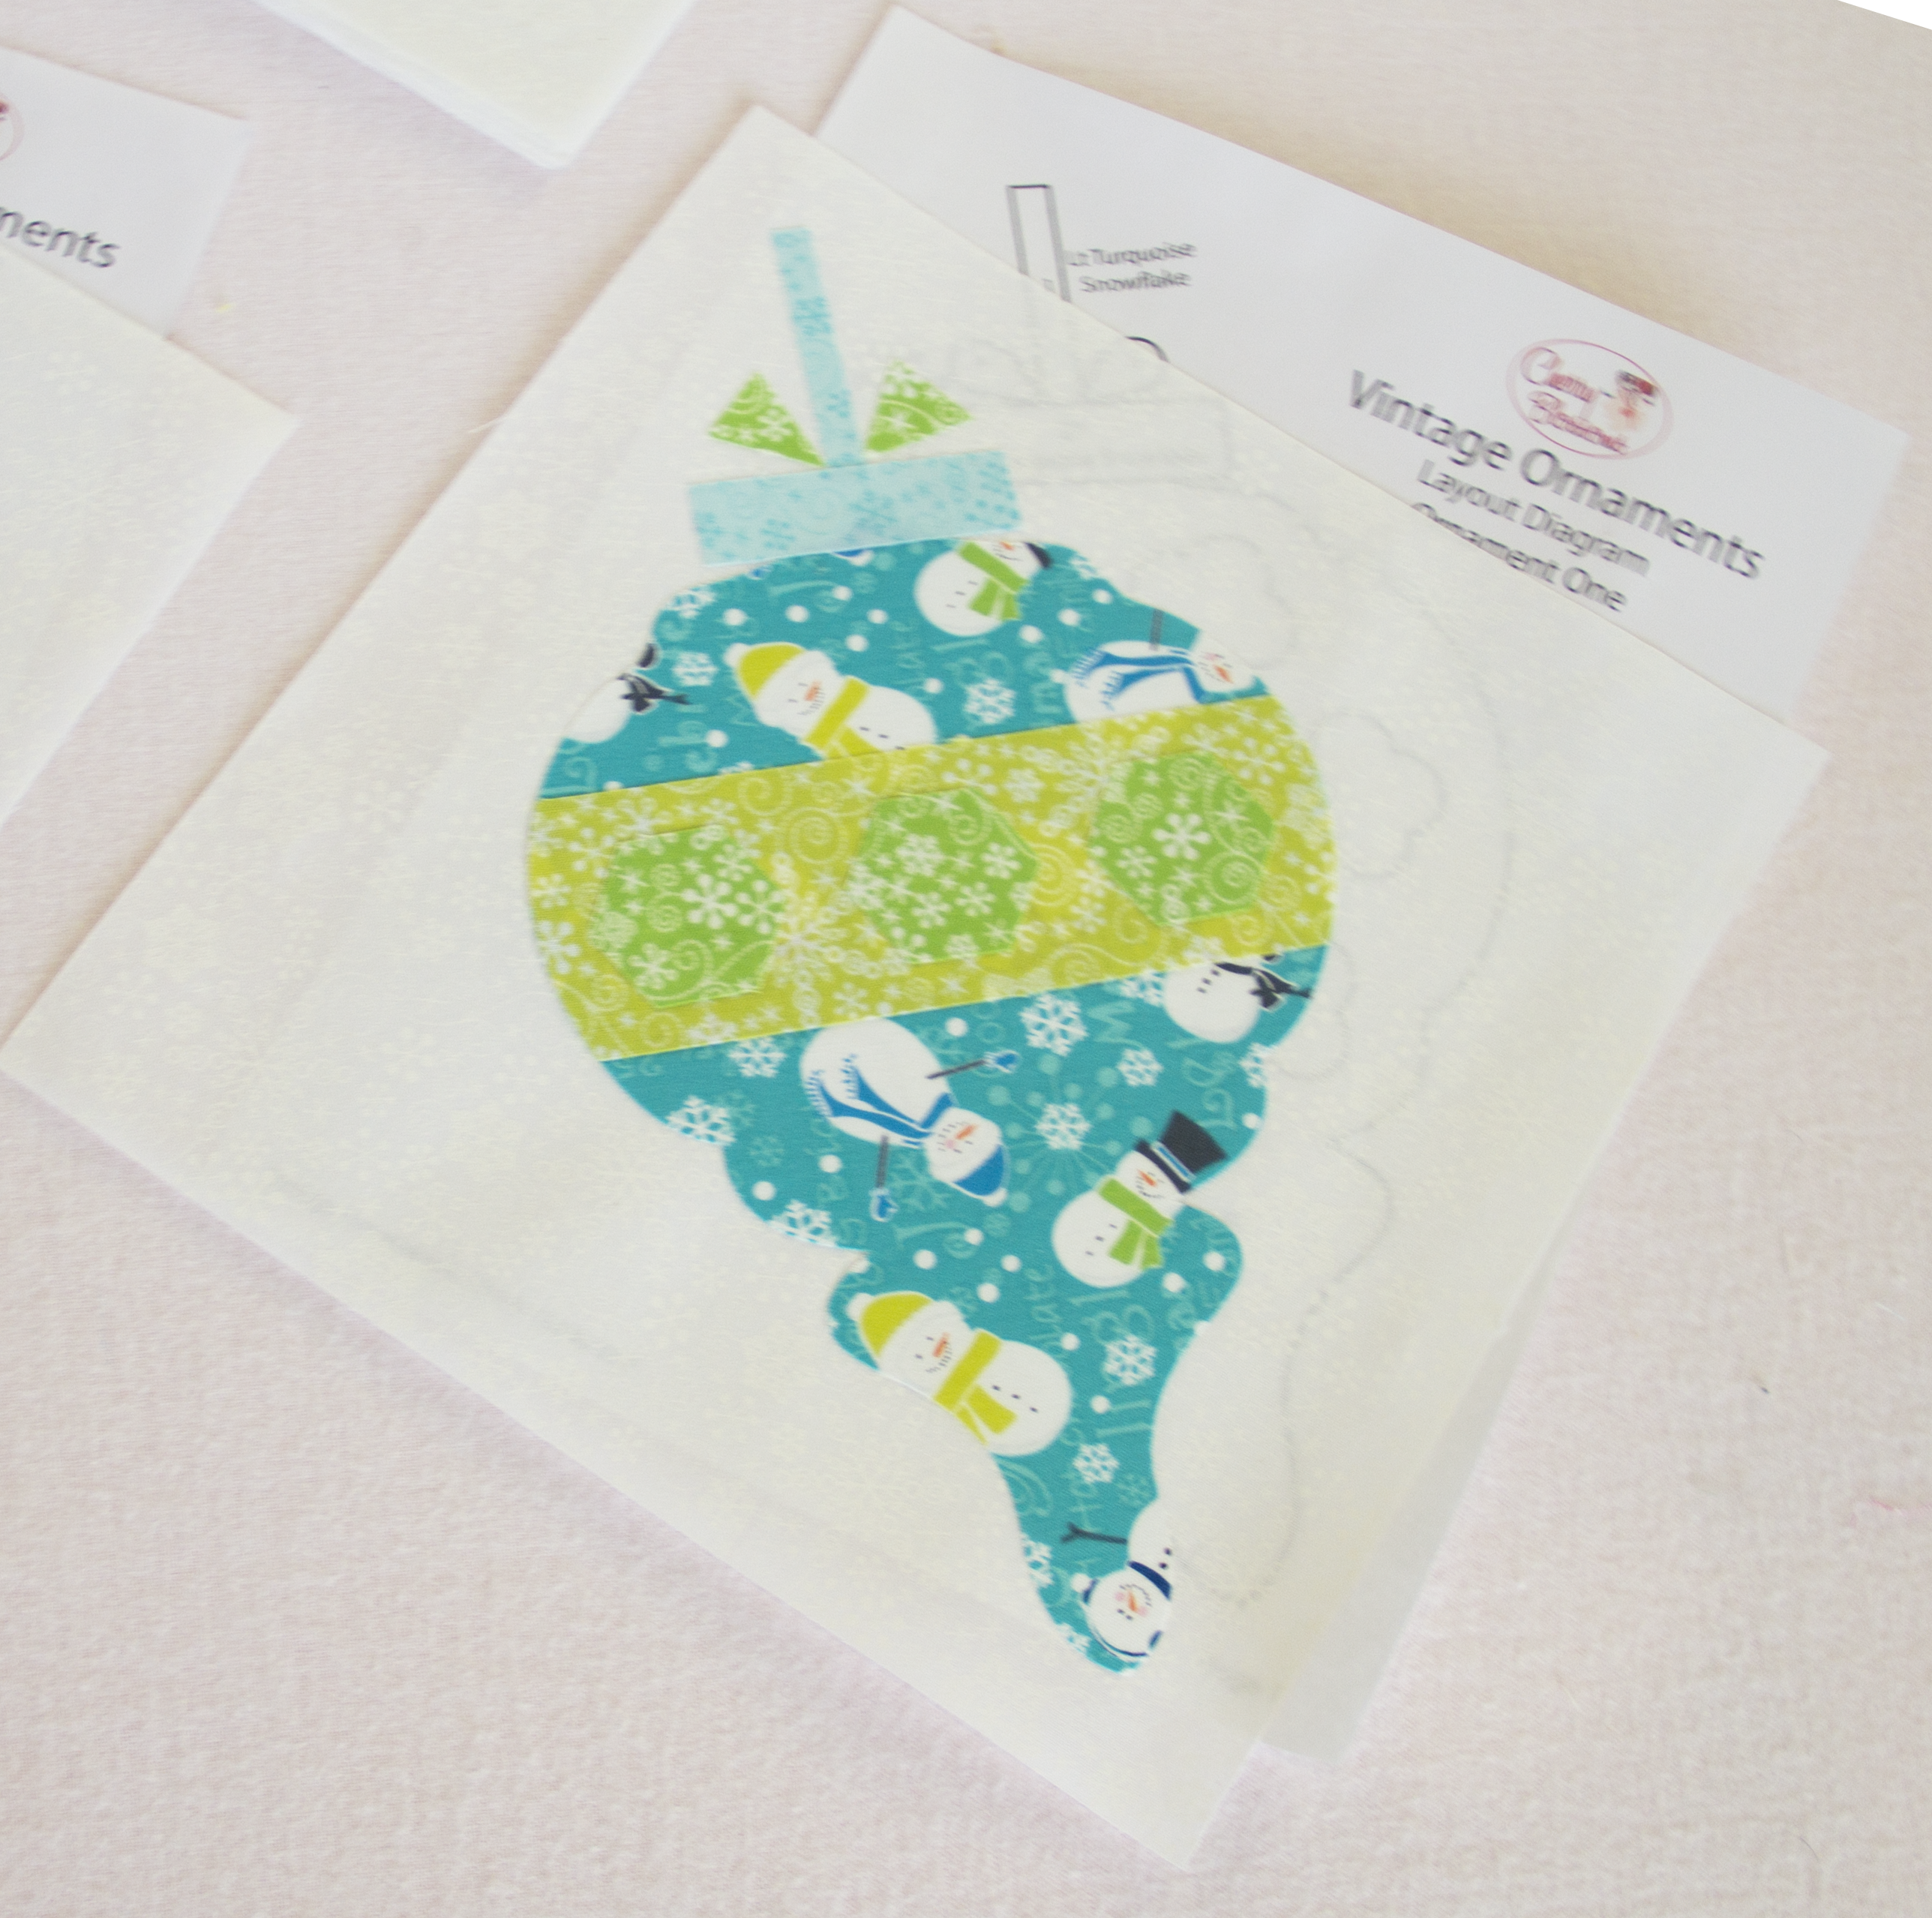
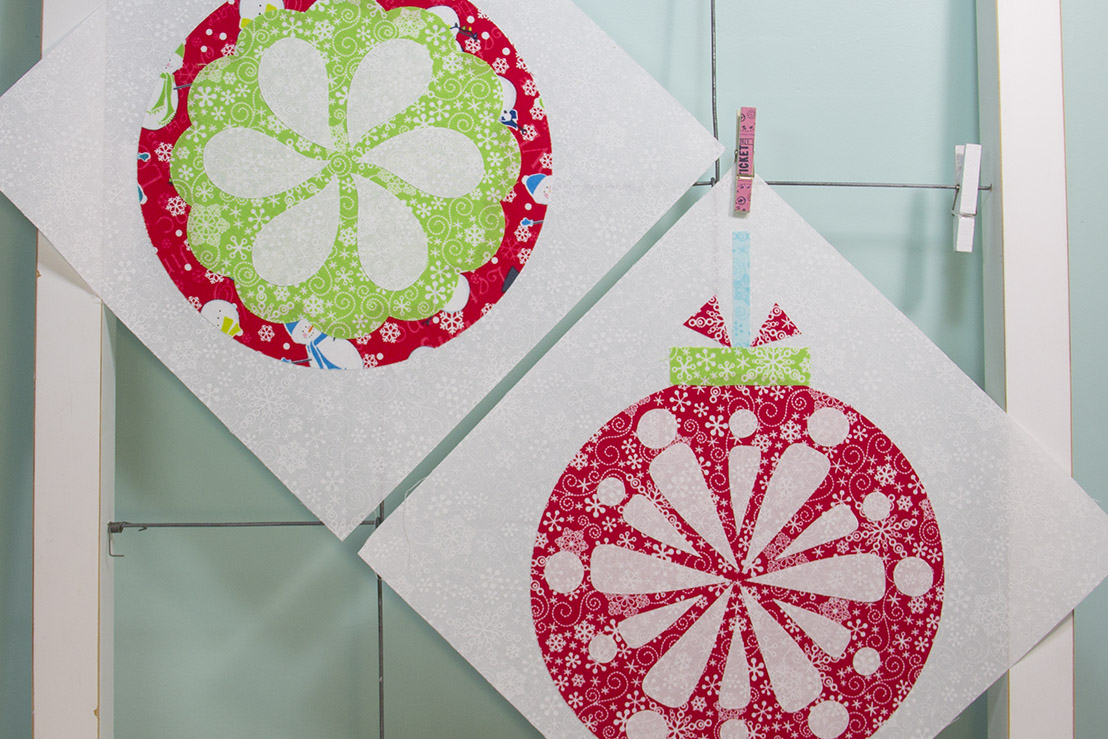
Fold a 9 ½” x 9 ½” background square A diagonally and center over the Vintage Ornaments layout diagram for Block One. You may want to use a light box for this step.
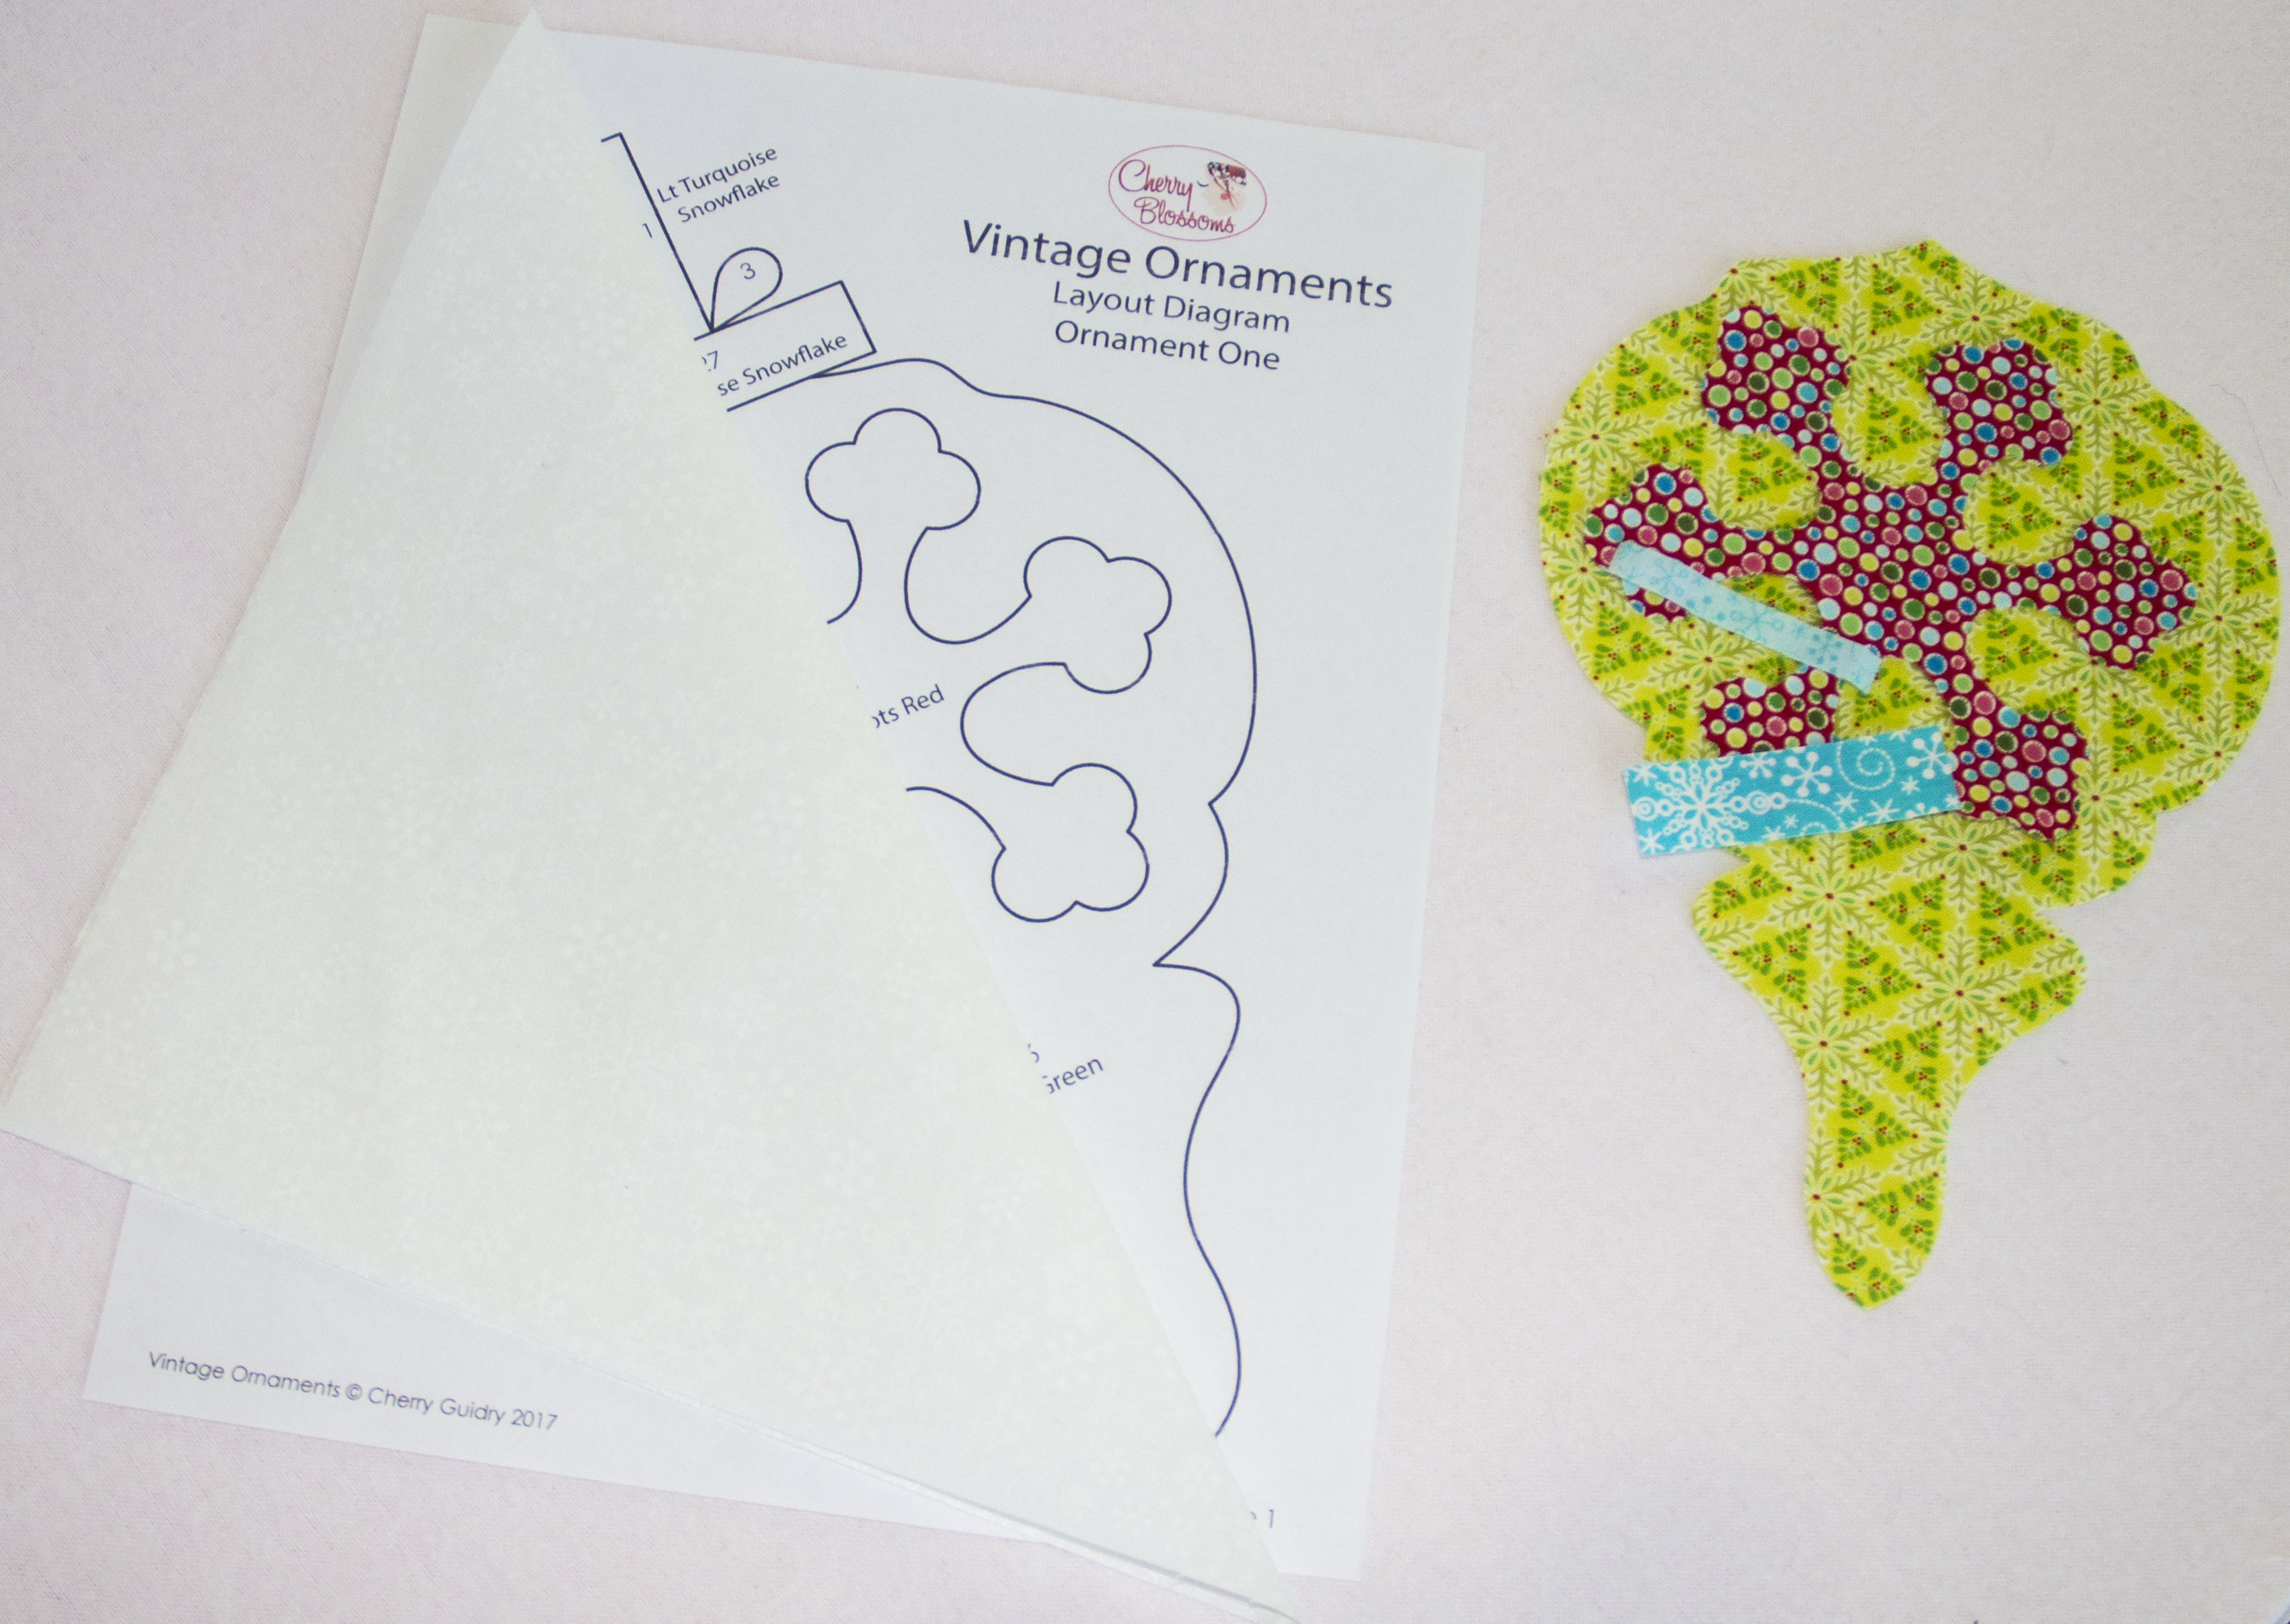
Pin the background fabric onto the layout diagram; peel the liner off the back of the fusible and place the shapes, fusible side down, onto the background fabric in sequential order from the lowest number to the highest. Iron the shapes to fuse them onto the background fabric following the manufacturer’s recommendations for you chosen fusible.
Fuse the rest of the shapes down.
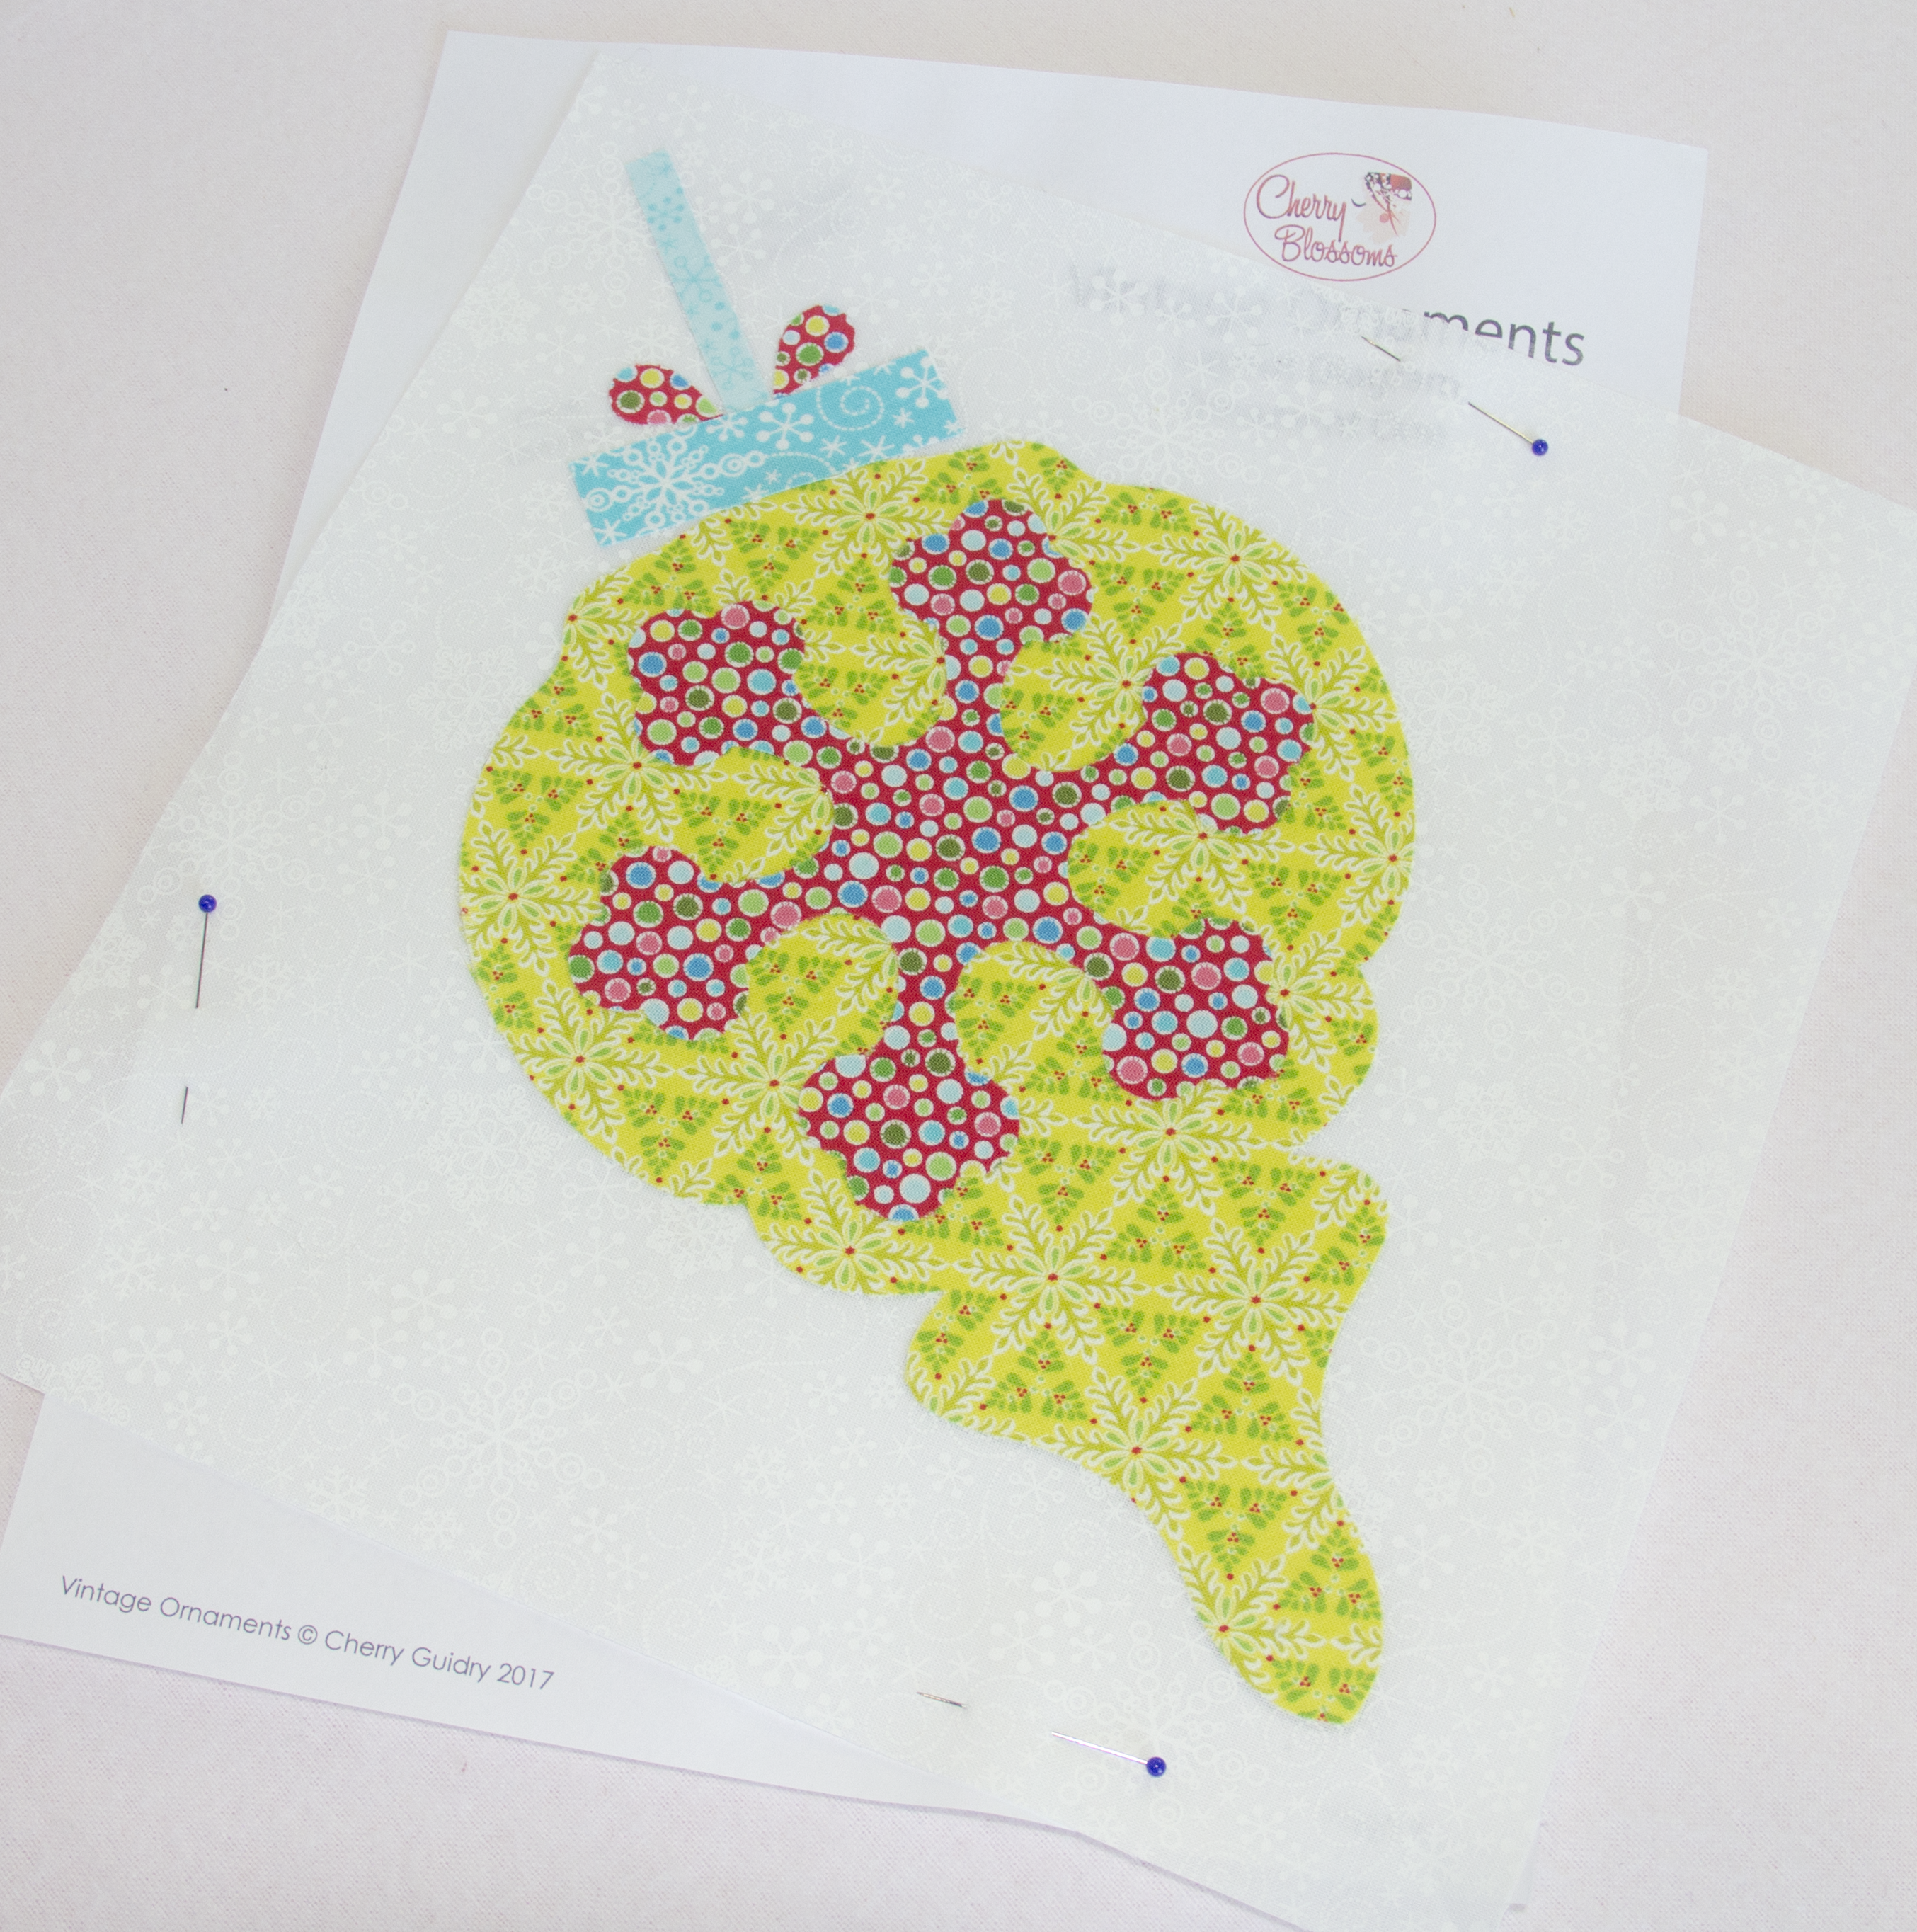
Repeat with Block Two.
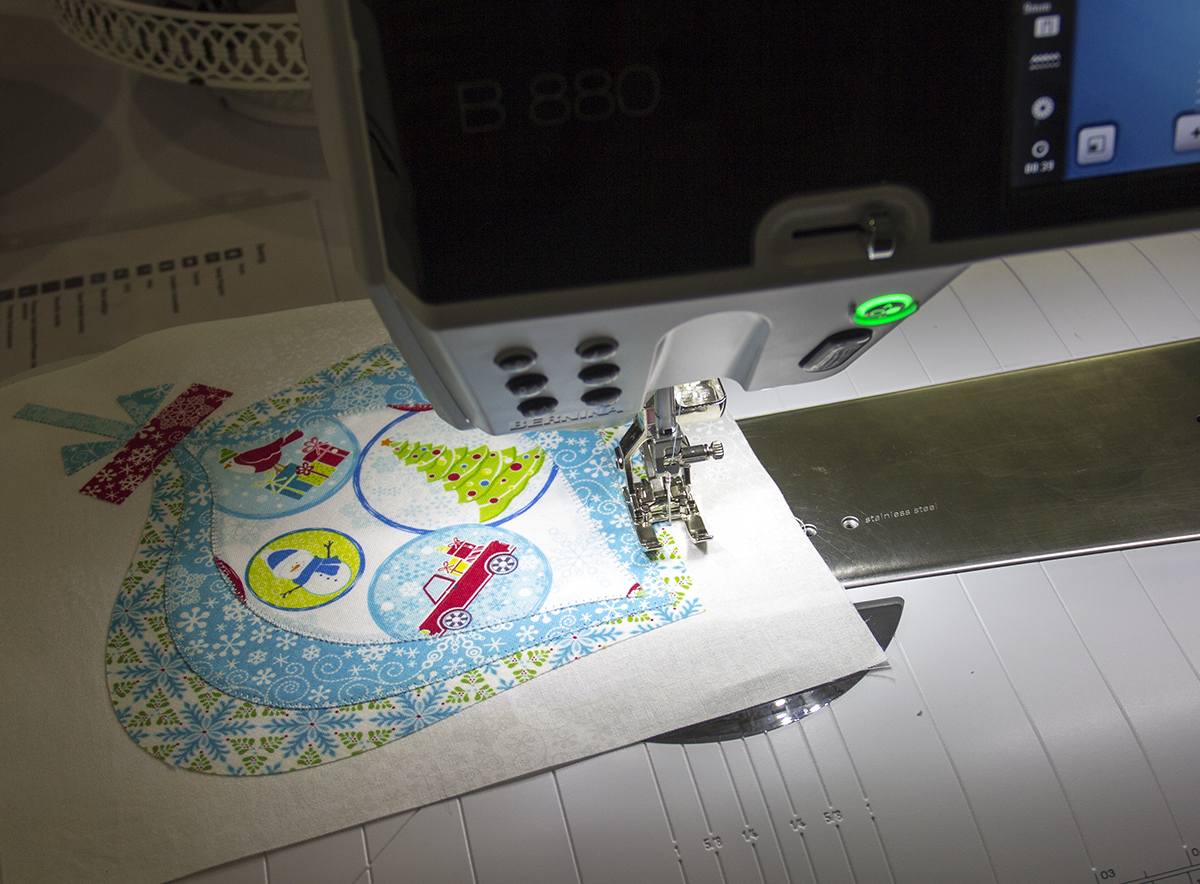
Step 3: Let’s sew!
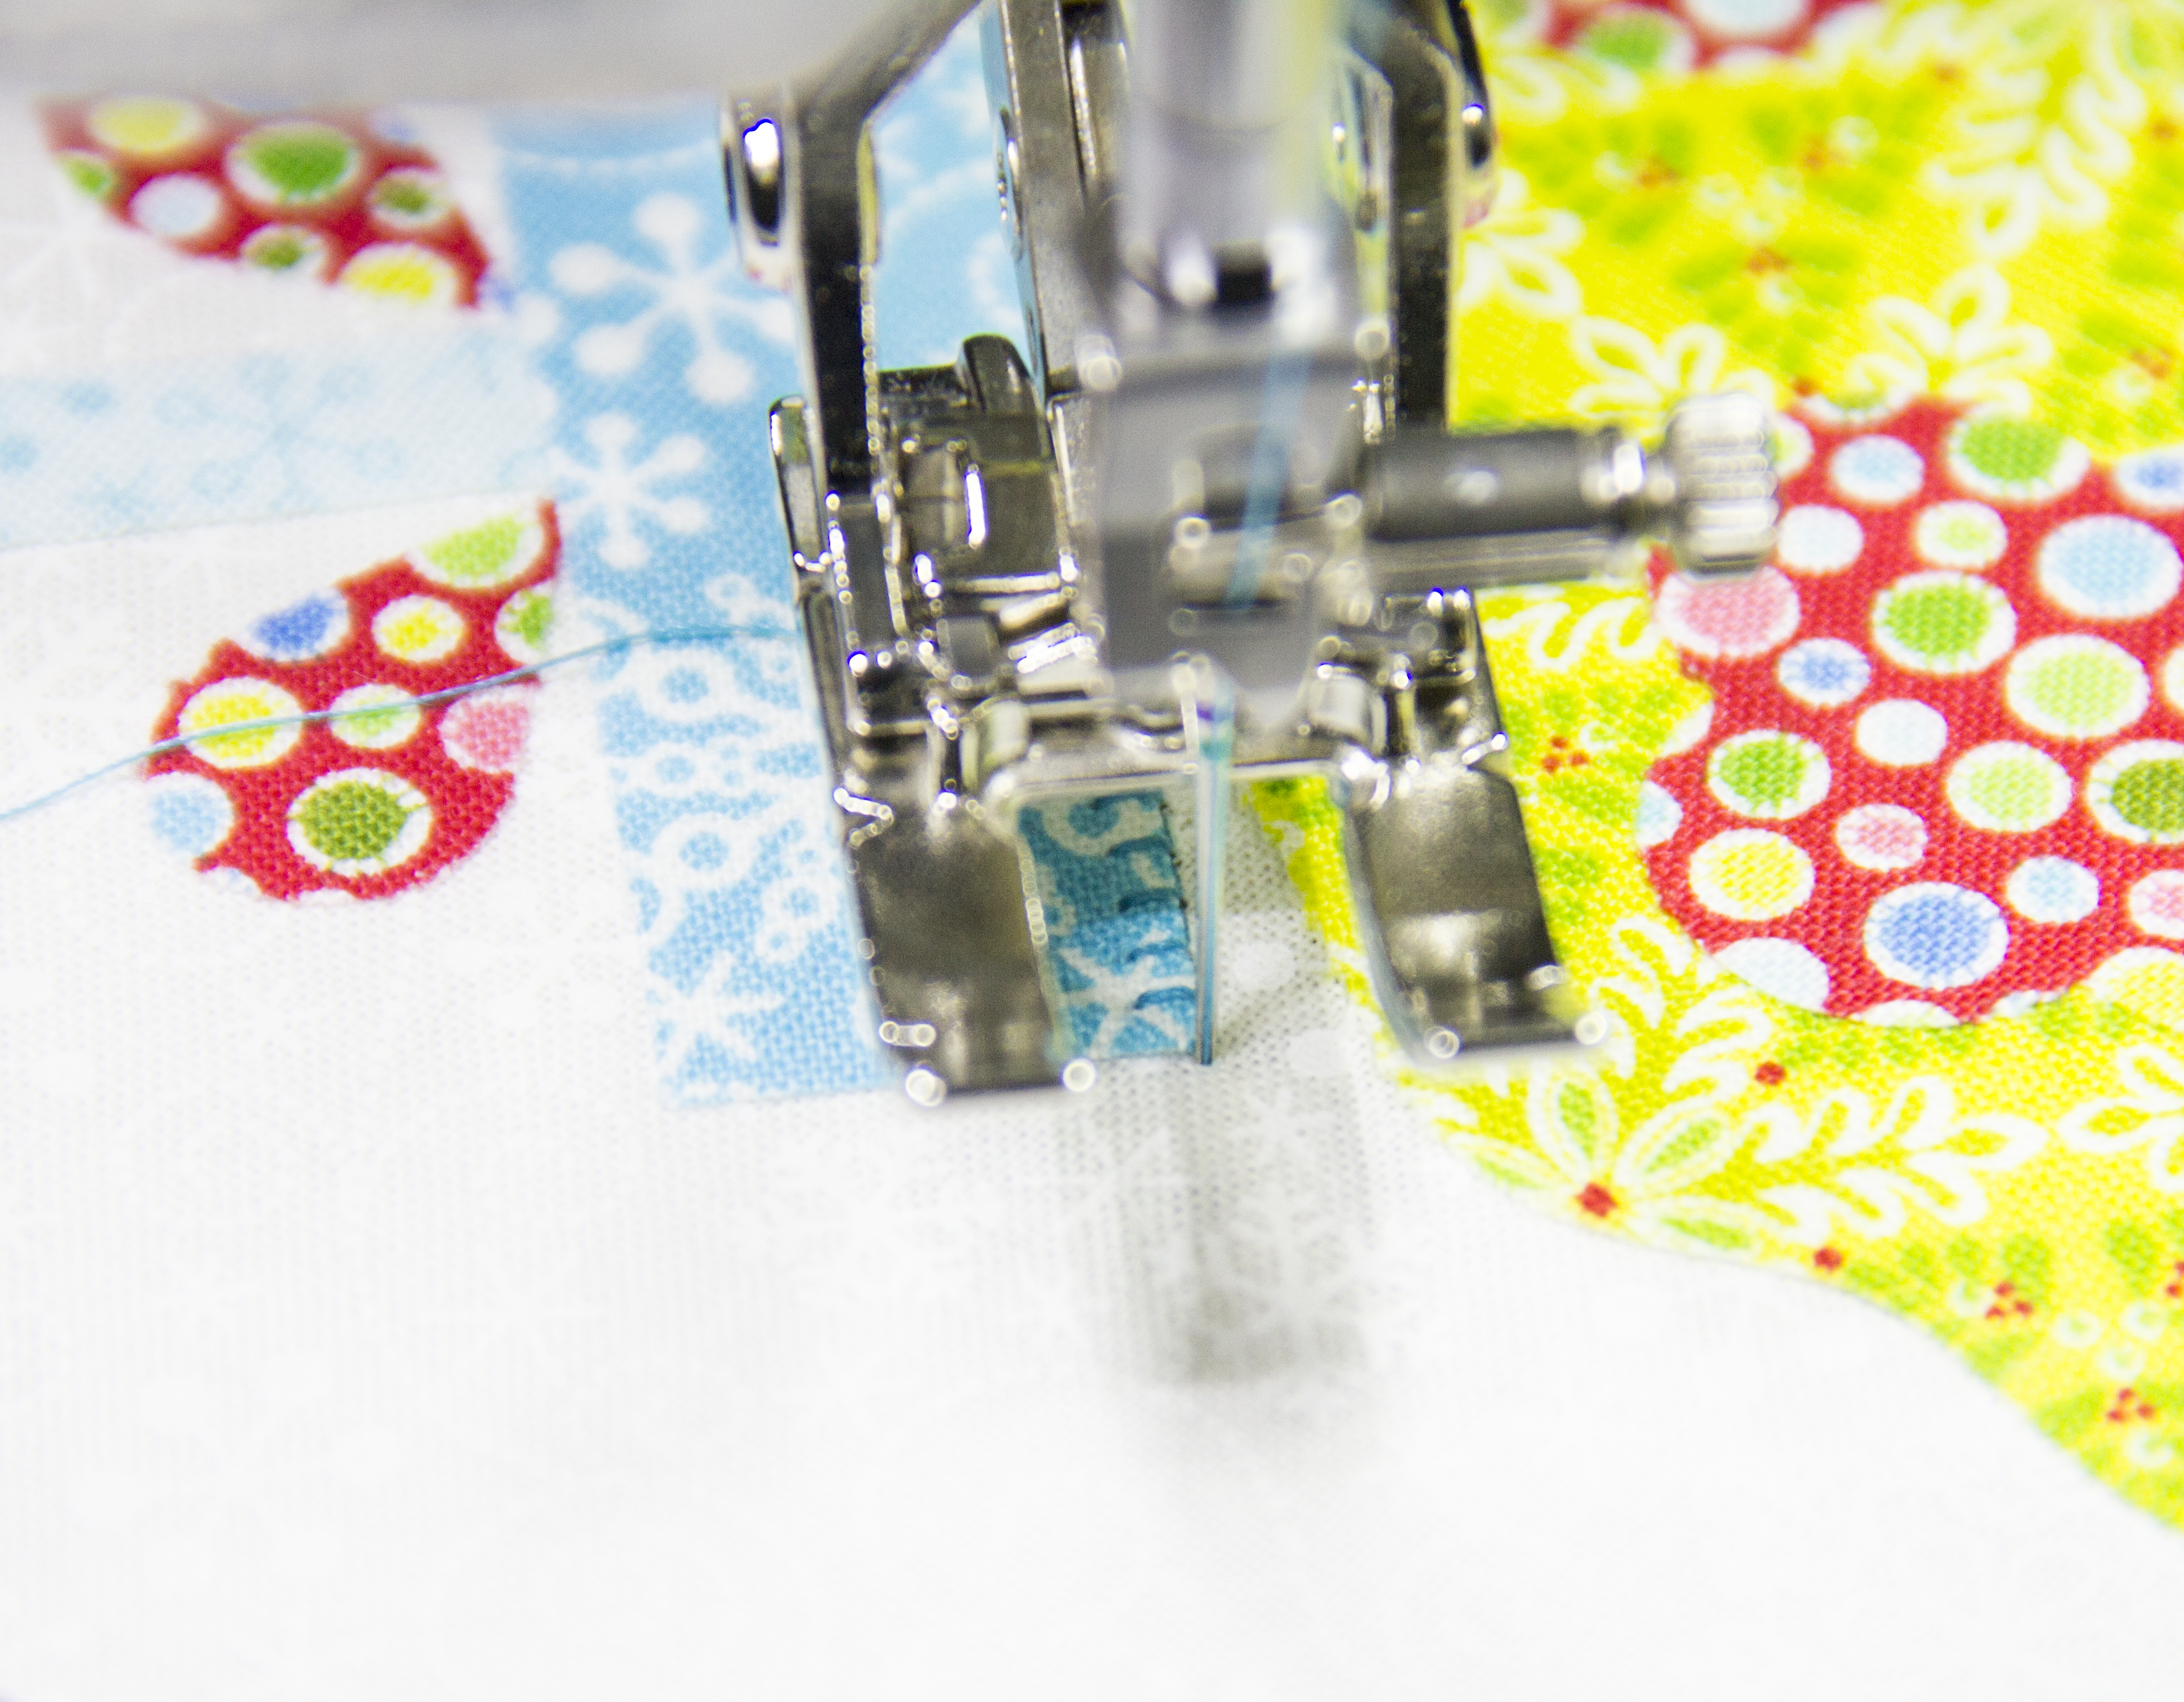
I prefer to use a small needle when stitching my appliques down and always start with a new Microtex 70/10 needle.
My favorite presser foot for machine applique is the Open embroidery foot #20D in conjunction with the Dual Feed on my B880.

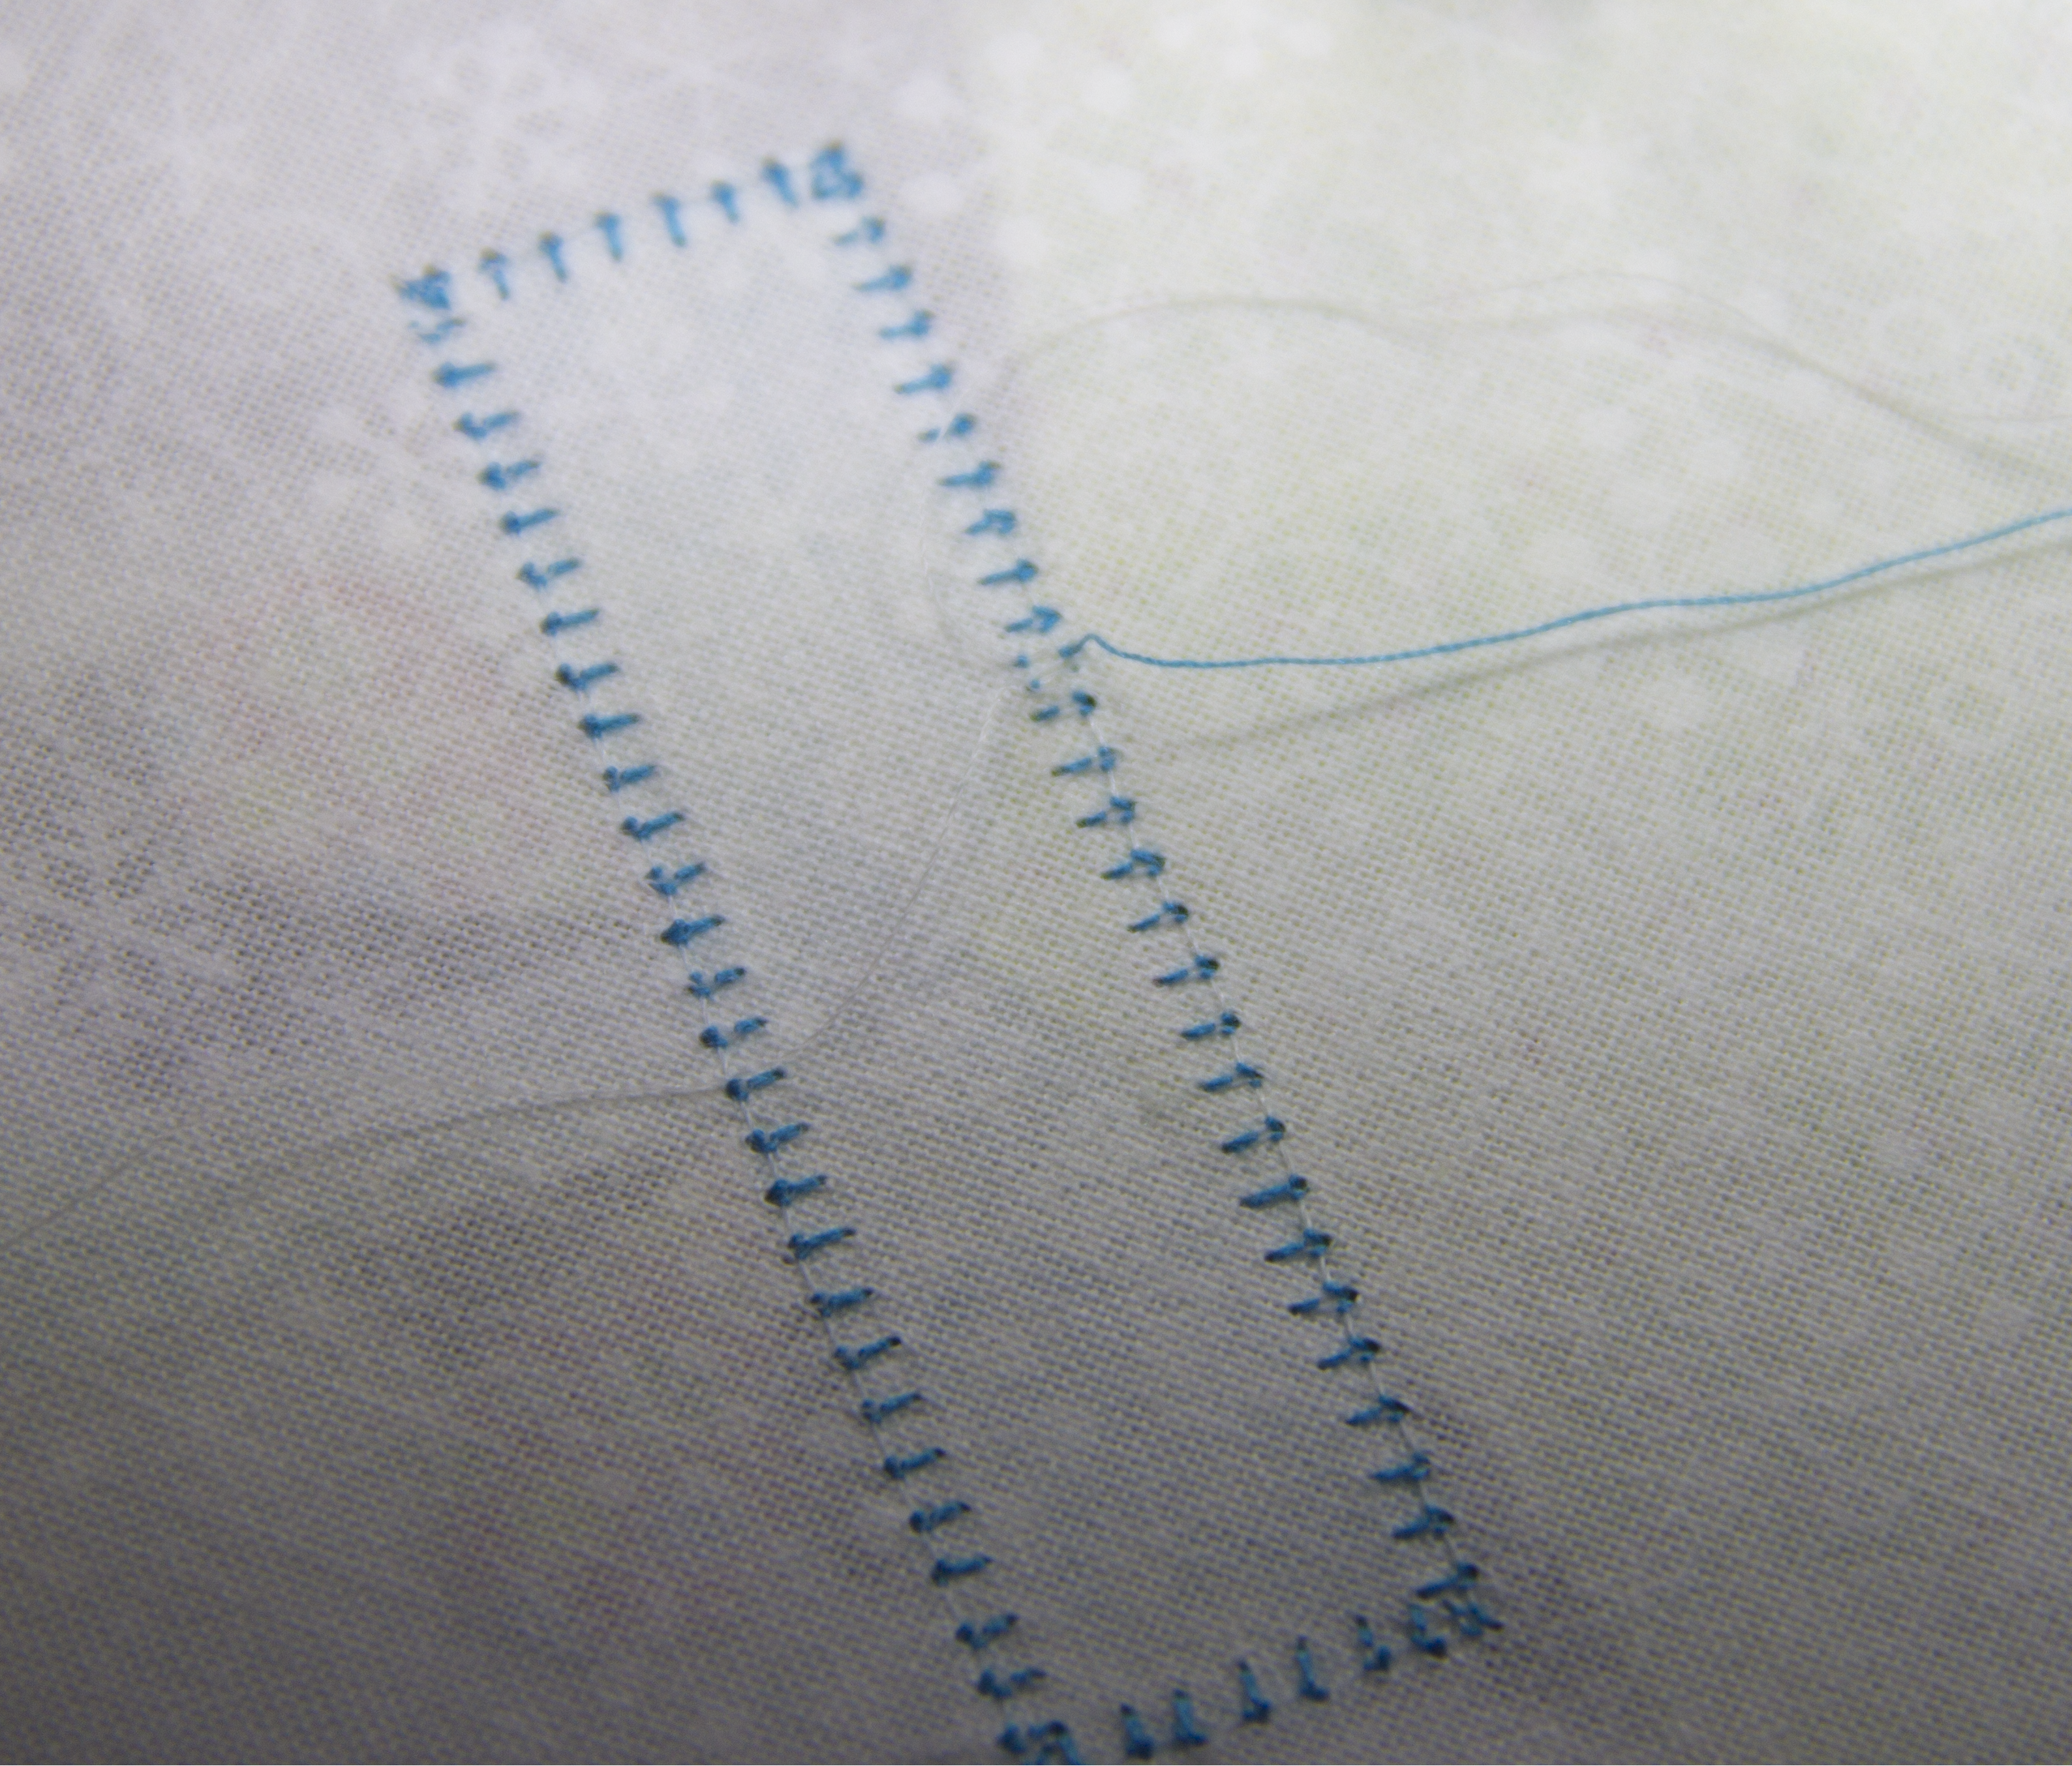
Choose the basic blanket stitch, in my machine that is stitch #1329.
![]()
Set your stitch length to 2.20, stitch width to 2.2, and the needle on the stop down position.

Thread the machine with a thread color that coordinates with the applique fabric, match the bobbin thread to the background fabric, in this case, white.
Begin stitching, leaving about 6-7″ of thread tails to secure later on.

Stitch down to the point of the applique shape and stop with the needle down at to point.
Keeping the needle down, lift the presser foot and pivot.
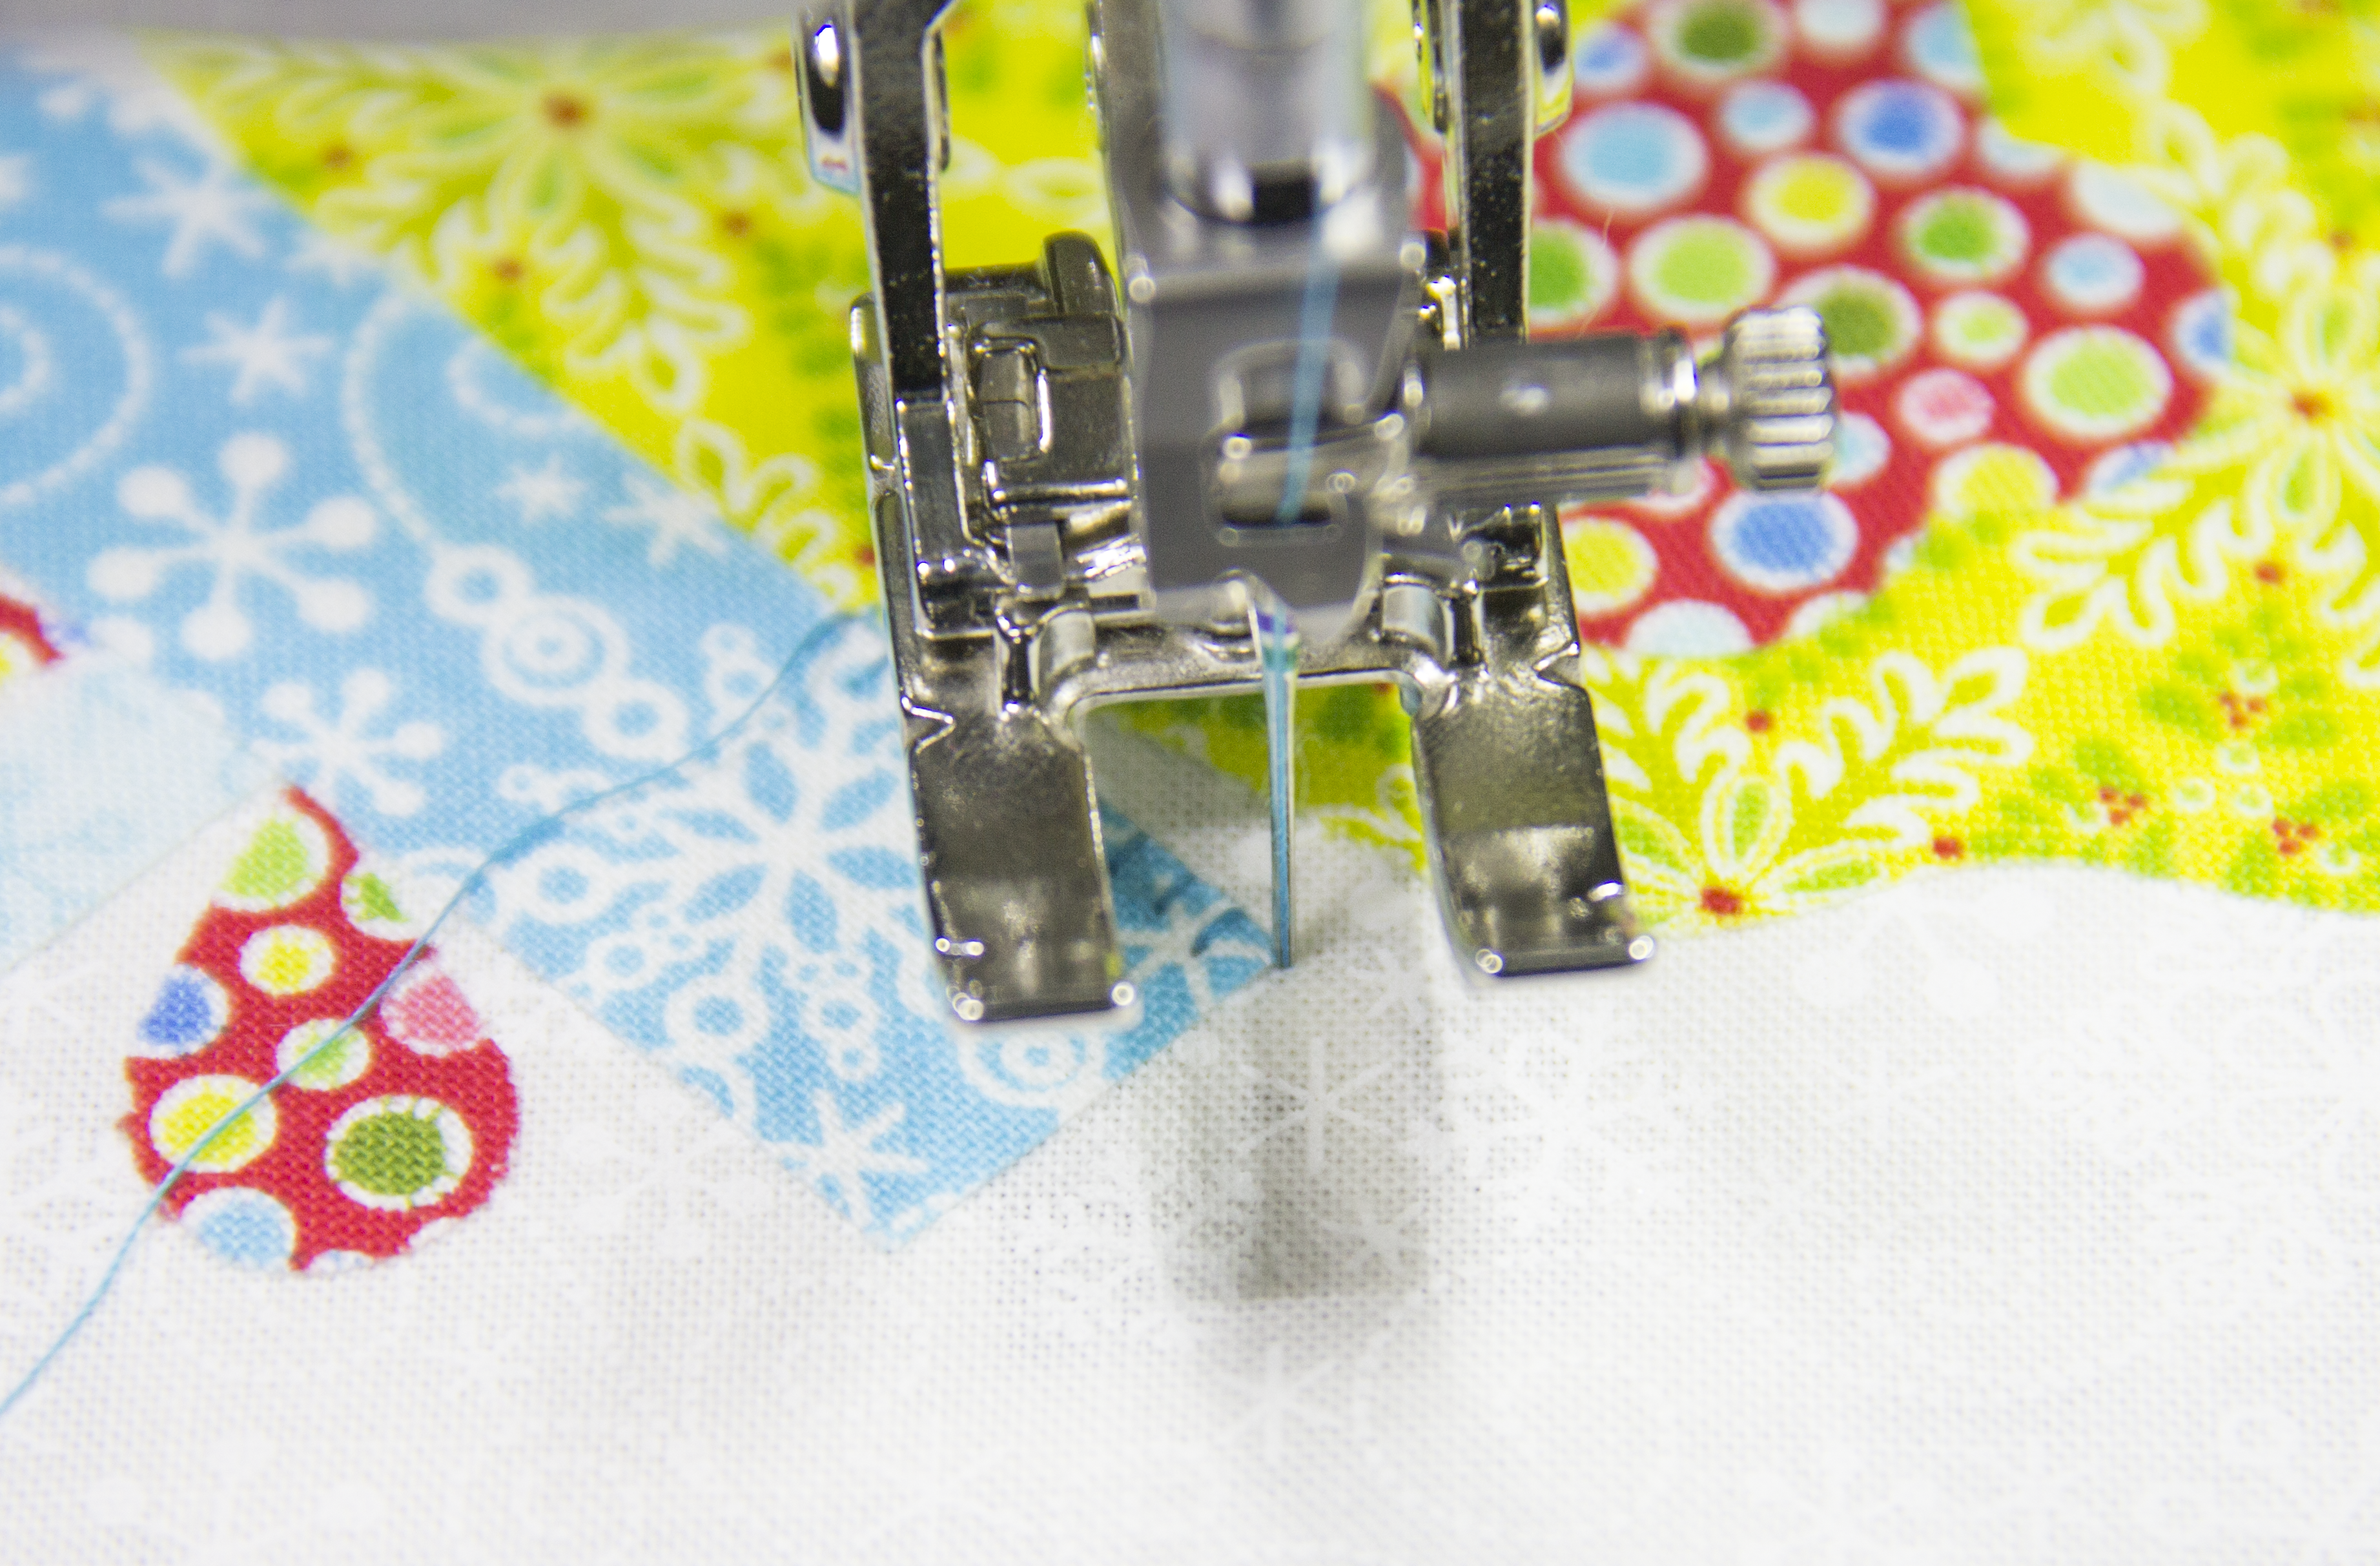
Bring the presser foot back down and manually stitch over and back to catch the point of the applique shape.
Once again, keep the needle down, lift the presser foot, and pivot.
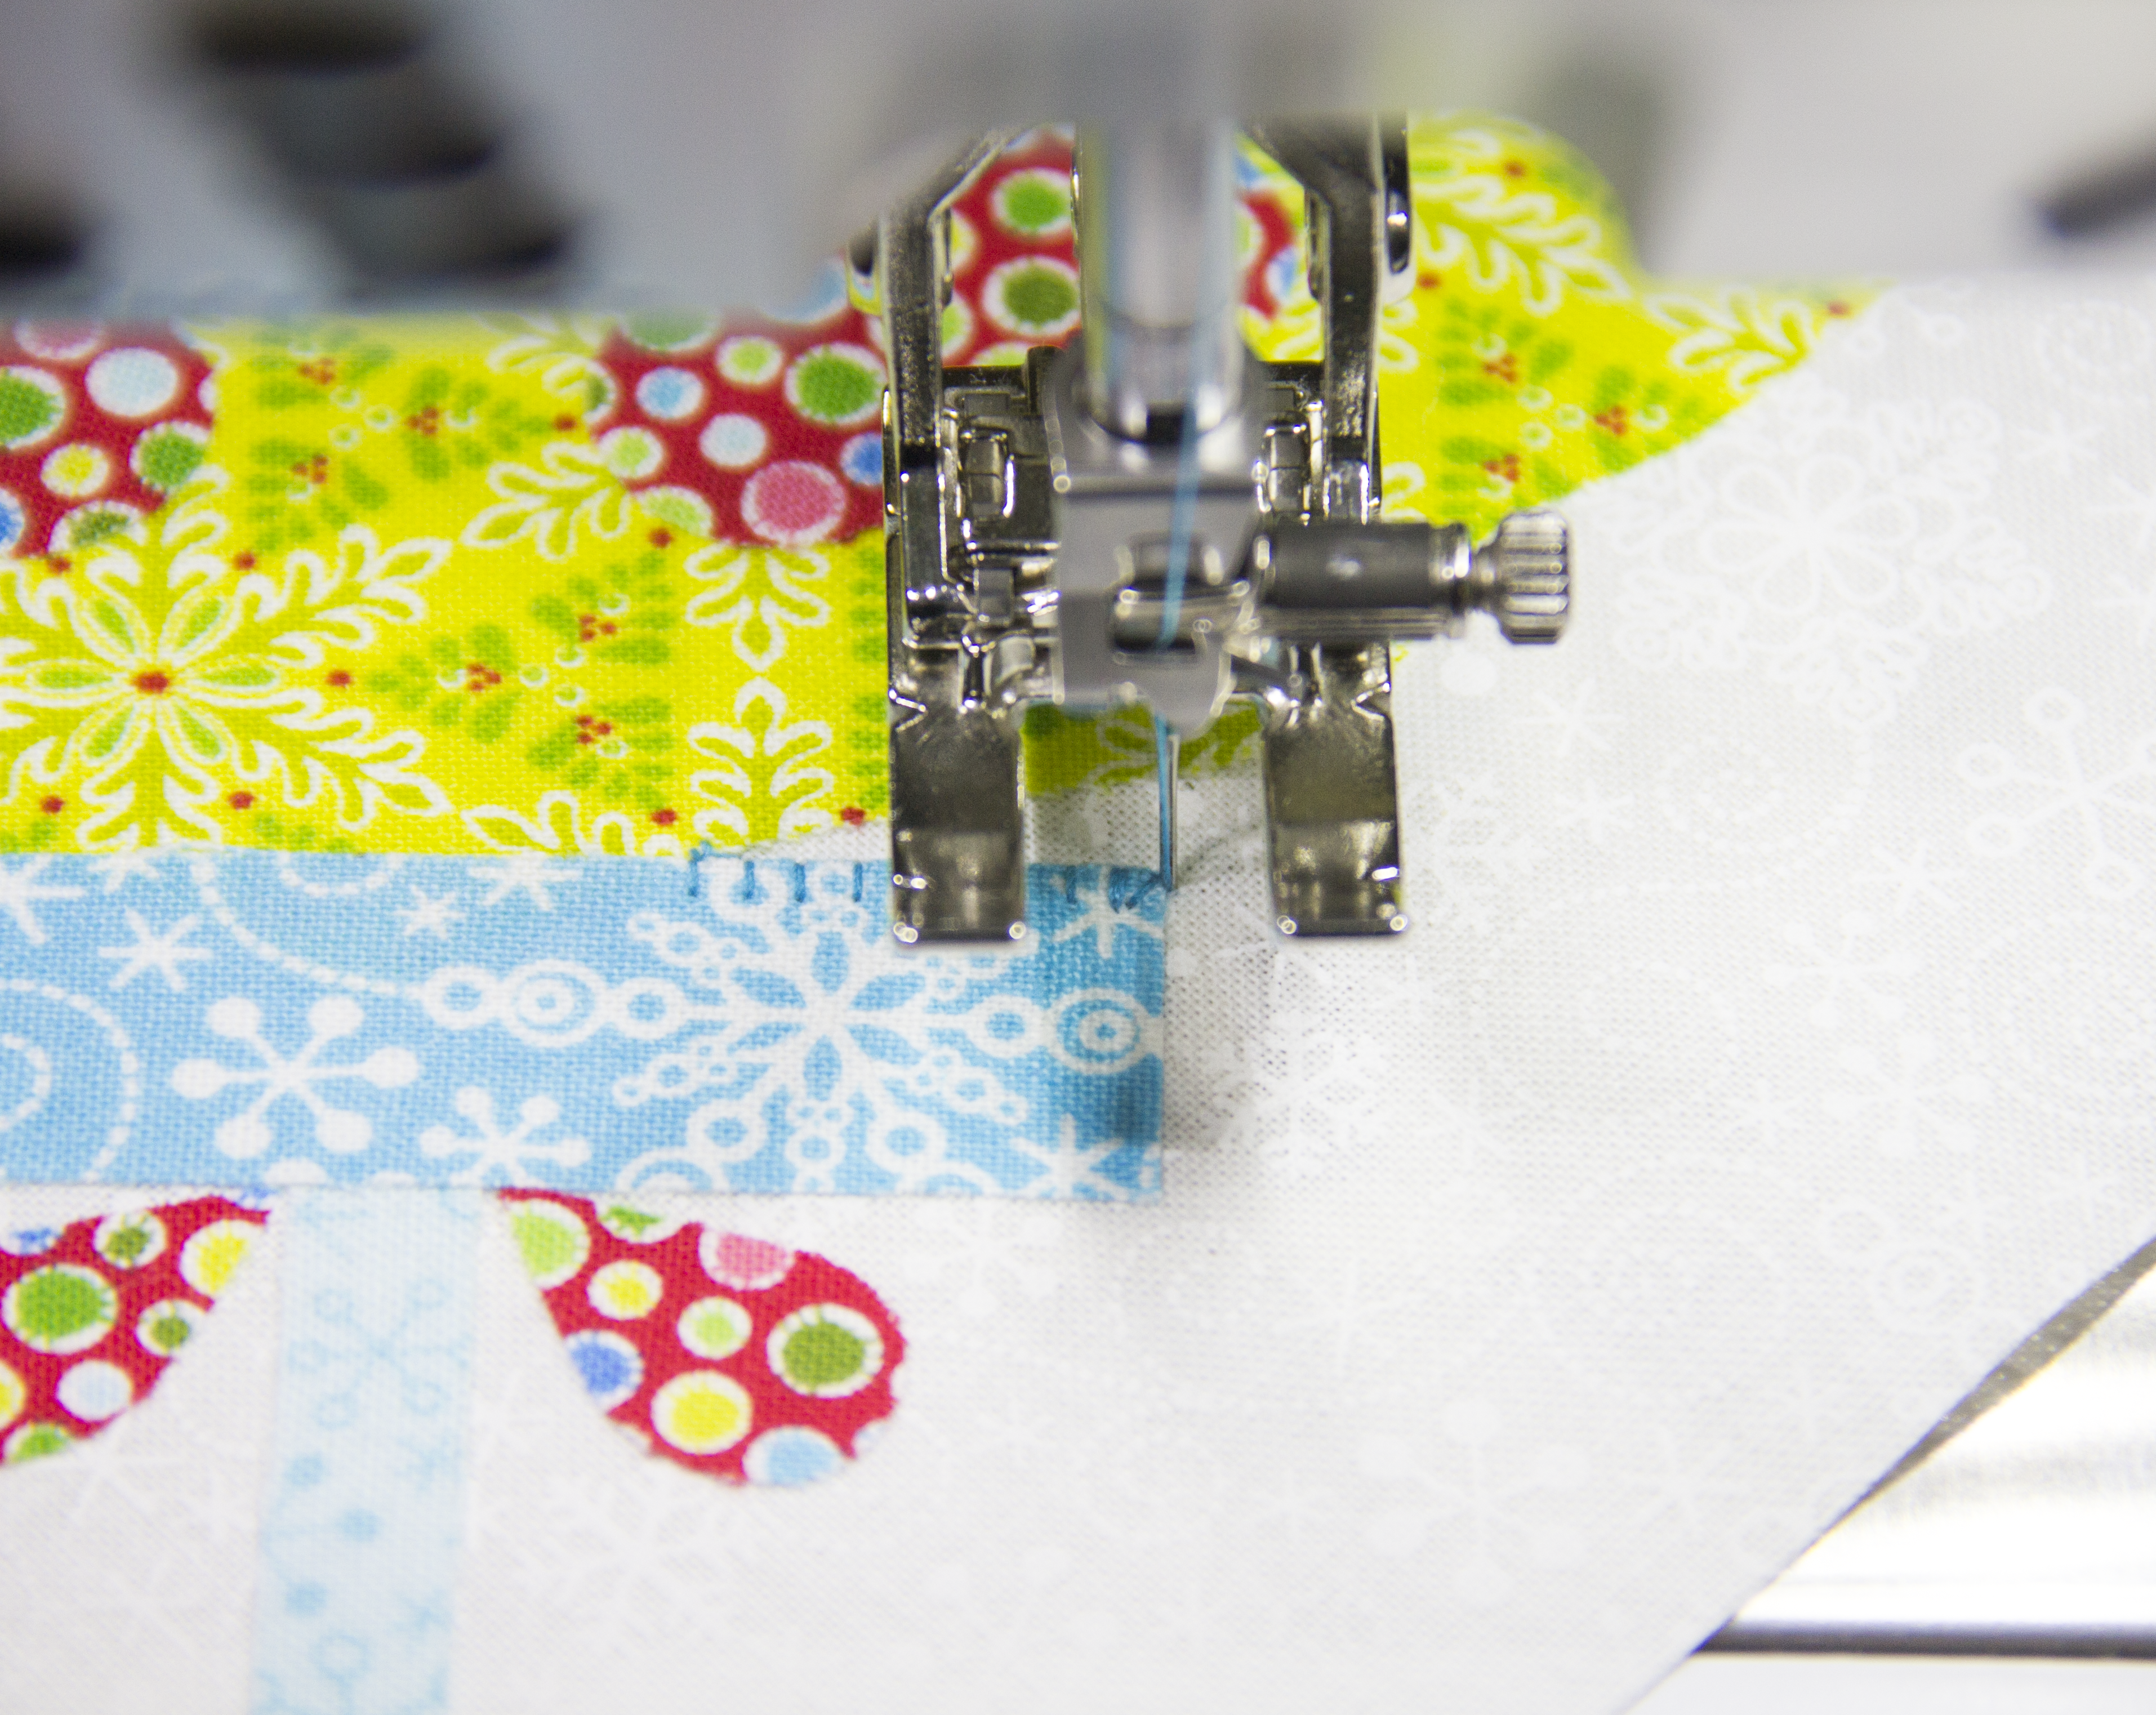
Continue stitching around the entire shape and cut the thread leaving a long enough tail to secure the stitches.
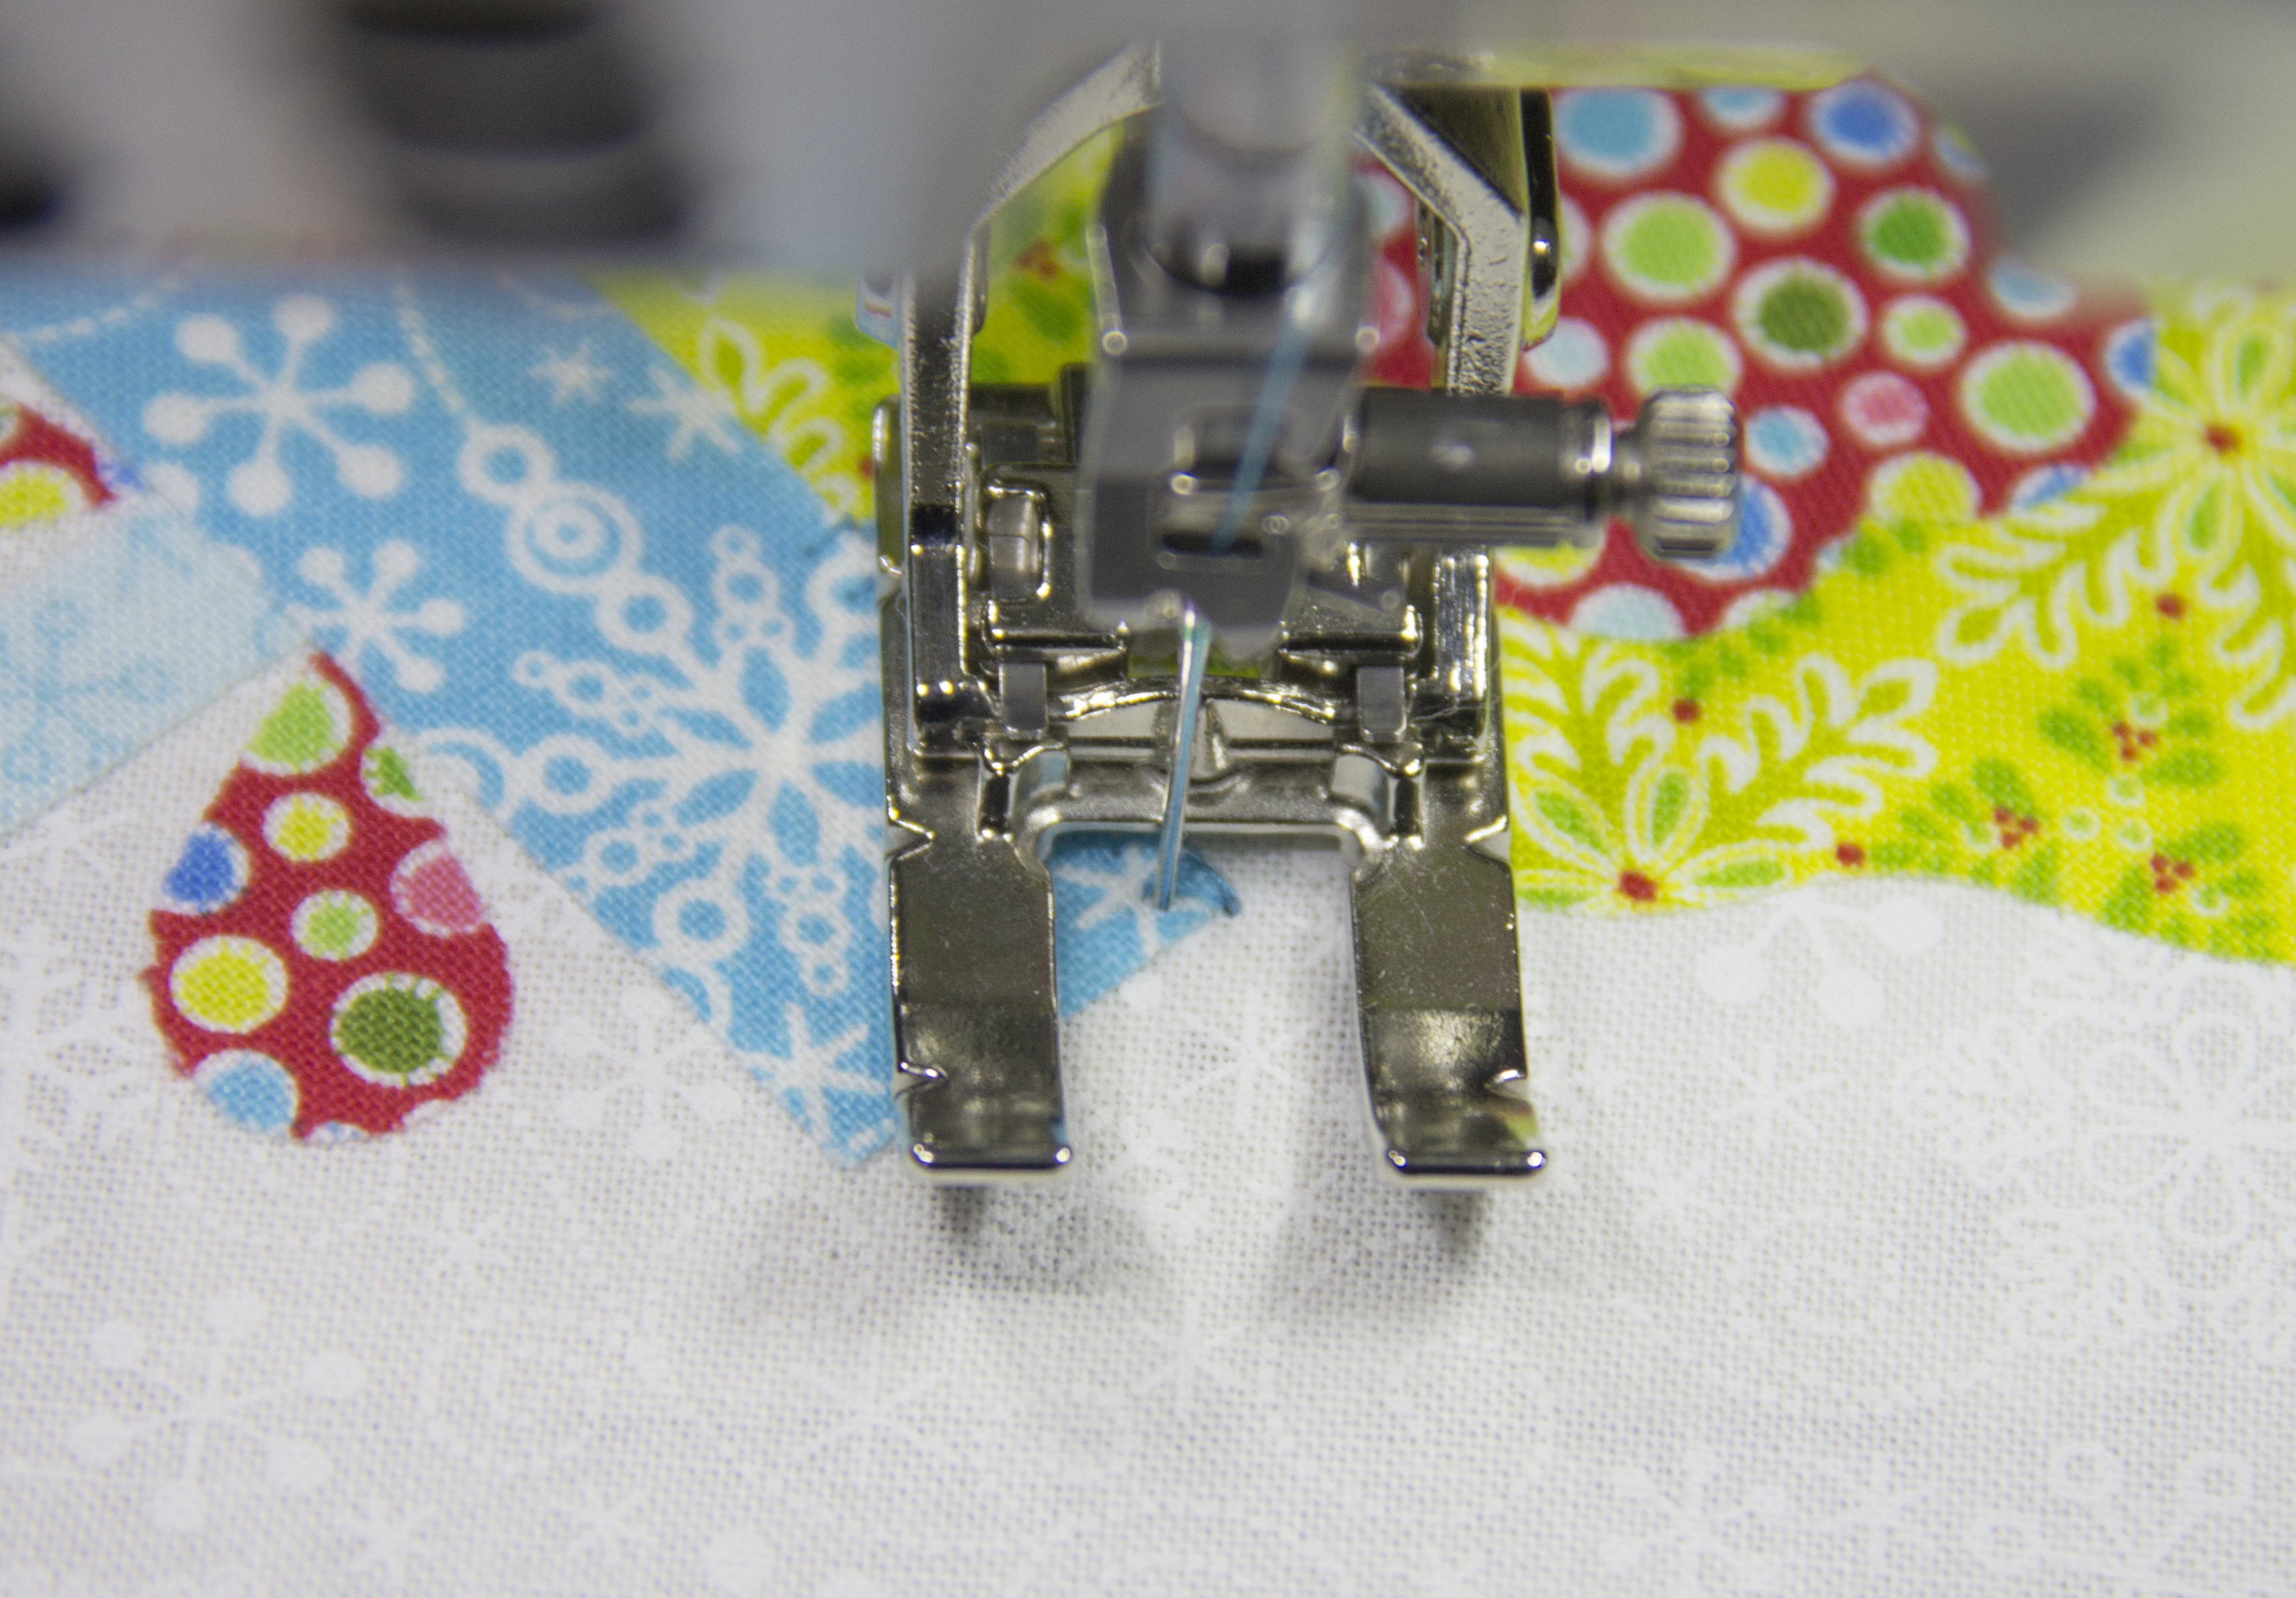
Bring the thread tails to the back and secure them by tying a knot.
Stitch around the rest of the applique shapes, matching threads to the fabric.
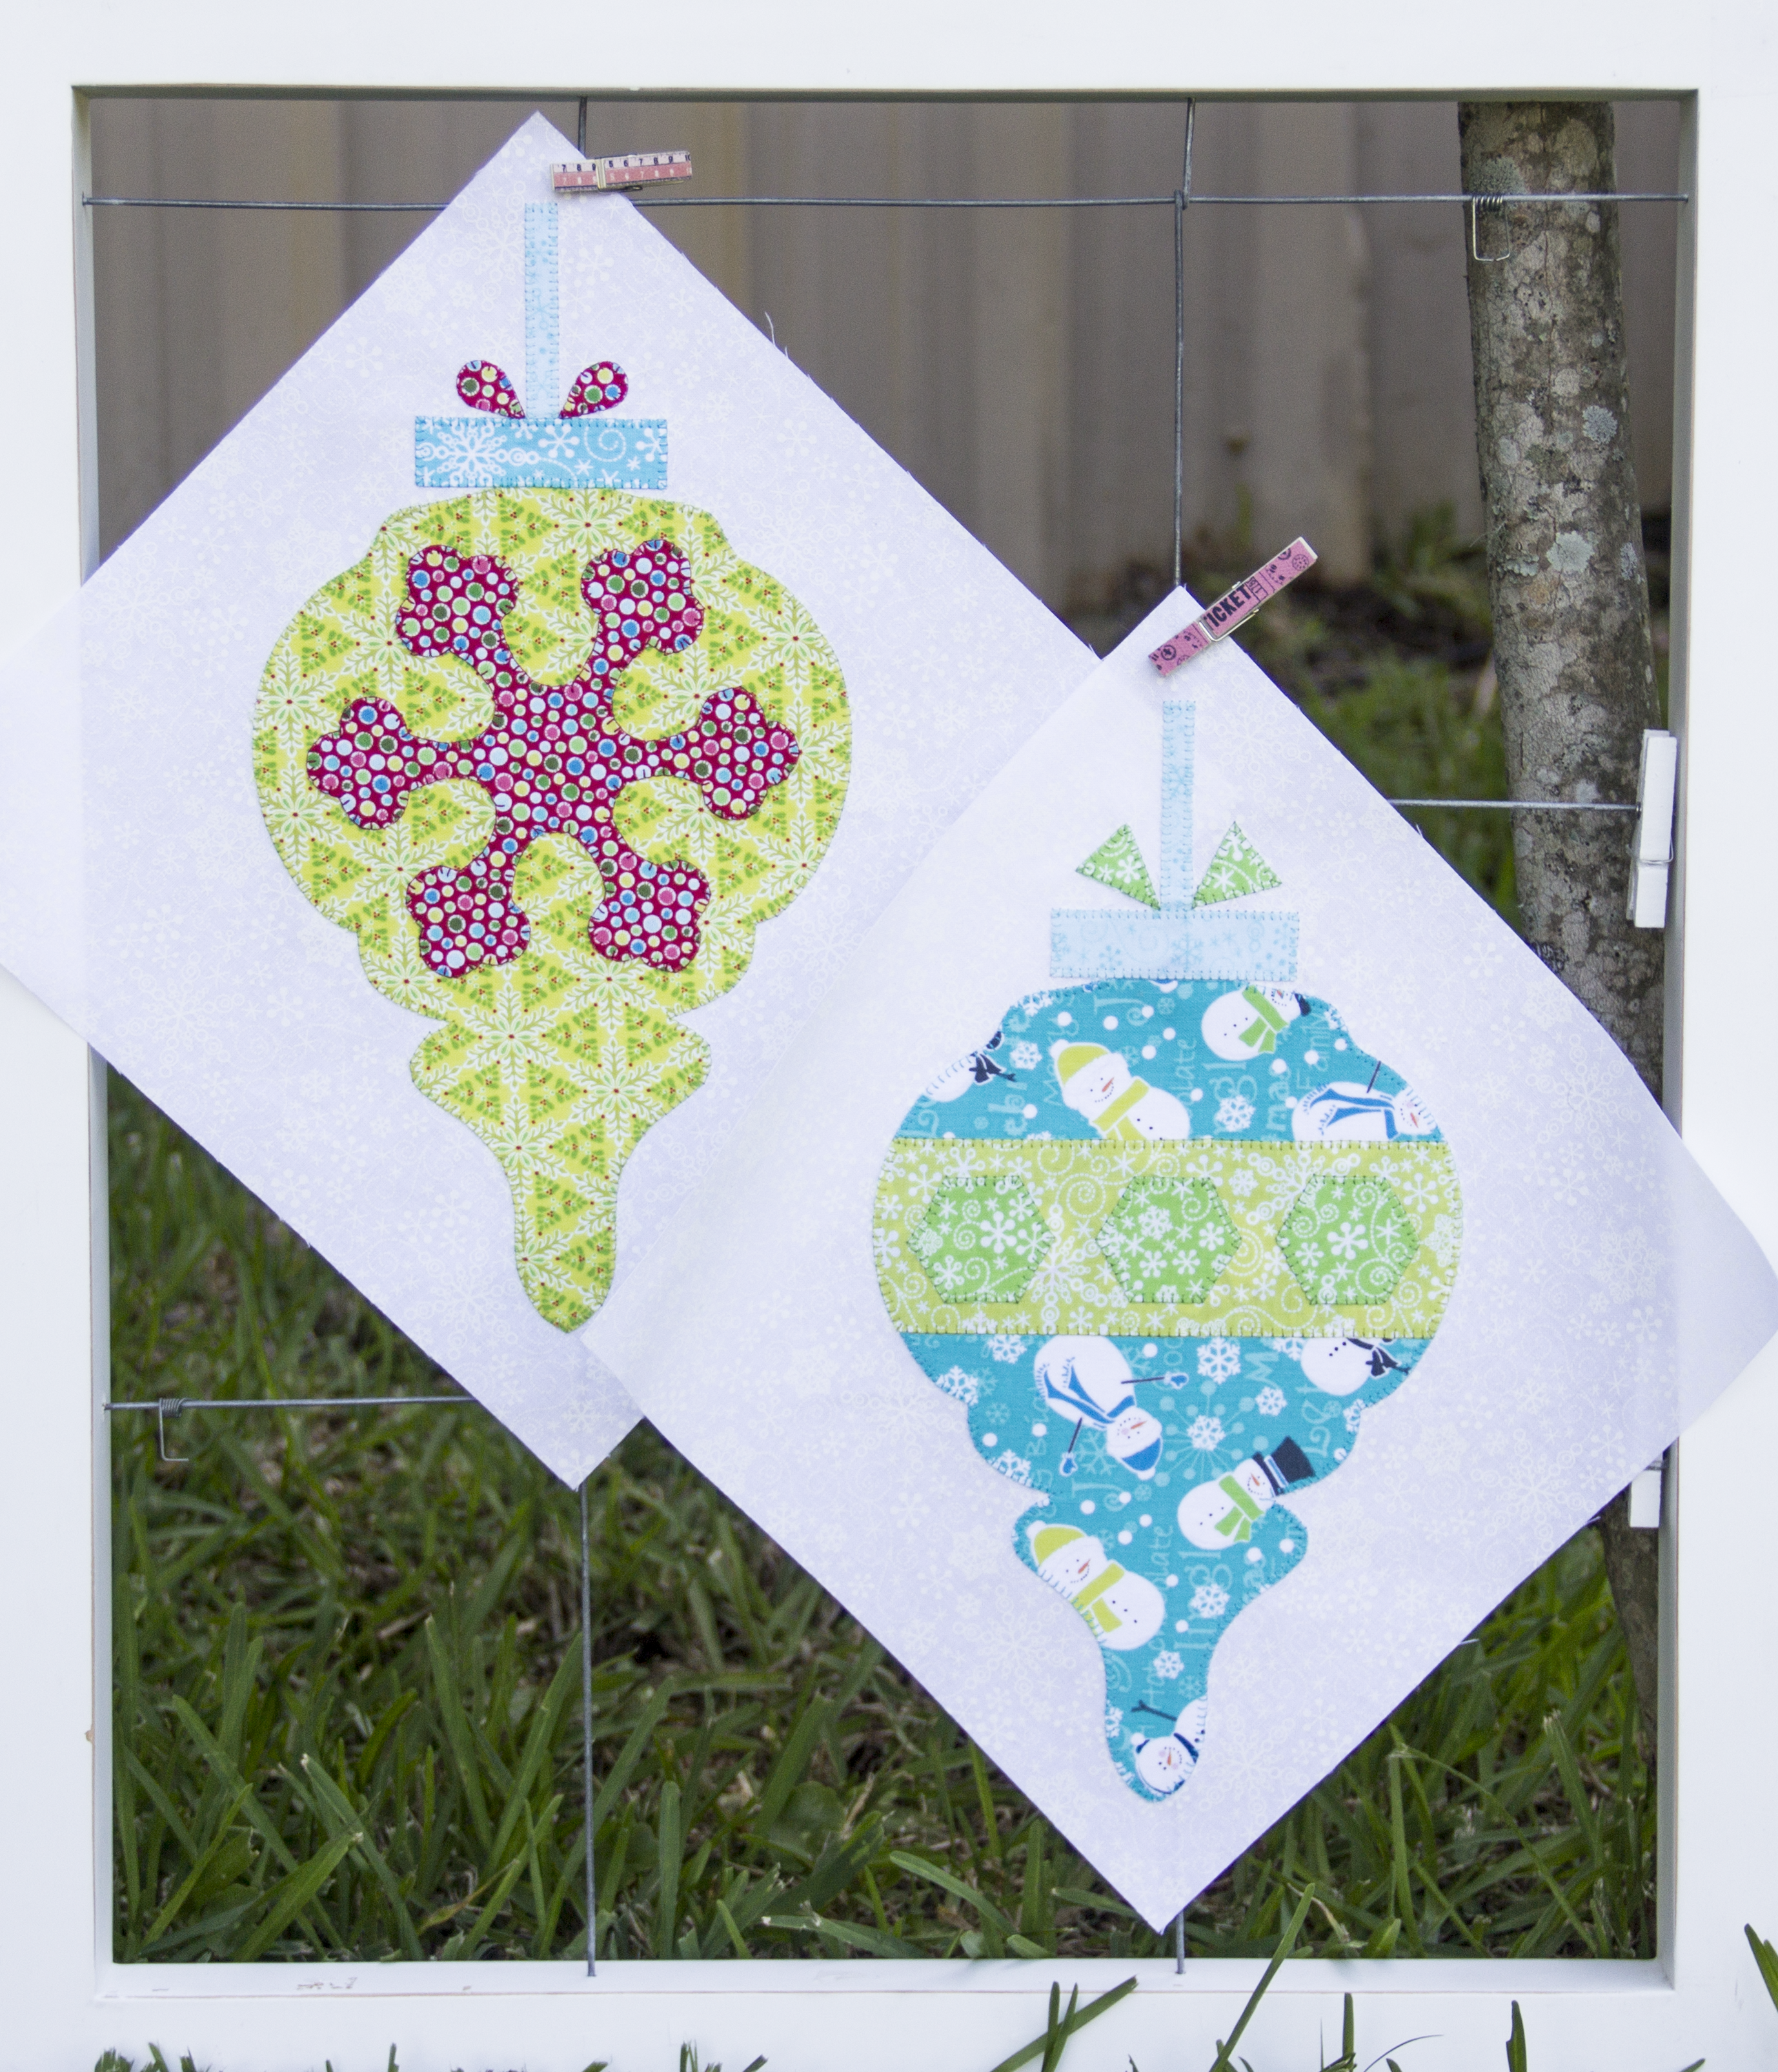
I hope you enjoy working on these two Vintage Ornament and come back next July 12th, when we’ll work on Blocks Three and Four.
Used Products


What you might also like


7 comments on “Vintage Ornaments Quilt-Along: Snowflake and Stripe Appliqué Blocks”
-
-
Did you get a template file that you could download? I had problems too, so I contacted Cherry at [email protected]
and got a good file that I just printed. You can contact Cherry or I can send it to you. Let me know if you want me to send the file directly to you.
Mindy-
Thank you for letting me know and for your kind offer Mindy. I have emailed Cherry, and I will let you know how I get on. Jenny
-
Hi Mindy –
Can you email me the template for blocks 1 and 2? Thanks.
-
-
-
So where do we post pictures of our ornaments? Would like to share mine and also see everyone elses.
-
We welcome all WeAllSew readers to share pictures of their projects on our community section here on WeAllSew.
This is how it works:
– Register on the WeAllSew blog
– Go to https://weallsew.com/community/create/
– Upload your image; you can upload up to 12 photos to show your creations from all points of view
– Write a short descriptionAnd that’s it! We’d love to see what you create!
-
-
Hi! I’m sadly late to this quilt-along, but would like to make it! However, I can’t seem to bring up the templates for blocks 1 & 2. Can you help?
Leave a Reply
You must be logged in to post a comment.

This is a great Sew-Along! Unfortunately I cannot download the ‘Template Month 1’ pdf. I have tried several times, even different devices. Is there a problem with it please? Thanks, Jenny