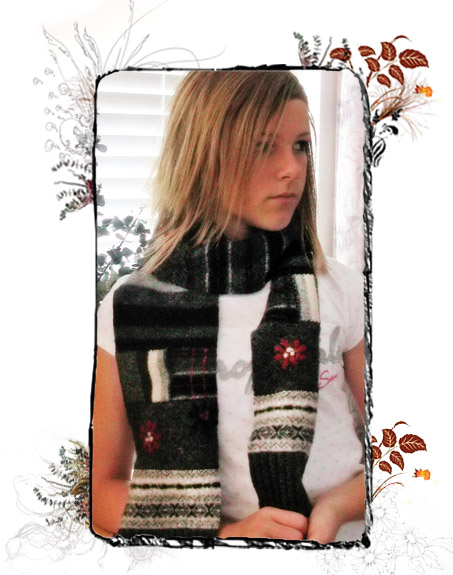
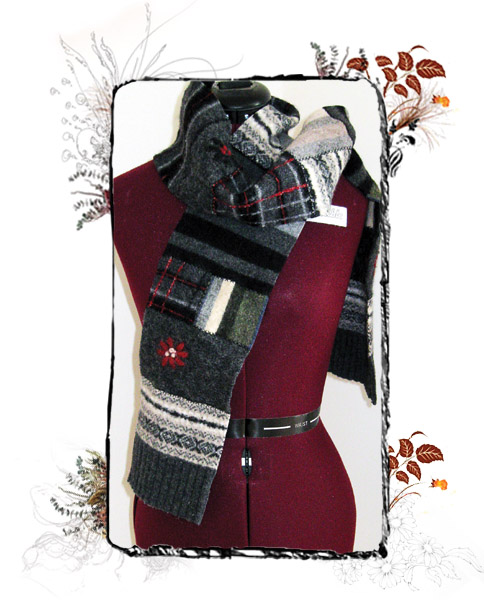
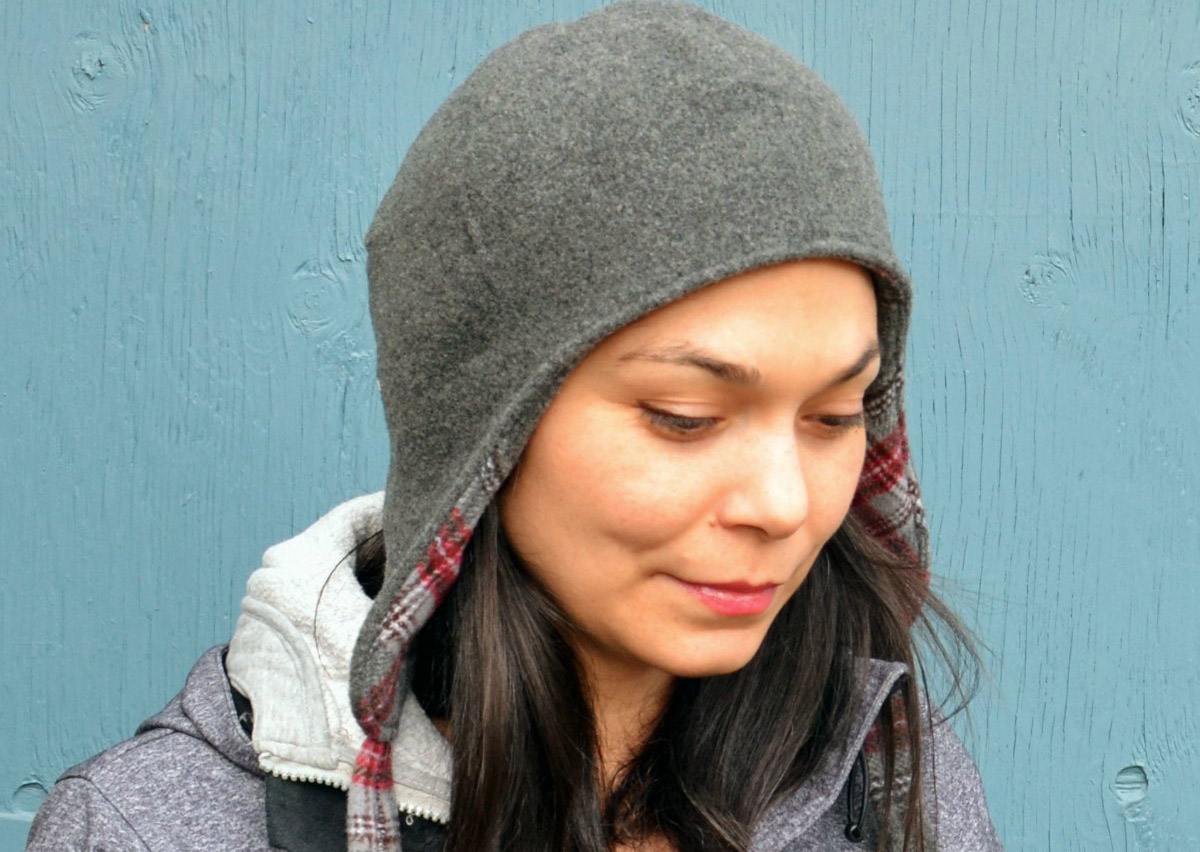
DIY Upcycled Wool Scarf
As the weather cools down, it’s the perfect time to heat up your accessory collection. Take this cool felted wool scarf for example: chilly day neck warmer, work wardrobe rehabilitator and piéce de résistance for any outfit. Plus, it’s really easy to whip one up for you and all your friends.
Supplies
- Felted sweater scraps
- Thread (coordinating or decorative)
- Ruler
- Rotary cutter and mat
Step 1) Felt the sweaters.
Have you ever thrown you favorite wool sweater into a too-hot wash cycle only to discover that it’s now too small to wear? What you just did was felt your fibers! Any sweater with at least 80% animal fibers (wool, cashmere, alpaca) can be felted with hot, soapy water in a washing machine, rinsed on cool, and dried using a heat setting on your dryer.
Felt your sweaters and when you are finished you will find that the knitted stitches are no longer visible and the fabric will not ravel when cut. You will also notice that there is a ‘right’ and ‘wrong’ side to your fabric. In this tutorial, we will always be working with ‘right sides’ up.
If you search your closet and find that you don’t have any sweaters to felt, don’t fret – you have several options! First shop your local Salvation Army, DAV, or secondhand store. If you turn up empty handed, you can also visit auction sites and online stores such as Etsy. Not only can you find sweaters to felt, but many retailers carry pre-felted materials. You may even find some that sell remnant scrap bags – a great way to expand your color, texture, and pattern options.
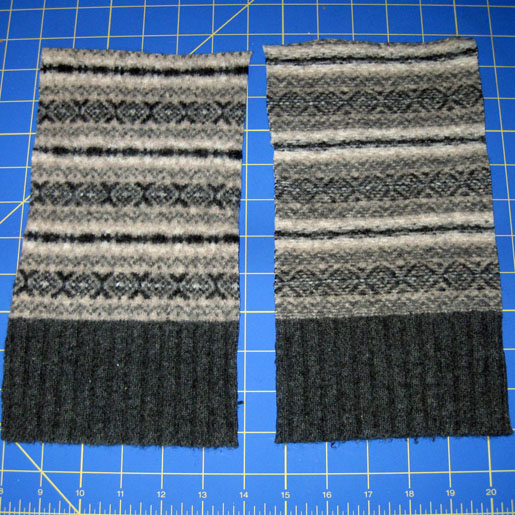
Step 2) Cut your felted sweater fabric.
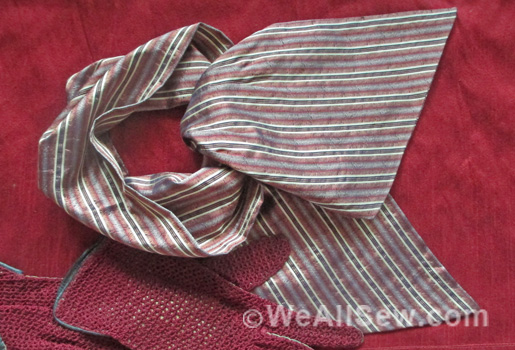
This tutorial allows the sewer a lot of artistic freedom in how their finished scarf will look. To design yours, cut strips or squares of felted sweater pieces 5-1/2″ long (or squares that when joined together are no wider than 5-1/2″ ) by your desired height. Since the pieces will be joined together by butting raw edges against each other, adding seam allowances to your pieces is not necessary – so have fun and play with your arrangement! The finished length of the model’s scarf is 67″. However, feel free to make yours longer or shorter depending on your needs.
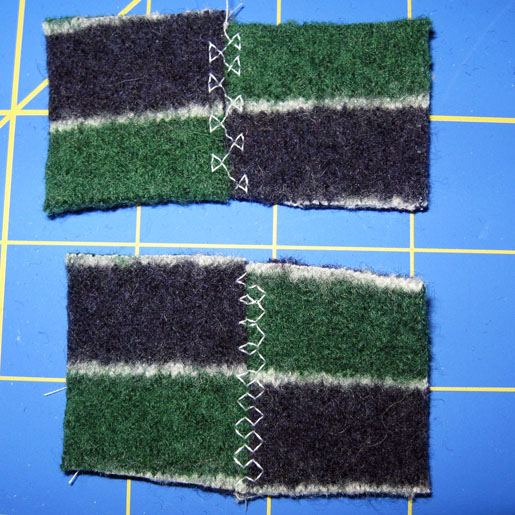
Step 3) Join the felt pieces.
After you are happy with your arrangement, you’ll need to join your squares and rectangles together. This is a good opportunity to try out the decorative stitches that come with your machine!
It’s important that the stitch join the two edges together, so the pattern you select should cross both sides of the material equally (zigzags and decorative zigzags work best). For example, stitches #25 or #57 (above) on the BERNINA aurora 440QE will work well, while a floral design like #64 will not.
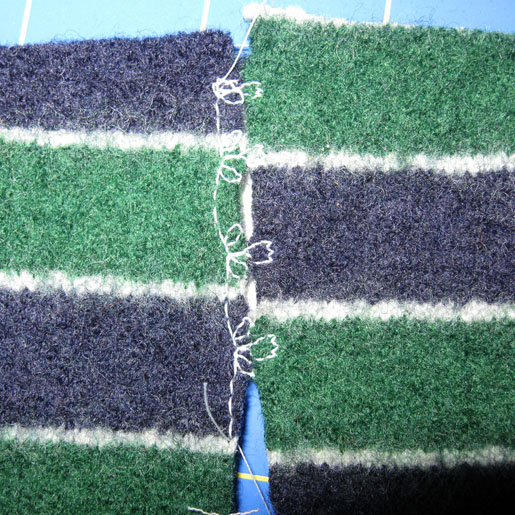
Small stitch patterns tend to get lost in the felted fibers, so it’s best to find designs that are not too close together. If your machine has the capability to lengthen and\or widen the design, this is a good time to do it. Otherwise, stick with larger scale patterns.
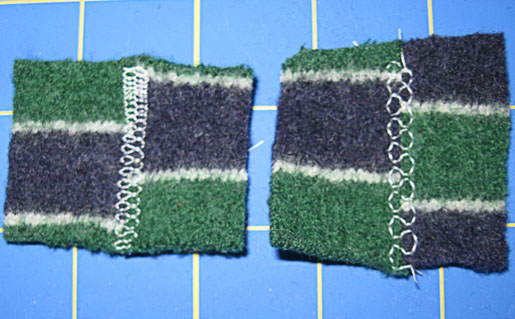
Be sure to test sew your stitch choice with scrap pieces of wool before sewing on your scarf. This will allow you to modify your design, change the stitch length or width, and practice the sewing technique before working with your pre-cut pieces.
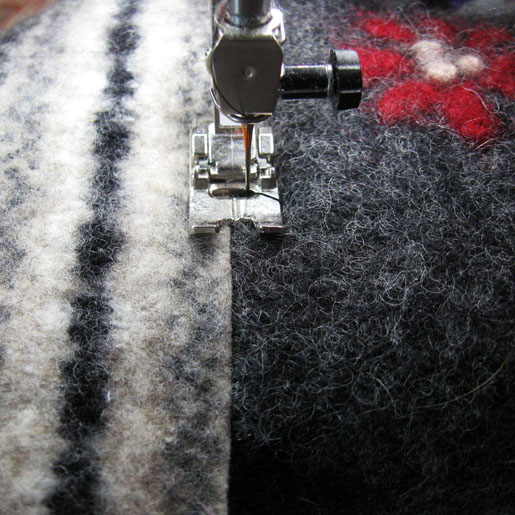
After selecting and testing your stitch, join two felted wool pieces together so that the ends are butted up against each other, but not overlapping. Place the pieces so that the butted edges are centered with the center mark found on the presser foot and sew.
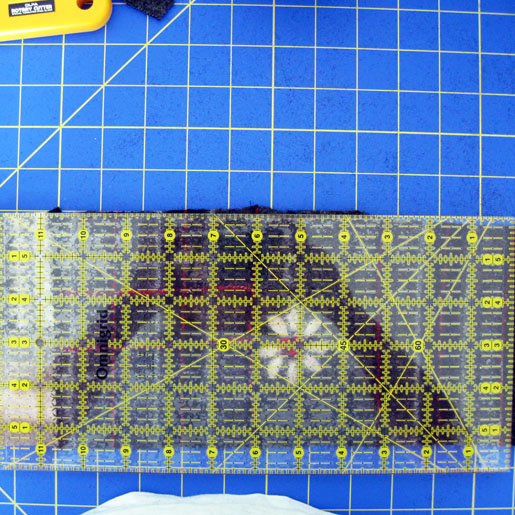
Continue joining wool squares until all pieces are sewn together to form a scarf. You may find that sewing will cause some of your edges to stretch out of shape slightly. Even up the edges of your scarf by placing a ruler over the edges and trimming the excess material with your rotary cutter.
Done!
What you might also like


2 comments on “DIY Upcycled Wool Scarf”
-
-
Yes, the same techniques will totally work for your project! The “rule of thumb” is to expect about 30% shrinkage, but each sweater can be different (some may only shrink 15%, others as much as 40%).
-
Leave a Reply
You must be logged in to post a comment.

I would like to make a felted wool ironing table. Can I prepare a piece of woven 100% wool fabric the same way you prepared the sweater by washing it in hot soapy water, rinse in cool water and dry in the dryer? If so, do you have any idea how much it will shrink?
Thanks. I hope it works.
Dorann Perry