Wrought Iron Embroidered Pillow
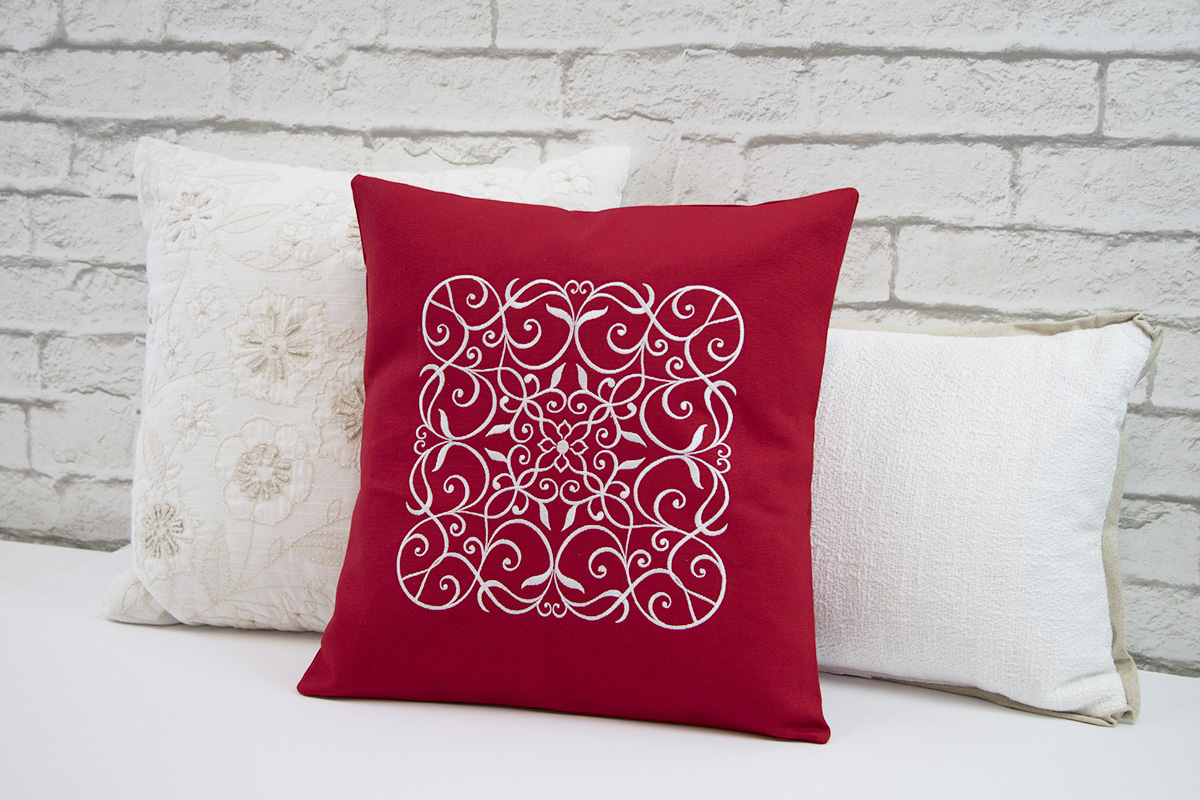
In this series of projects, BERNINA Educators were given a simple guideline—the project had to be red and white, which is a good combination if you ask me! My couch at home is in navy blue so I thought a large pillow in red canvas with a suitably large embroidery motif would fit the bill. My friends and colleagues know how much I like thread and solid color fabrics. So, this project was bound to be a fun one for me.
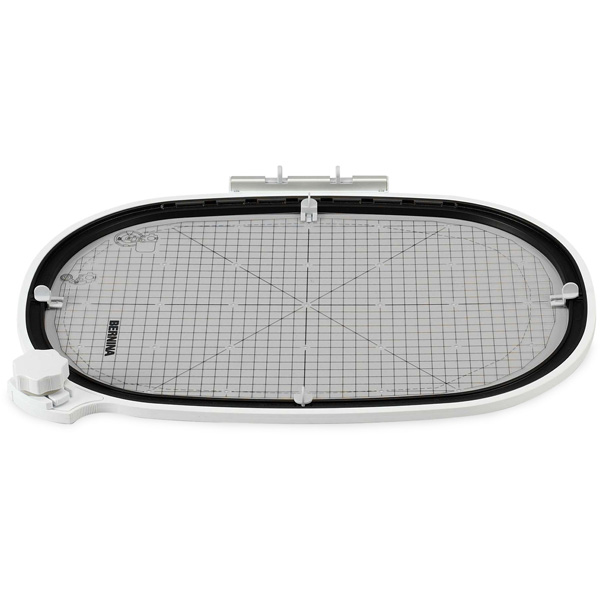
We at BERNINA try our best to make projects that will be accessible to all so whenever possible we use embroidery hoops that work on most, if not all, machines. That being said, this is one project where having a full Jumbo Hoop stitching field makes all the difference. I indulged and made this on my B 880 PLUS. Take it from an embroidery enthusiast, the size of the largest hoop is never too big, and sometimes not quite big enough. If you haven’t taken an 8 Series machine for an embroidery spin, you owe it to yourself to do so. It opens the door (wide) to a whole different scale of embroidery and projects.
The design concept for the pillow is:
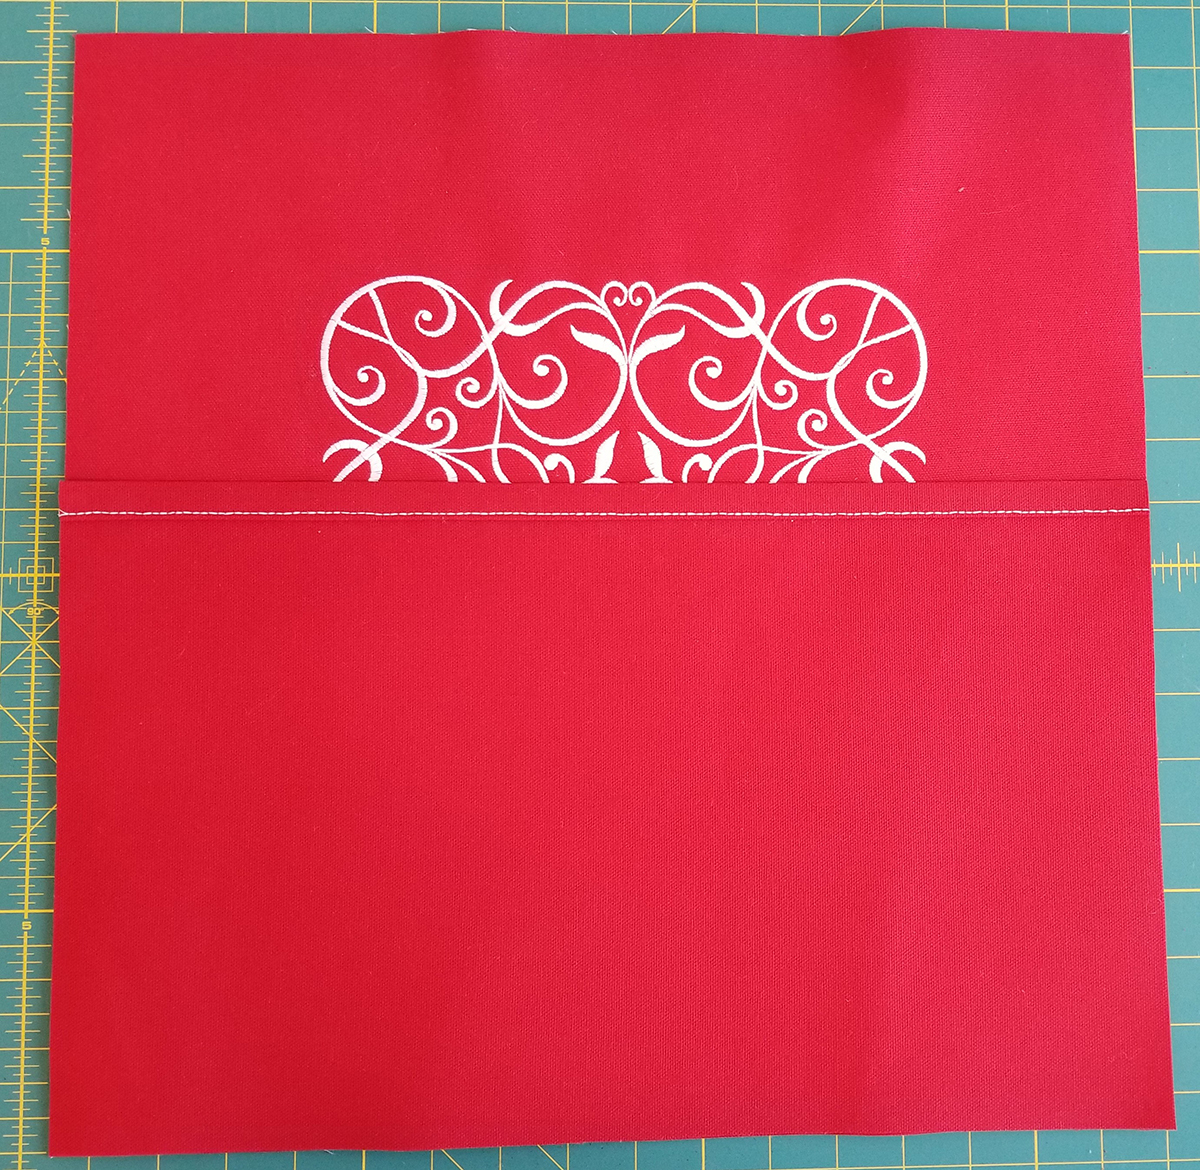
- A simple 16” x16” couch decorator pillow with a simple envelope back using a 16” square pillow insert
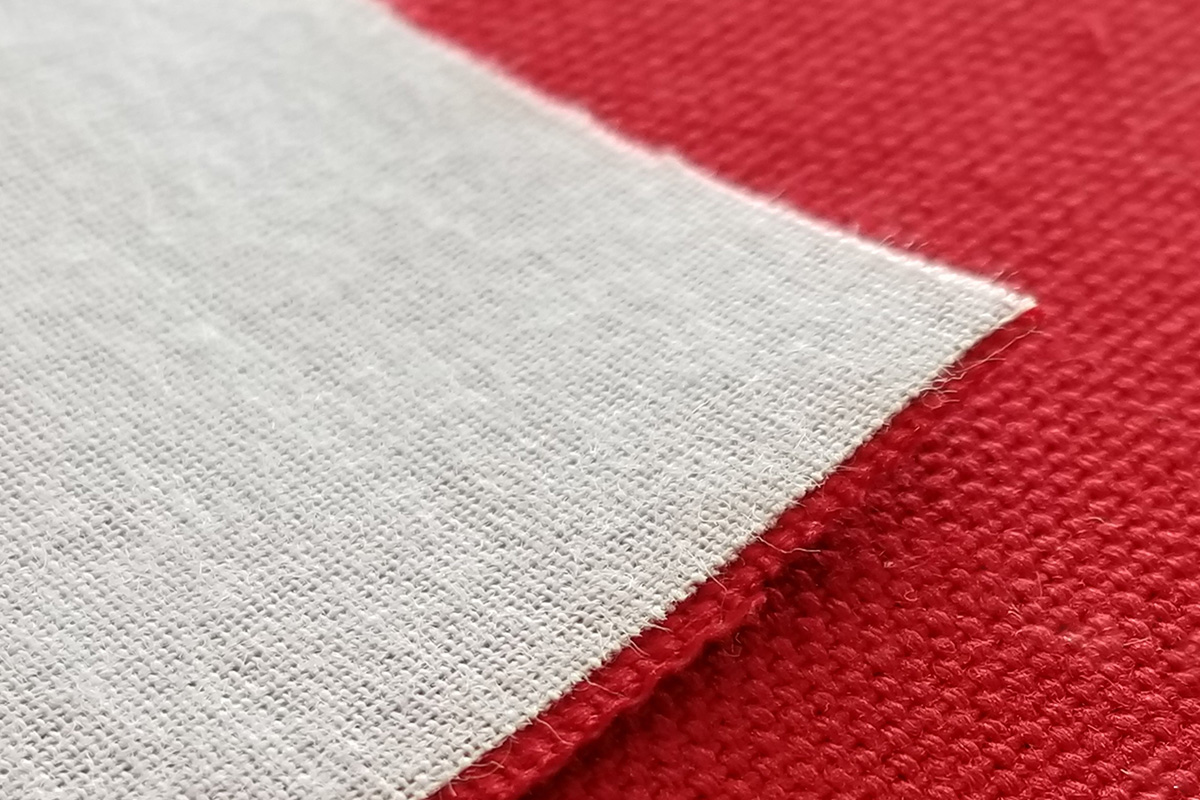
- Red duck cloth for the cover (I love textured fabrics!)
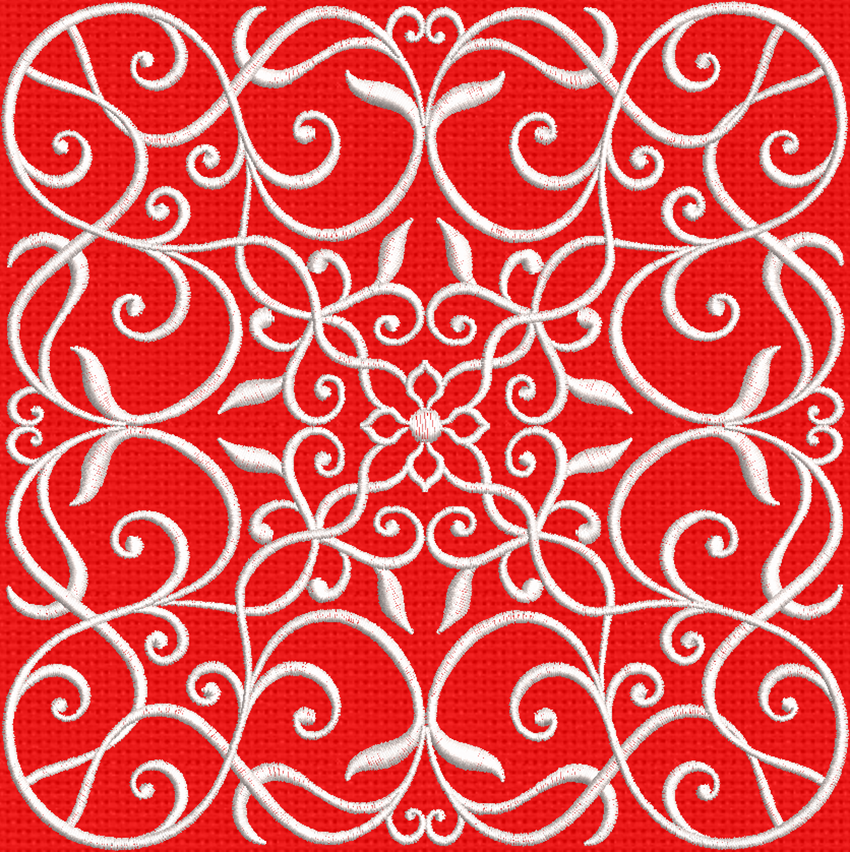
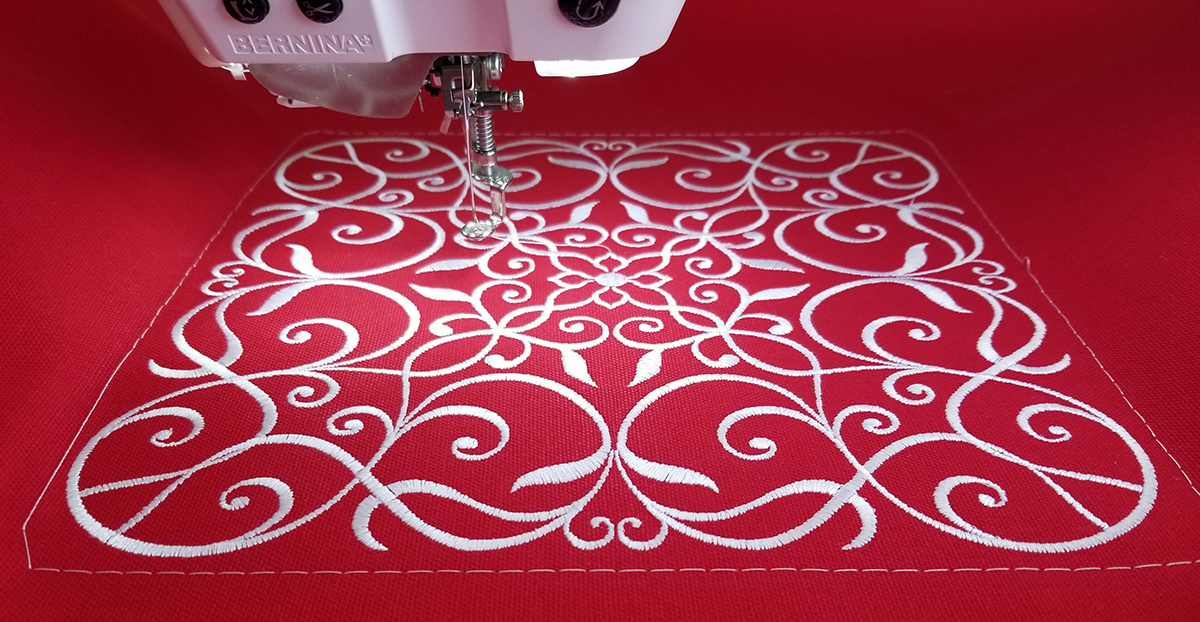
- Using an embroidery Design #31 from the OESD Collection #80300 Celestial Lights by Amanda Murphy
- Isacord 40 White embroidery thread for the design and construction
TIP: Isacord is a sturdy thread for project construction and any visible construction stitches can be made to match the color of the embroidery.
- Hoop: Jumbo Hoop for a single hooping of this large design
The process is simple:
- Enlarge the design to fill the Jumbo Hoop
- Embroider the design on the pillow front
- Make the pillow sham
In the beginning, there was software…
For this project, I went back to some very basics. While I have BERNINA Embroidery Software 8.1 on my computer, I wanted to point out a sometimes-overlooked option: BERNINA ARTlink (currently at version 8).
BERNINA ARTlink is a FREE (free is good, right?) and easy-to-use embroidery software that lets you do the following:
- Open and save various embroidery file formats, including ART files.
- Convert embroidery designs to many other formats.
- Send embroidery designs using the proper format to your BERNINA embroidery machine using a direct connection or USB stick.
- Rotate
- Scale (resize)the design.
- ART files are called ‘all-in-one’ files, containing all the details (objects, stitch types and angles, etc.) that the professional digitizer used in making the embroidery design.
- ART files are therefore more scalable than most other formats (most home embroidery file formats contain mainly a list of stitch coordinates). Other formats may be great for opening on a machine and stitching out “as is”, but not very good for scaling in general.
- Mirror Horizontal or Vertical.
- Skew.
- Assign thread colors.
- Print a paper template.
As a bonus, ARTlink comes with dozens of FREE embroidery designs in ART format. More ‘free’ is even better, right?
While I use my BERNINA Embroidery Software 8.1 a lot, I still often turn to ARTlink when I just want to open a design for a quick look or to export a machine file to a USB stick. Since ARTlink is a smaller program, it opens faster and I’m in and out in a shorter time.
Find out more about ARTlink at www.bernina.com/artlink
Now on to the design stage
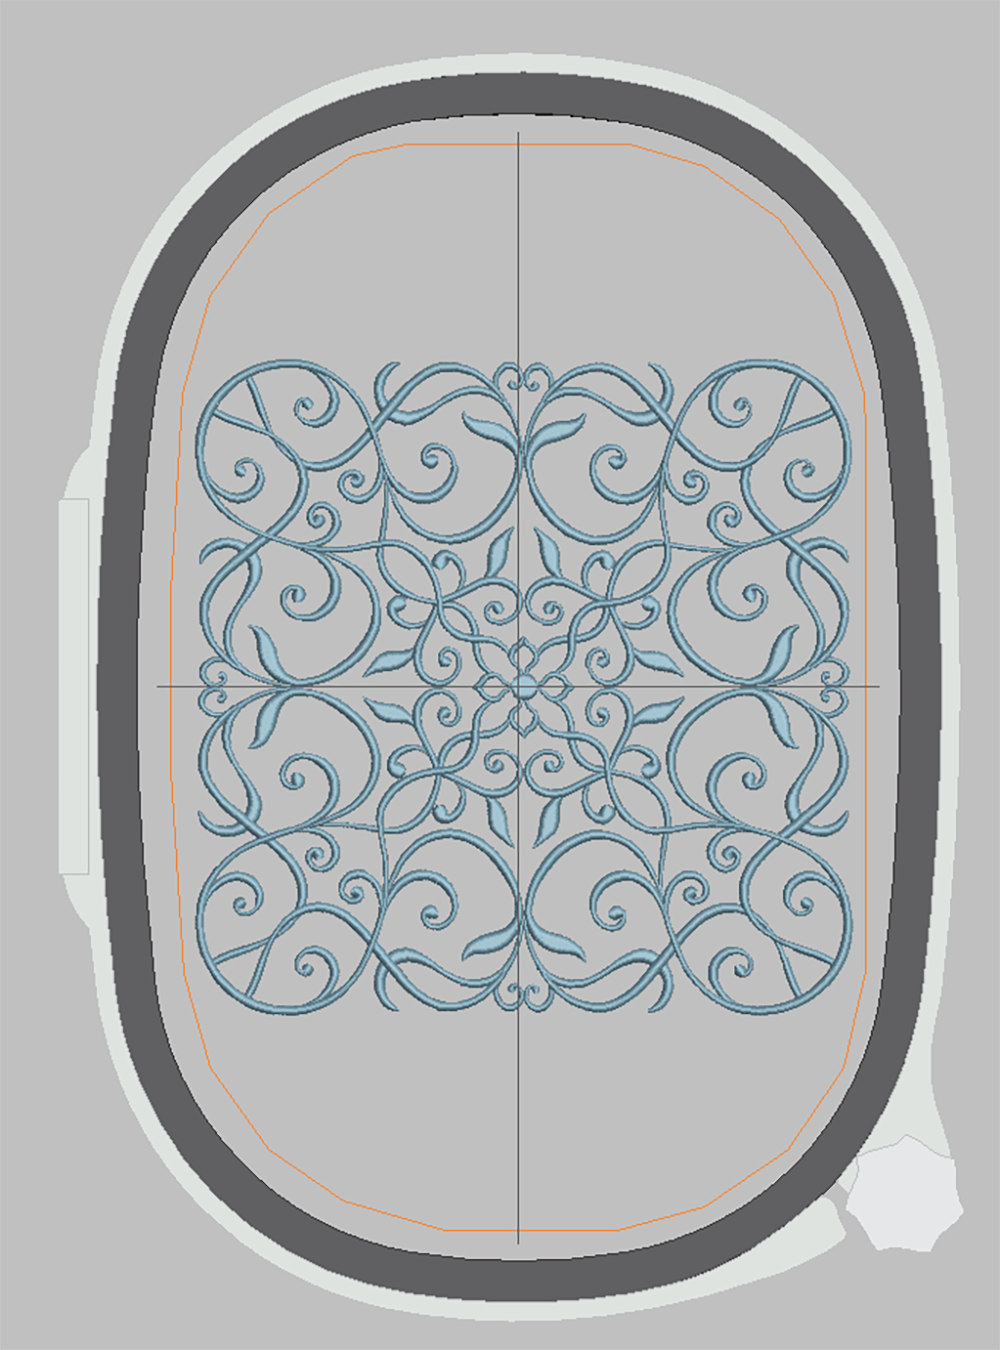
If you have a BERNINA 8 Series machine, you may already know the benefits of using the Jumbo Hoop. It makes stitching single large designs possible AND easy. That, combined with the fact that the embroidery collection I chose includes scalable ART files, led me to challenge the rule of thumb of embroidery, which recommends to scale up/down by a maximum of 20% to help ensure good quality embroidery. Given that the design is relatively simple, I thought ‘why not max it out in the hoop and see what happens’. So I did!
I technically could scale the design up to 9.9” x 9.9” and still fit it in the hoop. However, experience has taught me that having a bit a wiggle room in size (e.g. margin for error) is desirable for easy hooping. So, I opted for a finished size of 9.5 x 9.5 inches. A difference of less than half an inch will hardly be noticeable from any distance on the finished pillow.
Engaging Artistic View in ARTlink lets me preview the design in the assigned hoop with realistic thread effects.
I then exported a machine file to a USB stick.
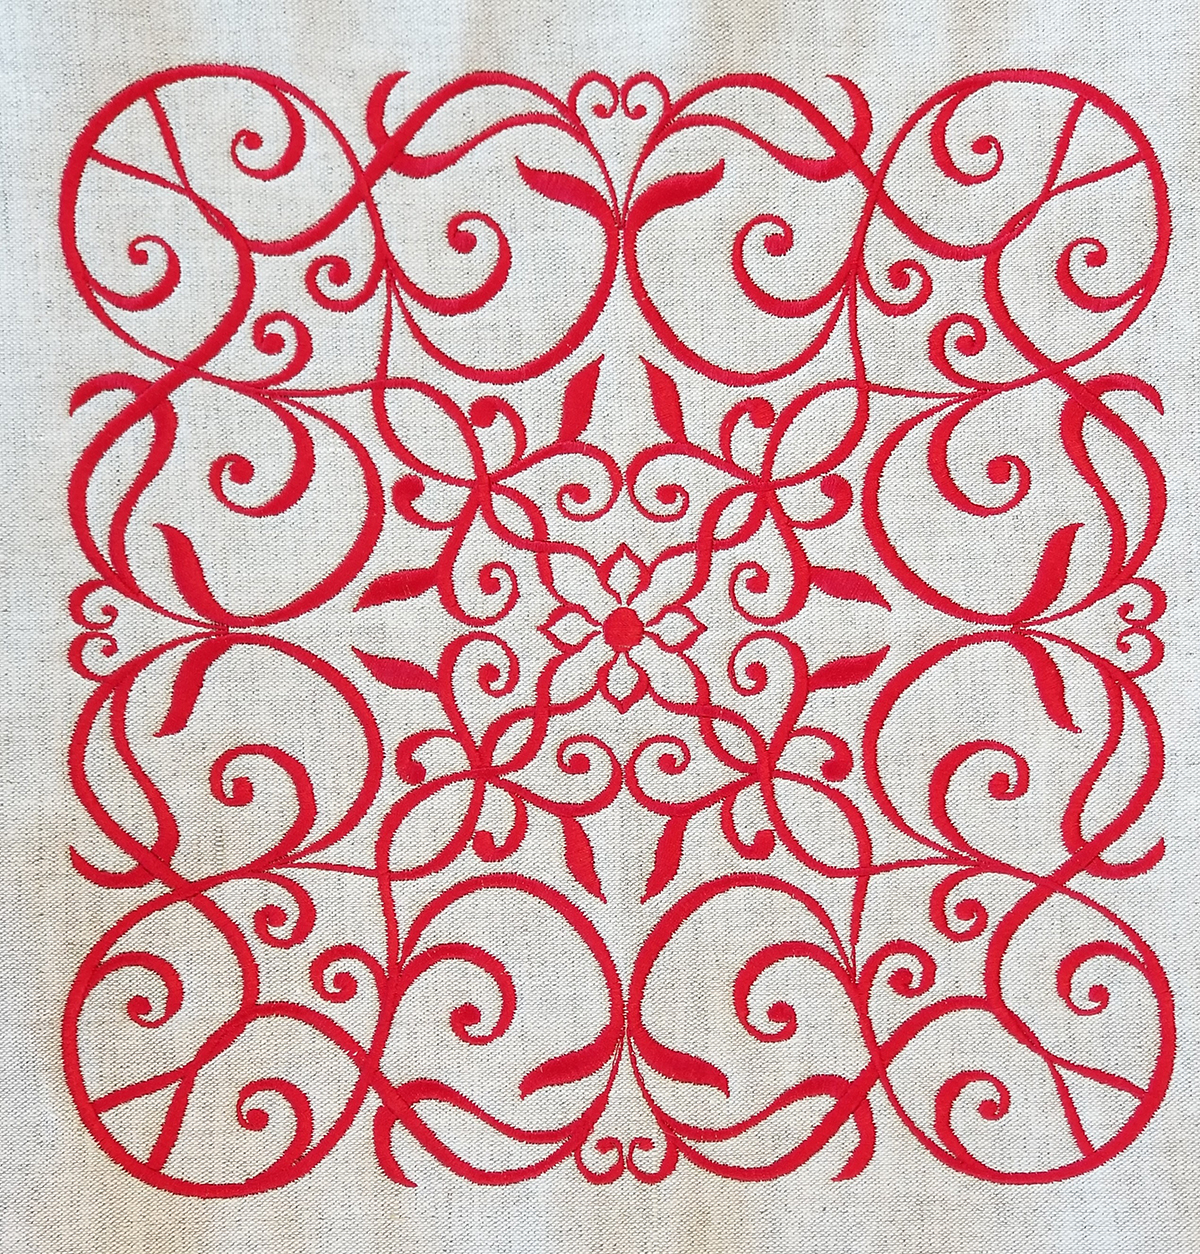
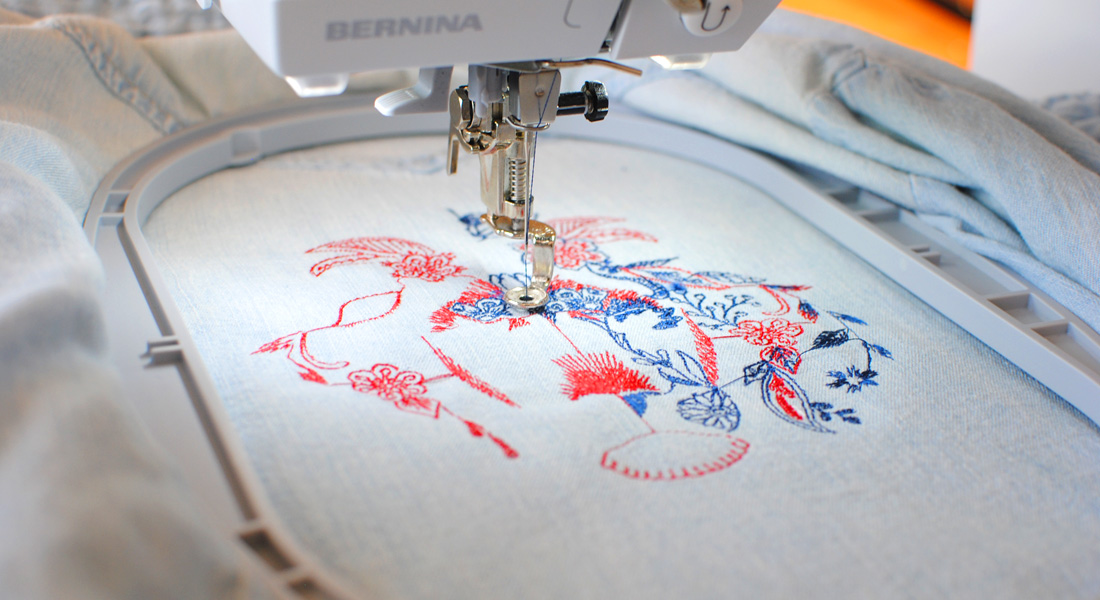
Before committing to the design as scaled (it’s big!), I stitched it in red Isacord thread on a heavy linen/cotton fabric we had floating around leftover from a previous project. It worked! So now I have the design in red on linen for another pillow, so the pair can mirror each other on the couch.
Now that the design is scaled, tested and ready to go, it is time for the actual embroidery on the red fabric. I like to keep that process simple. The best way I’ve found to keep it simple is to:
- Cut the fabric square larger than the needed size:
- Minimum size needed here: 16 inches + 1 inch for seam allowances = 17 inches on each size
- Cut larger: 20” x 20”
- Fuse a matching size piece of Pellon’s Shape Flex ® to the back of the fabric.
- Hoop a piece of OESD Heavy Weight Cut-Away stabilizer, sprayed with 505 Temporary Adhesive Spray.
- Attach the hoop to the machine.
- Open the rescaled design on the machine from the USB stick.
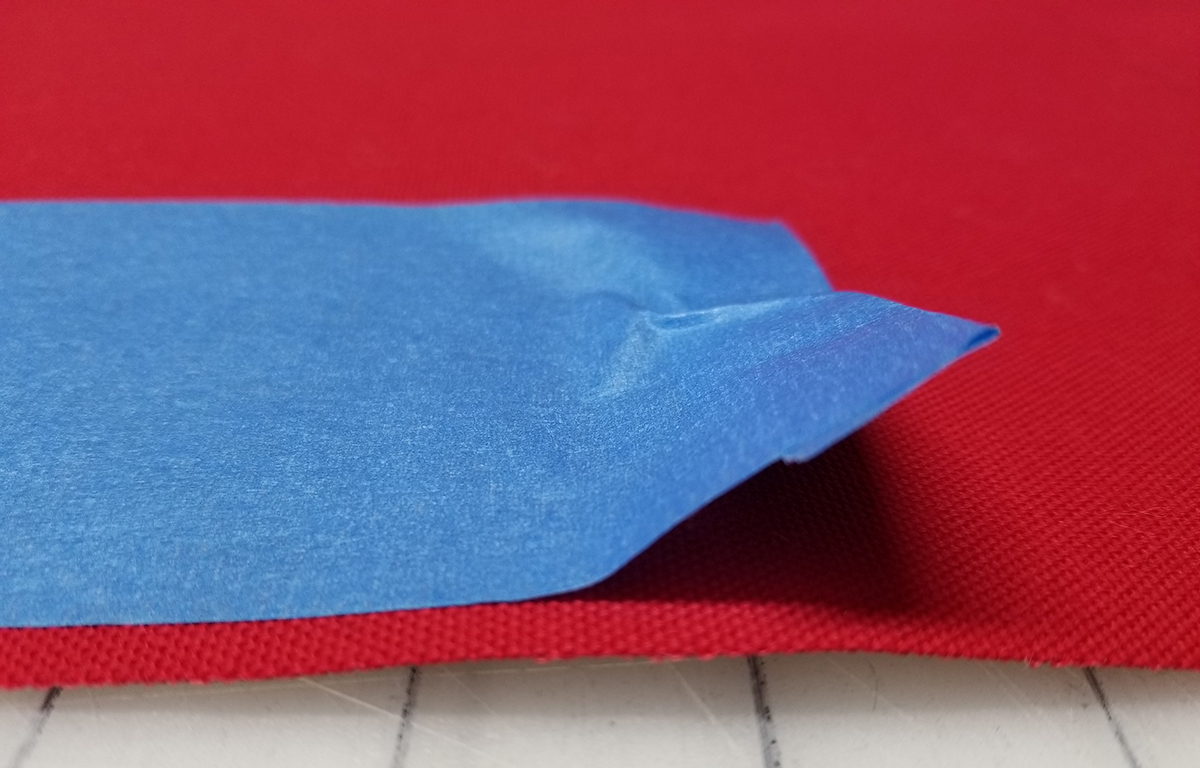
- De-fuzz the fabric with 4-inch wide painter’s tape. It’s fast and simple.
- Float the fabric (right side up) on top the hoop, centering it and aligning it with the hoop.
TIP: I chalk a vertical (Y) and a horizontal (X) cross line on the stabilizer and place the inner hoop ring with its template to match up to the drawn X/Y lines. I then use these lines to center and align the fabric (I crease the fabric slightly to make corresponding X/Y lines. Using a larger than needed fabric square has two advantages:
- I don’t have to sweat about an exact positioning of the fabric over the hoop. If I’m off by a bit, I have plenty of wiggle room to make up for it.
- If my embroidery pulls in a bit, I can compensate for that by cutting the piece to size after the embroidery is done.
- Stitch the Design:
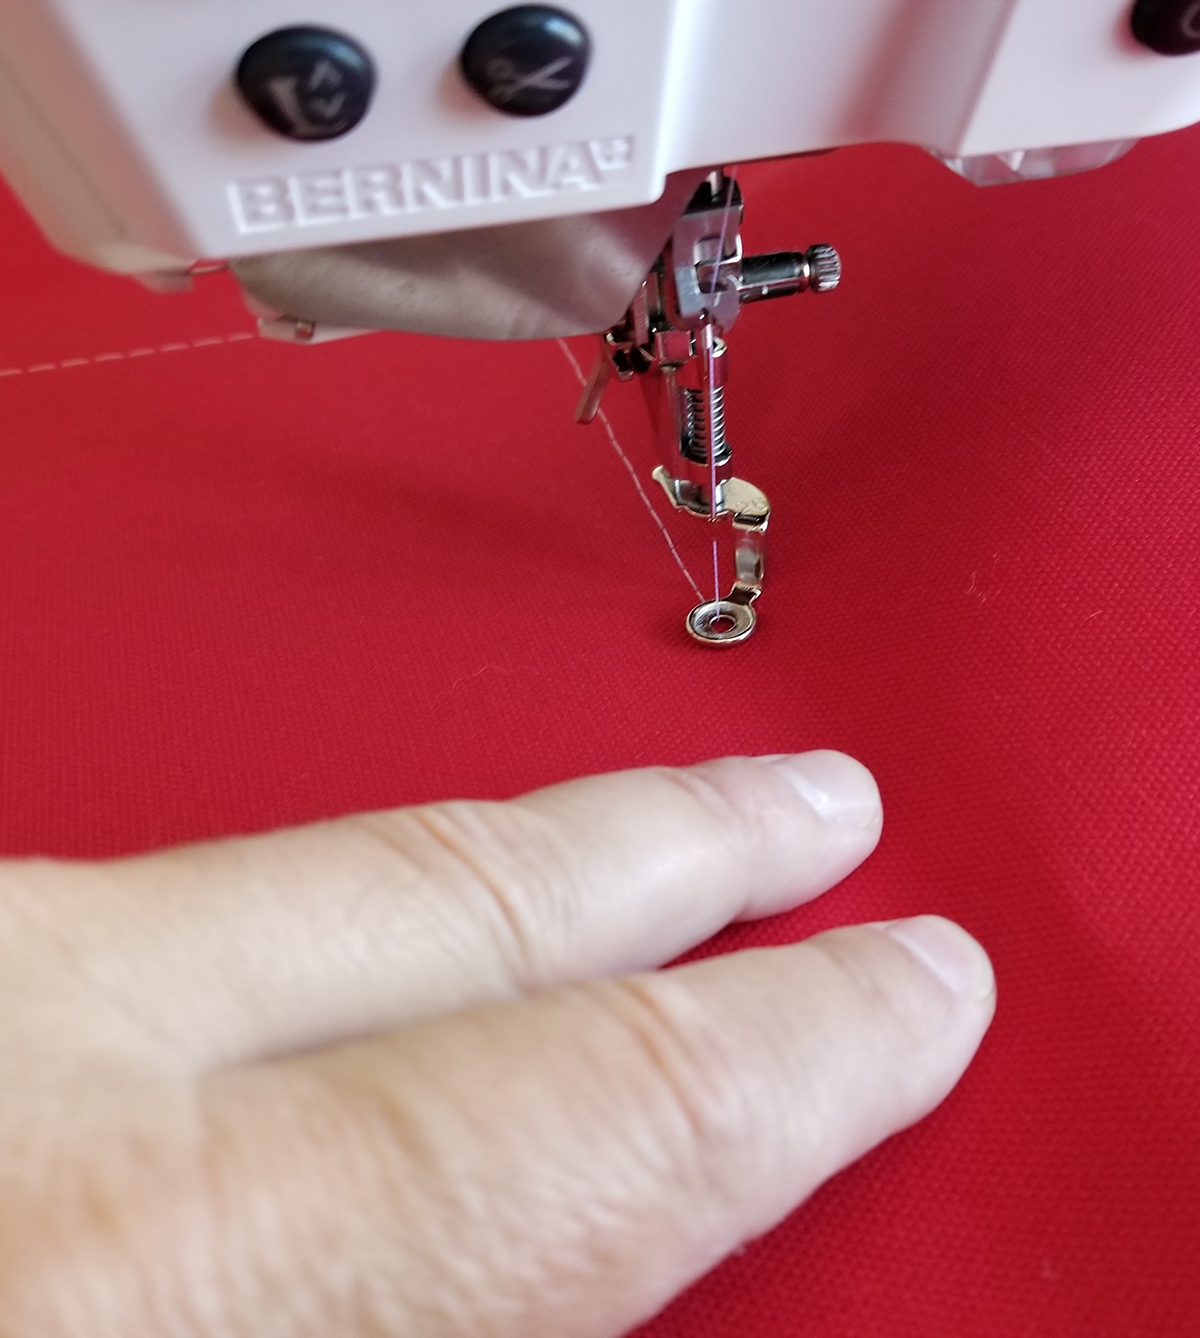
- Use the Design Basting feature and stitch the basting line before the design stitches.
TIP: I like to use the foot control to stitch the basting line when I float fabric over the hoop. I can press on the fabric with my finger ahead of the foot (always keeping my finger a couple of inches away from the foot . . . and the needle!) so that the basting line achieves best fabric control. I can also control the speed at will, which is useful if the fabric piece is large or thick and needs adjusting and guiding.
- Stitch the embroidery design
TIP: When stitching a very large design using a very large hoop, speed is not your ally. I much prefer using a moderate speed and let the machine run so that the embroidery proceeds ‘uneventfully’, aka ‘without issues’. It lets me work on something else while the machine is running. (I’ve been writing this blog post while the large design is stitching out.)
When the embroidery is done:
- Remove the hoop from the machine and unhoop the stabilizer.
- Snip and remove the basting stitches.
- Trim off the excess stabilizer.
- Square off the pillow front to 17 x 17 inches.
- This makes for 1/2-inch seam allowances, which keep the math simple.
Assembling the pillow
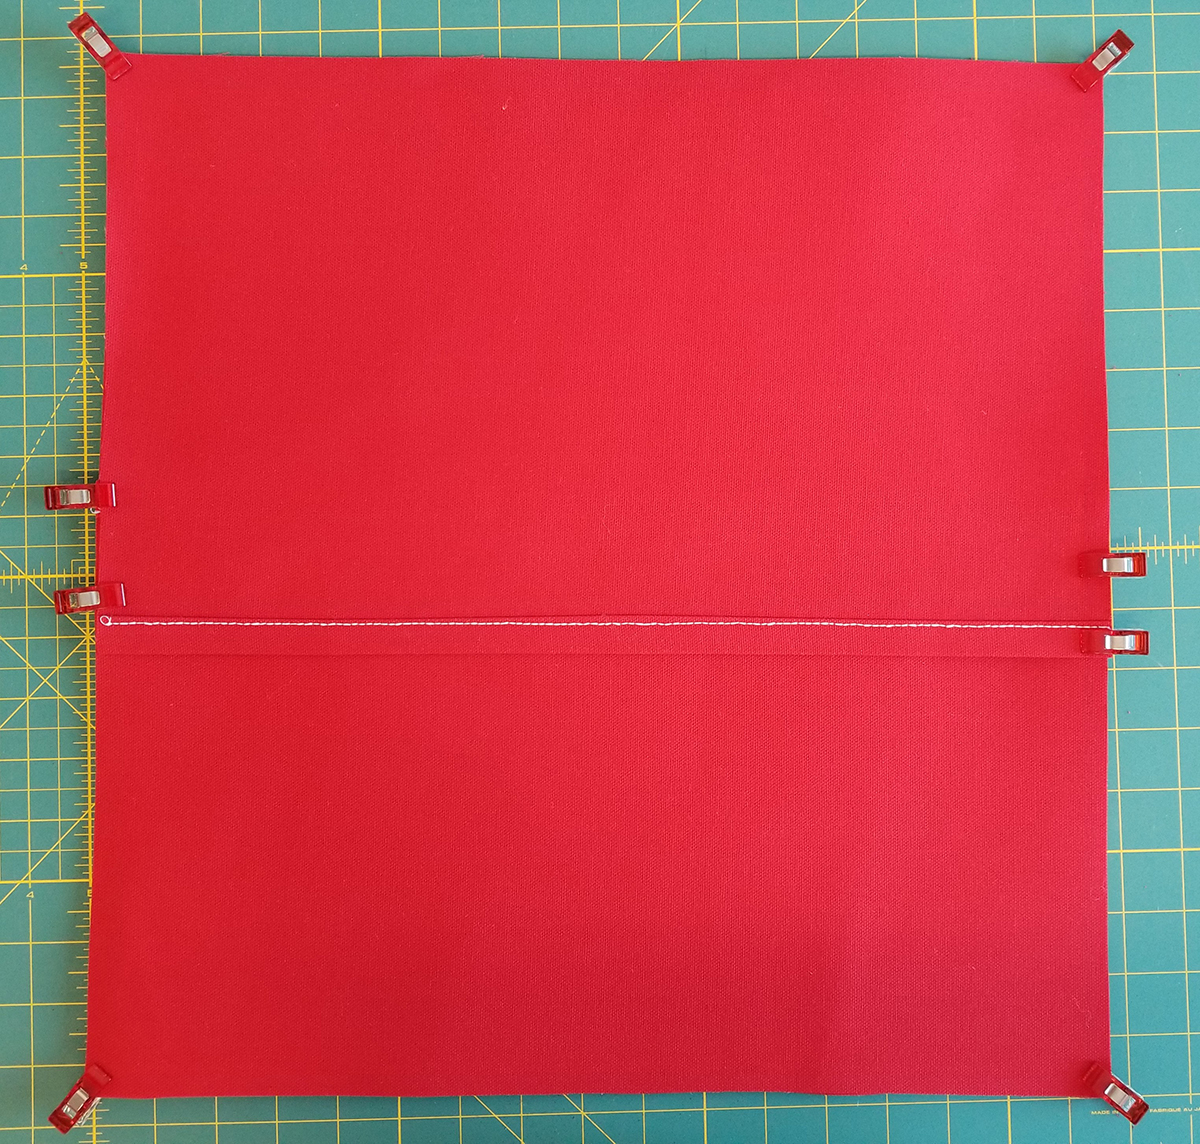
- Cut two pieces for the envelope backing: 17” wide by 11” in height.
- Use a 1-inch hem allowance along a 17-inch side.
- Double turn a 1/2-inch hem and stitch. (I used a triple stitch, length = 3 mm.)
- Place the pillow front on your work surface with right side up.
- Place the two pieces of the backing over the top, right side down. They should overlap by several inches in the middle with their hems a few inches apart.
TIP: I use Wonder Clips by Clover to hold the project together. It’s easier than using pins and the clips don’t create distortion along the edge. Also, pins are prone to bending when going through several layers of duck cloth.
- Stitch around the entire perimeter of the square to create the pillow sham.
I used a somewhat short stitch length of 1.8 mm on the duck cloth. It prevents stitches from peeking through once the pillow sham is filled with the pillow form. - Trim off the corners at 45 degrees to reduce bulk.
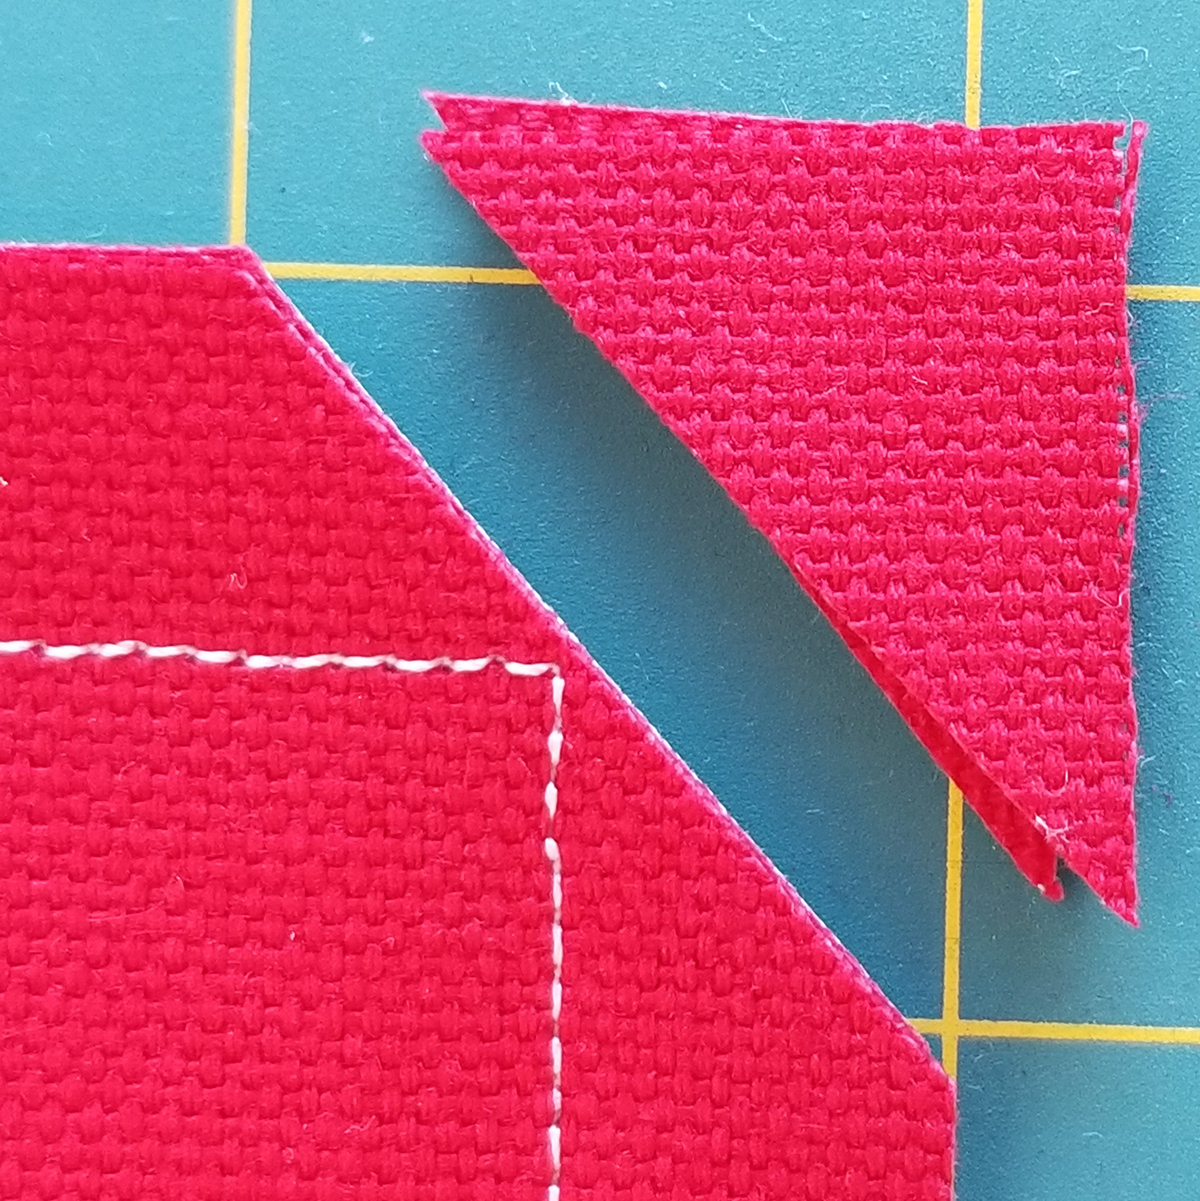
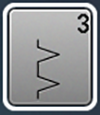
- Optional: It’s a good idea to overcast the raw edge of the seam allowances at this time.
- If you have an overlocker, you can cut off some of the seam allowances if you prefer a narrower finished seam allowance. The overlocker makes this process clean, simple and fast.
- Otherwise, Overlock Foot #2/2A with the Vari-overlock stitch will accomplish a similar finish.
And now for the exciting part!
We’re ready to turn the pillow sham right side out!
- Turn the pillow sham right side out.
- Push out the corners.
TIP: I recently discovered my new favorite tool—the OESD Expert Point & Press Tool! It has many uses, one of which is gently pushing out corners. With its bulbous tips, it pushes out corners without pushing through the seam.

- Insert the pillow form and work it into the sham to even out the fill.
Used Products

What you might also like


15 comments on “Wrought Iron Embroidered Pillow”
-
-
This is lovely. Is it possible to do this design with a B790?
-
Of course you can do this on the 790, or any embroidery machine.
Artlink is free software so just resize the design for your largest hoop. On the 790 your size will be smaller than the 880.
-
-
To reiterate birmanslave 1, I too, would like to know if this design can be stitched out on the B790 and also the B790 Plus machines. Please respond to our inquiries.
-
You can stitch it on a 790 but you need to resize the design to fit the maxi hoop.
-
-
This is a beautiful project. Where can I purchase the design? I tried both Embroidery Online and Scissor Tail Stitches and neither had the collection nor the individual designs.
Thank you, again for the beautiful project and many wonderful sewing inspirations.-
Hi Annec,
At the top of the directions there is a reference to the design collection (#80300 Celestial Lights by Amanda Murphy), just click on that line and it will direct you to the site. Hope that helps. -
I searched for the design as well, to no avail. I’ve contacted Amanda Murphy who created the design via her blog to see if it is available. Keep your fingers crossed.
-
I see someone already answered the question on how to get the design before I heard back from my local shop. You can’t buy the wrought iron design alone, you have to buy the collection from your Bernina dealer. Expensive, But there is a multitude of designs, they are beautiful designs and quilting line work also.
-
-
I think you can only get Celestial Lights from a Bernina Dealer right now.
-
-
I too would like to know where to buy this design
-
It could be stitched on the 790 or really any Bernina embroidery machine if you have the version 8 software and use the multi hoop tool.
-
I liked the painter’s tape tip. I, too, like to cut the fabric for a project larger than needed. When garment sewing I do this and lay the pattern piece on top and cut out after embroidering. Makes the job of positioning properly so much easier, especially for collars and cuffs.
-
love to sew and mend and now learning embordering. love it when things go smoothly though. I have a Bernina 535
-
This is a beautiful design, but worthless if we can’t download the design from OESD.
Leave a Reply
You must be logged in to post a comment.

Beautiful project. Thank you, Bernina for Artlink! I can’t believe how much I have been able to do using this free tool with free downloads on the internet.