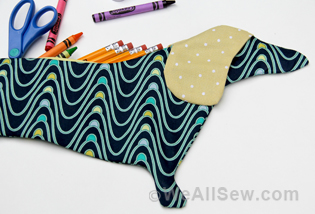
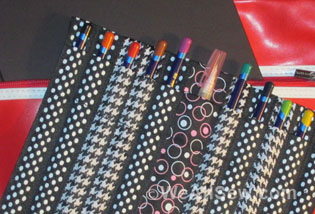
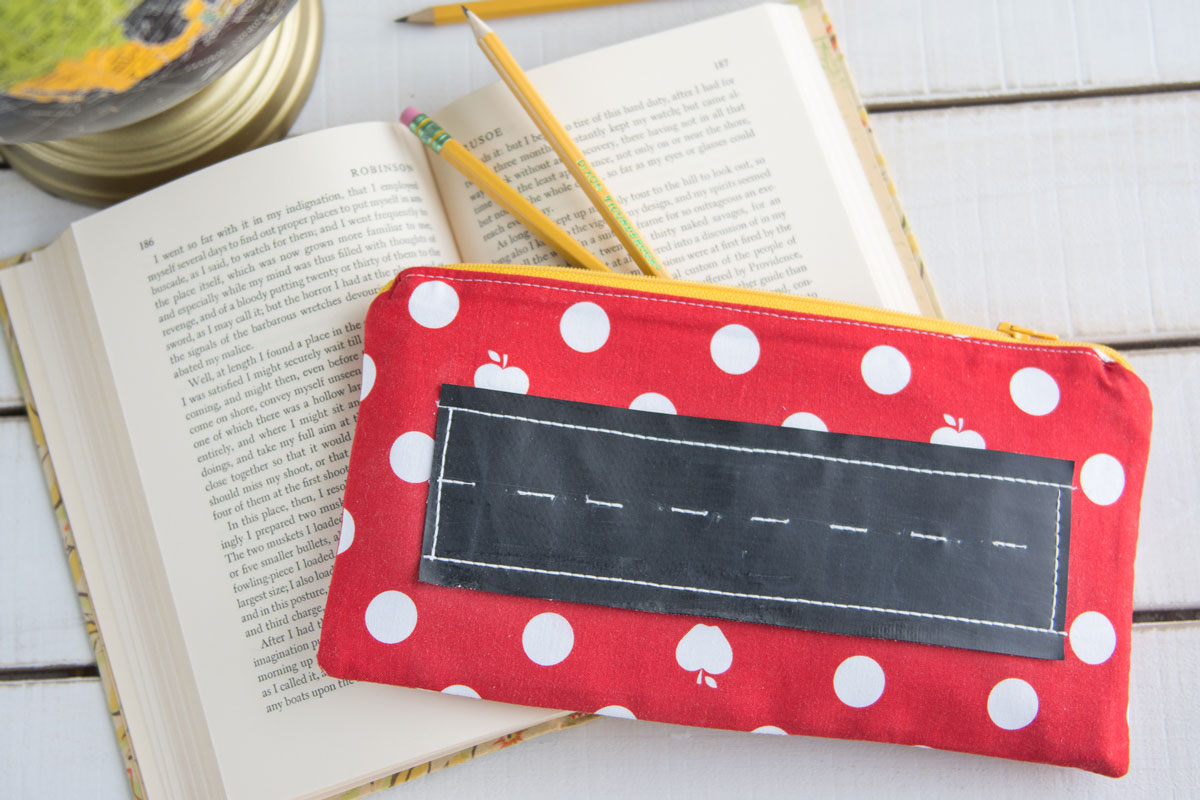
Zipper Pencil Case with Chalk Board Sewing Tutorial

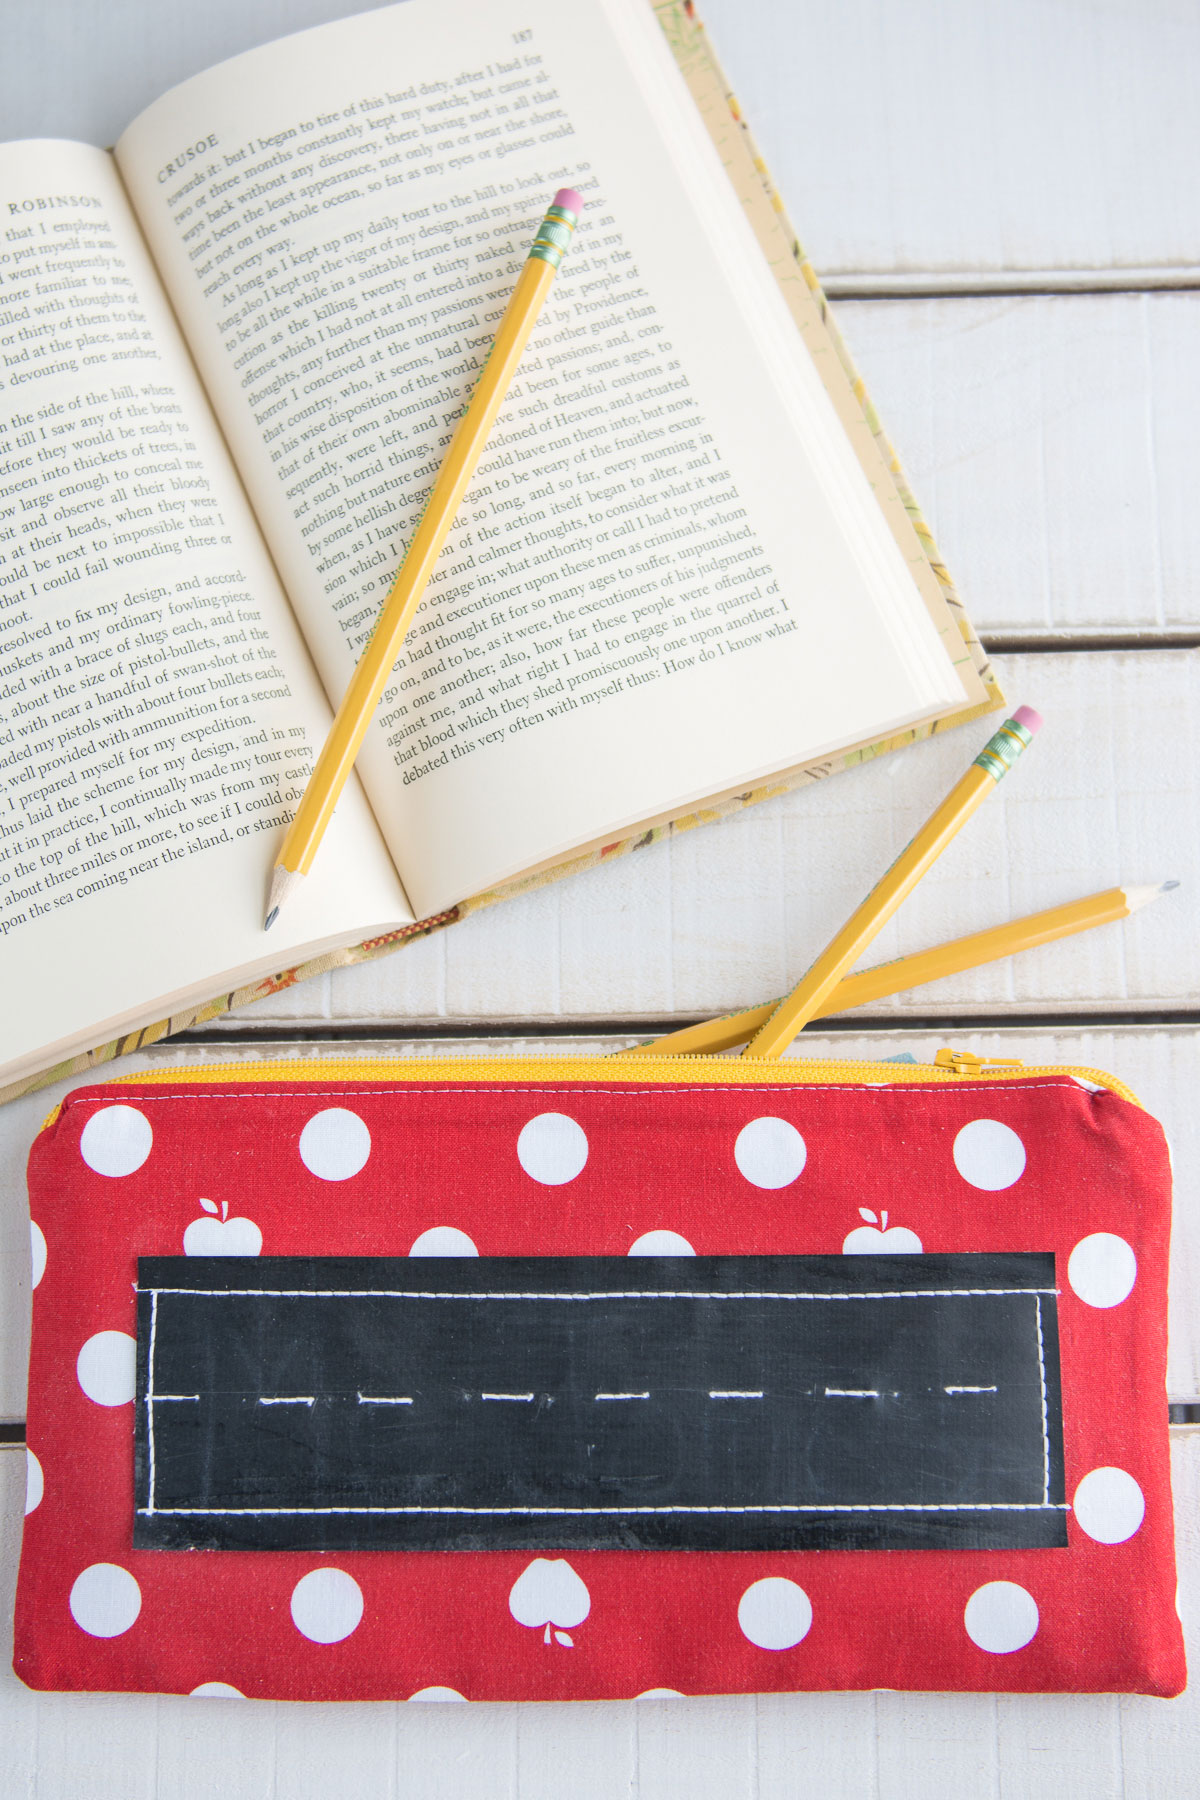
Hello there! My name is Melissa Mortenson and I’m the girl behind the Polka Dot Chair Blog. Some of my favorite things to sew are zippered pouches. They are easy to stitch and make great gifts! In honor of my kids going back to school soon, I decided that I’d design a zipper pencil case with chalk board for them to use. The mini chalk board on the front can be customized endlessly!
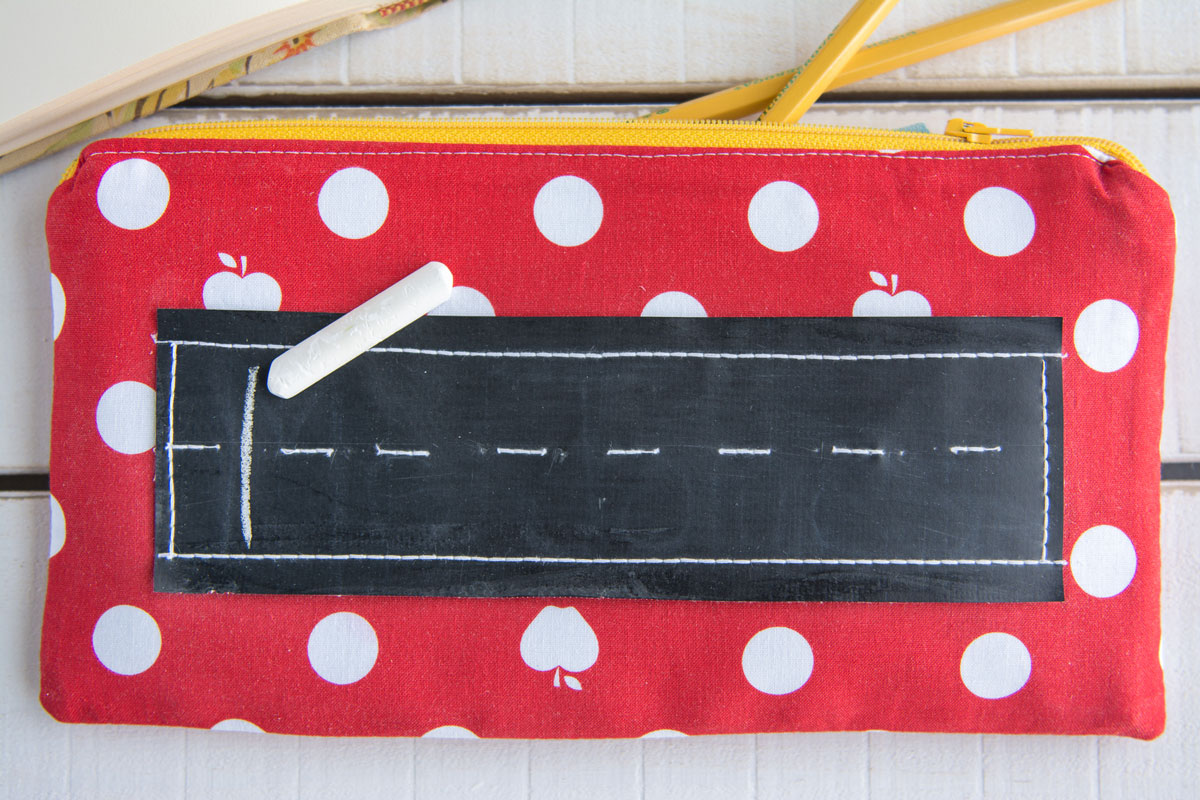
The chalk board is made from chalk cloth, which is a type of oil cloth that can be written on and wiped off just like a chalk board. Kids can use it to write notes to themselves or just to doodle on during the day. (This project would also make a great teacher appreciation gift).
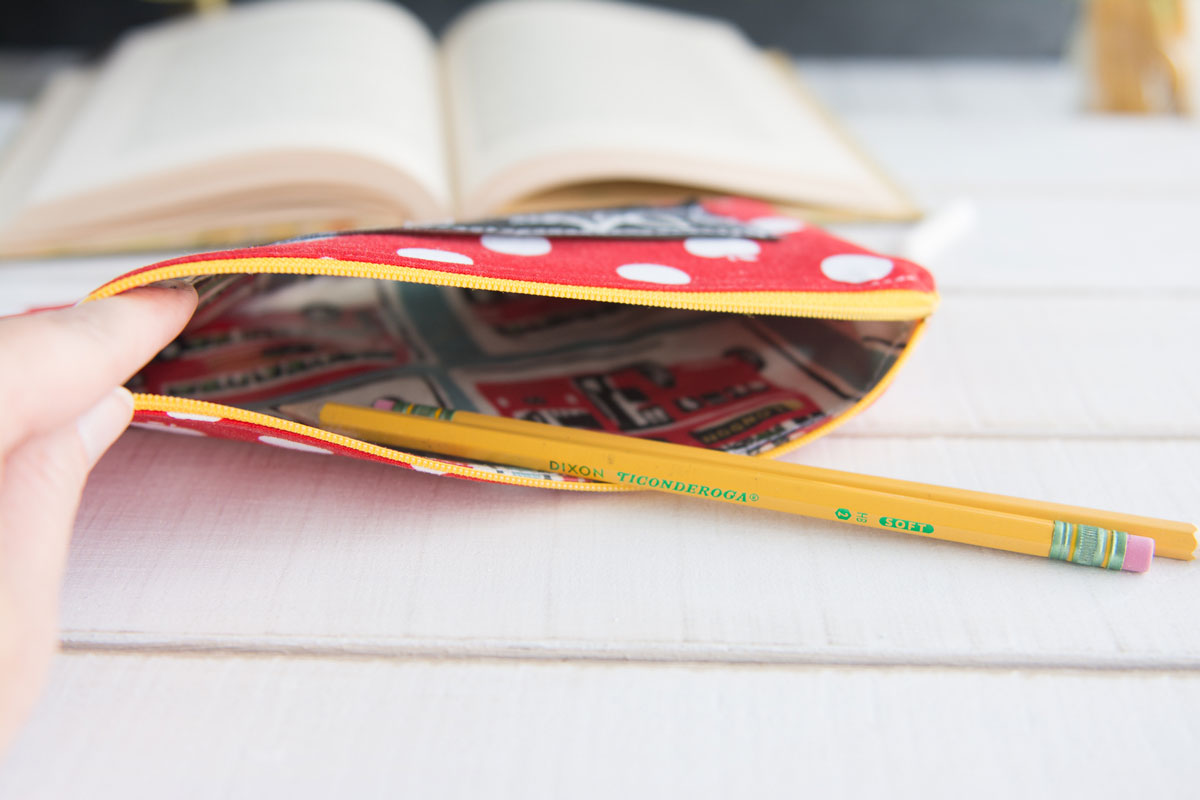
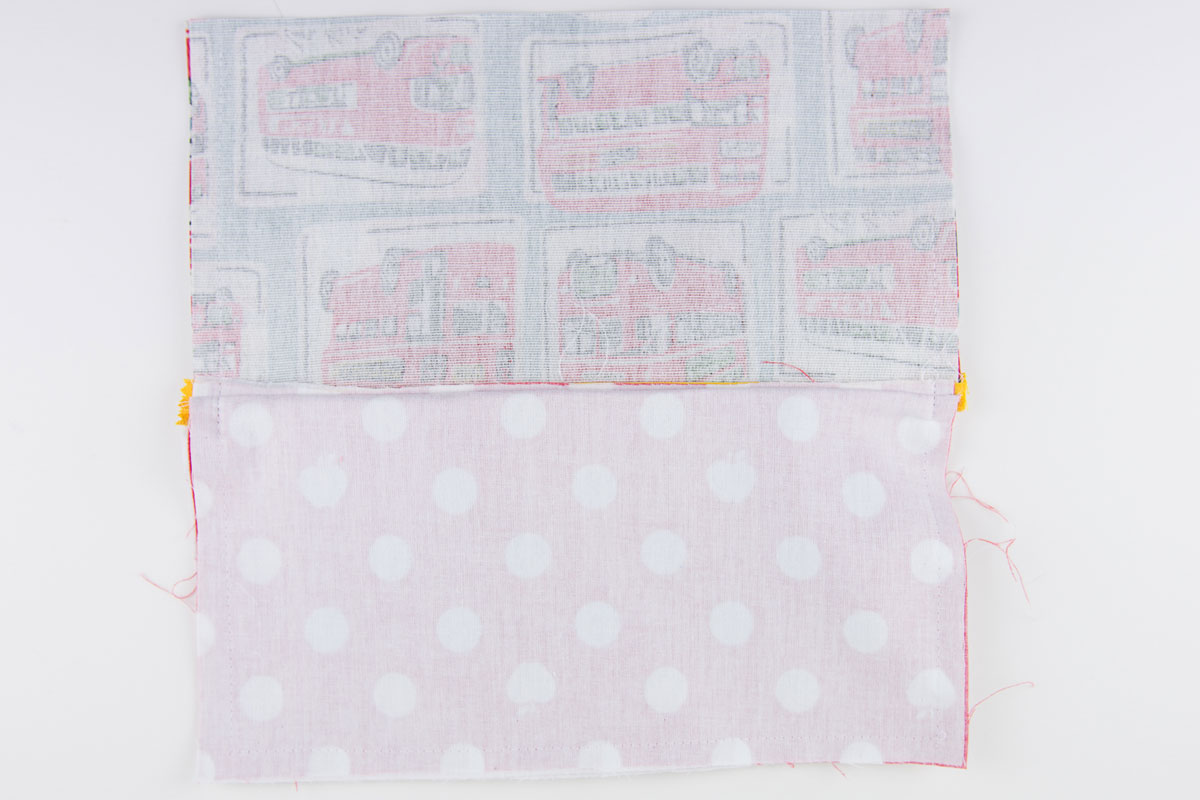
The pencil pouch is lined with oil cloth, but you could also use laminated cotton or an uncoated fabric. I chose to use a coated fabric because I thought it would hold up better to the onslaught of pencils and pens that the pouch is meant to hold.
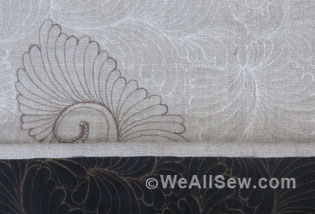
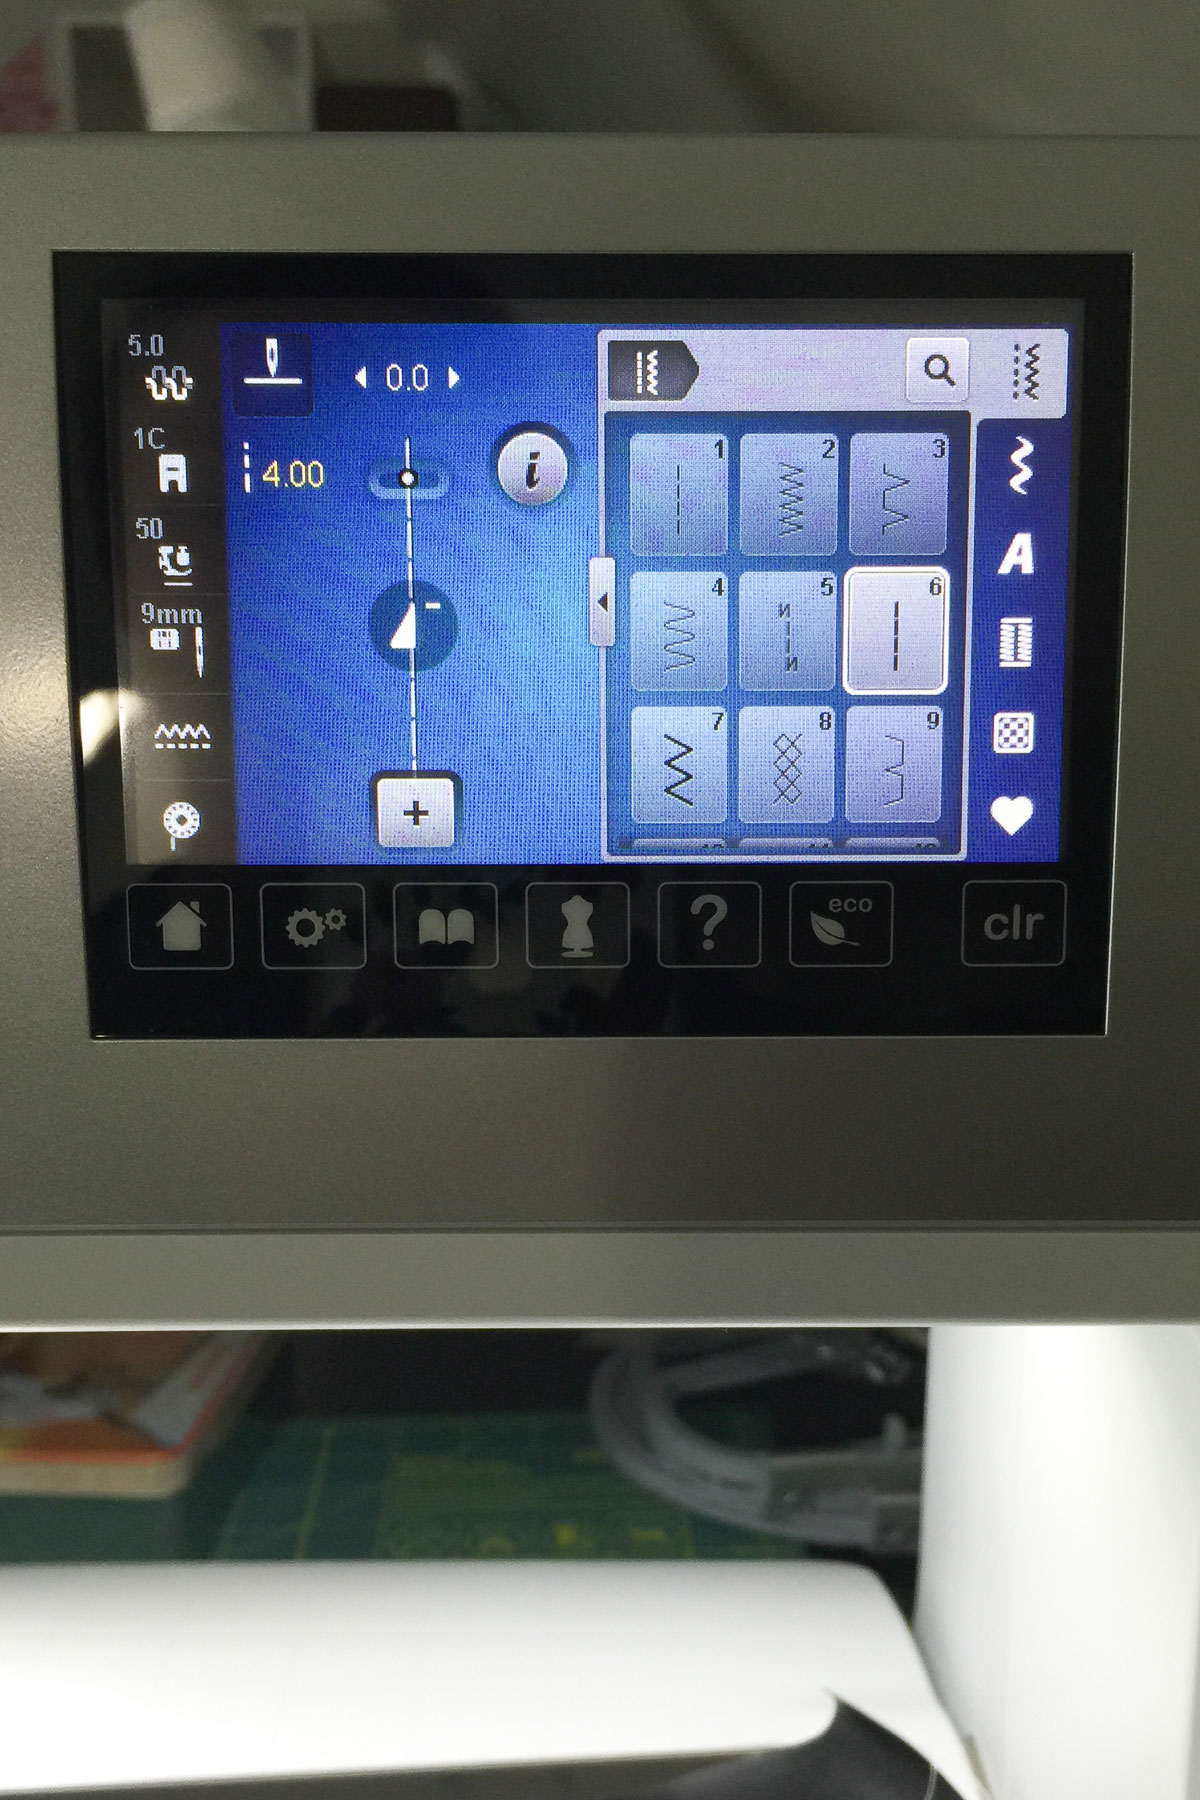
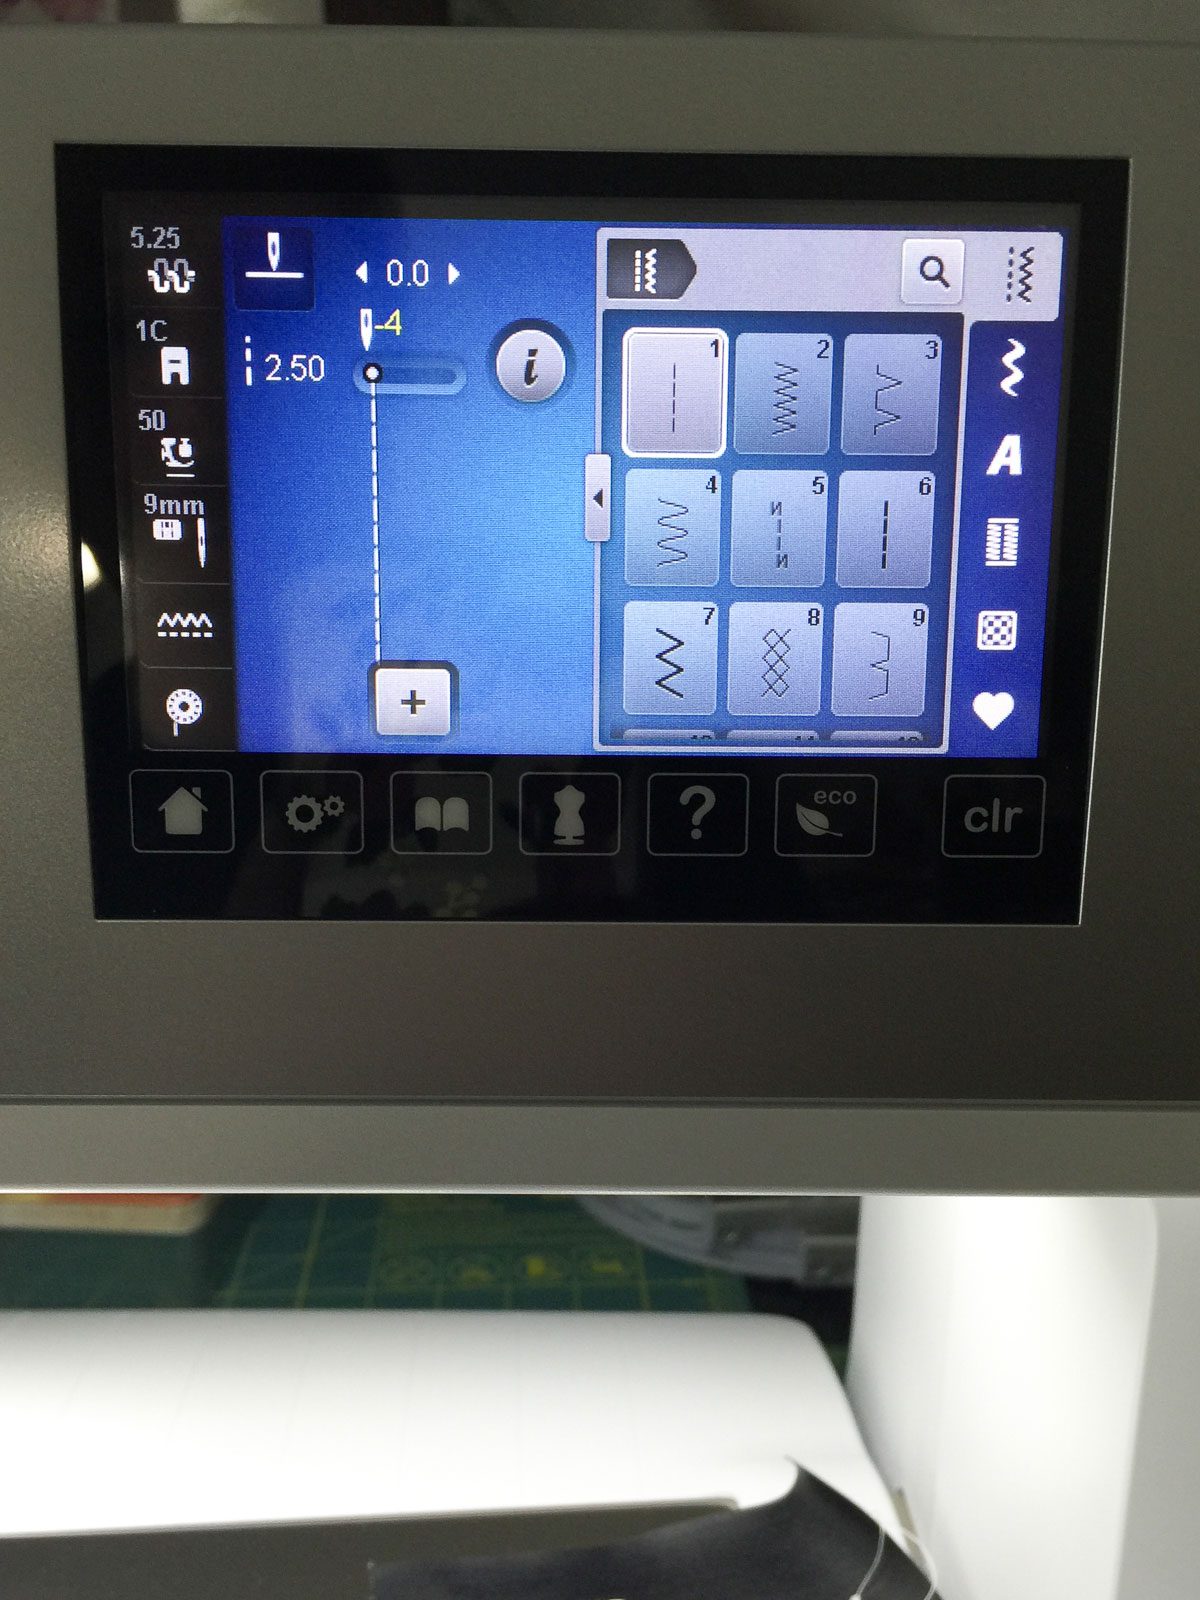
I customized the chalk cloth on the front of the pouch a bit by adding “lines” to the chalk board with a special stitch on my BERNINA 770 QE.
If you’d like to make a pencil pouch for yourself here’s what you’ll need.
Materials to sew a zipper pencil case with chalk board
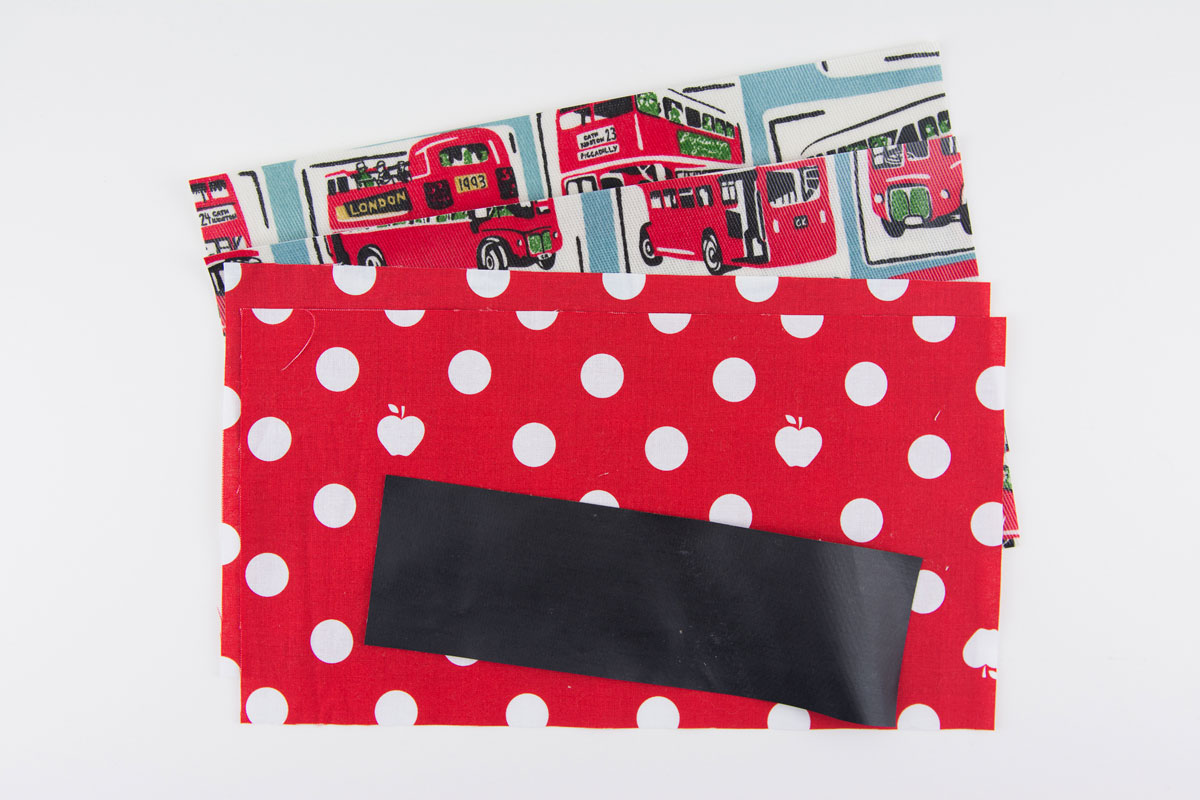
- 2 pieces of fabric each 6″ x 11″ for the pouch outside
- 2 pieces of fabric (oilcloth or other coated fabric) each 6″ x 11″ for the pouch lining
- 1 piece of chalk cloth 2 1/2″ x 8″
- One 12″ or longer polyester zipper (you’re going to cut it to size if it’s bigger than 12″ it does not matter)
- 2 pieces of Lightweight Fusible Interfacing (I used Shape Flex) each 6″ x 11″
- Chalk and Chalk Marking Tool (you need something with a bit of a sharp or precise point for marking)
- BERNINA Zigzag foot with non-stick sole #52 /#52D or other BERNINA foot coated with teflon
- BERNINA Zipper foot #4, or BERNINA zipper foot #4D
- Pressing Cloth
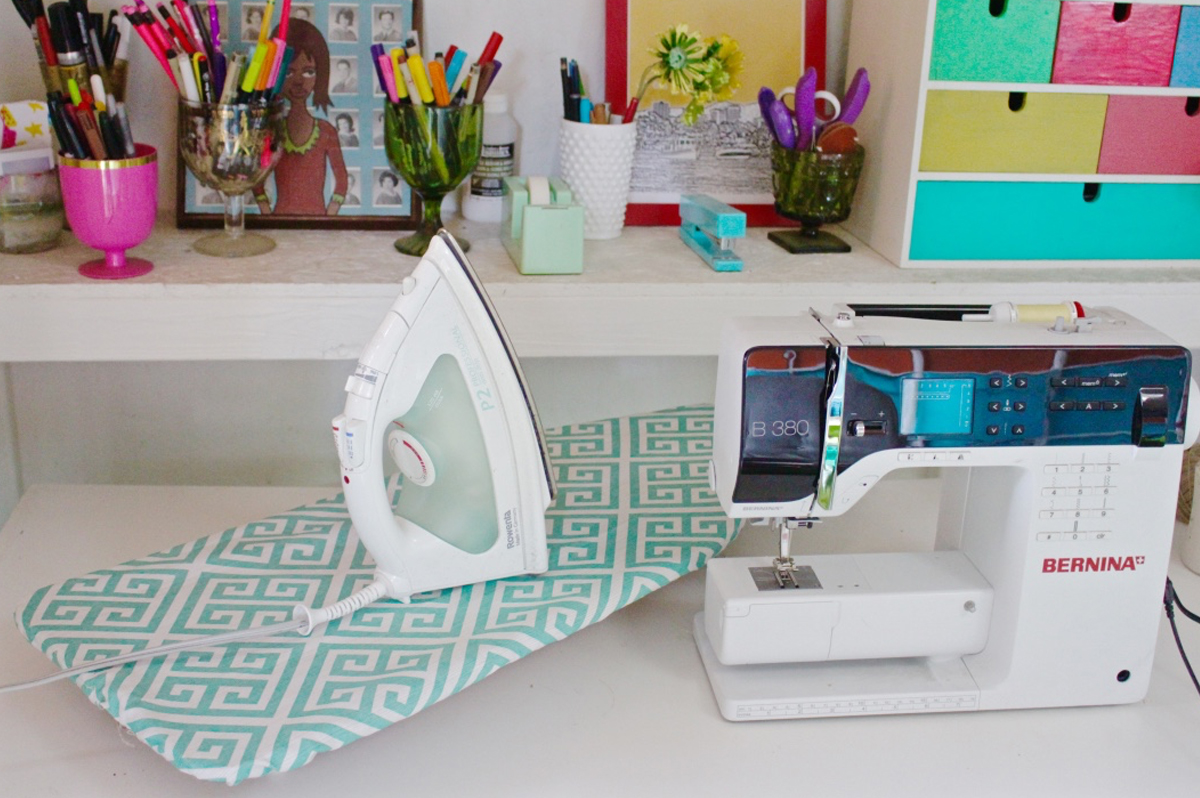
- Sewing Machine – I sew on the BERNINA 770 QE
- White Thread
A few items before we begin. You do not want to ever touch a hot iron to the surface of any of the coated fabrics. You can iron on the wrong side of the fabric or use a pressing cloth. Also after the pouch is sewn don’t iron the pouch when it’s “all one piece” the heat will melt the lining fabrics together and you won’t be able to open the pouch.
Step one
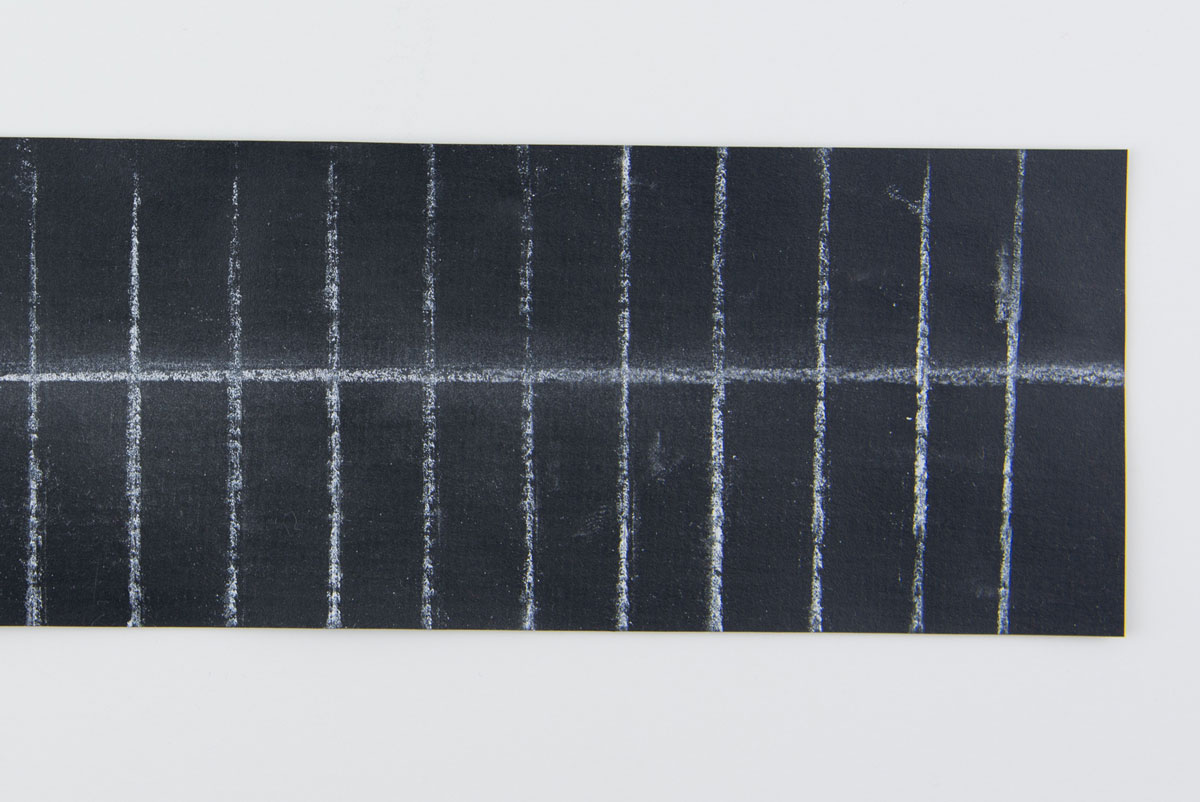
Mark the center of the short side of the 2 1/2″ x 8″ piece of chalk cloth with a straight line.
Place marks every 1/2″ along the length of the chalk cloth piece.
Step two
Set your machine for a straight embroidery stitch. On my machine this is stitch number six (6). Set your stitch length to four (4). Install foot #52 on your machine.
 \
\
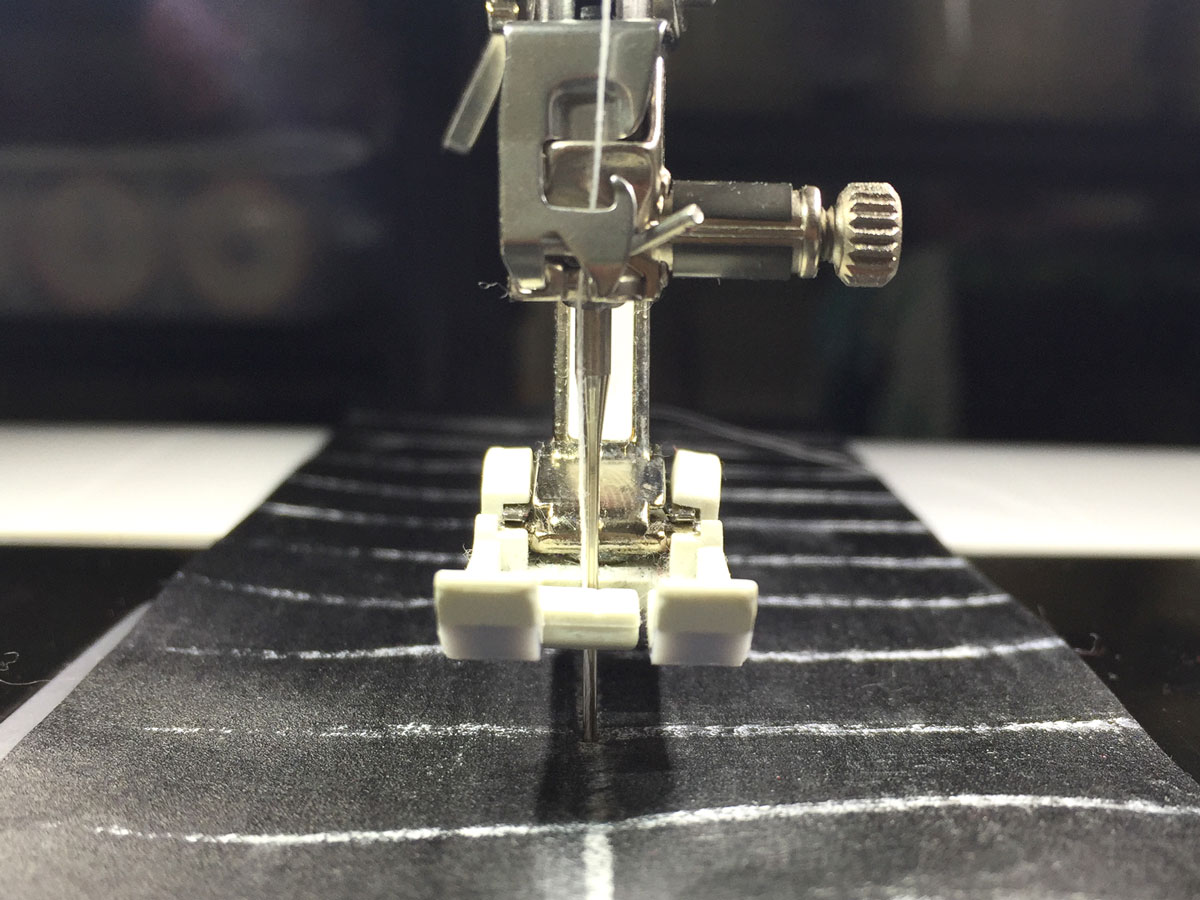
On the piece of chalk cloth stitch down the center of the cloth 1/2″ on every other 1/2″ mark. You’ll be starting and stopping several times.
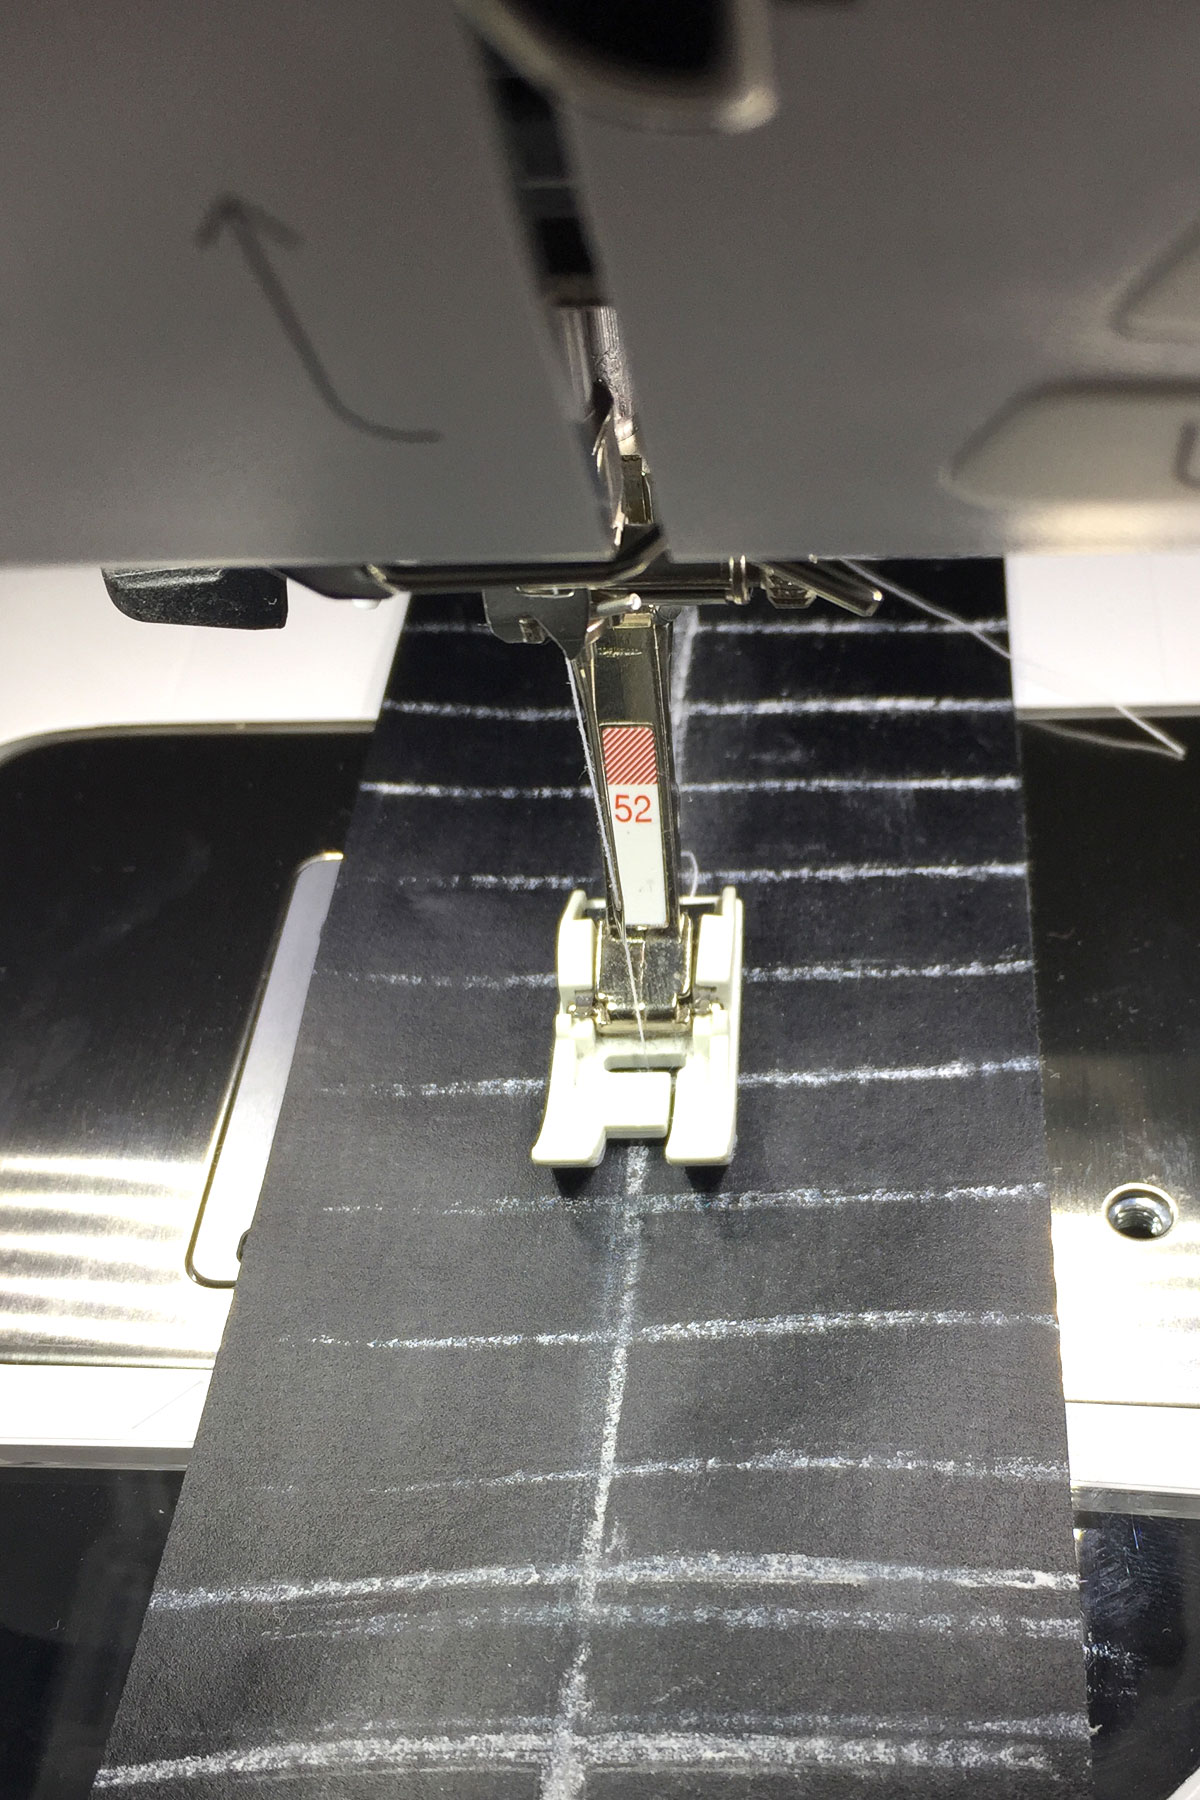
To ensure that your stitches are in the location that you want them, put your needle down in at the start point and begin stitching after you’ve manually placed the needle in the correct location.
You can use the cut feature on the machine to make this step a breeze.
Repeat until you’ve stitched the “dashes” across the entire piece.
Step three
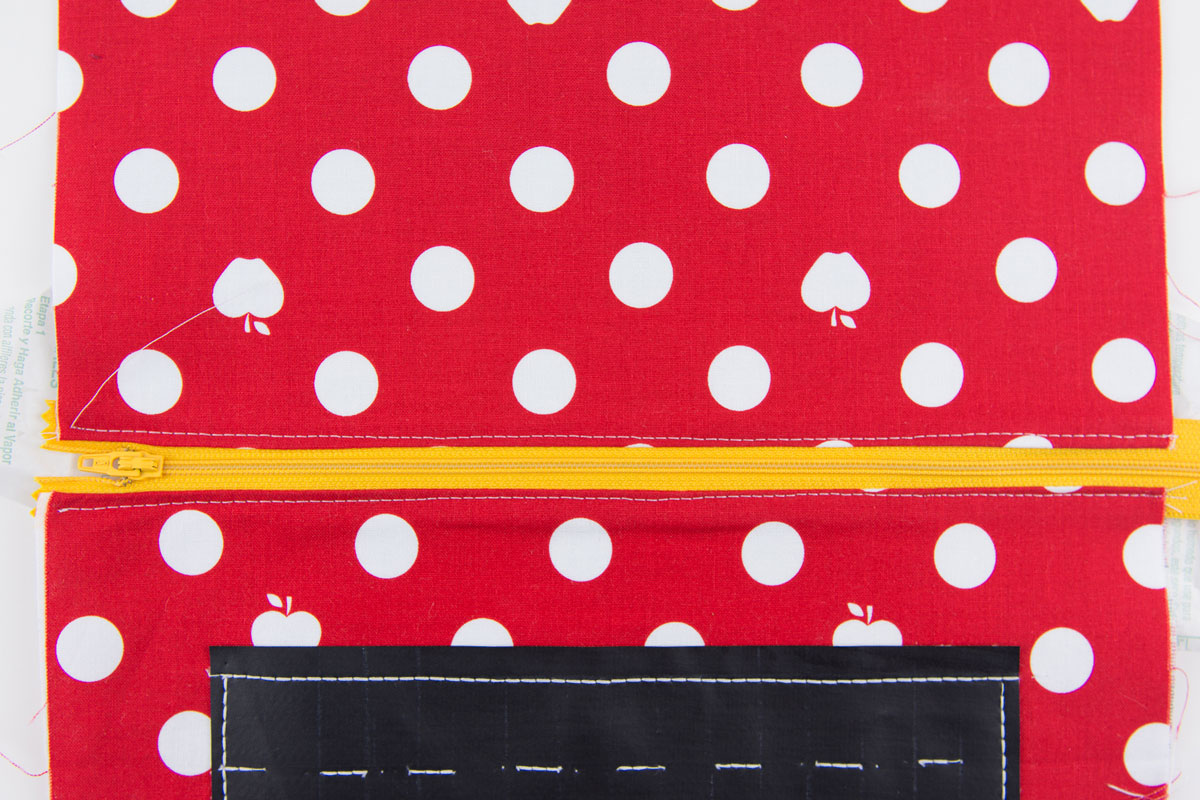
Iron the fusible interfacing onto the wrong size of the two pouch outside pieces.
Place the sewn chalk cloth piece in the center of the pouch front piece. Pin it in place.
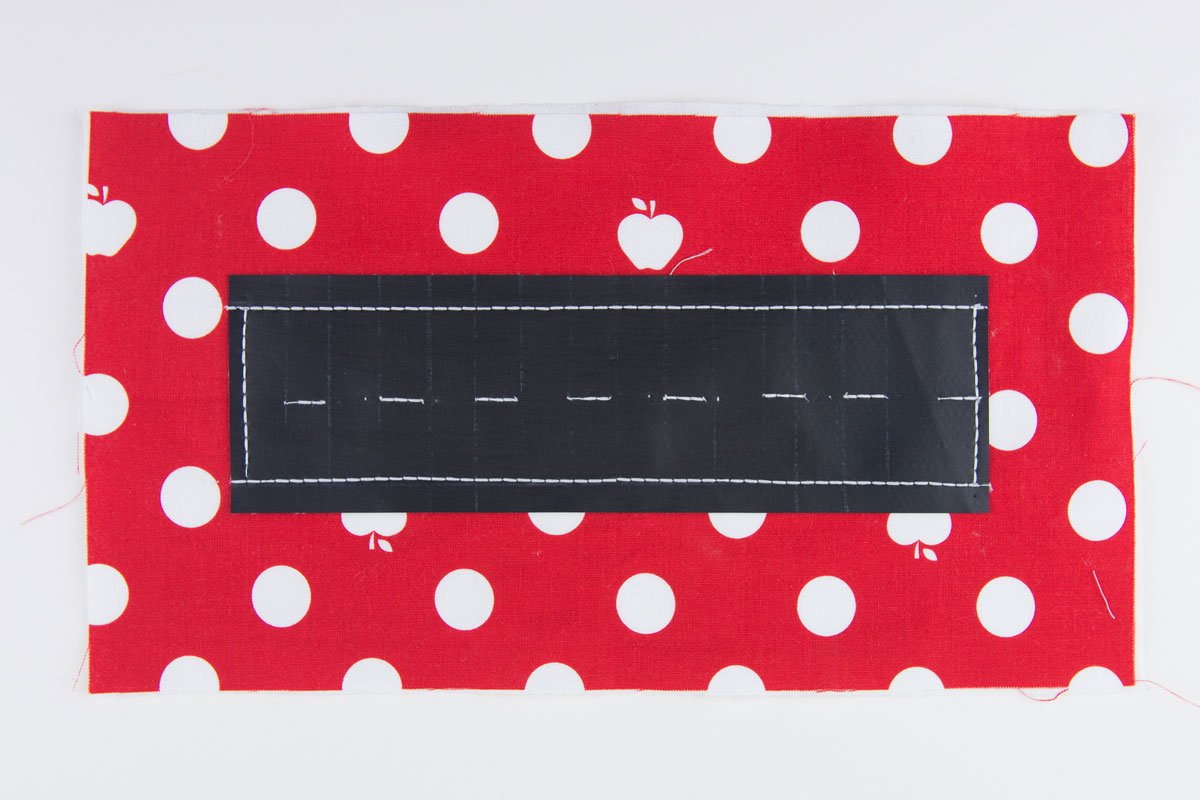
Using the same stitch as before, stitch around the perimeter of the chalk cloth 1/4″ in from the outside edge.
Step four

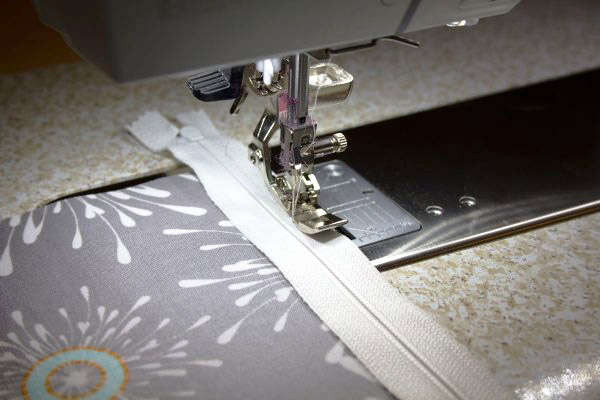
Pin the RIGHT side of the zipper to the RIGHT side of the pouch outside piece. Pin the WRONG side of the zipper to the RIGHT side of the pouch lining piece. (I find when I’m working with coated fabrics that it is easier to use binding clips than pins).
Install the zipper foot on your machine. Set your needle position to -4.
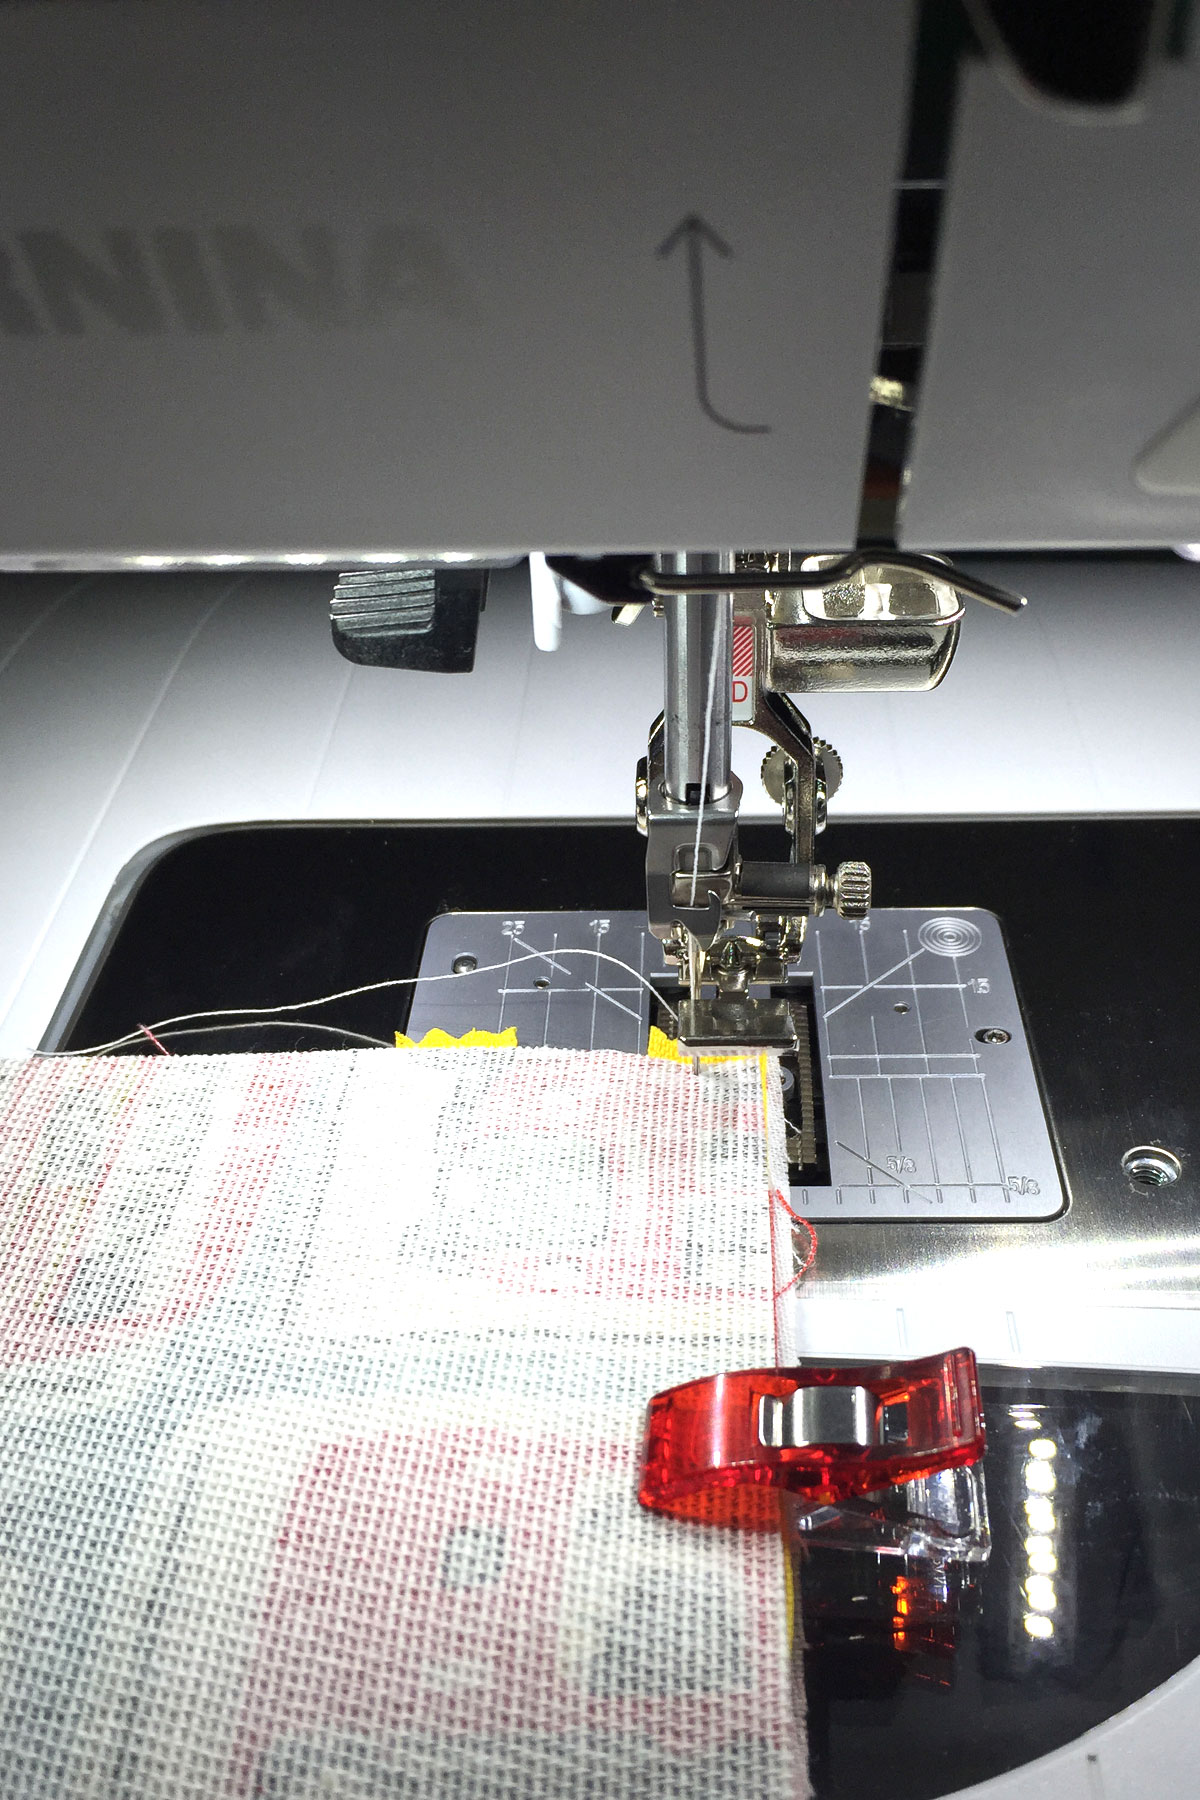
Stitch along the raw edge of the pouch, you’ll want the edge of the fabric even with the edge of the presser foot. If the zipper pull gets in your way when stitching, put your needle down, lift your presser foot and move the zipper pull out of the way. Then continue stitching. Finger press seams away from zipper.
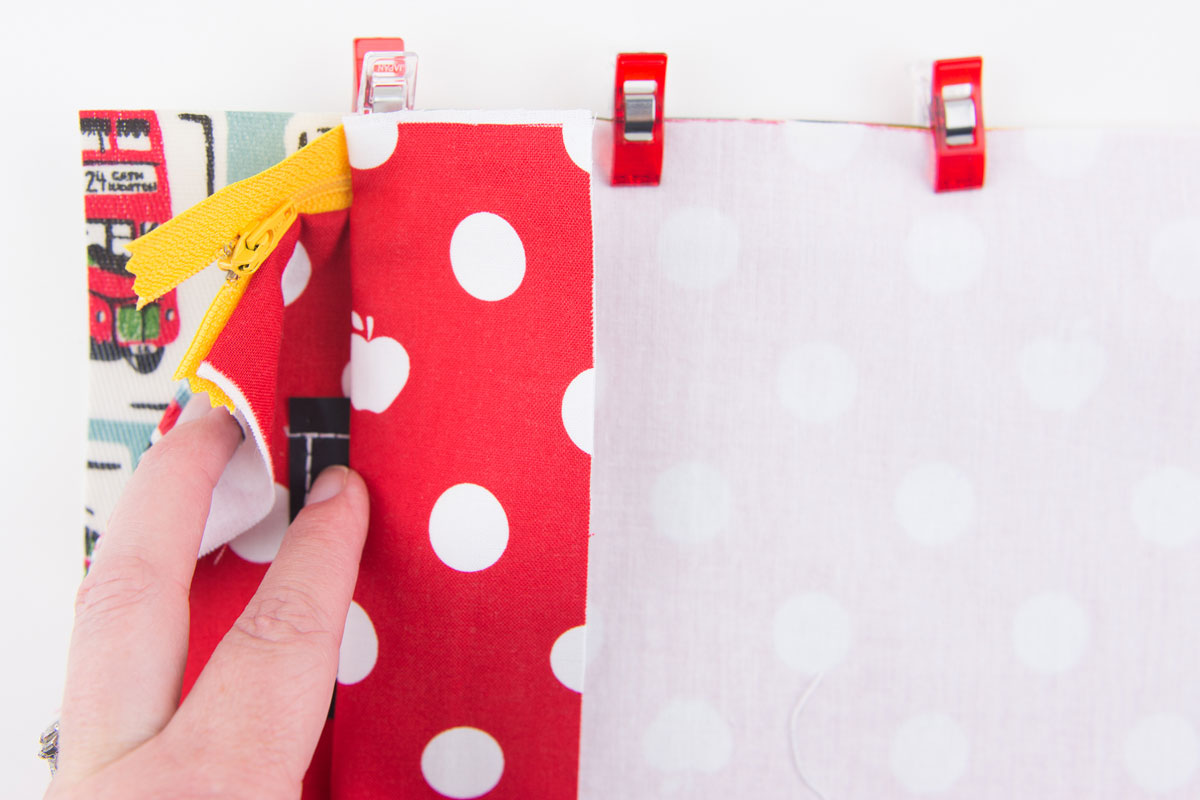
Next, pin the WRONG side of the OTHER side of the zipper to the RIGHT side of the lining fabric. Pin the RIGHT side of the other side of the zipper to the RIGHT side of the pouch back piece.
Stitch as you did for the first side.
Press the seams away from the zipper using a pressing cloth if necessary.
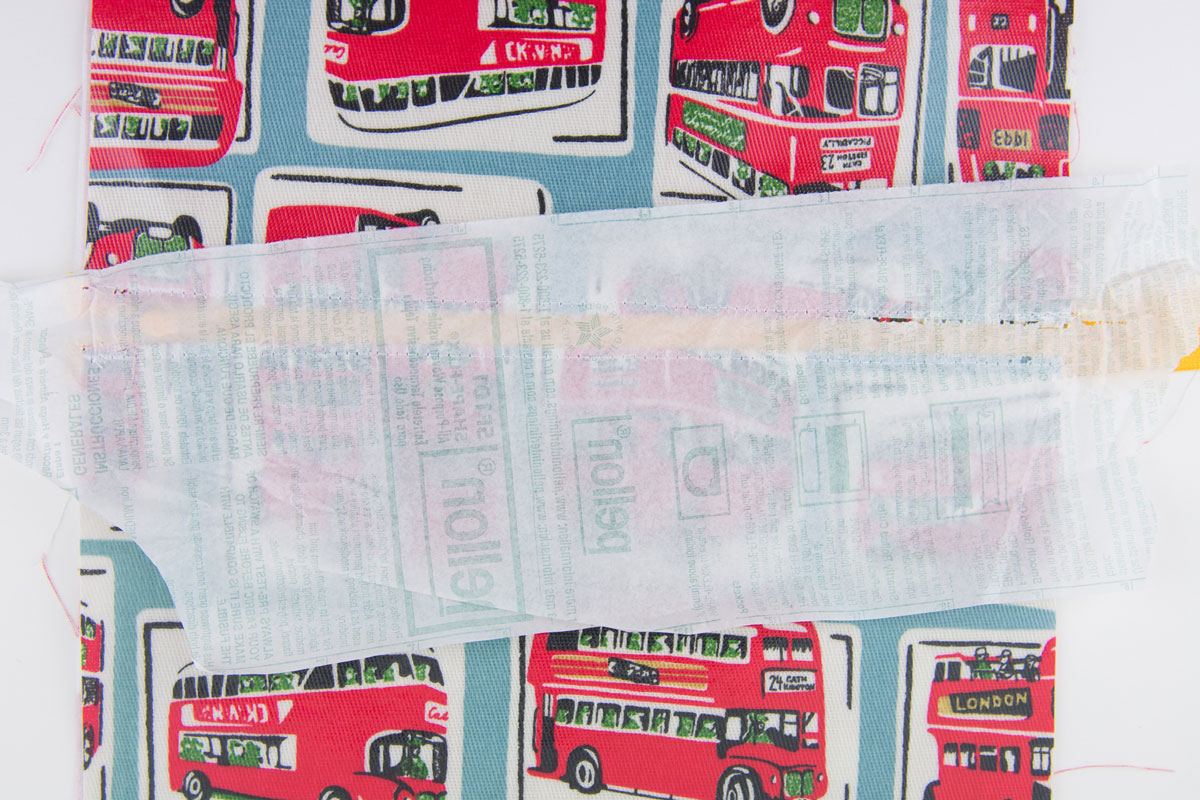
Take a scrap of tissue paper and place it over the zipper on the wrong side of the pouch (the side with the coated fabric). Flip this piece over and top stitch along both sides of the zipper. The tissue paper piece will keep the coated fabric from getting caught on the feed dogs of the machine.
Step five
Install the BERNINA foor # 1D foot on your sewing machine. Engage the Dual Feed if you have it (if not it’s okay).
Trim the zipper to the same width as the pouch. Unzip the zipper 3/4 of the way (NOT ALL THE WAY).
Pin the pouch so that the right side of the pouch outside pieces are lined up and the pouch lining pieces are lined up. Pin the zipper towards the lining pieces.
Stitch around the perimeter of the pouch with a 1/2″ seam allowance. Leave a 4″ opening in the bottom of the pouch lining piece.
Clip the corners of the pouch and trim the seam allowances of the lining to 1/4″.
Turn the pouch right side out.
Hand stitch the opening in the lining closed.
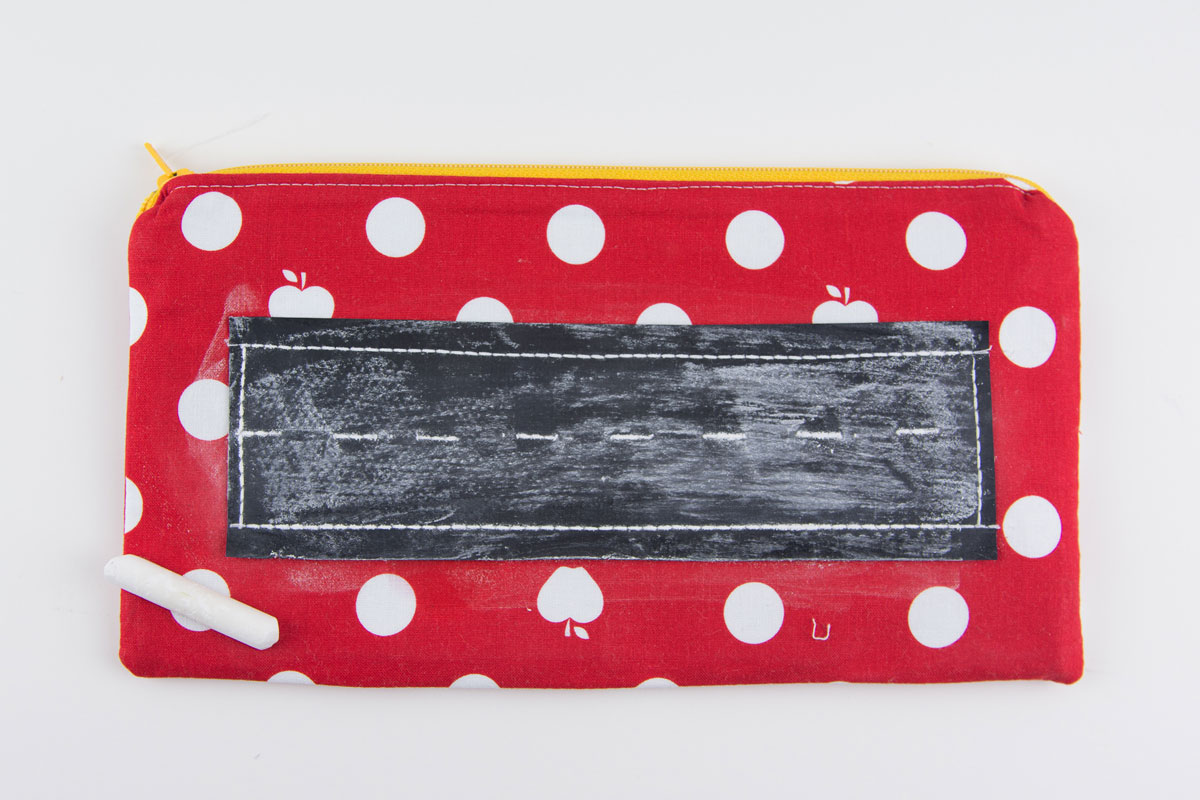
Before you use the pouch, you’ll want to “season” the chalk cloth by rubbing chalk all over the top of it then wiping it off.