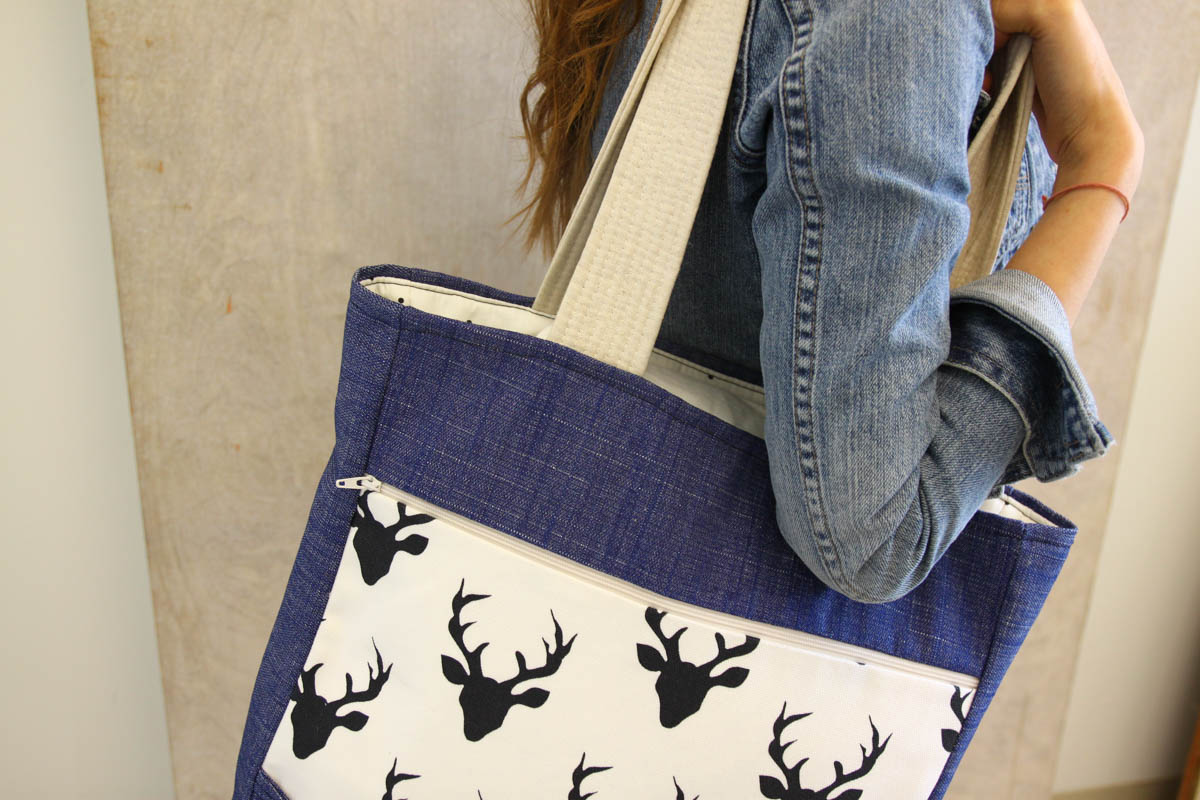
How to Make a Summer Book Tote
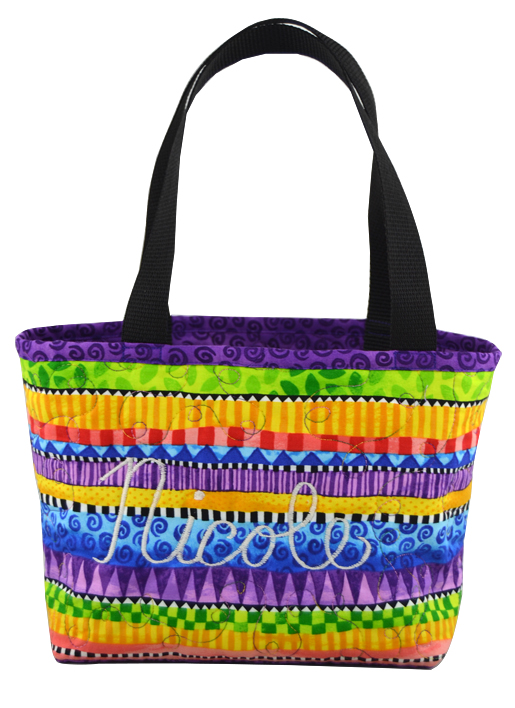
Make summer reading especially fun with a personalized book tote…perfect for kids of all ages. Go from the library to the car, and then on to the beach reading in style. Stitch this fast and simple tote by Renae Allen to practice free-motion quilting, free-motion embroidery, and to learn simple construction skills.
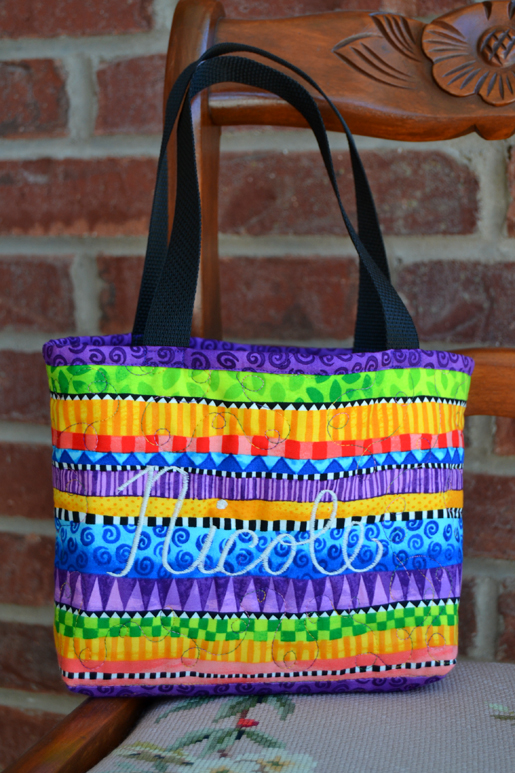
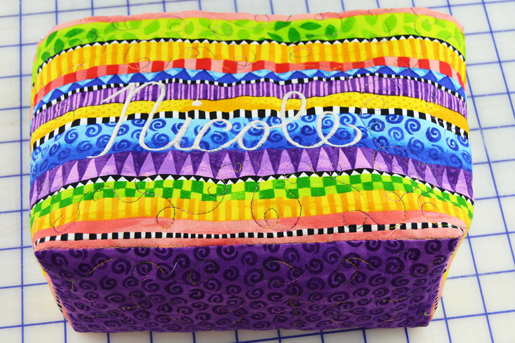
Finished Book Tote: 13″ x 7 ½”
Materials:
- 1 fat quarter or ½ yard cotton stripe/print for tote front sides
- ½ yard cotton print for tote bottom, lining, binding and optional pockets
- 1 yard 1″ webbing for handles
- Batting 20″ x 15″
- Thread
Cutting Instructions
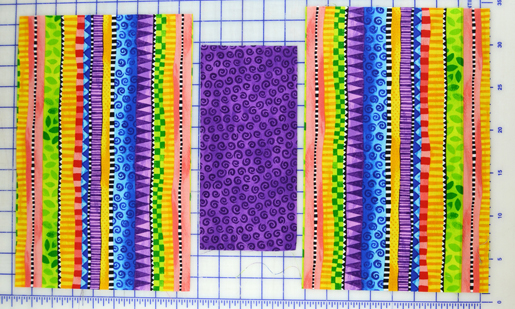
Cut the following pieces for the book tote:
(2) 13 ½” x 8″ Front
(1) 8 ½” x 4 ½” Bottom
(1) 20″ x 15″ Lining
(2) 18″ pieces of webbing
Binding – 35″ x 1 ½”
Sewing & Quilting Instructions
1. The featured bag fabric uses a one-way striped print. I cut the pieces so the side seams match and the pieces are sewn to the bottom as a mirror image so they match when folded together.
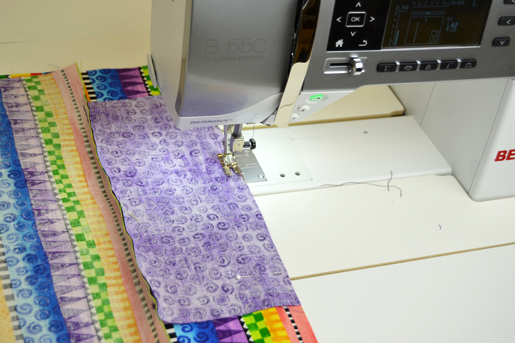
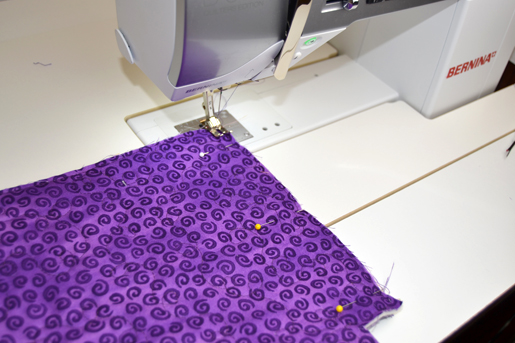
2. Match the centers of the front, back and bottom pieces, right sides together and pin. Stitch using a ¼” seam allowance. I stitched this project with a BERNINA 550 and Patchwork Foot #37 for ¼” seam allowances.
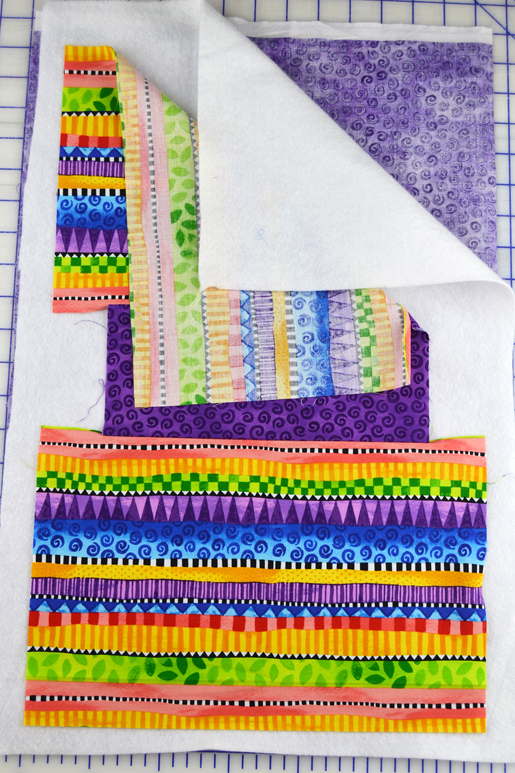
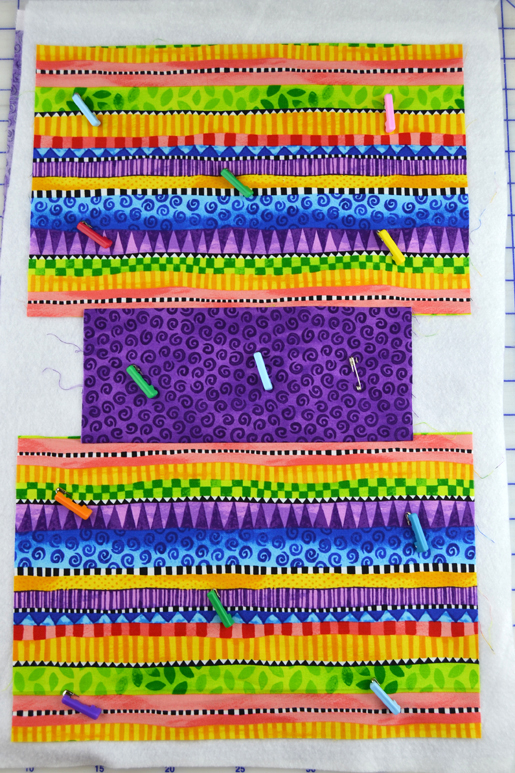
3. Layer the back, batting and front creating a quilt sandwich. Anchor with safety pins or spray baste. Tip: Quilter’s Delight Safety Pin Covers making pin basting much easier!
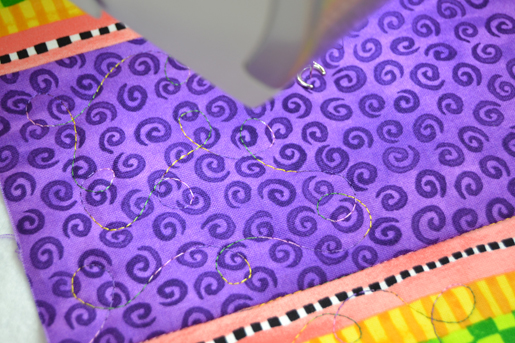
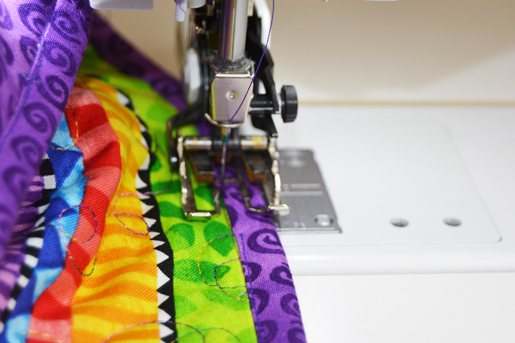
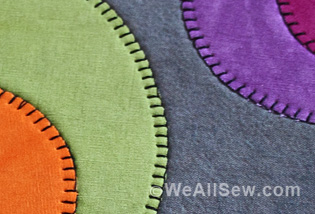
4. Quilt all three layers with a free-motion quilting design using Freehand Embroidery Foot #24. I stitched in the ditch on the tote bottom seams and quilted loops edge to edge. The bobbin thread is InvisaFil by WonderFil and the top is Superior Rainbows Tuscany variegated thread. I loosened the top tension and quilted with a topstitch needle.
5. After quilting, stitch all the way around the outside edge just under ¼”. I usually do this free-motion, but Walking Foot #50 also works well. Trim the excess batting and backing away.
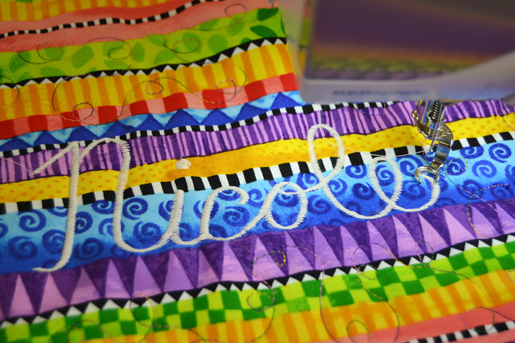
6. Use free-motion embroidery to stitch the name. I wrote the name “Nicole” with chalk and used Freehand Embroidery Foot #24 with the open toe and a zigzag stitch width of 3. I moved the fabric slowly and put the pedal to the metal! Tip: Loosening the top tension or threading the bobbin through the “finger” on the bobbin case pulls the top thread to the bottom making a nicer stitch.
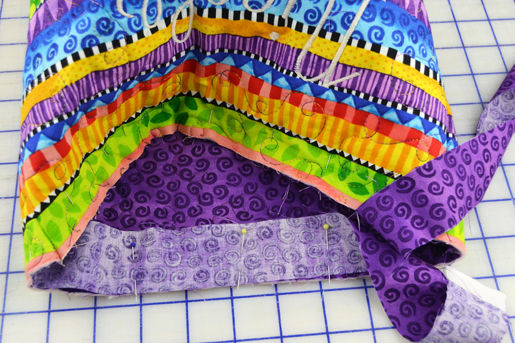
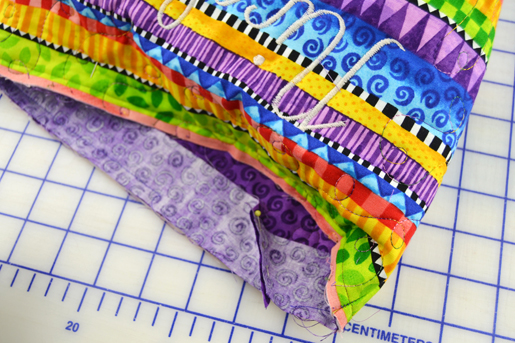
7. Fold the bag in half right sides together. Stitch the seams with a ¼” seam allowance. Finish the seam edges with a zigzag, serger or overlock stitch.
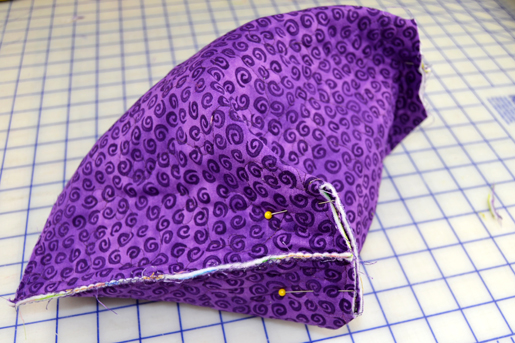
8. Form the box bottom by folding the tote sides to the tote bottom, matching raw edges. Stitch the seam on both sides and finish seam allowances with a zigzag, serger or overlock stitch.
9. Turn right side out.
10. Leaving a 3″ piece at the start, pin right side of binding to inside top edge of bag. Stitch ⅜” from edge. Stop stitching 4″ from the end to allow room to sew binding ends together. Tip: Use Walking Foot #50 and move the needle position to the far right. Use the edge of the foot as a guide.
11. Join binding pieces, pin and stitch seam. Finish stitching binding to the tote.
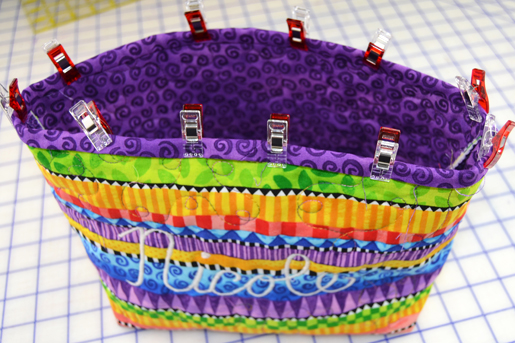
12. Turn binding to right side, fold raw edge under ⅜” and fold to right side. Secure binding. Tip: Wonder Clips are great. They don’t poke you!
13. Edge stitch the binding on the right side of the tote using Walking Foot #50. I moved the needle position to the left to stitch on the edge of the binding. Tip: A walking foot prevents the top layer from sliding and making diagonal wrinkles.
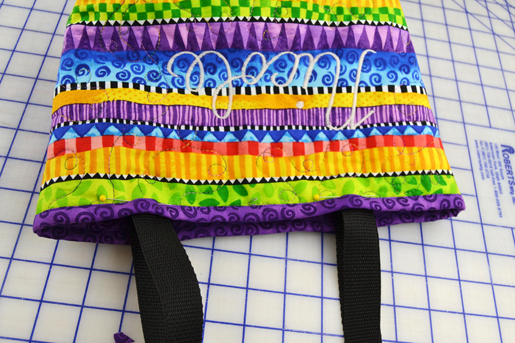
14. Attach the handles 3″ in from each side. Place the ends of the handles inside of the tote and stitch a square or X on the front to secure the handles. Tip: Melt the webbing ends with the flame of a match to prevent fraying. Zigzagging the ends will also work.
15. Enjoy!


What you might also like


3 comments on “How to Make a Summer Book Tote”
-
-
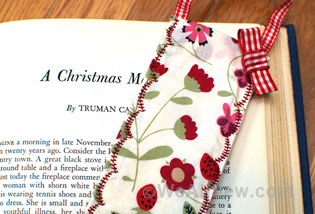
It is a great print with so many colors and patterns. The fabric is Blank Quilting Wondertones line pattern number 6856. I know that it is still available at Village Dry Goods in Brigham City, Utah.
-
Pingback: BERNINA Project: Summer Book Tote |
Leave a Reply
You must be logged in to post a comment.

Love the fabric for this tote, can you tell me what it is