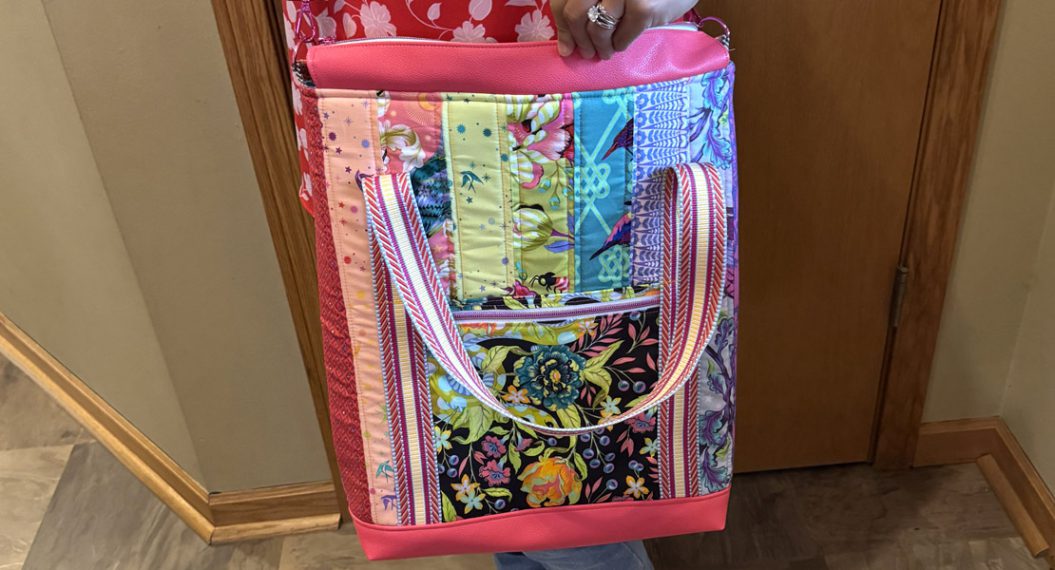
Meadow Tote

Get ready to put your feet on the sewing machine’s pedal and start sewing this adorable Meadow Tote.
Materials to Make the Meadow Tote
- Fat quarter of Pat Bravo IFL-46304 Fabric A
- Fat eight of Pat Bravo IFL-46302 Fabric B
- Fat eight of Pat Bravo IFL-56309 Fabric C
- Fat eight of Pat Bravo IFL-46300 Fabric D
- Fat eight of Pat Bravo DEN-L-4000 Fabric E
- 1/2 yard of Pat Bravo IFL-56301 Fabric F
- 1/3 yard of brown Suede
- 1/4 yard of double Double Sided fusible Stiff Interfacing
- 1/2 yard of Interfacing
- Universal needles size 80/12
- Sewing machine (I sew on a BERNINA 790)
- Open embroidery foot #20/#20C/#20D
- Reverse Pattern Foot #1/#1C/#1D
- Aurifil thread #2000 and #2930
- 1 yard of Kahi Chenille-it, Natural Chenille-it, Black Chenille-it, Navy Chenielle-it and Red Chenille-it
Cutting Instructions
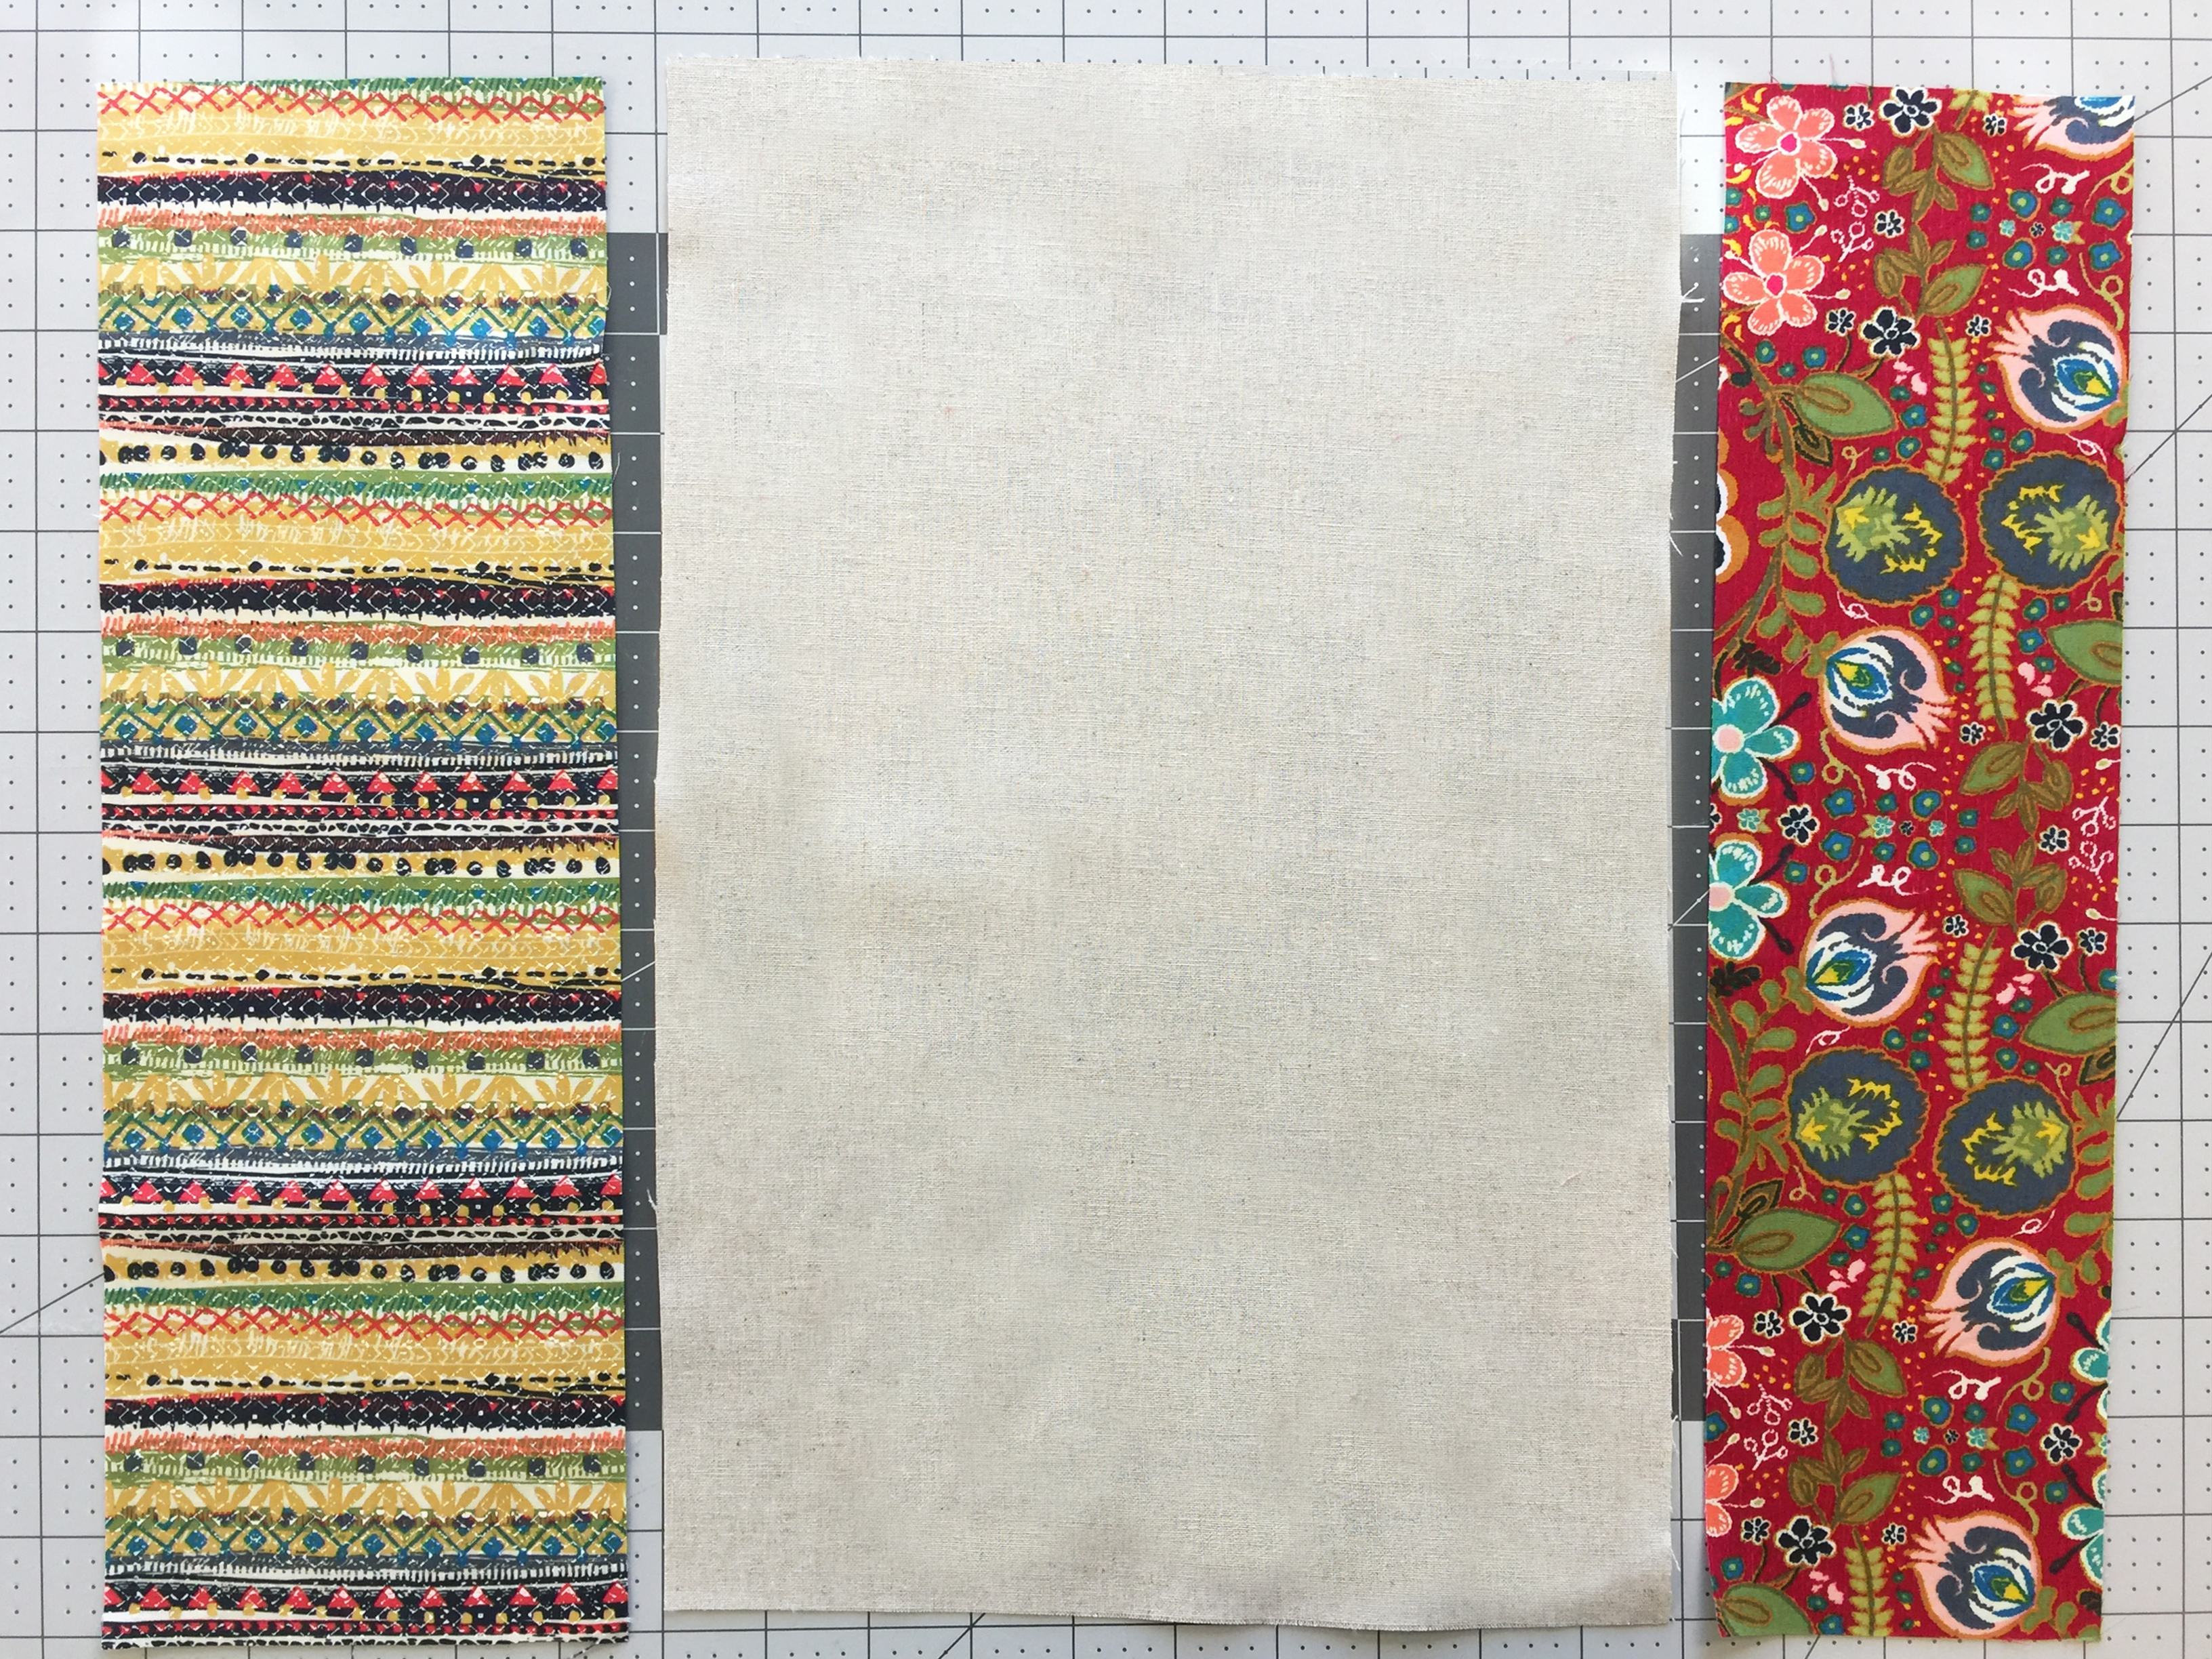
- Cut 2 (two) 5″ by 15″ of Fabric A
- Cut 1 (one) 2″ by 15″ of Fabric B
- Cut 1 (one) 2″ by 15″ of Fabric C
- Cut 1 (one) 4″ by 15″ of Fabric D
- Cut 2 (two) 10″ by 15″ of Fabric E
- Cut 2 (two) 19″ by 15″ of Fabric F
- Cut 2 (two) 19″ by 15″ of Interfacing
- Cut 2 (two) 29″ by 1″ of Double Sided fusible Stiff Interfacing
- Cut 2 (two) 29″ by 5″ of brown suede
Step 1- Tote Assembly
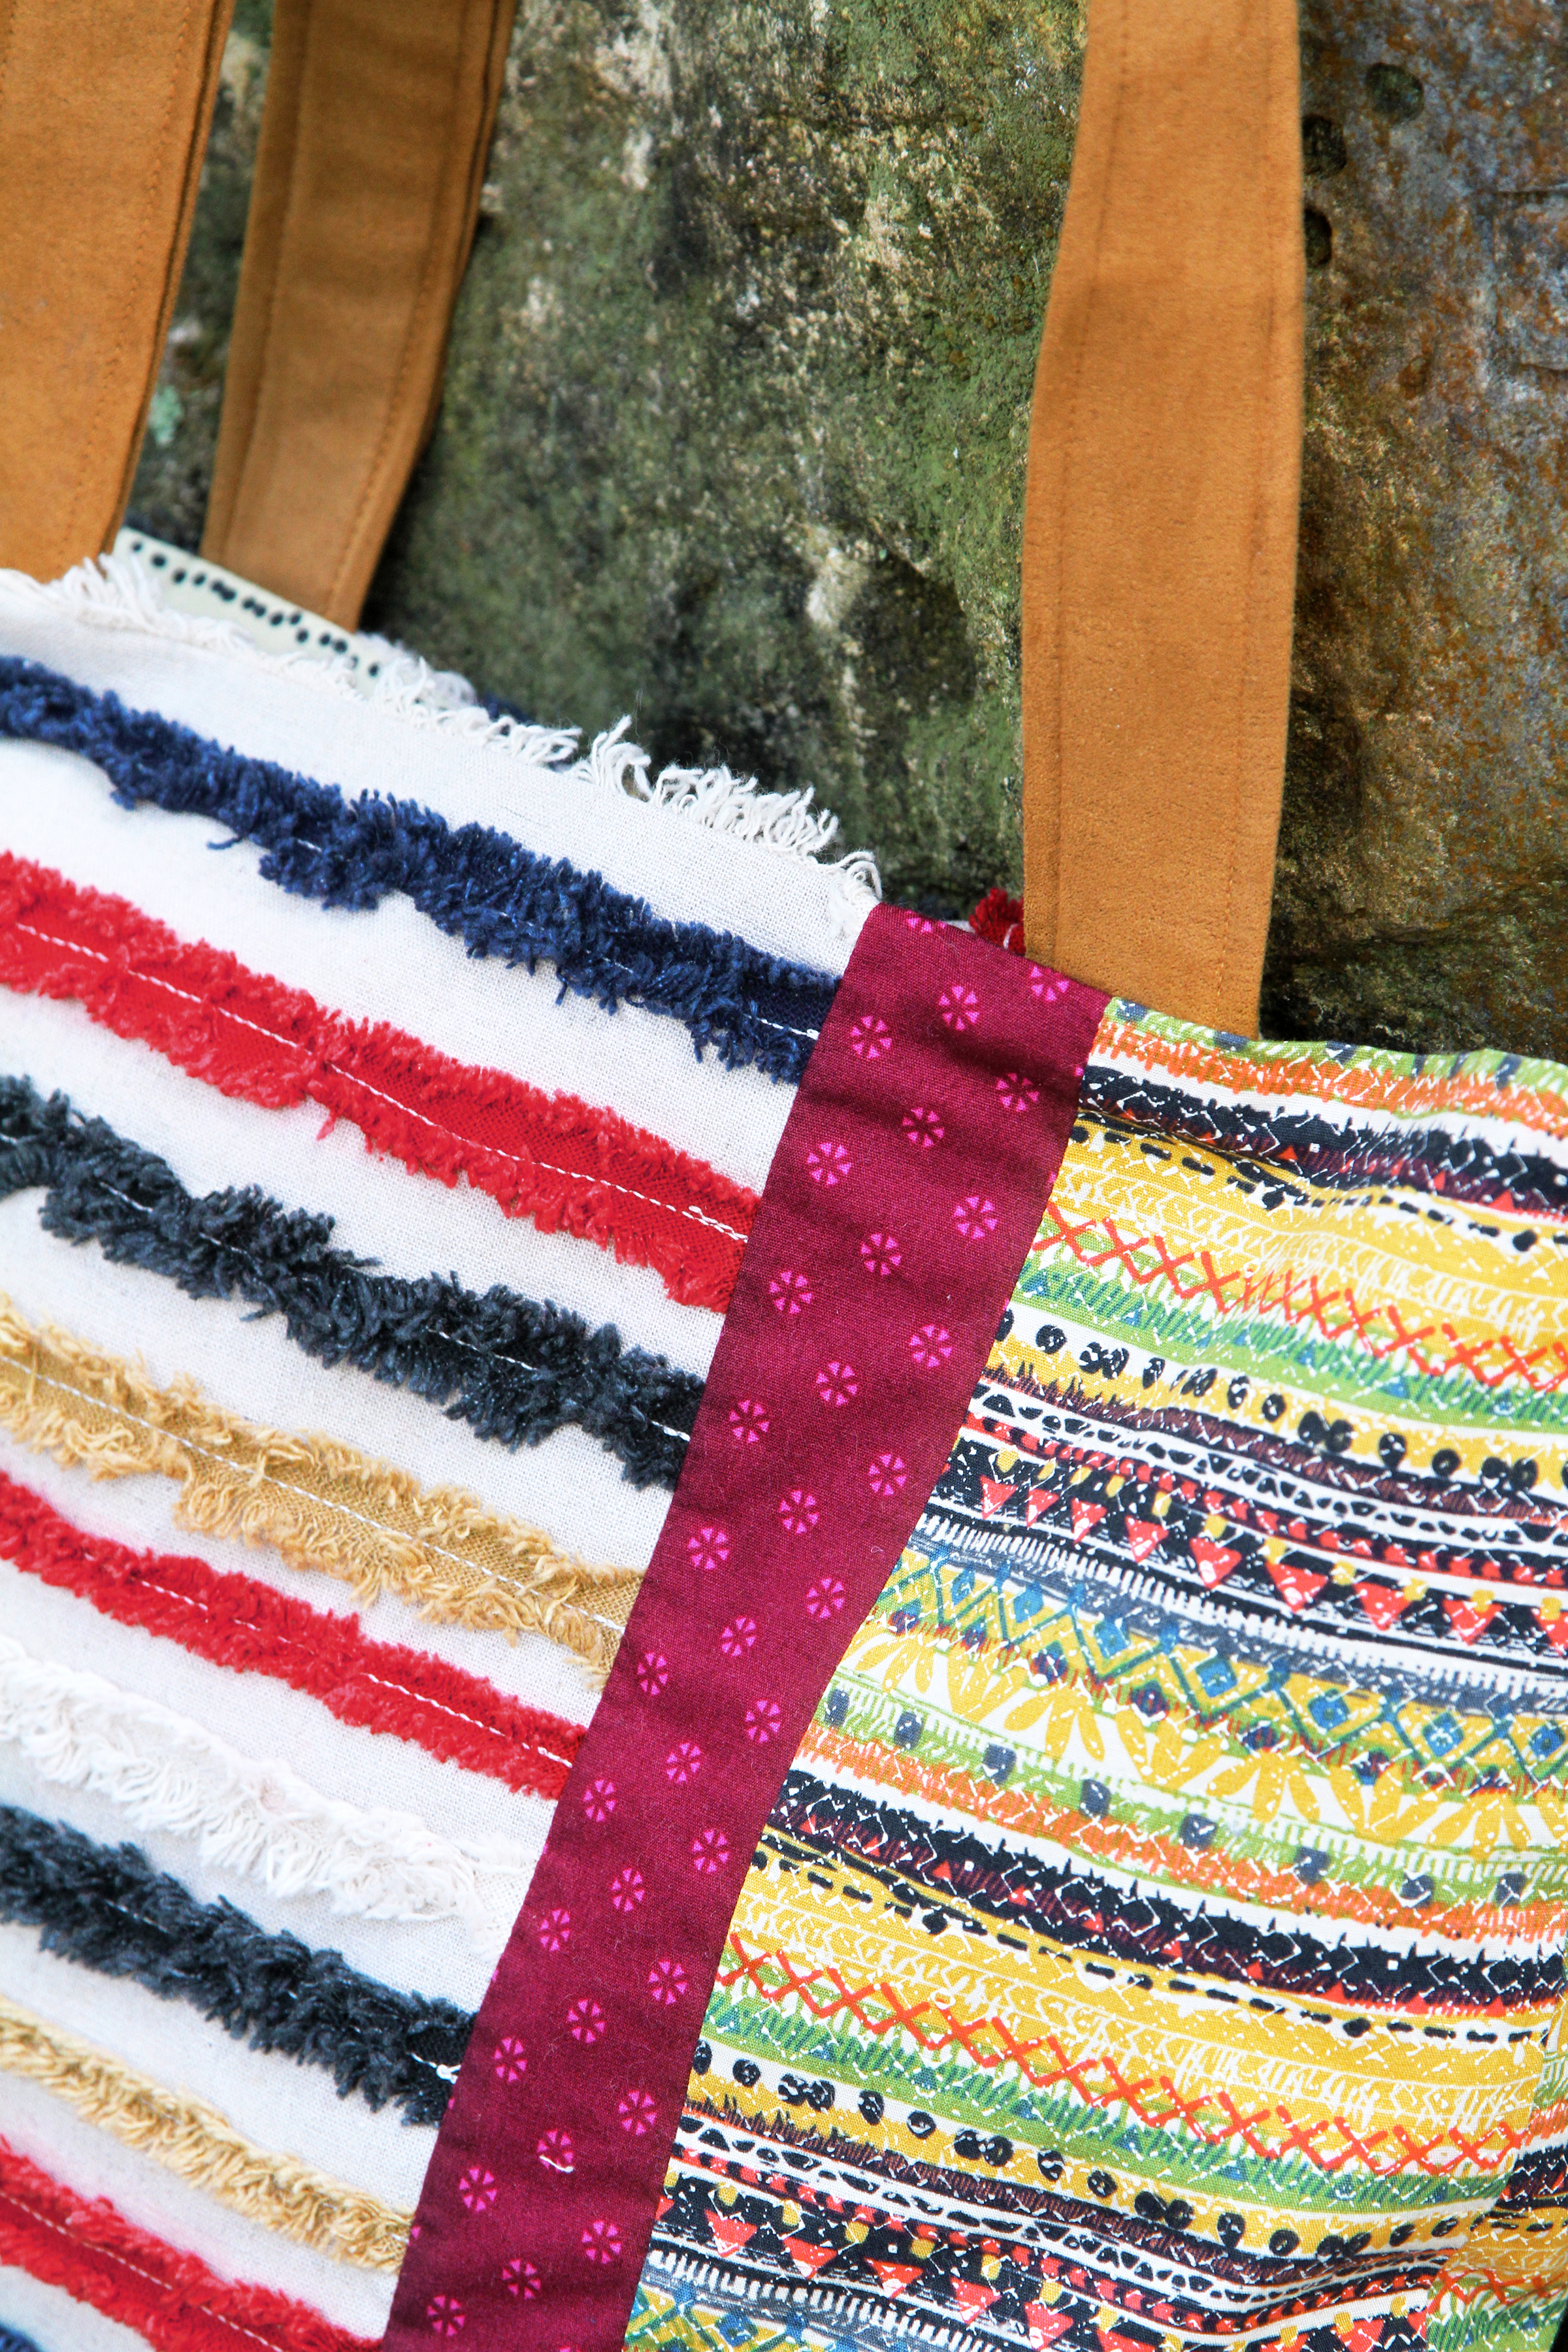
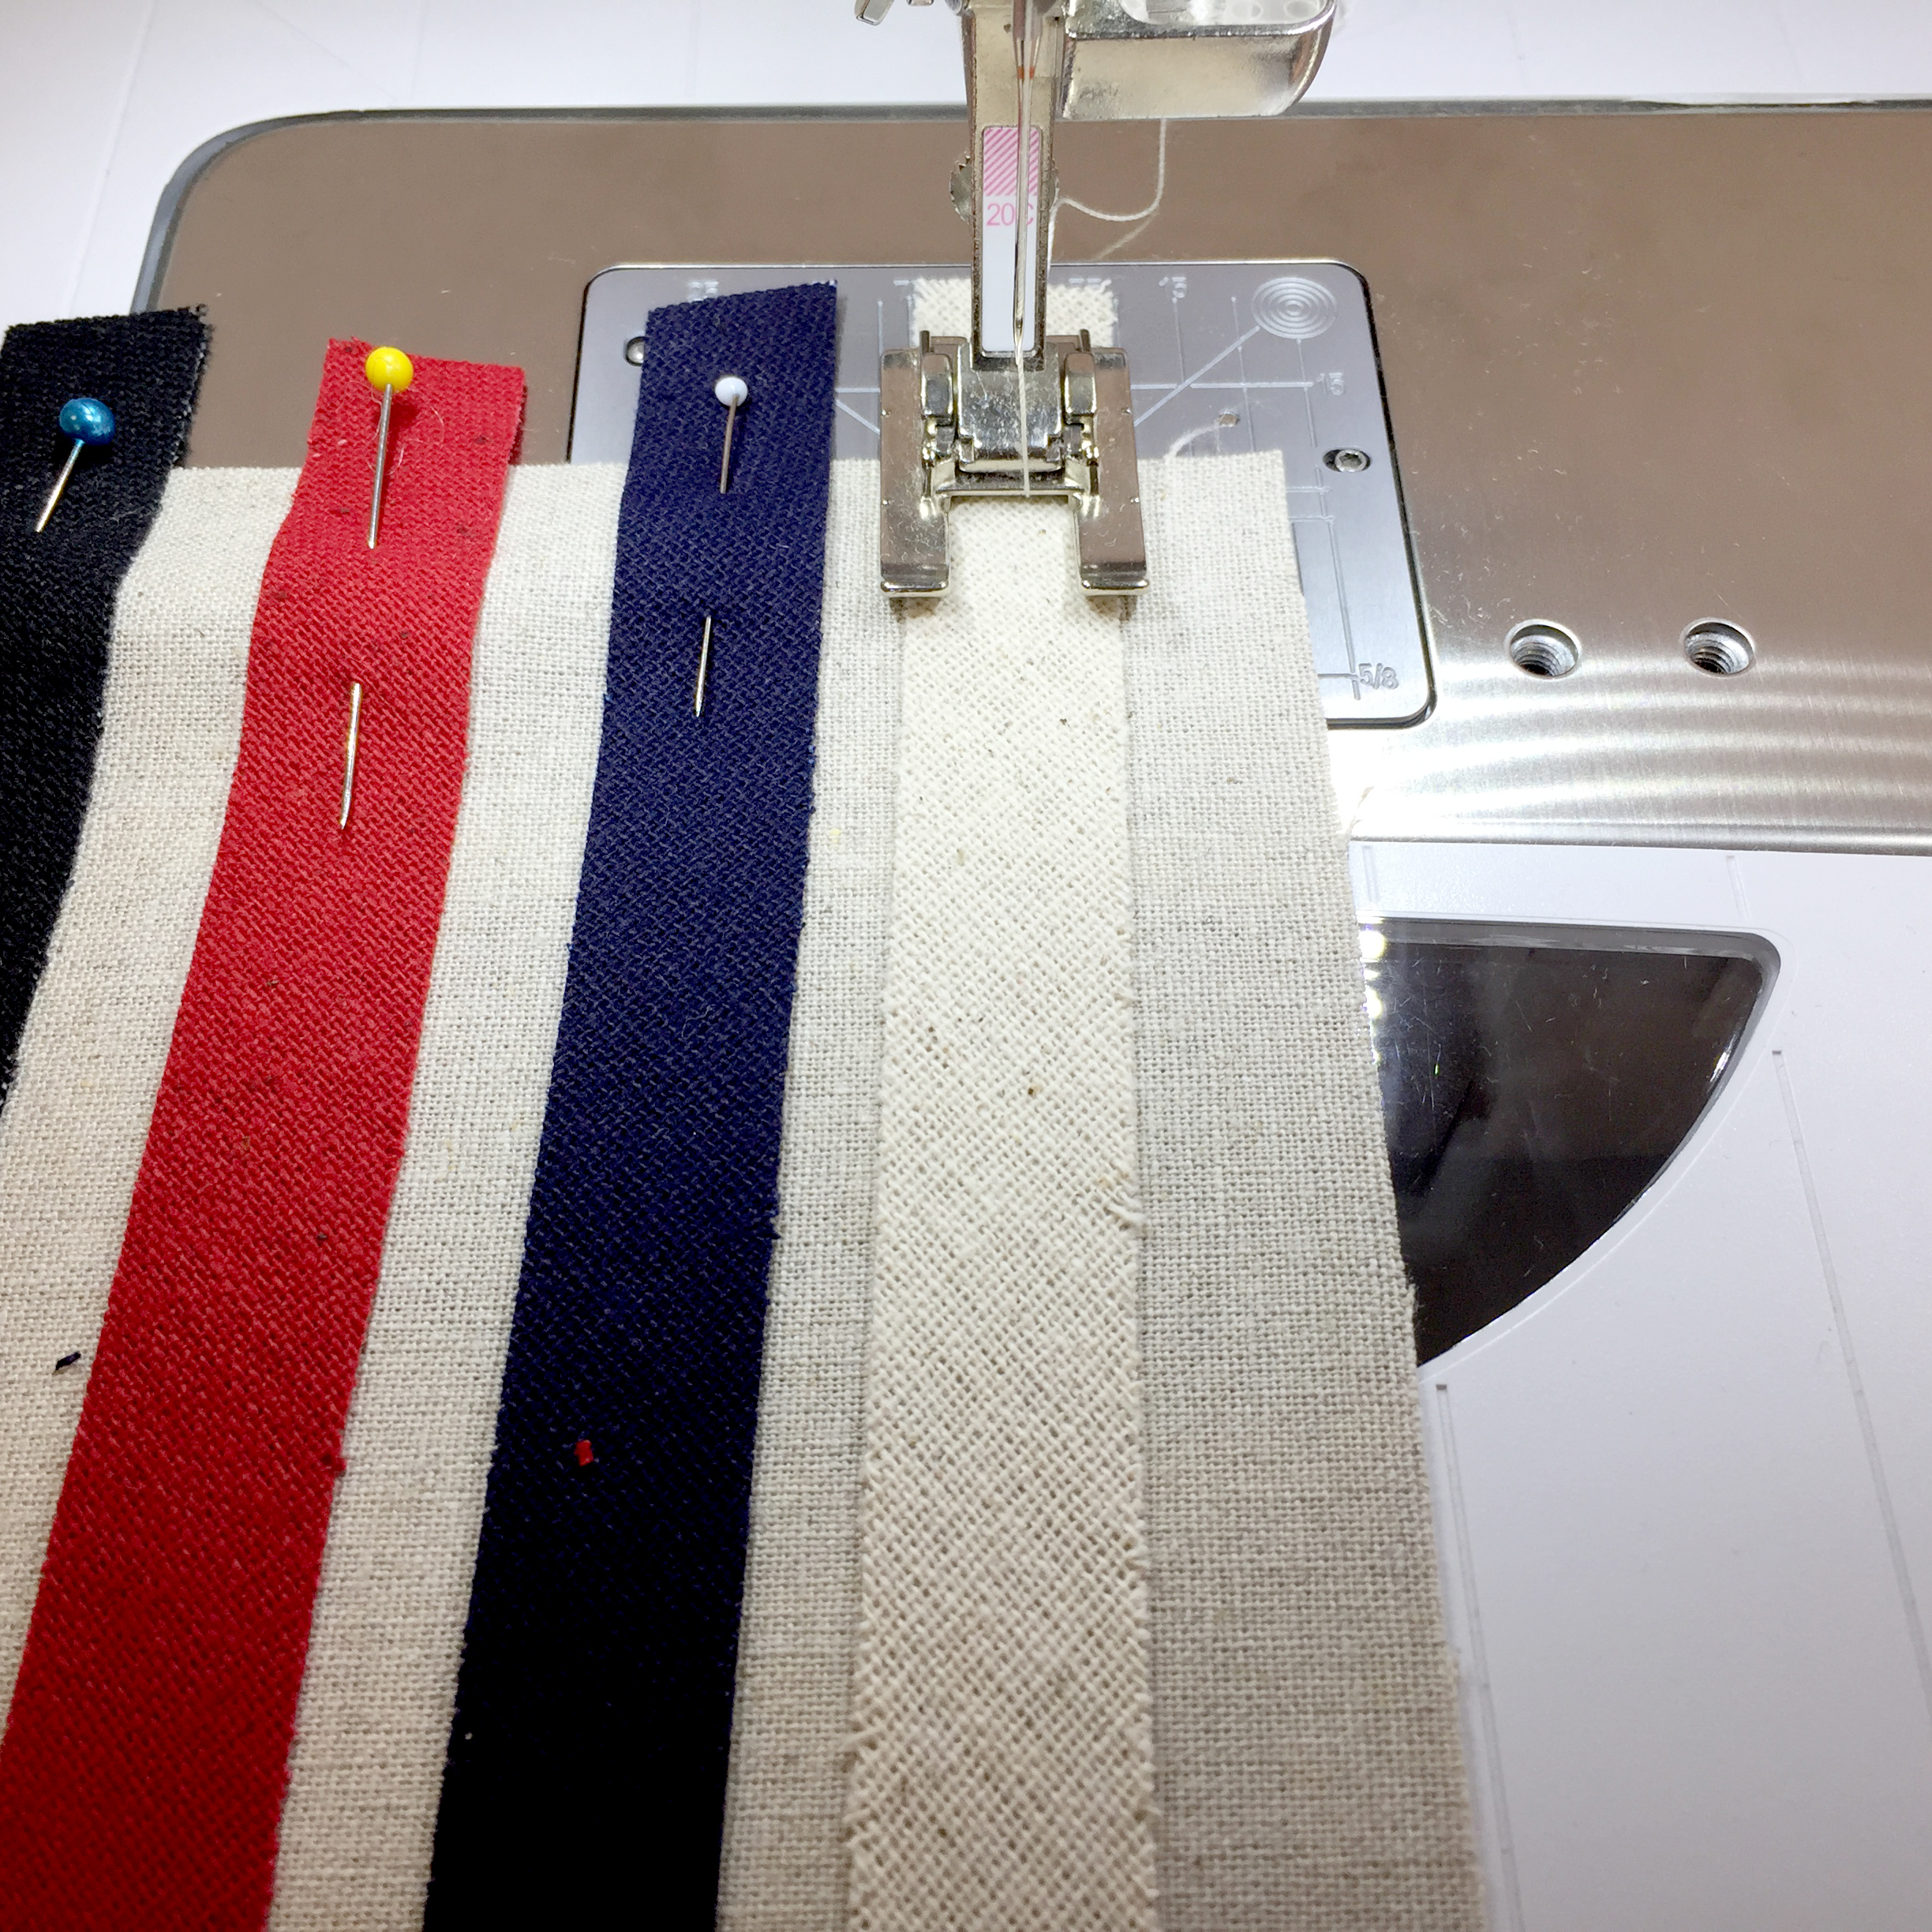
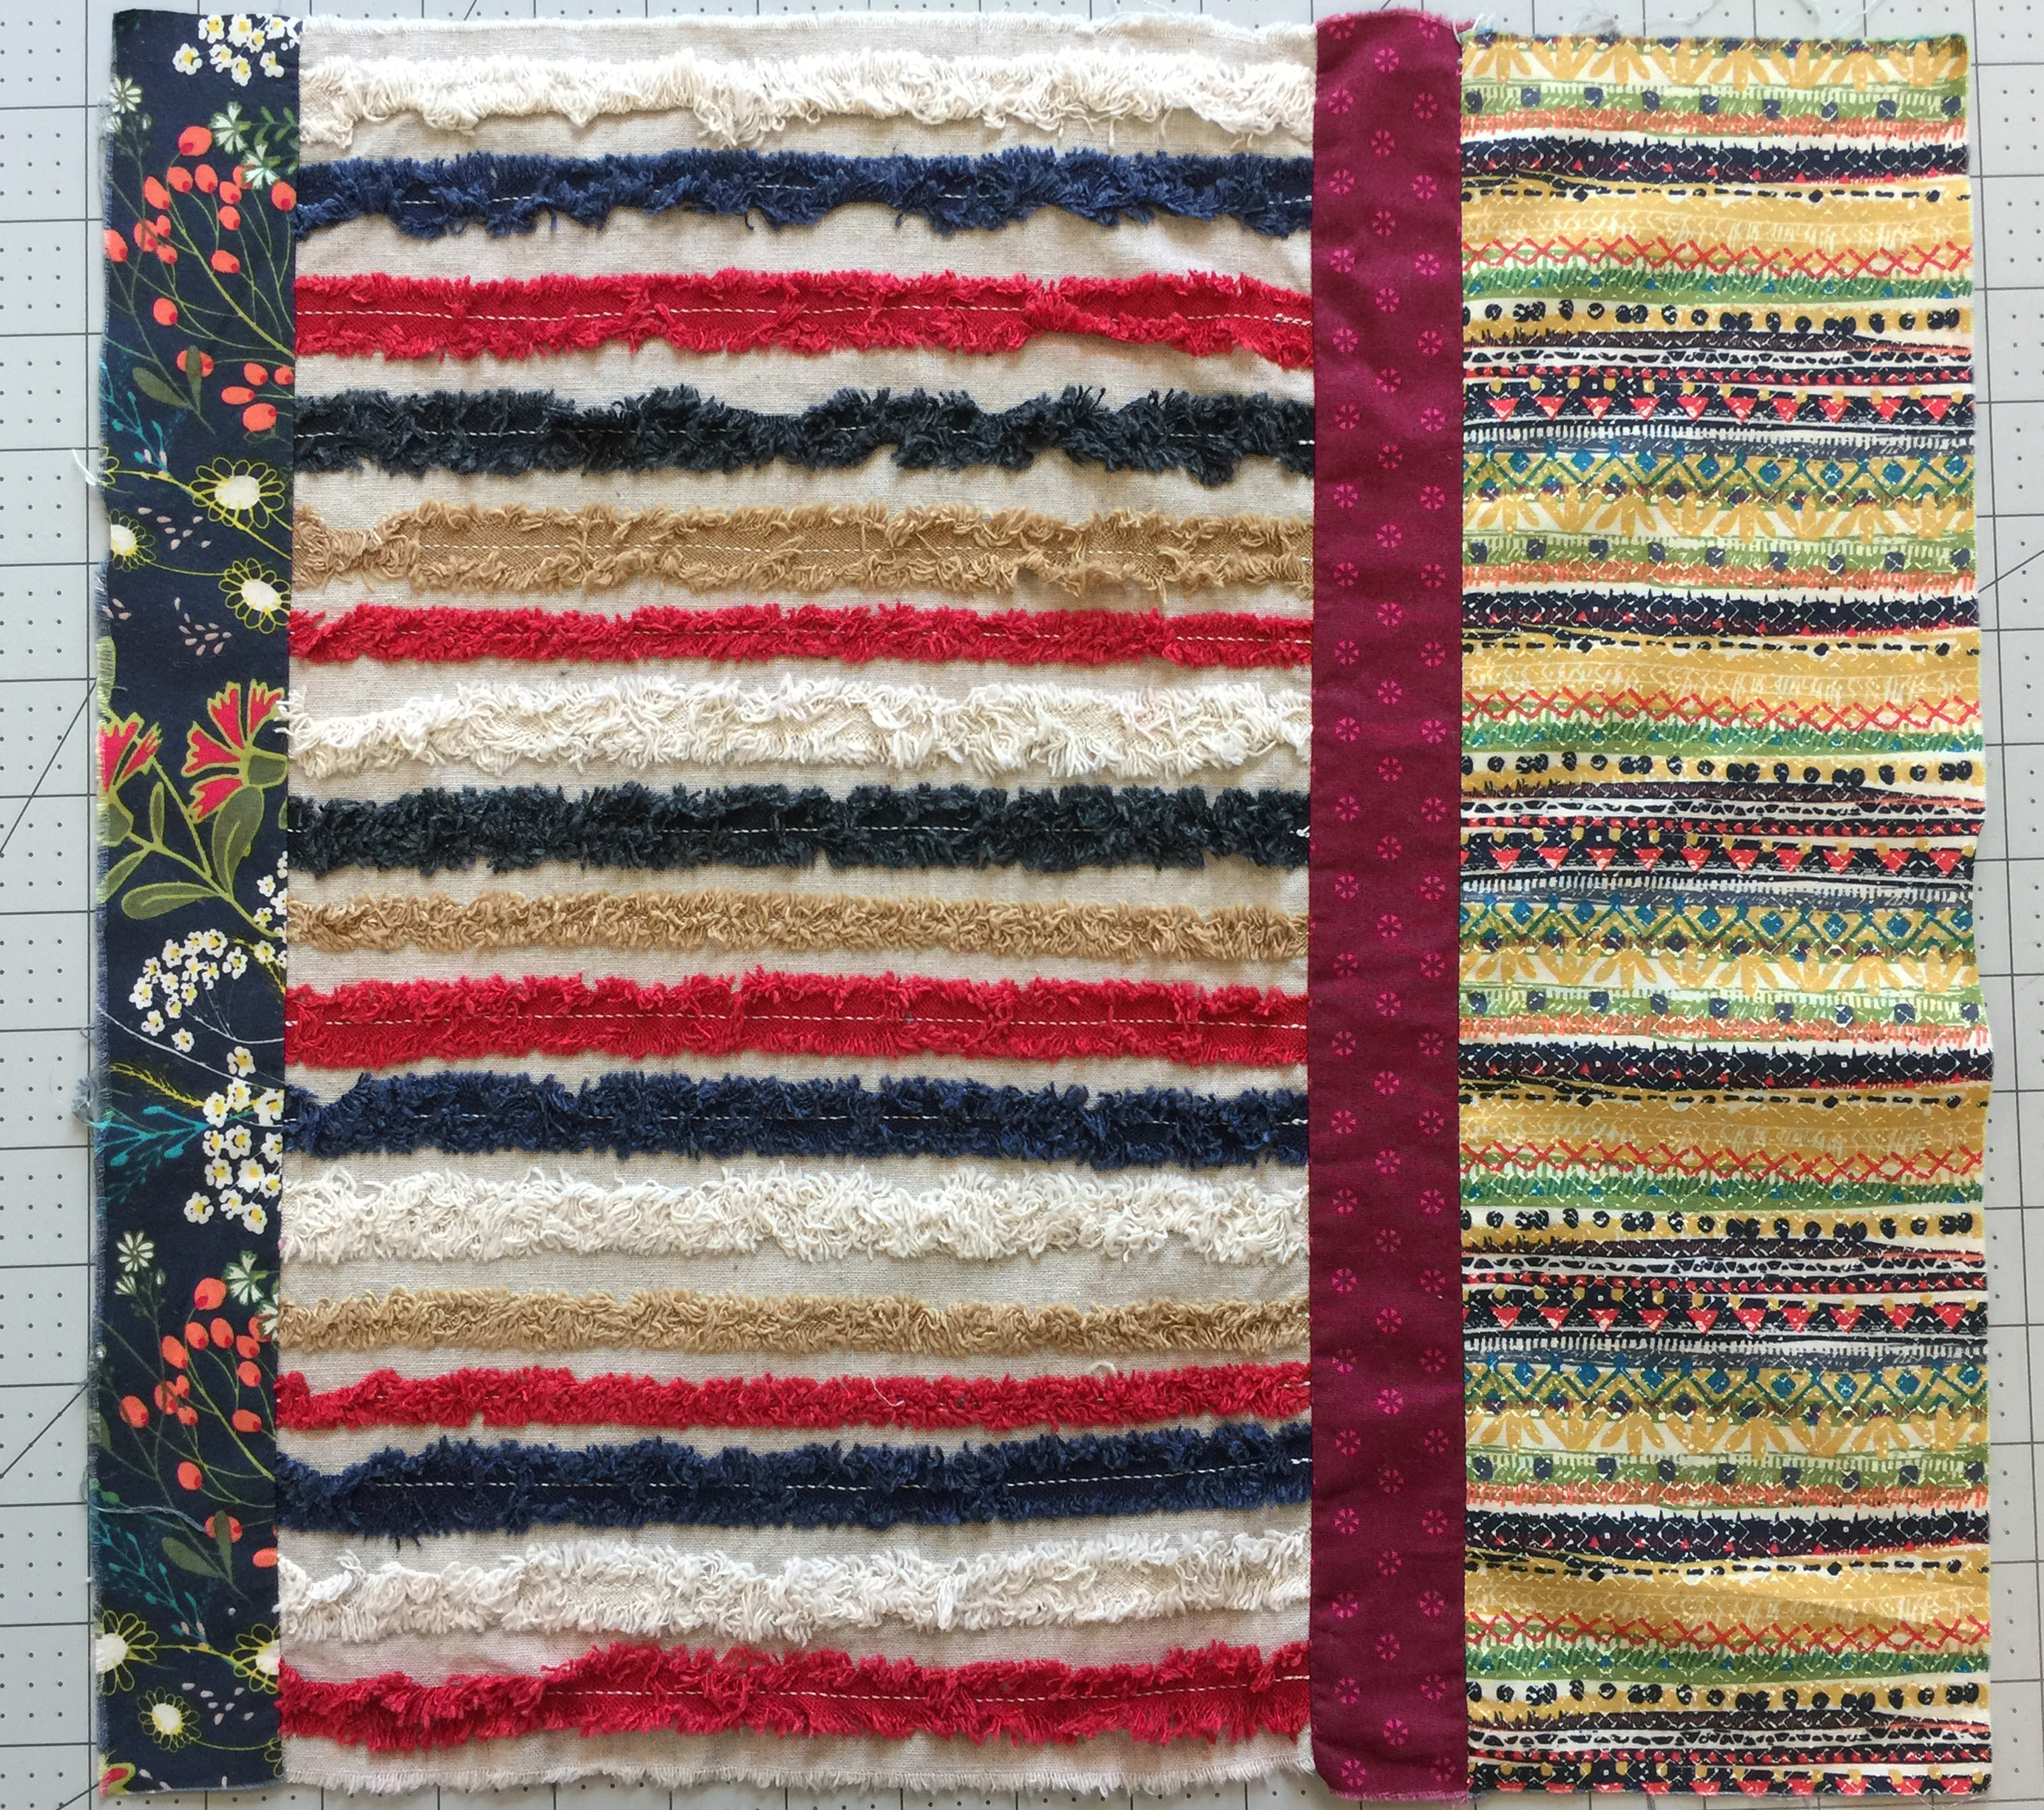
These are the pieces you will need to assemble the front of the tote.
1 (one) 2″ by 15″ of Fabric B
1 (one) 10″ by 15″ of Fabric E
1 (one) 2″ by 15″ of Fabric C
1 (one) 5″ by 15″ of Fabric A
Place them as shown on the image below.

For the back of the tote take:
1 (one) 5″ by 15″ of Fabric A
1 (one) 10″ by 15″ of Fabric E
1 (one) 4″ by 15″ of Fabric D
We are not going to assemble them together as of yet, first we will add the chenille to Fabric E.
Step 2- Chenille
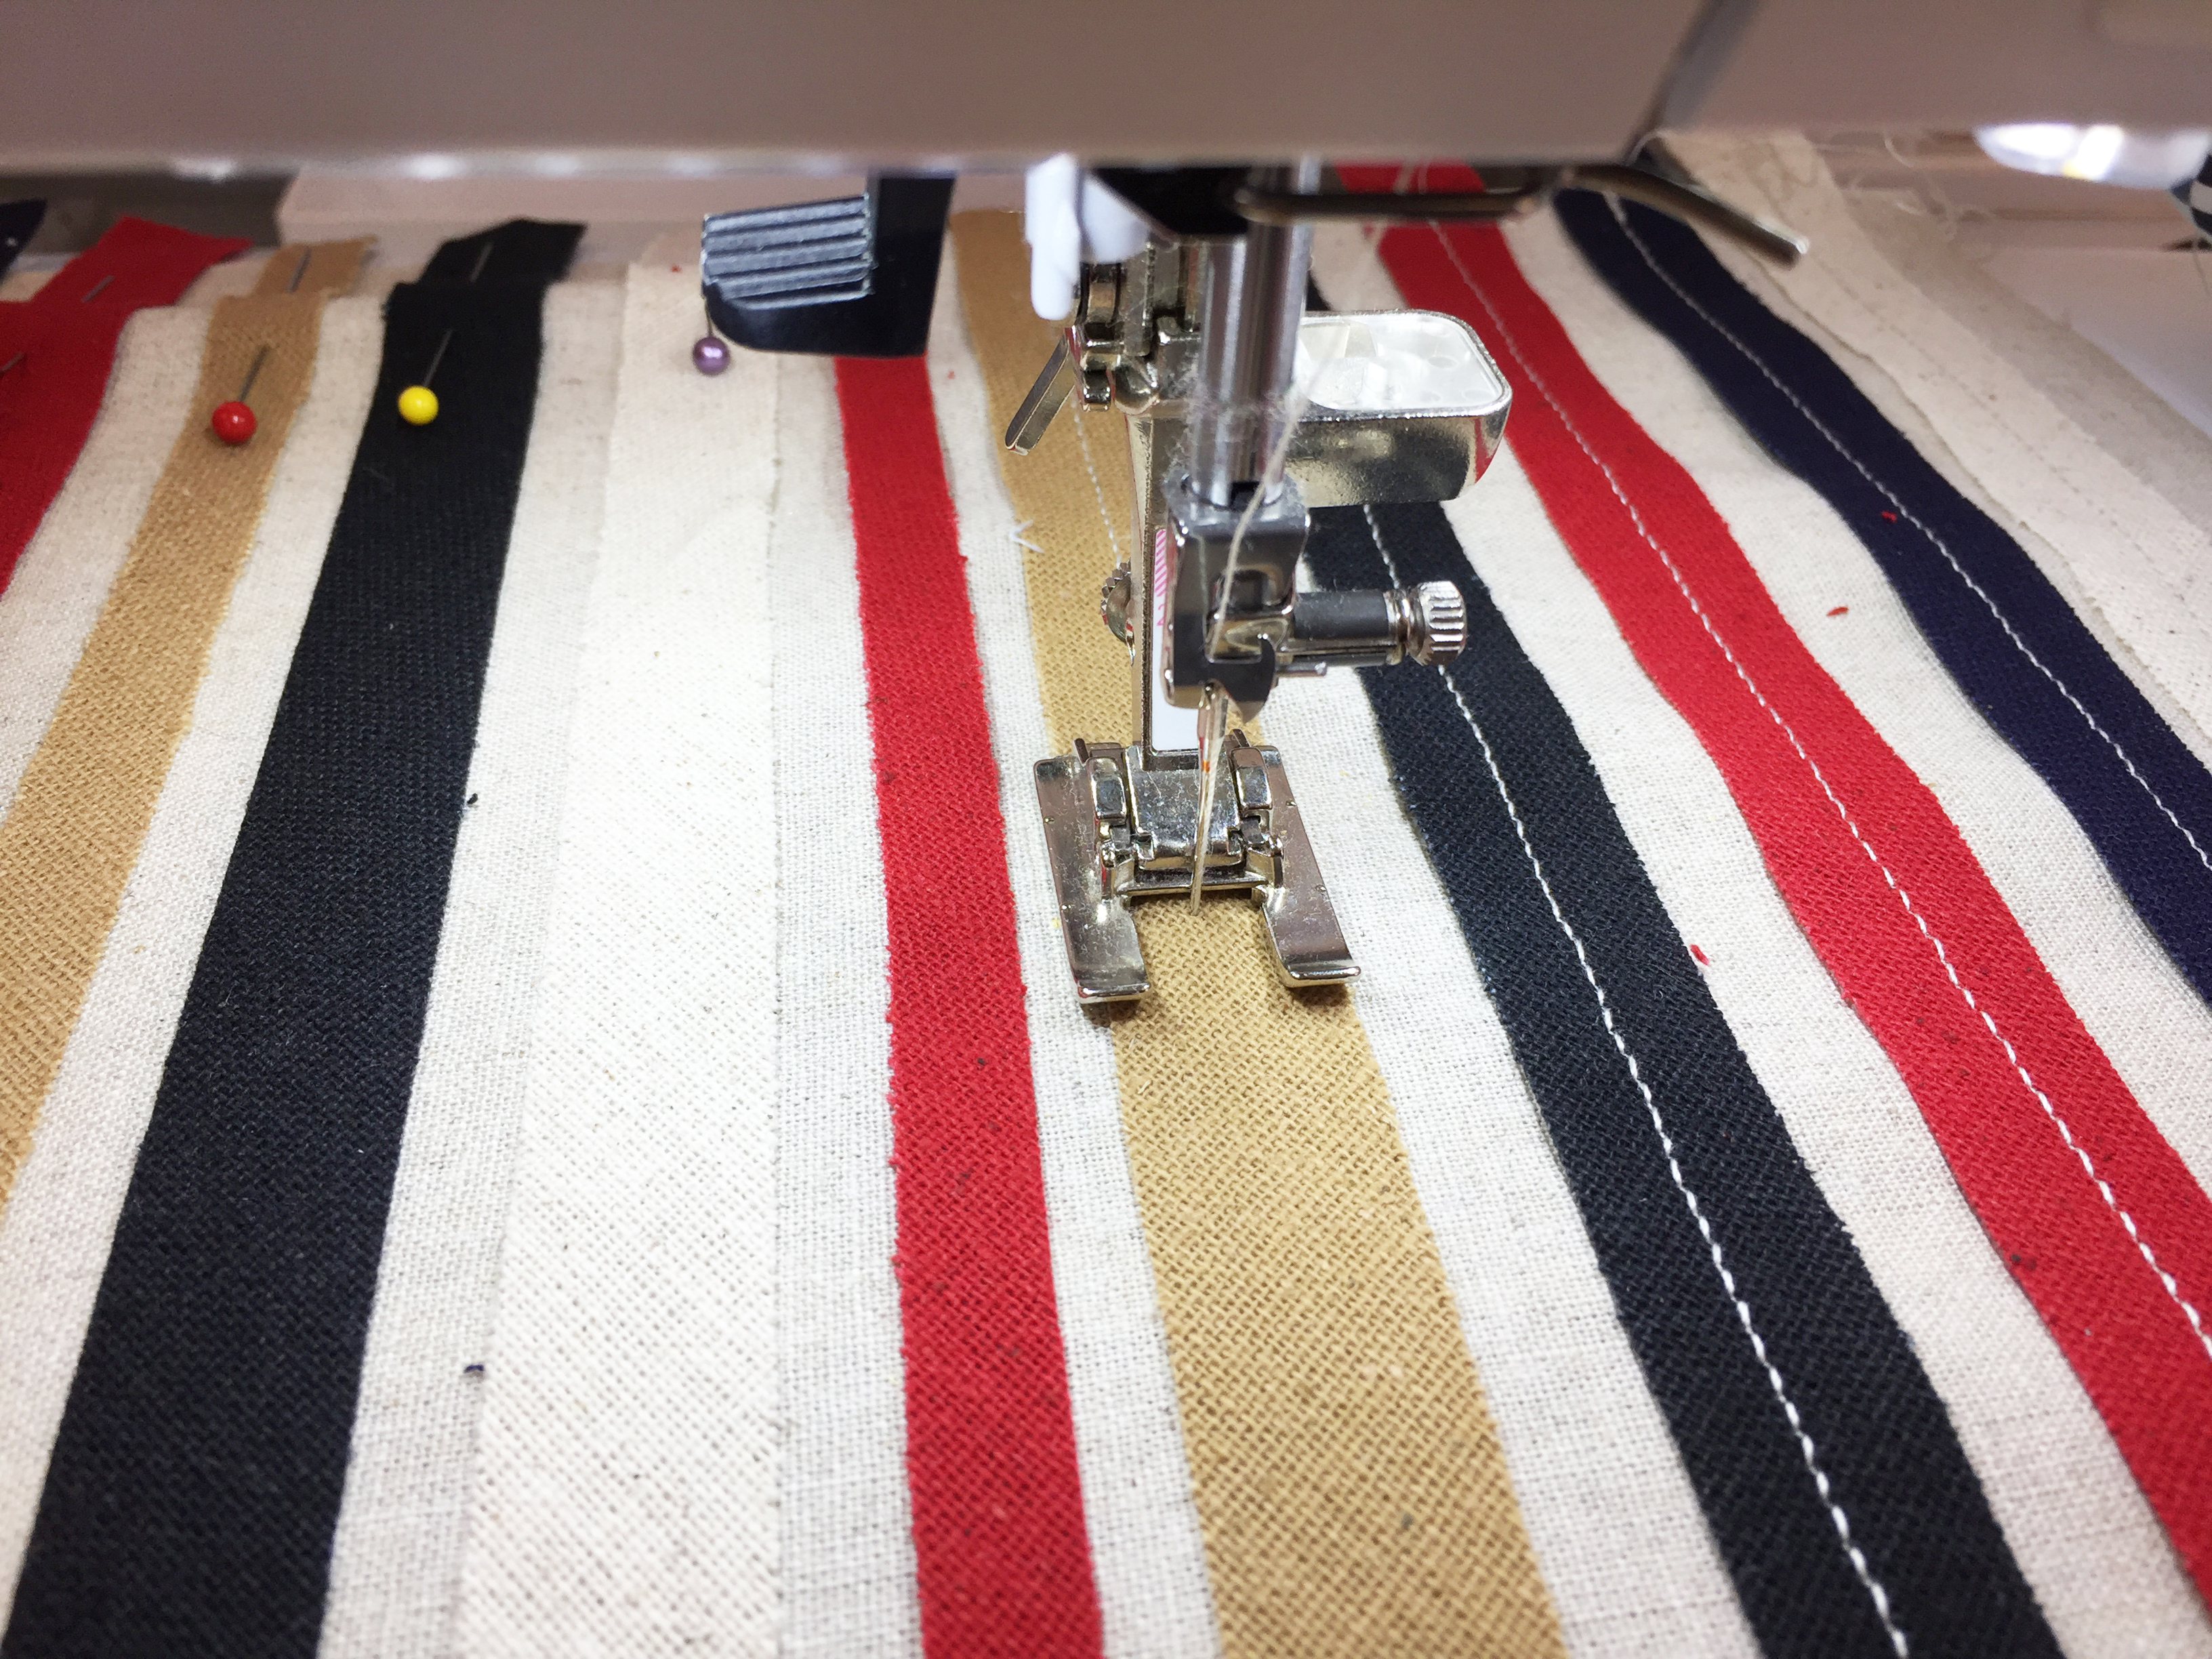
We are going to add Chenille to the front and back of the tote on top of Fabric E.
For the Front. Add the Chenille horizontally on this order and pin in place.
10” of Natural Chenille-it
10” of Navy Chenielle-it
10” of Red Chenille-it
10” of Kakhi Chenille-it
10” of Red Chenille-it
10” of Natural Chenille-it
10” of Navy Chenielle-it
10” of Kakhi Chenille-it
10” of Red Chenille-it
10” of Navy Chenielle-it
10” of Natural Chenille-it
10” of Kakhi Chenille-it
10” of Red Chenille-it
10” of Navy Chenielle-it
10” of Natural Chenille-it
10” of Red Chenille-it
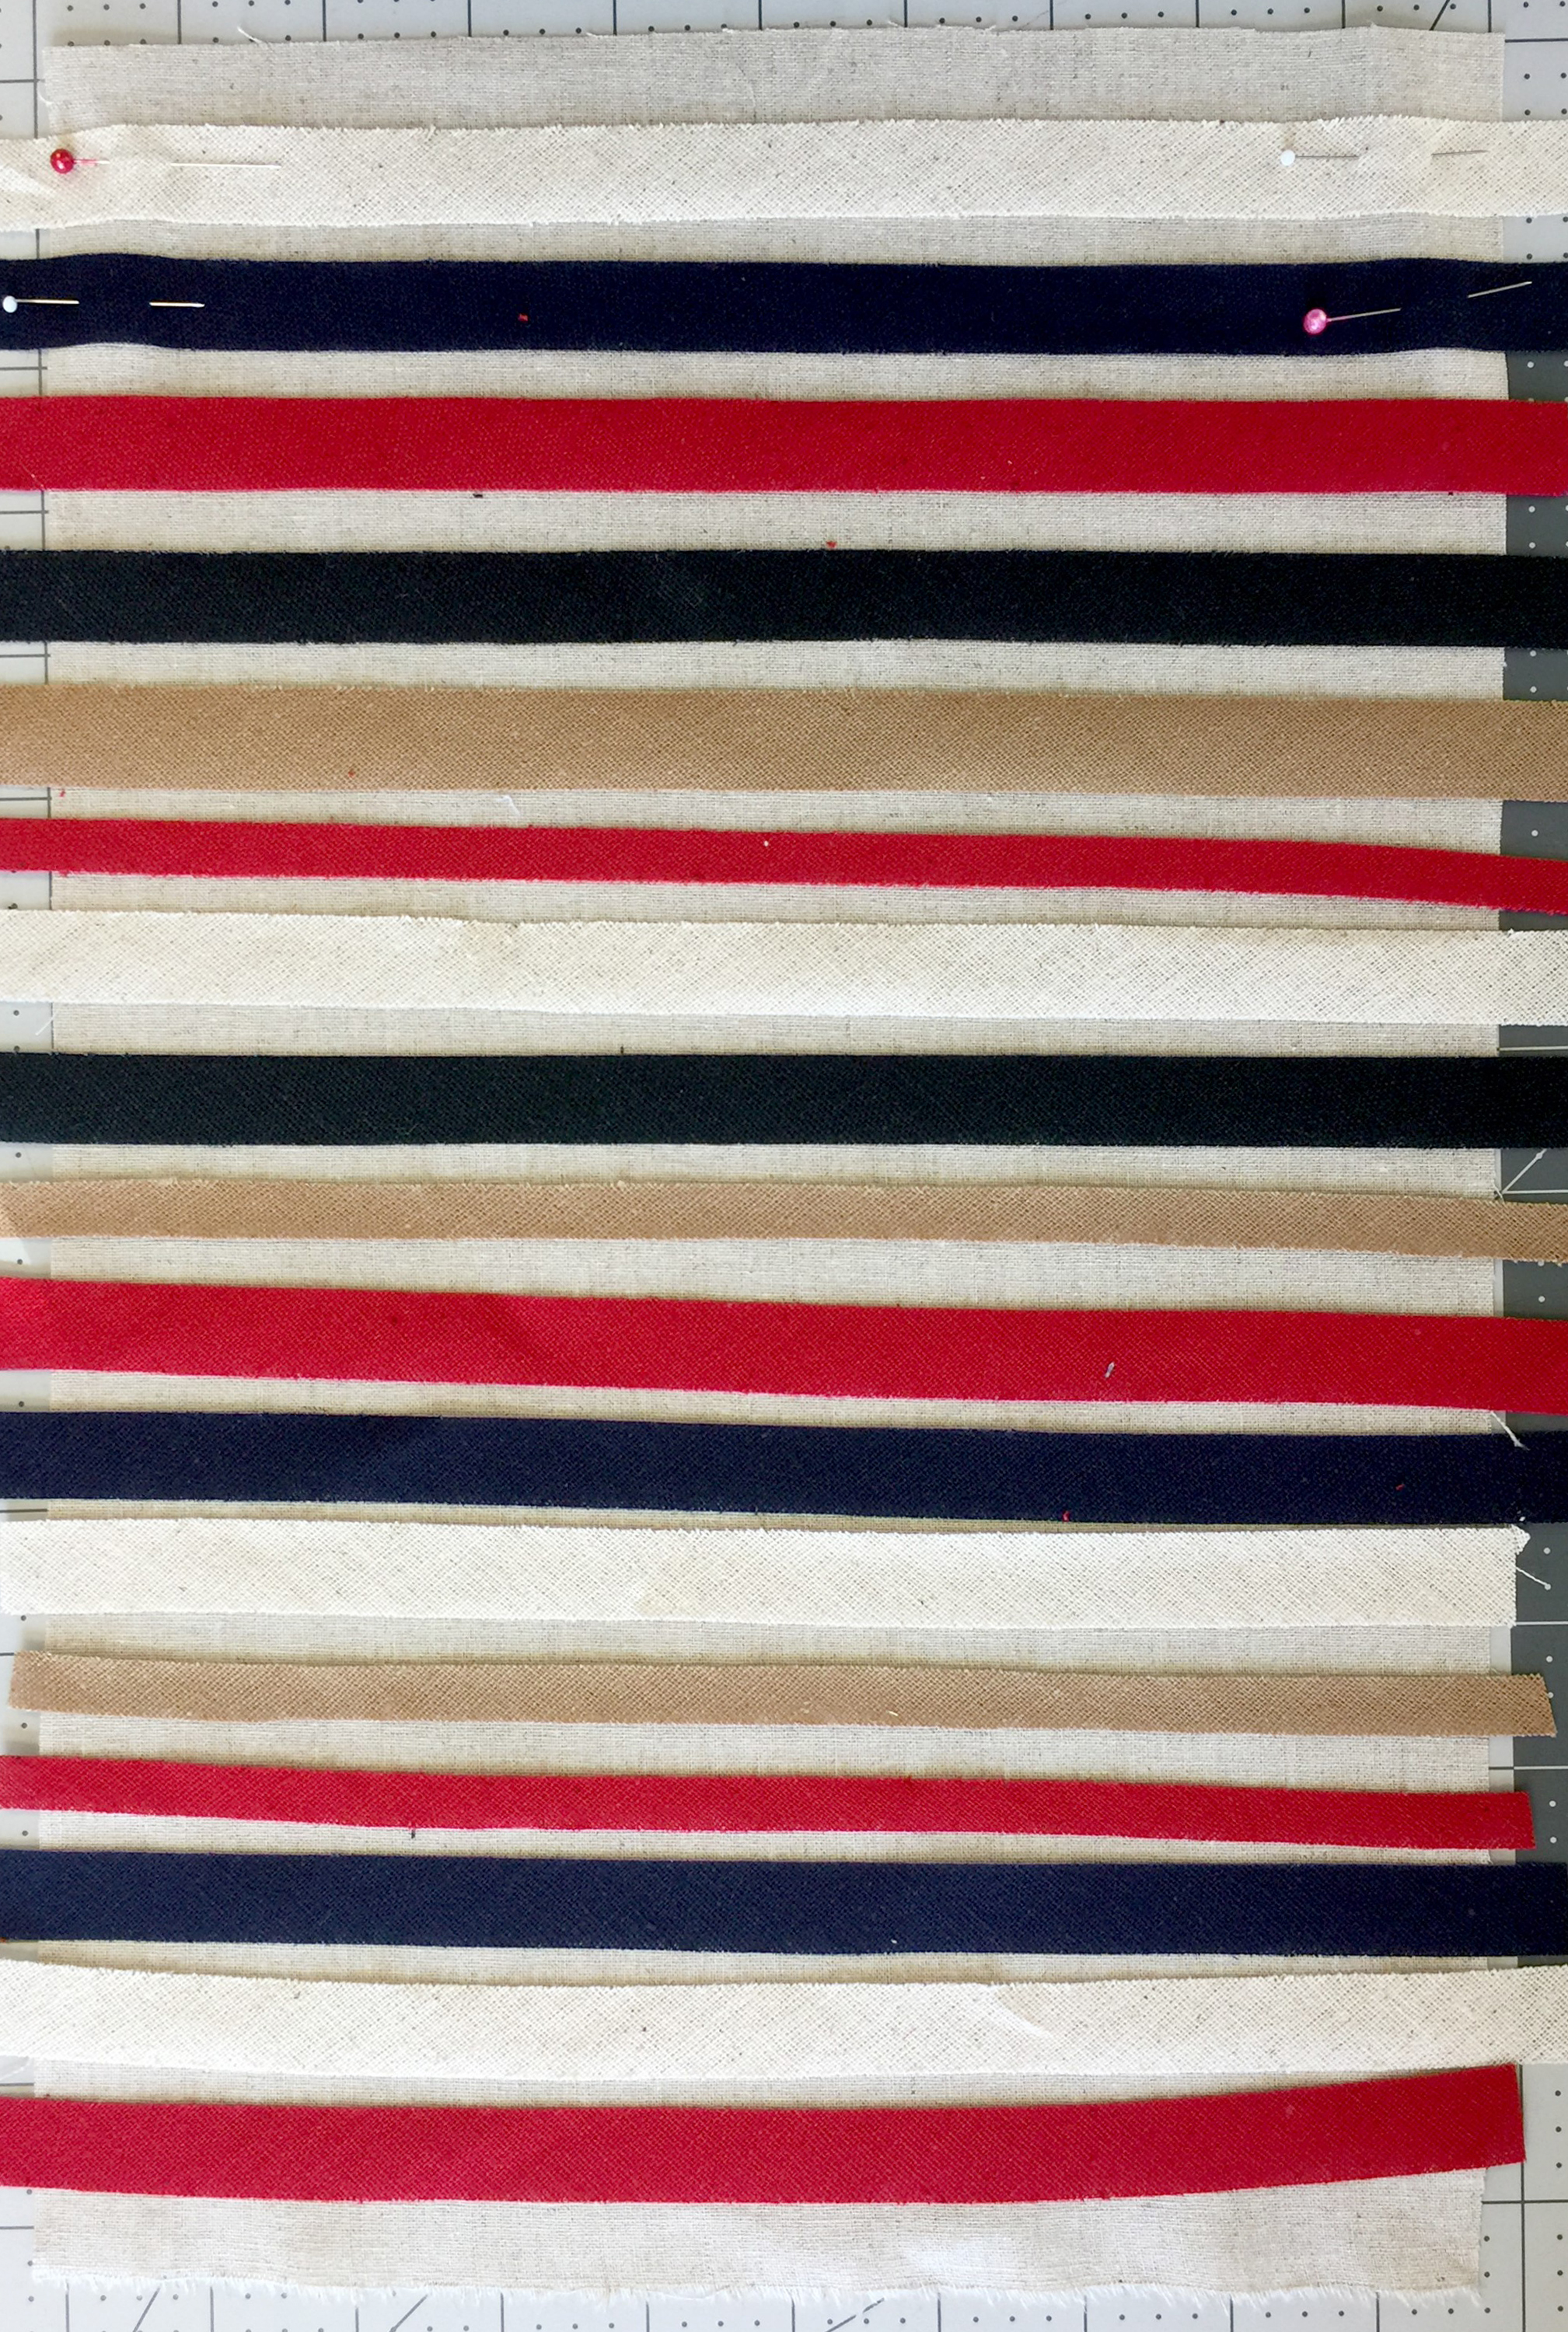
Change your current presser foot to the Open embroidery foot #20/#20C/#20D,

Start sewing in the middle of the chenille. This will permit the chenille to unravel once washed.
Repeat this step with all the Chenille strips
Now repeat this same step for the back of the tote, placing the chenille vertically on this order:
10” of Kakhi Chenille-it
10” of Navy Chenielle-it
10” of Red Chenille-it
10” of Black Chenille-it
10” of Natural Chenille-it
10” of Red Chenille-it
10” of Kakhi Chenille-it
10” of Navy Chenielle-it
10” of Natural Chenille-it
10” of Red Chenille-it
10” of Navy Chenielle-it

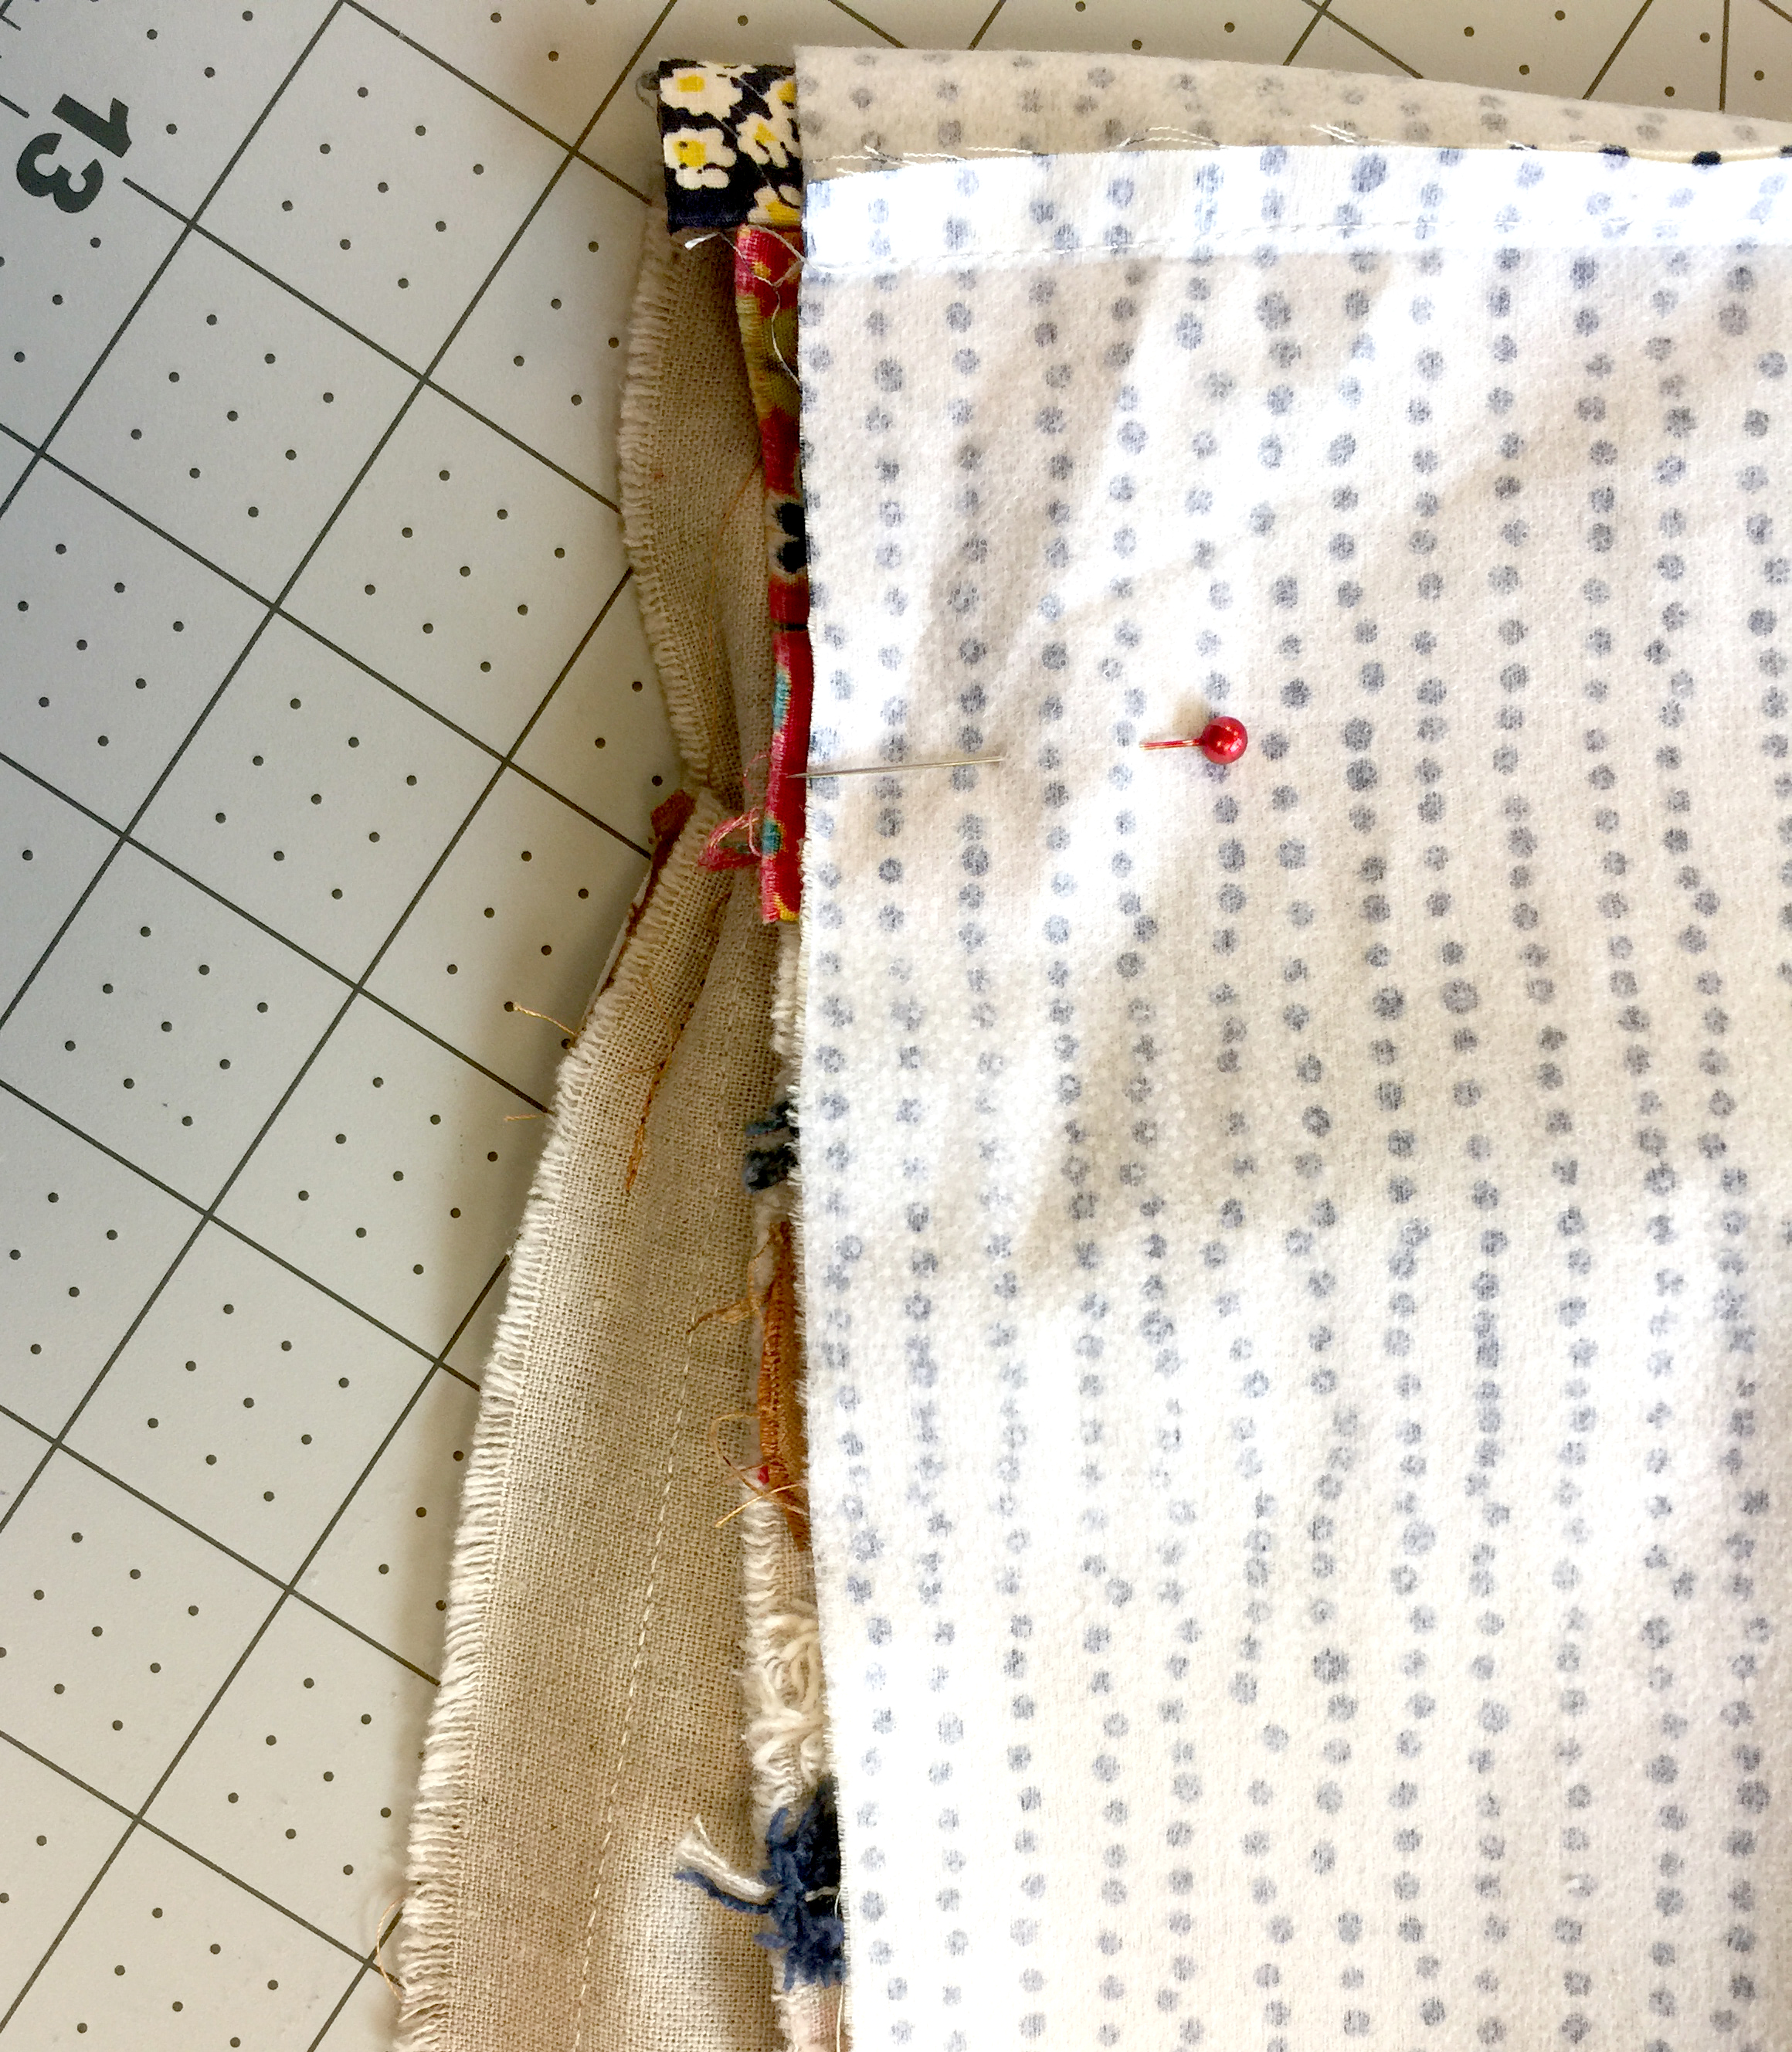
You have both the front and the back ready. We are now going to finish assembling the front and the back parts of the tote. Following the direction on Step 1, start sewing the front part of the tote.
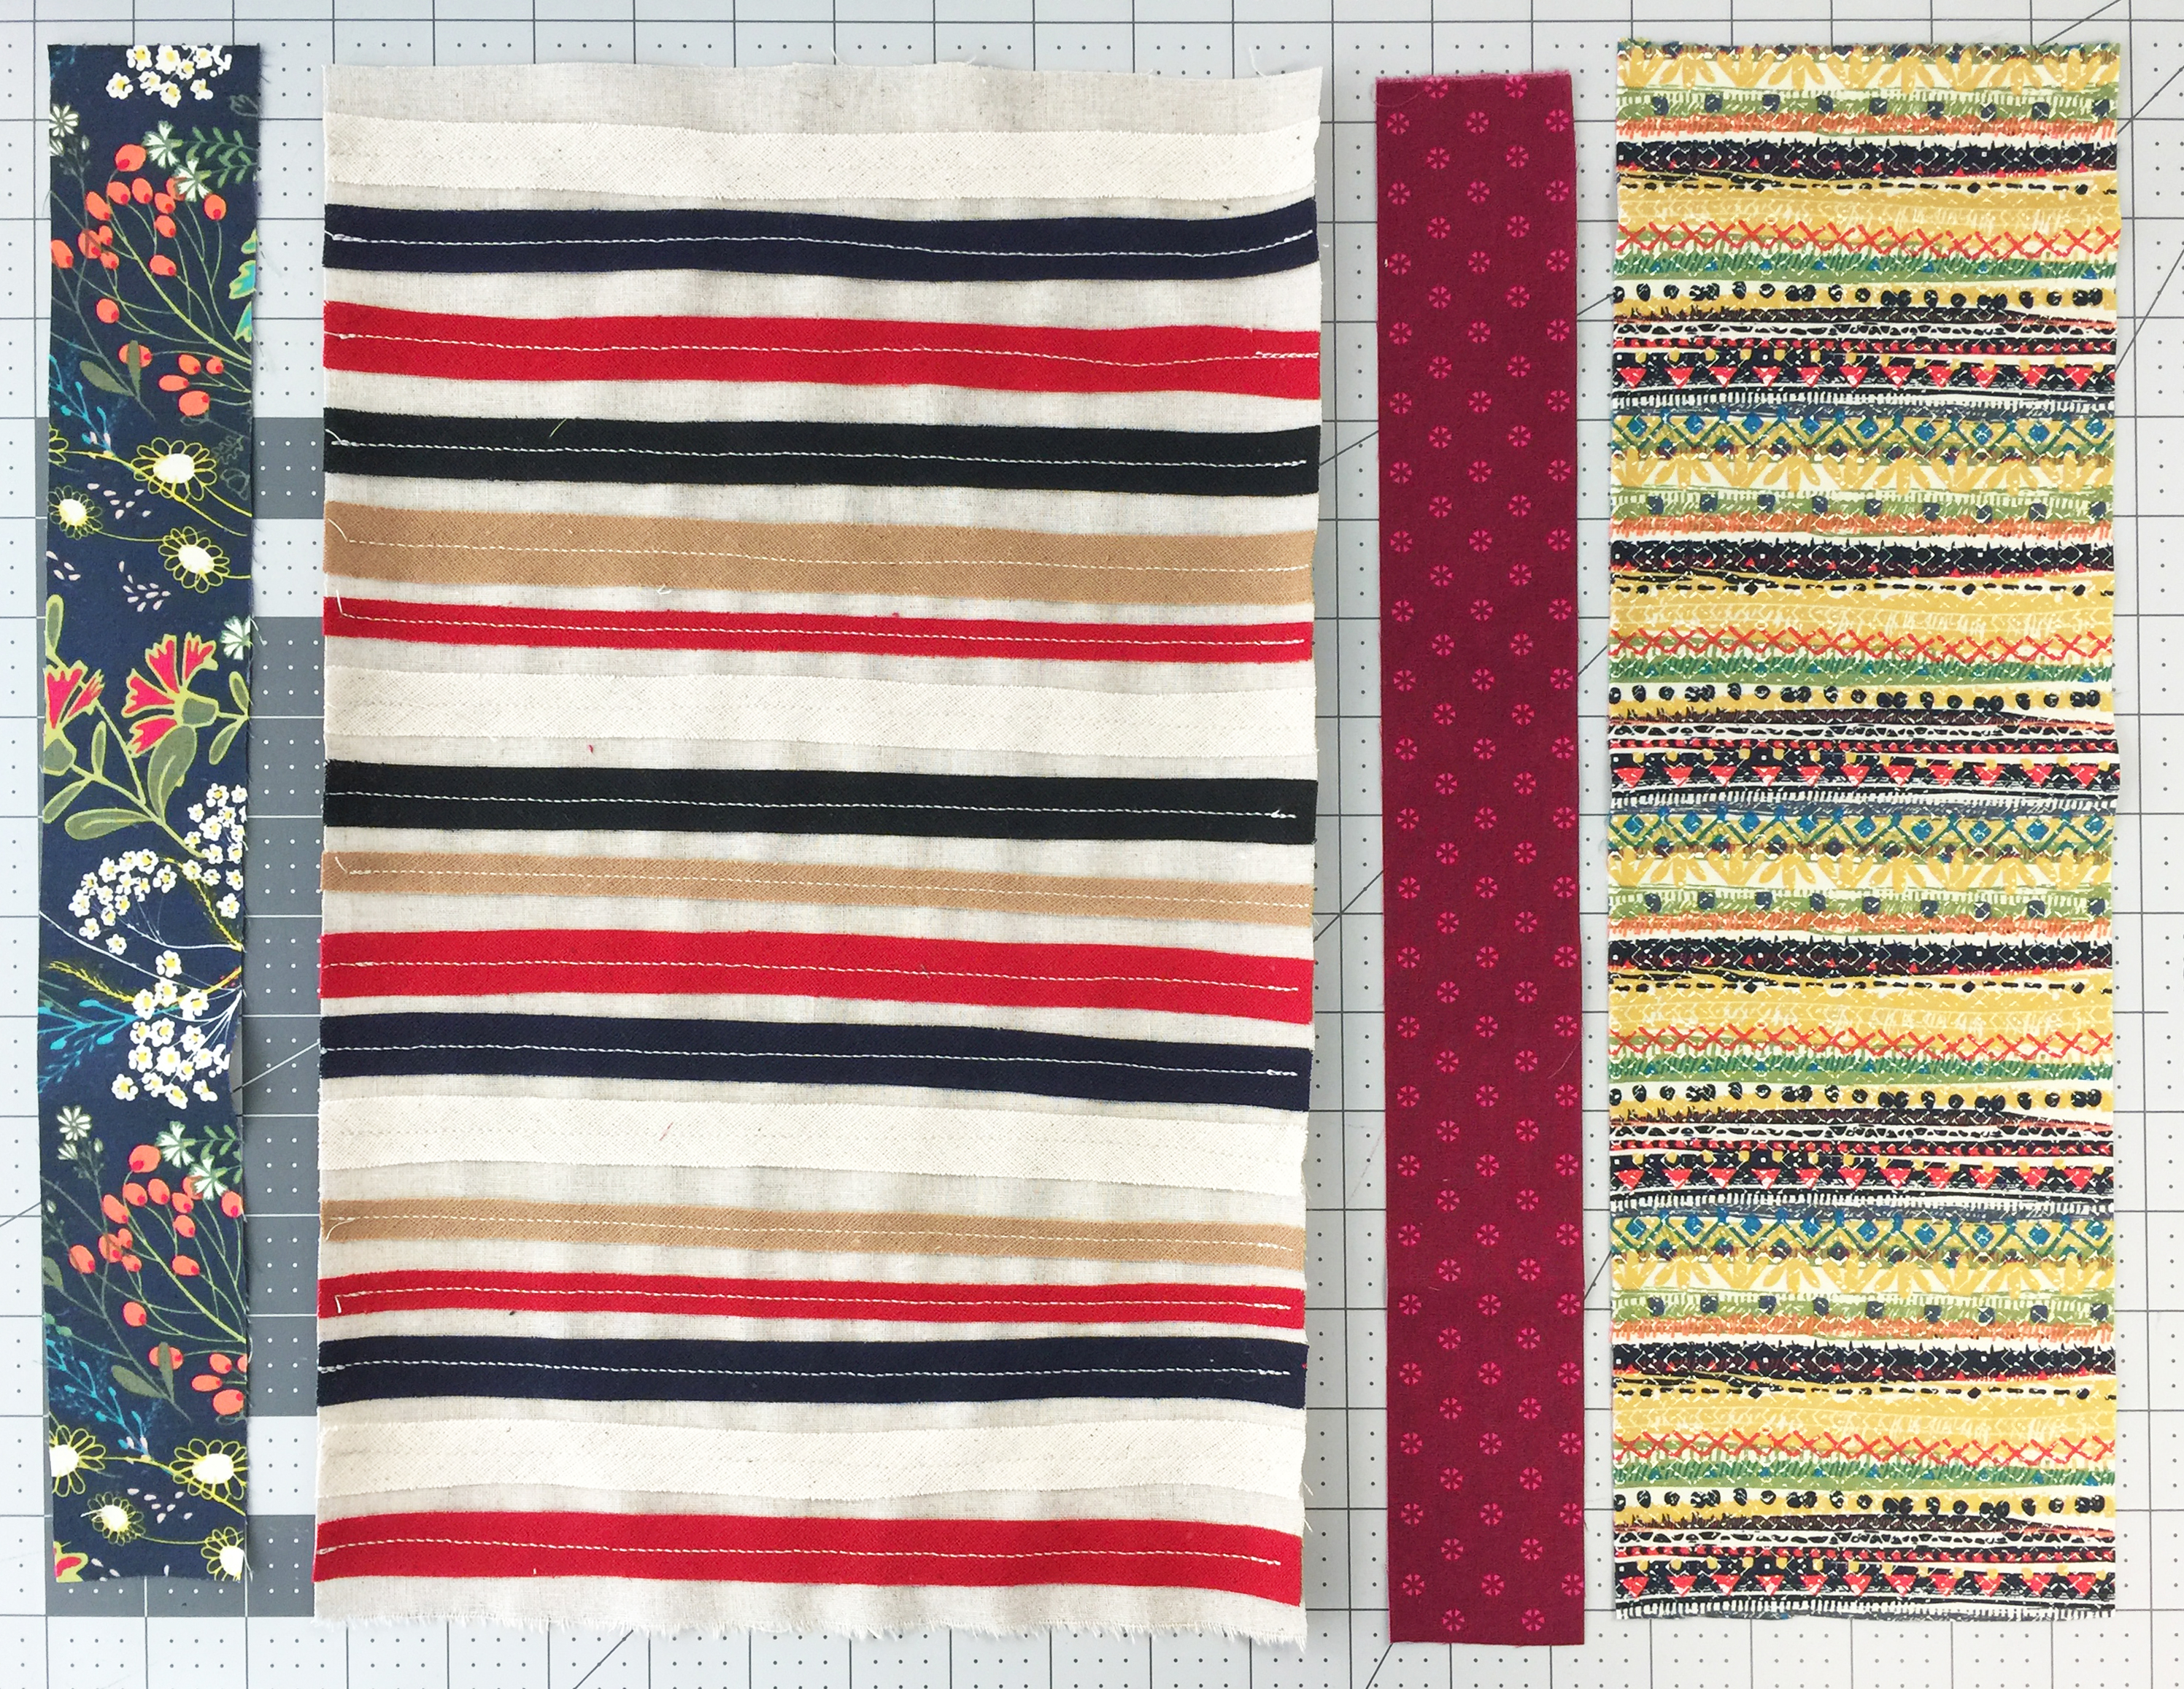
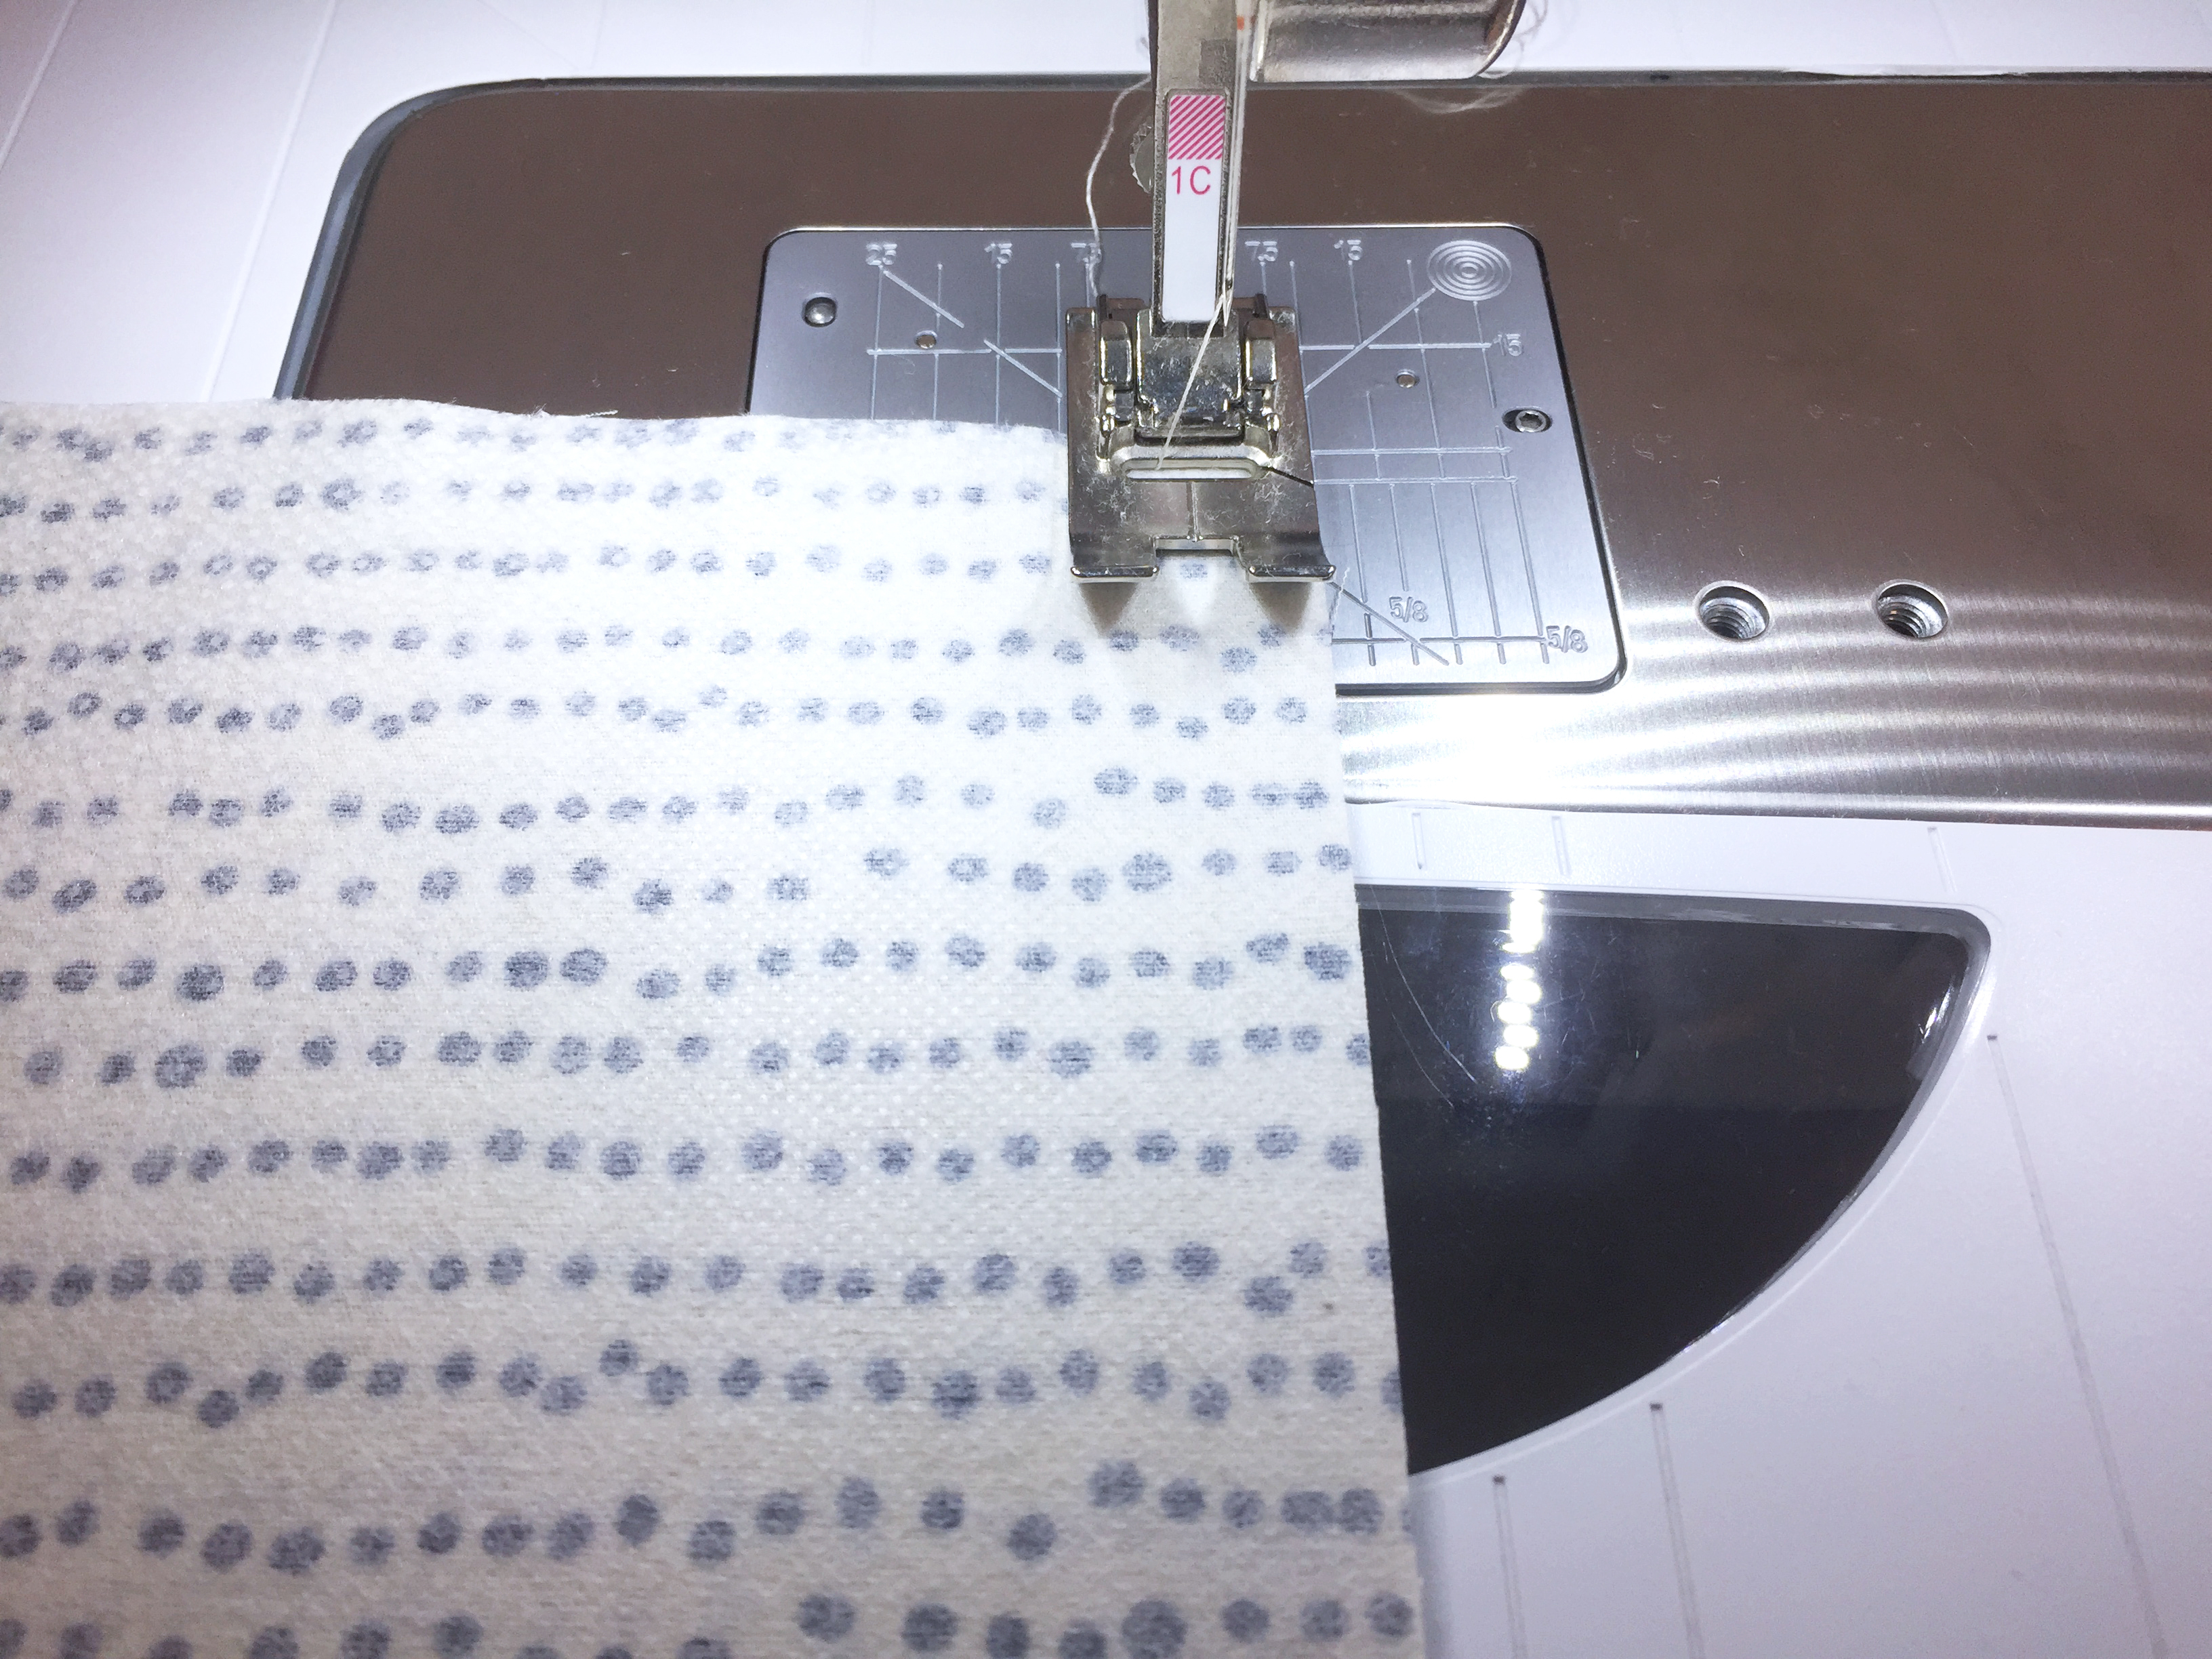
Prep your sewing machine using the all-purpose Reverse Pattern Foot #1/#1C/#1D and thread the needle with the Aurifil thread #2000.
NOTE: Move the needle position to the right until it reaches #2, this will give you a 1/4″ seam allowance. (See image below for reference.)

Now sew all the pieces together.
Repeat these same steps for the back of tote.
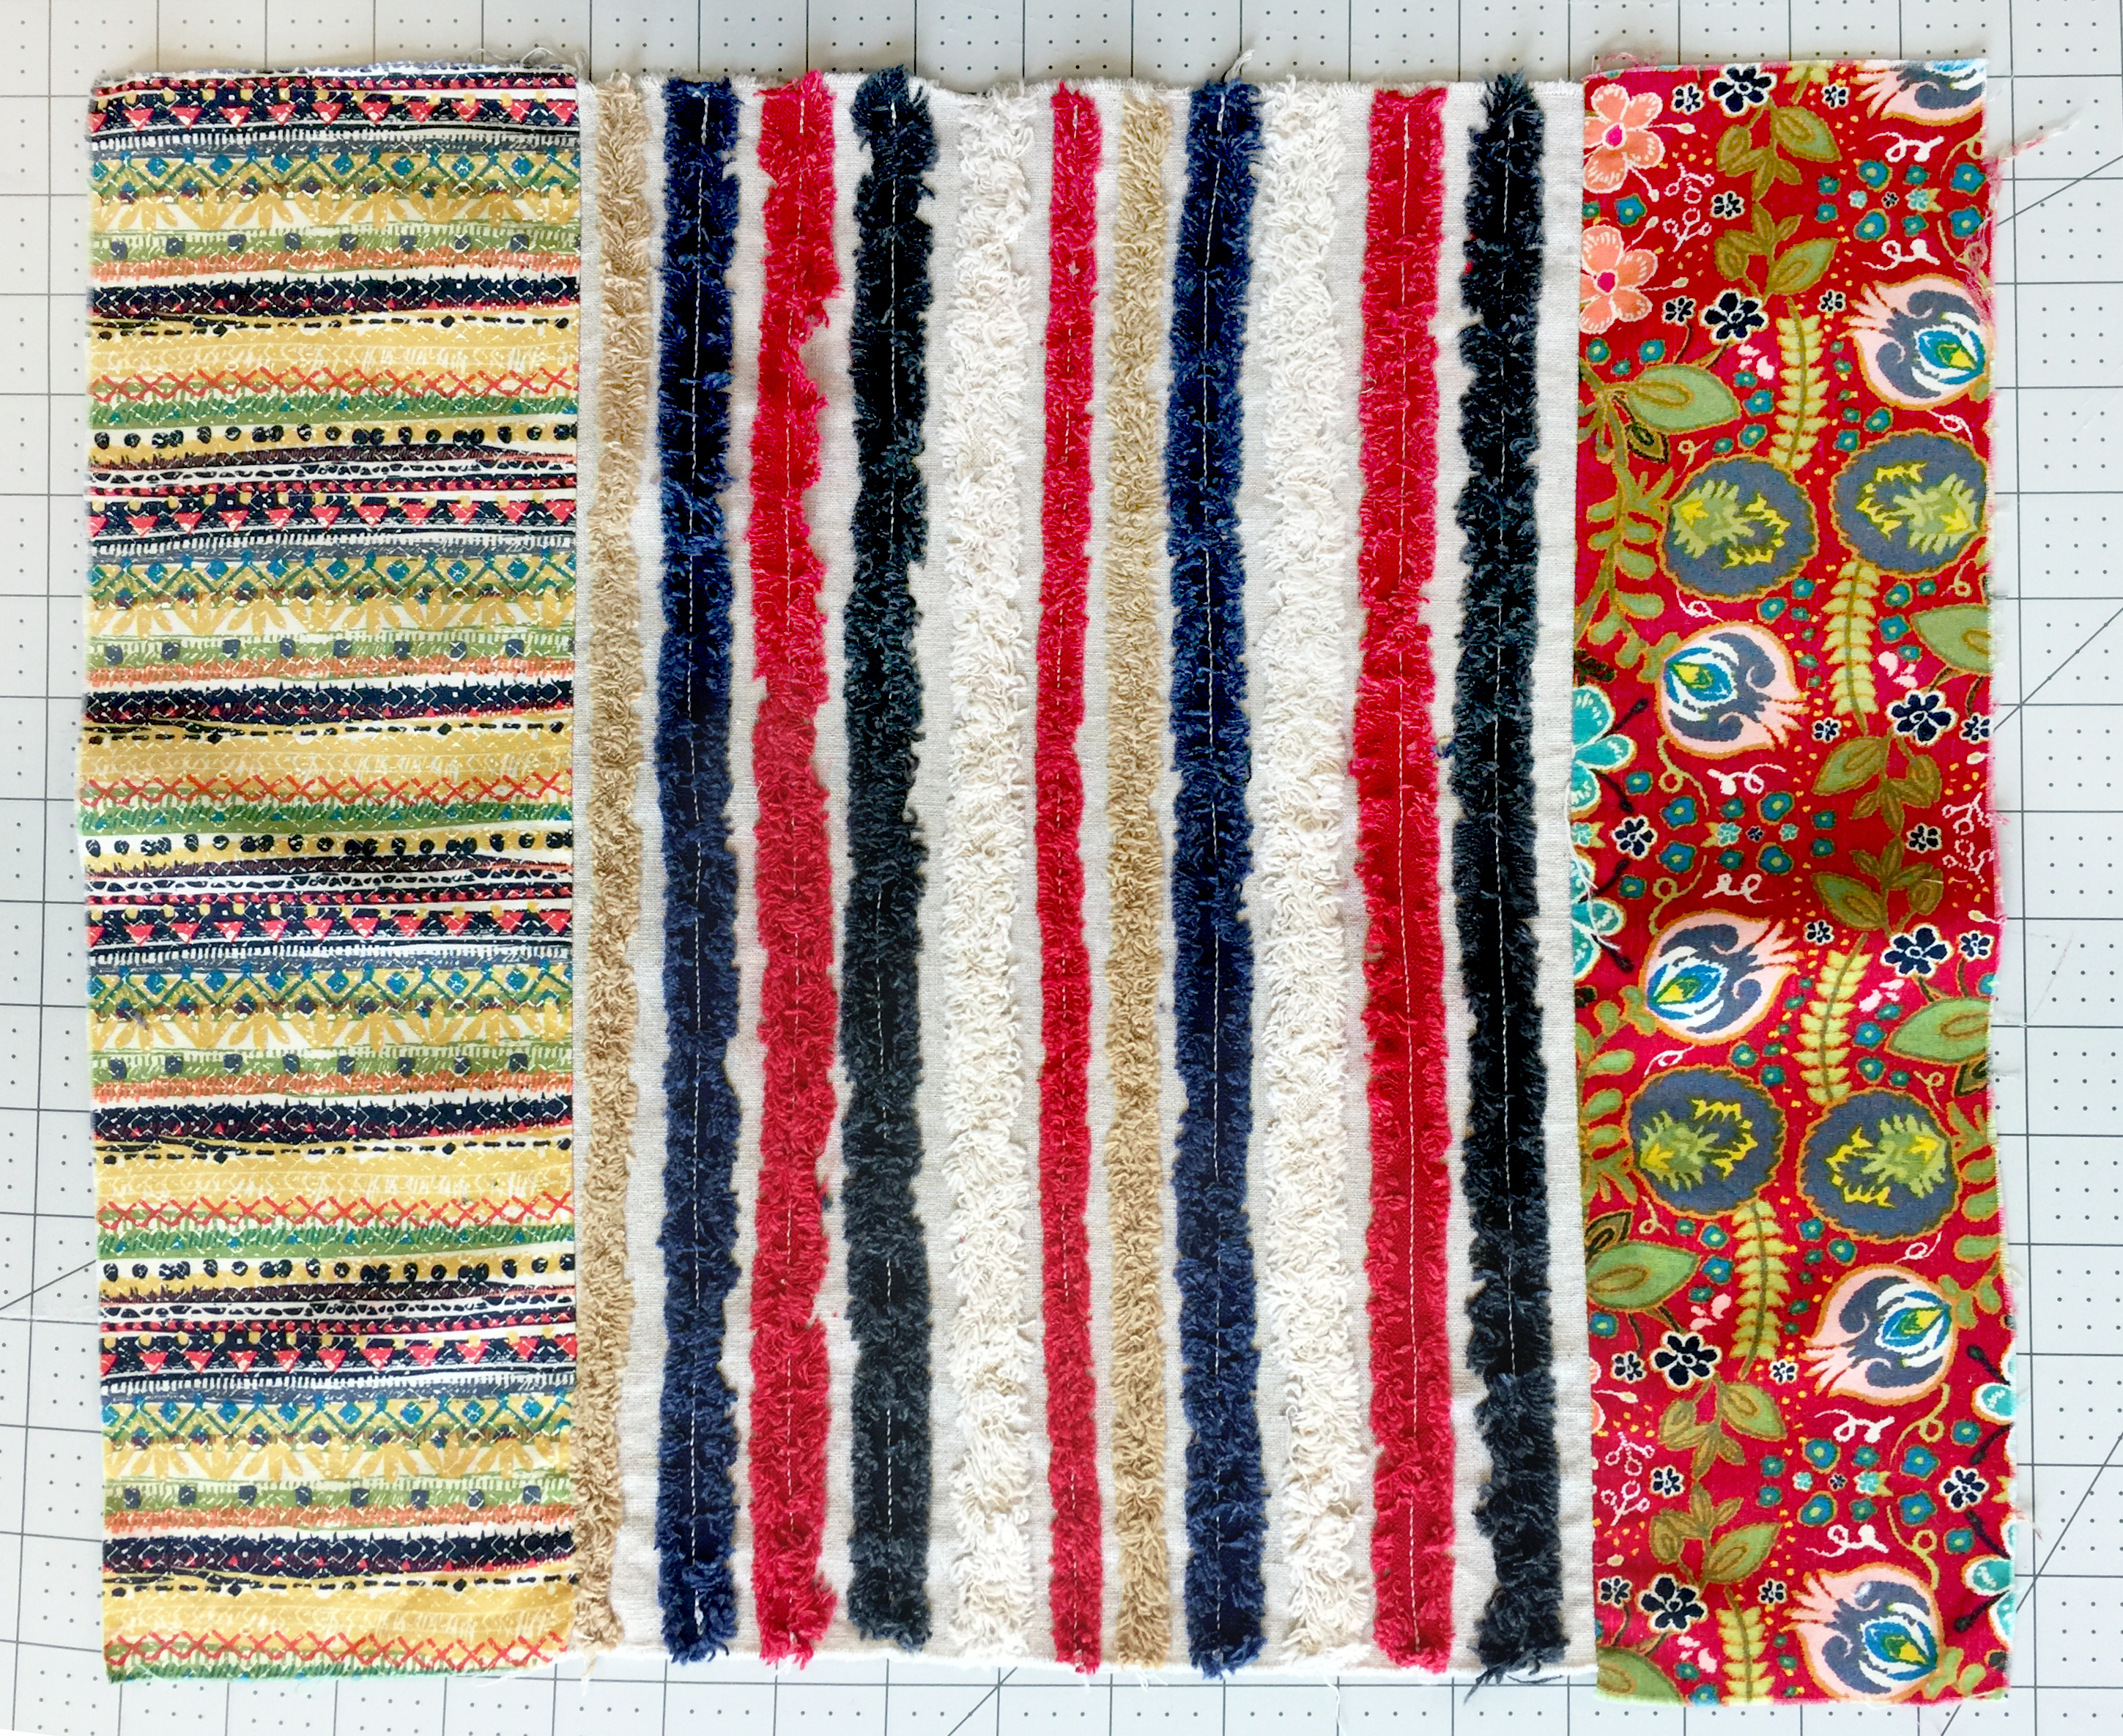
Once you have both of your pieces completed, machine wash both pieces on cold cycle and dry warm. This will add the full Chenille effect. Another alternative method: Spray with water, rub with a stiff brush and dry with hair dryer.
Once these steps are completed you will have two pieces looking like this.
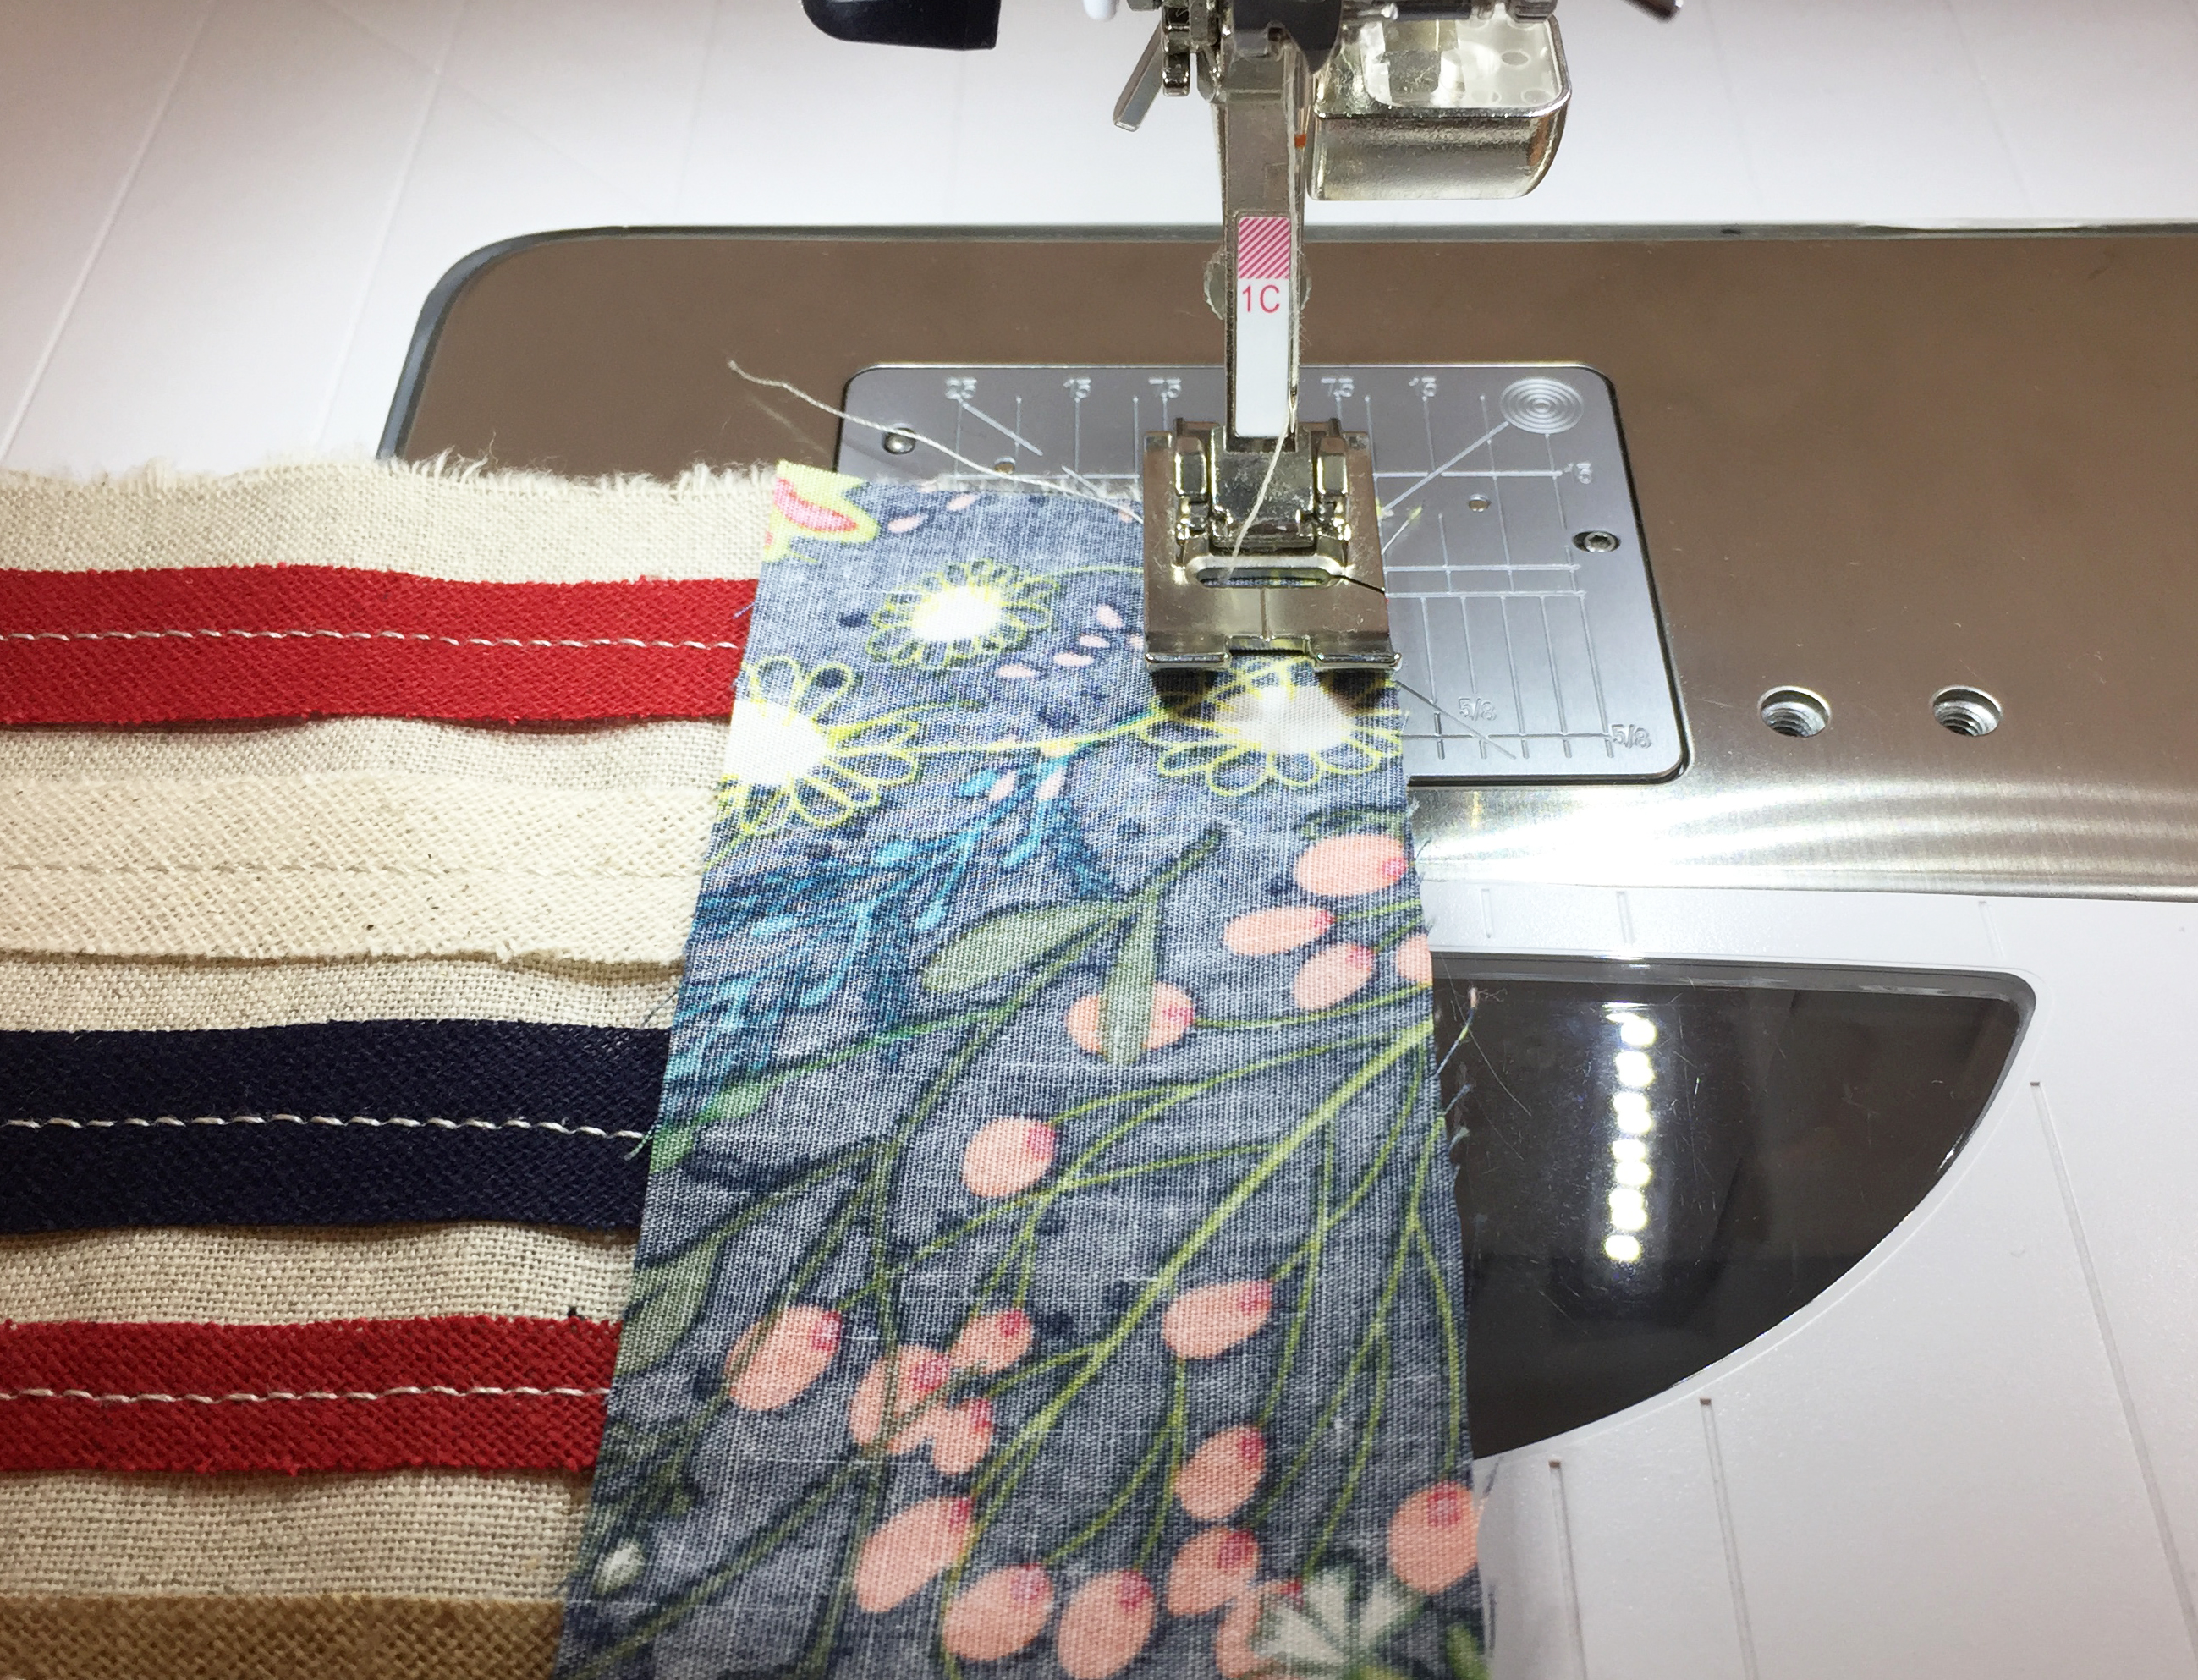
Sew the pieces together, starting from the top side corner of the tote to the other top side corner of the tote and set aside for later.
Step 3- Lining
Take 2 (two) 19″ by 15″ of Fabric F and 2 (two) 19″ by 15″ of Interfacing. Placing the interfacing in the wrong side of the fabrics.

Press in place.
Once both pieces have the interfaced attached, sew right sides together. Leave a small unsewn portion in the bottom of the tote so you can turn you bag right side out, which is one of the final steps in making your tote.
Step 4- Straps
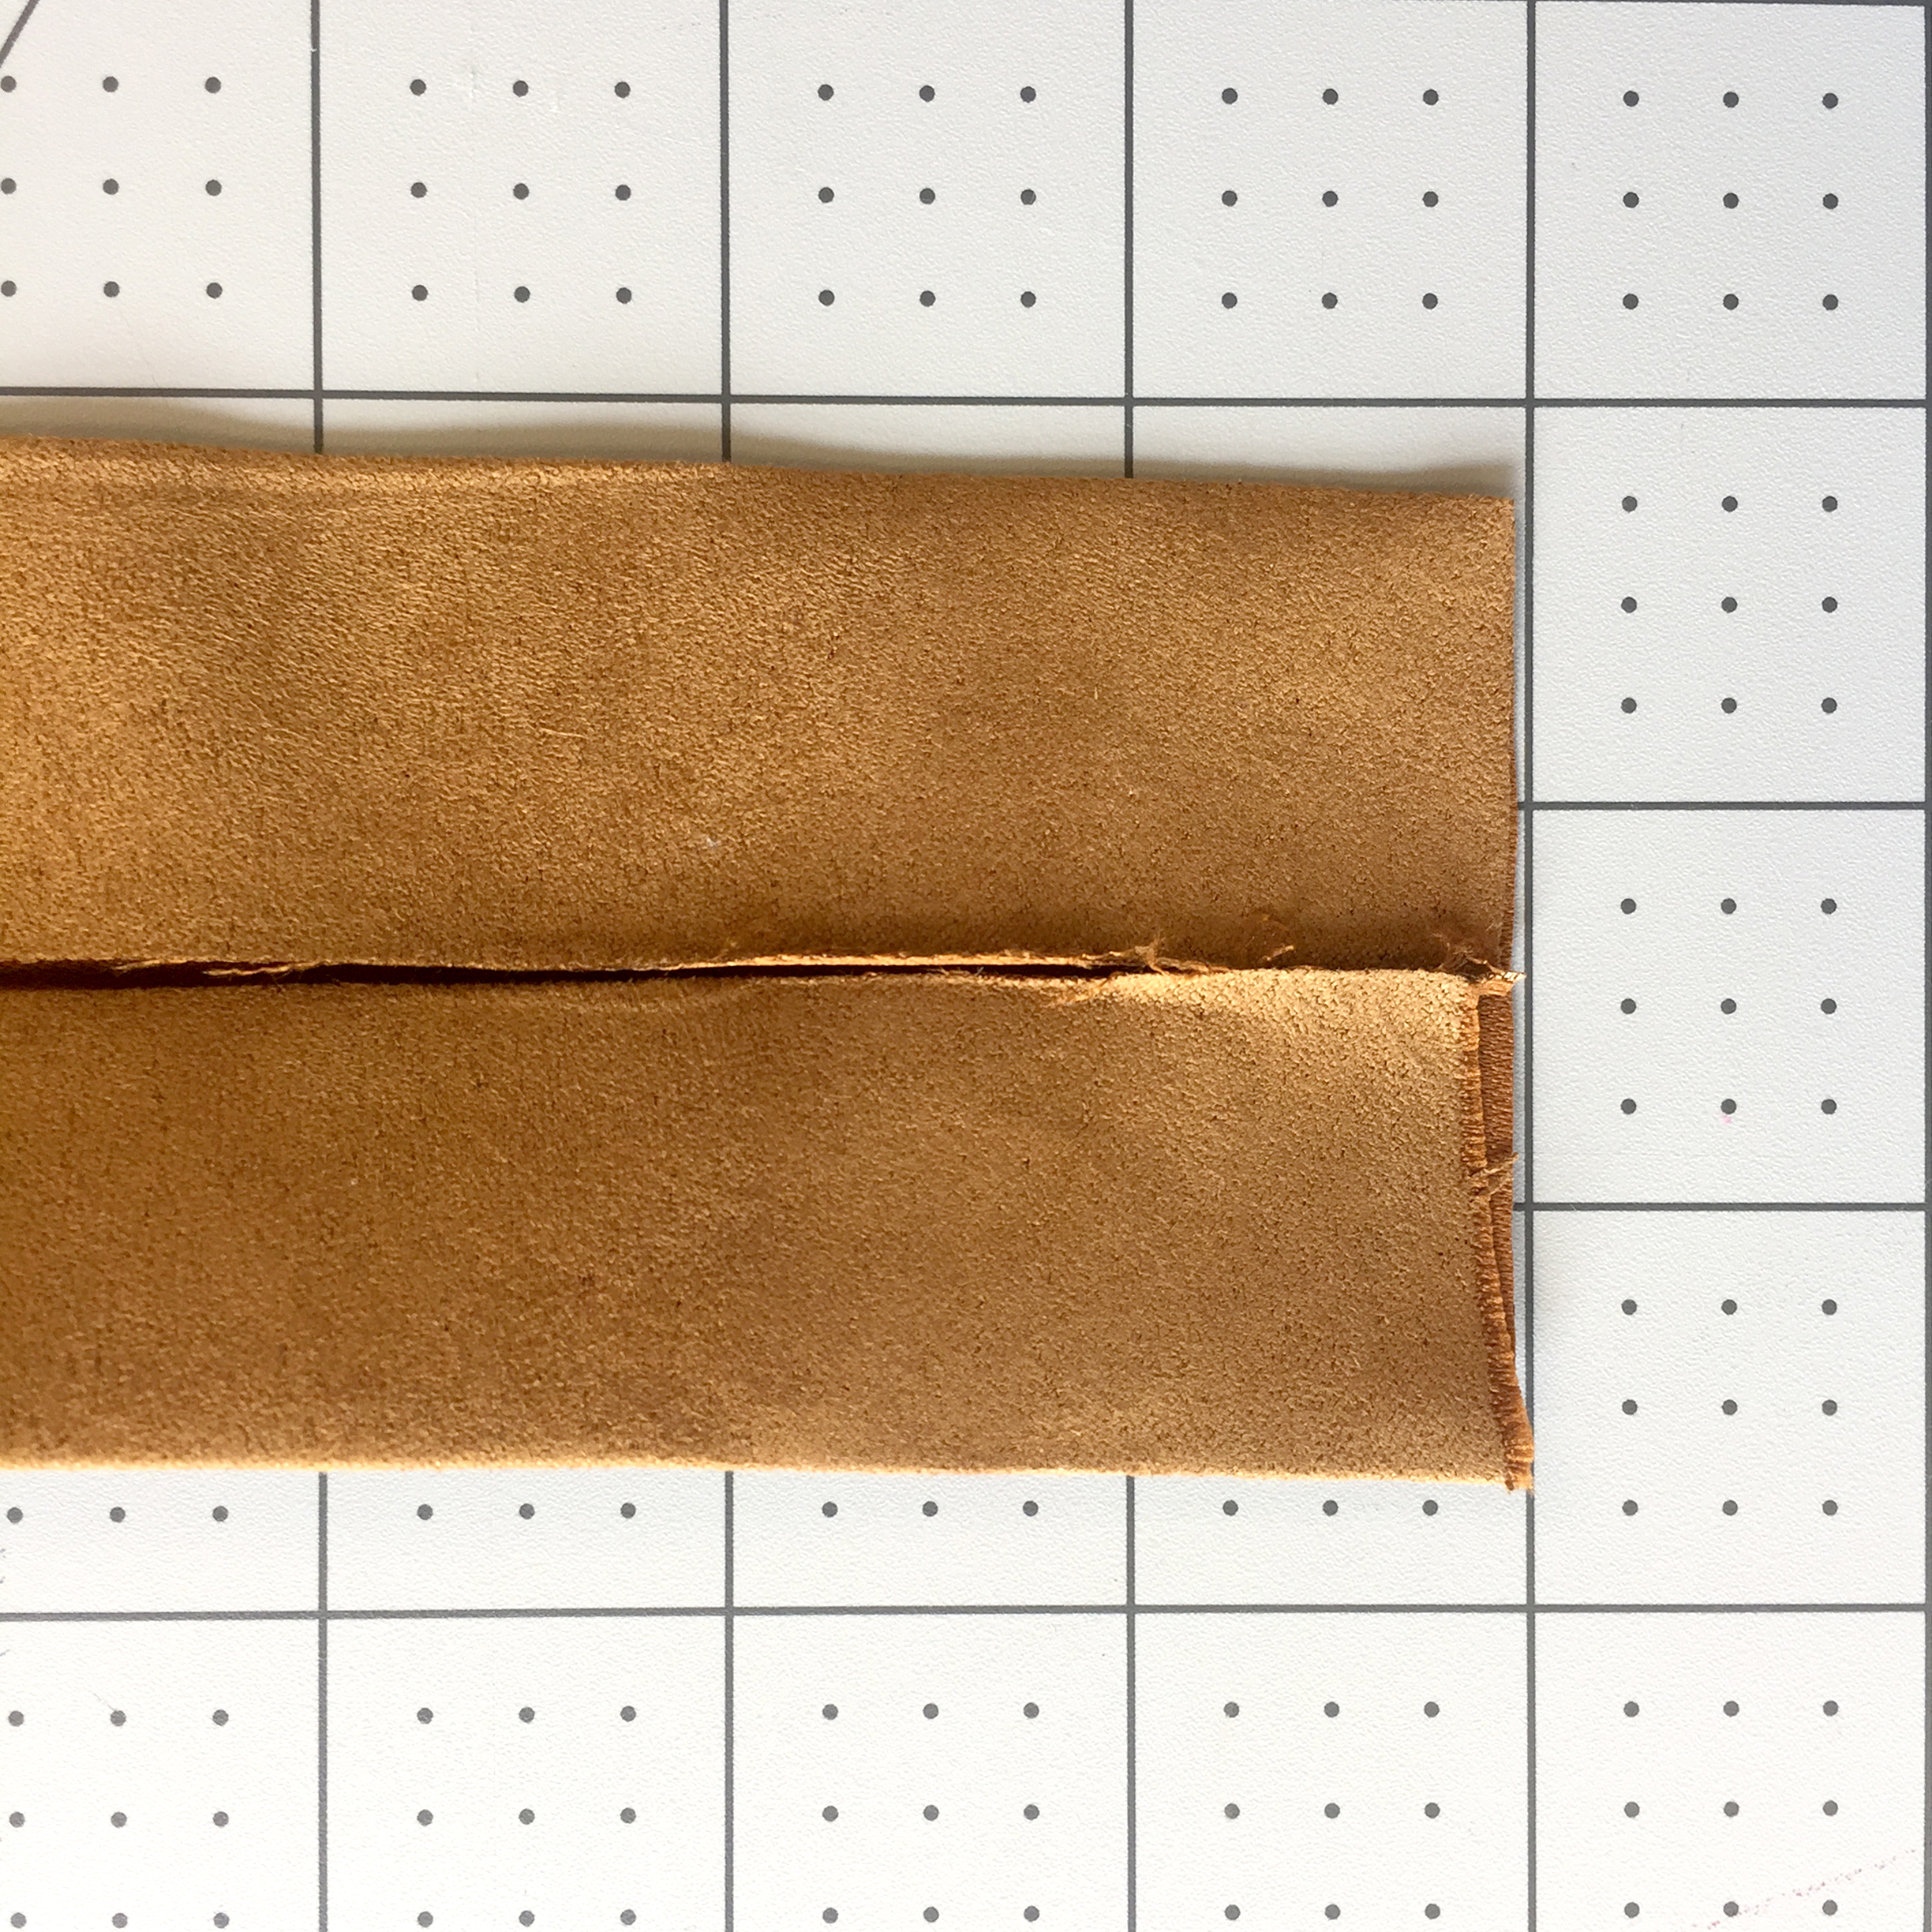
Take the 2 pieces of brown suede measuring 29″ by 5″ and folded in as shown below.
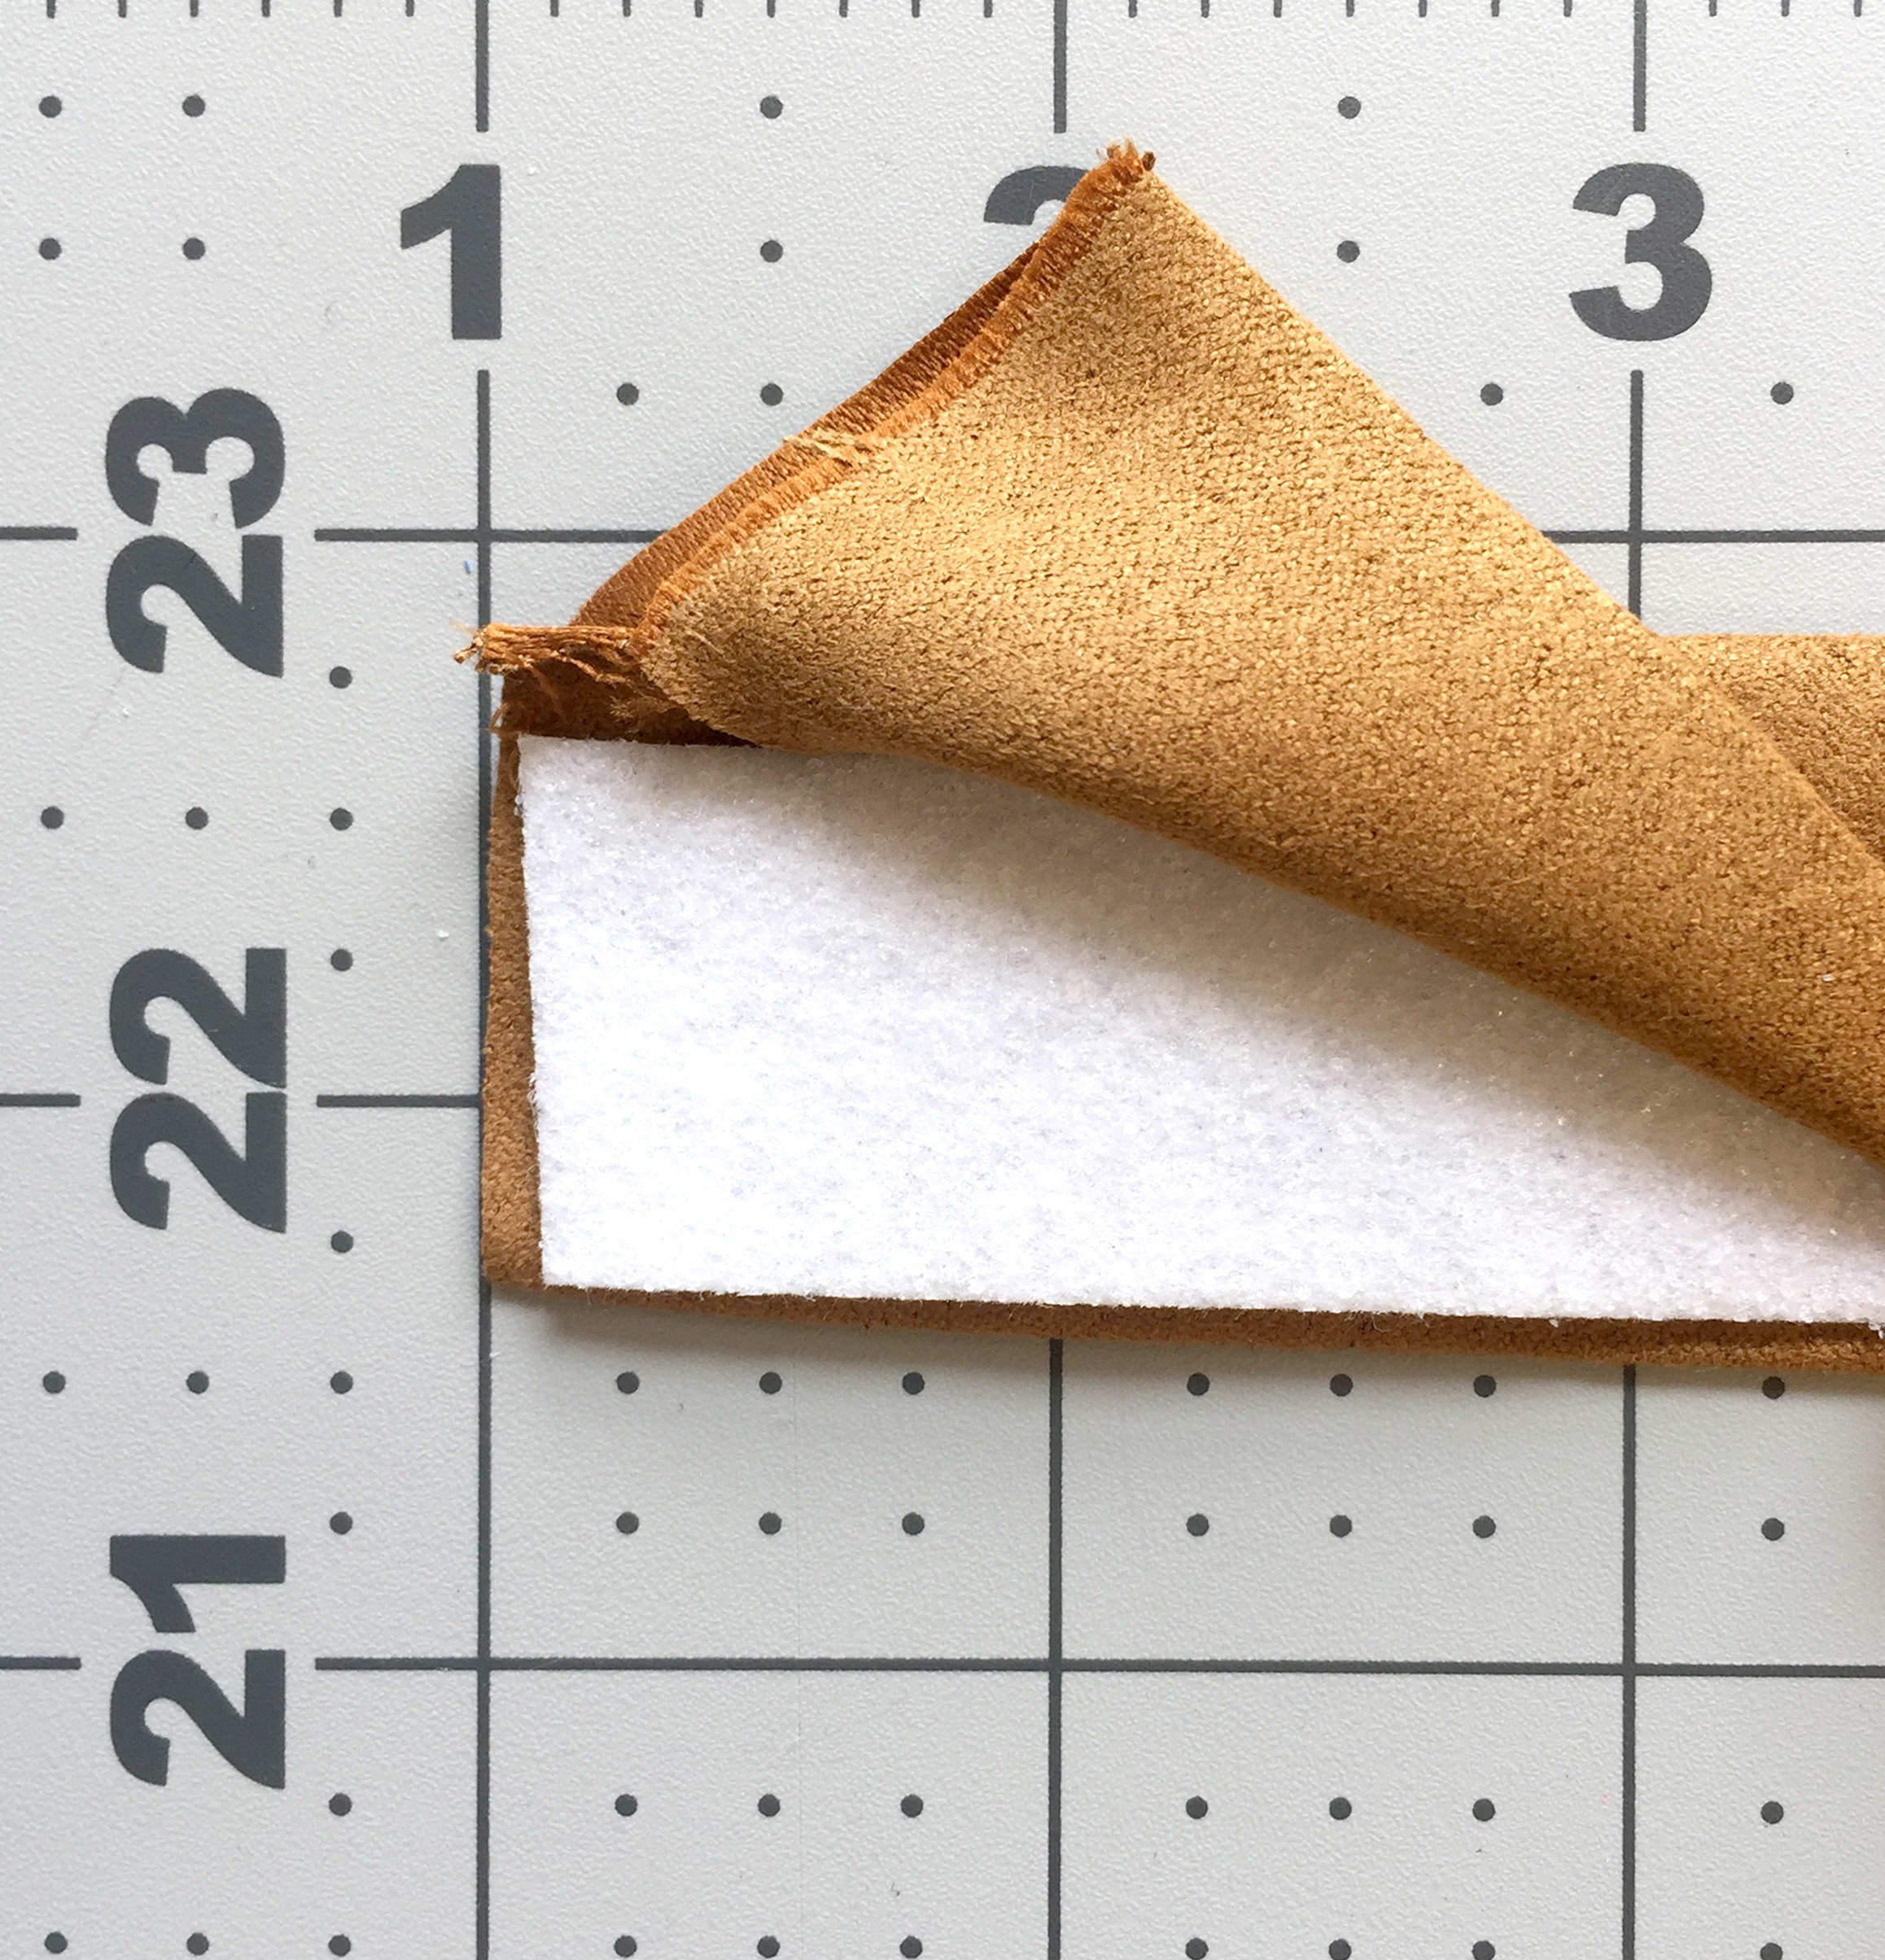
Now grab the 29″ by 1″ piece of Double Sided Fusible Stiff Interfacing and place it inside the folded suede strip. With a piece of fabric, cover the suede and press in place the double sided fusible stiff interfacing.
Repeat these steps with both pieces of suede and double sided fusible stiff interfacing.
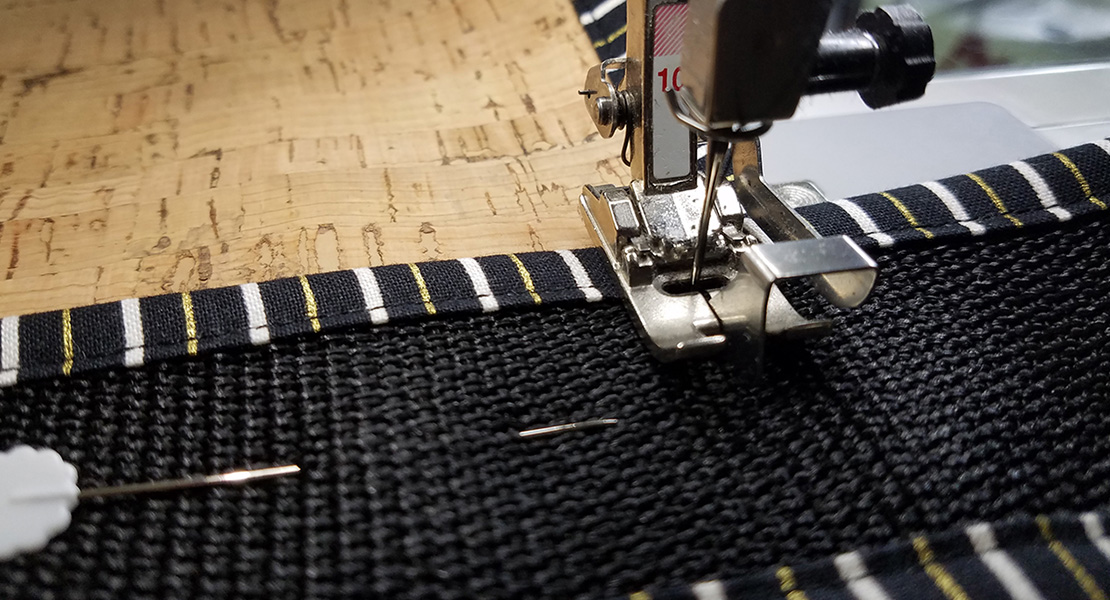
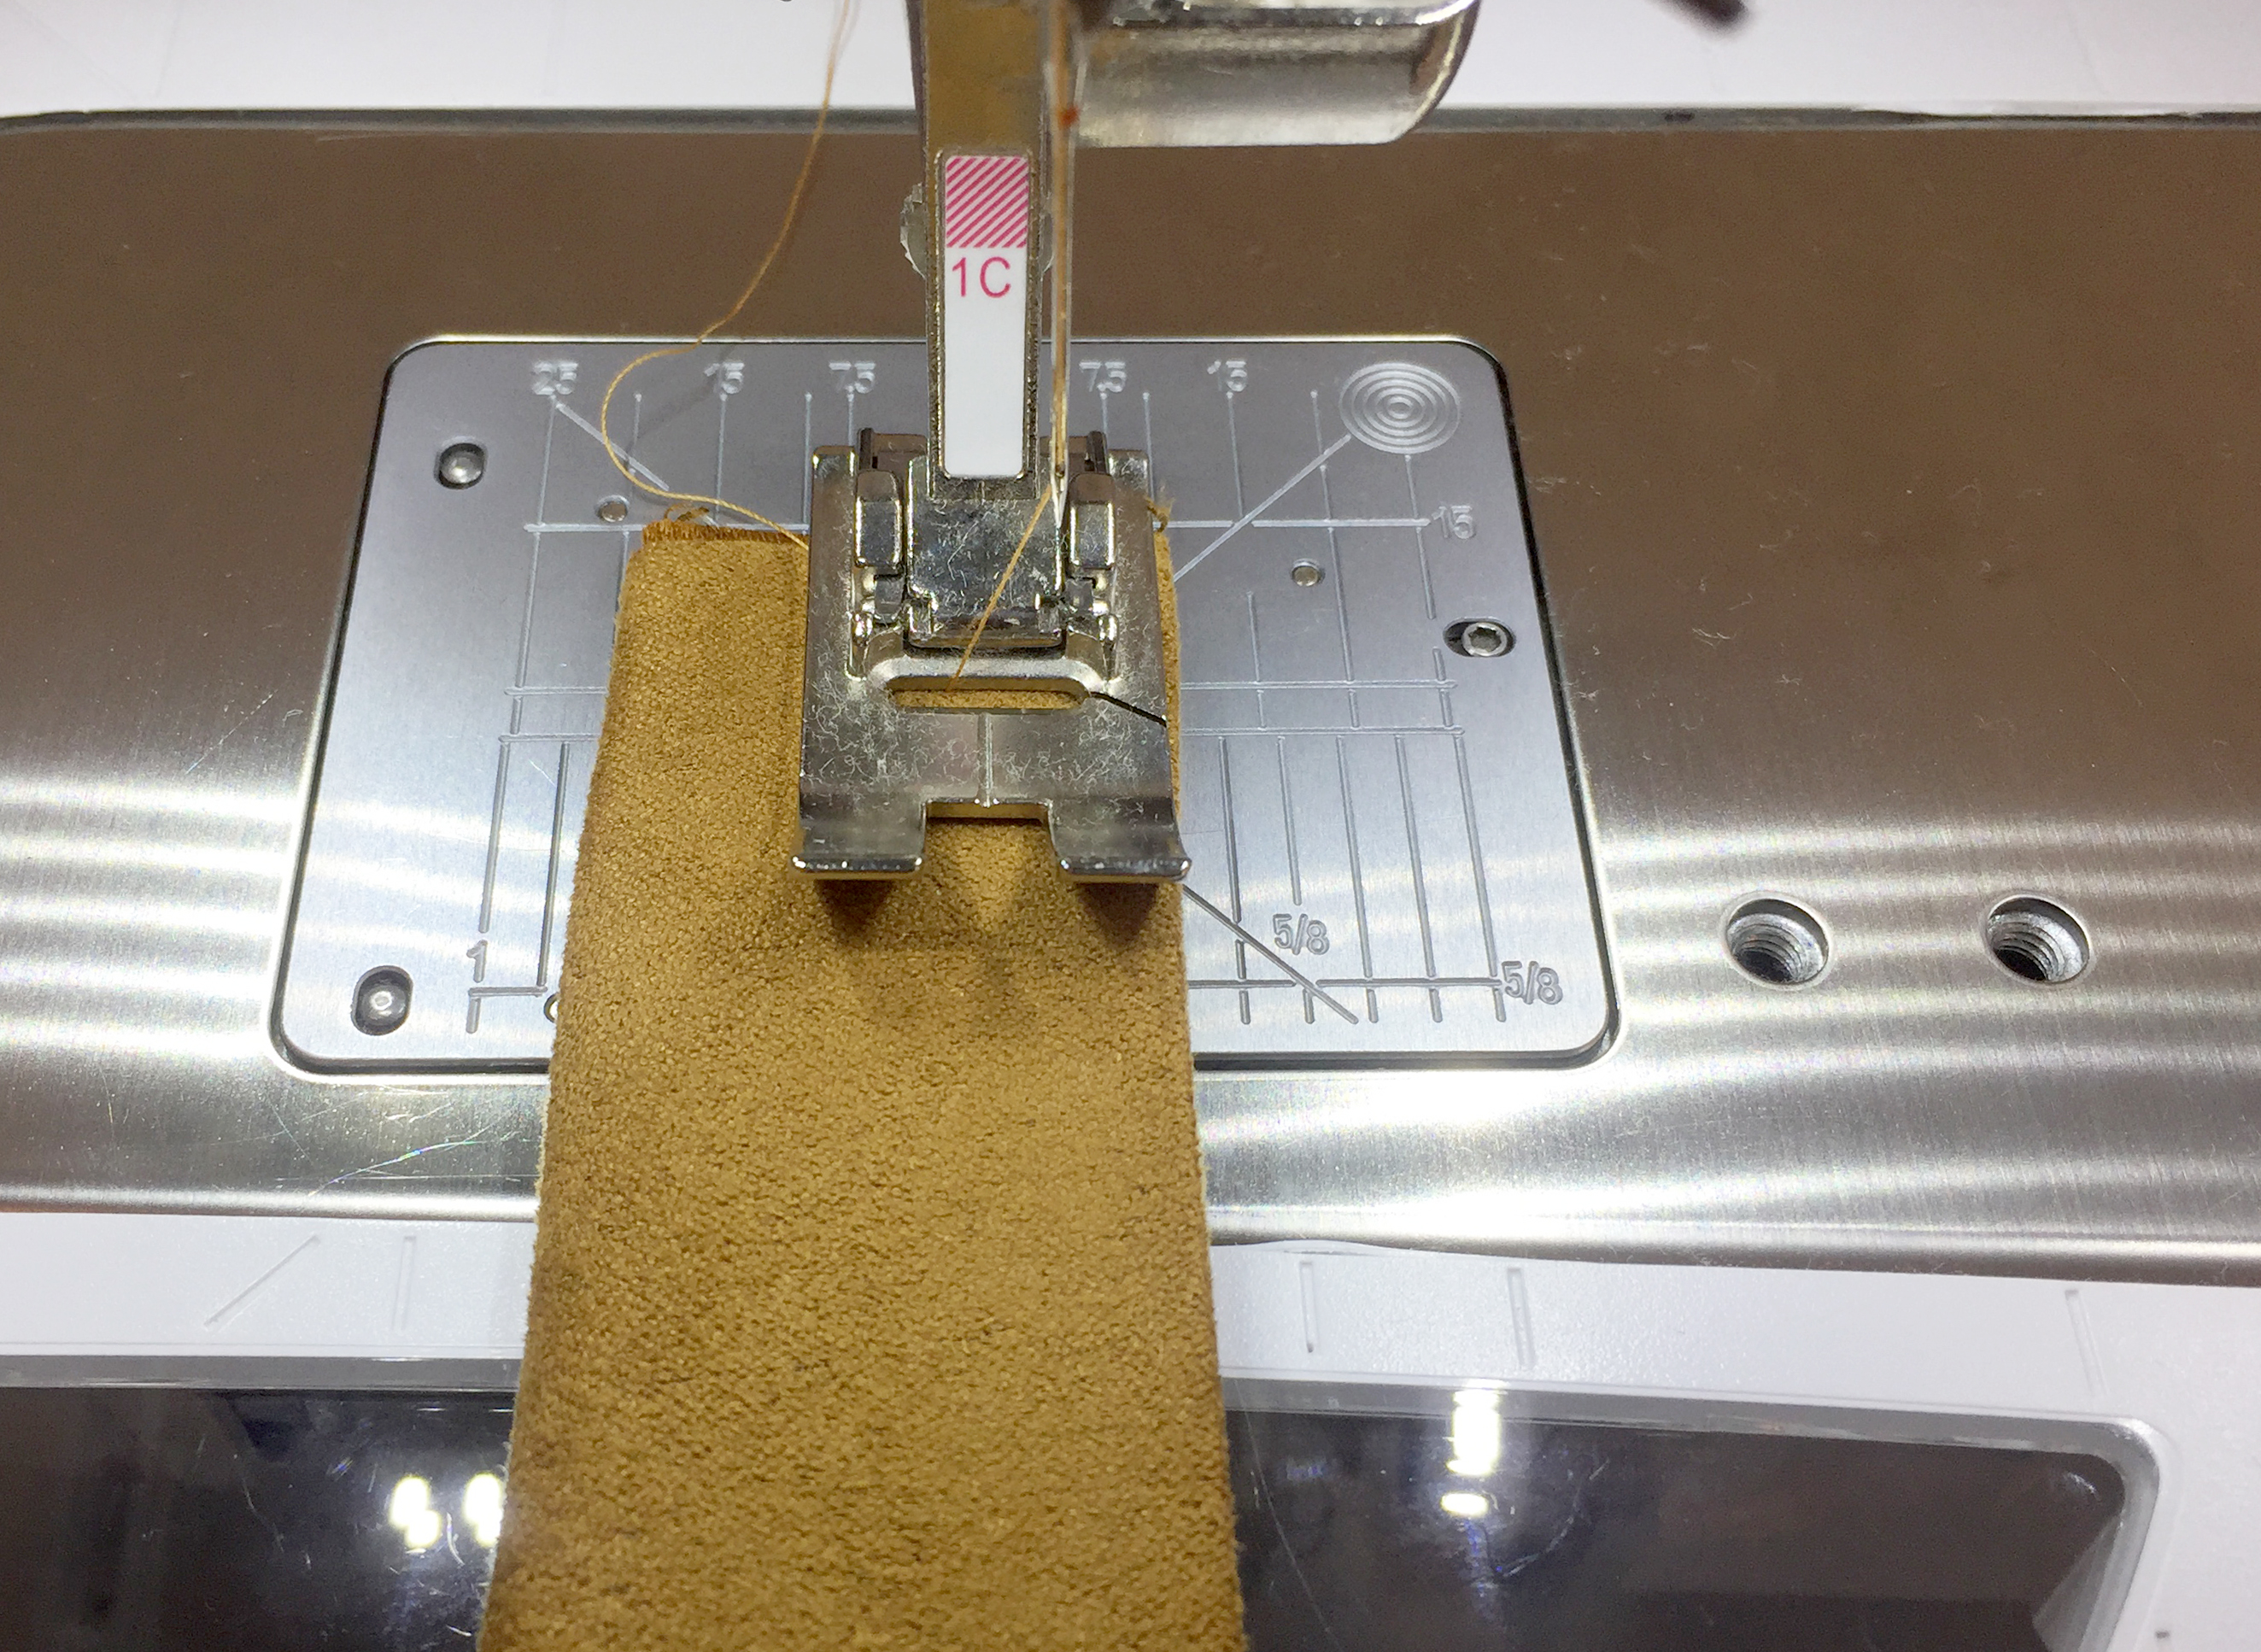
Thread the needle with Aurifil thread #2930 and sew around each strip.
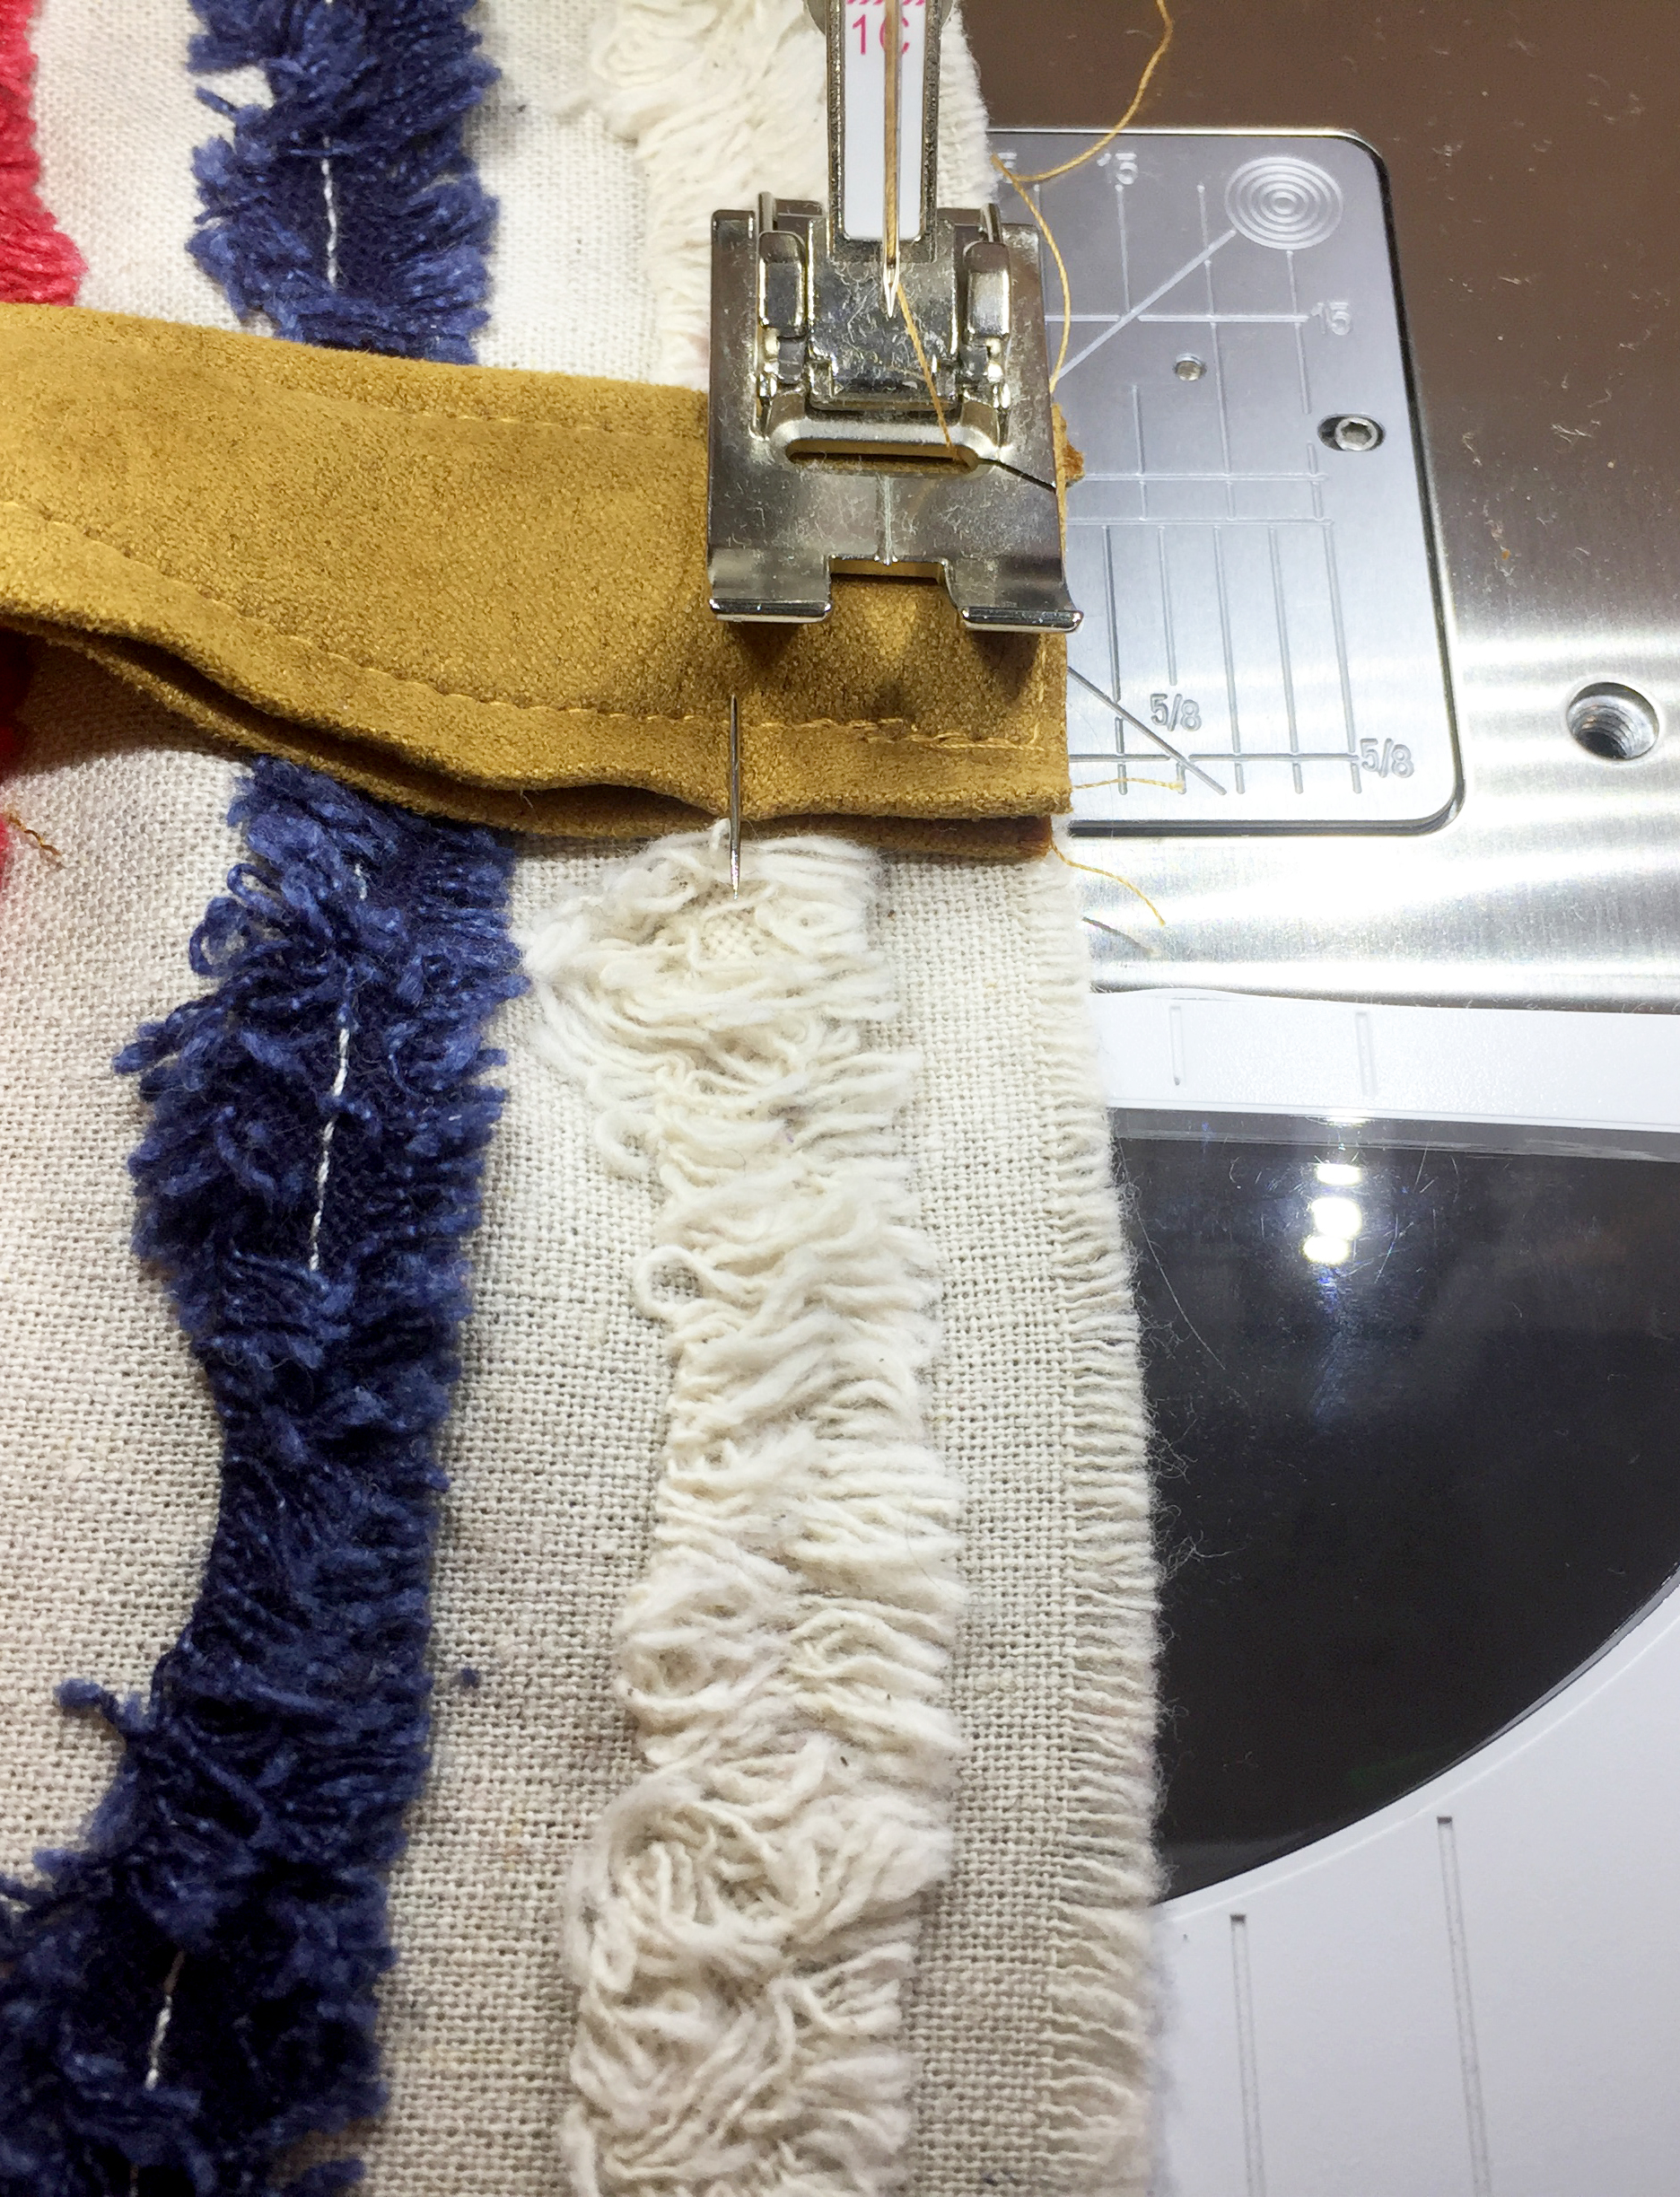
Take the tote outer-layer place one strip on the front part of the tote, with a 4” distance away from the edge. Repeat this same step for the back part of the tote.

Stitch in place.
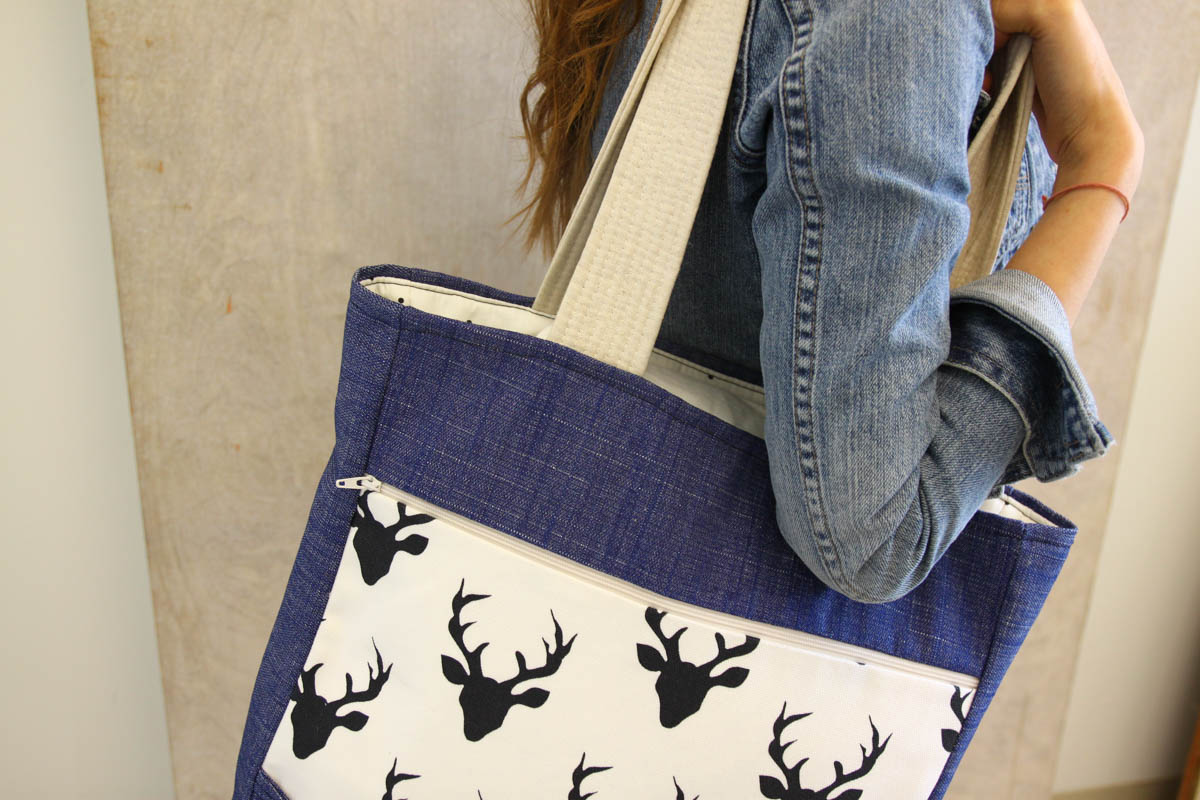
Step 4- Add Lining to Tote
Tuck the exterior of the bag with right sides out into the lining. Right sides of the lining and exterior of the bag should be facing each other. Stitch all around the top.
Pull right side of bag through the small portion you left unsewn in the lining, hand stitch or machine stitch shut and you are done!