Keyboard Lettering Tote Bag
My granddaughter at the library is like me at the fabric store…sometimes we get more than we can carry! She needed a personalized book bag to hold all of her “finds”. Using the Keyboard Design Collection feature of the BERNINA 9 DesignerPlus Software made it so much easier to work with my purchased alphabets. Plus, I used the new Large Freearm Embroidery Hoop to do the stitching. I loved the fact that I didn’t have to take apart my tote bag before embroidering!
Let me show you how to make a personalized tote for someone special in your life!
Materials and Supplies
- BERNINA Embroidery Software 9 DesignerPlus
- Embroidery Machine (I used the B 880 Plus)
- Large Freearm Embroidery Hoop
- Drop-shaped Embroidery Foot #26
- Embroidery alphabet collection(s) of choice (I used Hailey’s Alphabet 12909 from OESD)
- Tote Bag
- OESD Ultra Clean and Tear Stabilizer
- Embroidery threads of choice (I used Isacord)
- 80/12 embroidery needle
- Basic embroidery supplies
Creating a Keyboard Design Collection
Let’s first discuss why you want to create a Keyboard Design Collection. When you purchase alphabets, each character is a single design. That means when you want to make words, you have to open or insert each letter individually to create the word. That involves aligning and spacing your letters as well, and this is a bit time-consuming. By using the Keyboard Design Collection feature in the BERNINA 9 DesignerPlus Software, you can map, or assign, each letter to a matching letter on your keyboard. Then all you have to do is type in your word and it will show on the design screen. You can map characters individually or you can do an entire collection all at once, which is called a batch. (You can read more about Keyboard Design Collections in the Software 9 Reference Manual in the chapter on Lettering.)
So let’s go through the steps. I’m using the collection Hailey’s Alphabet 12909 from OESD, but you can use your favorite alphabet collection. Note that Grade A or Grade B files always produce the best results. You have some sample collections in ART format in your software.
Begin by opening the software and select Embroidery Library from the Home Screen.

Click on the Keyboard Design Collection icon so that it turns blue.
![]()
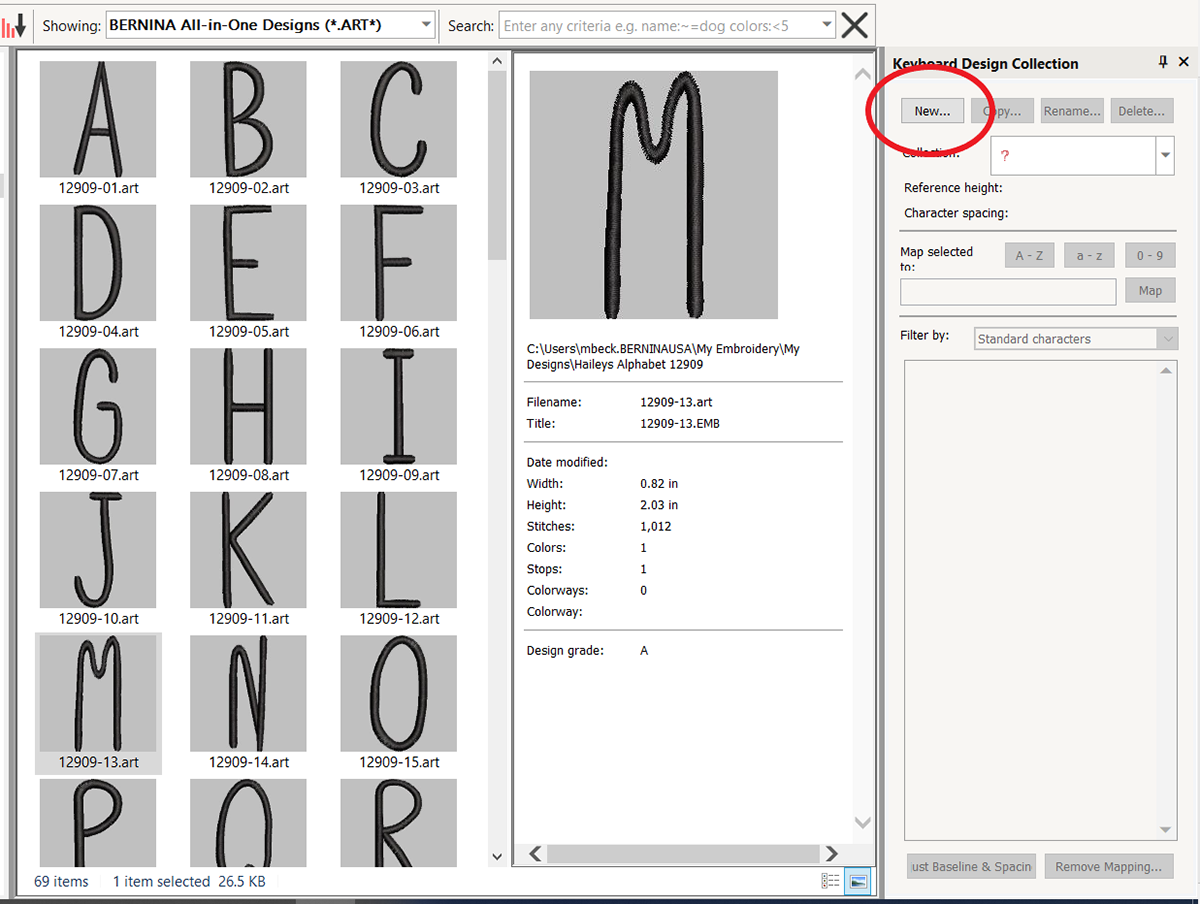
In the Navigation pane, drill down until you are at the location where you saved your alphabet collection and select it. When mapping the alphabet, start with the letter ‘M”. Select the uppercase letter “M”. Click New in the Keyboard Design Collection docker on the right side of your screen.
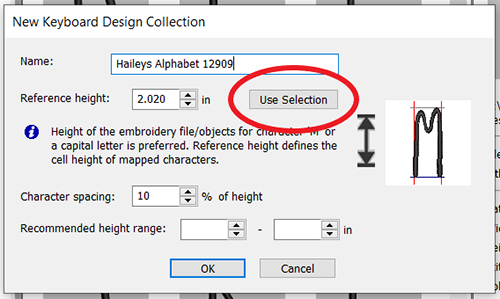
A new window will open and the name of the collection will automatically enter, but you can change it if you like. Click the Use Selection button and it will automatically fill the Reference height box. We are going to skip Character spacing and Recommended height range. Keep in mind that the recommended resizing for Grade A designs is +/- 20% and +/- 10% for Grade B, C and D designs. Click OK.
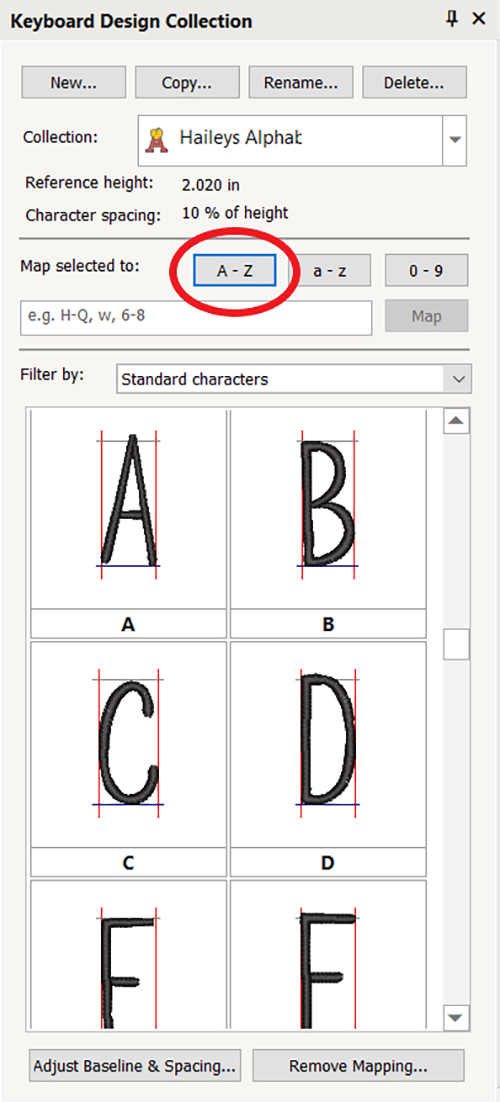
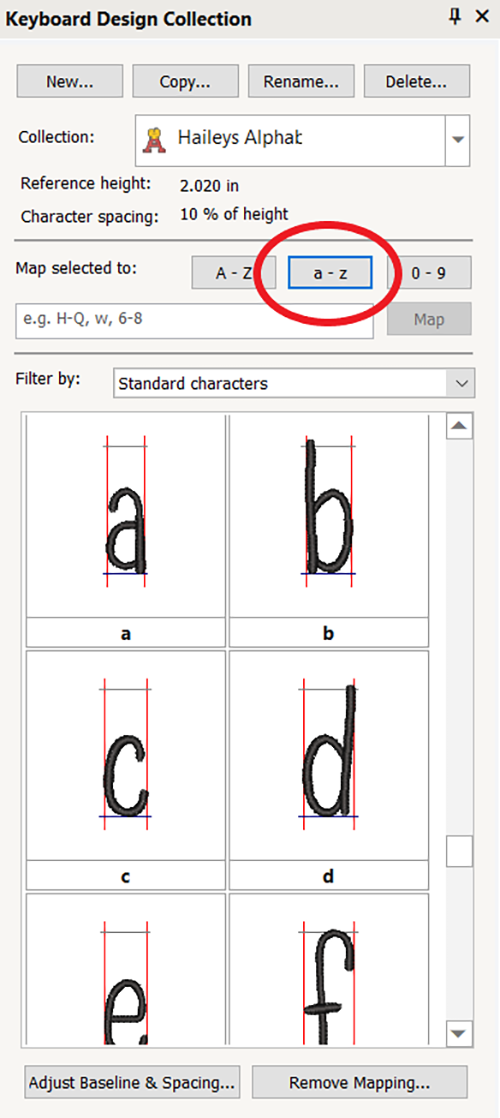
Now select the characters you are going to map. Make sure that Standard Characters is showing in the Filter by box. Click on the uppercase A, hold the shift key and click on the uppercase Z. All the uppercase letters are selected. Then click on the relevant batch-mapping button, which is the A-Z button next to Map selected to. You will see the letters populate the Keyboard Design Collection docker.
This alphabet collection has lowercase letters and numbers, so let’s map those, too. Select all of the lowercase letters. Click on the lowercase a-z mapping button.
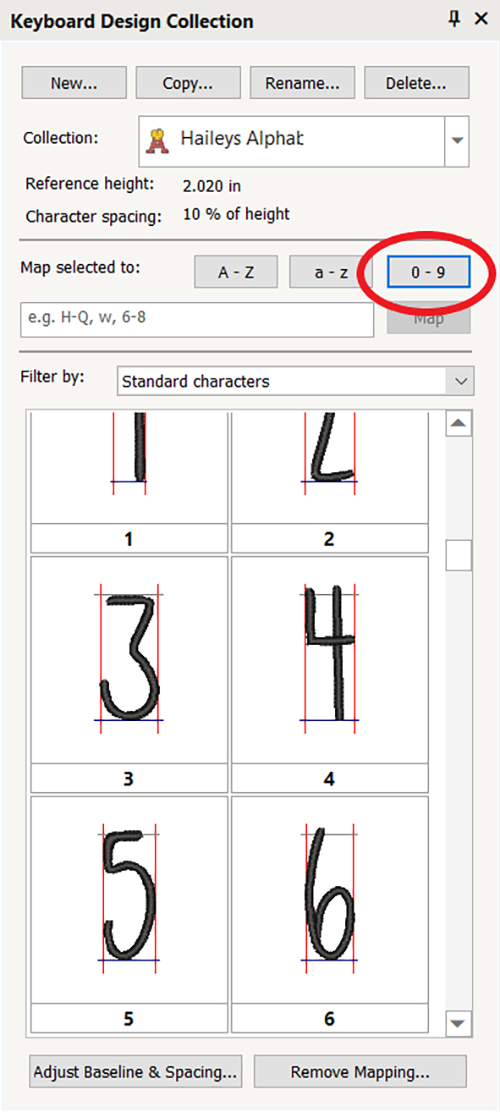
Repeat this process for the numbers. We will map the other characters a little differently later.
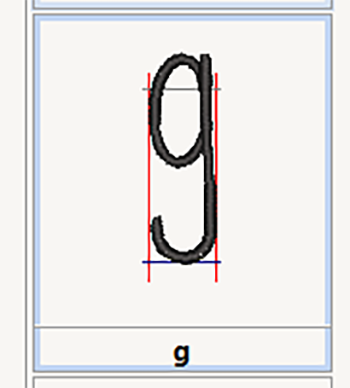
Before leaving this screen, let’s address the baselines of some of the lowercase letters. As you know, the letters g, j, p, q and y extend below the baseline. If you look at the letters in the docker, you can see that they are above the baseline. This is what lowercase g looks like.
Select the lowercase g in the docker and then select Adjust Baseline and Spacing at the bottom of the docker. A new window will open.
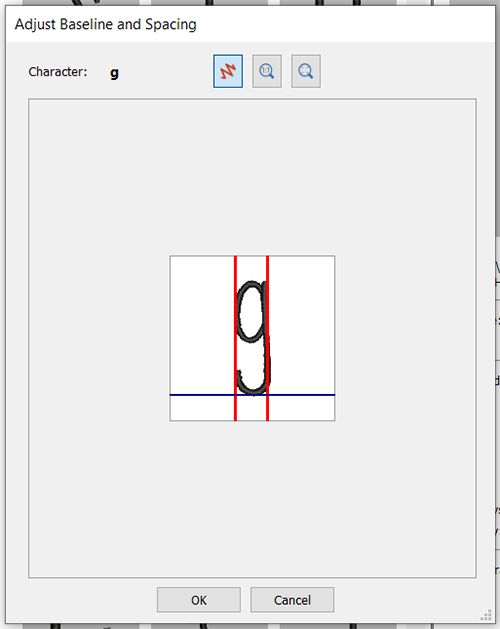
Click and drag upwards on the horizontal black line until the oval part of the letter is resting on the line. Click OK. Repeat with the letters j, p, q and y.

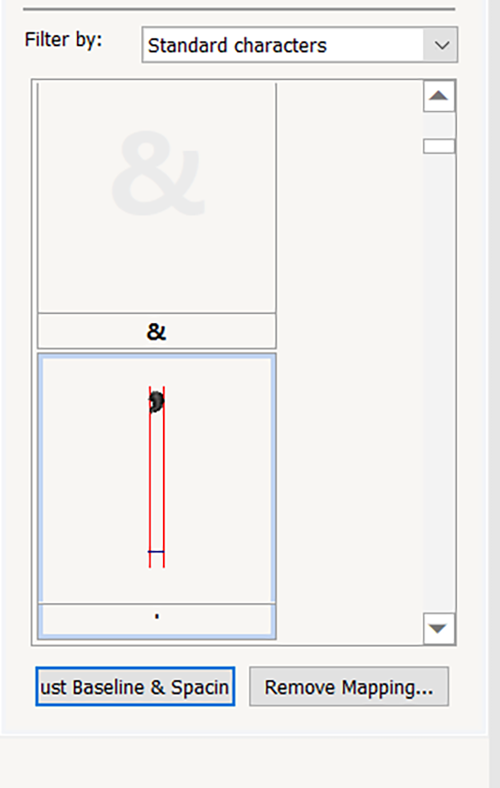
Return to Embroidery Canvas. You can also map characters from here. Click on Open Design and select design 12909-68.art. Is it a comma or an apostrophe? You can map to both, but today we are going to assign it to the apostrophe key.
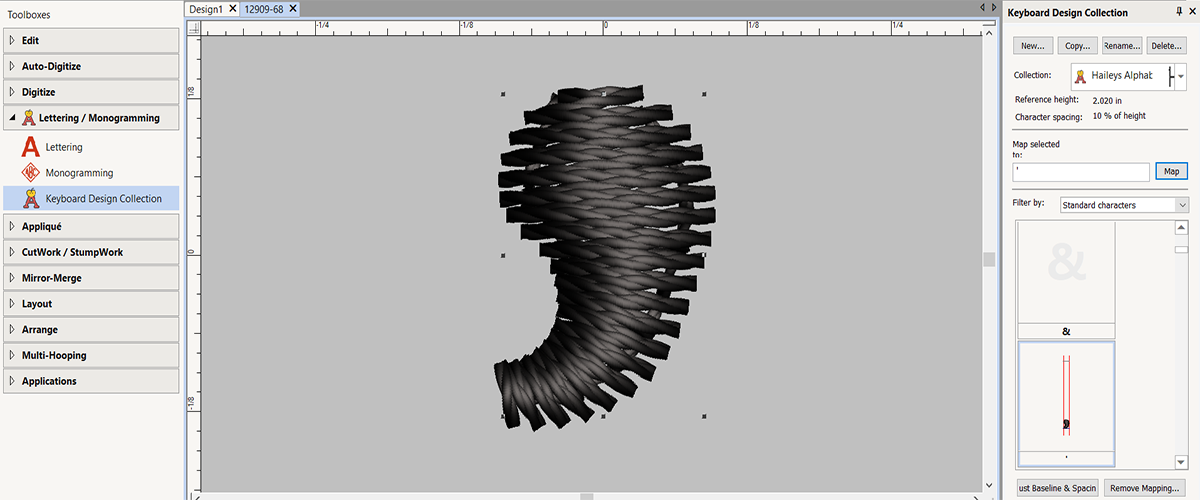
Select the design. In the Toolbox Menu, expand Lettering and click on the Keyboard Design Collection icon. This opens the Keyboard Design docker on the right side of your screen. Make sure Hailey’s Alphabet is showing in the Collection box. Type an apostrophe symbol in the Map selected to box and choose Filter by Standard characters. Click Map. Take a look at the apostrophe in the docker. Note that you are going to have to adjust the baseline.
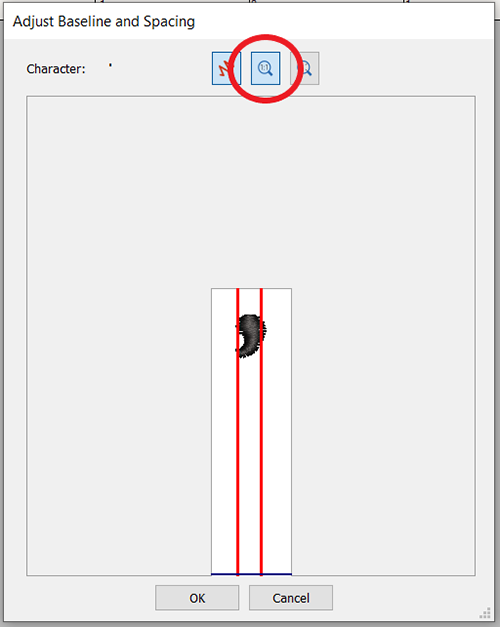
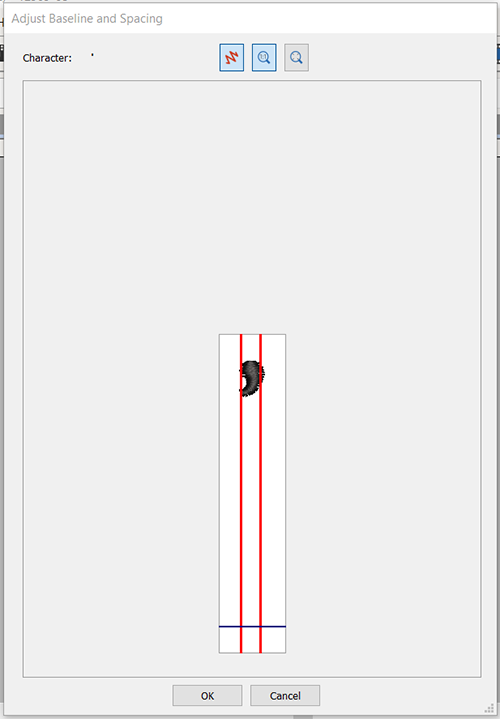
This is a multi-step process. Click on the apostrophe in the docker, and then click on Adjust Baseline and Spacing. Select the horizontal line and drag it to the bottom of the white box. Click OK. 
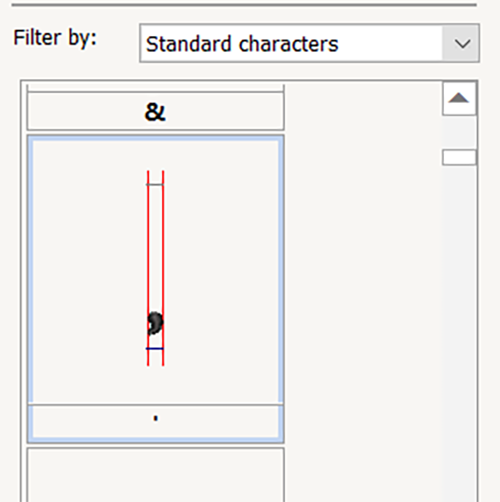
Take a look at the apostrophe in the docker and notice that it has moved up a little.
Repeat these steps until you have the apostrophe where you like it. If you find that you want it to go higher but you can’t see the black line anymore, click on Zoom 1:1, the icon will turn blue and the image in the box will change size to allow you to keep going. If you like, go ahead and map the other characters in the same manner.
Select New Blank Design. Right-click on Lettering in the Lettering/Monogramming Toolbox. This opens Object Properties. Select Keyboard design collection for Type. Then click on the drop-down arrow for fonts, and select the font you just mapped. Type in the words you wish to embroider and select Center Justification.
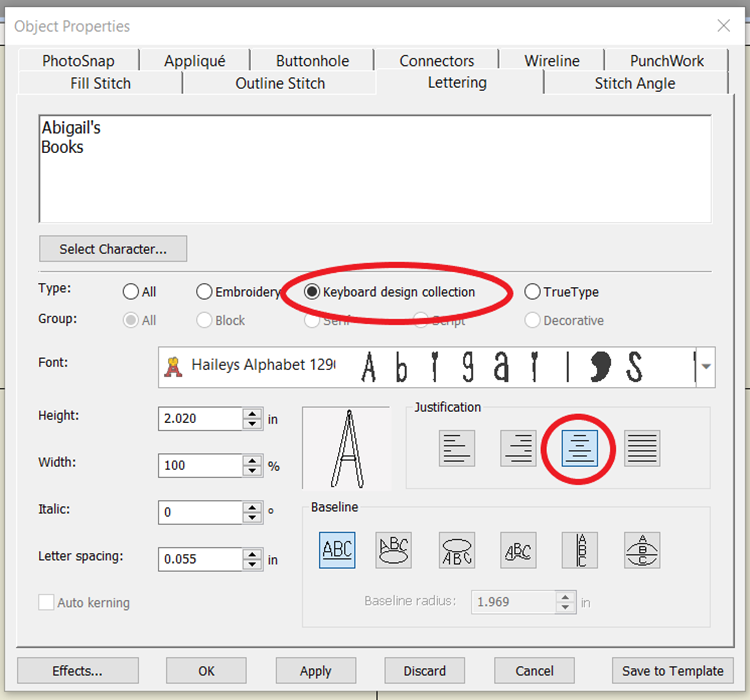
Click OK and then click on the design space to place the letters.

How about a little editing? I would like to space the letters a little more and change the colors.
Double-click on the letters to reopen Object Properties. Change the letter spacing to 0.25” and click OK.

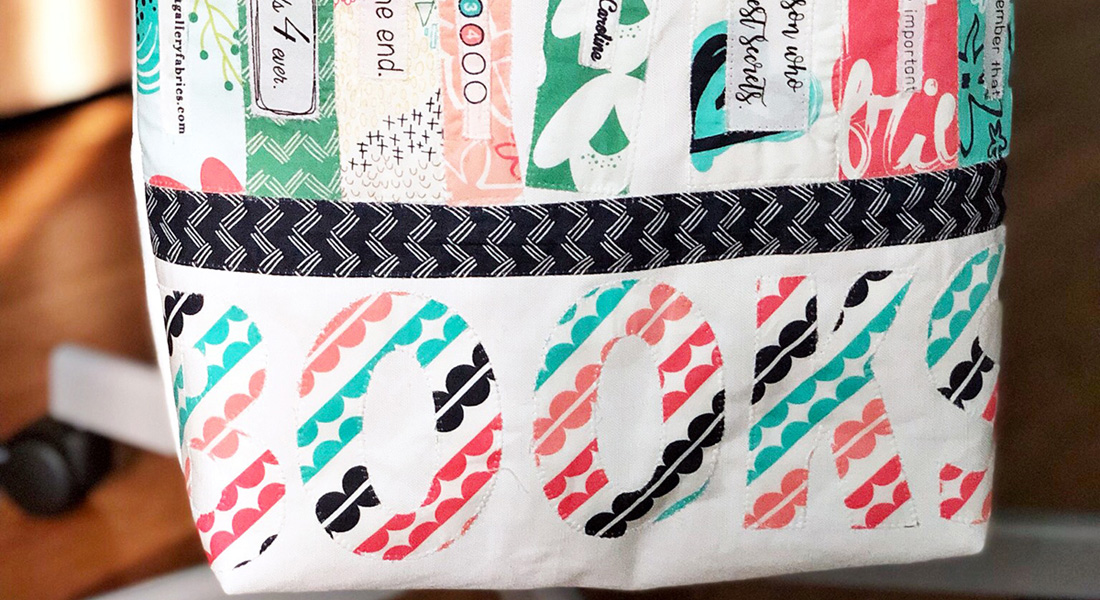
With the words selected, choose Break Apart in the Edit Toolbox. This breaks the design into two separate words. I selected “Abigail’s” and the Break Apart tool again. Now the word is broken apart by letter. I adjusted the placement of the letter “s” so that it was more visually pleasing to me.

Add colors as you desire. I used Isacord 2508 for Abigail’s and 2900 for Books. I broke apart the letter i’s and changed the hearts to 2900, too. Re-group the letters in words you broke apart and realign as necessary. To optimize color changes, click on Design in the General Toolbar and select Optimize Color Changes and click OK. I ended up with only one color change.

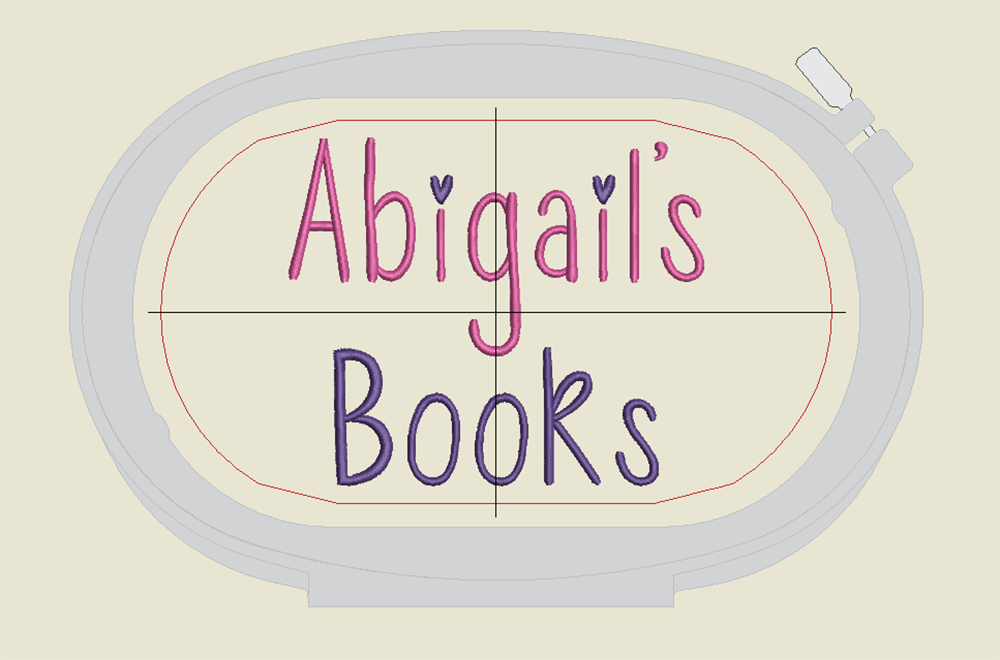
Right click on the Show Hoop icon and select the Large Oval Hoop. This is the same size as the Large Oval Freearm Hoop.
Note: On the template, will see a dashed line on the right hand side. Because of the free arm attachment, there is a slight reduction in embroidery space on the 5 Series machines. Adjust your design as needed to accommodate for this. Click OK. Click on Rotate Hoop Left 15⁰ until the clamp on the hoop is BELOW the letters. When you hoop the tote bag, the opening is going to be on the RIGHT hand side. Save the design and export to your machine.
Embroidering the Tote Bag
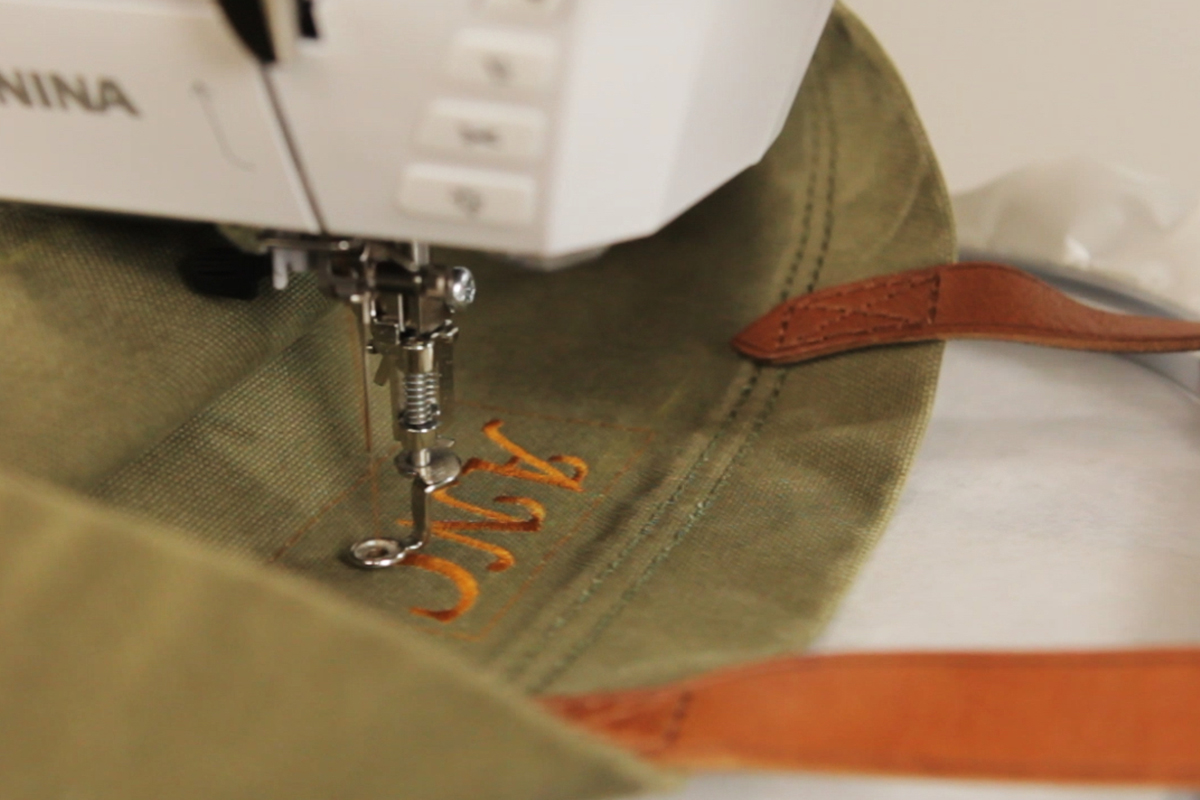
Consider size when choosing a bag to use with the Large Freearm Embroidery Hoop. My tote bag had a 13 1/2″ opening and the outer ring of my hoop just fit inside. Mark where you want to place your design and hoop with OESD Ultra Clean and Tear Stabilizer. Slide the outer ring of the hoop into the bag and insert the inner ring on top. Use the included template for improved accuracy.
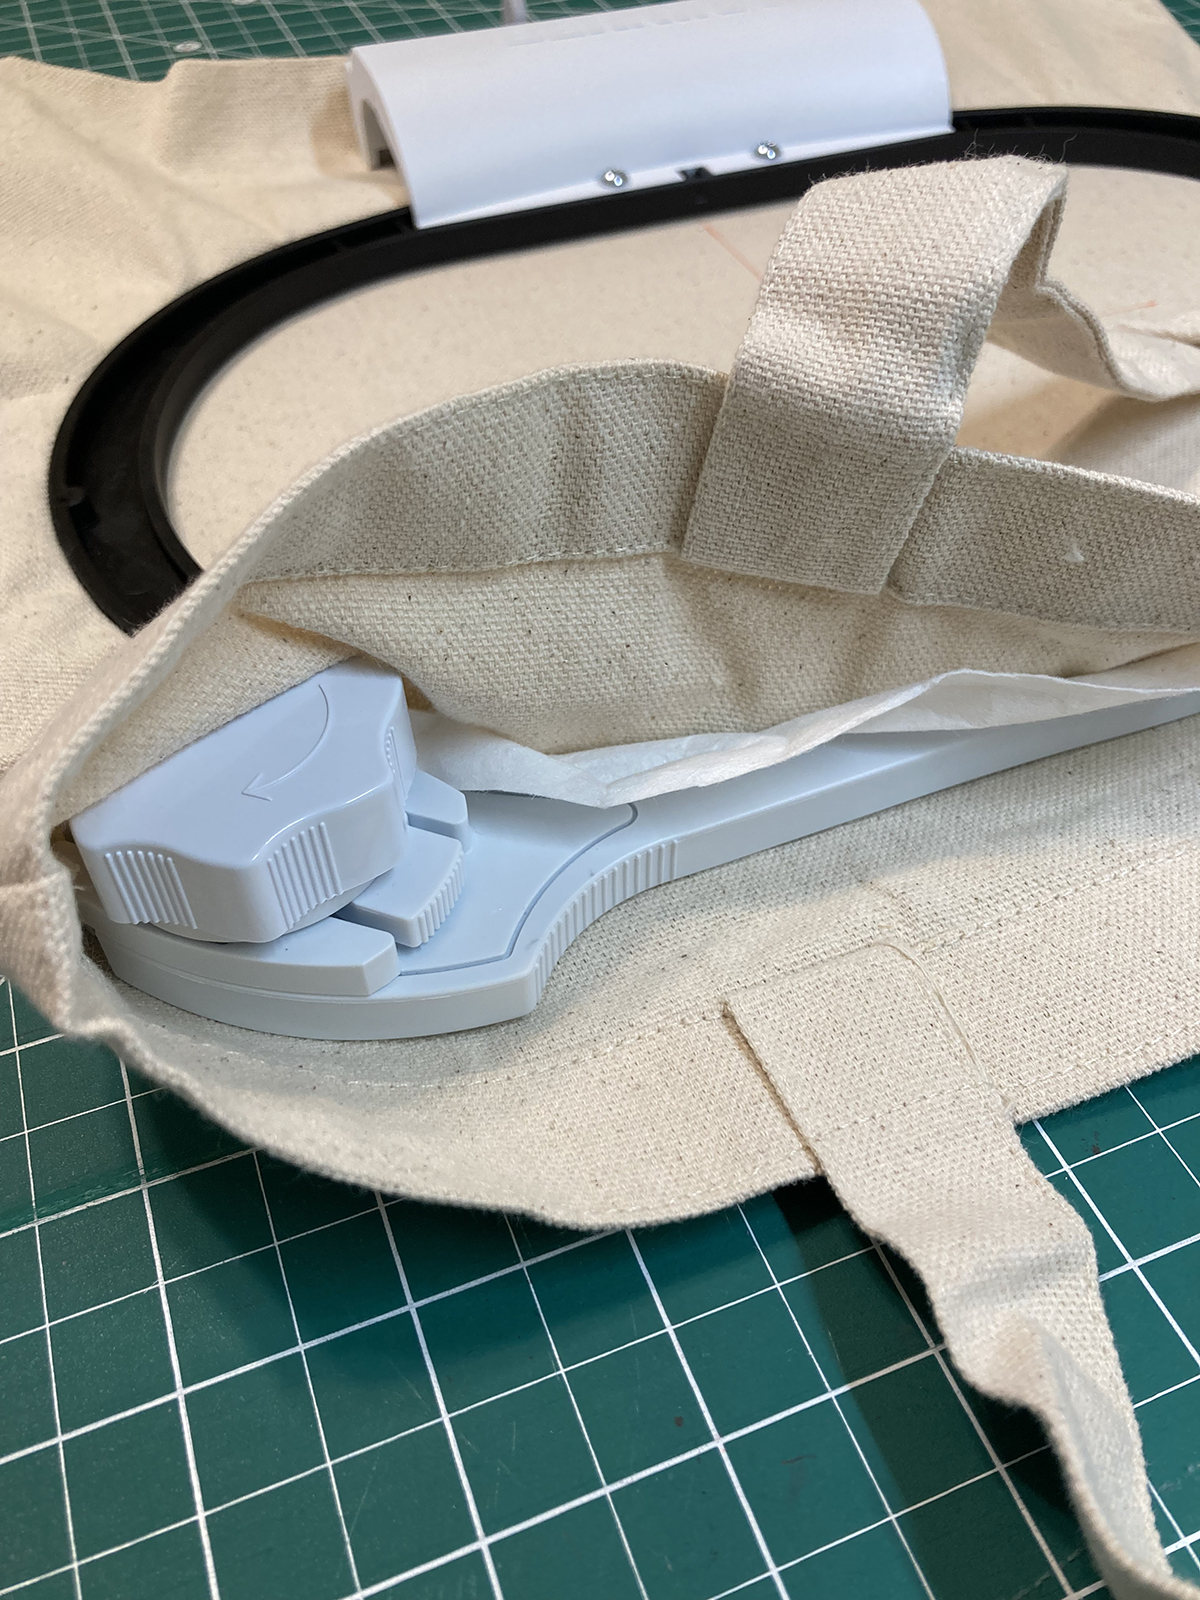
Attach the hoop so that the freearm part of the machine is inside the tote bag.
Note: With the Freearm Hoop, it is easier to load your bobbin BEFORE you get your hoop attached. You will also want to park your module to the far left, position your hooped bag around the machine’s freearm and then bring the module arm back into position.
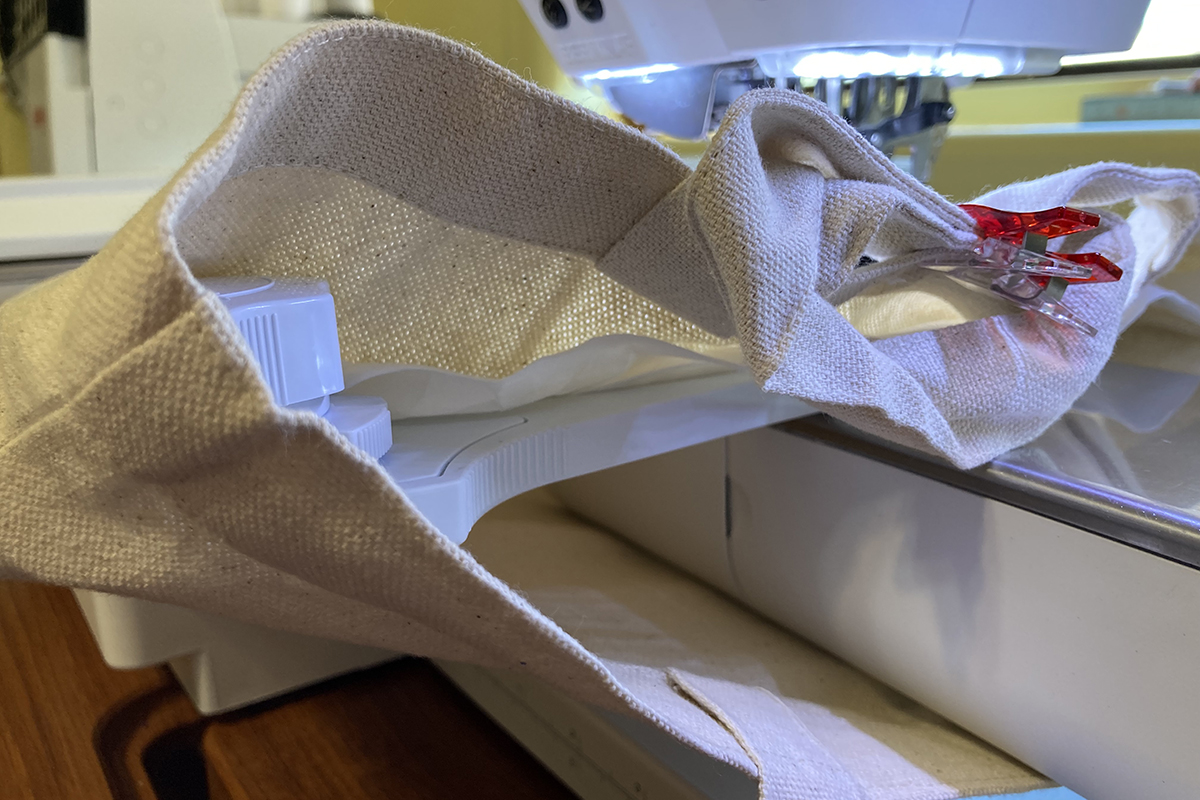
Notice that I used some clips to secure the handles of the bag so they would not accidentally get caught in the stitching. Use Pinpoint Placement to fine-tune the position of your design.
Now it’s time to get stitching! I think it’s fabulous that I don’t have to un-sew my bag before embroidering!

This hoop is perfect to use with the Freearm on your embroidery machine when embroidering on tubular items such as pre-made bags or T-shirts. The ergonomic twist-lock mechanism allows you to hoop easily and the click lets you know you have tightened the hoop enough. Click on this link for the hoop to see the compatible BERNINA embroidery machines. Also, check for firmware updates for your machine so that it will recognize the hoop.
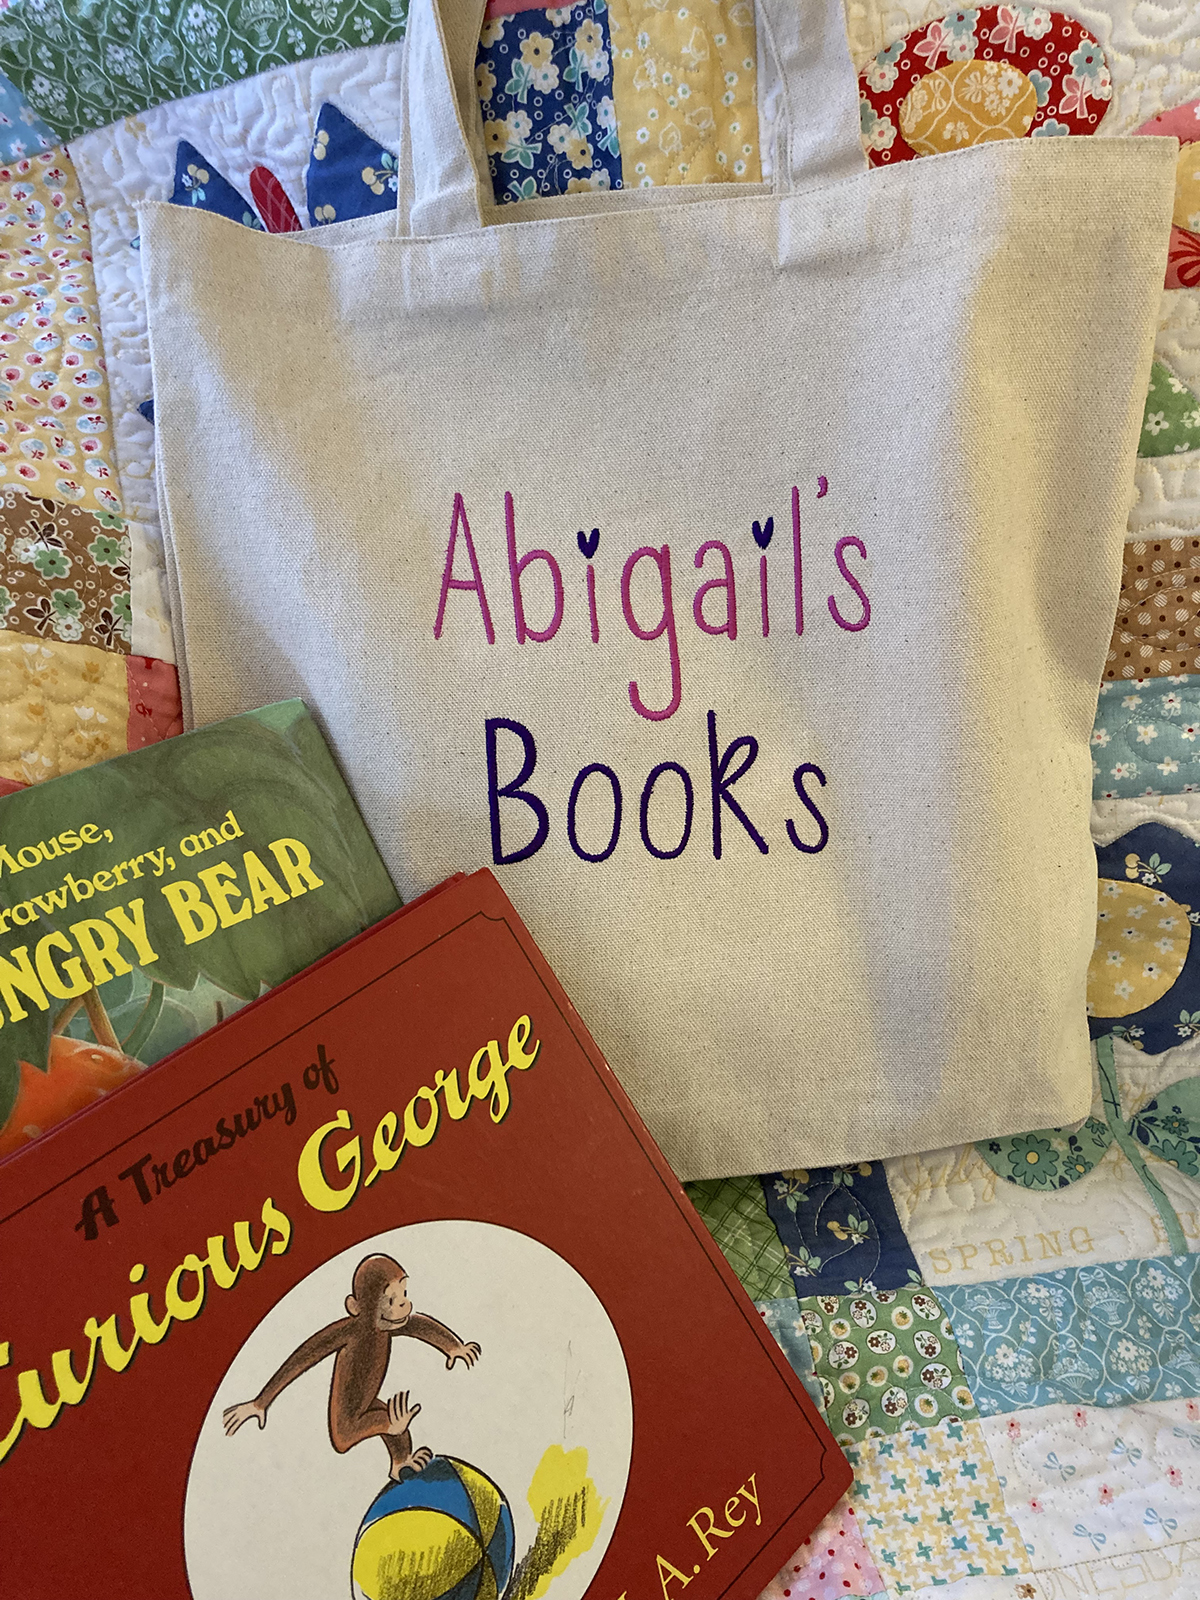
And there you have it…a custom tote bag for your favorite person (or yourself!).
I’d love to see what you create! Be sure to tag your picture on social media with @BERNINAUSA. Happy stitching!


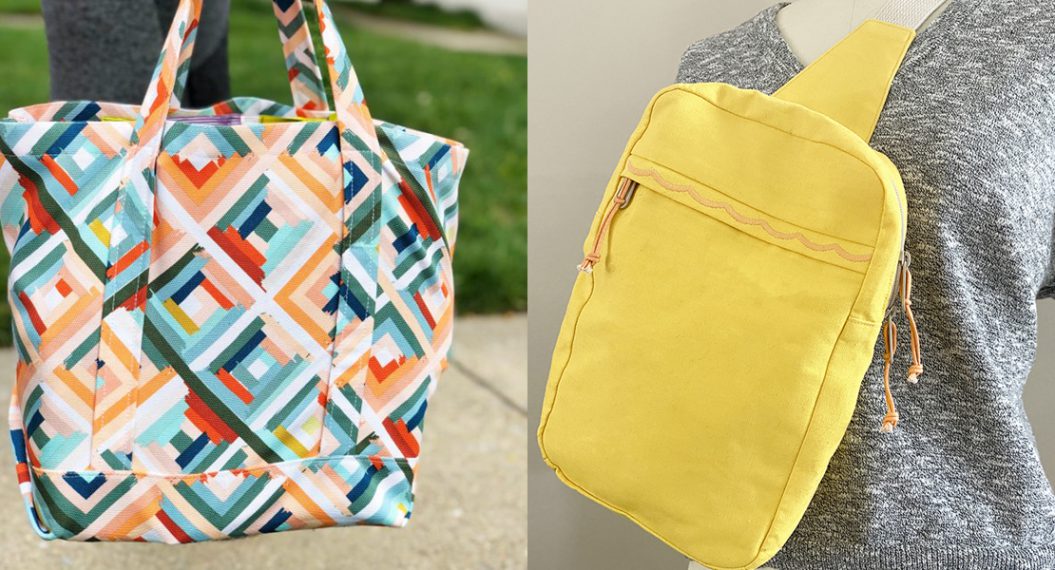
What you might also like


2 comments on “Keyboard Lettering Tote Bag”
-
-
pillowcases for grandkids
Leave a Reply
You must be logged in to post a comment.

Love these tote bags, made a few already