Sew an Ugly Christmas Sweater Ornament
The ugly Christmas sweater has become a holiday tradition. In fact, in the U.S., the third Friday in December is National Ugly Christmas Sweater day!
You can also adorn your tree with an ugly Christmas sweater when you stitch up this easy-to-sew ornament. You get to decide if your sweater will be gaudy and garish, or cute and charming. After all, ugly Christmas sweaters don’t have to be ugly.
Hello everyone! It’s Sharon with Sharon Sews, and you can connect with me on YouTube, (Sharon Sews) Instagram (@TheSharonSews) and my blog, (Sharon Sews) where I share sewing tips, projects, reviews, and fashion sewing ideas.
This ornament also makes a great gift for family and friends. Gather your fabric scraps, buttons and trims and let’s sew an ugly Christmas sweater ornament!
Materials to Sew the Ugly Christmas Sweater Ornament
- Quilting cotton
- 5″ x 10″ for ornament front and back
- 3-1/2″ x 3-1/2″ for sweater appliqué
- White and orange fabric scraps for snowman
- Batting – 5″ x 5″
- Ribbon – 8″
- Two 1/4″ black buttons
- Contrasting or coordinating thread
- Paper-backed fusible web
- Tear-away stabilizer
- Pencil
- Pins or clips
- Scissors
- Pinking shears
- Iron and ironing board
- Printer and paper (to print template pieces)
- Sewing machine – I used my BERNINA 770 QE PLUS

Steps to Sew the Ugly Christmas Sweater Ornament
Cut Fabric and Batting
Download the PDF Template and print.
Using the circle template, cut two circles from fabric and one circle from batting, then set aside.
Appliqué the Sweater
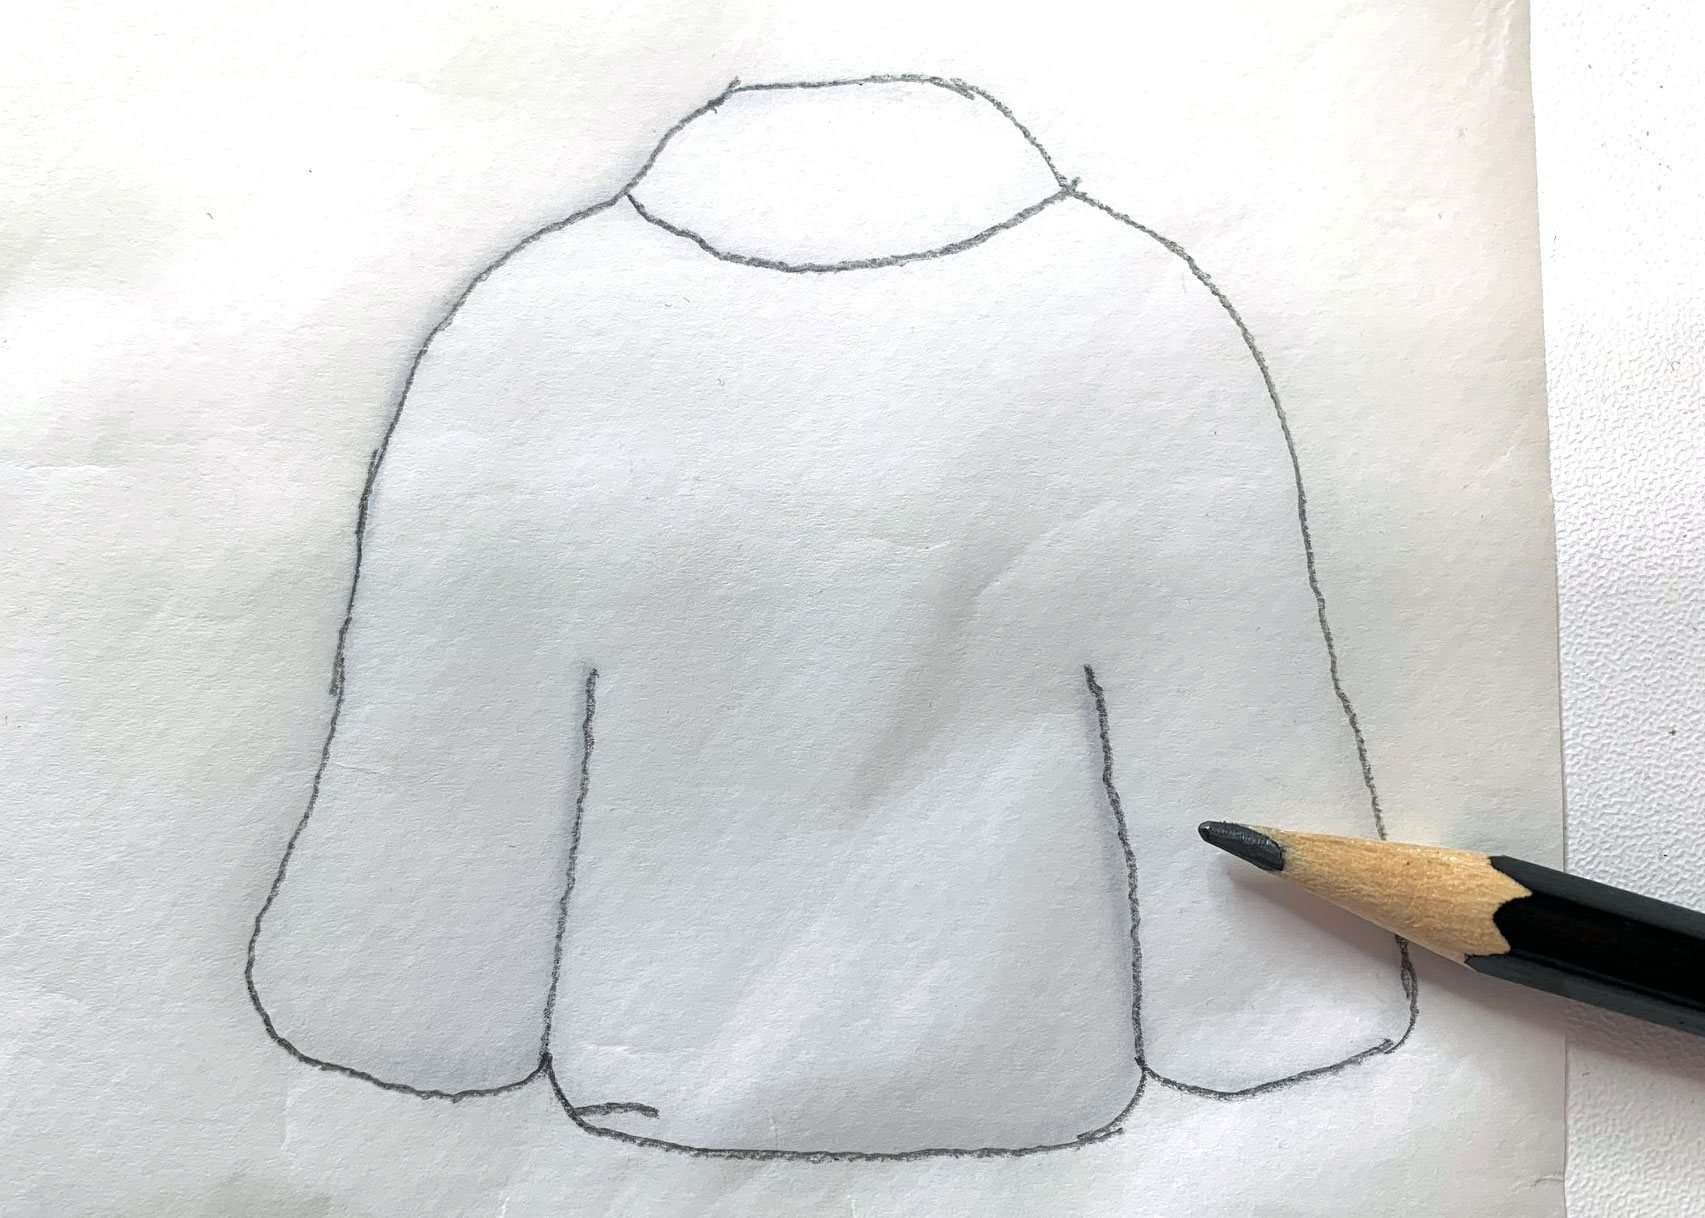
Trace and Apply the Sweater to the Circle
Place the fusible web paper backing with the paper side up (bumpy side will be down) over the sweater template. Trace using a pencil.
Tip: Don’t use a pen as the ink could bleed onto your fabric.
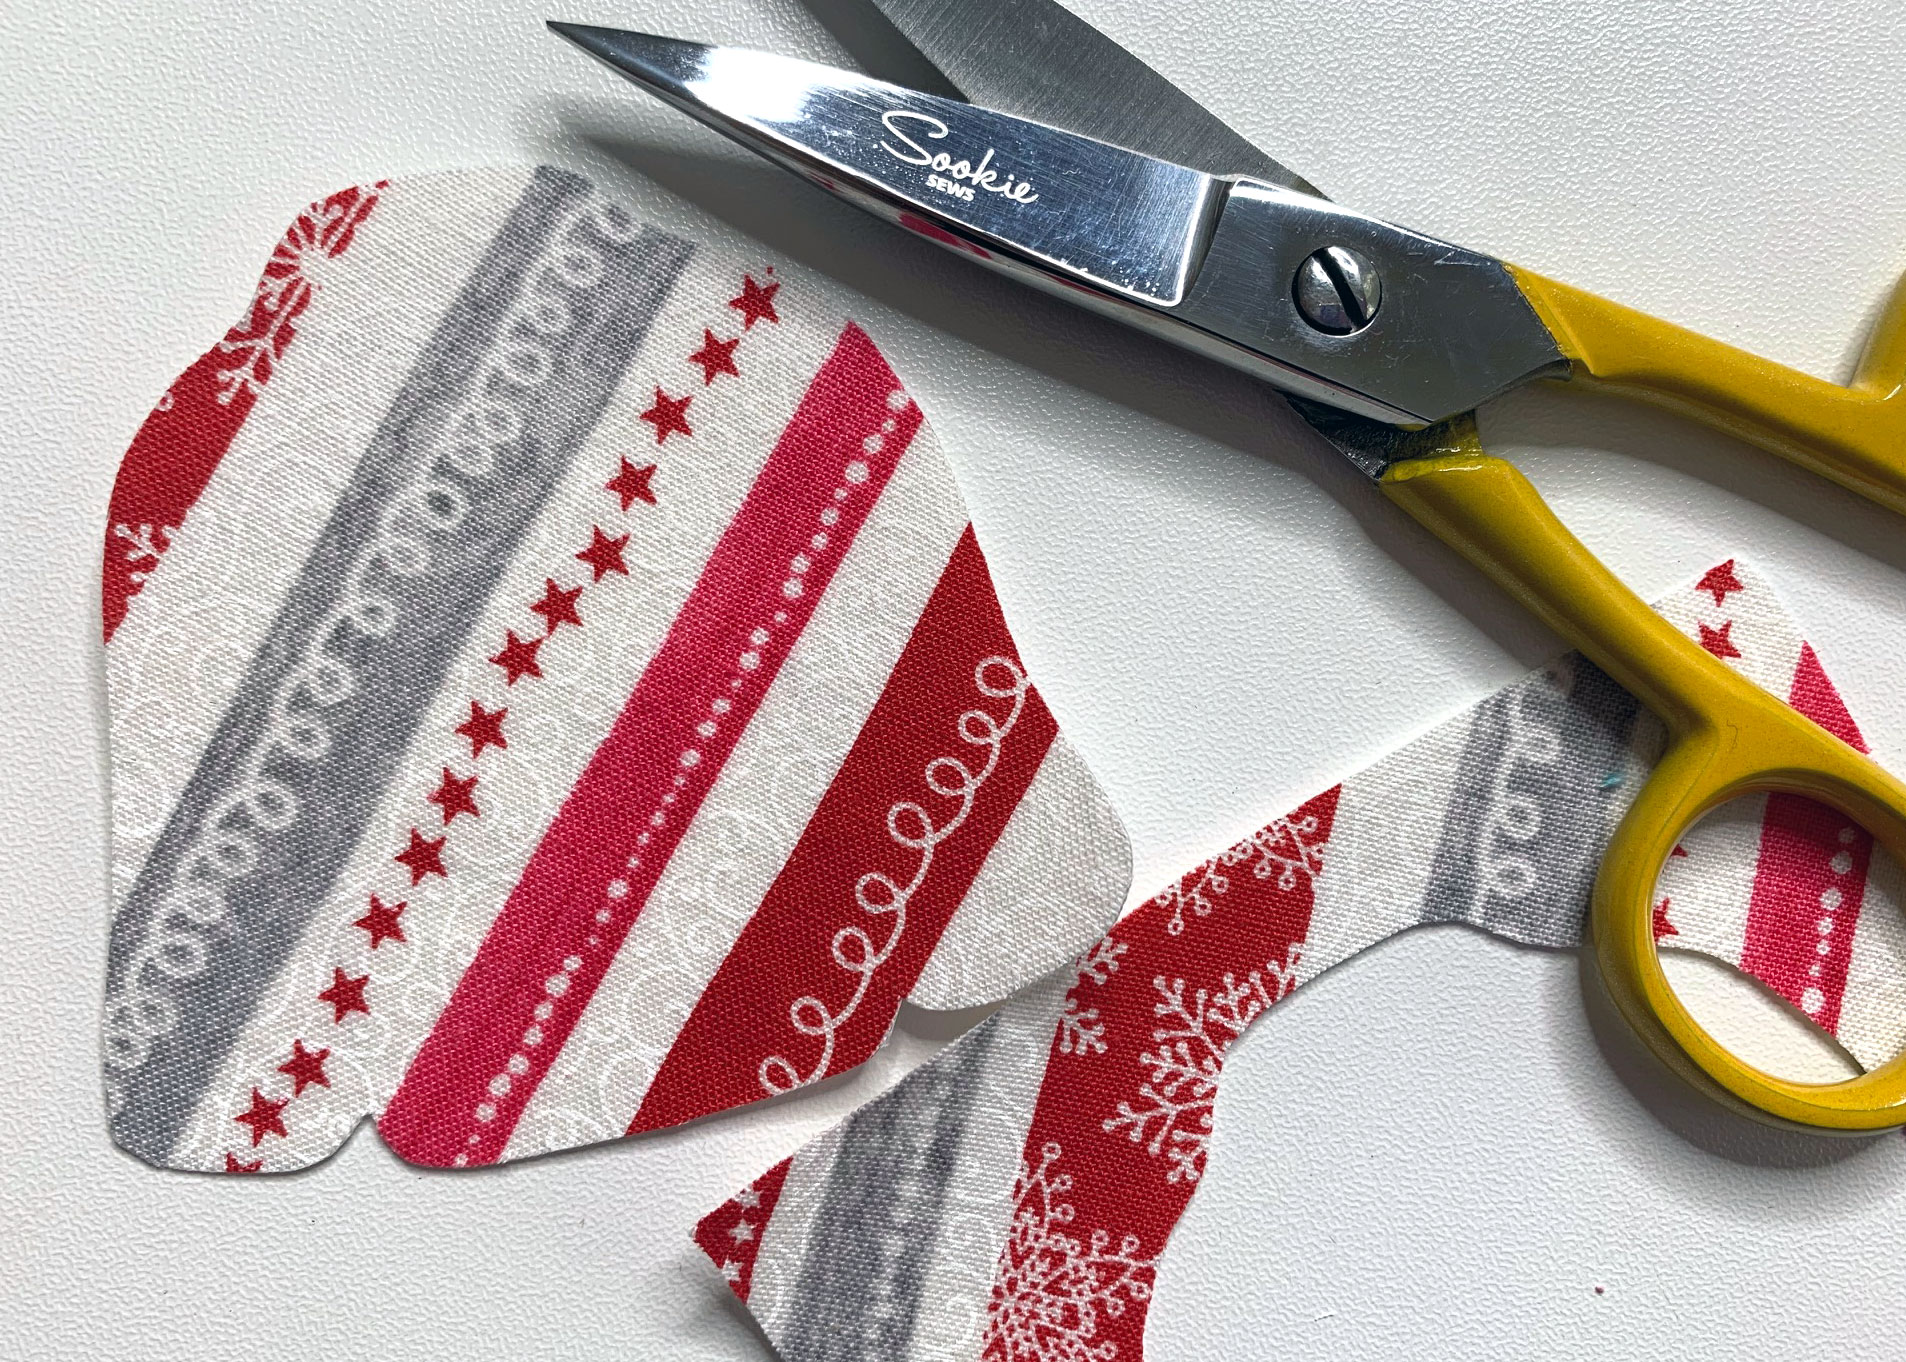
Following the manufacturer’s instructions, fuse the sweater to the wrong side of fabric and cut out.
Tip: I like to use my 5-1/2″ Sookie Sews All-Purpose Craft scissors as I get a clean and controlled cut. They were provided by Brewer.
Using a pencil, lightly mark the lines for the sleeves and neck band following the guidelines on the template.

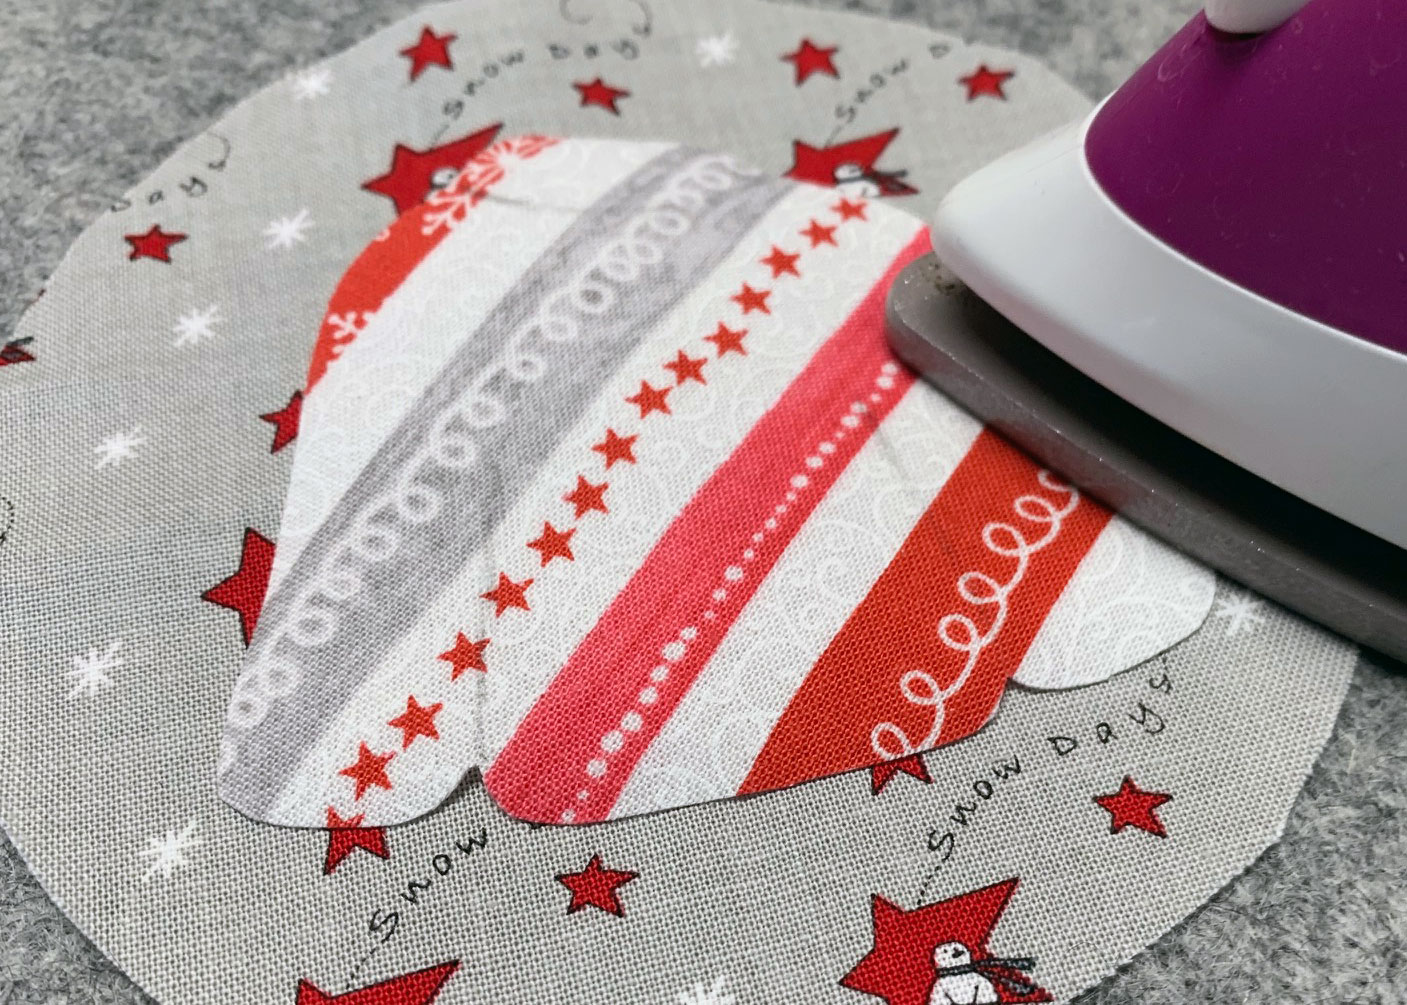
Remove the paper backing. Center the sweater on the right side of one fabric circle and fuse in place following the manufacturer’s instructions.
Machine Appliqué the Sweater
Iron a piece of tear-away stabilizer to the back side of the circle to help prevent the appliqué stitches from puckering.
Thread your machine with a contrasting thread to appliqué the sweater. I used a silk-finish cotton multi 50wt from Mettler.
Tip: If metallic thread is used, be sure to use a needle designed for metallic thread.
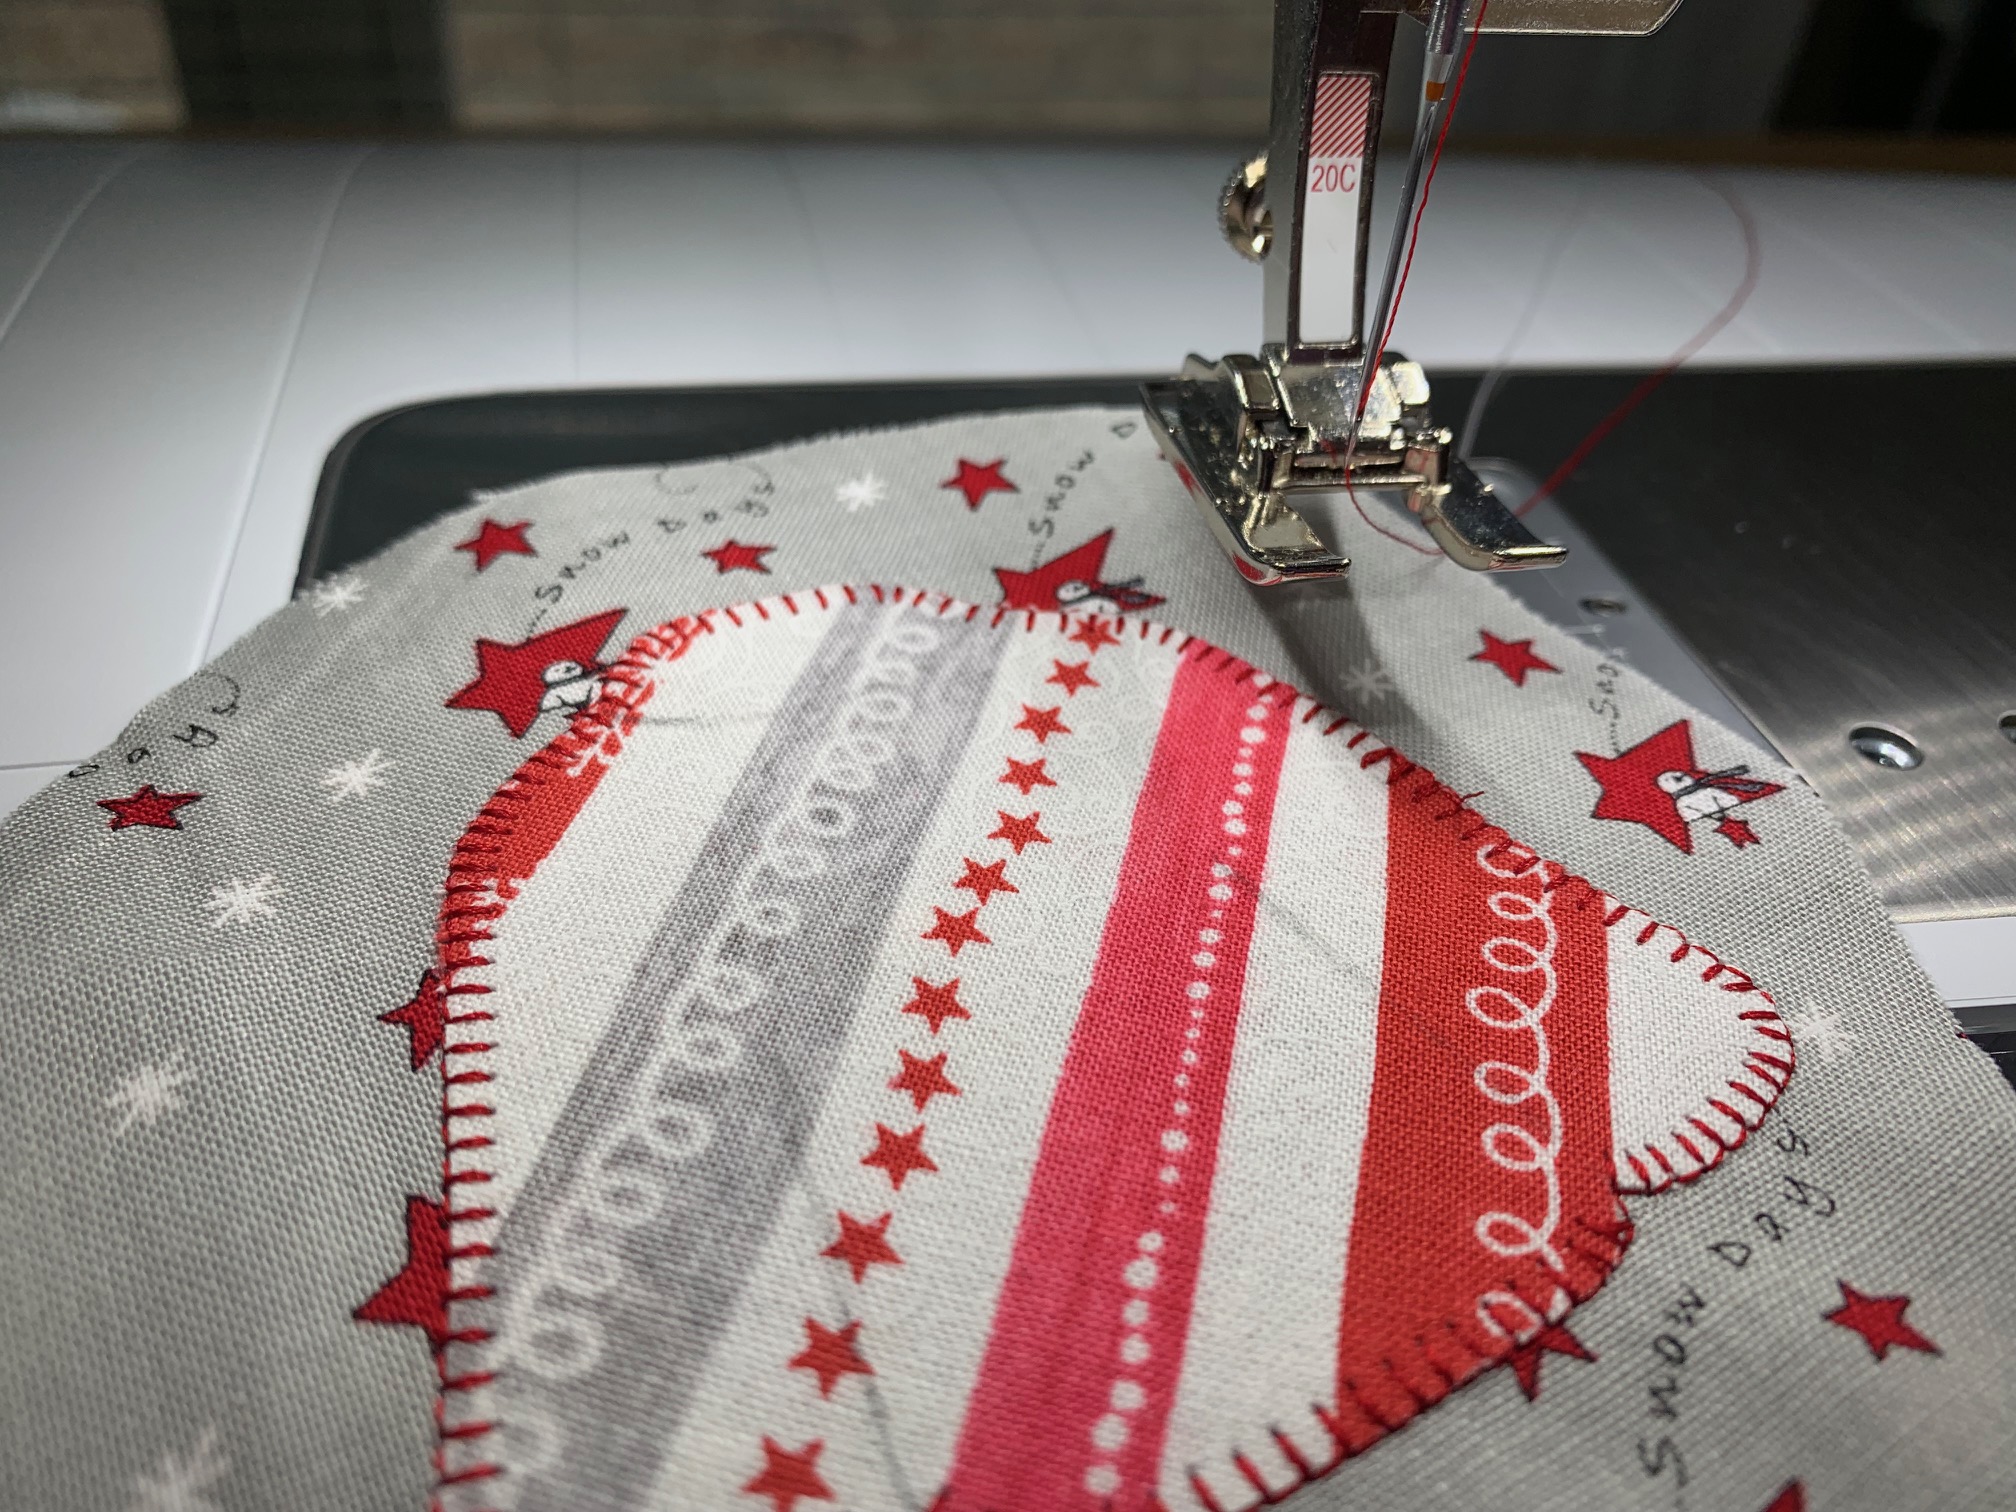
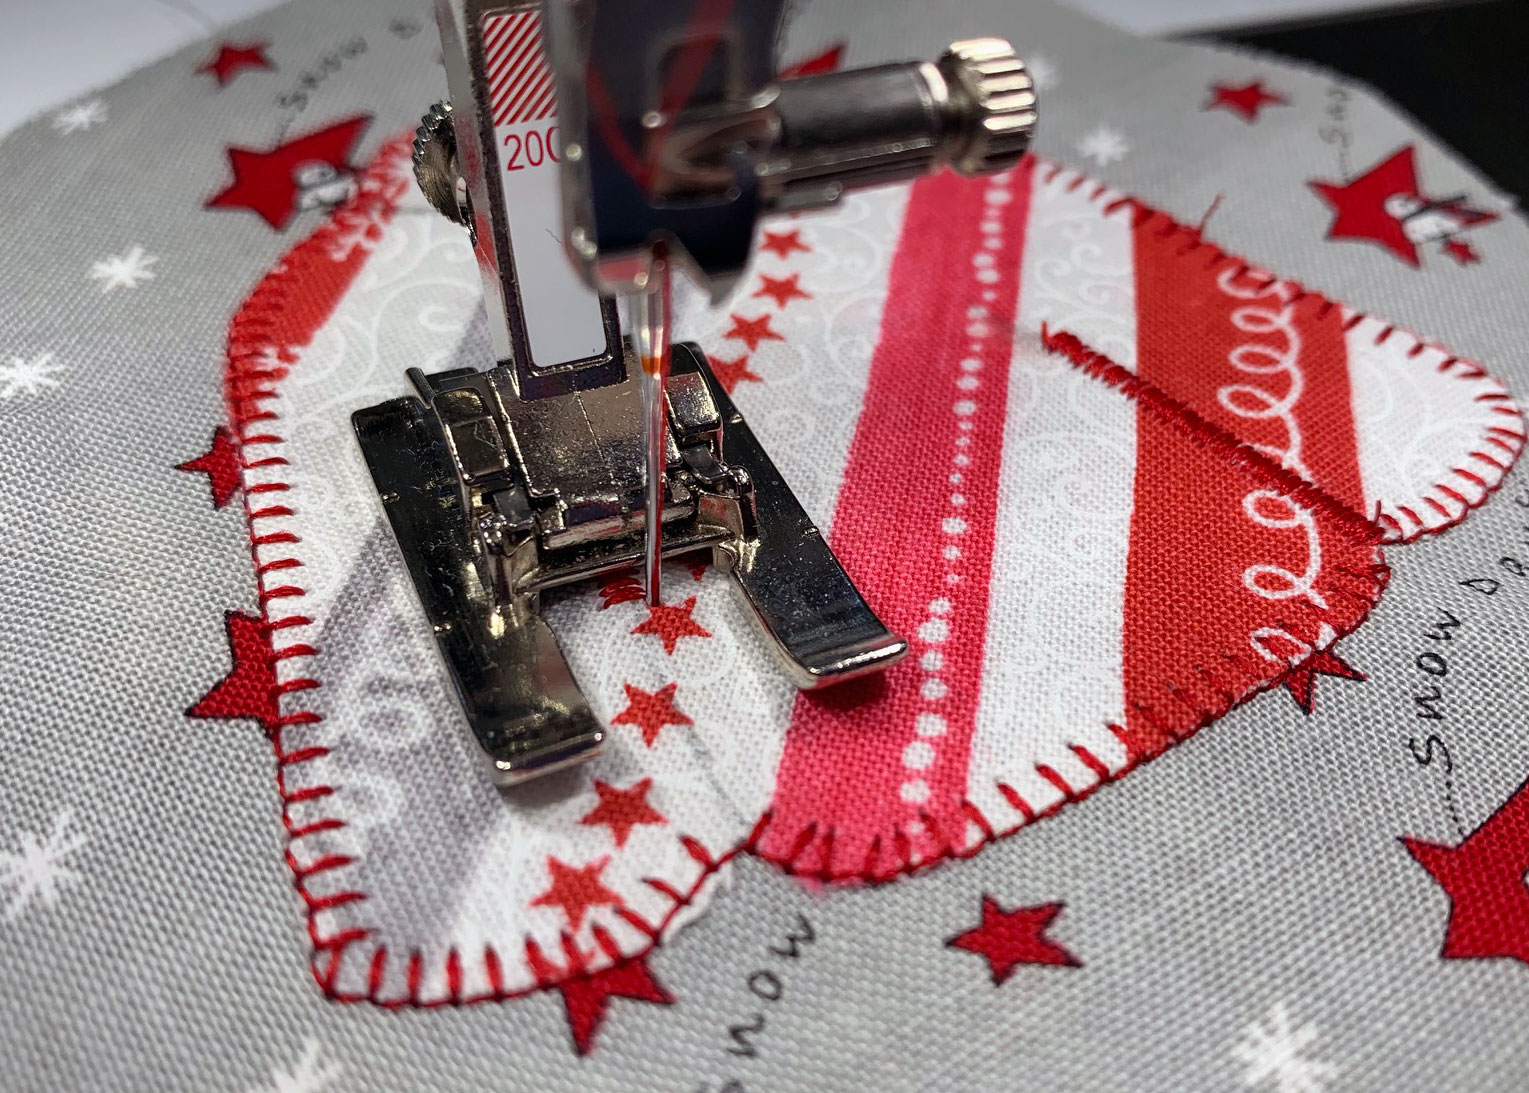
Put on an open-toe appliqué foot. I used the BERNINA Open Embroidery Foot #20C as the wide opening at the front allowed me to easily see my stitching area.
Set your sewing machine for a small blanket stitch. On my BERNINA 770 QE PLUS, I used stitch number 1309, under the quilting stitches section. Make sure the length is set to 2.0 mm and the width to 2.3 mm.
Set your machine for a needle-down position so the needle will stop down in the fabric when you need to pivot.
Make sure the left swing of the needle is on the sweater and the right swing is on the circle fabric.
Tip: Experiment on a sample piece of fabric first to determine the exact width and length to use on your machine before you begin to appliqué.
Tip: Stitch slowly for more control. Your knee lift comes in handy as you can lift the pressure foot just enough to rotate the sweater as needed while you appliqué.
Change the stitch on your machine to a satin stitch. On my machine it is stitch number 1315, under the quilting stitches section, with a length of 0.30 mm and a width of 2.5 mm.
Stitch over the pencil lines to define the sleeves and neckband.
Appliqué the snowman to the Sweater
Trace and Apply the Snowman to the Sweater
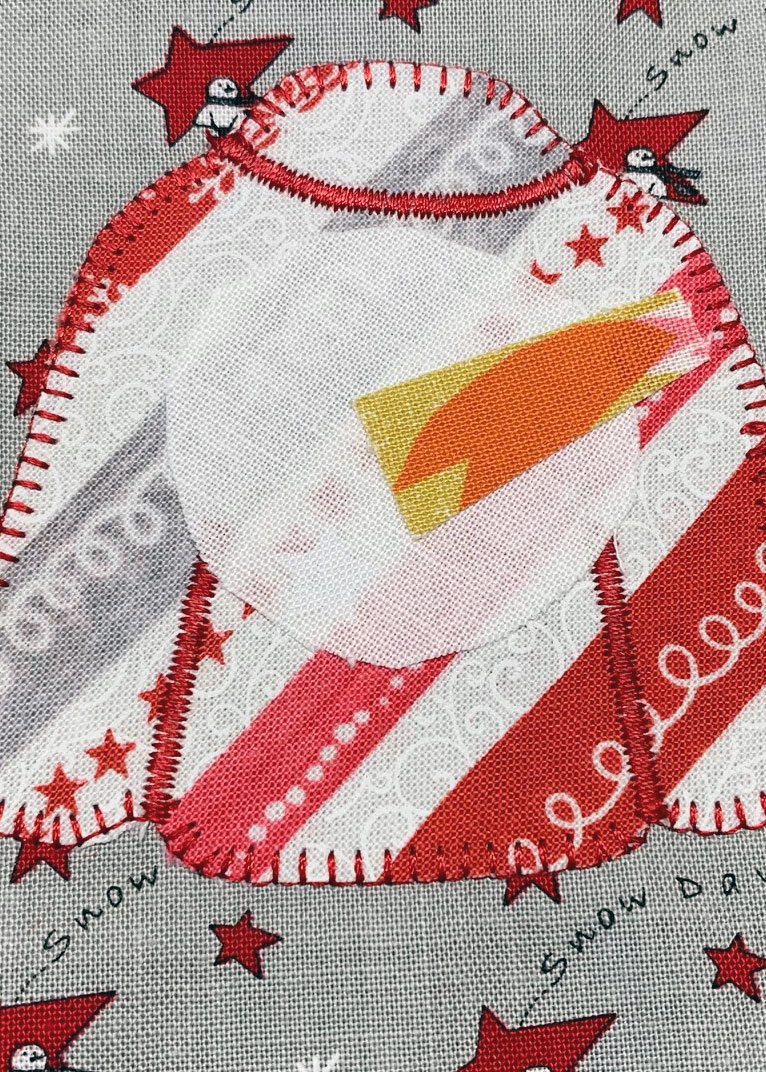
Place the fusible web paper backing with the paper side up (bumpy side will be down) over the snowman head (small circle) and nose. Trace using a pencil.
Following the manufacturer’s instructions, fuse the head and nose to the back side of fabric. Cut out the head and nose and fuse to the sweater. Use the photo as a guideline for placement.
Machine Appliqué the Snowman
Using a pencil, lightly trace the snowman’s smile onto the head.
Thread the machine with black thread and stitch over the pencil marking using a narrow satin stitch.
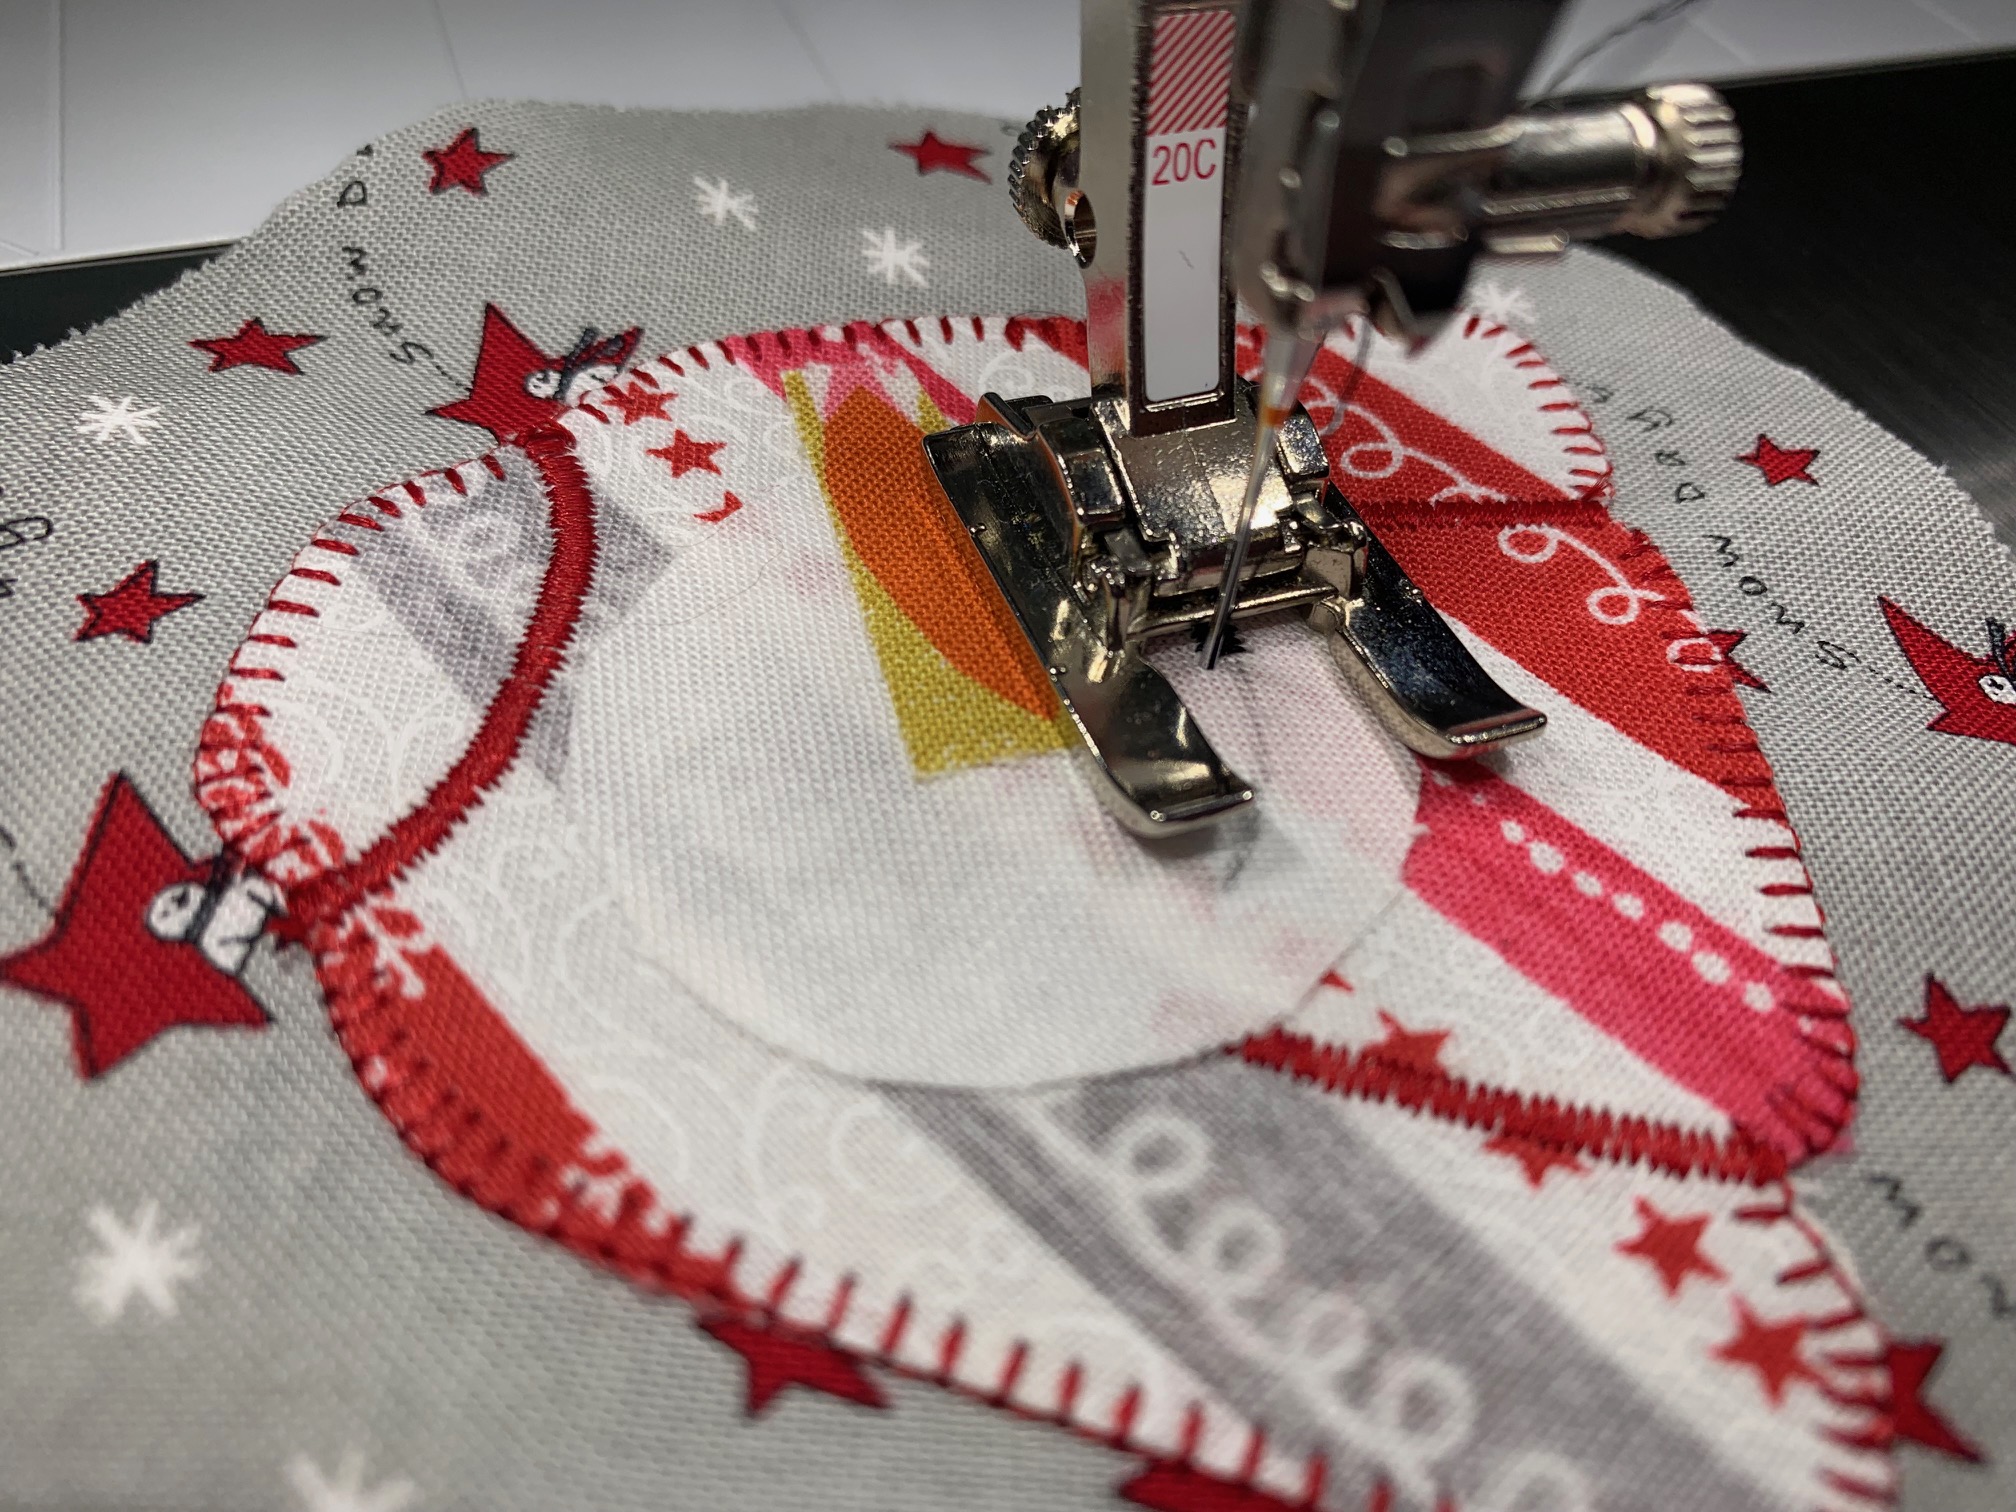
Thread the machine with white thread. Change the stitch back to a small blanket stitch and stitch around the small circle.
Thread the machine with orange thread and stitch around the nose using a small blanket stitch.
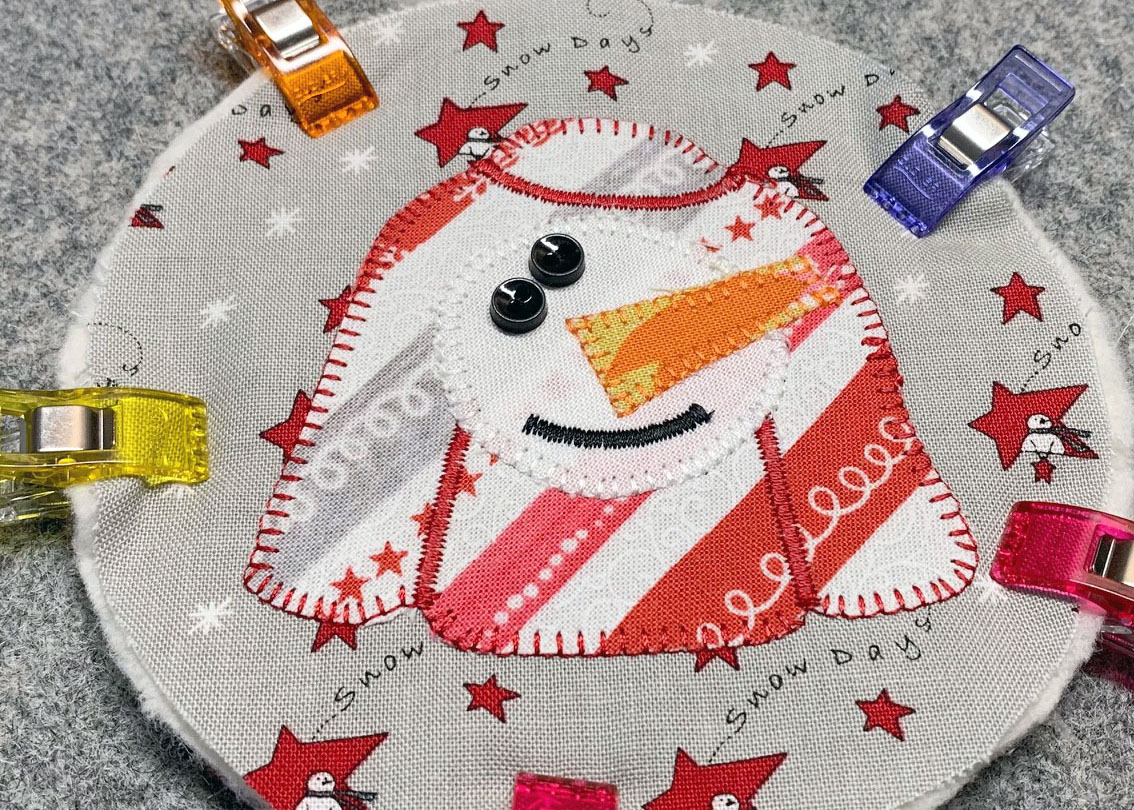
Hand-sew two small black buttons to create the snowman eyes..

Remove the stabilizer from the back of the circle.
Tip: I like to use my Sookie Sews angled precision tweezers to help remove the interior parts by gently pushing through the paper backing. The tweezers were provided by Brewer.
Finish the Ugly Christmas Sweater Ornament
Sandwich the batting between the front and back circles. If desired, use a temporary spray adhesive to secure the layers in place.
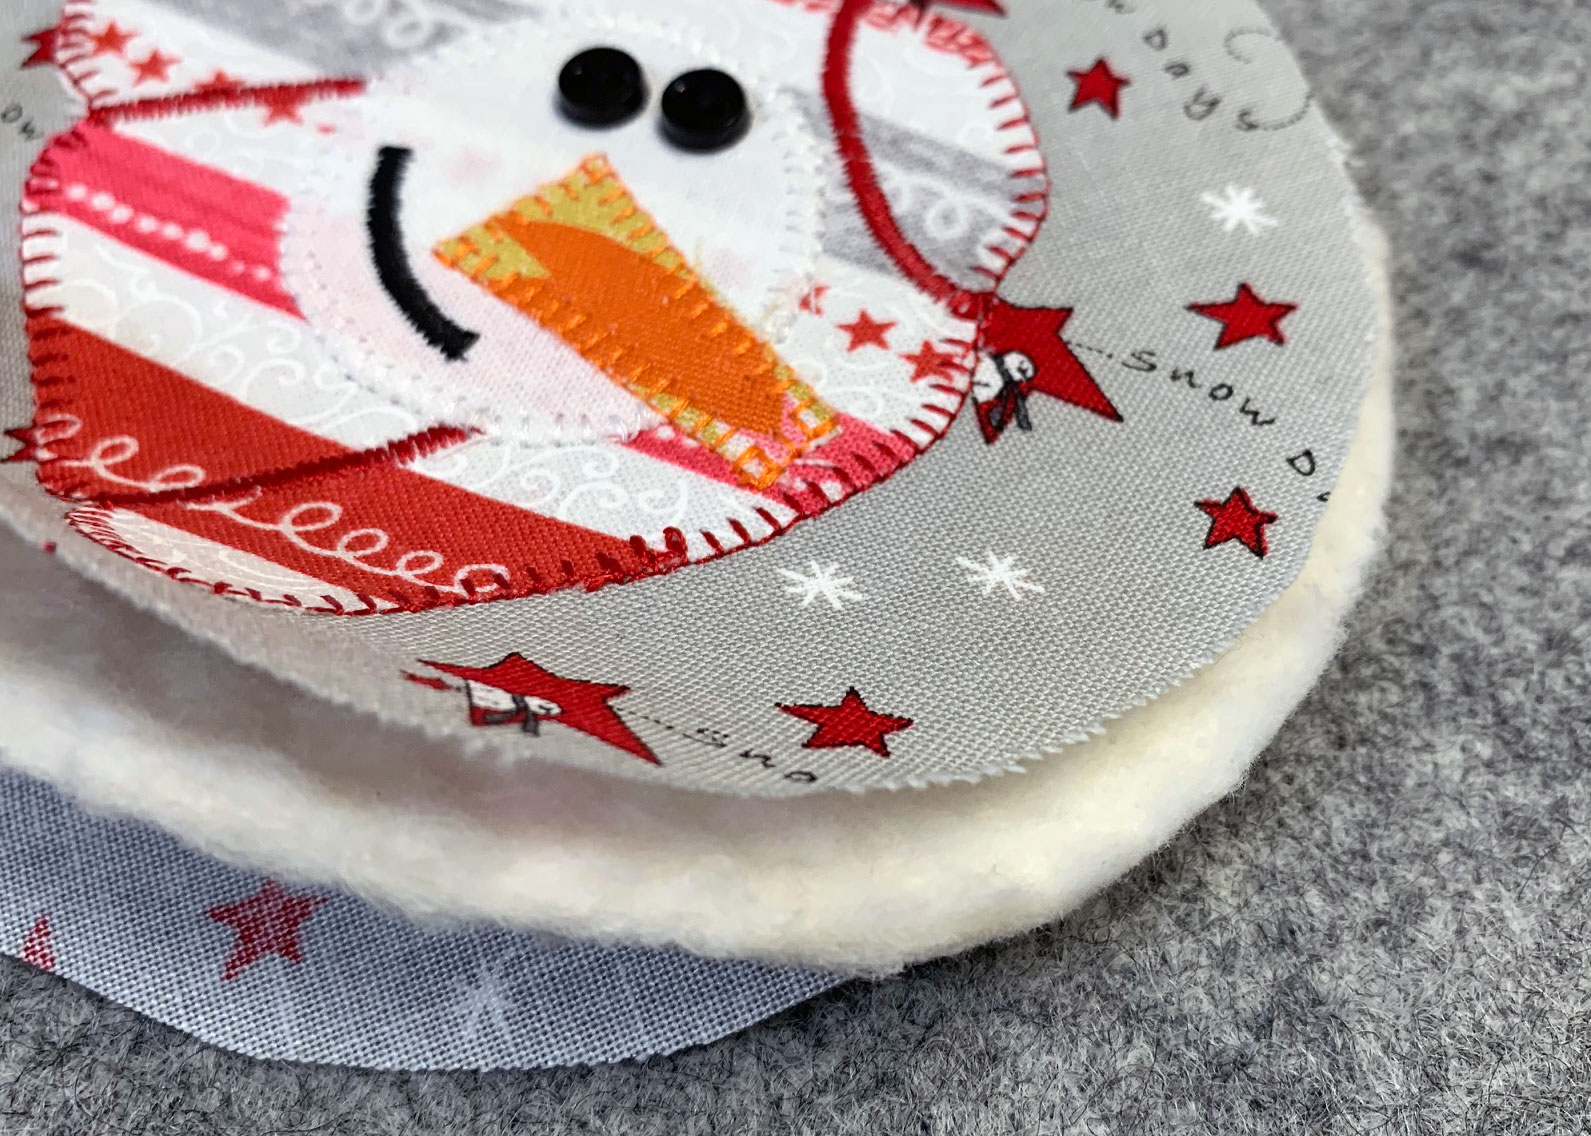
Clip, or pin, the three layers together before stitching.
Set the machine for a 3.0 mm straight stitch. Stitch around the circle 3/8″ from the edge through all three layers, leaving a 1″ opening at the top. The opening is where the hanging loop will be added.
Use pinking shears to trim away the outer edge of the circle.
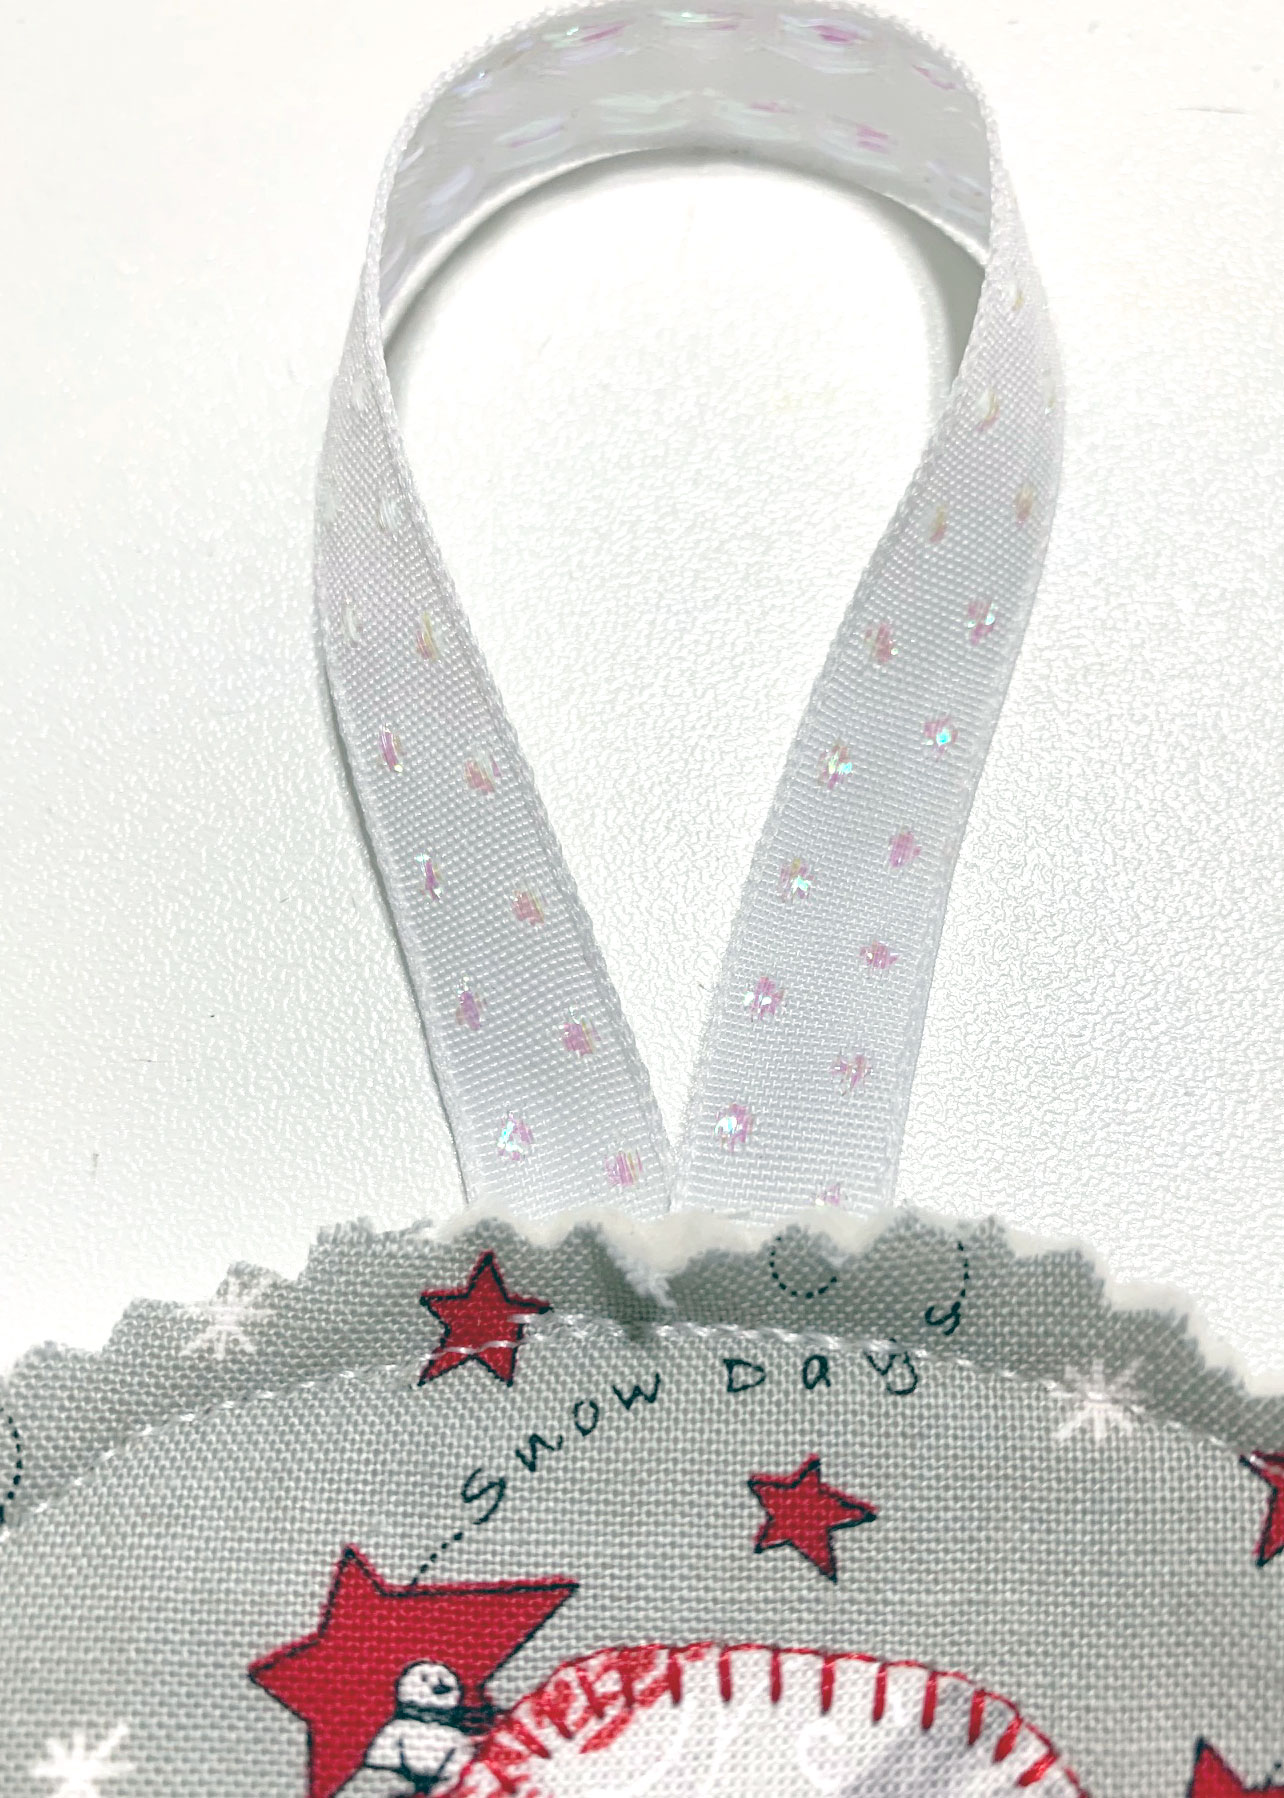
Cut a piece of ribbon 8″ long for the hanging loop. Fold the ribbon in half to create a loop. Insert between the batting and back circle about 1″, pin in place, then stitch the 1″ opening closed.
Additional Embellishment Ideas for the Ugly Christmas Sweater Ornament
Because ugly Christmas sweaters can be as cute or tacky as you wish, go ahead and add as much additional trim as you like.
On these snowman appliqués, a small piece of trim was added to the body of the sweater.
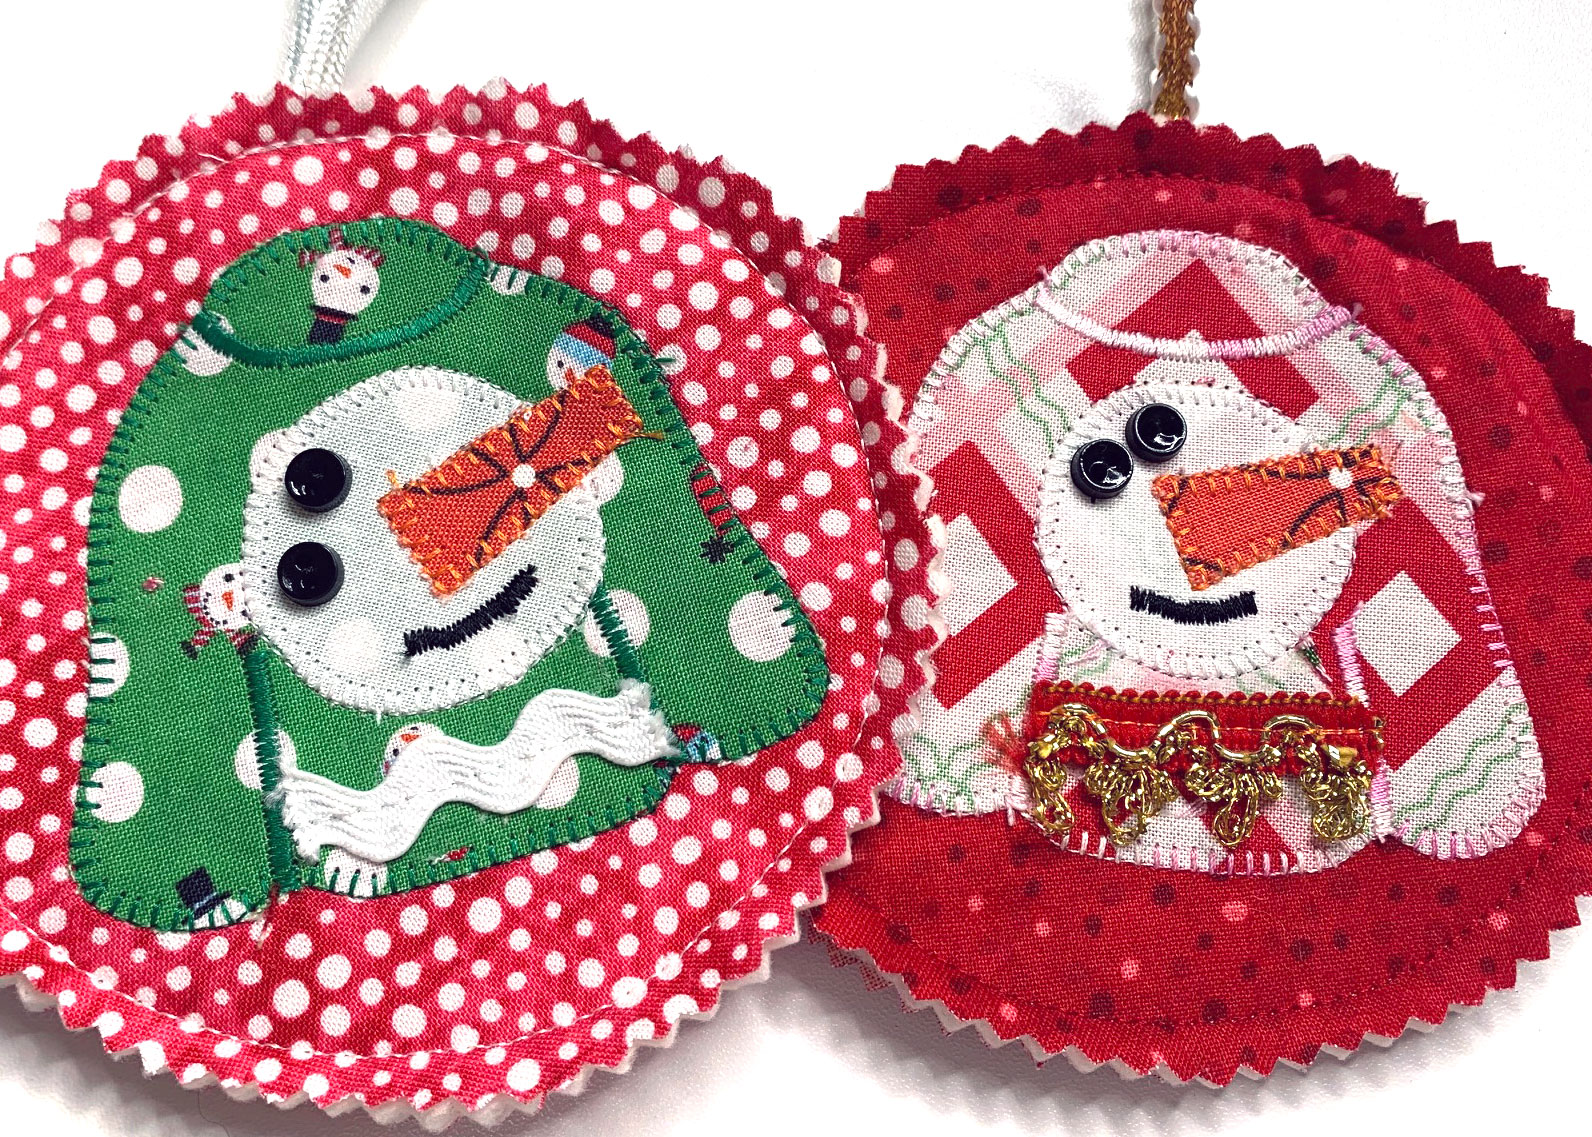
For additional to embellishment on the ornaments I traced the shape of mini cookie cutters.
On these ornaments, a stocking was appliquéd on the sweater. Trim was then added along the top of the stocking and on the sleeves defining the cuffs.
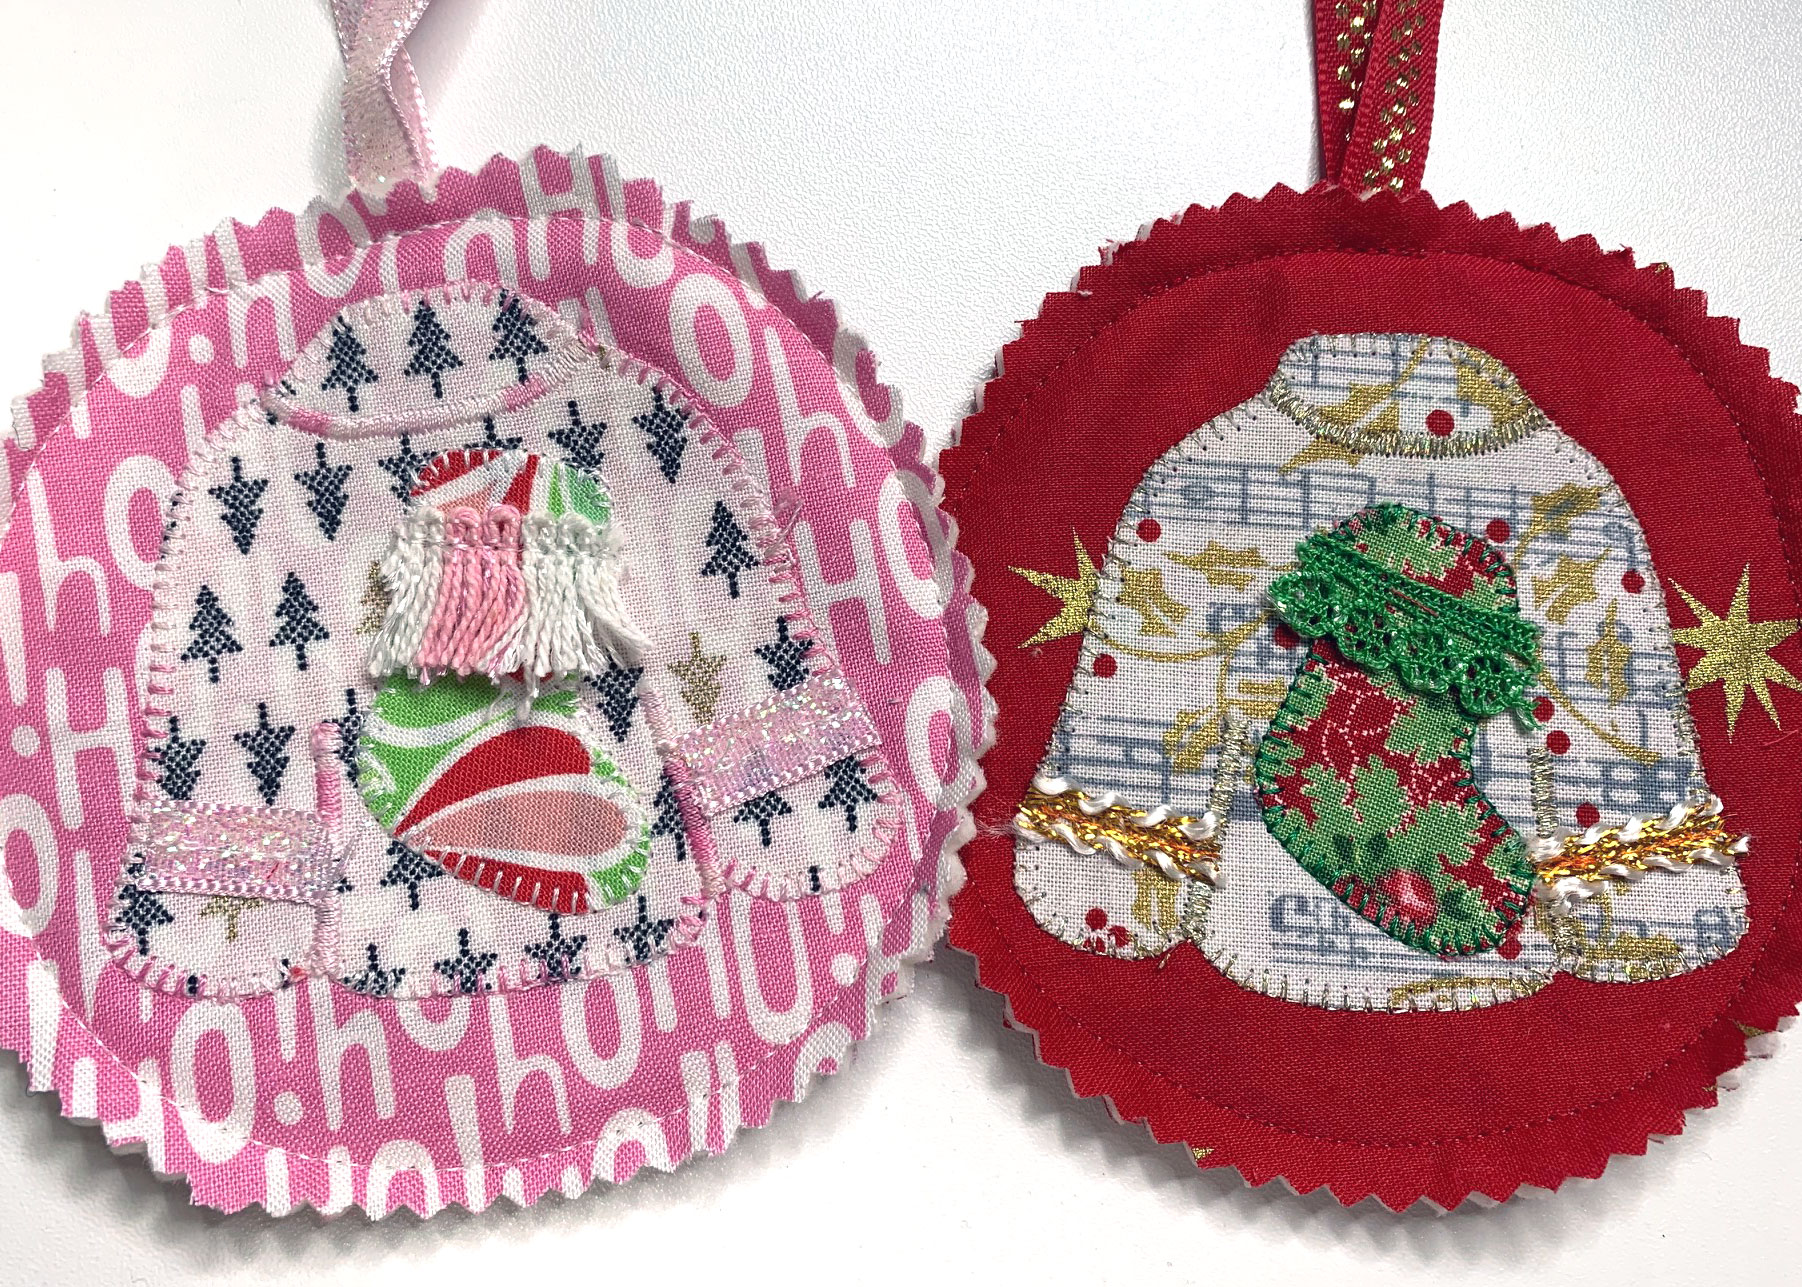
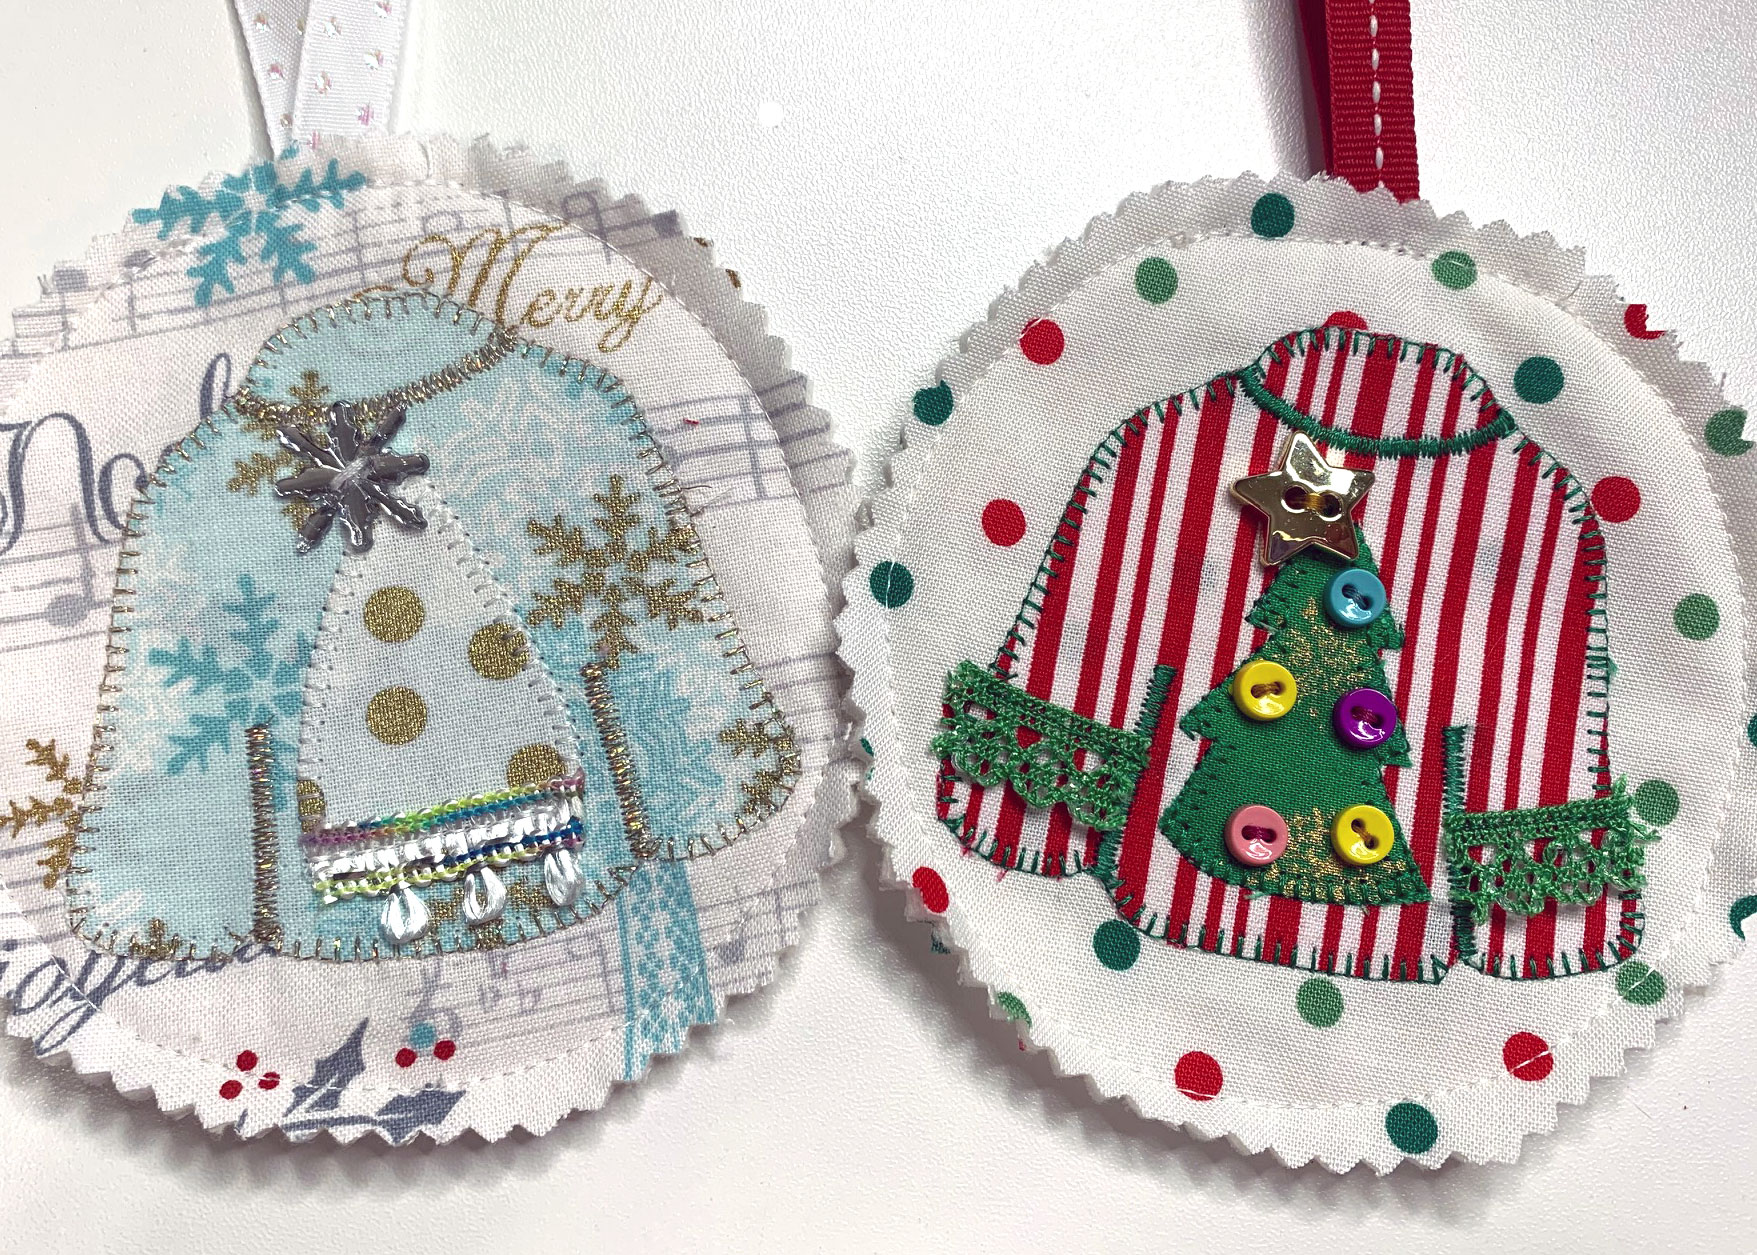
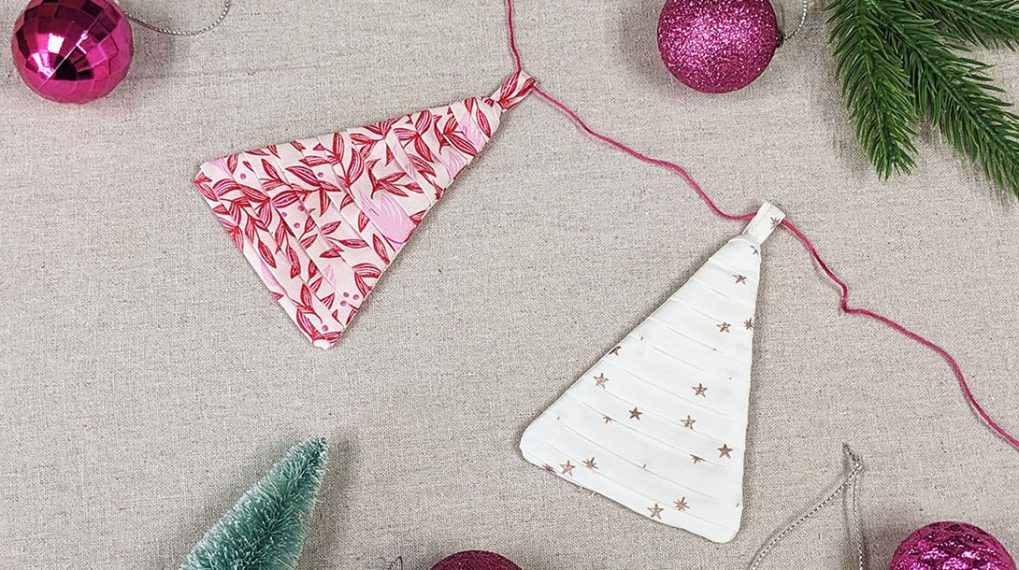
These sweaters were appliquéd with Christmas trees.
On the white tree, a piece of trim was stitched on the bottom of the tree and a snowflake button sewn to the top.
On the green tree, small pieces were cut out of the side of the tree to create branches. Colorful mini buttons were stitched on the tree with a star button sewn to the top. A piece of trim was added to define the cuffs on the sleeves.
You could add a star, a candy cane, or even fussy cut a design from your fabric to adorn the sweater.
Once you sew one you won’t want to stop! After you stitch a dozen or two ugly Christmas sweater ornaments, don’t forget to share them with me!
Used Products


What you might also like


One comment on “Sew an Ugly Christmas Sweater Ornament”
Leave a Reply
You must be logged in to post a comment.

I’m working on potholders, a little Christmas dress for my granddaughter, kitchen towel embroidery, and placemats.