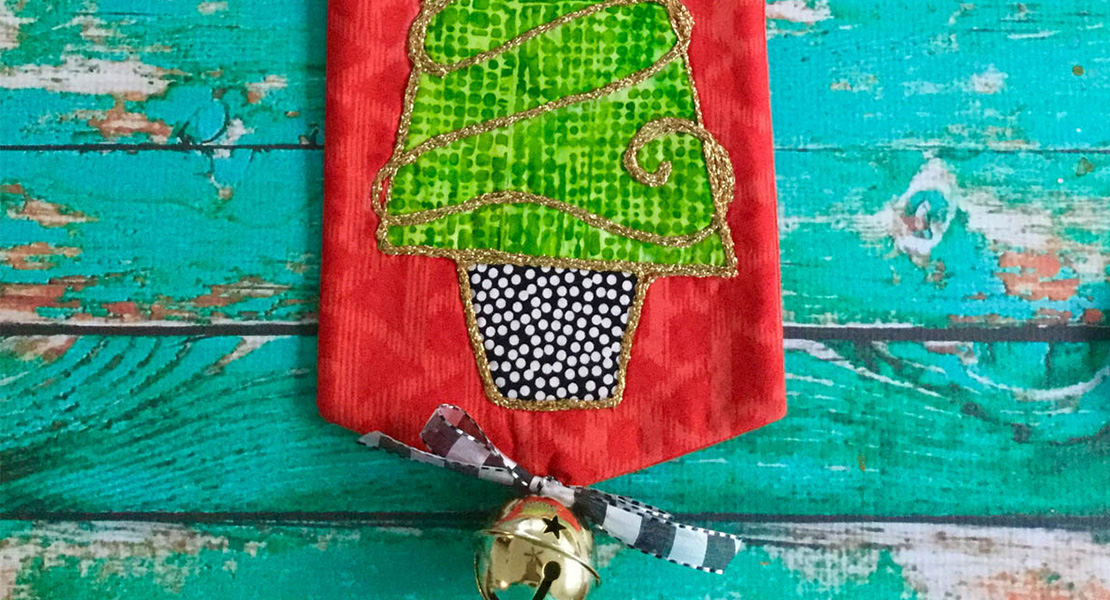
Christmas Tree Pleated Garland
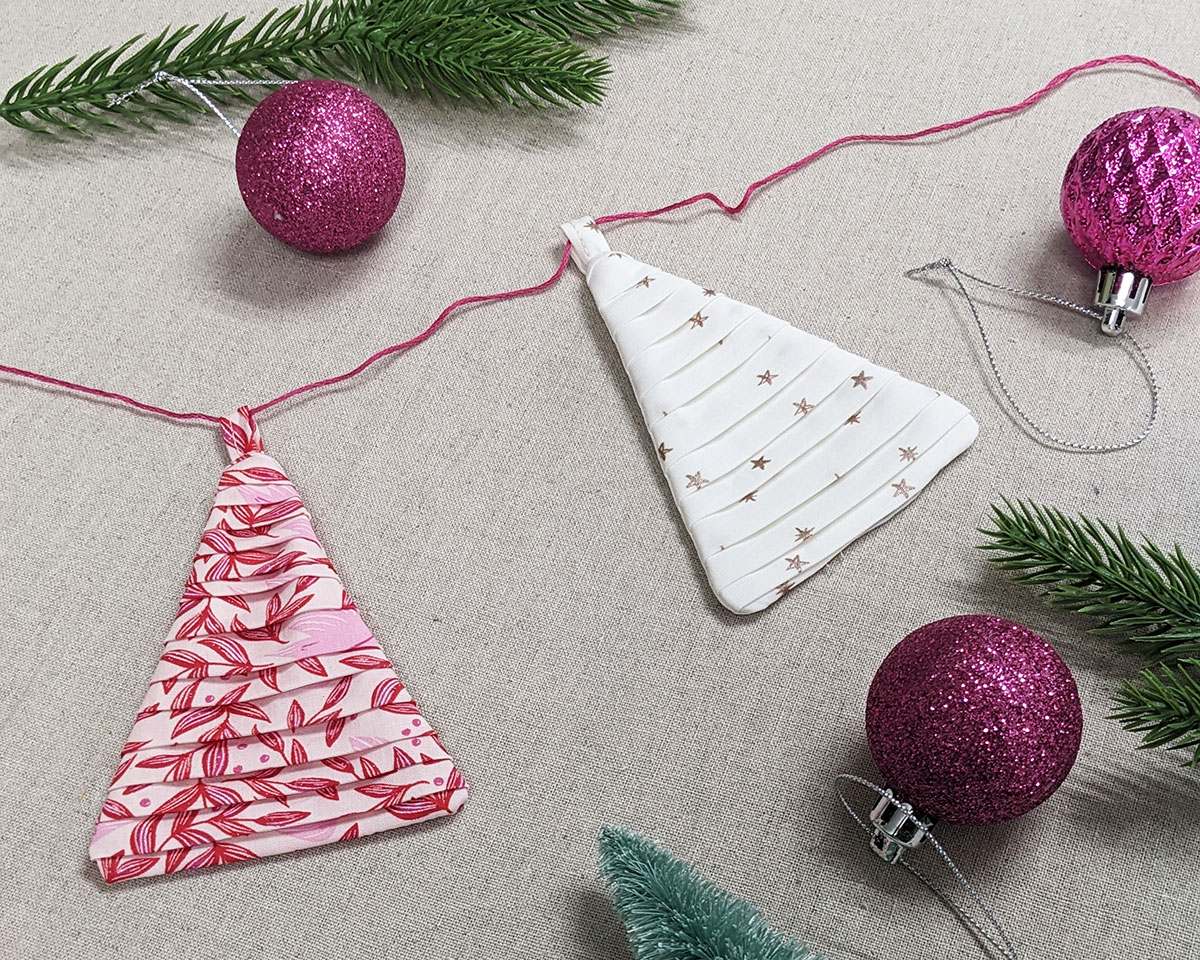
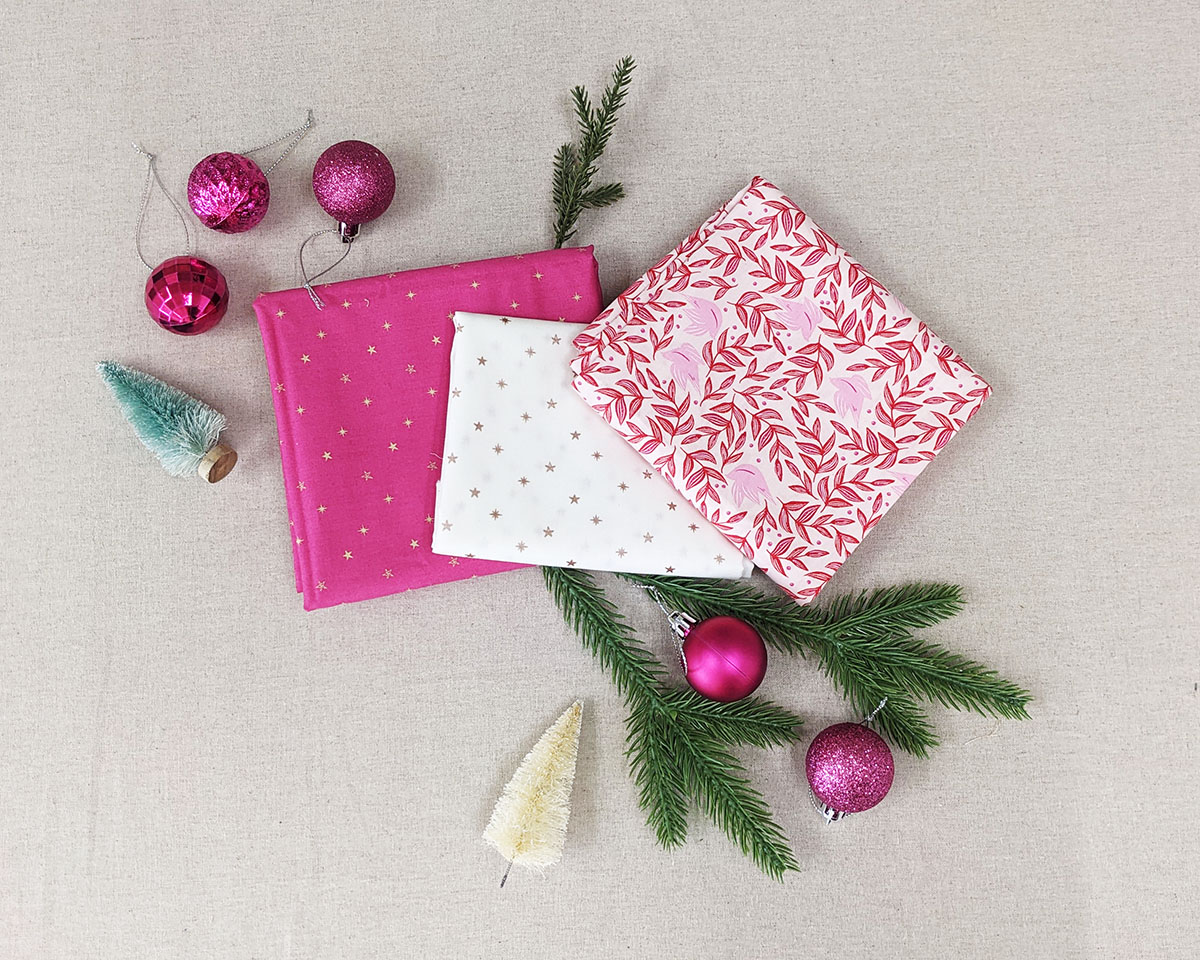
I can’t believe Christmas is around the corner! This means time to get started on your holiday sewing! And what better way to start than by making these quick and super fun garlands to decorate your home?
These pleated garlands are made with our Art Gallery Fabrics’ Christmas in the City collection. In this tutorial, I used Starry Sky Pink, Starry Sky Snow Metallic and Festive Carols but you can make tons of these ornaments with pleats with the entire collection of Christmas in the City using Fat Quarters.
I really enjoyed this technique because it makes the Christmas tree look more three-dimensional.
So, if you want to know how to make them, let’s get started!
Fabric Requirements to Sew the Christmas Garland
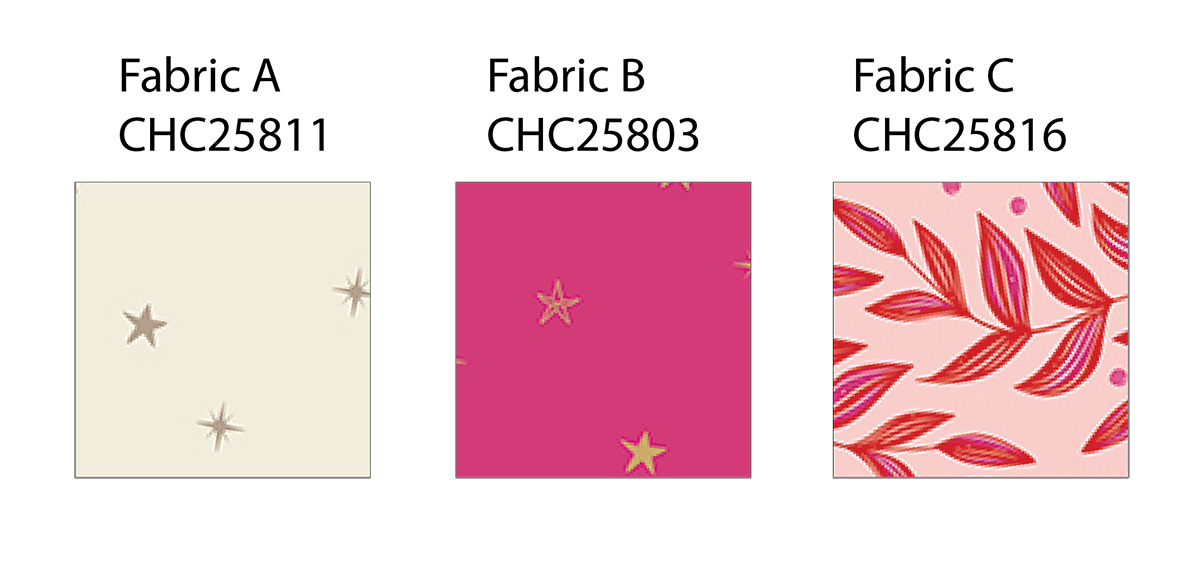
- Fabric A CHC25811 FQ
- Fabric B CHC25803 FQ
- Fabric C CHC25816 FQ
Additional Materials Needed to Make the Christmas Garland
- Fusible Interfacing.
- Coordinating quilting thread
- Triangle Template
- Reverse-pattern Foot #1D

Cutting Instructions
- One (1) 8” x 22” rectangle from fabric A.
- One (1) triangle template from fabric A.
- One (1) 1” x 2 1/2” rectangle from fabric A.
Steps to Make the Christmas Garland
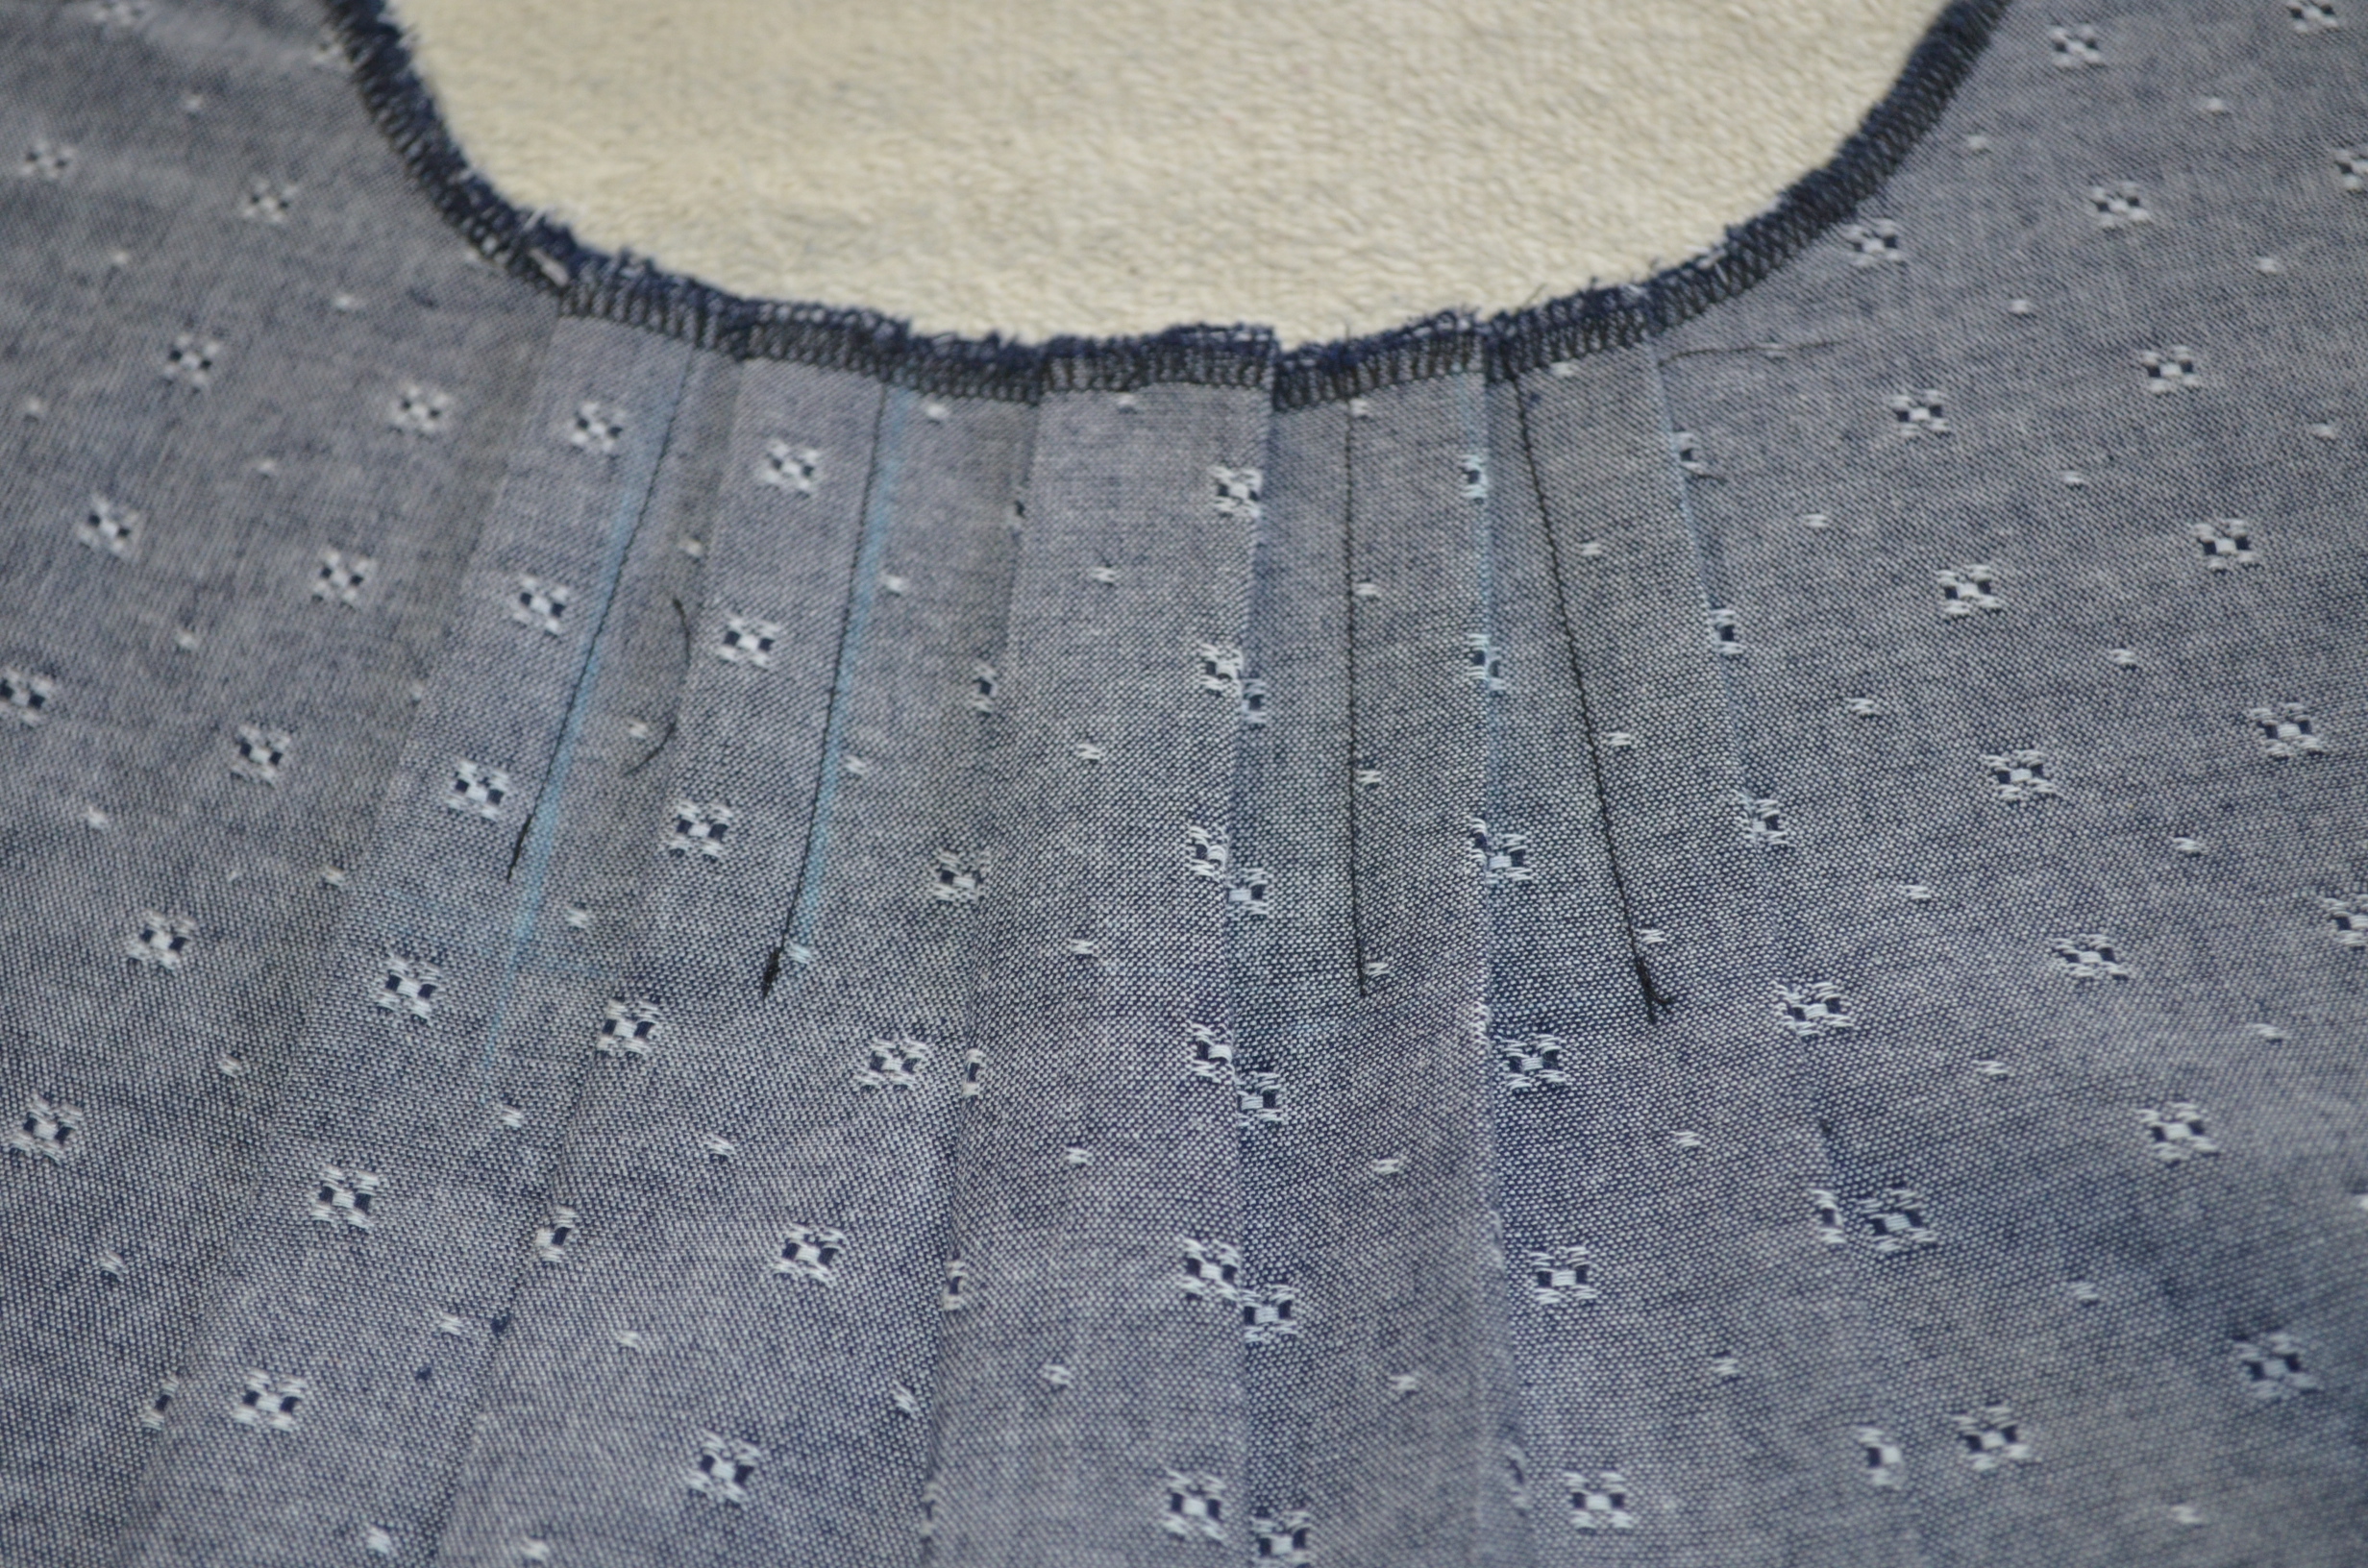
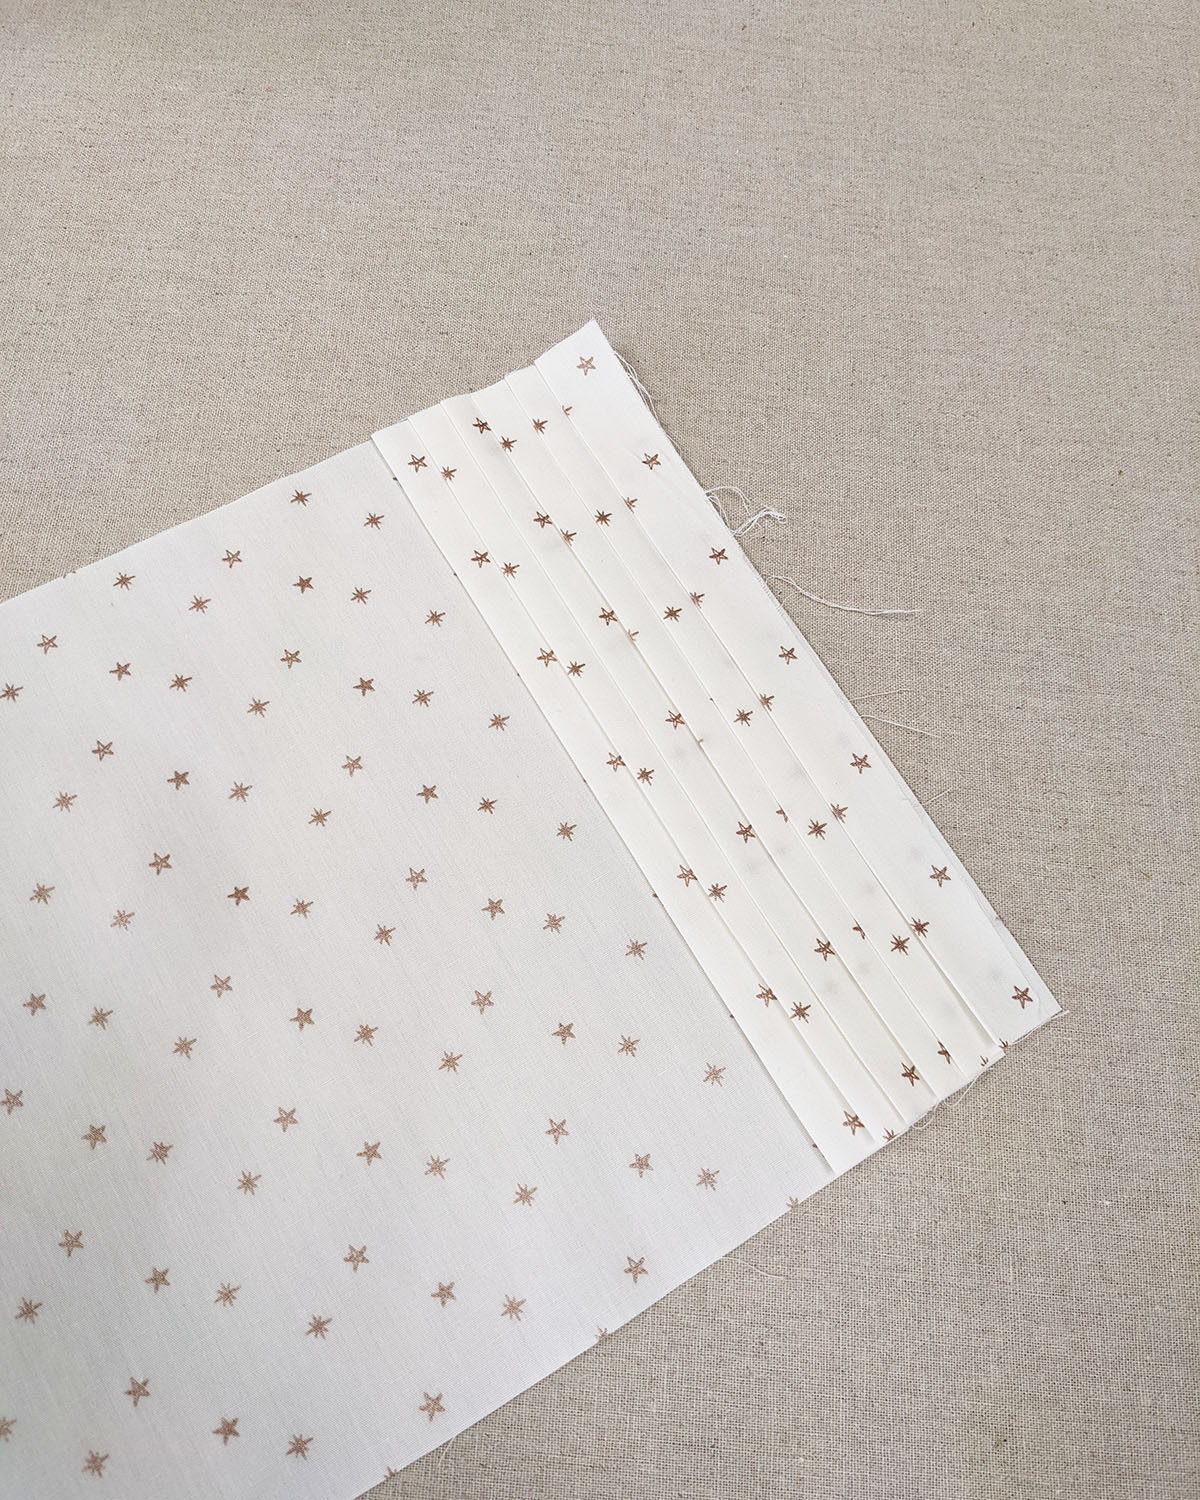
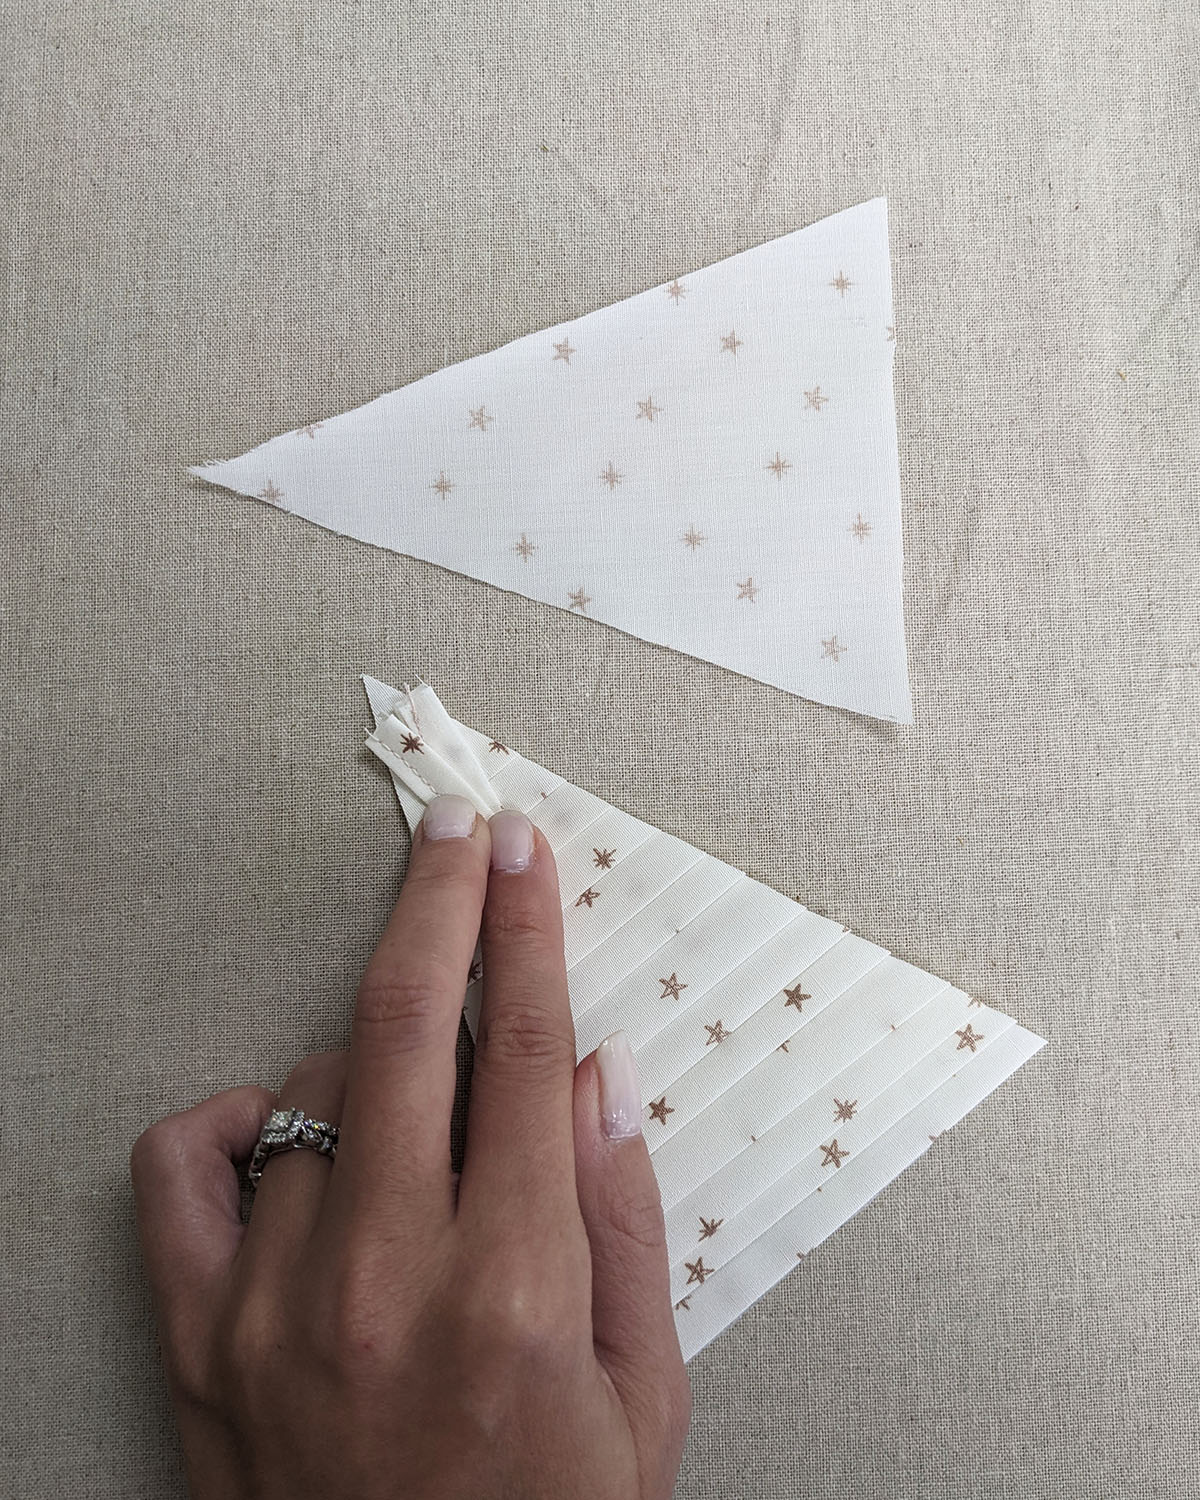
Step 1.
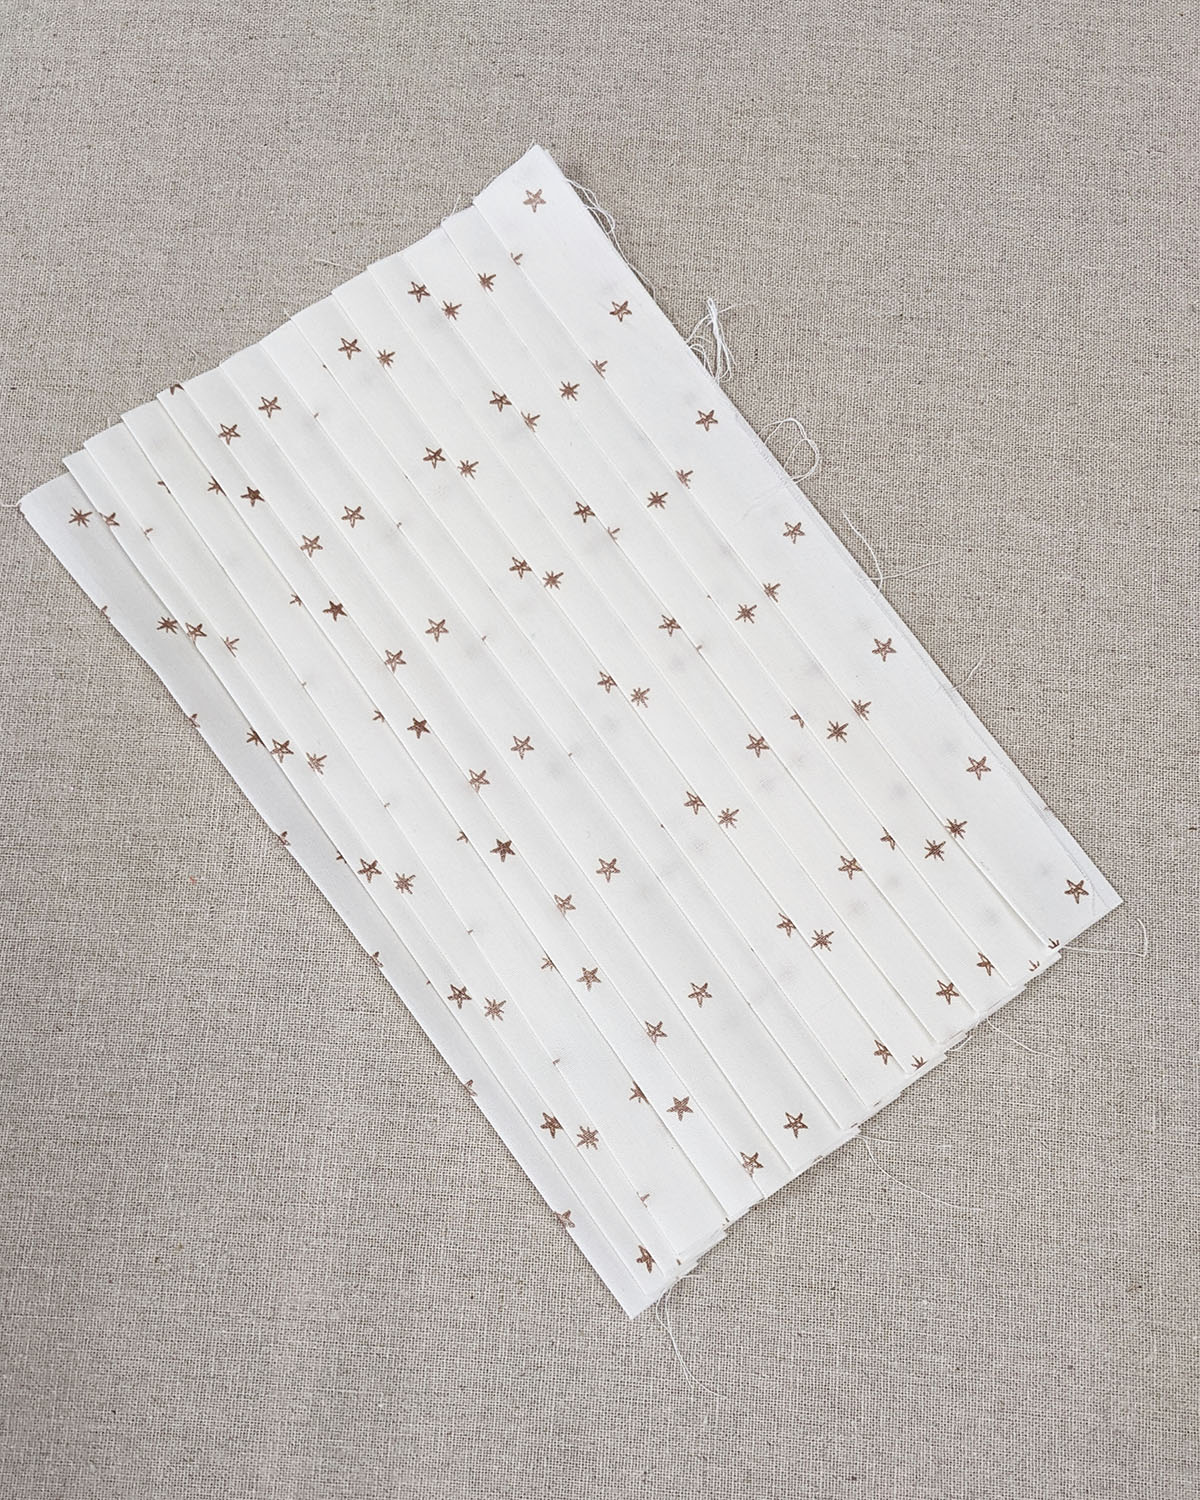
Take one (1) 8’’ x 22’’ rectangle from fabric A and start to pleat the fabric by creating some folds, ironing along the way.
It should look something like this:
Step 2.
Now, grab a piece of interfacing and place it on the wrong side of the fabric. Fuse carefully so you don’t damage the pleats.

Step 3.
Take the triangle template and place it on the wrong side of the fabric. Trace the shape and cut.

After cutting my piece, I realized that I had enough space to cut another triangle and probably use it for the backing or to create a second Christmas tree ornament.
So, feel free to use the leftovers!
Step 4.
Create the hanging loop by taking one (1) 1’’ x 2’’ strip from fabric A.
Fold both sides of your strip into the center of your strip and then fold in half.
Press and top stitch on one side of your strap at about 1/8’’ seam allowance.

Step 5.
Take the handle and place the edges on the top part of the Christmas tree ornament.
Overlap the strip creating a loop. Then, place one triangle template right side facing down, on top of your other two pieces.
Step 6.
Using craft clips, hold your pieces together and start sewing at a ¼’’ seam allowance all around making sure you leave about 3’’ of opening.
Be careful on the top part and always check you are not sewing the hanging loop.
Clip the corners and turn your piece inside out.

Step 7.
Close the opening with needle and thread. Press carefully and voila!
Repeat the same instructions for fabrics B and C.
Have fun making many pleated tree ornaments for this holiday!