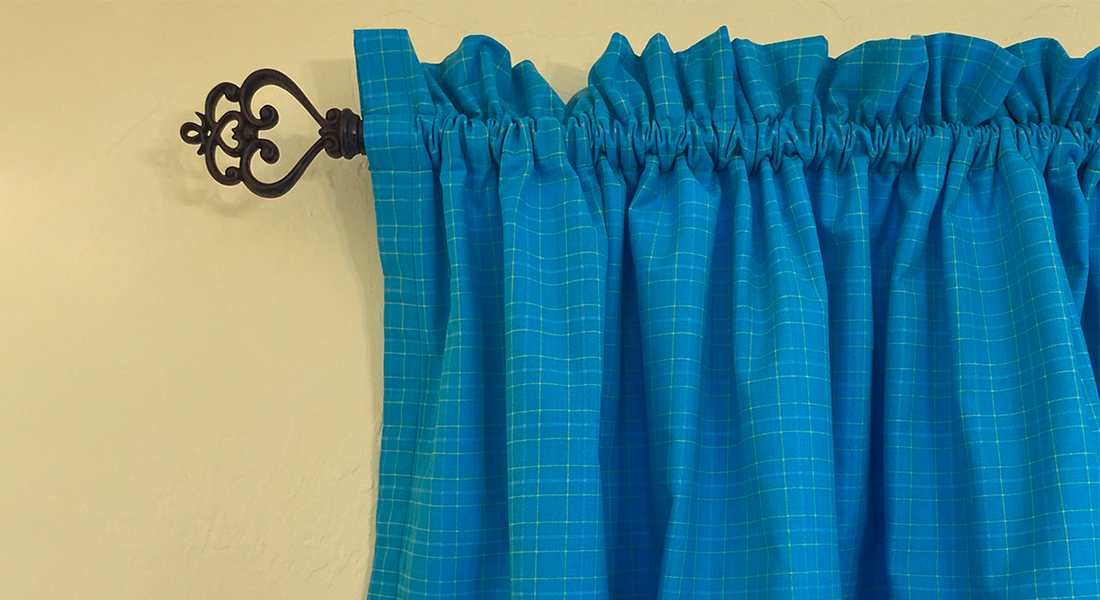
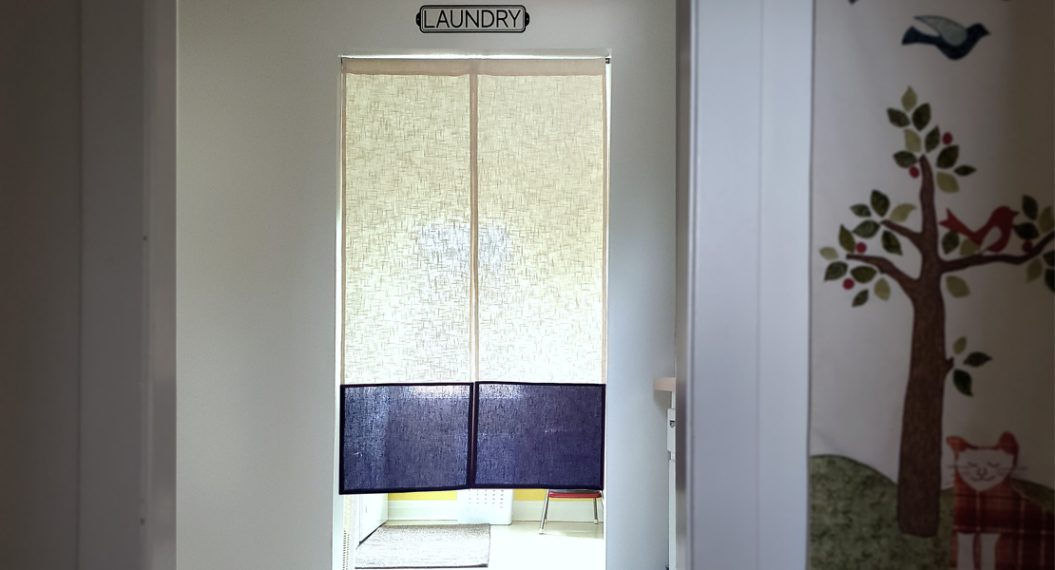
Casual Pleated Curtain
For the last few years, natural window blinds and roller shades have been very popular with the minimalist style trend. The forecast for 2023 shows curtain panels coming back in style. Hooray! I love another way to add texture, print and color in the house all while using my sewing machine. Panels are functional too keeping the cold drafts at bay. Now if you’ve ever shopped custom drapes, you know they are a pretty penny and then some. But wait! You have a sewing machine and know how to sew to a straight line! All you need to do is buy some beautiful fabric, pleat tape, oil your machine and follow this tutorial. It’s not complicated. I promise!
Machine Set Up
Supplies:
- Fabric cut & ready to sew
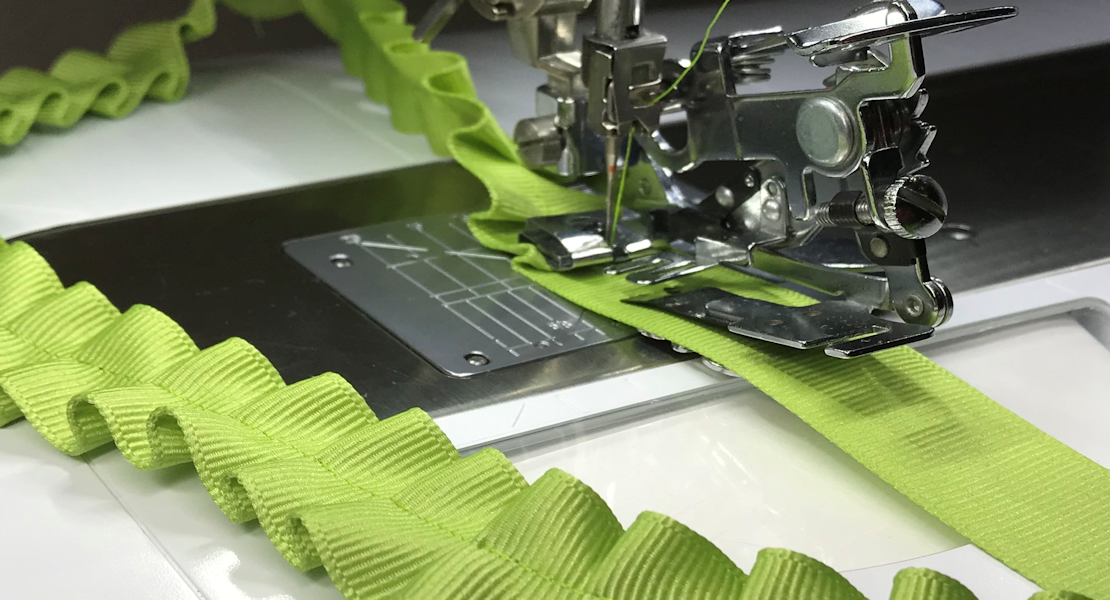
- Pleat tape
- 4-Prong Hooks
- Mettler Metrosene Thread that matches fabric color
- Topstitch Needle 80
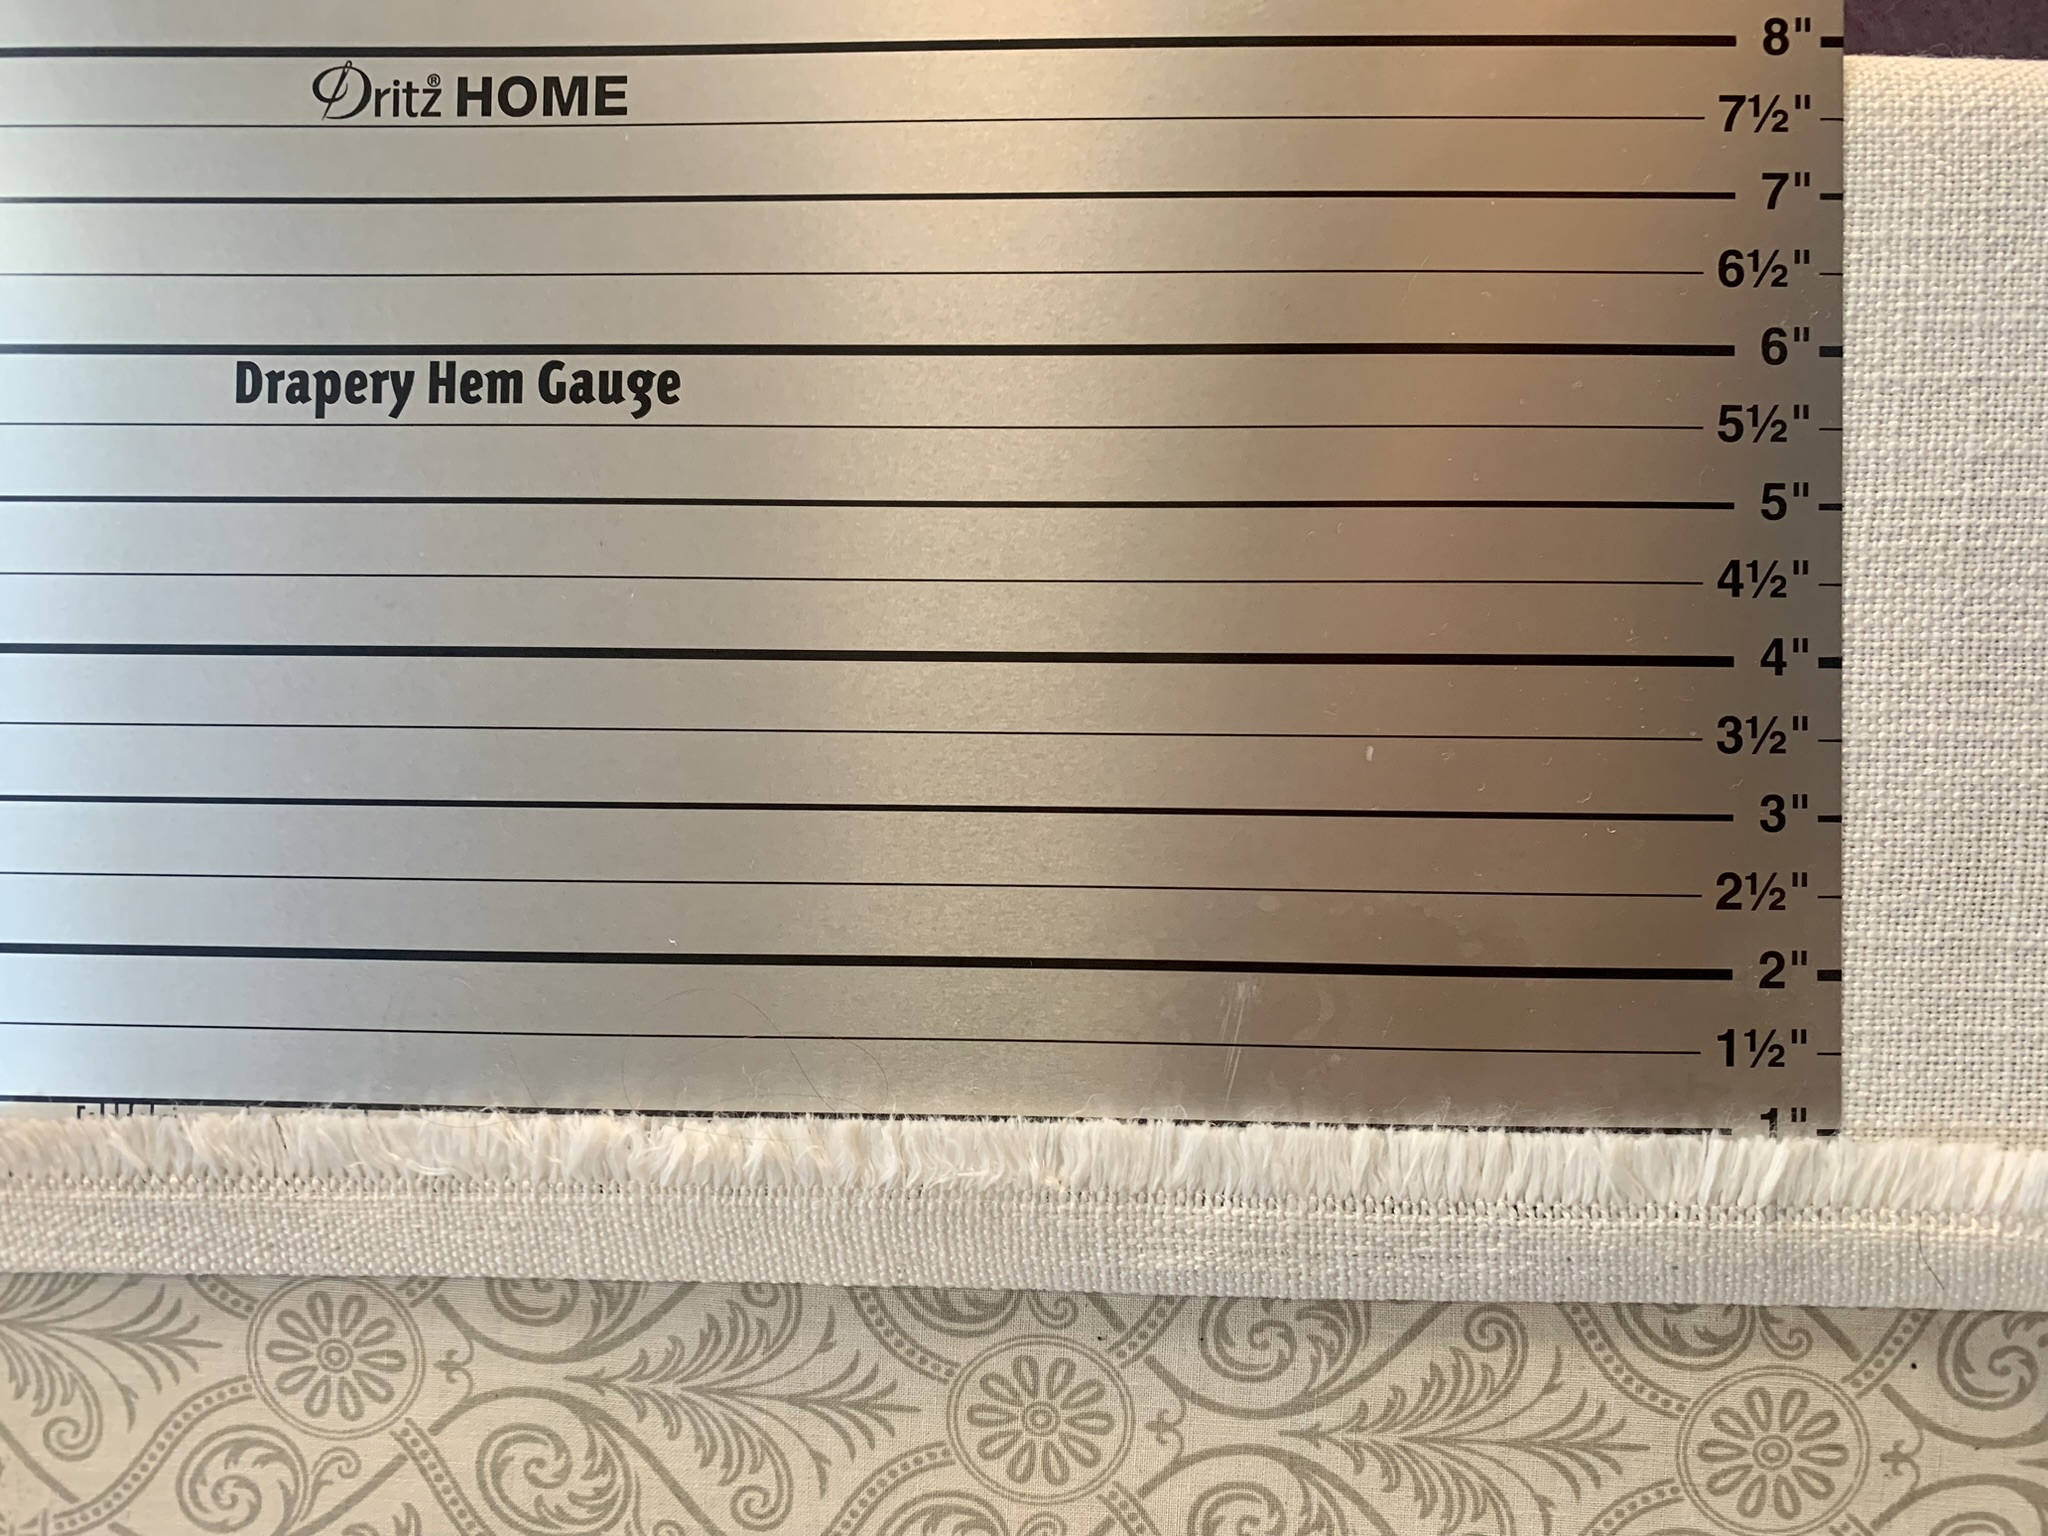
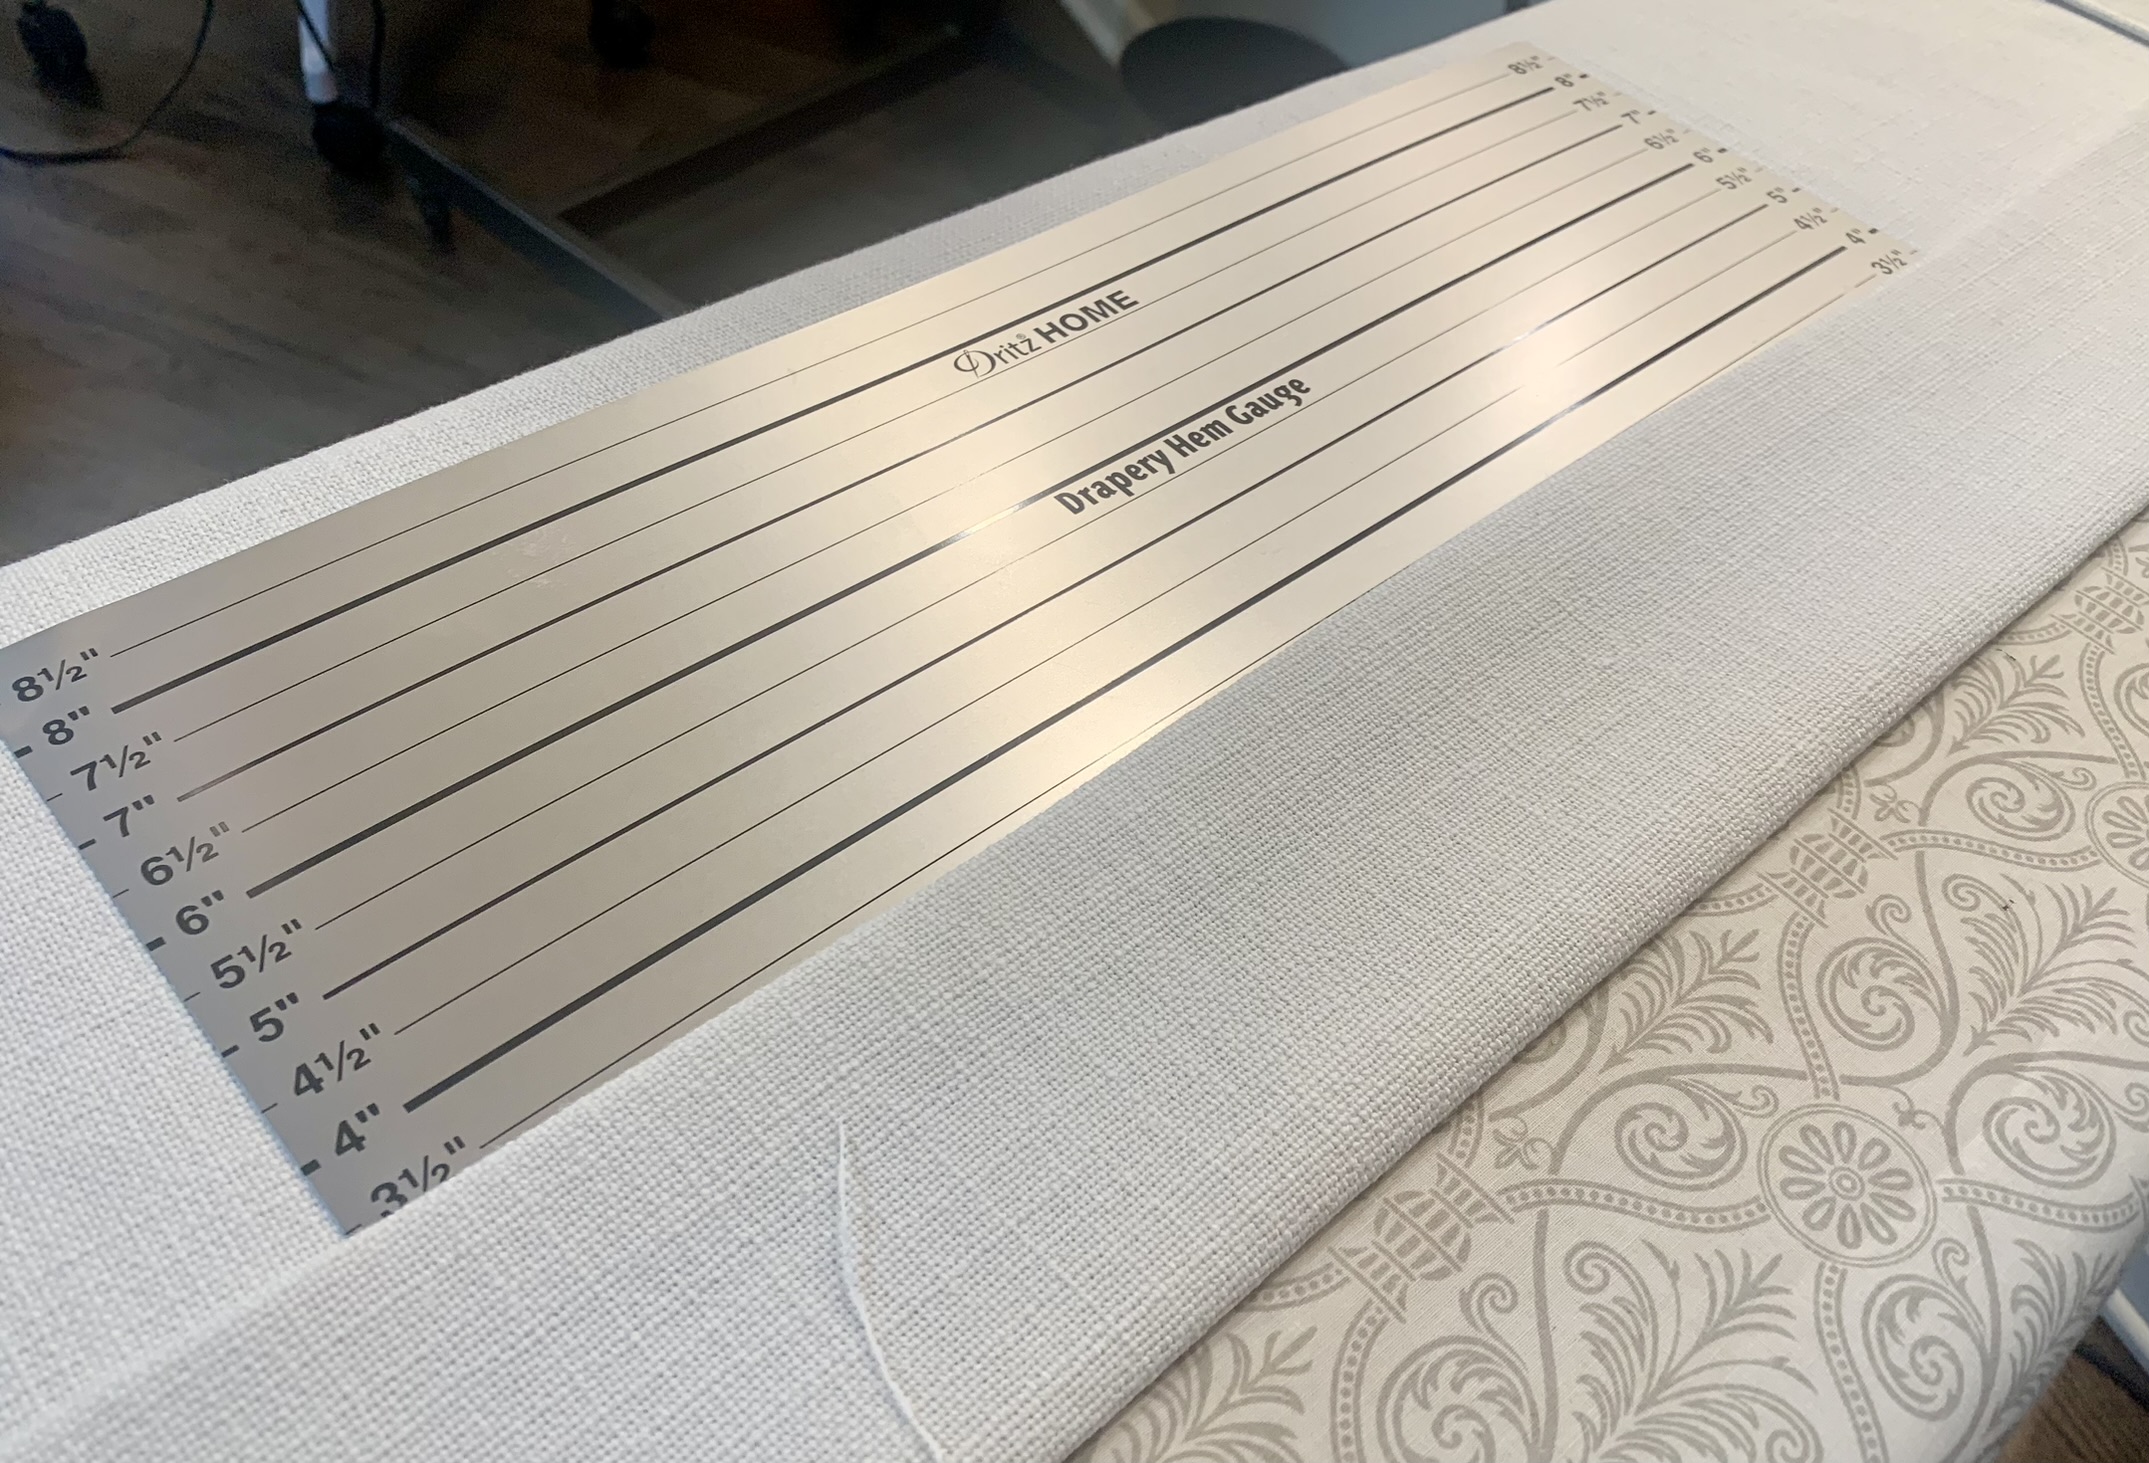
- Dritz Home Drapery Hem Gauge
- Iron and pressing mat
- Wonder clips
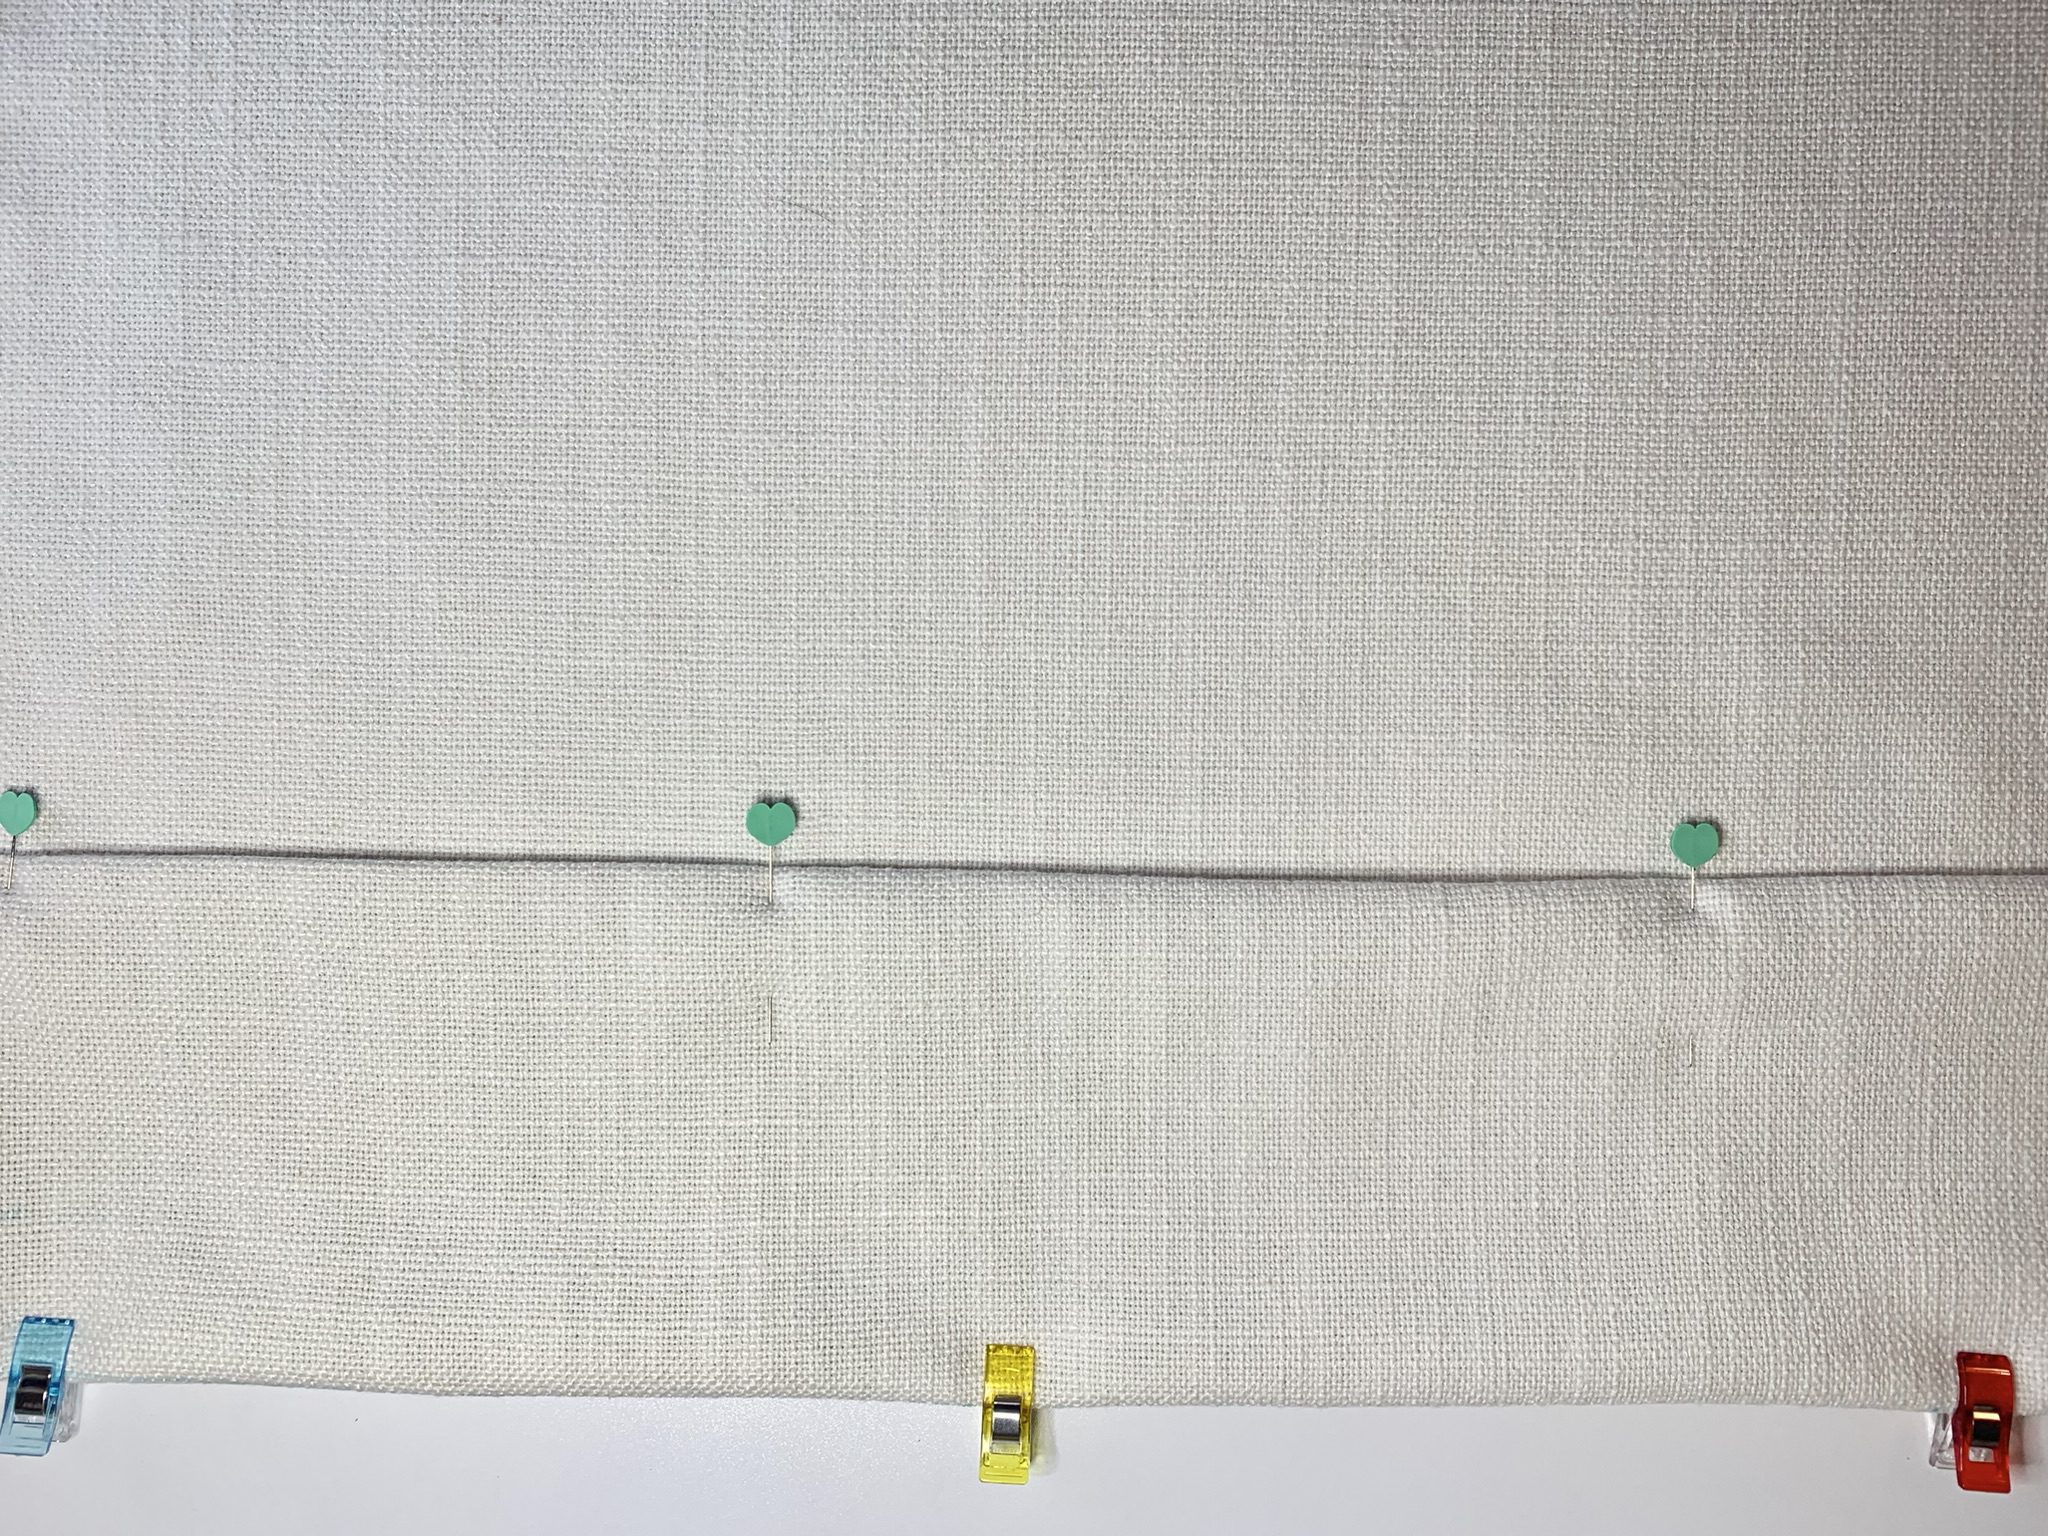
- Large pins
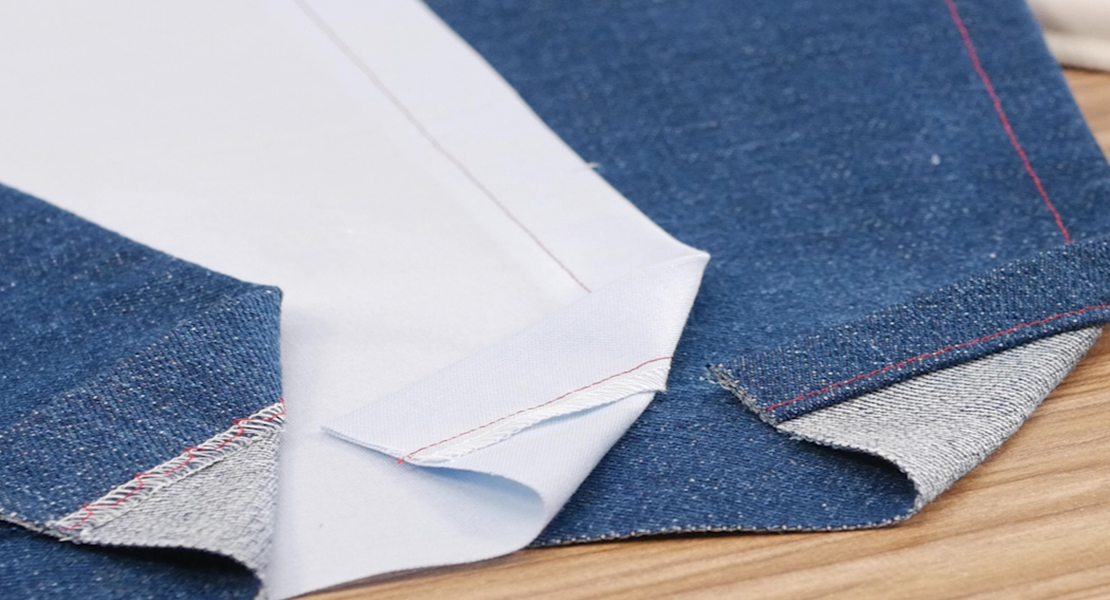
Step 1: Finish Side Seams
Drapery hem gauges are a must-have when making panels, especially long ones. The metal gauge make all the folding and pressing much easier and faster.

With the hem gauge, fold and press the sides 1”. You can press right on the metal gauge as you continue folding the fabric edge. This side had fringe which I included in the 1” measurement.
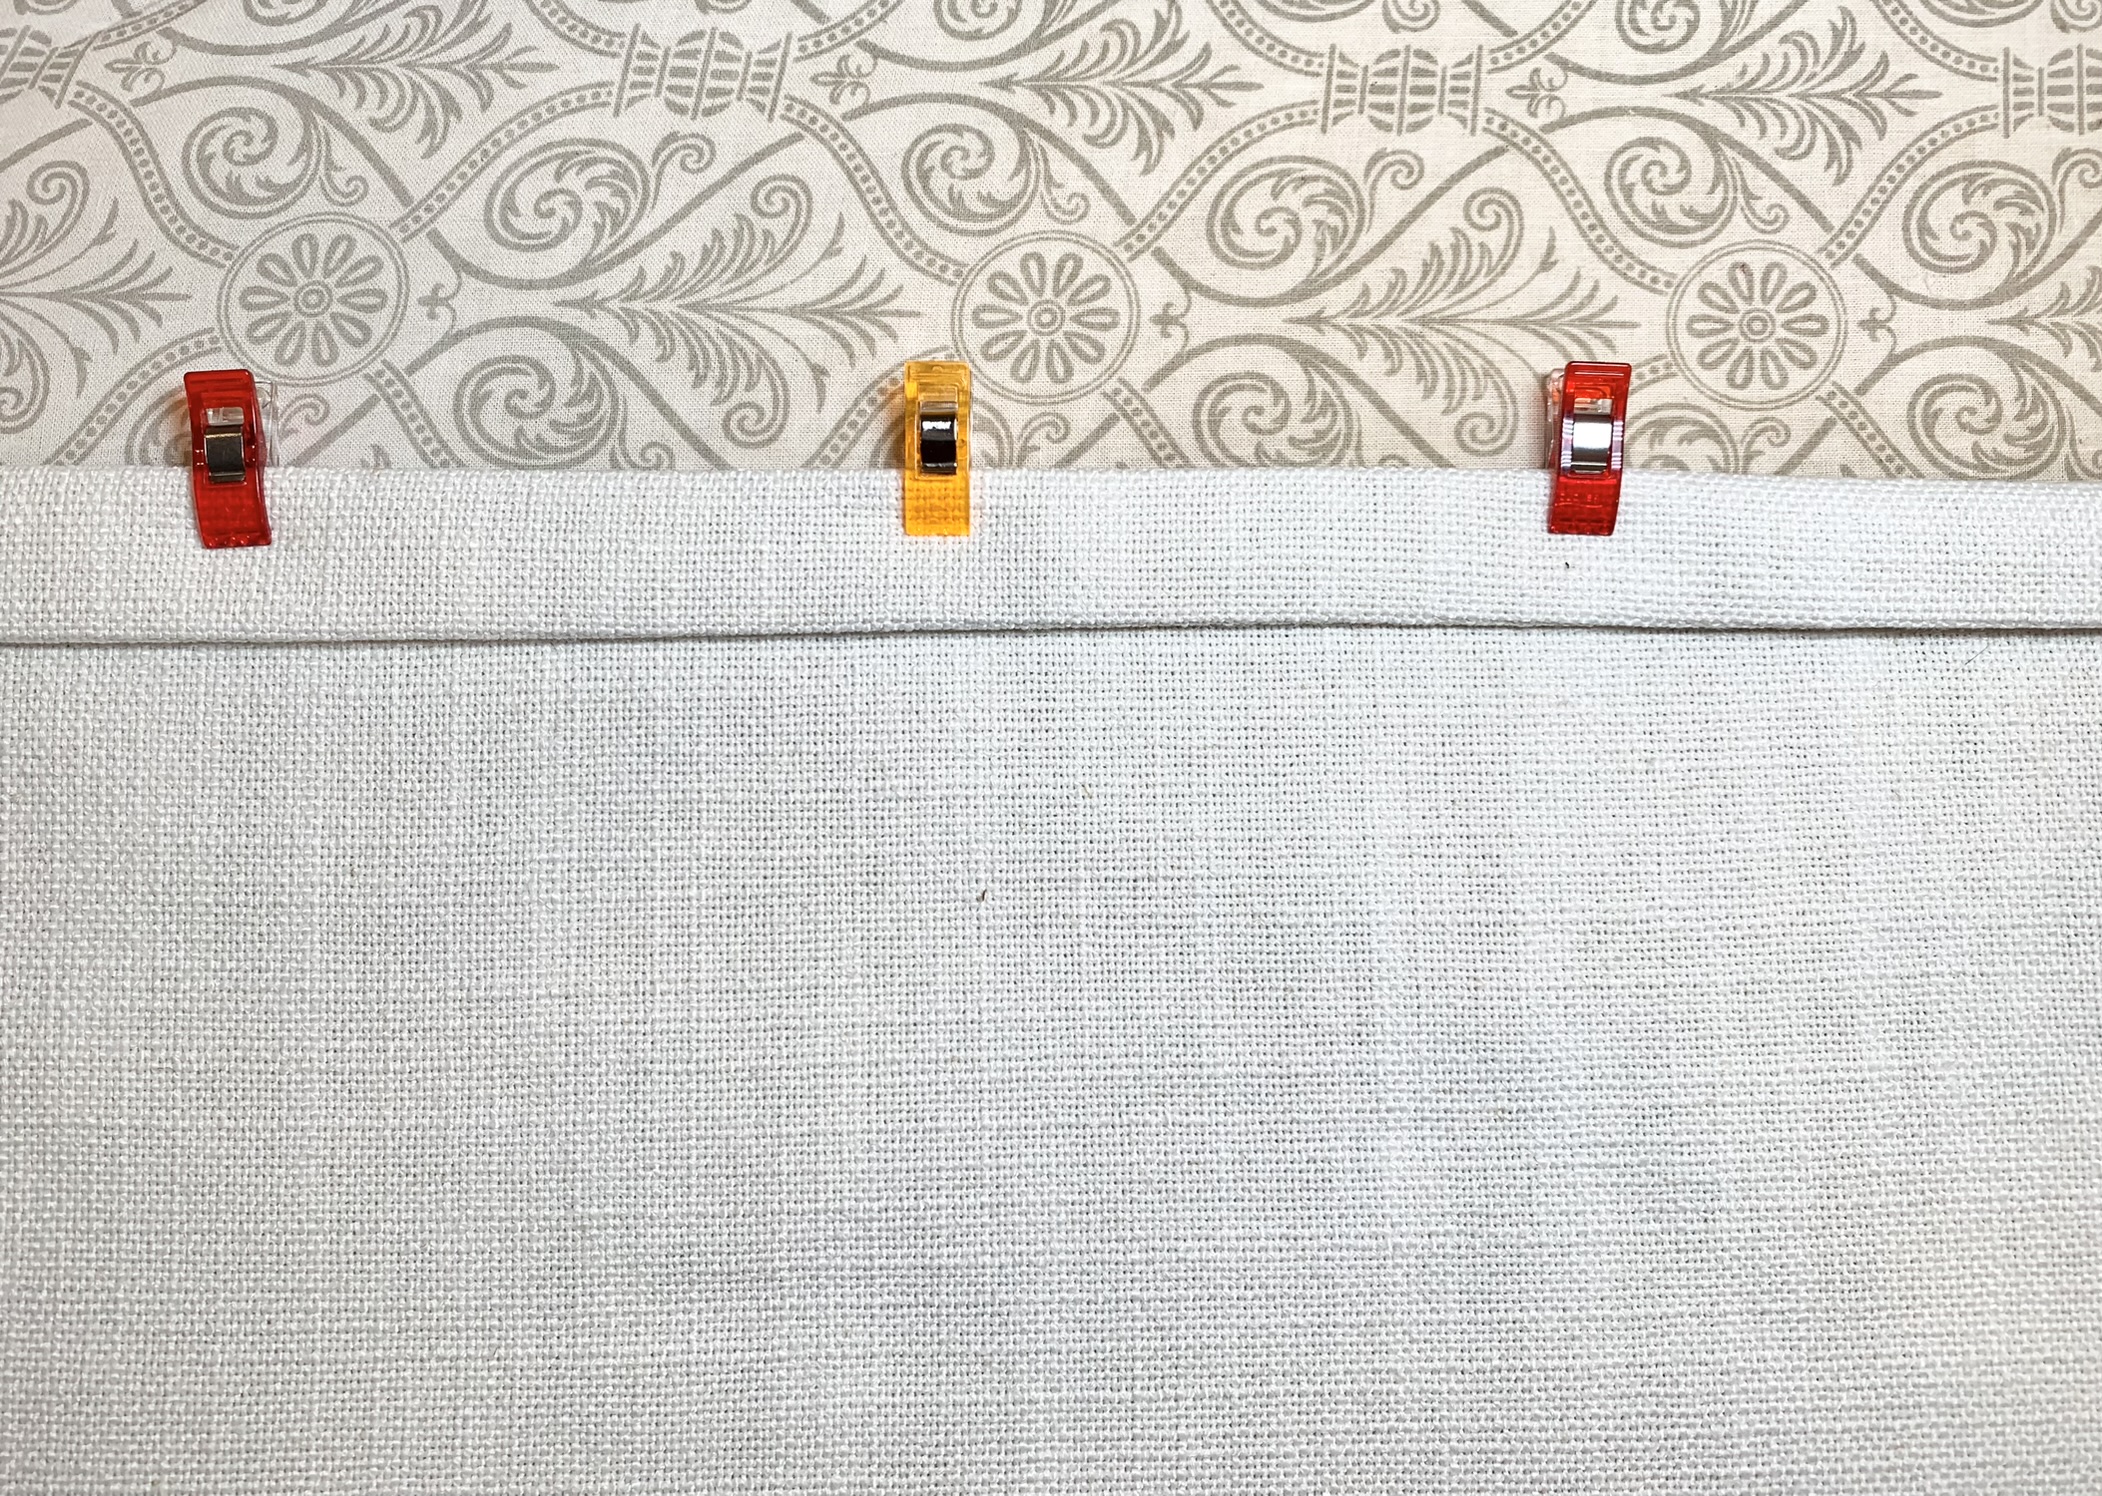
Fold and press the sides 1” again to create a double fold. Option: use Wonder clips to keep the fold nice and flat.
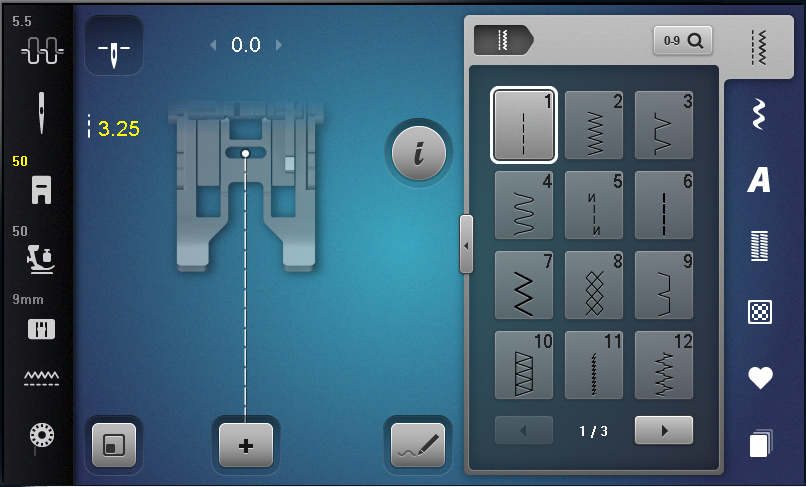
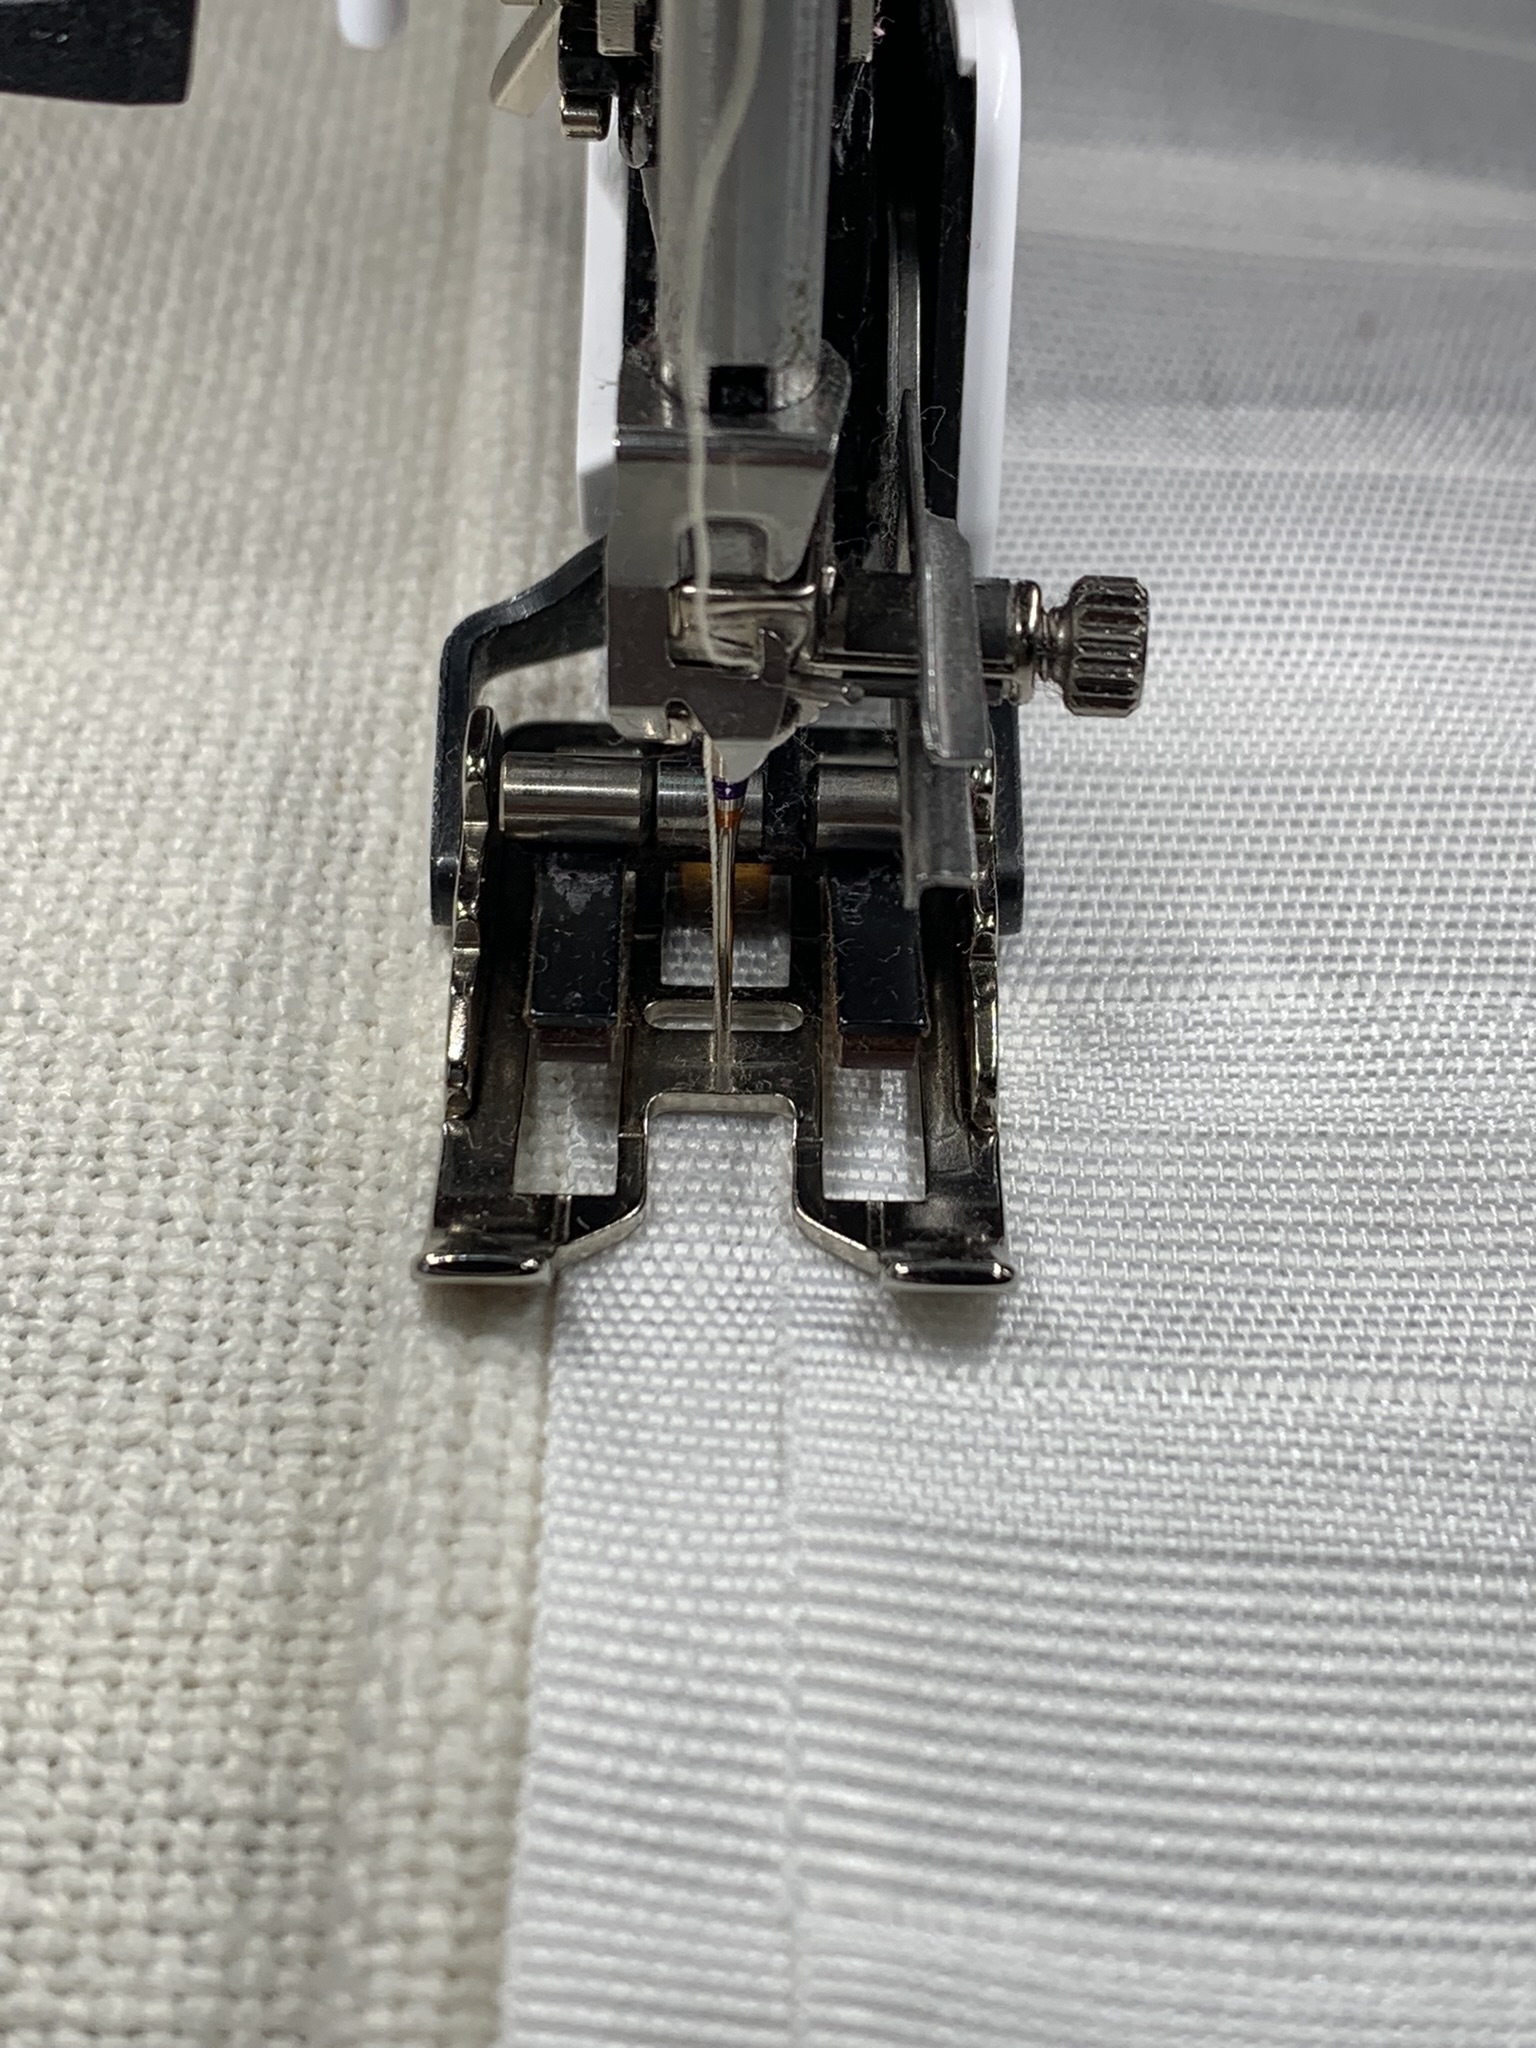
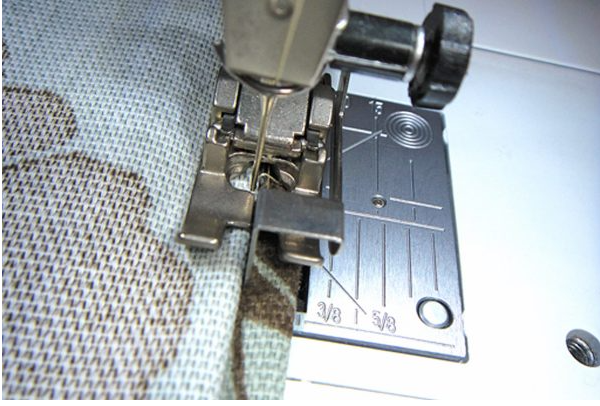
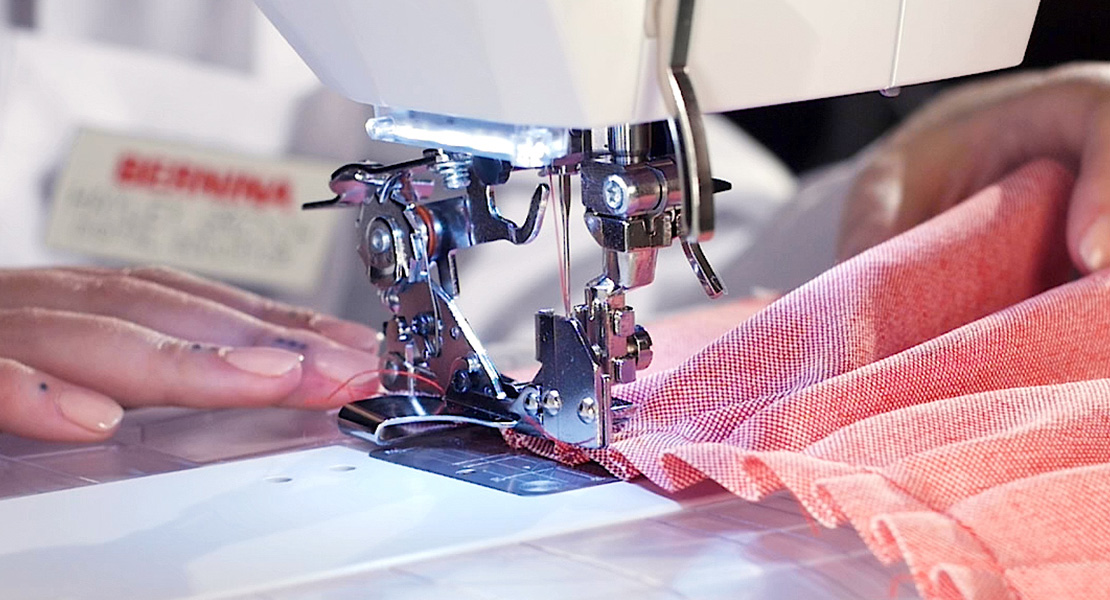
Attach Walking Foot #50. The fabric I am working with is very thick. I increased the Stitch Length to 3.25 mm. Remember BERNINA has total stitch control that allows you to adjust stitches to exactly what you need for your project. Line up the folded edge with the 5/8” mark on the stitch plate. Sew a 5/8” seam on both sides.
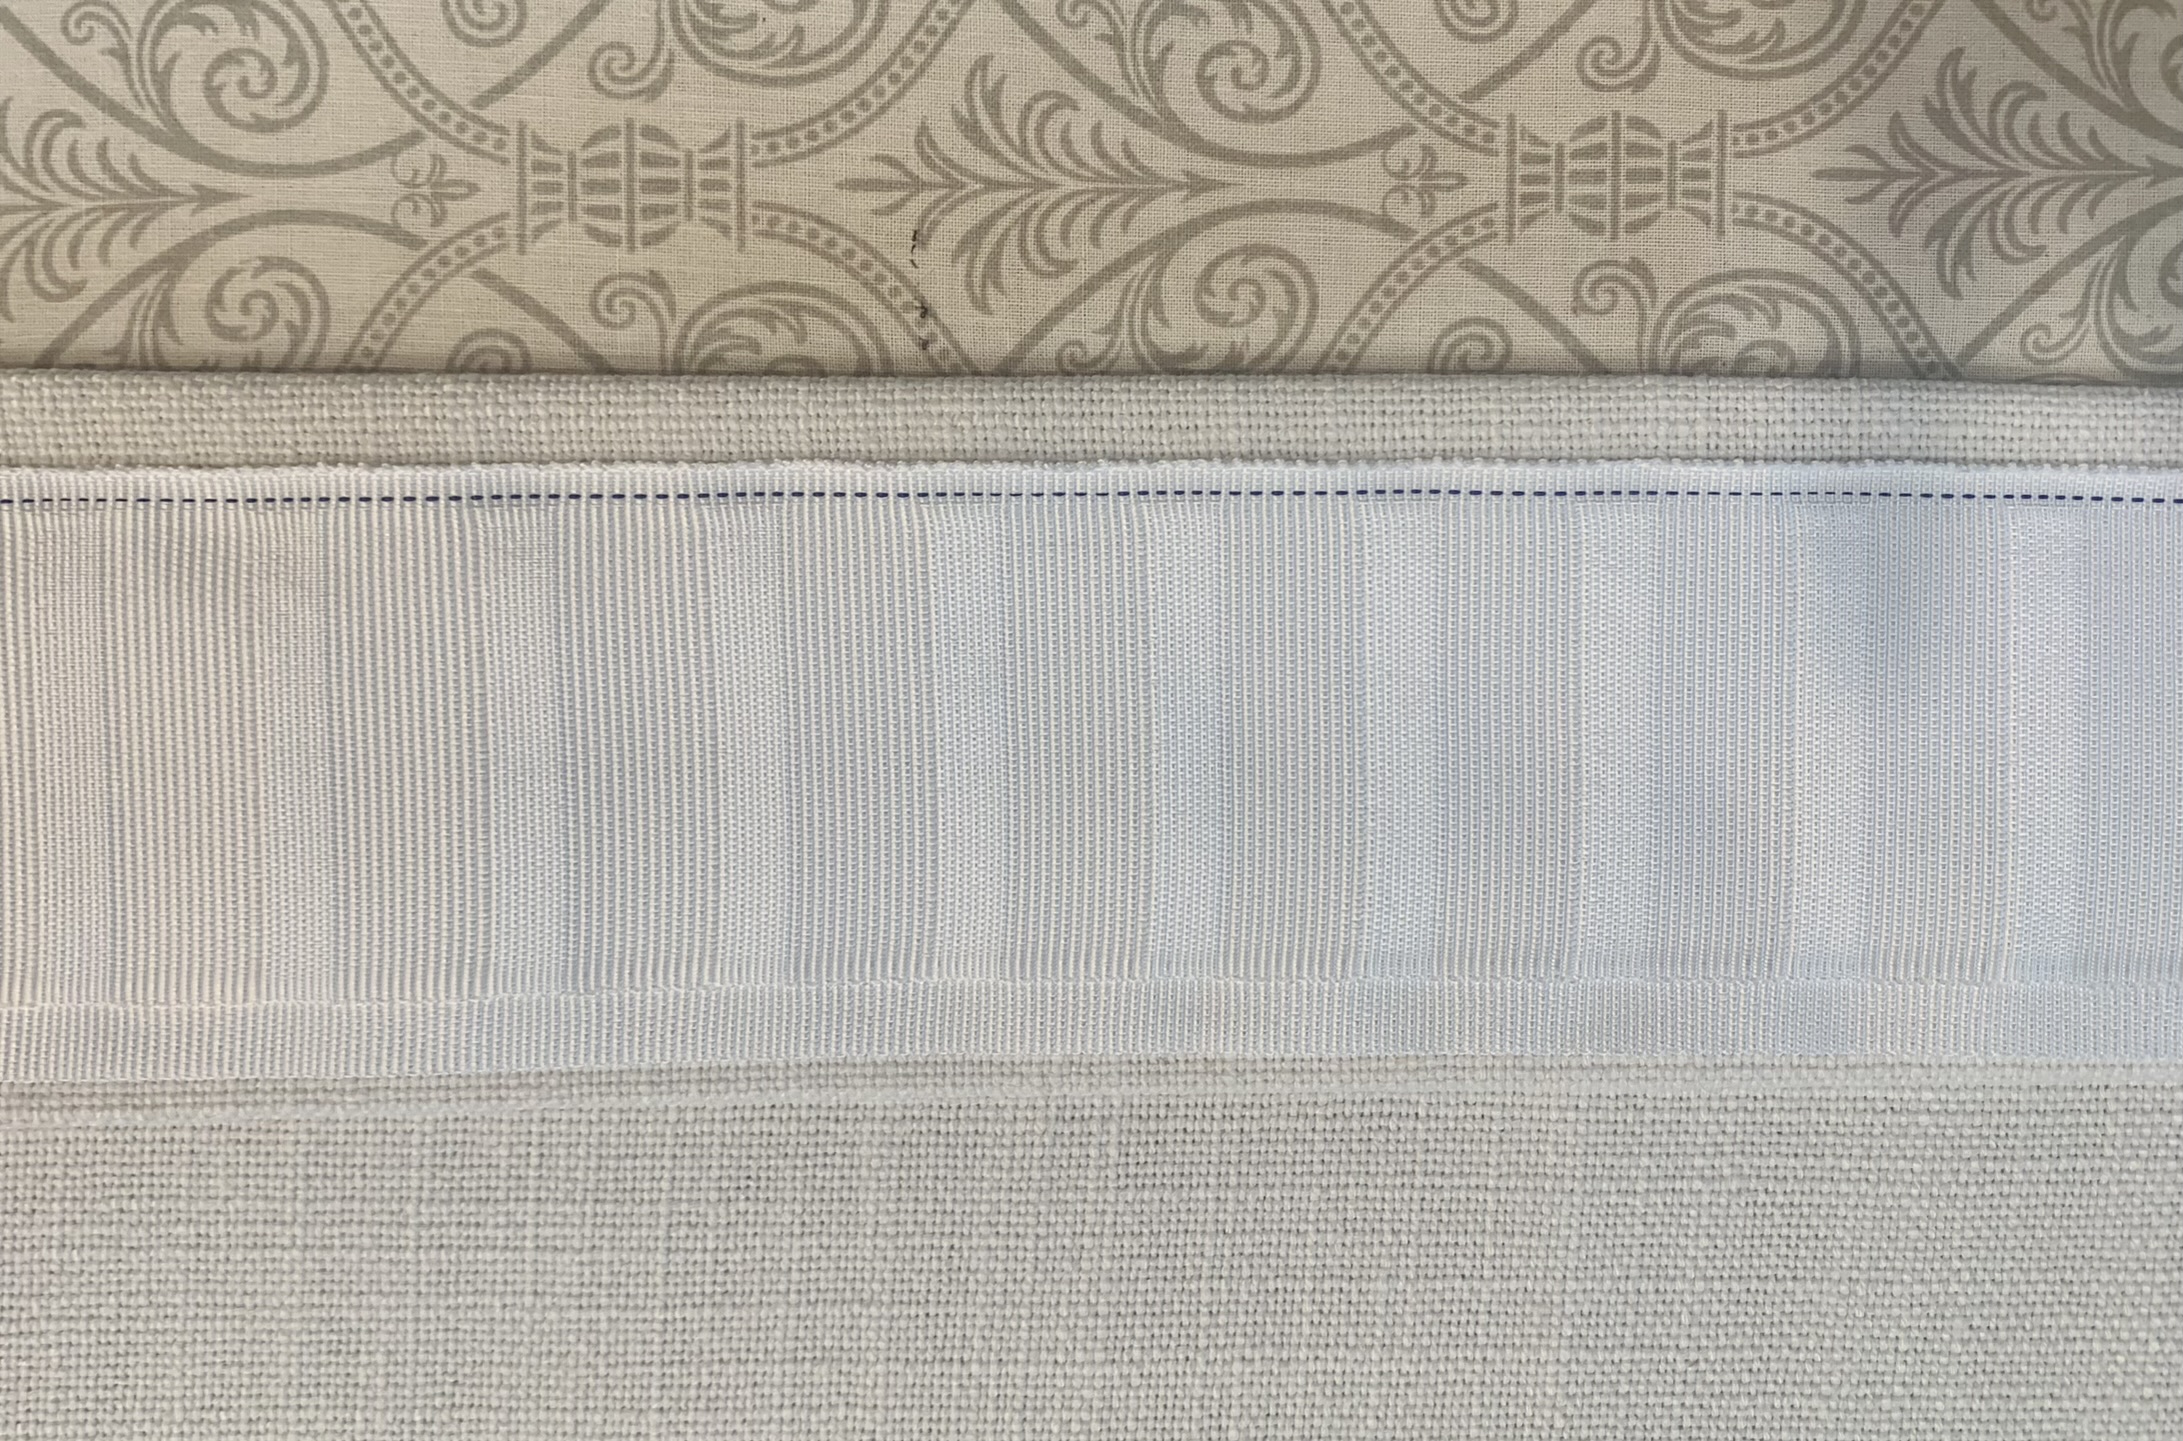
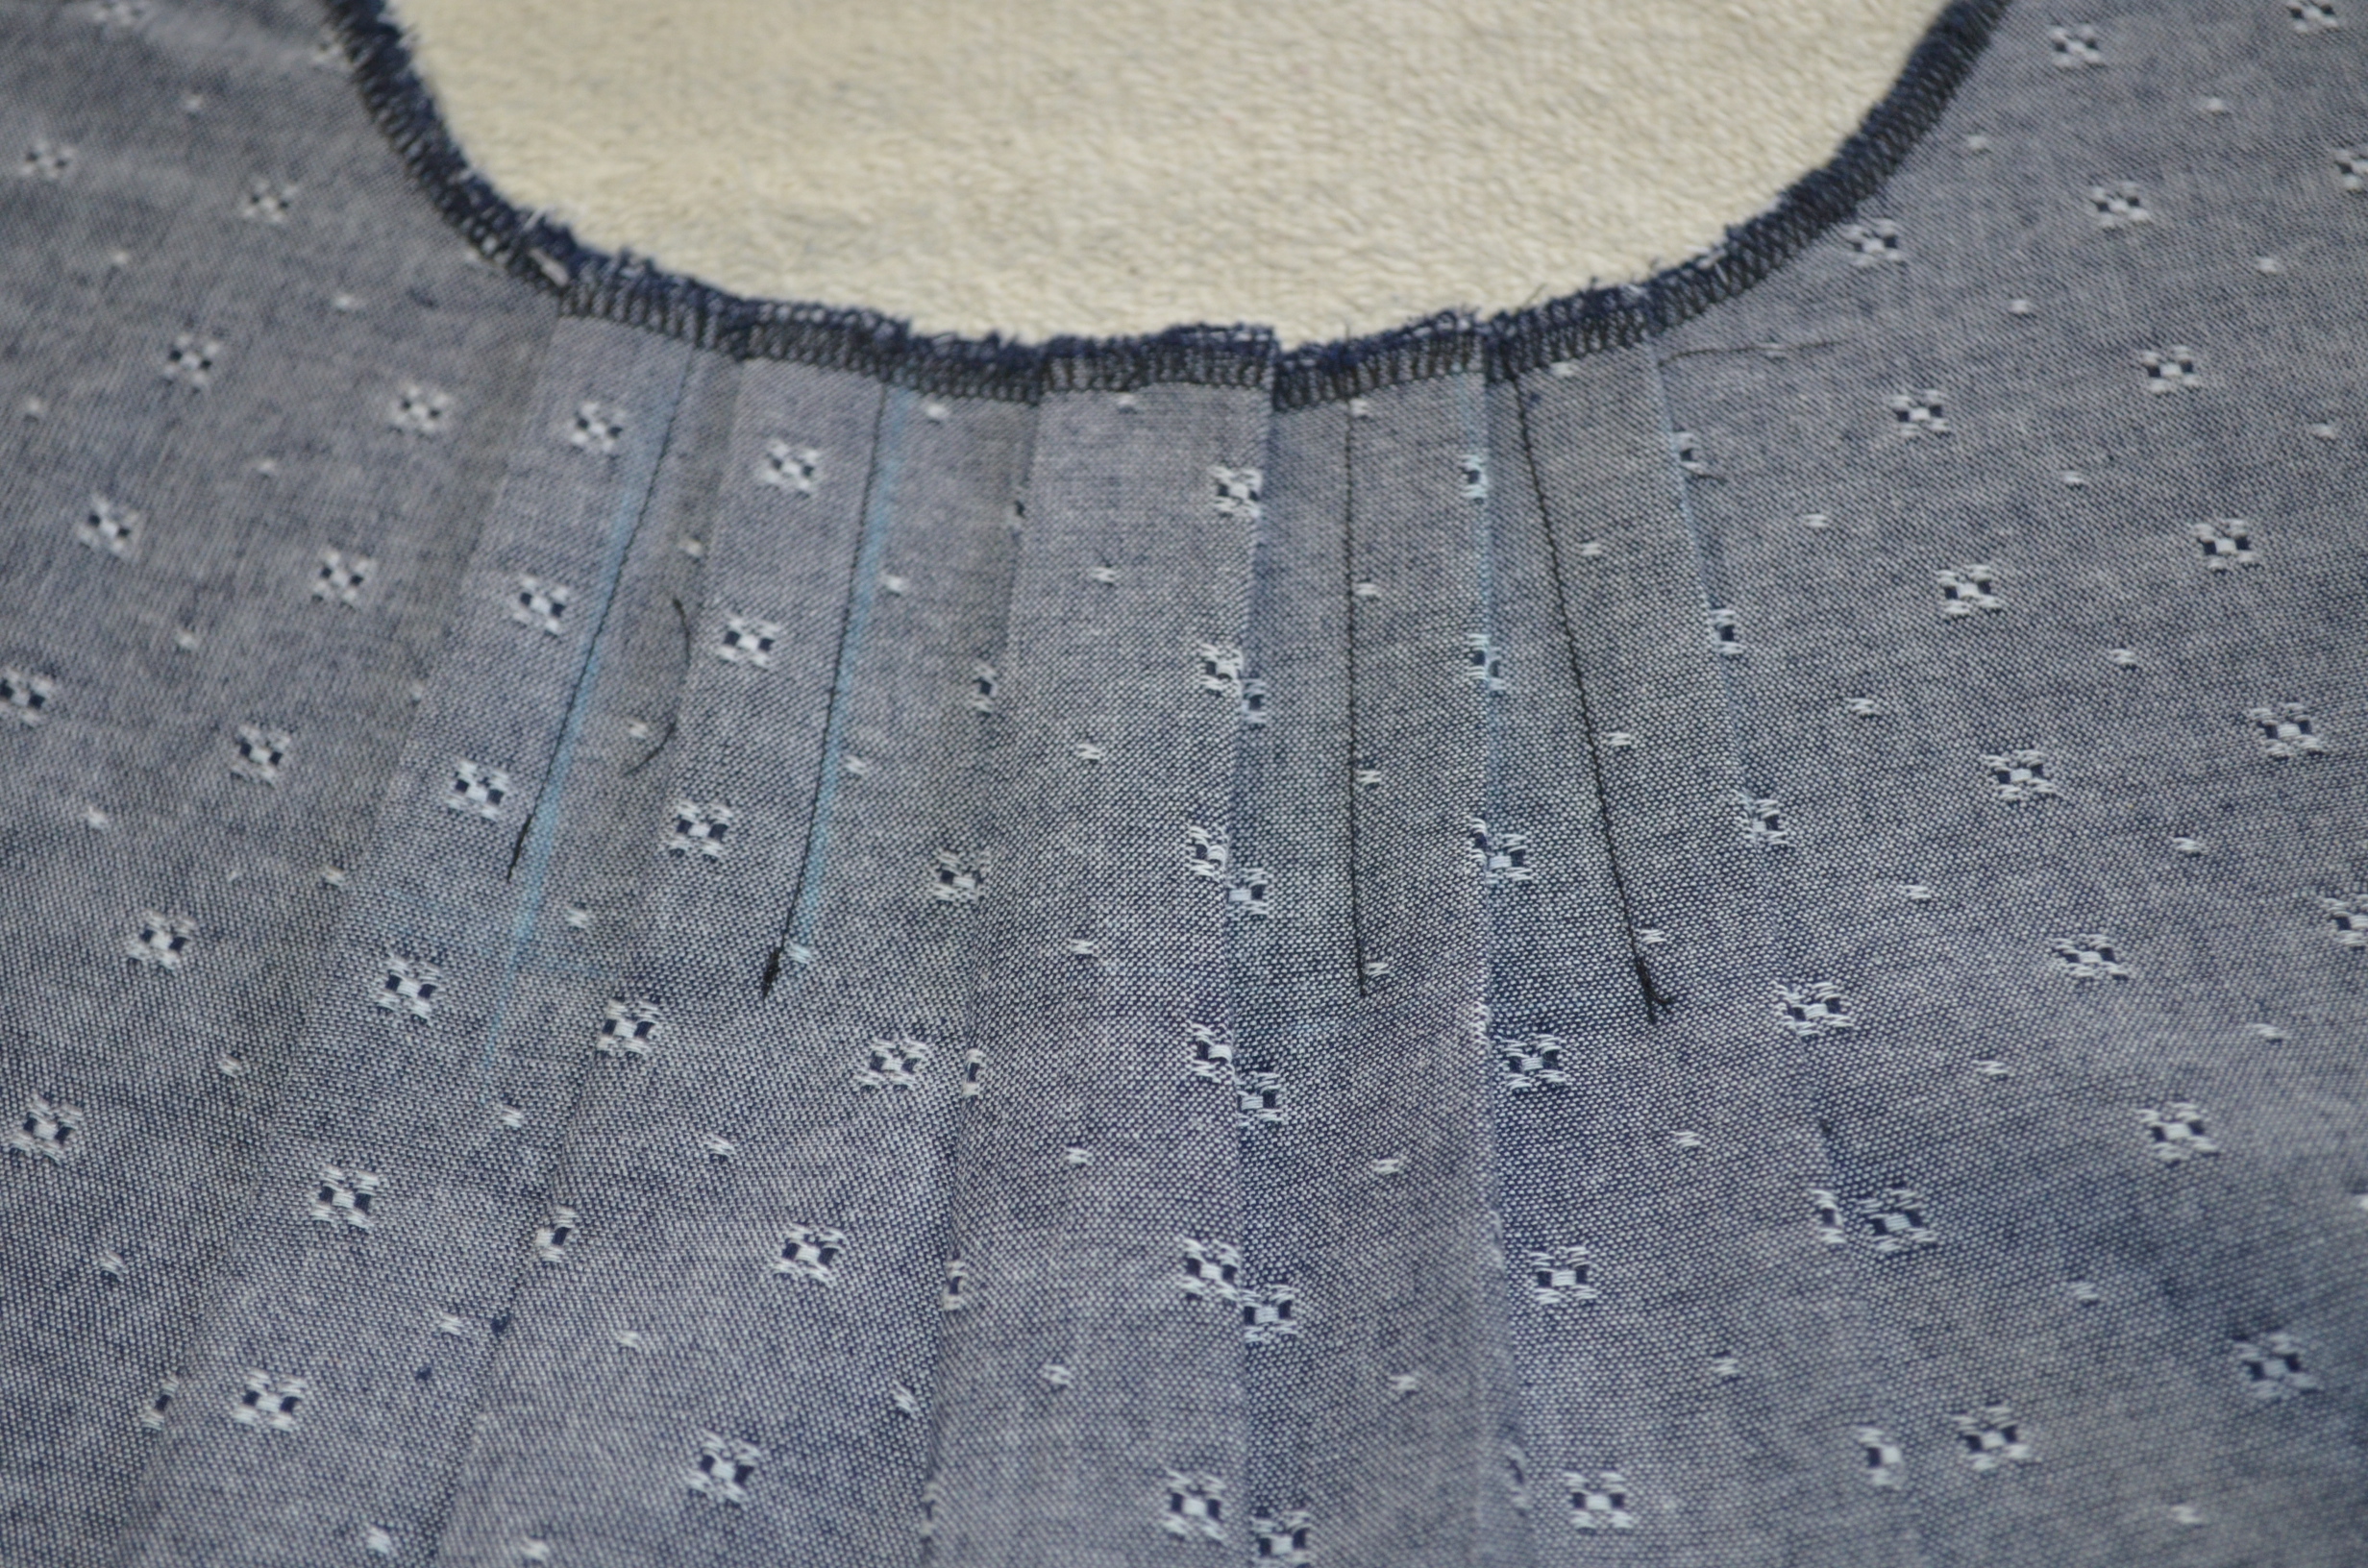
Step 2: Prepare Top Edge with Pleat Tape
Fold and press the top edge 1”. Then, fold and press again 3 1/2” (or 1/2” larger than your pleat tape). My pleat tape is 3”.
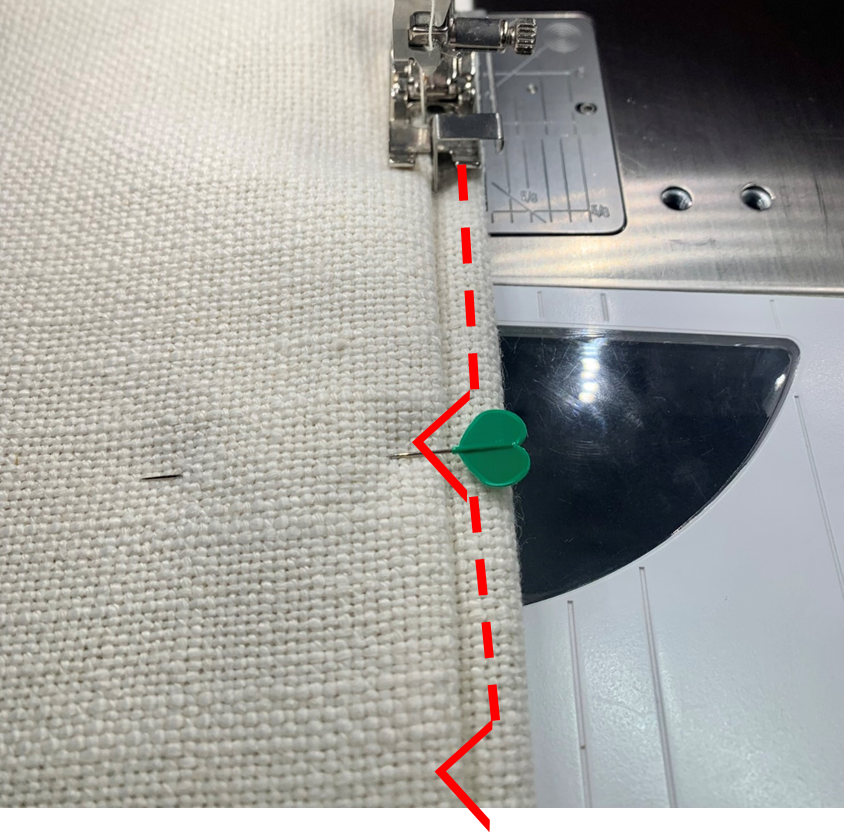
Cut pleat tape the width of your panel plus an extra 1” on ends to fold under. Place pleat tape on the folded fabric so it is 1/4” from the top. Here you can pin or baste with long stitches or a temporary spray to keep the tape in place.
Place the top under Walking Foot #50 and lower foot. Use your Freehand System to slightly lift the foot and position the pleat tape so the top is aligned with the 1/4” mark on the right toe. Also, fold under pleat tape 1” at start and end. Pardon my dust!
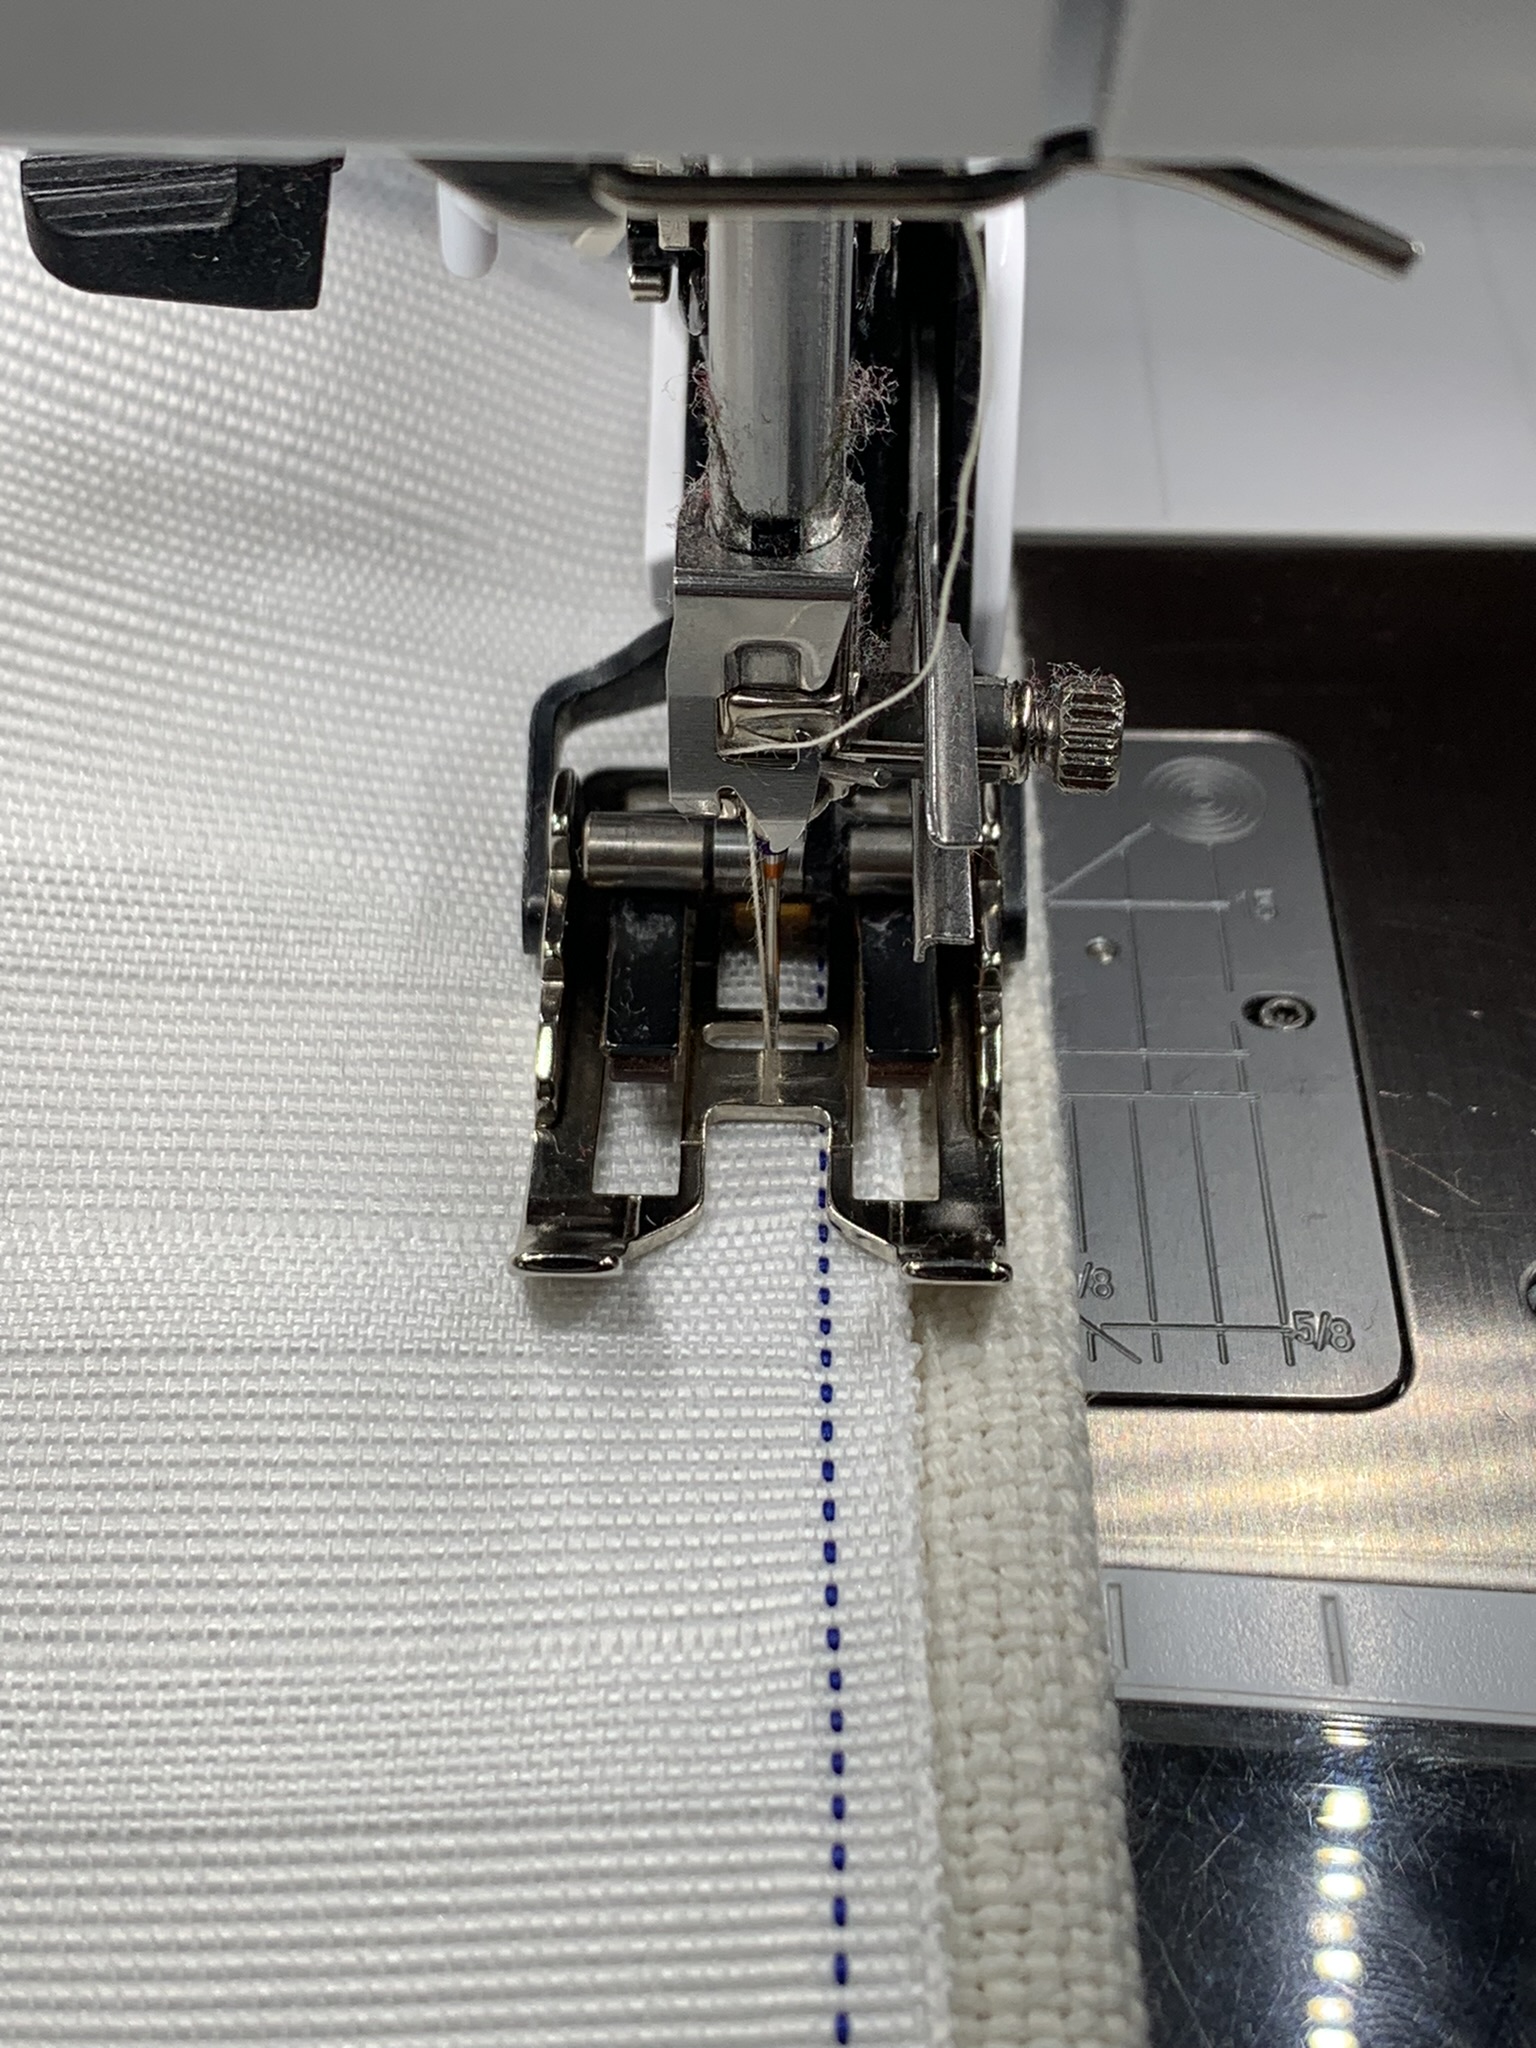
Sew down the top keeping an eye on the 1/4” mark. Start and stop with a securing stitch.
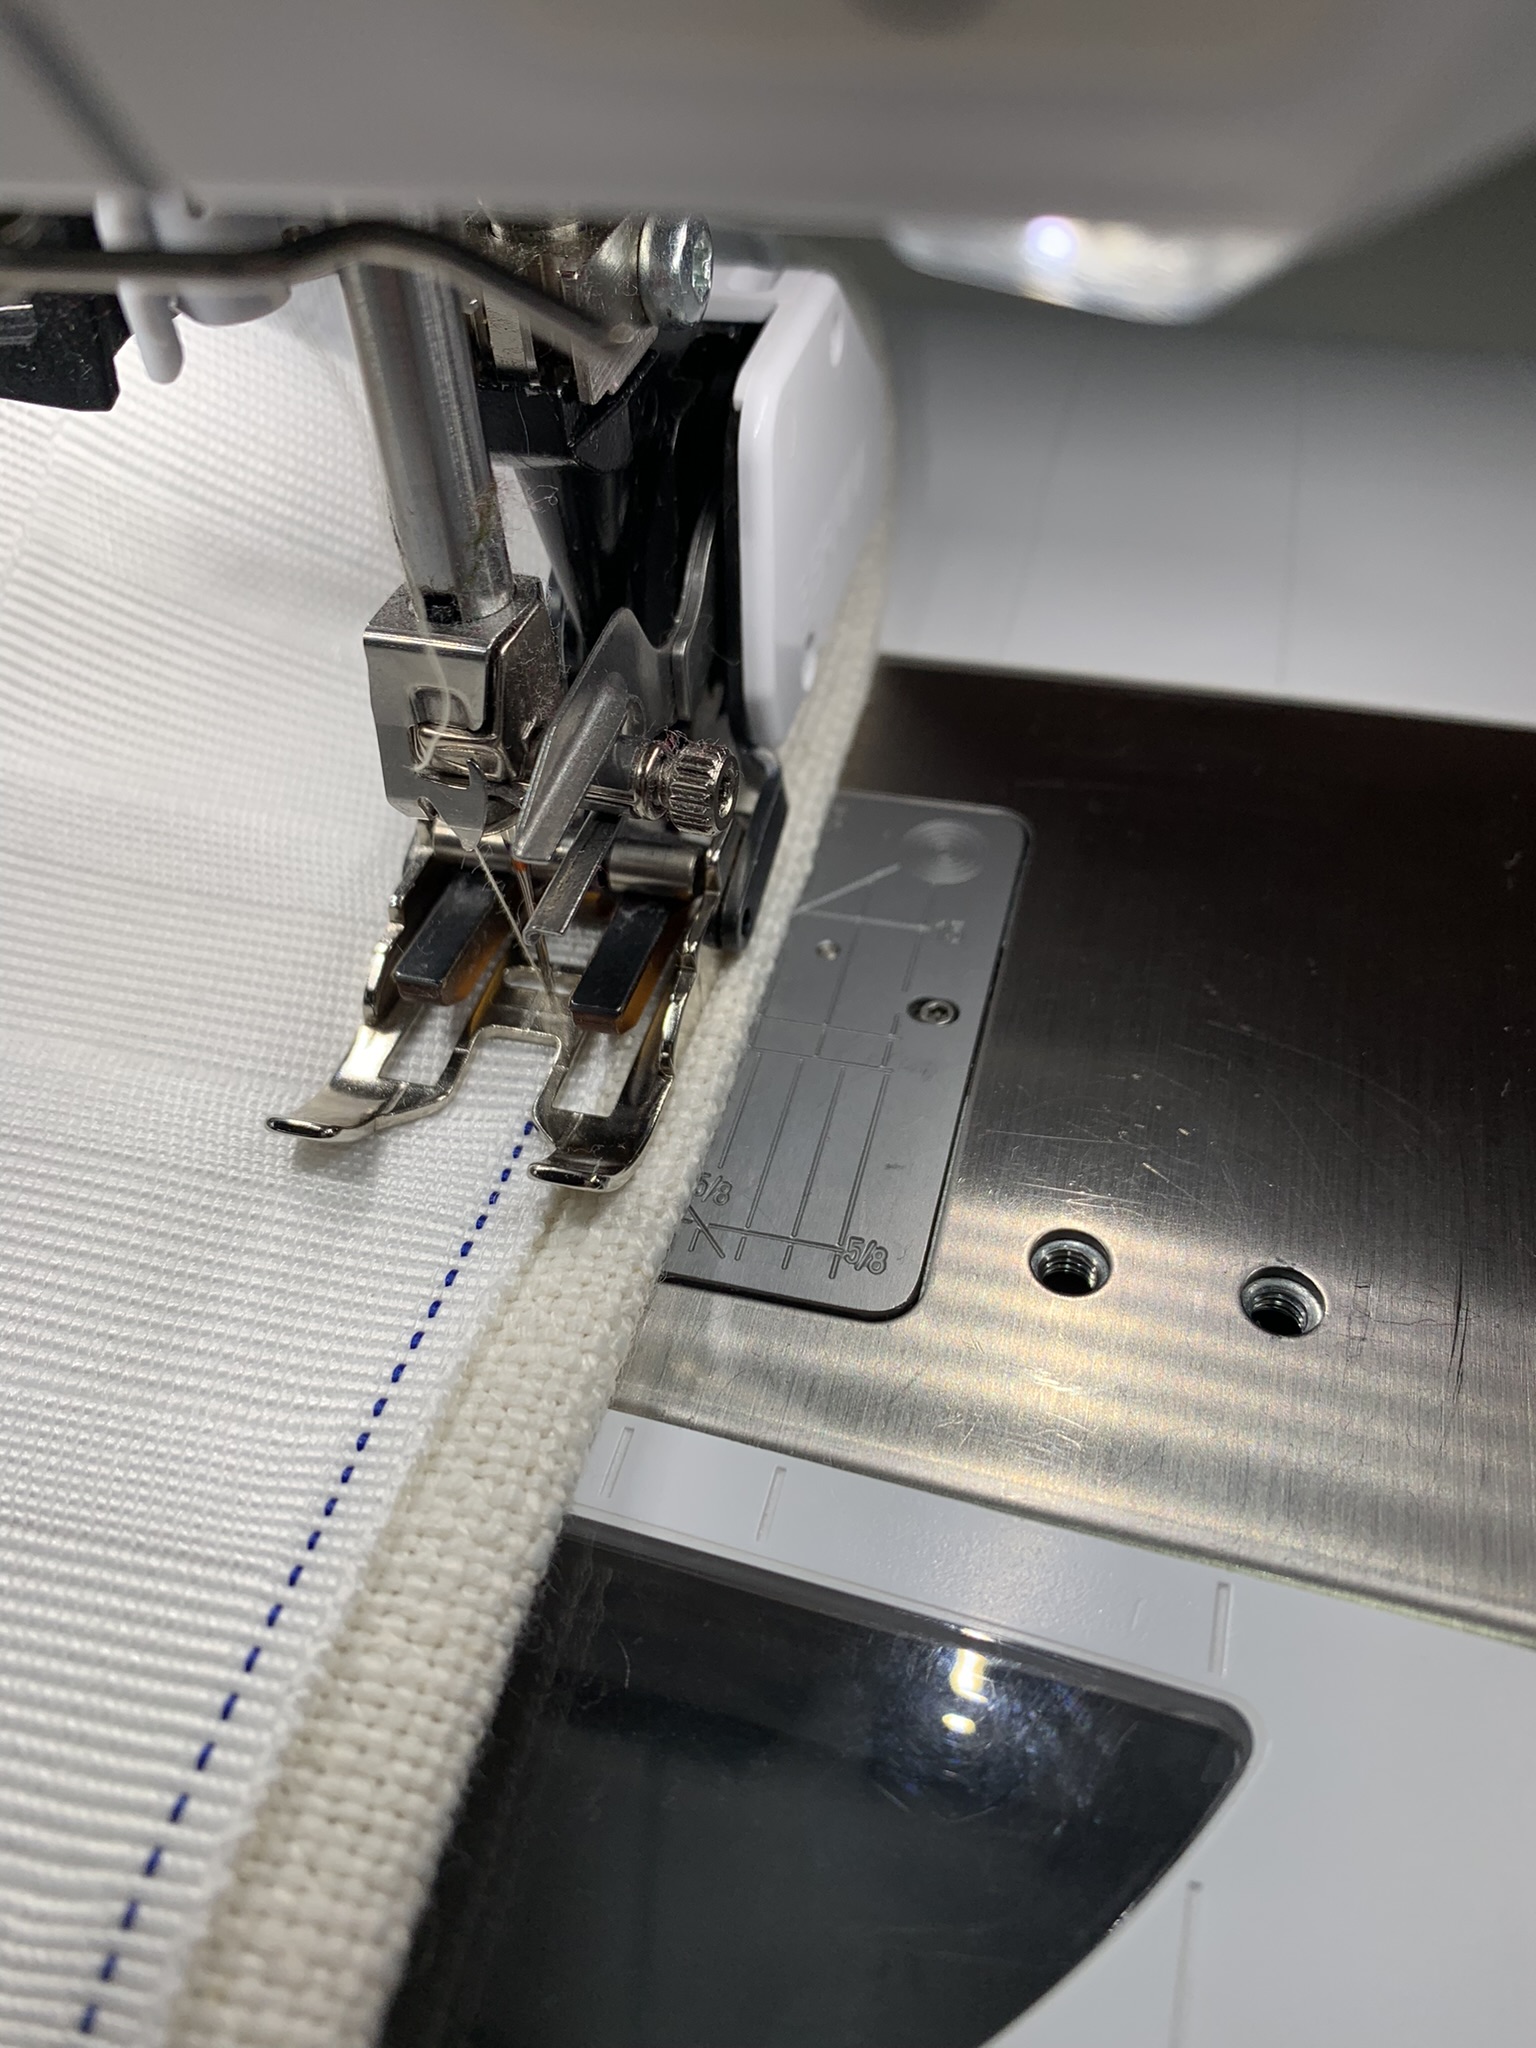
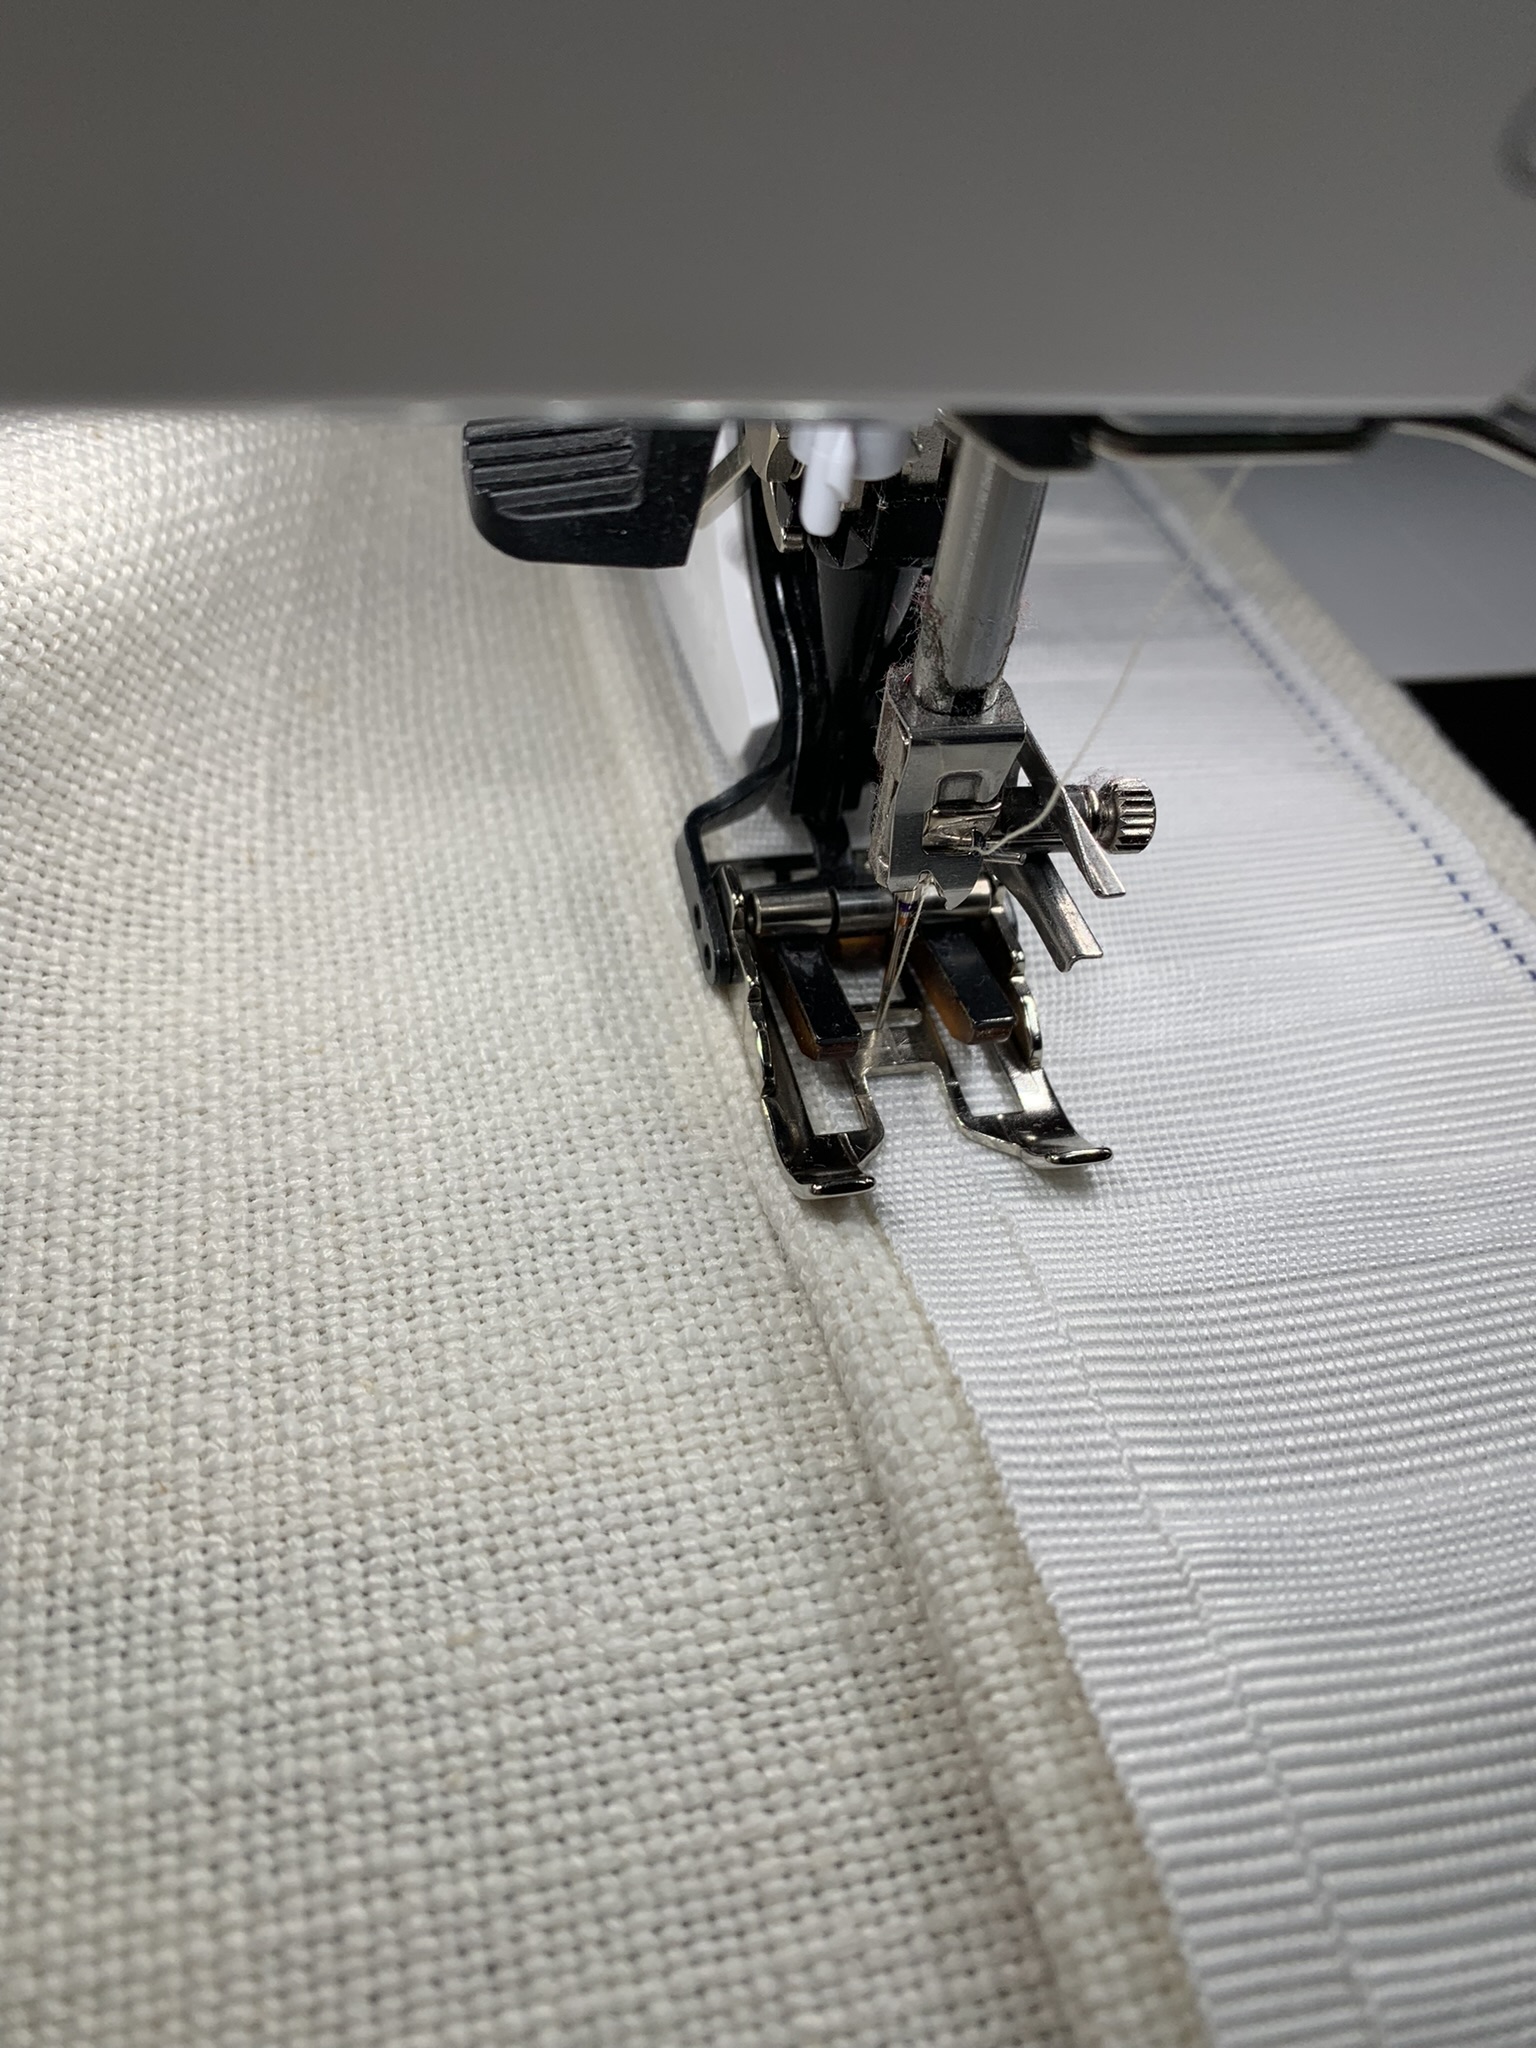
Do the same for the bottom of the pleat tape. This time position the tape by lining up the 1/4” mark on the left toe.
Sew along the bottom edge securing the tape in place. Remember to fold under the tape at start and end. Make sure you don’t sew the prong openings or you won’t be able to insert the prongs!
The pleat tape can be used for many different looks from very casual to crisp and tailored. The key is how you place the hooks. I buy 4 prong hooks because they allow for all the different variations whether I am using all 4 prongs or 2 prongs.
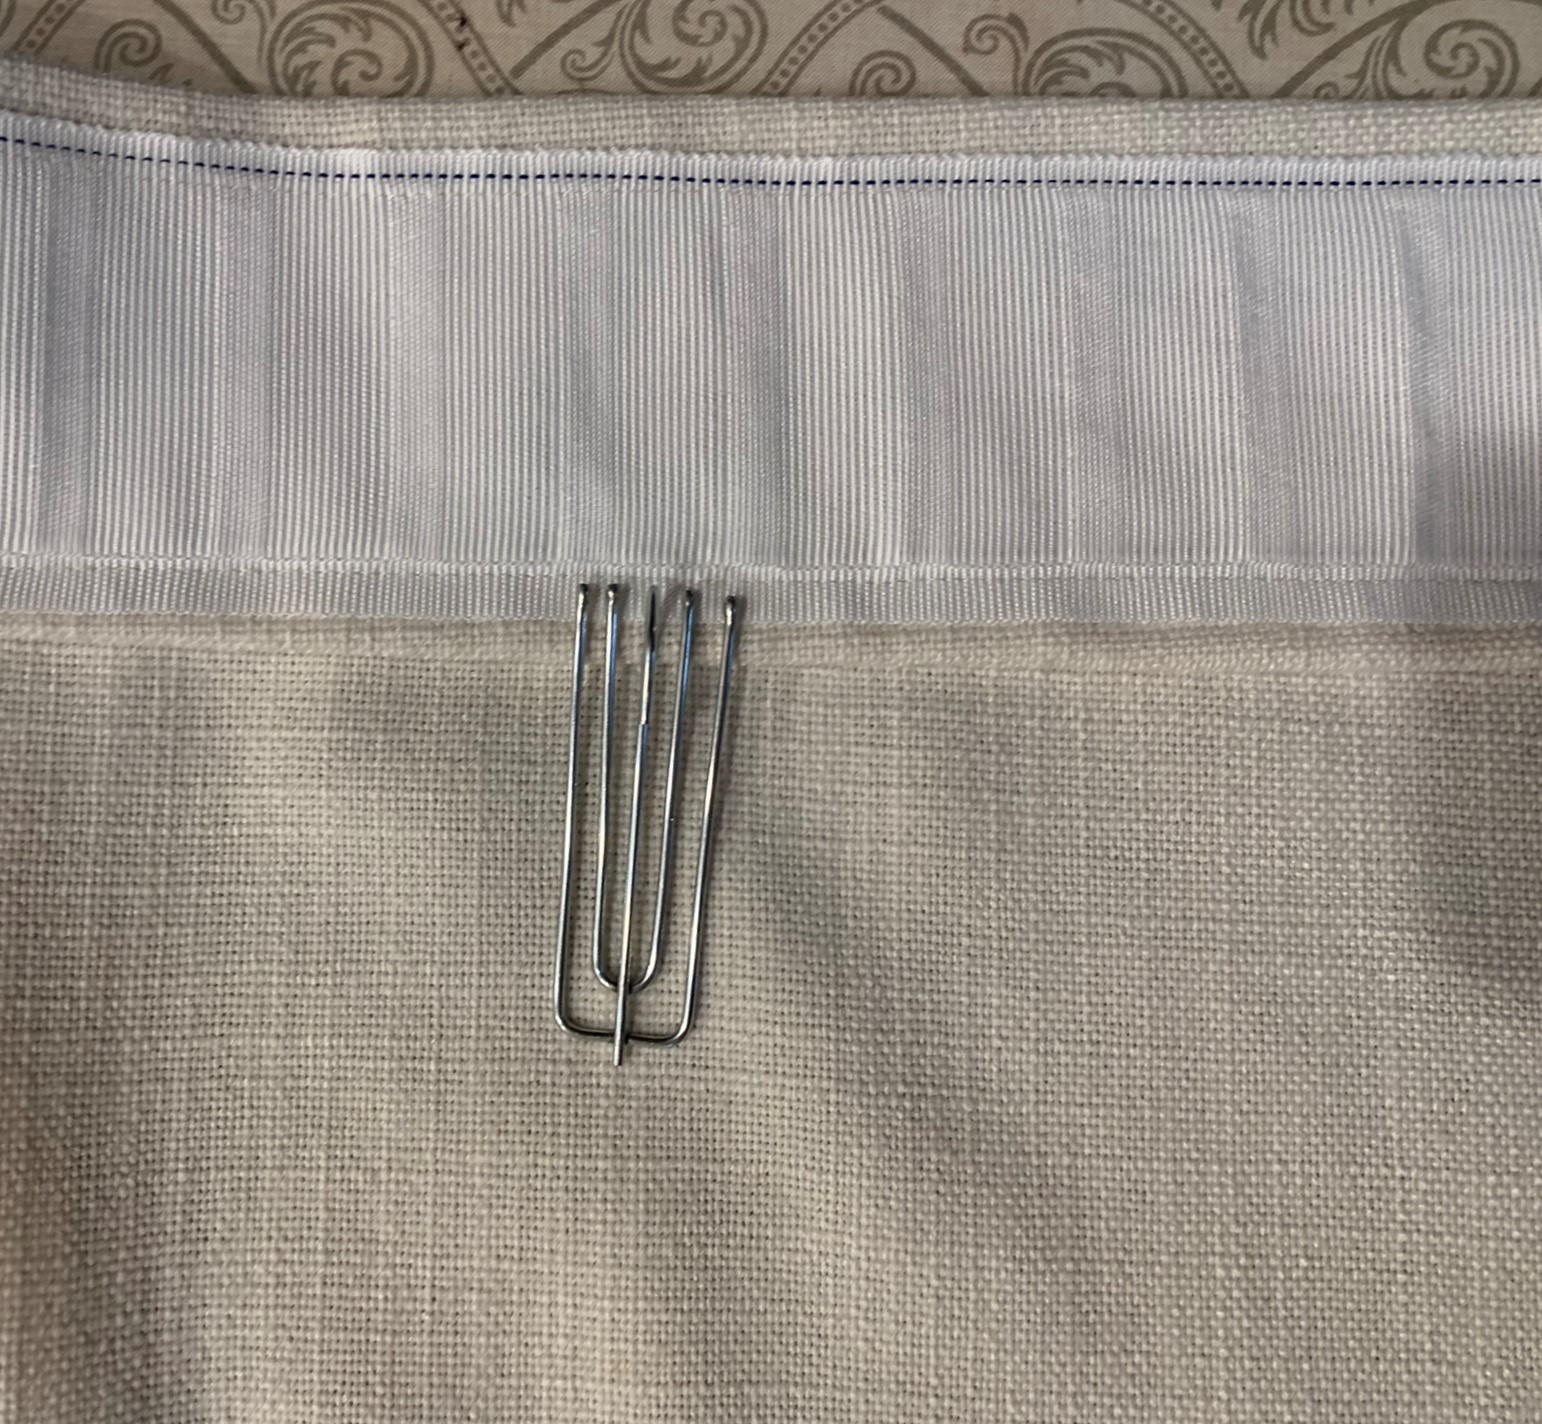
Today we are creating a casual pleat that is not very tailored but still neat. Lay out the pleat hooks along the tape so they are evenly spaced. For mine, I count every 8 openings – 4 for the hook and 4 to add space between hooks. If you need to make adjustments to even out the spacing, increase or decrease the spacing by 1.
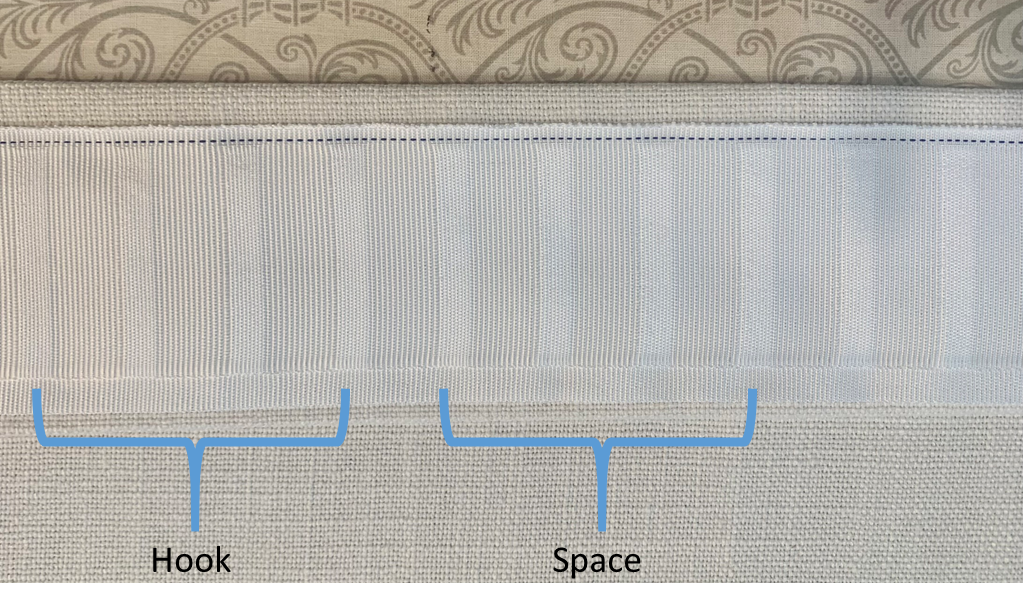 For the casual pleat, I insert the 2 outside prongs only. The 2 inside prongs remain outside of the pleat tape but I still count 4 openings per hook. The outside prongs will go into the 1st and 4th opening. The inside prongs will not be inserted but remain on the outside of the tape. The 2nd and 3rd opening will create a pleat. So the number of openings you have between the outside prongs will determine the depth of each pleat.

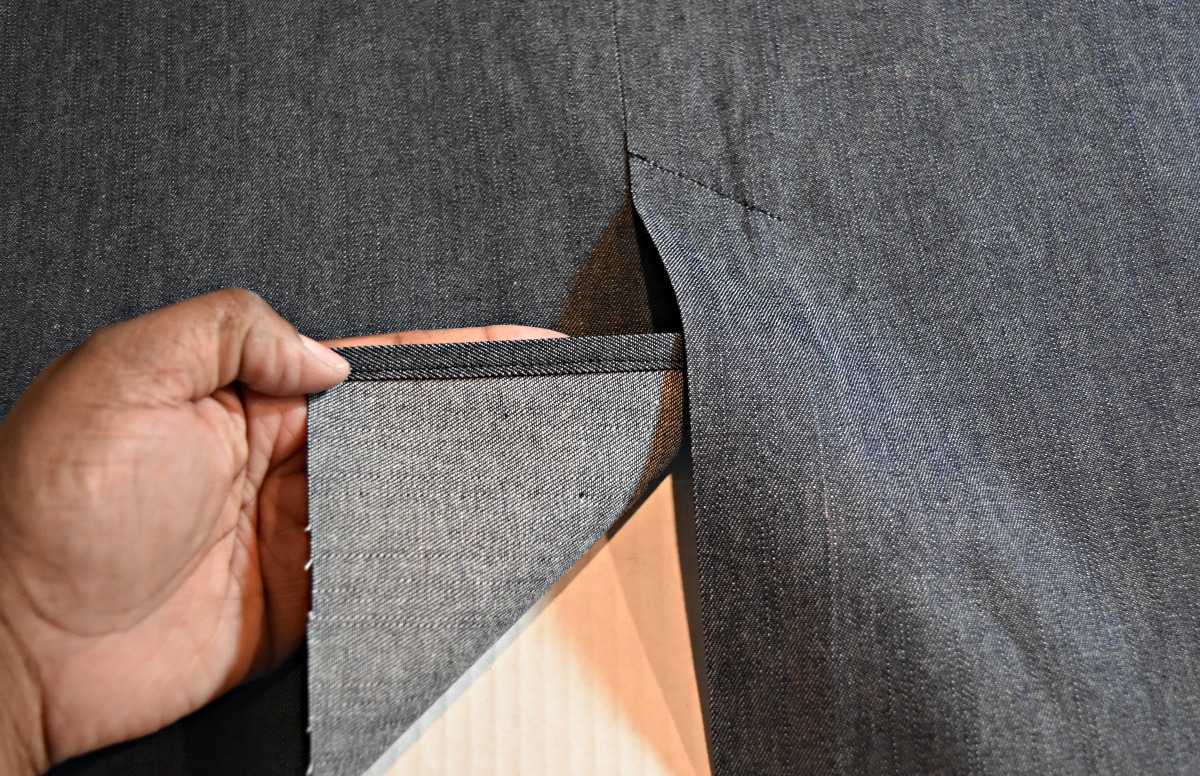
Step 3: Sew Bottom Hem with Blind Hem Stitch
Fold and press the bottom edge 1”. If you have a serger, you can overlock the edges (this is great for loosely woven drapery fabric that is thick). Fold and press again 4” to create a hem. Use Wonder clips to keep the edge neat.

Add large pins to the inside fold with the sharp points facing down.
Here is the tricky part. Fold the hem under the main fabric right sides together leaving a 1/4” of the hem peeking out. The pin heads should look like this in relation to the fold. The 1/4” fold under the pin head here will be referred to as the flange.
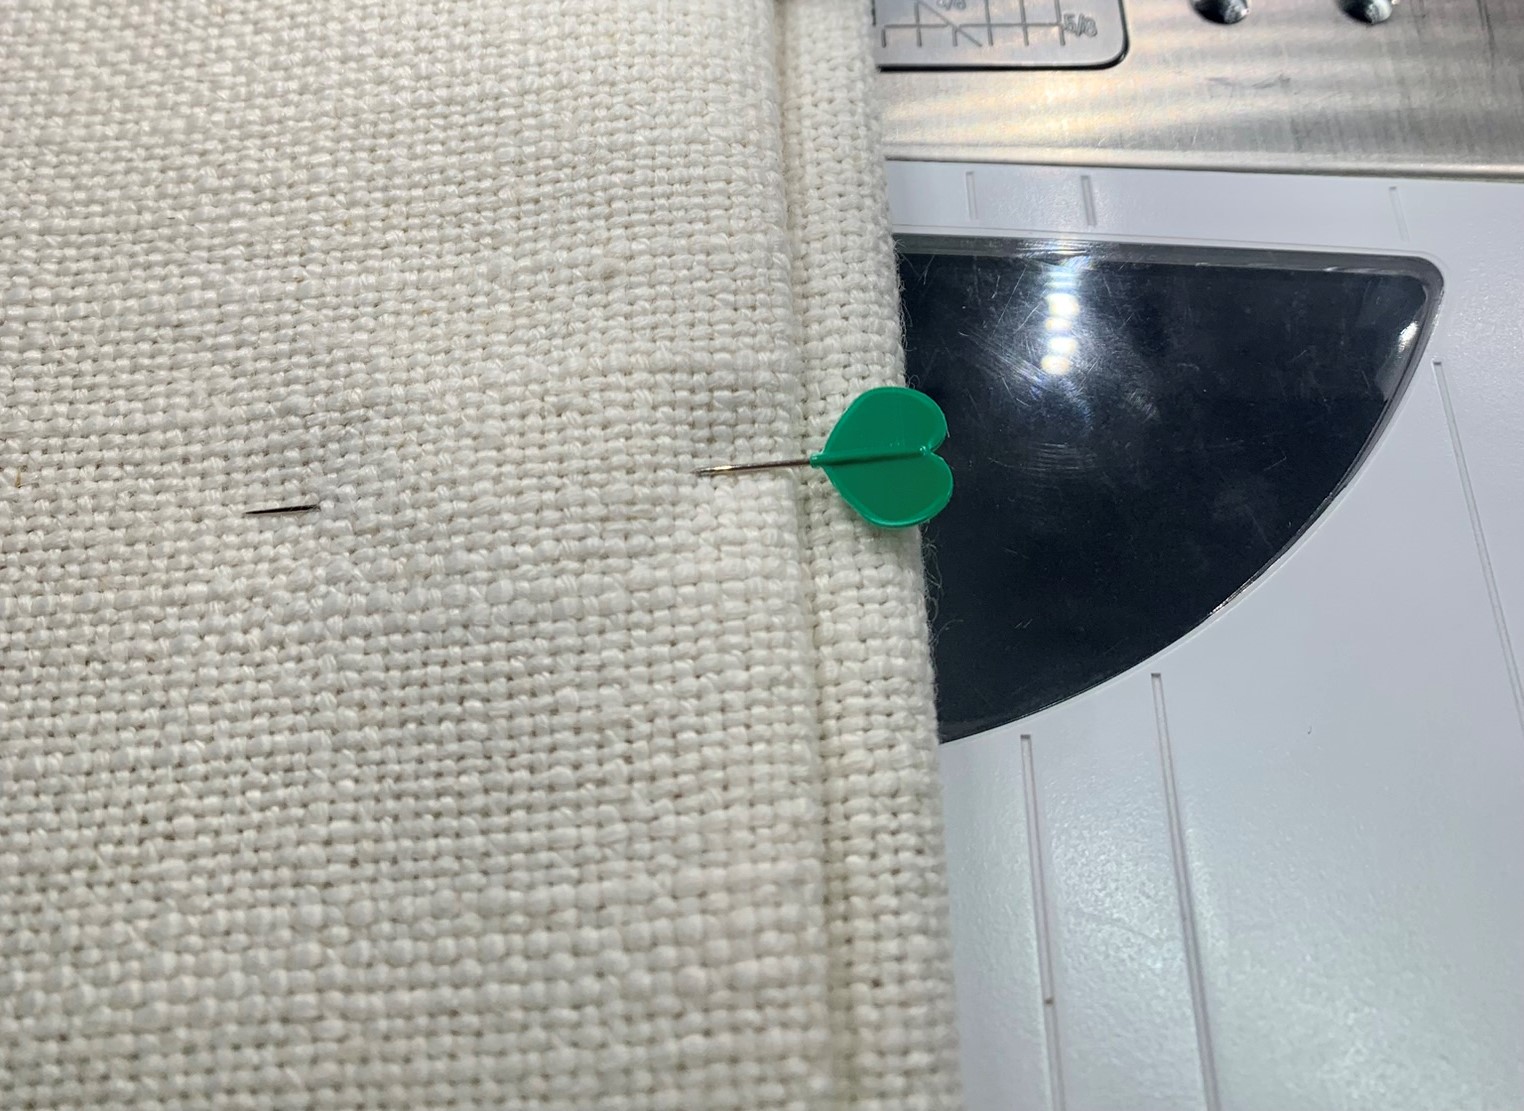
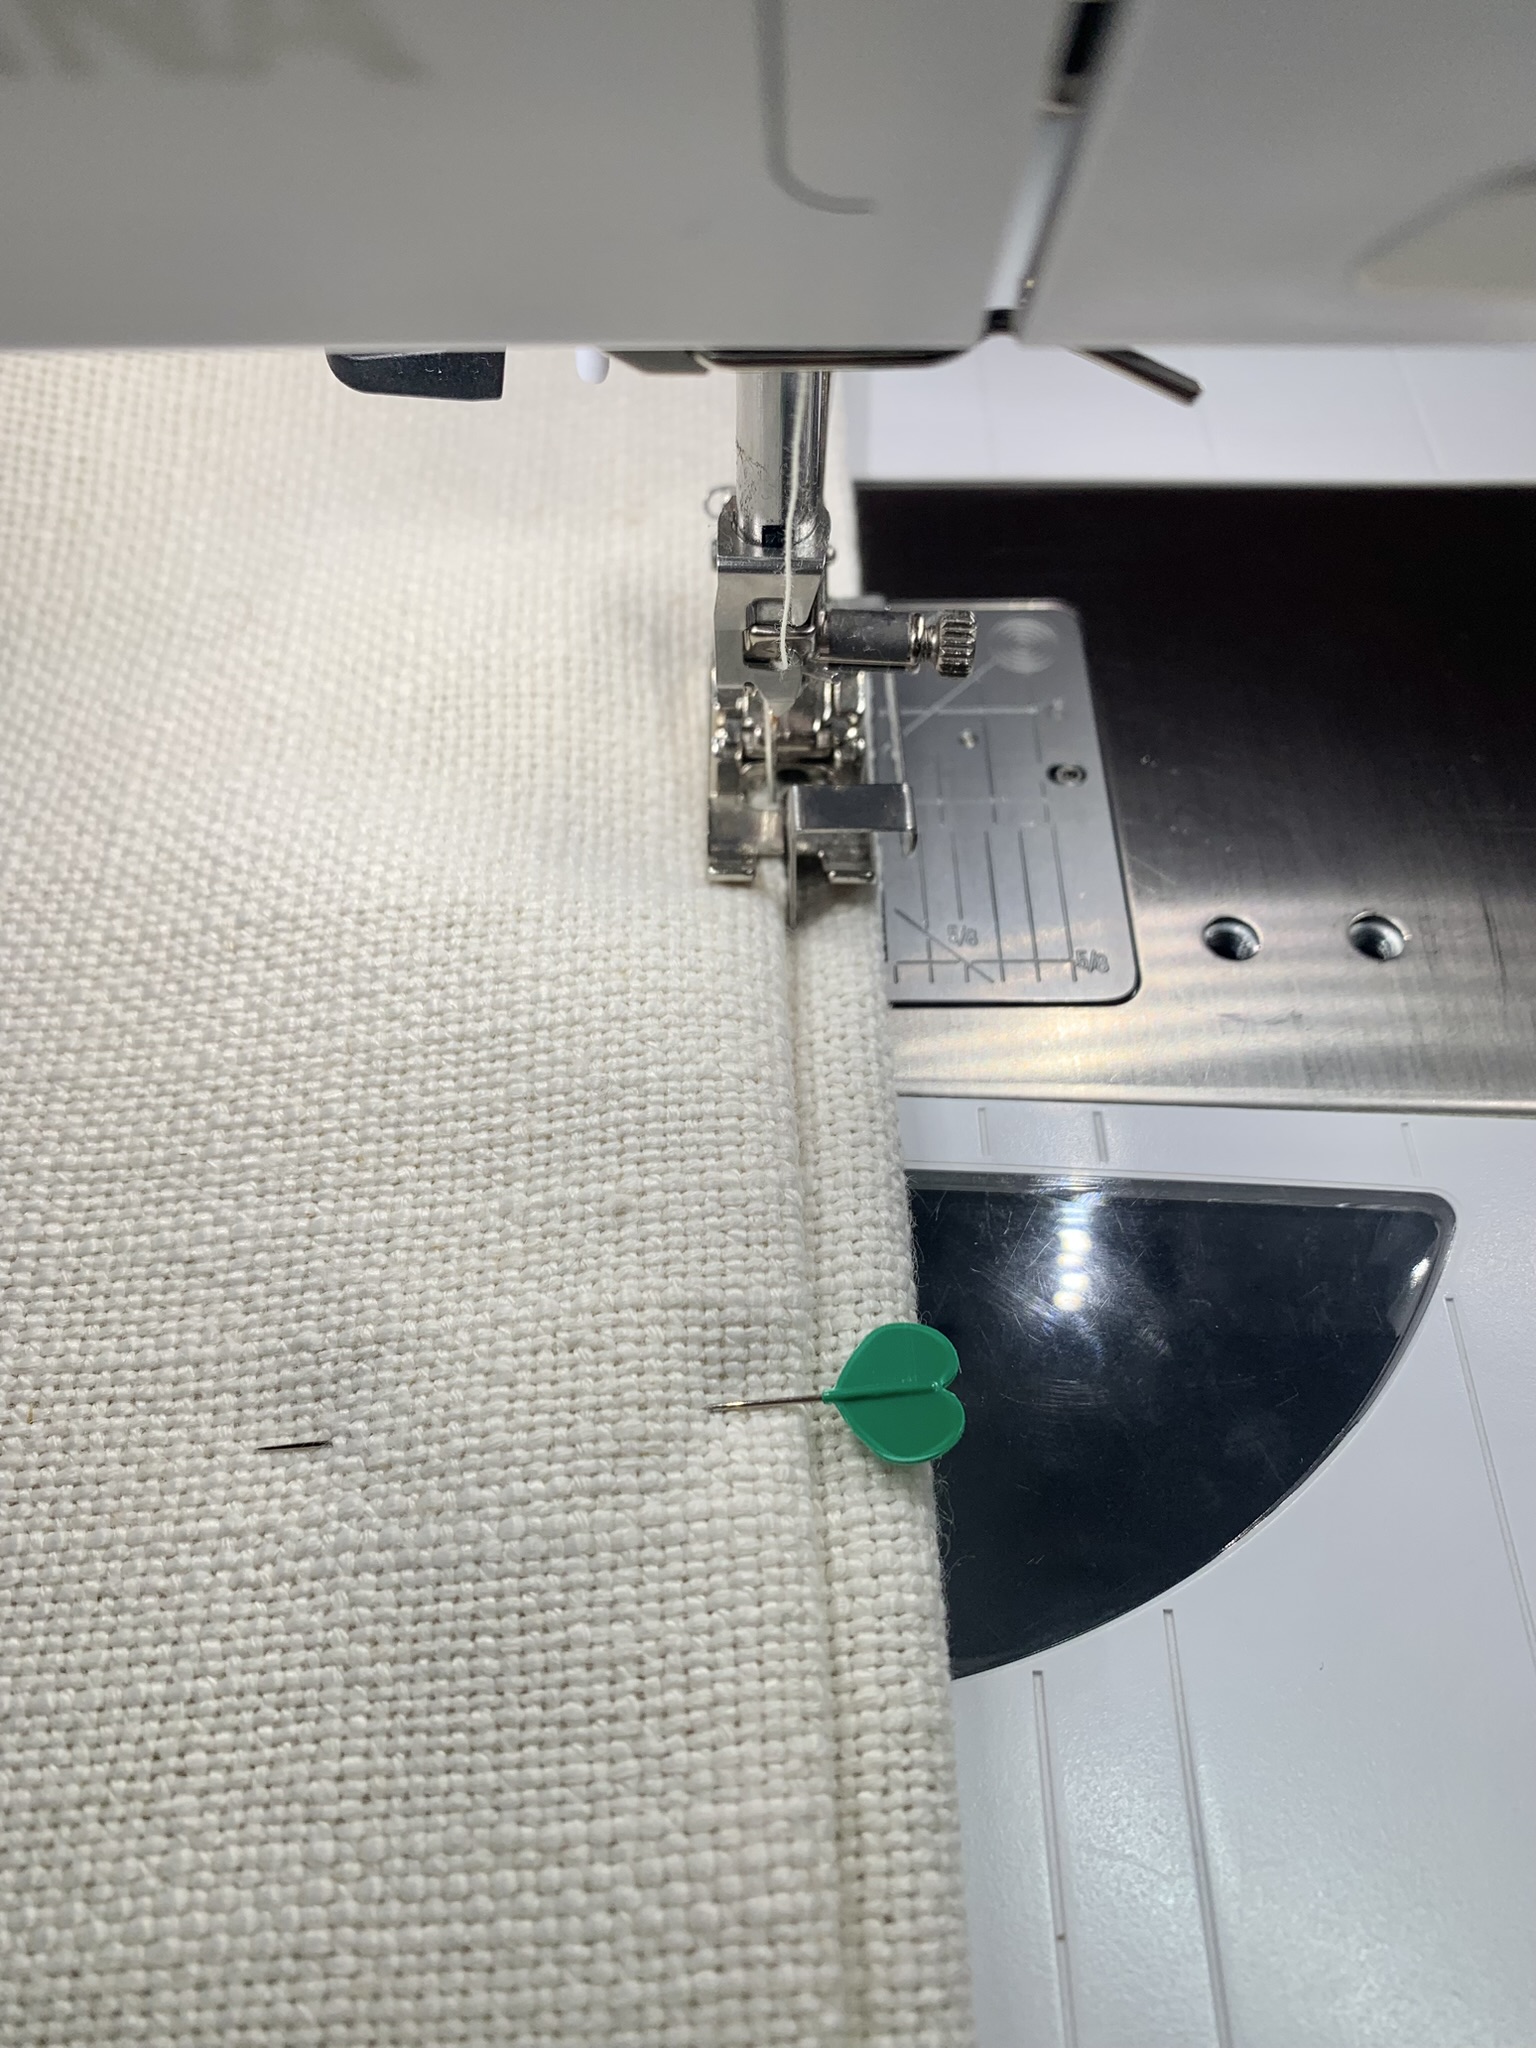
Attach Blindstitch Foot #5 to the machine. Position fabric so the flange is under the right toe and the fabric fold is up against the center guide. Notice why we placed the pins down – the heads of the pins are to the right where we can easily remove them.
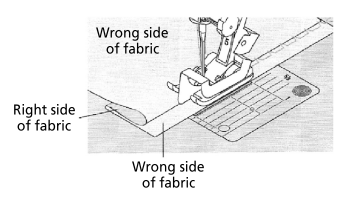
Here is a diagram that is helpful in understanding how the hem is folded under the main fabric:
Select Blind Hem Stitch #9. Notice the stitch pattern is made up of 4 straight stitches and 2 stitches that form a point. Also, notice the stitch starts on the point.

With the handwheel, lower the needle and see where it lands in the fabric. You want the needle to make contact with the folded edge. Does it fall into the fold? If not, increase the Stitch Width or move the Needle Position. Note: when moving the hand wheel the stitch pattern may not stay at the first stitch. Make sure to press Pattern Begin if you are not at the first stitch.
Make a few stitches keeping an eye on where the needle lands. The straight stitches should be in the flange and the points should be in the fold.
After a few inches check your blindstitch on the right side. If it is too visible, reduce the Stitch Width or move the Needle Position. If it is not catching the folded edge, increase the Stitch Width. In the picture below, white thread was used to show what the blindstitch looks like on the right side. If the thread was same color as the fabric, the stitches would be invisible.
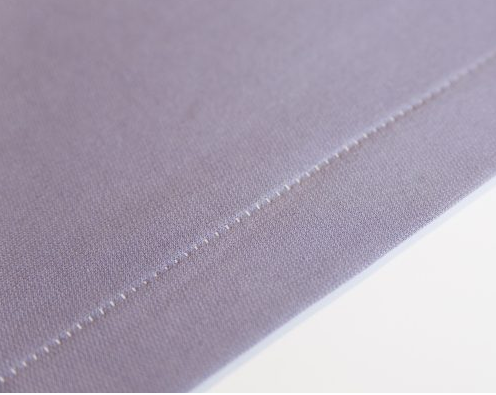
Finish stitching the bottom hem. Use a securing stitch at start and end. Then, press the hem so the flange is up. Admire your blind hem stitch! As you can see (or not see) the stitches are not noticeable.

Professional Tip:
Neaten the pleats of the panel and loosely tie them with a ribbon. Keep the ribbon on overnight to give the pleats some fabric memory. When you take off the ribbon the pleats will hold and keep the panel looking nice.

End Note
There are many different types of hems that you can machine stitch. Much depends on the texture and thickness of the fabric, how the hem should drape, and personal preference. You will learn, like me, what works for which fabric. Always test sew if you are working with a fabric that is not familiar to you. Such is the sewing adventure! We are always learning and growing as sewists!
Used Products


What you might also like


7 comments on “Casual Pleated Curtain”
-
-
Yes. You can add a lining by placing the lining fabric on the back before stitching the top and side hems. This way the raw edges of the lining fabric are inside the hems. The bottom of the lining will need to be finished separately from the blind stitch hem.
-
Would adding an insulated lining be too heavy for grommets?
-
-
It’d be helpful to see how these curtains are hung! Could you please respond and tell us? Thank you.
-
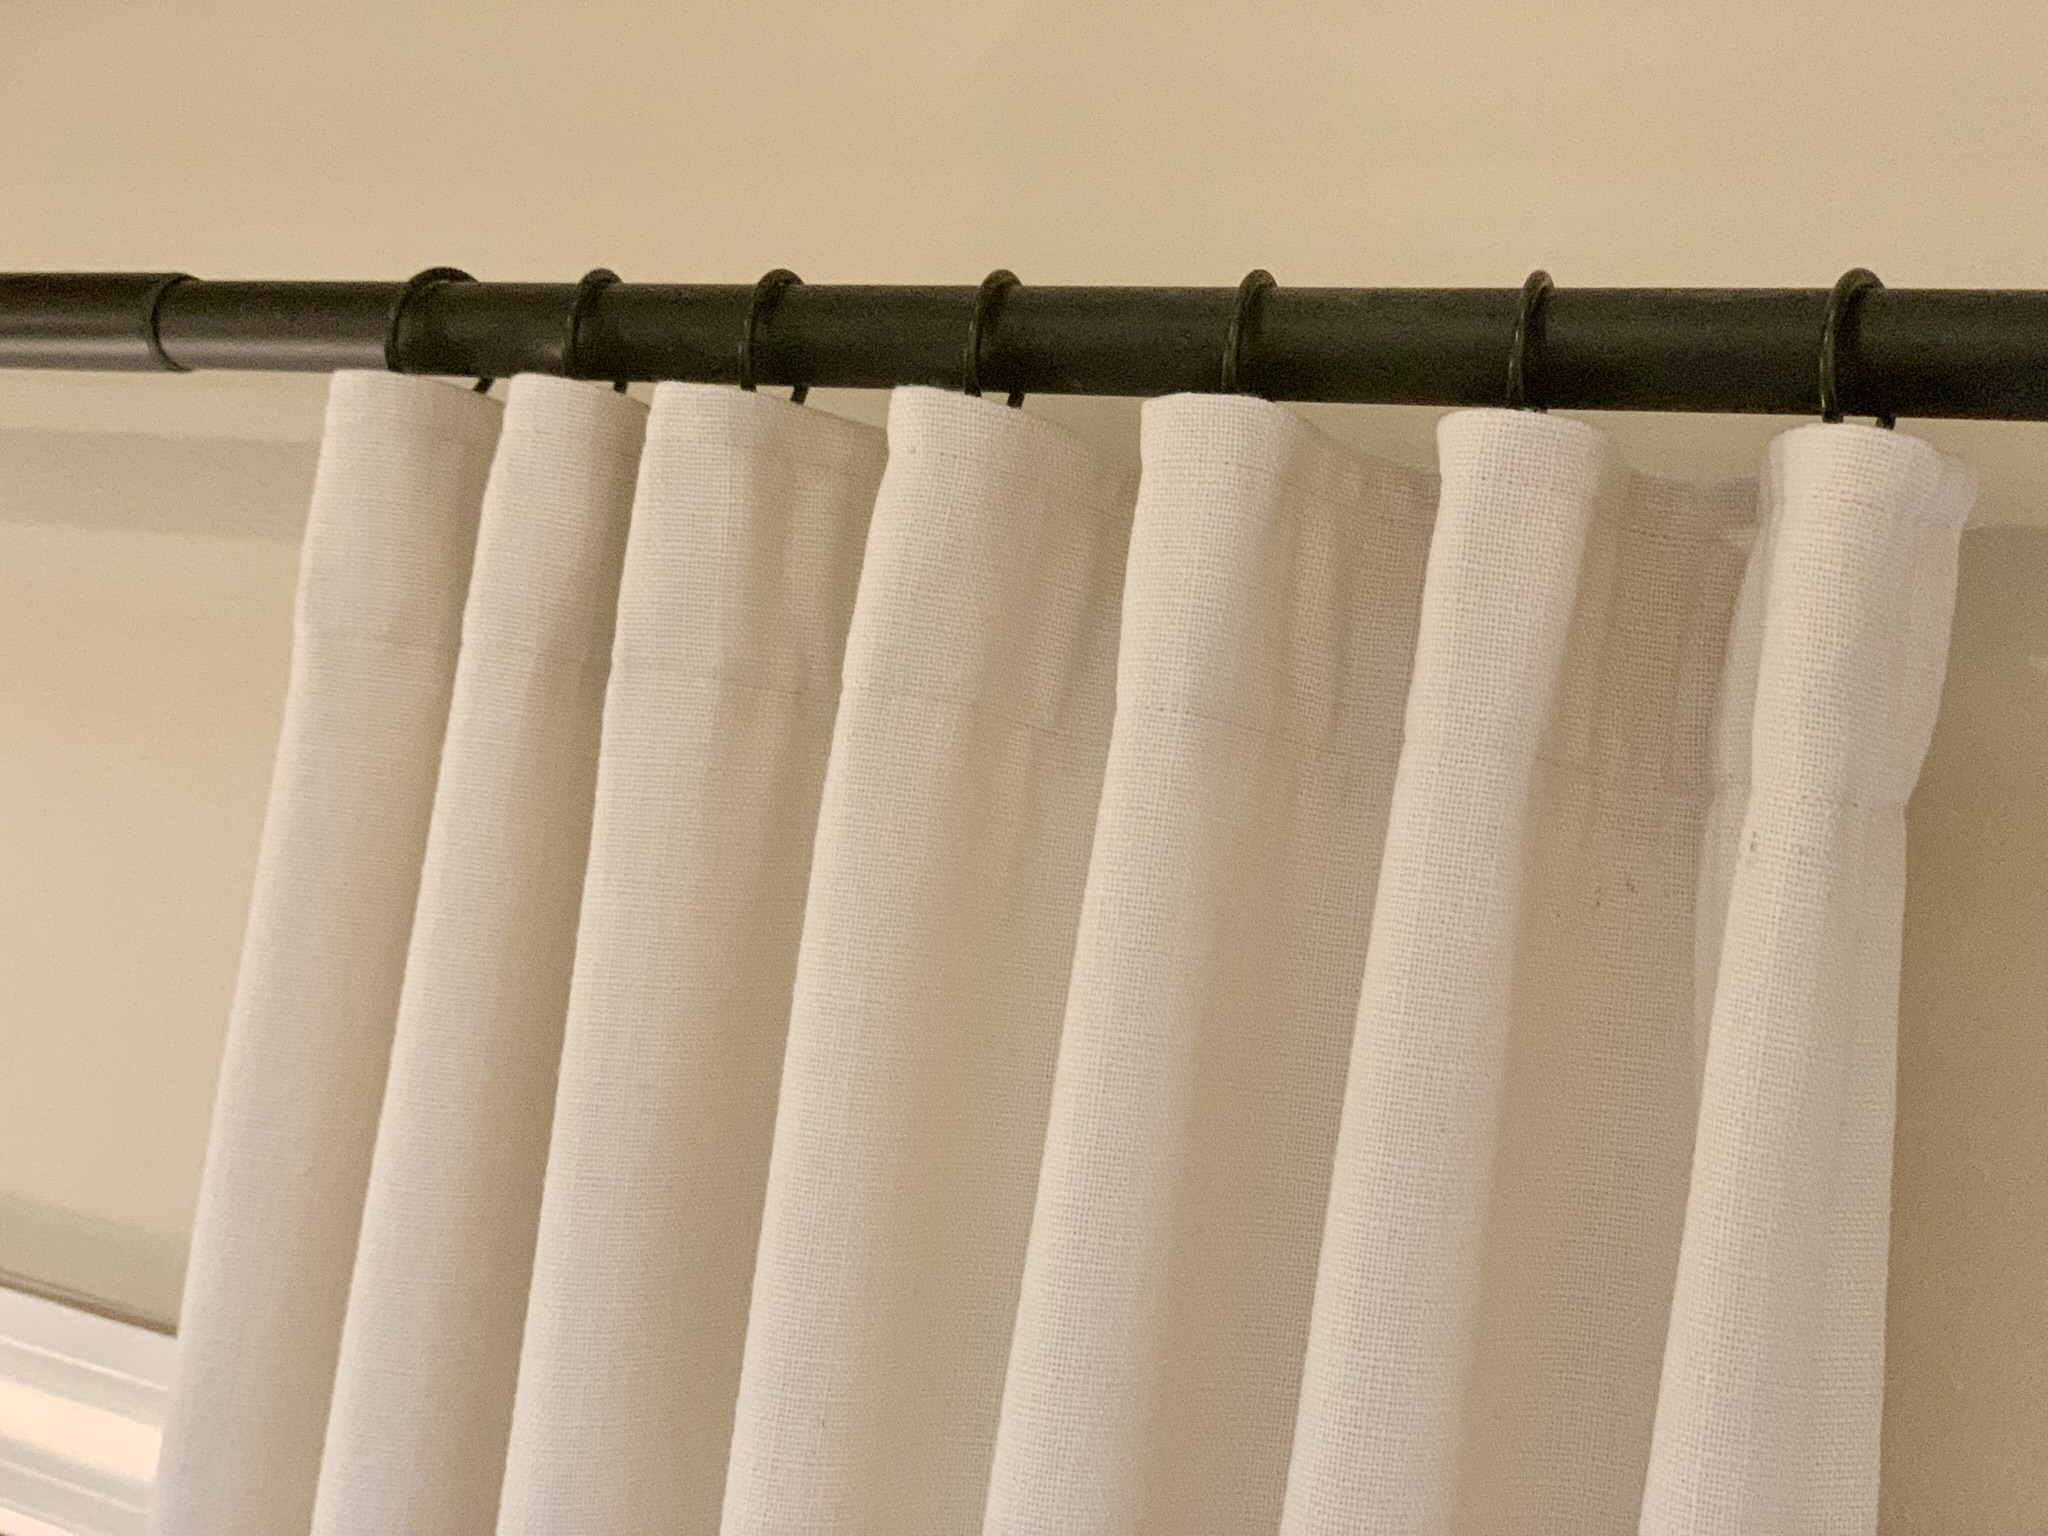
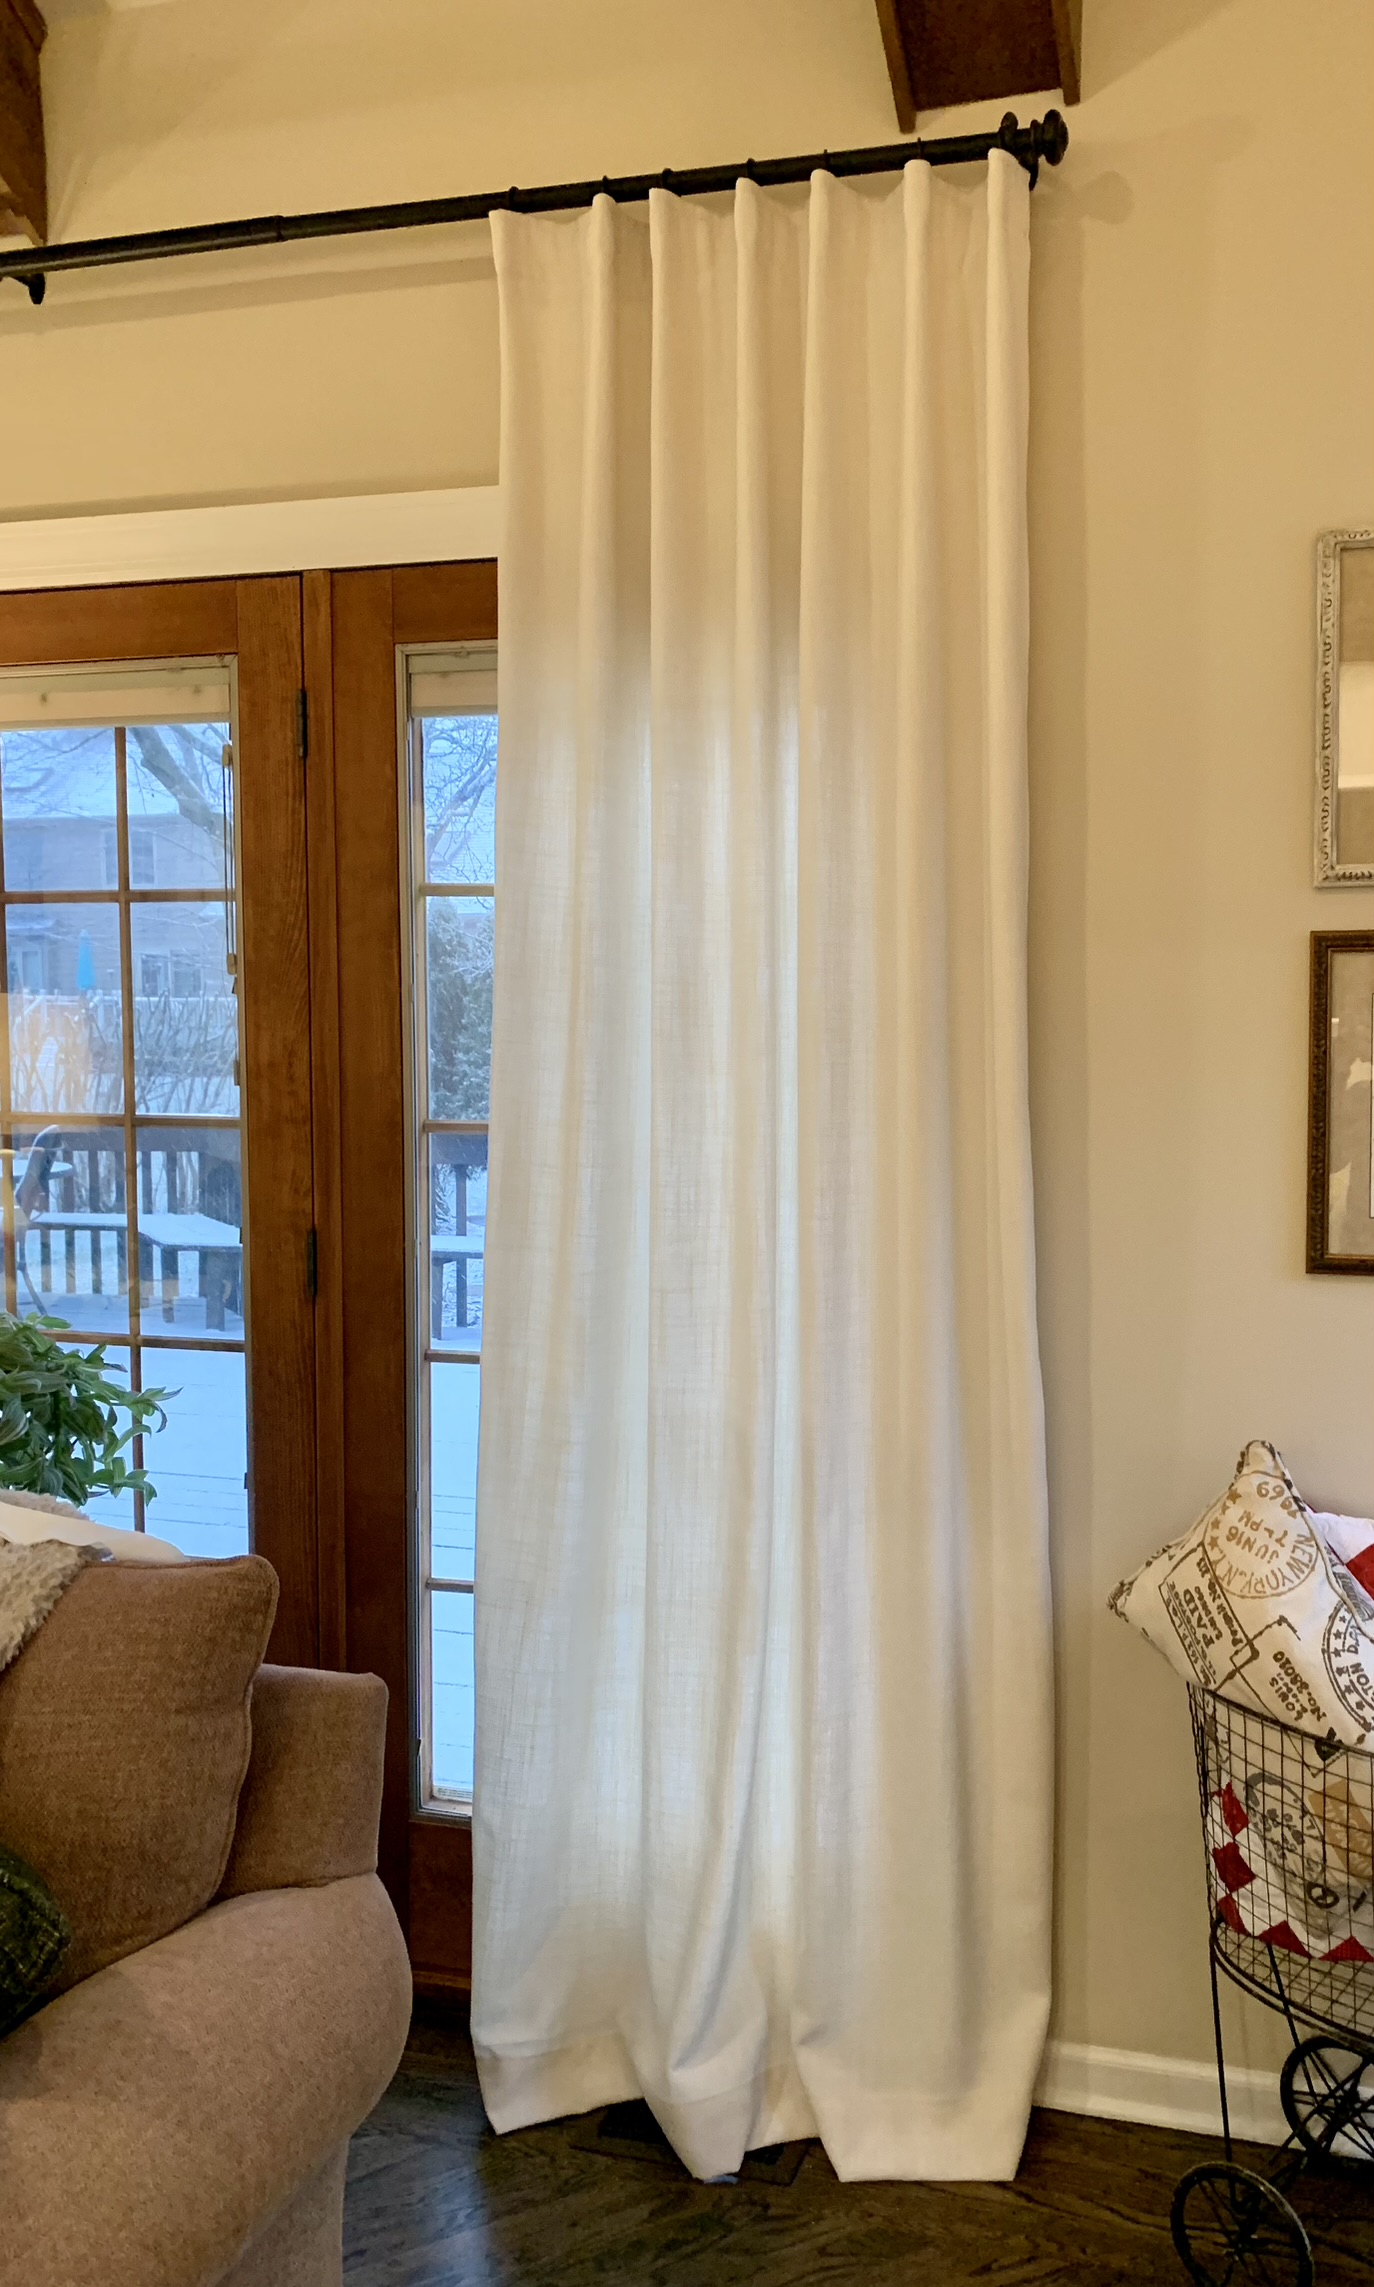
Hello. To hang the curtains, you will attach the prongs to curtain rings. You can see the rings in the first picture along the drapery pole. The prongs are not visible. Hope that helps!
-
-
How do you figure the width of your panels?
-
The width of home dec fabric is usually 54″. I used the entire width. If you have a large window that you would like full coverage, sew 2 panels together to double the width or make another panel. I like to keep the panels separate rather than joining them so there is more versatility down the road. For example, instead of make two extra wide panels, I’ll make 4 panels. If you are using a print, you will need to buy more fabric to match prints. Hope that helps!
-
Leave a Reply
You must be logged in to post a comment.

Can you add a lining?