Hemming Three Different Ways
Hemming is often the last stage of a project. It’s a step I look forward to as there is nothing more satisfying than taking a seam that yields that beautifully finished edge. As always, it helps ensure perfect results to have the right tools and notions in place. In this article we will review 3 basic hem styles (techniques).
- Basic simple turned hem: perfect for lightweight applications where bulk is undesirable
- Blind hem: great for garments and for curtains
- Double-turned hem: typical on jeans and useful for heavy applications like the top of tote bags
Before we start hemming…here are some general guidelines, regardless of the style of hem:
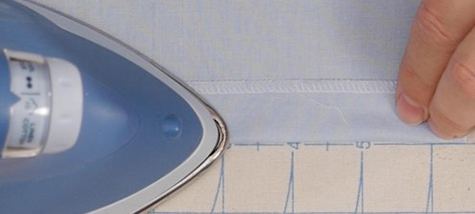
- Always press the hem first before manipulating it further or stitching it.
- I like to press the hem with a dry iron:
- Use a pressing motion: press / lift and move over / press.
- Never iron (aka drag the iron over) the hem! It will only stretch the hem allowance and make it difficult to get an even hem.
- While pressing I use a small puff of steam (about 1/3 push on the steam puff button on my iron) to relax the fibers. This will help ‘collapse’ the hem and flatten it.
- I then keep the dry iron in place for several seconds to set the crease of the hem.
- I repeat as I go along (lift / press-steam / press dry).
- Note that when hemming you are often stitching through more than the typical two layers of fabric (e.g. on a double-turned hem). In such cases you may have to use a larger needle. A telltale sign that you need a larger needle is when you start seeing skipped stitches on the hem when your needle worked just fine to sew the project together.
With these guidelines in mind, let’s explore three different ways to hem. Together, these 3 techniques cover the bulk of hemming scenarios.
Simple Turned Hem
This type of hem is perfect for applications where bulk is to be avoided. Linings of various types for garments, curtains, etc. come to mind.
Fabric preparation:
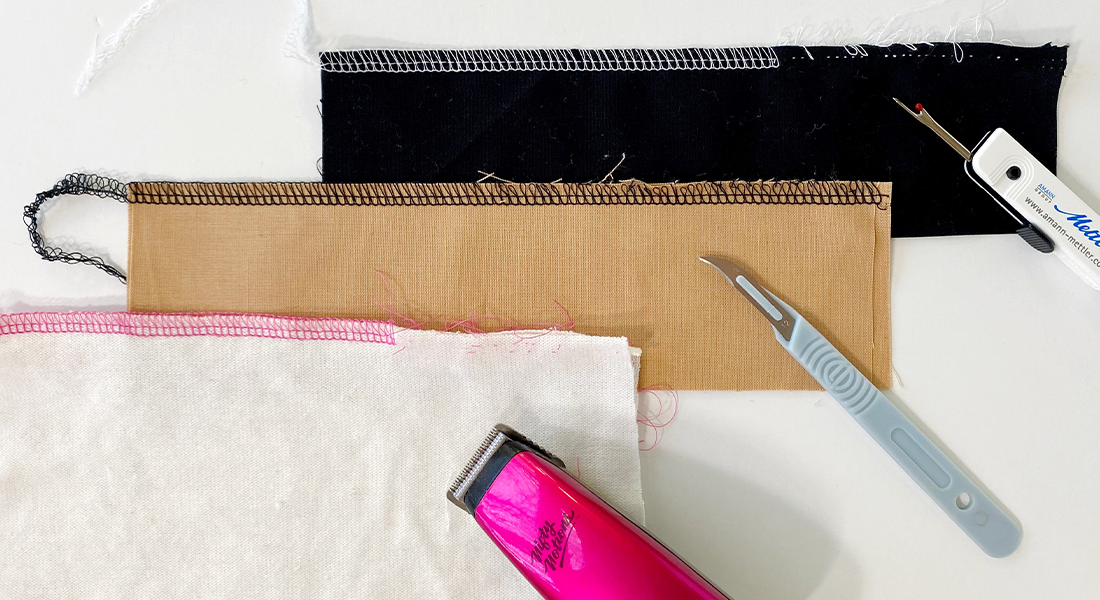
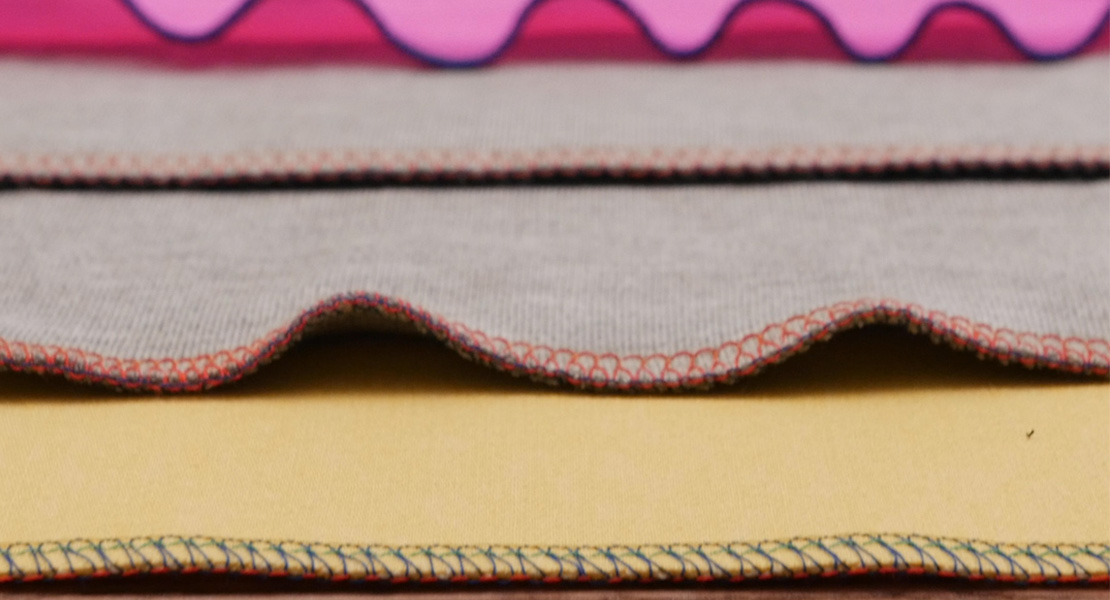
- Since the raw edge of the hem will not be encased, it is important to neaten that raw edge and overcast it first.
- You can use the Vari-Overlock (overcasting) stitch on your BERNINA with Overlock foot #2/2A to finish the raw edge. The stitch is pre-programmed to work with the foot to make stitching easier.
- An overlocker makes this step faster, easier and even neater.
Forming and Pressing the hem
- After finishing the raw edge, turn in the hem according to the desired finished hem allowance (here: 1 inch).
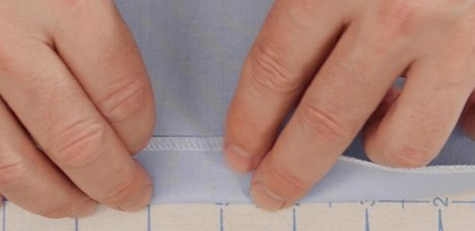
- Next: Press the hem (refer to the guidelines above).
- Stitching the hem
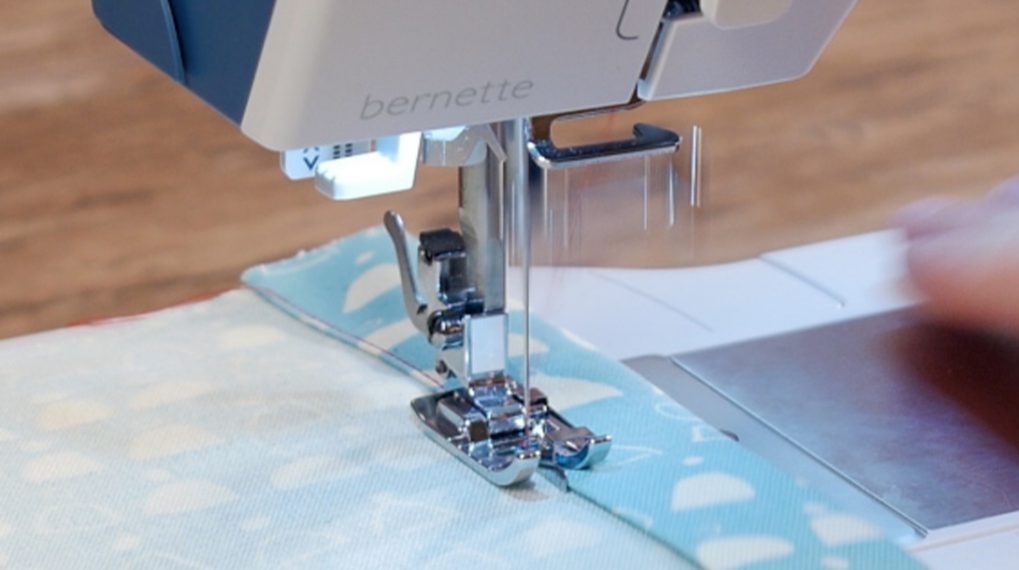
TIP: Whenever possible, stitch the hem with the hem allowance ‘down’ and against the feed dog. Since the hem allowance is more prone to stretching (being near cut edges) the feed dog will keep it in check and feed it more evenly with the project.
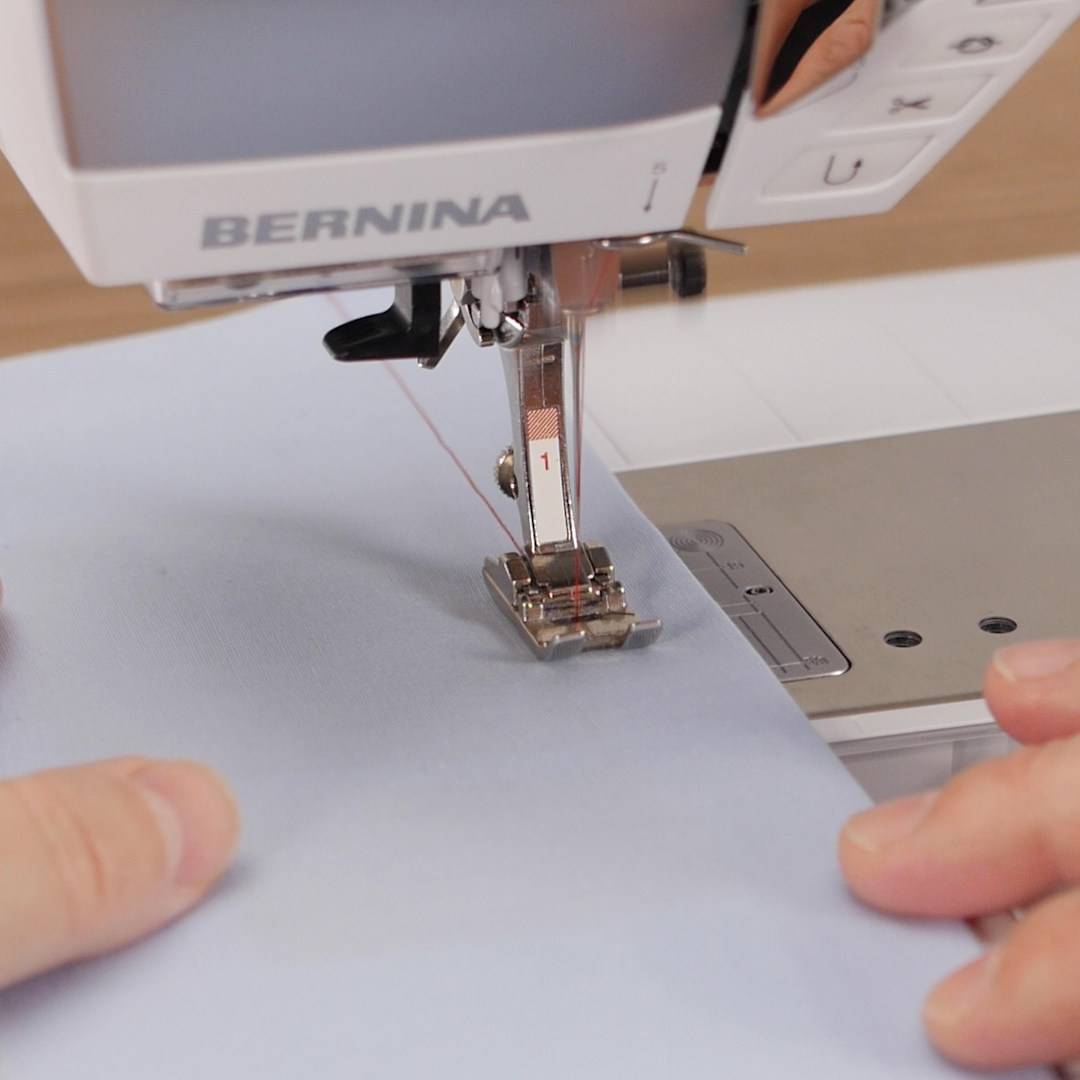
Note: The companion video for this post used a 4 Series BERNINA machine which does not have Dual Feed as one of its features. However, if your machine has dual feed capability, do take advantage of it. Using Reverse Pattern foot #1D with Dual Feed will help feed both layers together for best results.
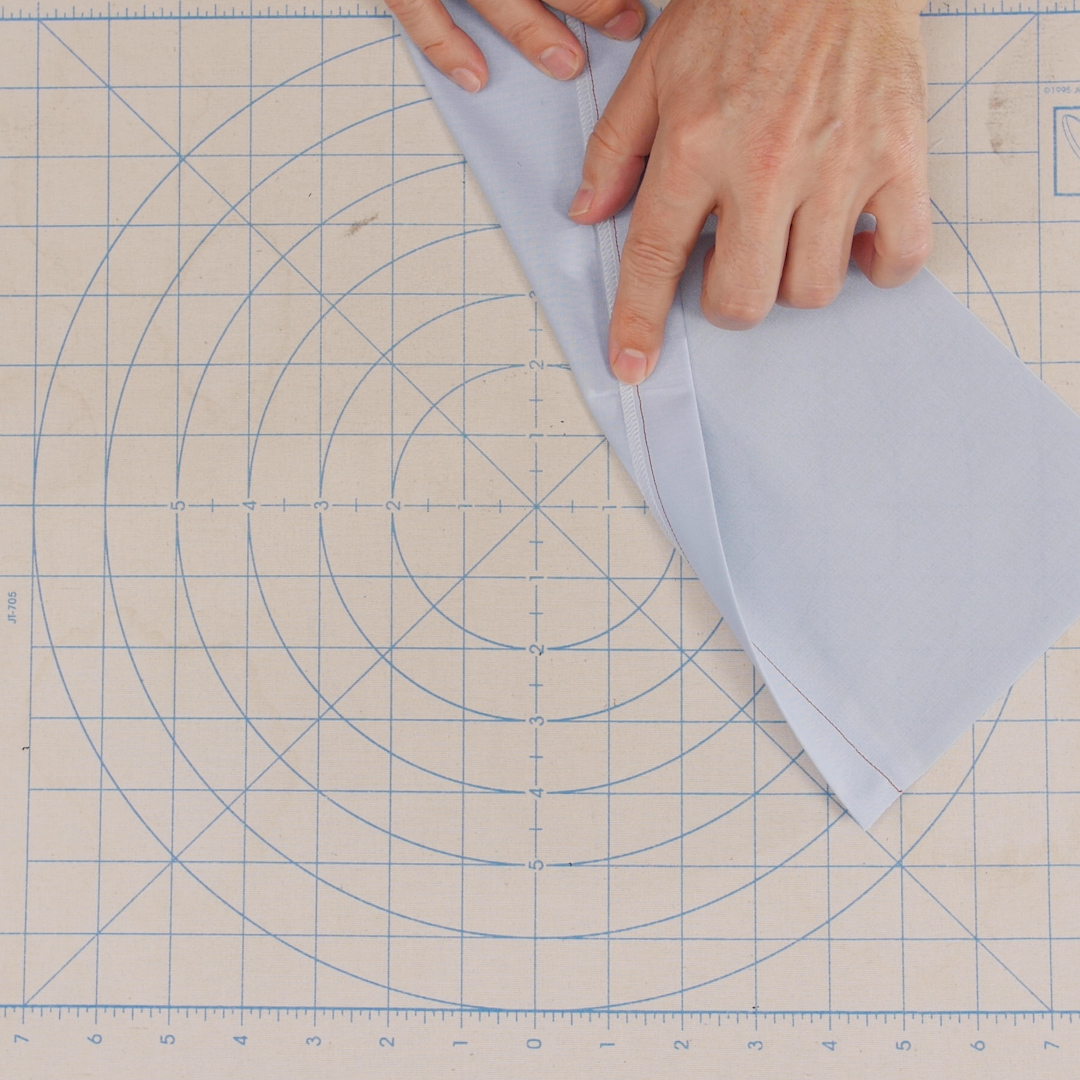
The result is a clean looking hem without bulk.
The Blind Hem: a classic for subtle hems on lofty fabrics
While a simple turned hem is expeditious and has many applications, it is not the best choice when a subtle finish is desired. Couture applications come to mind. In French, a blind hem is known as an ‘invisible’ hem. It yields a hem where no stitching is showing on the right side of the garment. The advantages of the blind hem are:
- It is an elegant finish with no stitching in sight.
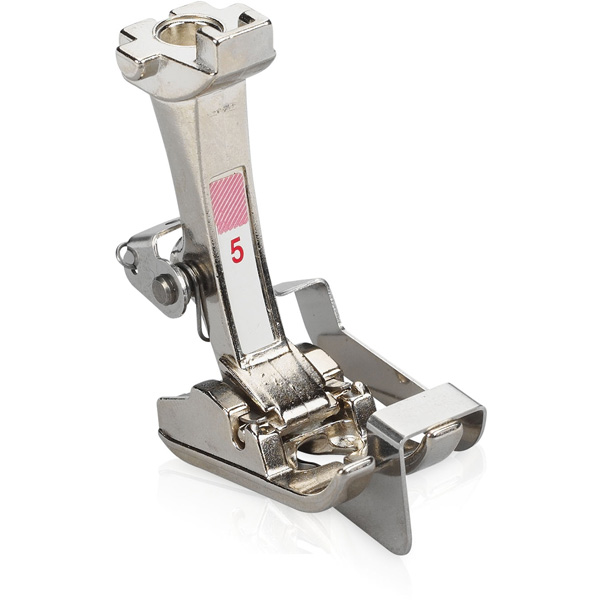
- The hem hangs beautifully thanks to Blindstitch foot #5 which automatically creates a slack in the stitching so the hem can hang completely flat by eliminating the tightness that a straight seam would introduce (e.g. in a simple turned hem).
- NOTE: It works best with fabrics with a thickness or loft.
A good application for the blind hem, in addition to fine hemming on garments, is for curtain hems. Curtain hems can pose a challenge if stitched through all layers such as with a simple turned hem. It can then pucker up and hang unevenly, since the stitching stiffens the hem (which is normal), preventing it from flowing with the rest of the curtain. A blind hem lets you release that stiffness and lets the bottom of the curtain hang smoothly.
For examples of blind hem stitching and applications, see the list here on weallsew.com.
Fabric preparation: same as for the Simple Turned Hem
- Since the raw edge of the hem will not be encased it is important to neaten that raw edge and overcast it first.
- You can use the Vari-Overlock Stitch (an overcasting stitch) on your BERNINA with Overlock foot #2/2A to finish the raw edge. The stitch is pre-programmed to work with the foot to make stitching easier.
- An overlocker makes this step faster, easier and even neater.
Forming and Pressing the hem
- First, turn in the hem according to the desired hem allowance depth (here: 1 inch) and

- Next: turning the project over for stitching
- Place the project right side up, hem down with the hem to the left.
- At this point the hem is flat on the surface, its right side down and wrong side up.
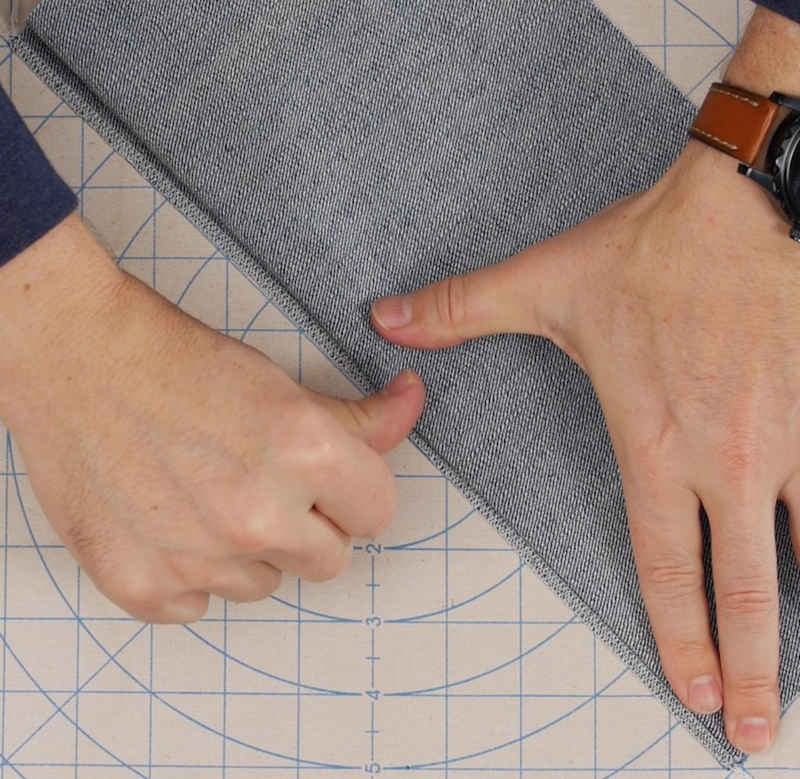
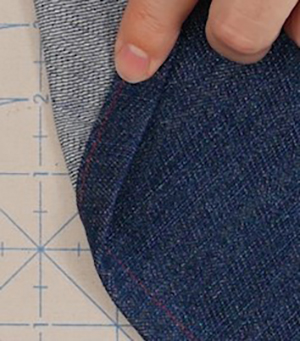
- Fold back the project (not the hem) until only about 3/8 inch of the hem extends on the right of the fold (that will be the overcast raw edge extending past the fold).
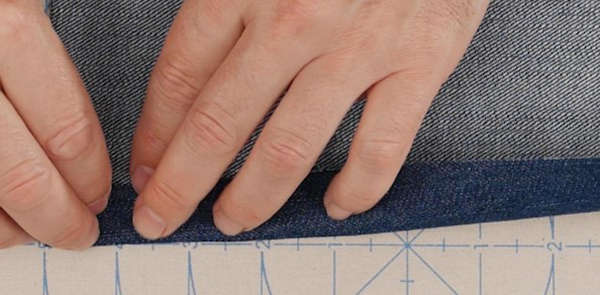
- TIP: I like to lightly finger crease the fold on suitable fabrics (e.g. denim) to pre-form the edge I will follow with the presser foot. Note that this is not possible on fleece and softer fabrics.
Stitching the hem
- When the project is folded over with only a bit of the hem edge peeking out as in the picture above, place the project on the machine with the overcast hem edge to the right.
- With Blindstitch foot # 5 on the machine, place the project so that the fold touches the left side of the guide in the middle of the foot.
- Use the pre-programmed Blindstitch (Stitch # 9 on most BERNINA machines).
- Use as fine a needle as possible without skipping stitches.
- Use a fine thread since it will be easier to conceal the thread in the fabric.
- Sew a couple of inches and verify that the zigzag portion of the stitch is just barely biting into the fold.
- Adjust the stitch width as needed:
- If the stitch fails to bite into the fold (e.g. loftier fabrics typically have their fold further to the left), that would result in the hem not being secured
- If the stitch bites too much in to the fold, that would yield visible stitches on the right side of the project
- TIP: It helps to practice first on a scrap of the same fabric if available. Use contrasting thread so that you can easily gauge the width of the stitch for the perfect invisible, yet secure hem. As a bonus, your settings will then be ready for the actual project.
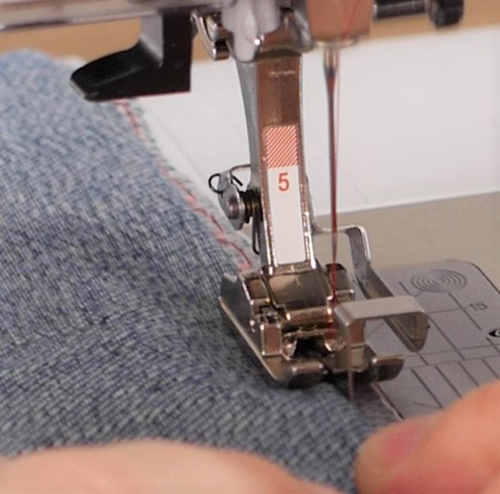
- As you stitch, the machine will sew straight stitches on the right (onto the loose overcast edge of the hem) and will take a zigzag stitch toward the left and into the fold every 5th
TIP: What makes BERNINA’s blind hem special is the design of the foot. As the zig-zag stitch crosses over the metal guide in the center of the foot, it creates a bit of slack in the stitch due to the small elevation of the guide. That’s the secret sauce! When the hem is allowed to unfold after stitching that little bit of slack lets it hang completely flat, without puckers and without any tugging.
When finished, the stitches on the hem are only visible on the hem allowance on the wrong side of the project.
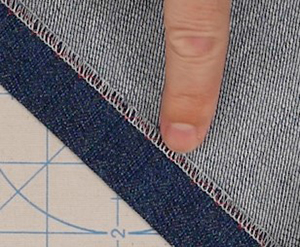
The result is an elegant finish similar to a hand-picked hem.
From the right side, there appears to be no stitches, since they are buried in the fold and don’t come through the layer.
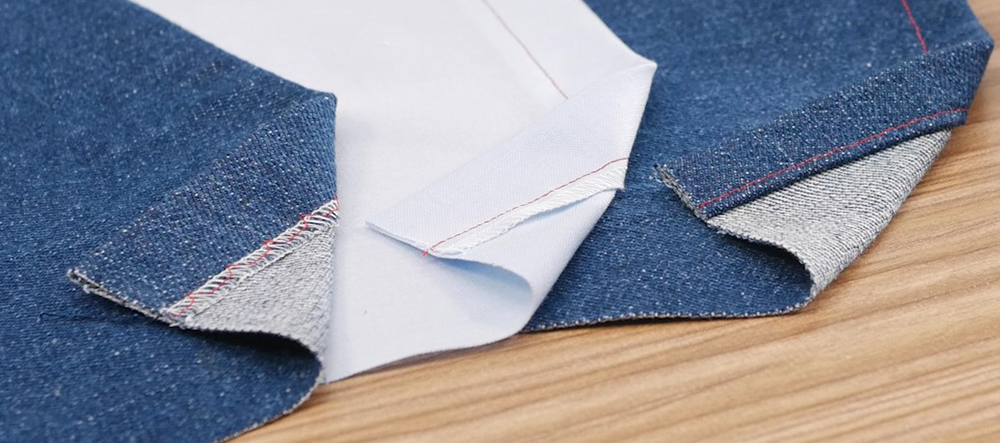
Double Turned Hem: Sturdy and Durable.
The hem of your jeans comes to mind first, and that is a good example to keep in mind for double hems.
They are indeed sturdy and durable since no raw edges are left exposed, which also makes them ideal for edging flags and banners that are subject to wear and tear.
This type of hem is simple to sew with good results as long as we keep in mind a couple of factors.
Note: This example is for a 1/2-inch finished hem, using a 1-inch hem allowance.
Fabric preparation:
- It is simplified as there is no need to overcast an edge.
- An evenly cut edge is essential for an even hem allowance.
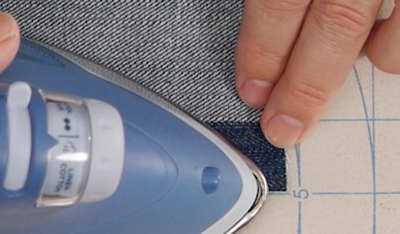
Forming and Pressing the hem
This hem will be turned twice, but there is definitely a preferred way to turning it:
- The hem should first be turned using the full hem allowance.
- The second turn is merely a folding in of the raw edge of the hem allowance inside the hem until it almost reaches the first fold of the hem.
- Note: Turning half the hem allowance two times is not advisable. With bulky fabrics, this method will use up more than the planned hem allowance.
- First, turn in the hem allowance, planning on twice (2x) the depth of the finished hem. E.g. for a half inch finished hem, plan on a 1-inch hem allowance.
- Press the hem well and set the fold.
Note: Pressing is advisable for all hems in general. It is especially important for this type of hem since with the bulkier fabrics, the second turn will challenge the first fold if not pressed well, resulting in an uneven hem.
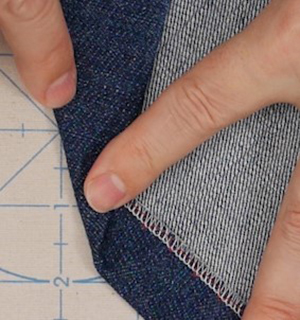
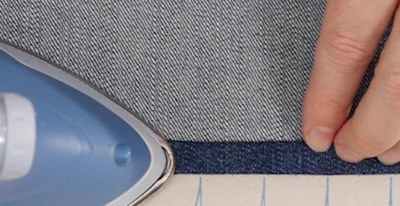
- Turn under the raw edge into the hem:

Note: When tucking in the raw edge of the hem allowance, resist the urge to push it against the inside fold. Keep a slight gap of about 1/16th of an inch between the raw edge and the inside fold. This will yield 2 benefits:
- It will help prevent tightening (and unevenness) in the hem.
- It will help maintain the originally planned finished hem depth since bulky fabrics use up some of the hem allowance with every fold.
- Press the hem again.
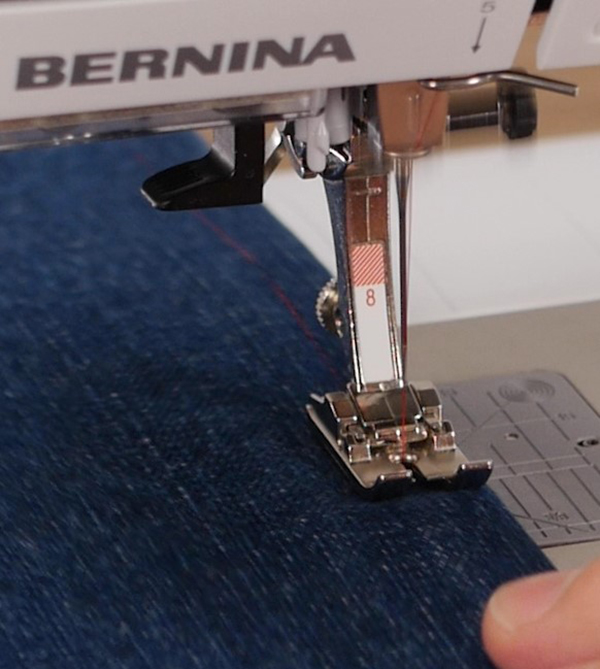
Stitching the hem
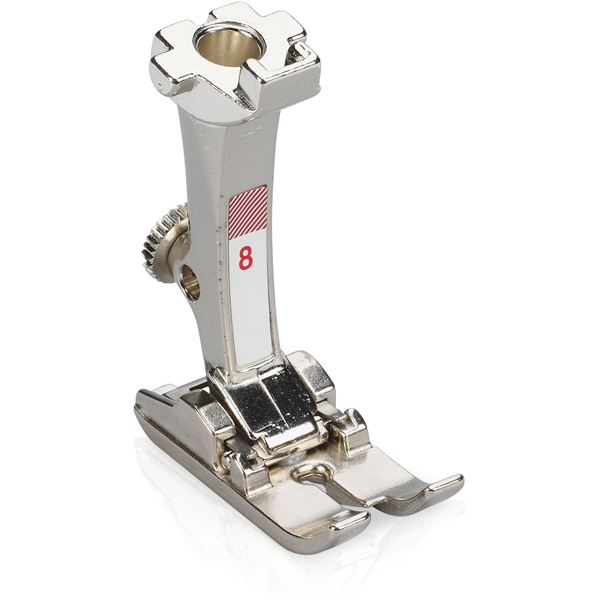
- Use Jeans foot #8/8D. This straight stitch foot yields a beautiful seam on hems and handles bulky layers well.
- TIP: Since this is a straight stitch foot, use a straight stitch plate for best results.
- Consider using a larger needle. Two layers of denim can easily be sewn with a Jeans 80 needle. With 3 layers now in the hem, you will likely need a size 90 needle. If using heavier materials still (think heavy canvas), you may need an even larger needle.
- Place the hem with the wrong side against the feed dog.
- With the planned ½ finished hem, follow the 3/8-inch seam allowance marker on the stitch plate
- Use a straight stitch, center needle position.
- The default stitch length of 2.5 mm works in most cases but can be lengthened for heavier/bulkier fabrics.
- Stitch down the hem.
This will yield a beautiful hem on heavy and/or bulky fabrics. This method is great for hemming jeans and for tote bags, home deck projects, especially for edges that are subject to heavy use and wear.
And talking of heavy/bulky fabrics… sometimes the triple layers can get very bulky and hard to stitch through. Think double turned layers of heavy canvas, top edges of tote bags where webbing might even be stitched on top of the hem. In such cases, you can rely on BERNINA engineering to offer a simple solution.
When the going gets tough… aka when it gets really bulky.
- Needle first: Use a large 110 needle if you’ve hit a broken needle already at size 90.
- Use the Straight Stitch Plate for your machine.
These two elements, in combination with Jeans foot #8/8D are engineered to keep the needle aligned with the stitch hole in the plate and prevent broken needles.
Remember to ‘feed the seam’ – when sewing thicker layers (or multiple layers) use a longer stitch length between 3 to 4 mm. A longer stitch will allow the thread to properly travel through the layers and form the first stitch before the next one gets formed.
There you have it. Between a precision machine like a BERNINA and the precisely engineered accessories to complement it, you have the best ticket for successful sewing, all the way down to the hem.