One Shirt Pattern Three Ways, Part Two: Pintucks & Decorative Stitches
In part two of the One Shirt Pattern Three Ways series, the sleeve is widened, embellished with pintucks and decorative stitches, and the sleeve cuff is changed to elastic. The same pintuck and decorative stitches embellishment technique is used on the back of the yoke. 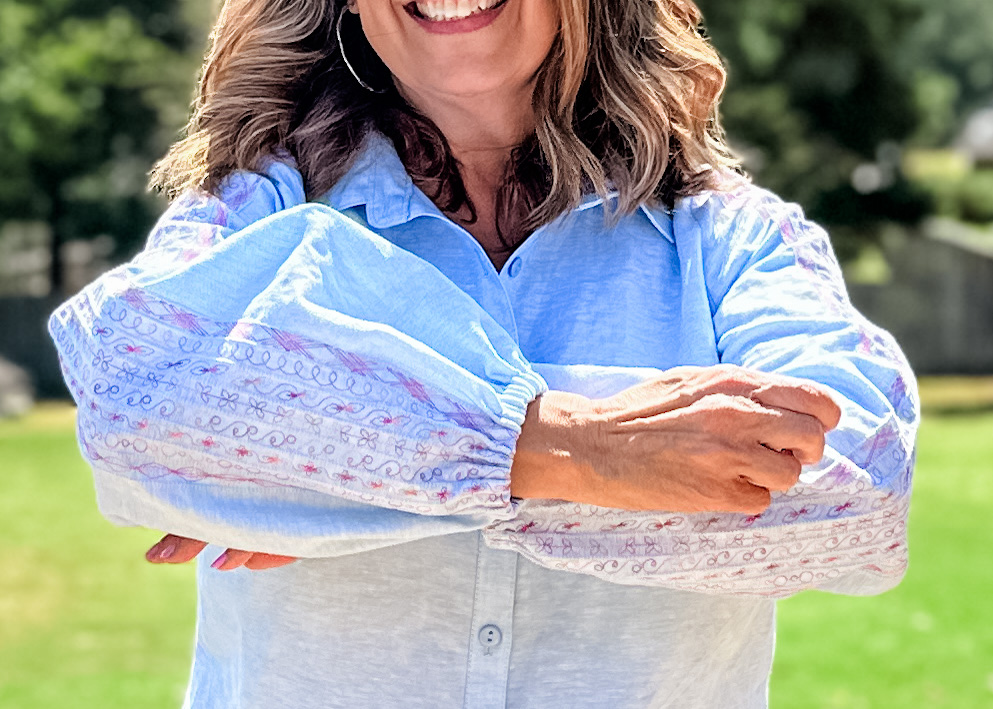 In this three-part series, I show you how to use one classic button up shirt pattern to sew three different looks.
- In part one, two fabrics are used to create a colorblocked shirt.
- In part two, the sleeves are embellished with pintucks and decorative stitches.
- In part three, patchwork ruffles are added to the neck and shoulders.
Hello everyone! It’s Sharon from Sharon Sews. You can connect with me on YouTube, Instagram and my blog, where I share sewing tips, projects, reviews, and fashion sewing ideas. 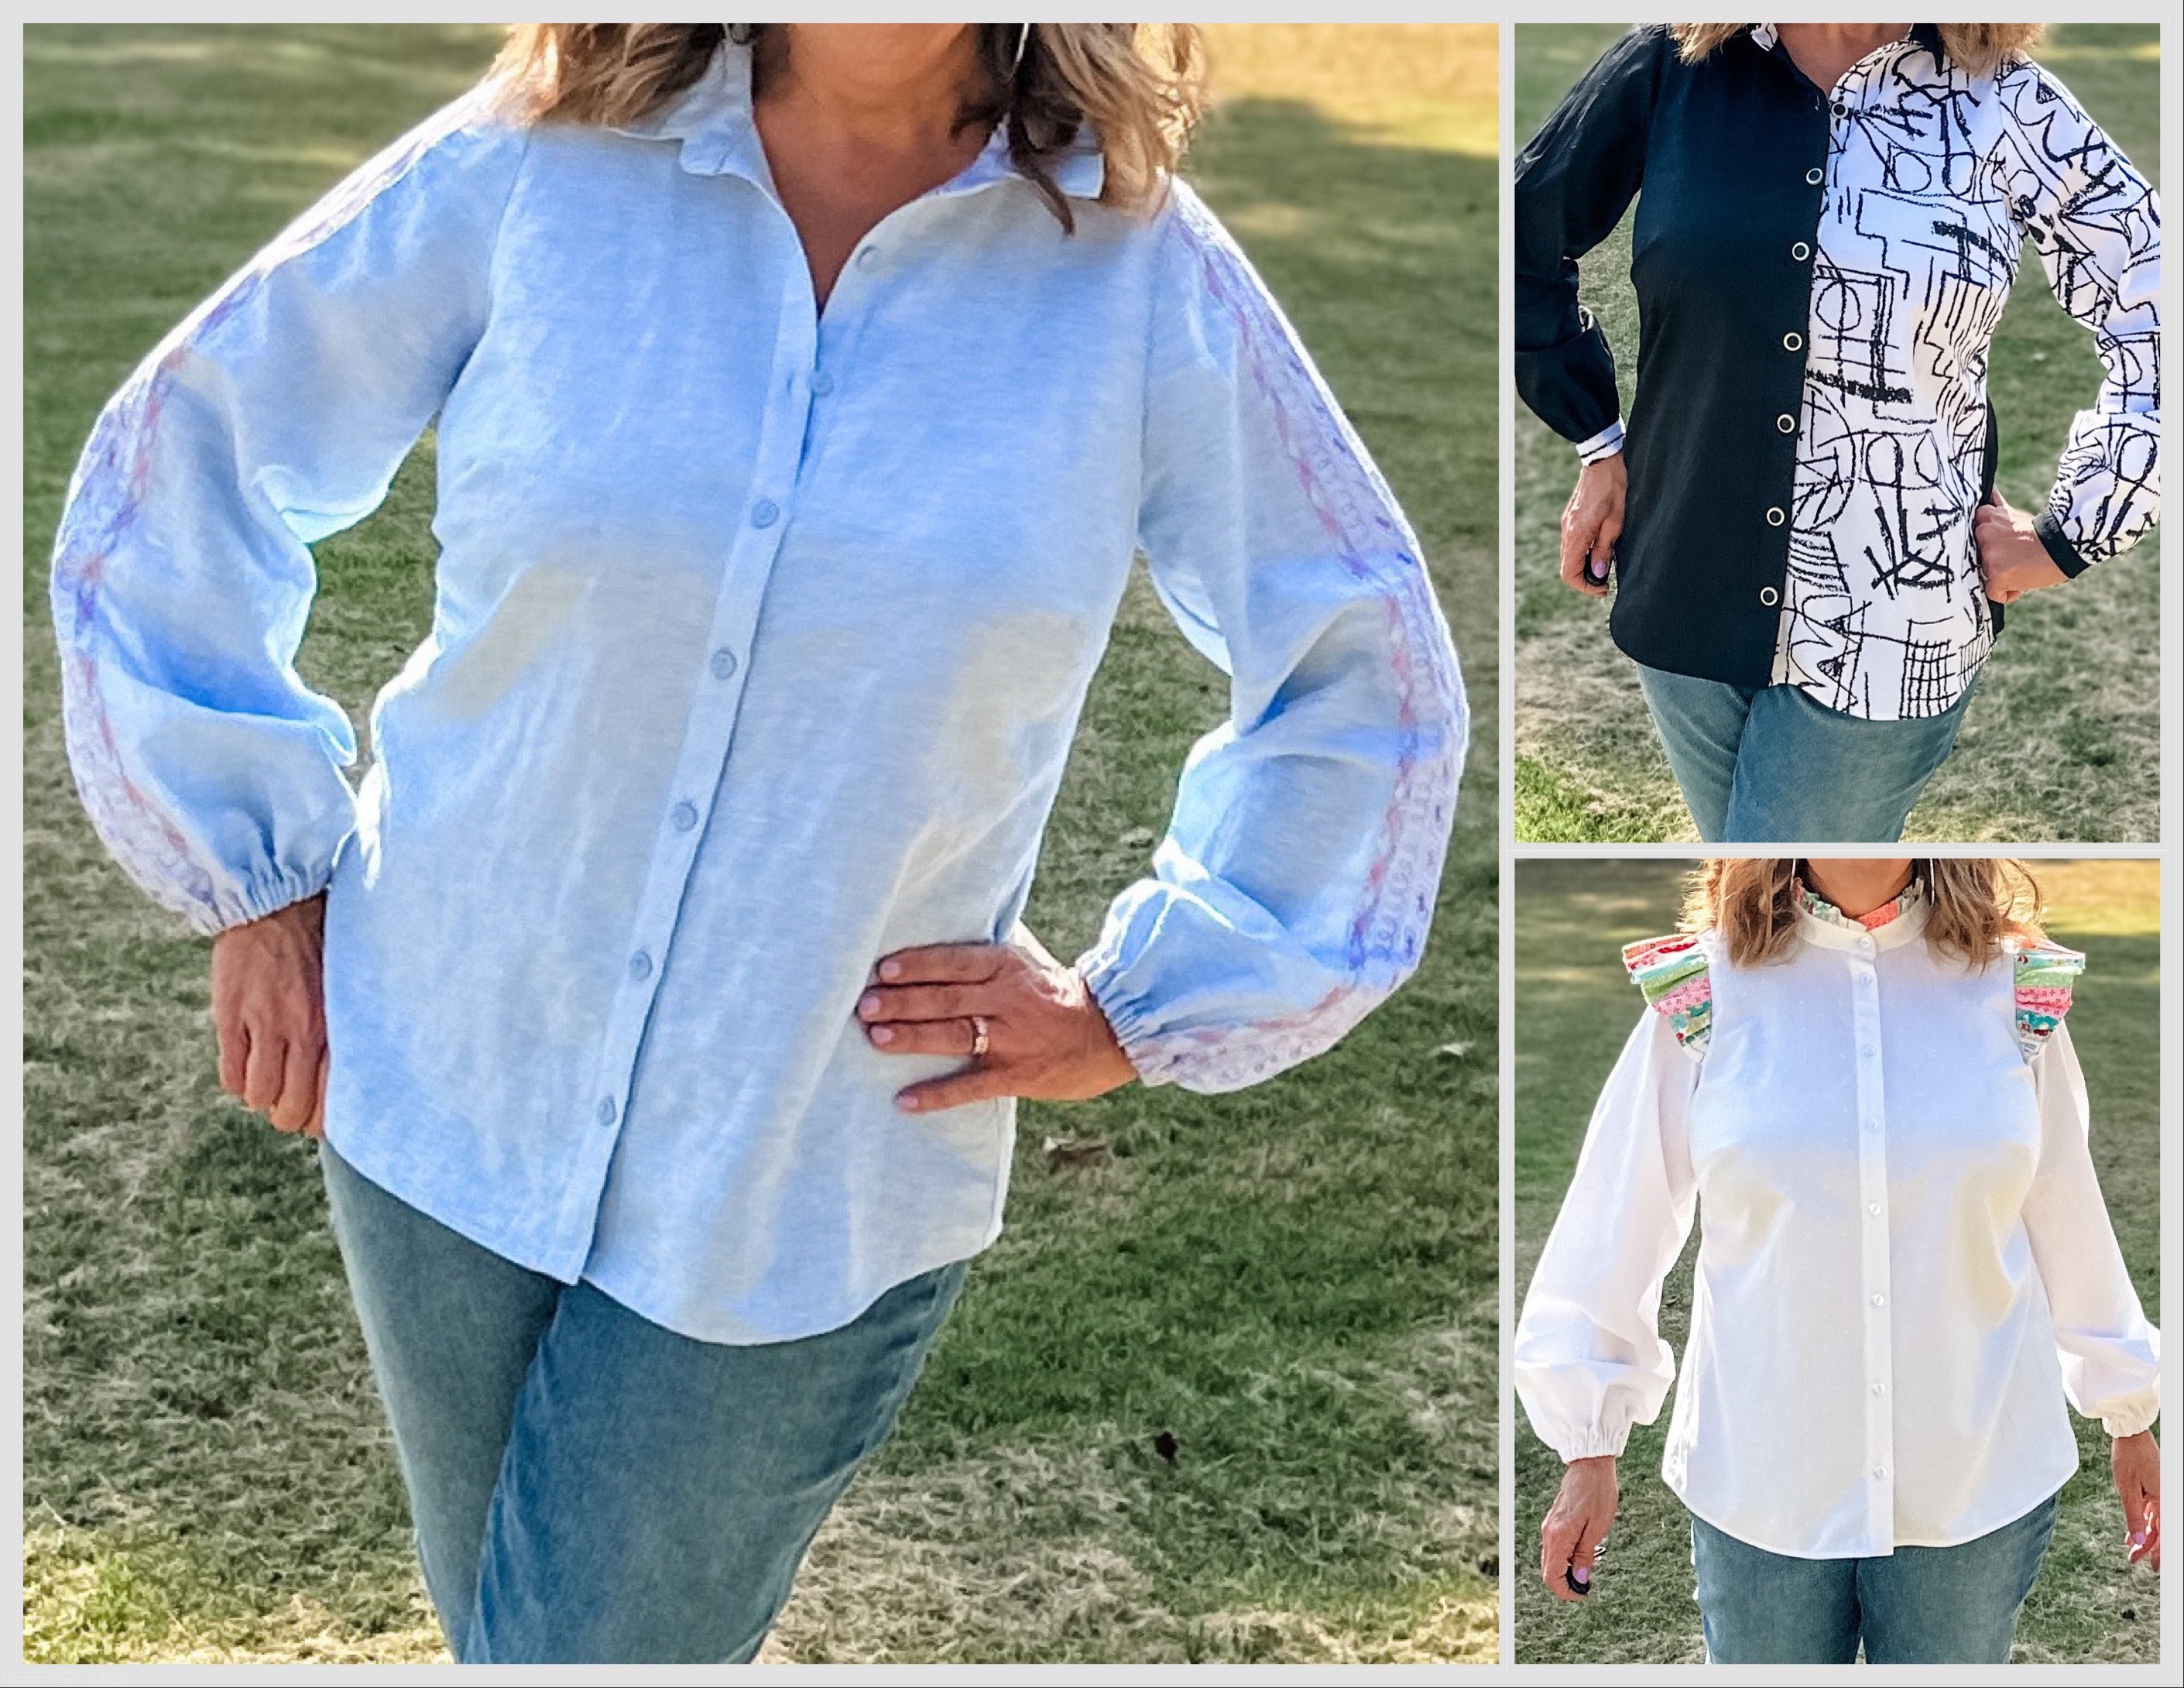 For all three shirts, I used the Cashmerette Vernon Shirt pattern, a classic button up shirt with collar, collar stand, button placket, back yoke, and narrow buttoned cuff. The pattern is available in both print and PDF, has a wide range of sizes (0 to 32), as well as cup sizes (making it easy to fit the bust). Cashmerette provided the pattern for this project.
  Let’s get started sewing the embellished sleeve shirt.
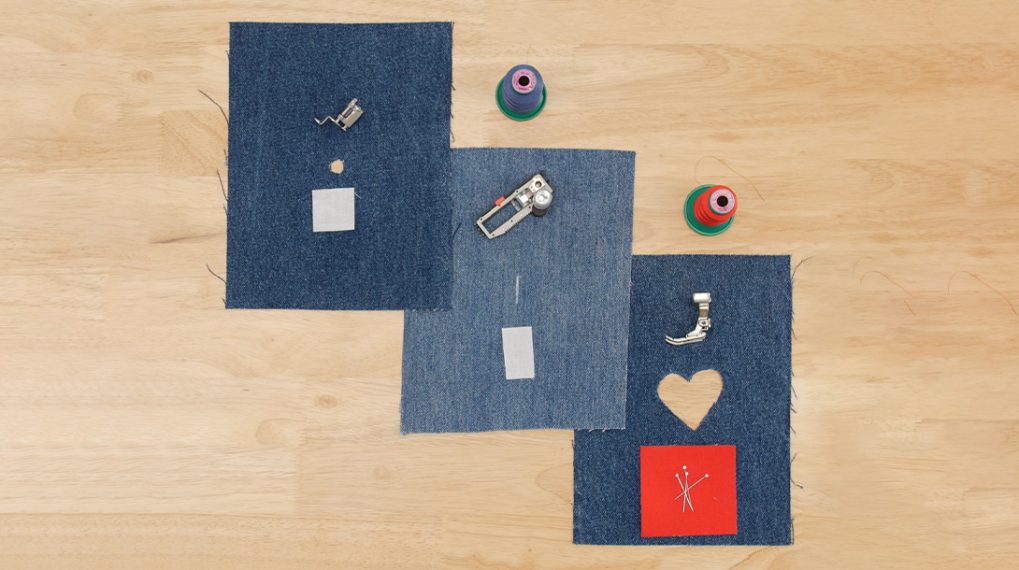
Materials to Sew the Embellished Sleeve Shirt
- Sewing Machine – I used my BERNINA 770 QE PLUS
- Pintuck and decorative stitch foot #46C
- Classic long sleeve button-up shirt pattern, the Cashmerette Vernon Shirt Pattern
- Note: you can use any shirt pattern with a long sleeve and back yoke as long as it’s designed for woven fabrics.
- Linen blend shirting fabric – yardage per pattern
- Interfacing – yardage per pattern
- Seven 1/2″ buttons
- 3/8” elastic – enough to fit around each wrist
- Coordinating all-purpose thread – 2 spools for the twin needle
- 30 wt contrasting cotton thread – I used Sulky Blendables
- Tear-away stablizer – I used Sulky Totally Stable
- 2.0 twin needle (for the pintucks)
- Point turner
- Buttonhole cutter and wooden block
- Tracing paper
- Pen
- Ruler
- French curve ruler
- Paper scissors
- Tape
- General sewing supplies
- Iron and pressing surface
Let’s get started sewing the embellished sleeve shirt.
Prepare the Sleeve Pattern
Trace the Sleeve Pattern
Trace the sleeve pattern in the size you are using. To do so, place the sleeve pattern right side up on a flat work surface and place tracing paper over the top of the pattern piece. Using a pen, ruler, and French curve, trace along the size line of the sleeve pattern piece. Transfer all the pattern markings to the traced pattern piece.
Add Width to the Sleeve Pattern
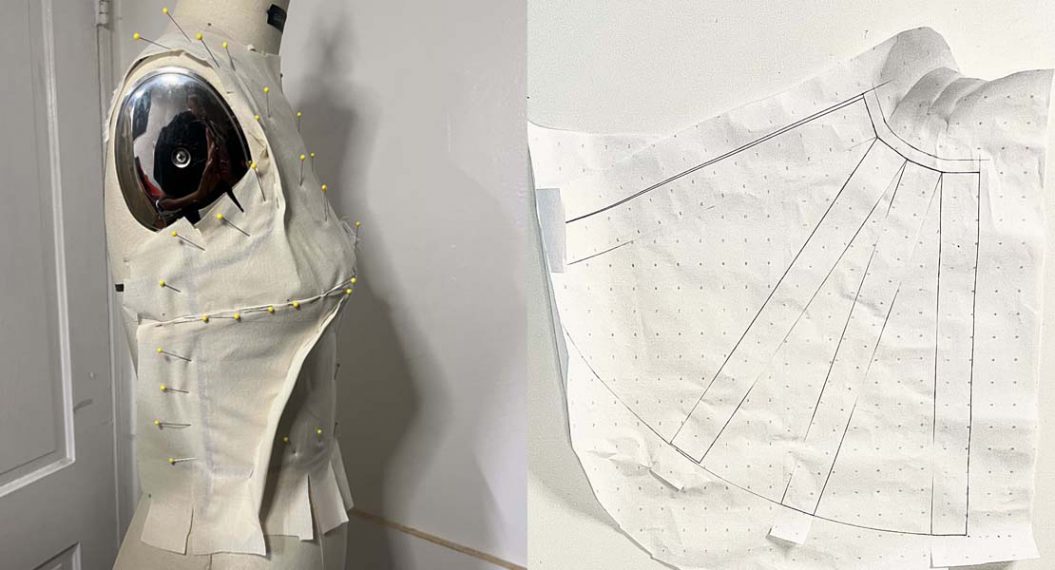
Place a piece of tracing paper on a flat work surface. I like to use a cardboard cutting mat as I can pin my pattern to the mat while I make changes. Place the traced sleeve pattern on top of another piece of tracing paper and secure in place. Draw vertical lines from the underarm points to the lower edge. Extend the lines beyond the lower edge by 2″. Connect the lines straight across at the lower edge. Fold the sleeve pattern in half lengthwise and unfold; verify that the fold line is parallel to the grain line as it’s important to maintain an accurate grainline. Draw a vertical line along the foldline from the sleeve cap to the bottom edge of the sleeve. Measure 2″ from the line and draw another vertical line. Continue until there are five vertical lines drawn. These are the slash lines that will be used to add width to the sleeve. (Image 1) Cut along each line from the bottom to the seam line (1/2” from the sleeve cap). Cut a small clip in the seam allowance, forming a hinge. Spread each slashed section 1/2″ and tape in place. If you want a wider sleeve, make the space between each section larger. Normally I use tracing paper for all my alterations, but I added colored tissue paper to make the change more visible. (Image 2) Measure 1/2″ at the bottom center of the sleeve and make a mark. Use a fashion ruler to draw a slight curve from that mark tapering to the side seams to complete the new sleeve pattern. The finished pattern will be wider and longer at the bottom. (Image 3, with the original sleeve pattern on top). 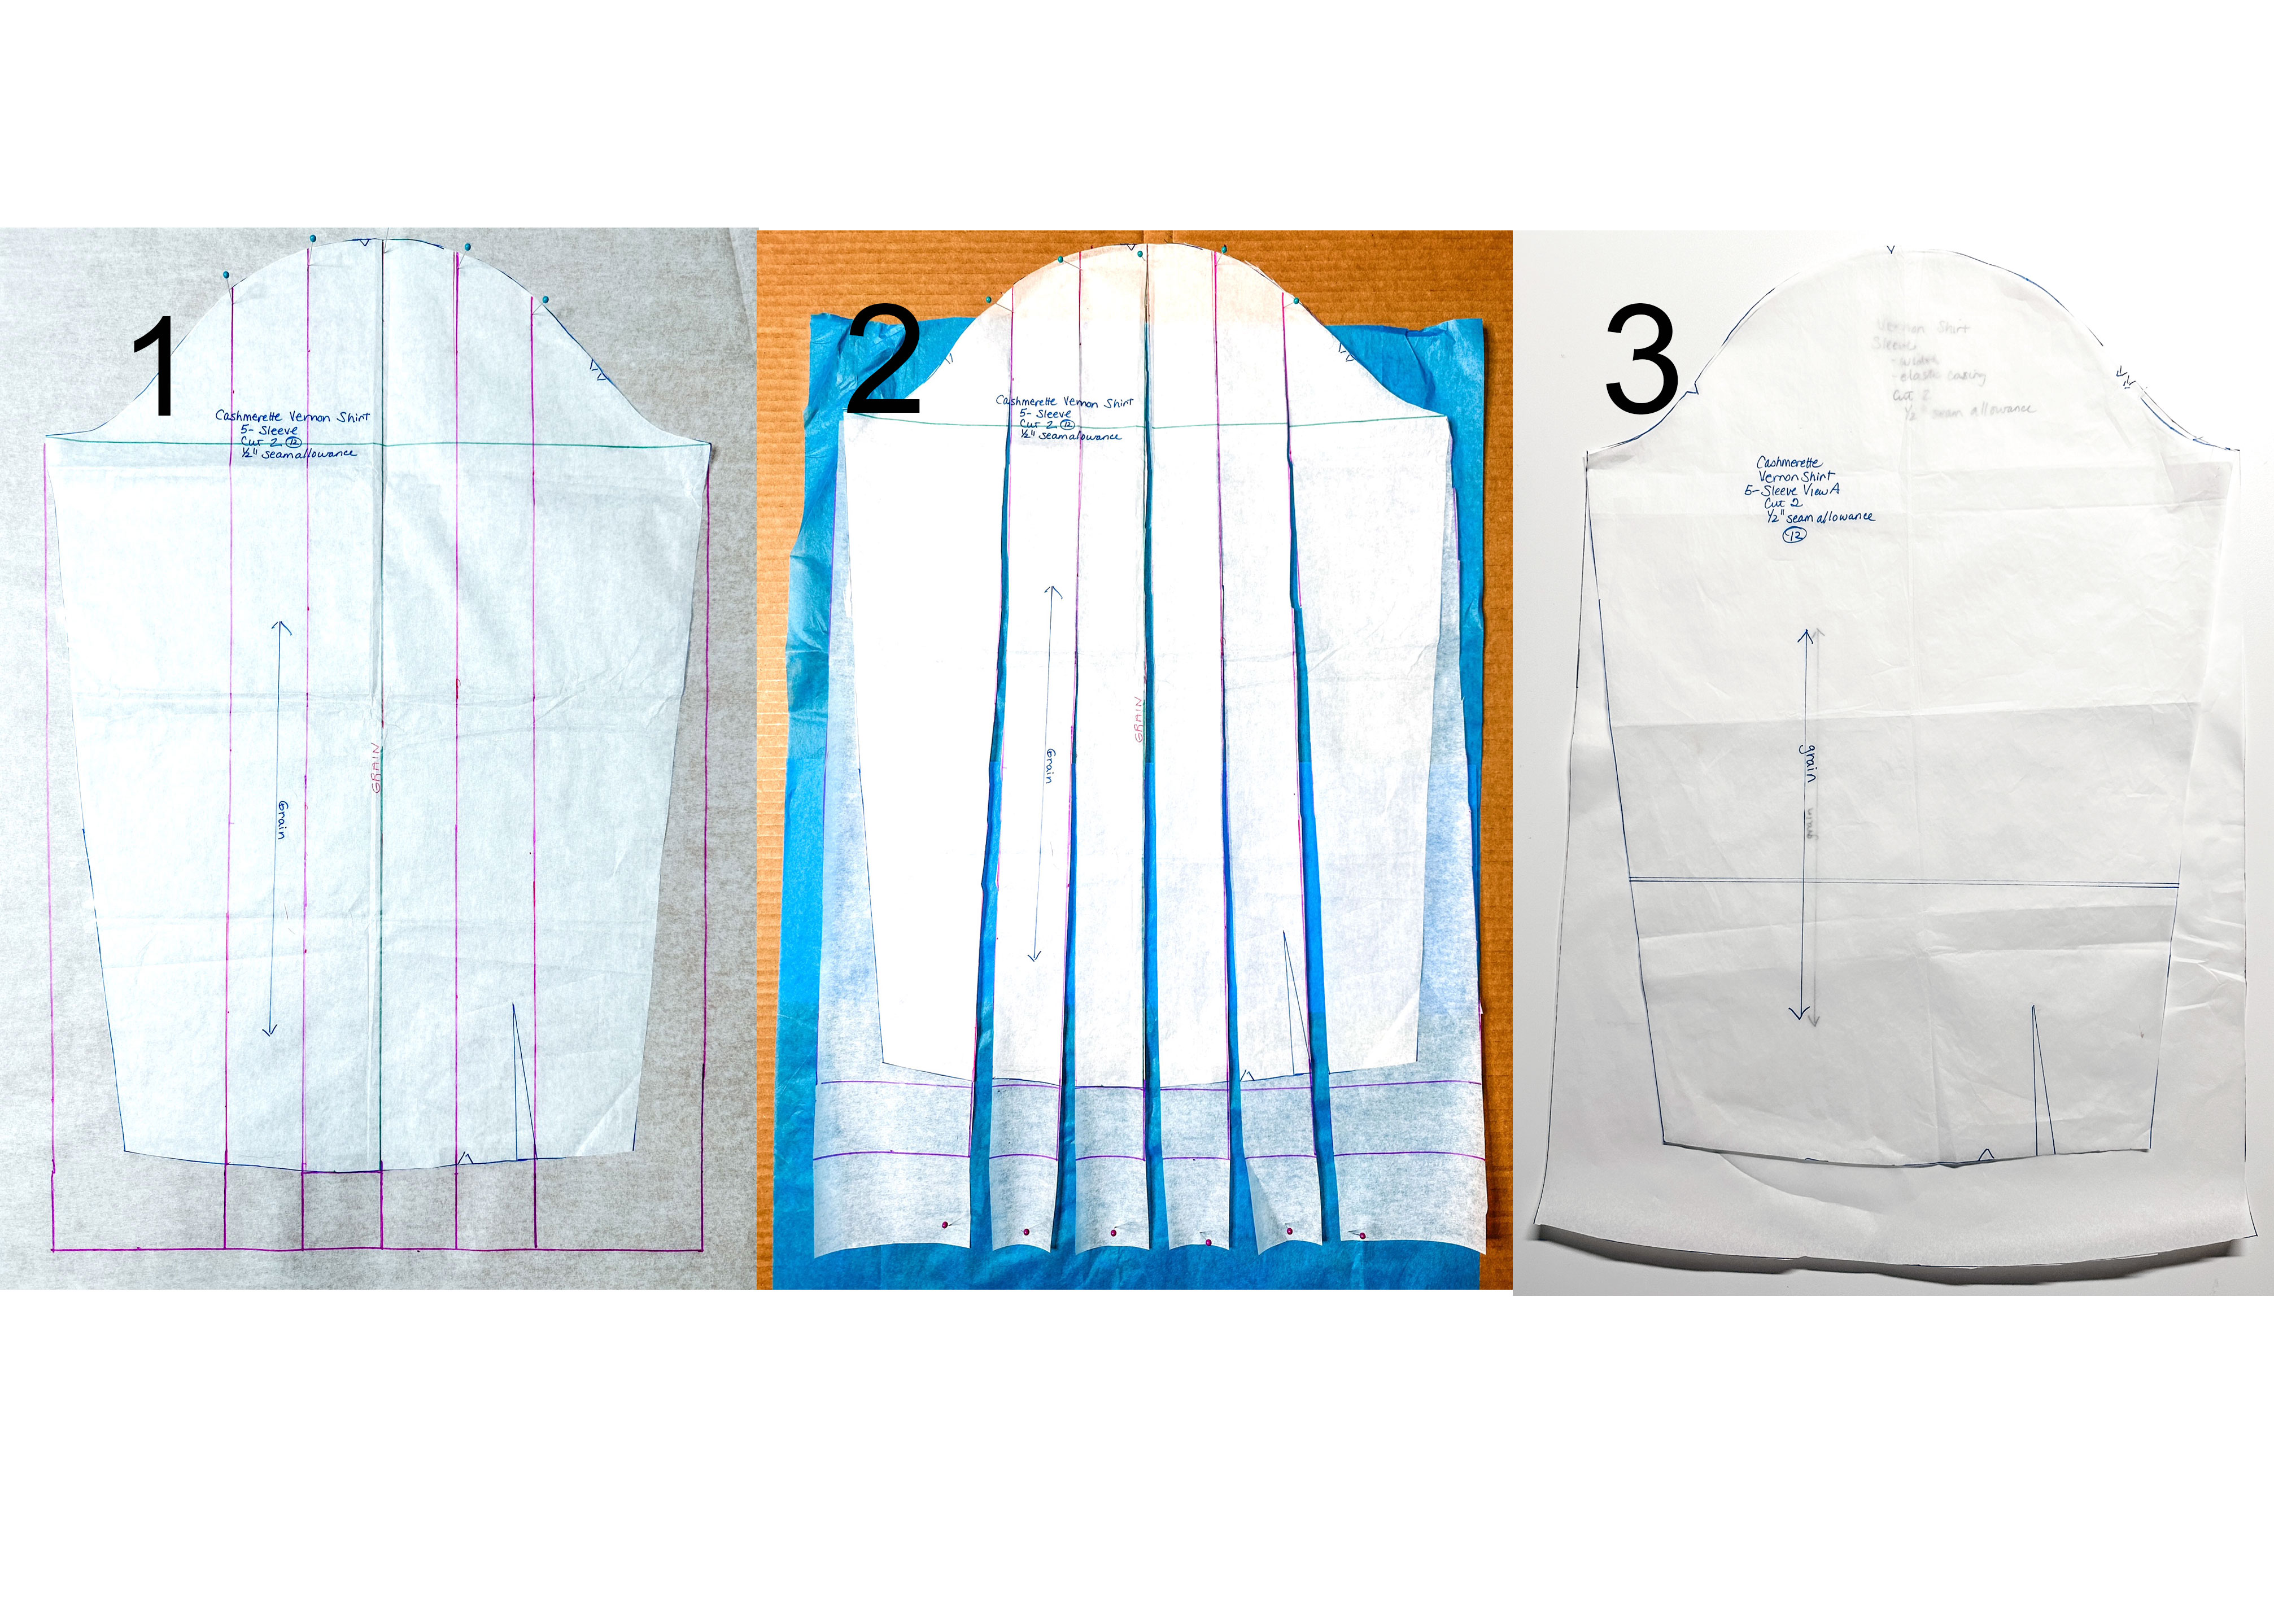
Add Pintucks and Decorative Stitches
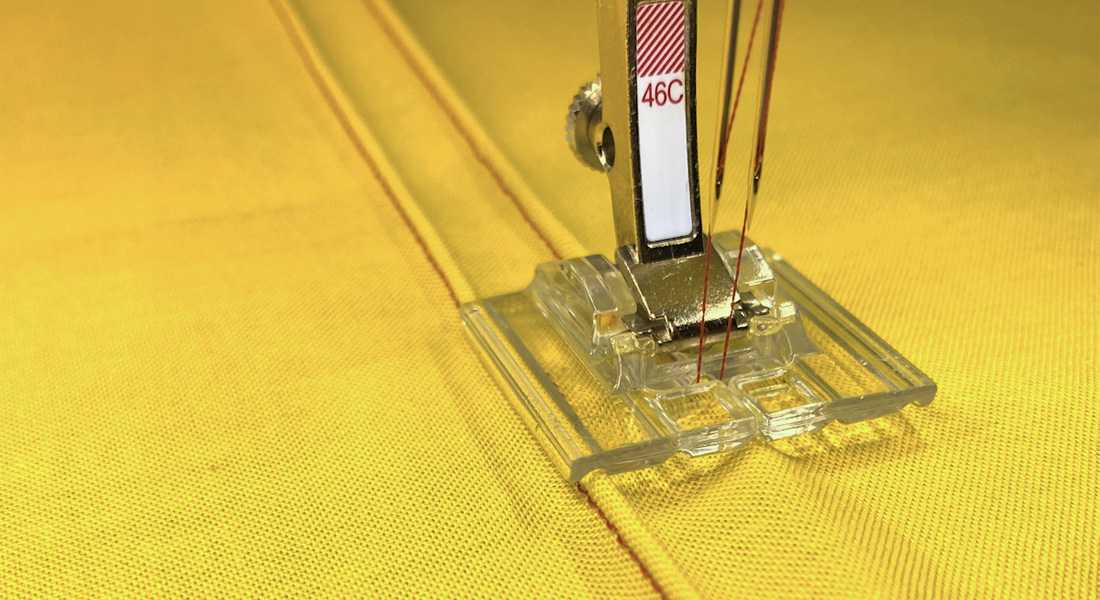
The Pintuck and Decorative Stitch Foot #46C will be used along with a 2.0 mm twin needle. The #46C foot has evenly spaced groves to create evenly spaced pintucks, as well as a 9 mm opening for wide decorative stitches. The pintucks are stitched first, followed by the decorative stitches. 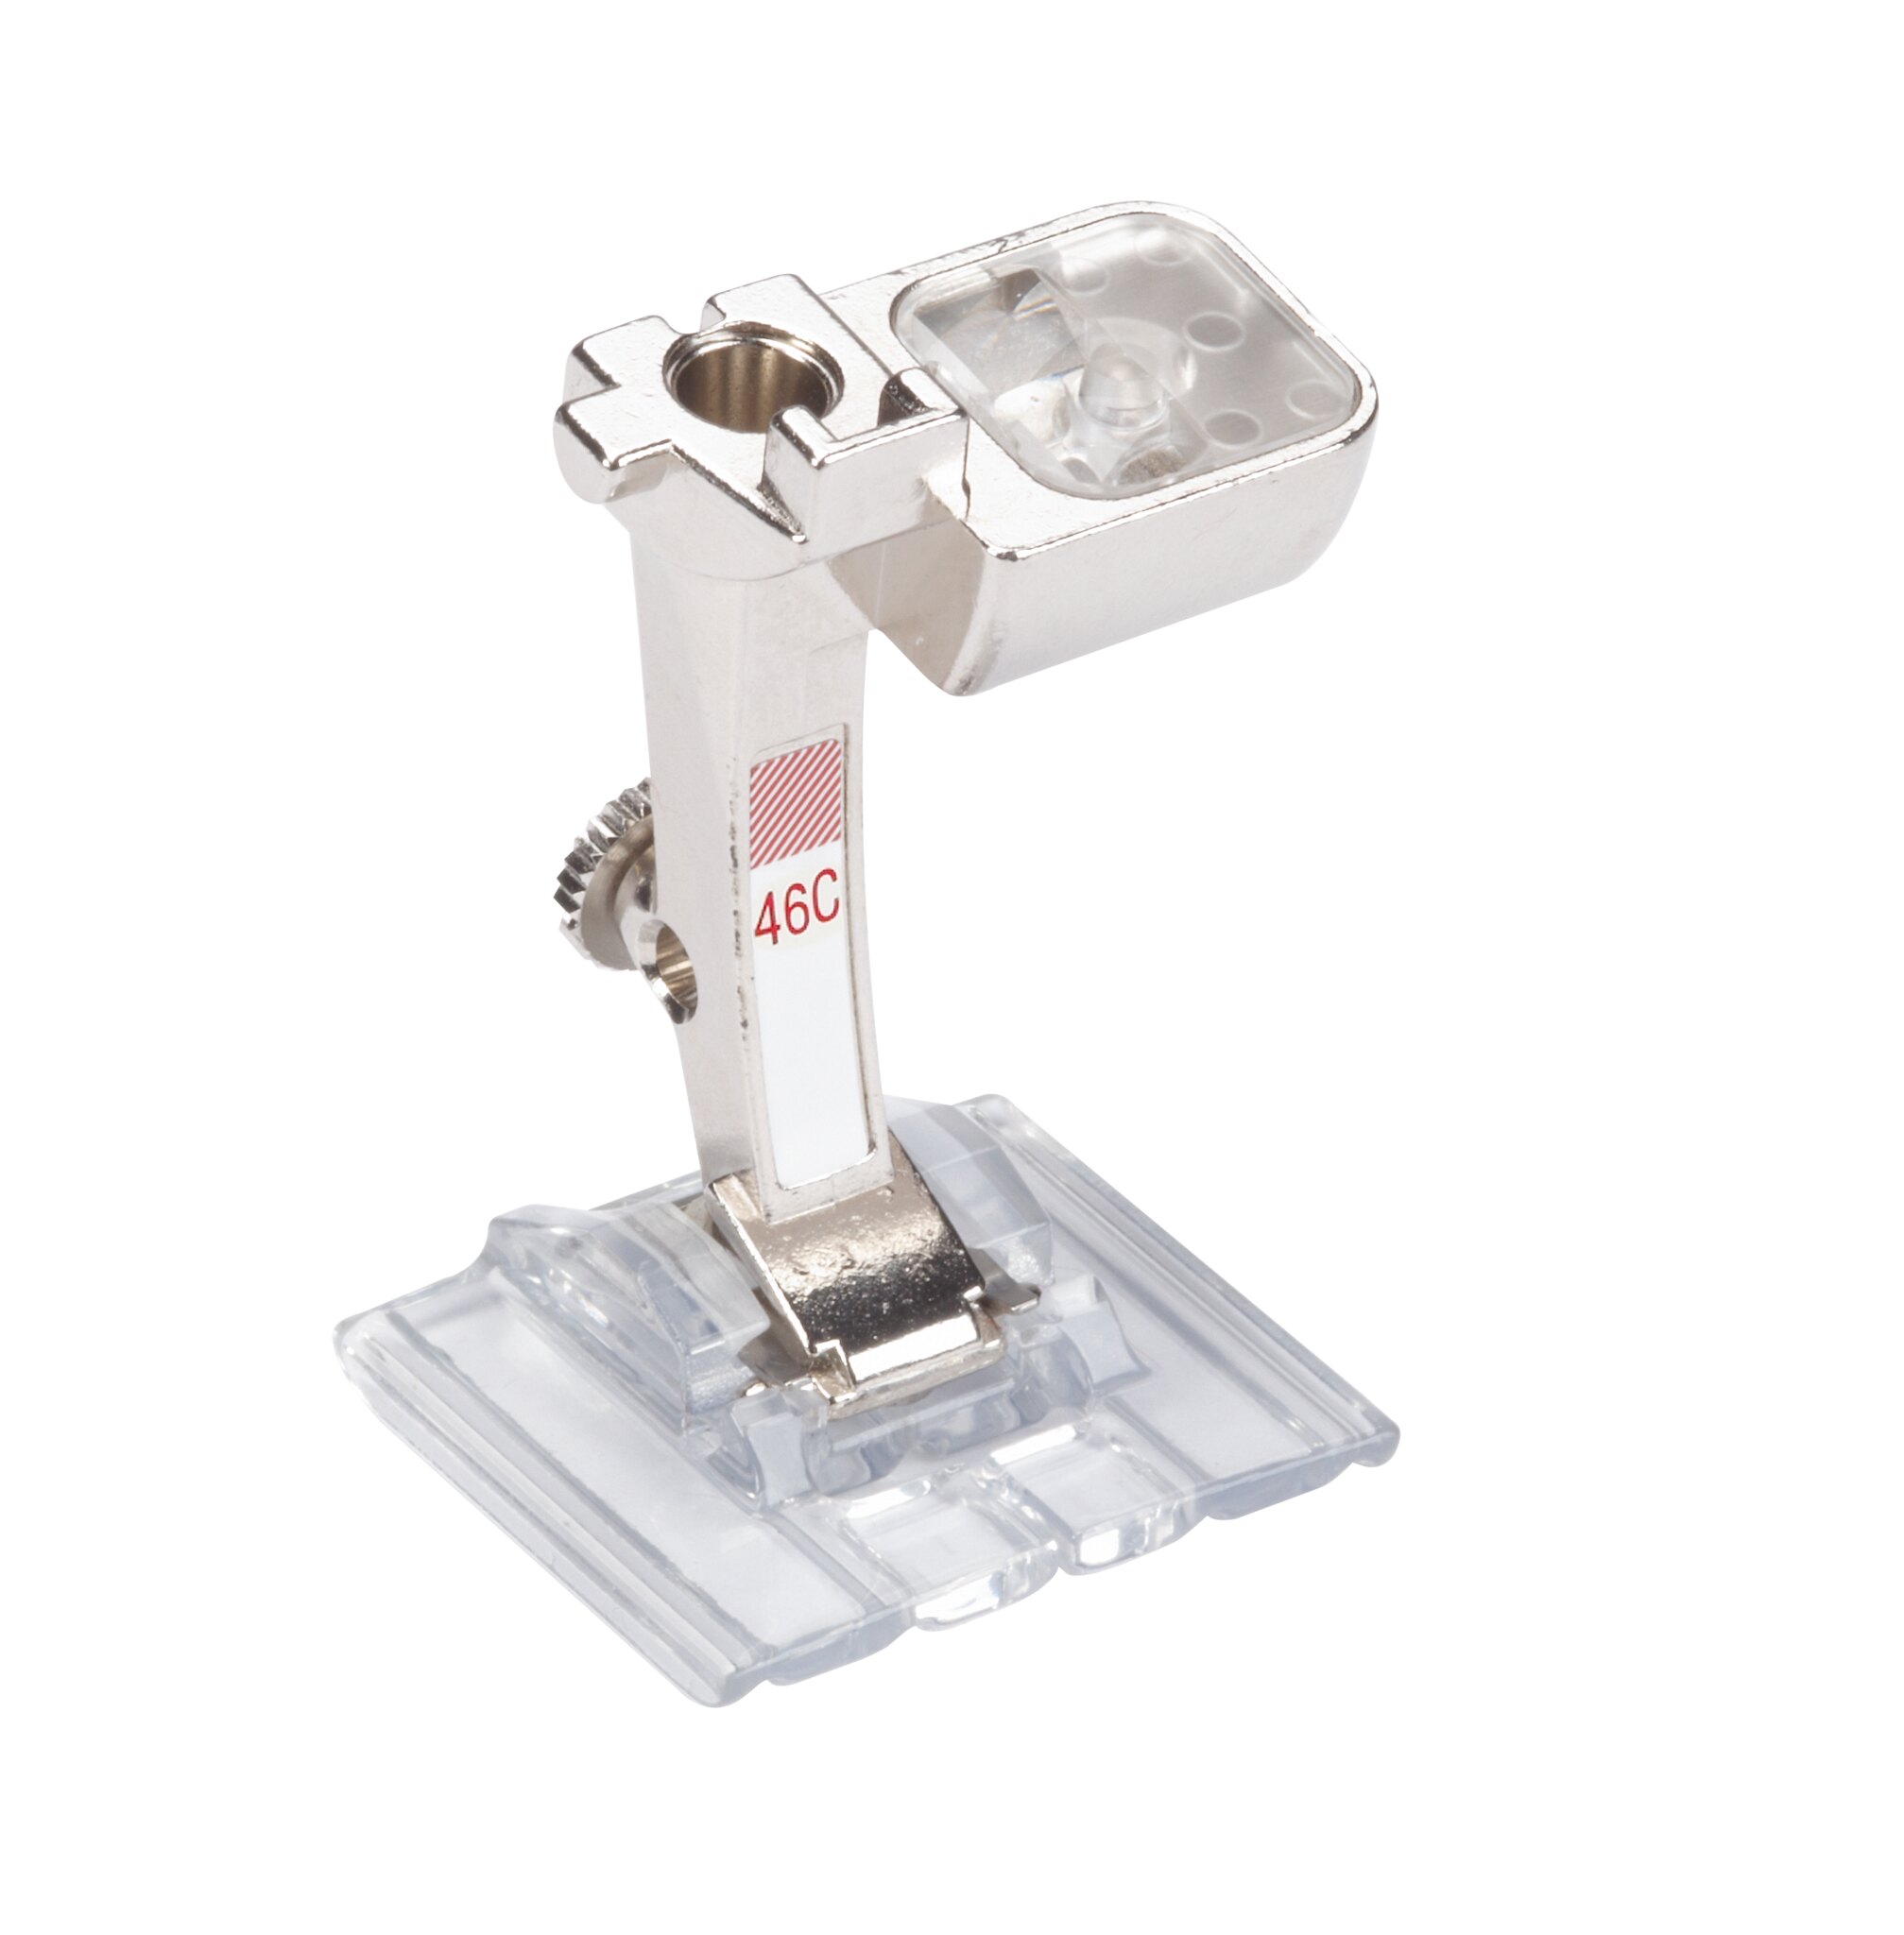 Creating the vertical pintucks will shrink your fabric slightly so the actual sleeve and back yoke pattern pieces will be cut after the pintucks and decorative stitches are added to the fabric. The pintucks are sewn vertically, so only the width of the fabric will decrease. Place the sleeve and back yoke patterns on the fabric and rough cut around the pattern pieces, leaving about 2″ on each side.
Set Up Sewing Machine for Pintucks
Insert a 2.0 mm twin needle in your sewing machine. I have a security feature on my BERNINA 770 QE PLUS that allows me to select the needle, stitch plate, and pressure foot that I am using. This ensures that all three work together, and that any decorative stitches I use will work with the foot. Thread the machine with two spools of thread, following the directions in your sewing manual. 
Sew the Pintucks on the Sleeves & Back Yoke
Note: It’s a good idea to test the pintuck stitch on a piece of scrap fabric before sewing on the fabric pieces for the sleeves and back yoke. Creating the pintucks and the decorative stitches with the #46C foot is done in two steps: all the pintucks are sewn, followed by the decorative stitches. Nine pintucks will be sewn on the sleeves and back yoke, with one down the center and four on each side of the center pintuck. Using a ruler and a removable marking pen or chalk, with the sleeve fabric right side up, draw a line down the center. Mark the center of the back yoke fabric the same way. This will be the guideline for the first pintuck. Place the line under the center of the twin needle and begin stitching with a straight stitch. As you sew, the foot will draw up fabric creating the first pintuck. 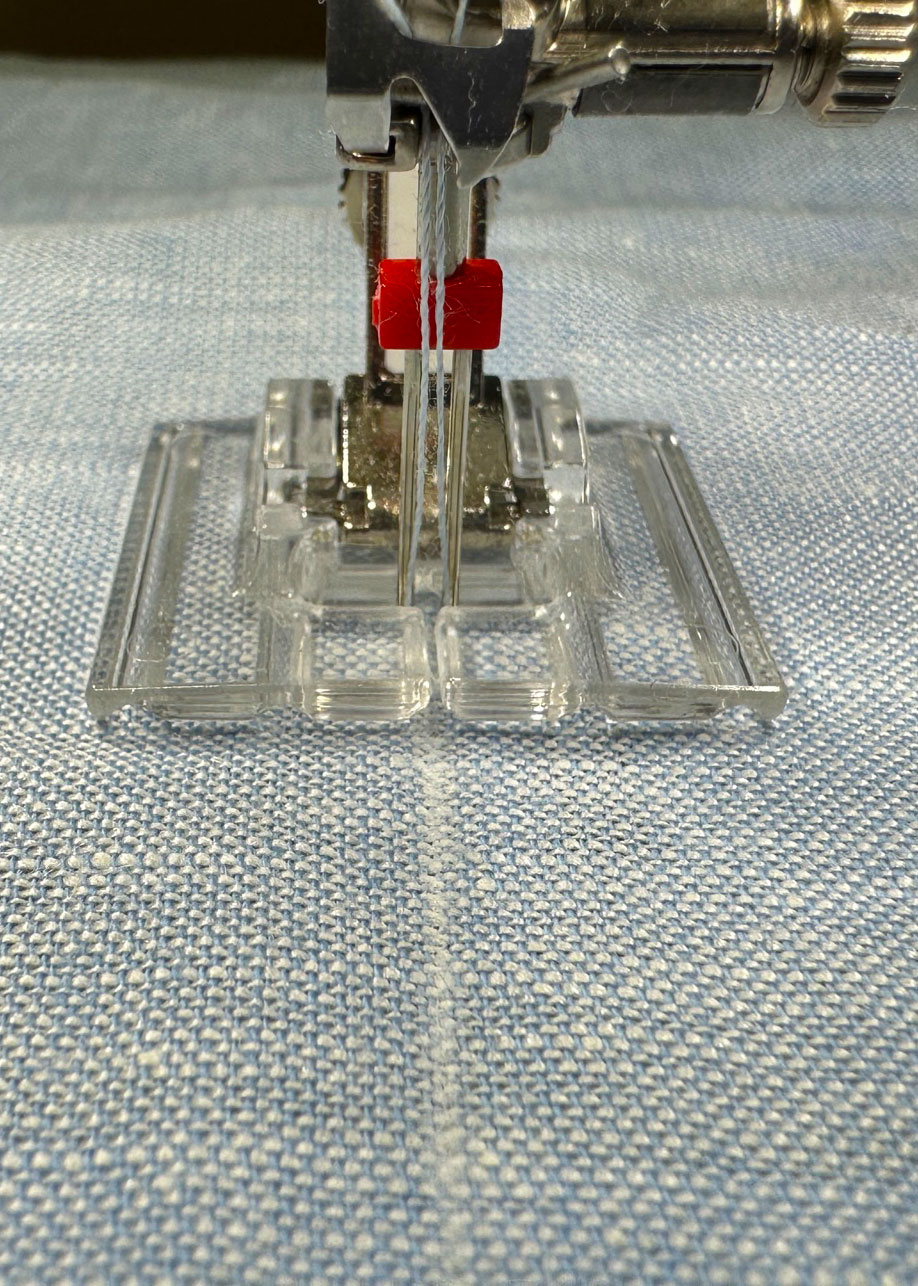 Next, move the fabric and position the first pintuck in one the outer groove of the #46C Foot and stitch, creating the next pintuck with a 9 mm space in between (which will be filled in later with decorative stitches).
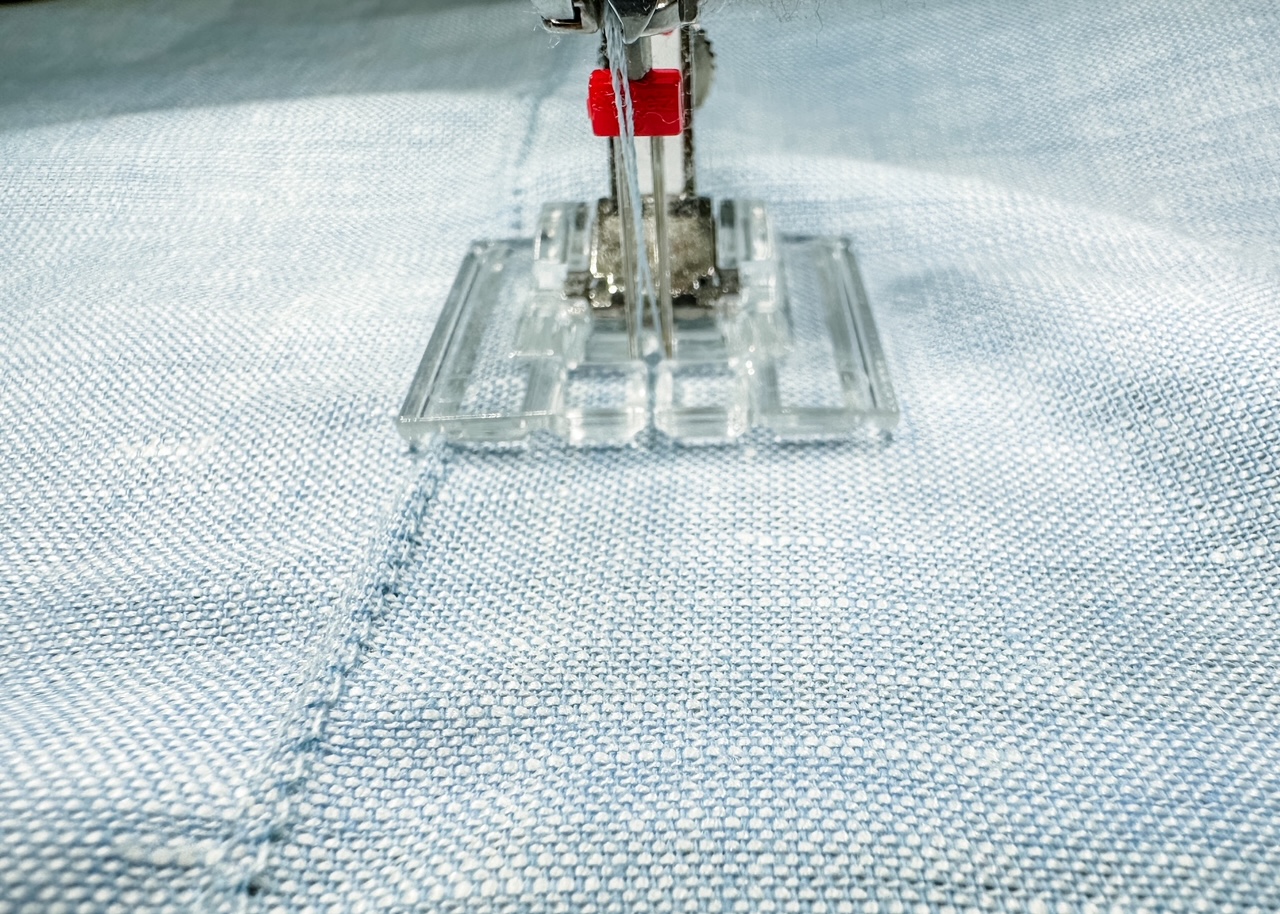 Continue repositioning the pressure foot and placing the pintuck in the groove of the foot until all four pintucks are sewn on the right of the center pintuck, and four are sewn on the left.
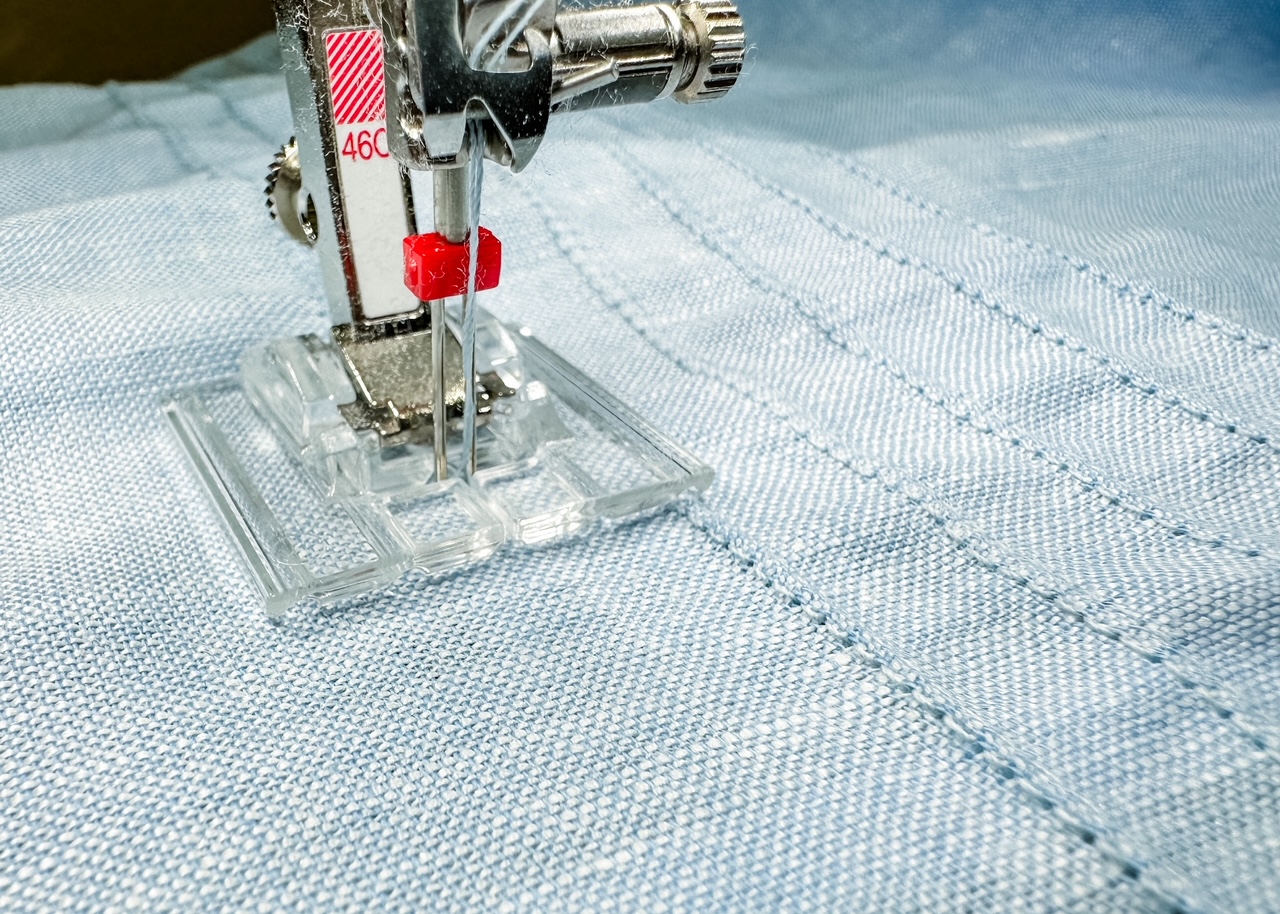
Prepare the Sleeve & Back Yoke for the Decorative Stitches
Iron a tear away stabilizer to the wrong side of both sleeves and the back yoke underneath the pintucks to provide stability to the decorative stitches. Replace the twin needle with a single needle. Be sure to change the needle selection from the twin needle to a single needle also. Thread the machine with 30 wt cotton thread in a contrasting color. When it was time to choose the thread for the decorative stitches, I reached out to Sookie Sews, the BERNINA Embroidery Software V9 Expert, as I was debating whether to use a cotton or a rayon thread. After talking to her, I ended up choosing a 30 wt cotton in variegated shades of pink as I wanted the heavier-weight matte finish it would provide, versus a thinner shinier finish that the rayon thread would provide. You can use either one for this project or even do tone-on-tone decorative stitches for a more subtle design. For more information and inspiration on decorative stitches, check out the Big Book of Stitches, available at your local BERNINA dealer.
Sew the Decorative Stitches on the Sleeves
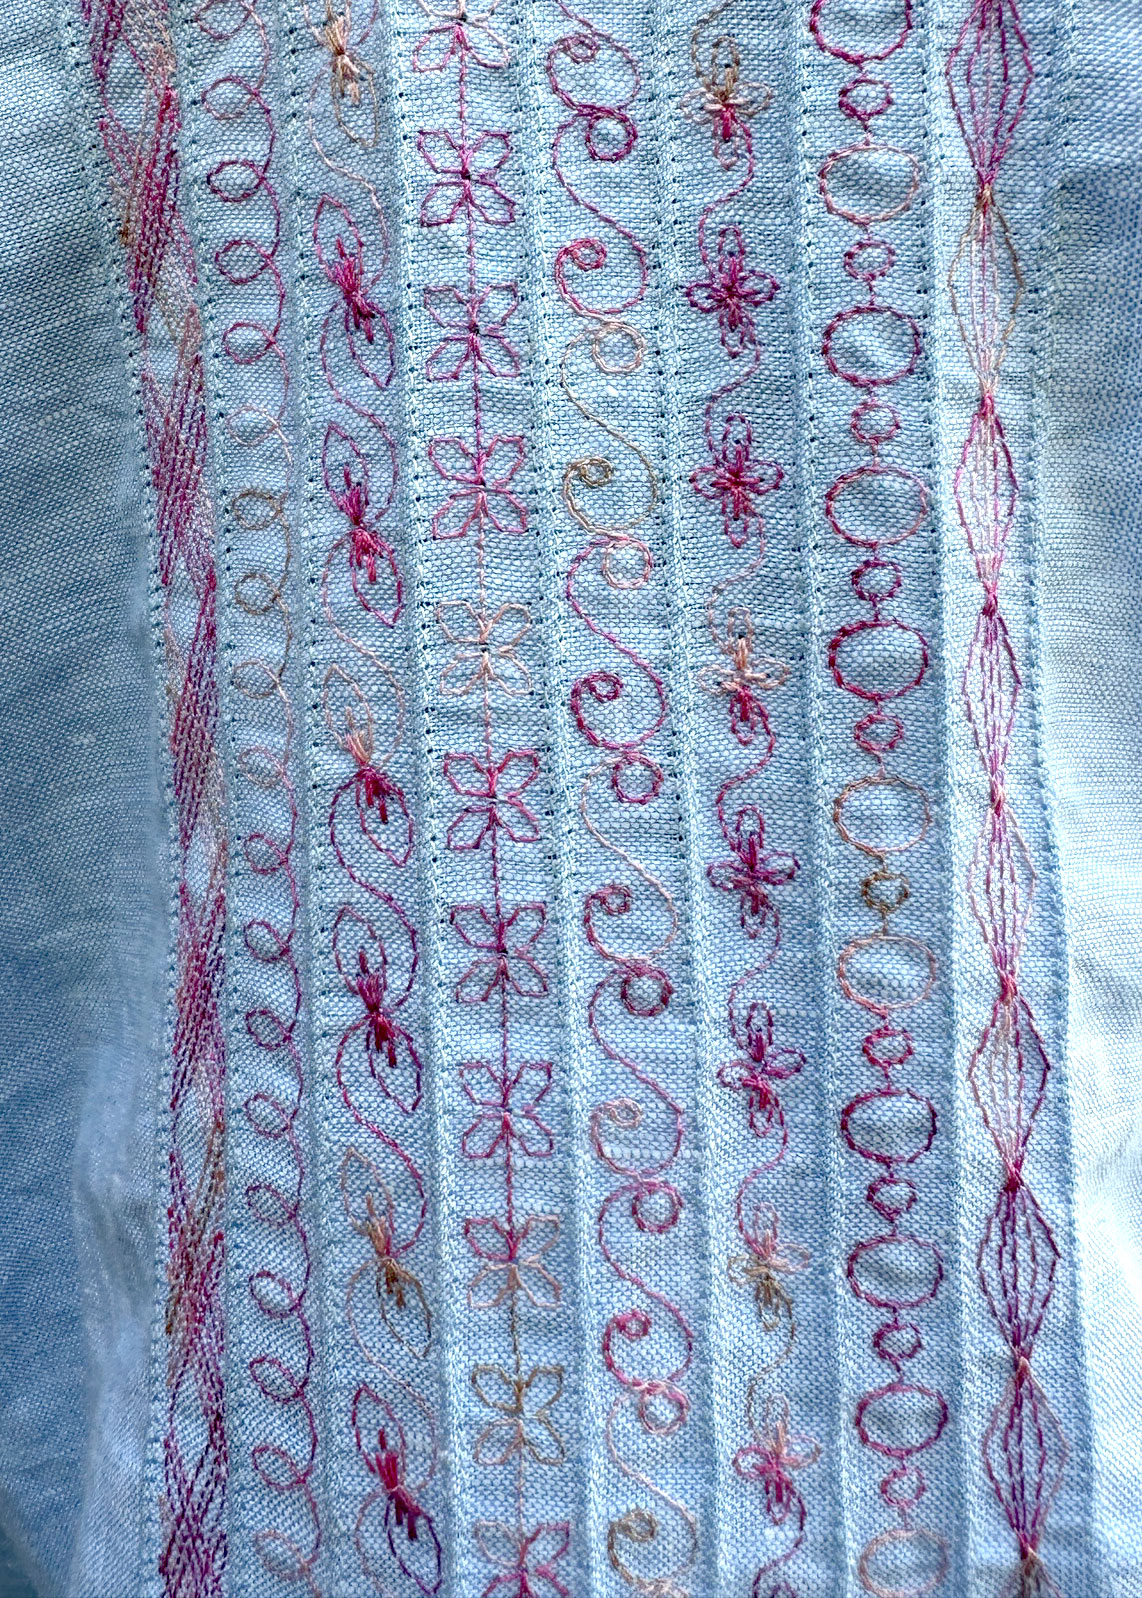
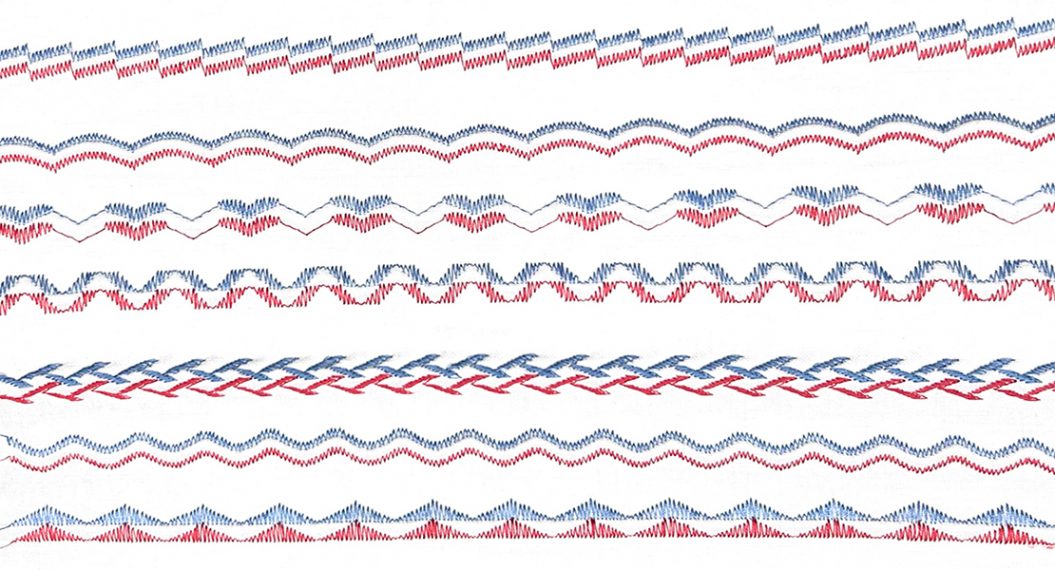
This is the fun part! Using a scrap of fabric, with stabilizer, experiment with different stitches to determine the ones you like best. Play with the settings of the stitches such as the pattern elongation. This is a feature that allows you to expand the stitch pattern length without the stitches looking stretched out. I decided on eight different stitches as I liked the look, but you could choose fewer stitches if you prefer. Remember, you’re the designer of your one-of-a-kind creation! From left to right, the decorative stitches I used on my BERNINA 770 QE PLUS:
- Stitch 648, elongated 200%
- Stitch 782, elongated 180%
- Stitch 717, elongated 125%
- Stitch 123, no changes
- Stitch 656, no changes
- Stitch 152, elongated 150%
- Stitch 607, no changes
- Stitch 665, no changes
 Select the first decorative stitch and sew between the pintucks with the pintucks in the grooves of the #46C foot.
 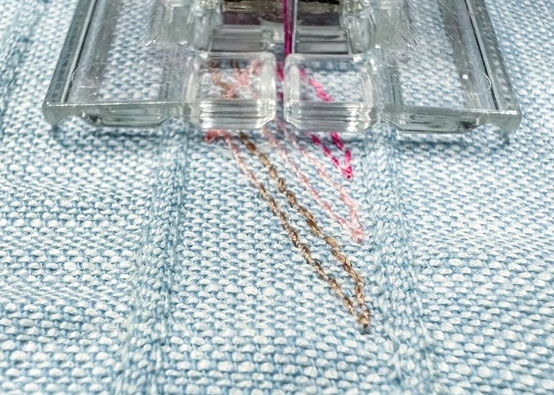 Move the fabric and place the next set of pintucks in the grooves of the foot and sew the next row of decorative stitches, continuing until all eight rows are stitched.
 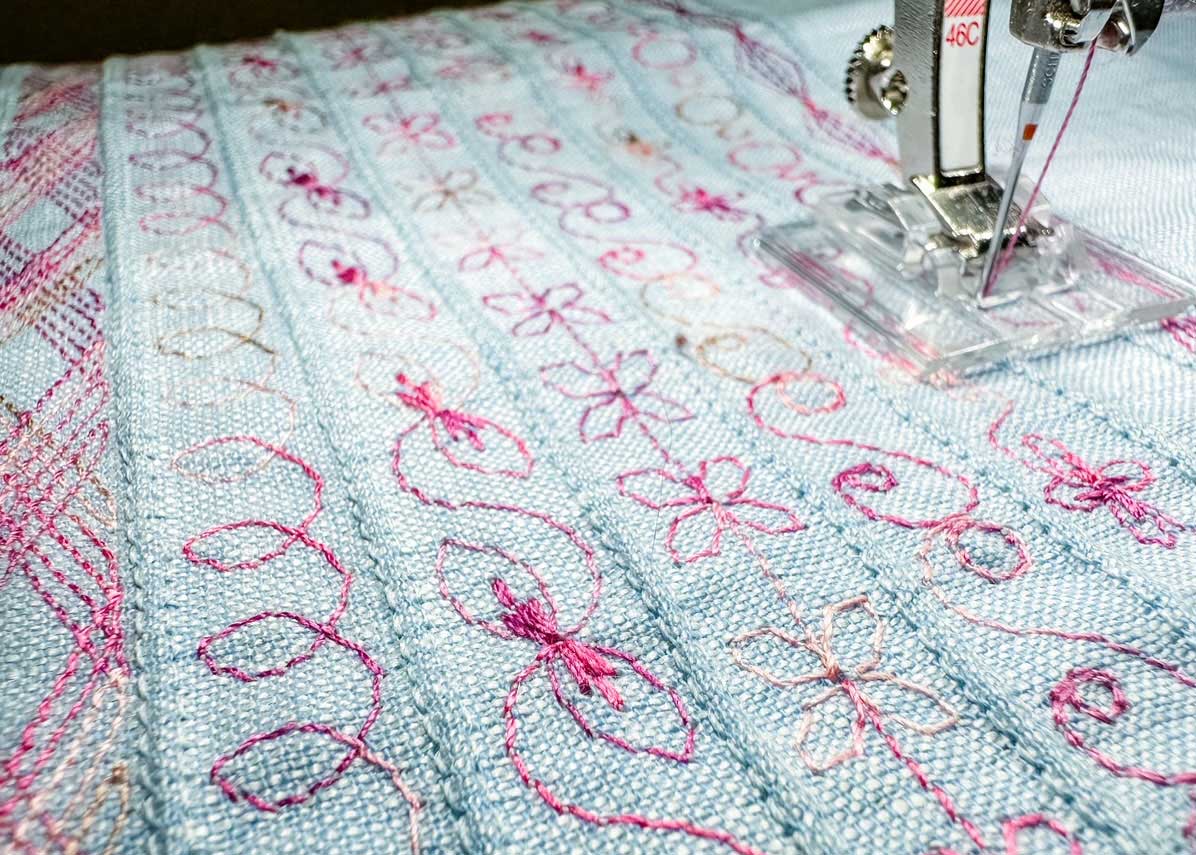 Repeat the process so the fabric for both sleeves and the back yoke have pintucks and decorative stitches. Remove the stabilizer from the back of each piece of fabric. Place the back yoke pattern piece centered on the pintucks and cut out. Align the shoulder seam notch of the sleeve pattern with the center pintuck, pin the pattern in place and cut out the two sleeves.
Sew the Embellished Sleeve Shirt
Cutout the remaining pattern pieces, but do not cut out the sleeve plackets or the sleeve cuffs. Cut out and apply interfacing to the collar, collar stand, and front bands per the pattern instructions. Sew the shirt following the pattern instructions, but do not add the sleeve placket or sleeve cuff as these sleeves will be finished an elastic casing, following the instructions below.
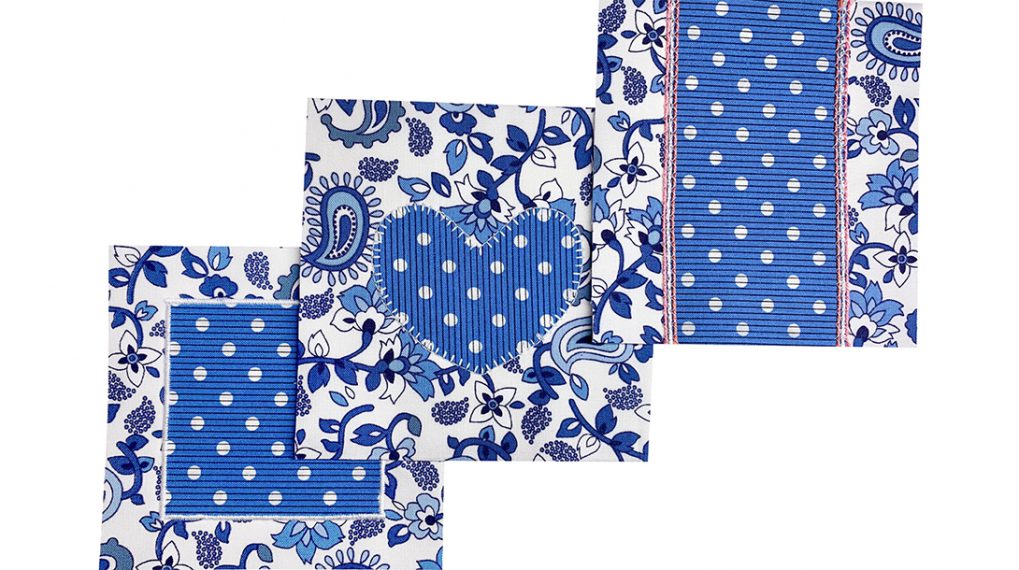
Add a Label to the Back Yoke Facing (Optional)
If you want to add a personalized label to the back of the shirt, add it to the back yoke facing before constructing the shirt. On this shirt, I added an inner facing to highlight the label, a design detail inspired by a high-end menswear shirt. Using a 6″ x 8″ piece of fabric, fold it it half and cut an arc shape, press under 1/4″ to the back side, sew the personalized label to the fabric, center and pin on the back yoke facing, and edgestitch in place using the Edgestitch Foot #10D. 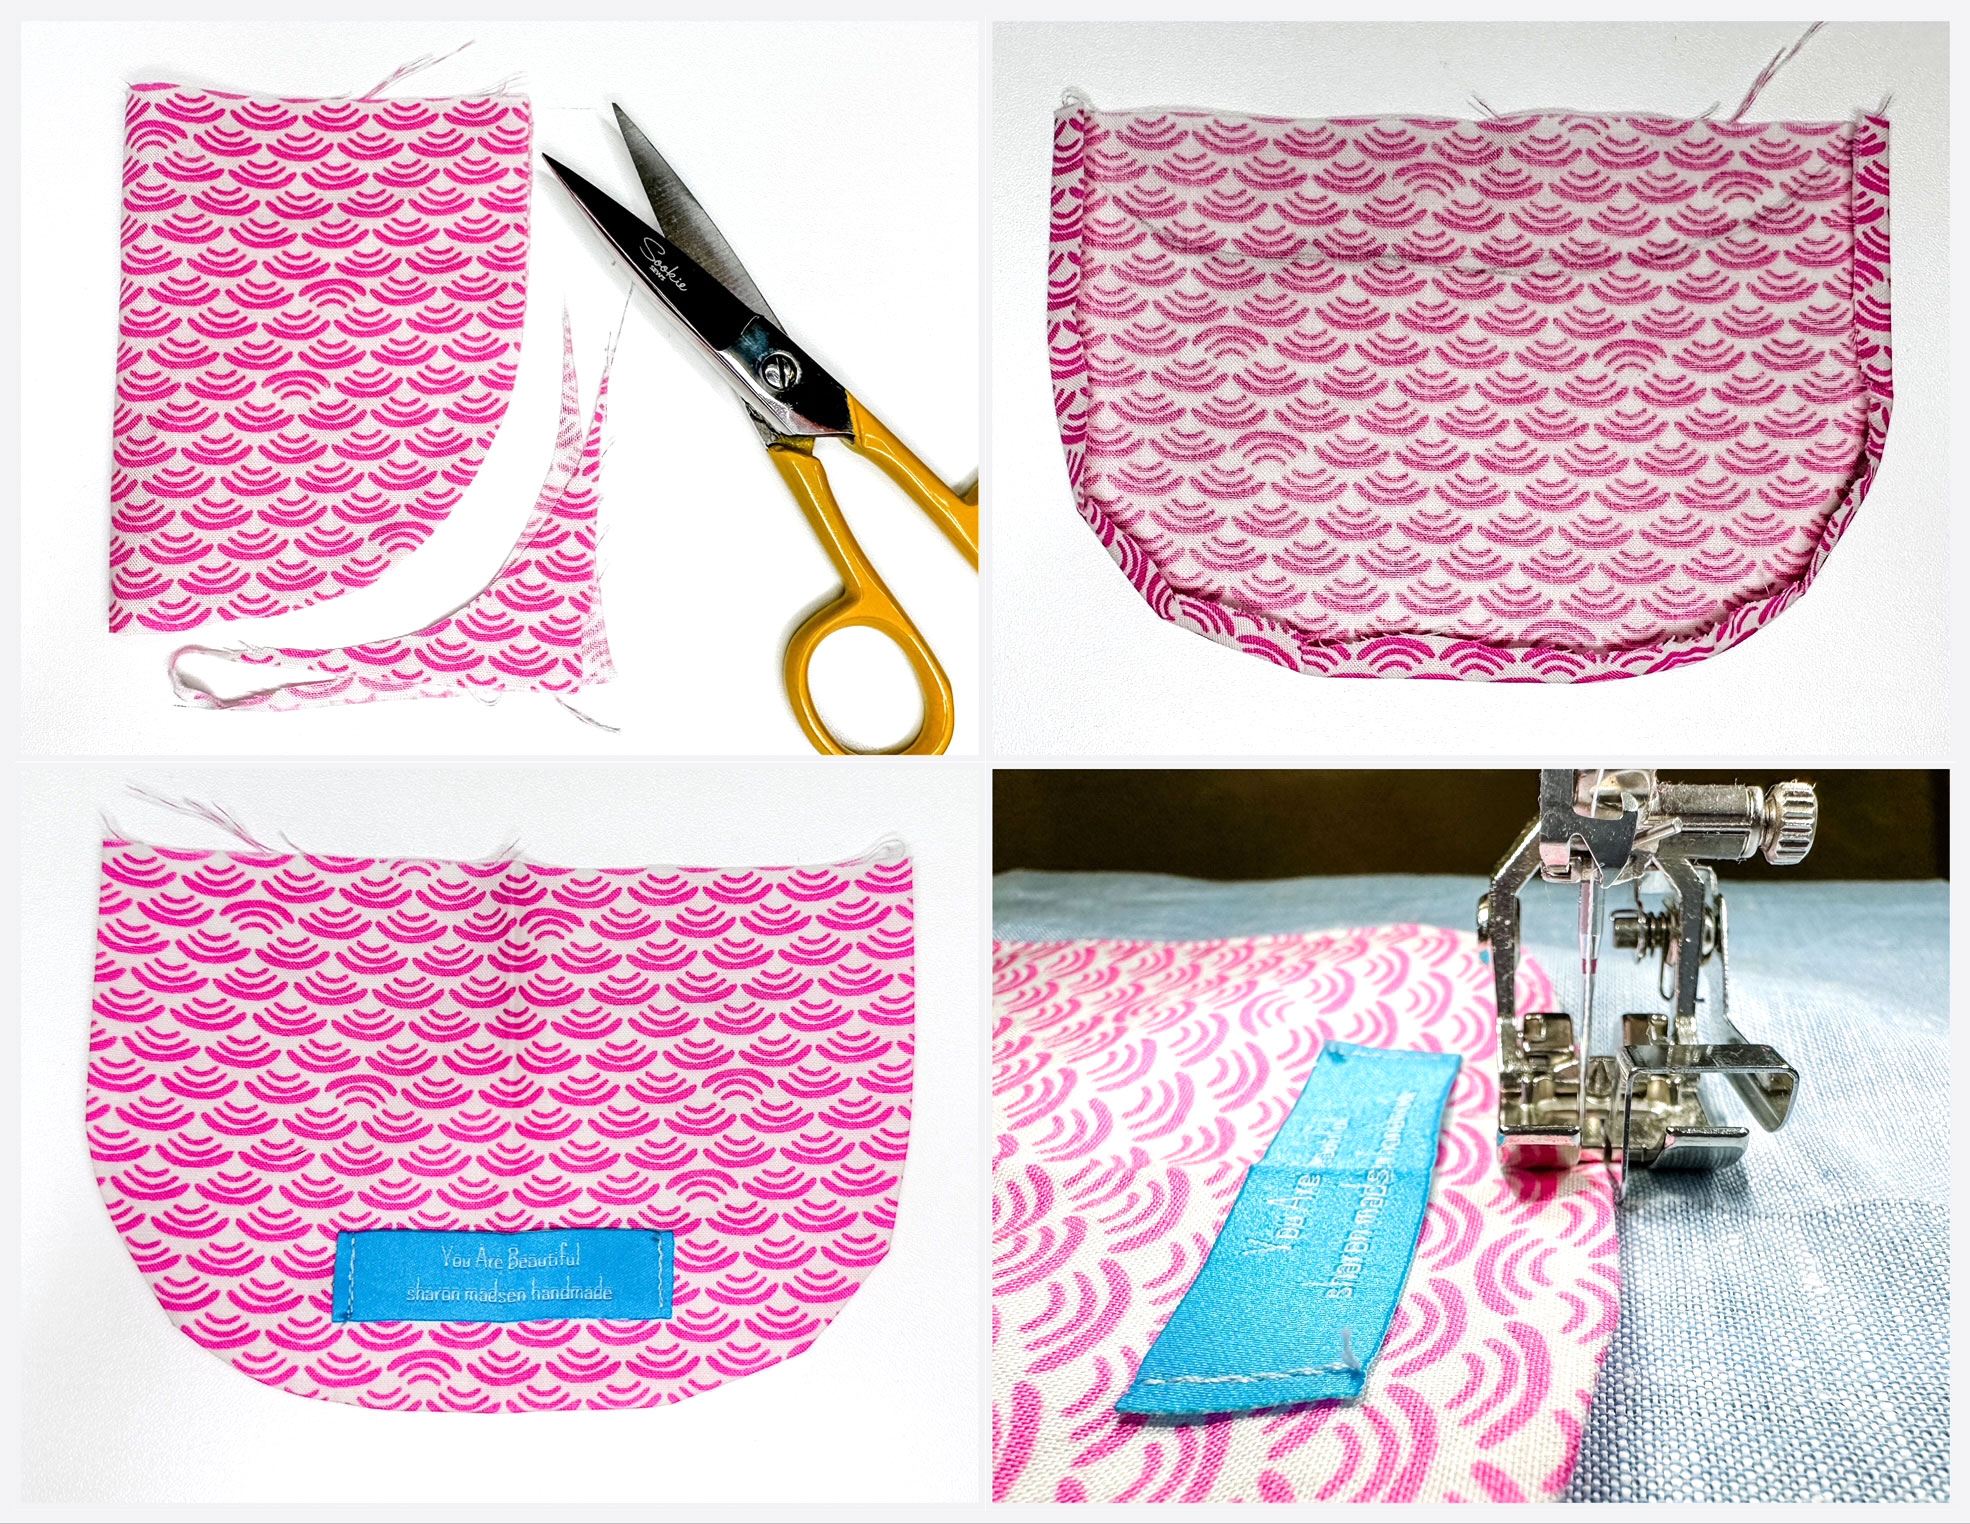 Turn the back yoke facing over, trim away the excess following the neck edge of the yoke, and the back yoke facing is now ready to sewn when you reach that step. If you prefer a step-by-step video tutorial, you can find one on my YouTube channel.
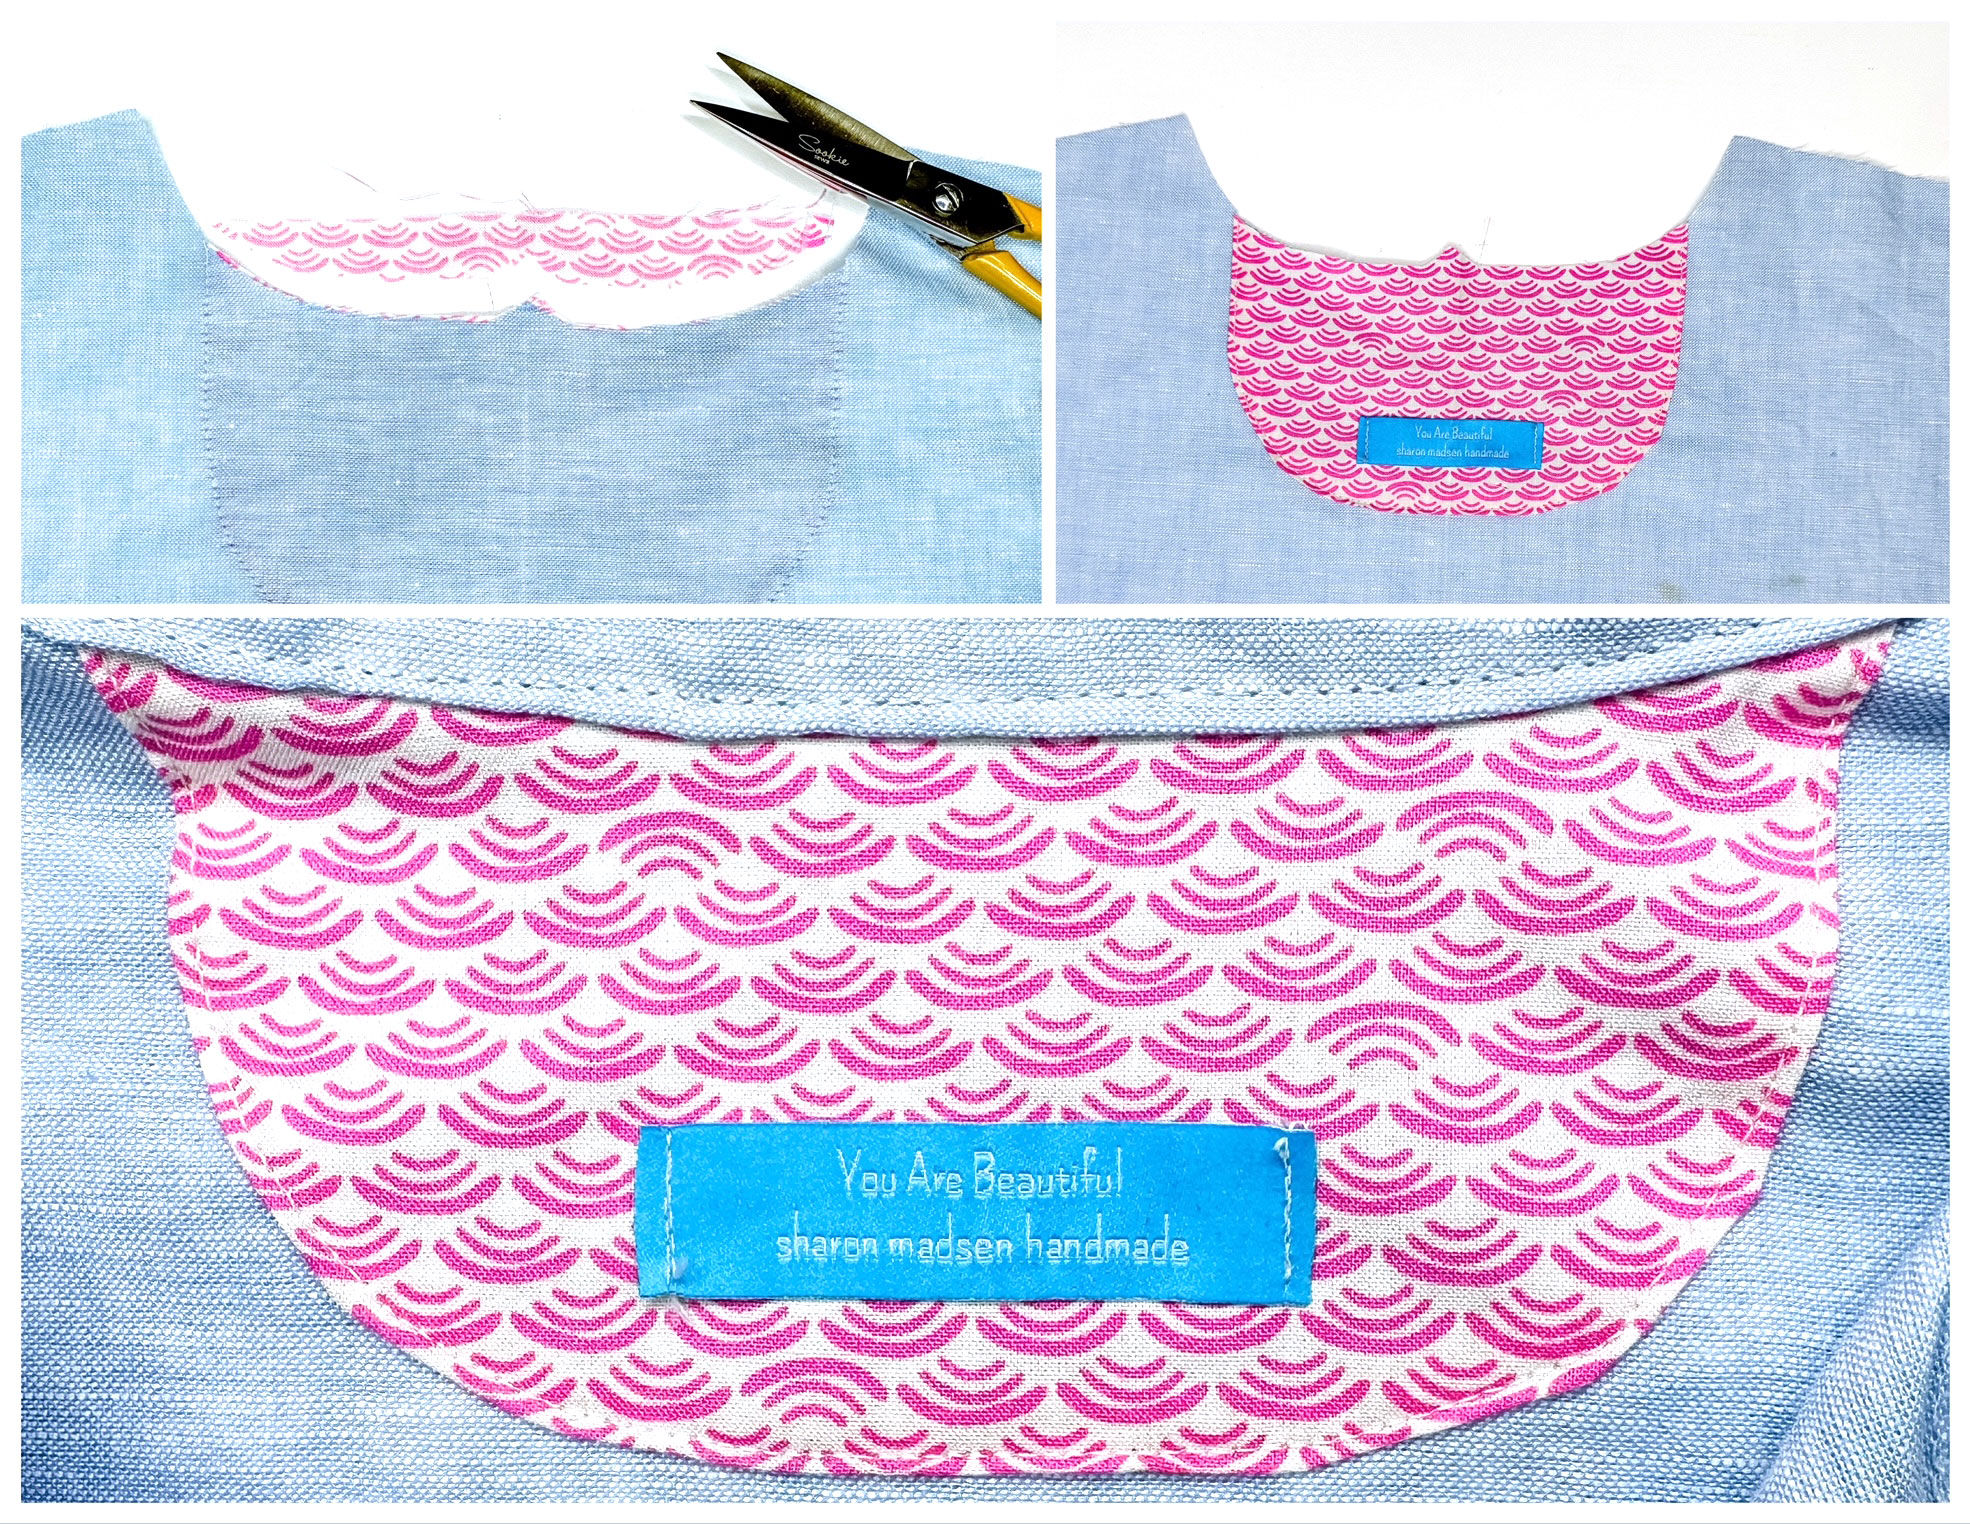
Add an Elastic Casing to the Sleeves
To create the elastic casing, turn under the bottom edge of the sleeve 1/4″ to the wrong side and press. Turn under another 5/8″ toward the wrong side and press. Stitch close to the fold, leaving a 1″ opening at the seam to insert the elastic. Cut two pieces of elastic to fit comfortably around your wrist. Secure a safety pin to one end of the elastic and insert into the casing.  Pull the elastic all the way through, but be careful the other end of the elastic doesn’t pull through. Overlap and sew the two ends of the elastic together, making sure the elastic did not twist, then sew the casing opening closed.
Sew the Buttonholes
When it’s time to sew the buttonholes, sit back and relax as they practically sew themselves with the Buttonhole Foot #3A! 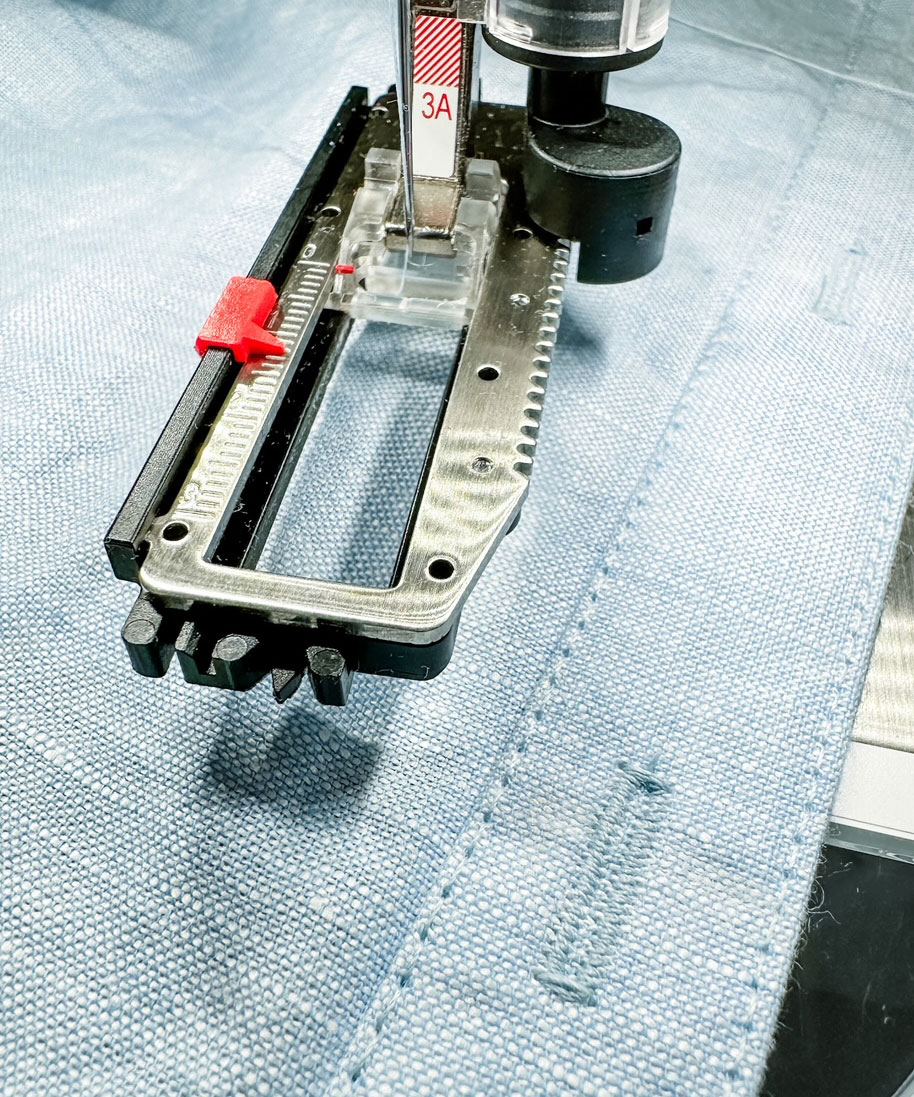 I didn’t add a button and buttonhole on this collar stand of this shirt, however, if you decide to consider using the Buttonhole Leveler, which fits underneath the Buttonhole Foot #3A. It is designed to help sew buttonholes that are close to a fabric edge that may have an uneven surface, like the collar stand.
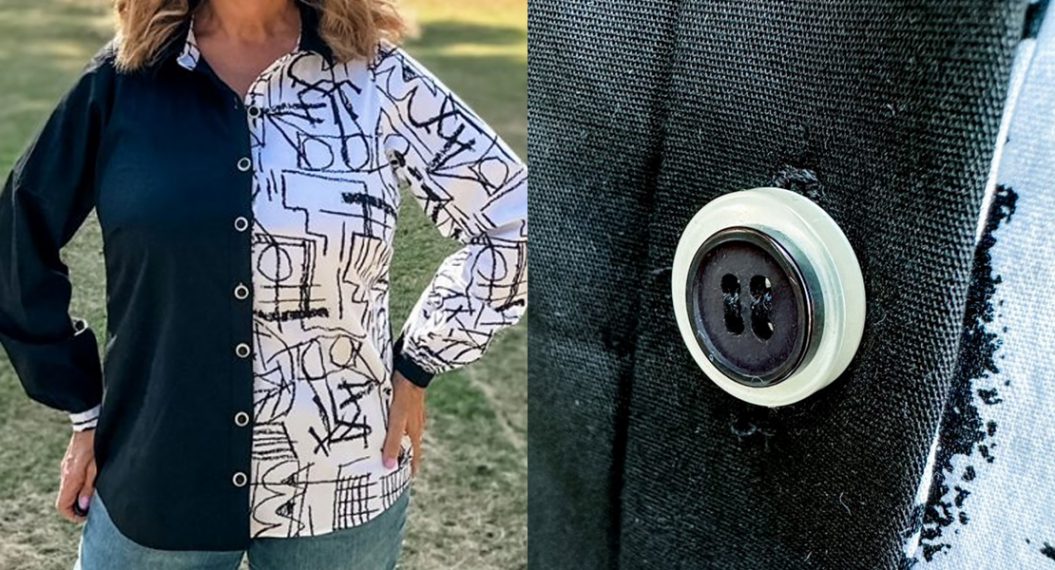
 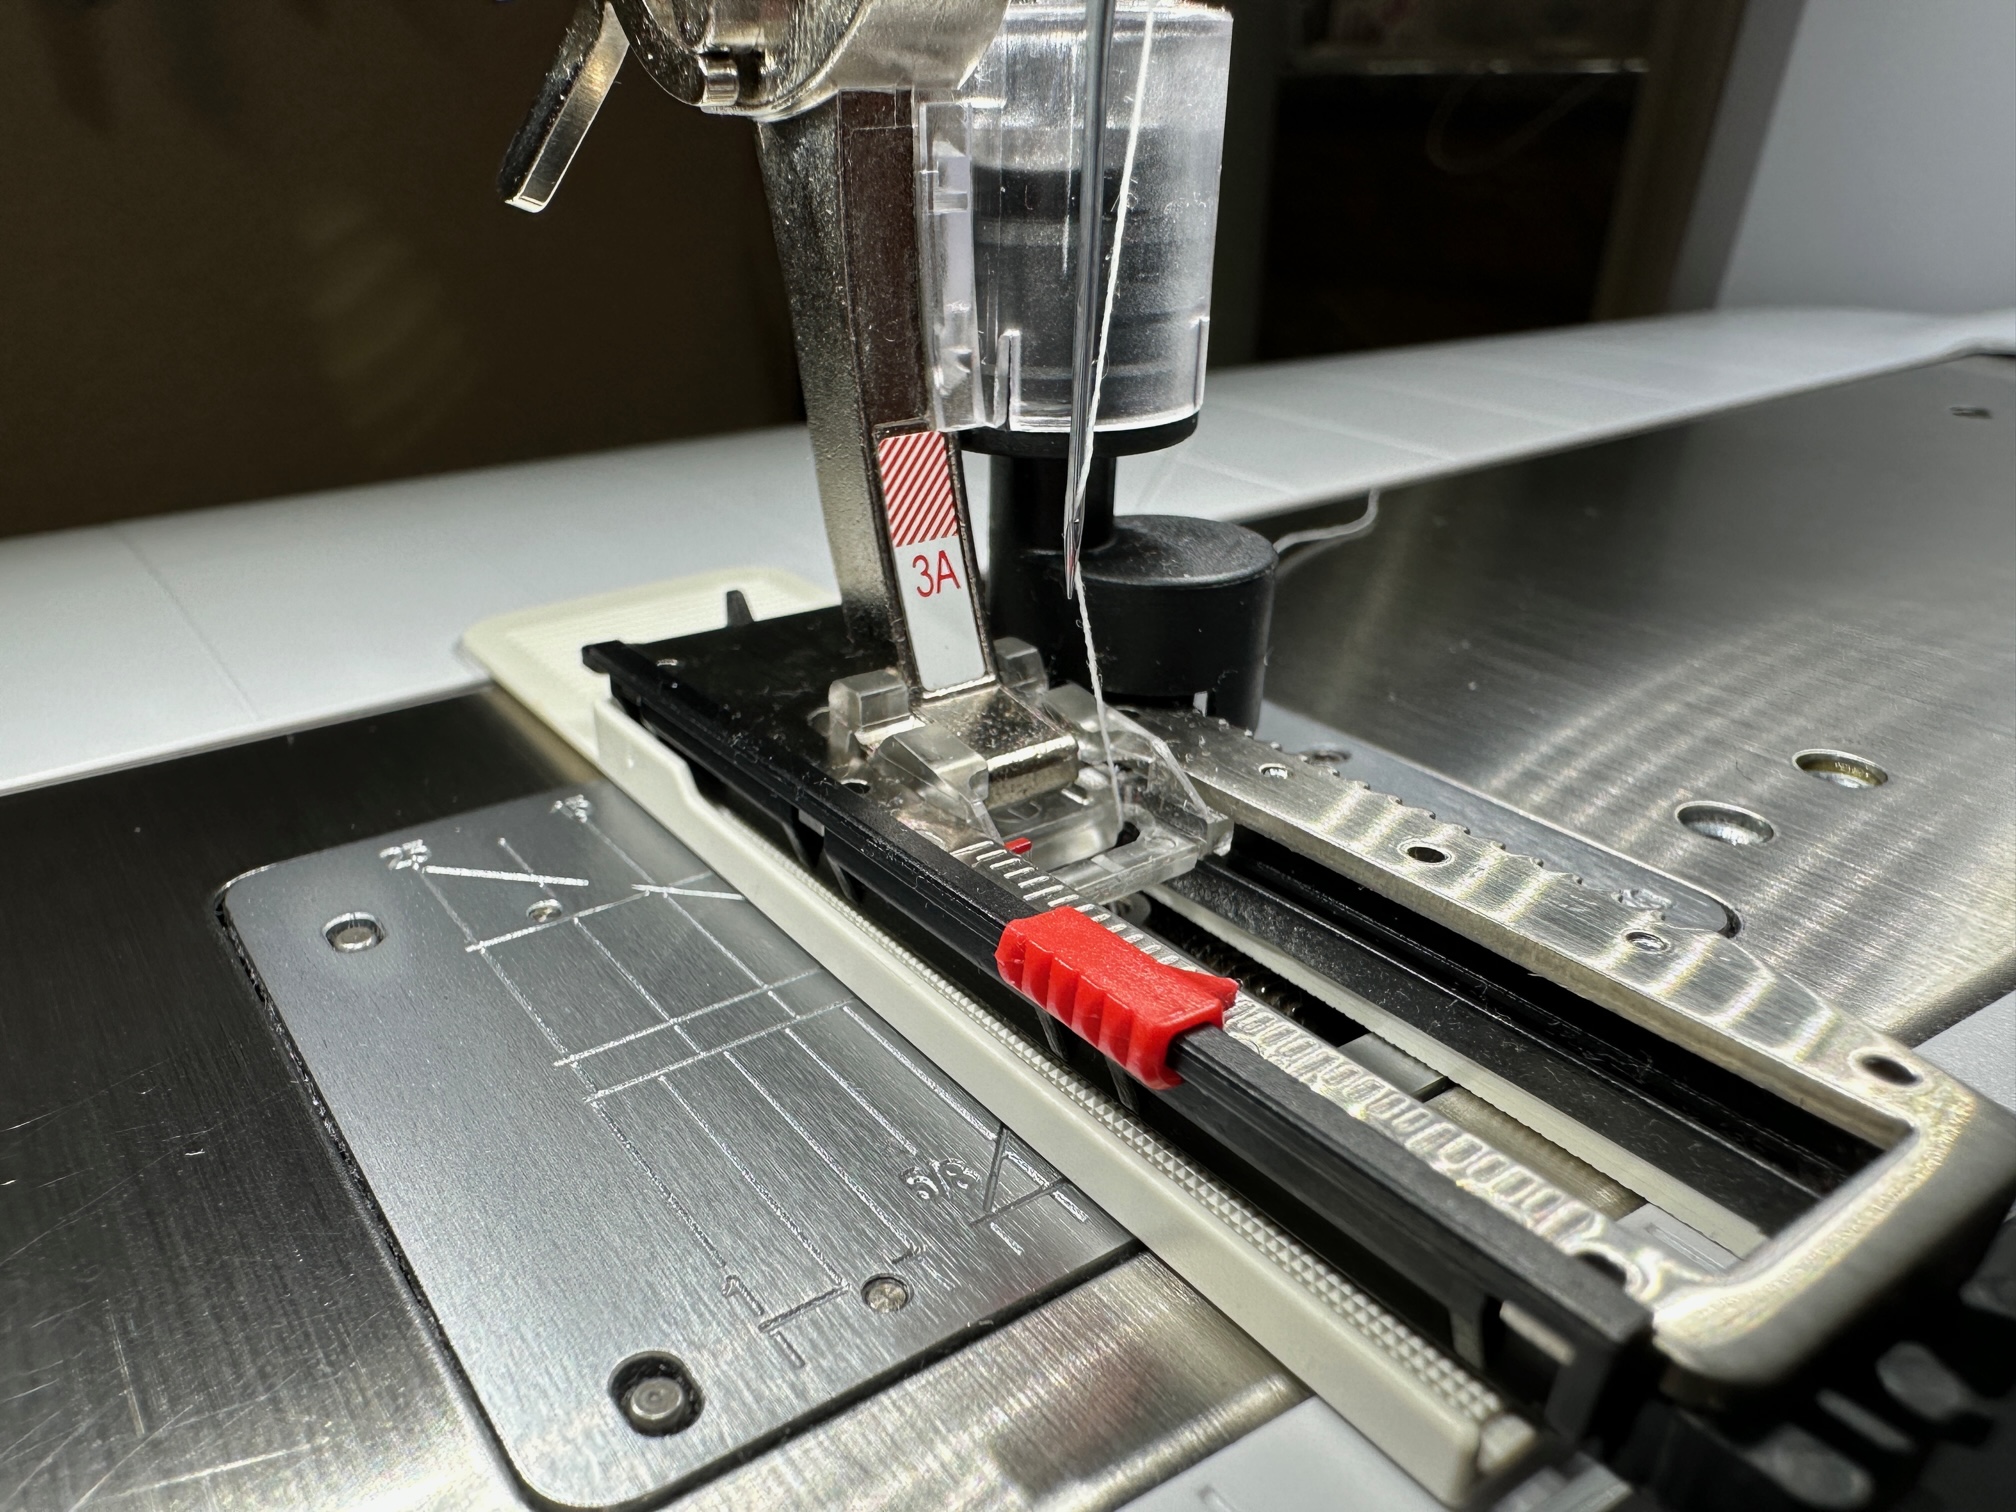 When cutting open the buttonholes, use a buttonhole cutter and wood block to easily – and safely – cut them open. Sew the buttons on the shirt and your done! Be sure to tag me (@thesharonsews) and BERNINA (@berninausa) on Instagram when you sew your shirt!
  Join me in the Part 3 blog post and learn how to add width to the sleeve, change the button cuff to an elastic closure, and add a patchwork ruffle to the sleeves and neck band.

What you might also like


2 comments on “One Shirt Pattern Three Ways, Part Two: Pintucks & Decorative Stitches”
-
-
Hi Marlys!
Thank you so much! I can’t believe I forgot to include a pic of the back yoke! I’ll see if I can get that added to this post. I simply copied the same stitches I used on the sleeves. I did put a video together showing all four shirts I sewed using the Vernon Shirt – and that includes pics of the back yoke. (Sharon Sews on YouTube)
For the pintucks, I used a straight stitch. Perhaps it looks different in the photos because my fabric is linen and I used a narrow double needle.
Leave a Reply
You must be logged in to post a comment.

What stitch did you use for the pintucks? I’ve always used the straight stitch, but your stitch looks like it crosses over in a regular pattern. Love the sleeves! I love pintucks and decorative stitches, oh my this is a lovely blouse. Do you have any shots of the contrast back yoke? Love that idea!