Quilt Safari, Part One: Instructions & Free Pattern
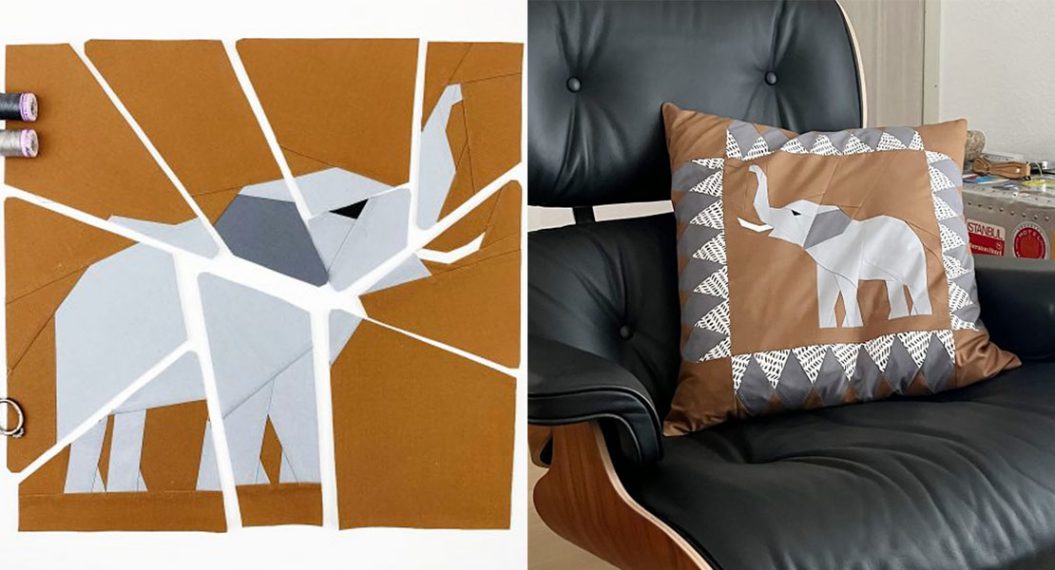
Hello to all of you Quilt Safari travelers, do you have everything you need for the safari in your suitcase? Straw hat, camera, khaki shorts…. ohh, I meant of course: sewing machine, fabrics and patterns, LOL 😀. Today we begin the Quilt Safari 🦁🦒🐘🦓🦏, and I have a free pattern for you to start with: the Diamond Border quilt block for our quilt.
We Are Sewing the Diamond Border
Today we are sewing the first block – the Diamond Border block! For all of those who have purchased the Safari quilt pattern, you have this pattern as a bonus pattern in the Safari quilt pattern.
In this post, we cover all the details of foundation paper piecing so that even beginners can learn this technique and join in the quilt safari. In addition to the step-by-step instructions, there are two video tutorials.
Over the next few weeks, we will be sewing the other blocks one by one. We’ll start with the simpler blocks and gradually increase the level of difficulty.
Are You Ready?
Are you ready, have you all gotten your “Safari Quilt” pattern and chosen and organized your fabrics? Do you know the schedule and have you chosen a nice spot in our safari jeep? Then you’re ready to go!
If not, that’s no problem either. You can join this quilt along at any time. If this is your first time hearing about the Quilt Safari, read the following blog article in which I summarize the most important information:
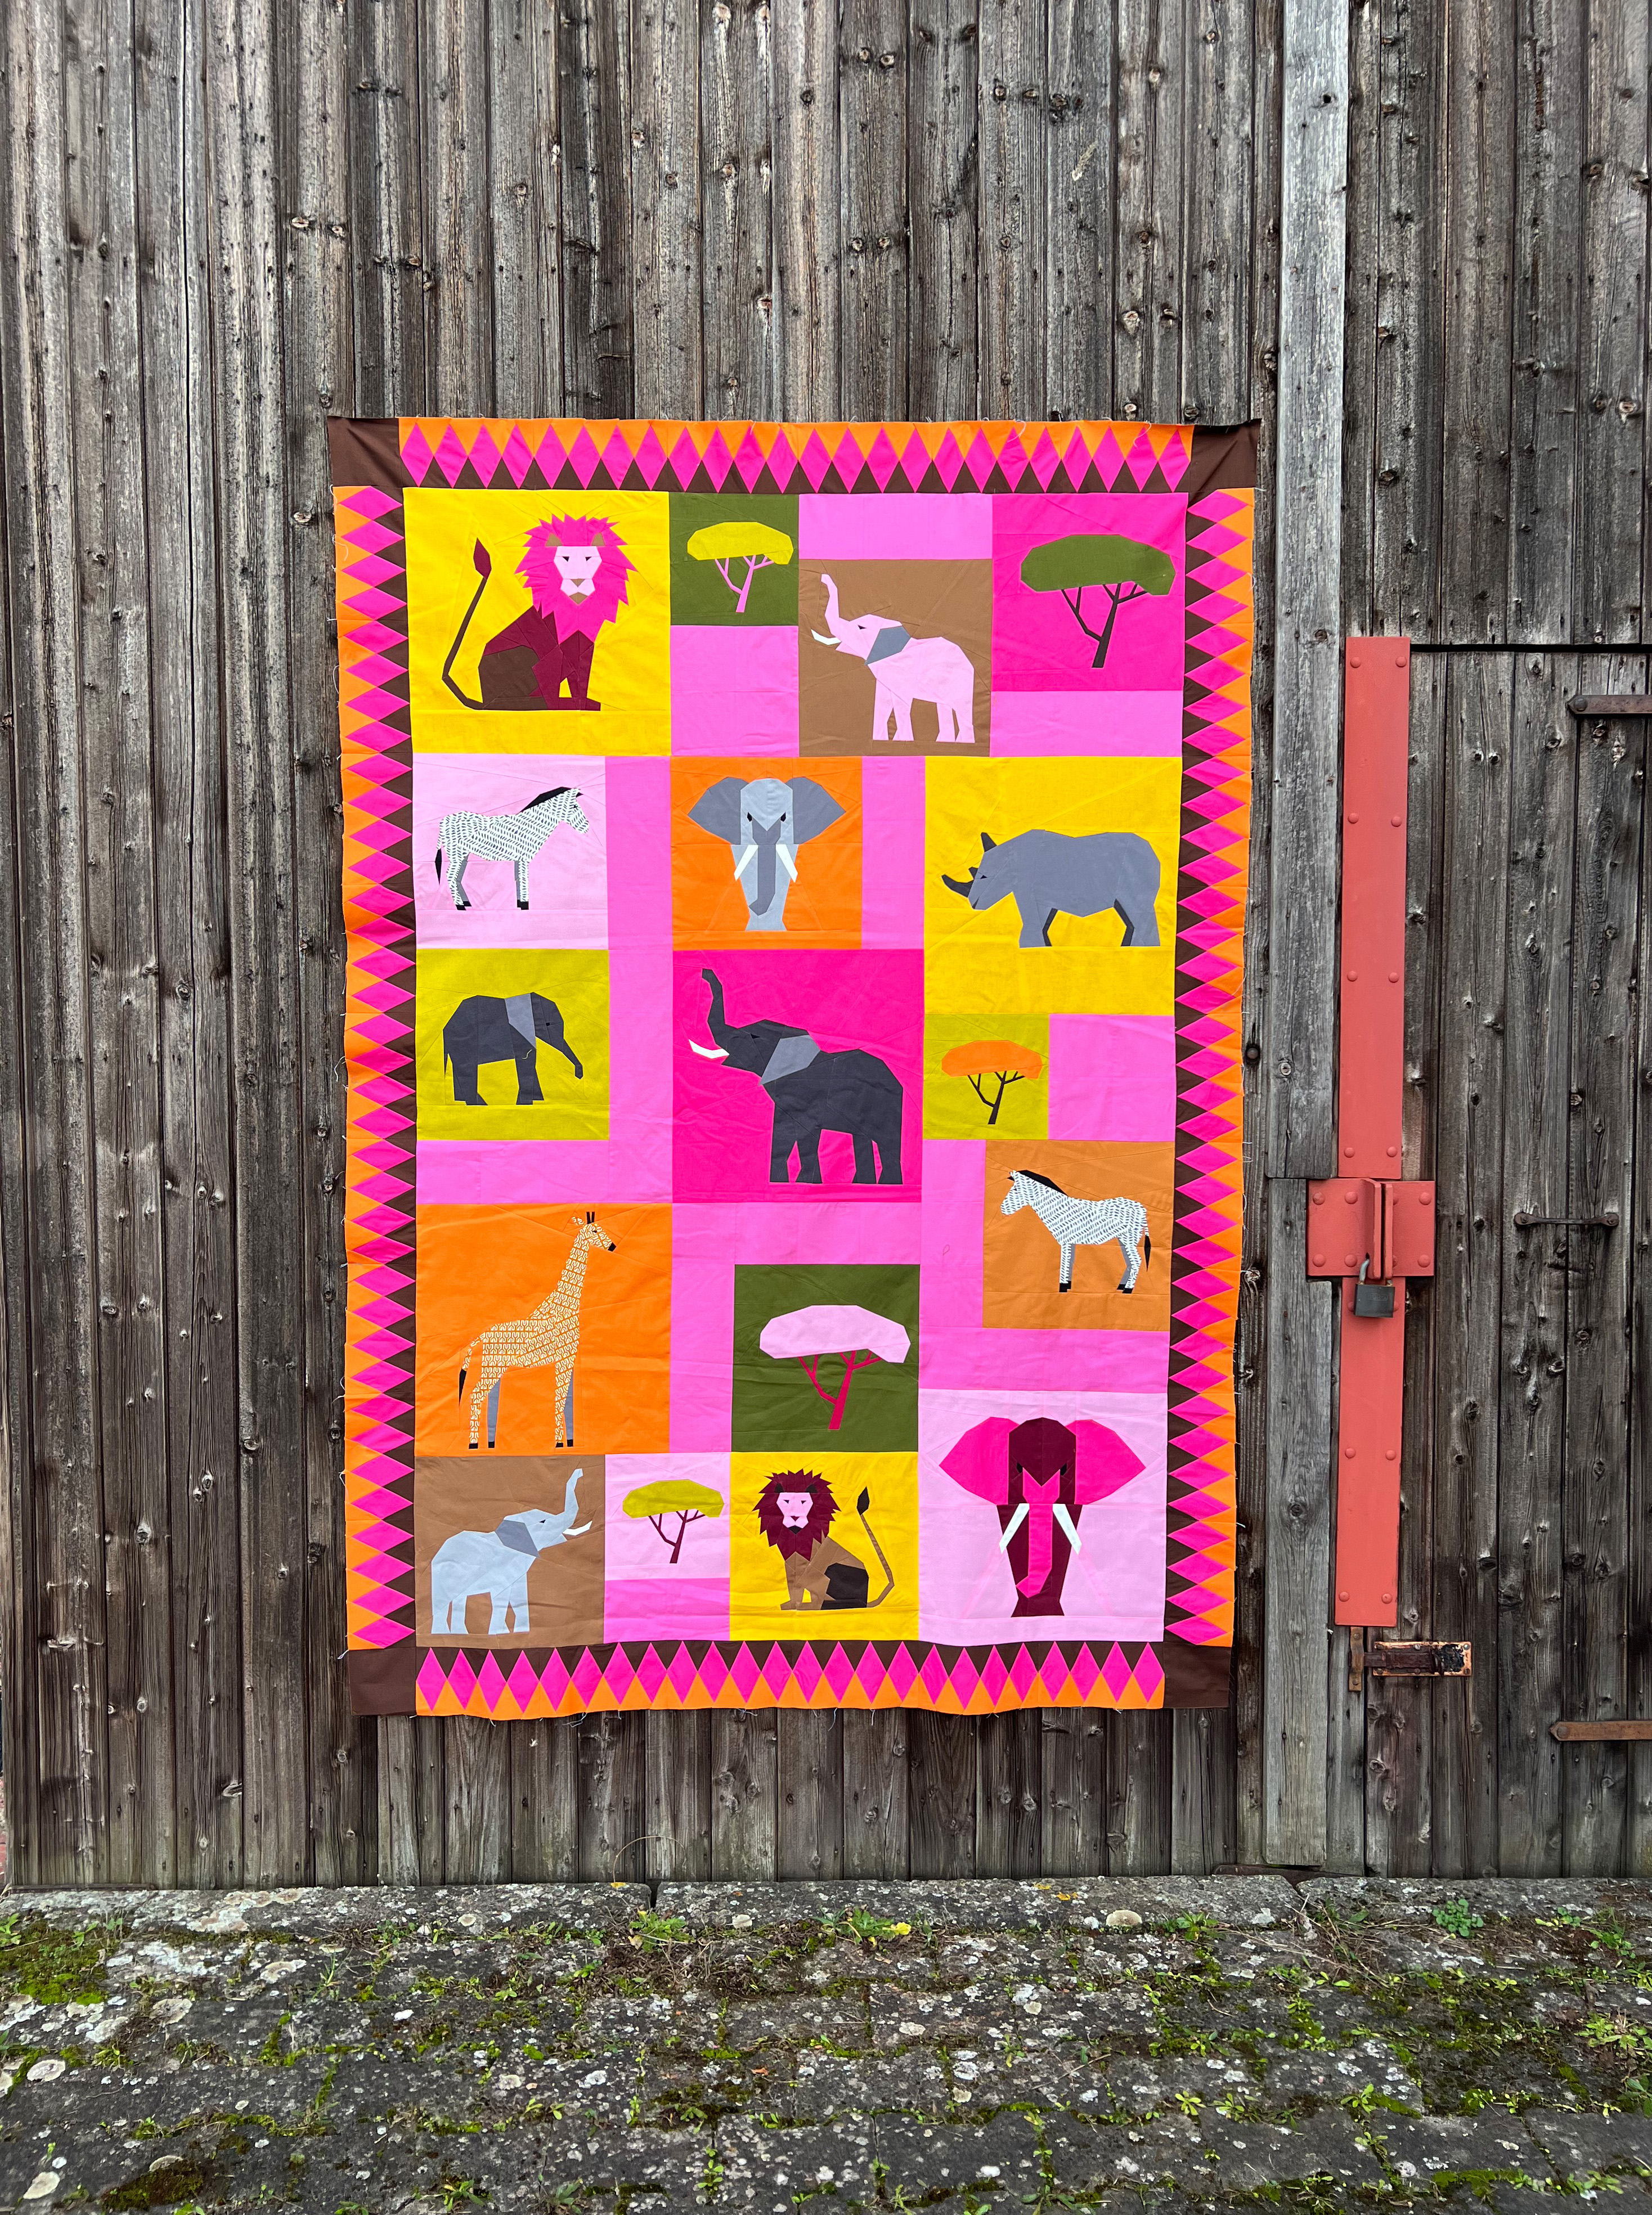
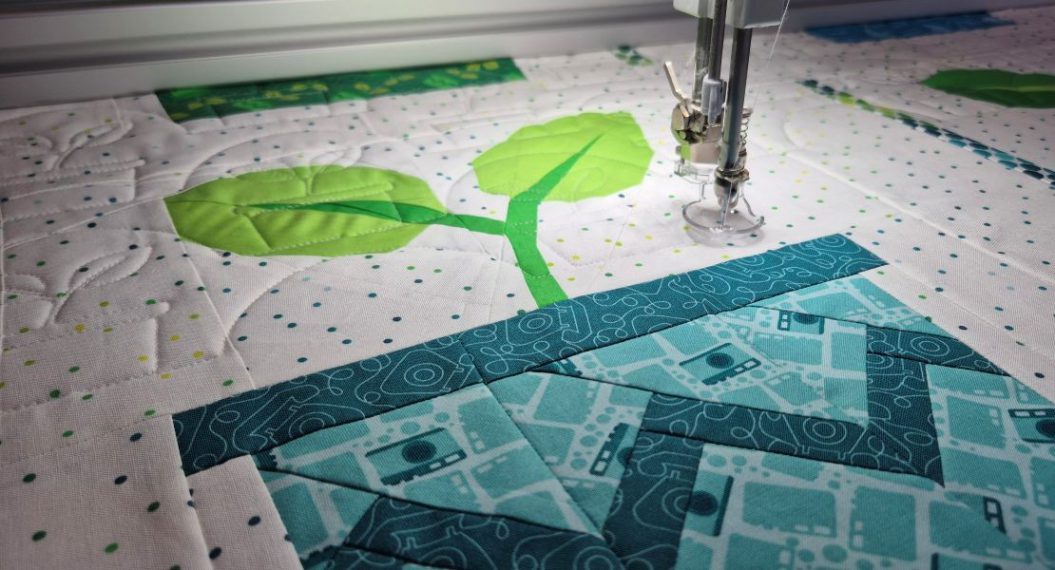
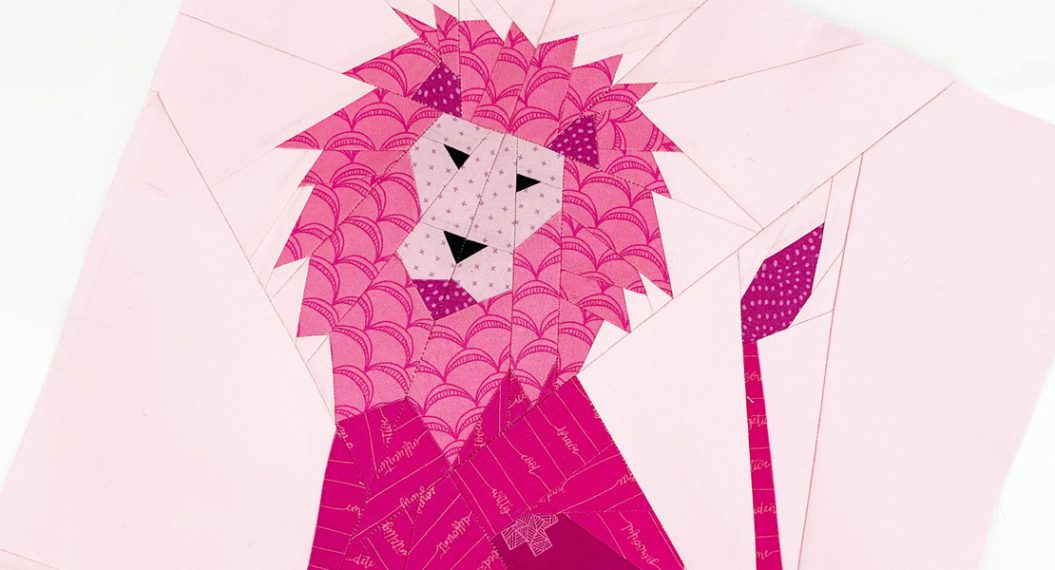
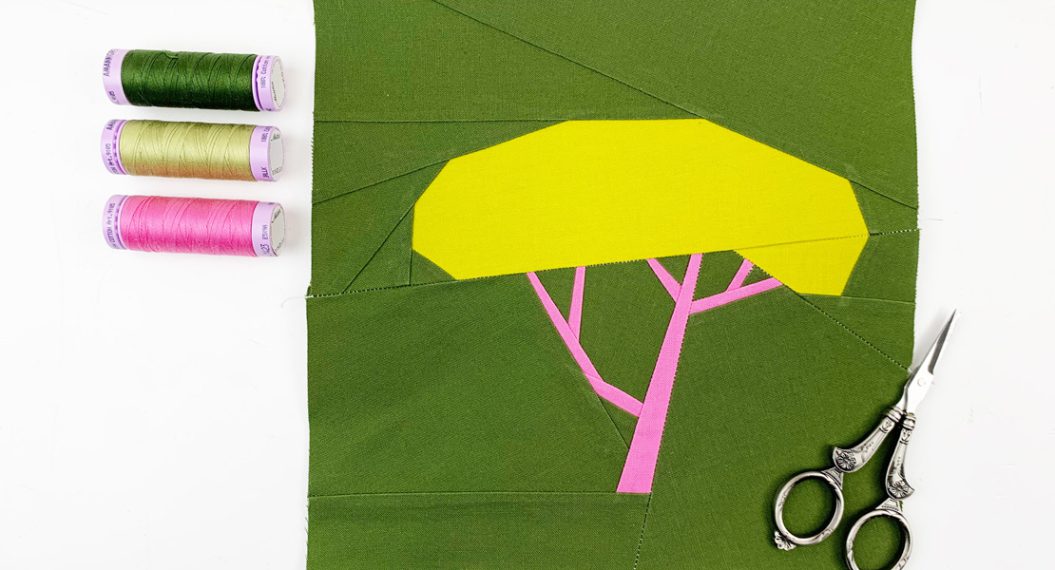
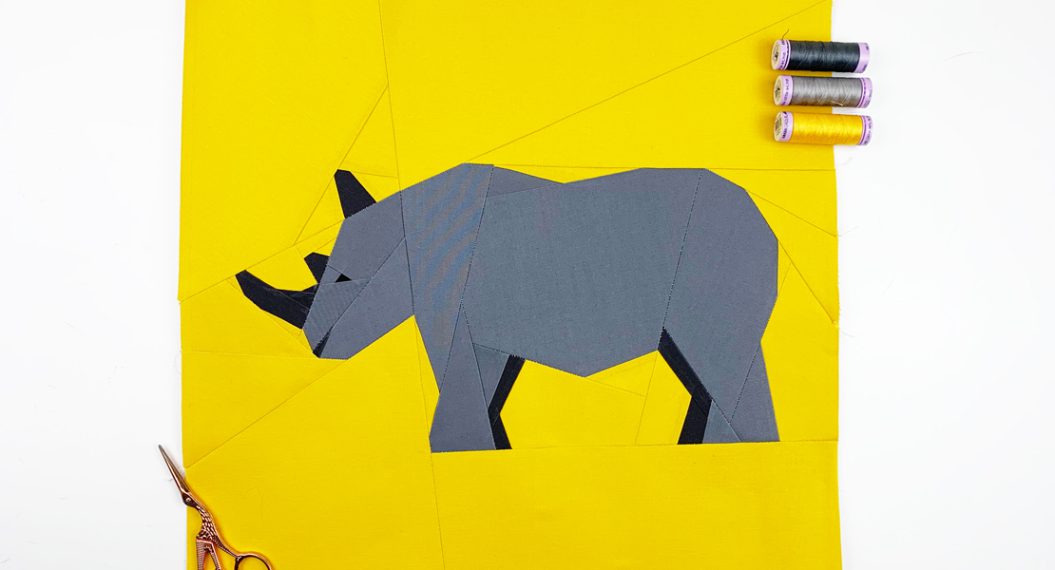
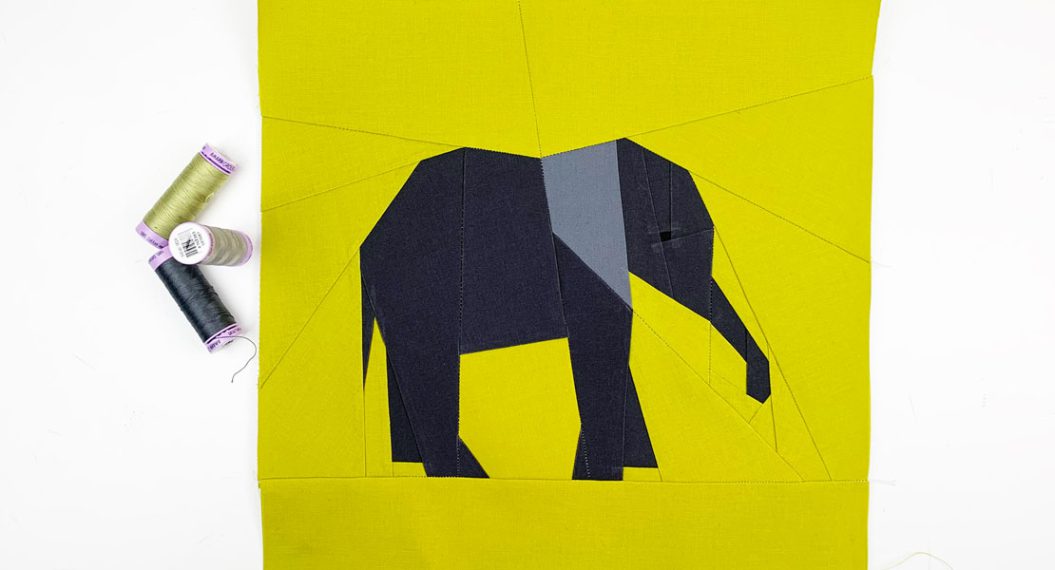
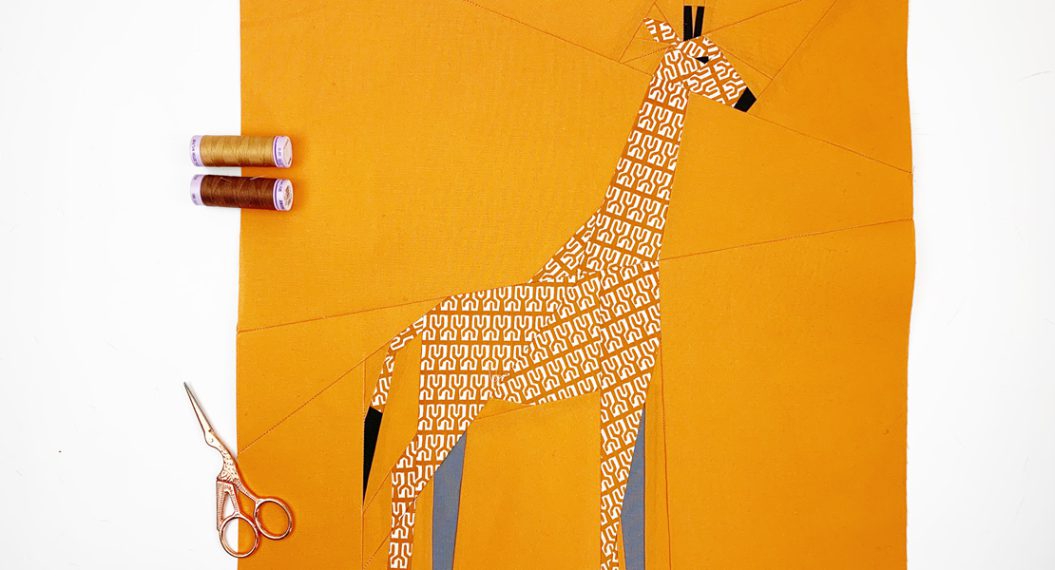
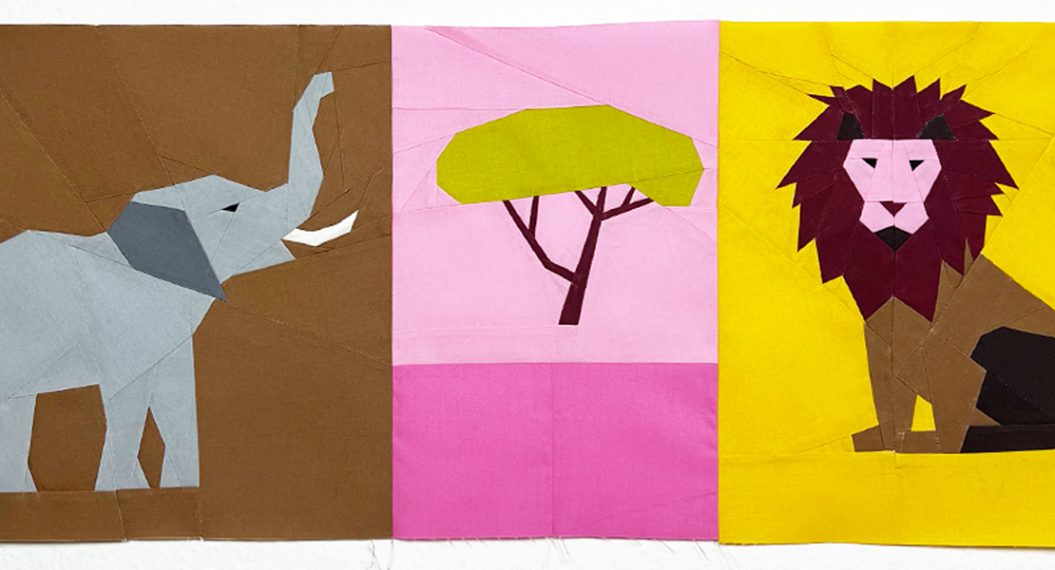
Together we will sew a quilt with FPP blocks featuring fantastic wild animal designs.
The patchwork instructions are published block by block on WeAllSew. Here you can find an overview of all the blog posts that have been published so far.
There is no time pressure with the Safari. You can follow your own rhythm and roam the savannah at your own pace. There is only one date to keep in mind: If you want to take part in the final giveaway (and there are fantastic prizes to be won!) you have to show a photo of your finished quilt top on social media or in the community section of the blog by June 16, 2024.
Material Overview – What Do You Need?
Fabric selection is one of the most important things when making a quilt. It is super important to choose your favorite fabrics because you will be spending a lot of time with them.
For Foundation Paper Piecing you will also need the following 10 things:
1. Sewing Machine and Needles
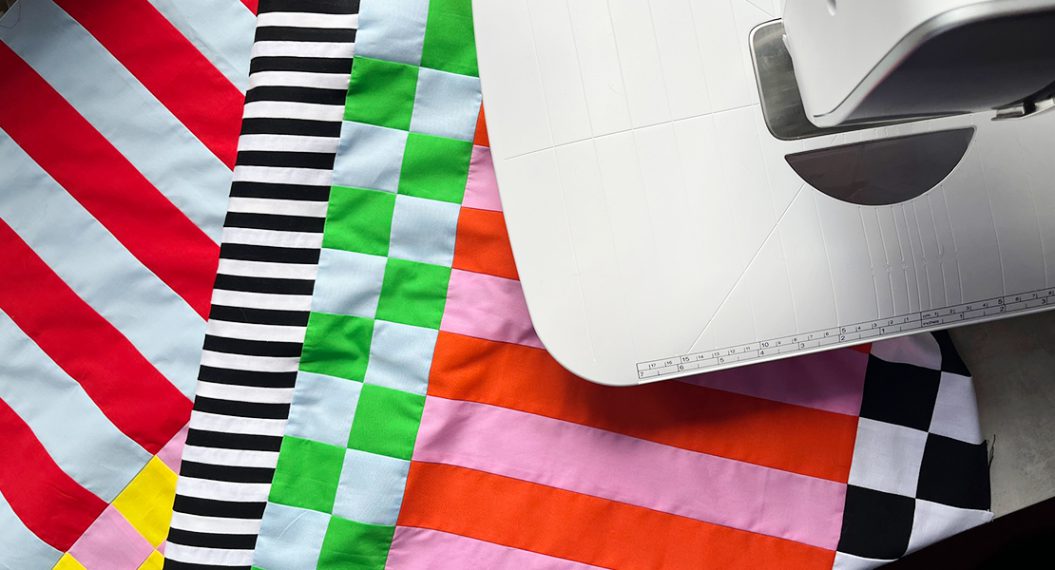
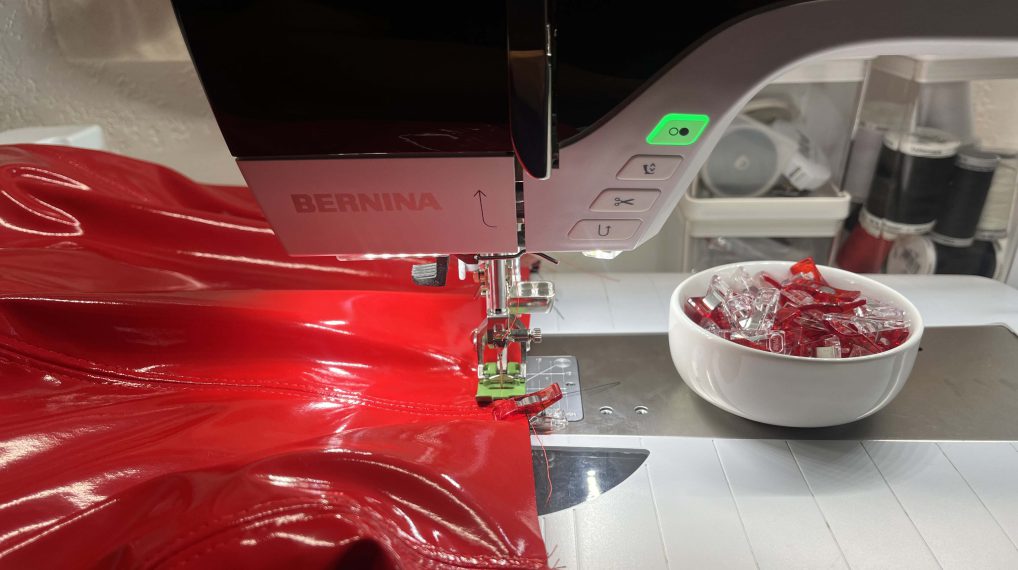
Any standard sewing machine is suitable for sewing foundation paper piecing patterns. I use the BERNINA 770 QE PLUS Kaffe Edition. I usually use 70 mm needles, but 80 mm needles are also suitable. Change the needles more often than usual, as sewing through paper puts a little more strain on the needles than sewing through fabric alone.
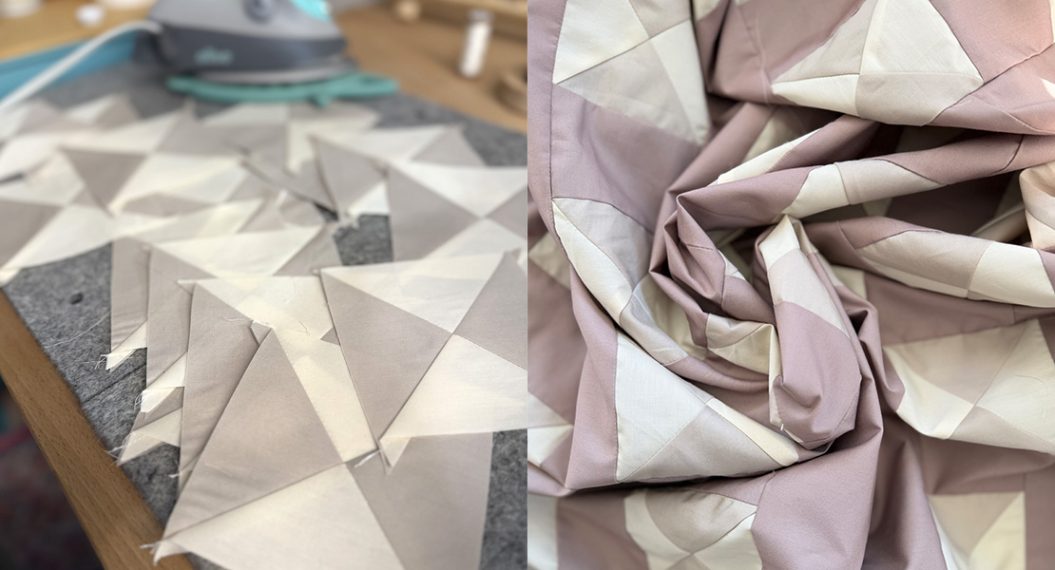
2. Iron
Ironing is essential for foundation paper piecing. The more the fabric and the segments are ironed, the flatter and smoother the seams will be, which makes it much easier to sew the individual segments together. This ensures the all-over accuracy and size of the quilt block.
3. Paper
There are various paper options for foundation paper piecing. You can read about the individual advantages and disadvantages here on my blog. I prefer to use standard printer paper (80 g) here and in general. It’s the easiest to get a hold of and it is usually already in my printer. It is the cheapest and, in combination with a fabric glue stick, the simplest and most effective option in my personal opinion.
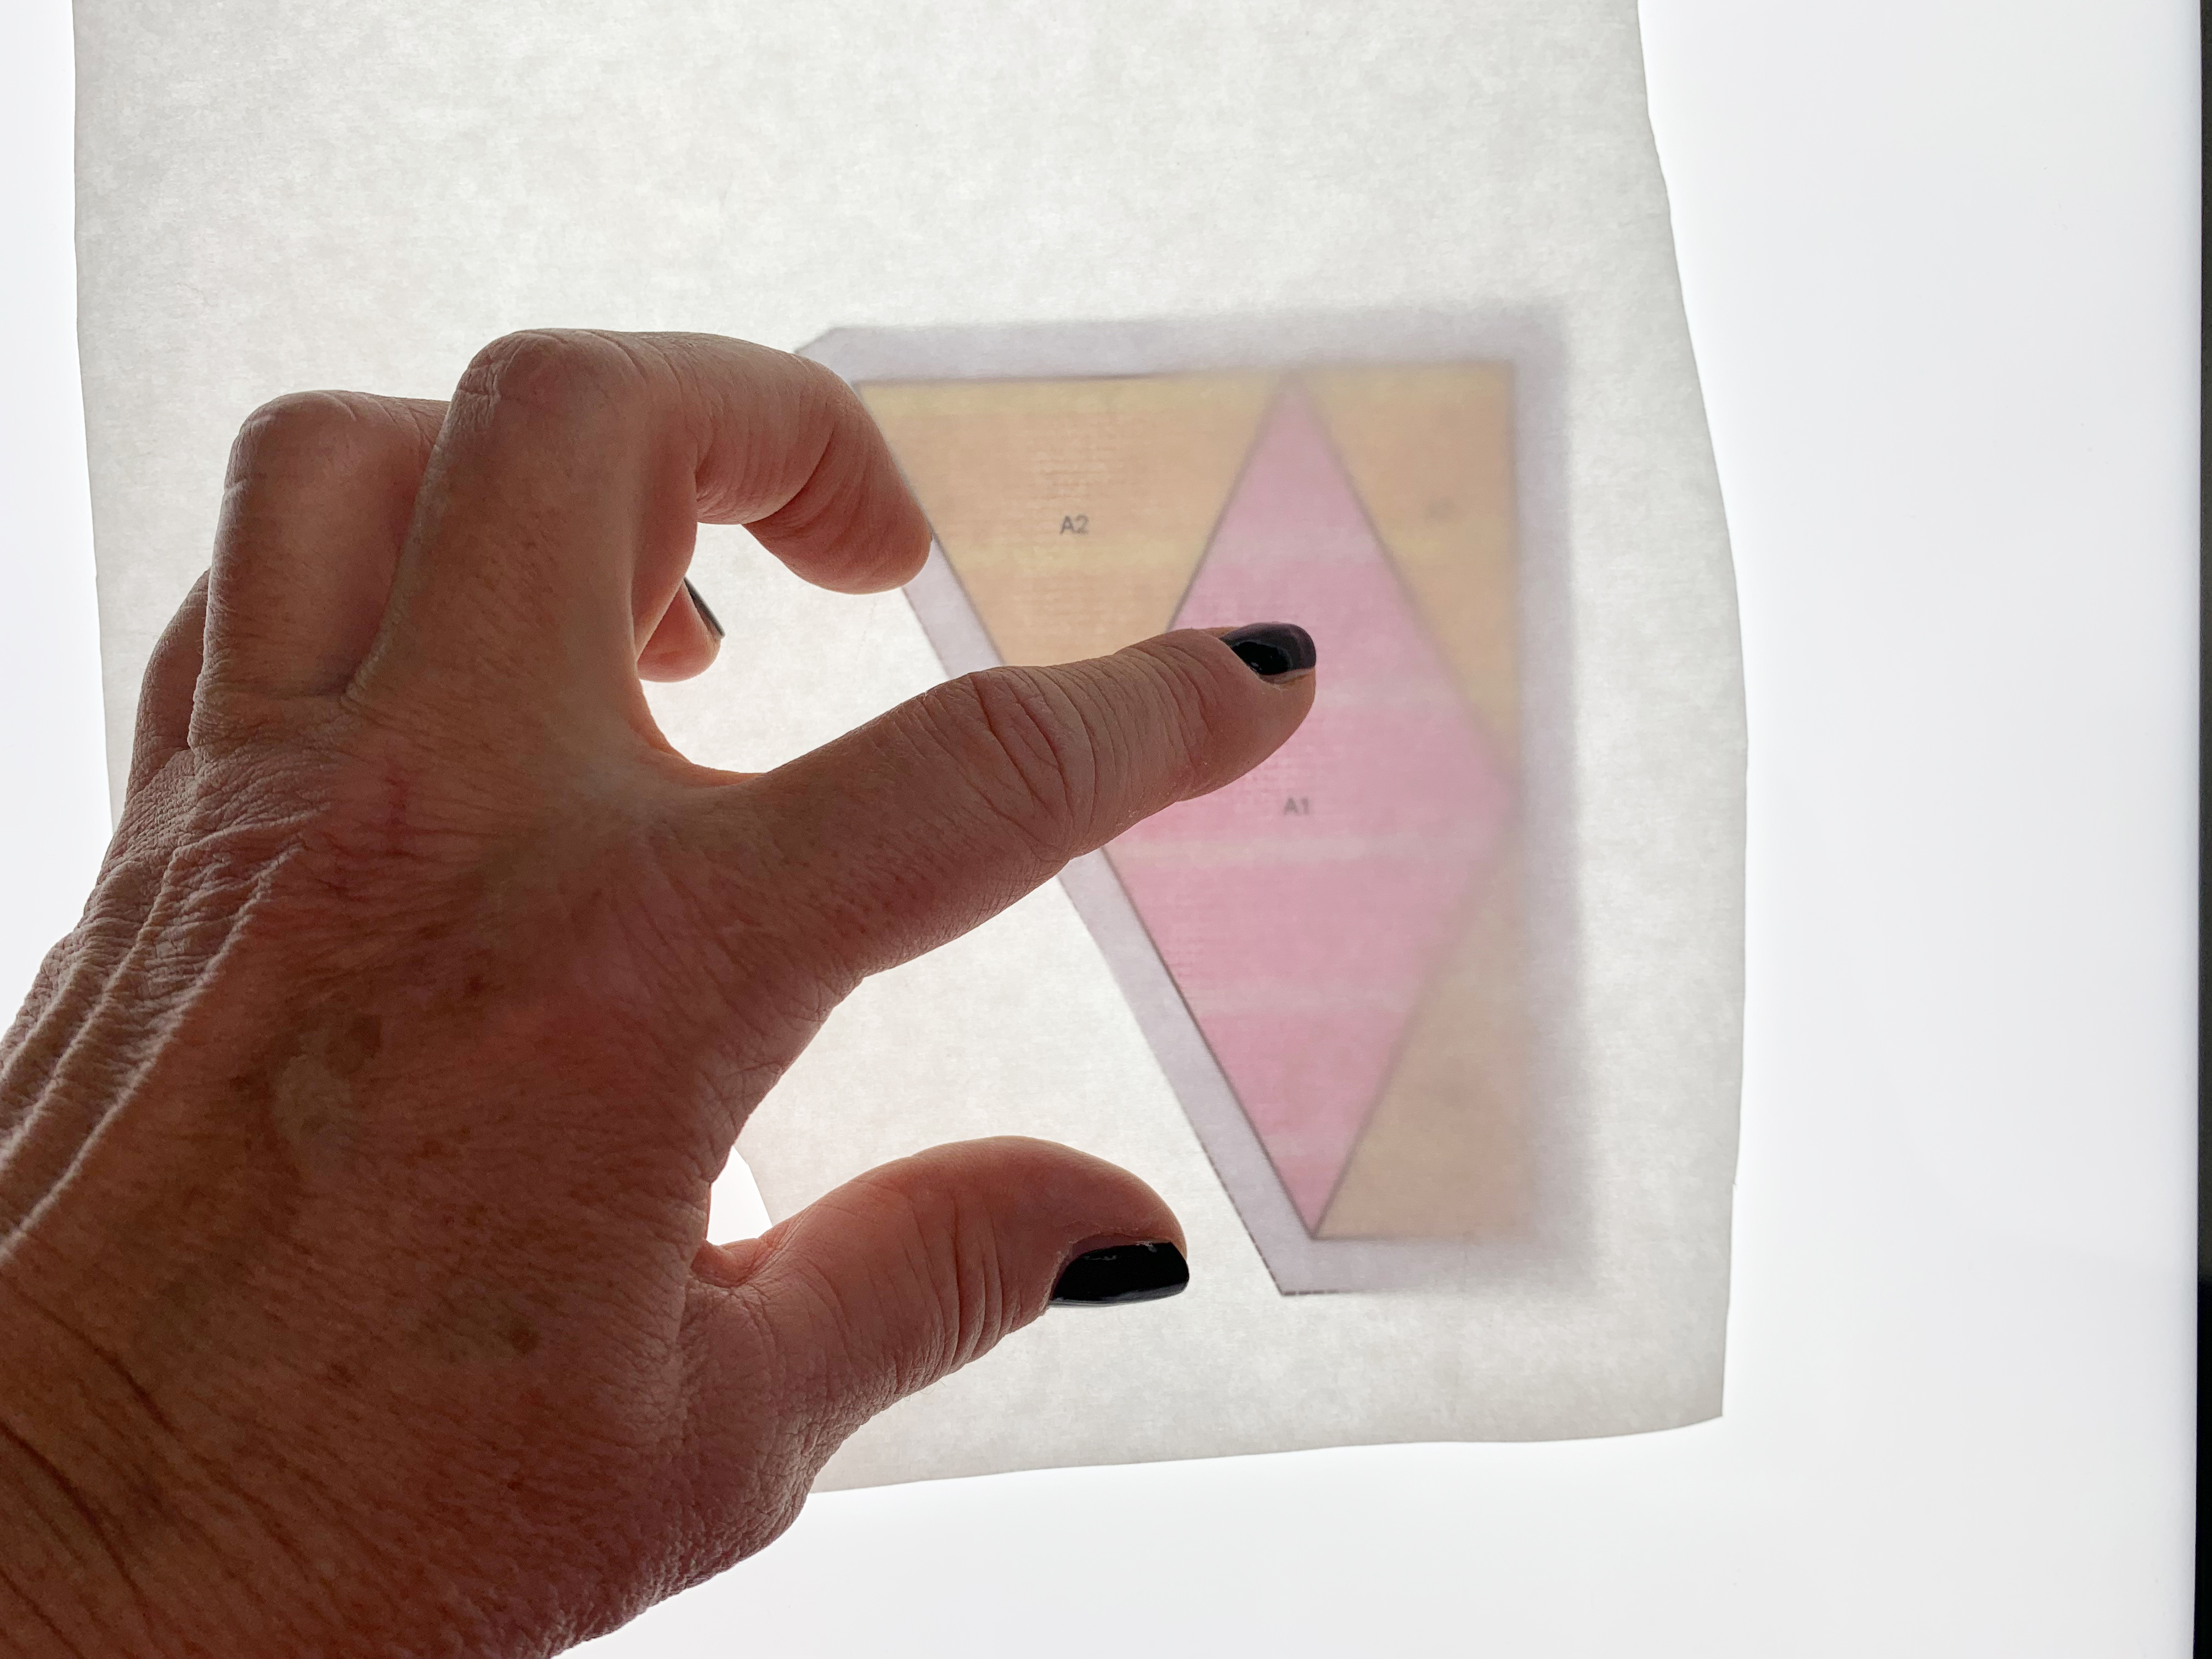
4. Light Box (not necessary for this quilt, if you’re using solids like me)
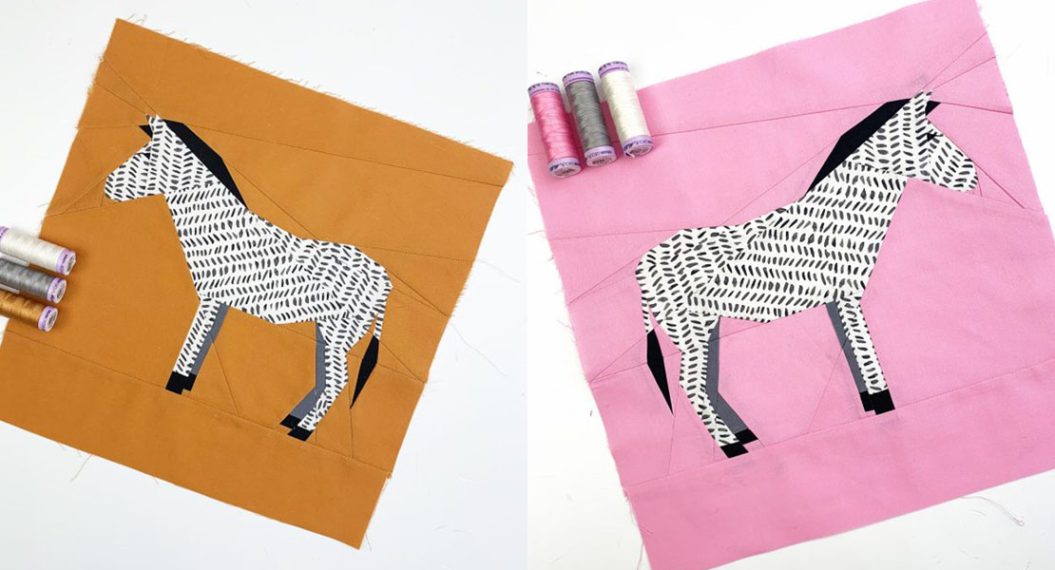
A light box is only necessary if you do a lot of fussy cutting. Then it is a lot easier to place your pattern piece on the fabric. For the safari quilt, I almost exclusively use solid fabrics, except for the zebra and the giraffe, which do not require a light box. I just wanted to mention this for the sake of completeness.
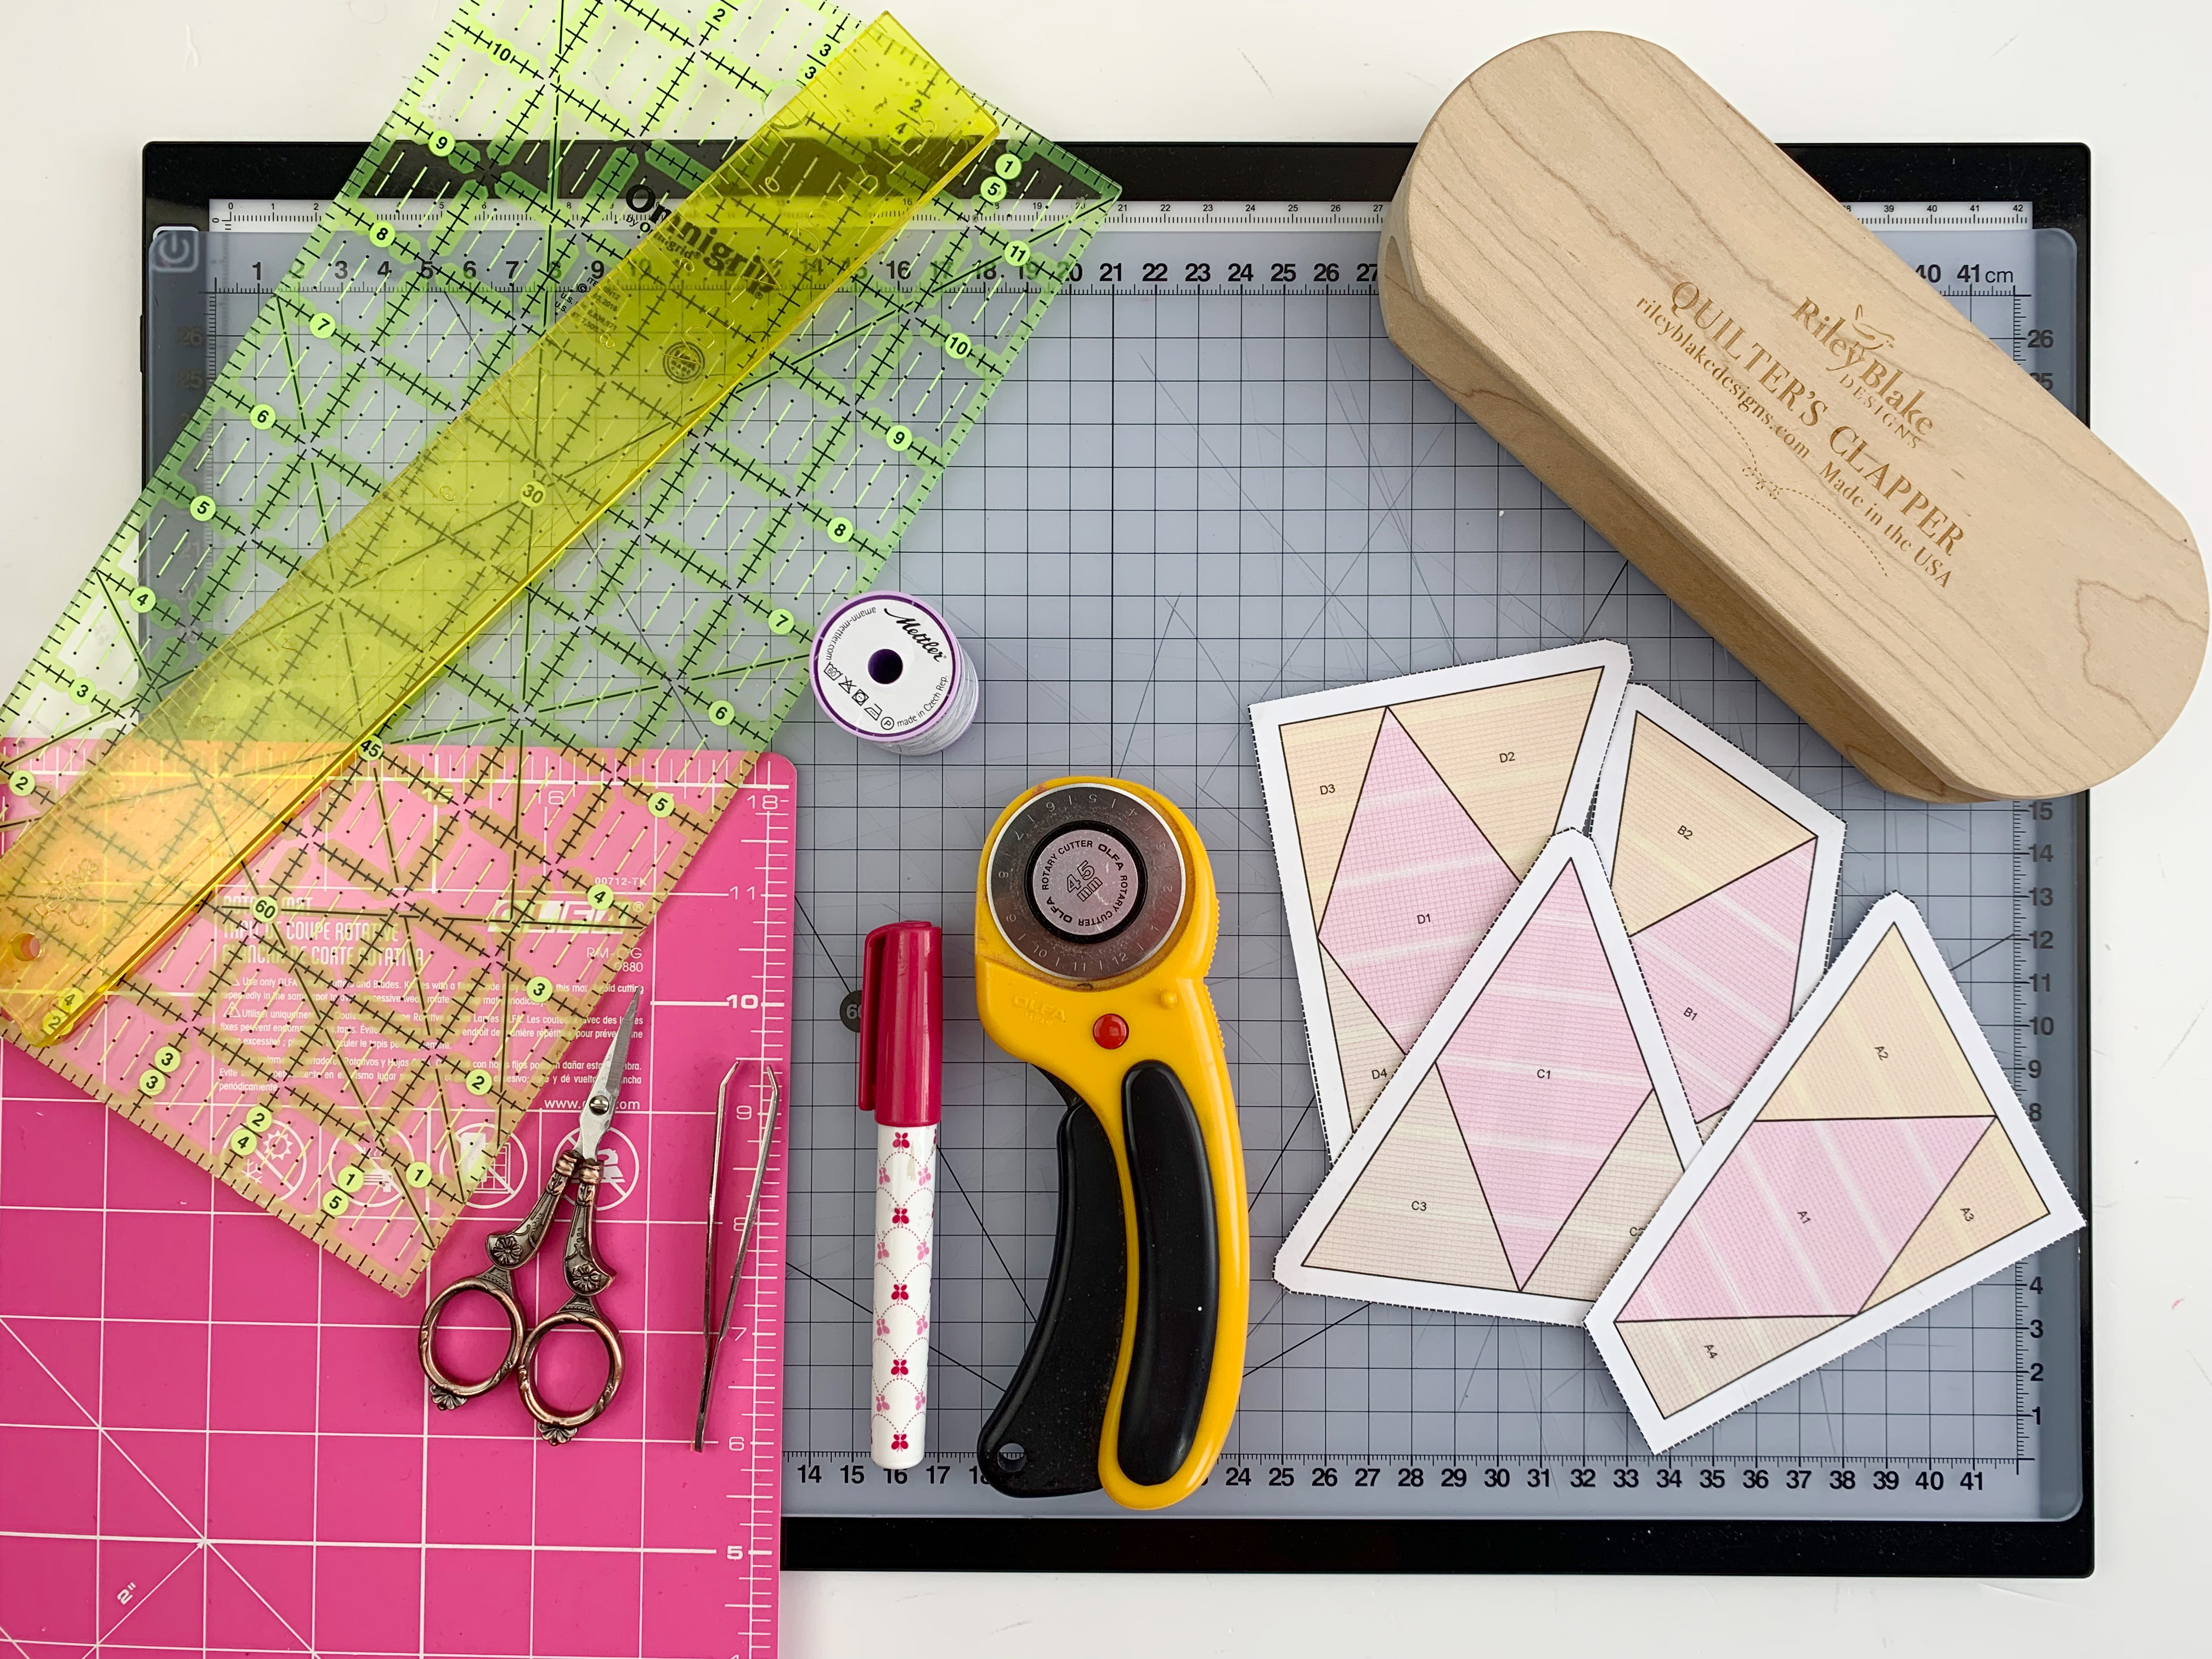
5. Cutting Tools: Rotary Cutter, Cutting Mat, Scissors
Basically, you can’t have too many cutting mats. In the photo above you can see a small 12″ x 12″ cutting mat that I always have next to my sewing machine.
Dull scissors are like an ill-fitting shoe, you don’t immediately notice what’s wrong and annoying, but over time it becomes unbearable. Nice sharp scissors and rotary cutter blades are half the battle when sewing.
6. Fabric Glue Stick
Since I usually work with standard printer paper, I use these fabric glue sticks all the time. It’s much easier to work with than with pins. As it is only a temporary glue, there is no glue residue left on the fabric or on the needle/sewing machine.
7. Acrylic Rulers
The options here are truly endless. However, a small 12″ acrylic ruler is perfect for foundation paper piecing.
8. Thread
Of course, it is important to use a good thread for sewing as well as good fabric. I use Silk Finish Cotton 50 from Mettler, either in white or cream, which matches most of the fabric combinations I choose.
9. Tailor’s Clapper
This is one of my favorite tools. You iron the segments and then leave the clapper on top, which results in wonderfully flat seams. Here you can read what the clapper can do for you. Of course, you can also sew the Safari patterns without a Tailor’s Clapper. It just makes your workflow a lot easier.
10. Tweezers
These help to remove small pieces of paper.
Now that you have a detailed overview of my favorite tools, we can get started, right?
Instructions for the Diamond Border
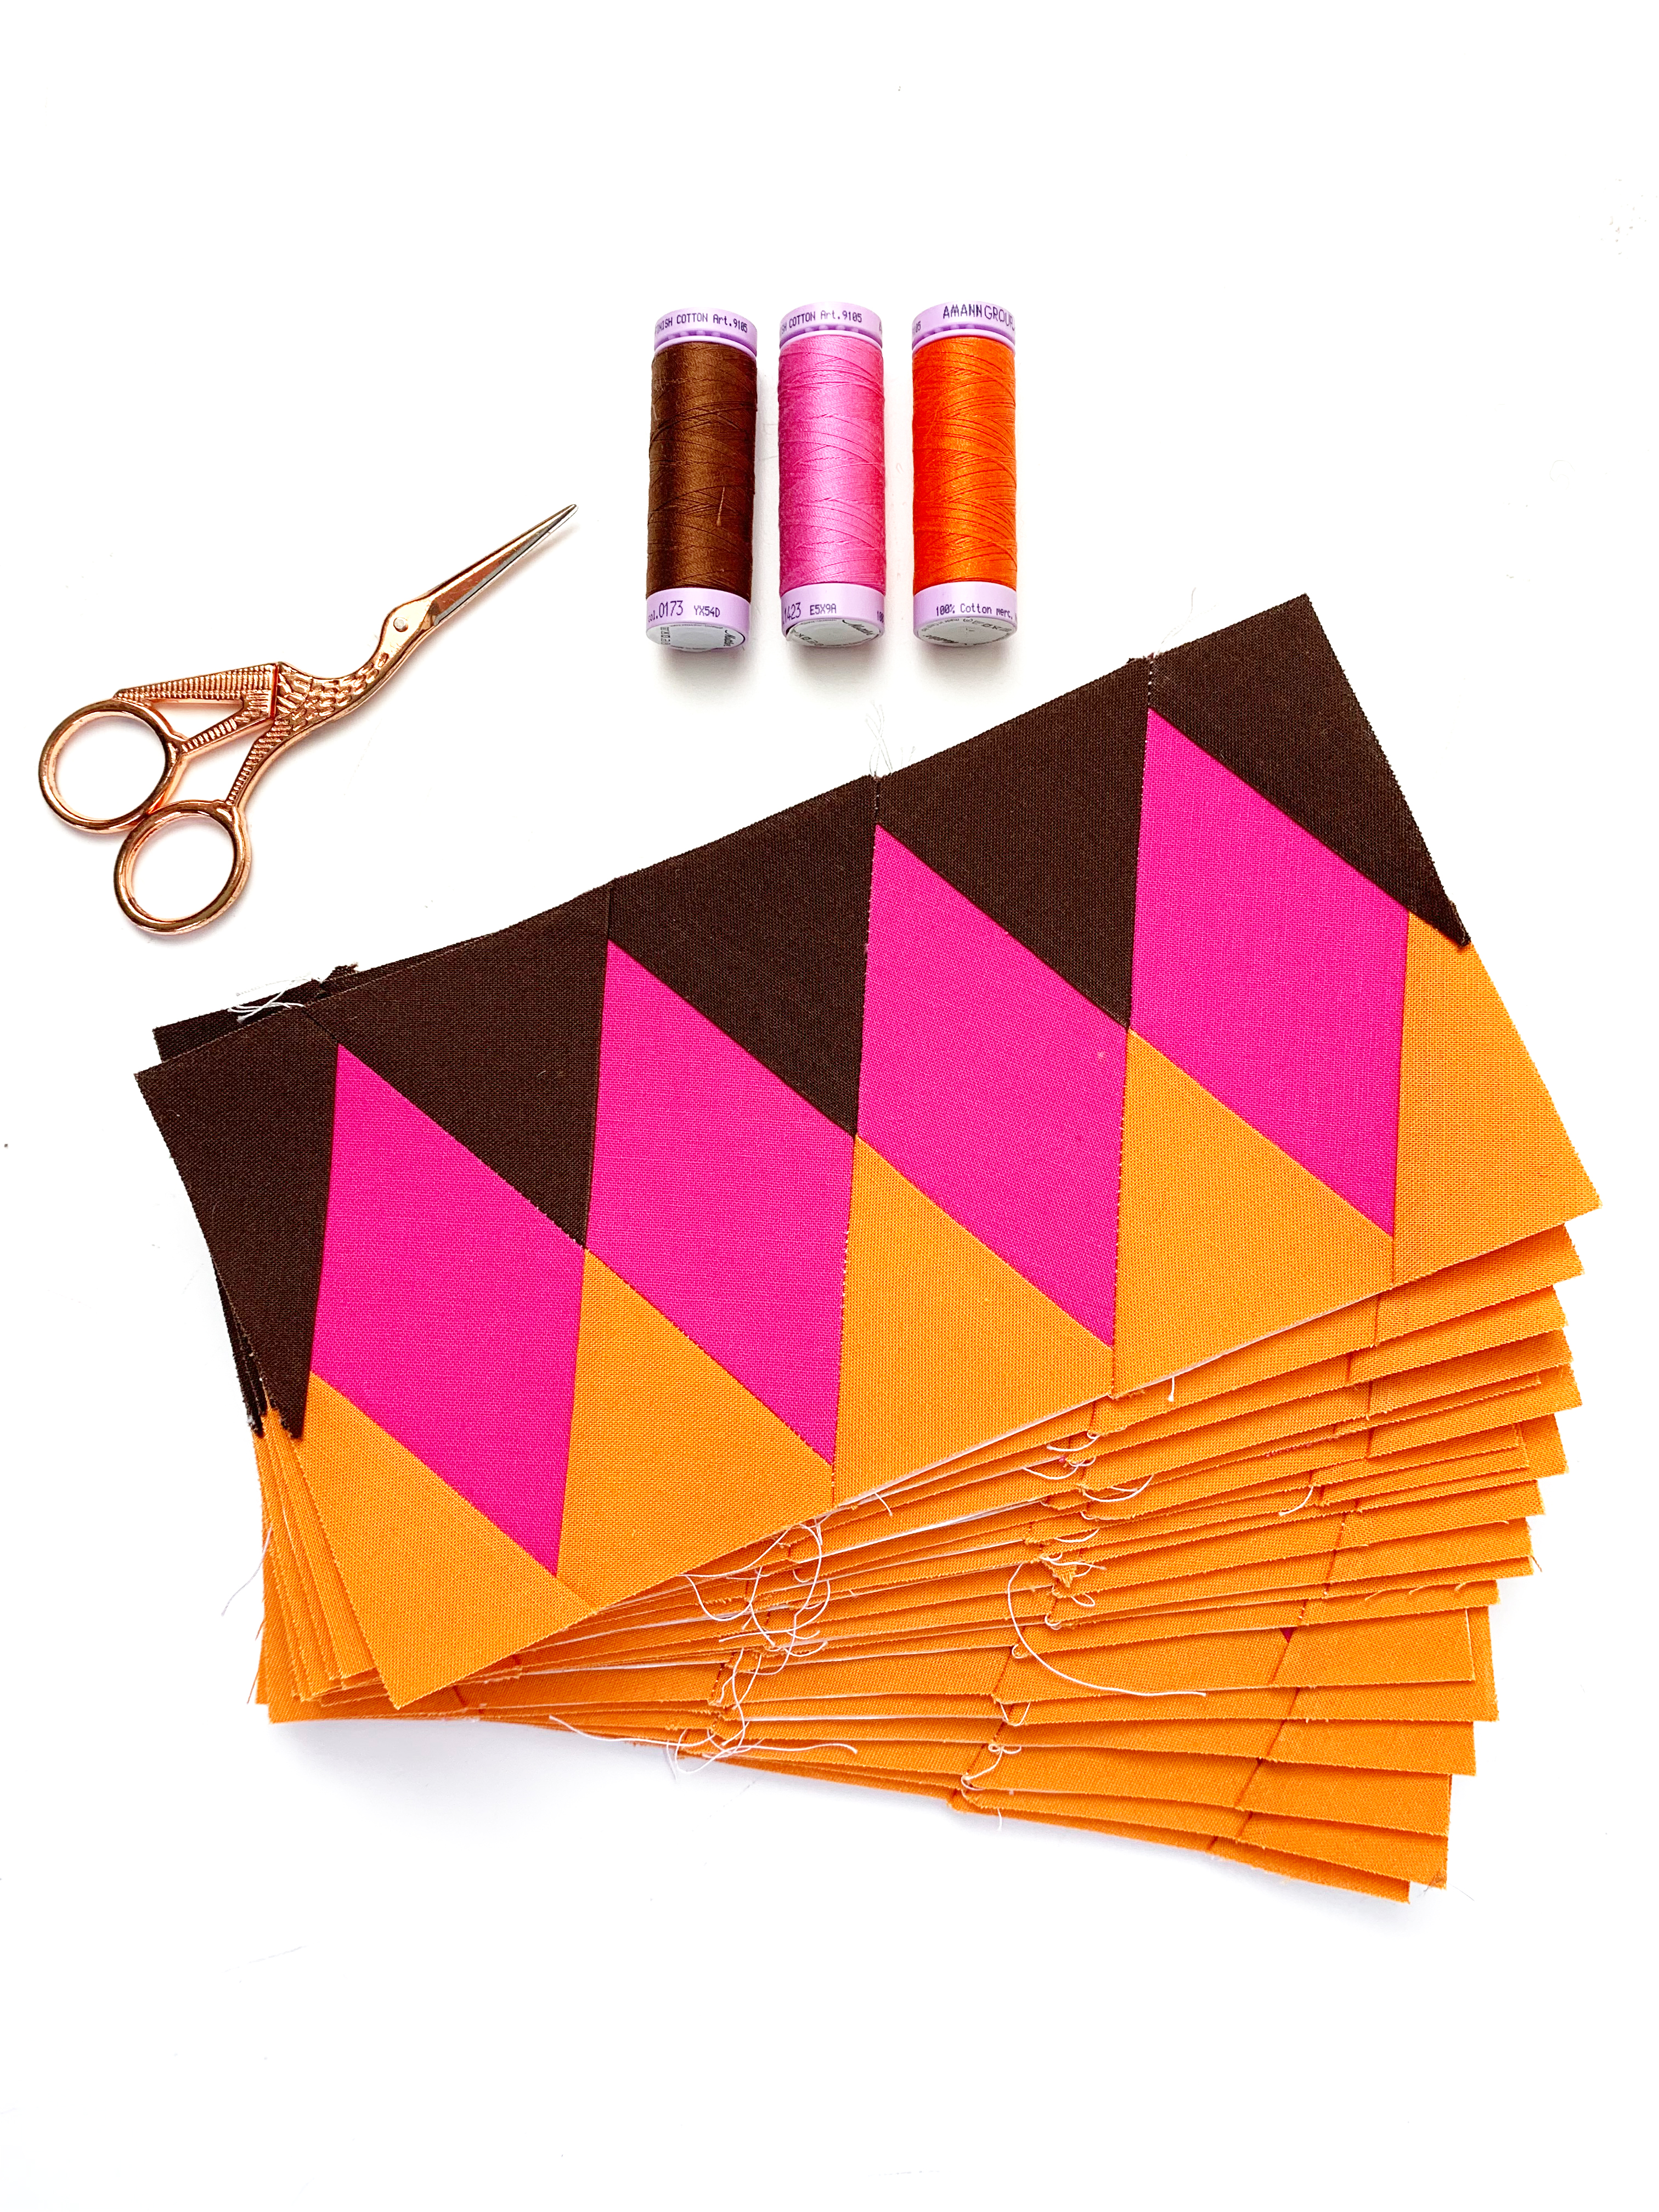
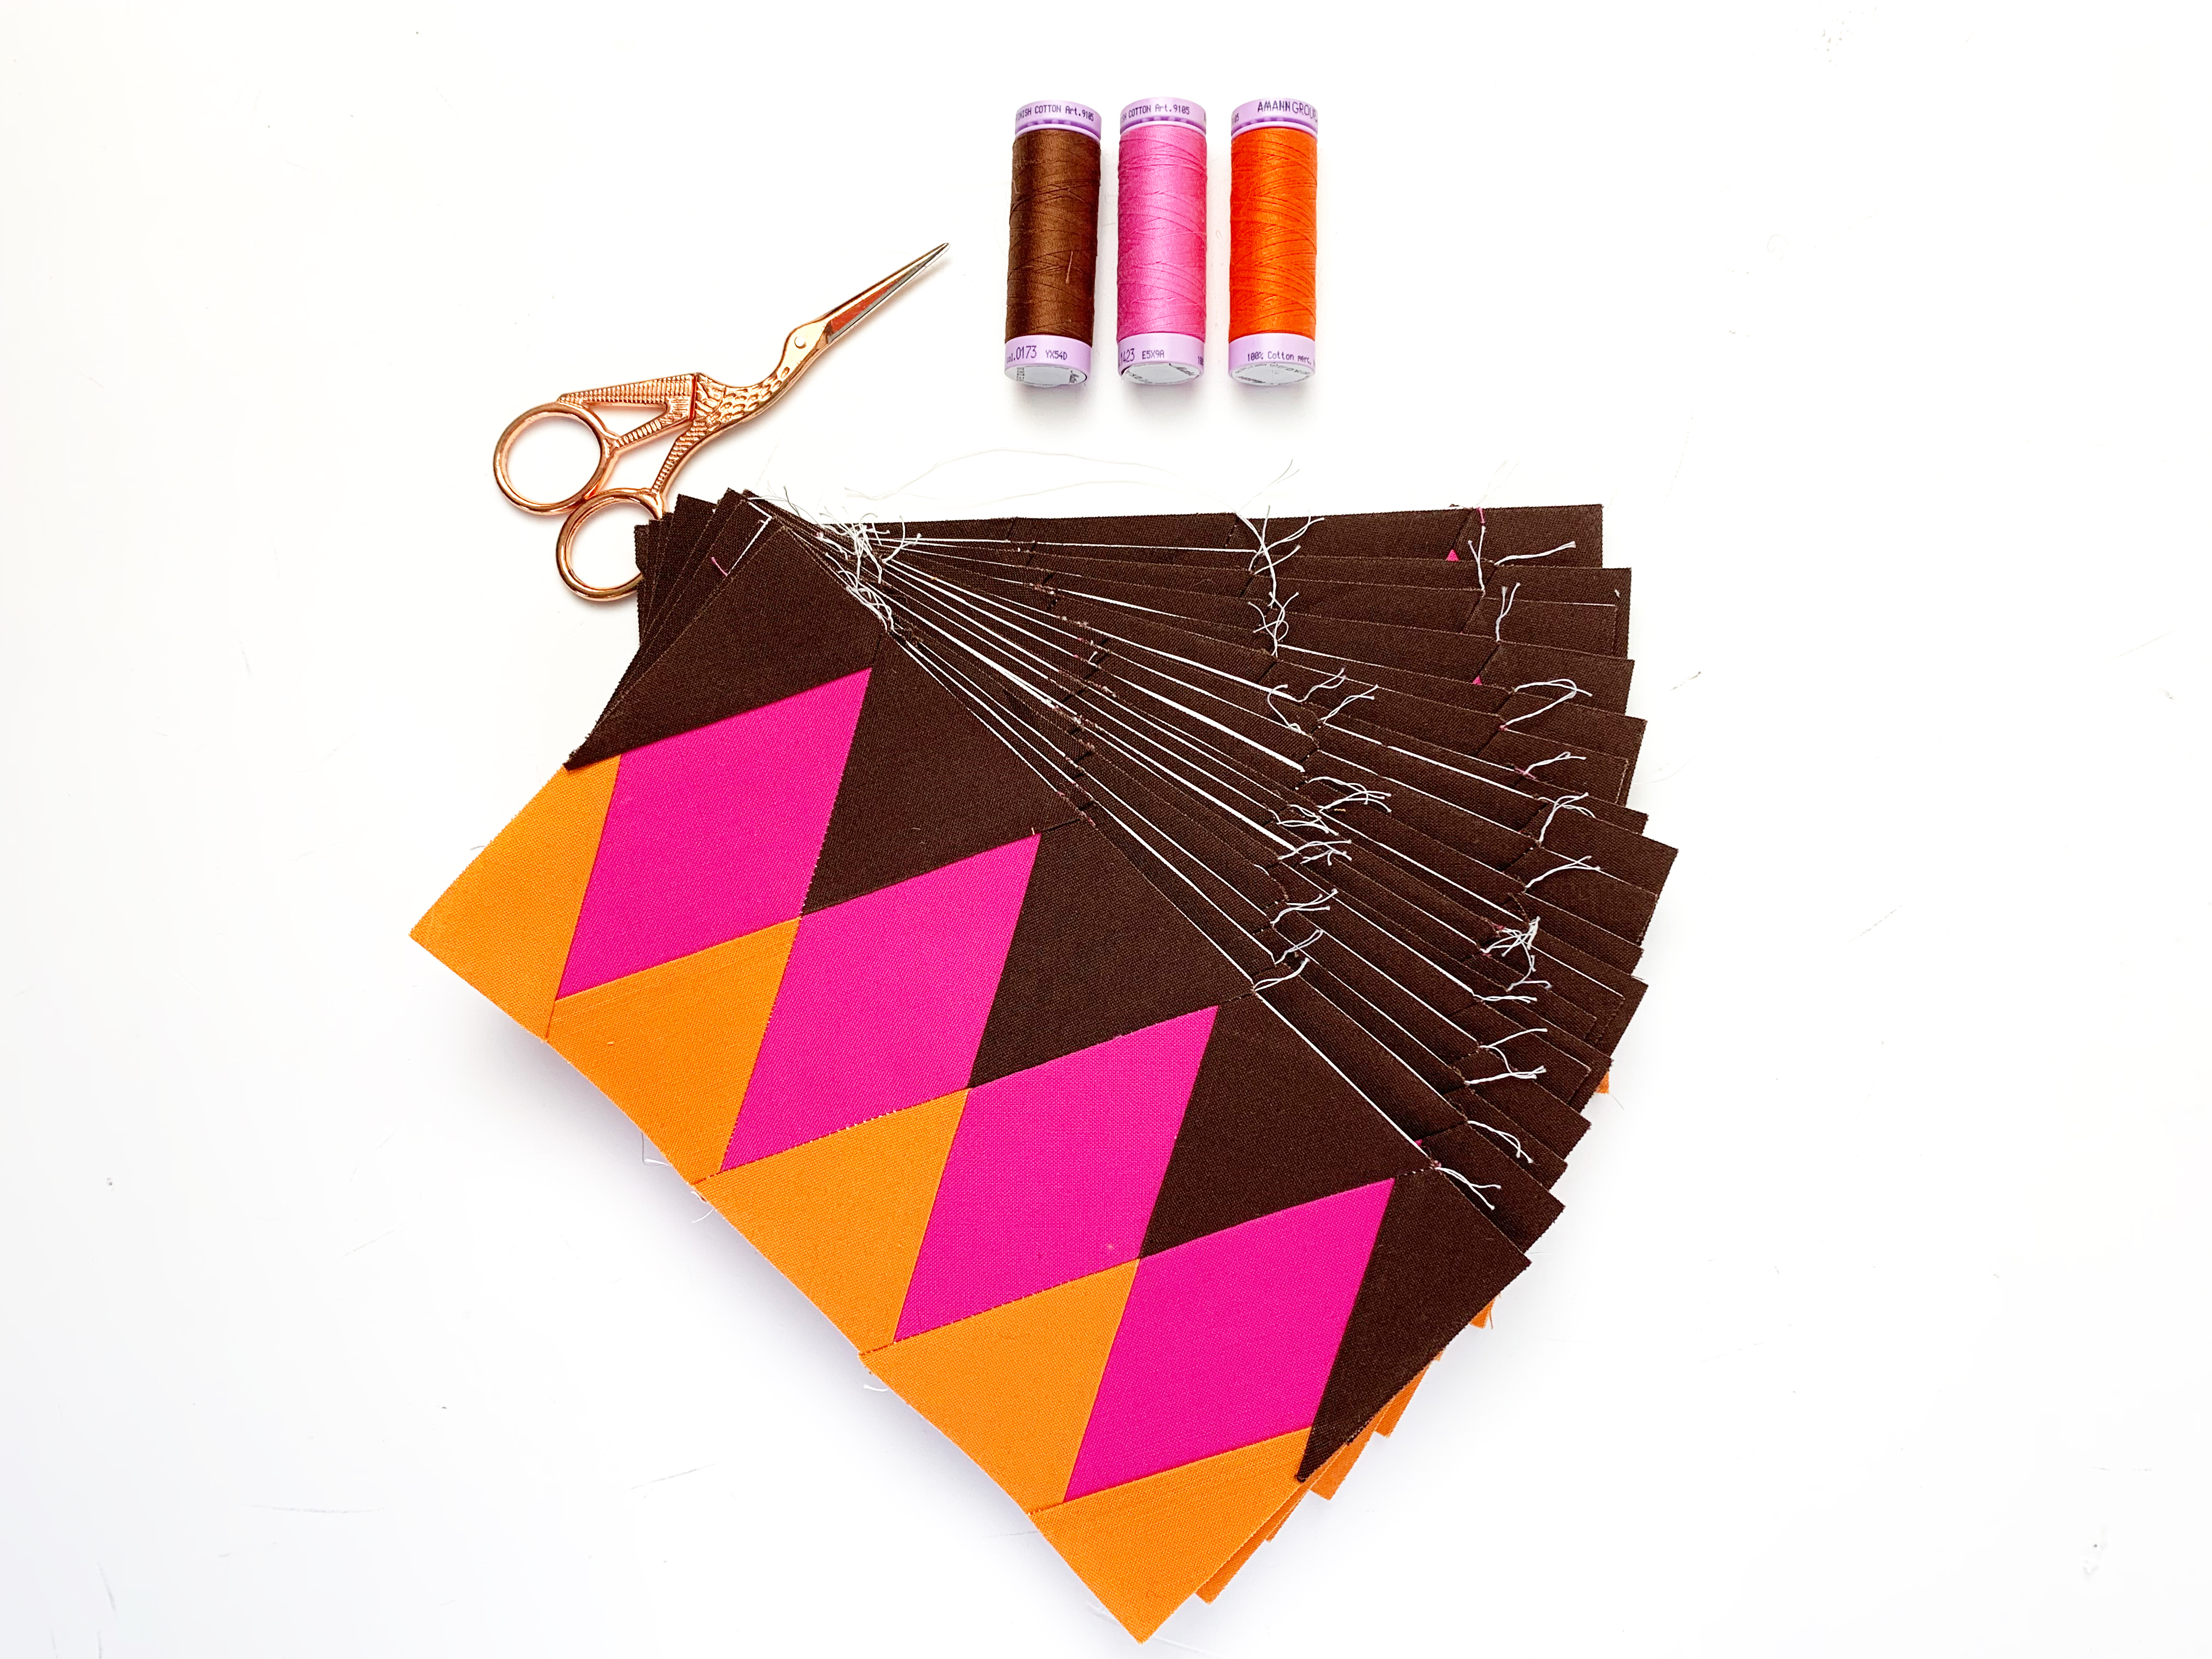
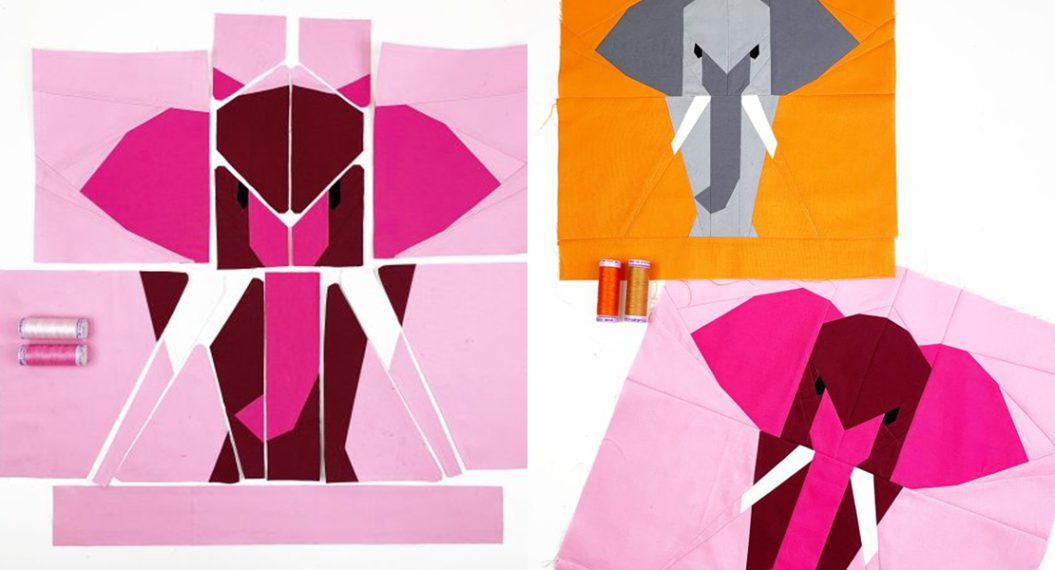
My Fabric Selection
Here is my fabric selection for the Diamond Border:
- Chocolate brown
- Orange
- Bright pink
The border consists of 30 4″x 8″ blocks.
Let’s Go! We Are Sewing a Diamond Border Quilt Block
Before you think, “Oh my goodness, 30 blocks for the border”, that’s too much printer paper, ink, etc. – don’t worry, there are several ways to save on this.
- As the first option, I’ll introduce you to a method where you only need one template that can be reused
- You can use previously printed paper, the reverse side is completely sufficient.
- You can of course print in grayscale, which saves color cartridges
- You can have the segments printed out in a copy shop, which is often really inexpensive
So let’s start with the border block.
If you don’t have it yet, you can find the pattern for the complete quilt here on my website.
Or here is the free download for the Diamond Border in the size 4 “x 8” only.

The Classic Foundation Paper Piecing Method
This is the classic FPP method where we sew through the paper.
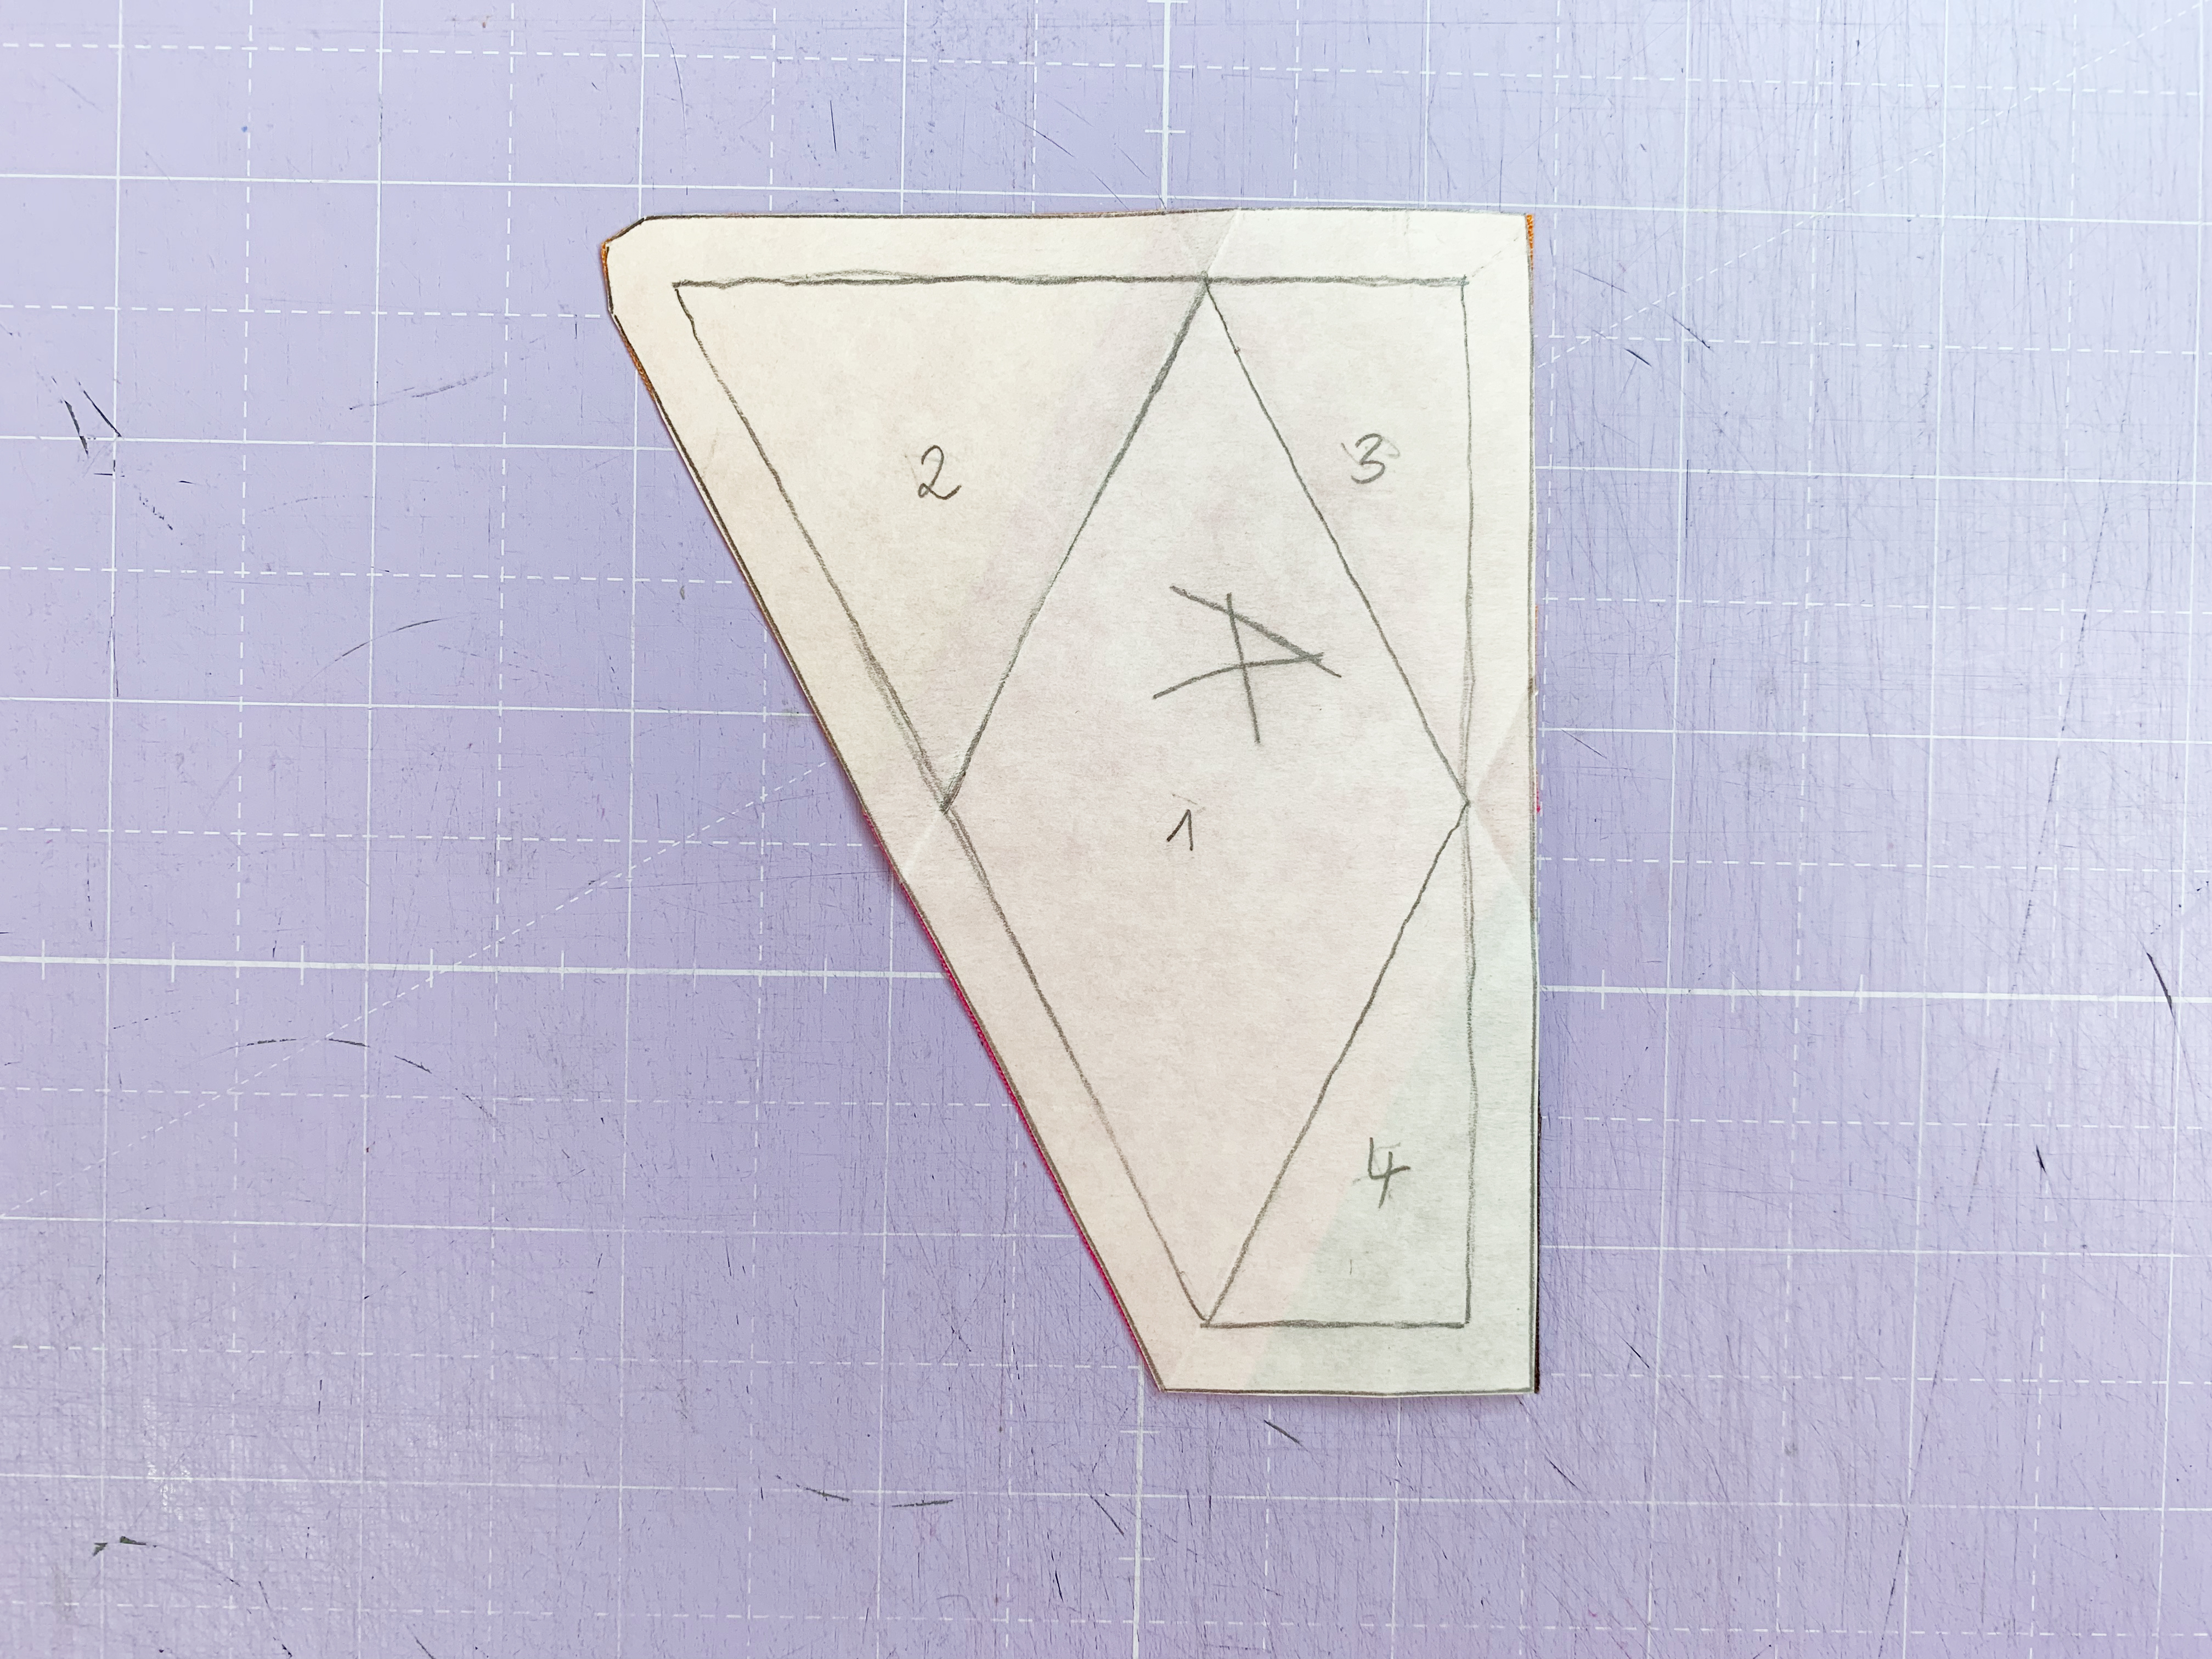
1. There are a total of 30 border blocks to sew for this quilt, they are 4 “x 8” in size. First, you print out all the parts of your pattern with letters and numbers. Of course, you do not have to print out the instructions and overview.
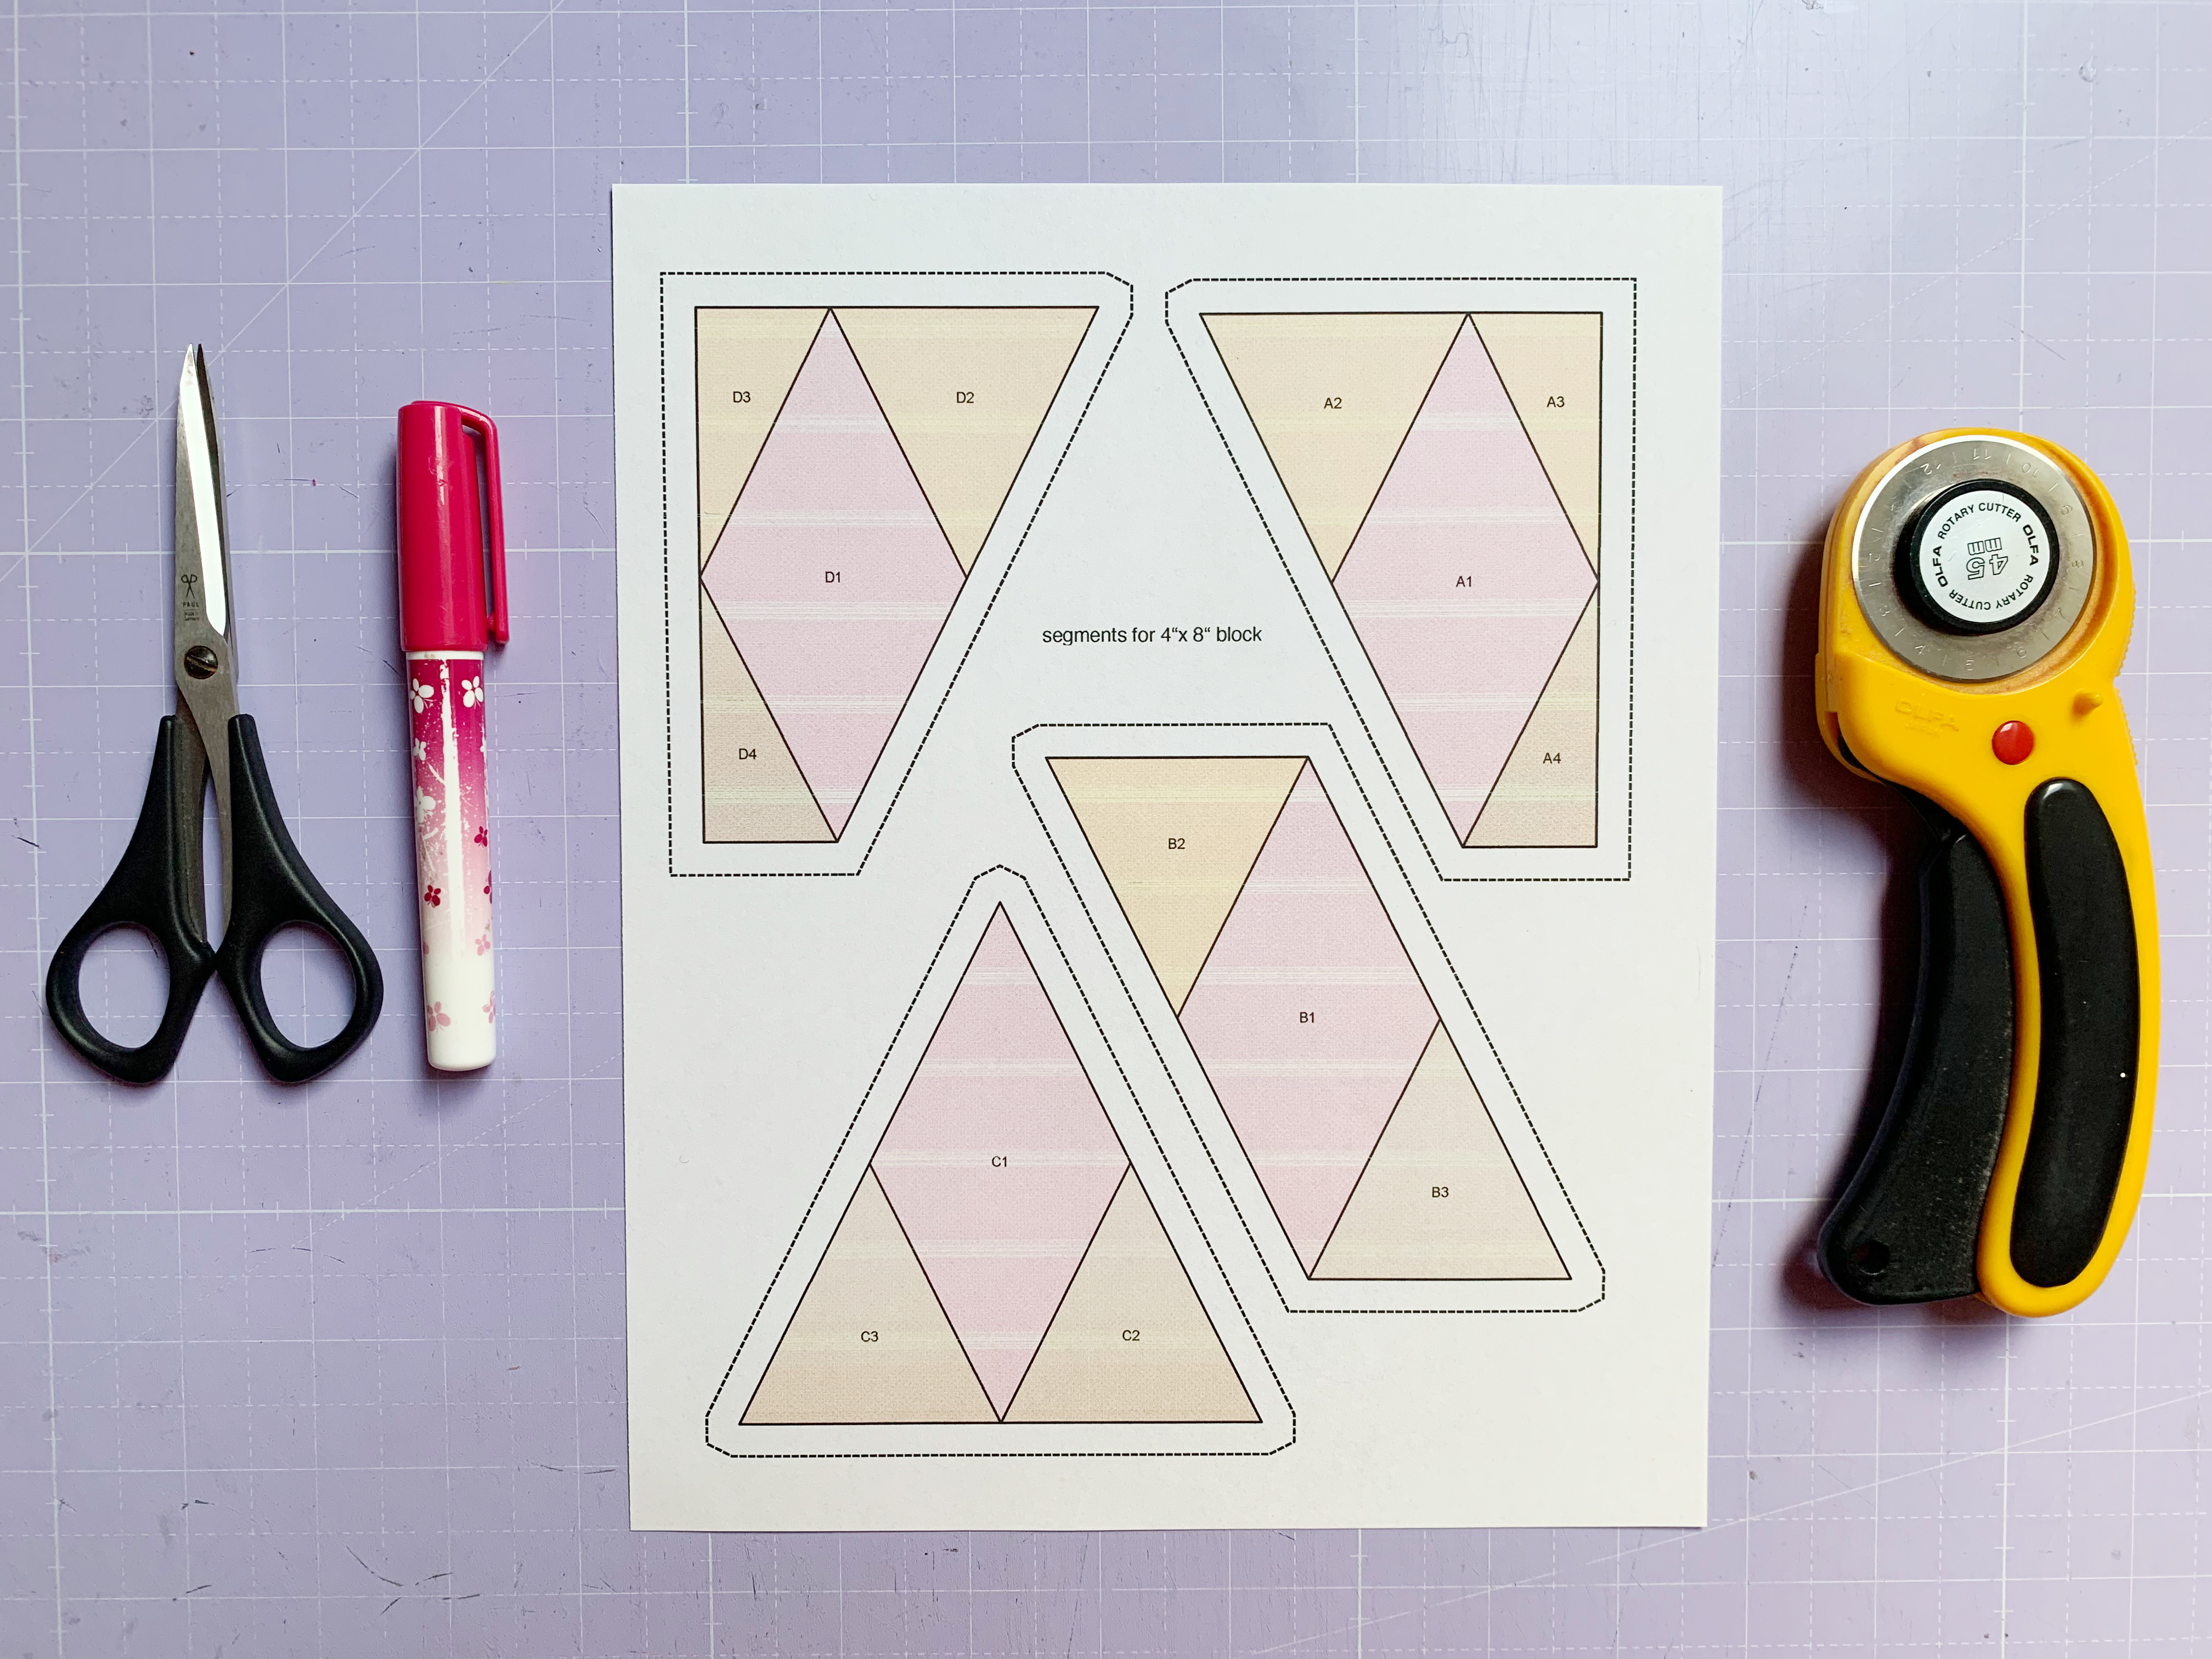
2. Cut out the pattern pieces along the dotted line. The more precisely you cut out, the easier it will be for you to join the individual pieces together.
3. It is now important that you understand that the quilt block is created on the back of the pattern! This fact often leads to misunderstandings. The pattern is not placed on the fabric and then cut out, as it is done with classic sewing patterns, but the pattern serves as the foundation for sewing, the quilt block is created on the back.
4. Set your sewing machine to a small stitch length. I like to use 1.2 mm to 1.5 mm. The small stitch length makes it easier to pull out the paper in the end, when you’re done sewing. I also use the sewing machine foot with transparent sole #34D. This allows me to sew super accurately on the line.

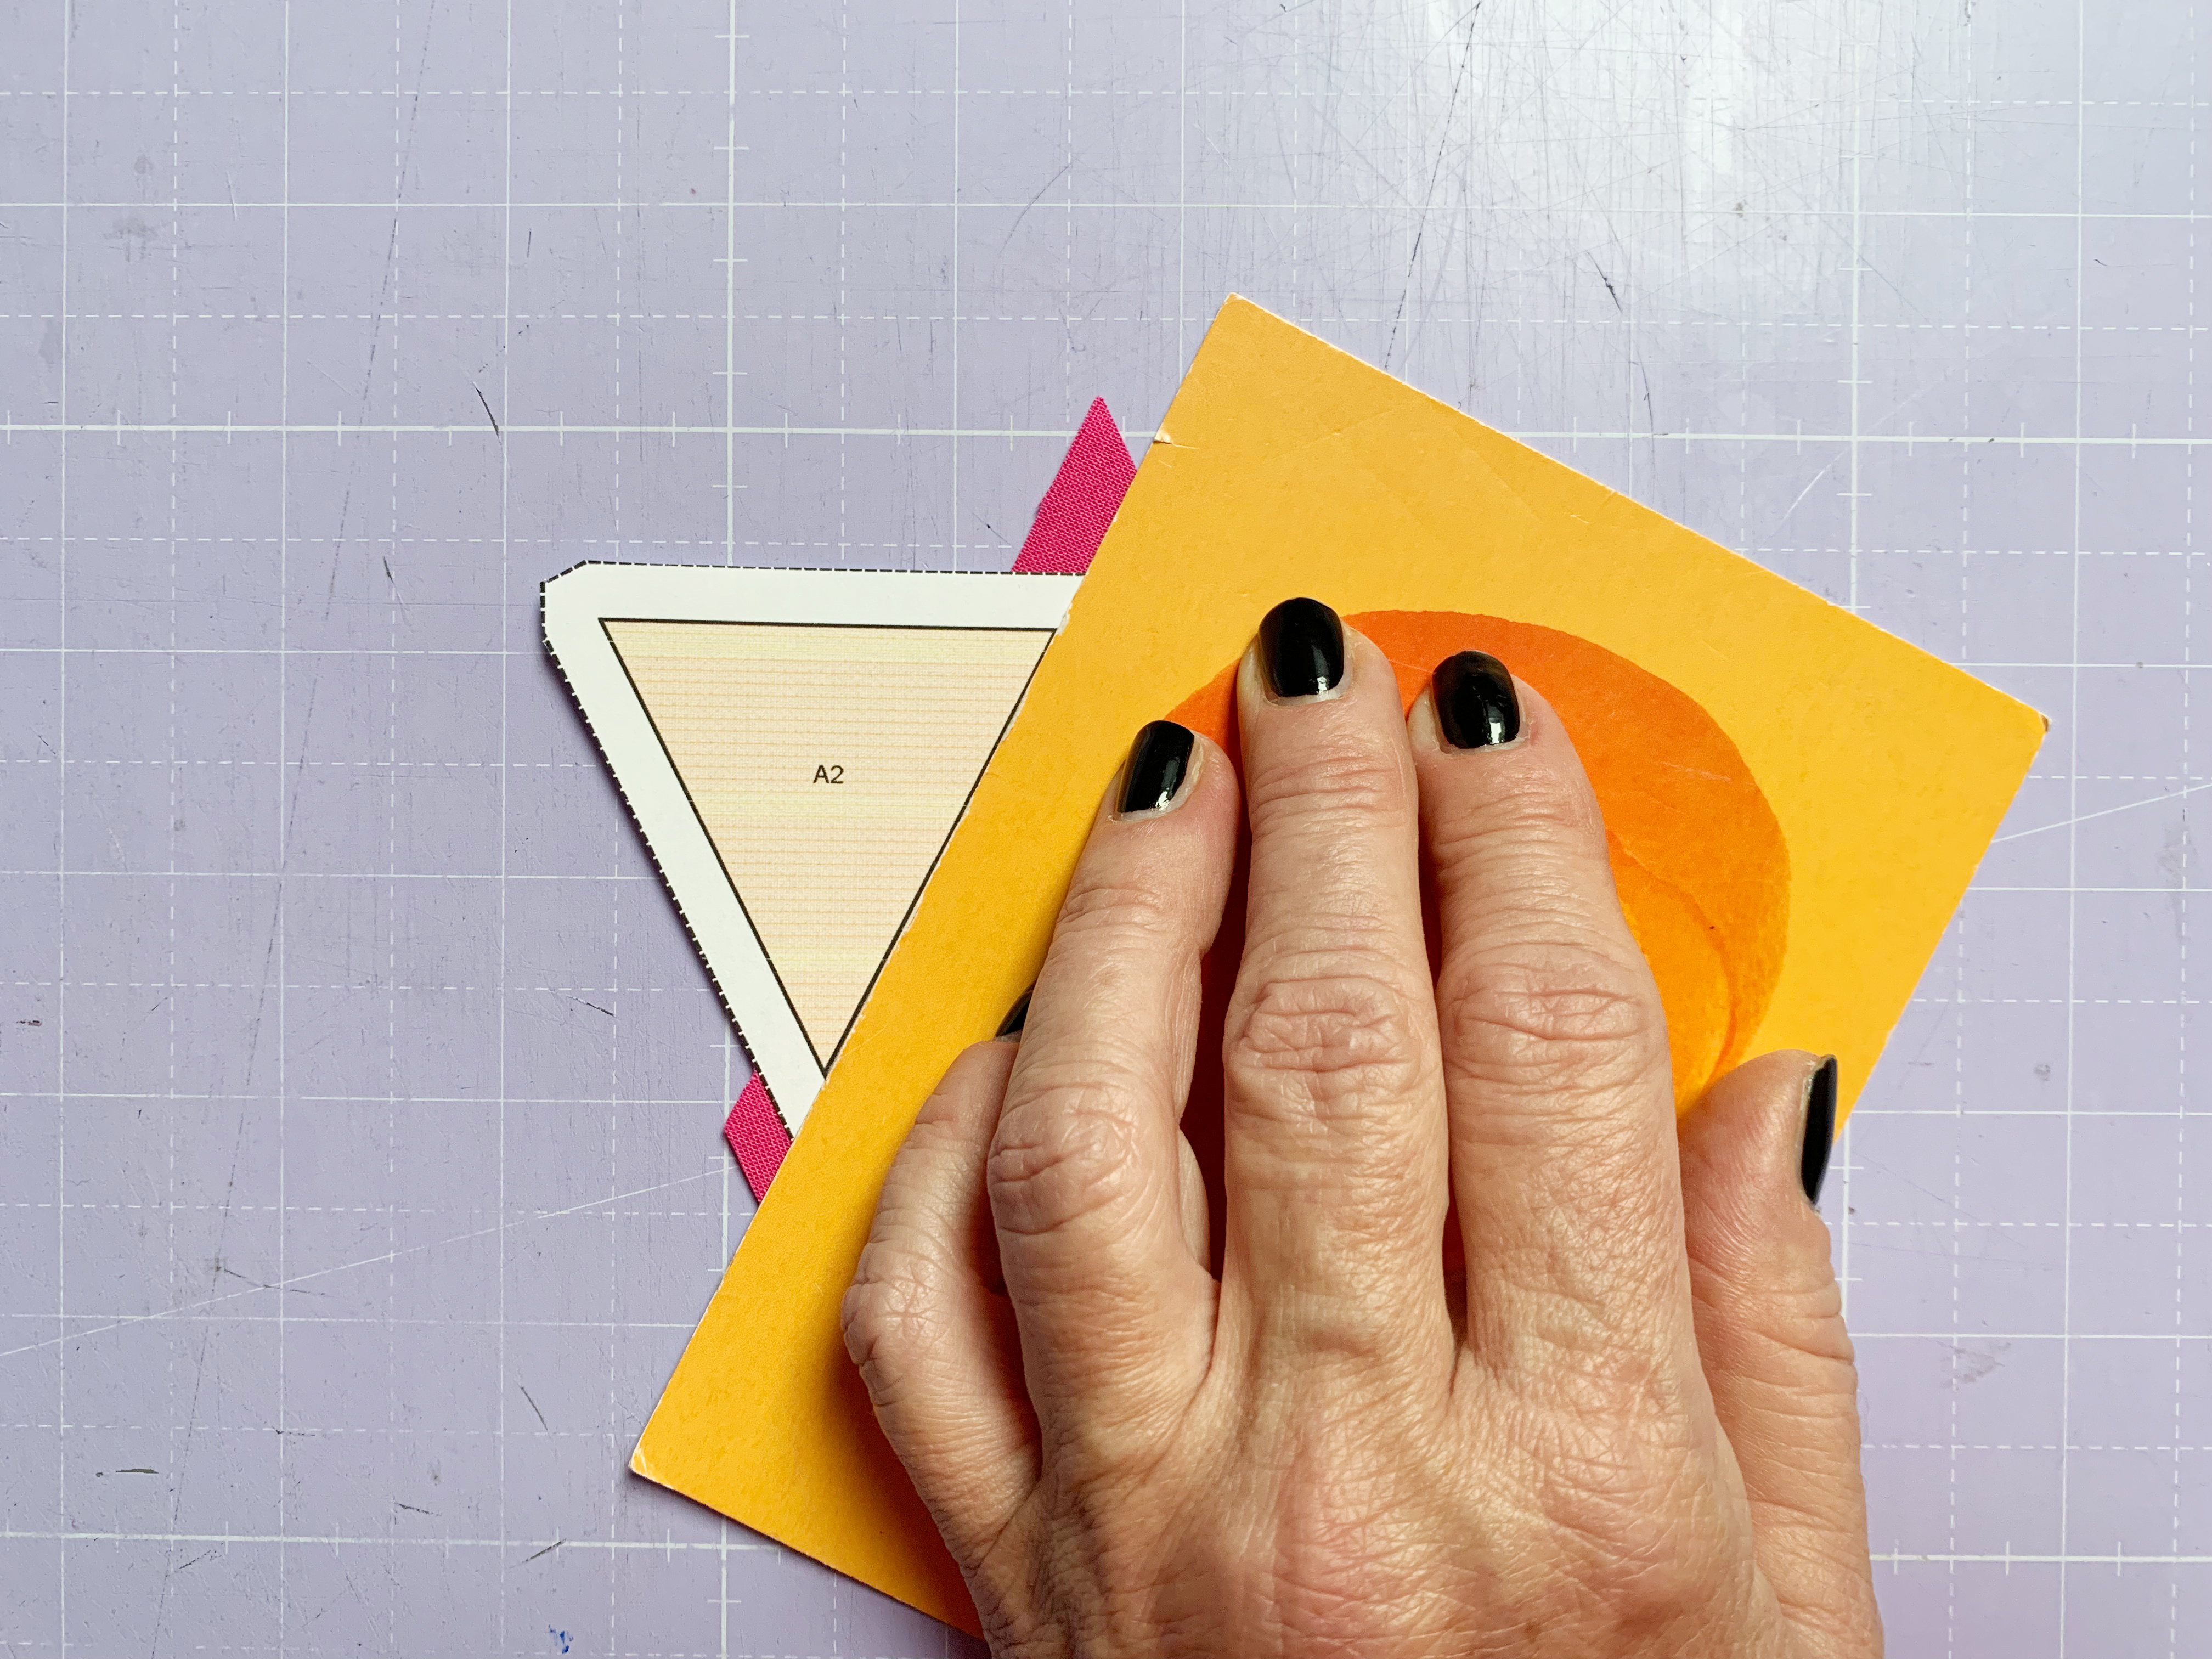
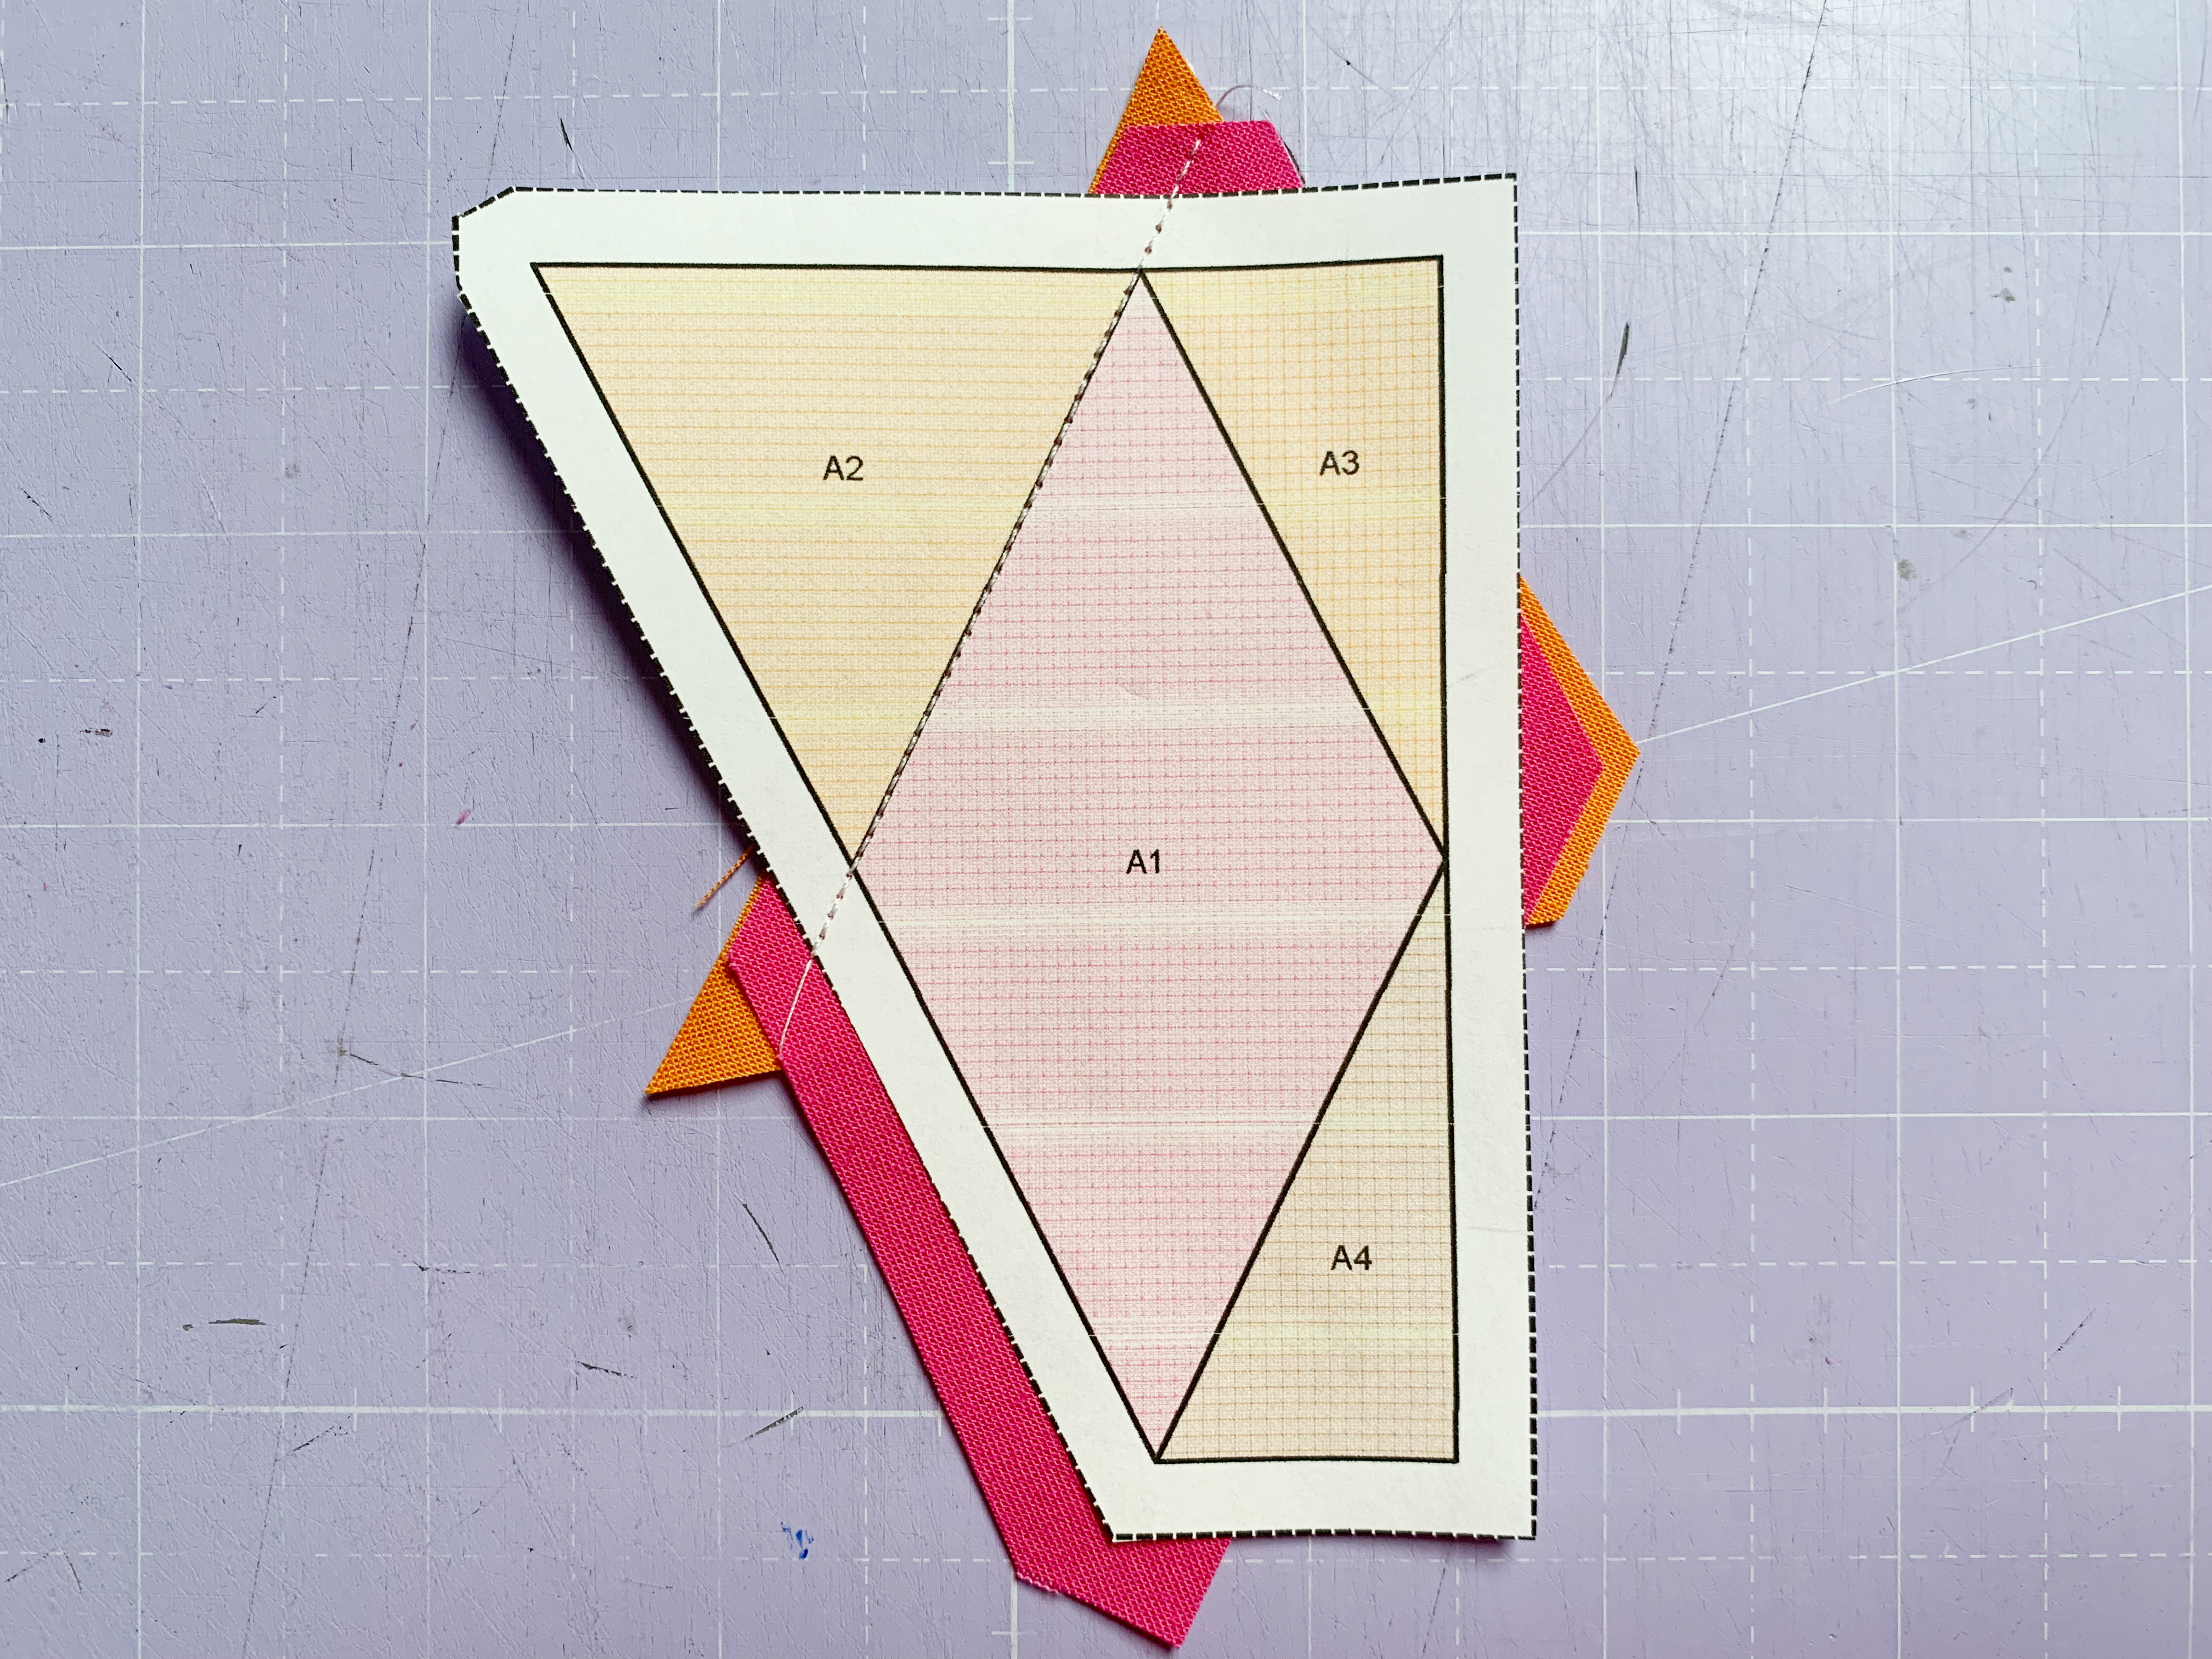
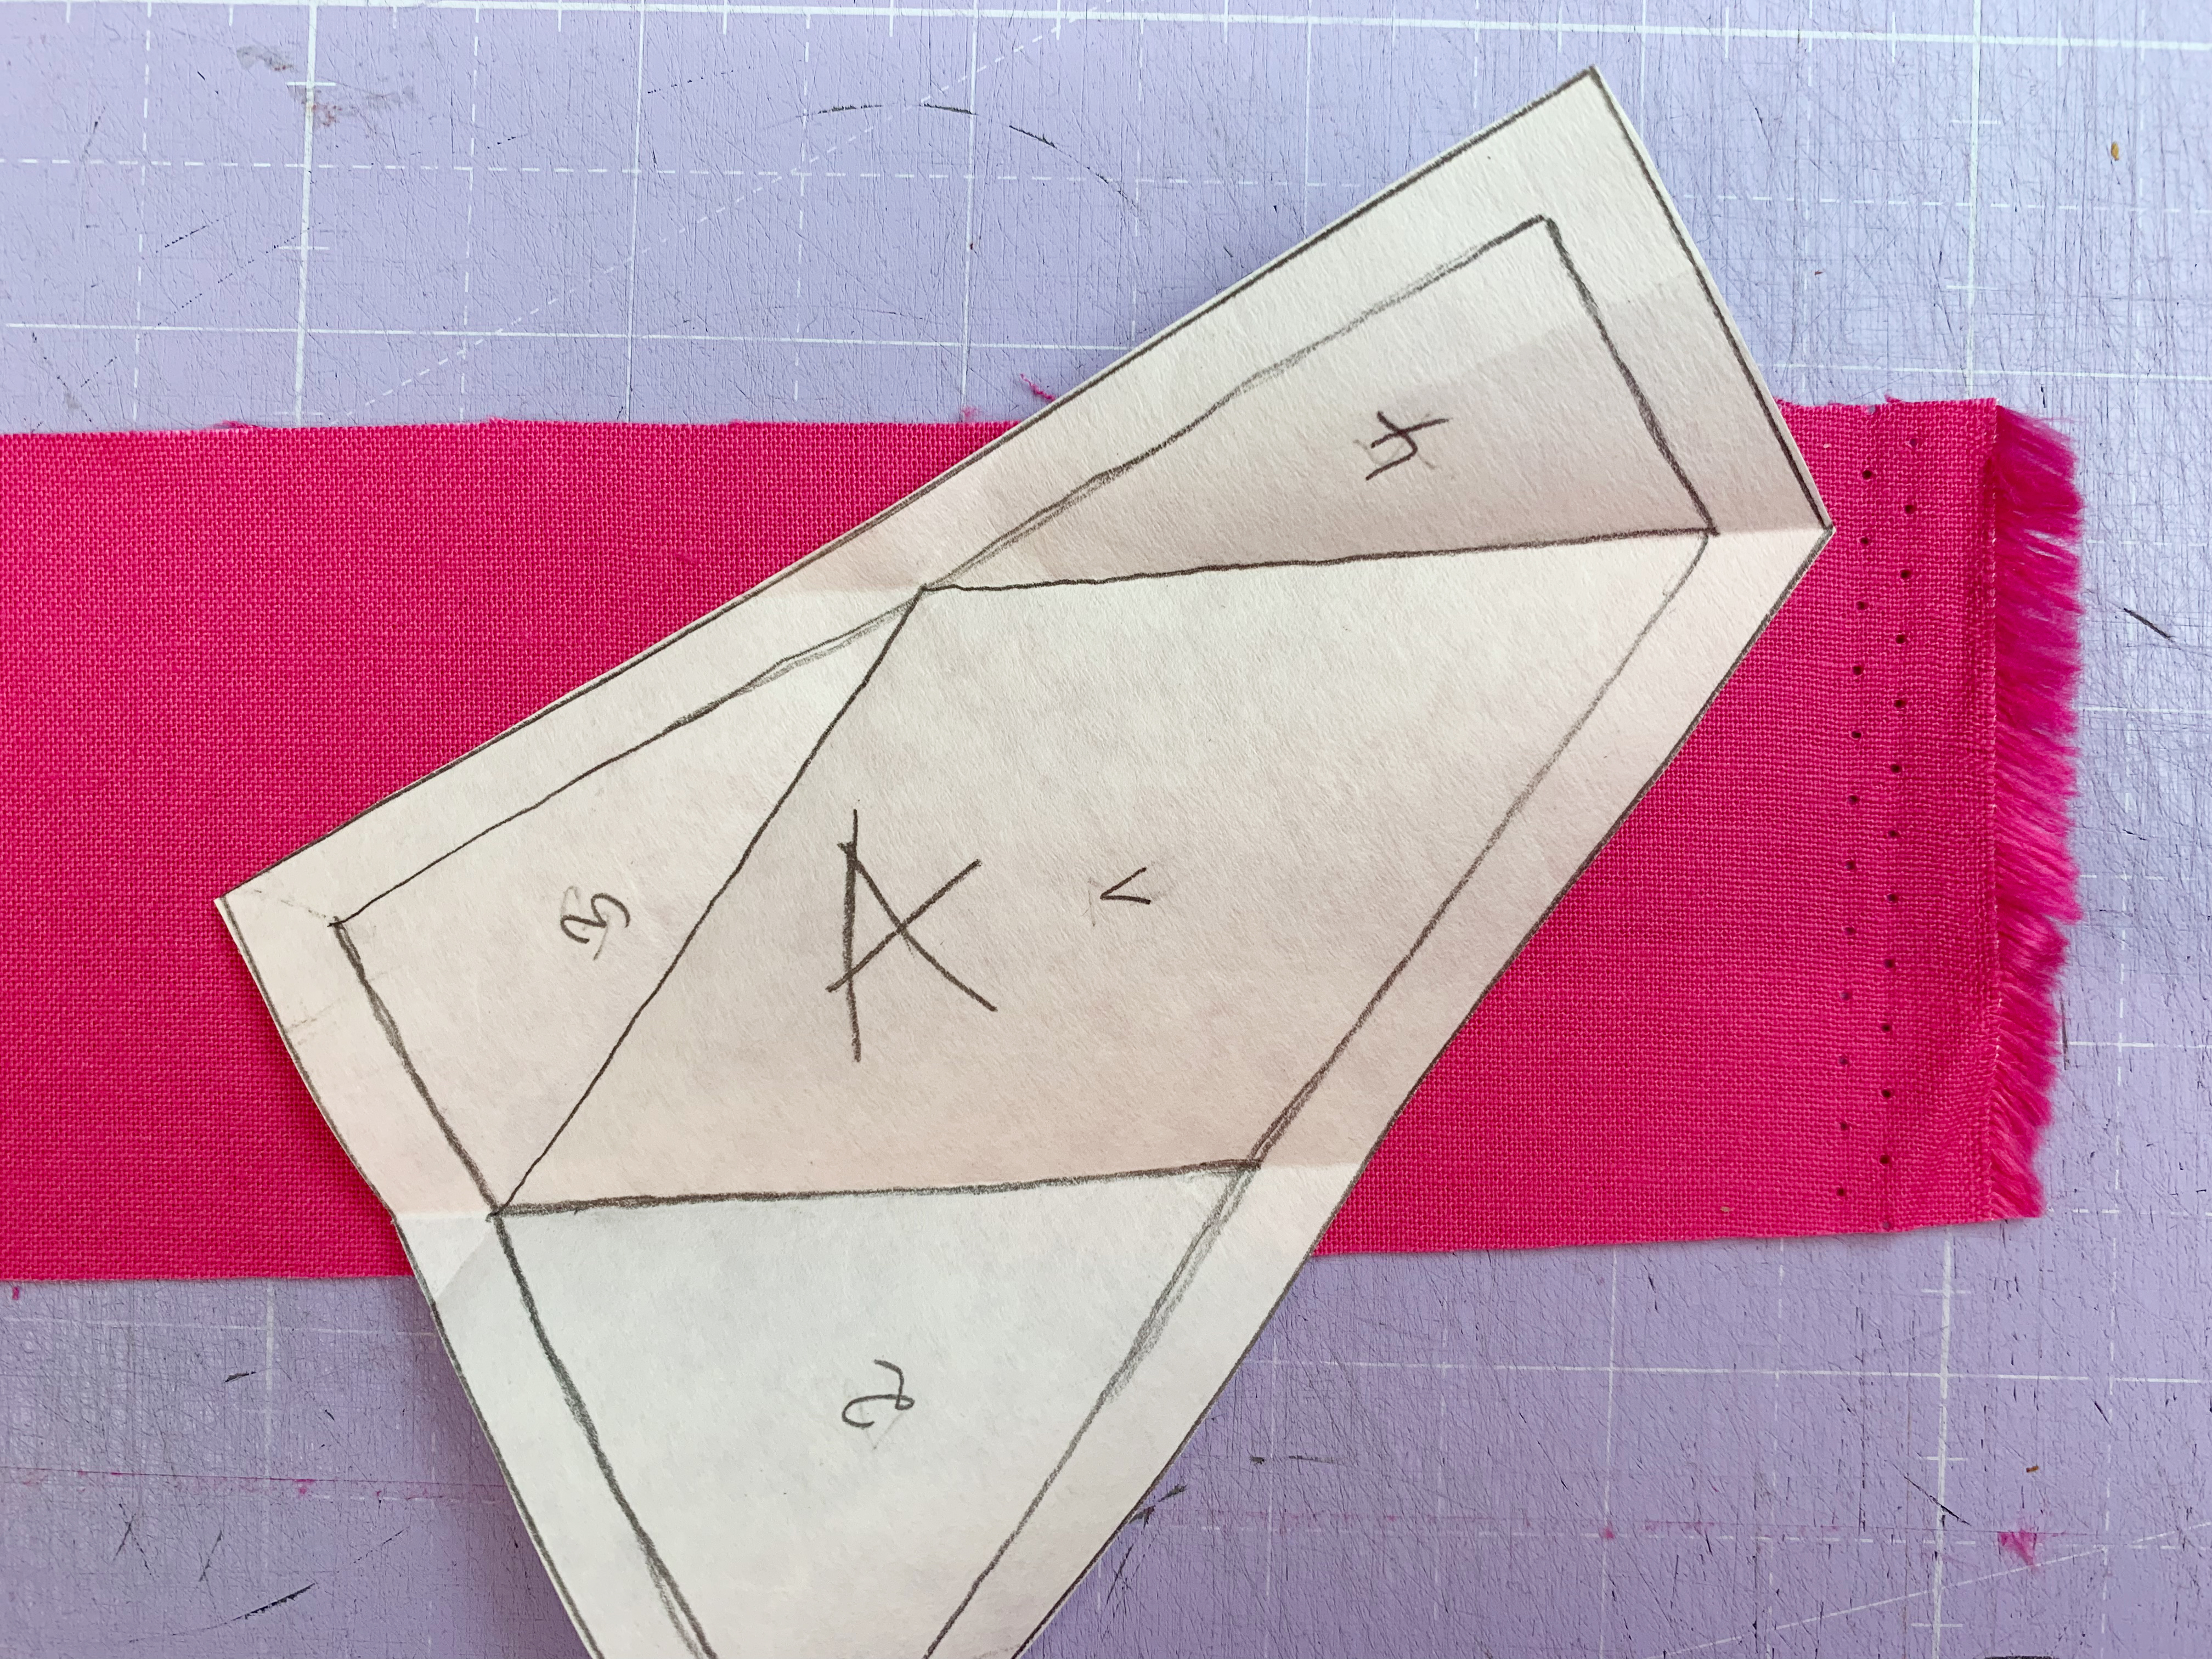
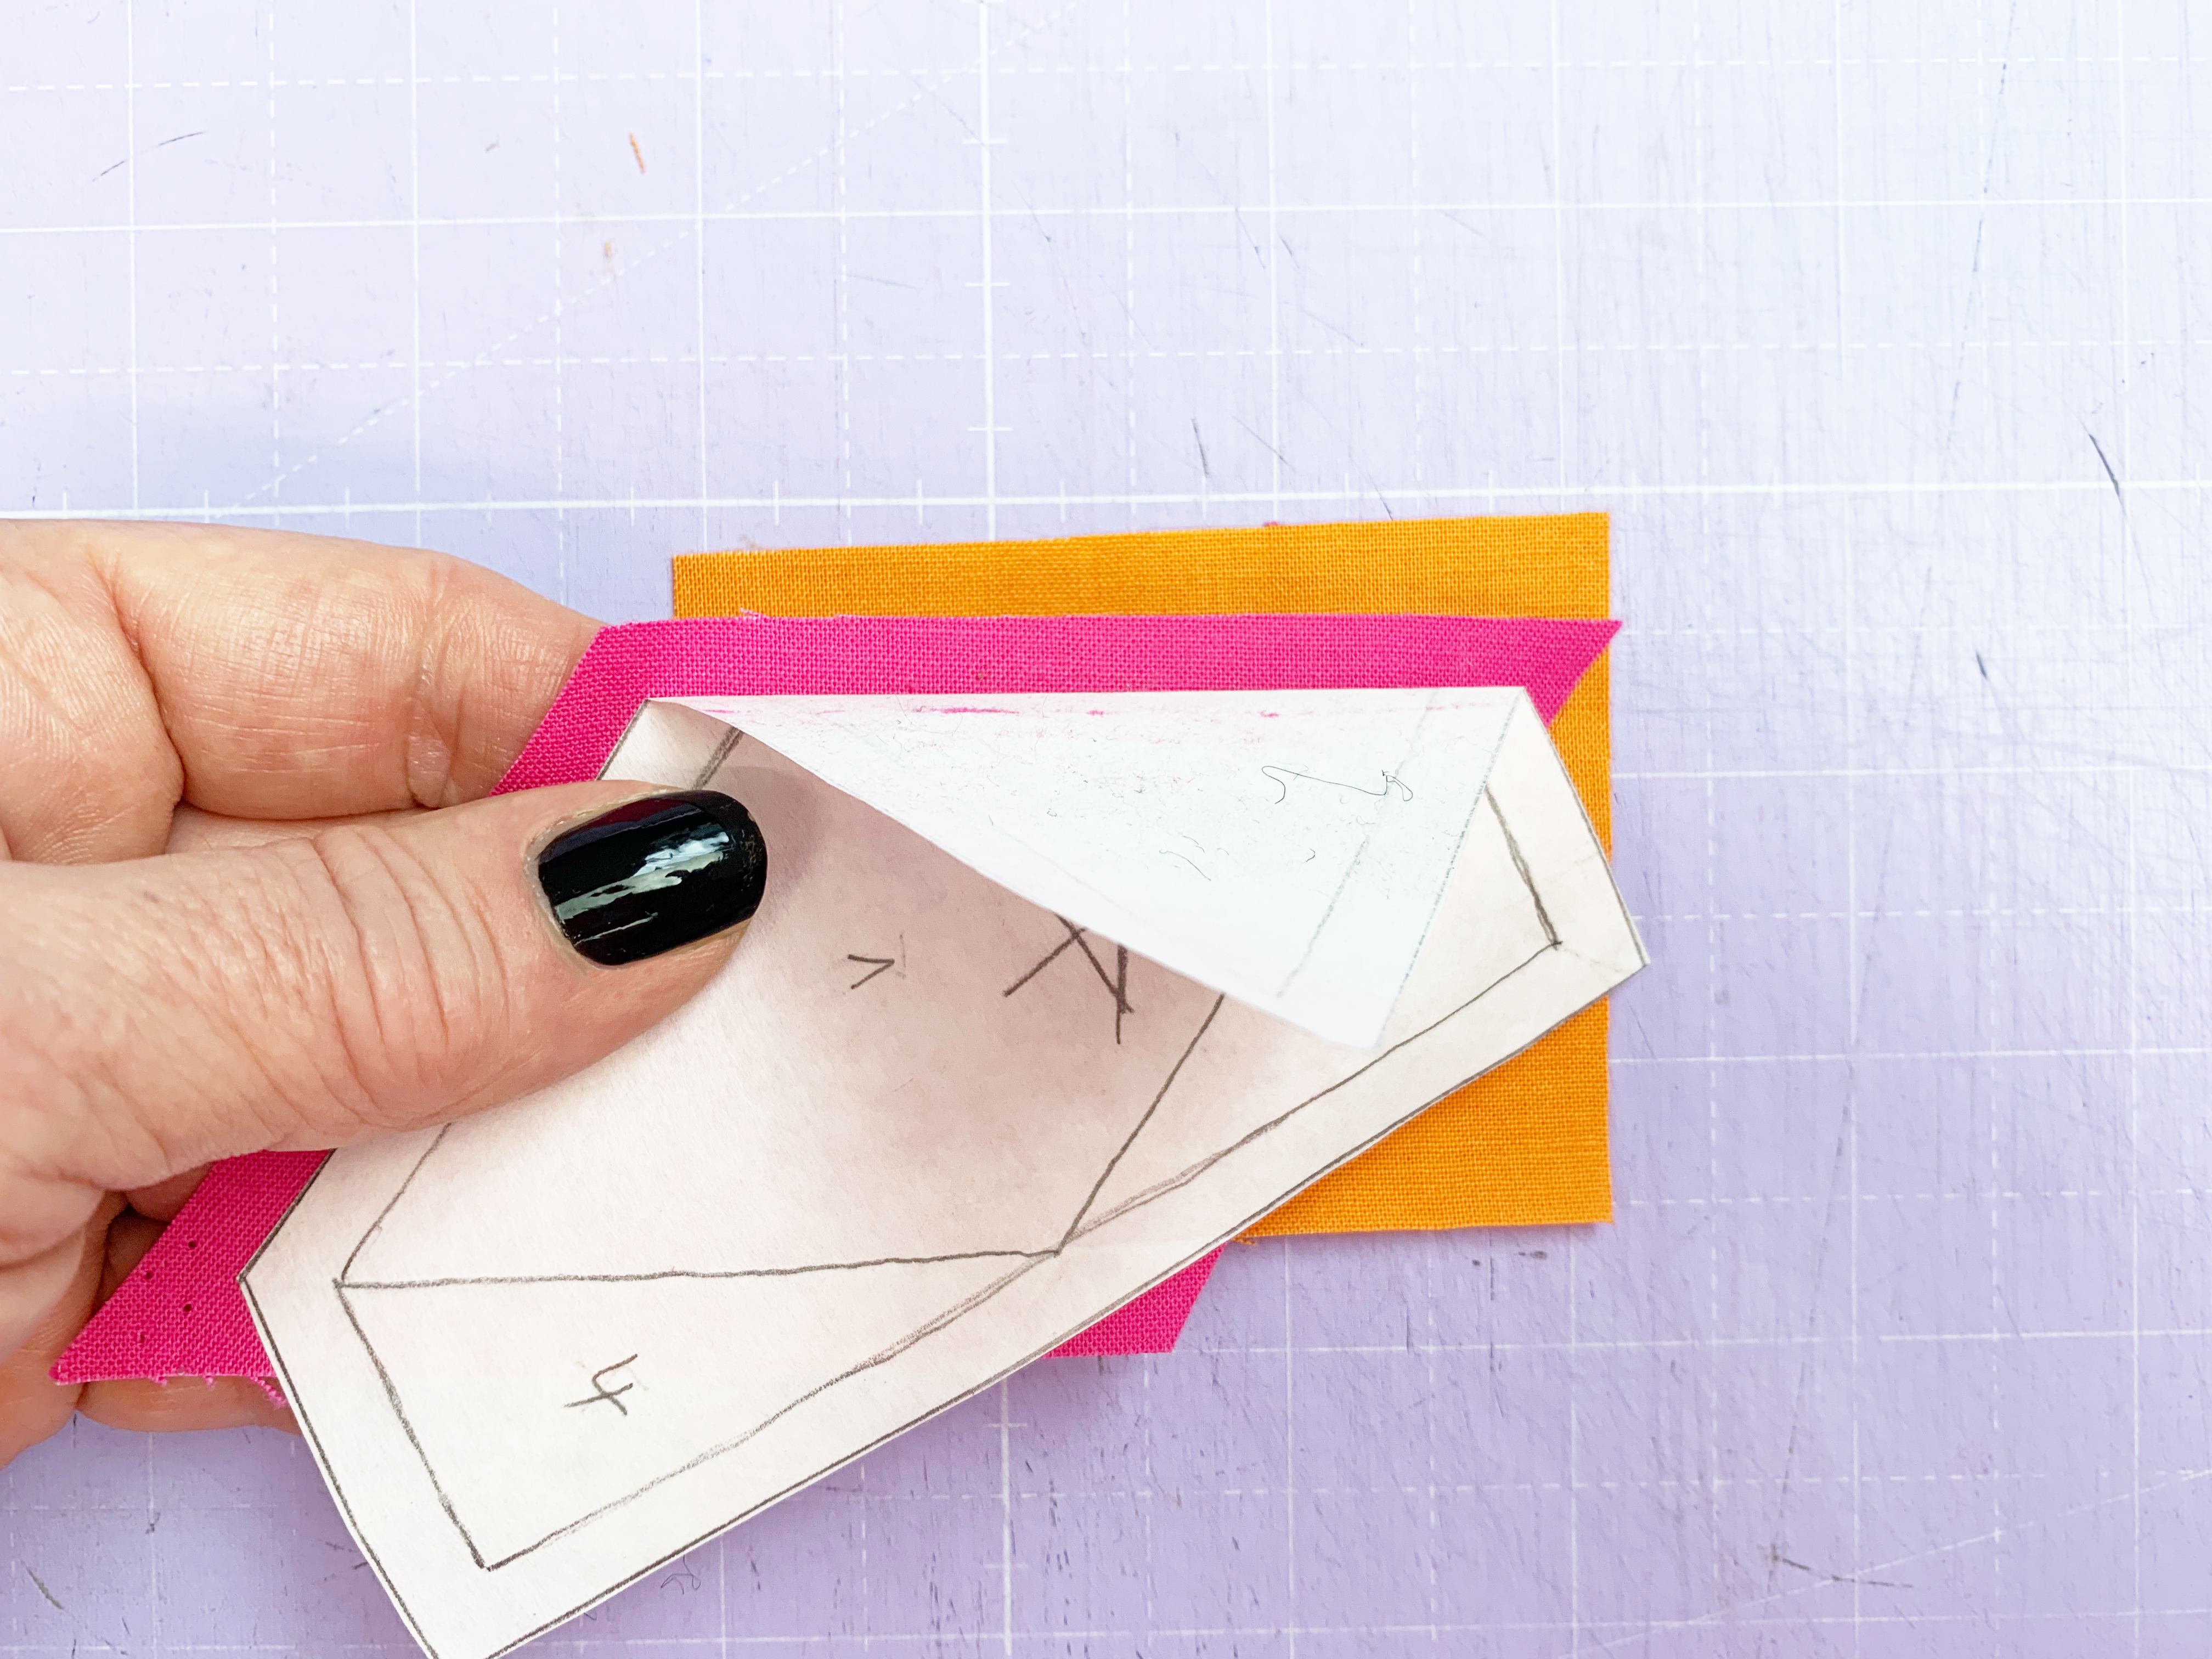
5. This is how you start: Turn the first segment (marked with the letter A) to the wrong side so that the wrong side is facing you. Place the fabric that is to cover part 1 with the wrong side on the pattern.
Like this:
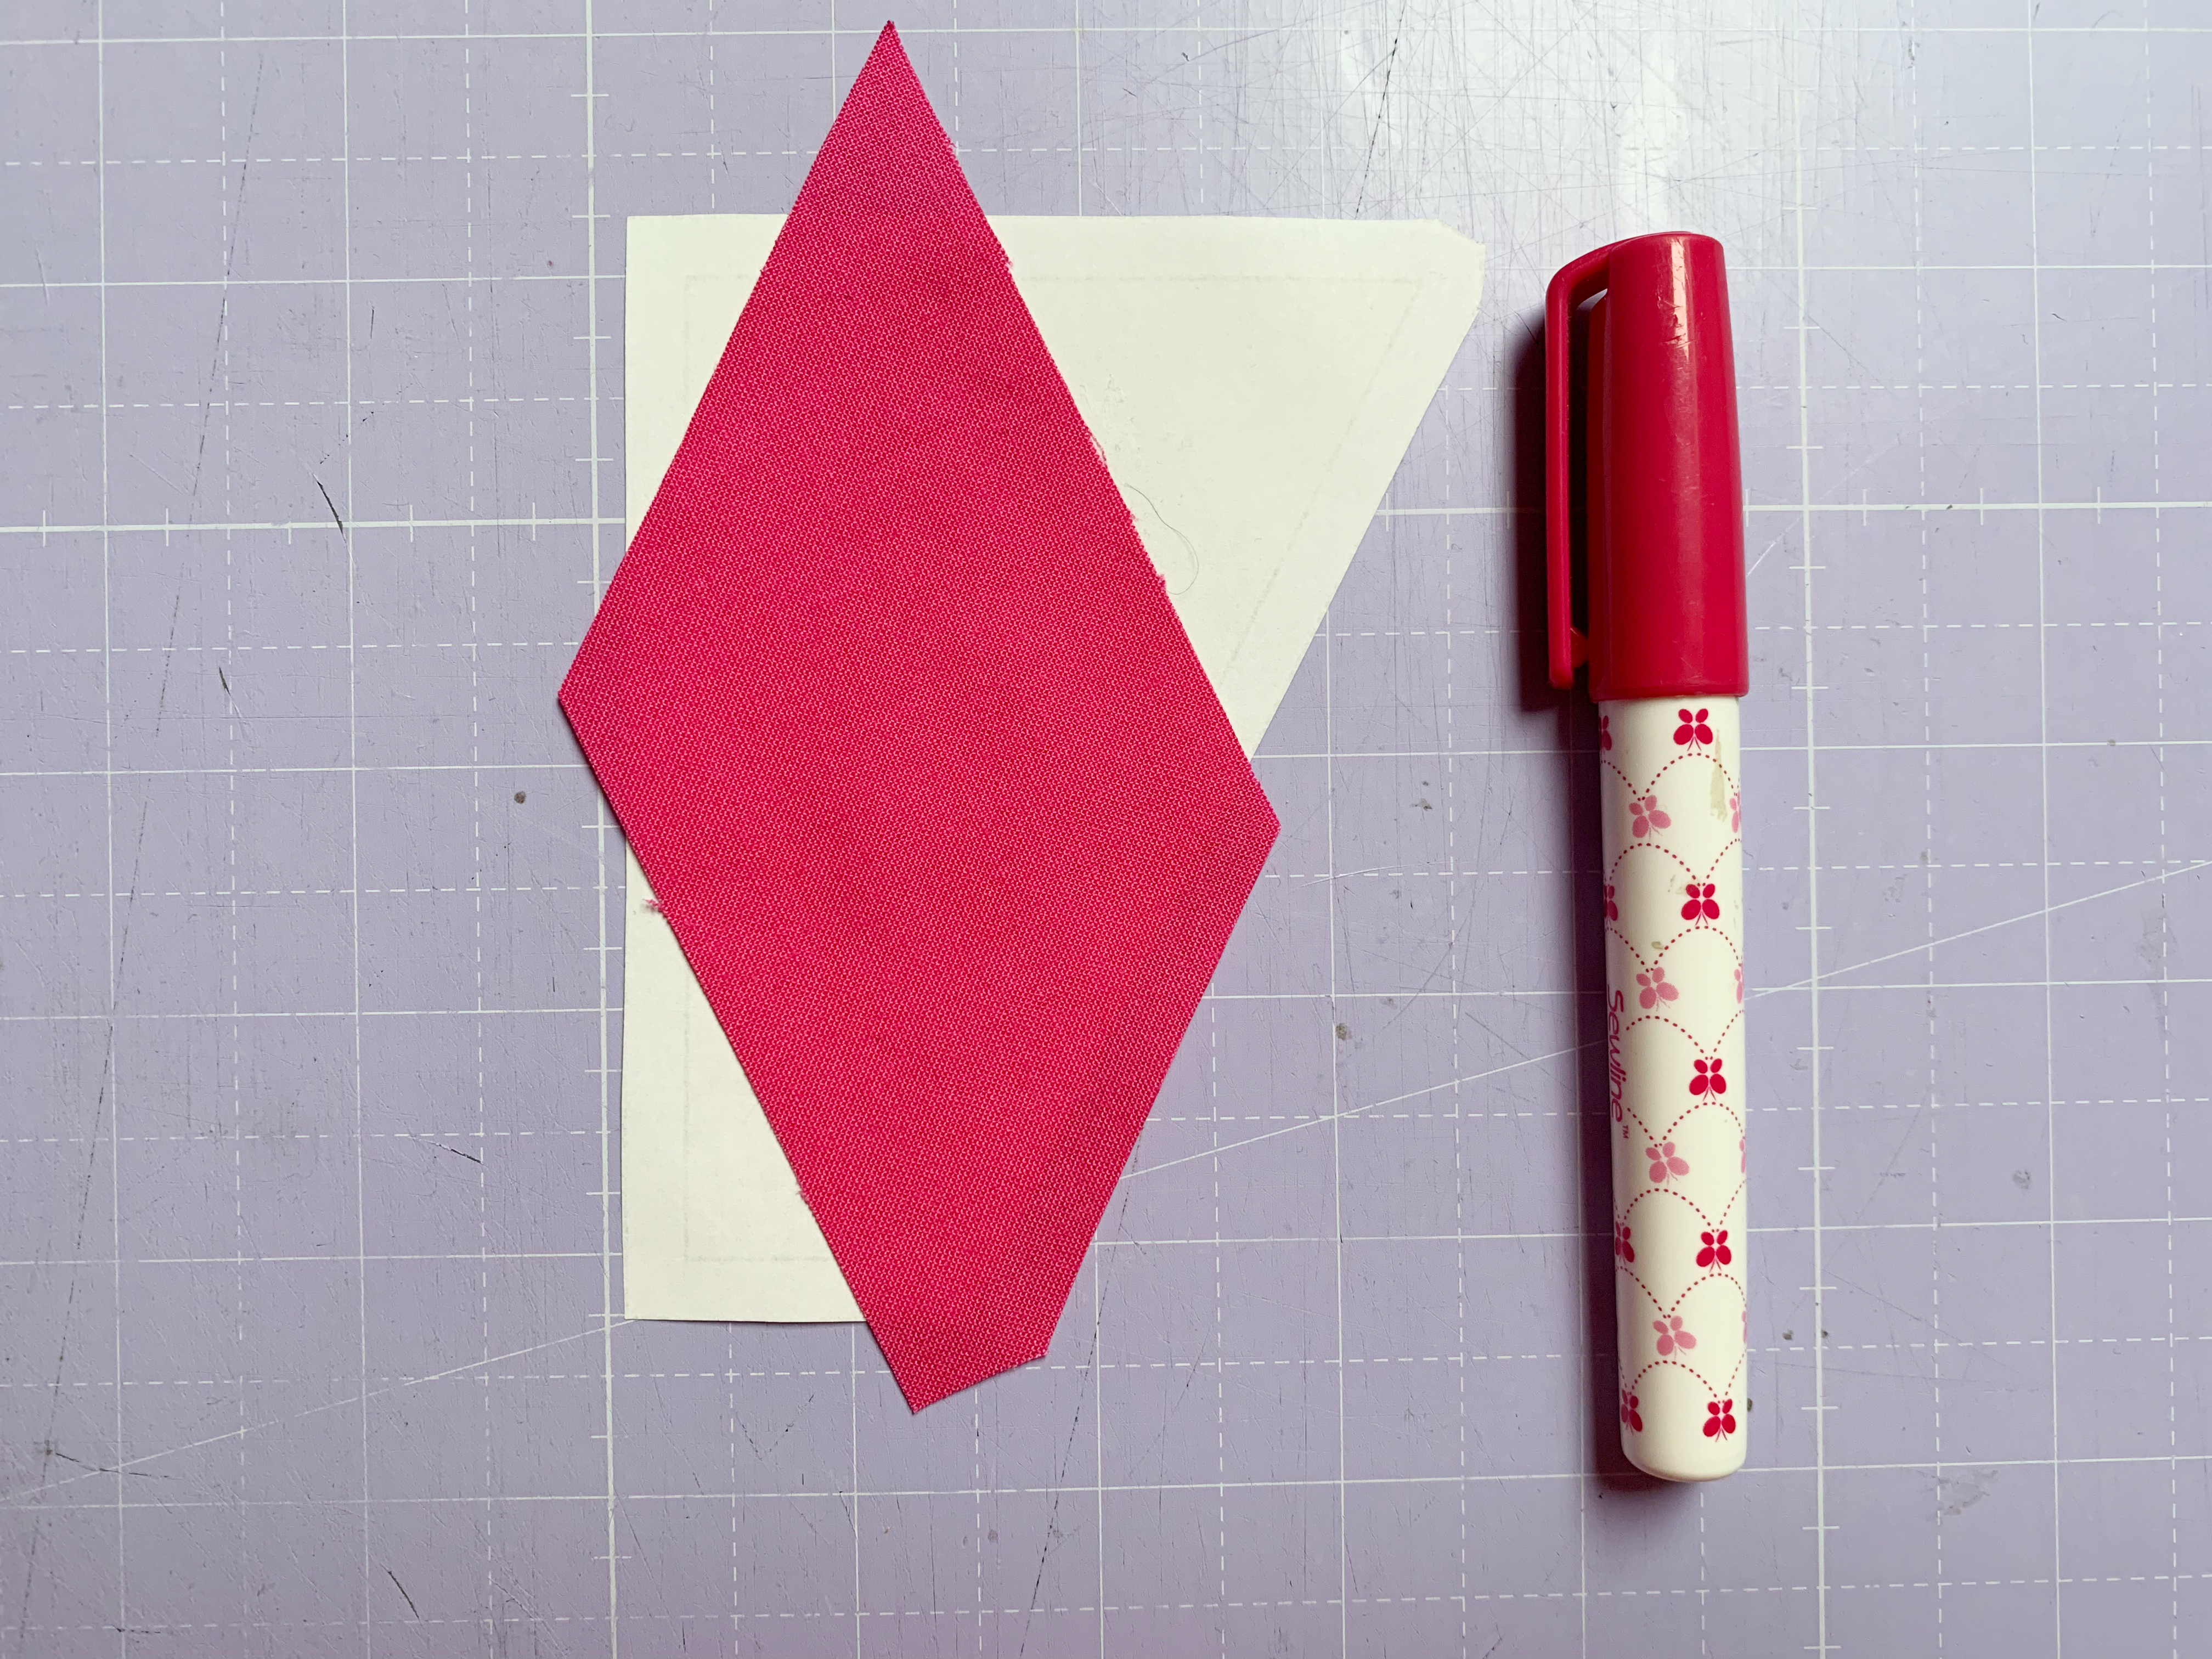
Wrong side of the fabric against the wrong side of the pattern!
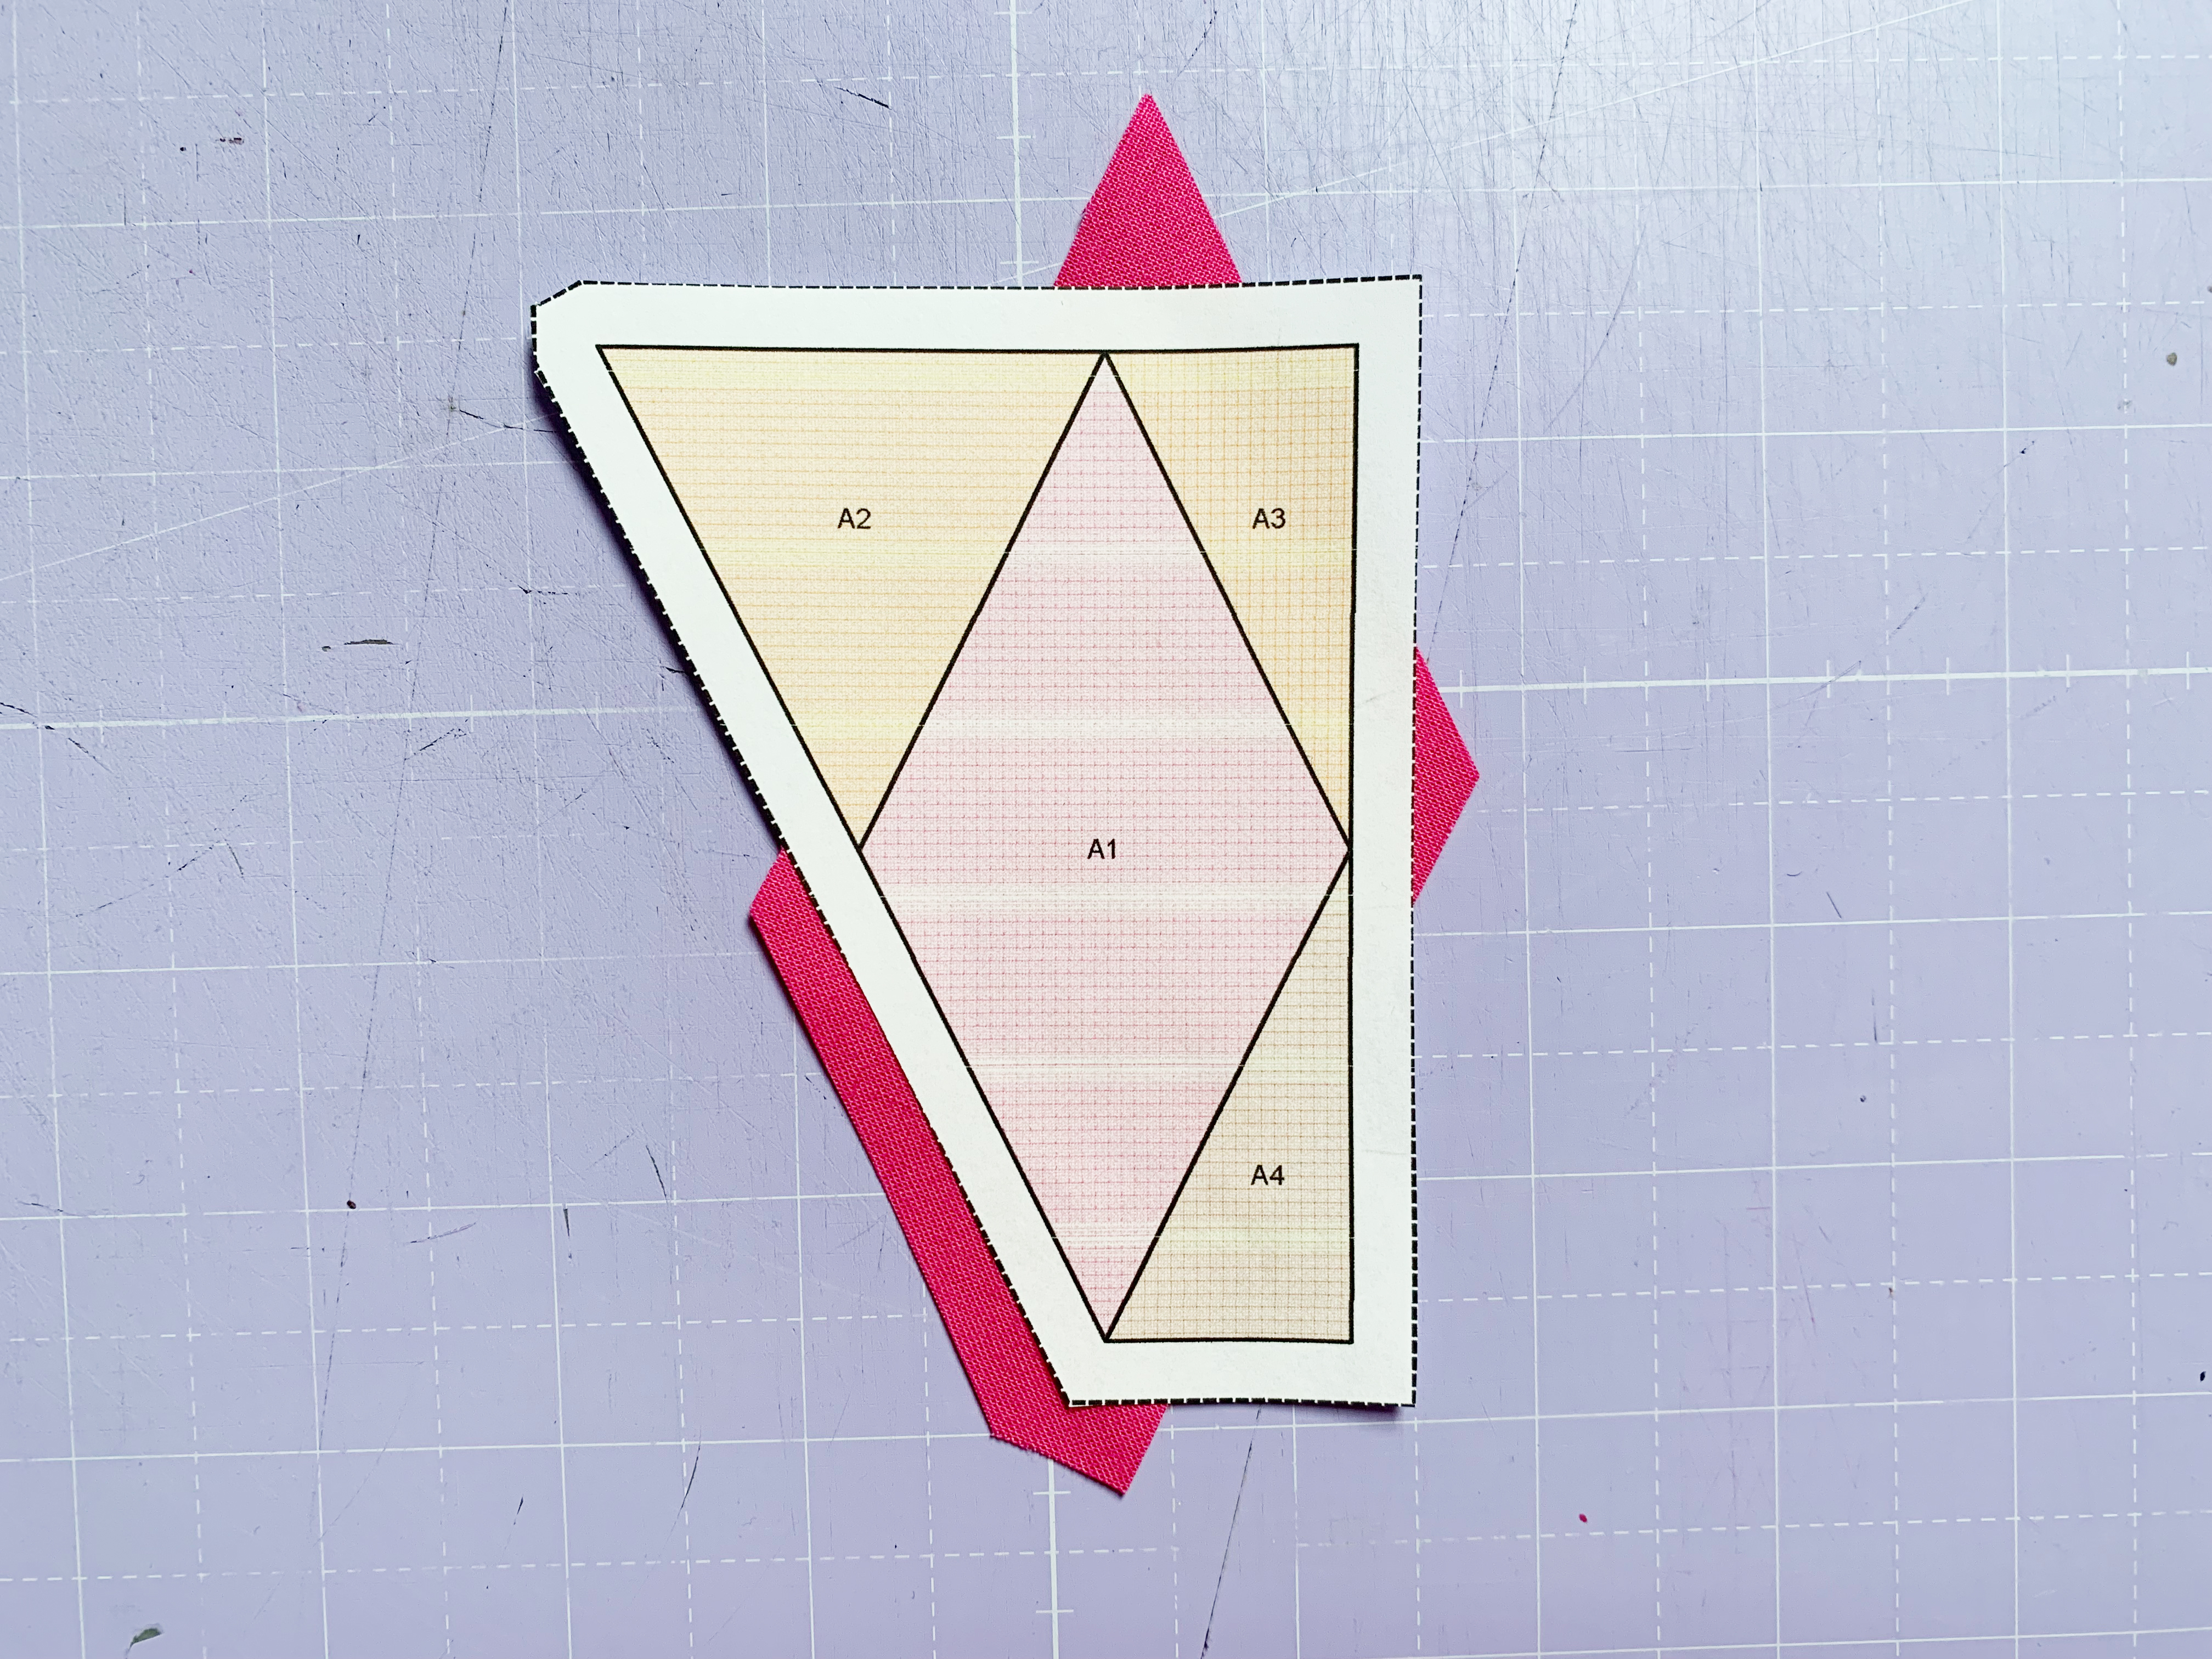
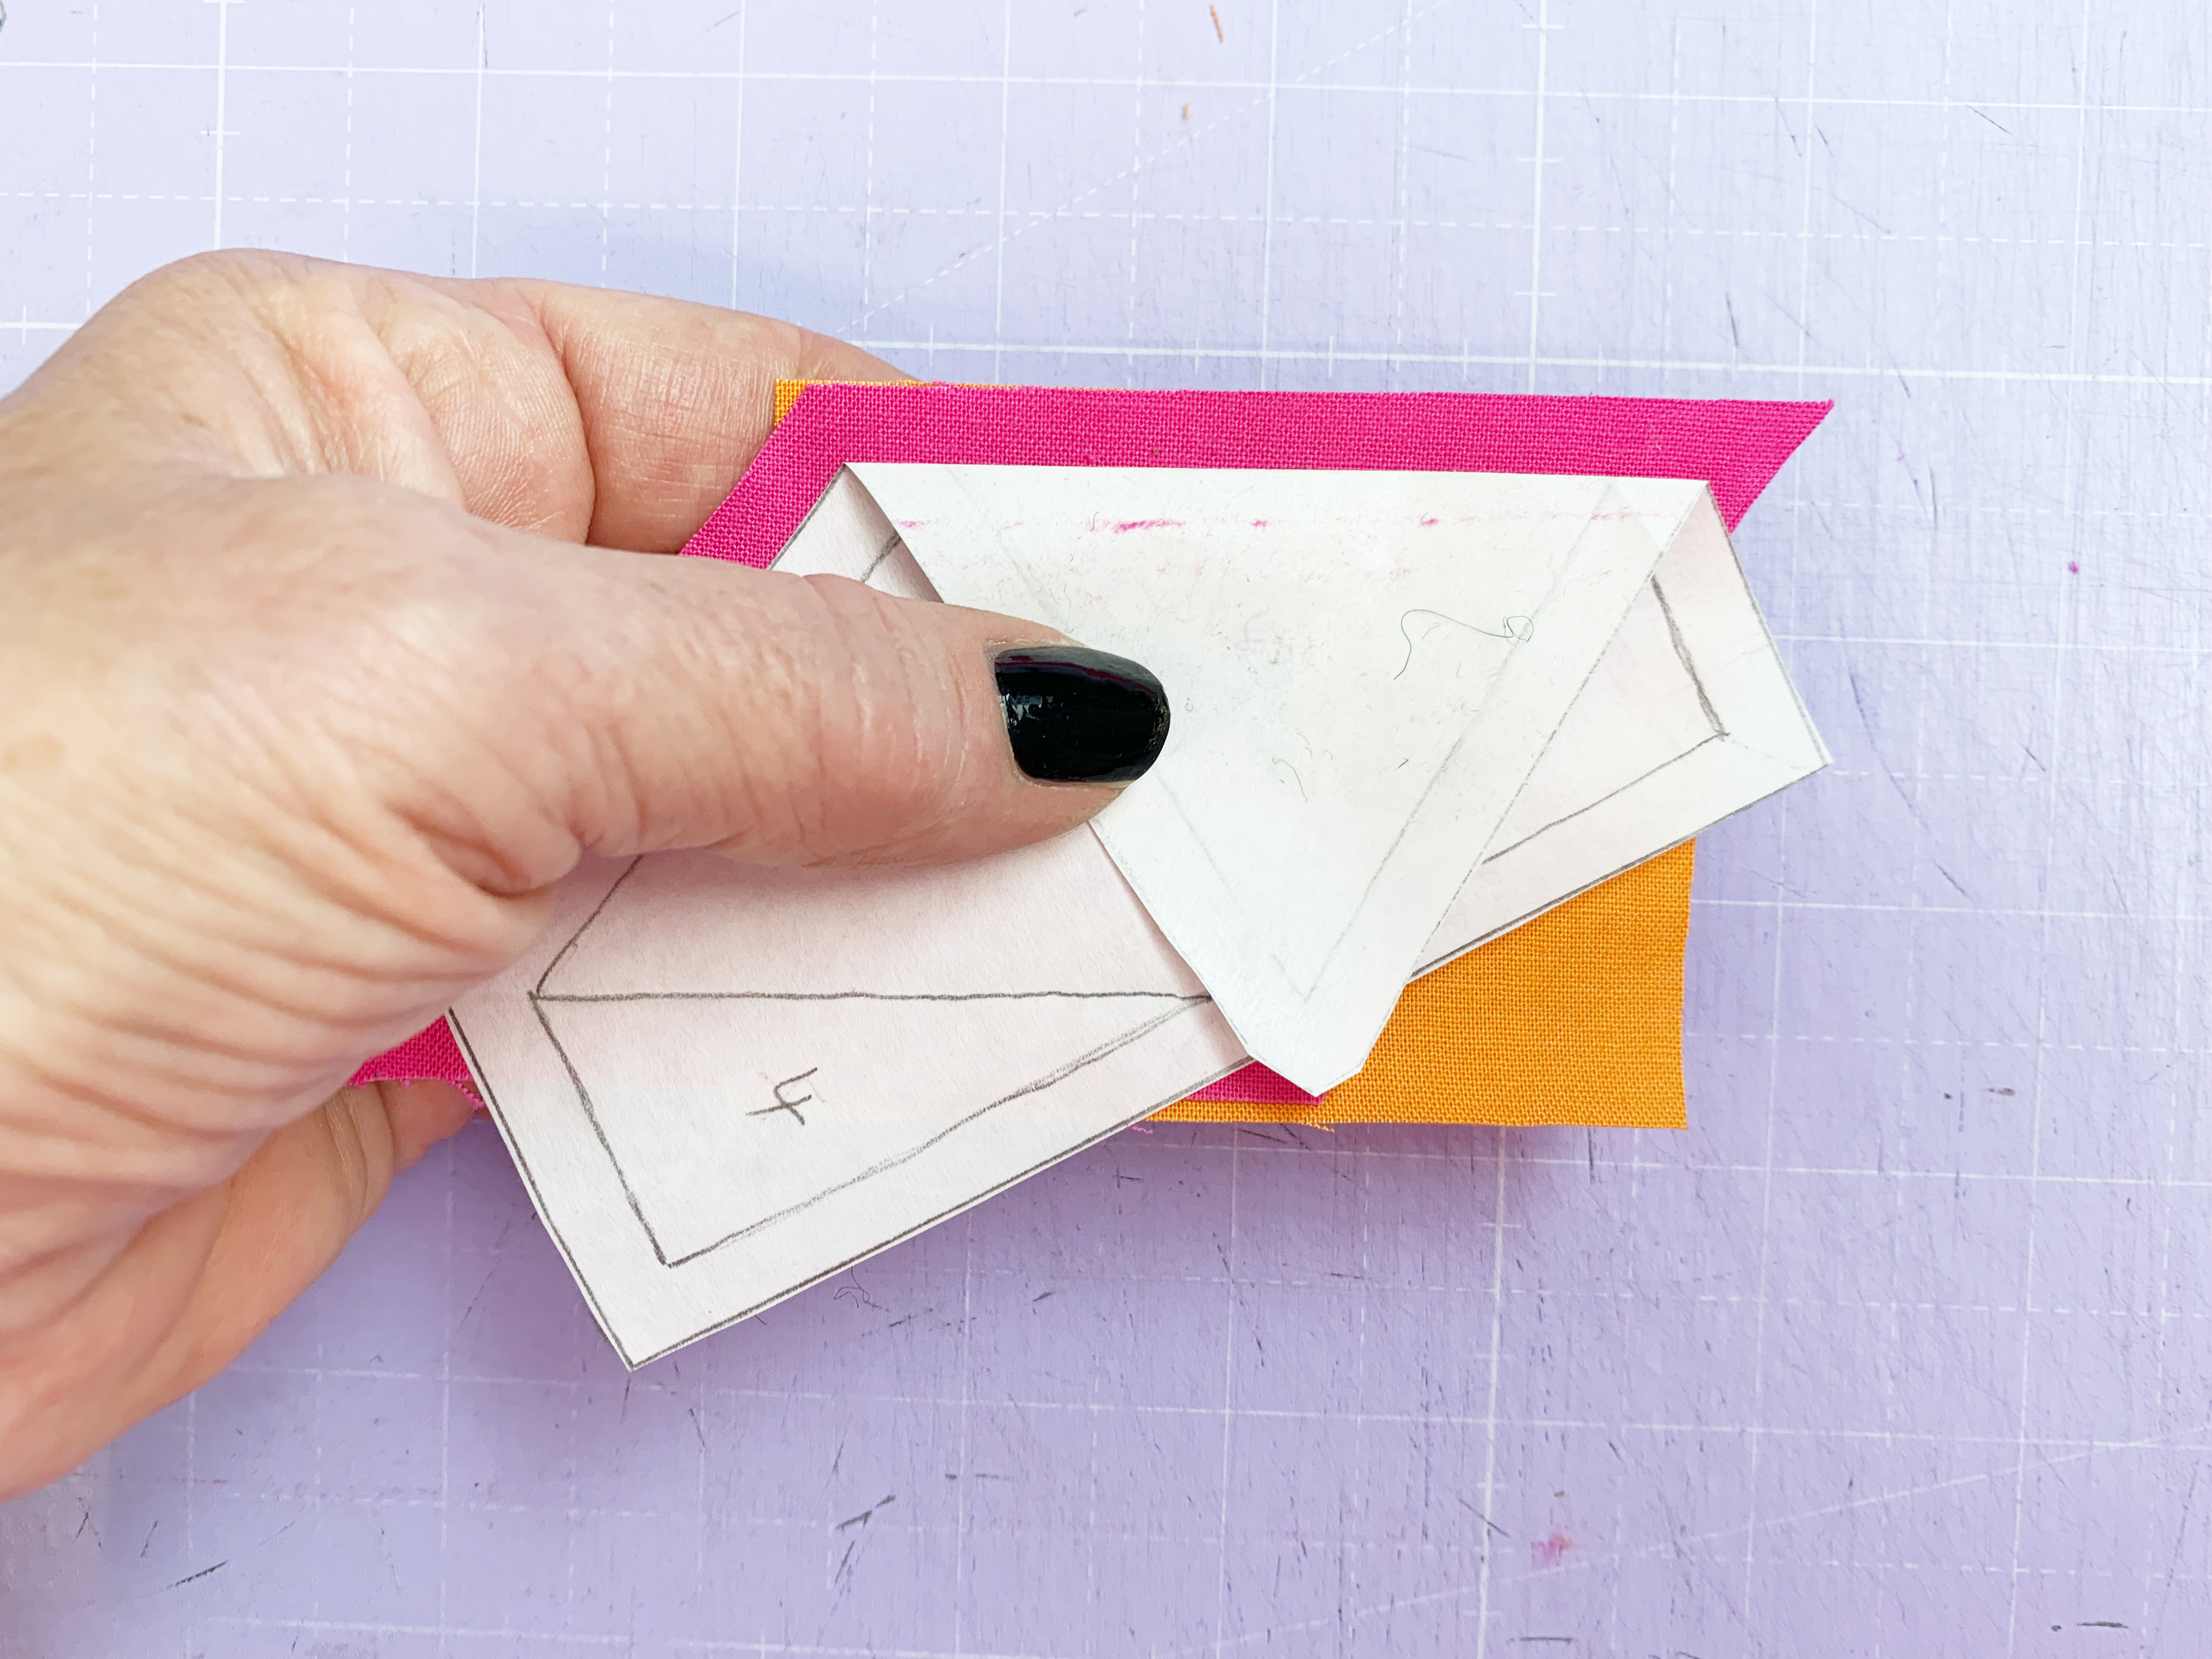
Make sure that the fabric covers the entire area of 1, plus 1/4″ to 1/2″ seam allowance. You don’t have to pay attention to neat edges or the grainline. This will look like in the photos below. It shows the view from both sides.
Pin this piece of fabric in place with a pin or, if you want to work like me, use the fabric glue stick.

6. Turn the segment so that the printed side is facing you. Fold the pattern on the line between 1 and 2. It is best to use a postcard for this step, as you can achieve a nice crisp fold like this. The line between 1 and 2 is also the line that you will sew first.
The segment with the printed side is facing you.
Fold the line between 1 and 2 (use a postcard):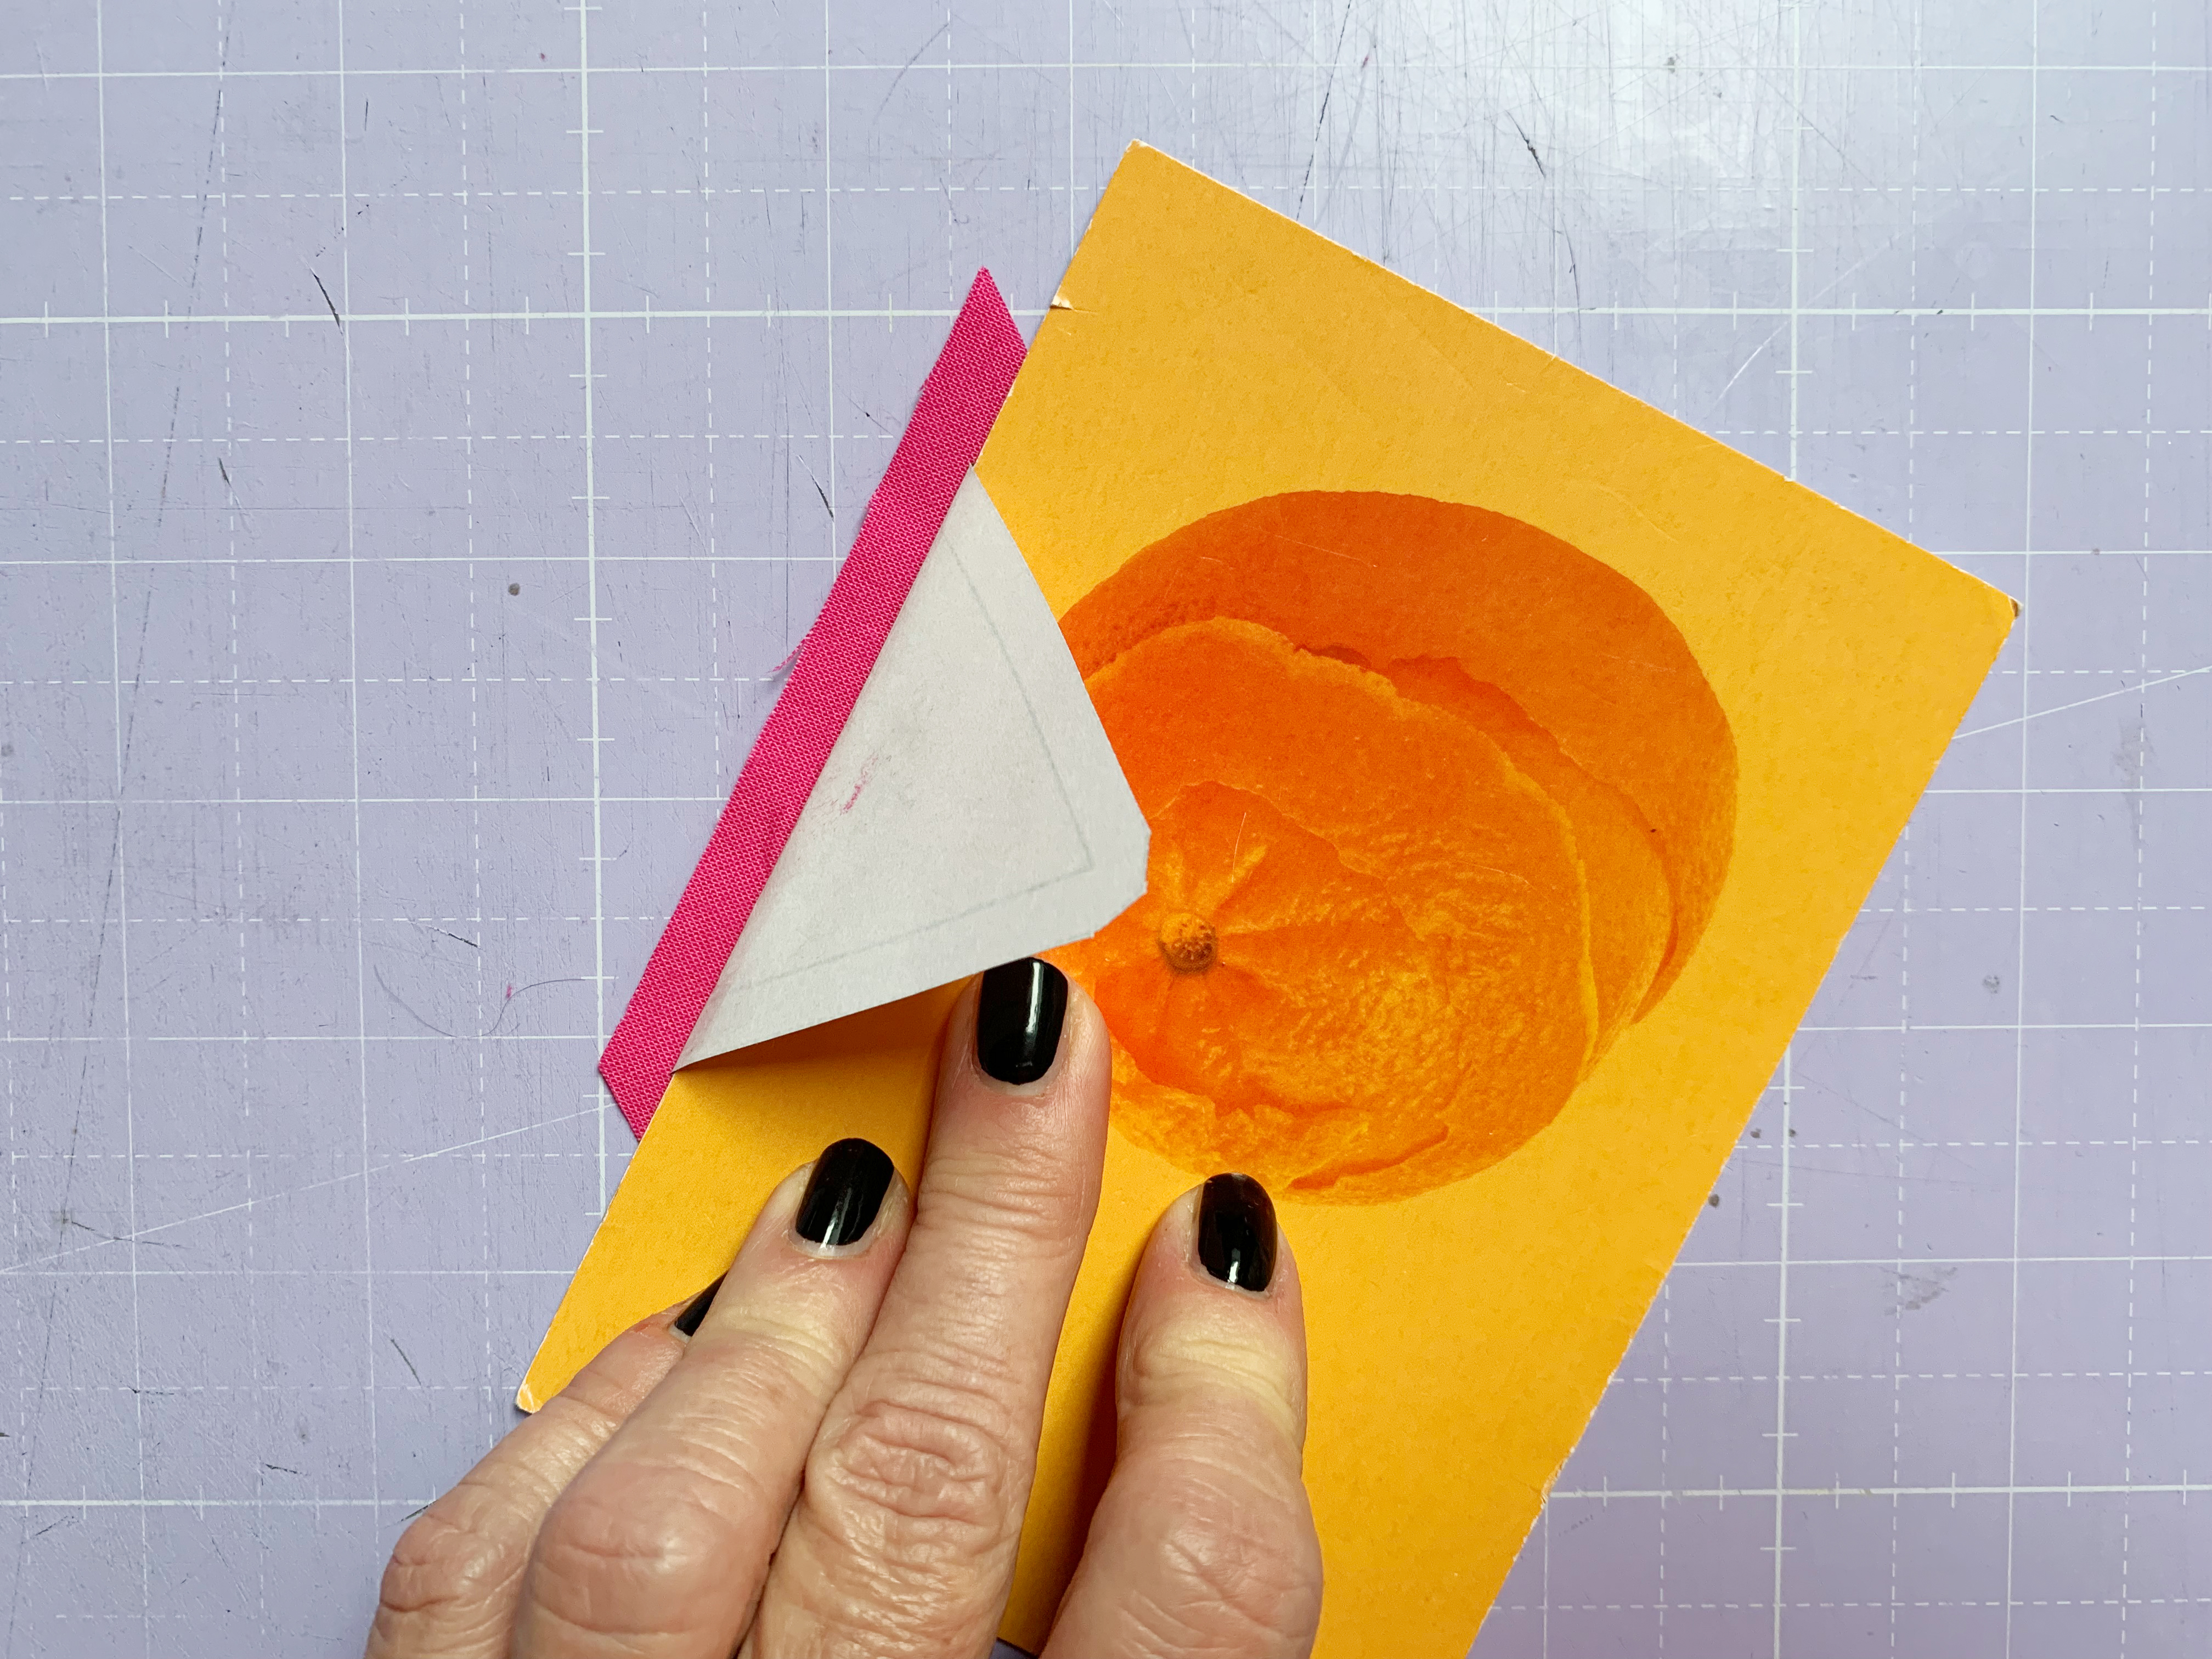
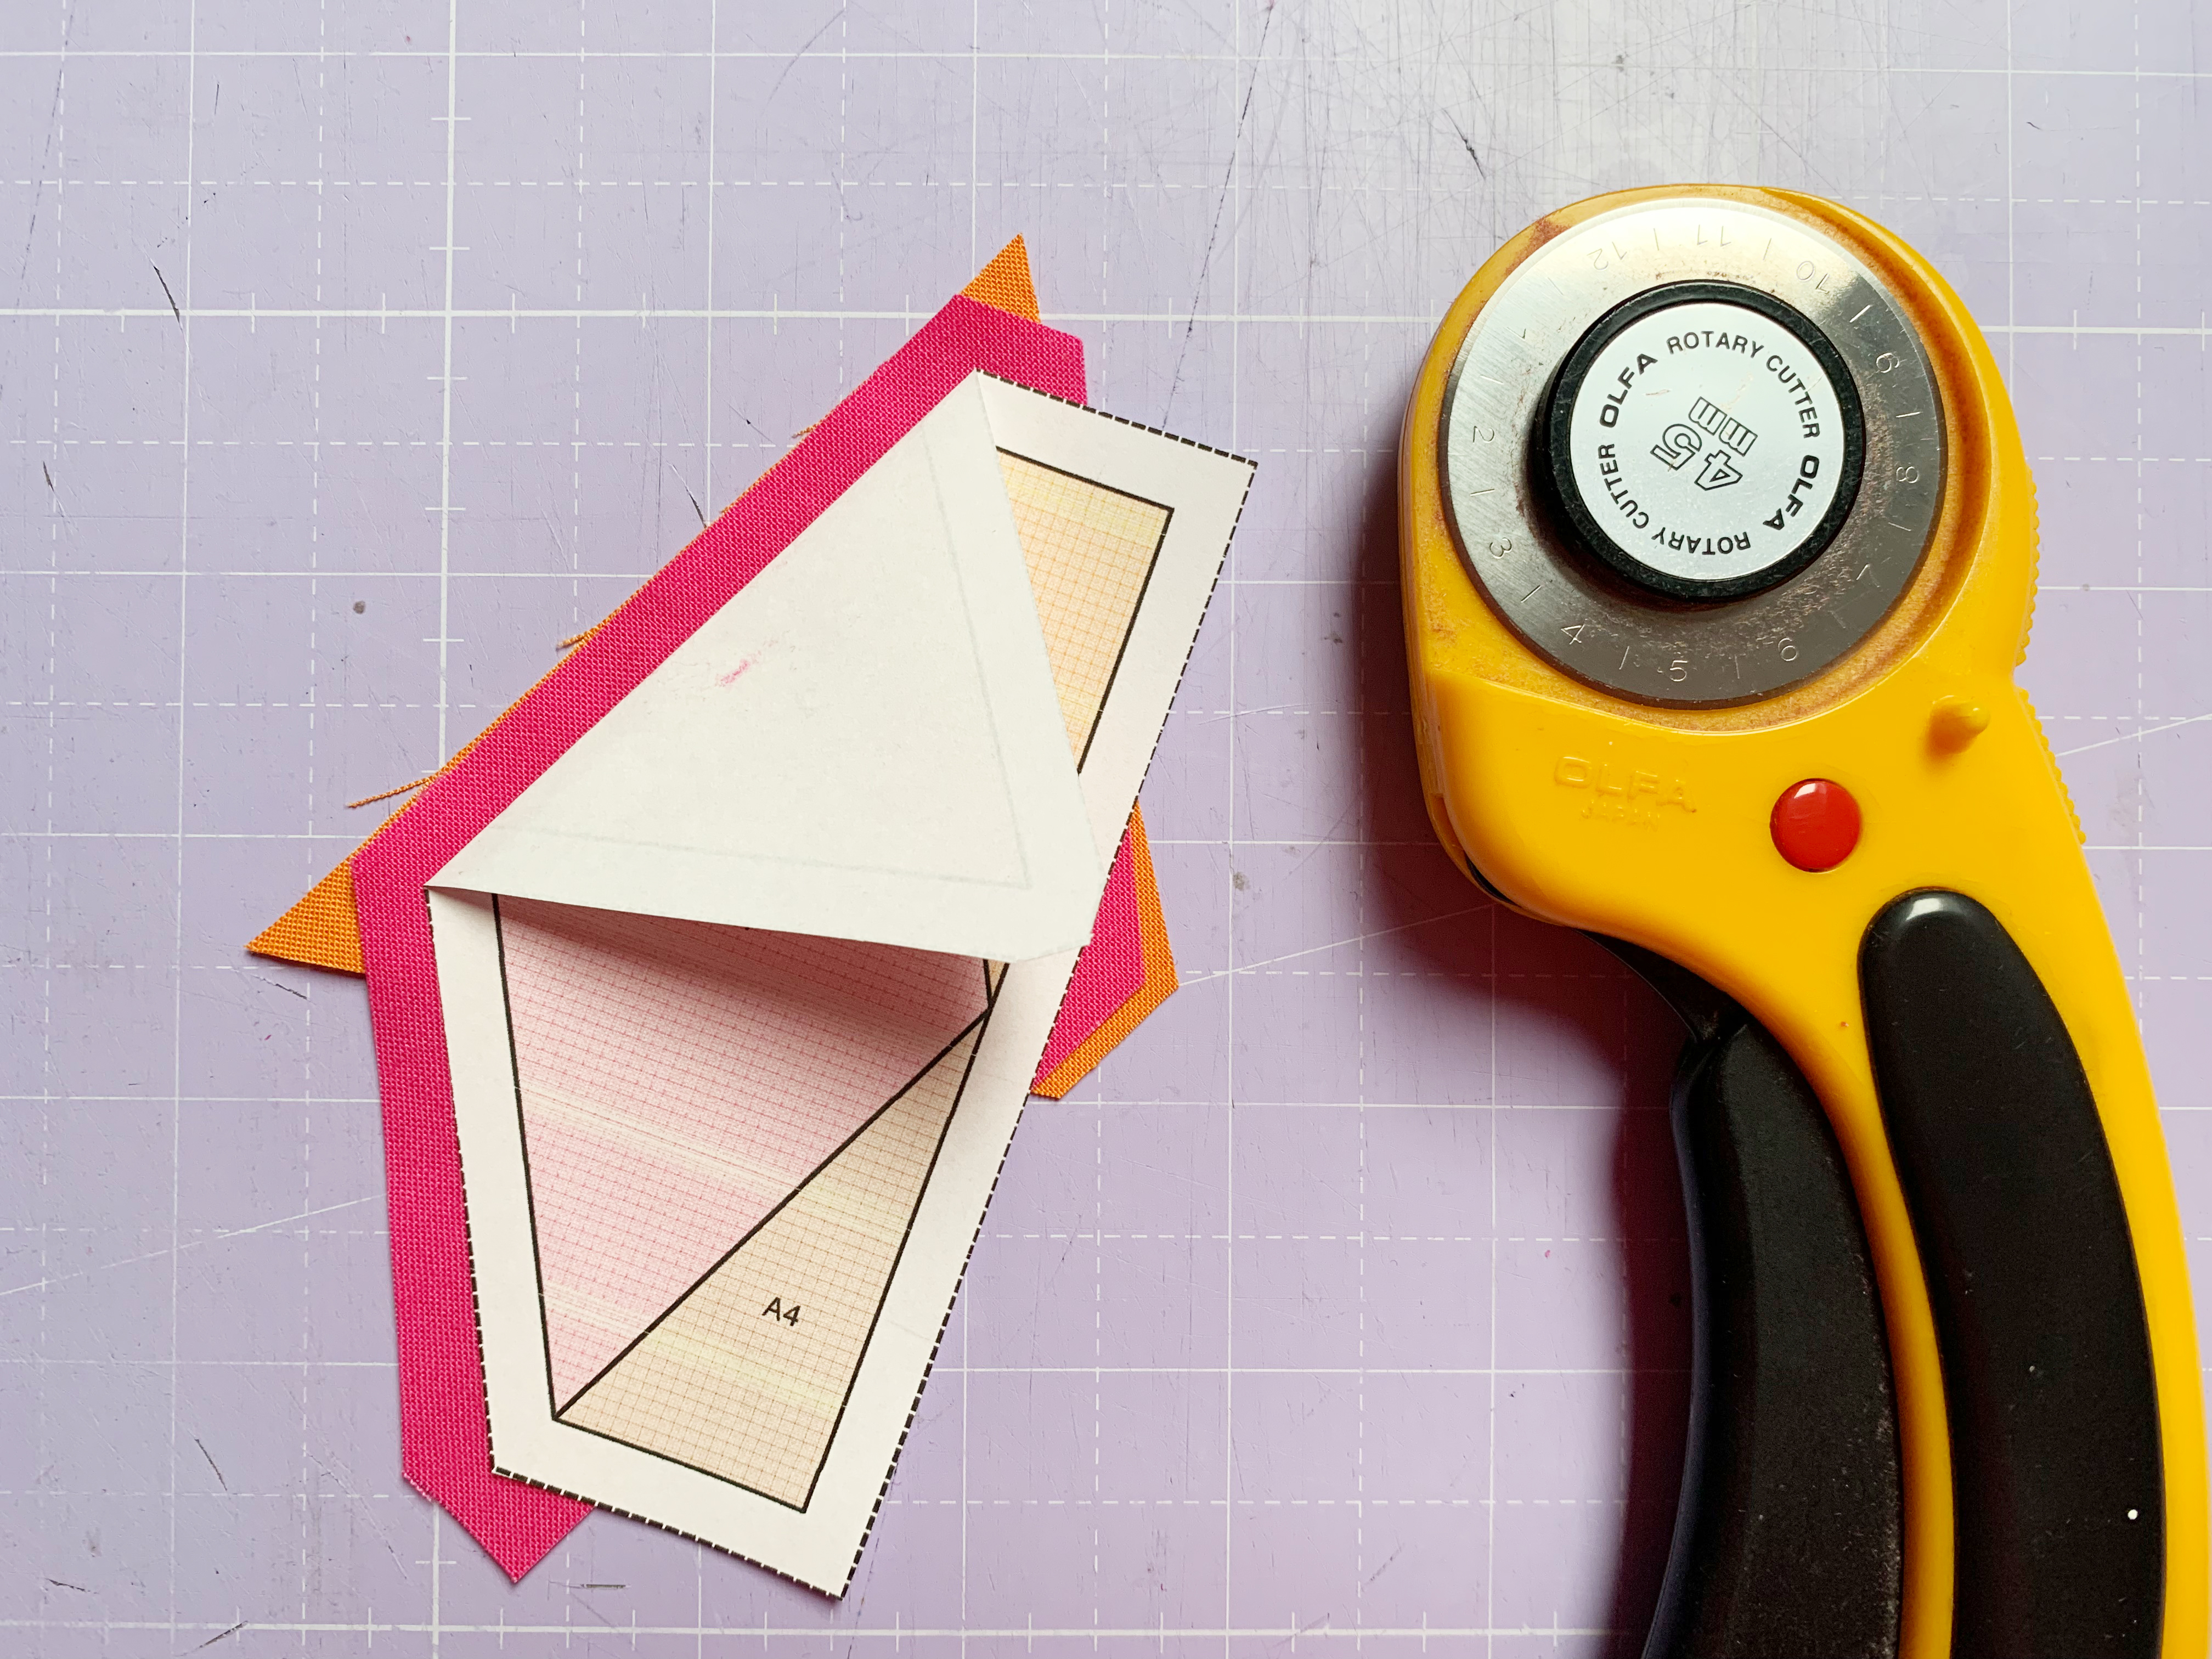
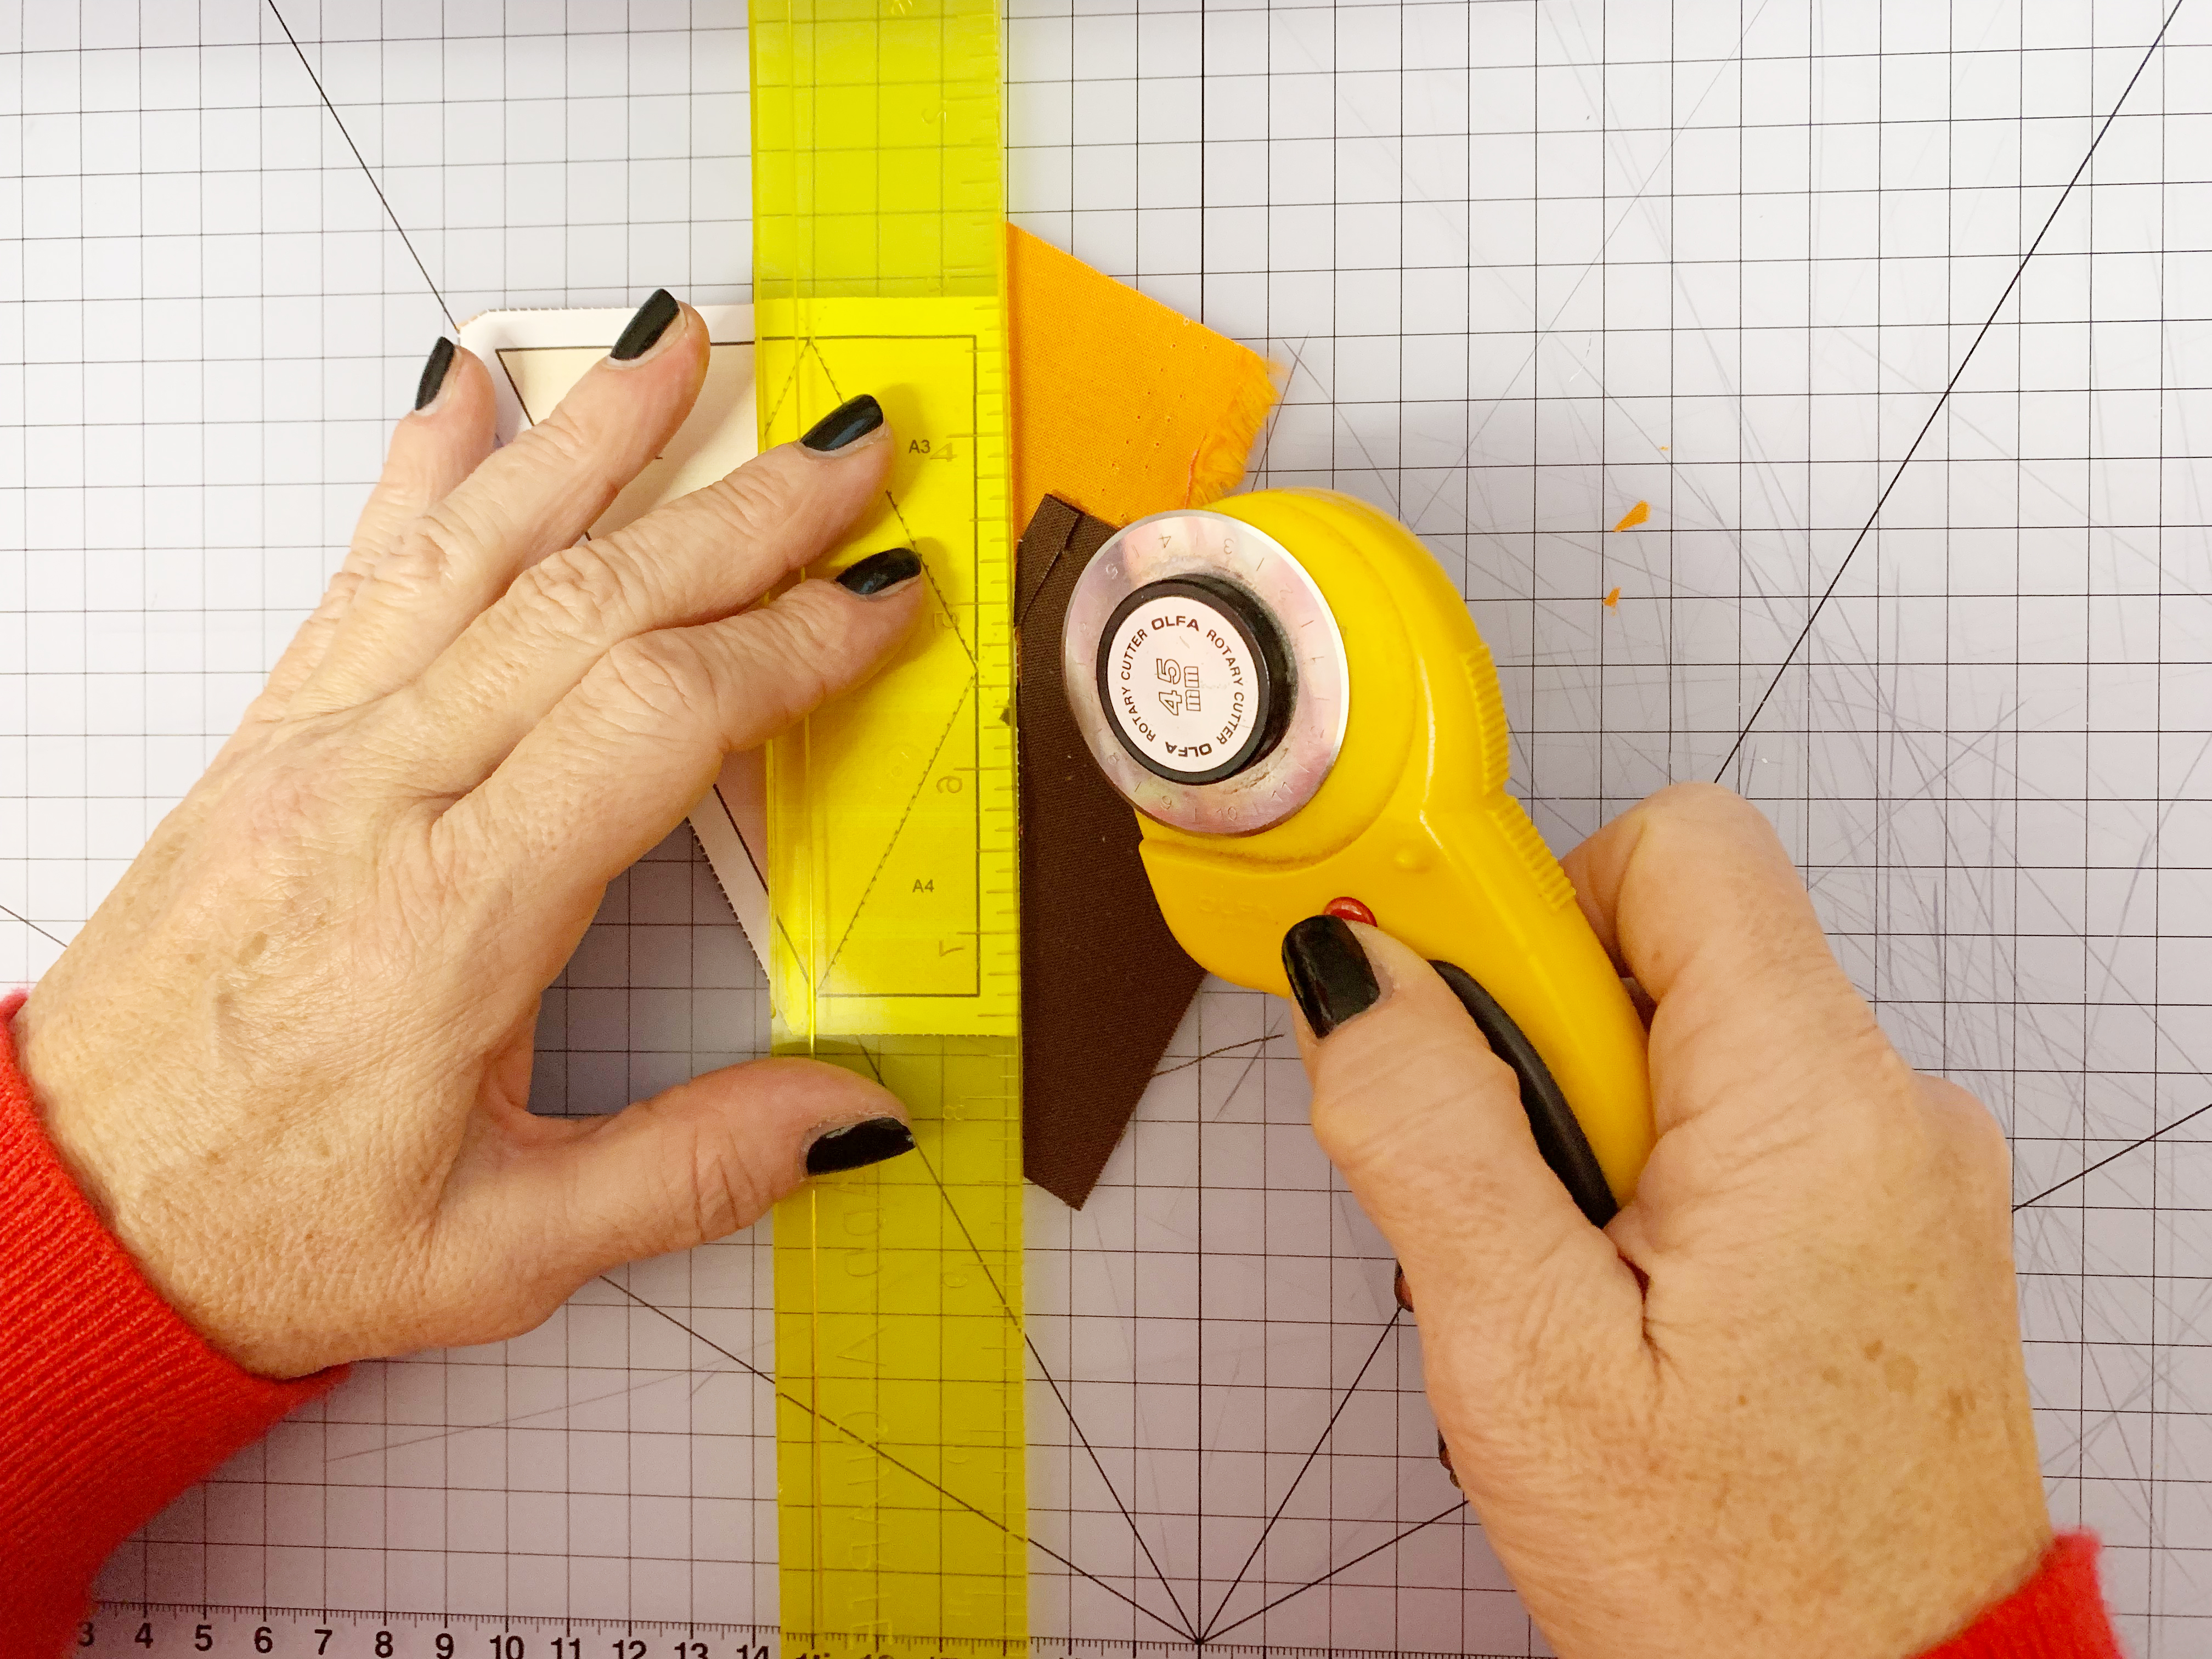
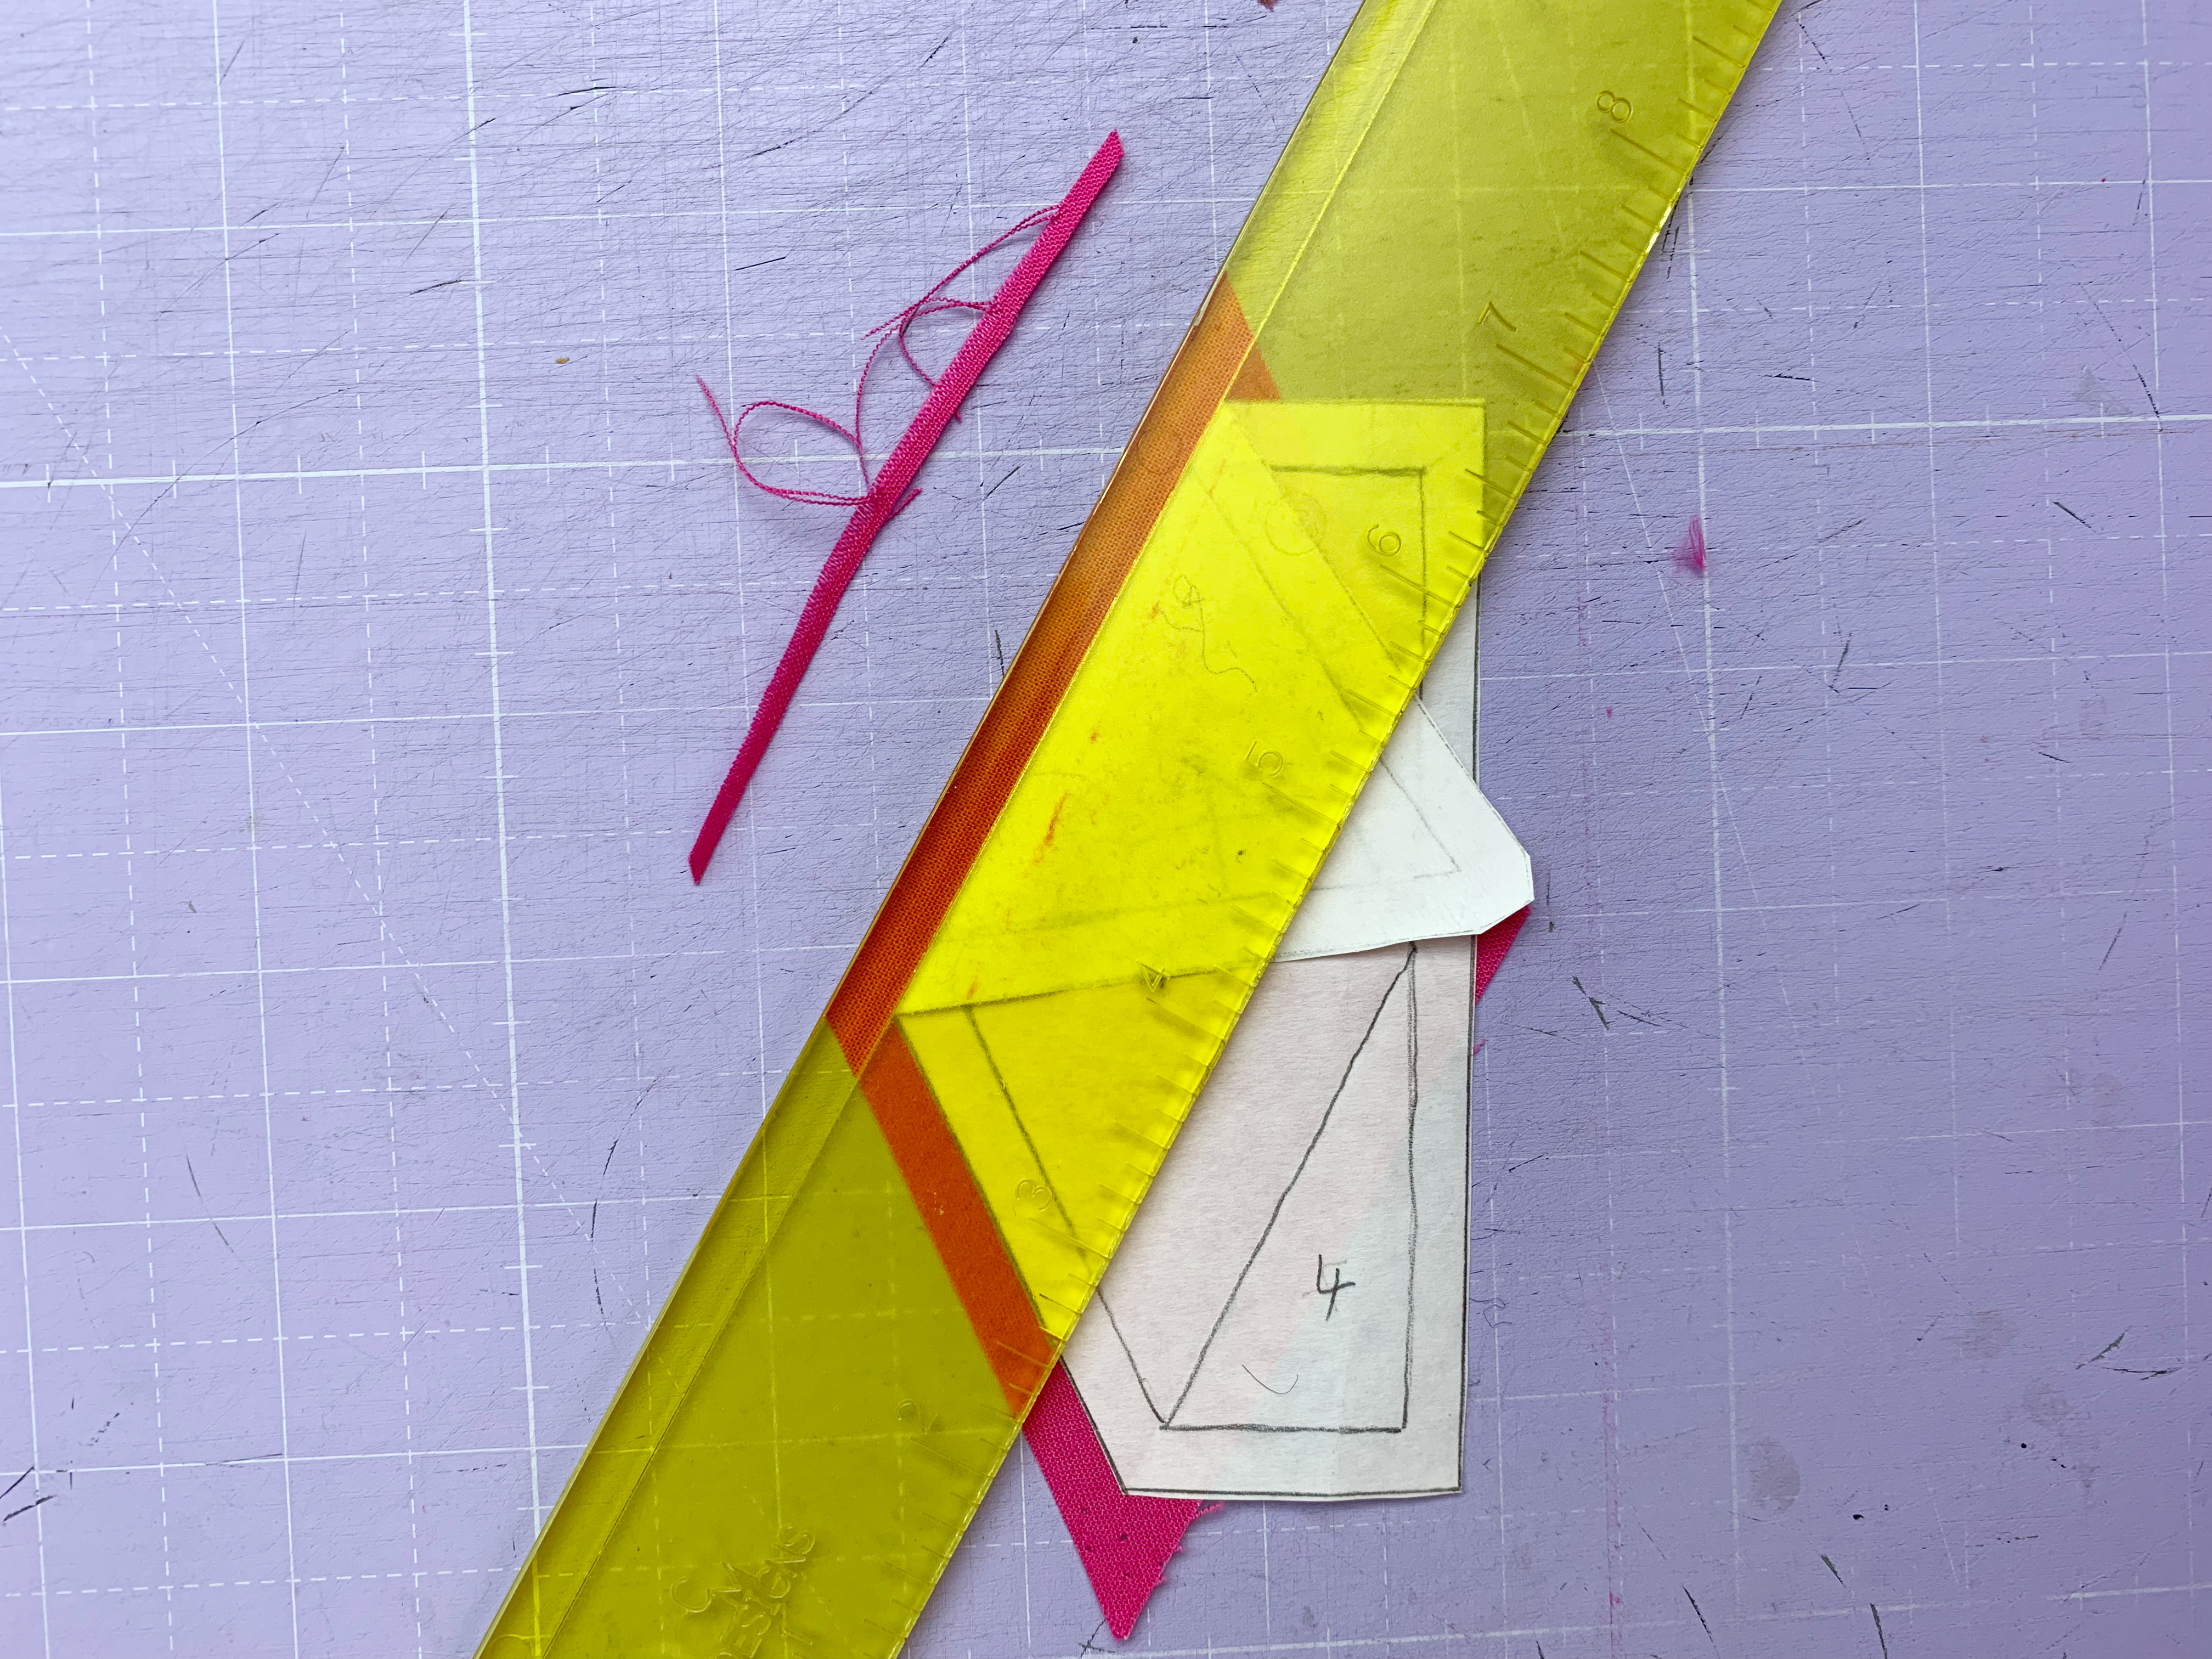
7. Cut the seam allowance to 1/4″. Use the acrylic ruler and the rotary cutter for this:

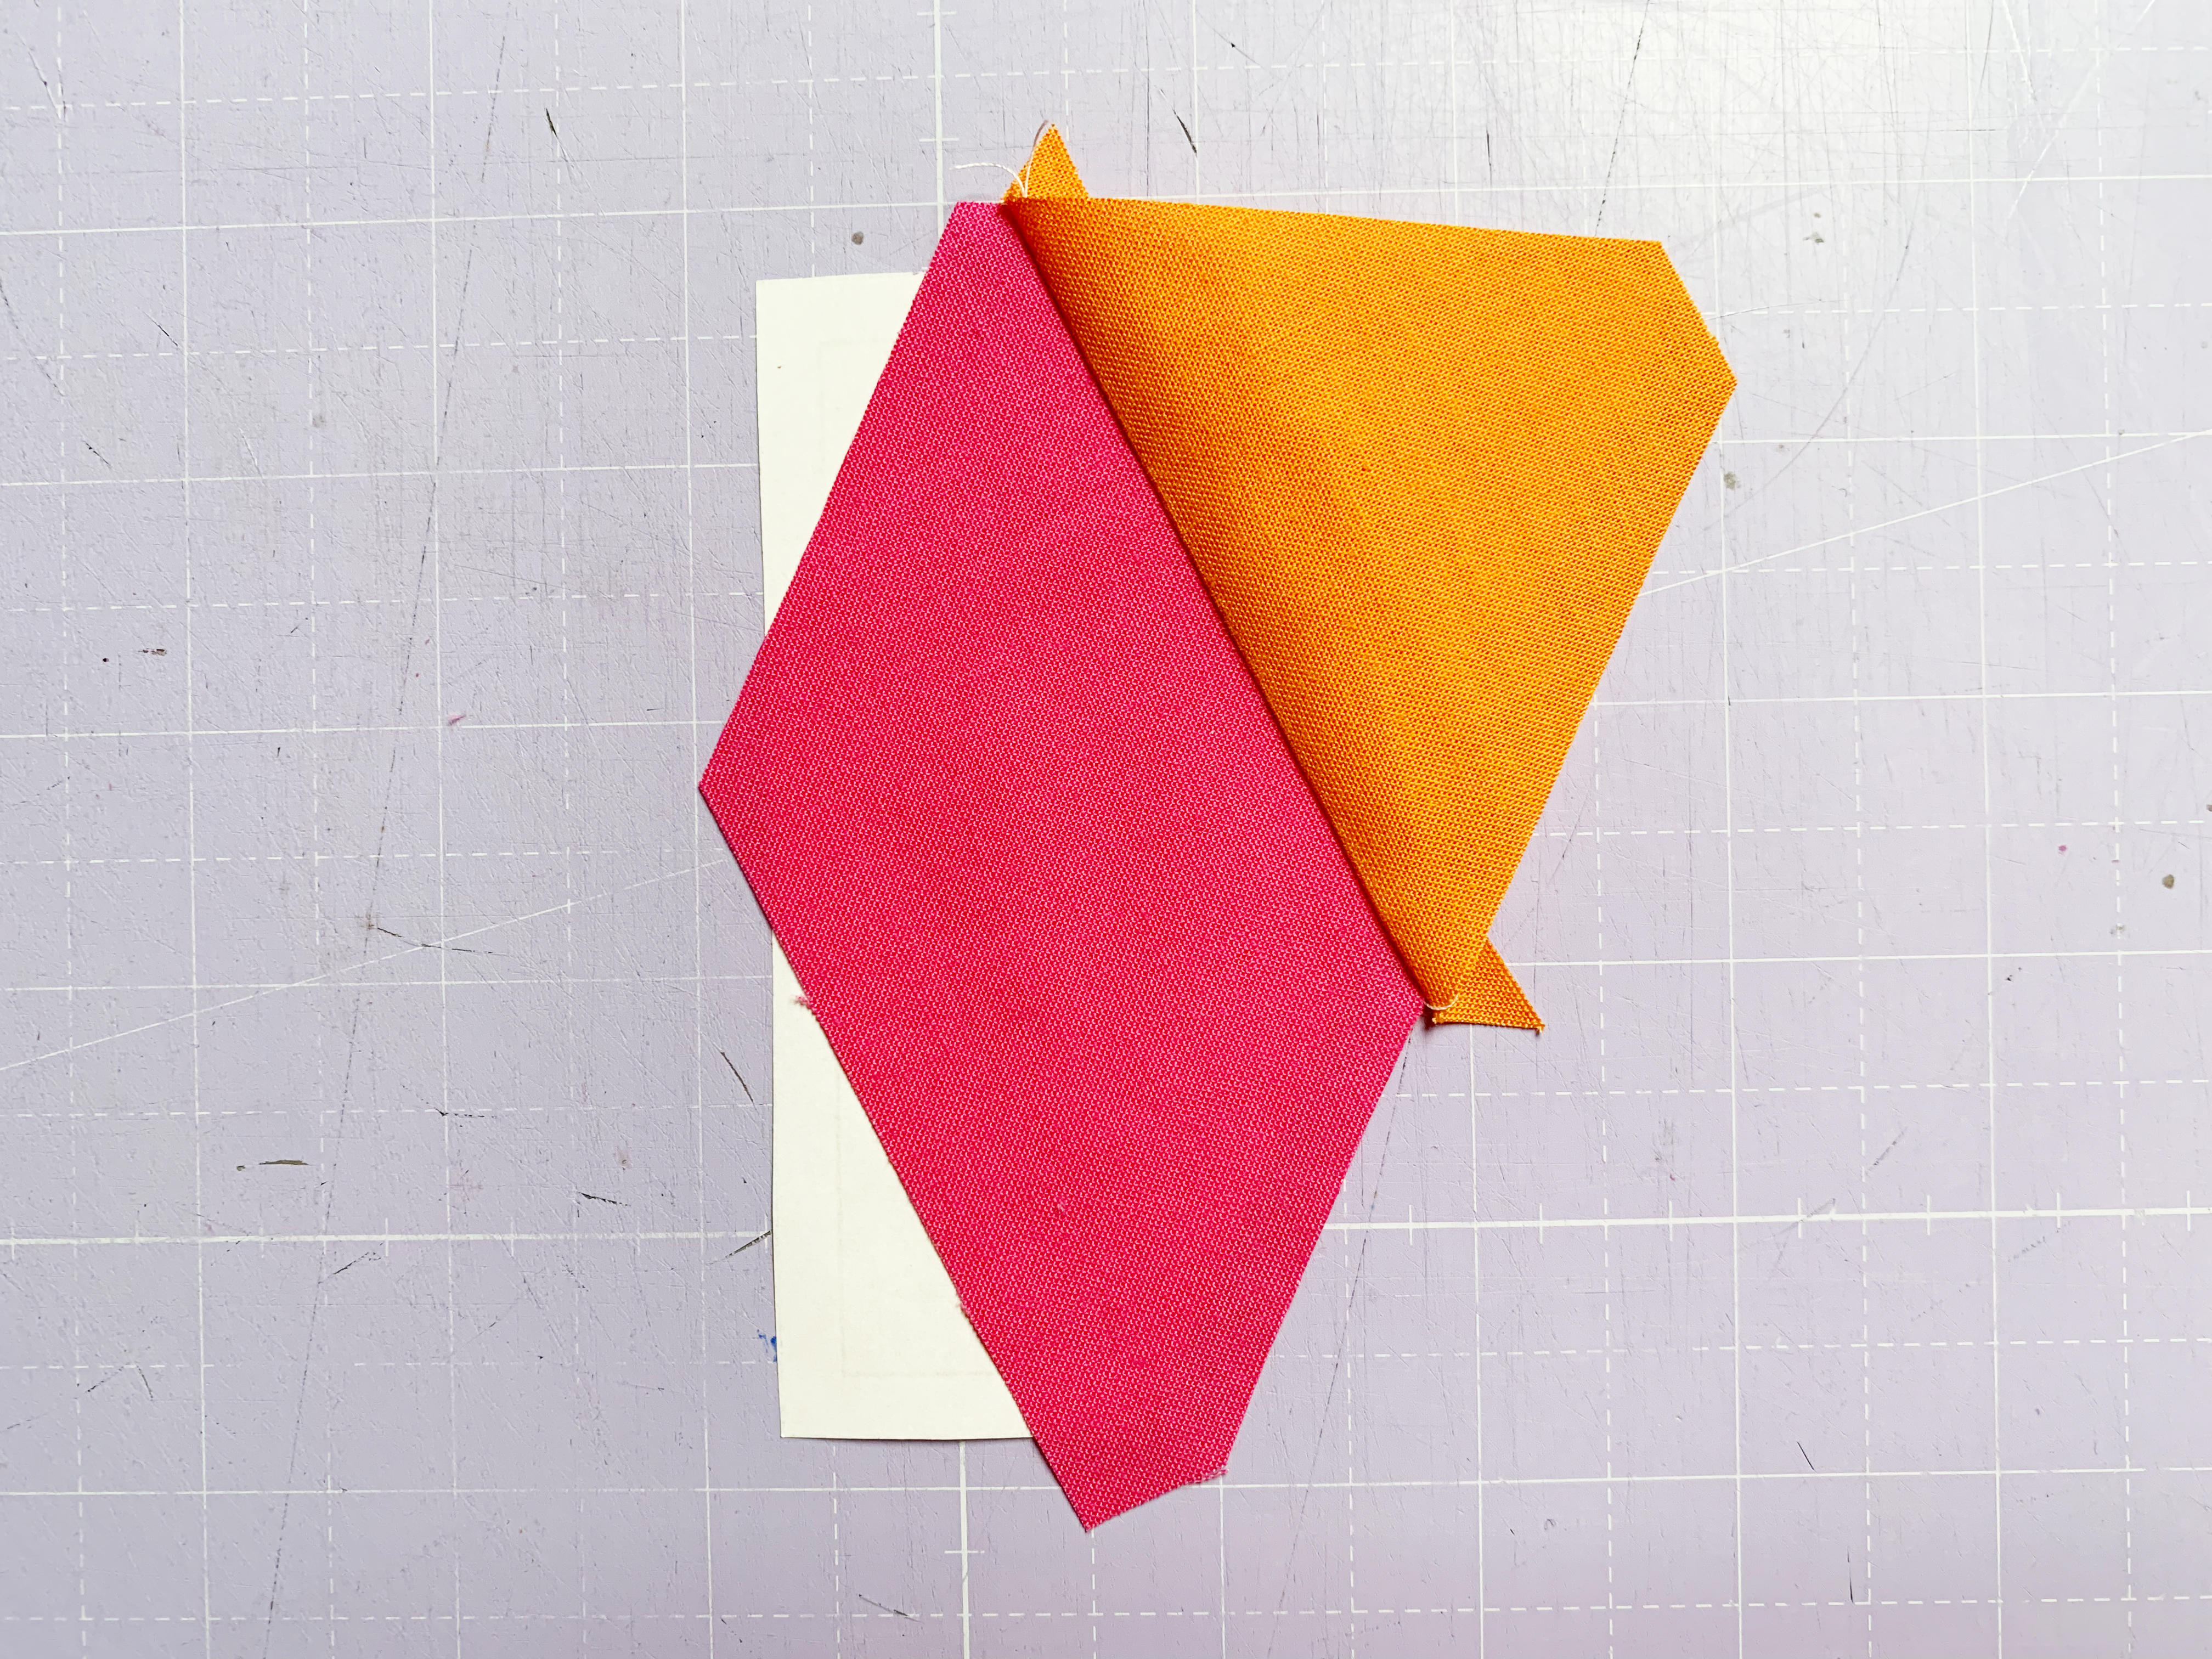
8. Choose a piece of fabric for the part of the segment numbered 2. Make sure that the piece of fabric covers the whole area of 2, plus 1/4″ to 1/2″ seam allowance. Be generous at the beginning. When you have sewn a few blocks later on, you can use slightly smaller pieces of fabric.
Lay the fabric for part 2 right sides together on the first fabric and align the edges of the seam allowance exactly on top of each other:
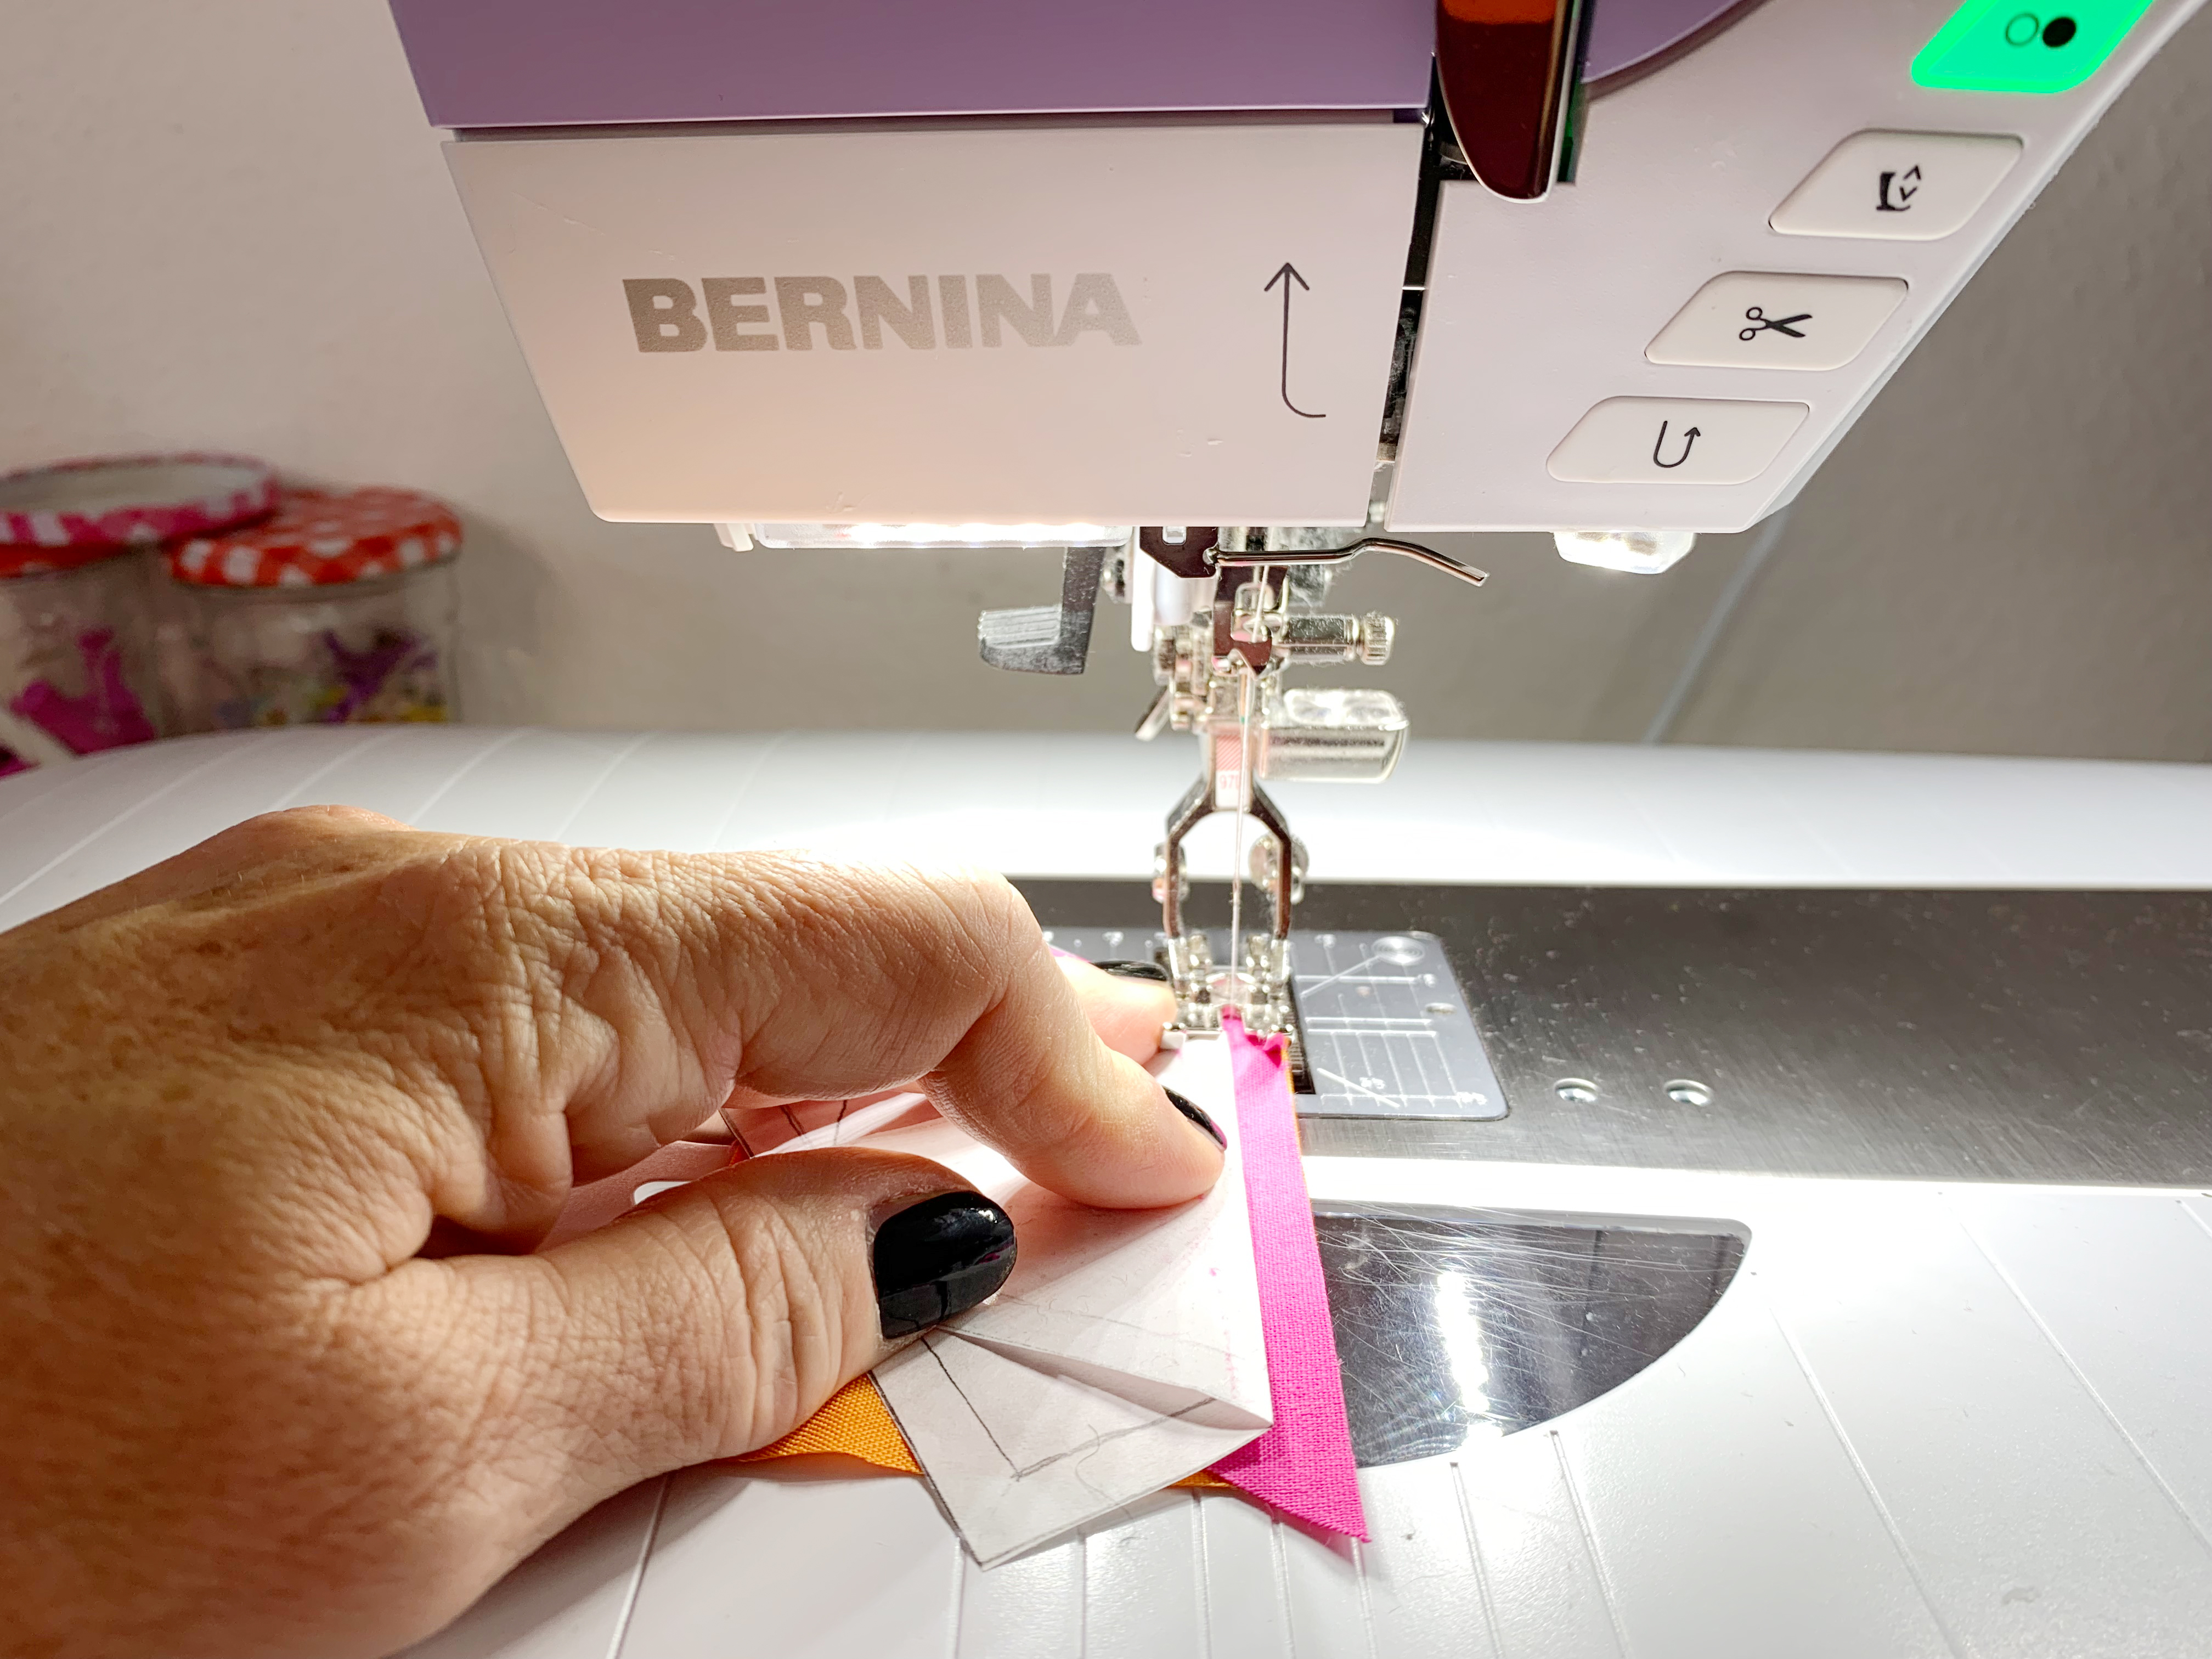
9. Sew exactly on the line between 1 and 2. It doesn’t matter if you make a few stitches before and after. The transparent presser foot sole of the sewing machine foot with the transparent bottom #34 and the patchwork foot #97 are both absolutely perfect here. I like to use both for FPP all the time.
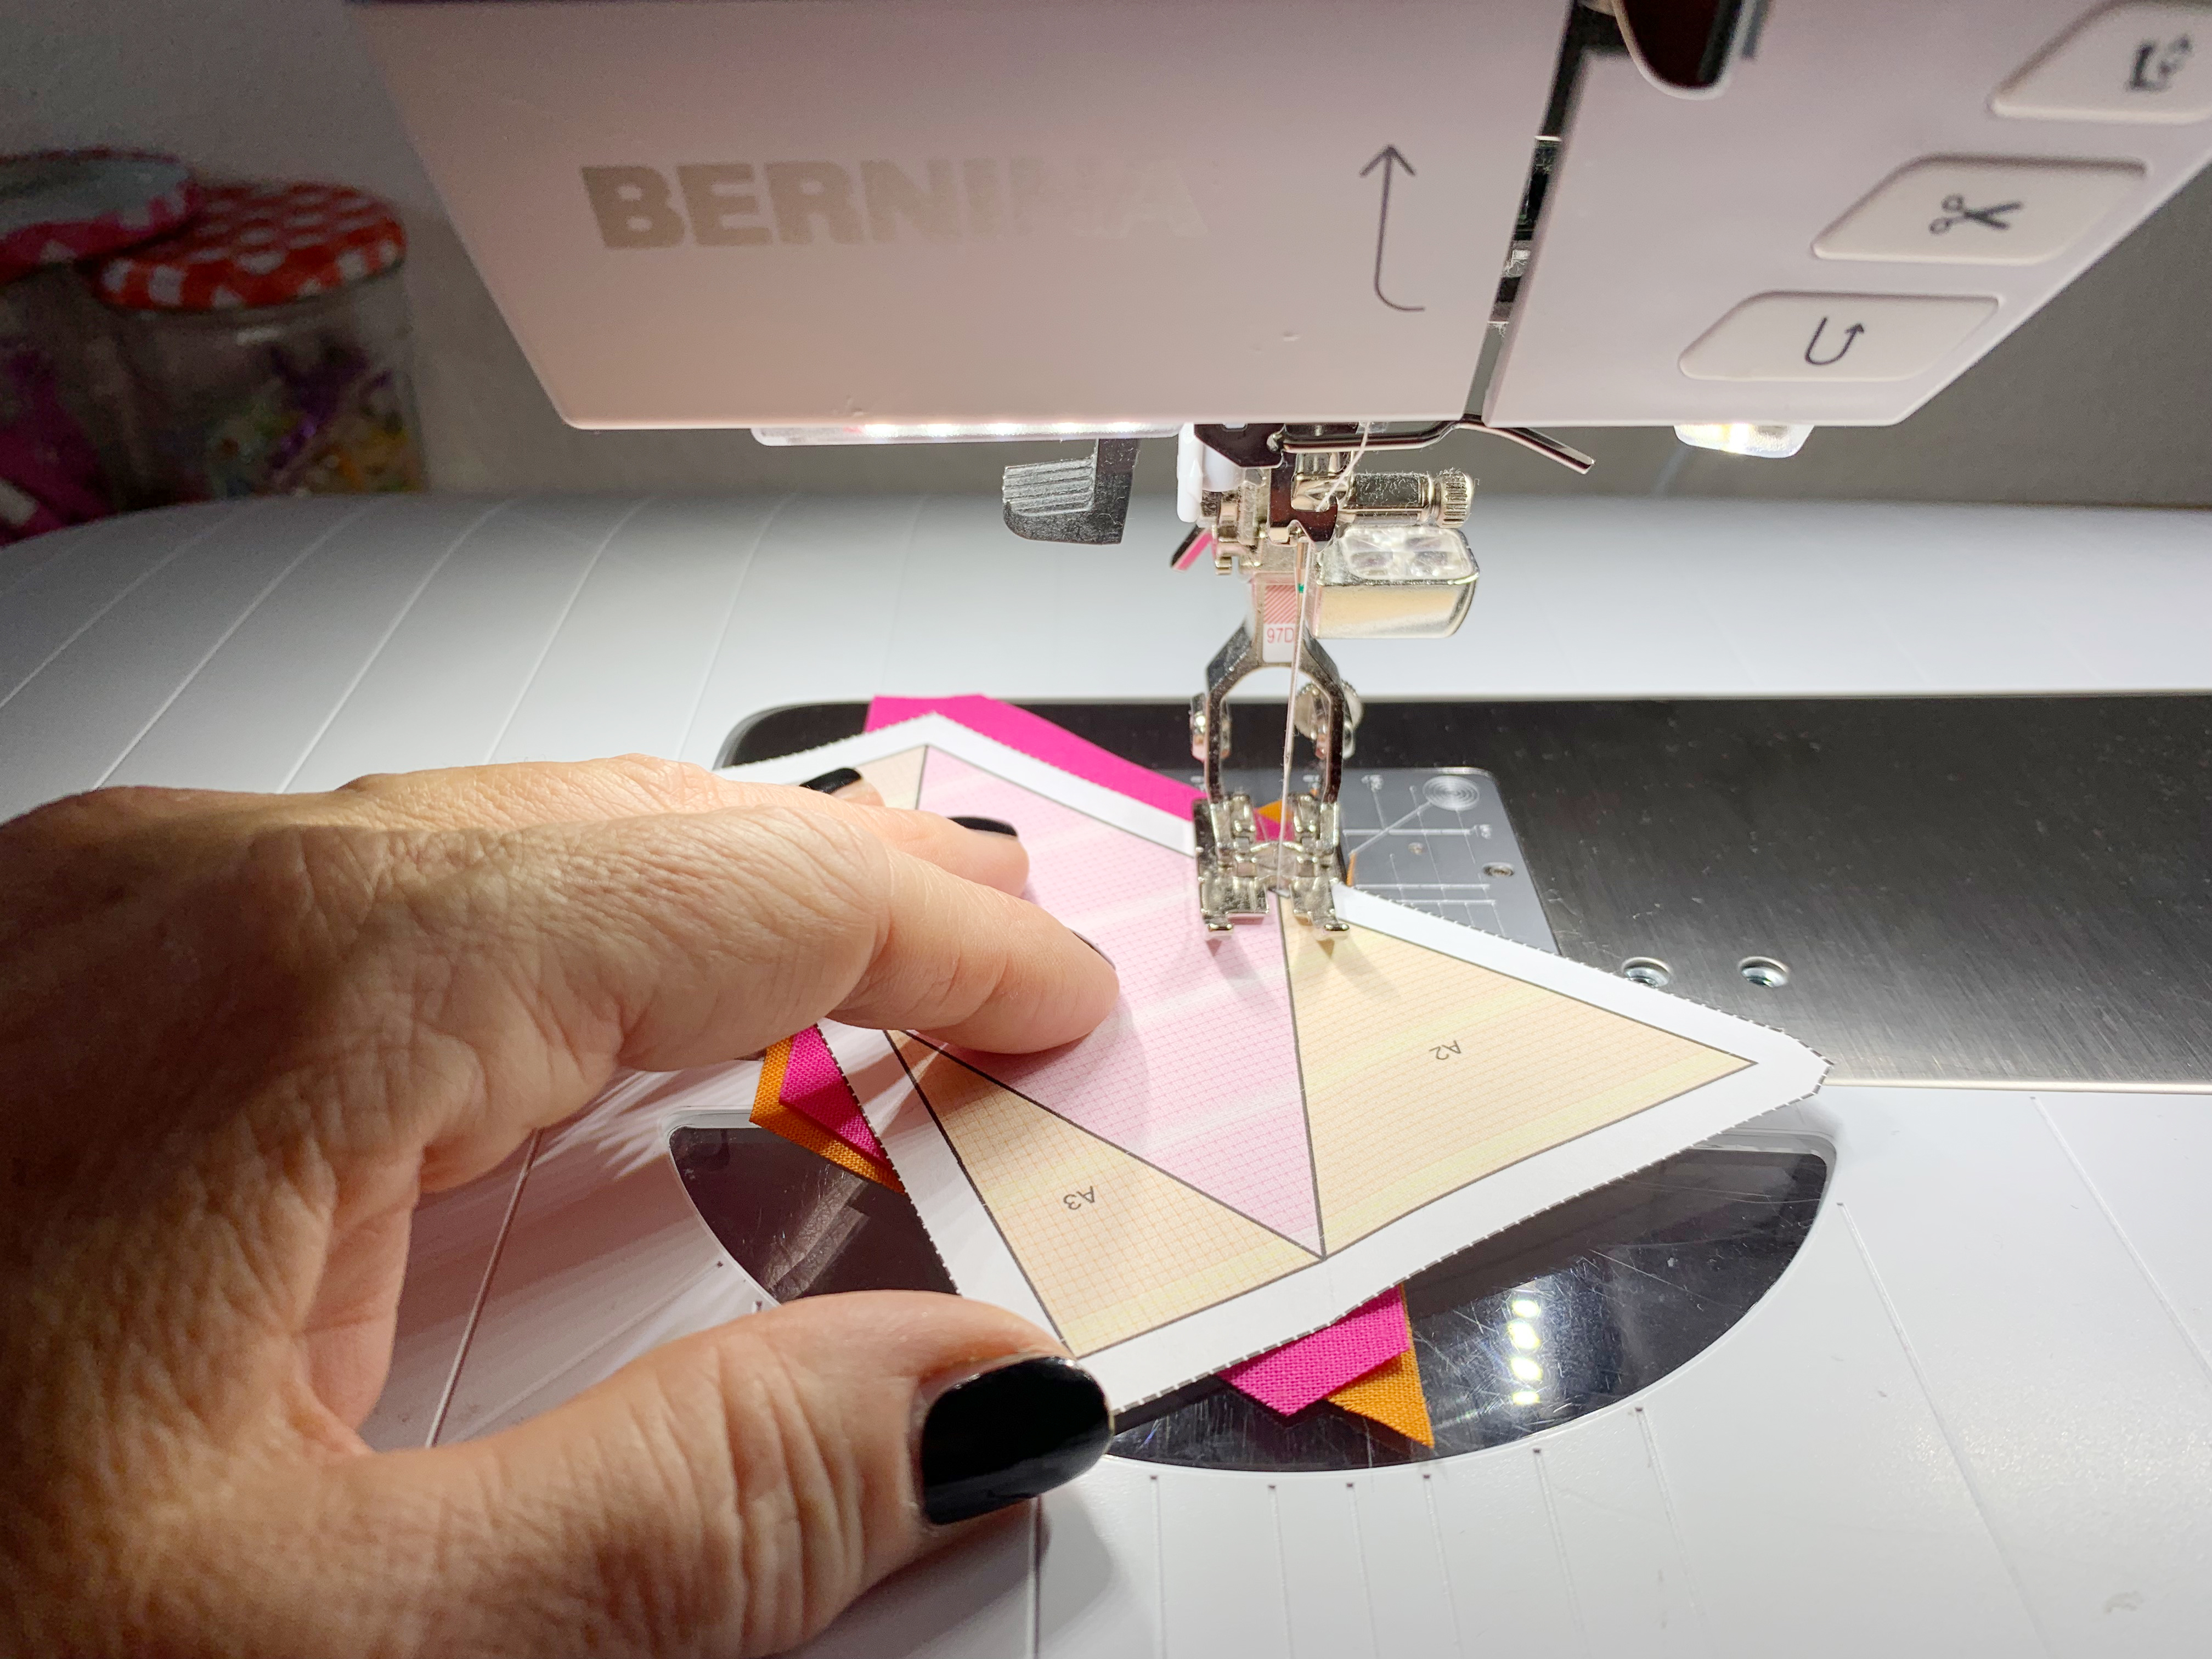
The seam between 1 and 2:
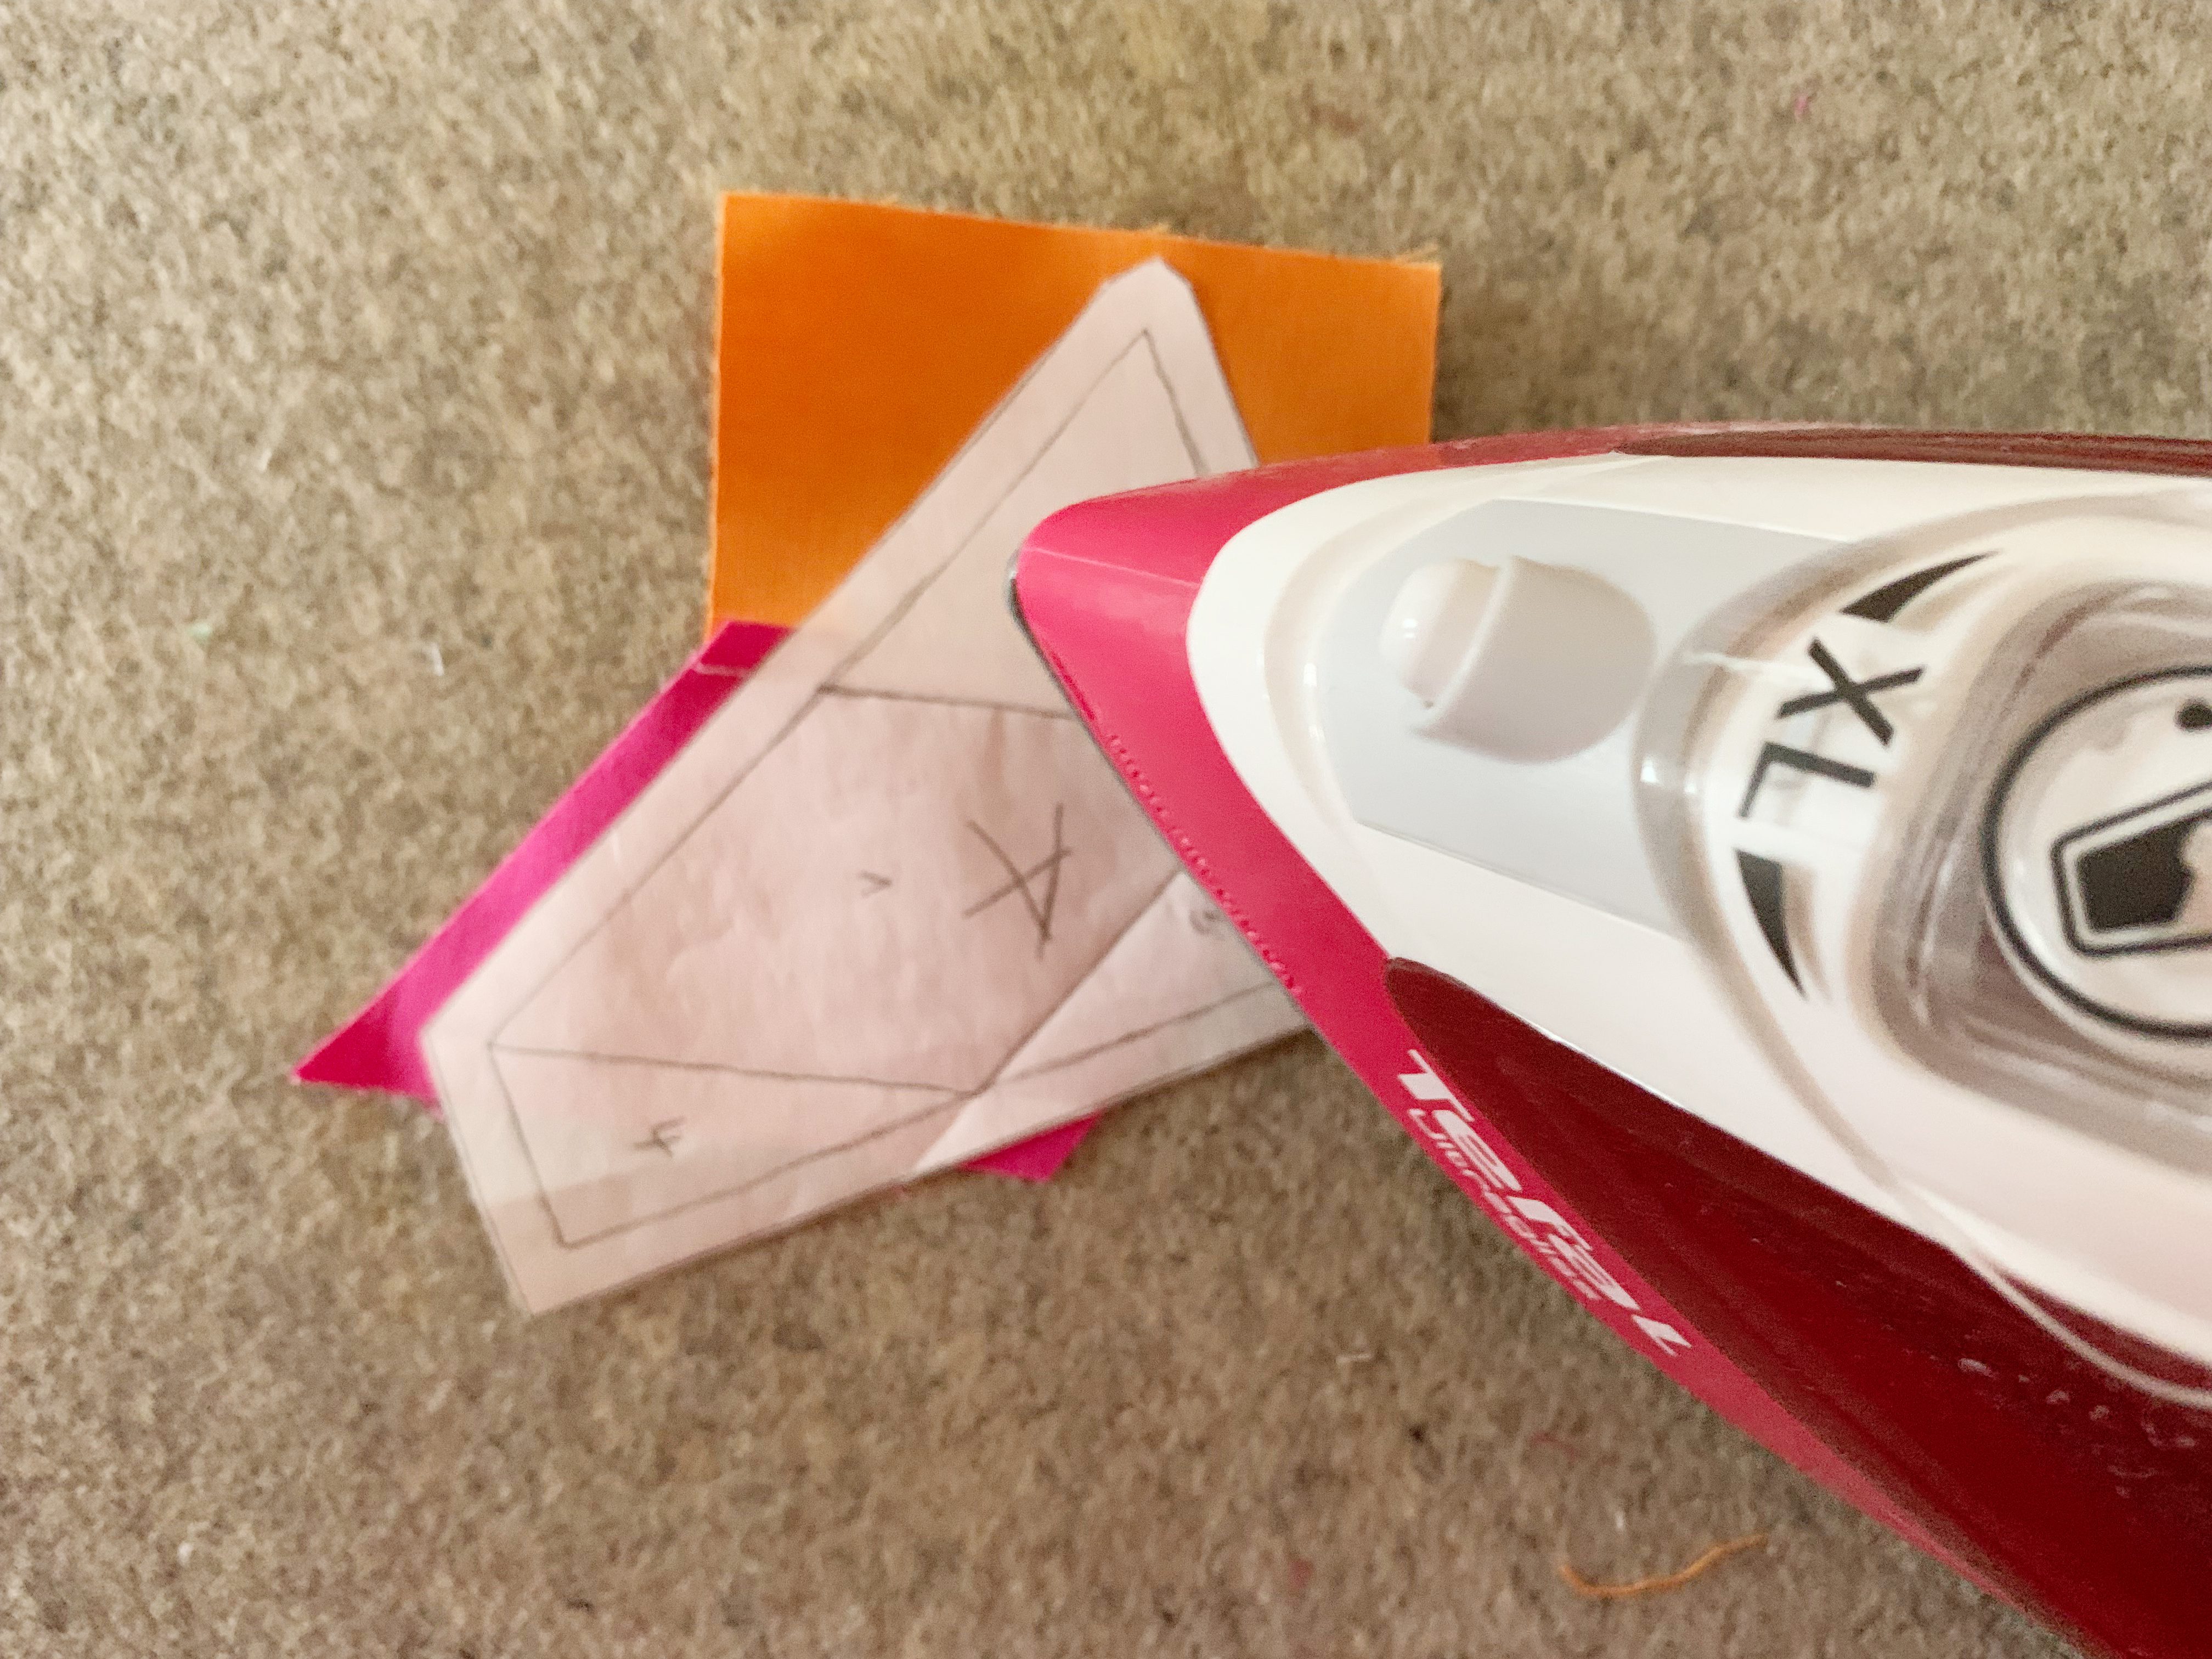
10. Now unfold the fabric from 2 so that you can see both right sides of the fabric and press this with the iron or finger press.
11. Now continue sewing the same way in numerical order. Next is the seam between 1 and 3. First fold along the seam with the postcard and trim the seam allowance. Place the piece of fabric for 3 aligning the edges of the seam allowance of 2 and sew along the line between 1 and 3. Now finish this segment in numerical order.
12. Sew all 4 segments of the diamond border block in this way.
Video Instructions
I have created a video in which I show the steps just mentioned.
It will help you – especially if you are new to FPP. Many things are easier when you see them in a video.
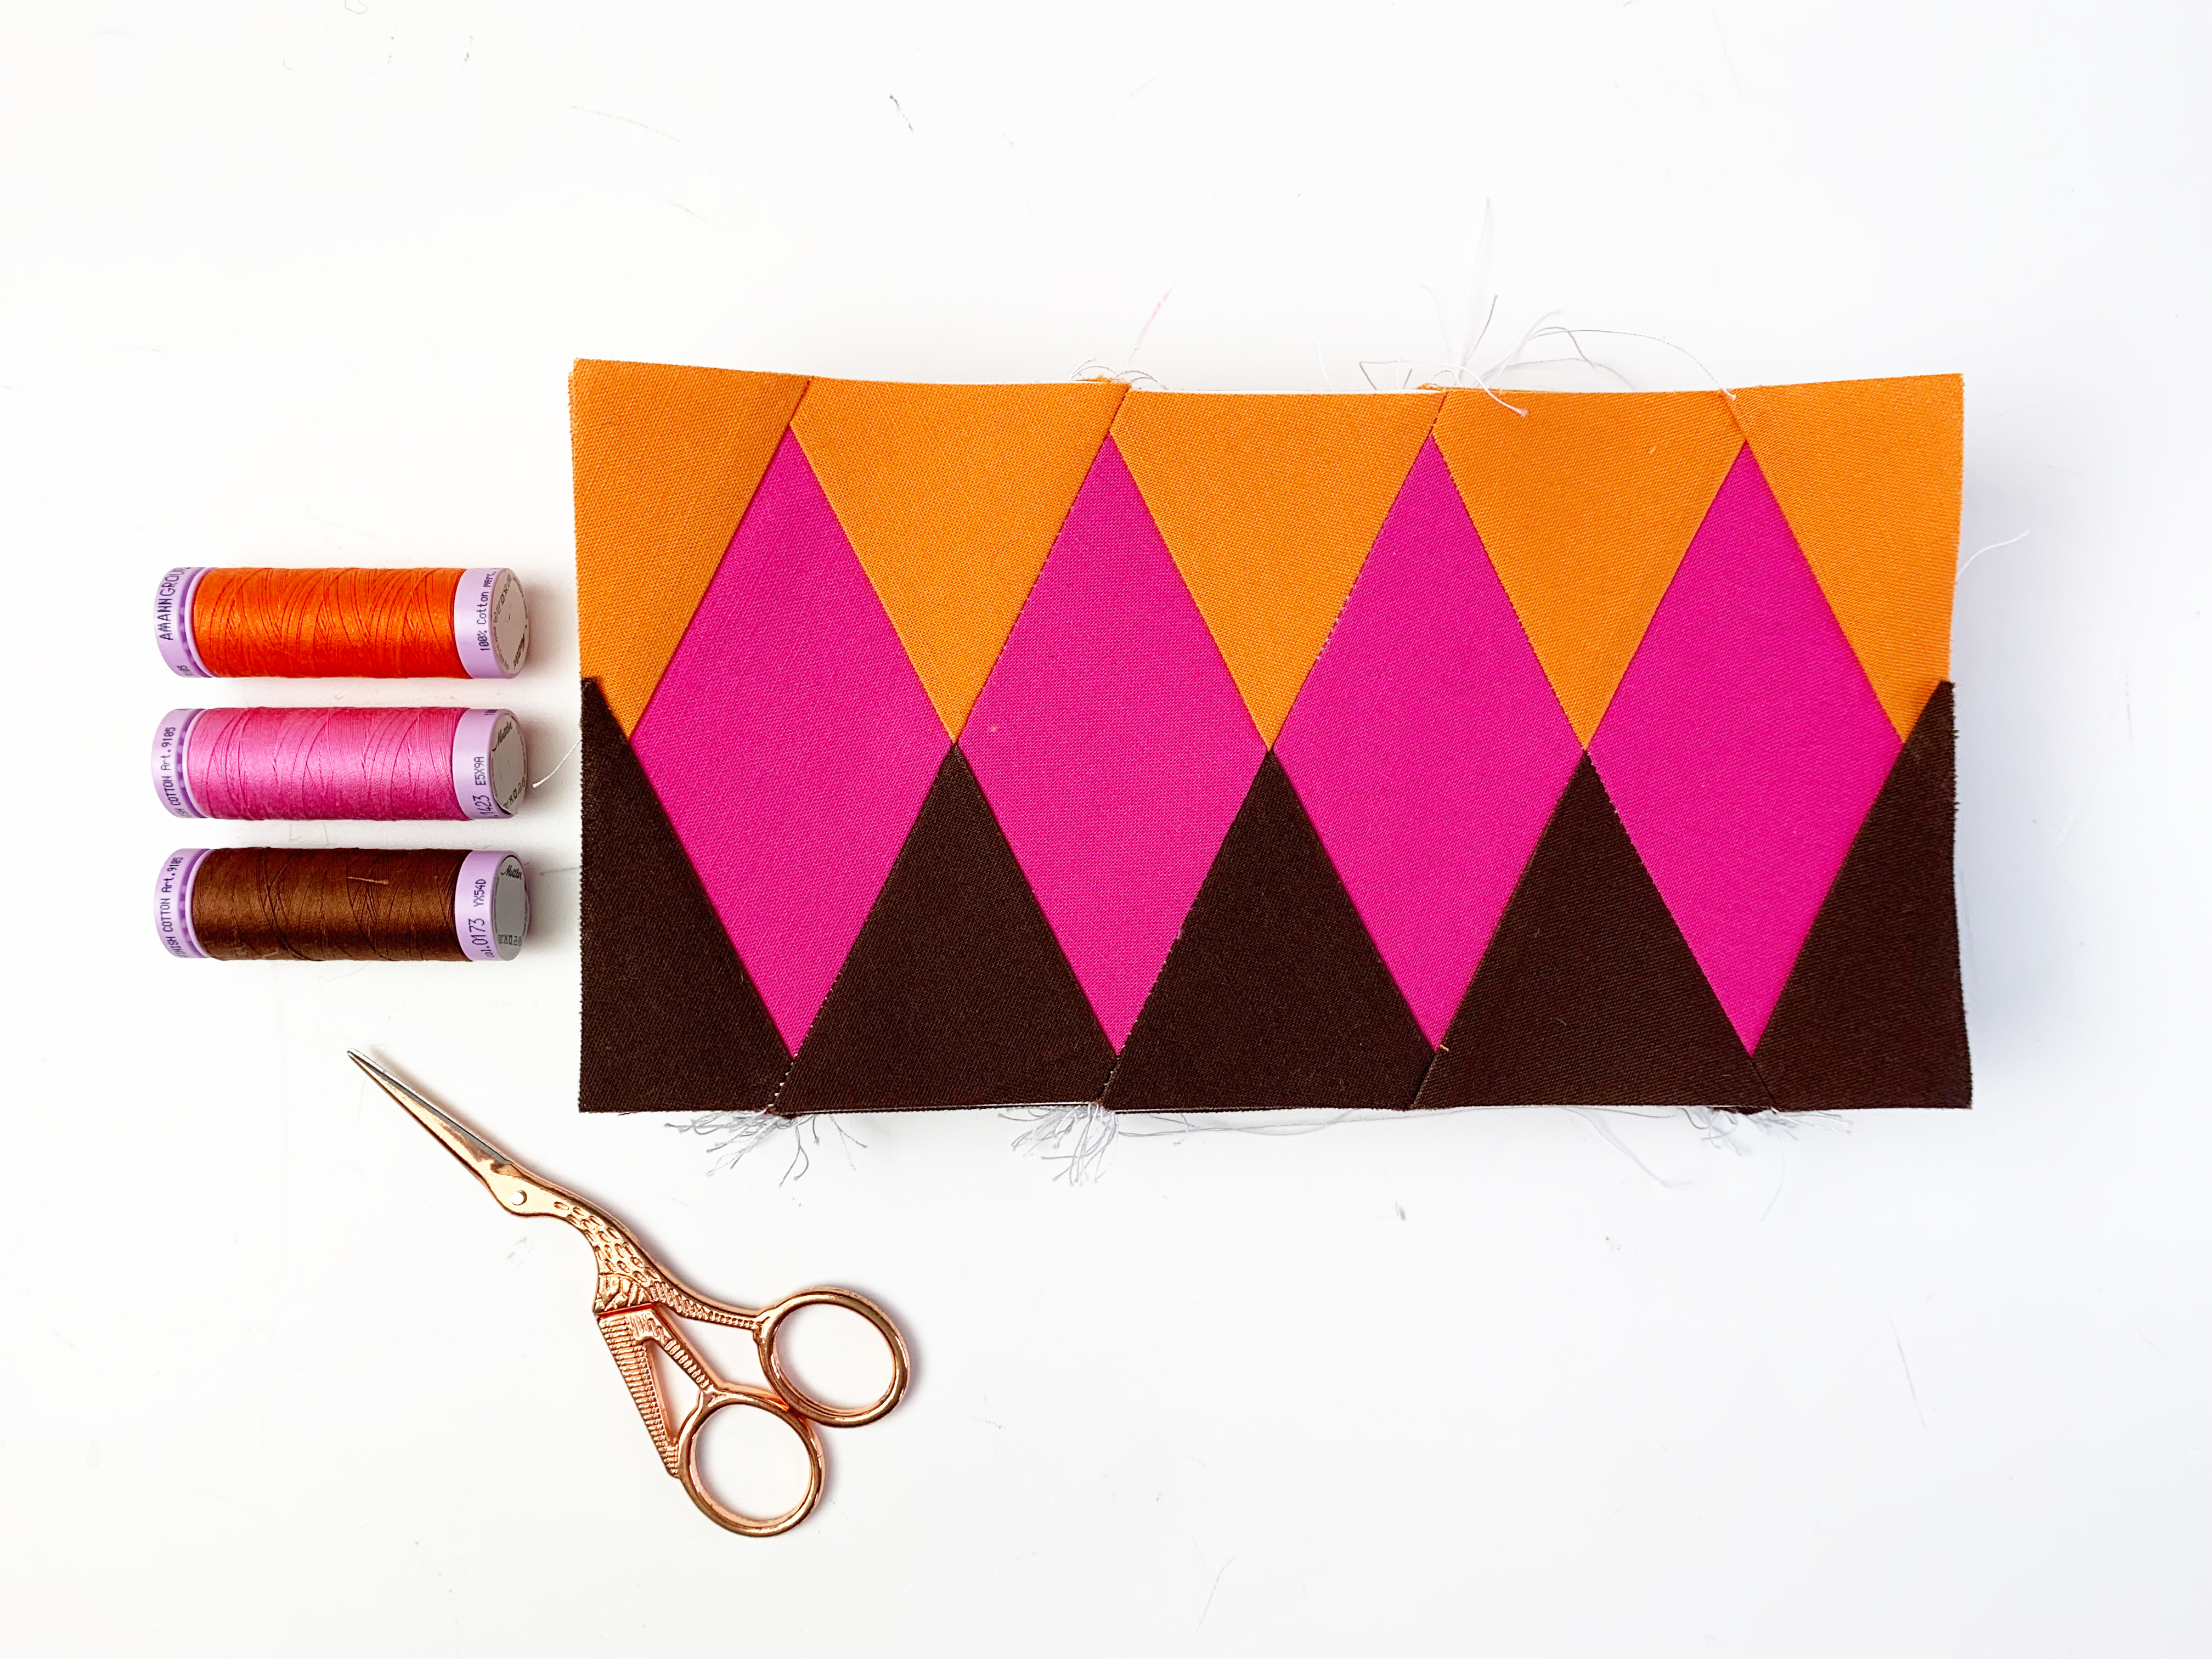
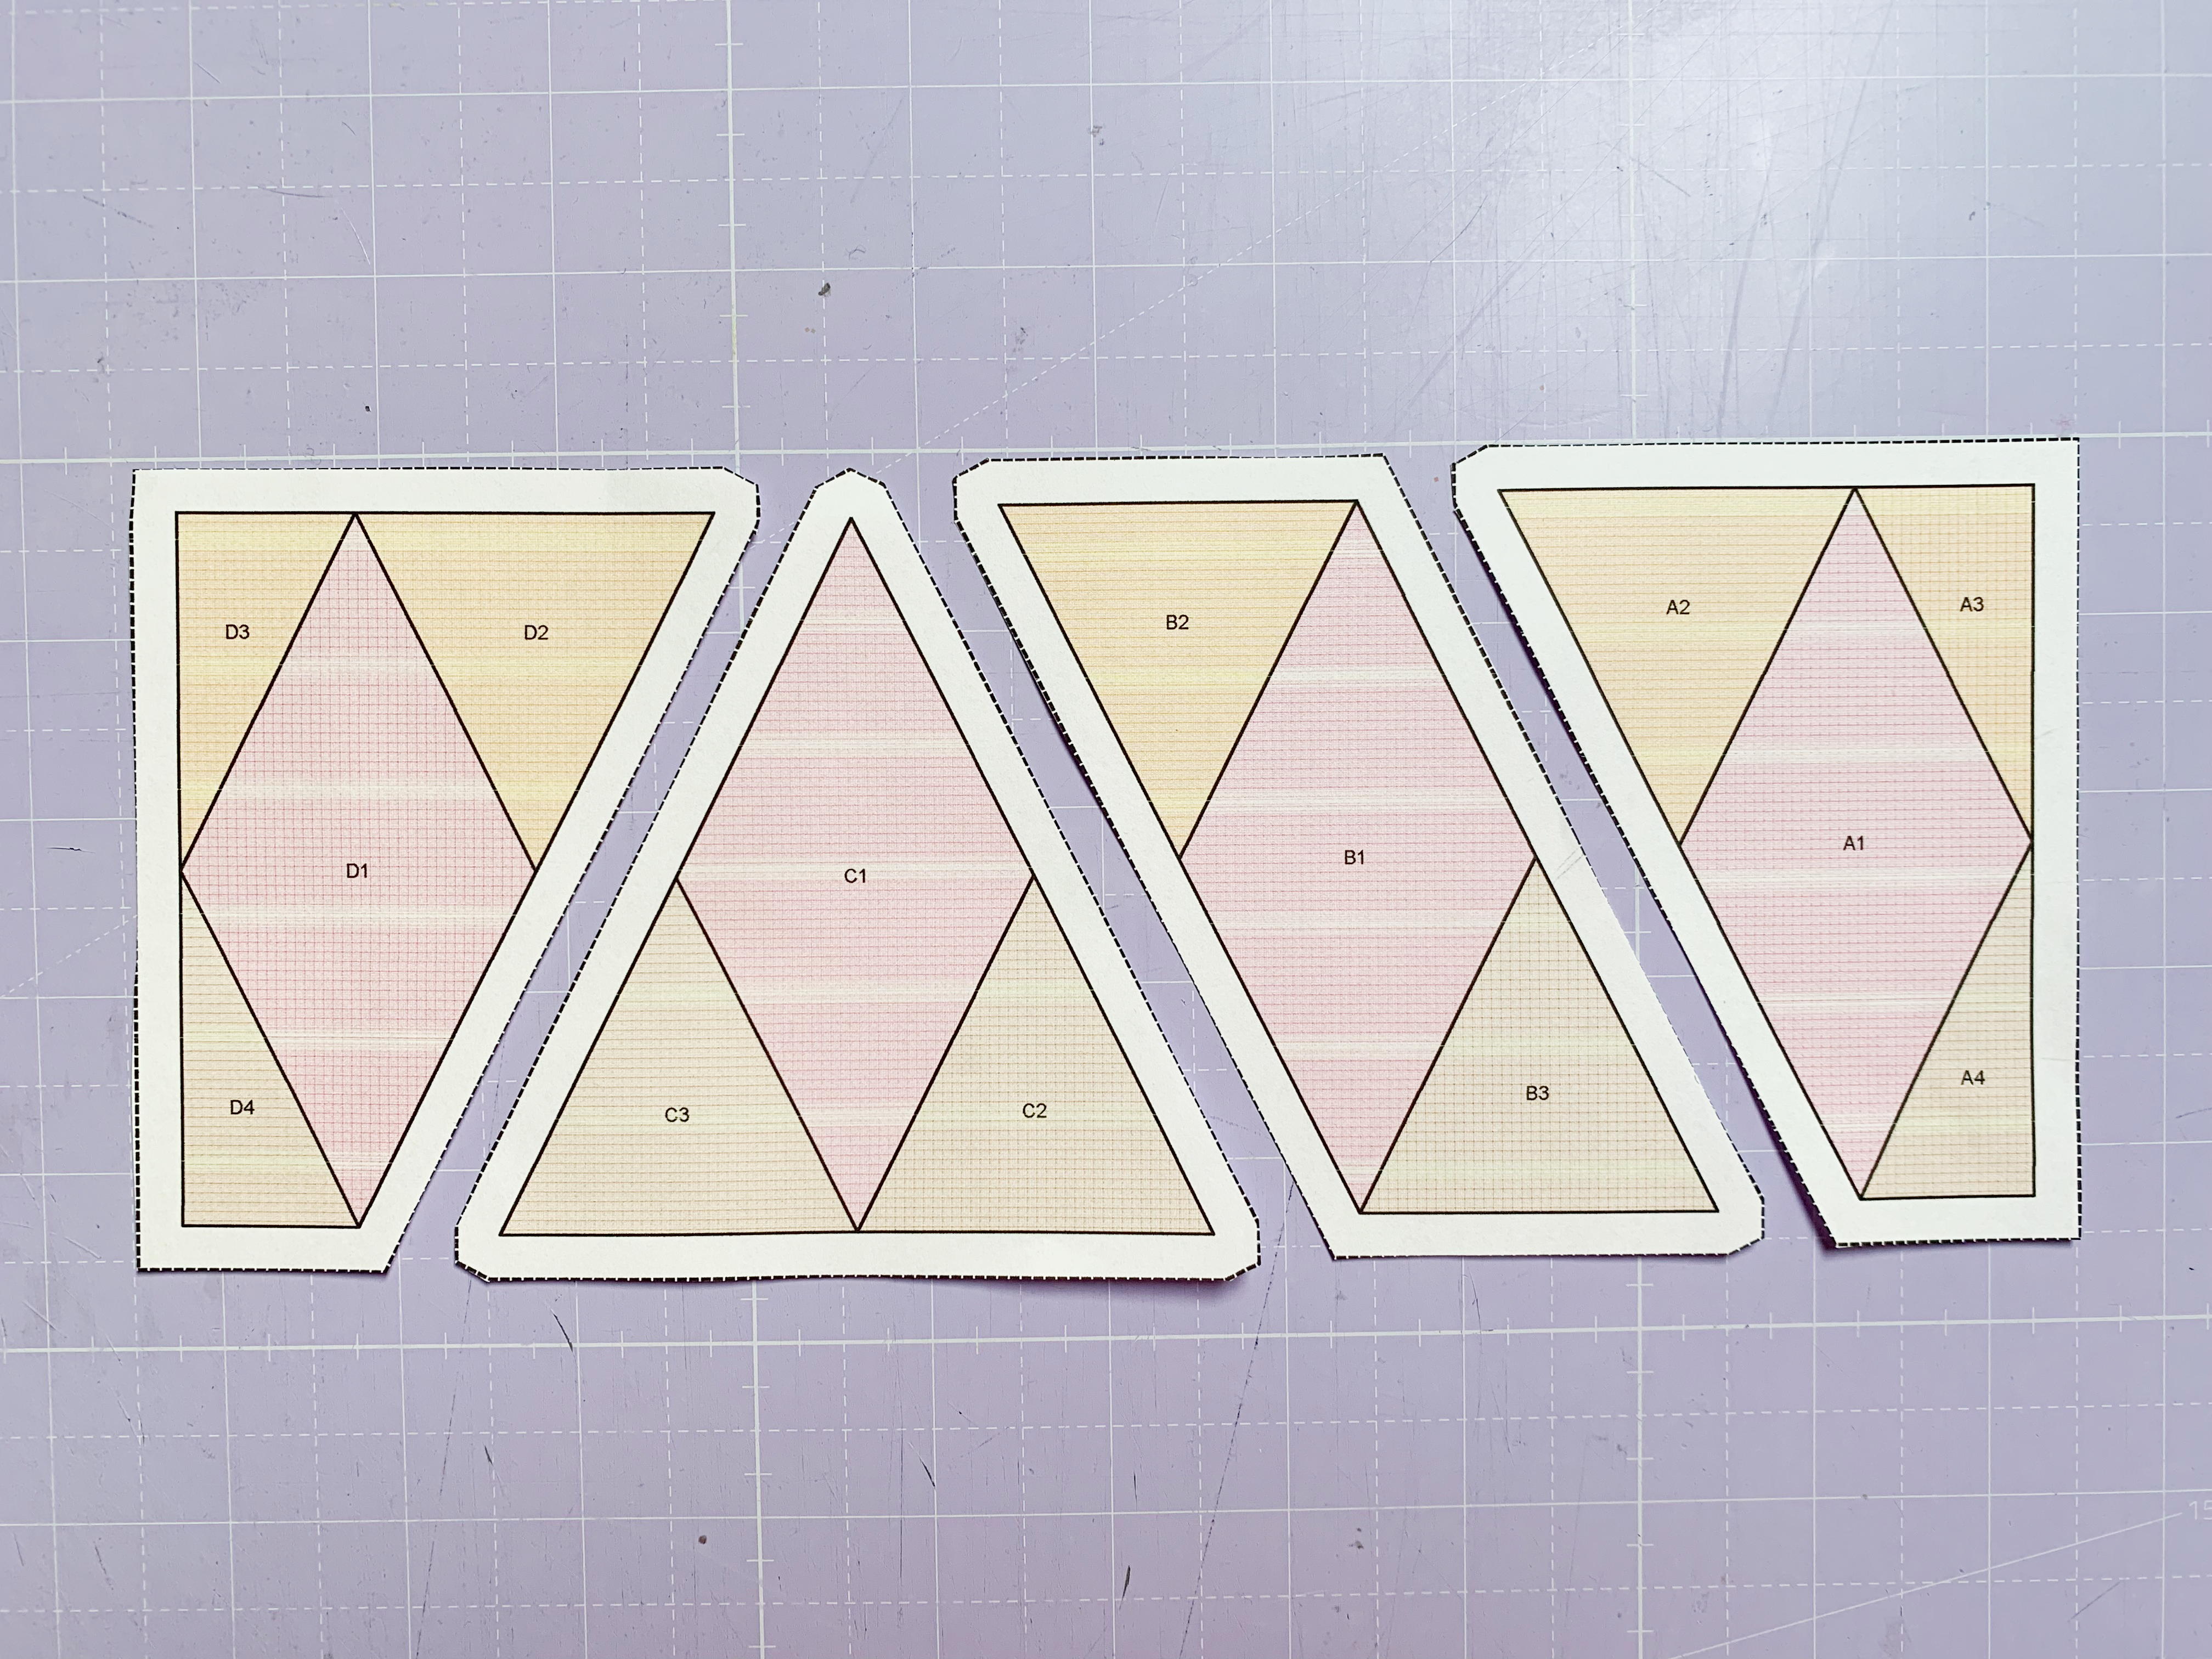
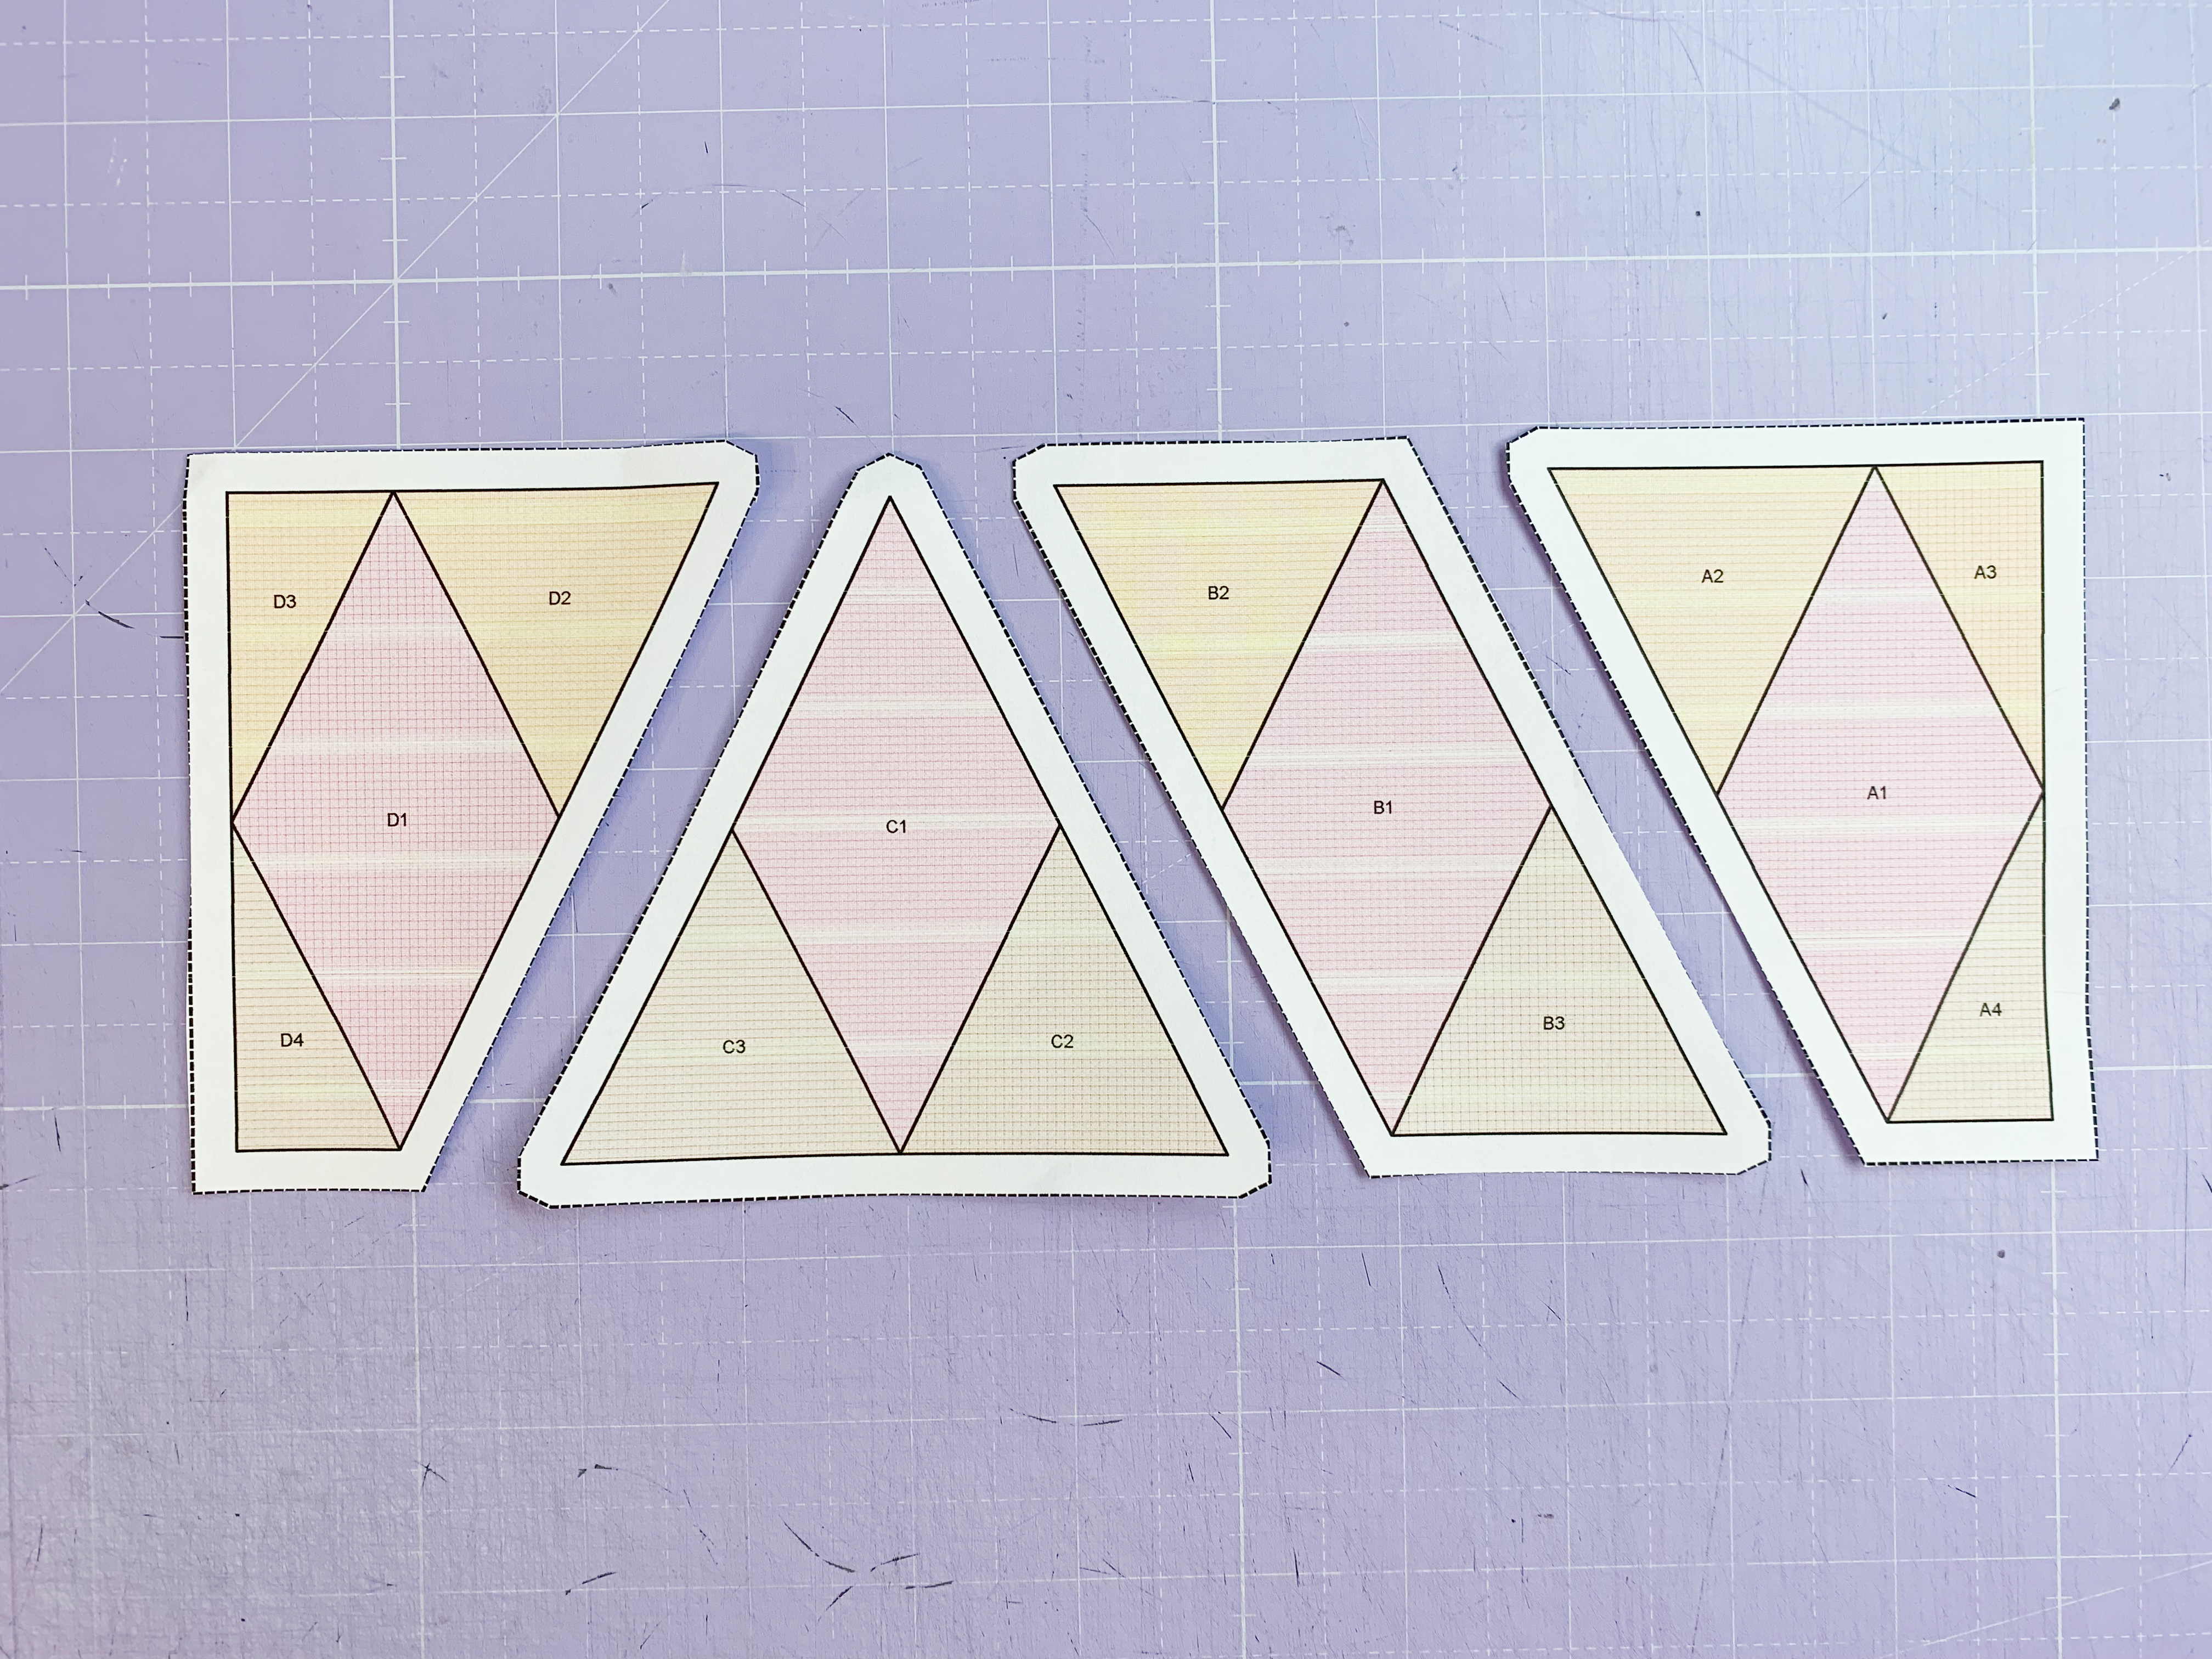
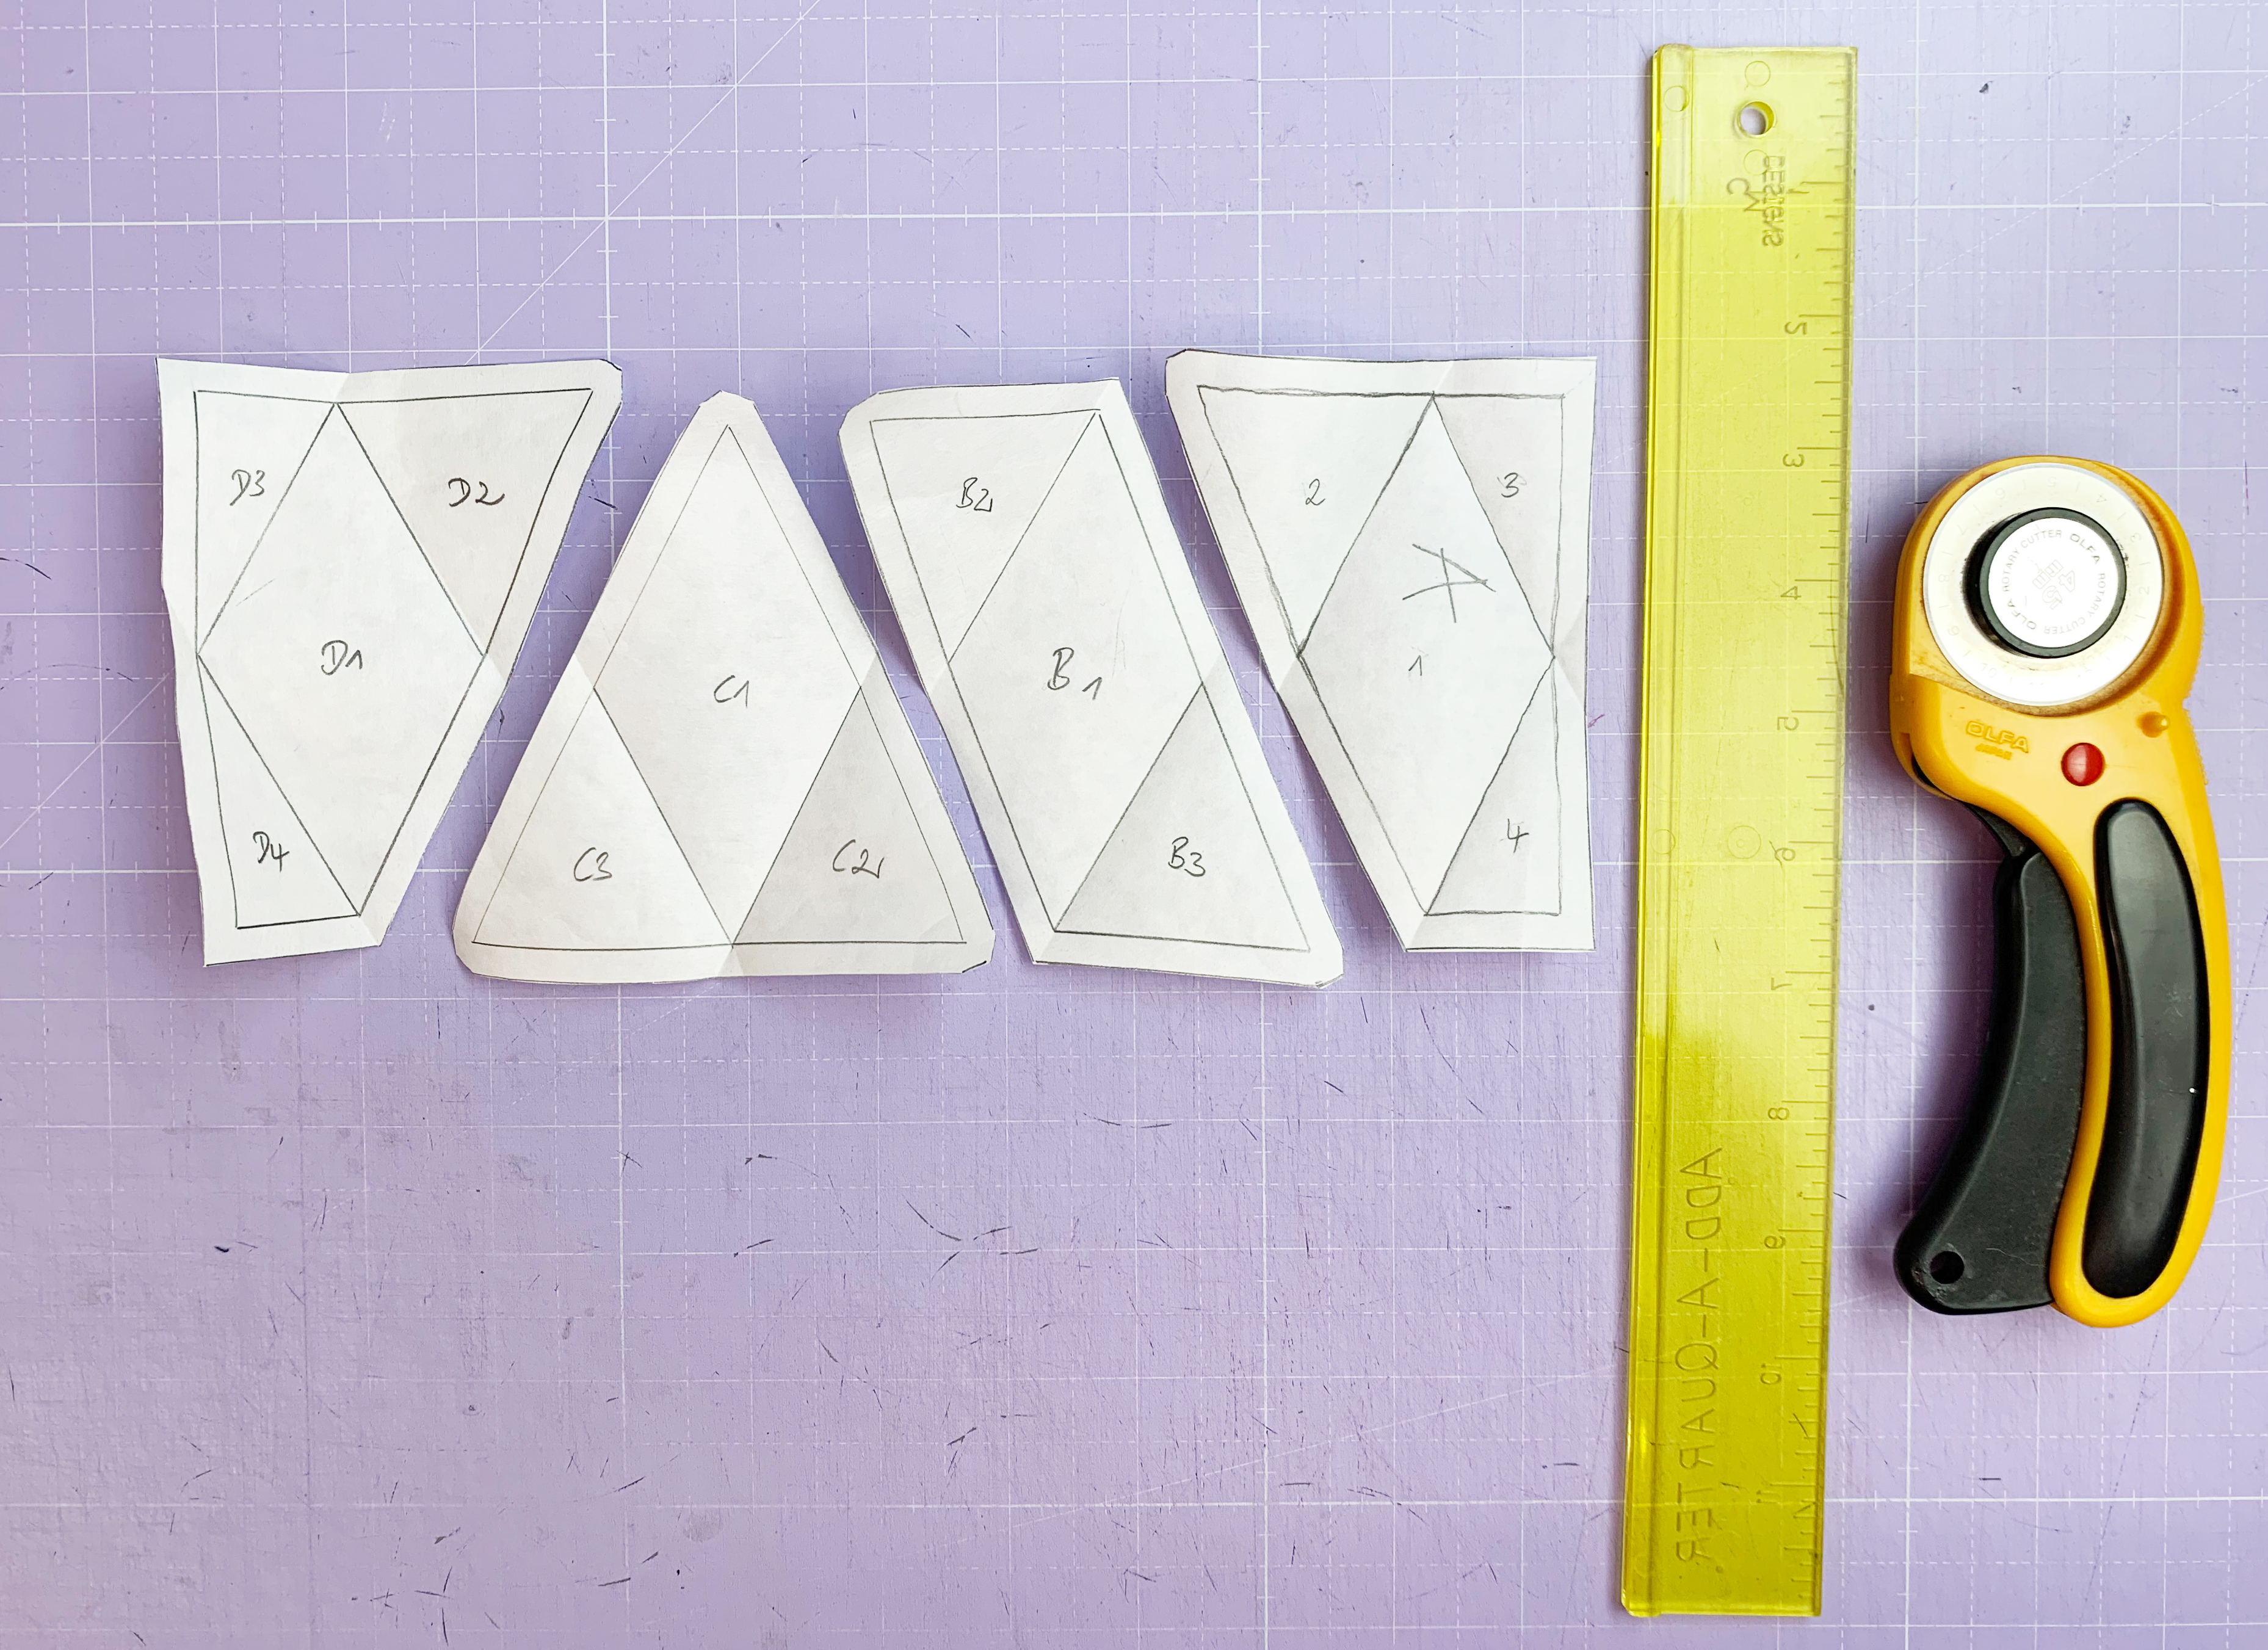
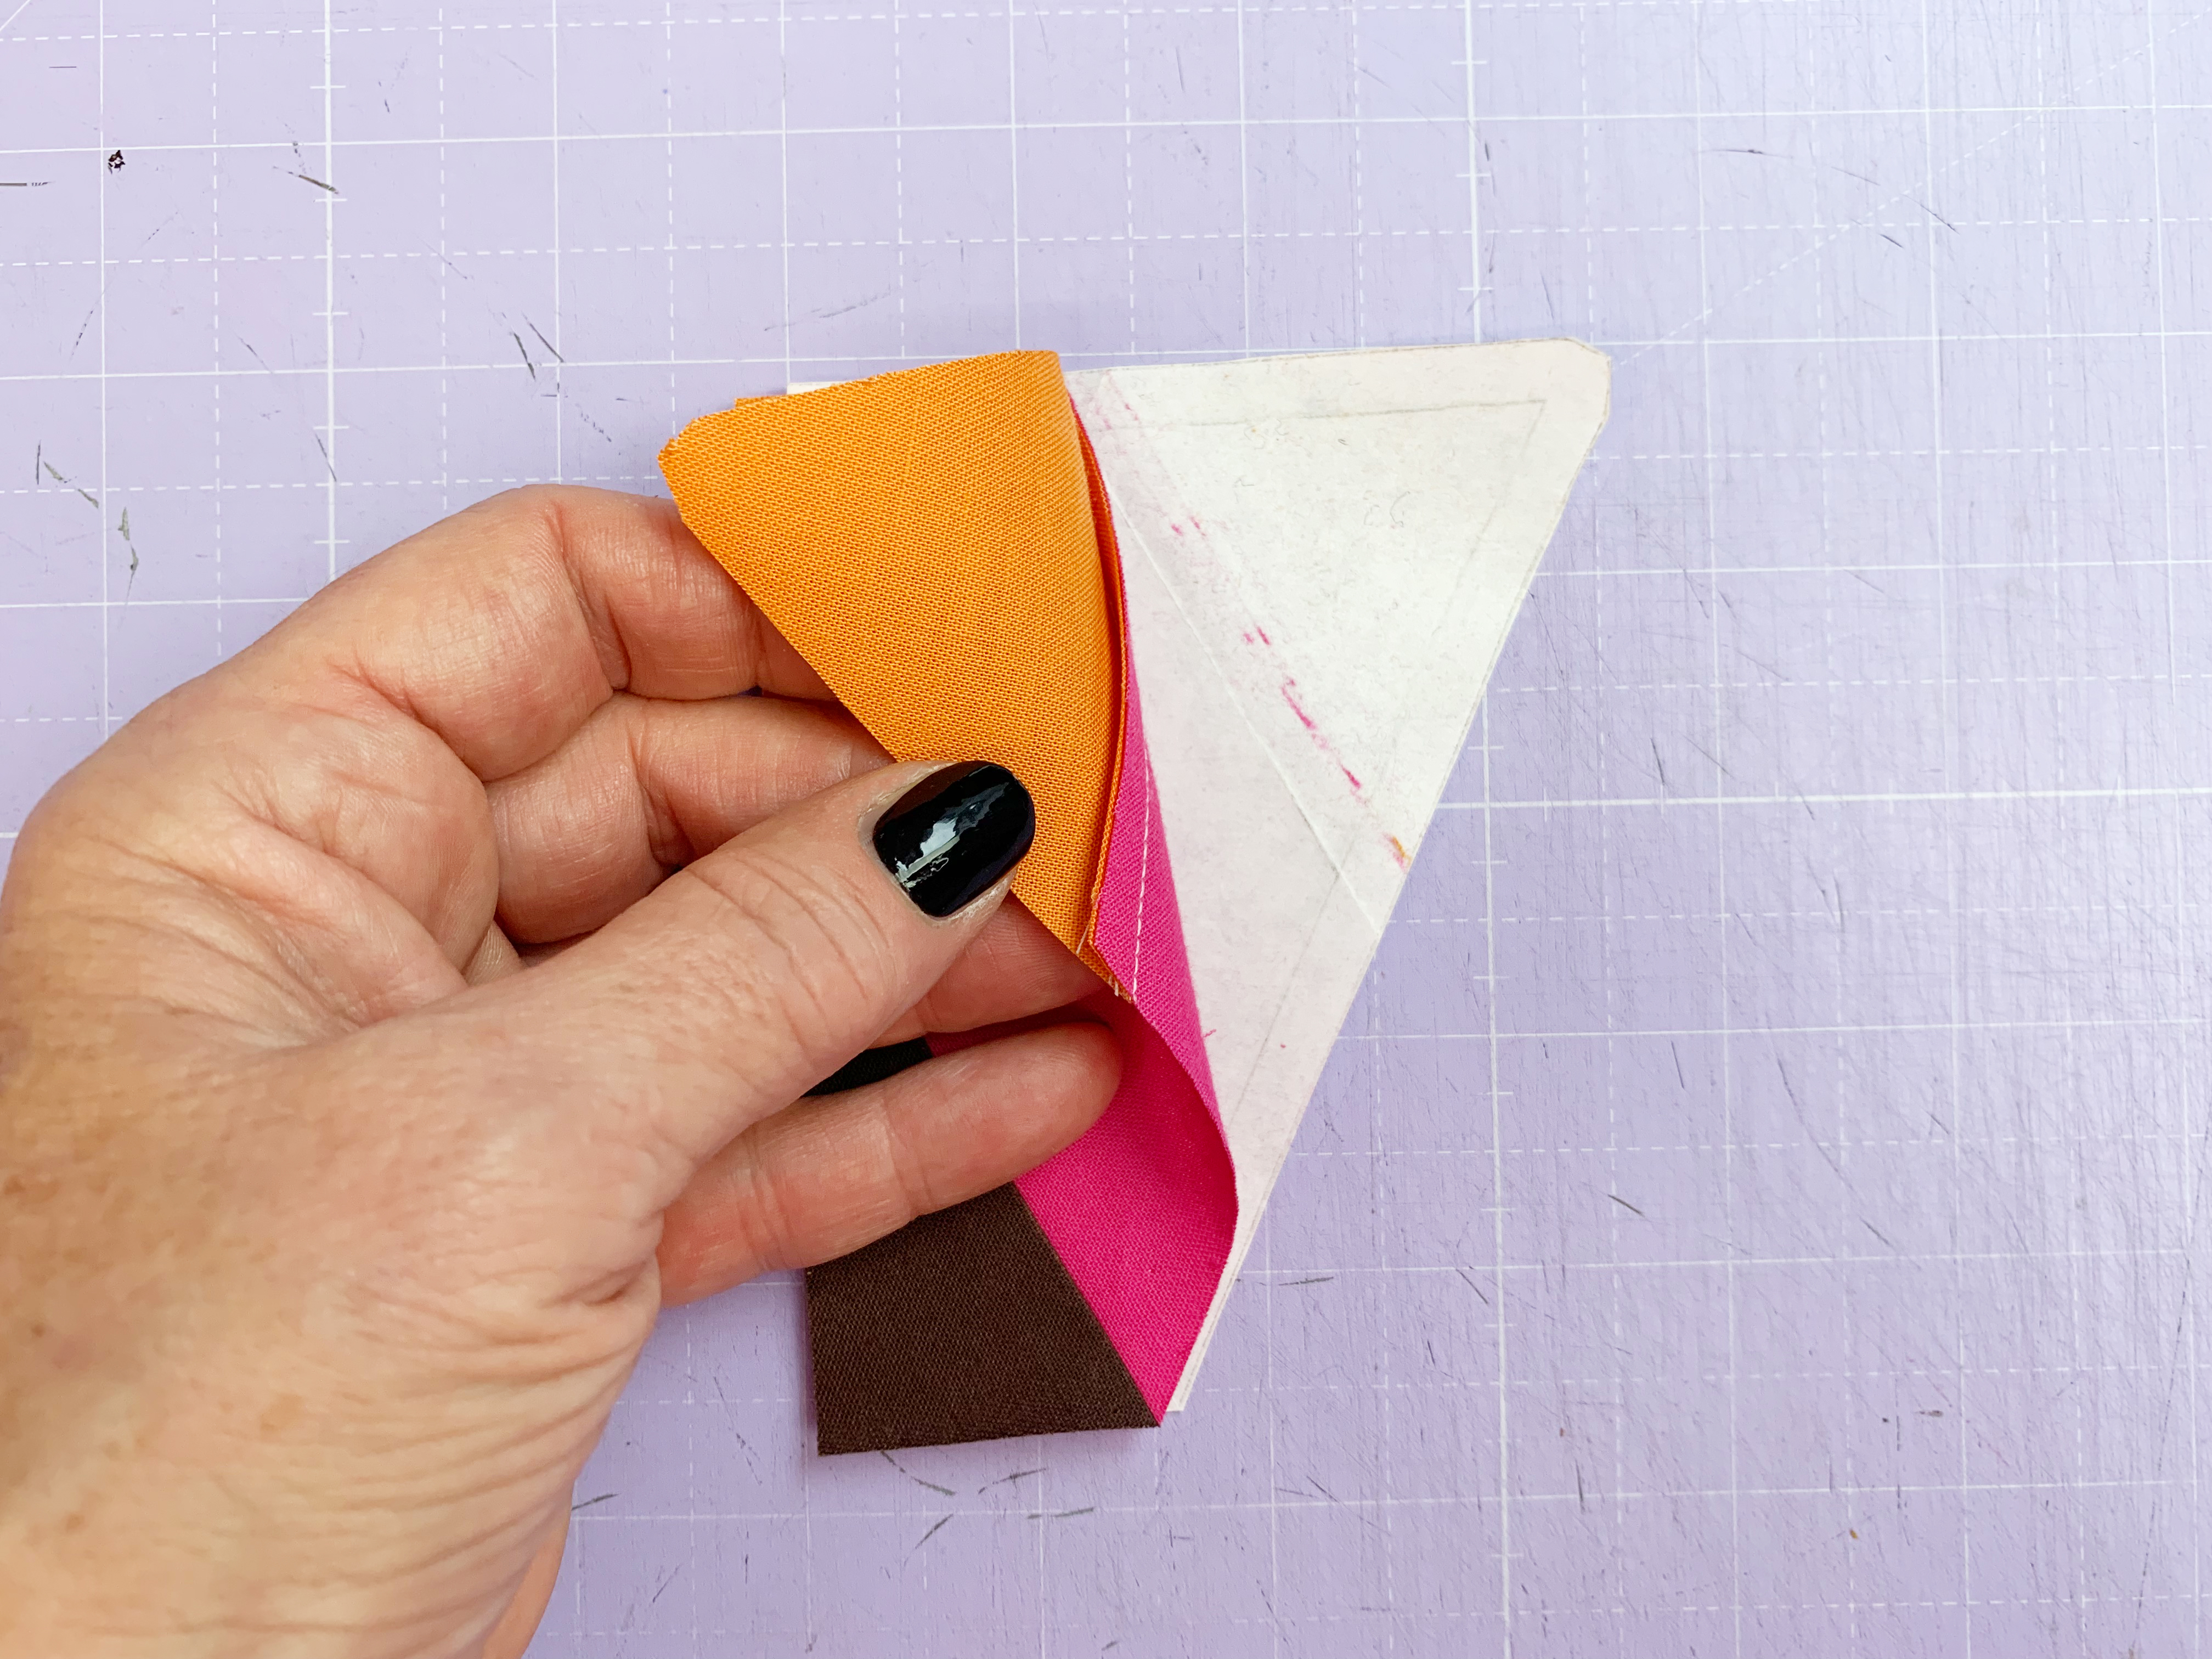
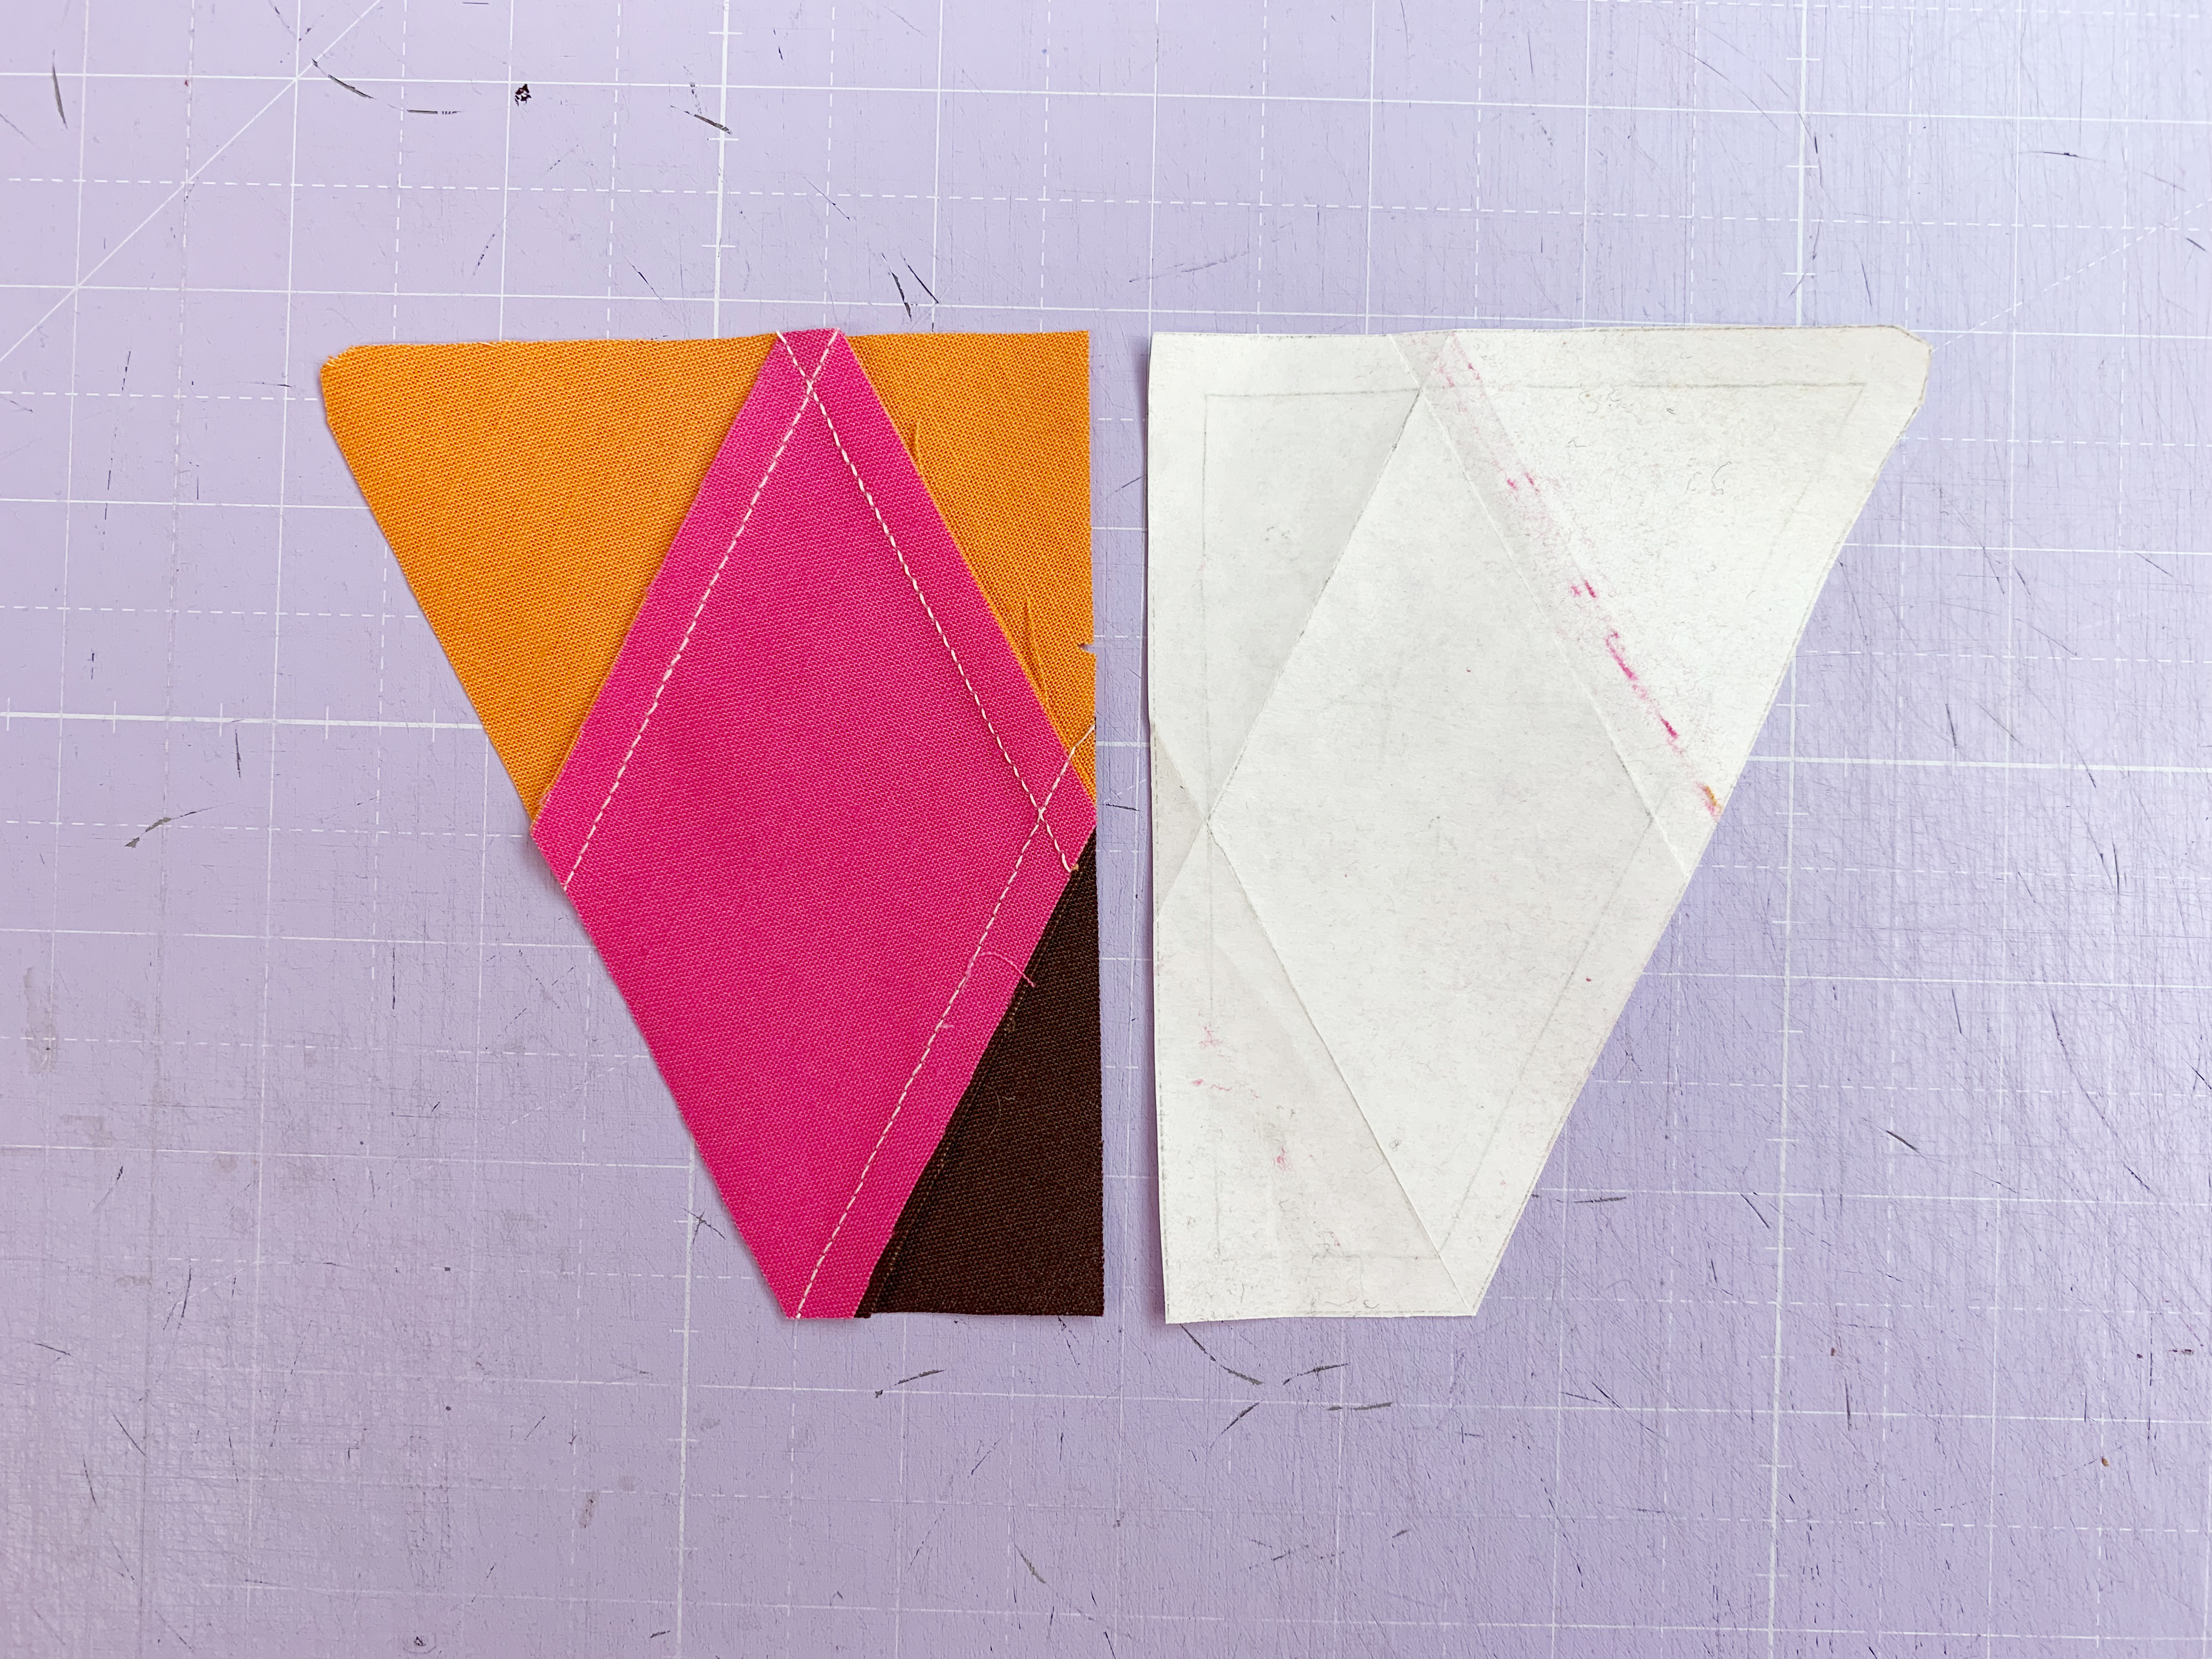
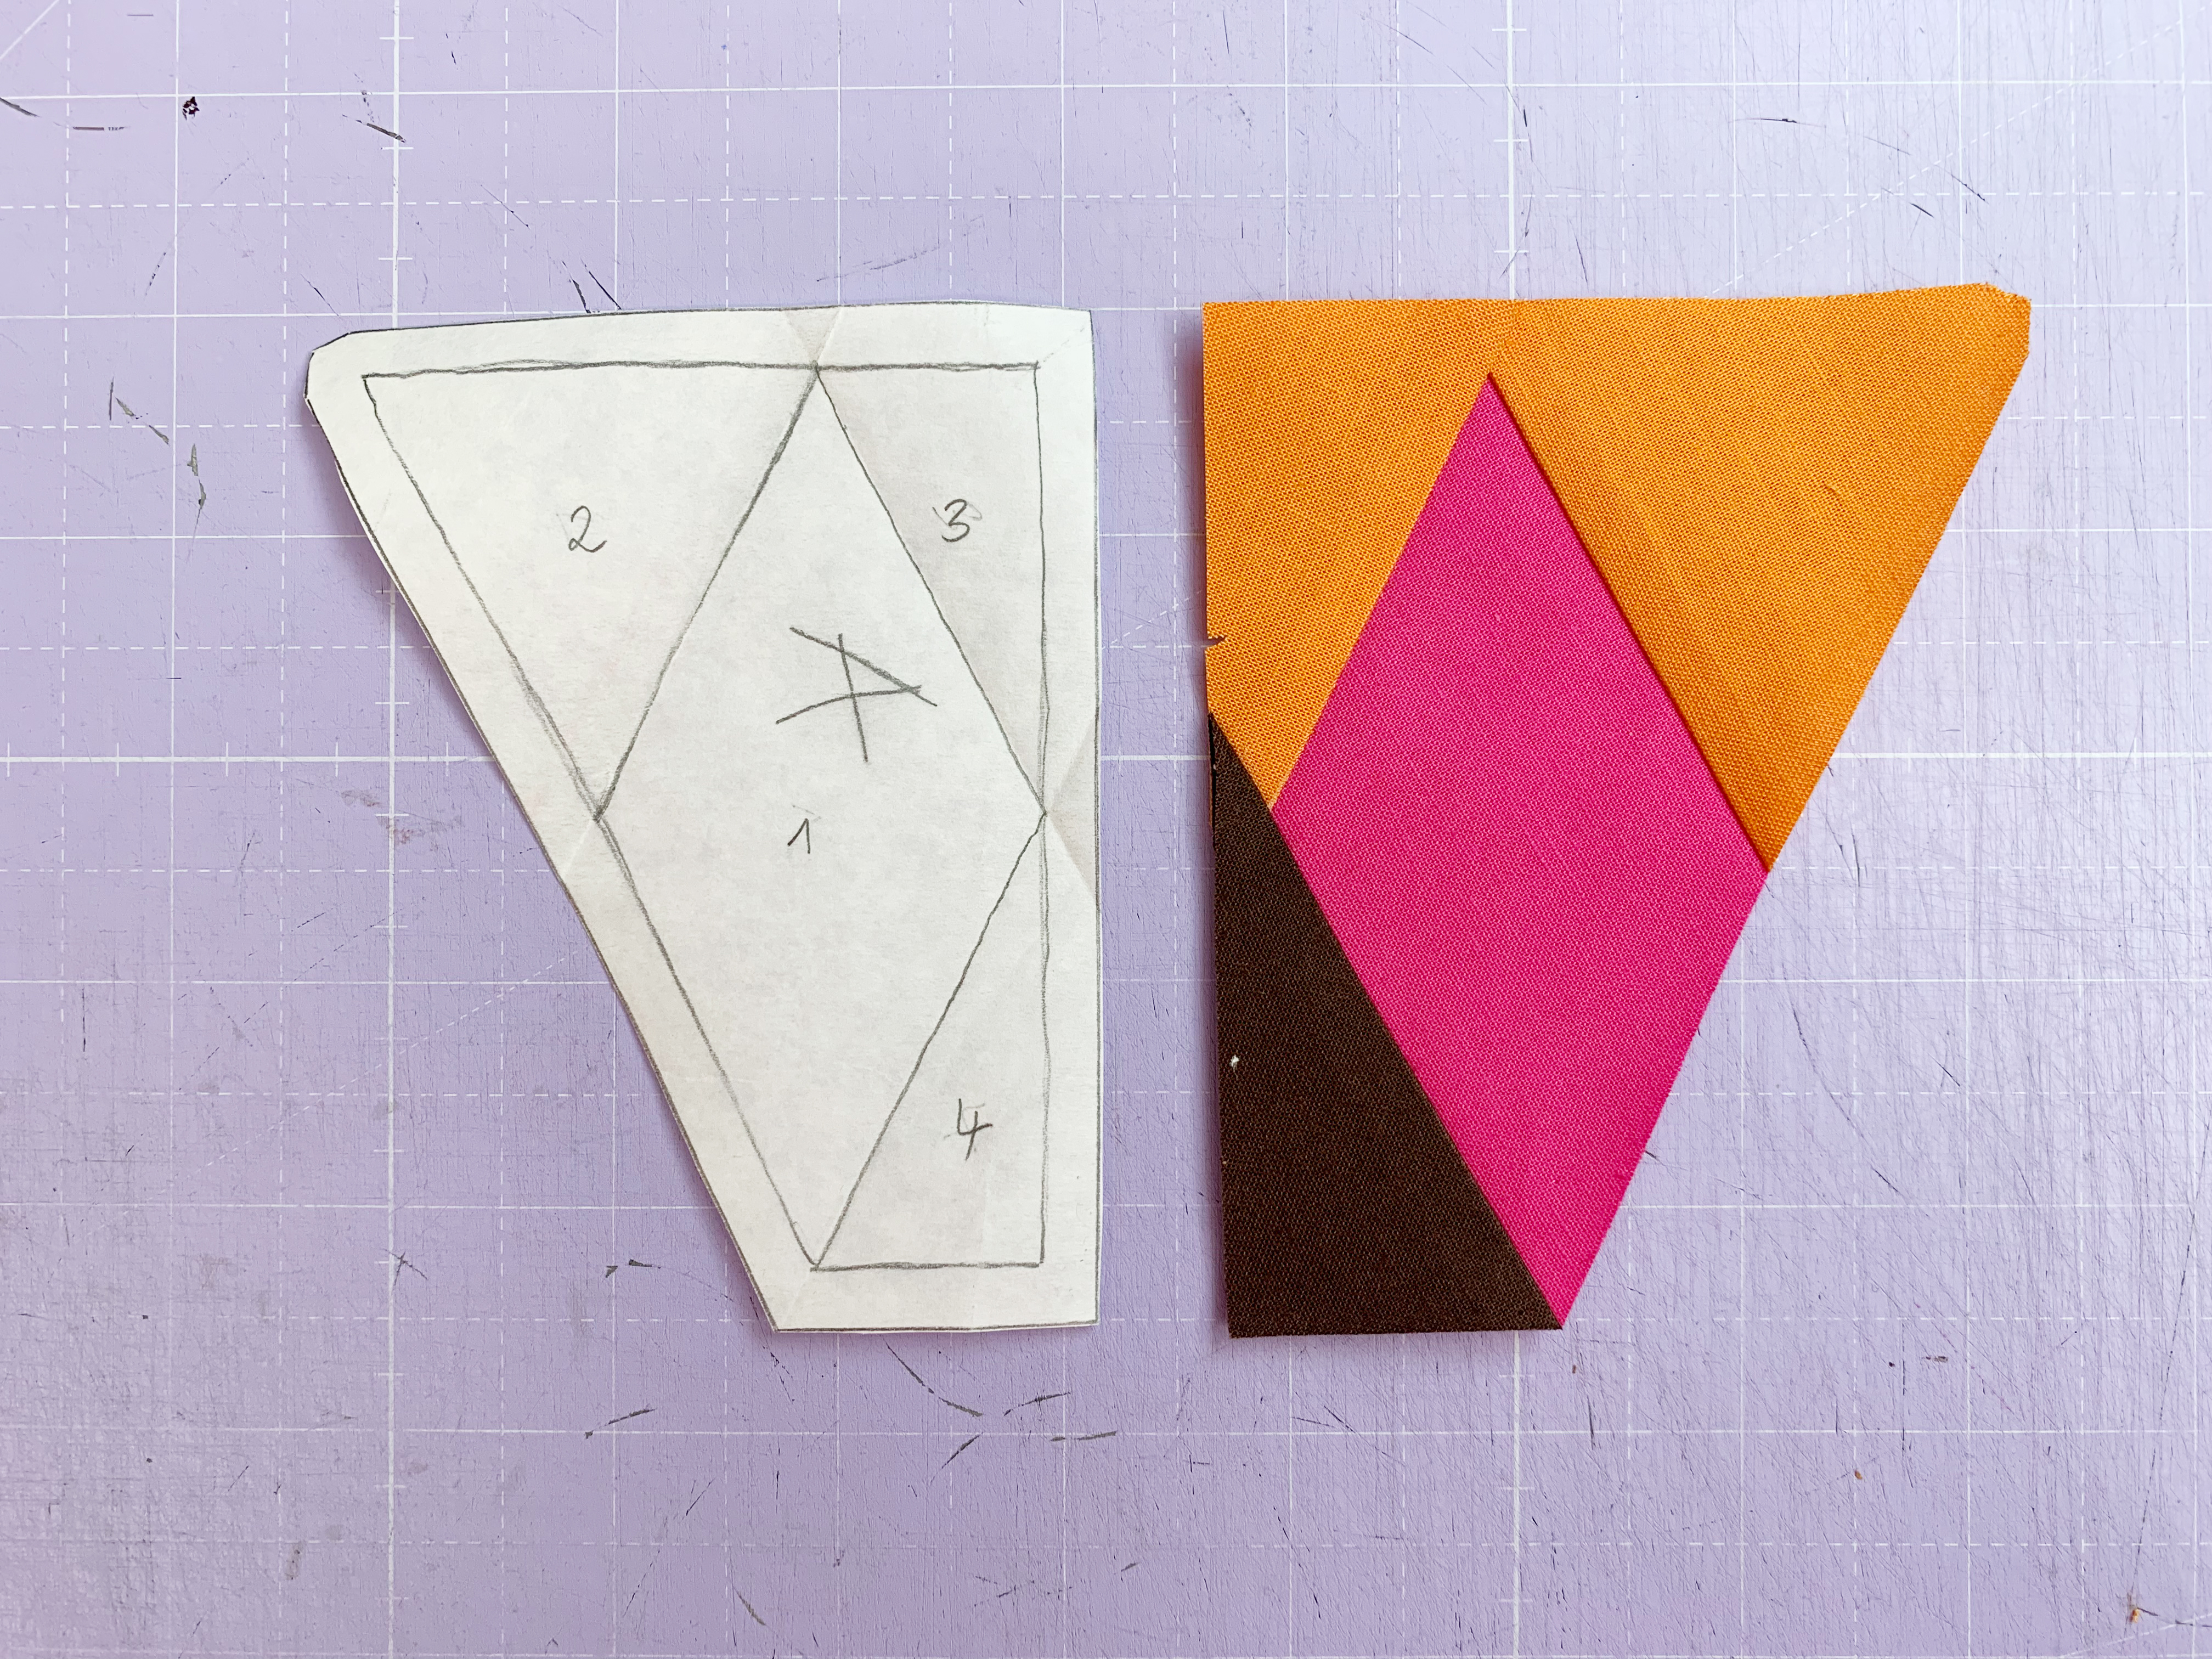
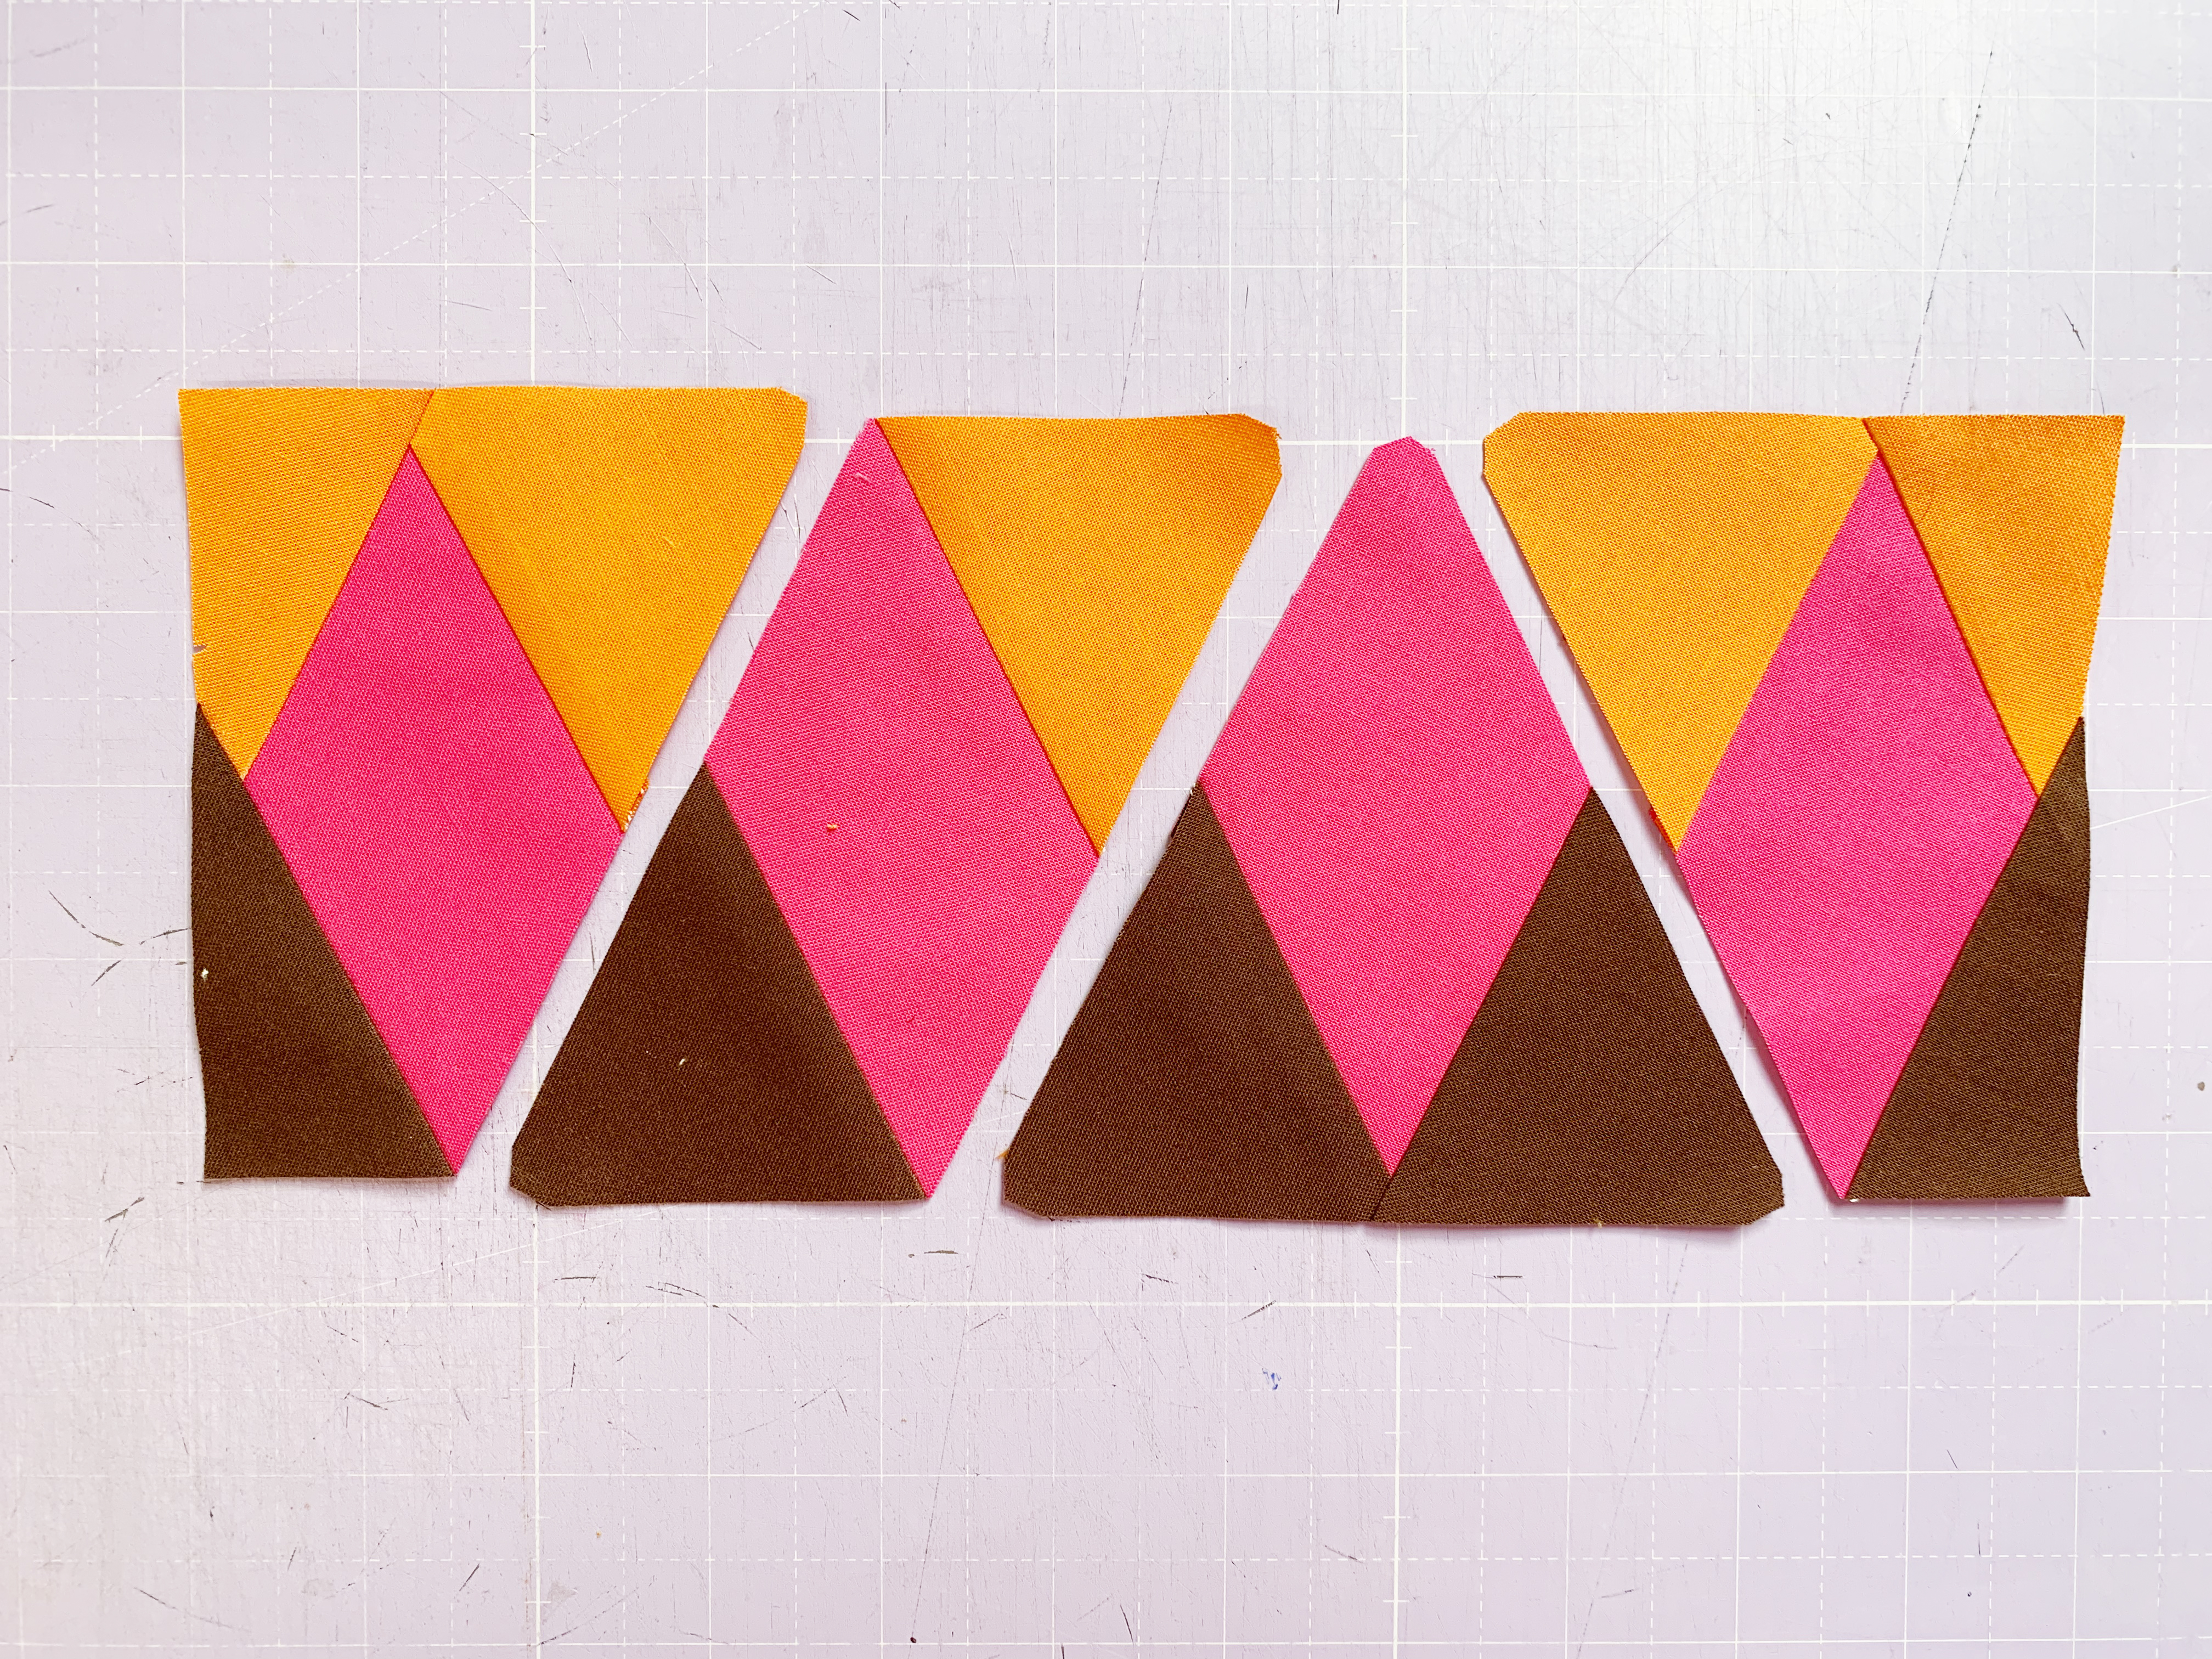
13. Cut back the excess fabric along the outer edges of the segments back to the seam allowance. Lay out the individual pieces as shown in the overview.
All the segments:

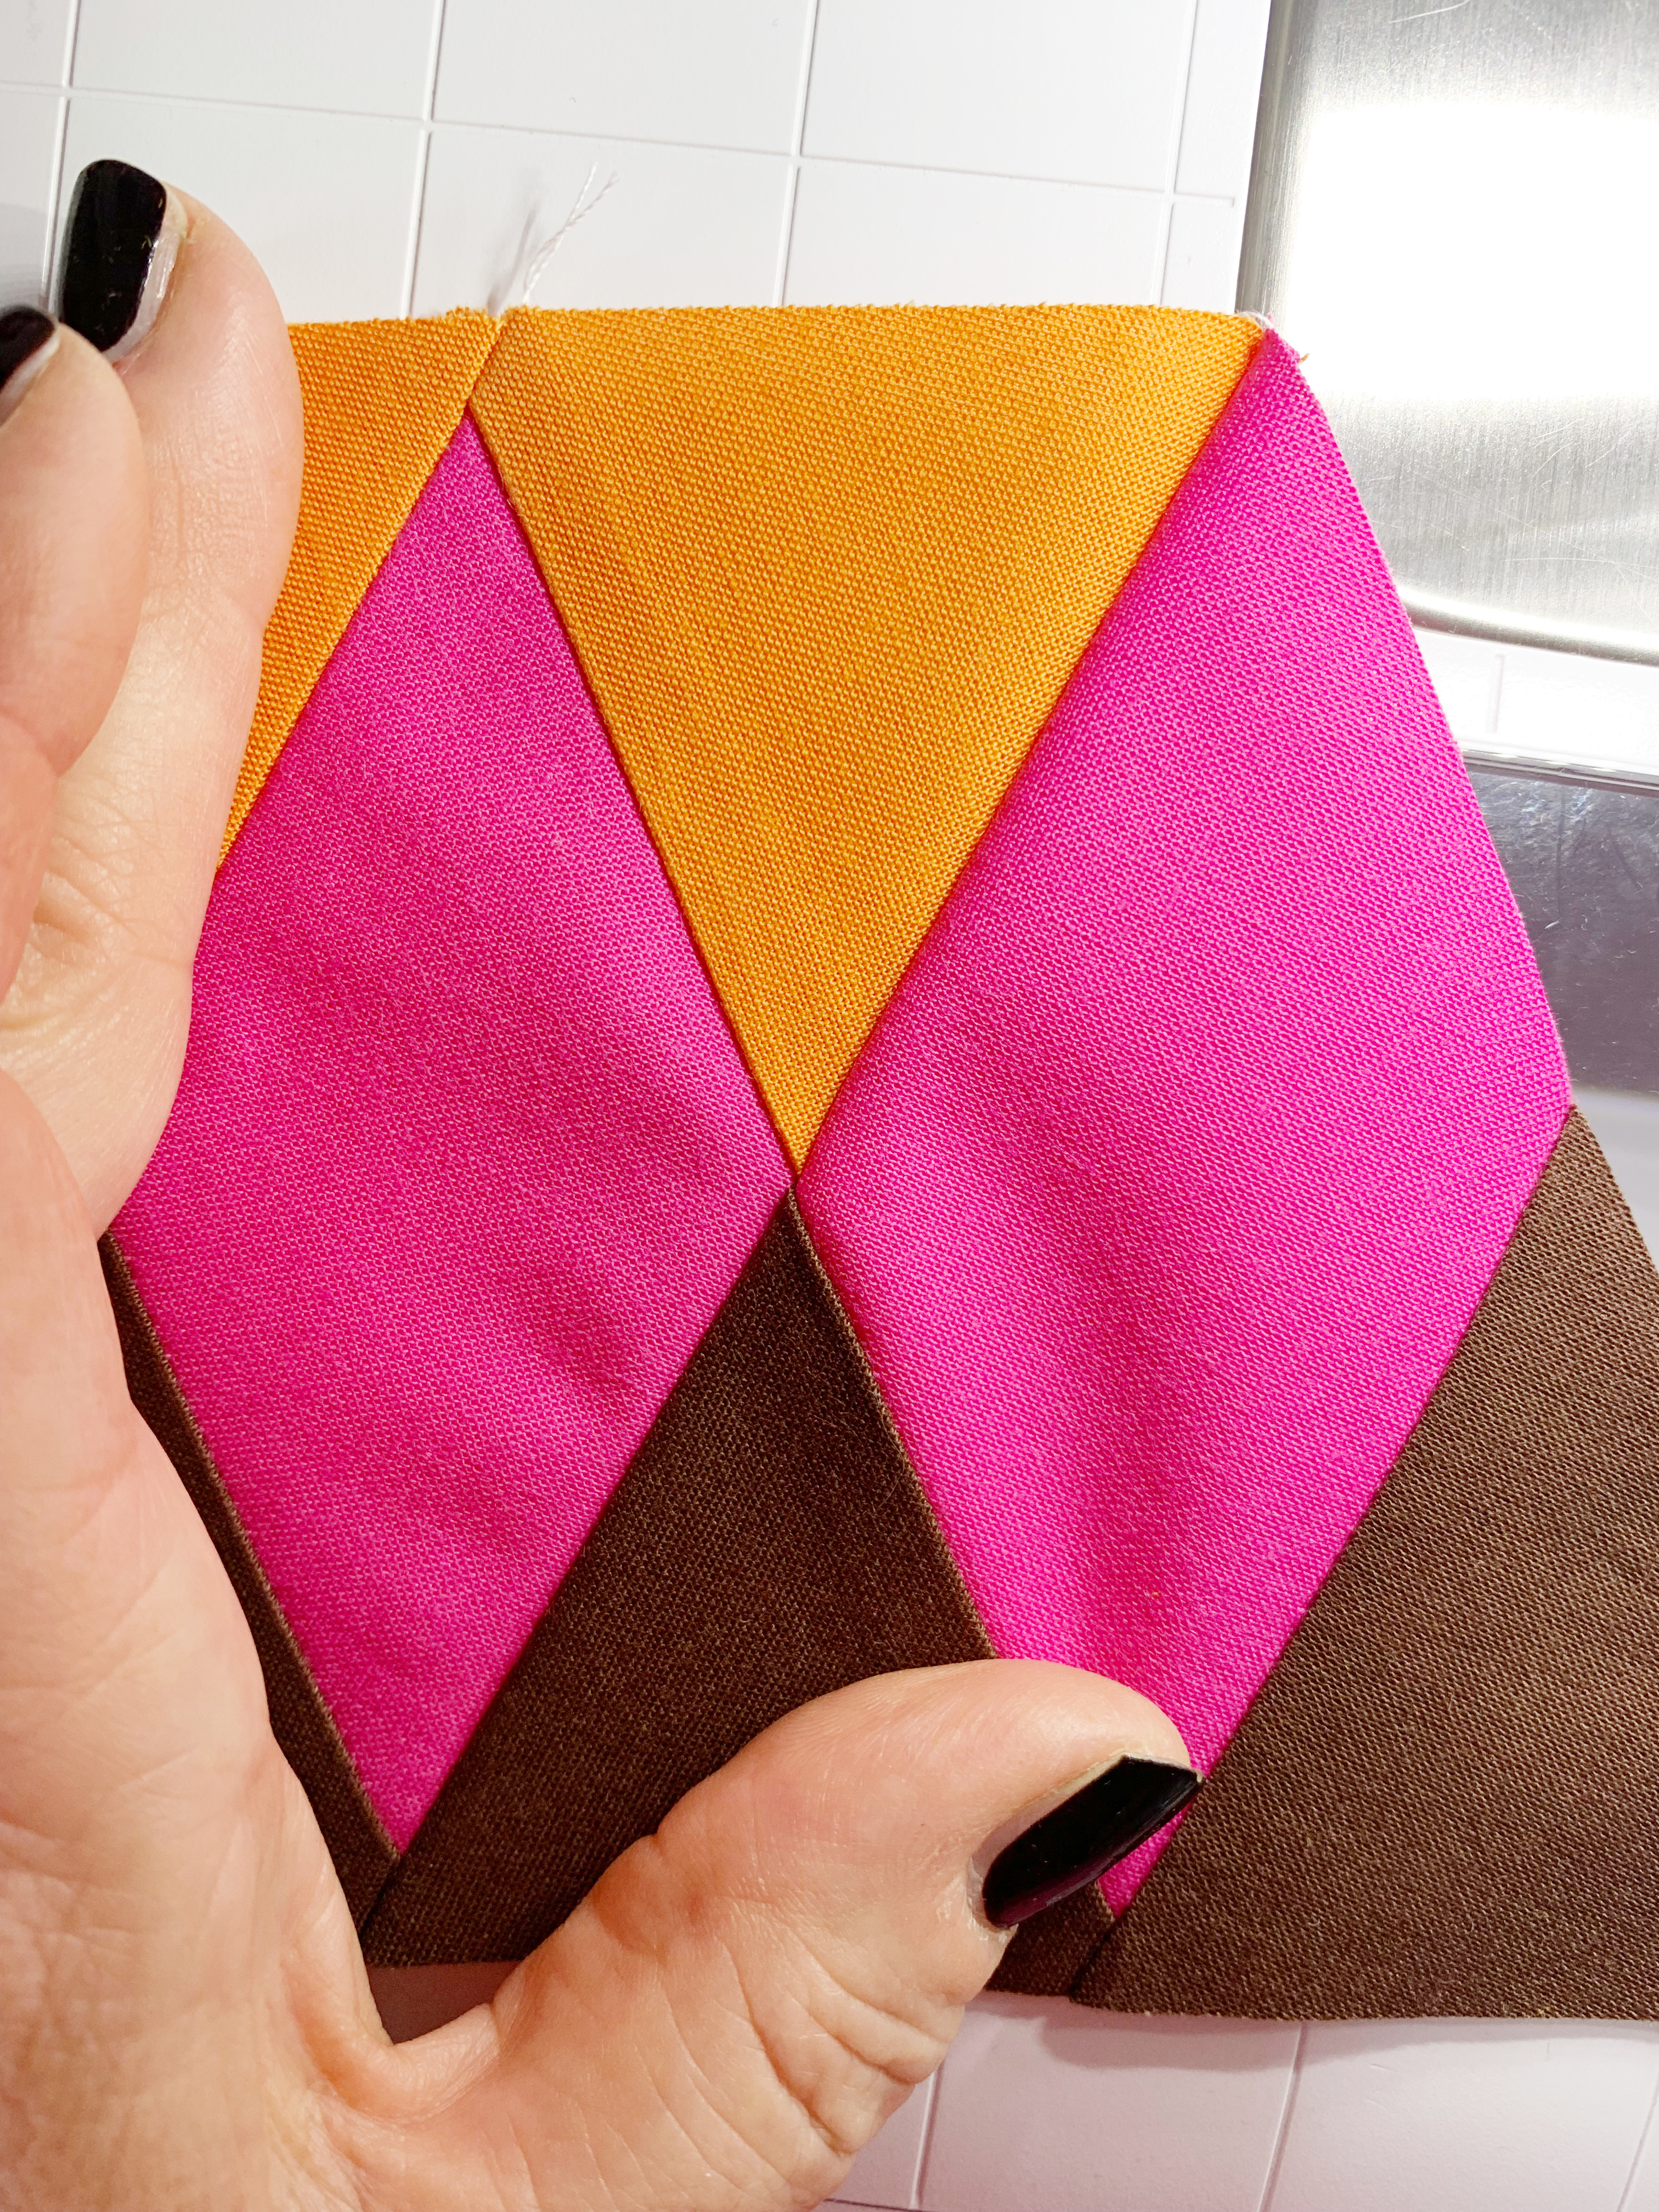
14. Join the segments in the order mentioned in the pattern. If you have sewn two segments together, remove the paper from the seam allowance only and press the seams open. This is where the Tailor’s Clapper comes into play, it helps to ensure that the seams are nice and flat.
There is another YouTube video for finishing the FPP pattern
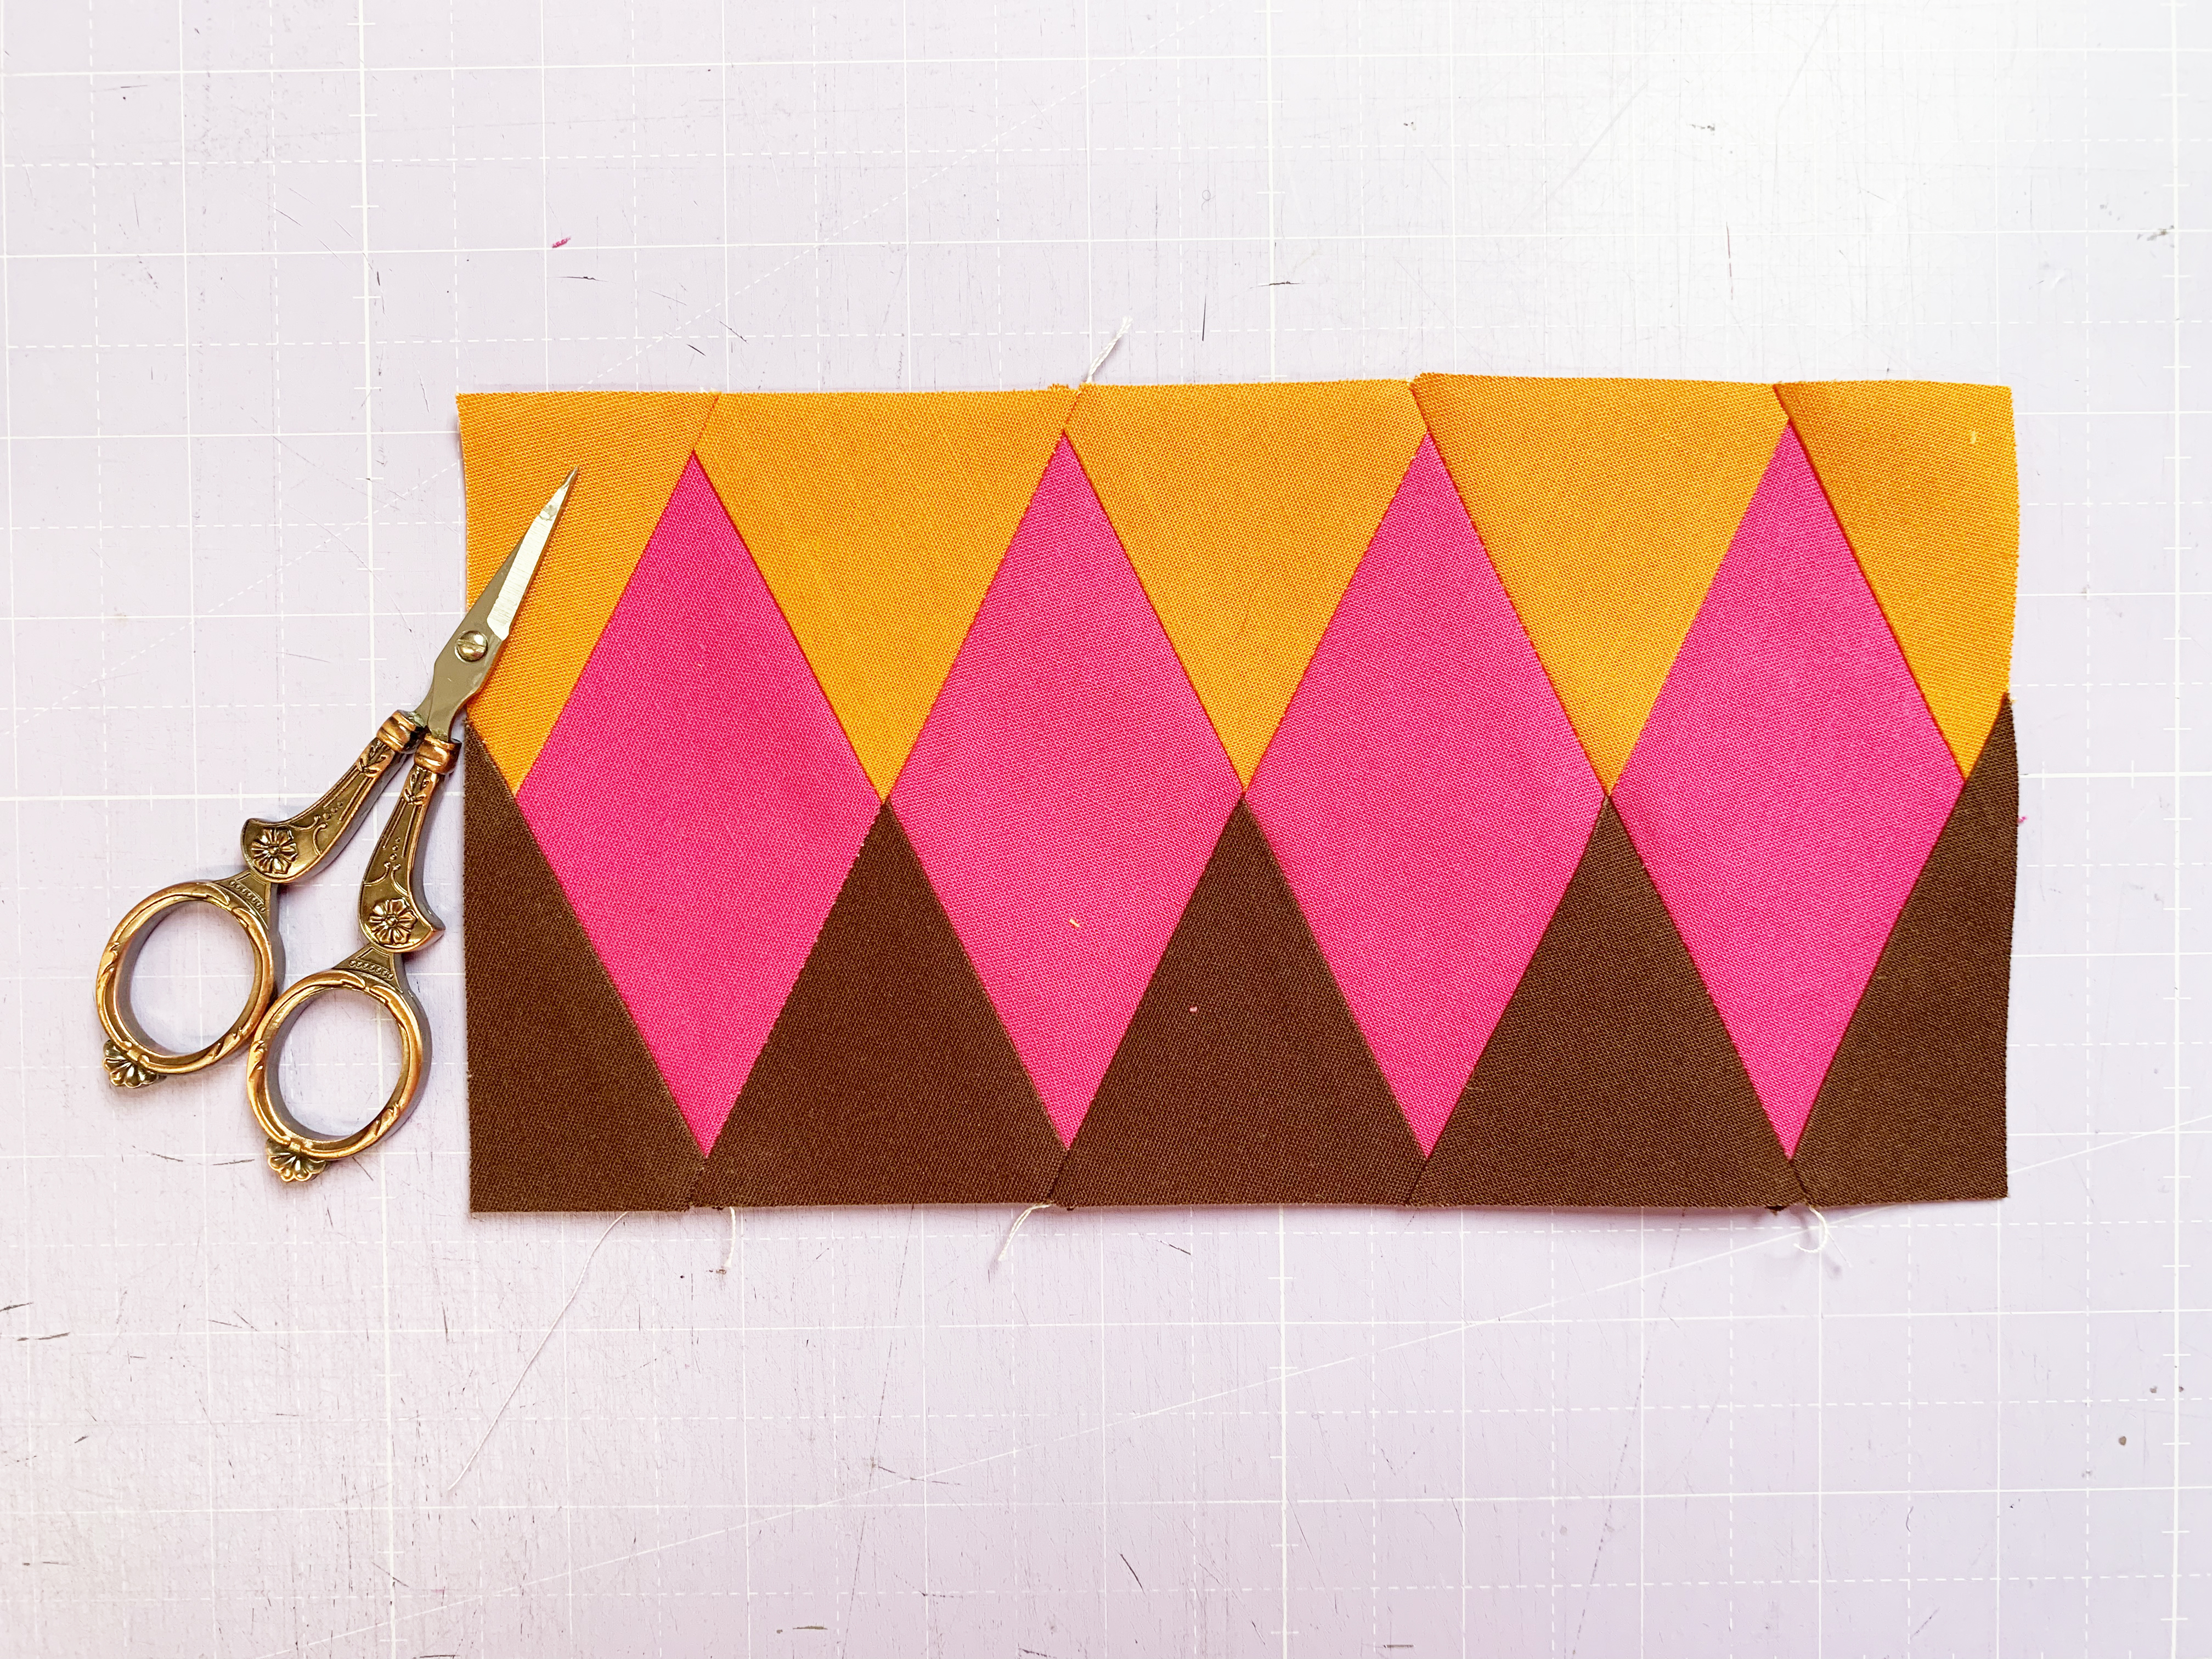
Now the first block for the Border is finished! Let’s move on to the next one 🙂
The Second Method of FPP With Reusable Freezer Paper Template
In this method, we use freezer paper and do not sew through the paper.
1. What is freezer paper?
Freezer paper is a coated paper that is usually used to wrap food so that it can then be stored in the freezer. The coating is a kind of waxy plastic, like a film, and is intended to help prevent freezer burn. This paper is also frequently used in the creative and craft sector.
The waxy coating can be pressed to fabric with an iron without sticking. Making this paper ideal for templates of all kinds.
Freezer Paper is available from specialist creative and craft shops and, of course, online. Freezer Paper is available as a roll or for printing on your printer, which is the luxury version.
The advantage of freezer paper is that you don’t need as much paper and you don’t have to pull out the paper at the end.
2. First take your printed templates (you have to print them out once) and cut them out along the dotted line as with the classic method of FPP.

I have used a Freezer Paper roll here. Trace your templates onto the paper side of your Freezer Paper. If you have one, use a light box. It doesn’t matter if you don’t have a light box, you can just trace the templates on a window onto the Freezer Paper, this works just as well.
3. Label your templates exactly as they are labeled on the paper templates. Transfer the numbers and letters exactly.
4. Now work exactly the same way as you would in the classic version. Take your fabric for part 1 and place it against your template, wrong sides together. The fabric must cover part 1 generously.
5. Instead of using the fabric glue pen, press your template onto the fabric (part 1 only). If you like, you can also use a mini iron or a travel iron to press more precisely.

6. Continue as with the classic version. Fold between 1 and 2 along the seam that now needs to be sewn, again preferably using a postcard. And cut the seam allowance back to 1/4″.
7. As with the classic version, place your fabric for part 2, aligning the seam allowances, right sides together.
8. Now this is the step that is different from the classic version! You do not sew through the paper, but the template remains folded back and you sew exactly next to the fold.
The patchwork foot #97 is a great help here, as the edge of the foot aligns perfectly with the edge of the seam allowance.
9. Now fold the fabric back and press part 2 against the freezer paper. Then continue as with the classic version.
10. Now fold the seam between 1 and 3 with a postcard. Lay the fabric for part 3 aligning the allowances, right sides together. And sew again exactly along the folded edge.

11. Finish your segment in this way and cut the segment back to the seam allowances, just like in the classic version.

12. Now you can simply peel off your Freezer Paper and use it again.
13. Sew all 4 segments of this block and then join them together. If you have traced and sewn very accurately and cut back the seam allowances precisely, the pieces will fit together perfectly and your diamond corners will also match perfectly. As previously mentioned, the patchwork foot #97 is a real blessing for this work.

Here is a YouTube video for this freezer paper foundation paper piecing method:
Conclusion
I much prefer sewing on paper and don’t mind pulling out the paper afterward at all. I just like the extra base. That’s just my personal opinion. You can of course decide for yourself, I look forward to your feedback.

Show Me Your Diamond Border Blocks!
I’m looking forward to seeing the photos of your blocks. Share them on Instagram and Facebook by tagging @berninausa, or in the Community Section of WeAllSew!
Always use the hashtag #quiltsafari on Instagram and Facebook. In the community section of the blog, don’t forget to select the “Quilt Safari” campaign.
See you again very soon,
Ingrid
PS: Did you take part in the giveaway? Thanks so much to all the participants – and congratulations to the winner: Amy S.! Don’t forget to keep an eye out for future giveaways!


What you might also like


4 comments on “Quilt Safari, Part One: Instructions & Free Pattern”
-
-
I have tried to download the free pattern, but all that happens is it goes back to this page when I click checkout. I also couldn’t comment on that page.
https://www.joejuneandmae.com/store/p491/Diamond_Border_Quilt_Block_-_PDF_pattern______.html -
Been out of town so just starting. Is there a part of the instructions that gives a rough size to cut each piece of fabric before placing under the paper to stitch? Most patterns come with a pre-cutting to save fabric.
-
I had commented about this very early on as there are 30 border blocks so it seemed easy to give the cutting dimensions. But my comment was deemed unacceptable, I suppose, so never was posted.
-
Leave a Reply
You must be logged in to post a comment.

Finally worked my way to the first post. Assume we need to find the post in We All Sew. I was waiting for a notification. So I started with the trunk up elephant. Got it now…doing border first.