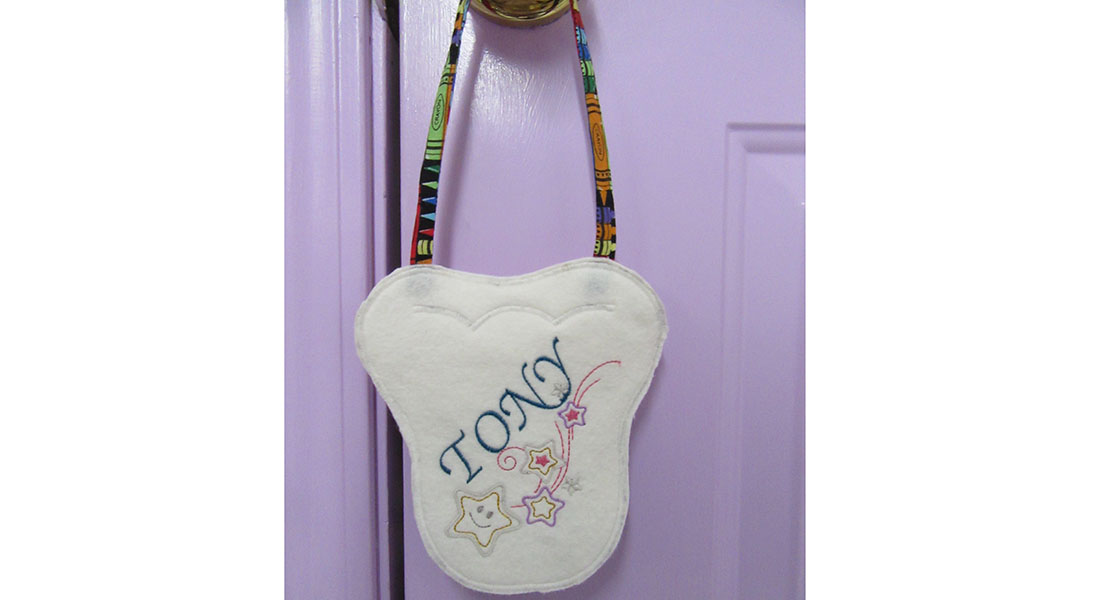
Tooth Fairy Door Bag Tutorial
One of the milestones of childhood is losing your baby teeth so that the permanent ones can grow instead. This can be traumatic for some children but is made easier by the knowledge that the baby tooth will be replaced by cold, hard cash from the tooth fairy. This Tooth Fairy Door Bag can be a fun part of the process. My children are long grown at 20 and 23, but I can remember the excitement and anticipation of waiting for the tooth fairy to come. Placing their baby tooth in an envelope under their pillow and anxiously falling asleep knowing that the tooth fairy would take it and replace it with cash to be found upon waking.
The problem for me was switching the tooth to cash. I knew a lot of parents who were able to just switch the tooth out for cash before sliding the envelope under a pillow, but I had very suspicious children who always checked to make sure the tooth was safely in the envelope before placing it under the pillow themselves. So, I had to actually reach under the pillow to switch out the envelope.
This wasn’t a problem with my oldest, who, like a lot of children, was a sound sleeper. Not so much with my youngest. That child never slept, and on the rare occasions he did, you did not want to do anything that might wake him up. I came up with the Tooth Fairy bag for just this reason. Put the tooth in the pocket on the back, hang it on the door or bedpost, and the life of the tooth fairy (read mom) just got immeasurably easier. LOL
Tooth Fairy Door Bag Tutorial
This tutorial will walk you through how to make a fun personalized tooth fairy bag for your child. I used a fun fabric with crayons on it, but any fabric that your child will relate to, or even a solid will work. You could even include your child in the process by having them help you pick out the fabric. In addition to the printed fabric, you will need to pick out an embroidery design. The design needs to be able to fit inside the tooth template pattern. You can use your machine’s embroidery software to resize if needed or to rotate the design to a diagonal. I used a design and alphabet that came with my B 790 PLUS. If you are looking for more ideas or different fonts, try oesd.com
Materials Needed For Tooth Fairy Door Bag
- White Felt- ¼ yard
- Cotton Fabric- fat quarter kids print
- Embroidery thread for machine embroidery (I like a light weight poly thread)
- Printed pattern template- print pattern to actual size not to fit
- Stabilizer for Embroidery

Step 1
Cut out two pieces of felt 7 inches by 8 inches. Next, cut a strip 1 ½ inches by 15 inches and a 4-inch by 6-inch rectangle from the print fabric.
Step 2
Fold under ¼” along one of the 6-inch sides of the printed fabric right sides together. Fold under another ¼ inch using the first fold as a guide and press. Stitch closely along the edge of first fold.
Step 3
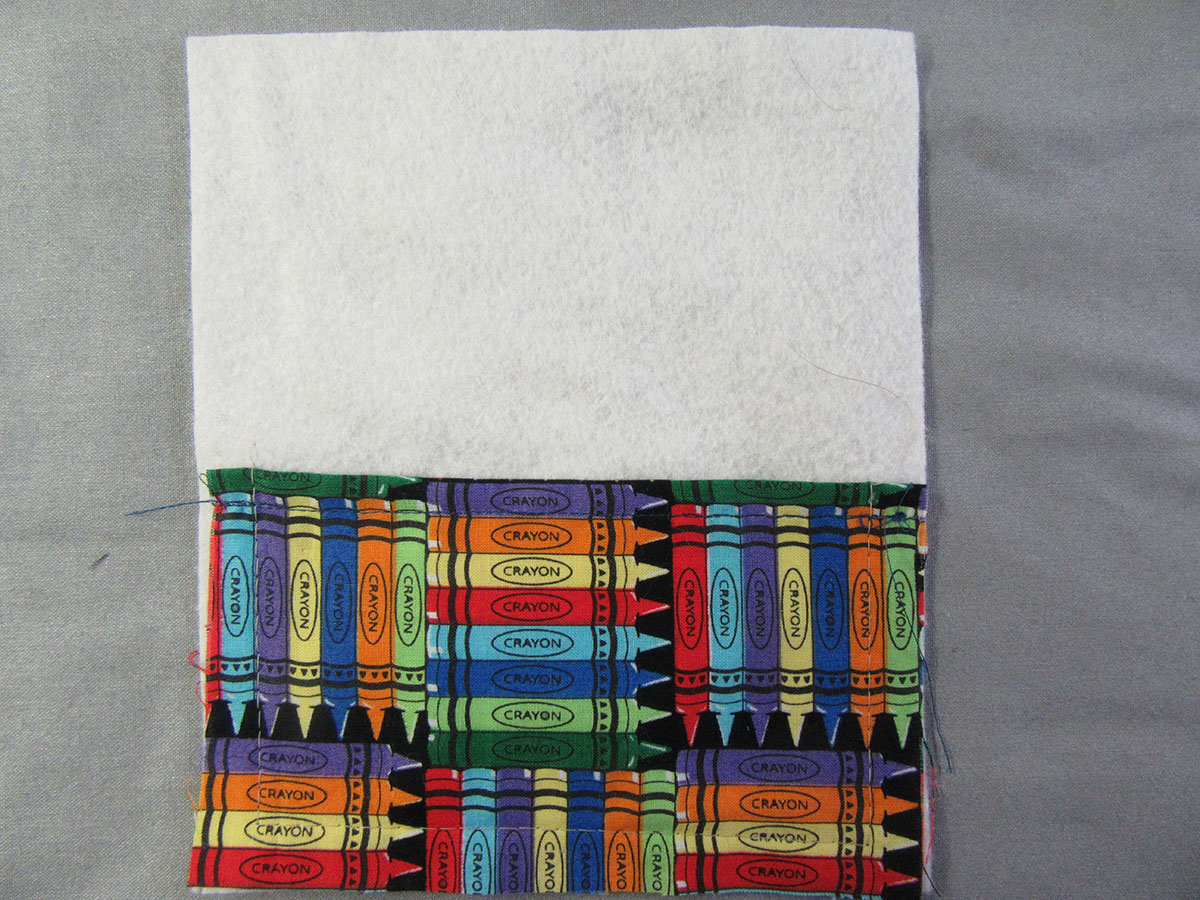
Pin the rectangle sewn in the previous step to one of the felt pieces. Make sure the stitched finished edge is to the top. Align raw edges with raw edge of felt. Both felt and printed fabric should be right side up. Baste around both sides and across the bottom of the printed fabric using a 1/4-inch seam allowance. Leave the top finished edge of printed fabric open. This will create the pocket on the back of the “tooth”.
Step 4
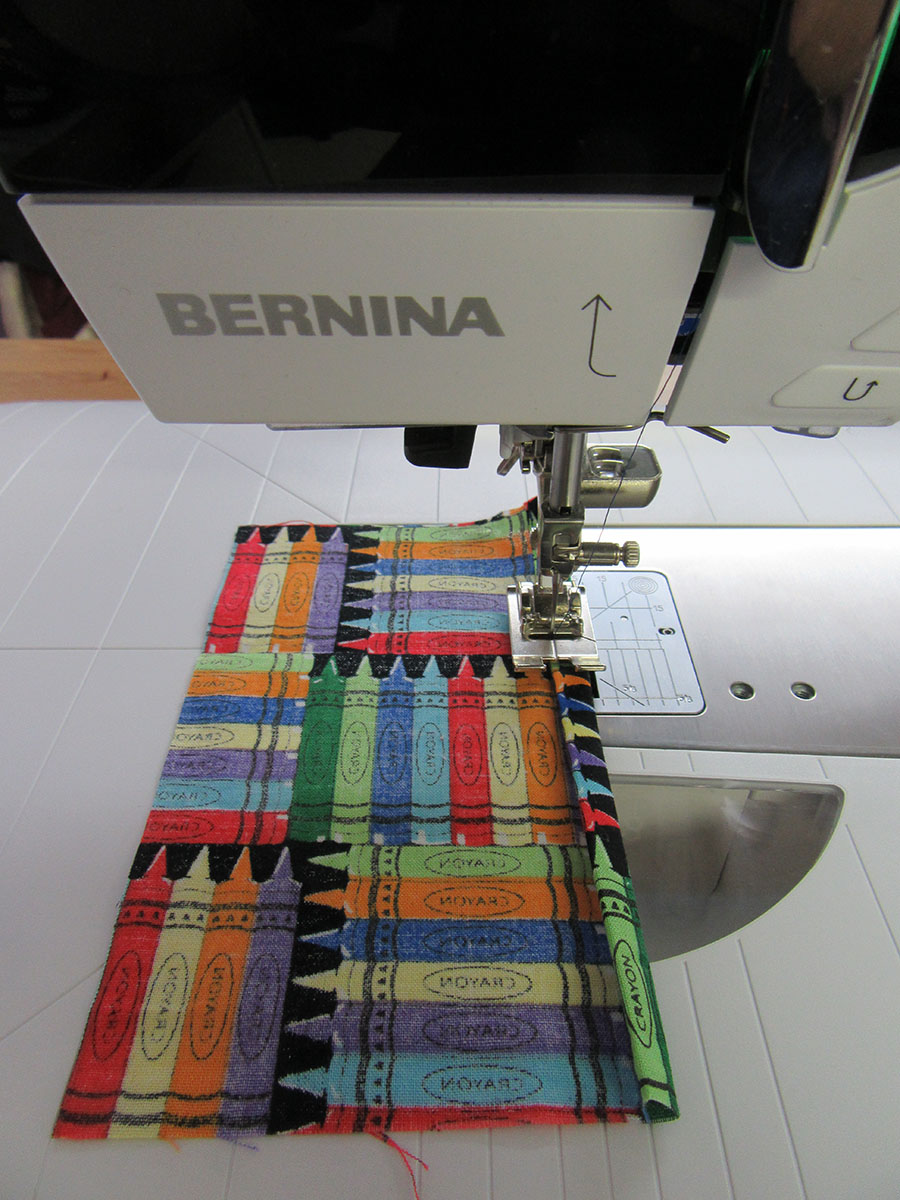
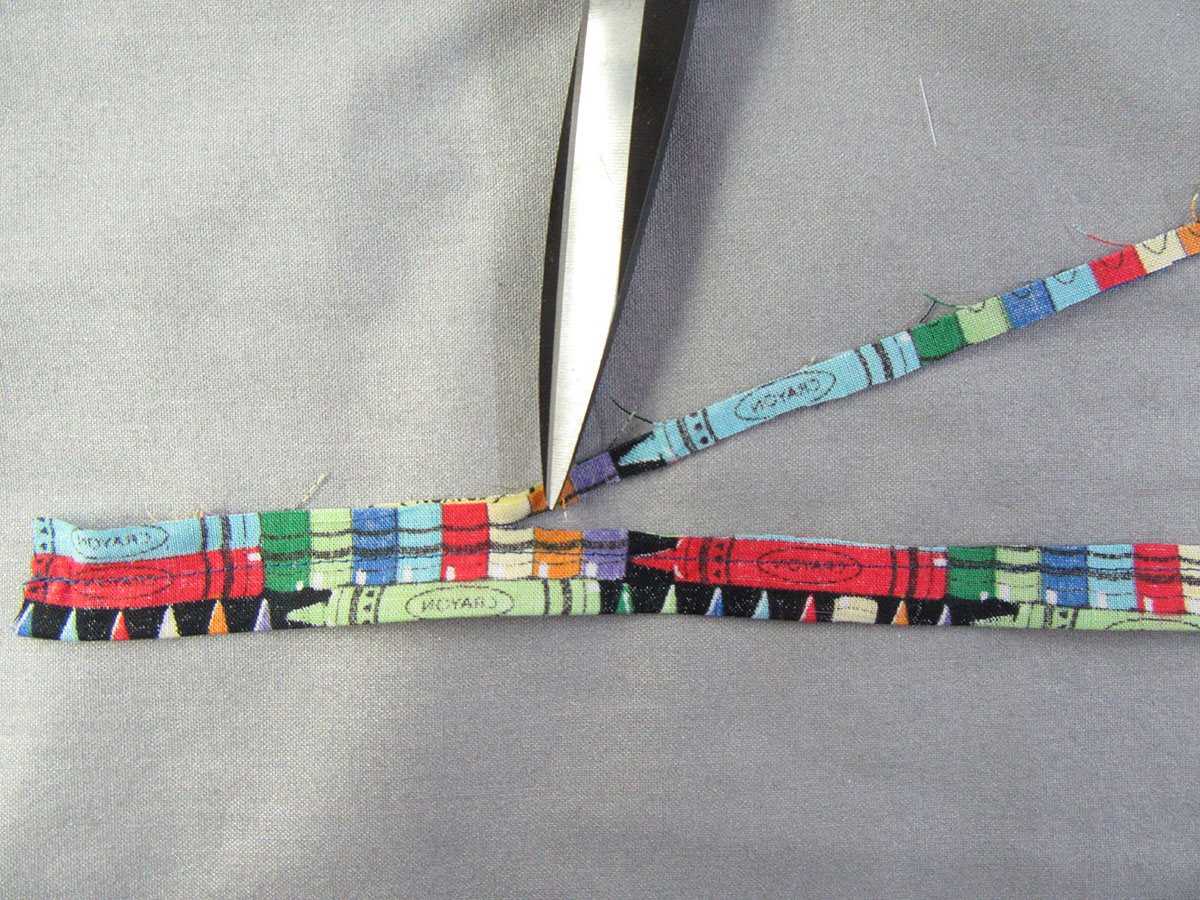
Fold the 15-inch strip in half, bringing right sides of long edges together. Stitch long edge only using ½ inch seam allowance. Trim close to the seam and turn right side out. A tube turner is really helpful for this step. If you don’t have one, I have been known to use a chopstick and it works fairly well. Be careful not to clip the seam line.

Step 5
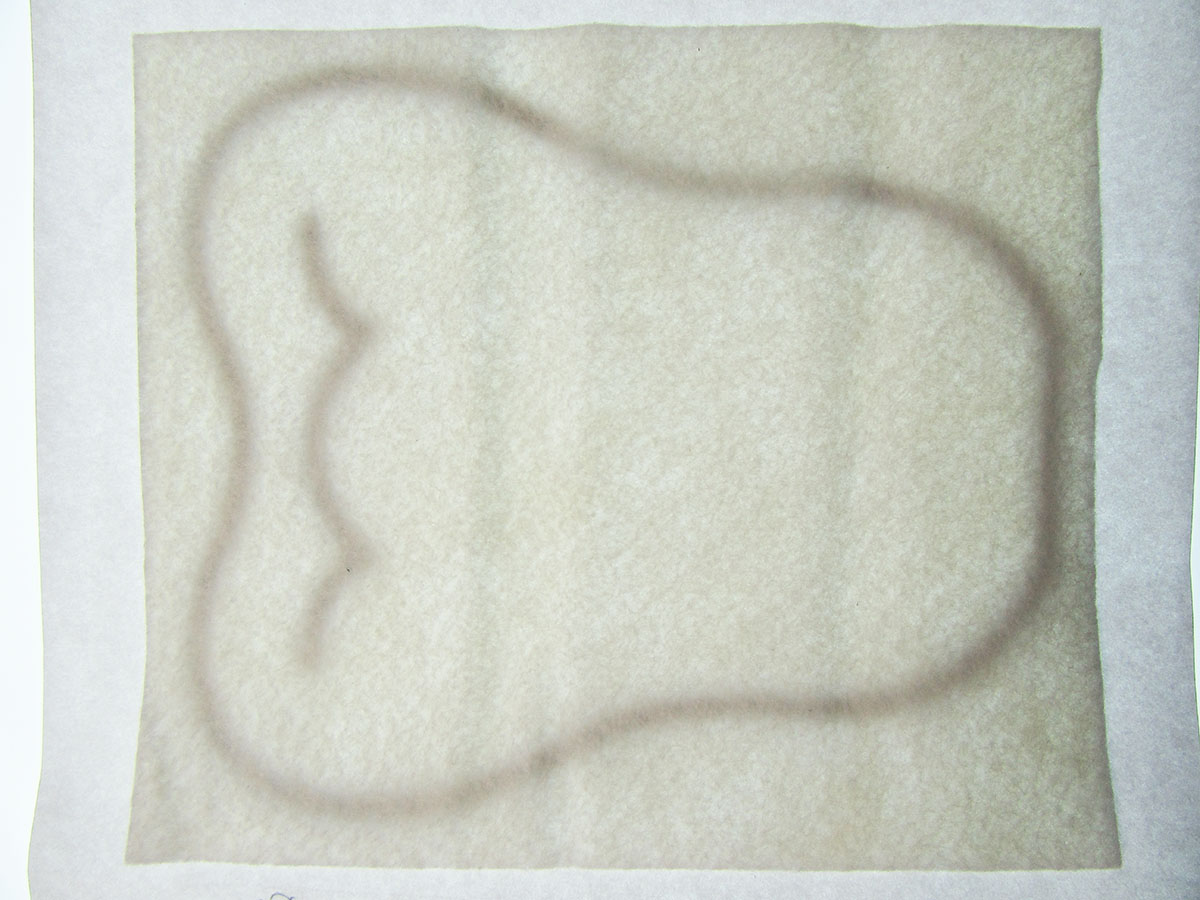
Print out the tooth pattern template. Make sure to print “actual” size and not “to fit” or it will be too big.
Step 6
Lay one piece of felt over the tooth pattern and trace tooth outline and “molar” line onto felt using a pencil, or other fabric marking tool. You might need to use a lightboard for this step, depending on the thickness of the felt. Make sure to lightly trace lines so that they will not show through the stitching that we will do further on in the project.
Step 7
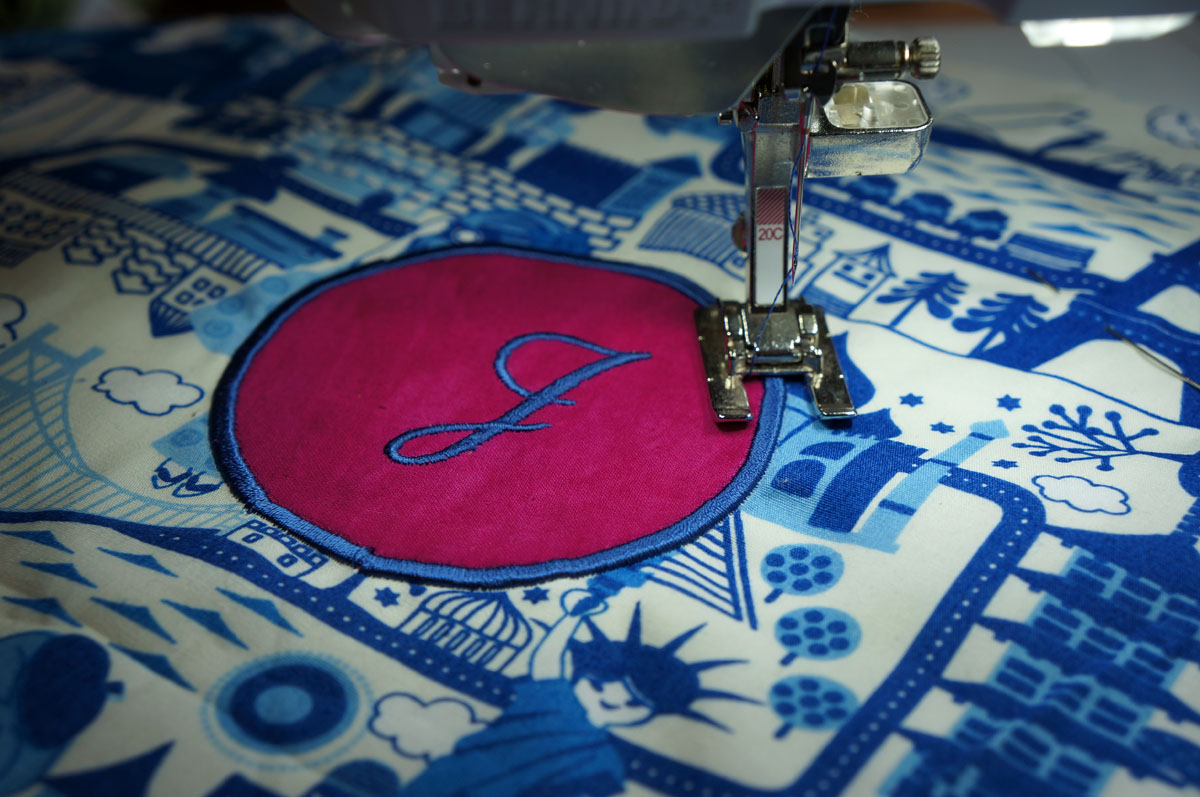
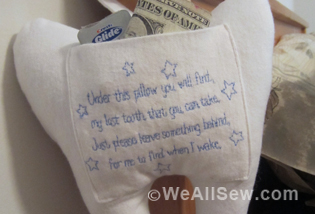
Apply stabilizer to the backside of the felt marked in step 6. Center felt in the embroidery hoop. The star design and the alphabet I used to write the name were both preloaded onto my BERNINA 790 PLUS, but you can use any designs you prefer. Adjust design as needed to fit your project. Embroidery design needs to be at least ¼” inside of all of the tooth outline marks. In addition, you want to make sure that none of the design crosses the “molar” line. Embroider the design onto the felt.
Step 8
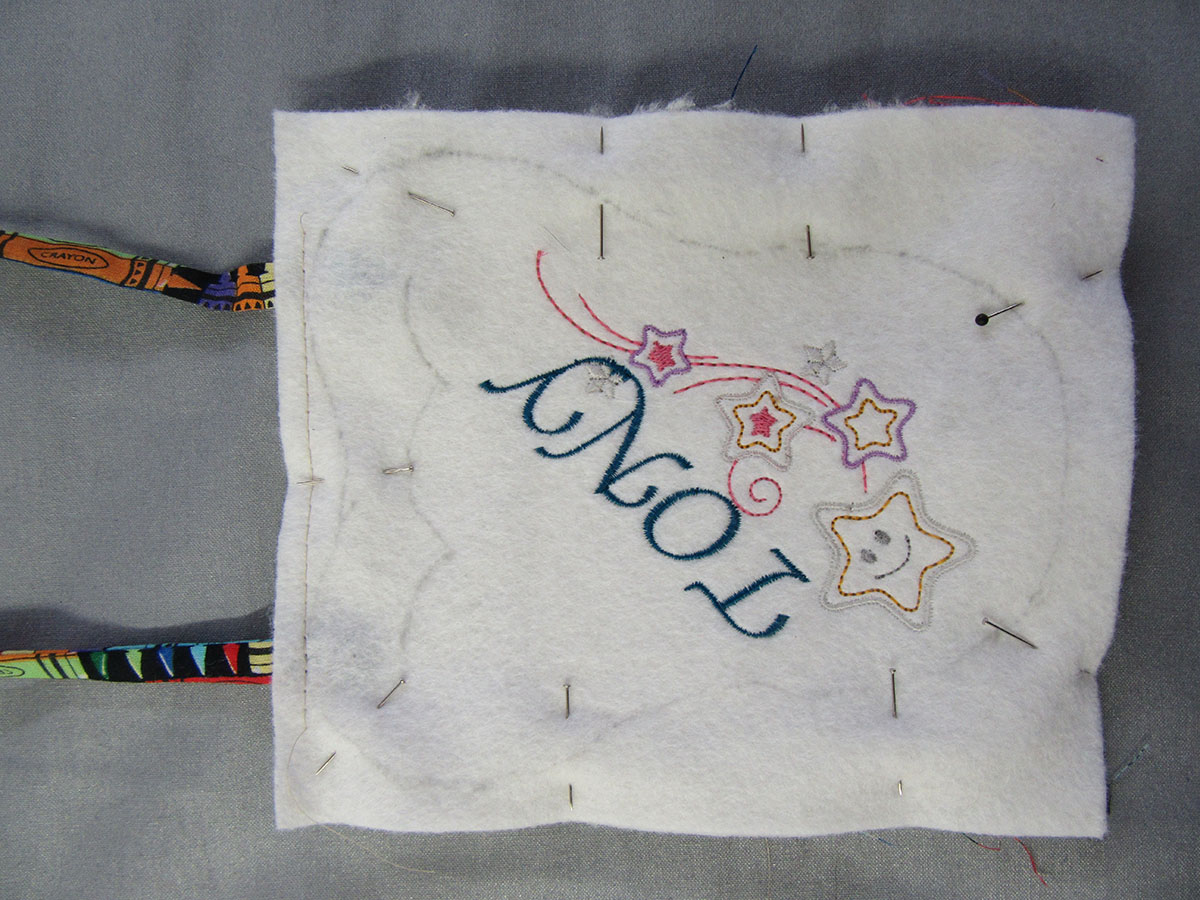
Remove as much stabilizer as possible. Pin long narrow printed tube made in step 4 to the wrong side of the top of the embroidered felt rectangle. Make sure that the raw edges are approximately ¼ inch below the top line marking the top of the tooth and that the strip is not twisted. Baste tube ends in place.

Step 9
Lay the felt piece right side down on a hard surface. Place the embroidered piece of felt with the basted printed fabric attached to it right side up top of this piece and pin together. Printed fabric tube will be sandwiched between the two pieces of felt. Make sure that it is sticking up in a “u” and not trapped in the seam line except at the previously basted ends.
Step 10
Using a wide satin stitch, stitch around the outline of the tooth making sure to cover the marked line. Next satin stitch the “molar” line.
Step 11
Trim felt close to satin stitching. Make sure not to clip stitching. You will have to trim the felt on each side of the tube separately. Take care around the printed tube at the top so that you don’t accidentally cut it off.
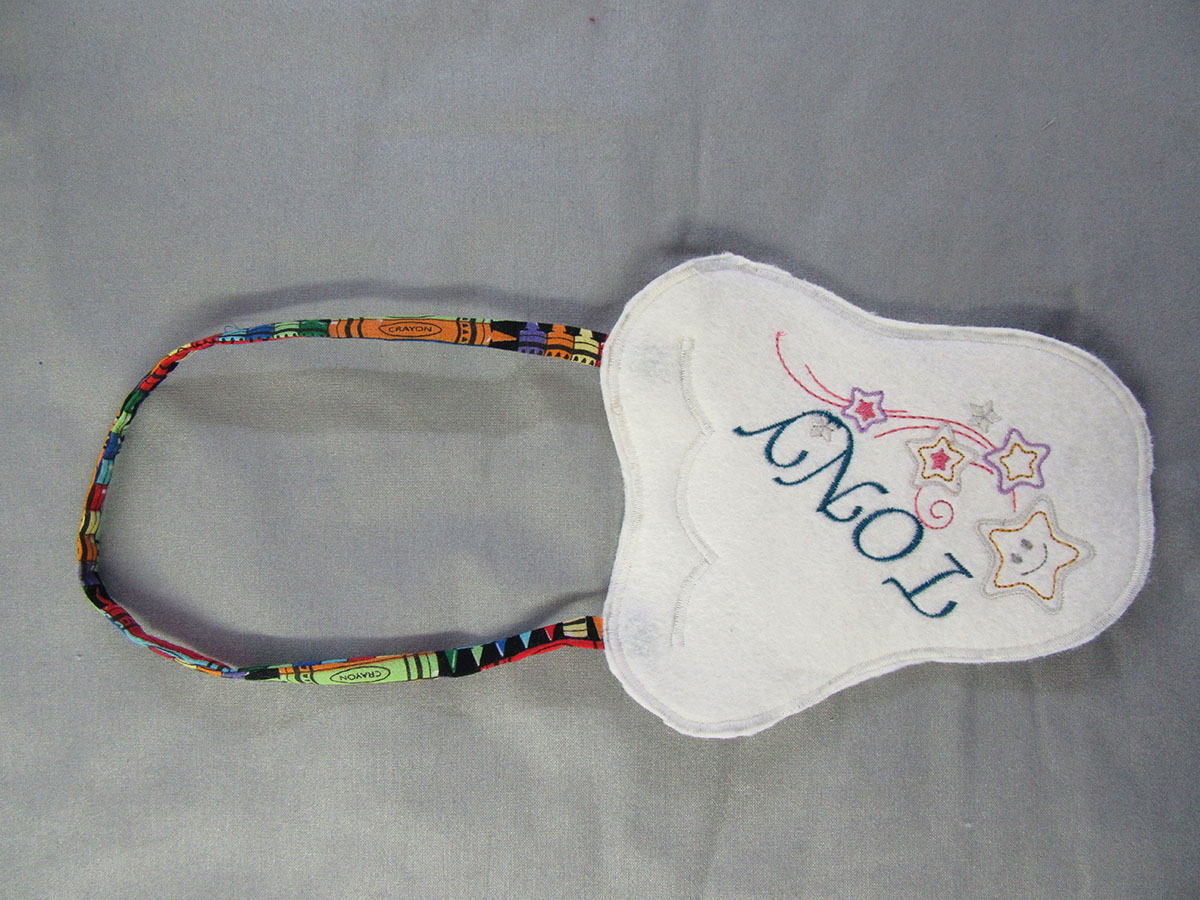
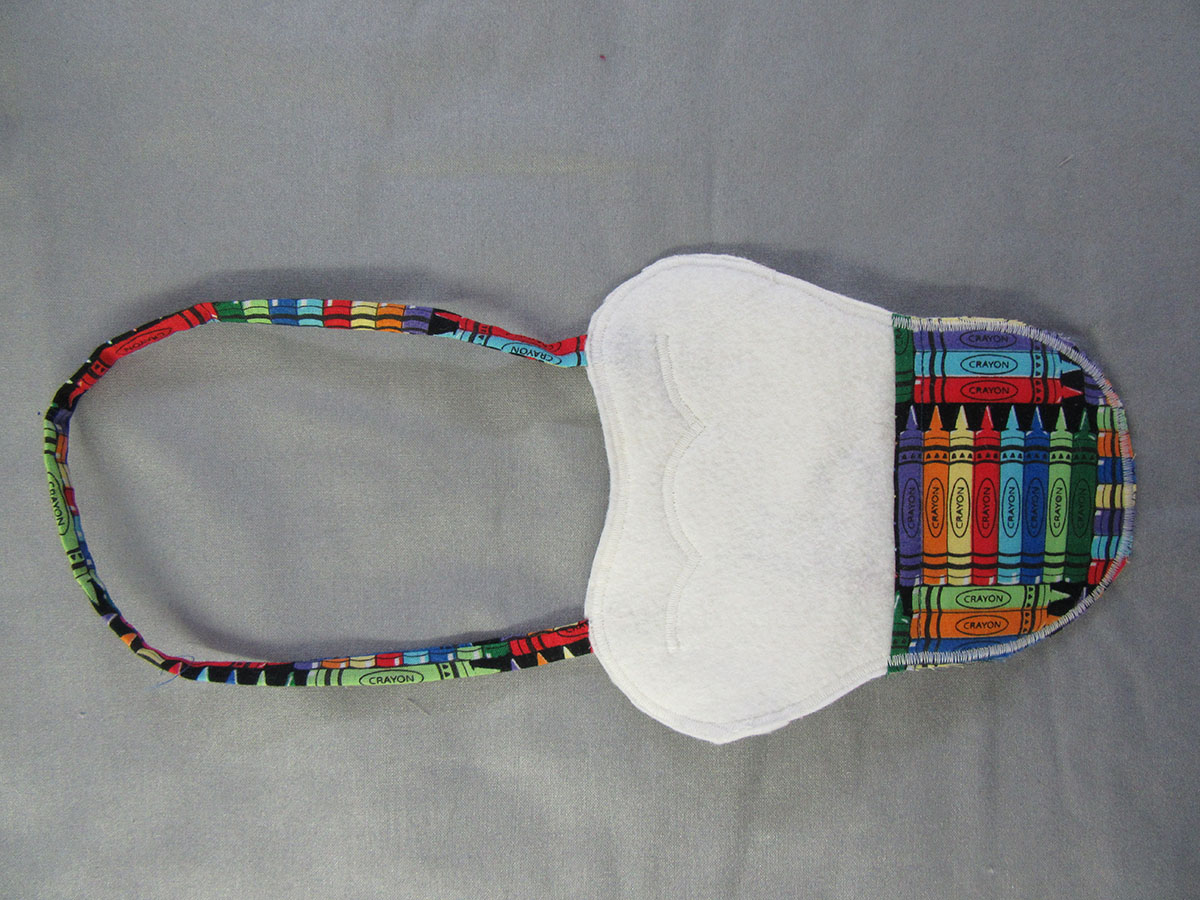
Your child’s Tooth Fairy Door bag is now ready for use. Simply put the tooth in the pocket on the back, (I liked to put the tooth in an envelope first, so that it is easier to take in and out.) hang on the door and the Tooth Fairy will have a breeze visiting.


![Have a habit of misplacing your keys. Losing your iPod? Forgetting your coupons? Now, with this handy organizer, all your little necessities are in one convenient spot when you're ready to head out the door - right on the door knob! How to Make a Door Organizer Supplies 1/3 yard or heavyweight fabric such as twill, canvas, or denim 1/3 yard of fusible interfacing Coordinating thread Scissors Water-soluble marking pen or tailor's chalk Ruler 1/4" presser foot (BERNINA Patchwork Foot #37 or Patchwork Foot with Guide #57) Download and print the keyhole template: [download id="88"] Step 1) Prepare the fabric pieces. Cut from the heavyweight fabric: Two 5" x 11" rectangles for the organizer body One 5" x 12" rectangle for the large pocket One 5" x 7" rectangle for the small pocket One 6" x 7" rectangle for the hanging pocket Fuse interfacing to the wrong side of both 5" x 11" fabric rectangles following the manufacturer's directions. How to Make a Door Organizer Cut the keyhole: Measure down 1" from the top edge of one 5" x 11" rectangle. Center the top of the keyhole template on this mark. Trace the template. Cut along the traced line. Repeat for the second 5" x 11" rectangle. How to Make a Door Organizer Step 2) Make the large and small pockets. With wrong sides together, fold the large pocket in half to create a 6" x 5" rectangle. Topstitch close to the folded edge. How to Make a Door Organizer Place the large pocket on top of the right side of one 5" x 11" rectangle, matching the raw edges along the sides and bottom edges. Baste in place. How to Make a Door Organizer With wrong sides together, fold the small pocket in half to create a 3 1/2" x 5" rectangle. Topstitch close to the folded edge. Place the small pocket on top of the large pocket, matching the raw edges along the sides and bottom edges. Baste in place. How to Make a Door Organizer Step 3) Make the hanging pocket. With wrong sides together, fold the 6" x 7" rectangle in half lengthwise. Press. How to Make a Door Organizer Unfold the strip and then fold the long raw edges to the center fold line. Press. Refold the strip along the center crease. Topstitch close to both long edges. How to Make a Door Organizer Fold under 1" on both edge of the finished 7" strip. Measure up 1-1/4" from the lower edge on the right side of the second 5" x 11" piece. Center the bottom of the strip on this mark. How to Make a Door Organizer Sew close to the folded ends of the strip, then again 1/2" away from the first stitching. How to Make a Door Organizer Step 4) Construct the door organizer. With right sides together, place the two 5" x 11" rectangles together, matching the raw edges and the keyhole opening. How to Make a Door Organizer Stitch around the entire rectangle, leaving the keyhole open. Do not stitch around the keyhole area! Clip the corners. How to Make a Door Organizer Turn the organizer right side out through the keyhole opening. Press. How to Make a Door Organizer Topstitch close to the finished edges. How to Make a Door Organizer Baste the raw edges of the keyhole opening together. How to Make a Door Organizer Satin stitch close to the keyhole edges. Position the fabric so the needle goes just barely to the right of the raw edges and encloses them in stitches. Tip: A satin stitch is a zigzag stitch with a very short stitch length, so the stitches are very close to each other. How to Make a Door Organizer How to Make a Door Organizer Fill your organizer with keys, pens, letters, etc. so you never leave home without your essentials! How to Make a Door Organizer](https://weallsew.com/wp-content/uploads/sites/4/2011/10/How-to-Make-a-Door-Organizer-WeAllSew.jpg)