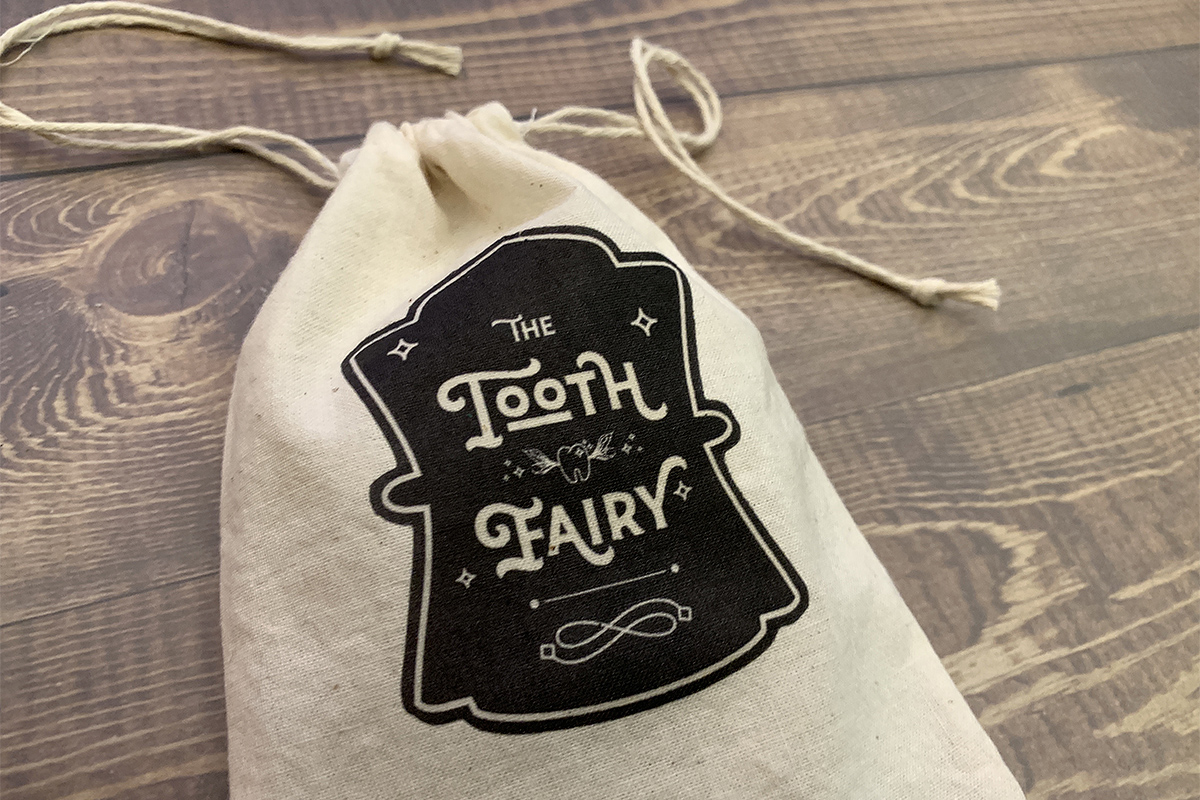
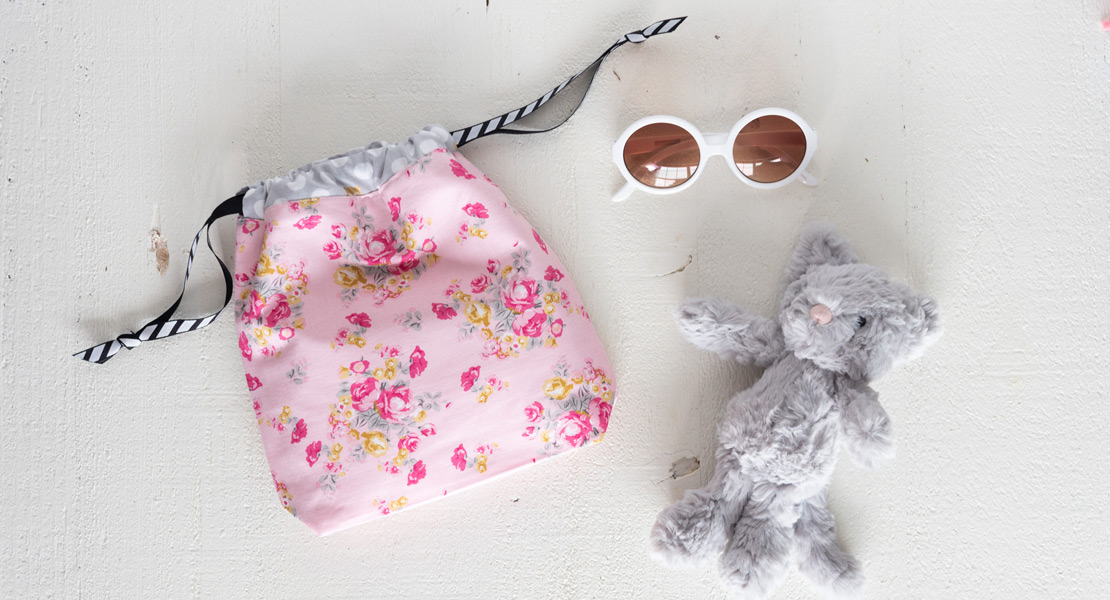
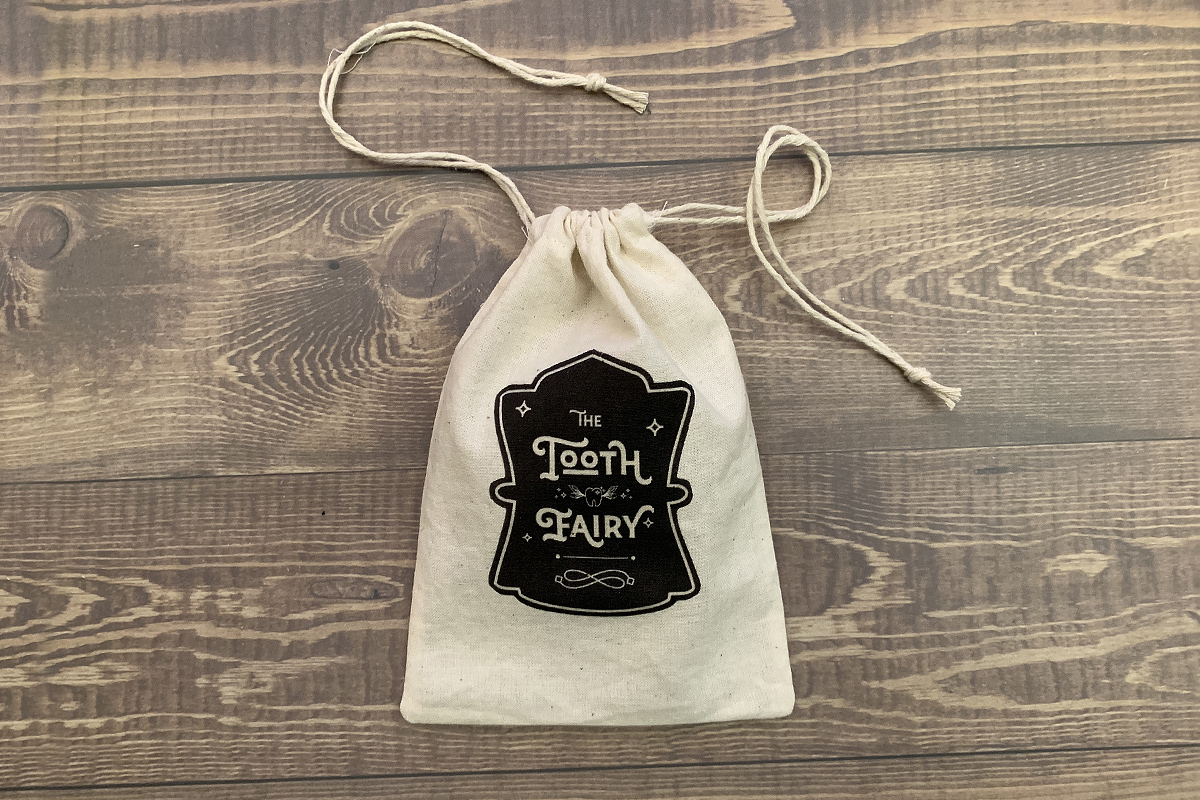
Tooth Fairy Drawstring Pouch
With the recent arrival of my son’s first loose tooth, I realized that fumbling around his LEGO-strewn floor in the middle of the night to swap a tooth for a treat would not be easy. Instead, I opted for a small, drawstring bag he could hang on his doorknob so the tooth fairy could do her thing without risking a twisted ankle—or swearing loudly. Hence, this adorable tooth fairy drawstring pouch pattern!
Drawstring bags are always a quick make, and this is the perfect size for whatever the tooth fairy might have up their sleeve, not too big and not too small. And, with the included printable iron, you’ll be tooth fairy ready in no time.
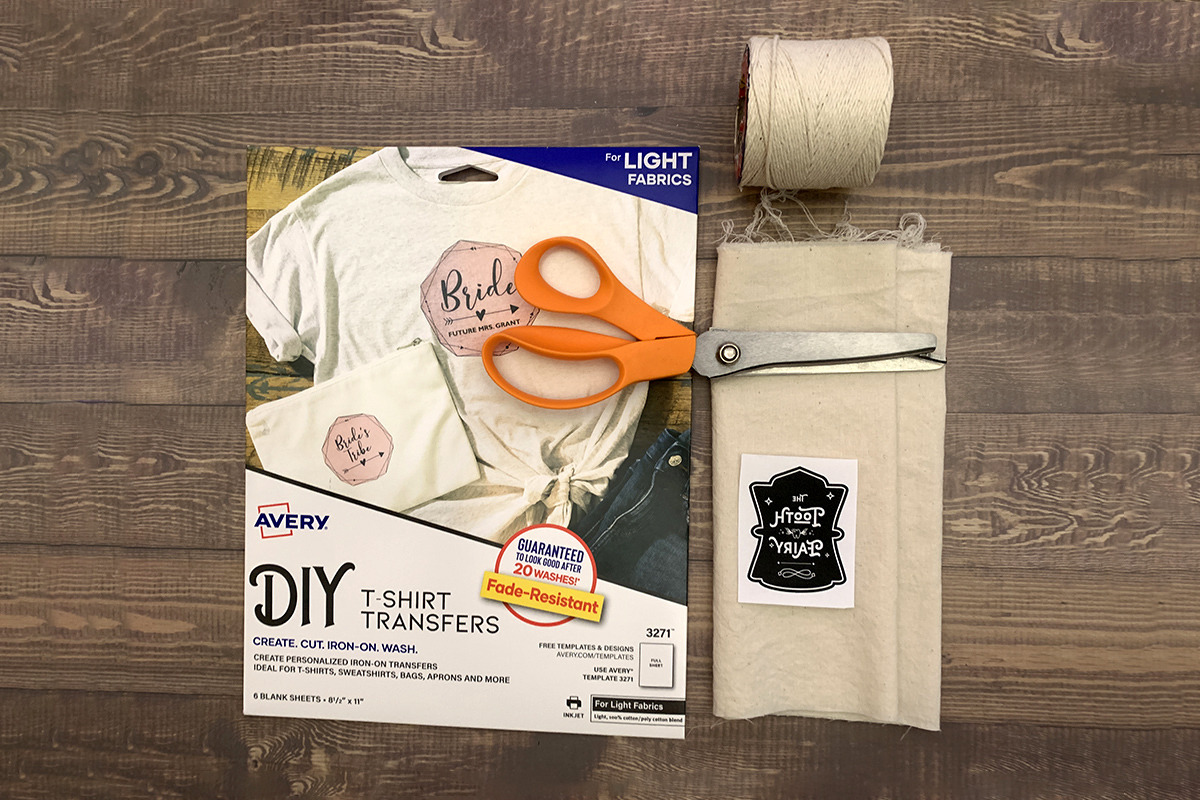
Materials to Create the Toothfairy Drawstring Pouch
- Two pieces of 100% cotton fabric measuring at least 4.5 x 6.5 inches (unbleached muslin shown here)
- 30 inches of cotton cording
- Printable Heat Fabric Transfer (I used Avery 3271)
- Inkjet printer
- Small, unfinished wooden board or similarly hard heat-resistant surface (an ironing board will not work)
- Pinking shears
- Sewing Machine + Thread

Sewing Instructions for Tooth Fairy Drawstring Pouch
These little tooth fairy drawstring pouches are so quick to make that the longest part may be waiting for your printer to spit out the downloadable iron-on decal!
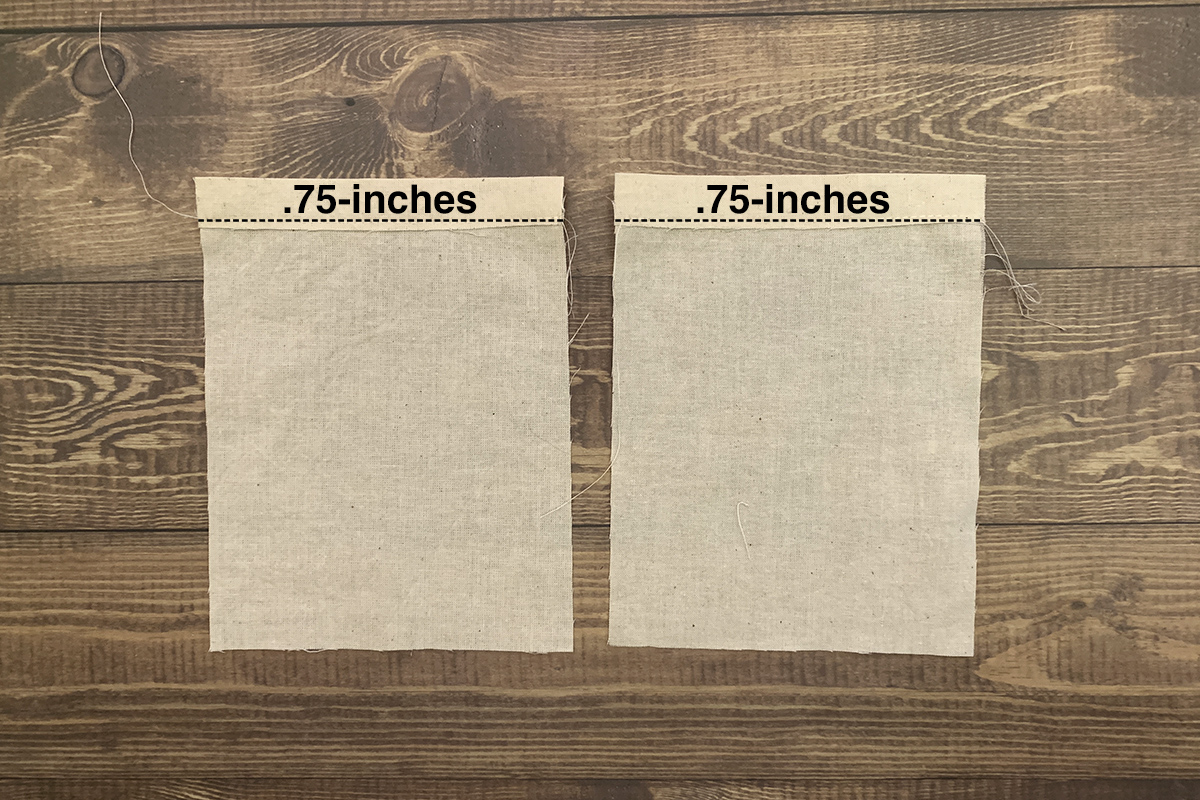
Step 1: Cut Your Fabric
You’ll need two pieces cut 4.5-inches wide and 6.5-inches tall.

Step 2: Create the Drawstring Casing
Fold the top of both fabric pieces down .75-inch and press. Stitch along the bottom of the casing about 1/8-inch from the edge.
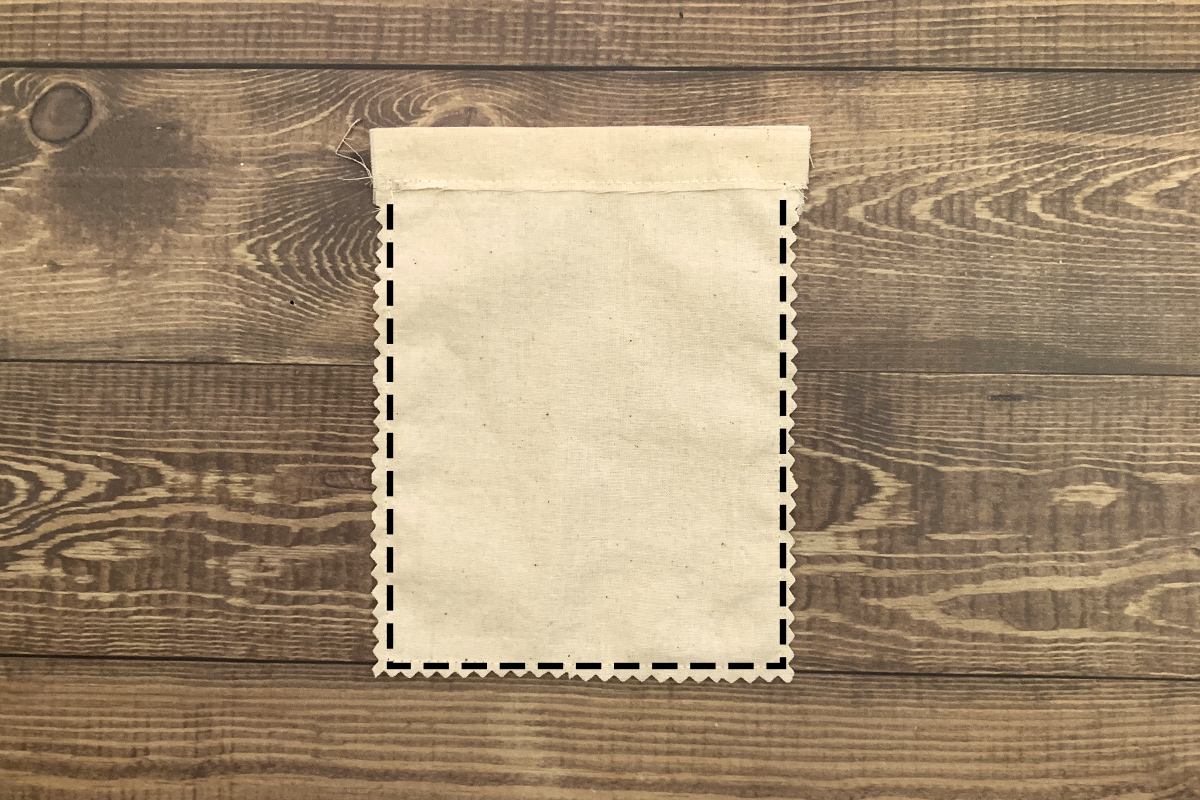
Step 3: Sew the Bag
With right sides facing, stitch around from just below the casing, down along the bottom, and up the other side using a .25-inch seam allowance and being careful to stop at the bottom of the casing. (Be sure not to sew the casing closed.)
Trim the seam allowance with pinking shears to prevent fraying. Then turn right sides out and press.
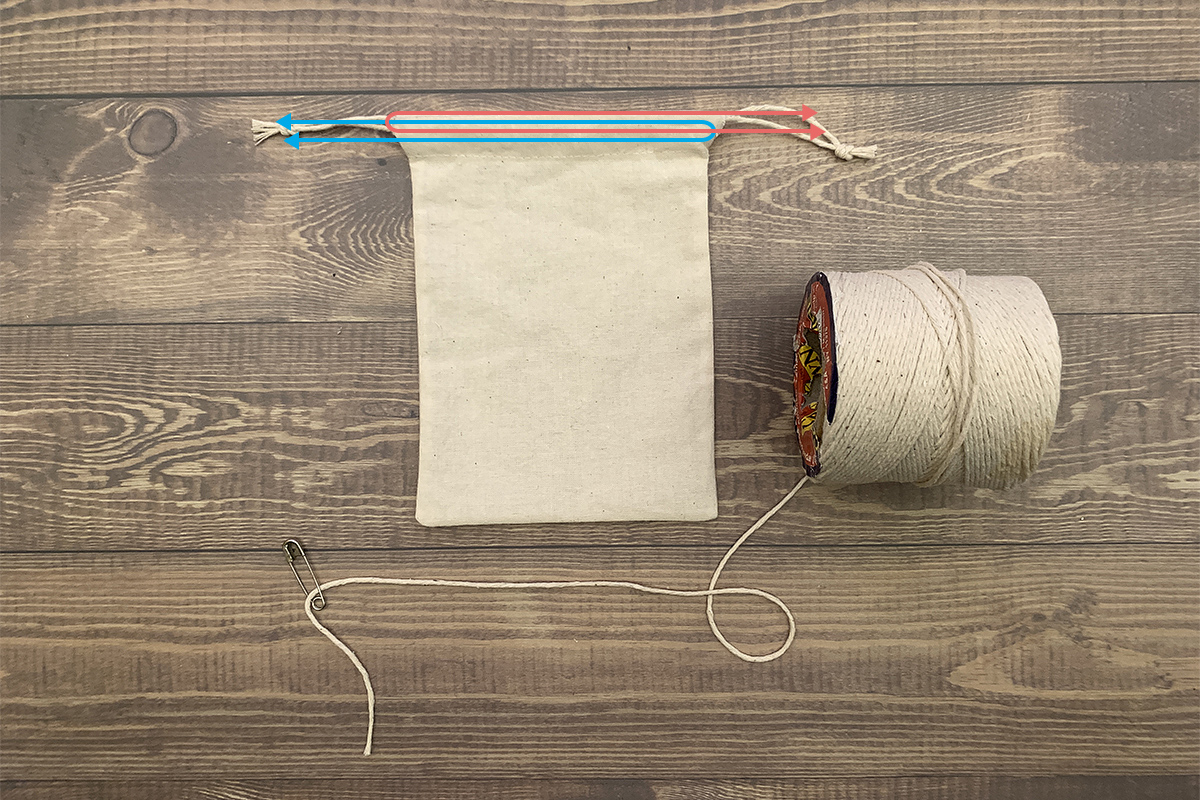
Step 4: Add the Drawstring
Cut two 15-inch lengths of cotton cording and thread through the casing using, out the other end and then back through the other side using a safety pin or similar. Knot the ends together and repeat with the second piece of cotton cording, beginning on the opposite side of the bag.
Step 5: Print and Iron-On the Decal
Download the printable tooth fairy decal and make a test print to be sure which way to load the Printable Fabric Heat Transfer paper so it prints on the correct side. (Note that the tooth fairy decal is reversed and will appear backward until applied to your project.)
After making a successful print, carefully cut out the tooth fairy label, trimming carefully along the edge of the decal’s shape.
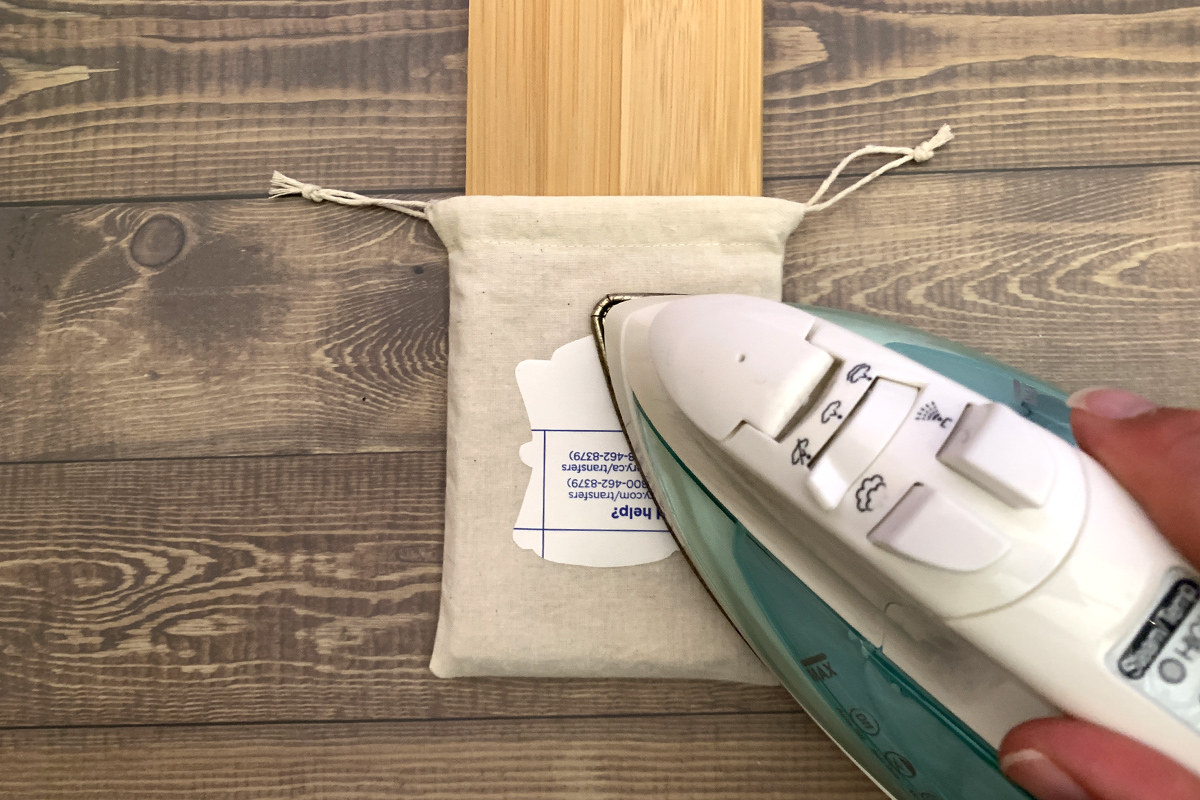
Place the finished tooth fairy drawstring pouch on your hard, heat-resistant surface (again, an ironing board will not work). I used a broken piece of an old wooden cutting board that just happens to fit inside the bag, allowing me to separate the fabric layers (not required, just how it worked out for me).
Position the tooth fairy decal face down on the fabric. Personally, I’ve found it looks best if you center it on the portion of the bag that’s below the casing. To make it easier, I folded the casing under, then visually centered the decal within the remaining area of the bag.
Follow the instructions included with your transfer paper for iron settings and pressing time. (You’ll likely need to turn off your iron’s steam setting.)
That’s it! Sprinkle with magical pixie dust and you’re ready to rock your little one’s world with this adorable tooth fairy drawstring pouch! ?
For more learning, projects, and freebies visit me at KharaPlicanic.com.