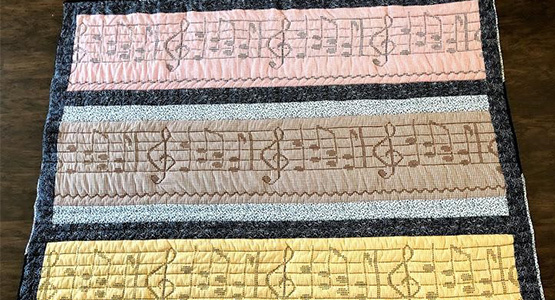
Machine-made Tapestry
I made a small wall-hanging tapestry using my BERNINA machine. I’m going to share the techniques I used to create this piece in hopes that you will use them as inspiration to make a masterpiece yourself. I will focus on the different tools and methods you can use to create different textures rather than show you the exact steps I used to create my specific tapestry. I want you to feel inspired and prepared to create something that is uniquely your taste and suits your home. The techniques I’ll demo will utilize three different sewing methods: standard couching, free-motion couching, and felting.
Supplies to Make a Tapestry
Feet and Accessories
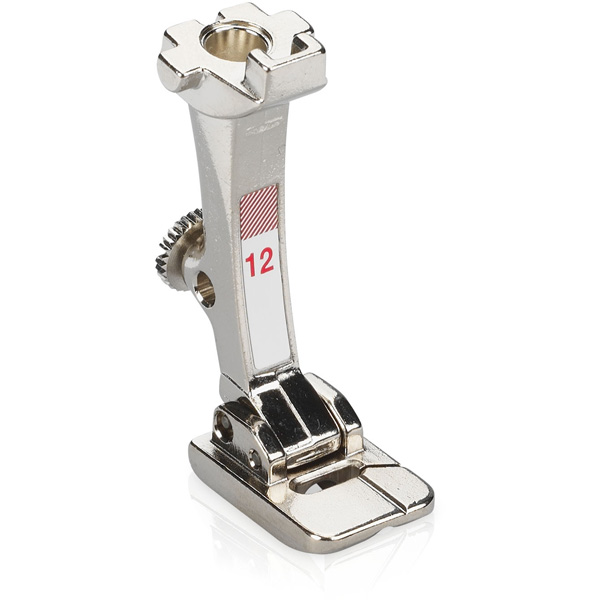
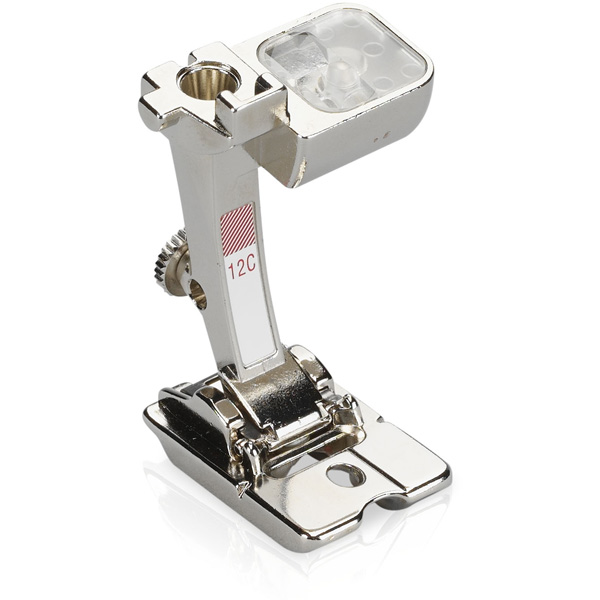
- Bulky Overlock Foot #12/12C
- Adjustable Ruler Foot #72
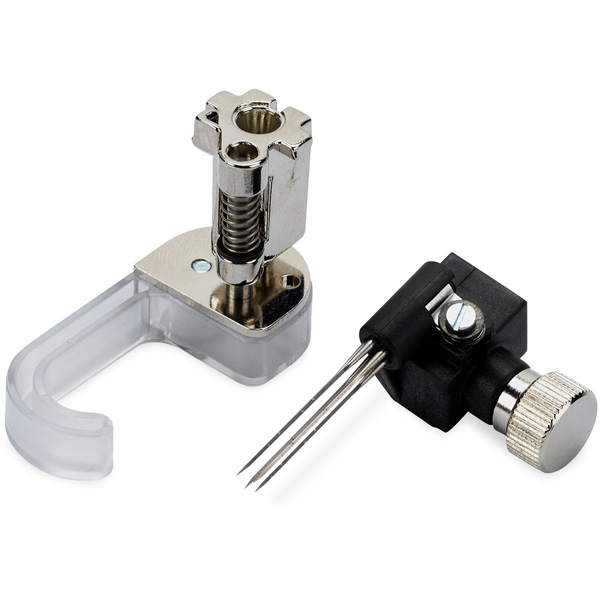
- PunchWork Tool for Rotary-, B9- and BERNINA-hook Machines
- PunchWork Tool for CB Hook Machines
Notions and Fabric
- Cotton canvas or duck cloth – cut one 16” x 21” for wall hanging, cut one 8” x 10” for swatch
- Quilting cotton backing – cut one 16” x 21”
- 18” long 1/2” wood dowel
- Twill tape or ribbon for hanging
- Iron and ironing board
- Rotary cutter and cutting mat
- Fabric scissors
- Bulky yarn (variety colors)
- Worsted weight yarns (variety colors)
- Sock weight yarns (variety colors)
- Wool roving
- Wool felt
- Pencil
- Thread snips

Prepare Your Canvas
- Pre-cut main fabric (either duck cloth or wool felt) and quilting cotton (for backing) to 16” x 21”
- Measure 1/2” in from the raw edges on both long sides and one short end and mark with a pencil.
- Repeat, measuring 1” in from the three sides.
- Along the remaining short edge, measure and mark 1/2” down, and again 2 1/2” from the raw edge.
- Within these marked lines is the ‘working area’ of your canvas. Using a pencil, sketch the outlines of your desired design, such as the three shapes on the lower part of my wall hanging.
- Fill in the design using a variety of the following techniques: traditional couching, free-motion couching, and felting.
The first things I want to discuss are tools and materials. We have a number of presser feet designed specifically to incorporate different materials and fibers. I’ll talk a bit more about each accessory as we put them into use.
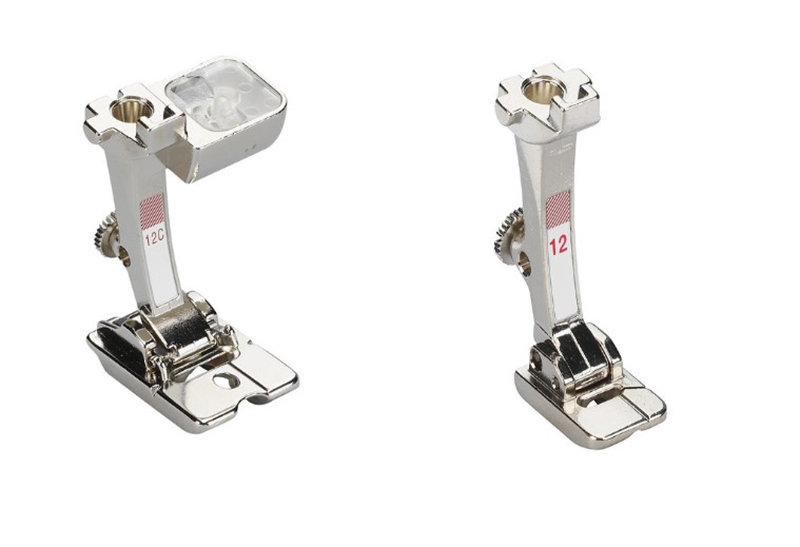
First is the Bulky Overlock Foot #12/12C. This foot is great for standard couching while using the feed dog with thicker yarn or cording.
Next, for free-motion couching, we have a few options. Free-motion Couching Foot #43 is great for finer yarns or cords crochet cording or sock-weight yarn.
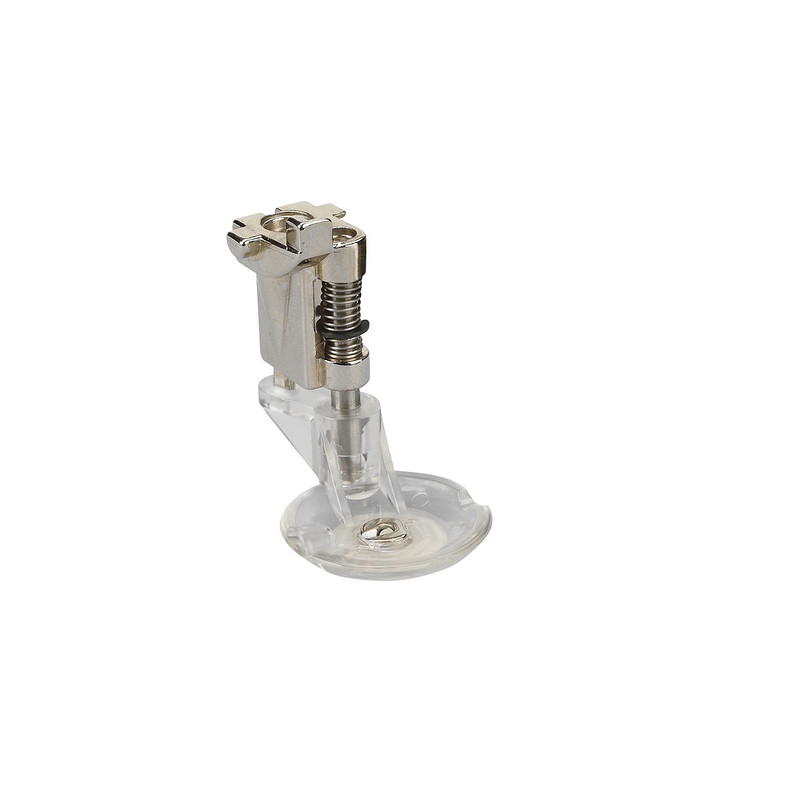
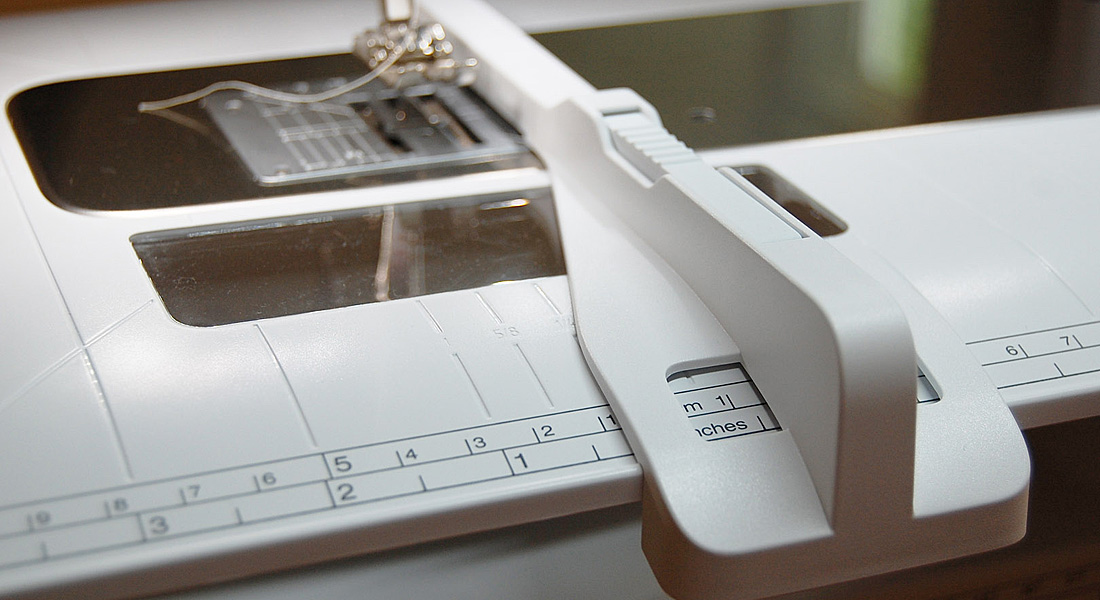
But if you’d like to use a thicker yarn, using Adjustable Rulerwork Foot #72 with the Couching Inserts will be a great tool.
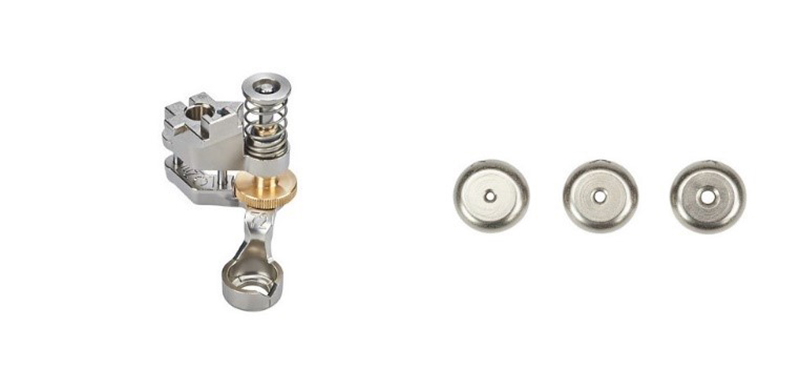
Then, try using the Needle Punch Set #45 for needle felting. There are two versions of Needle Punch Set #45 available, labeled for “rotary hook” or “CB Hook” machines. The “rotary hook” style will accommodate 4, 5, 7, and 8 Series machines with a 9 mm stitch width only. If you decide to try out needle punch you will also need to purchase the corresponding needle punch stitch plate that will work with your machine.

Traditional Couching with the Bulky Overlock Foot
Traditional couching is a great choice for straight lines, gentle curves, or precise angles. A wide variety of yarns or cording can be used. The stitches used on my sample correspond to the BERNINA 790 PLUS, but these stitches may be found on other BERNINA machines. Consult your owner’s manual’s stitch charts.
- Attach Bulky Overlock Foot #12/12C and the 9mm Stitch Plate to the machine.
- Select a decorative stitch on the machine. For example, I used Honeycomb Stitch #8.
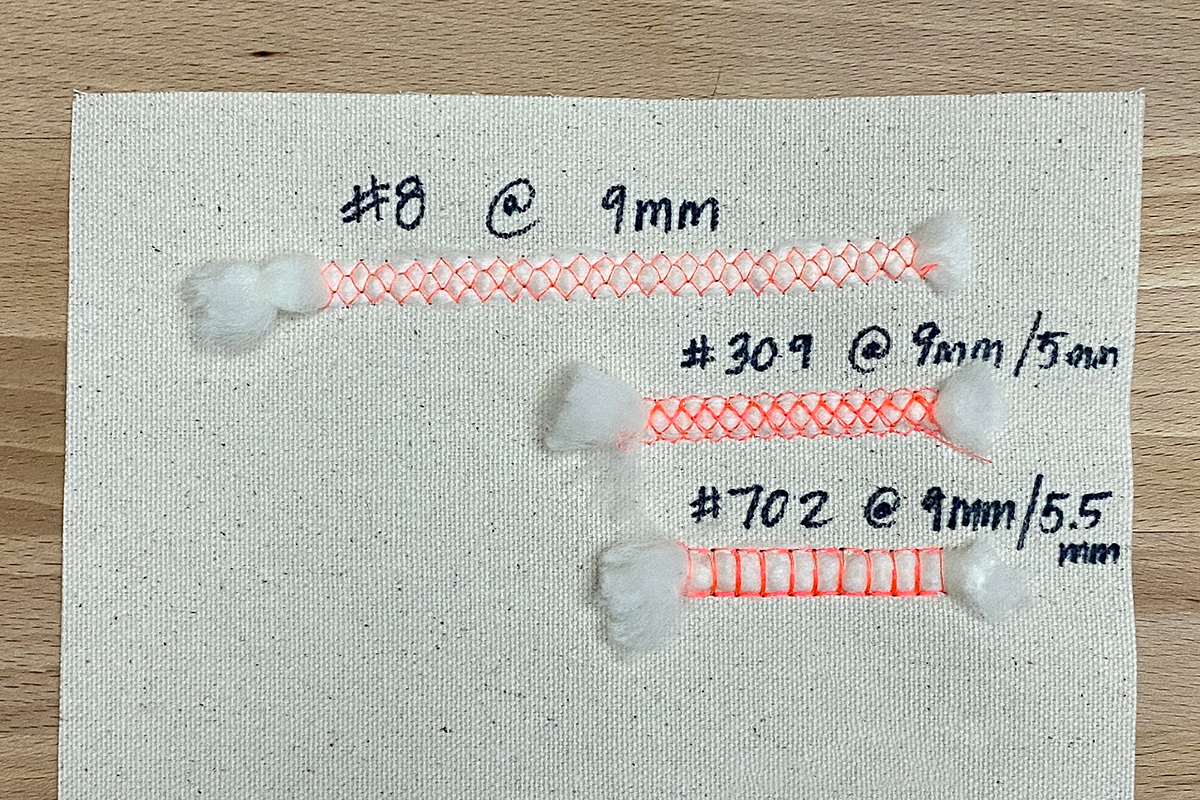
- Place a bulky yarn underneath the presser foot, nested in the deep groove on the bottom of the foot.
- Stitch over and through the yarn.
Tip: For a subtle textured look, stitch with a thread that matches your yarn. For more pronounced stitching, use a high-contrast thread.
Free-motion Couching
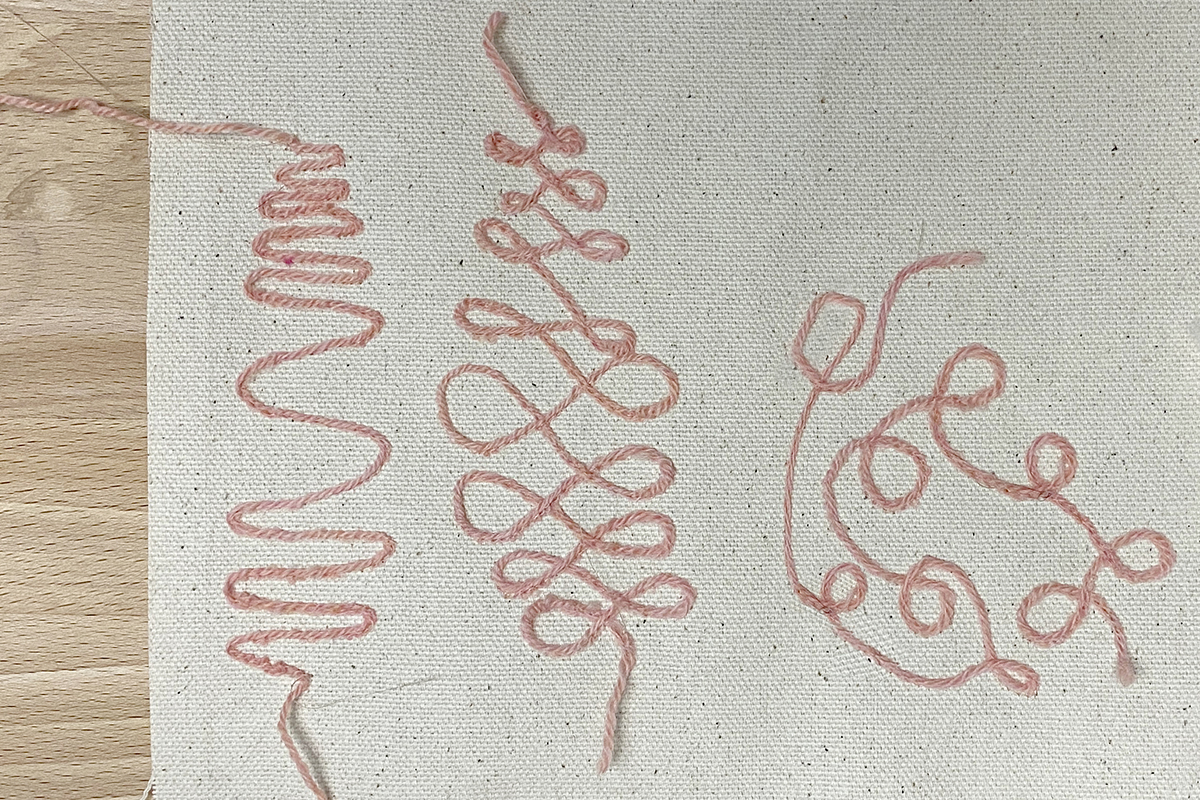
Free-motion couching can be used to couch yarns in any shape or direction. Crisp lines can be drawn or filled in with this technique.
- Choose a yarn for couching.
- Determine the best fitting couching insert for the Adjustable Ruler Foot #72. The yarn should be able to pass through the opening of the insert without resistance, but there should be no gaps between the yarn and the opening of the foot.
- Press the couching insert into the bottom of Foot #72. Thread the yarn from the top through the bottom of the foot.
- Attach the presser foot and the Straight Stitch Plate to the machine
- Lower the machine’s feed dog.
- Stitch free-motion. Motifs like loops, ribbon candy, and serpentine waves make for great couched designs.
Felting
Needle punch felting uses a specialty accessory and specialty needles to bond or embed fibers of yarn or roving together with the base fabric. It can be used to create incredibly unique, three-dimensional textures.
- Insert Triple Punch Needle.
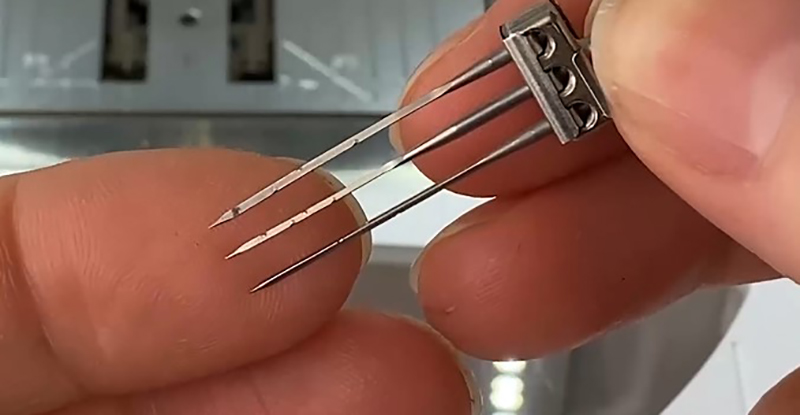
- Attach Needle Punch Set #45 to the machine with the appropriate punch stitch plate for punchwork.
- Remove thread and bobbin from the machine.
- Deactivate Upper and Lower Thread Sensors.
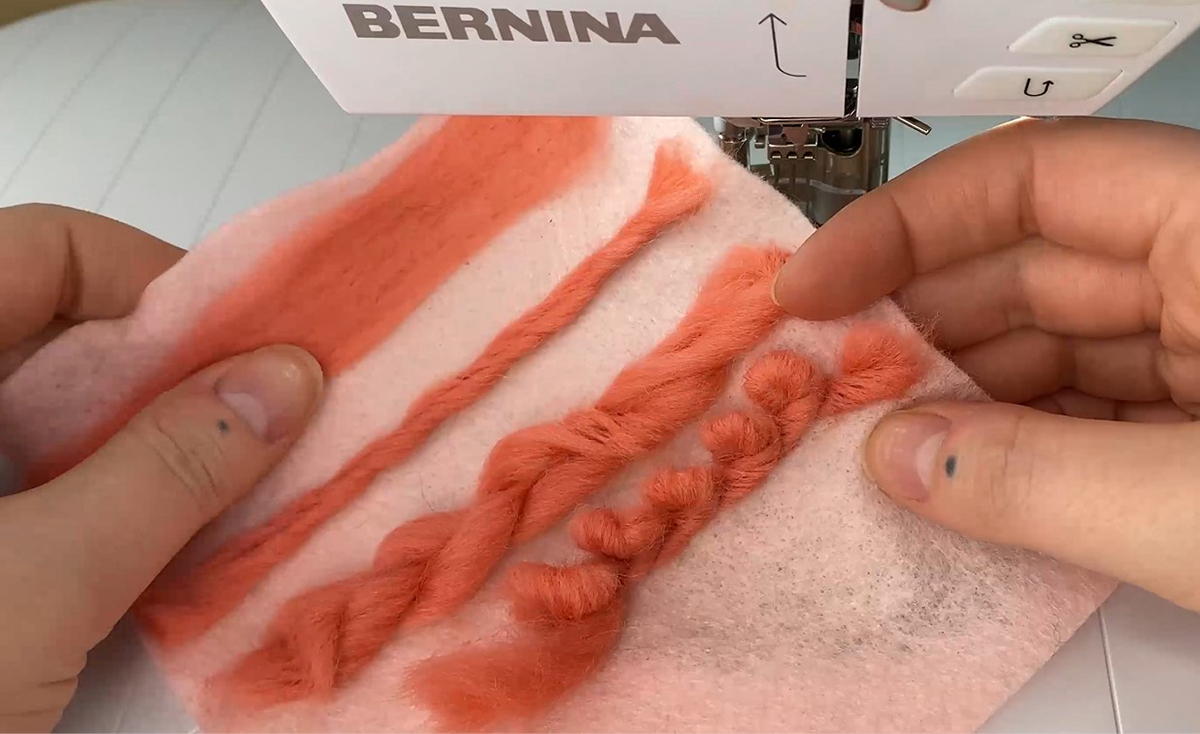
Machine felting allows you to place yarn or roving down on your fabric and ‘stitch’ it in place, moving in any direction and to stitch over the same area as many times as you like. Experiment with the yarn or roving to find textures you like. A few to try out include:
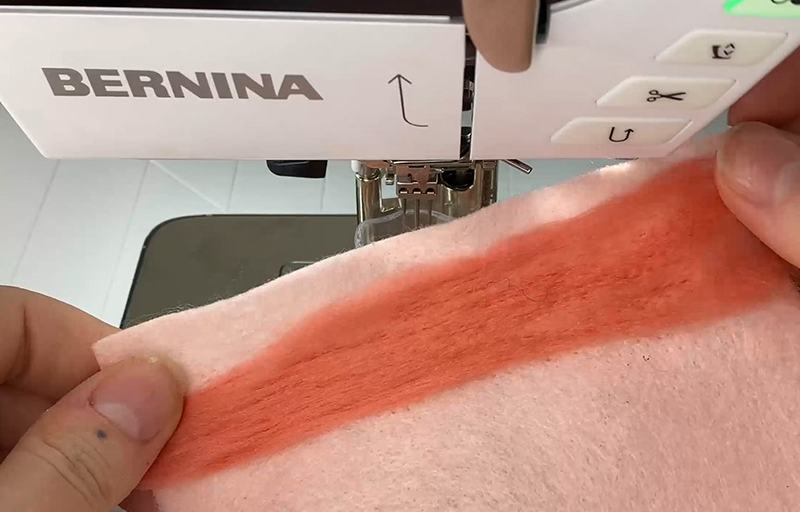
Flat Fill
- Untwist yarn or spread roving into an even, undefined area. Stitch back and forth across the yarn in many directions to create an evenly ‘filled’ area.
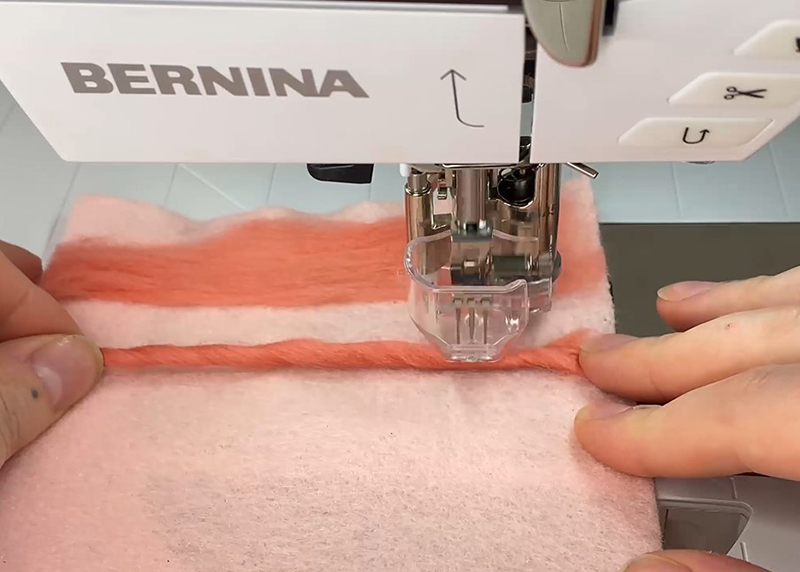
Single Twist
- Stitch down a length of yarn, moving the fabric under the presser foot and triple felting needle parallel to the needle. The result is a crisp, defined line.
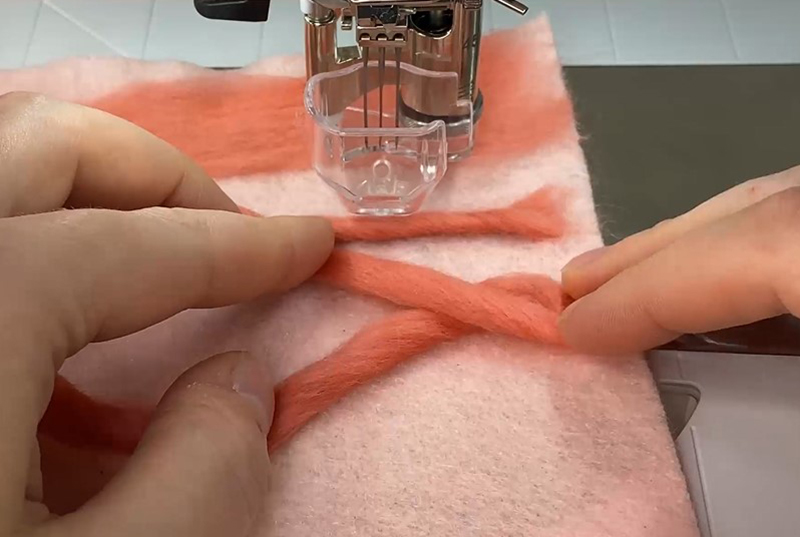
Double Twist
- Using two (or more) strands of yarn, cross the yarns over one another and ‘stitch’ in place at the intersection of the yarns to tack down. Continue crossing, or twisting, and tacking down to create a fluffier, less defined line.
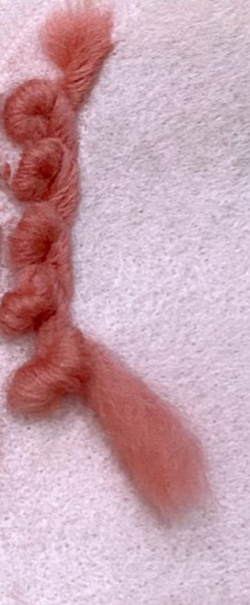
Loops
- Tightly twist a strand of yarn and cross the yarn over itself to create a small (under 1/2” diameter) loop. Tack down at the point where the yarn crosses over itself. Repeat many loops in a row to create a dense, three-dimensional texture.
Creating the Wall Hanging

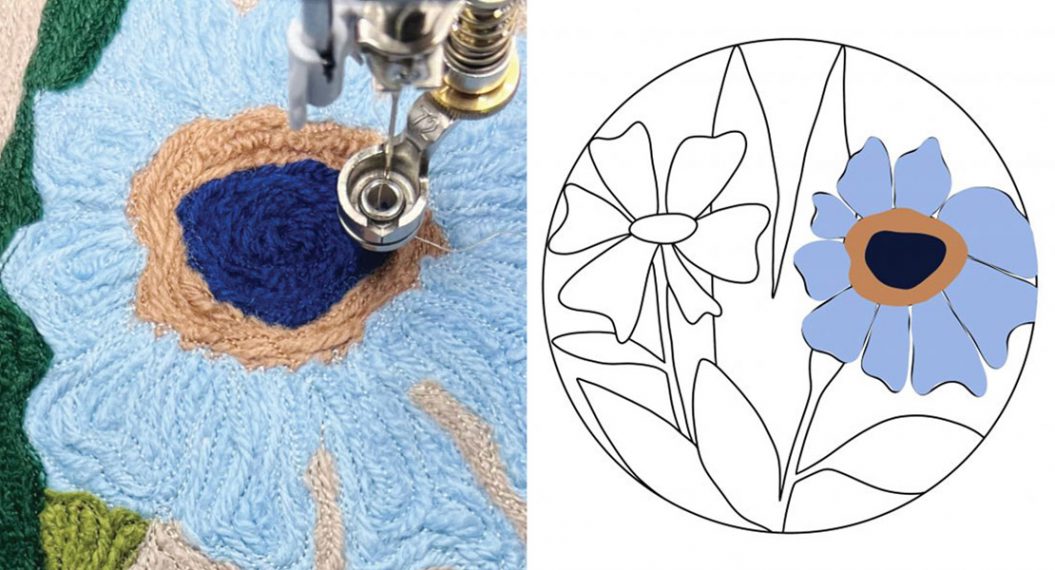
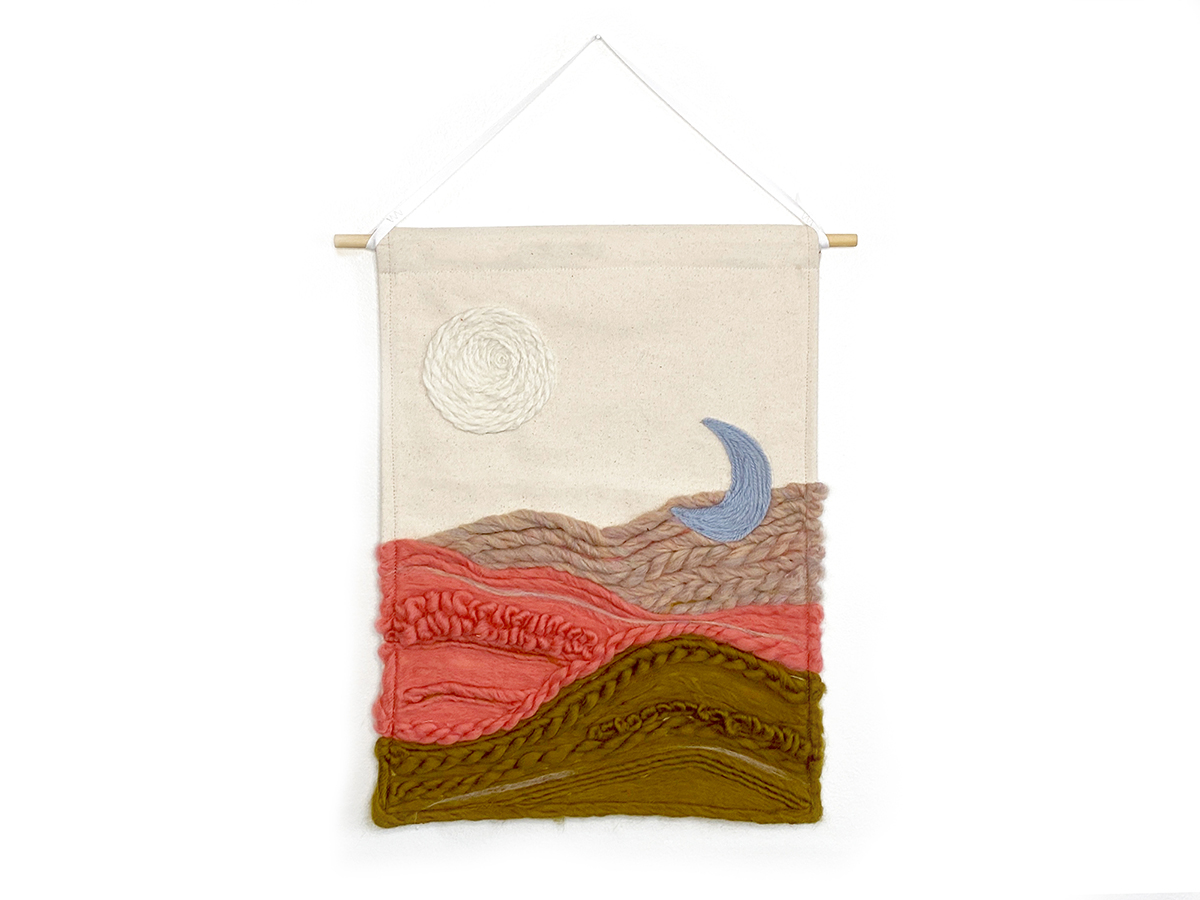
I designed this really simple wall hanging using colors that reminded me of one of those glowing pink sunsets. We have the sun coming down with a moon on the horizon. Nothing is all too complicated here! Use this picture as a guide, or create your own design.
For my wall hanging, the finished size will be 14″ x 18″. I cut my duck cloth 16″ x 21″ to allow for hemming the bottom, sides, and folding for a hanging sleeve at the top. I’ve cut a separate piece of quilting cotton to the same size for a backing.
I couched with Foot #C12 to get a smooth-edged circle for the sun. Then I worked across the landscape—you want to make sure that if you have areas right next to each other or overlaying each other, you consider what needs to be stitched on top of what. So I started with the furthest out background with this soft, mineral pink, then came down and stitched over the bottom edge with the bright coral, and then the foreground with this bronzed olive color. You can see all the different patterns created here with felting to create depth and dimension in the “landscape”. Then finally, I used free-motion couching to stitch my crescent moon over top of my felted background.
Finishing the Edges
To finish, I placed my backing fabric wrong sides together with my canvas. You can even use a little temporary adhesive spray to hold these layers in place. Fold the raw edges toward the backing at the drawn lines (1/2” and 1”) and press. Then I did a simple double-fold hem on the sides and bottom, stitching down with the Walking Foot #50.
Hanging Pocket
Fold the raw edges toward the backing at the drawn lines (1/2” and 1”) on the three sides and press.
Edgestitch along this fold to secure the hanging sleeve on the top, backstitching at the beginning and end.
Fold the top edge toward the backing at the ½” marking and press. Fold again along the 2” marking and press. Edgestitch along the fold to create the channel for the rod.
Insert an 18” long 1/2” wood dowel through the hanging pocket.
Cut a 21” length of bias tape or ribbon. Tie to either end of the wood dowel to hang
I hope this project has brought you a spark of inspiration and helped you create something unique and beautiful for your home. Until next time, happy stitching!