Machine Appliqué Three Ways
Did you know there are several techniques for machine appliqué? Today, I’ll cover three of my favorites: (1) blanket stitch appliqué, (2) satin stitch appliqué and (3) corded appliqué. Each technique involves a specific and special BERNINA foot that makes machine appliqué easy and fun, giving your project a beautifully finished look! Let’s start with setting up your machine for appliqué. The machine settings are the same for all three techniques.
Machine Set Up
- BERNINA 570 QE
- BERNINA Freehand System (FHS)
- Open Embroidery Foot #20/20C/20D
- Cording Foot #22
- Clear Appliqué Foot #23
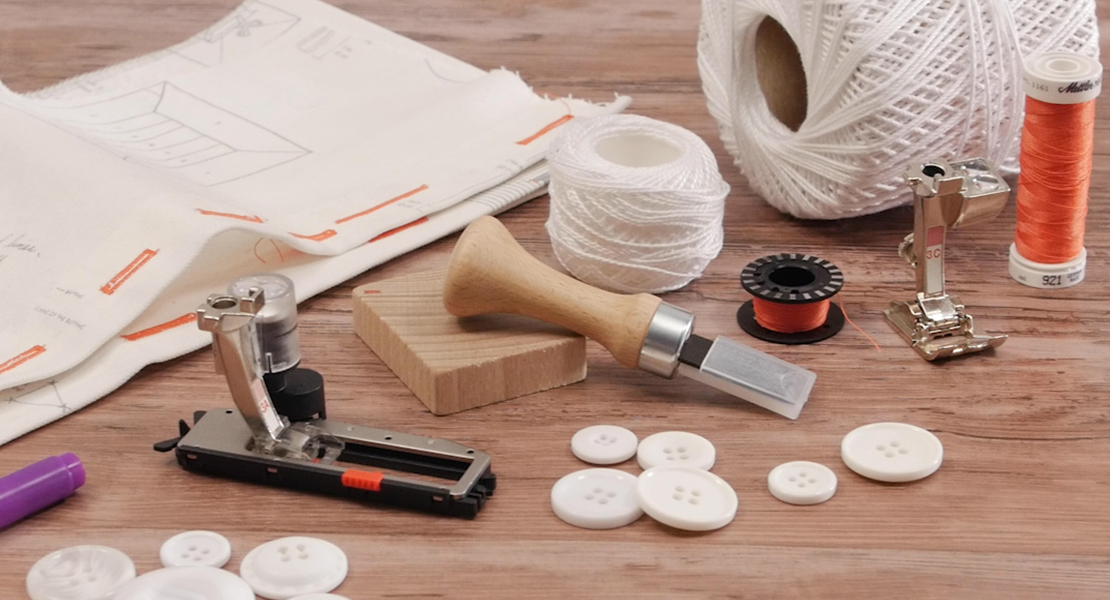
Supplies
- Mettler Silk Finish Cotton Thread 50 wt
- Perle Cotton
- OESD Ultra Clean & Tear Stabilizer
- Double Sided Fusible Web, such as HeatNBond Lite
- Iron and pressing mat
Machine Settings
Select Setup Program > Sewing Settings
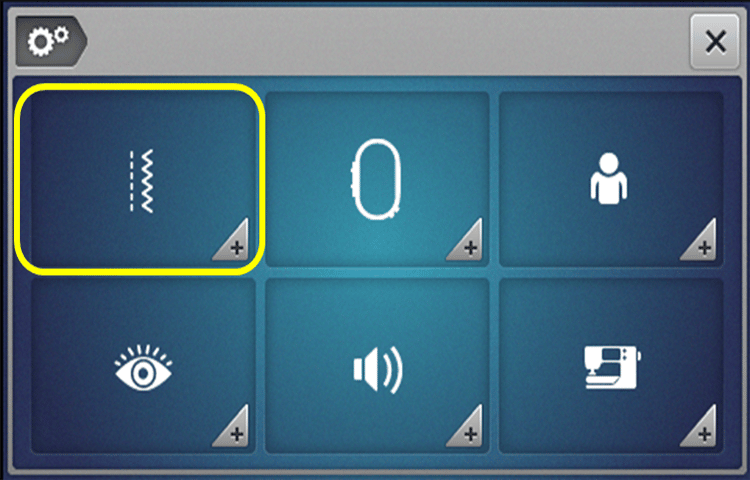
Select Program Buttons and Icons.
![]()
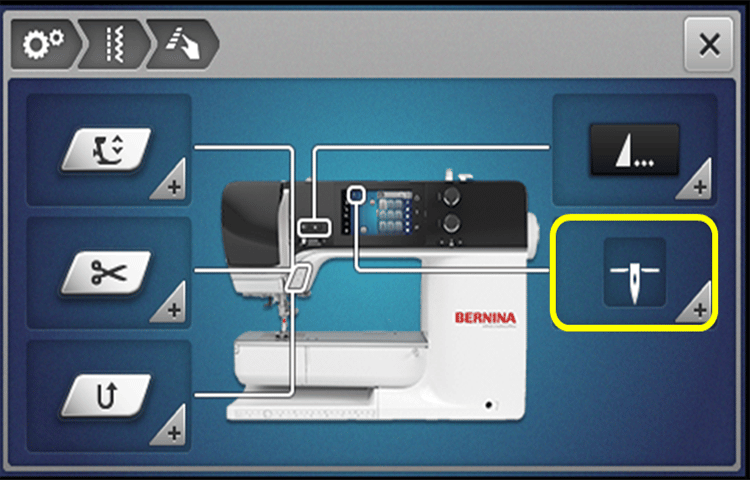
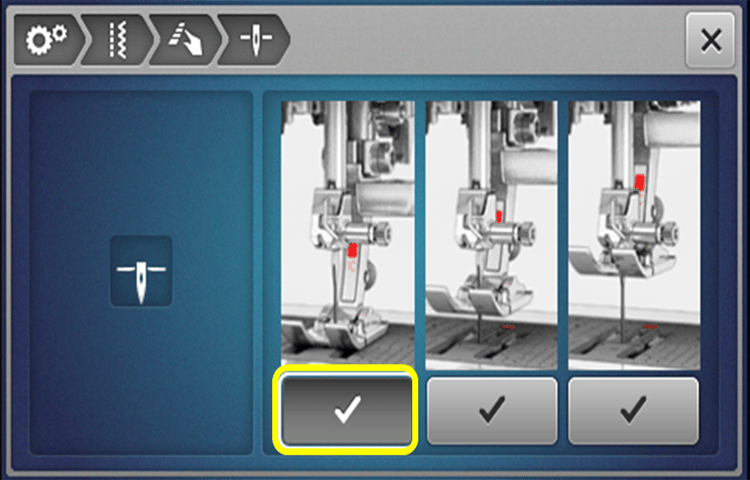
Select Presser Foot Position with Needle Stop Down.
There are 3 options for foot position when sewing stops with needle down in the fabric: (1) foot remains down, (2) foot slightly raises or (3) foot raises to the highest position. Select option 1 so foot remains down.
-
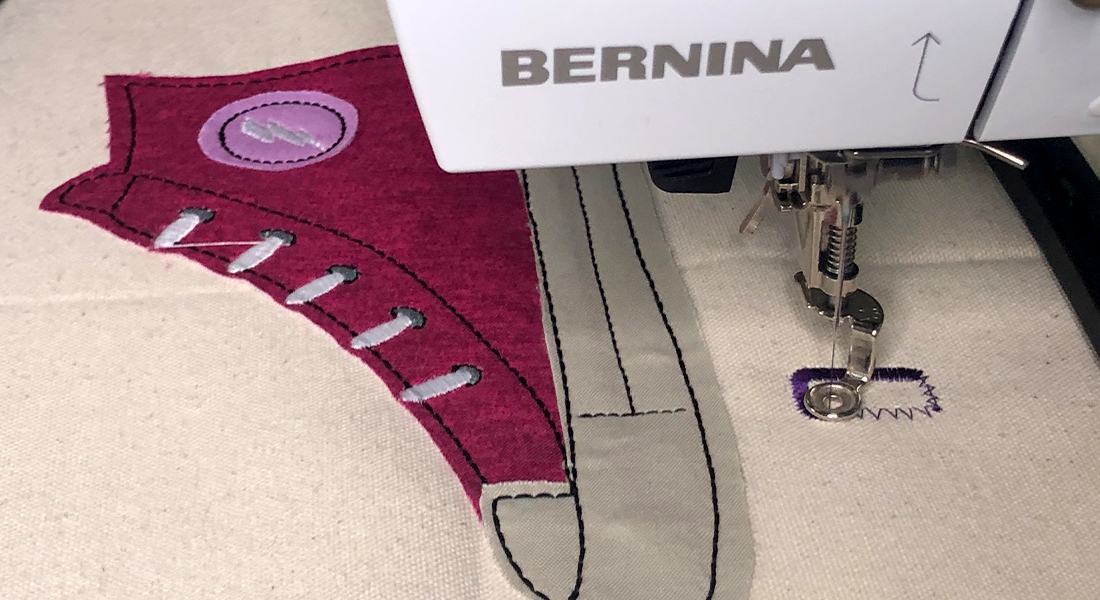
Blanket Stitch Appliqué
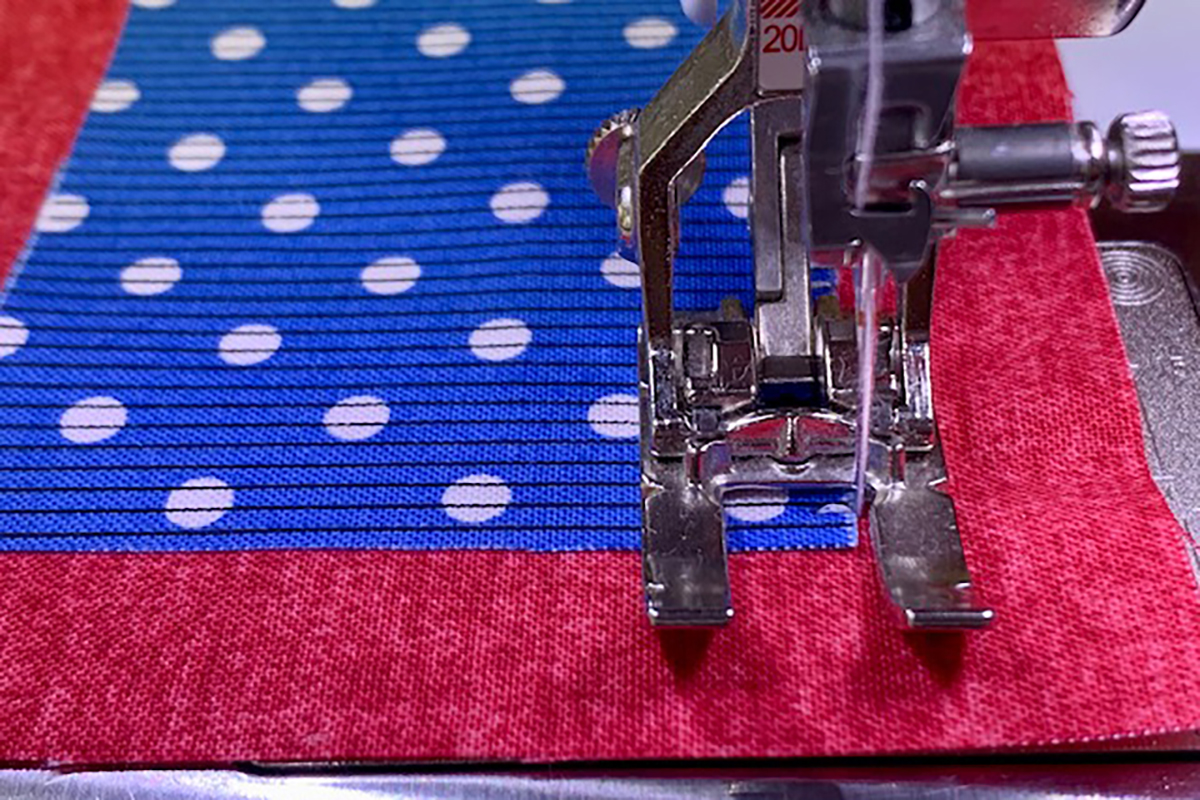
Blanket stitch appliqué is achieved with Open Embroidery Foot #20/20C/20D. The open area between the toes of this foot gives a clear view of the stitching area – important for curves and corners!
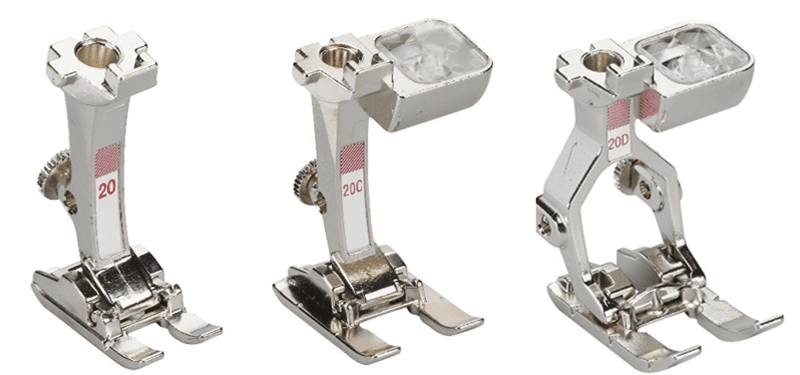
This foot has a wedge-shaped indentation on the bottom of the sole that allows compact stitches to feed easily under the foot.

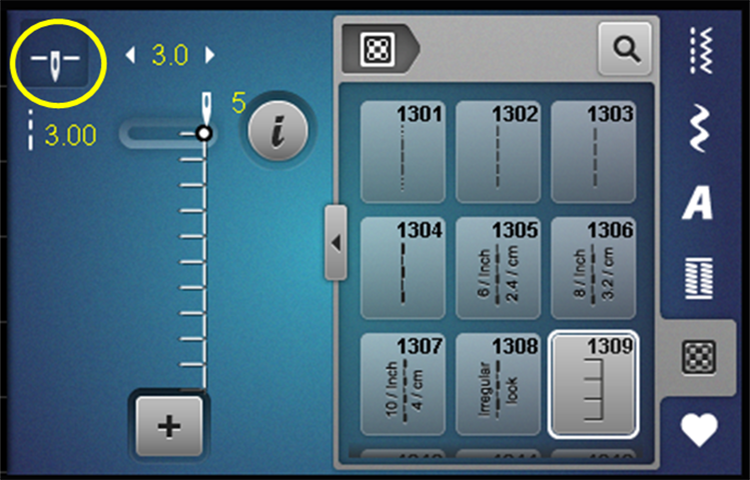
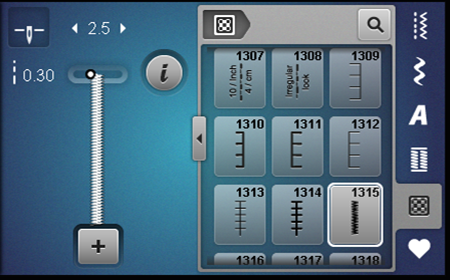
Select the Quilting Stitches Menu. For blanket stitch appliqué, select Stitch #1309. Increase Stitch Length and Stitch Width to 3 mm. Move Needle Position to 5. Also, it’s essential the needle icon is in the down position. When you stop sewing, the needle will be in the fabric which prevents the fabric from shifting.
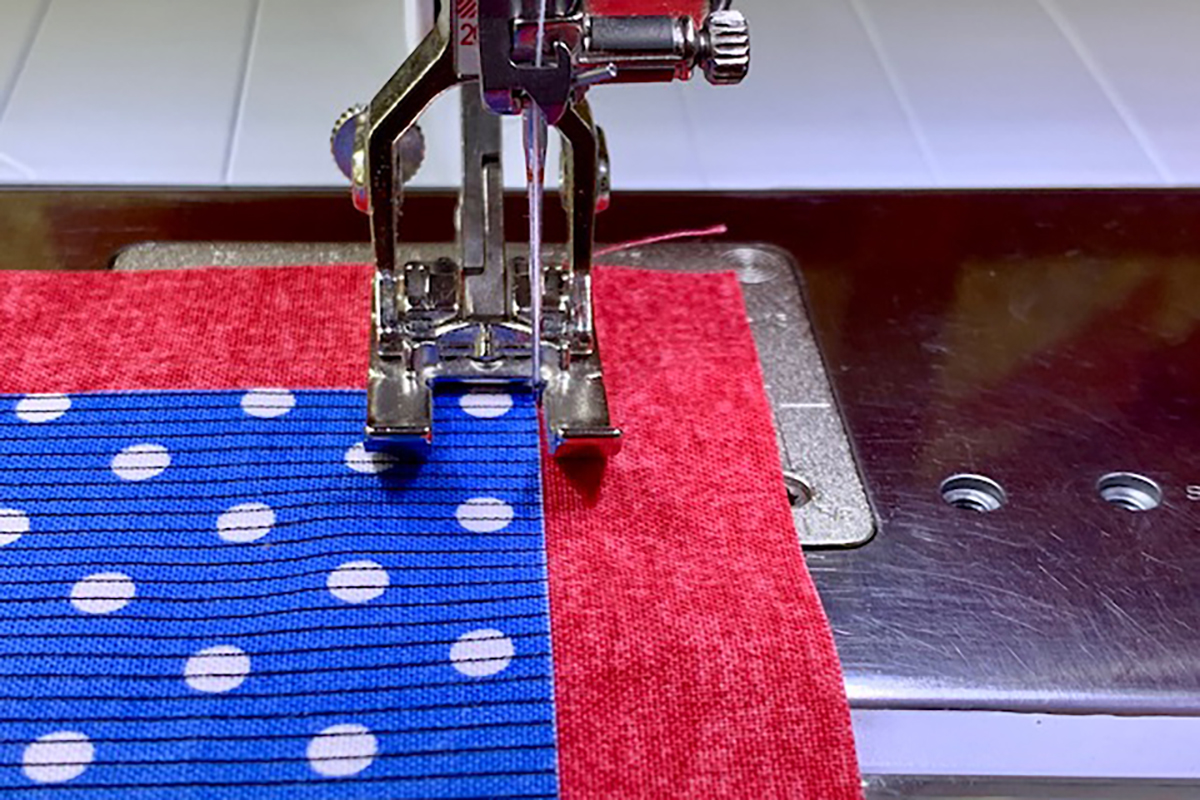
Place fabric and stabilizer under the foot so the appliqué edge is next to the inside right toe. Lower the needle with the hand wheel. Notice the little indentation on the foot where the needle falls. This allows the straight part of the stitch to form right next to the appliqué without going into the appliqué. BERNINA has the best foot for creating beautiful blanket stitch appliqué!
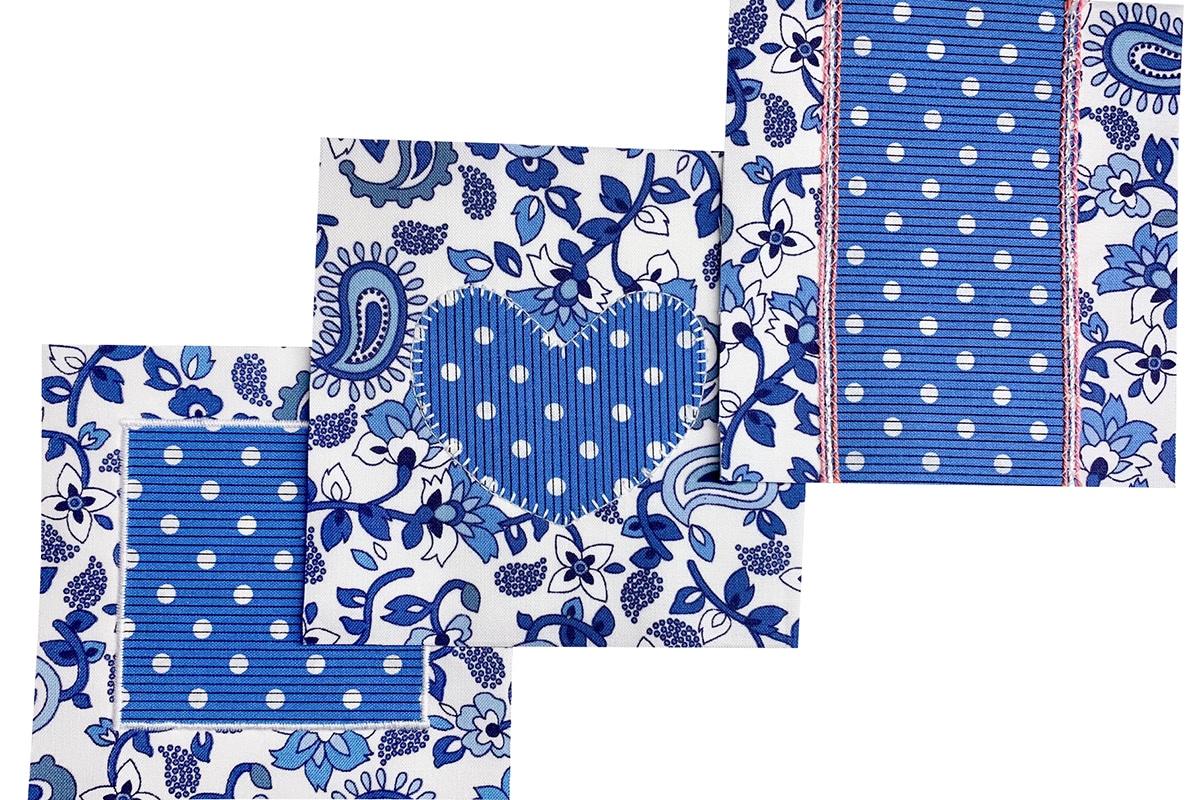
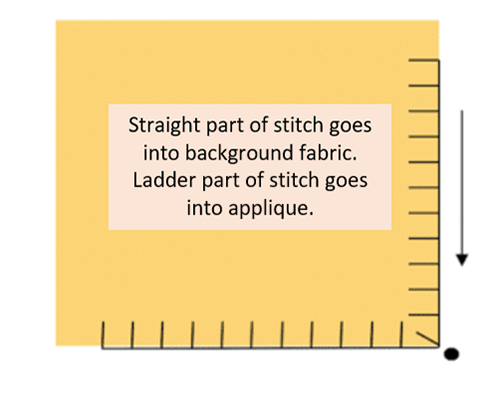
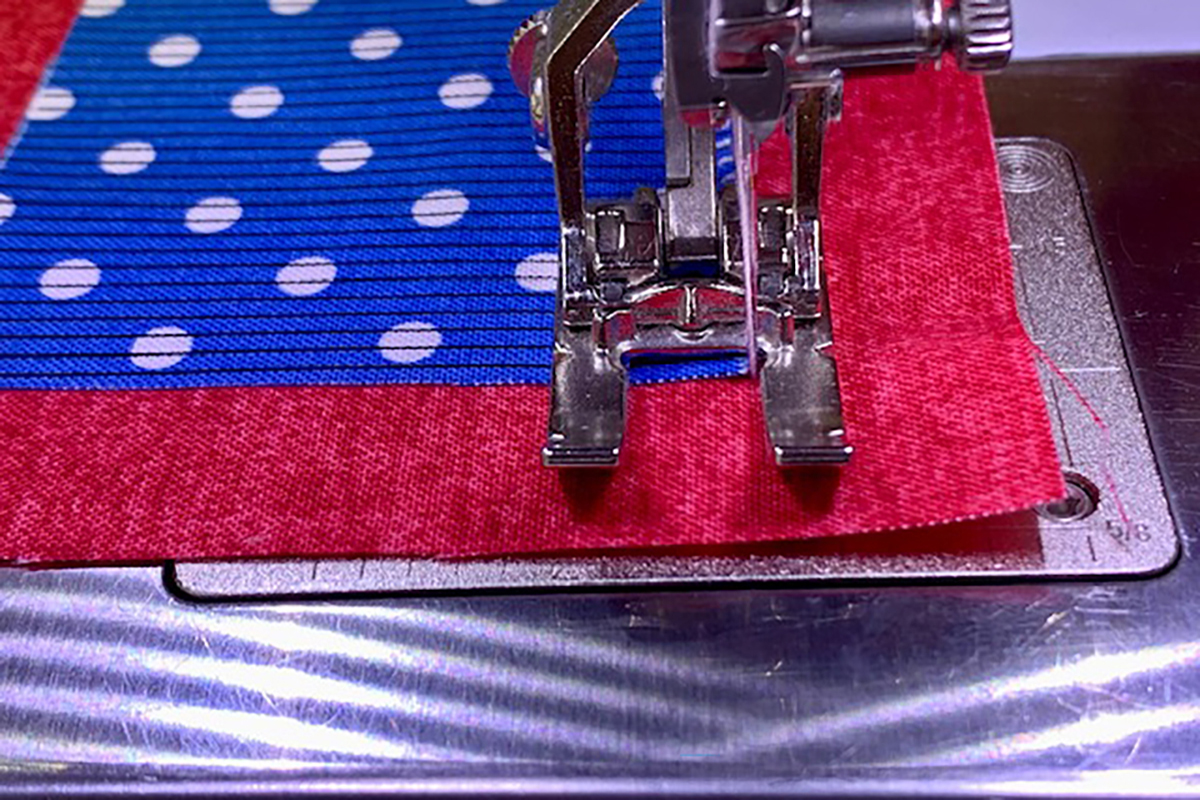
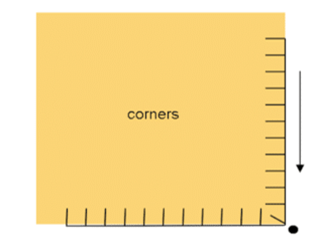
If you are new to blanket stitch appliqué, start with a rectangle shape. The straight part of the stitch goes in the background fabric only and the ladder part of the stitch in the appliqué shape.
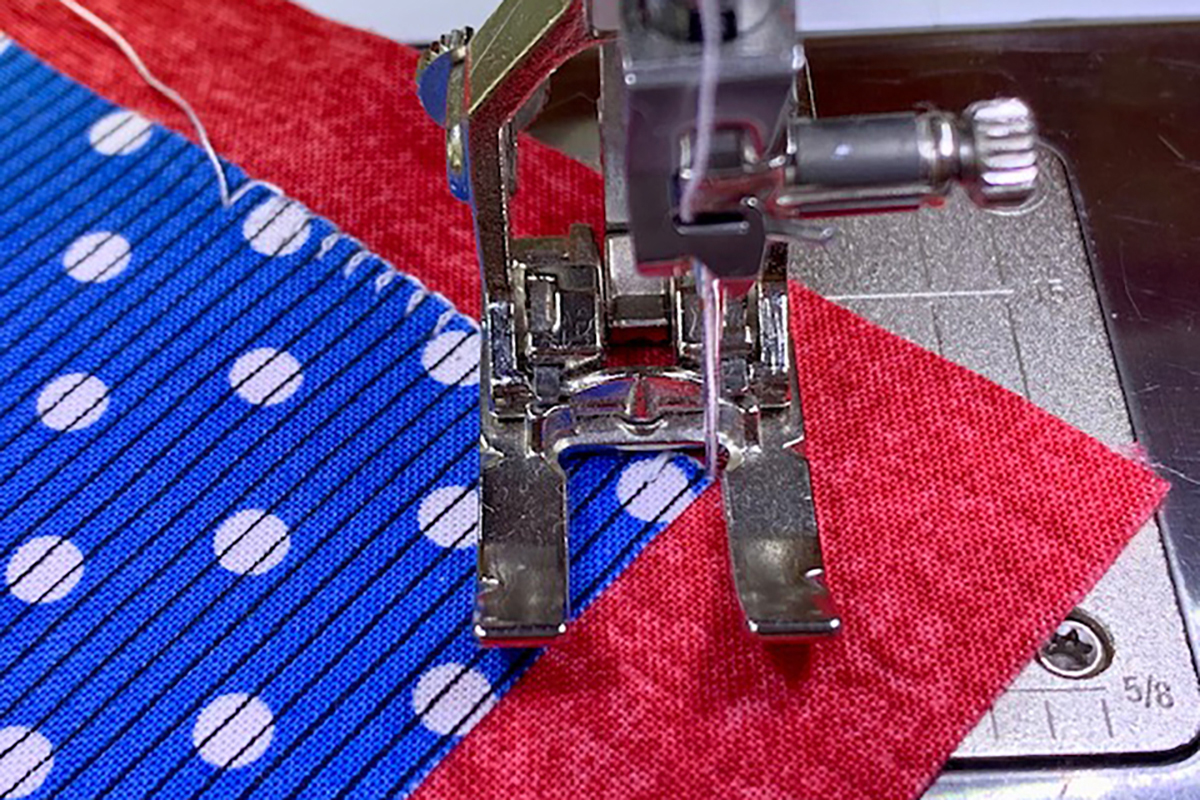
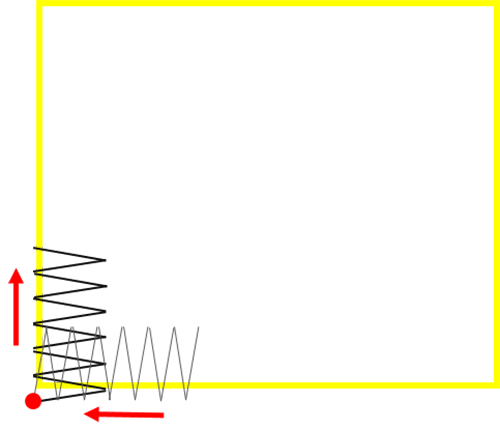
What about corners? Slow down as you near a corner paying attention to the stitch pattern. Stitch #1309 is one stitch forward and two stitches sideways. So each blanket stitch is formed in a 3-stitch pattern. Counting 1, 2, 3 as you sew will help you keep track of where you are in the stitch formation. Here, I stopped very close to the corner. This looks like a good point to make one last straight stitch before pivoting.
You can use the handwheel to move the fabric a smidge to get the needle exactly in the corner or you can slightly increase/decrease stitch length at the machine. Just remember to change stitch length back to 3 mm.
Pivot fabric 45°. The Freehand System makes all the difference when turning corners!
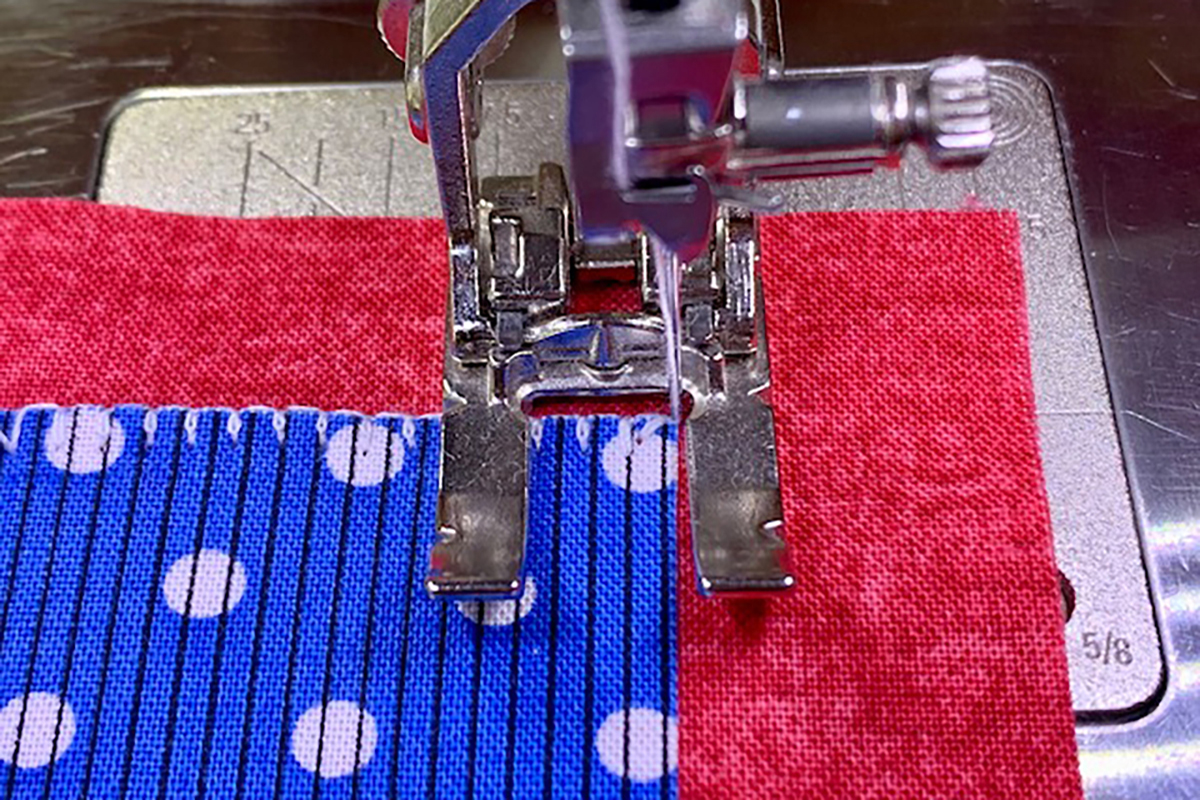
Sew ladder part of the stitch pattern on the angle (remember 2 stitches). Pivot 45 again and continue sewing blanket stitch.
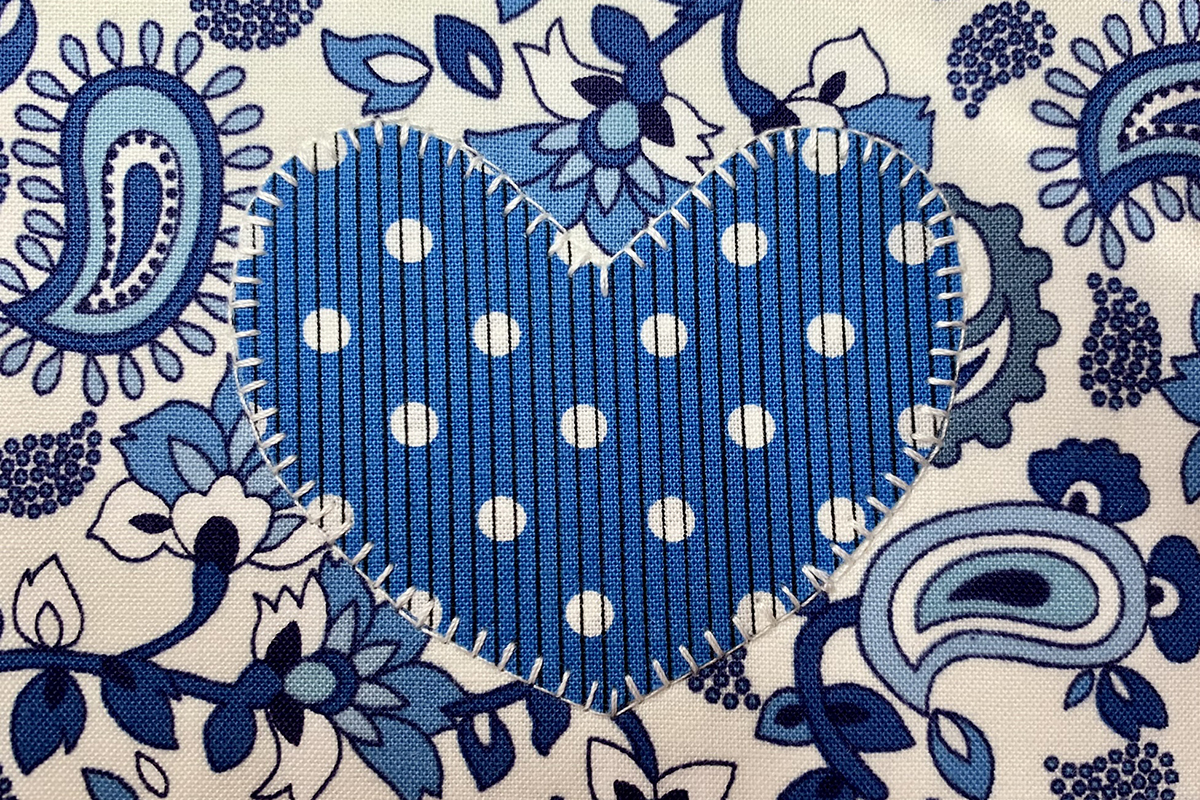
After some practice, try the blanket stitch on a heart appliqué piece. This one shape includes curves, an inside corner and outside corner. To stitch a smooth curve, stop and slightly pivot in the background fabric around the curve. Use the Freehand System to lift the foot and micro-pivot as needed following the curve.
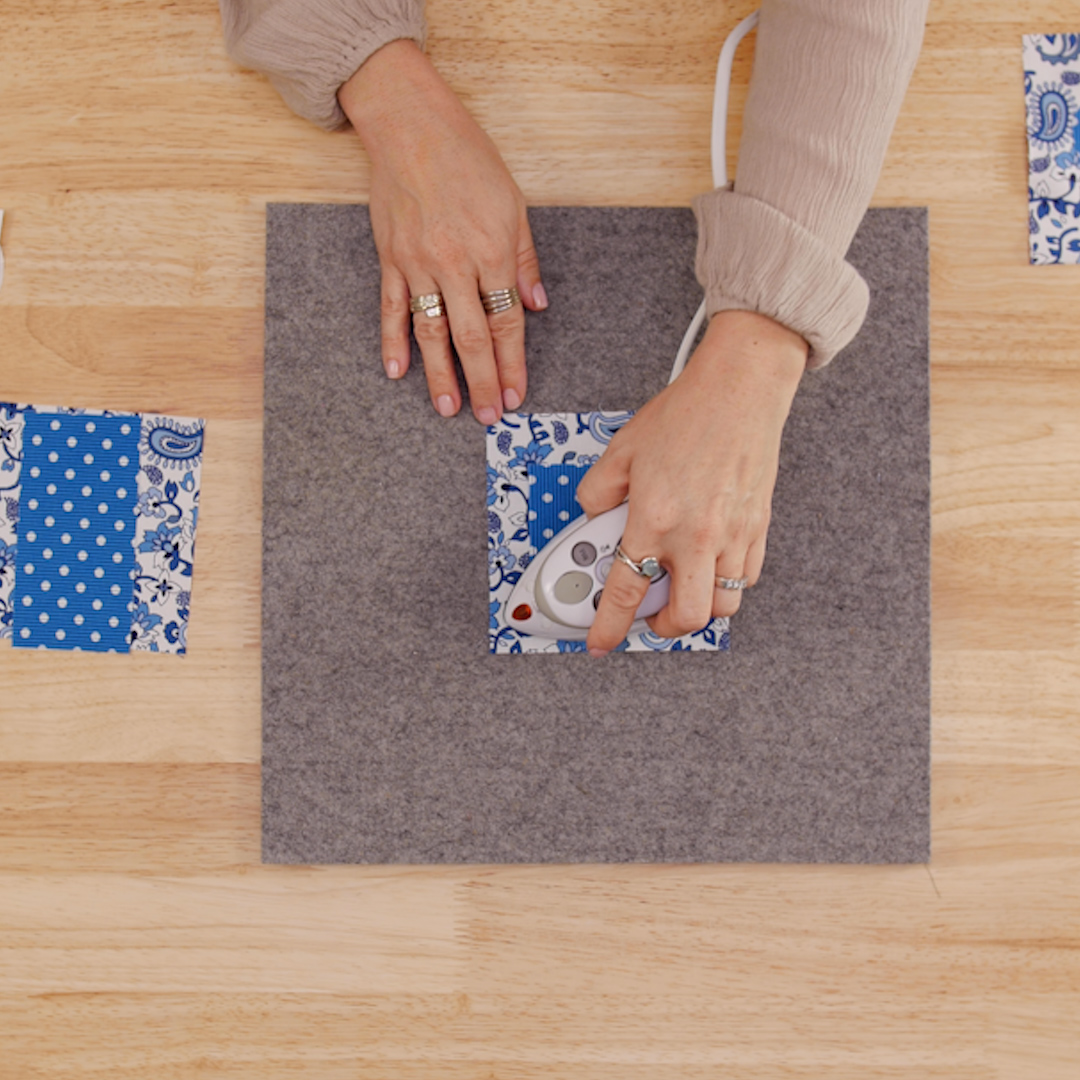
I love the Nifty Notions travel iron for small projects. And it has a steamer option!
-
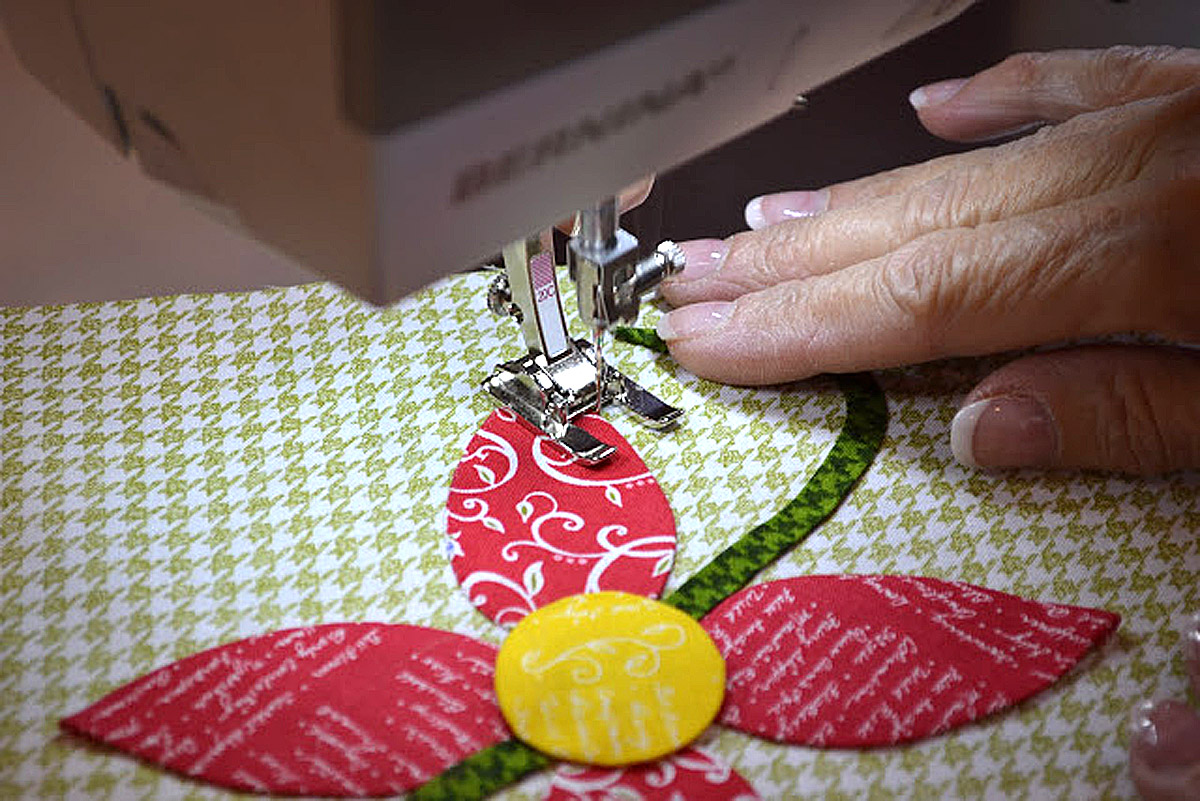
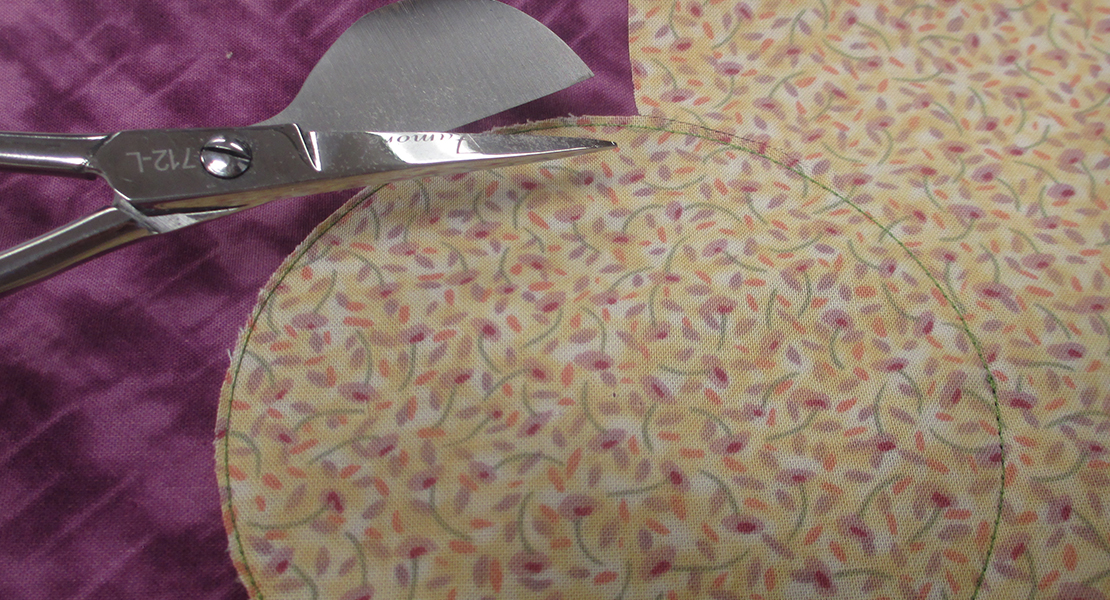
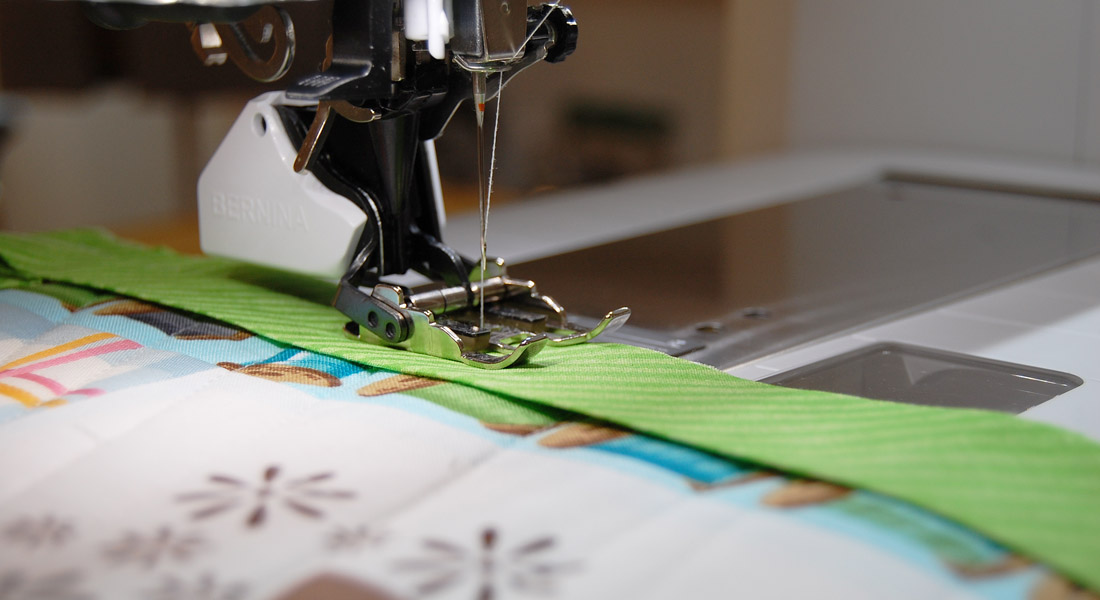
Satin Stitch Appliqué
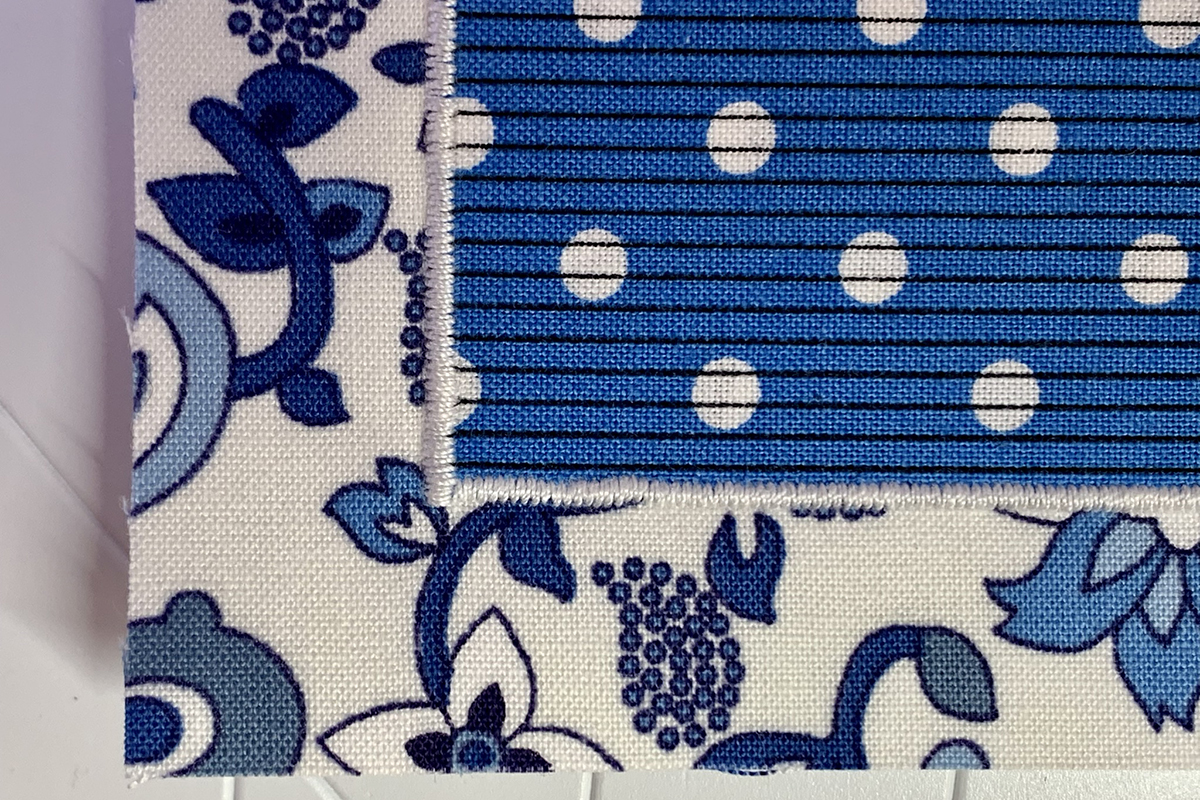
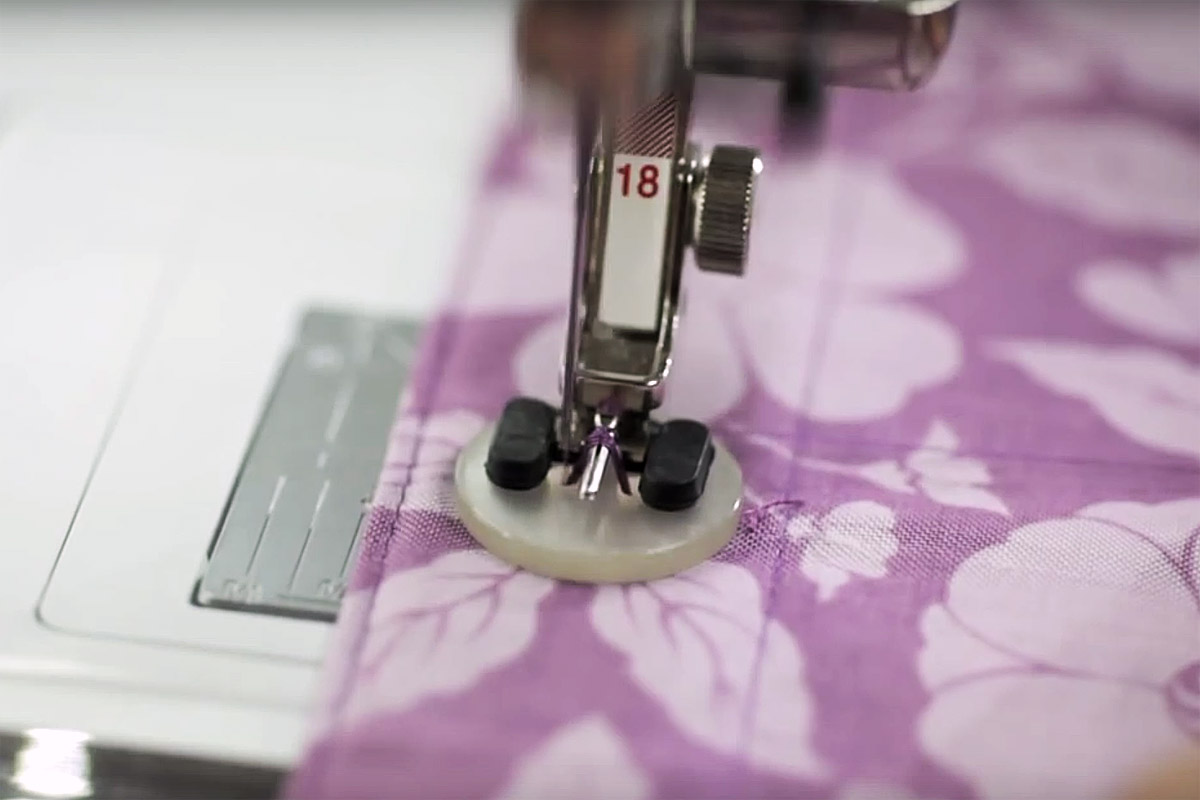
Satin stitch appliqué is achieved with Clear Appliqué Foot #23. This foot has a 2 mm channel under the foot perfect for creating a small satin stitch. Also, Foot #23 is clear allowing an unobstructed view of the sewing area. As one of the smallest BERNINA feet, Clear Appliqué Foot #23 is great for sewing around appliqué shapes, especially curves.
![]()
For this technique, select Stitch #1315 in Quilting Menu. This satin stitch is preset for machine appliqué.
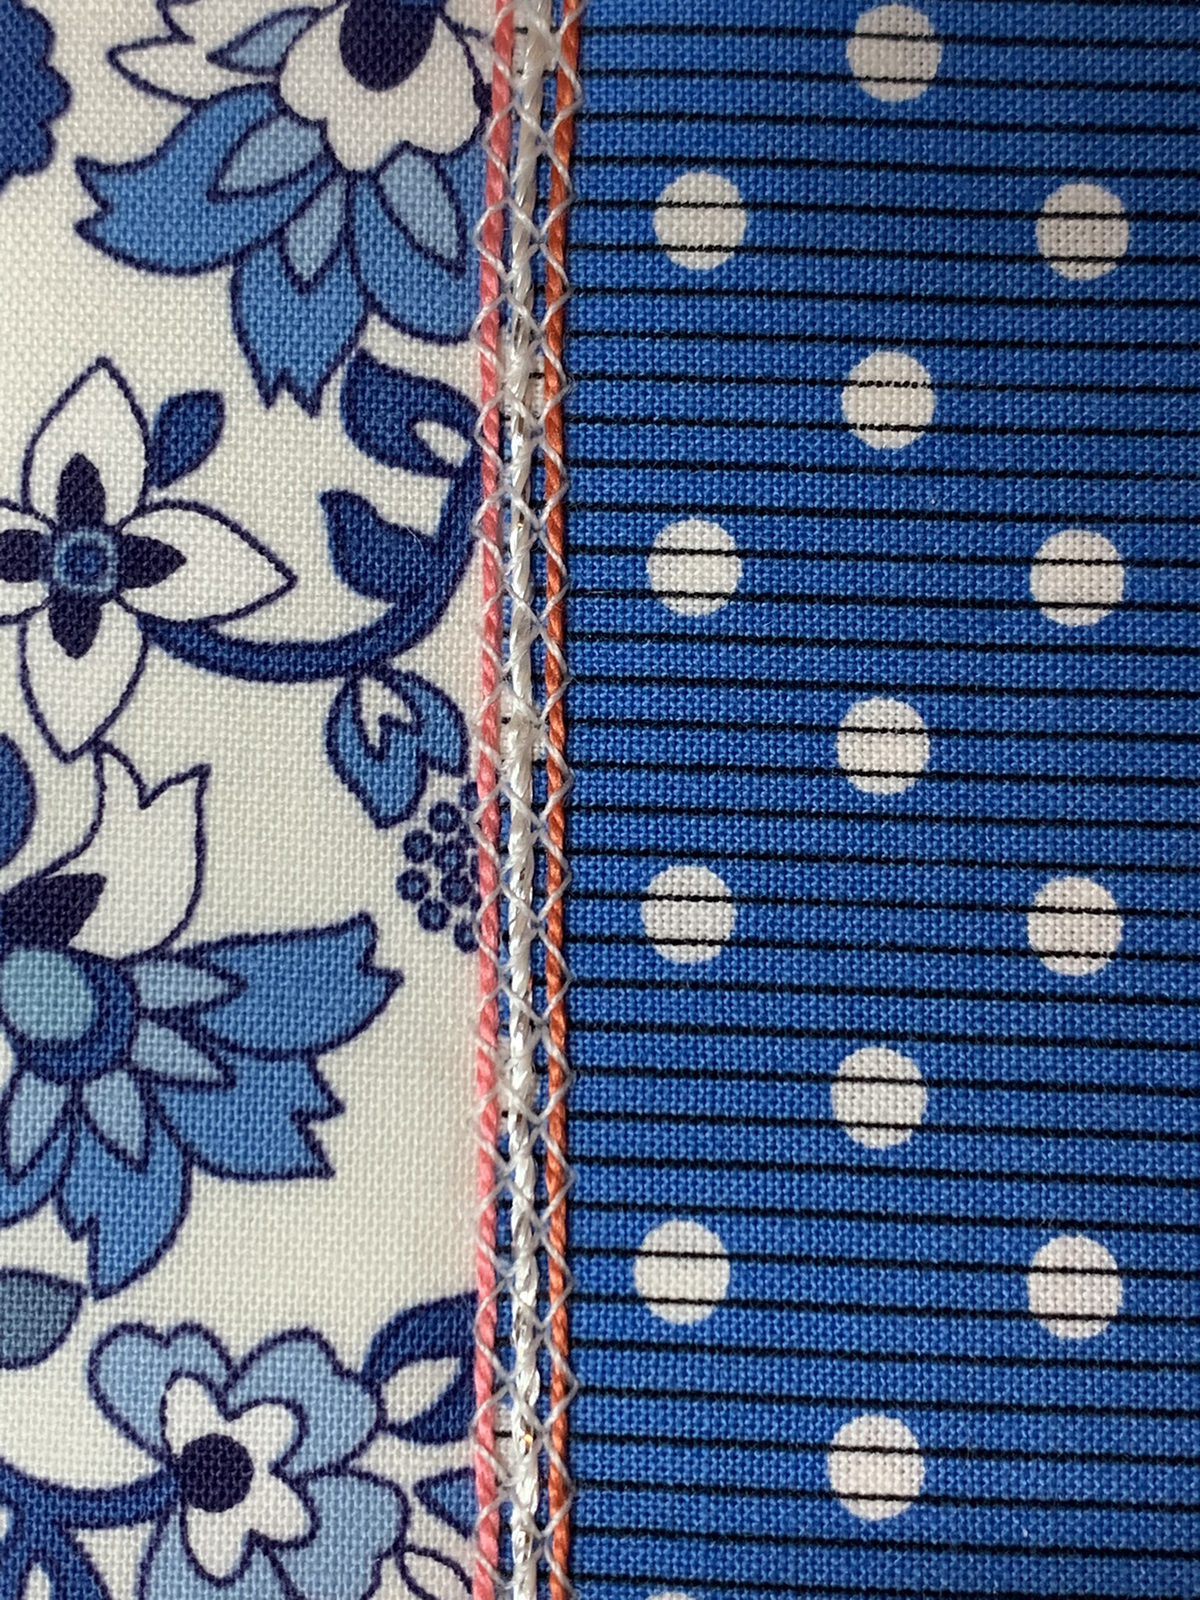
Place fabric and stabilizer under the foot so that the appliqué edge is in the channel. To guide the fabric, I align the appliqué edge with the right channel indentation. So glad this foot is clear!
![]()
For corners, pivot with the needle in the background fabric next to edge of the appliqué.
For curves, use the Freehand System to micro-pivot every few stitches depending on the curve. For outside curves, pivot with needle in the background fabric next to the edge of appliqué. For inside curves, pivot with the needle in the appliqué fabric.
-
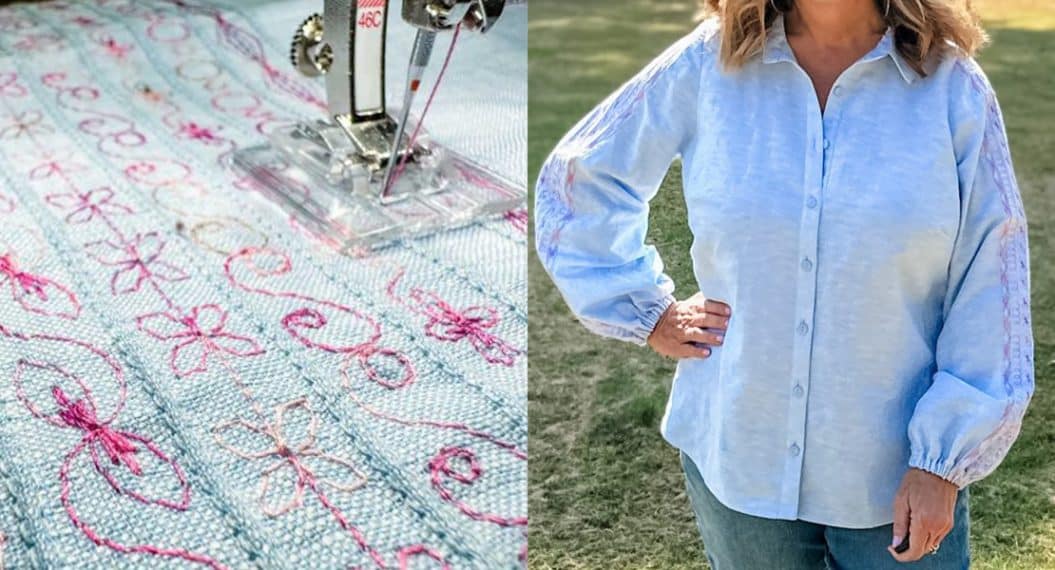
Corded Appliqué
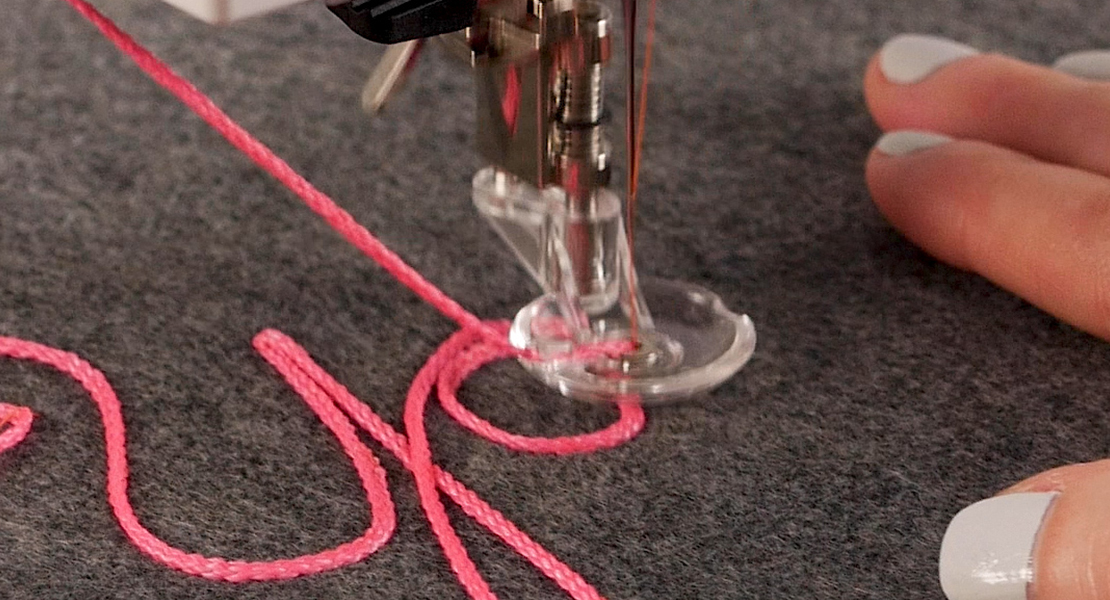
Corded appliqué is achieved with Cording Foot #22 and #25. Both feet have grooves in the soles allowing cords to pass through easily without twisting or tangling. Foot #22 has three grooves and #25 has five grooves. A black latch secures the cords and holds them in place while sewing.
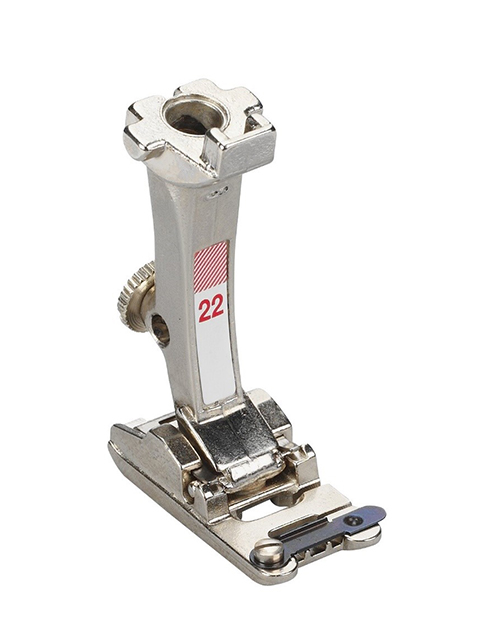
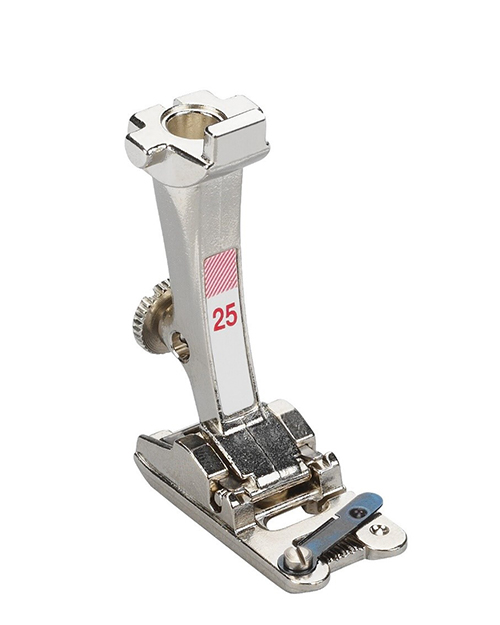
Before attaching Foot #22 or #25 to the machine, open the black latch and insert the cords. Add cords in all the same color or different colors. Here, I am inserting two orange cords and one silver cord to Foot #22.
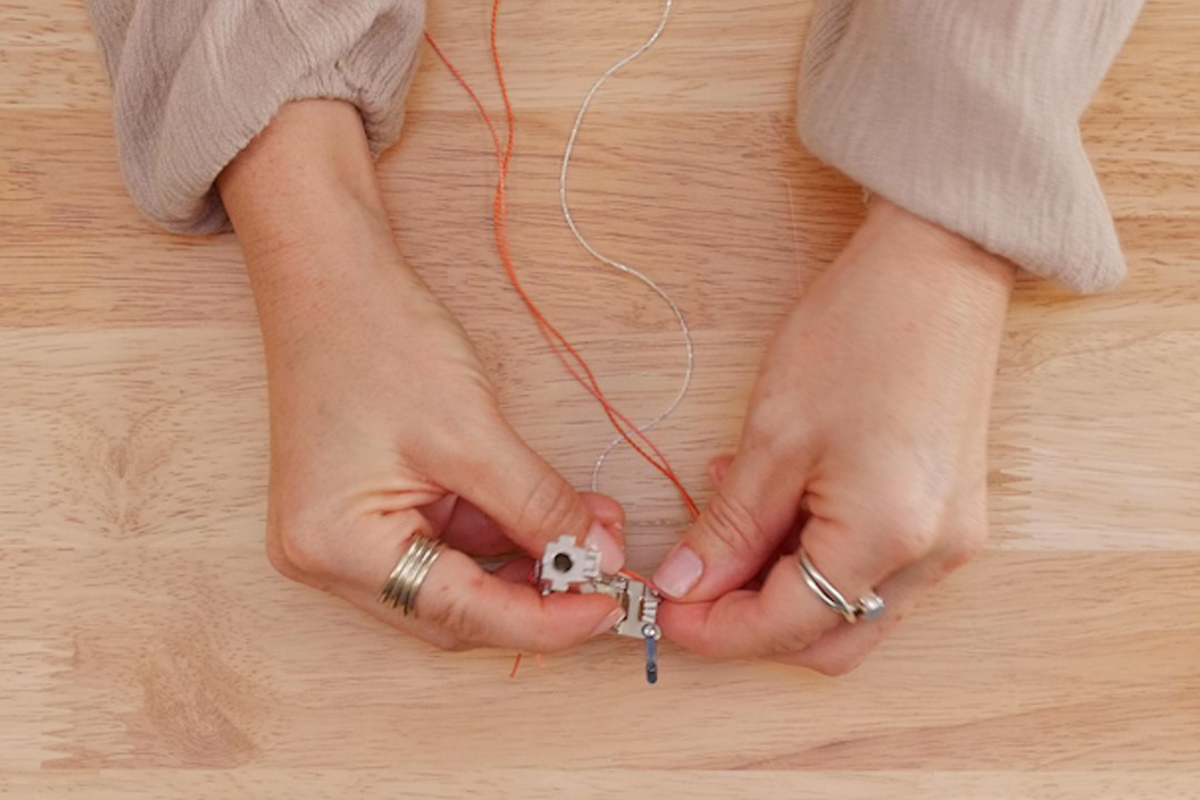
Slide cords to back of foot and make a knot. This will help keep the cords in place. Close the latch. Now carefully attach the foot the machine with the cords.

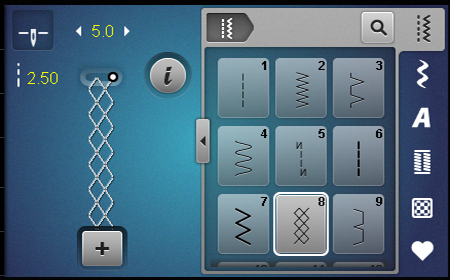
Notice the letter C is not after the foot number. This indicates that the foot can accommodate a stitch width up to 5.5 mm. Select Honeycomb Stitch #8. Change Stitch Length to 2.5 mm and Stitch Width to 5 mm.
Place fabric and stabilizer under the foot making sure the raw edges of the appliqué will be covered by the cords. This sewing technique is also called couching.
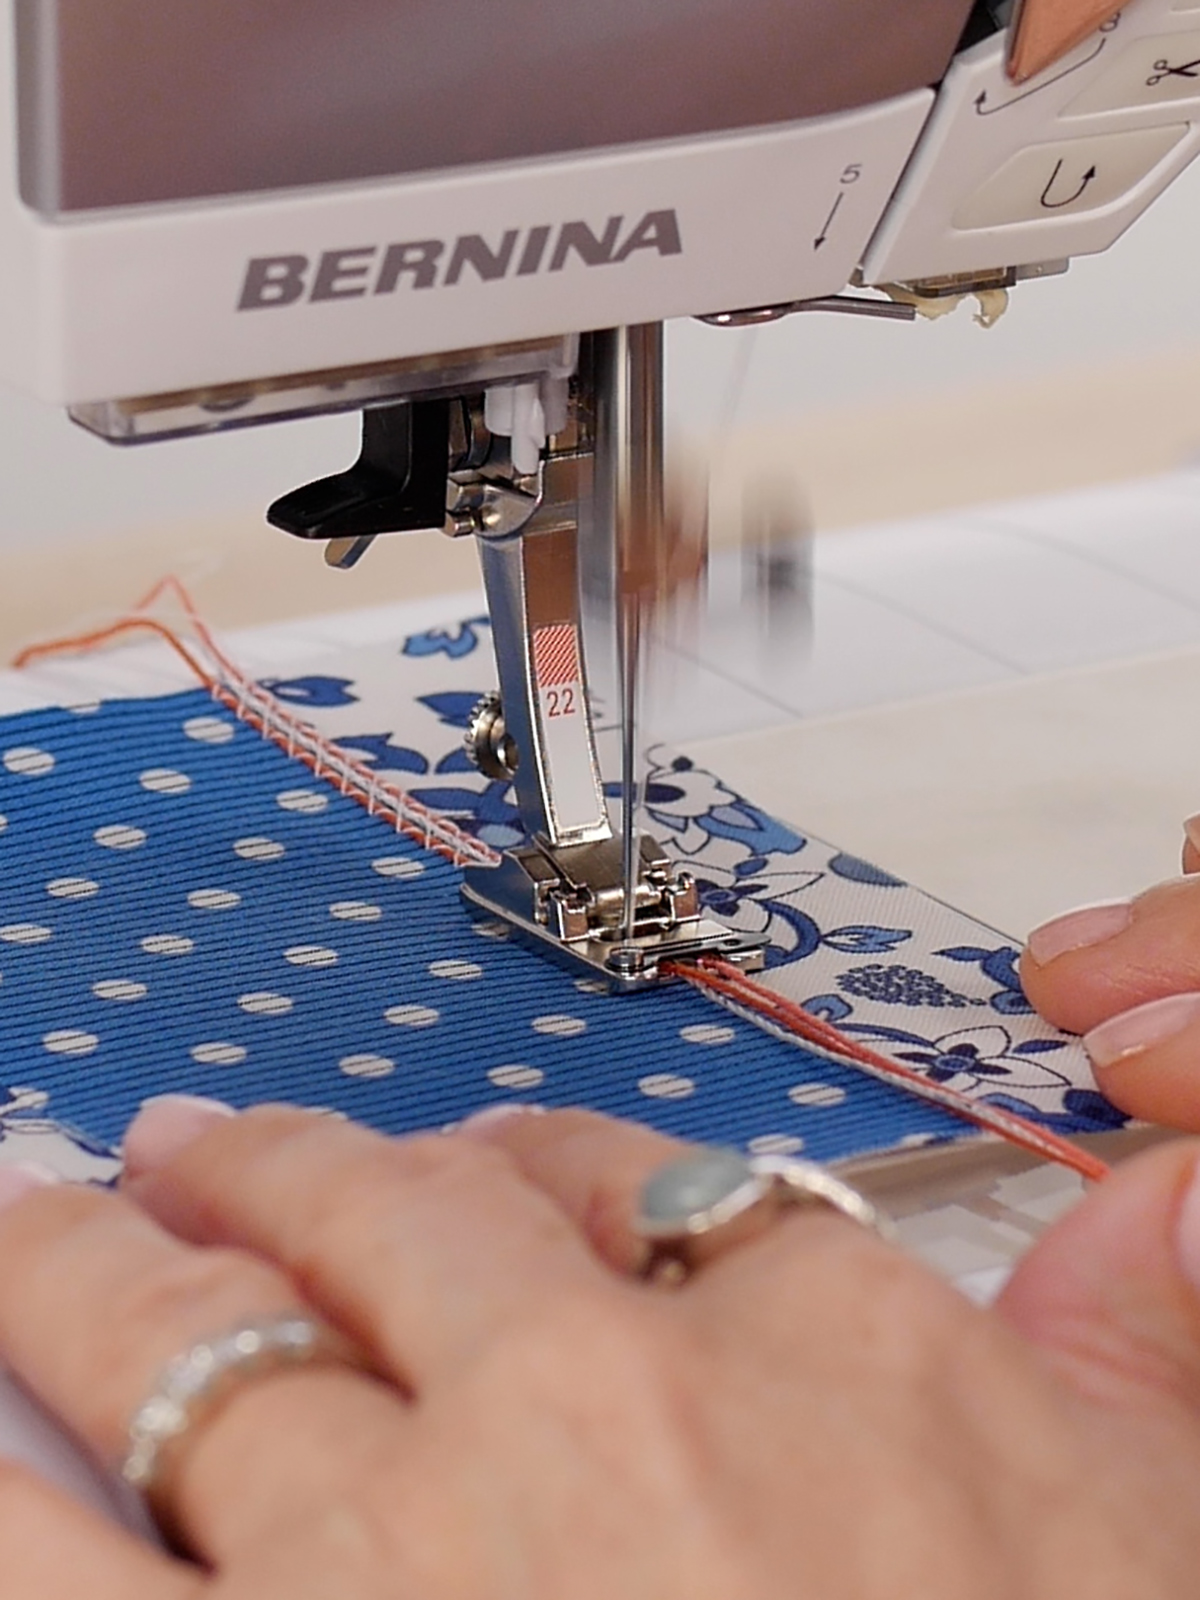
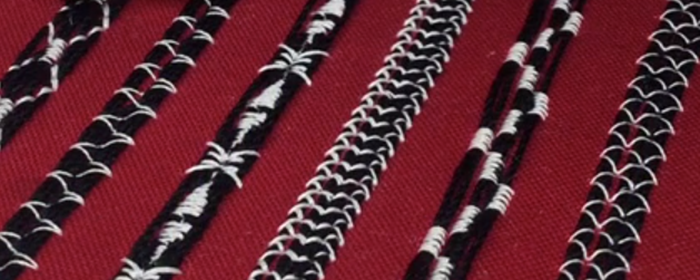
The multiple cords give a finished, braided look. If the cords will not end up in a seam allowance, leave a few inches excess at start and end. This will allow you to thread cords to back.

The honeycomb stitch is one of many decorative stitches that work well with this technique. Stitch #422 is another one of my favorites.
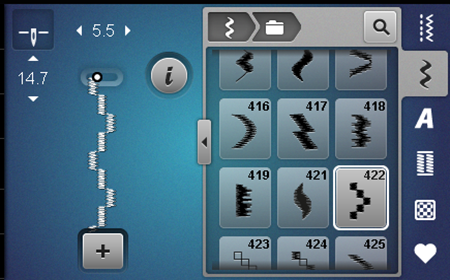
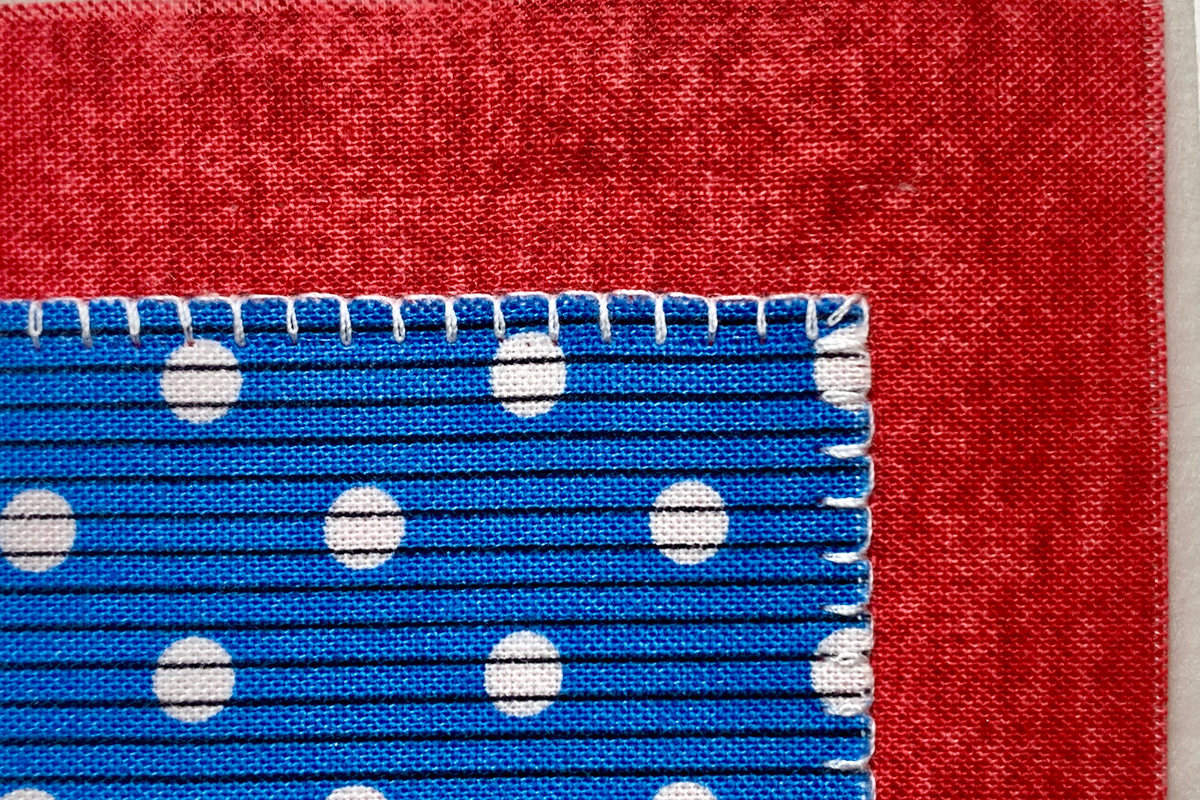
Using a thread color similar to the cords will create a subtle effect and using a thread color that contrasts with the cords will add another color element. Here are black cords with white thread on red fabric that create a nice contrast and really show off the stitching. Stitch #422 is second from the right.
I hope these three machine appliqué techniques have inspired you to try something new. Explore all three and discover a fun way to embellish your next small project. No matter where your sewing adventures take you, BERNINA has you covered!
Used Products


What you might also like


2 comments on “Machine Appliqué Three Ways”
-
-
Wow! You have been busy… and using fabric from your stash. That’s great! If you are on instagram use #berninausa and #bernina to show your projects! We love when our fellow sewists share with us!
-
Leave a Reply
You must be logged in to post a comment.

I have made all of my gifts this year directly from my stash and that includes a lap quilt, table runner, handstitched ornaments and a machine -applique wall hanging of a nutcracker. I have collected Christmas fabric for years so it was very easy for me!