Couching Fibers Along, Part Five
Grüezi mitenand! Hello BERNINA Q . . . Quilters?!
Here is BERNINA Ambassador Carolina Asmussen, from Carolina Asmussen Designs.
Welcome to our last week of Couching Fibers Along! I’m already missing all the fun here with you.
If for some reason you lost the Couching Fibers Along previous information you can check by week here: Week 1, Week 2, Week3 and Week 4.
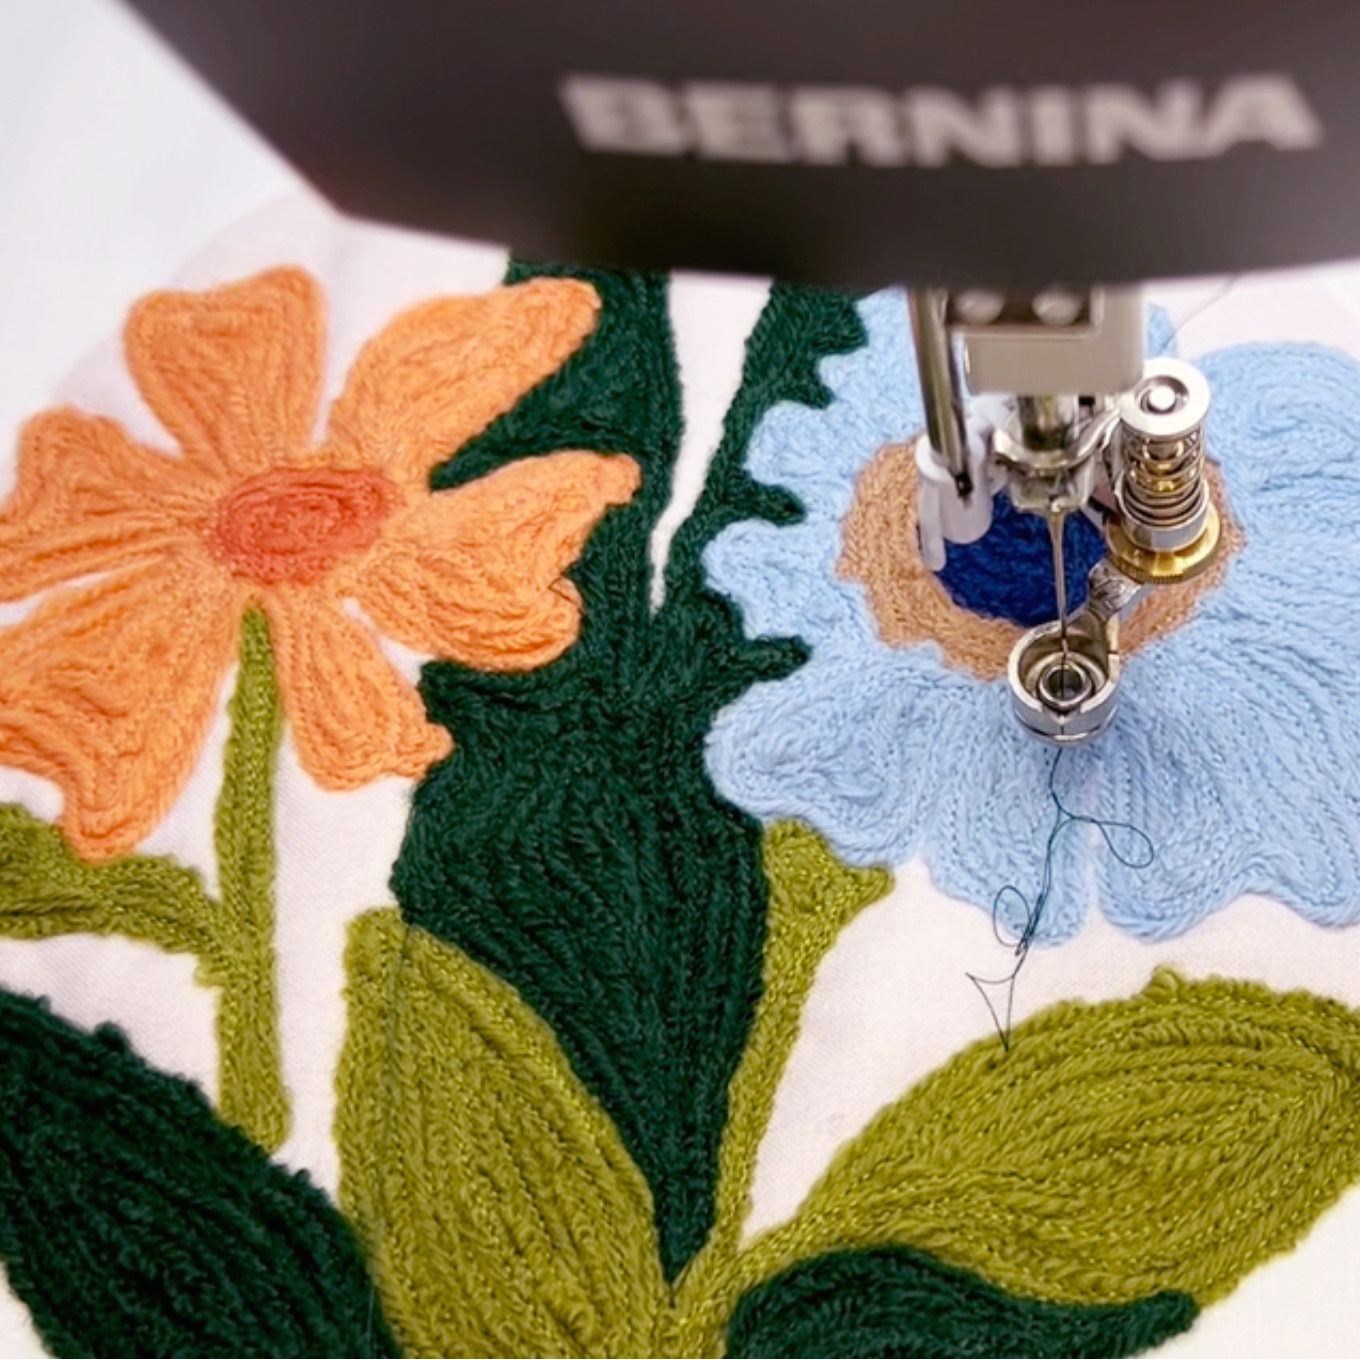
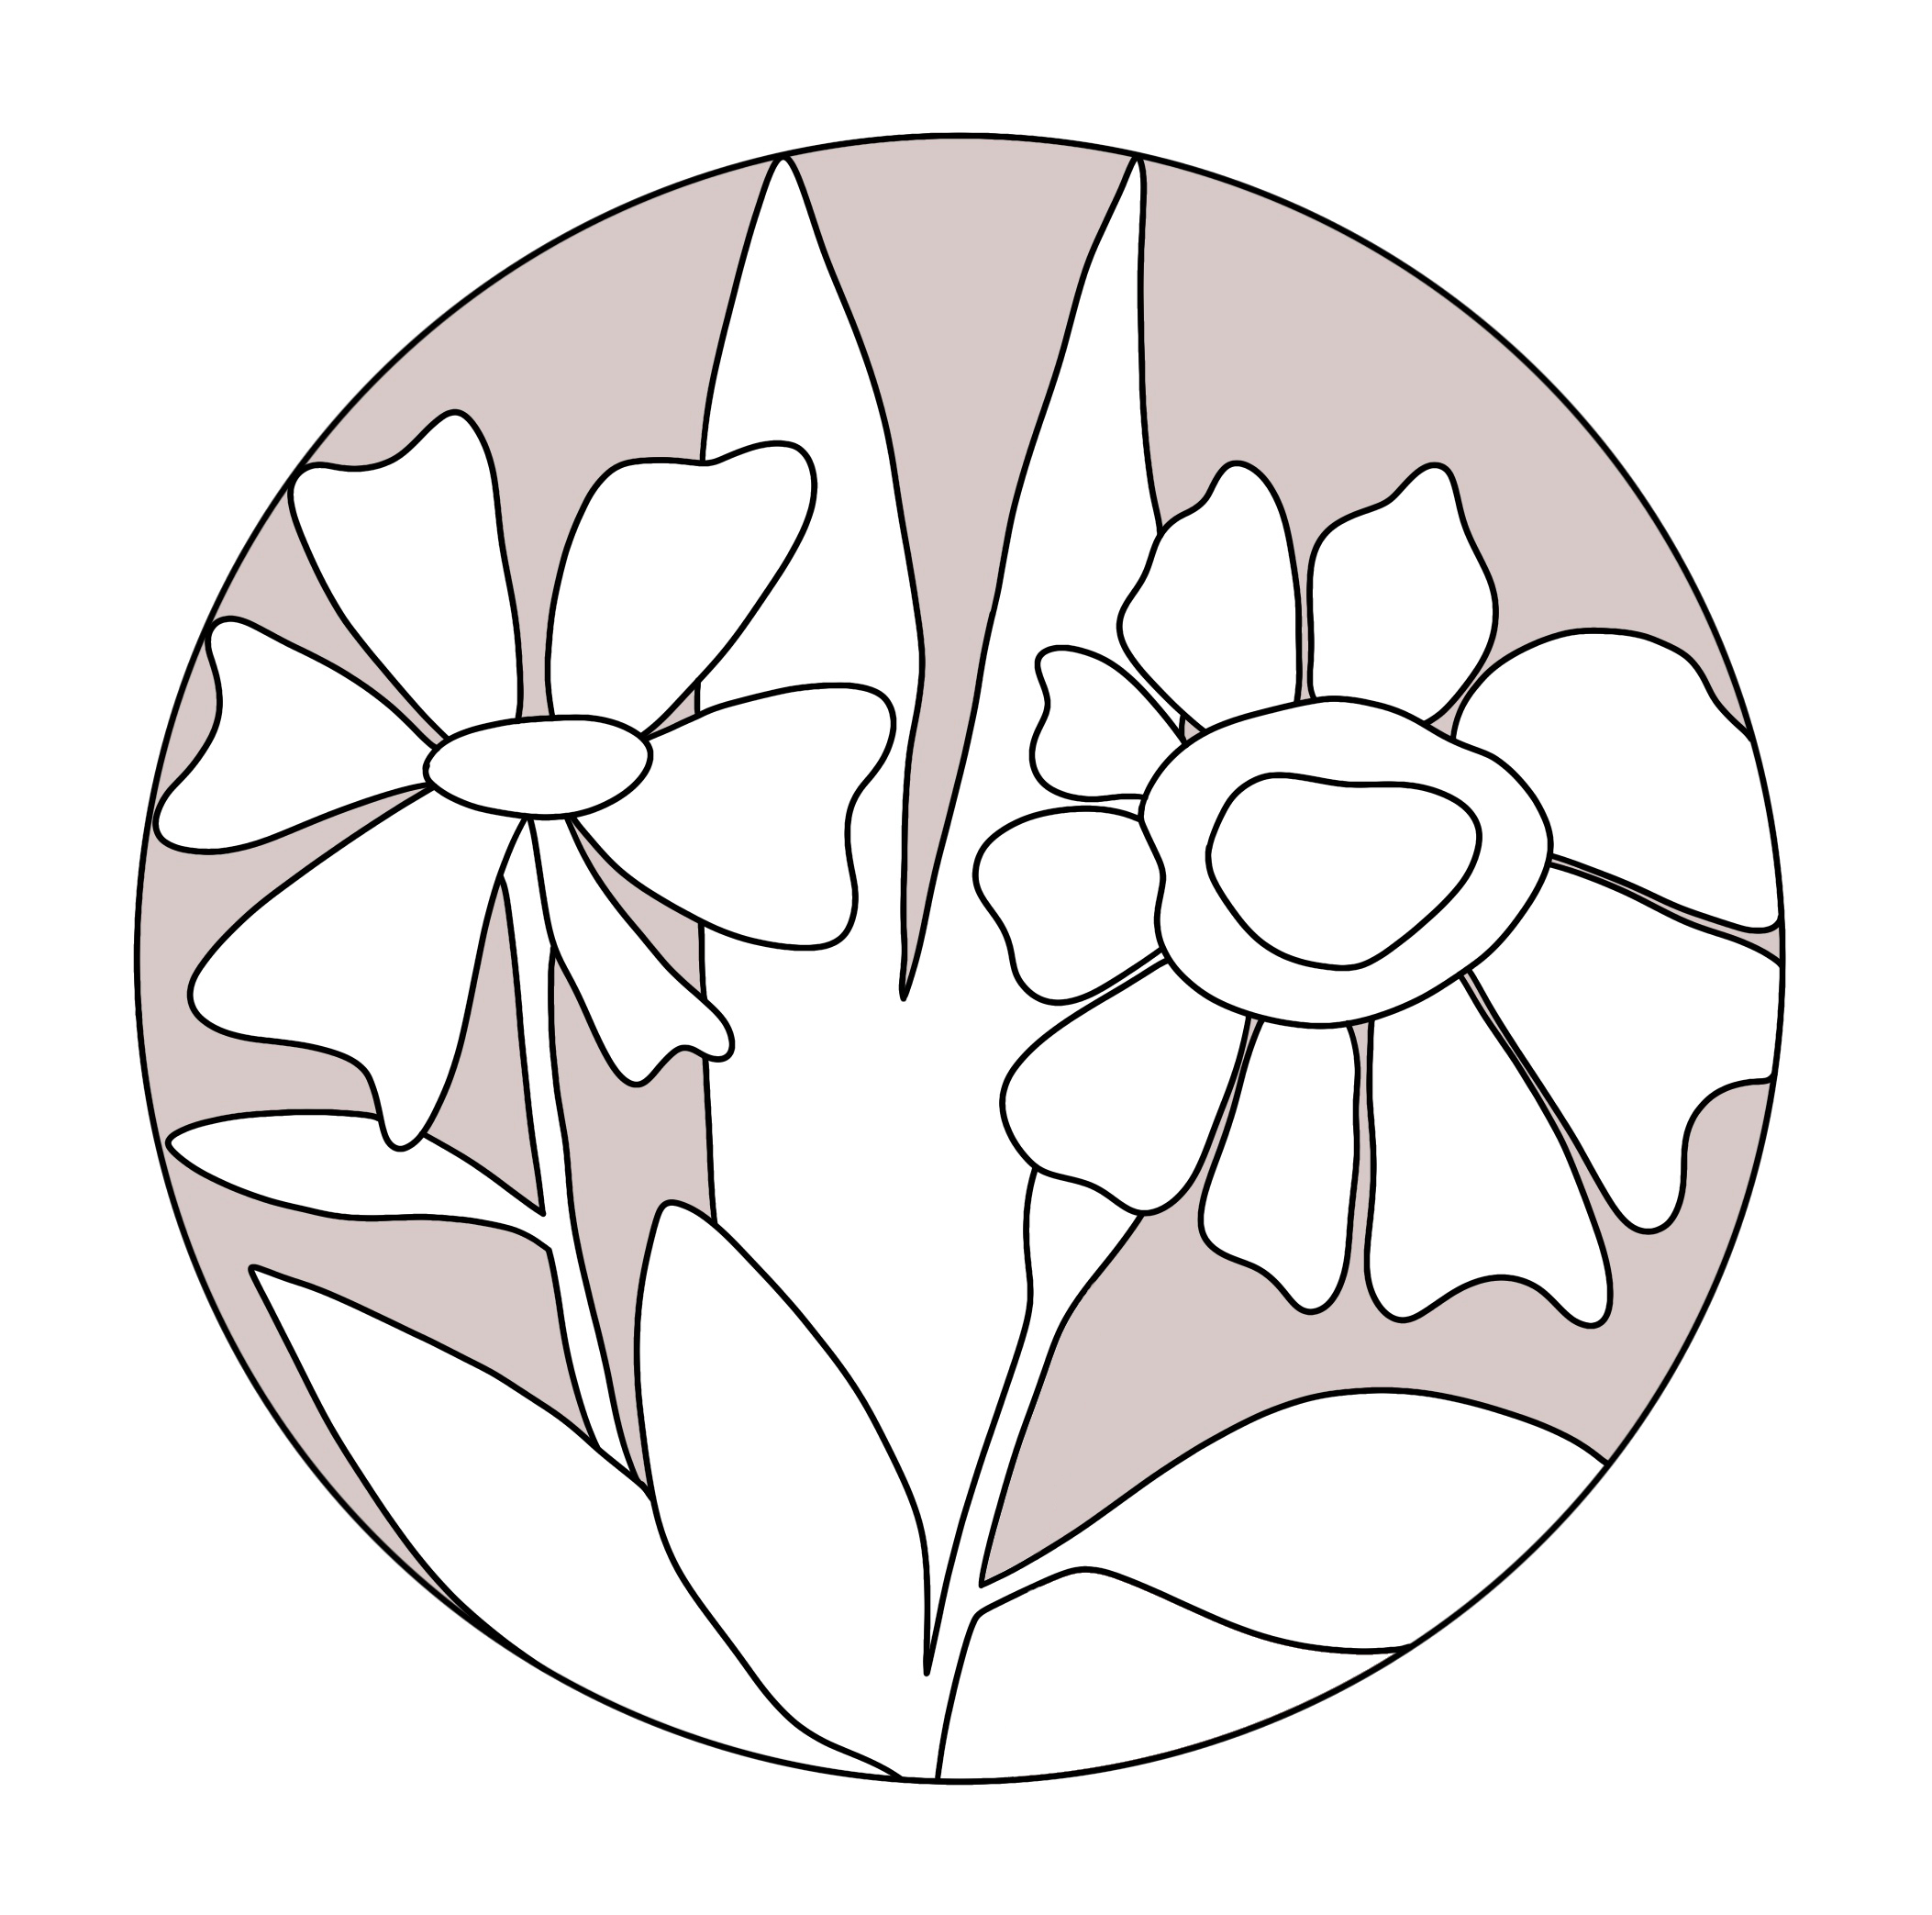
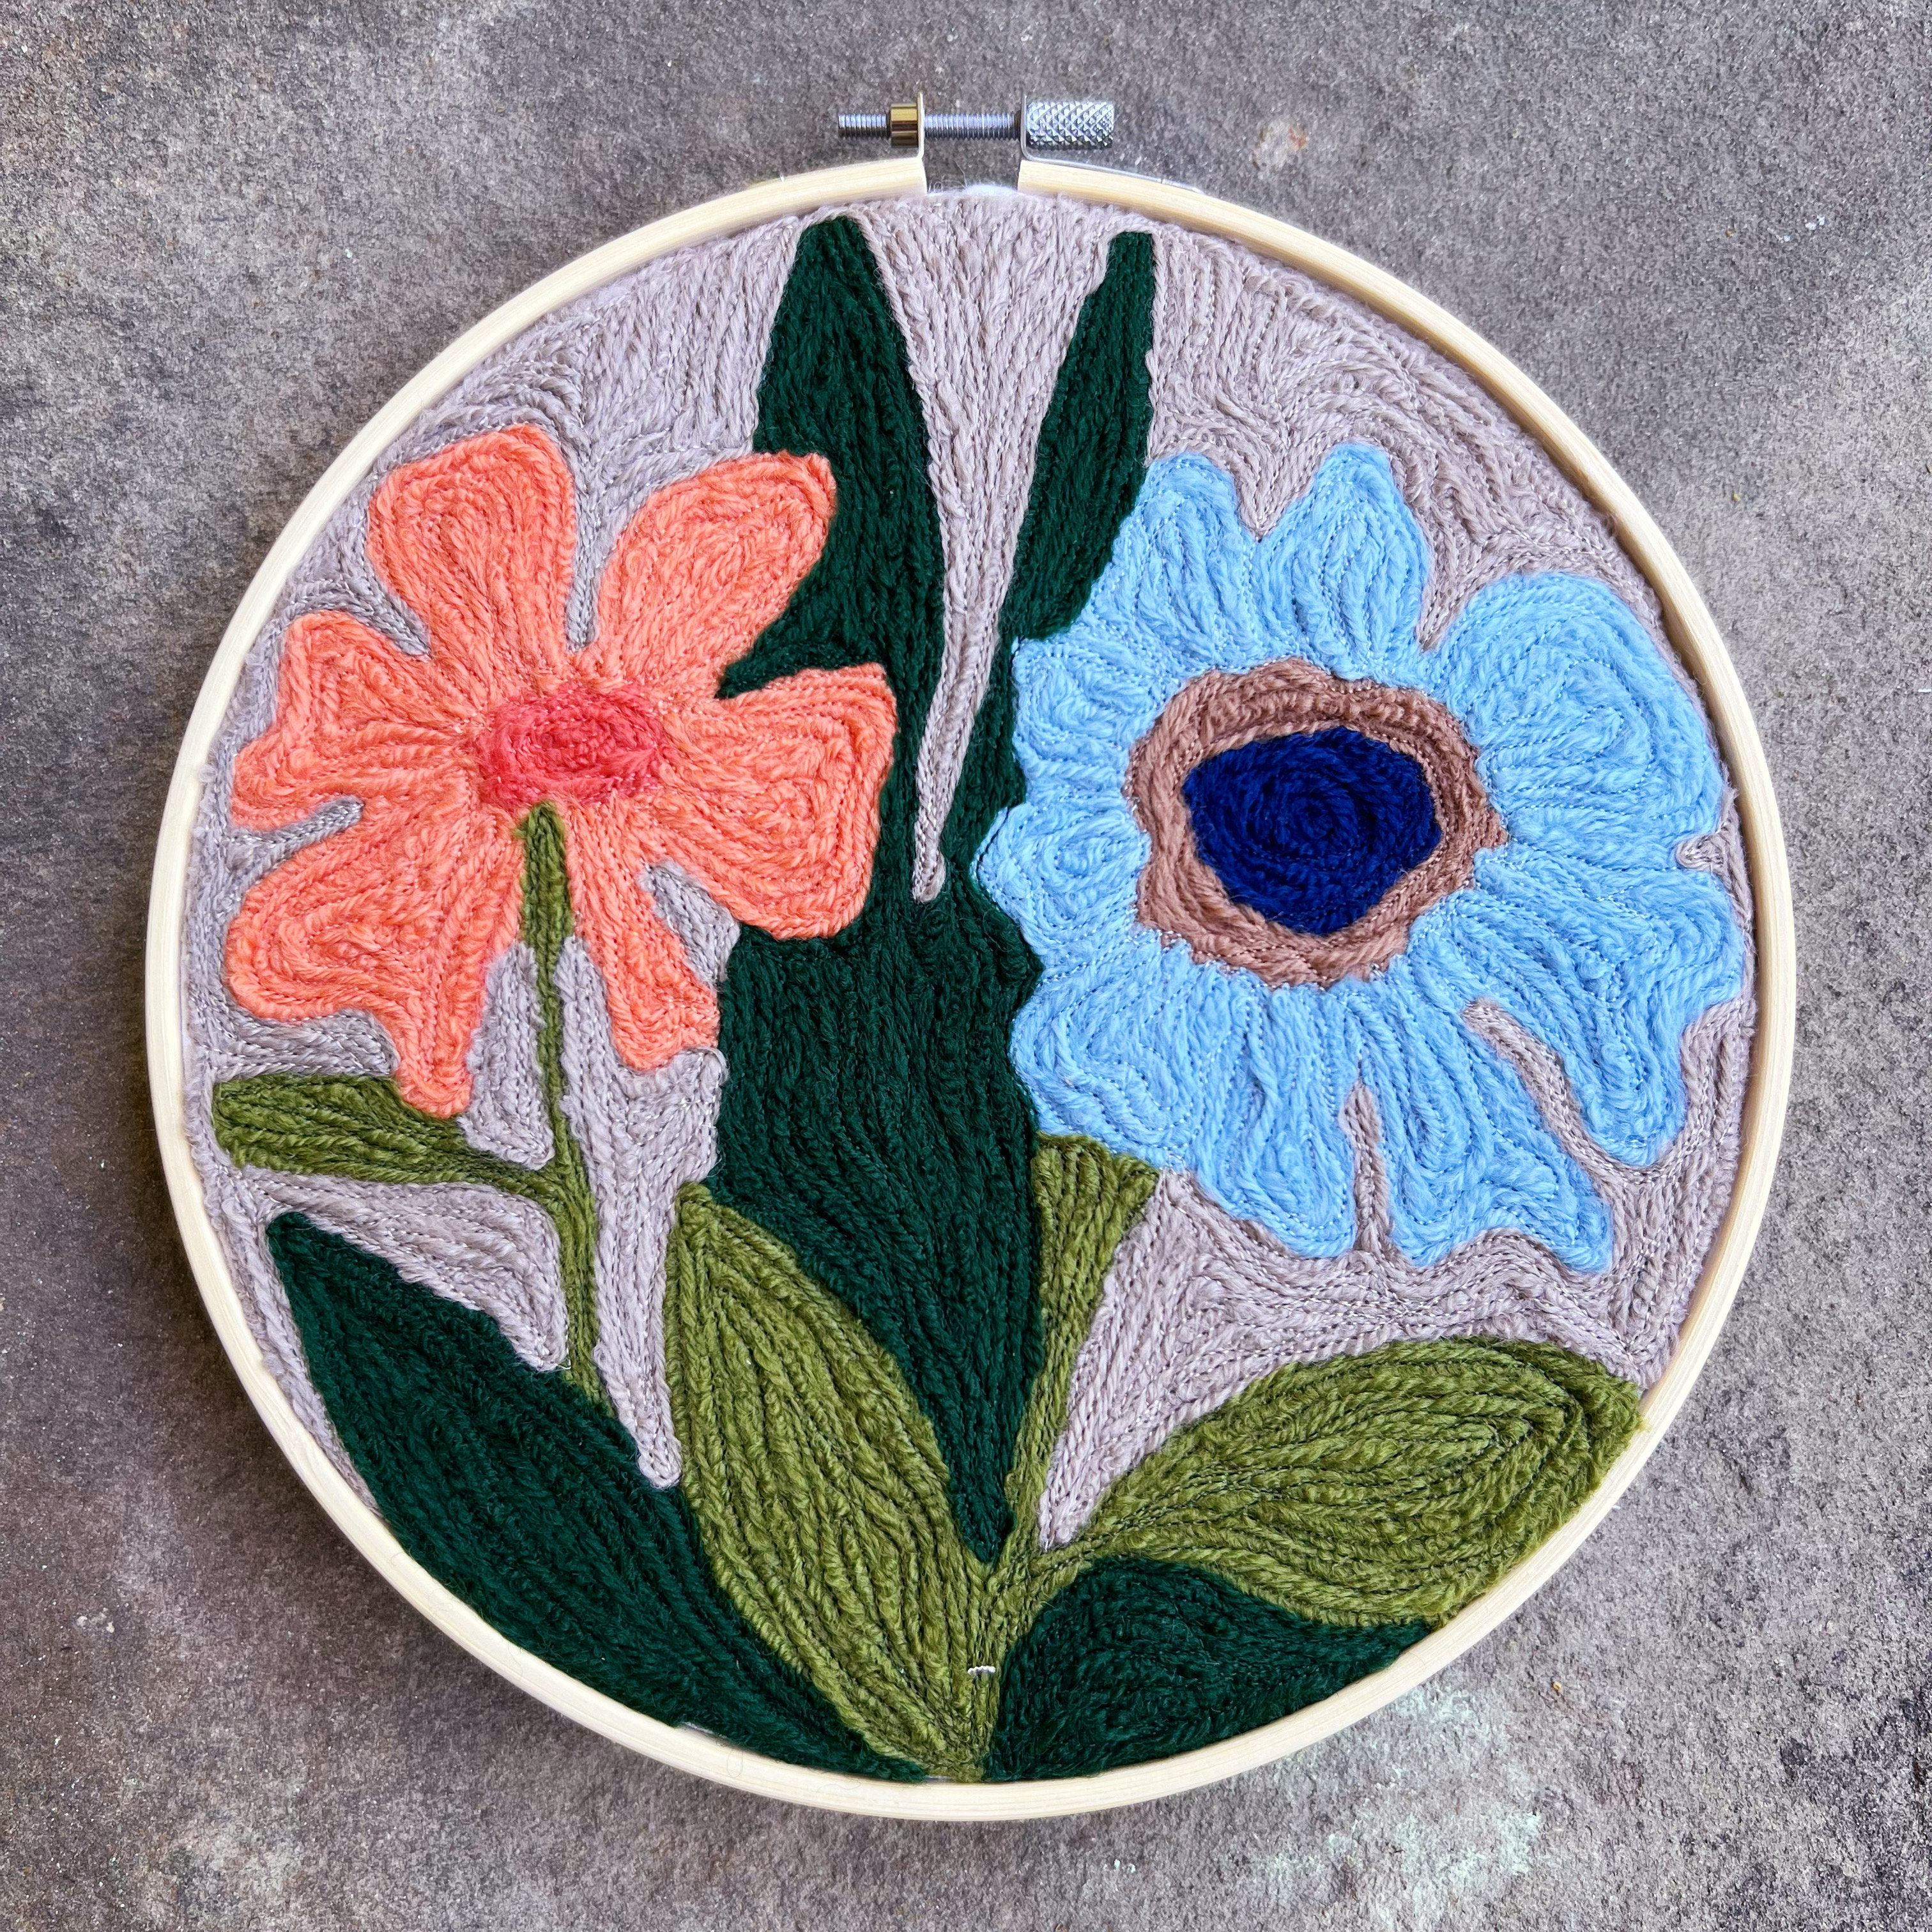
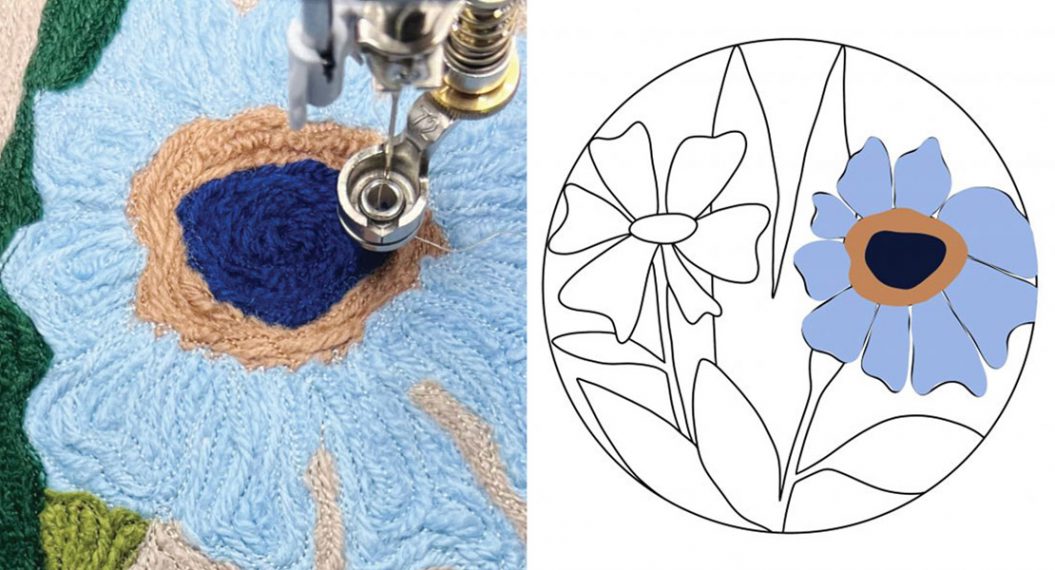
During the past weeks we free-motion couching flowers and leaves and for this week it’s just the background of the template left.
I left the background to be our last activity on purpose. If you look at the quilt sandwich right now, you will notice some gaps between the flowers and leaves that need to be filled with the background fiber color.
So this week we will need to be more careful about the stitching. First because all the other designs are already stitched. Second because we are not stitching a continuous design, we will need to stop a couple times, cut the thread, finish stitching and move to the next area.
But don’t worry! I’m explaining step by step in the videos below! So, gather your materials and let’s make some noise with our BERNINA.
Couching Fibers Along – Week Five
The background!
Couching Fibers Along – Week 5
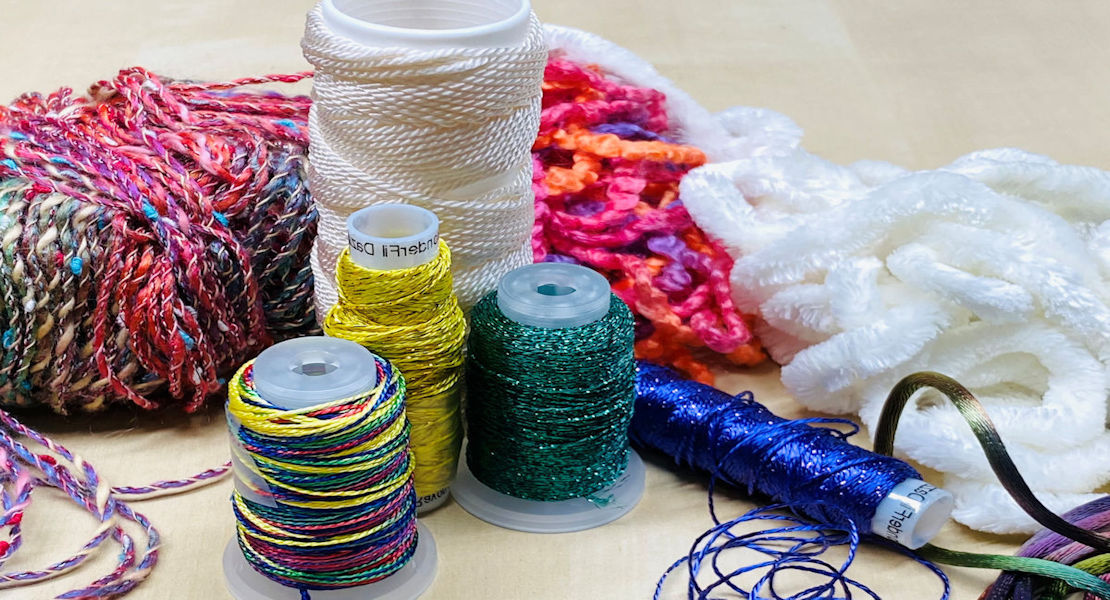
Materials for Week 5:
- Quilt sandwich (white cotton fabric with the design template, batting and backing fabric)
- DMC Tapestry Wool color 7509 coordinated with Aurifil 50wt color 5011 (we will call this combination our color 8)
- BERNINA Adjustable Ruler Foot #72 and couching inserts
Preparing the BERNINA Adjustable Ruler Foot
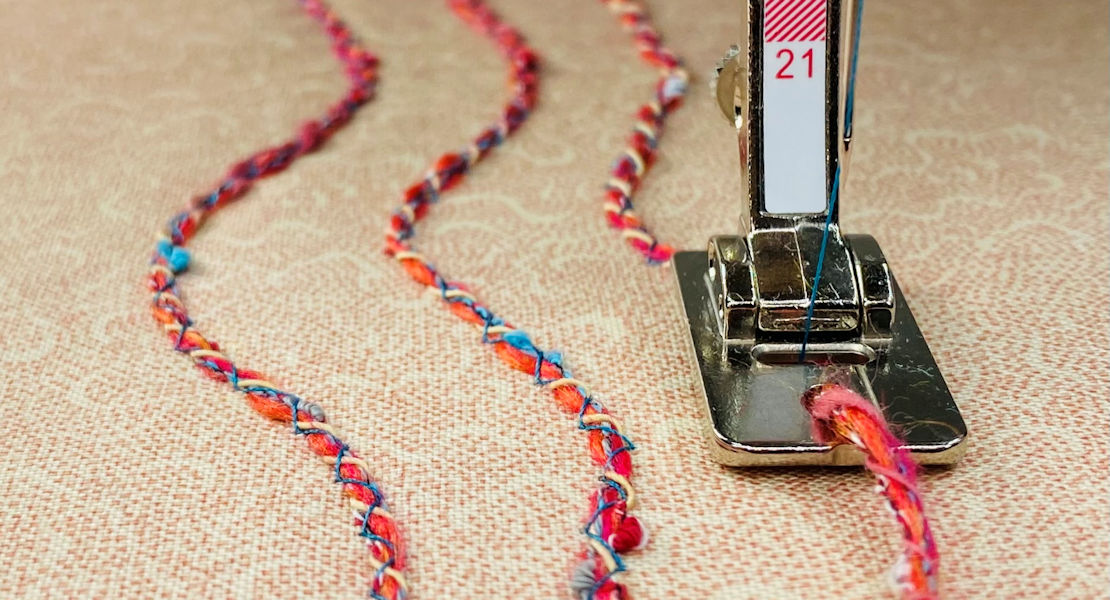
Because we are doing much more than ruler work this time, we need to attach the couching insert to the bottom of the BERNINA Adjustable Ruler Foot #72.
The couching inserts come in a package with 3 different sizes: 2.2mm, 1.8mm and 1.4mm.
For this entire project we will use the insert with the larger gap at the center, the 2.2mm.
Now you just need to snap the couching insert to the bottom of the foot and attach to your machine.
Free-motion Couching Color 8
Wind a BERNINA bobbin with Aurifil 50wt color 5011 and get the DMC Tapestry Wool color 7509 close to your machine.
Watch the video below to start stitching the color 8.
How to Finish
When the stitching is all done, you can use this sample in many different ways. You could appliqué to a jacket, a bag, make a cushion cover… the sky is the limit.
I like to use an embroidery hoop to frame all my special techniques samplers so I can hang on my studio wall. After you finish the stitching and framing, use a zigzag scissors to cut the excess of fabric 1″ to 1 1/2″ around the embroidery hoop. Using a hand sewing needle baste the fabric around the hoop starting and ending at the top. Pull both tails of the thread and secure with a knot and a bow. Check the image below:

And we are done! I hope you enjoyed our time here, please let me know if you have any questions in the comments section below. Don’t forget to upload and image of your own version of the Couching Fibers Along in the WeAllSew Community section, I would love to see your work!
Uf Widerluege! (See you soon!)
Used Products


What you might also like


3 comments on “Couching Fibers Along, Part Five”
-
-
Hi, thank you for your comment. The last video is playing the right content (the background with the color 8) from my side. Could you please reload the page and check if now its playing correctly? I hope it does and that you have tons of fun trying couching fibers!
-
-
this was amazing!!! thank you so much. I’m now sure how to up load a project but I did finish this and really learned a lot. thank you again
Leave a Reply
You must be logged in to post a comment.

I enjoyed your project very much and look forward to trying the technique; thank you. The last video is linked incorrectly to the coral flowers though and we didn’t get the video of you finishing the outside border color 8.