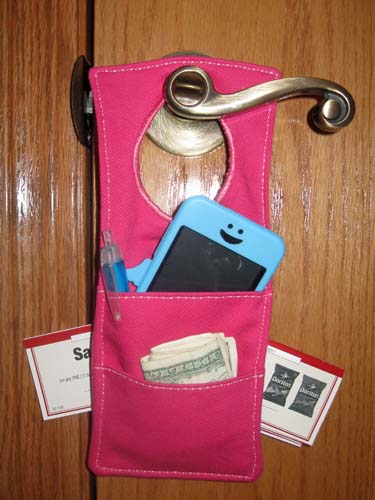
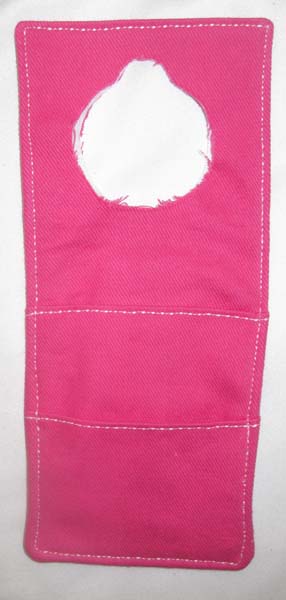
How to Make a Door Organizer to Hang on a Doorknob
Have a habit of misplacing your keys. Losing your iPod? Forgetting your coupons? Now, with this handy organizer, all your little necessities are in one convenient spot when you’re ready to head out the door – right on the door knob!
Supplies
- 1/3 yard or heavyweight fabric such as twill, canvas, or denim
- 1/3 yard of fusible interfacing
- Coordinating thread
- Scissors
- Water-soluble marking pen or tailor’s chalk
- Ruler
- 1/4″ presser foot (BERNINA Patchwork Foot #37 or Patchwork Foot with Guide #57)
Download and print the keyhole template: Door_Organizer_-_door_knob_template_-_121814.pdf
Step 1) Prepare the fabric pieces.
Cut from the heavyweight fabric:
- Two 5″ x 11″ rectangles for the organizer body
- One 5″ x 12″ rectangle for the large pocket
- One 5″ x 7″ rectangle for the small pocket
- One 6″ x 7″ rectangle for the hanging pocket
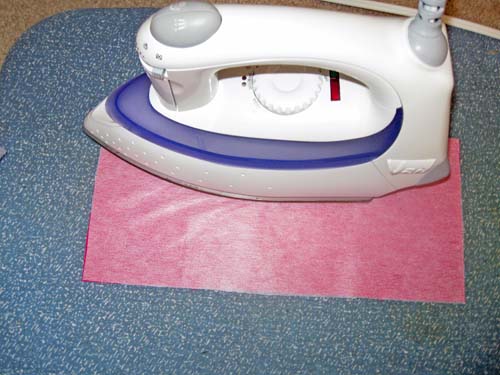
Fuse interfacing to the wrong side of both 5″ x 11″ fabric rectangles following the manufacturer’s directions.
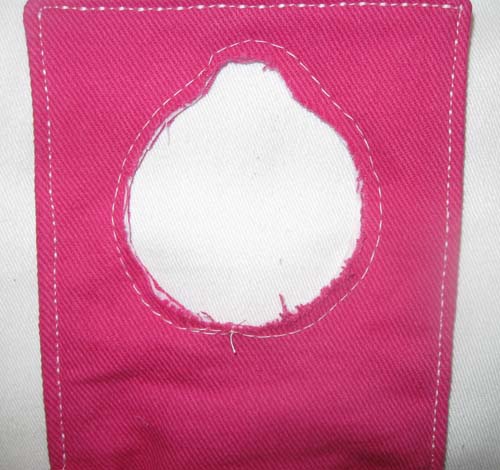
Cut the keyhole:
- Measure down 1″ from the top edge of one 5″ x 11″ rectangle.
- Center the top of the keyhole template on this mark.
- Trace the template.
- Cut along the traced line.
Repeat for the second 5″ x 11″ rectangle.

Step 2) Make the large and small pockets.
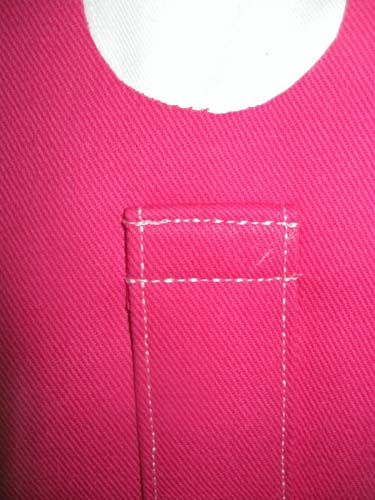
With wrong sides together, fold the large pocket in half to create a 6″ x 5″ rectangle. Topstitch close to the folded edge.
Place the large pocket on top of the right side of one 5″ x 11″ rectangle, matching the raw edges along the sides and bottom edges. Baste in place.
With wrong sides together, fold the small pocket in half to create a 3 1/2″ x 5″ rectangle. Topstitch close to the folded edge.
Place the small pocket on top of the large pocket, matching the raw edges along the sides and bottom edges. Baste in place.
Step 3) Make the hanging pocket.
With wrong sides together, fold the 6″ x 7″ rectangle in half lengthwise. Press.
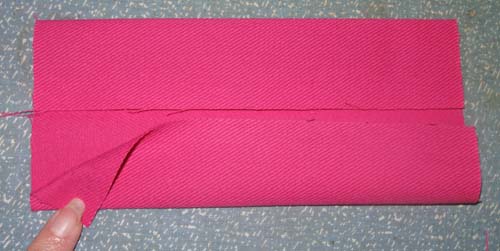
Unfold the strip and then fold the long raw edges to the center fold line. Press.
Refold the strip along the center crease. Topstitch close to both long edges.
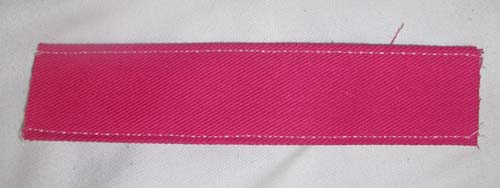
Fold under 1″ on both edge of the finished 7″ strip.
Measure up 1-1/4″ from the lower edge on the right side of the second 5″ x 11″ piece. Center the bottom of the strip on this mark.
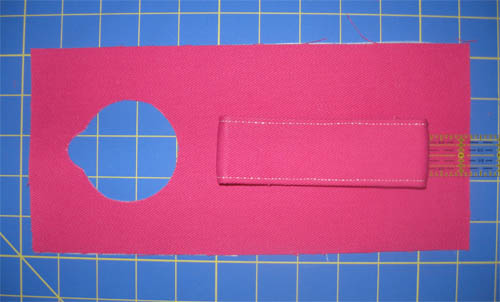
Sew close to the folded ends of the strip, then again 1/2″ away from the first stitching.
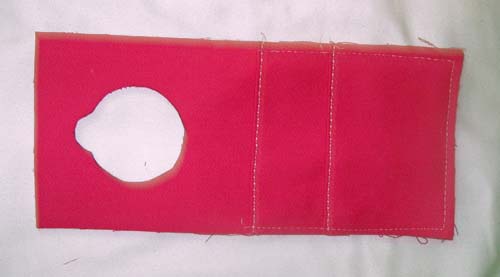
Step 4) Construct the door organizer.
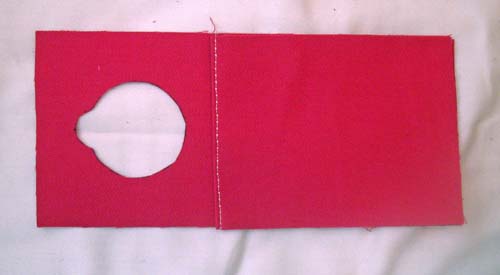
With right sides together, place the two 5″ x 11″ rectangles together, matching the raw edges and the keyhole opening.
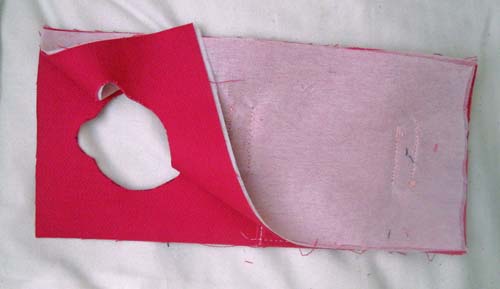
Stitch around the entire rectangle, leaving the keyhole open. Do not stitch around the keyhole area!
Clip the corners.
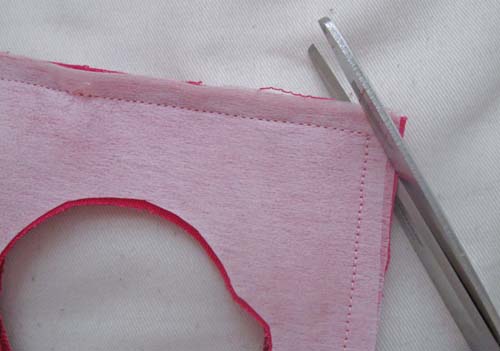
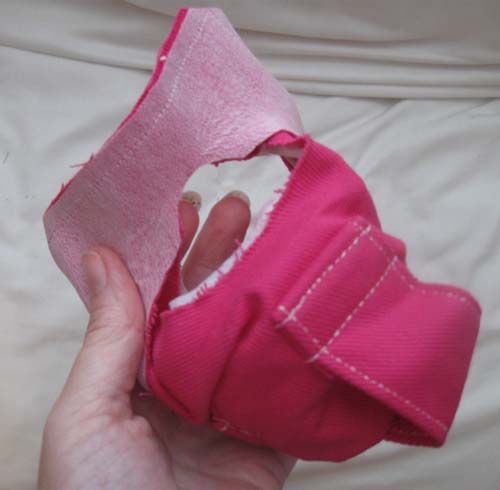
Turn the organizer right side out through the keyhole opening. Press.
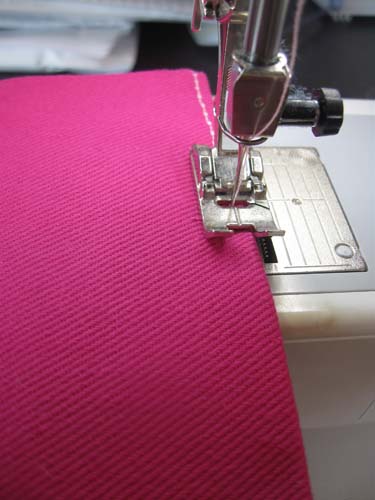
Topstitch close to the finished edges.
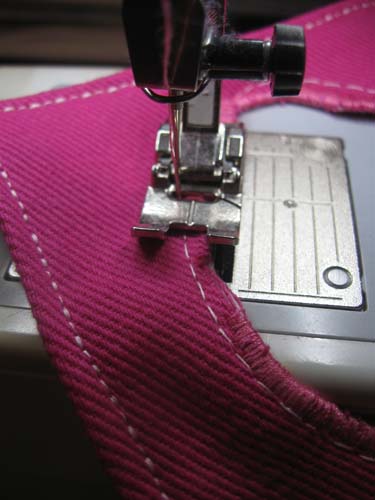
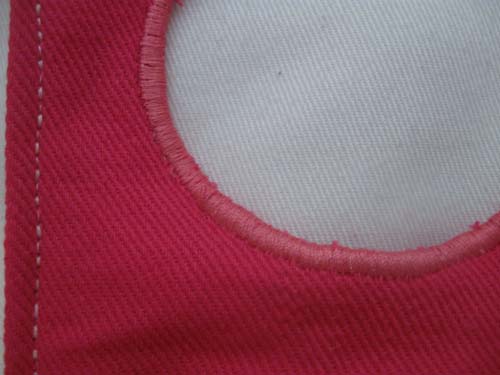
Baste the raw edges of the keyhole opening together.
Satin stitch close to the keyhole edges. Position the fabric so the needle goes just barely to the right of the raw edges and encloses them in stitches.
Tip: A satin stitch is a zigzag stitch with a very short stitch length, so the stitches are very close to each other.
Fill your organizer with keys, pens, letters, etc. so you never leave home without your essentials!


What you might also like


15 comments on “How to Make a Door Organizer to Hang on a Doorknob”
-
-
This sounds so cool! How do I get the pattern or just instructions.
-
This looks like the perfect organizer/reminder. Can’t wait to make it.
-
How do I download the directions for the door hanger organizer? Betty [email protected]
-
how do you download this project, I keep getting sent to this page to post a comment
-
How am I suppost to leave a comment when You cant’t see all of the project that you want. All that I am trying to do is get the project.
-
How can I get instructions for the dor organizer?
-
this is my 4th time to post here.
I can’t down load the door organizer even where it says down load
so what up with your site?-
Hi Lillian — Sorry for the inconvenience. We’re still working on fixing this. Jo
-
-
LOve this website. Think the organizer would be great gift.
-
Here’s I found the directions: Pg 1 Click on Door Organizer label alongside the picture of the organizer. Pg.2 Click on Door Organizer by Stacey Schlyer. Pg3 Click on Door Organizer by Stacey Schlyer in small print under the larger print stating the same thing. Hope this is easy to follow!
-
The Door Organizer is a good idea but I am having a hard time downloading it. Can you help
me?
Pat -
This PDF is still not worling, tried several times with no luck. Please fix, I’d like to make some!
-
Hi — The link seems to be working from our end. Are you clicking on the red underlined Door Organizer link? Try copying and pasting this link — https://weallsew.com/wp-content/uploads/sites/4/2011/09/BoA_WAS_DoorOrganizer.pdf — and see if you have better luck. If not, let me know — Jo
-
-
Pingback: WeAllSew « https://weallsew.com
Leave a Reply
You must be logged in to post a comment.

Nice idea to get organized