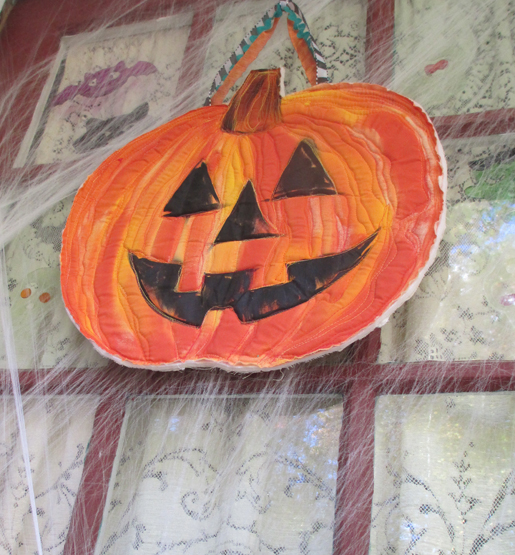
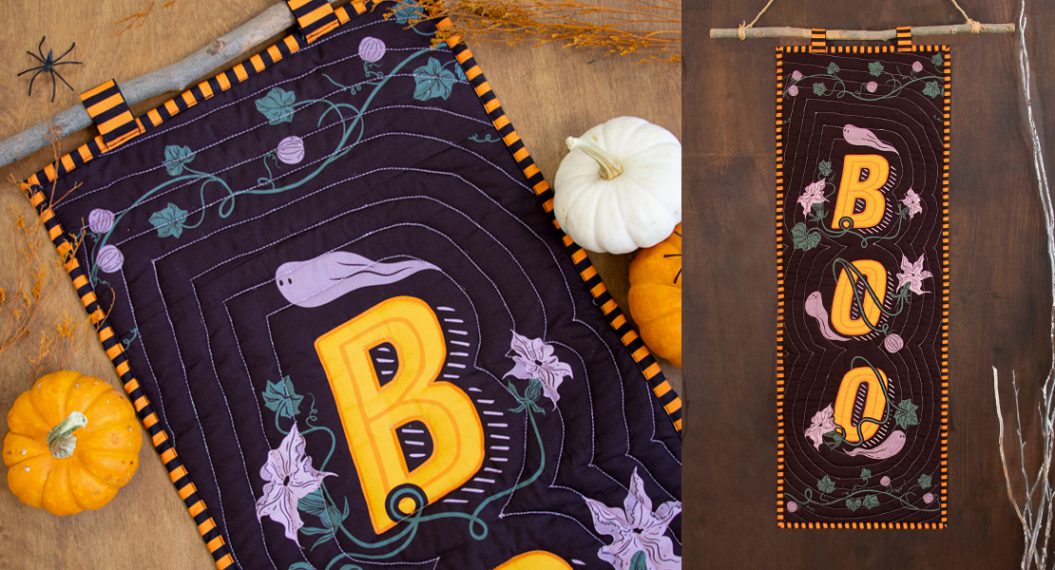
DIY Happy Jack Door Hanger
What happens when mixed media artist Joanne Sharpe gets her hands on some orange paint, thread, and ribbon? She makes a cheery Jack-o-Lantern door decoration! Visit Joanne’s Whimspirations and Artful Quilt and Stitch blogs for more whimsical imspiration and information on her many creative online classes.
Here’s a super fun and simple fabric pumpkin painting project to embellish with free-motion stitching. No carving required. Don’t over think this, just have fun! When creating your whimsical jack-o-lantern art on your fabric, call upon your “2nd grade self,” let loose, and paint away. I love adding free motion machine stitching to my textile arts and quilts. Art and sewing are good for you!

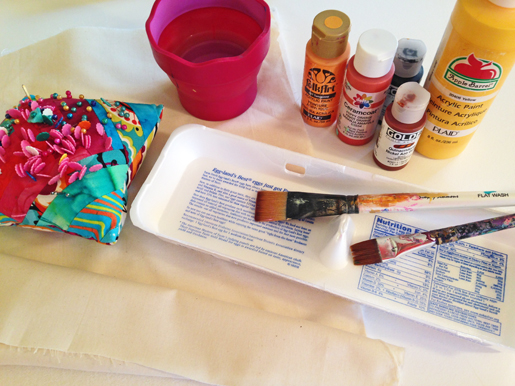
Supplies
- 1 yd muslin
- 1 piece of Soft and Stable interfacing
- Disappearing ink fabric marker
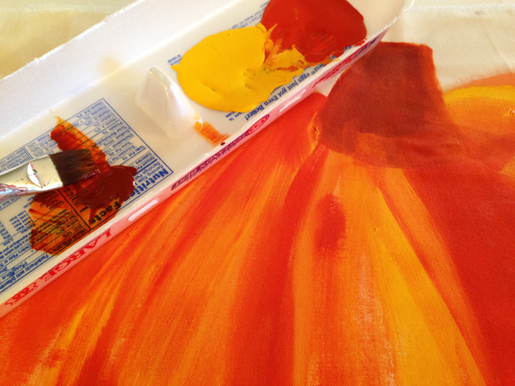
- Acrylic craft paints (any brand is fine) in orange, yellow, black, and brown
- Foam or flat paint brush ( 1″ flat for acrylic is what I use)
- Orange variegated thread
- About 16″ each of one or several ribbons or rickrack for the decorative hanger
- Straight pins
- Egg carton top for paint palette
- Scissors
- Your favorite free-motion stitching foot
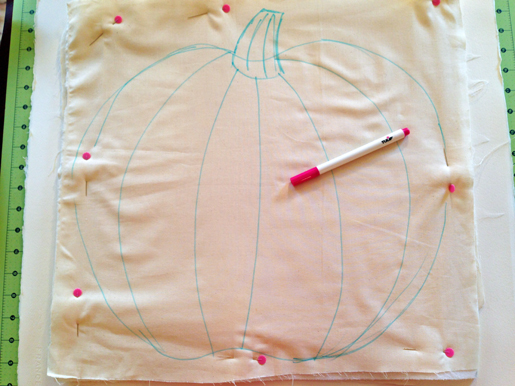
Step 1) Prepare the fabric.
Cut two 20″ x 20″ muslin squares, and one 20″ x 20″ square of interfacing. Don’t worry if they aren’t exactly 20″ x 20″ or exactly square.
Make a “quilt sandwich” with the interfacing between the two square of muslin.
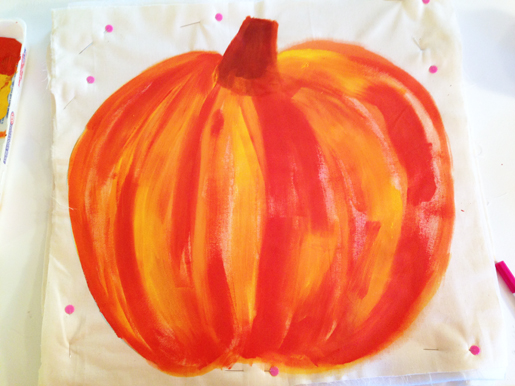
Use a disappearing pen to draw your pumpkin face. Make it as large as your whole piece of muslin, filling the whole space.
Tip: Did I hear you say you can’t draw? Don’t fret! Pretend you are just writing the letter “O” and adding a little dip at the top and bottom.
Detail the shape with vertical curved lines.
Add a stem at the top. (Pretend you are writing the letter “A” with a flat top to create the stem shape.)
With your brush dipped in a little orange and yellow paint, color inside your vertical curved lines to create the pumpkin surface. Paint the stem brown.
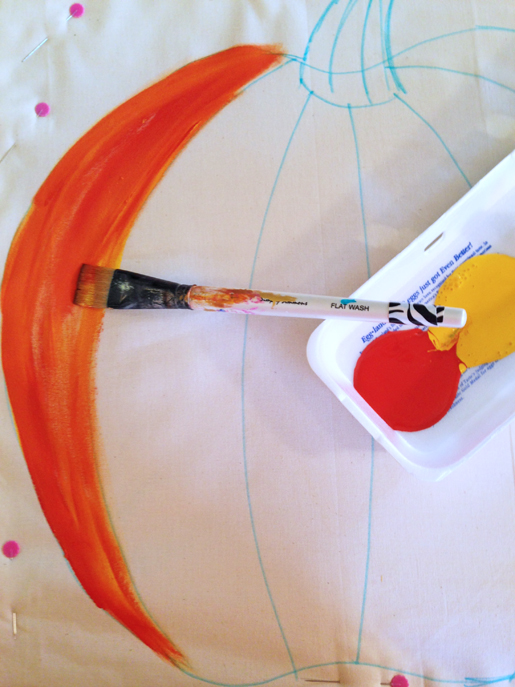
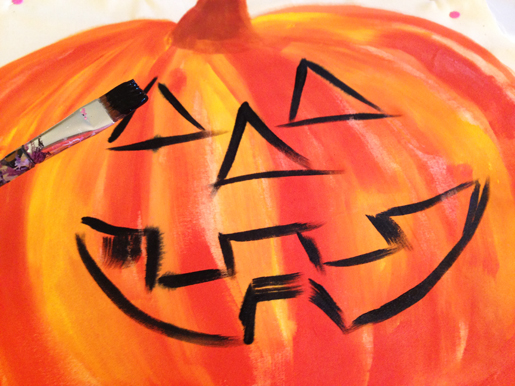
Let dry to touch, then add the black triangle eyes, nose and mouth.
Let entire piece dry for at least 12 hours, or overnight.
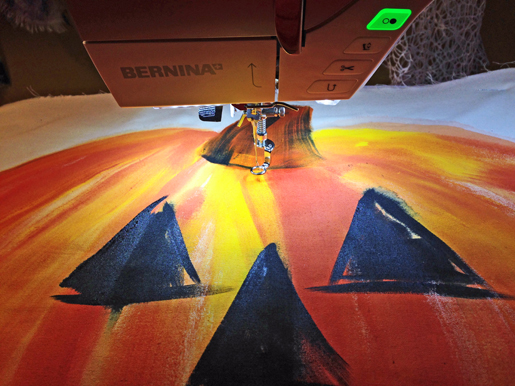
Step 3) Quilt the pumpkin.
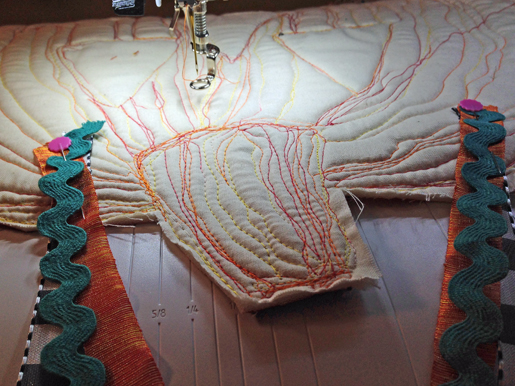
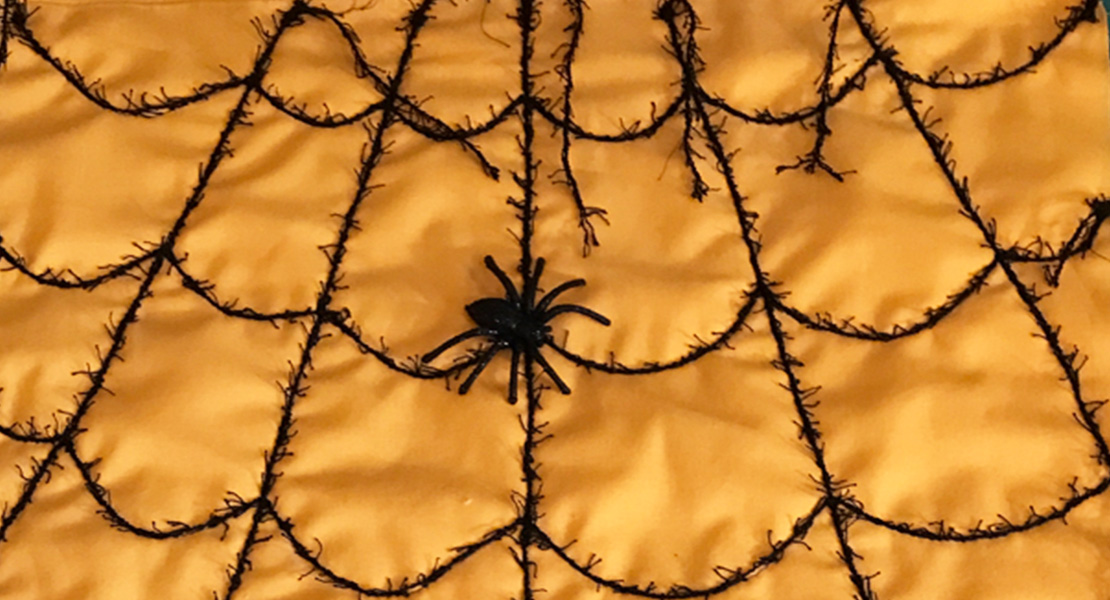
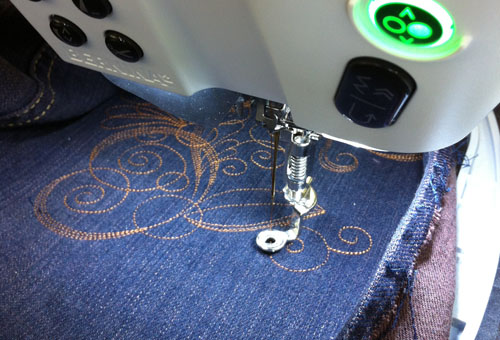
With orange variegated thread, start free-motion stitching, sewing the vertical designs on the “pumpkin sandwich” from the center out, stopping at the black painted shapes. Sew around the black designs, staying in the orange area. Follow the path of your painted lines to give the pumpkin surface an organic feel.

When all the lines and stem are stitched, stop at the outside edge of the piece.
Sew 1/4″ into the orange edge all around the “Happy Jack” shape.
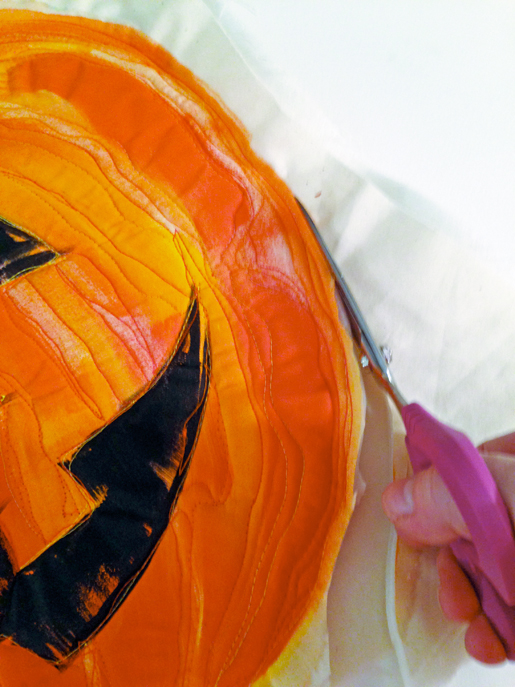
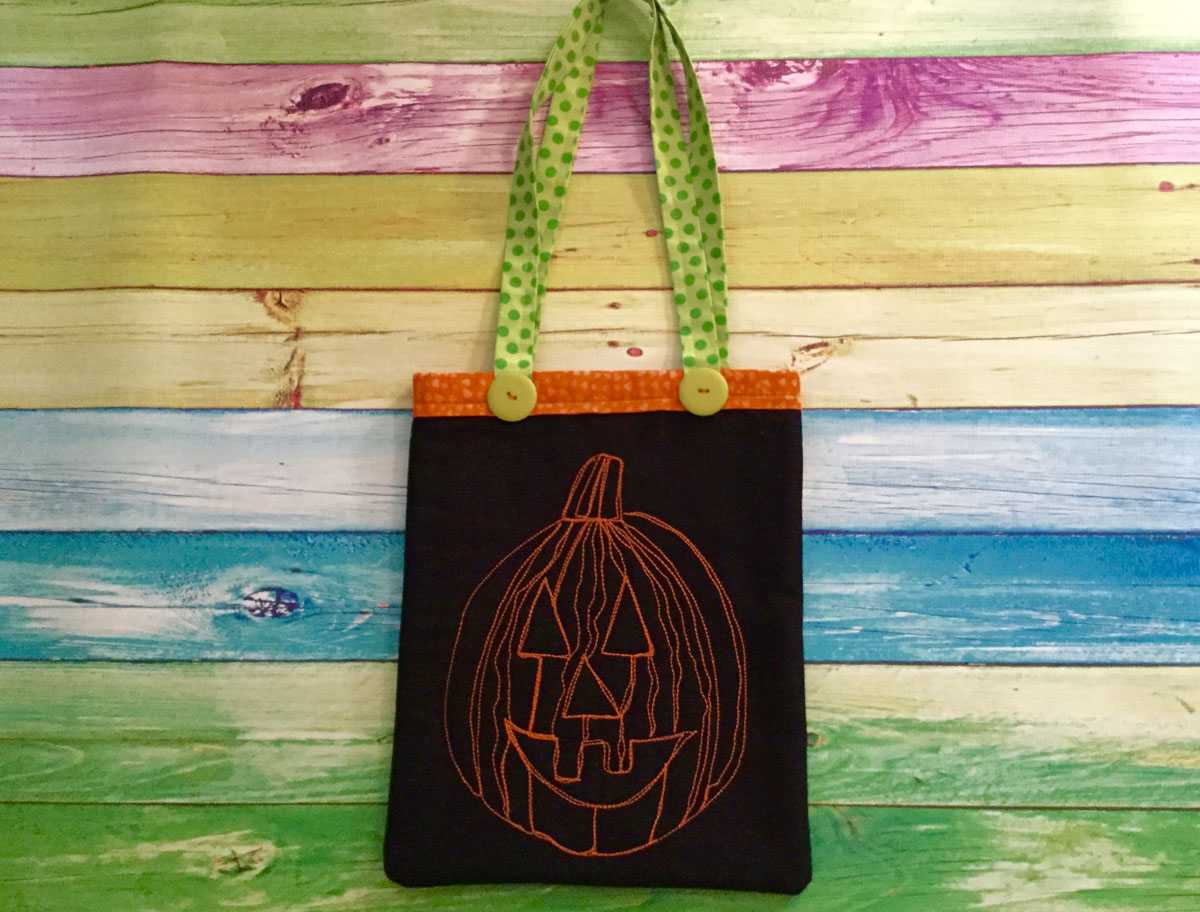
Cut all around the painted edge of the piece and voila! A Happy Jack pumpkin face!
Step 4) Add the hanging loop.
Cut your decorative ribbons and/or trims to the desired length for hanging on or over a door.

Place the 14″ ribbons flat on the back and sew them to quilted lines on the back, so they are secure and become a part of the whole piece.
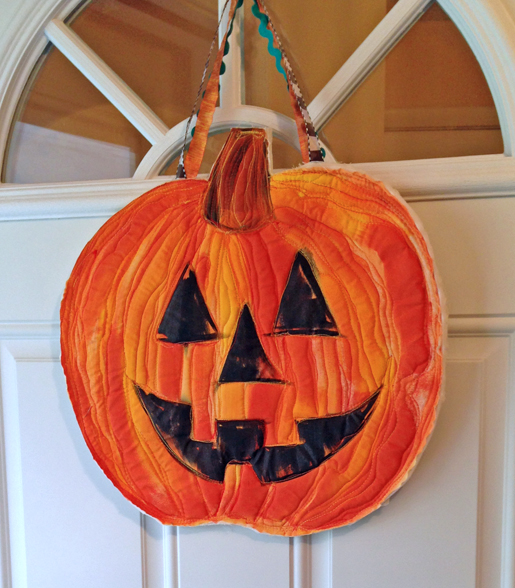
Add an additional loop of ribbon for hanging, so the sewn in loop hangs straight. Your piece shouldn’t be floppy, as the Soft and Stable interfacing combined with the painted fabric help it to hang flat.
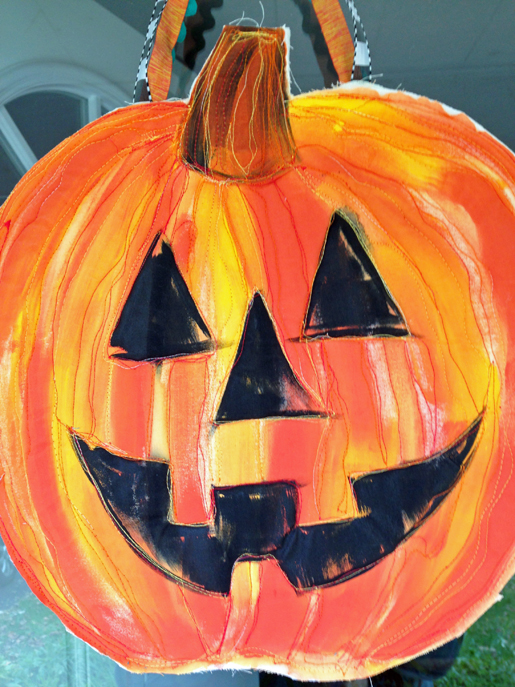
Happy Jack is ready to greet your October guests at the door!


![Have a habit of misplacing your keys. Losing your iPod? Forgetting your coupons? Now, with this handy organizer, all your little necessities are in one convenient spot when you're ready to head out the door - right on the door knob! How to Make a Door Organizer Supplies 1/3 yard or heavyweight fabric such as twill, canvas, or denim 1/3 yard of fusible interfacing Coordinating thread Scissors Water-soluble marking pen or tailor's chalk Ruler 1/4" presser foot (BERNINA Patchwork Foot #37 or Patchwork Foot with Guide #57) Download and print the keyhole template: [download id="88"] Step 1) Prepare the fabric pieces. Cut from the heavyweight fabric: Two 5" x 11" rectangles for the organizer body One 5" x 12" rectangle for the large pocket One 5" x 7" rectangle for the small pocket One 6" x 7" rectangle for the hanging pocket Fuse interfacing to the wrong side of both 5" x 11" fabric rectangles following the manufacturer's directions. How to Make a Door Organizer Cut the keyhole: Measure down 1" from the top edge of one 5" x 11" rectangle. Center the top of the keyhole template on this mark. Trace the template. Cut along the traced line. Repeat for the second 5" x 11" rectangle. How to Make a Door Organizer Step 2) Make the large and small pockets. With wrong sides together, fold the large pocket in half to create a 6" x 5" rectangle. Topstitch close to the folded edge. How to Make a Door Organizer Place the large pocket on top of the right side of one 5" x 11" rectangle, matching the raw edges along the sides and bottom edges. Baste in place. How to Make a Door Organizer With wrong sides together, fold the small pocket in half to create a 3 1/2" x 5" rectangle. Topstitch close to the folded edge. Place the small pocket on top of the large pocket, matching the raw edges along the sides and bottom edges. Baste in place. How to Make a Door Organizer Step 3) Make the hanging pocket. With wrong sides together, fold the 6" x 7" rectangle in half lengthwise. Press. How to Make a Door Organizer Unfold the strip and then fold the long raw edges to the center fold line. Press. Refold the strip along the center crease. Topstitch close to both long edges. How to Make a Door Organizer Fold under 1" on both edge of the finished 7" strip. Measure up 1-1/4" from the lower edge on the right side of the second 5" x 11" piece. Center the bottom of the strip on this mark. How to Make a Door Organizer Sew close to the folded ends of the strip, then again 1/2" away from the first stitching. How to Make a Door Organizer Step 4) Construct the door organizer. With right sides together, place the two 5" x 11" rectangles together, matching the raw edges and the keyhole opening. How to Make a Door Organizer Stitch around the entire rectangle, leaving the keyhole open. Do not stitch around the keyhole area! Clip the corners. How to Make a Door Organizer Turn the organizer right side out through the keyhole opening. Press. How to Make a Door Organizer Topstitch close to the finished edges. How to Make a Door Organizer Baste the raw edges of the keyhole opening together. How to Make a Door Organizer Satin stitch close to the keyhole edges. Position the fabric so the needle goes just barely to the right of the raw edges and encloses them in stitches. Tip: A satin stitch is a zigzag stitch with a very short stitch length, so the stitches are very close to each other. How to Make a Door Organizer How to Make a Door Organizer Fill your organizer with keys, pens, letters, etc. so you never leave home without your essentials! How to Make a Door Organizer](https://weallsew.com/wp-content/uploads/sites/4/2011/10/How-to-Make-a-Door-Organizer-WeAllSew.jpg)


This project is really great. It feels a little out of my realm with the painting. But you did a wonderful job it looks superb.