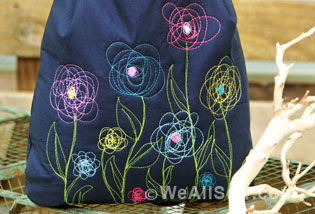
How to Make a Bucket Bag
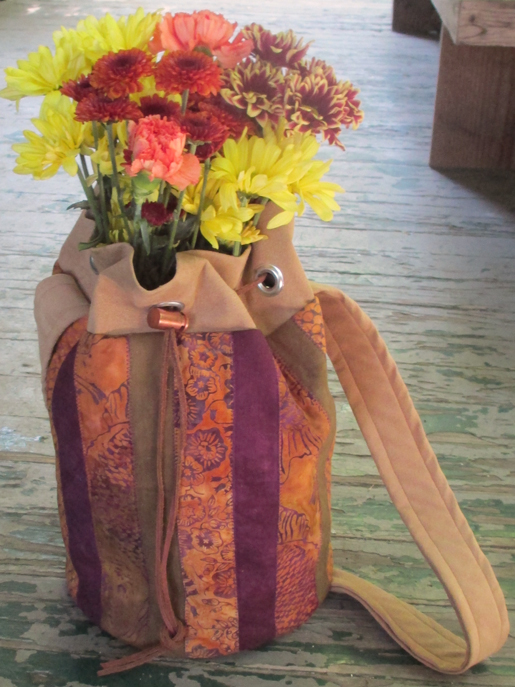
Just in time for autumn, a pretty and practical bucket bag from Sue Bleiweiss, whose other projects for WeAllSew include a Wool Applique Needle Book and a Padded Phone Pouch.
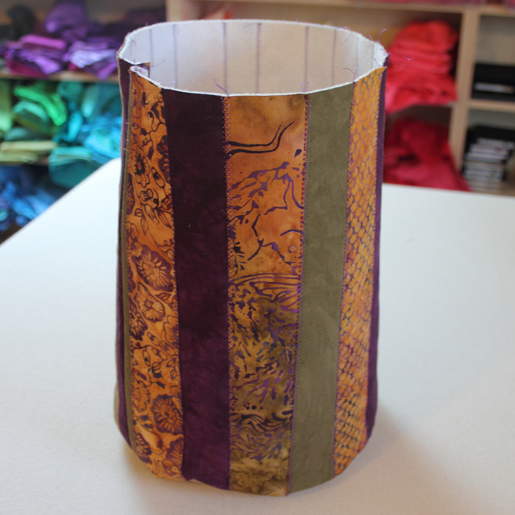
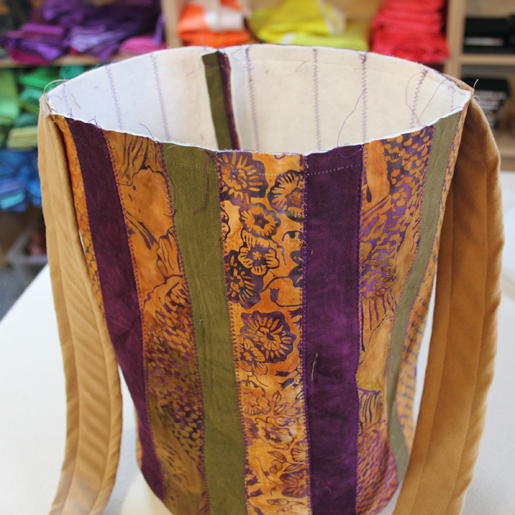
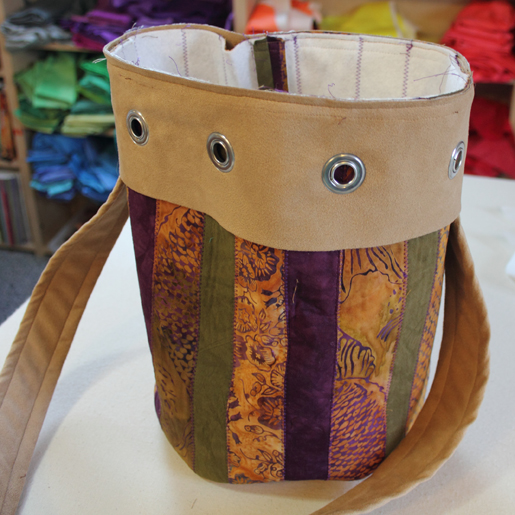
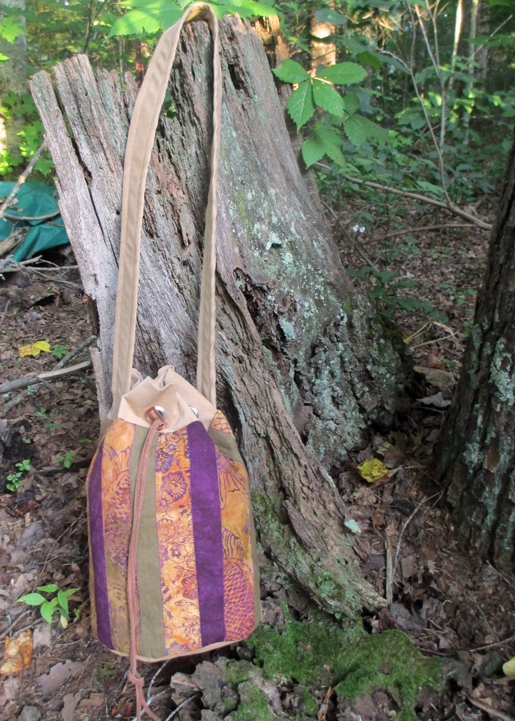
This sturdy wool bucket bag is the prefect accessory for fall. The round shape provides a deceptively roomy interior, while the patchwork shell is canvas for showcasing your favorite fabrics. Make it scrappy for a casual, bohemian feel, or go with 2-3 solids for a more classic look.

Supplies
- Wool felt (can substitute quilt batting)
- One piece 30″ x 13″
- One piece 10″ x 10″
- Assorted fabric strips for the outside of the bag, at least 13″ long and varying in widths from 2″ to 3″ wide.
- Ultrasuede (can substitute denim or cotton)
- One piece 7″ x 43″ (strap)
- One piece 7″” x 27-1/2″ (band)
- One piece 10″ x 10″ (bottom)
- Fabric for the lining of the bag
- 1 piece 8″ round (Tip: Use an 8″ dinner plate as a template.)
- 1 piece 27-1/2″ x 12″
- One 2-1/2″ yard package of Mistyfuse Fusible web
- Nine 7/16″ grommets
- 1 yards of leather or suede cording
- One cord lock
- Wonder Clips or binder clips (optional)
Step 1) Prepare the patchwork.
Fuse a layer of Mistyfuse to one side of each of the pieces of wool felt.
Place the 30″ x 13″ piece of wool felt on your work table with the Mistyfuse side up.
Place your fabric strips on top arranging them so that each one overlaps the one next to it by 1/4″.
Press with a hot iron to fuse the strips in place.
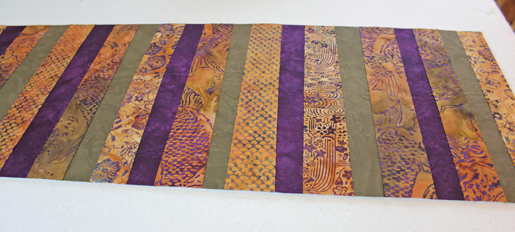
Zigzag stitch along each raw edge of the strips to secure them in place.

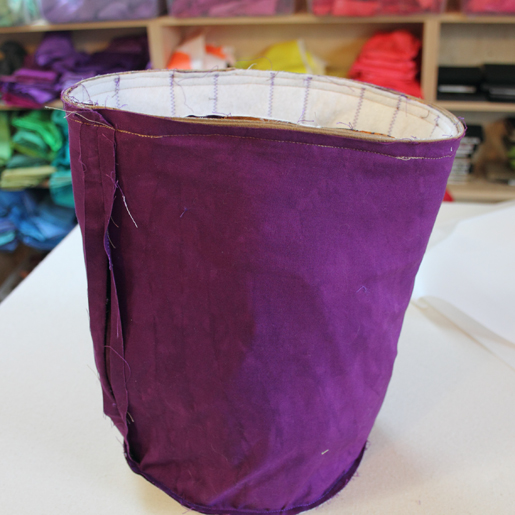
Step 2) Stitch the body of the bag.
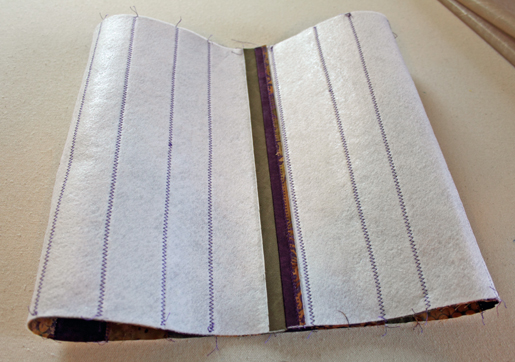
Trim the striped piece to measure 12″ x 27-1/2″.
Fold it in half wrong sides together and sew along the 12″ edge using a 1/2″ seam allowance to create a tube. Press the seam open and set it aside.
Fuse the 10″ piece of Ultrasuede fabric to the 10″ x 10″ piece of wool felt.
Note: When fusing Ultrasuede always use a press cloth to avoid touching the Ultrasuede directly with the iron.
Cut an 8″ circle from this piece. This is the bottom of the bag.
Pin the bottom of the bag to the striped body of the bag right sides together. Sew them together using a 1/2″ seam allowance.
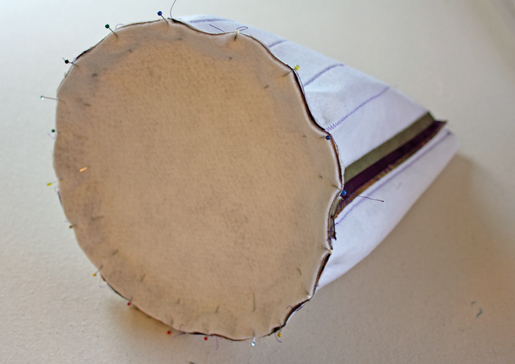
Turn the bag right side out and set it aside.
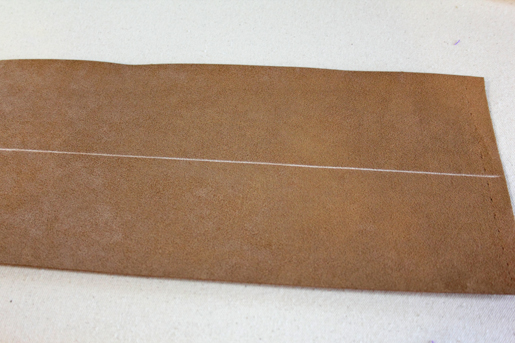
Step e) Make the shoulder strap.
Mark a line on the wrong side down the center of the 7″ x 43″ (strap) piece.
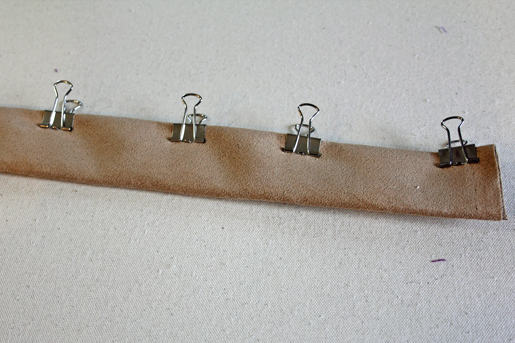
Fold the long edges into the center line and then fold the strip in half to enclose the raw edges. You may find it easier to use binder clips instead of pins to keep the strap closed.
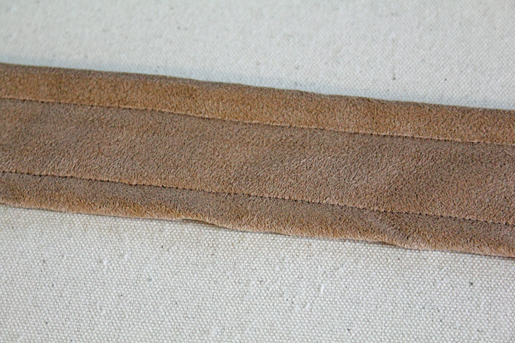
Stitch along each outer edge of the strap 1/2″ or so in from the outer edge to secure the strap edges.
Sew the strap to the bag using a 1/4″ seam allowance placing each raw edge of the strap equal distance apart along the top edge of the bag.
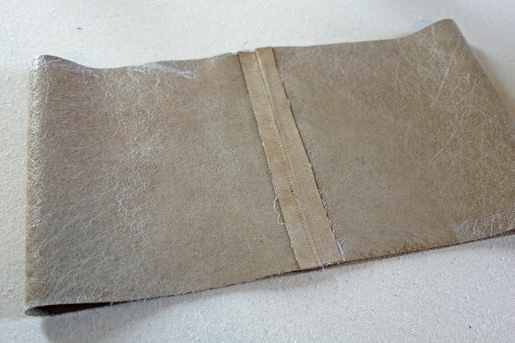
Step 4) Make and attach the band.
Put a layer of Mistyfuse on the wrong side of the 7″ x 27-1/2″ (band) piece.
Fold the band piece in half right sides together and sew it together using a 1/2″ seam allowance along the 7″ edge to create a tube 7″ wide. Press the seam allowances open.
Fold the band piece in half wrong sides together along the long edge to create a tube 3-1/2″ x 27″. Press it using a press cloth to fuse it together.
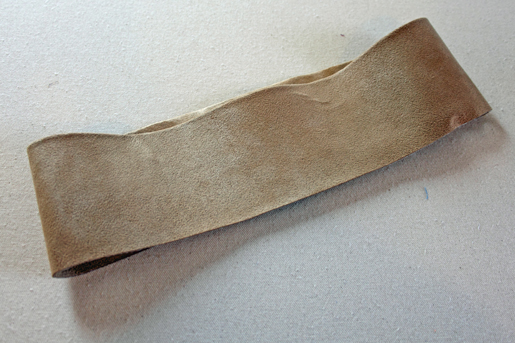
Mark 9 spots along the band tube 1-3/4″ up from the folded edge 3″ apart to indicate where you will put the grommets.
Install the grommets following the manufacturers directions on the package.
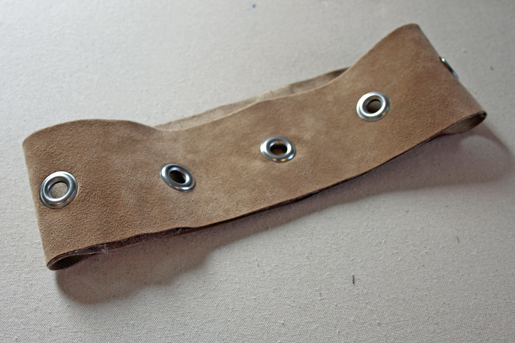
Sew the band to the bag right sides together using a 1/4″ seam allowance.
Step 5) Make the bag lining.
Fold the 27-1/2″ x 12″ lining piece in half wrong sides together and sew using a 1/2″ seam allowance along the 12″ edge leaving a 6″ opening to be used for turning later. Press the seam open and set it aside.
Cut an 8″ circle from the 10″ x 10″ square lining piece and pin it to the bottom of the bag lining body. Sew them together using a 1/2″ seam allowance.
Place the bag into the lining right sides together matching the raw edges. Pin. Sew them together using a 1/2″ seam allowance.
Turn the bag right sides out through the opening you left in the lining.
Sew the lining opening closed and push the lining into the bag.
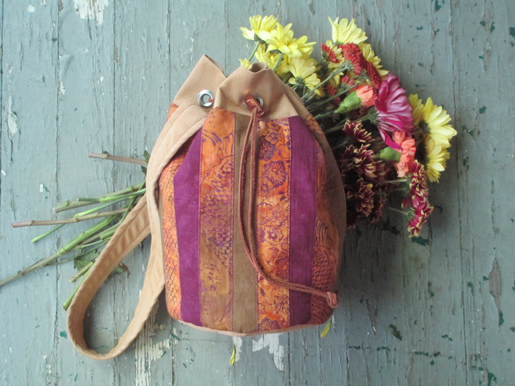
Thread the leather cording through the grommets and then through the cord lock.
Tie the ends of the cording into a knot so they don’t slip back through the cord lock opening.


love my bernina I have one that I have had for years, it still sews wonderful but I would like one that has more features like that stitch regulator. I saw the 780 and I would love to own that machine hope to one day.