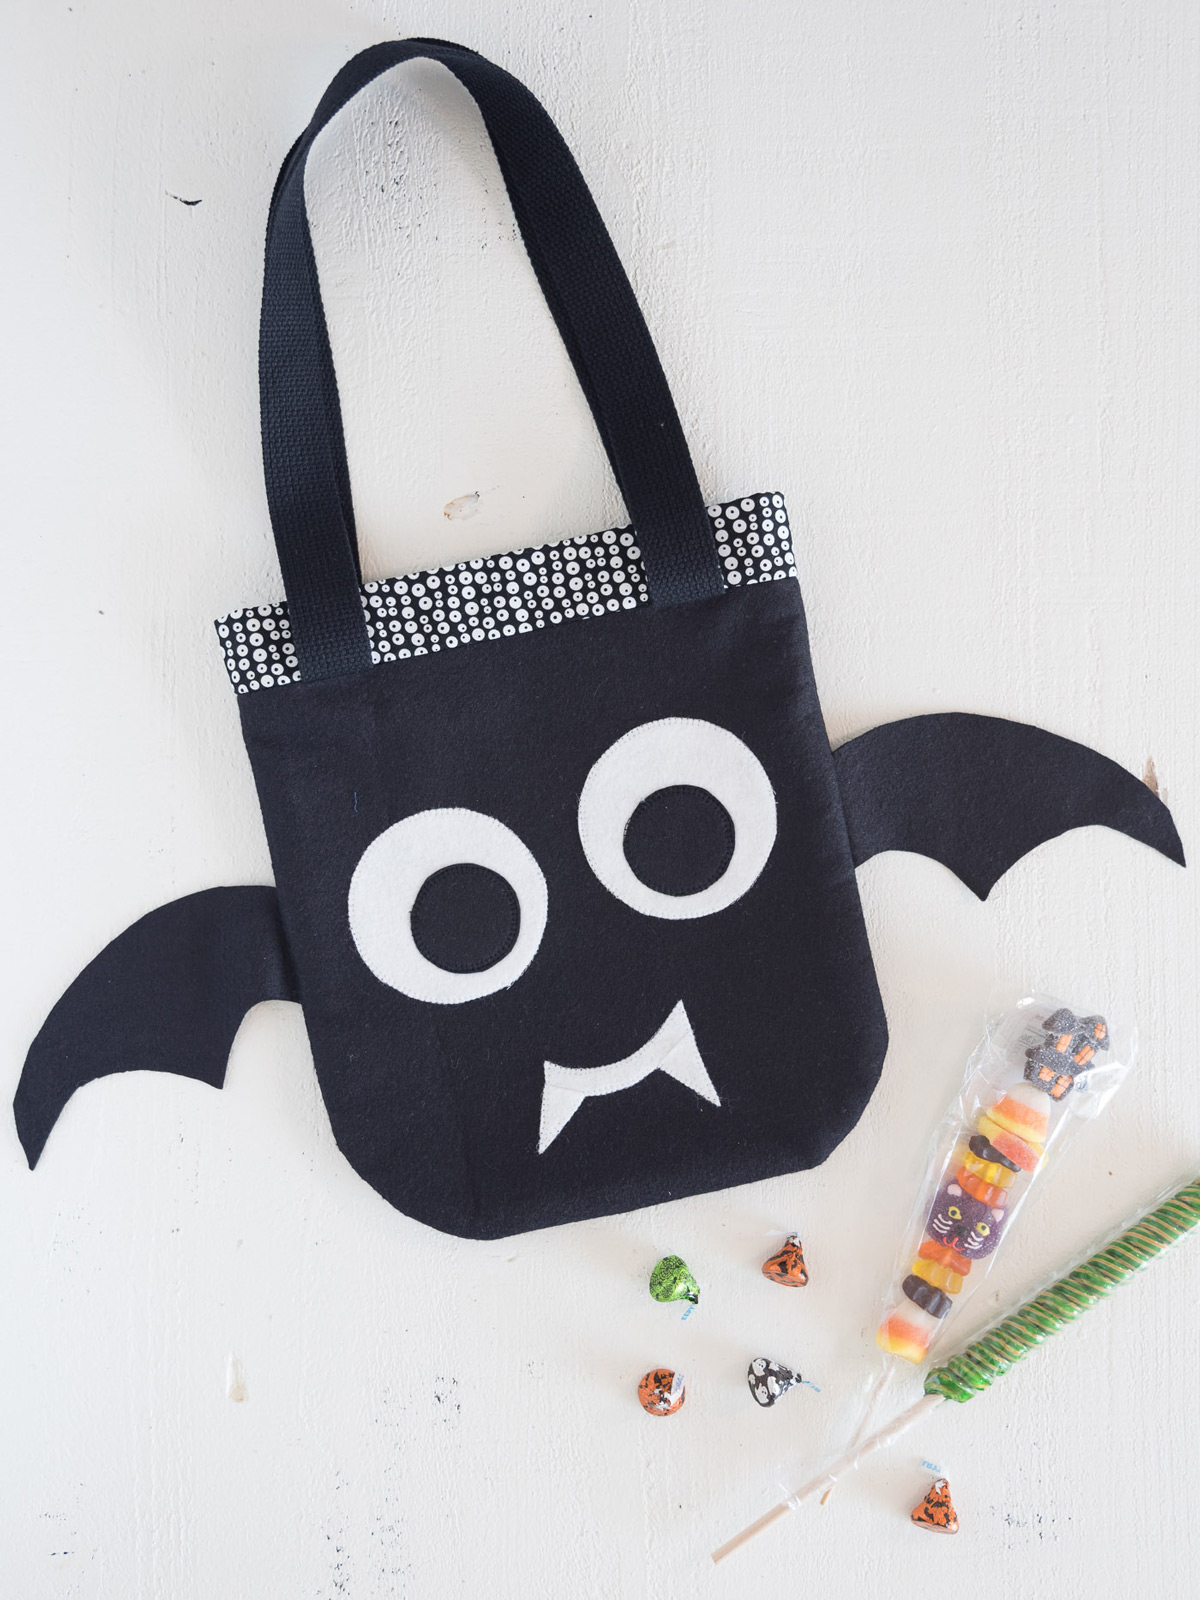
Bat Trick-or-Treat Bag Tutorial
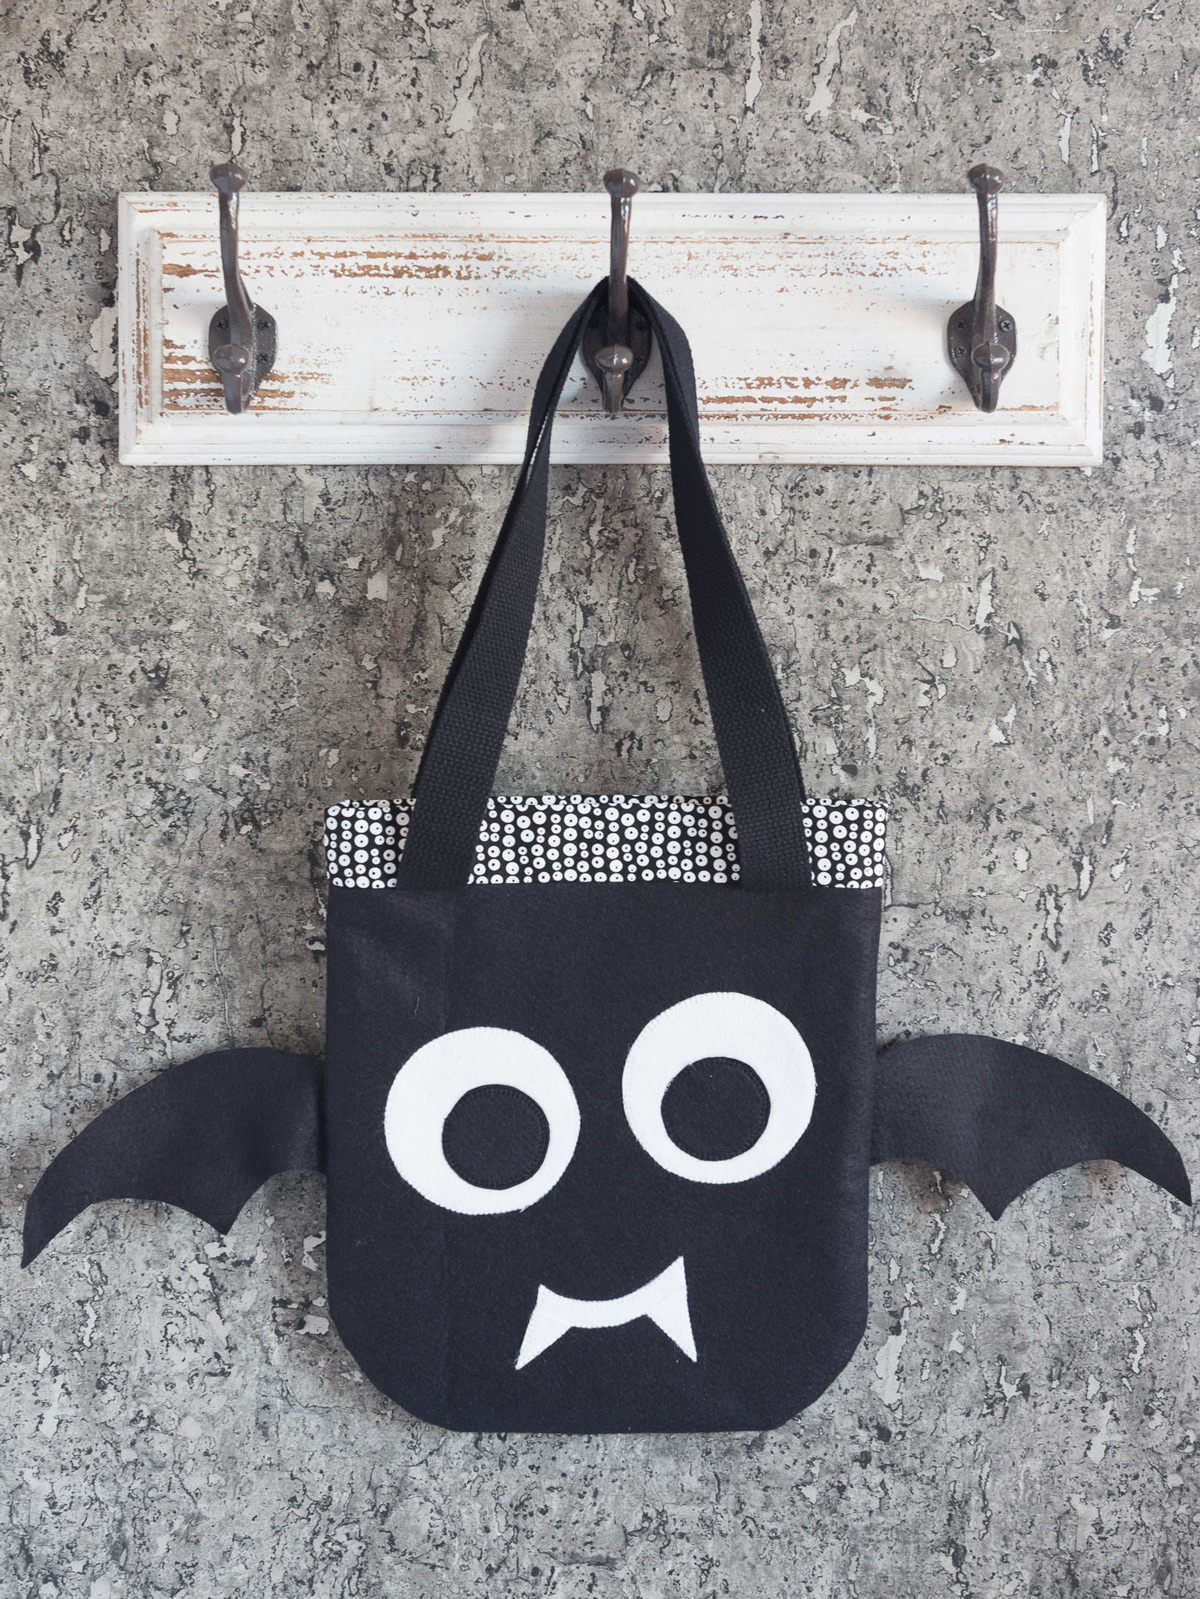
Hello WeAllSew readers! My name is Melissa Mortenson and am excited to be sharing with you a free tutorial for this fun Felt Trick or Treat Bag. You can find me over at the Polka Dot Chair where I love to share loads of sewing and quilting tutorials and projects.
This bag is easy to construct and is perfect for someone who is just learning how to sew. The bag is made from felt so there is no need to line it. To “jazz” it up a bit I’ve created a fun applique for the front of the bag.
Materials to Make a Bat Trick-or-Treat Bag
- 1/2 Yard of Black Felt- I prefer to buy the nicer felt that comes on a bolt at the fabric store. It’s a bit heavier and holds up better for a bag project like this.
- 2 large pieces of White Felt
- 1/4 Yard of Fabric for Bag Band
- 1/4 Yard of Heavyweight interfacing, I used Decor Bond
- 2 Yards of 1 or 1 1/2″ wide Cotton Webbing
- Pattern for Eyes and Bat Wings
- Paper Backed Fusible Web—1 package will be plenty
- Sewing Machine & Notions:
- Sewing Machine—I sew on a BERNINA 770QE
- BERNINA Open Embroidery Foot #20C—or other open embroidery foot
- Reverse Pattern Foot #1D
Step One: Begin by Creating the Appliqué
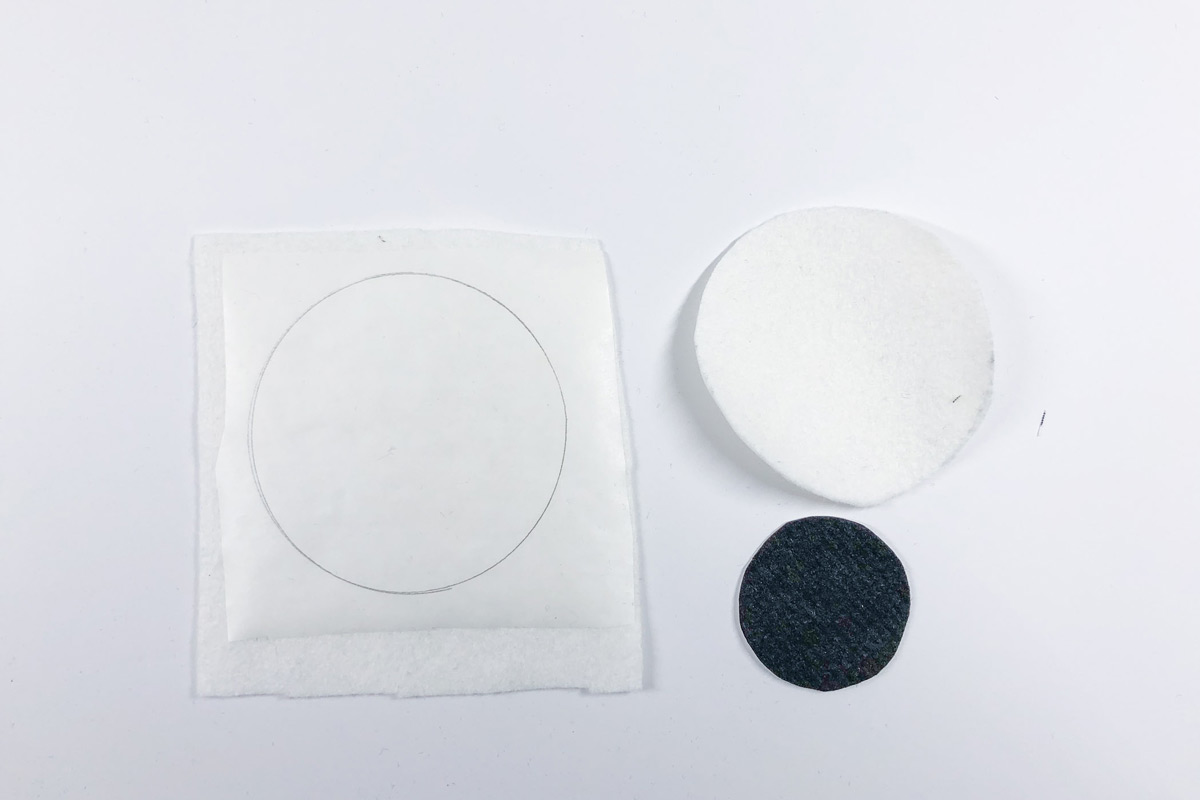
On your piece of paper backed fusible web, trace two small circles and two large circles from the PDF pattern piece. Also, trace the mouth. (Note: Make sure you trace onto the paper side of the fusible web).
Cut out the traced pieces loosely. Iron onto the wrong side of your felt. Follow the directions on the package for pressing instructions.
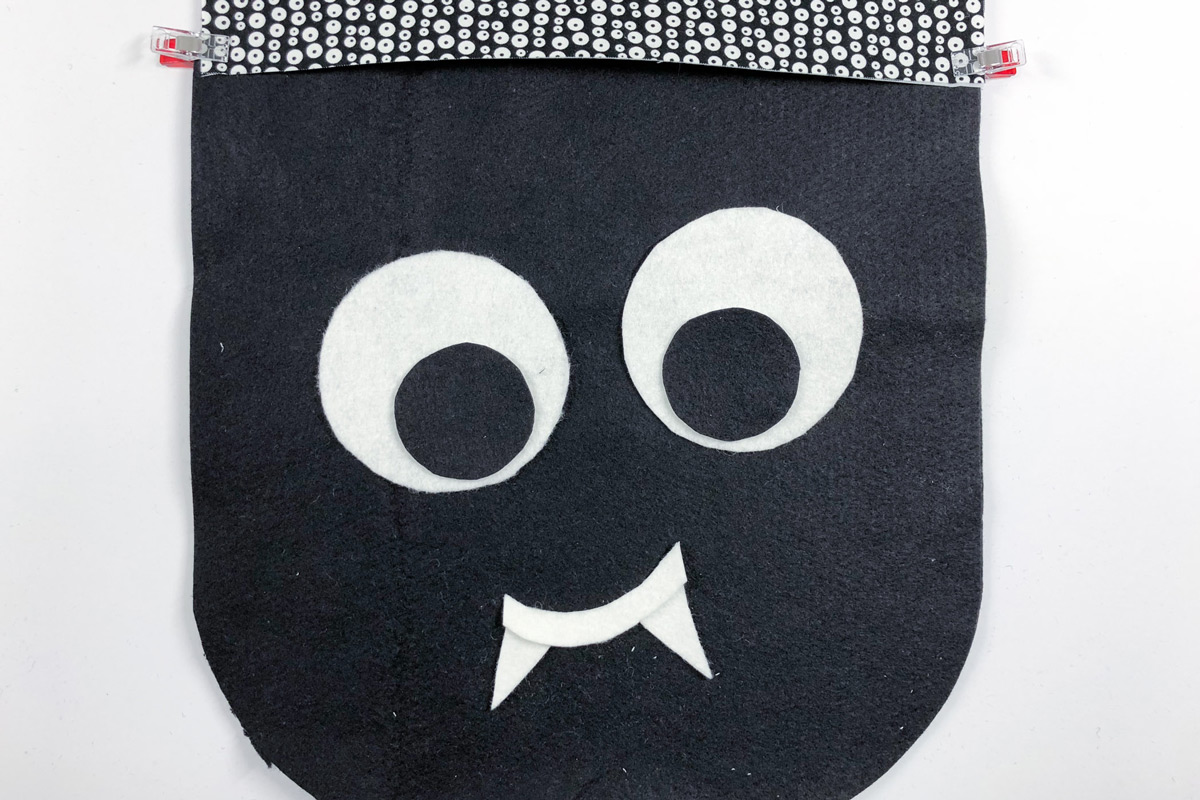
The small circles are attached to the black felt, and the rest are cut from white felt. Cut out again, this time precisely.
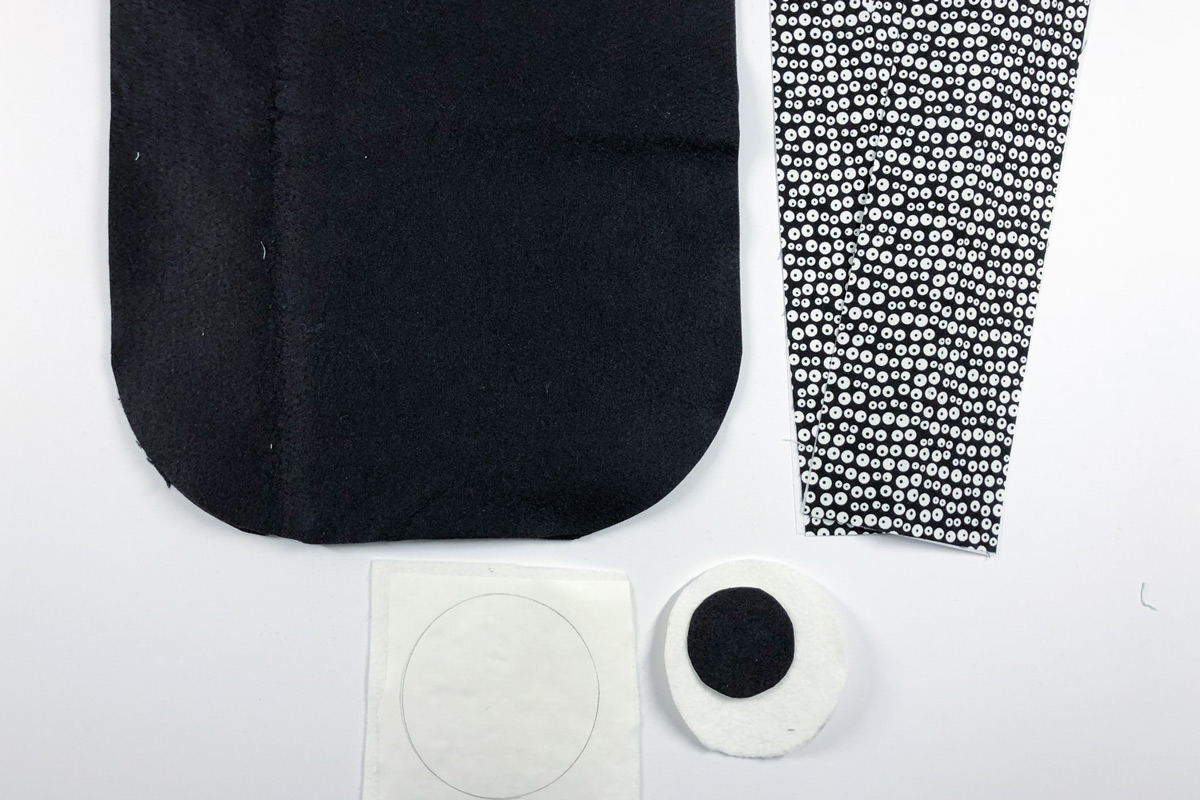
Now you need to make your bag pattern pieces. Cut two pieces of black felt each 12×12. Take a small plate (like a dessert plate, or you can use a CD) and round off the bottom two corners of the felt pieces.
Cut two pieces each 4″ x 12″ from your bag band fabric. Cut two pieces each 4″ x 12″ from your heavyweight interfacing.
Apply the interfacing to the wrong side of the cut fabric pieces.
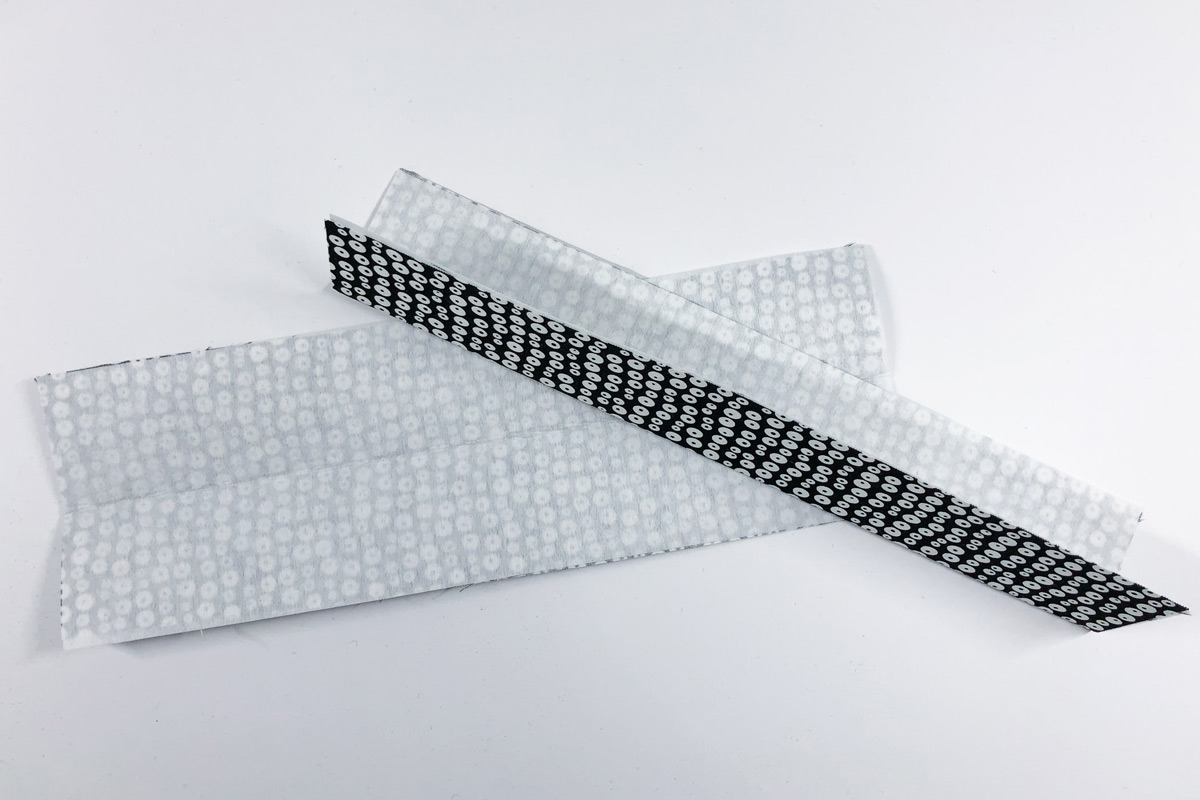
Fold the two pieces in half lengthwise and press. Set aside.
Step Two: Face Appliqué
Next, you’ll want to create the applique for the face (note the bag band shown in the photo above is just there to visualize the placement of the eyes, it’s not sewn on yet)
Peel the paper backing off of the applique pieces and lay them out on the bag where you’d like them. When you have them in the spot that you want, use your iron to adhere them to the bag front piece.
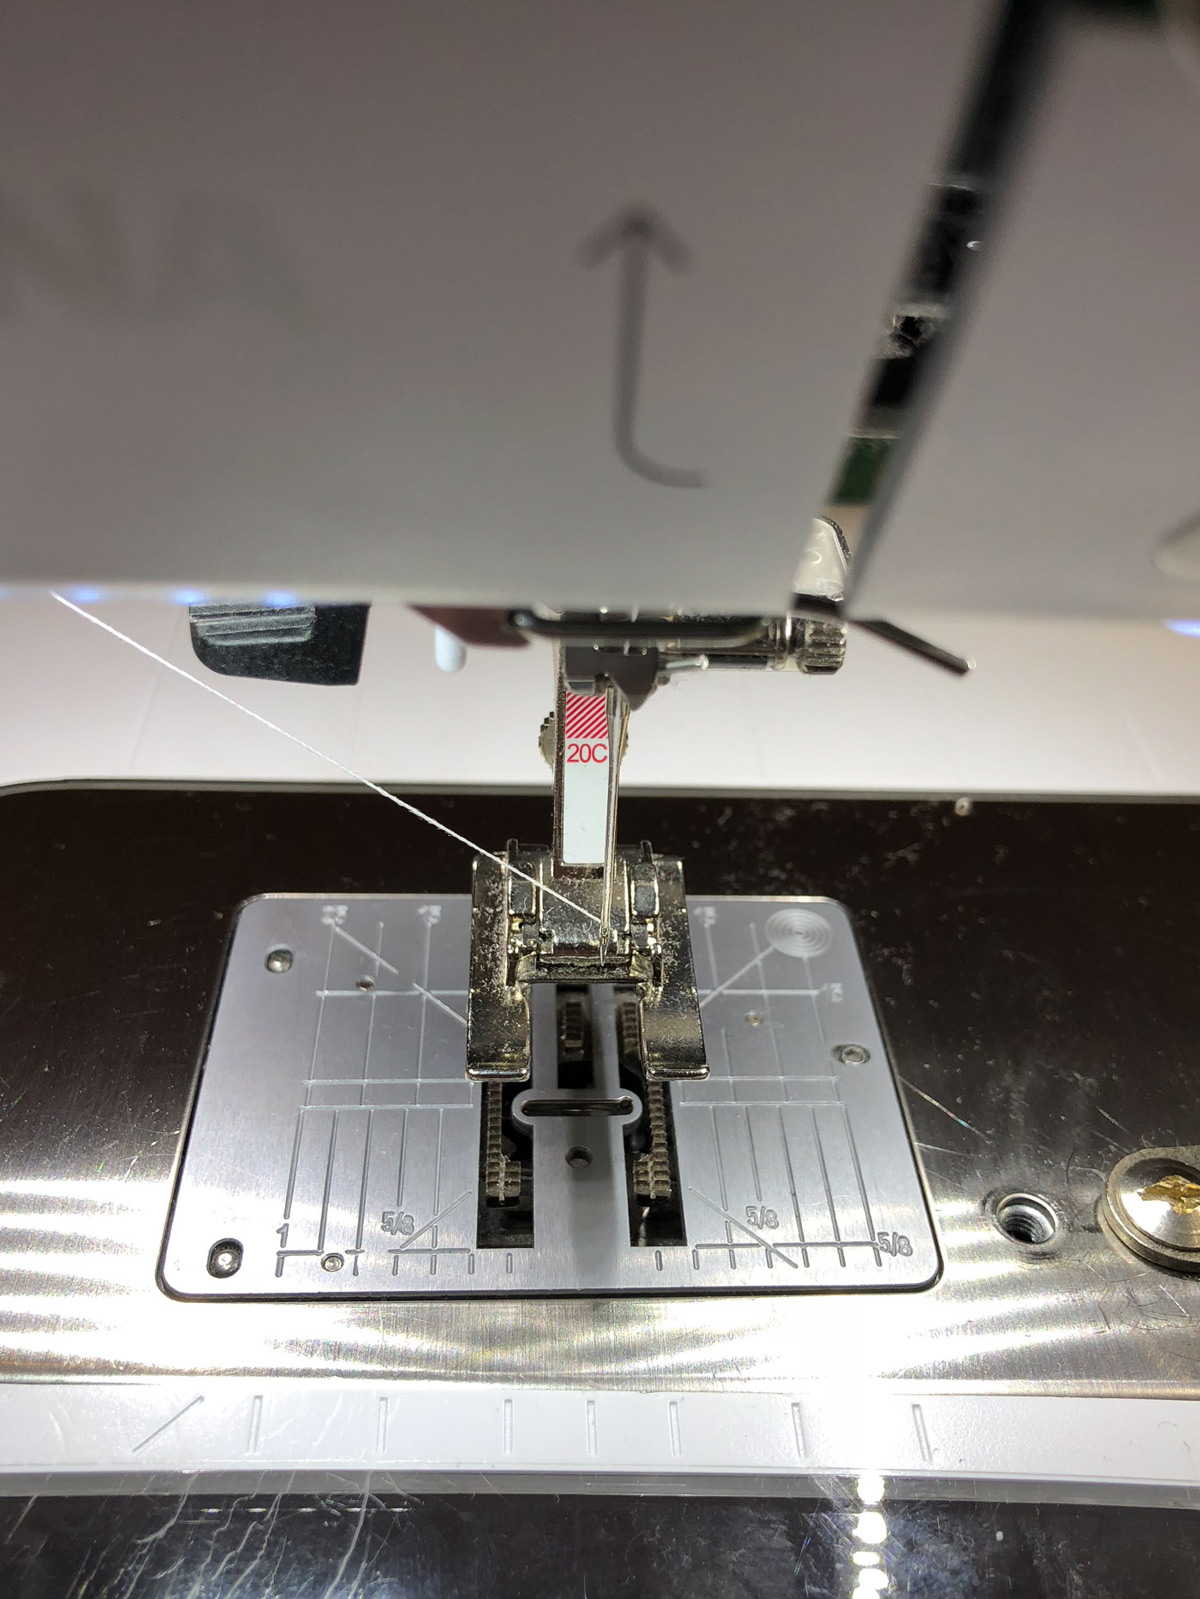
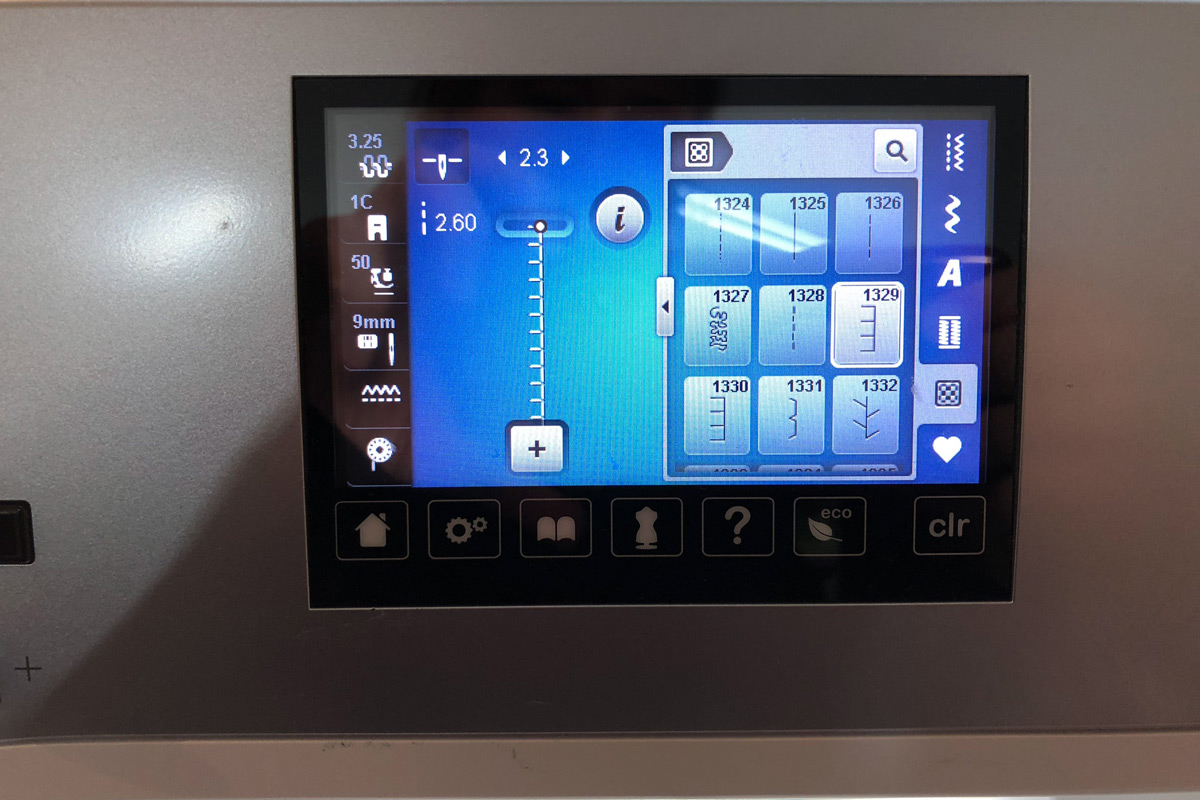
On your machine, set it for a simple applique stitch. On my 770QE it’s stitch #1329. Install Open embroidery foot #20 on your machine. Load the machine with thread to match your applique. I like to start with the white applique, then change to black thread to finish the project.
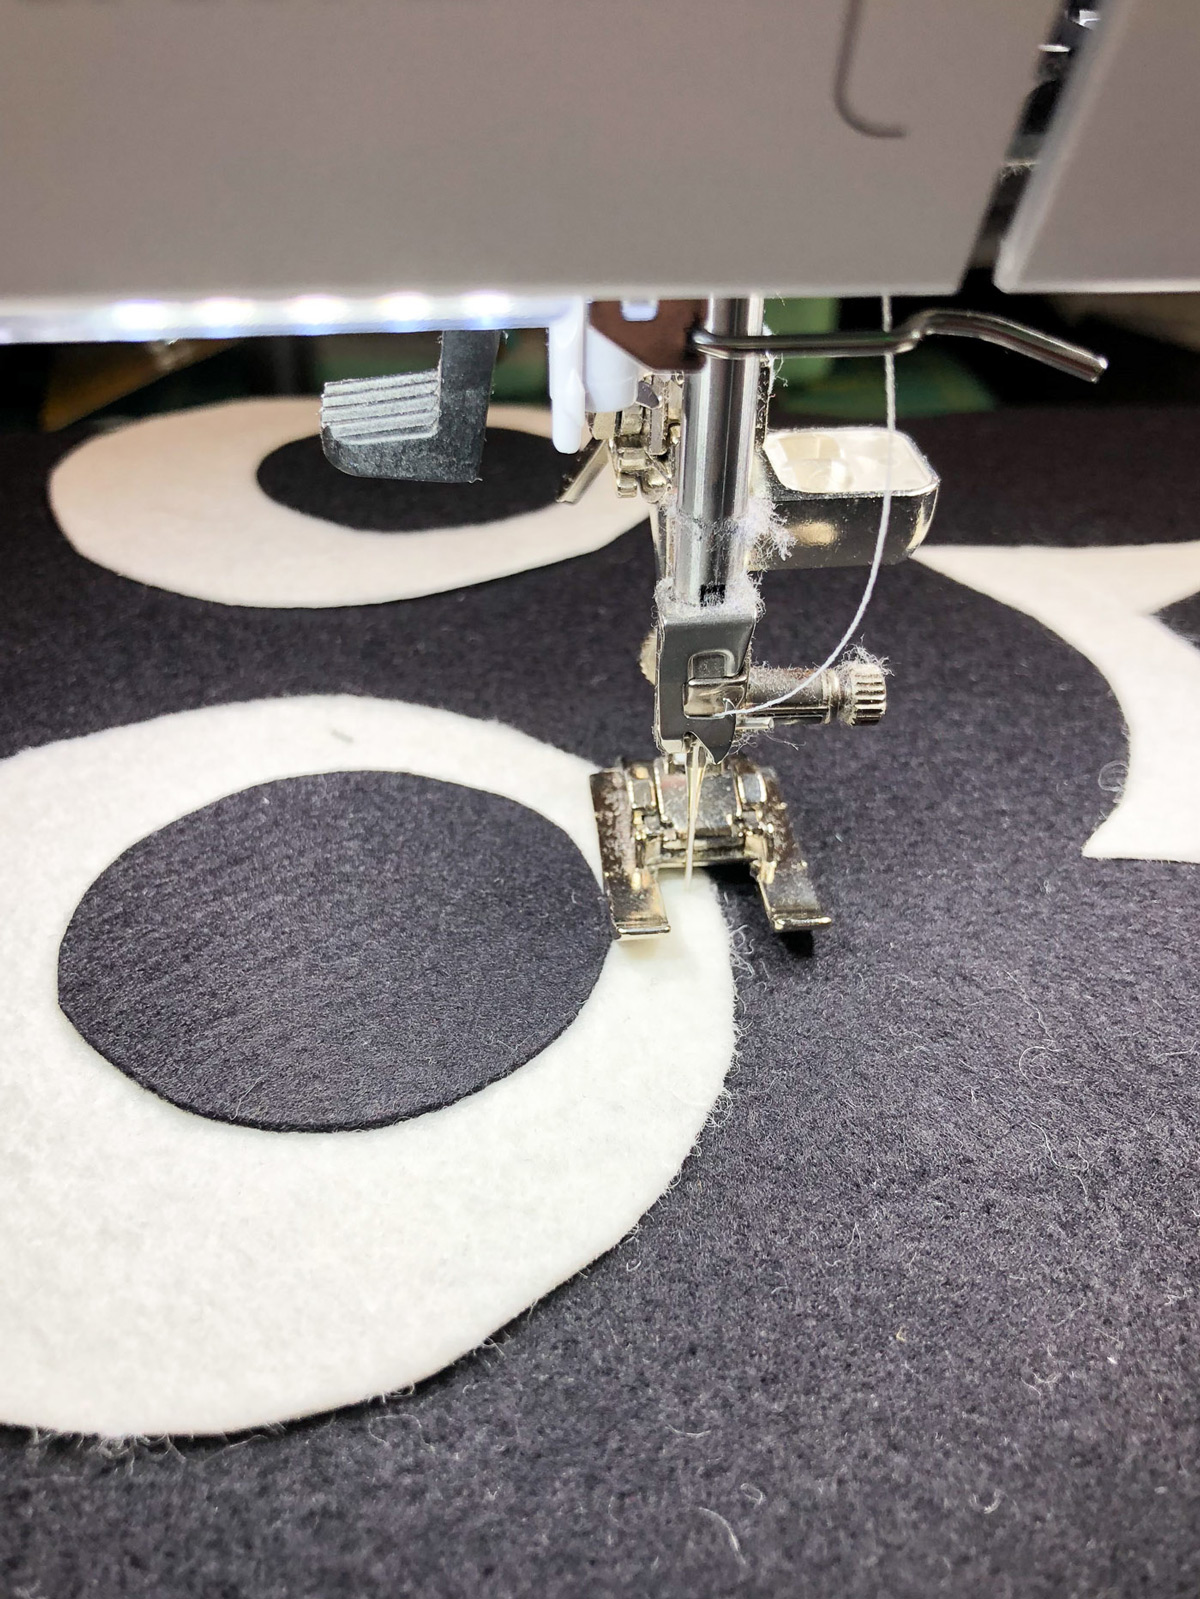
Stitch around the outside of your appliques, As you stitch the —- section of the stitch will be off of the applique shape and the ||| portion of the stitch will go onto the applique to secure it in place. Stitch all of your applique pieces in place.
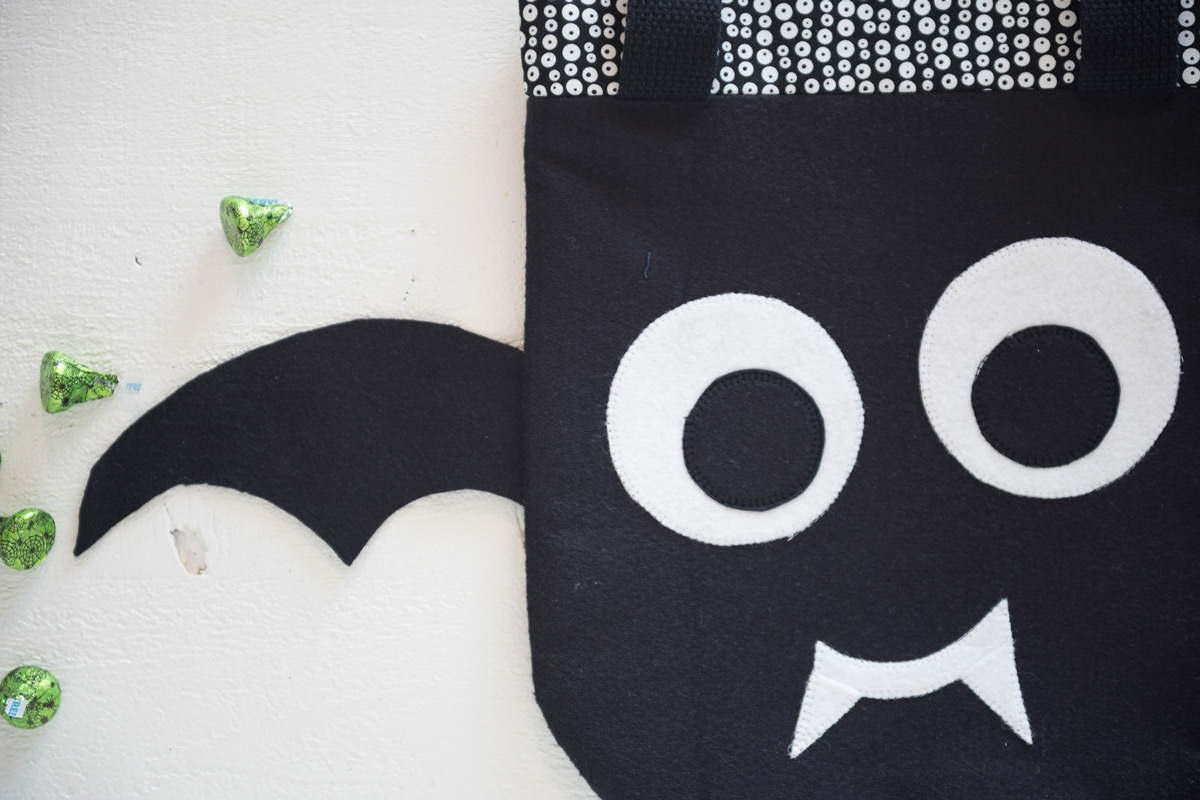
Step Three: Attach the Bat Wings
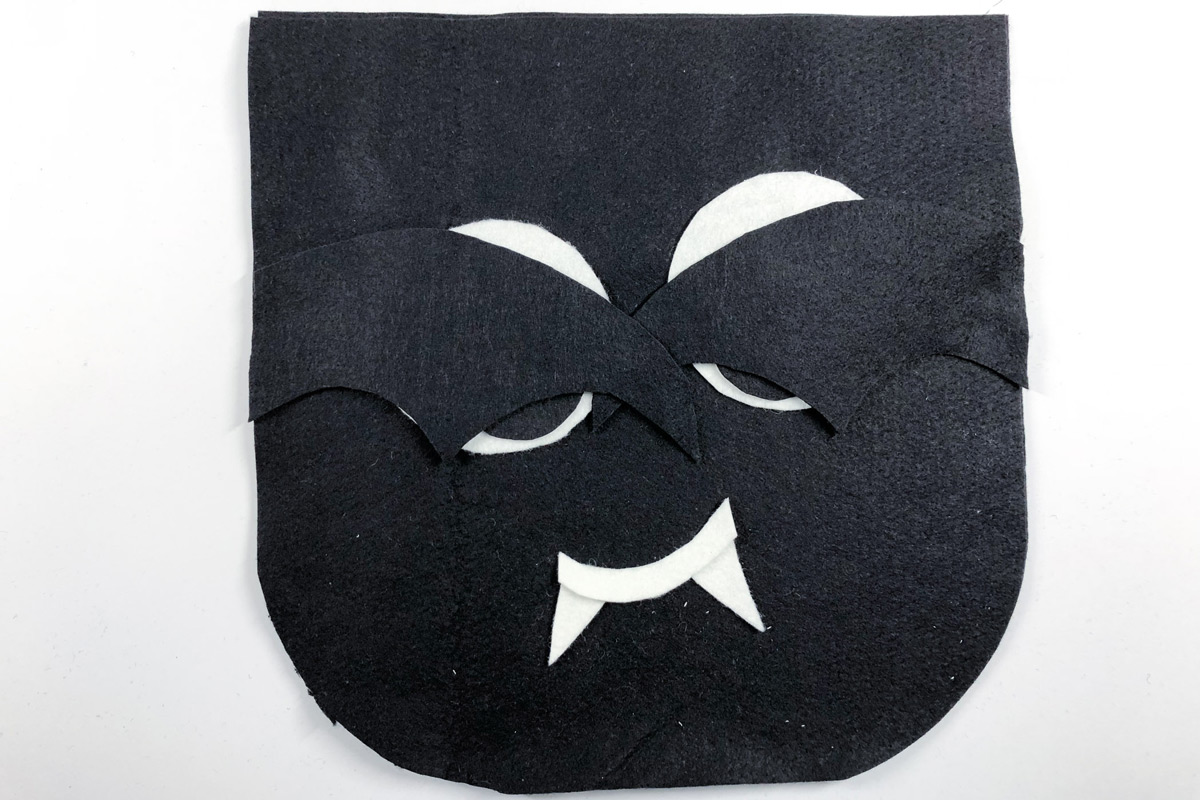
From the black felt, cut two pieces with the batwing piece from the PDF. Make sure that the two pieces are mirror images of each other. Place them on top of the bag front piece, so that the wings cover the eyes. Change your foot to the Reverse pattern foot and your stitch to a standard straight stitch. Stitch in place along the outside edge with a 1/4″ seam allowance.
Step Four: Attach the Straps
Cut two pieces of cotton webbing to 25″ each. I recommend finishing the ends of the strap with a bit of fray check. Pin one webbing piece to the bag front piece 2″ in from the sides and with the raw edges of the strap even with the raw edge of the top of the bag. Stitch in place with 1/4″ seam allowance. Repeat with the second 25″ bag strap and the bag back piece.
Step Five: Assemble the Bag
Pin the bag front and bag back pieces together right sides facing. Stitch around the outside edge (not the top) with a 1/2″ seam allowance.
Turn the bag right side out.
Take your two 4″ x 12″ fused fabric strips and stitch them together along the short sides with a 1/2″ seam allowance.
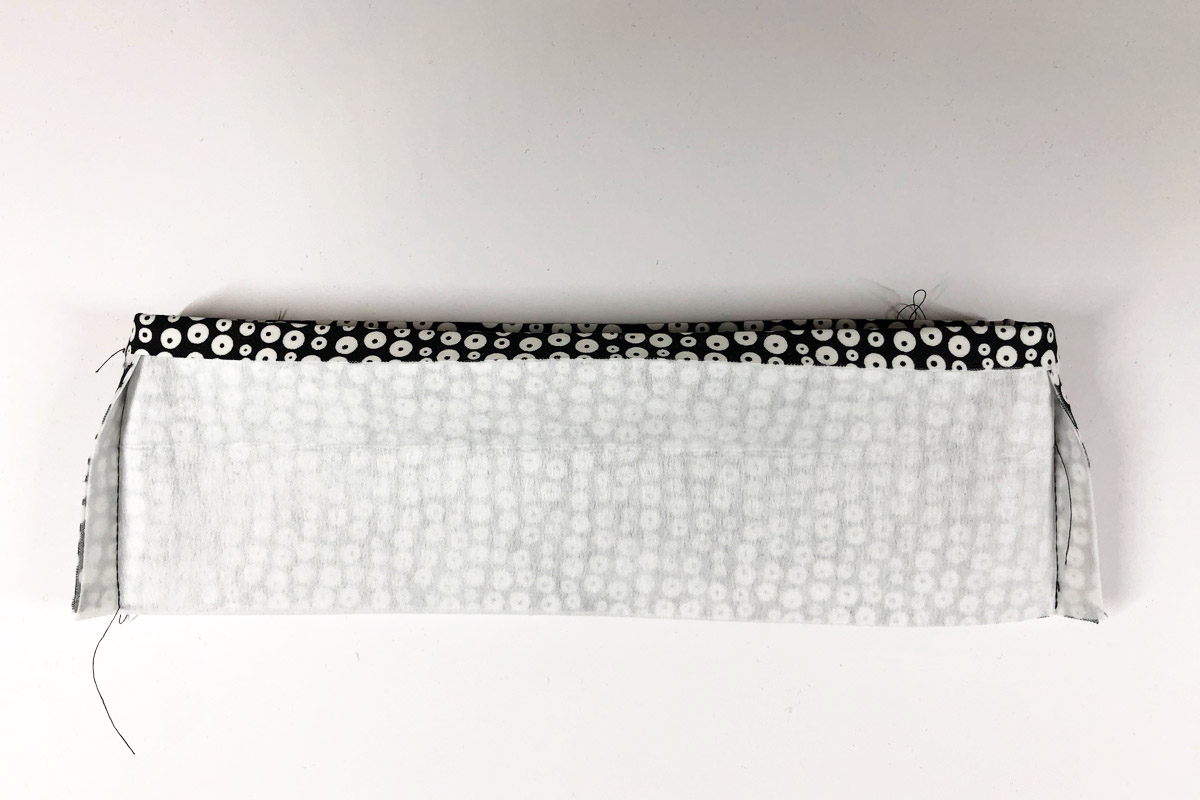
Press the seam open. On one long edge of the sewn piece, press the edge over 1/2″.

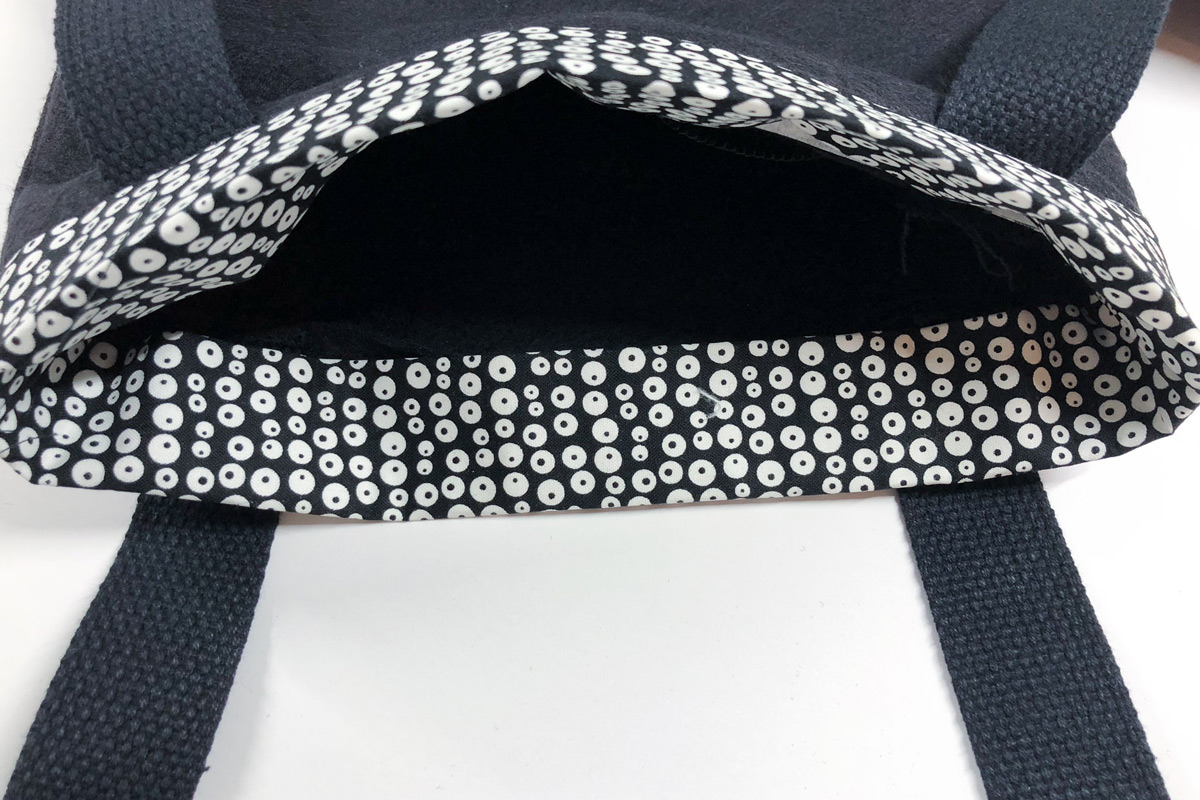
Place the sewn strip onto the sewn bag, the raw edge (non folded) of the fabric strip will be flush with the top of the bag and the side seams will be matching.

Remove the arm from your machine. Stitch together using a 1/2″ seam allowance. Stitch all the way around and stop stitching when you get back to where you started.
Flip the bag band up, and fold it along the fold line you created at the beginning of the project. Press in place.
With a needle and thread, slip stitch the bag band piece in place. Give the bag a good pressing! Since you’re pressing felt you might want to use a pressing cloth just to be safe!
That’s it!!
Enjoy your bag, and enjoy your Halloween! It’s one of my favorite Holidays!
– Melissa