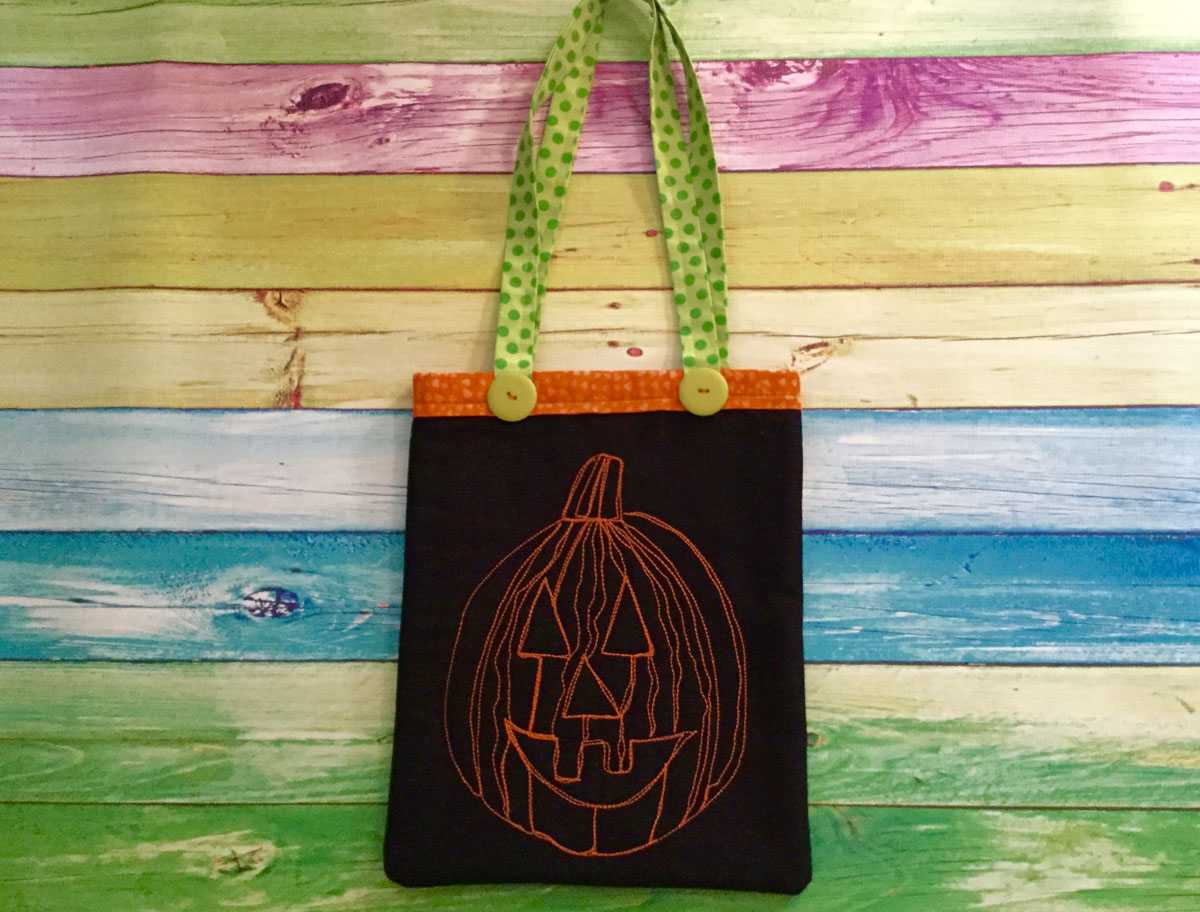
Holiday Treat Bag Topper Tutorial
Hello Everyone,
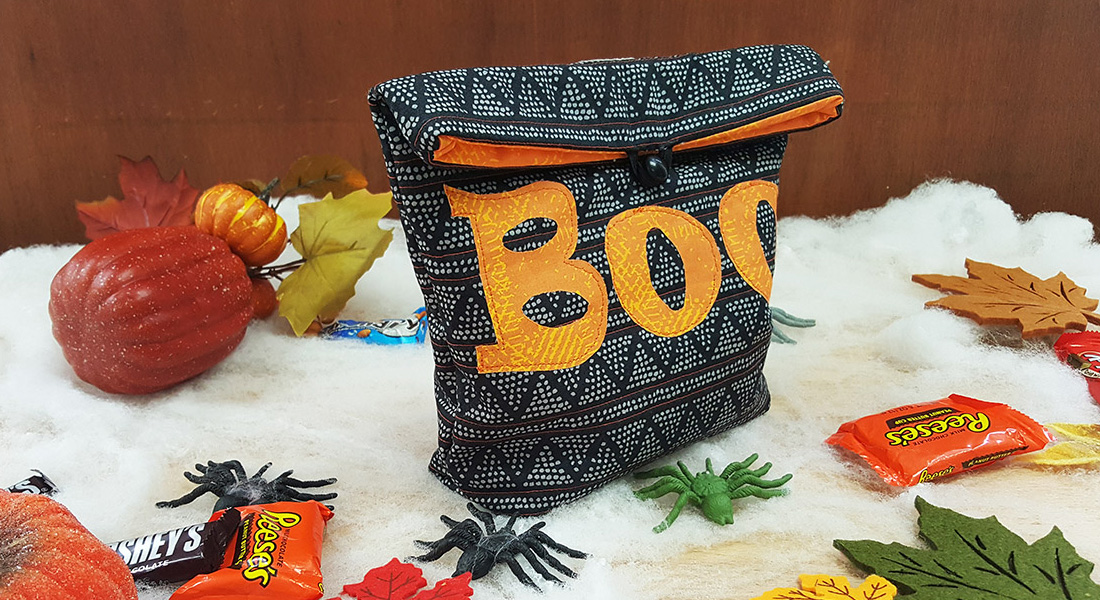
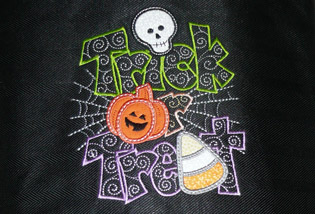
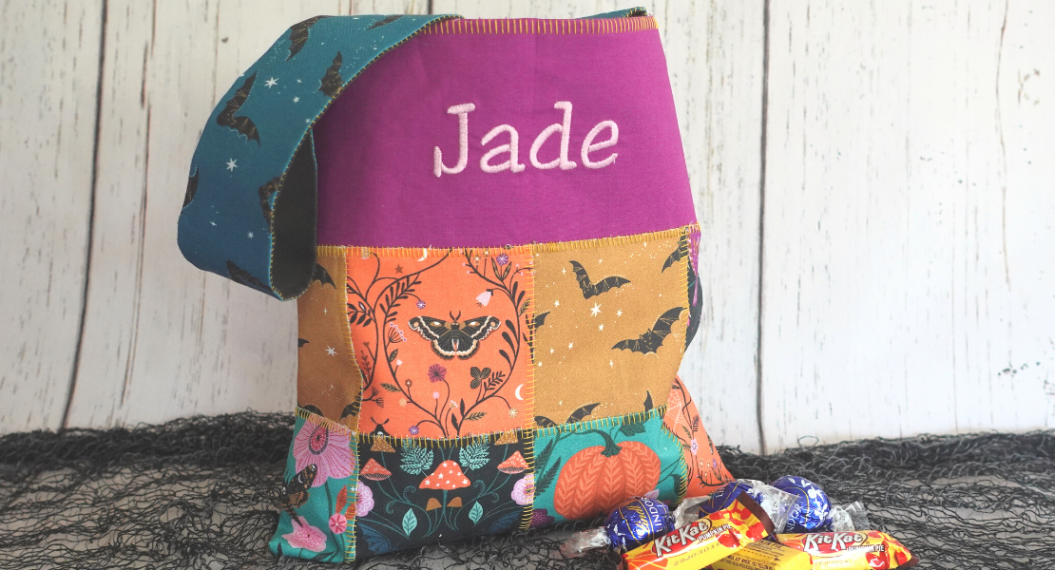
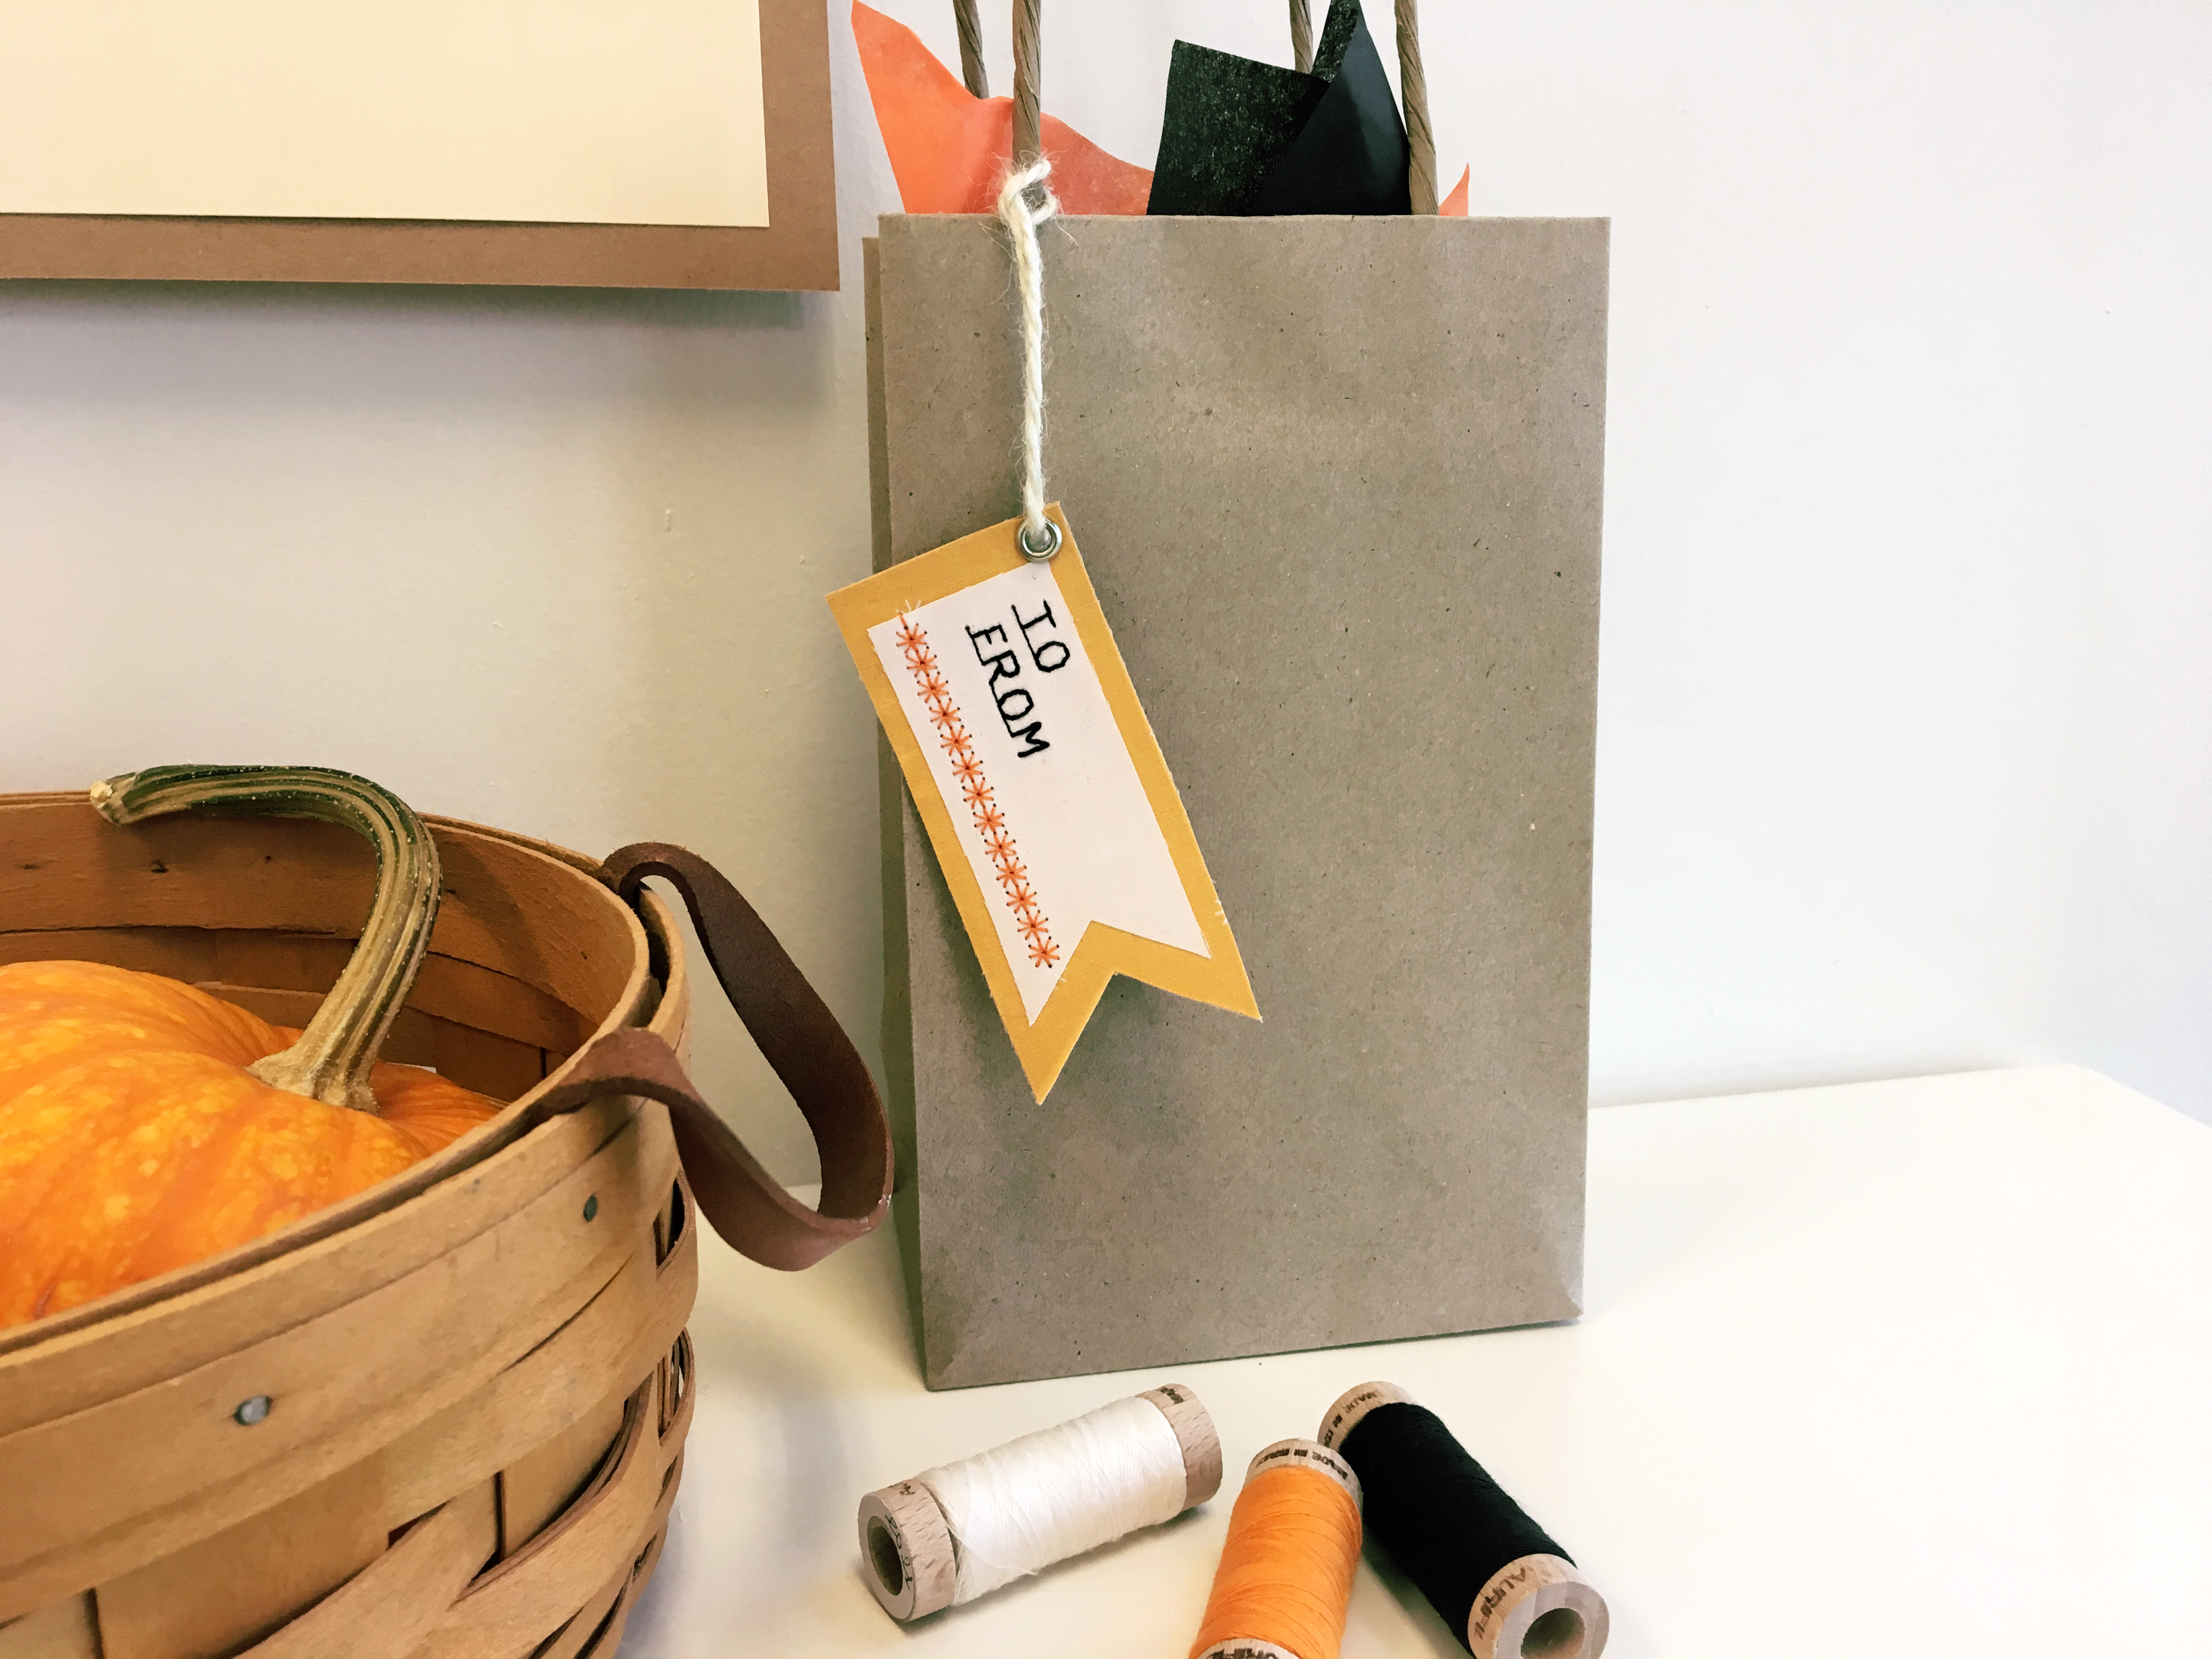
With the holiday season fast approaching here at the AGF Headquarters we are always looking for fun creative ways to up our gift giving game! What better way than making your own fabric treat bag toppers! So that’s how these adorable Halloween inspired gift tags featuring Boardwalk Delight came to be. What is incredibly great about this project is you need very little fabric, so head to your scrap stash and pull out colors to coordinate for the holiday theme, or that special someone you are making the gift tags for.
Enjoy making your holiday fabric tags, it will sure to add the perfect touch to all of your gifts this season.
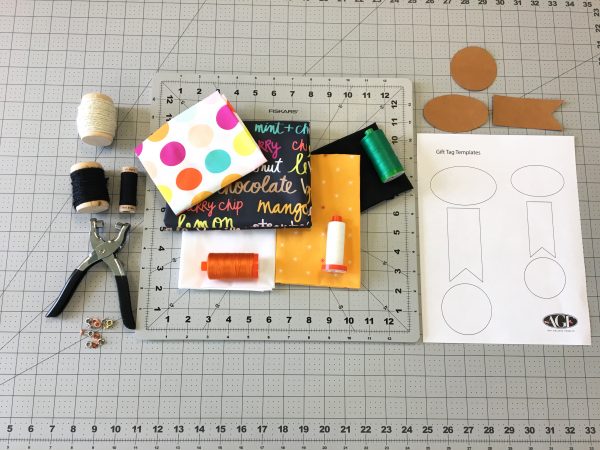
Materials needed to make fabric Treat Bag Toppers:
- Sewing machine (we use a BERNINA 350 PE)
- Reverse pattern foot #1/#1C/#1D
- Open embroidery foot #20/#20C/#20D
- Kratex or Cardstock Paper
- Small eyelets
- Small eyelet tool
- Hole Punch
- Steam-A-Seam
- String, colorful ribbon, or cording
- Treat Bag Topper Pattern
Aurifil Thread:
#2865- Emerald
#2150- Pumpkin
#2021- Natural White
# 2692- Black
Fabrics Used:
Fabric A- BWD-781
Fabric B-BWD-780
Fabric C-BWD- 785
Fabric D-PE-433
Fabric E-PE-413
Cutting Directions
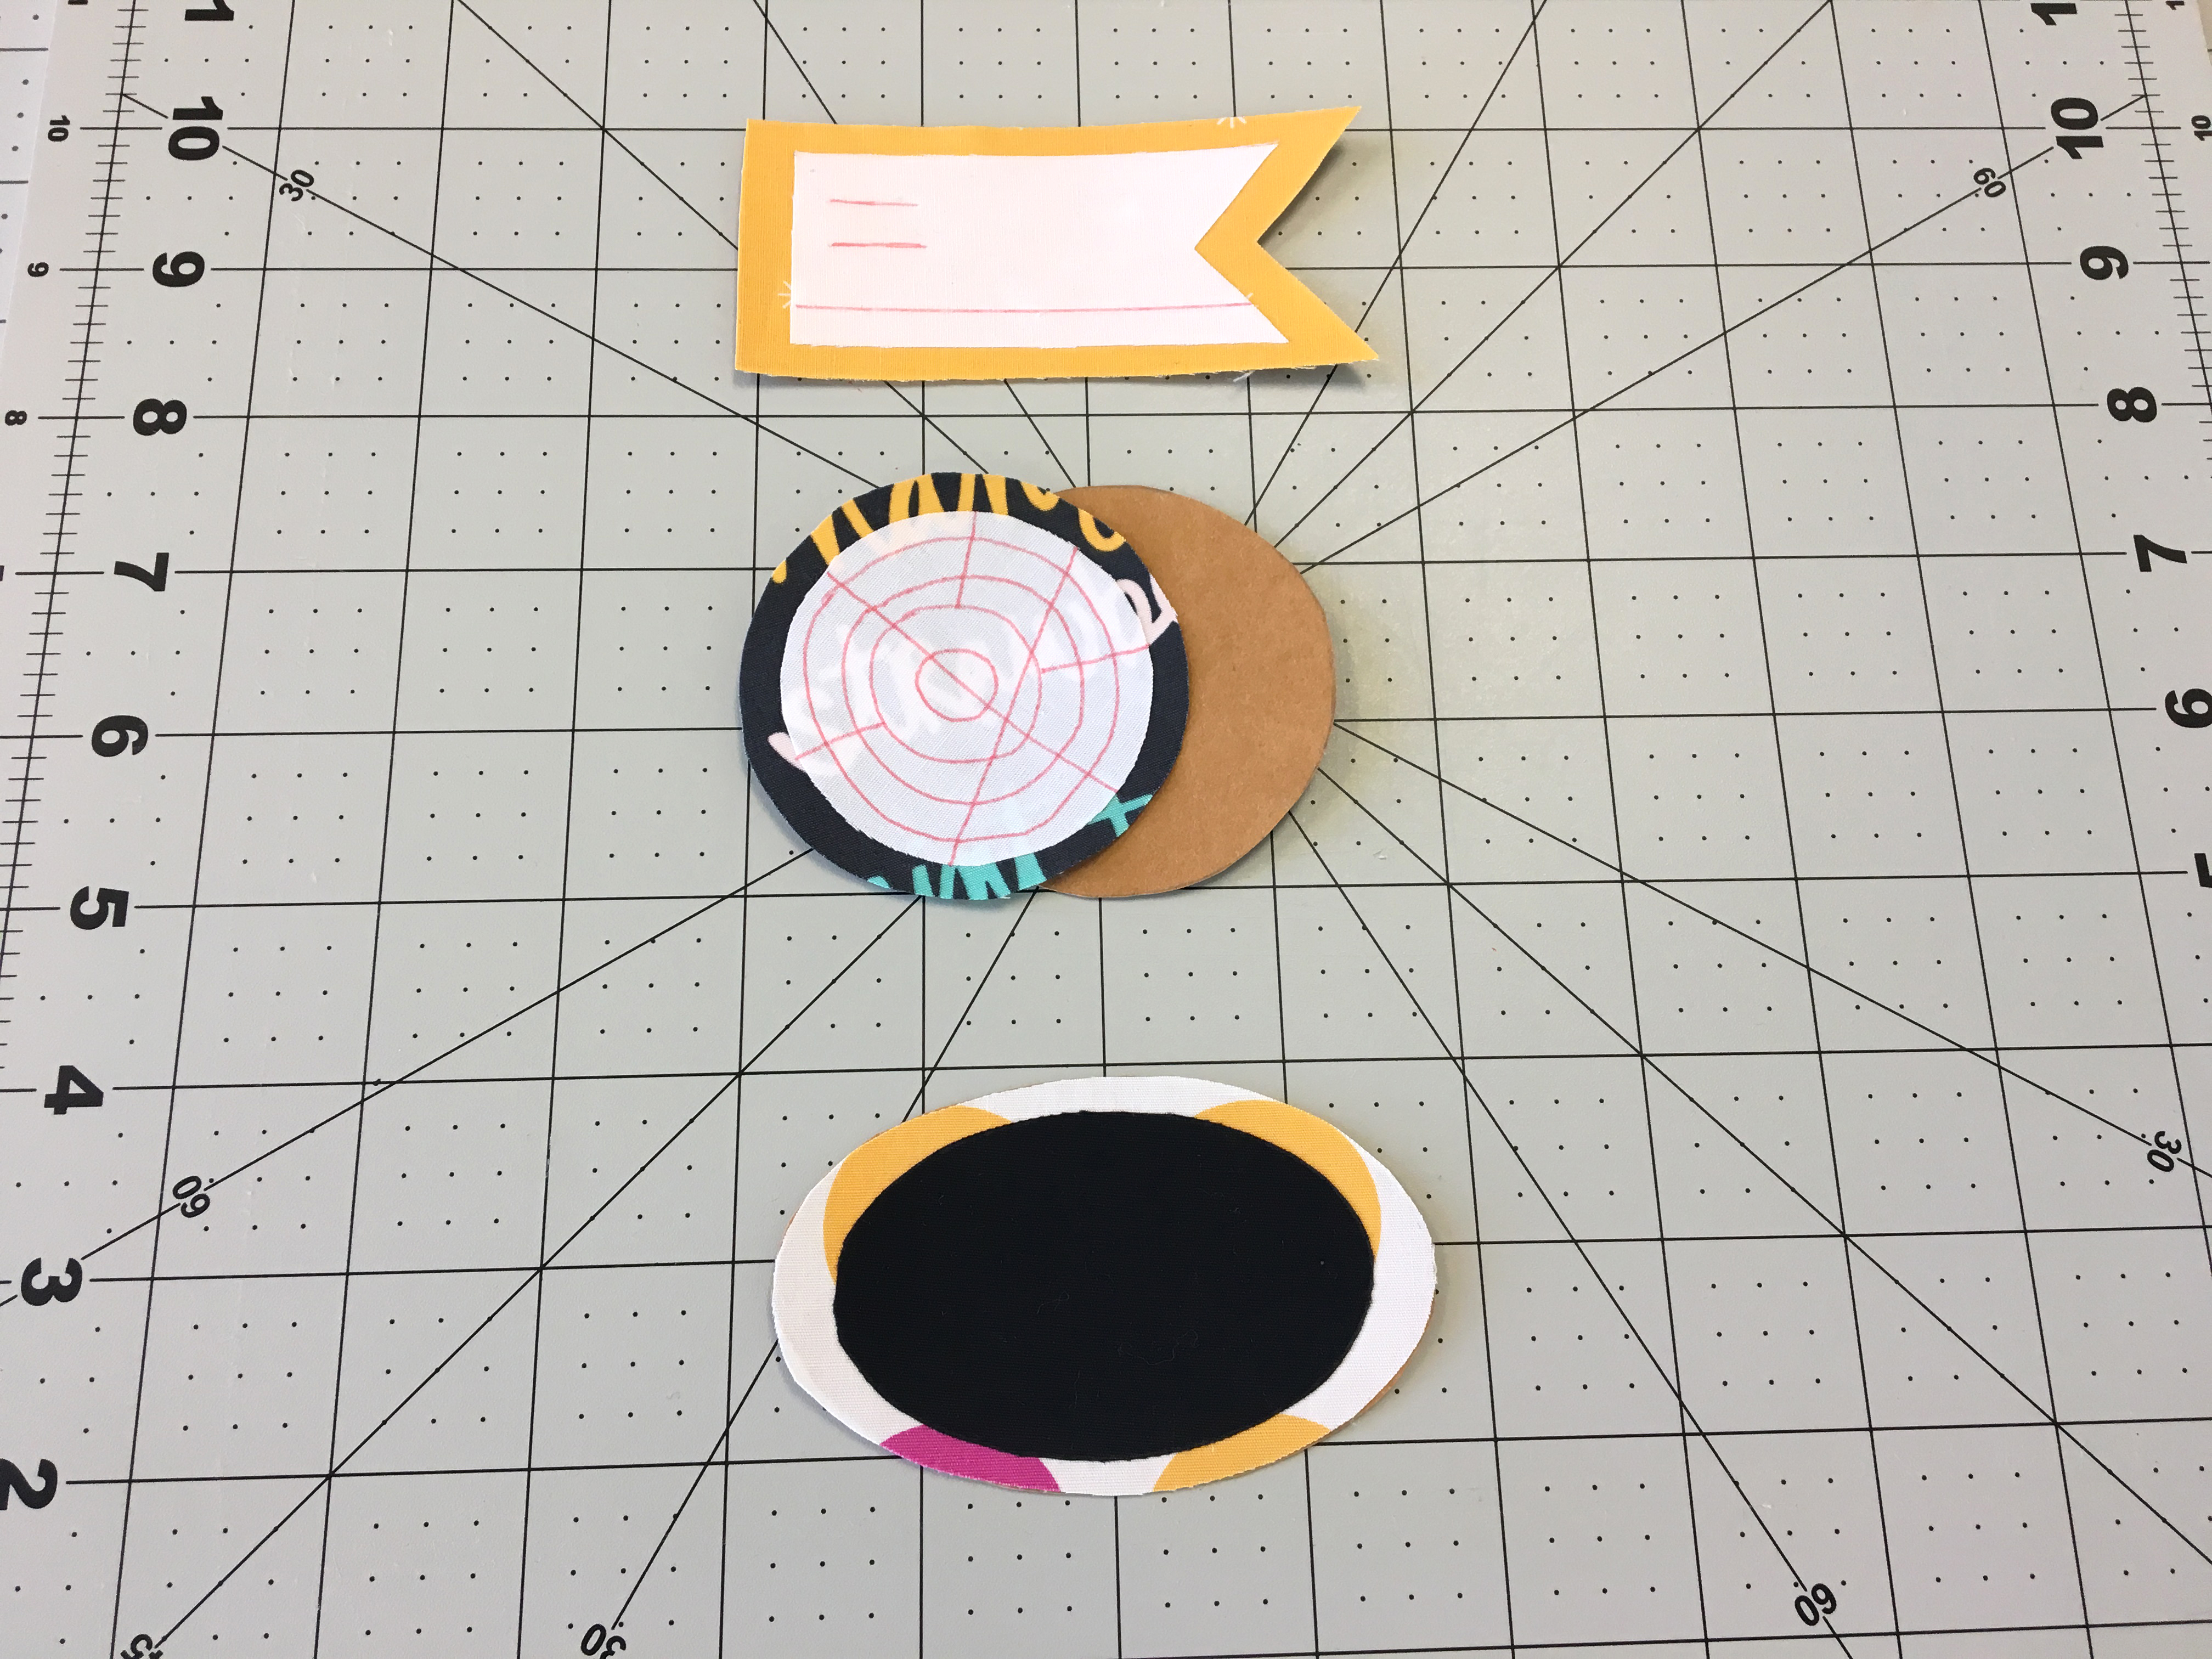
Download the Treat Bag Topper Pattern from link in the materials list above. Cut out all of your tag templates.
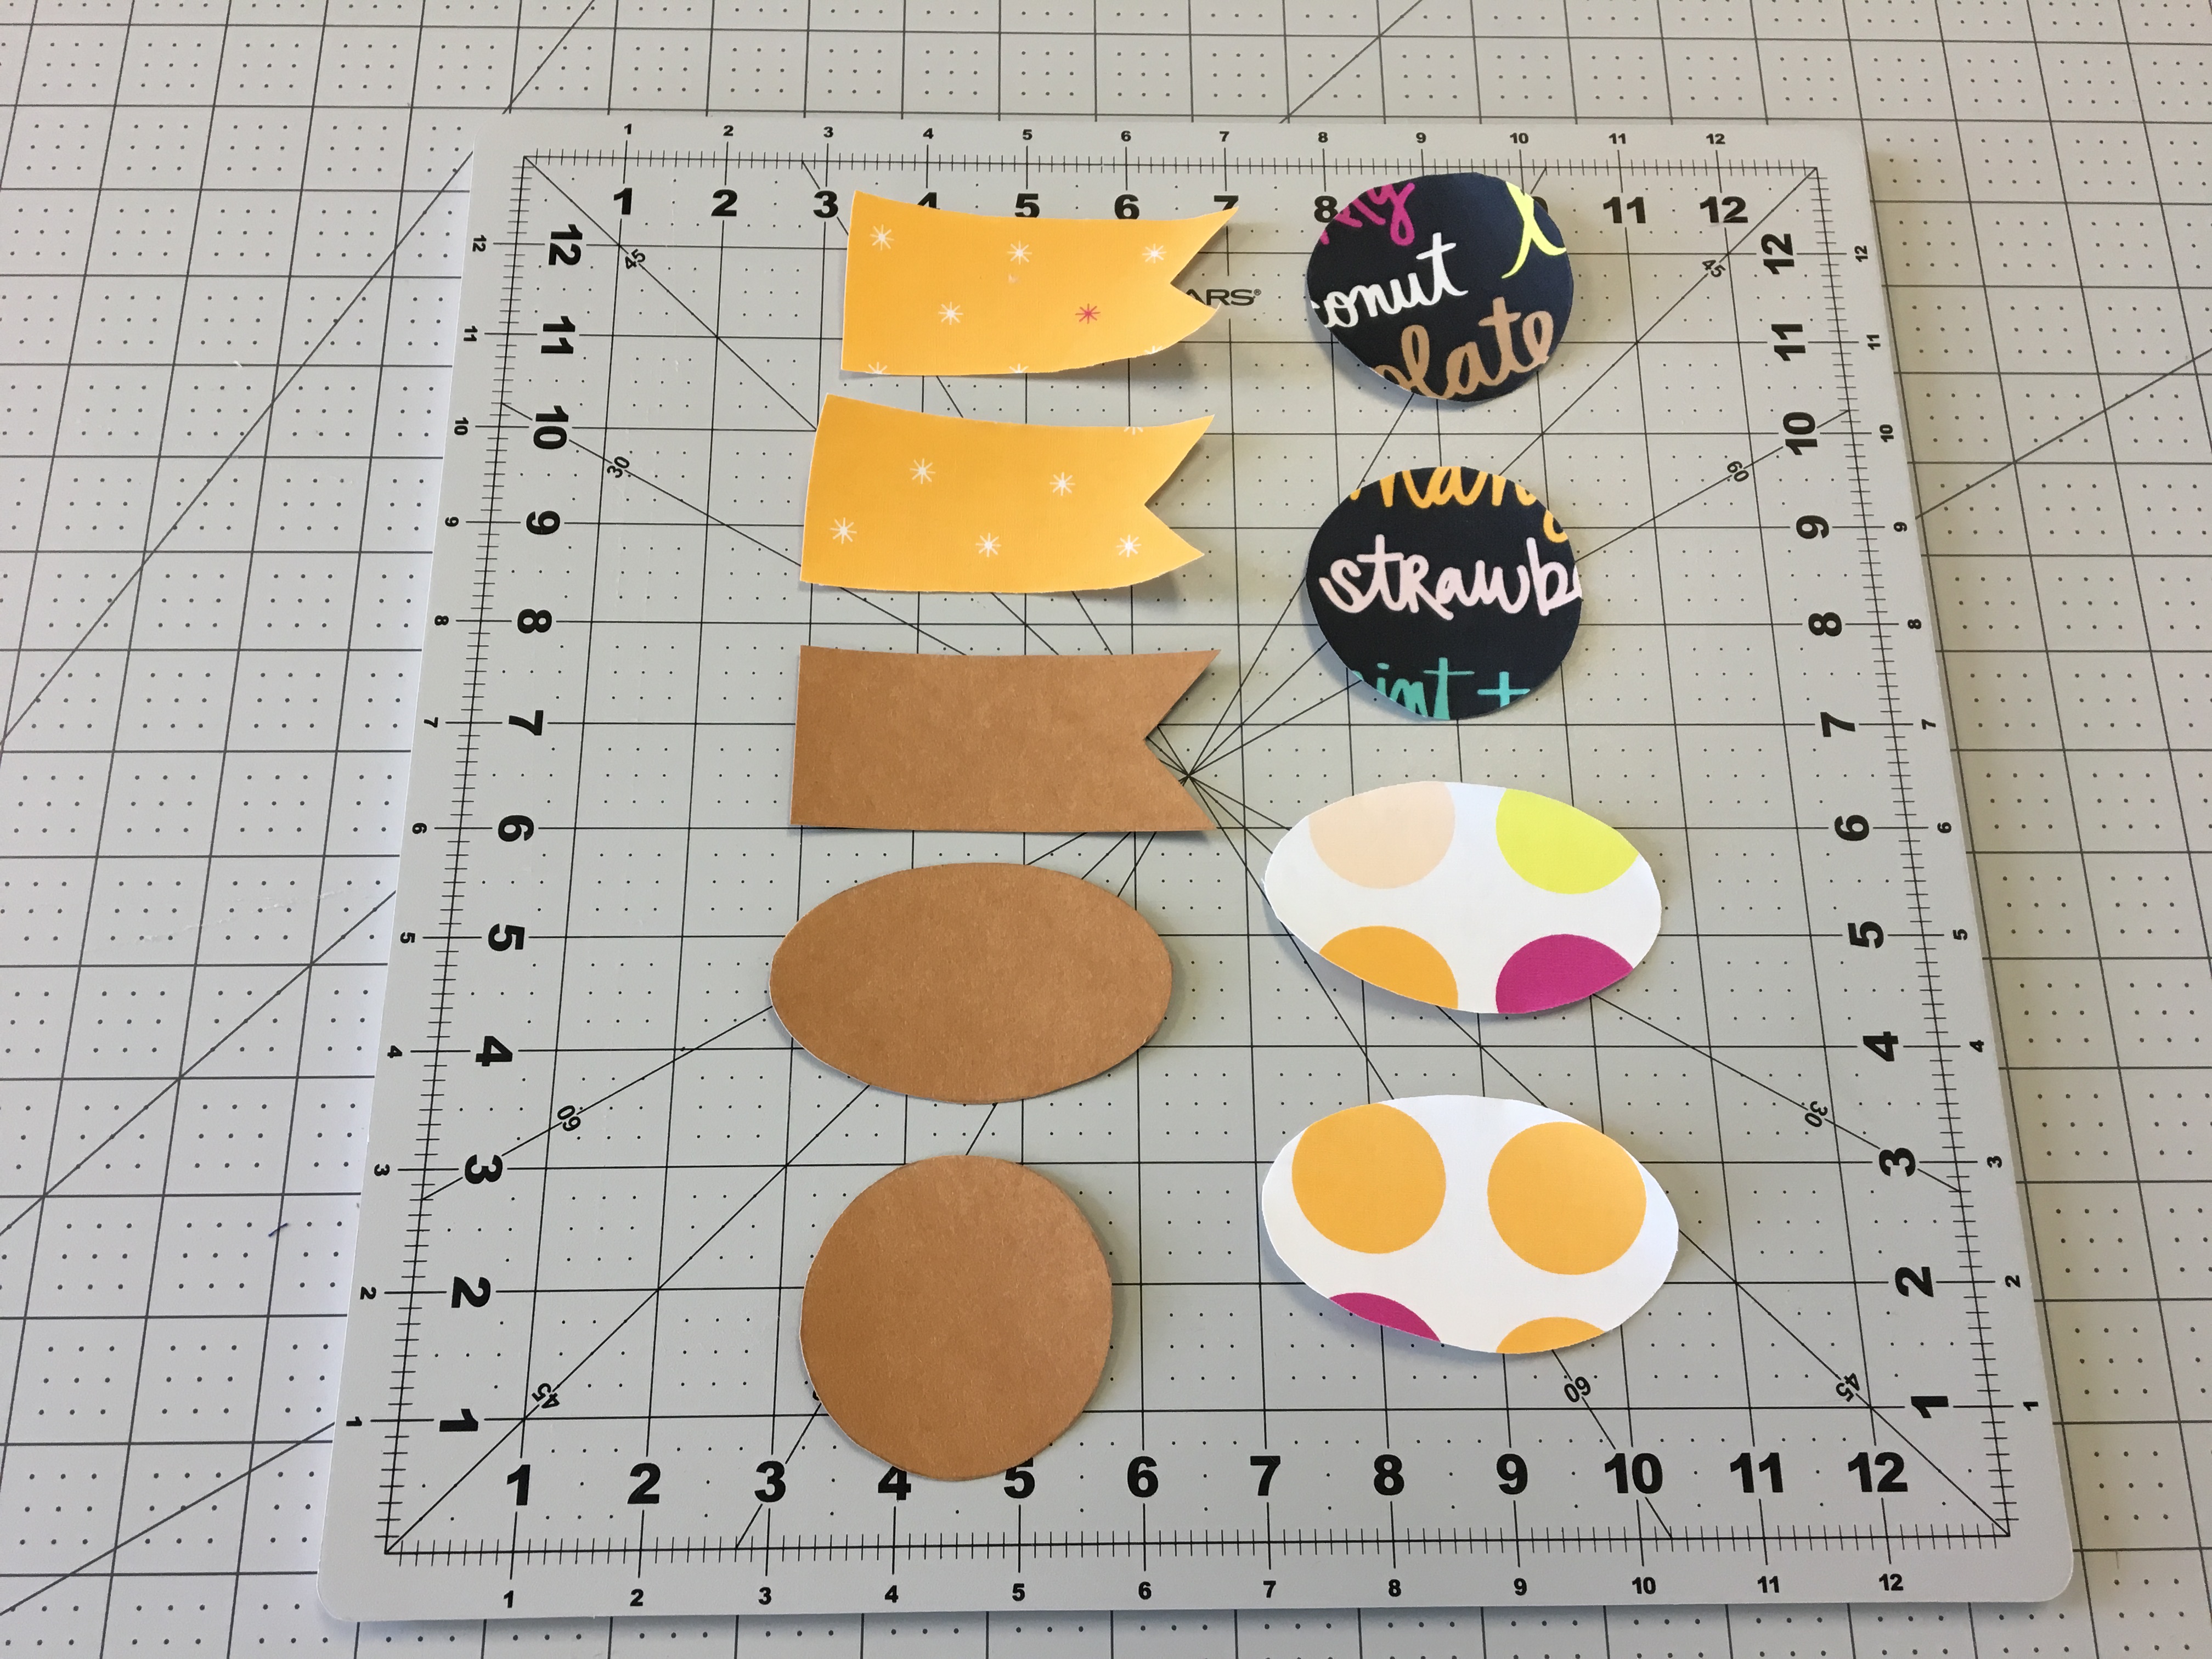
Use scrap pieces of fabric from Fabric D and E, and cut strips of fabric big enough to fit your inside template pieces. Also cut Steam-A-Seam for each piece but cut slightly smaller. Fuse Steam-A-Seam to wrong side of fabric. Trace your inside template on the right side of your fabric with a fabric pen. Cut out pieces.

Repeat this same process for your outer tag cutting two of each template with the remaining fabric.
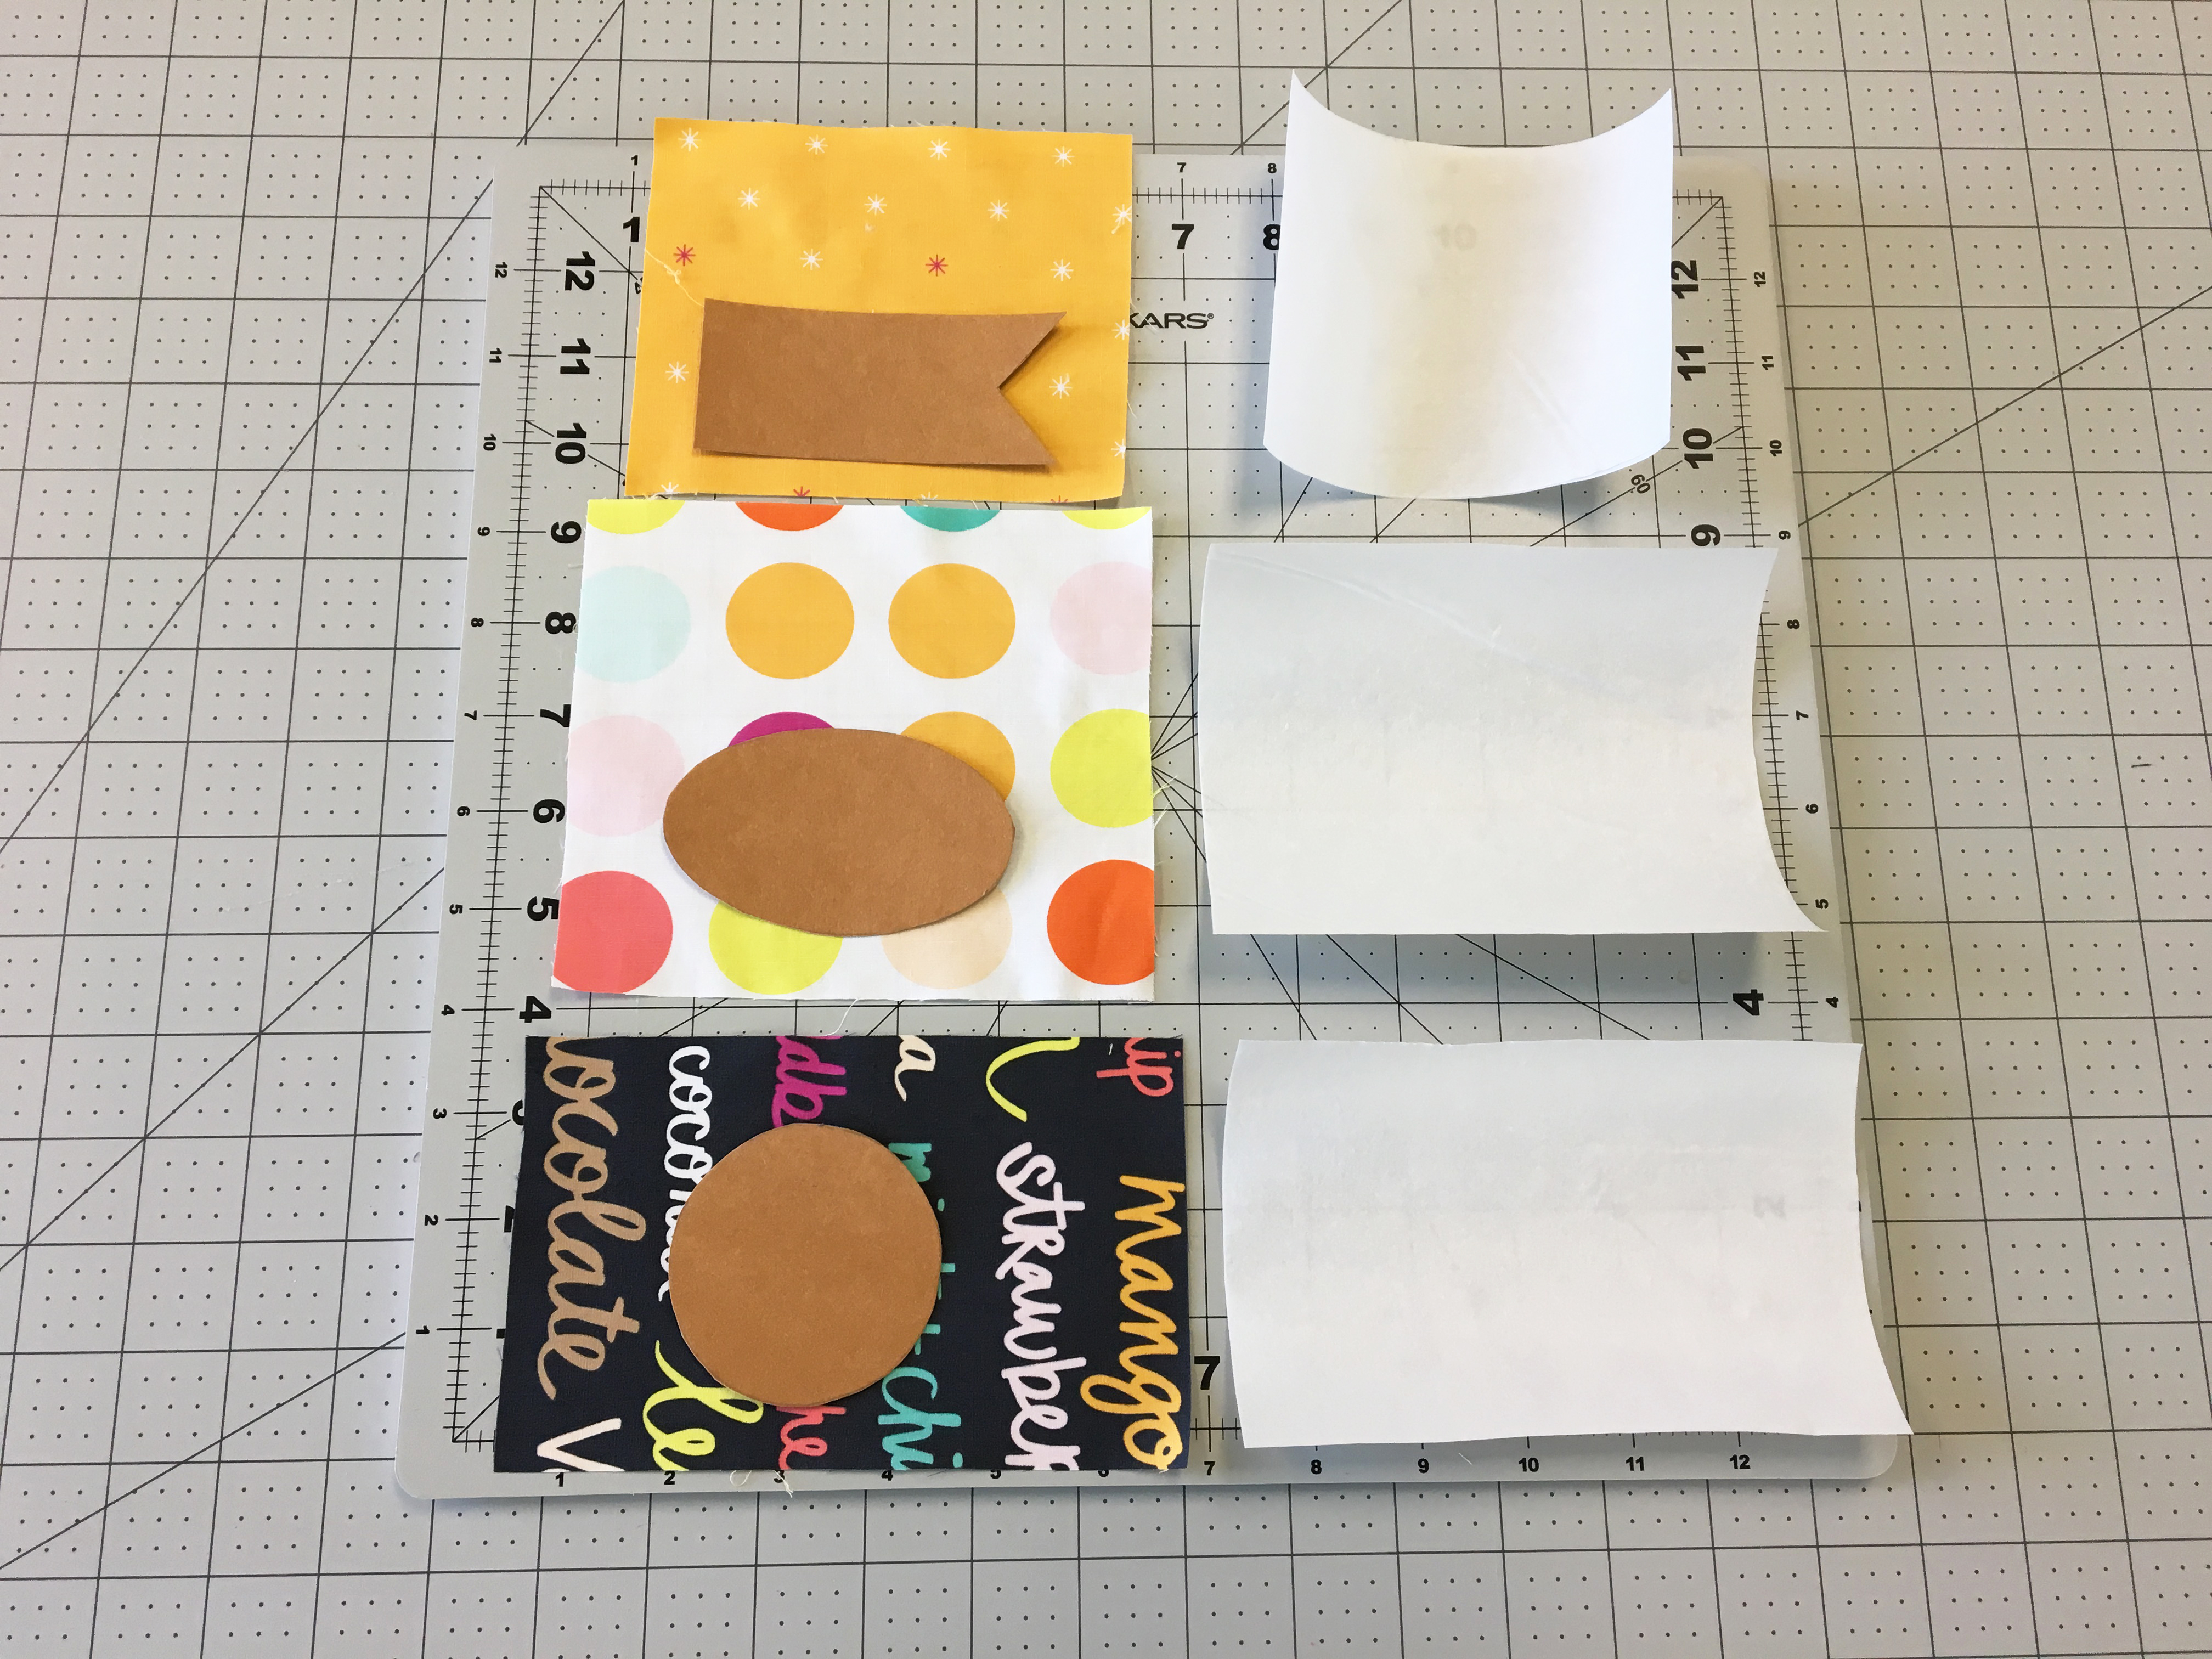
Cut out one of each outer template in Kraftex or cardstock paper.
Assembling the Tags

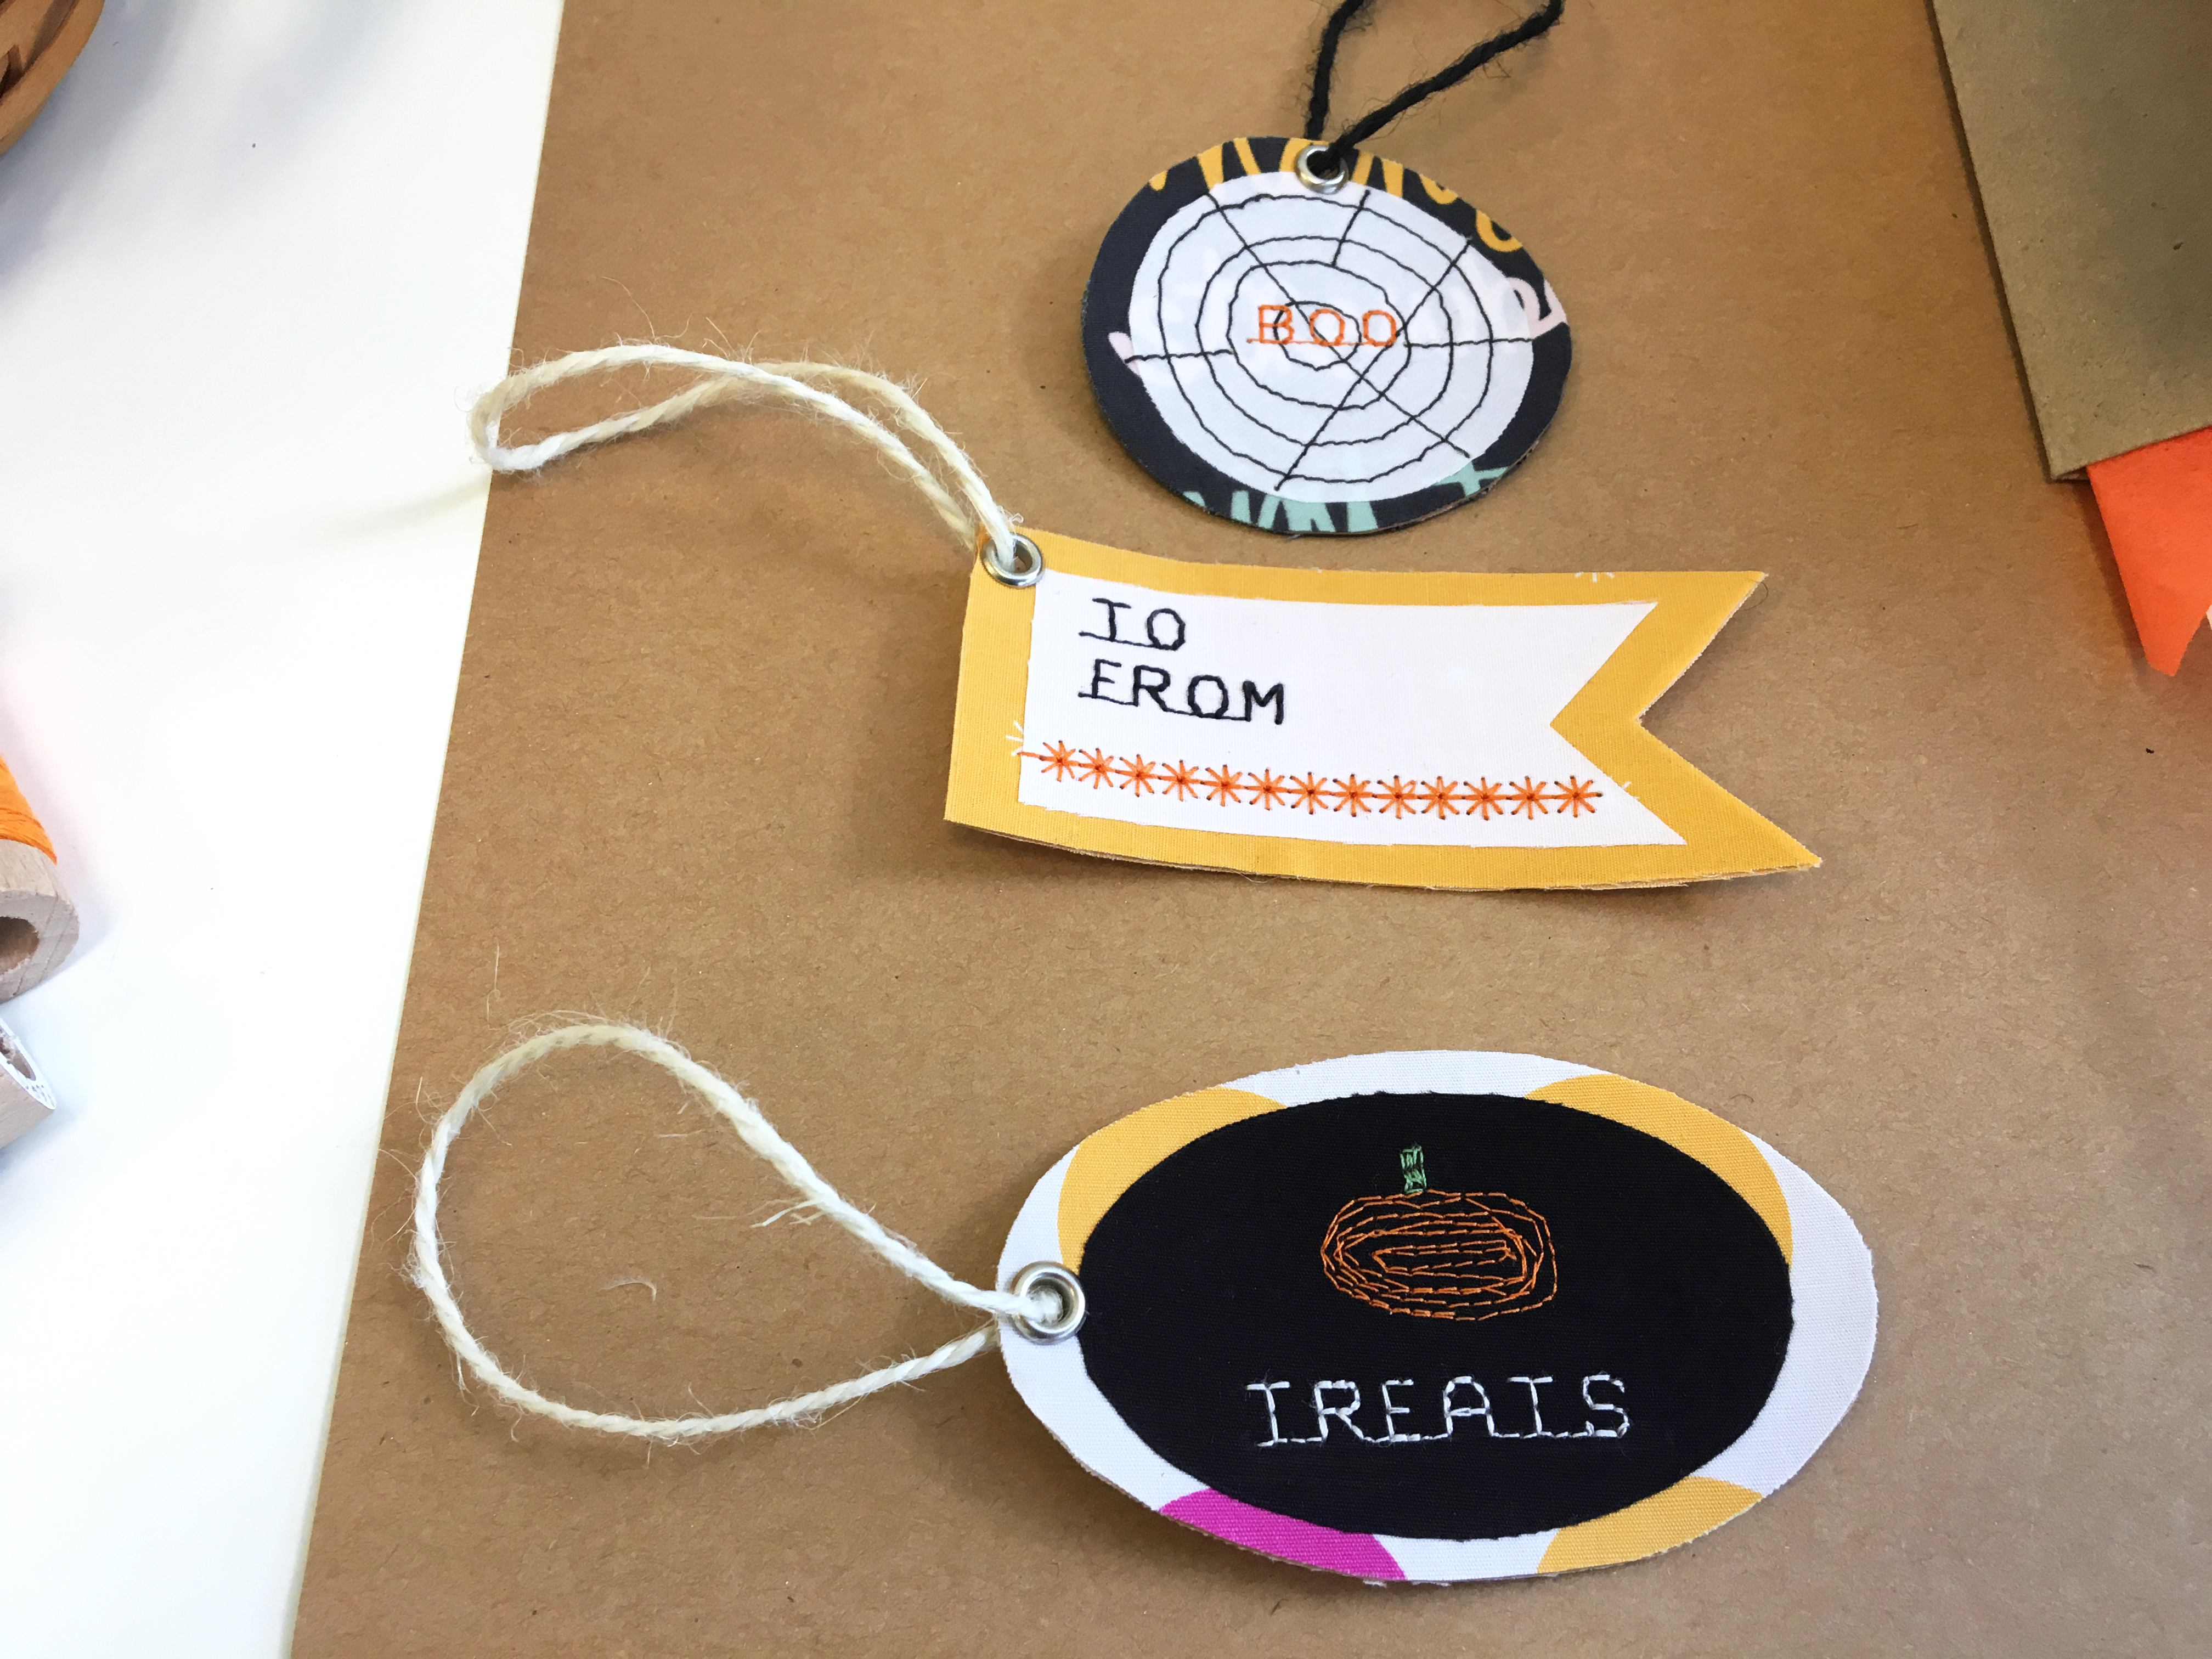
Peel off backing of Steam-A-Seam and fuse to the middle of all your outer tag pieces, centered in the middle. Next peel off the backing of your outer tag pieces and fuse to Kraftex. Mark with a fabric pen where you would like your writing to be sewn on your tag or draw a design you would like to stitch onto your tag.
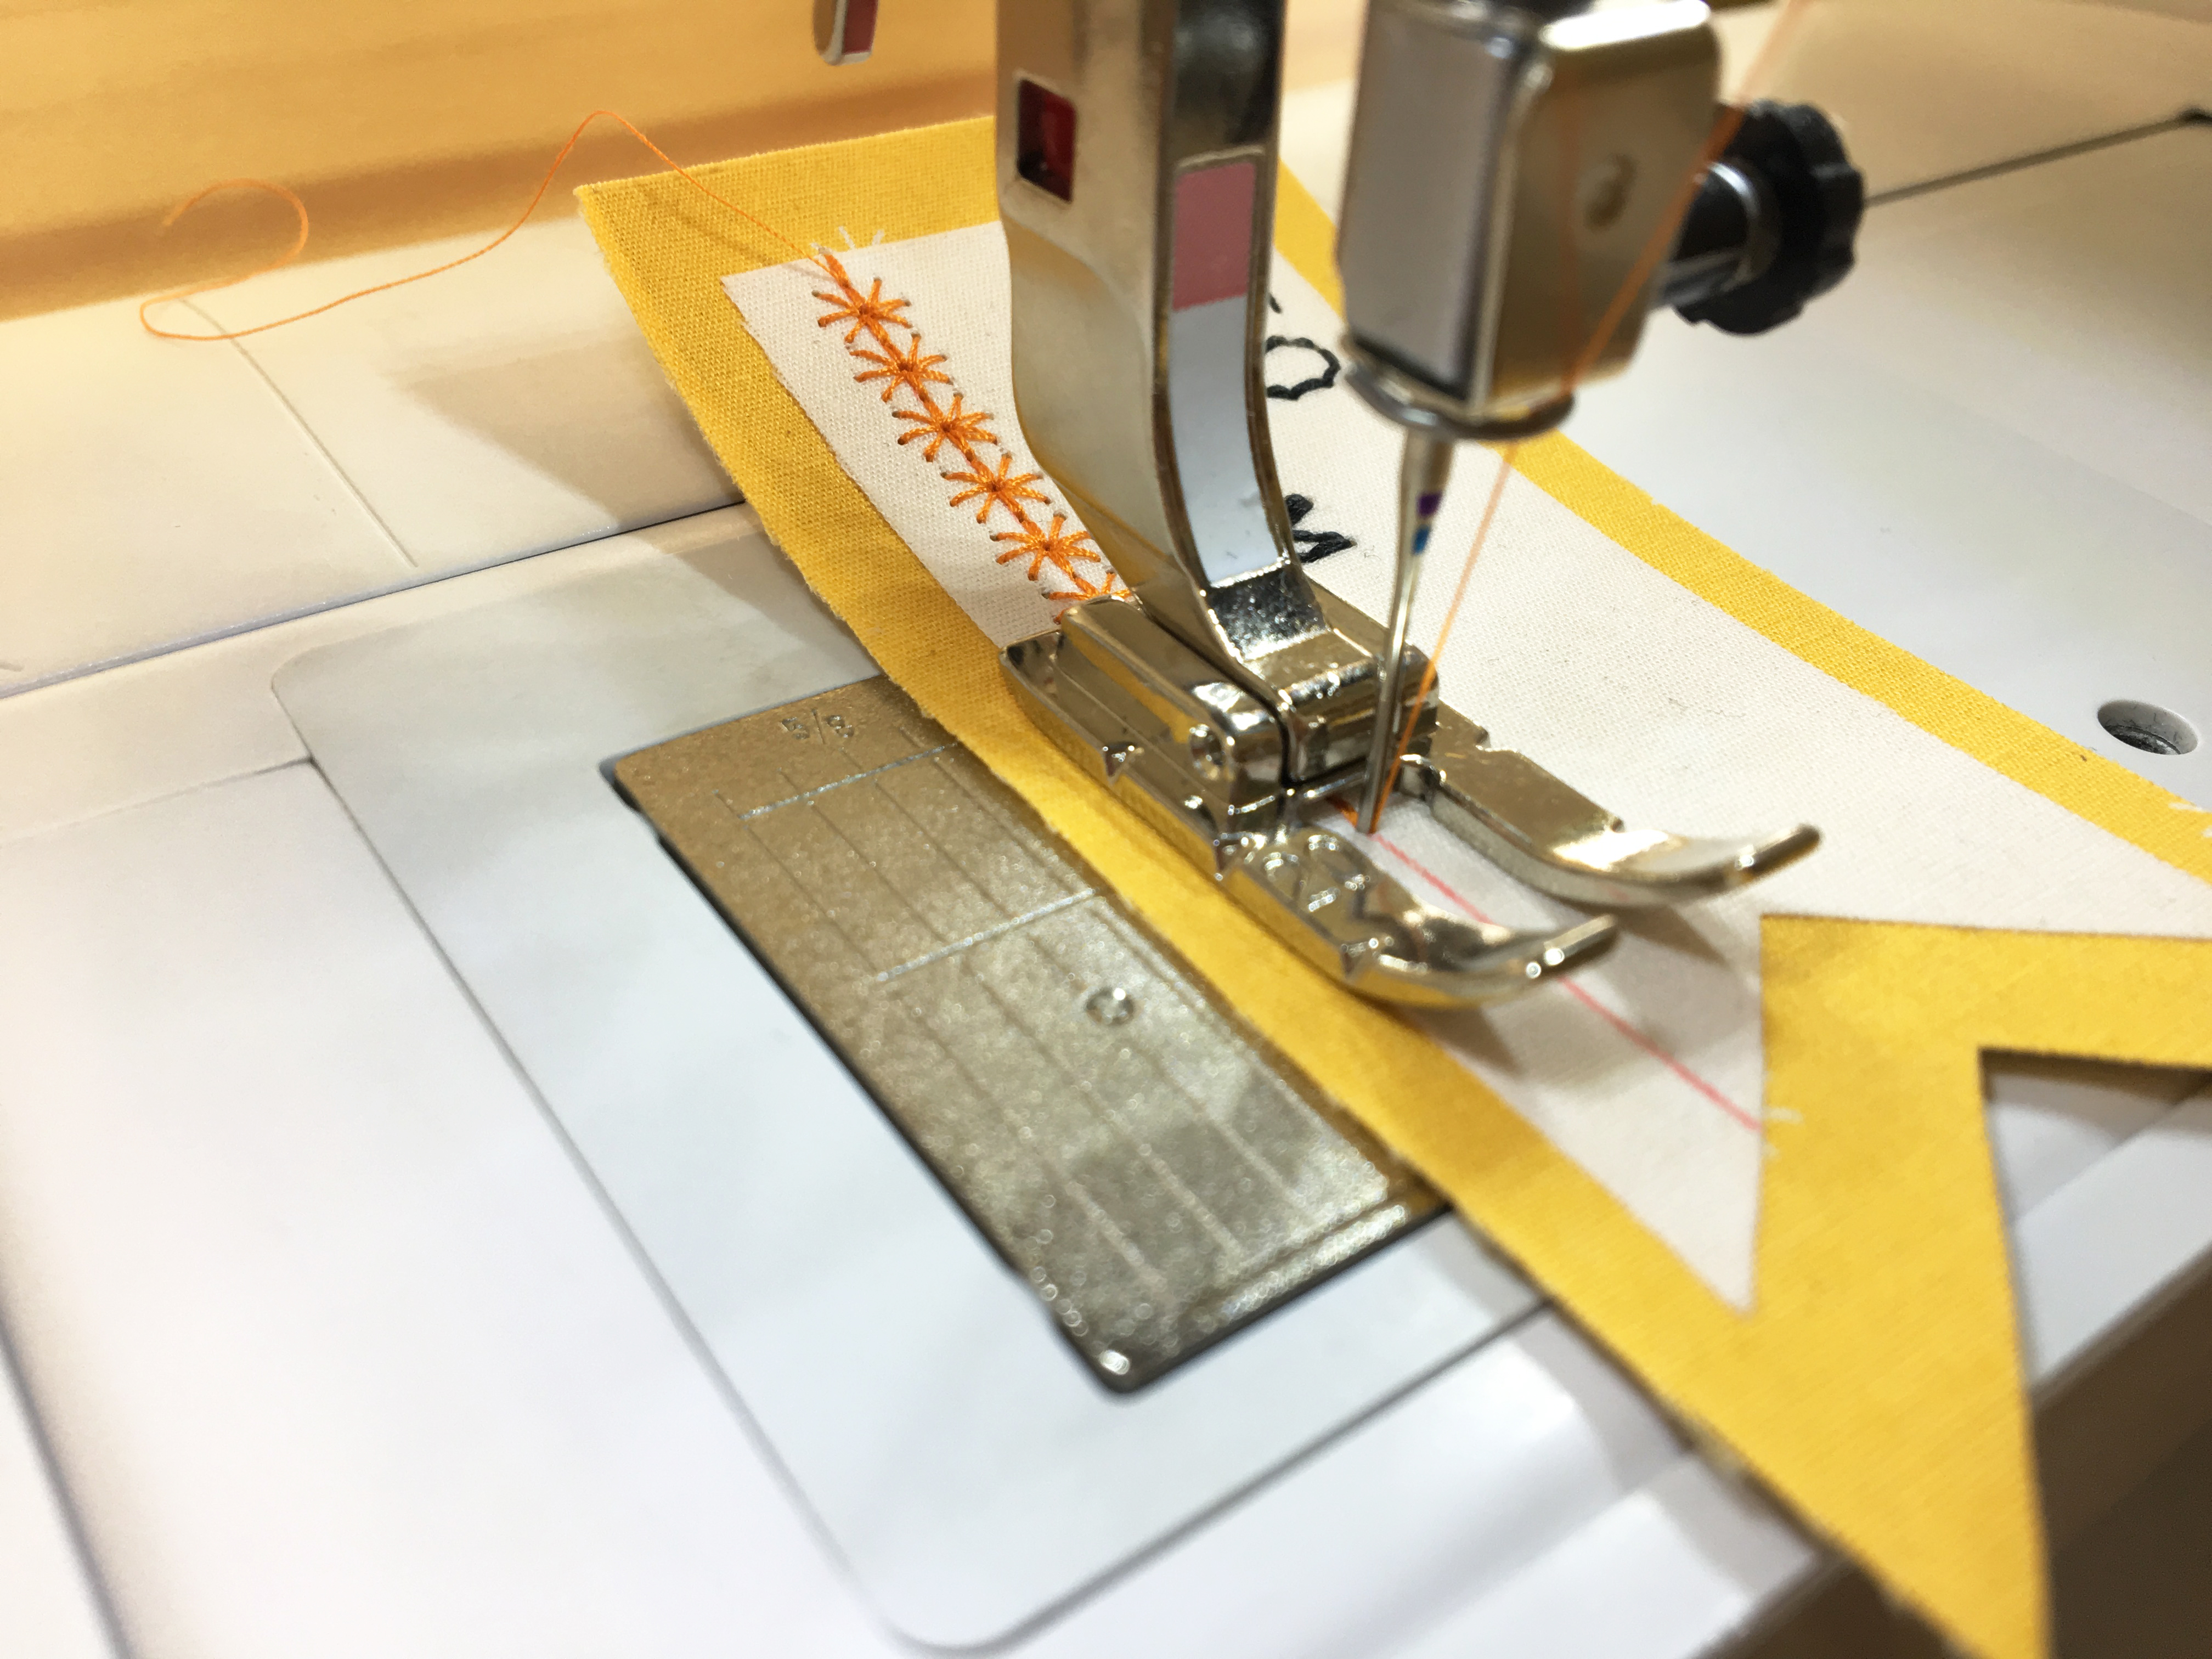
To learn how to program alphabets and numbers on your BERNINA machine click here.
Use a test piece of fabric to see how long and wide your word will be. Make sure to push the pattern end button so you your machine will stop sewing after your word is stitched.
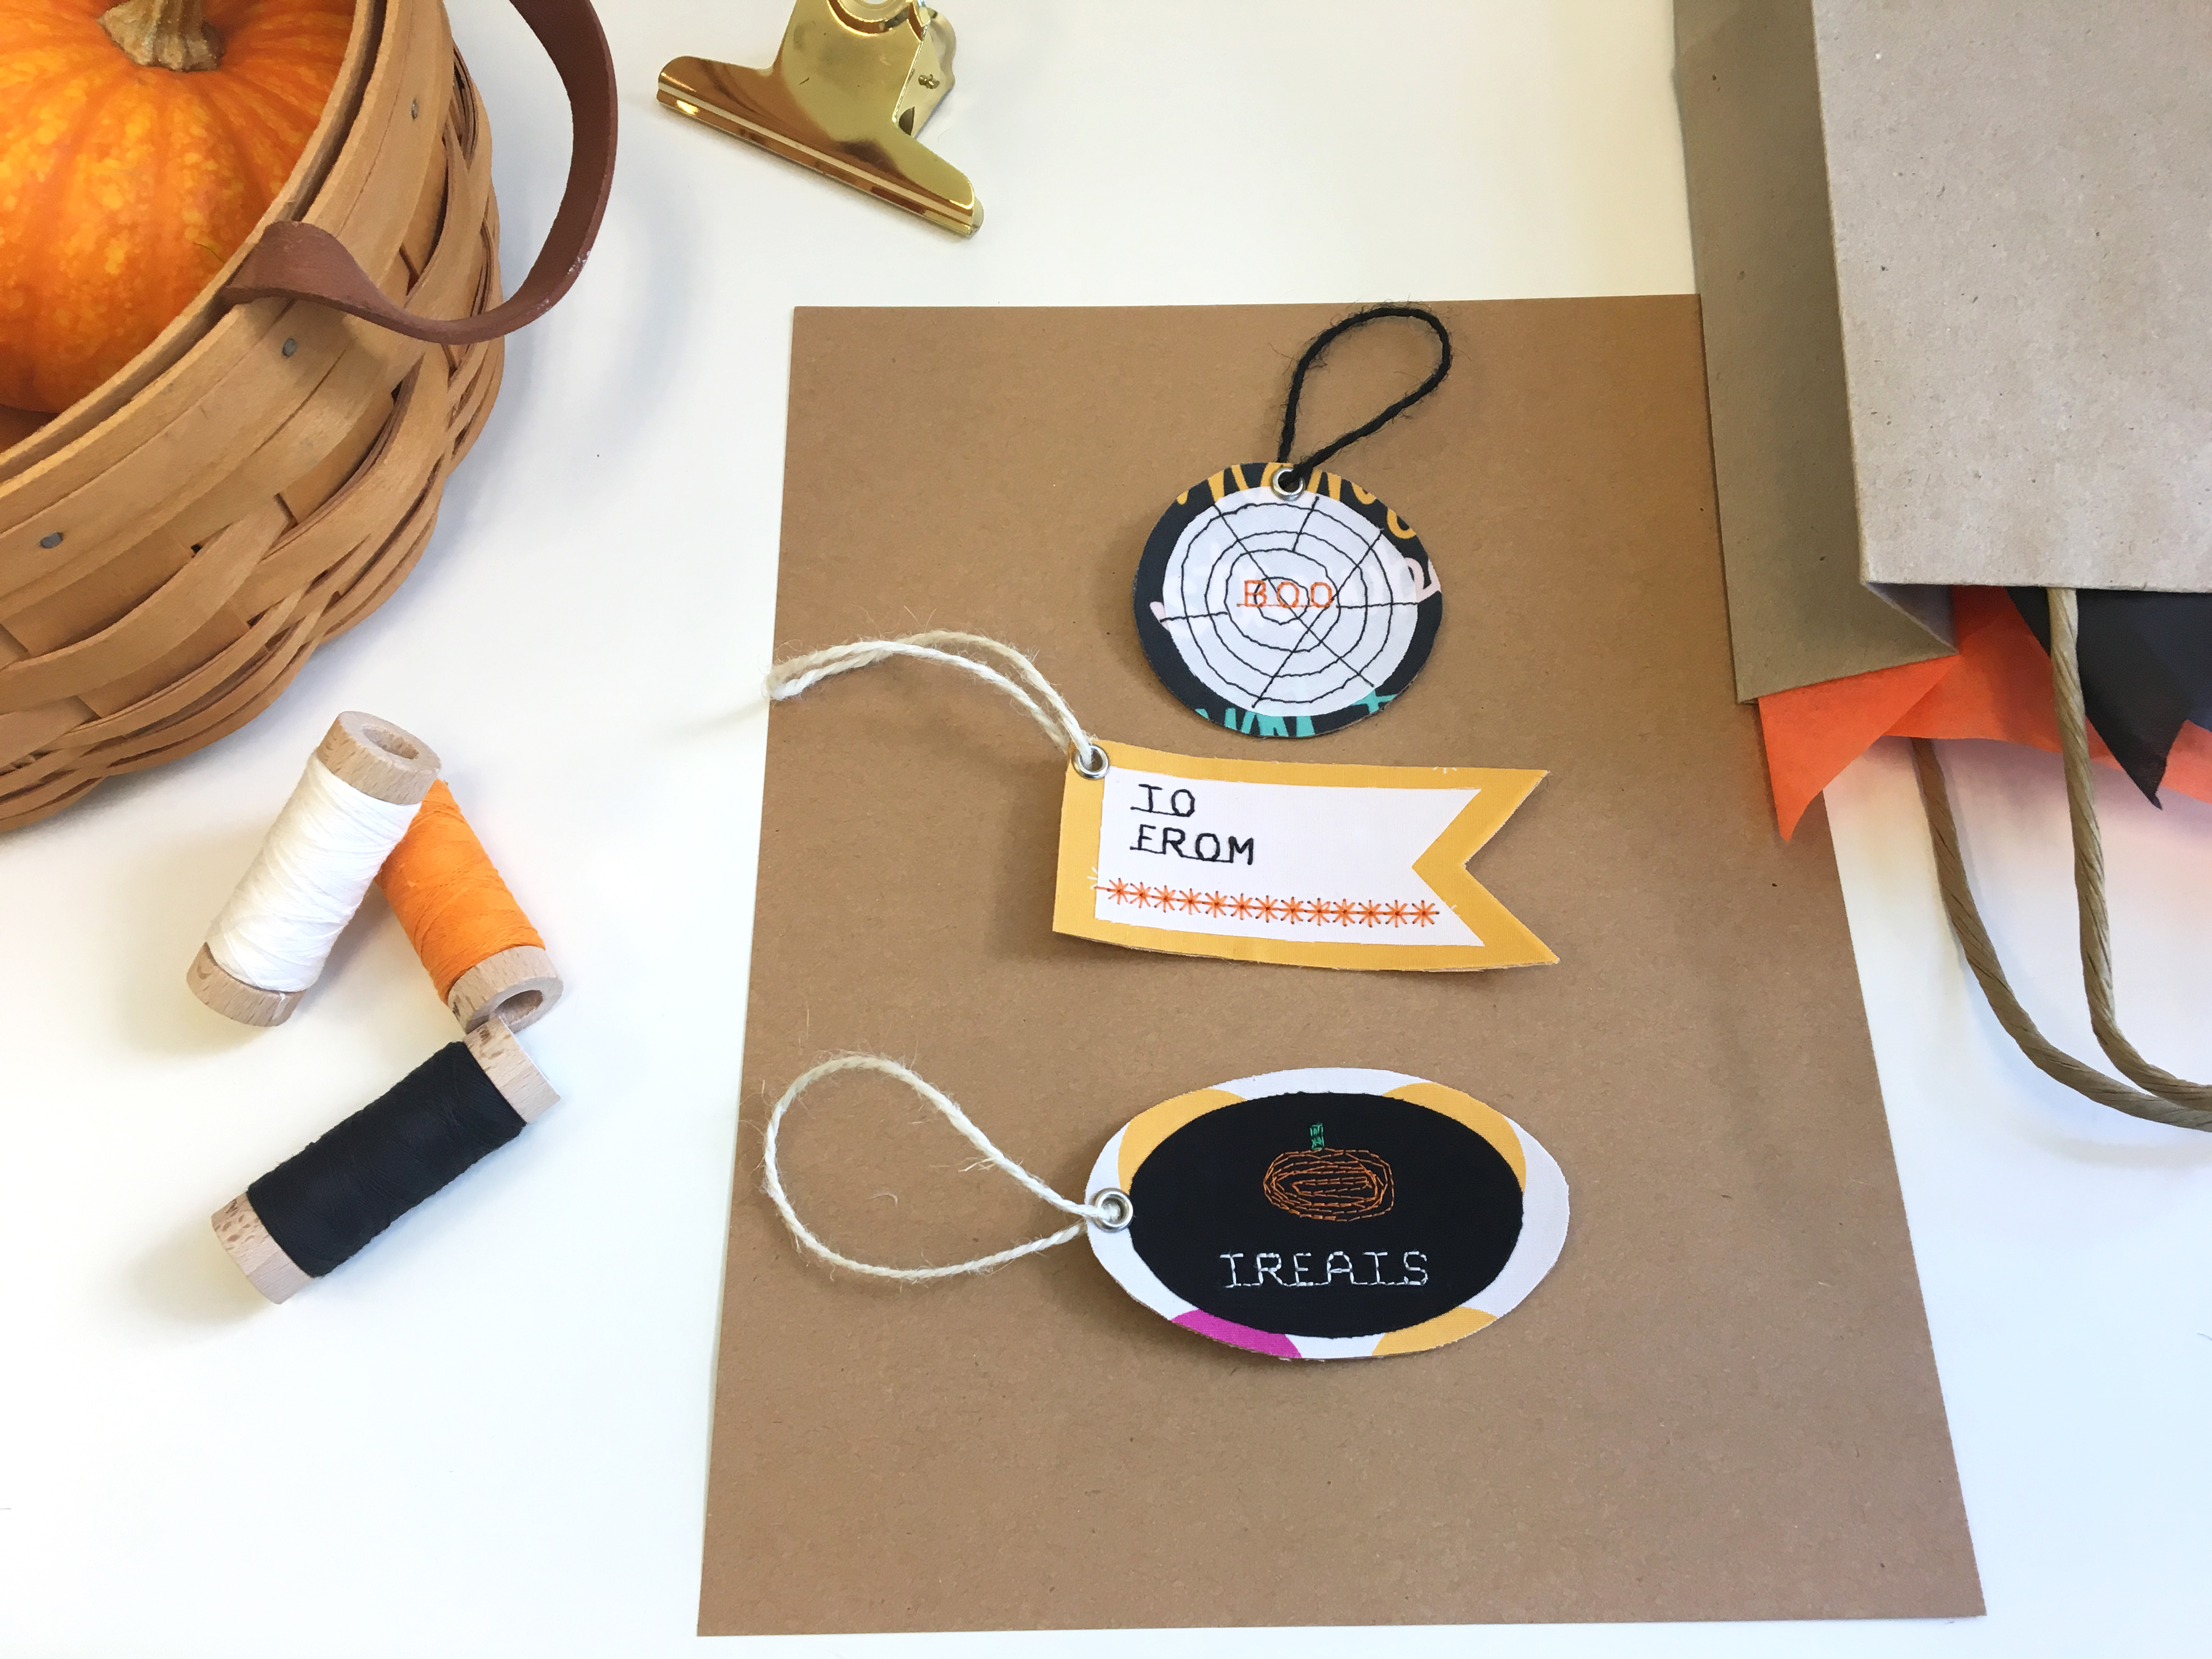
For our To/From Tag we wanted to add a fun decorative stitch with Aurifil pumpkin color thread. We used stitch #66 on my machine.
For the Pumpkin tag we stitch around and around in a oval shape and stitched back and forth to create the steam. Be creative making any design you want. Using the Open embroidery foot #20 may help for you to see your work a bit better as you are sewing. Next fuse your back fabric tags to the back of your tag. Make a small hole punch big enough to fit your eyelet. Using your eyelet setter, set eyelet.
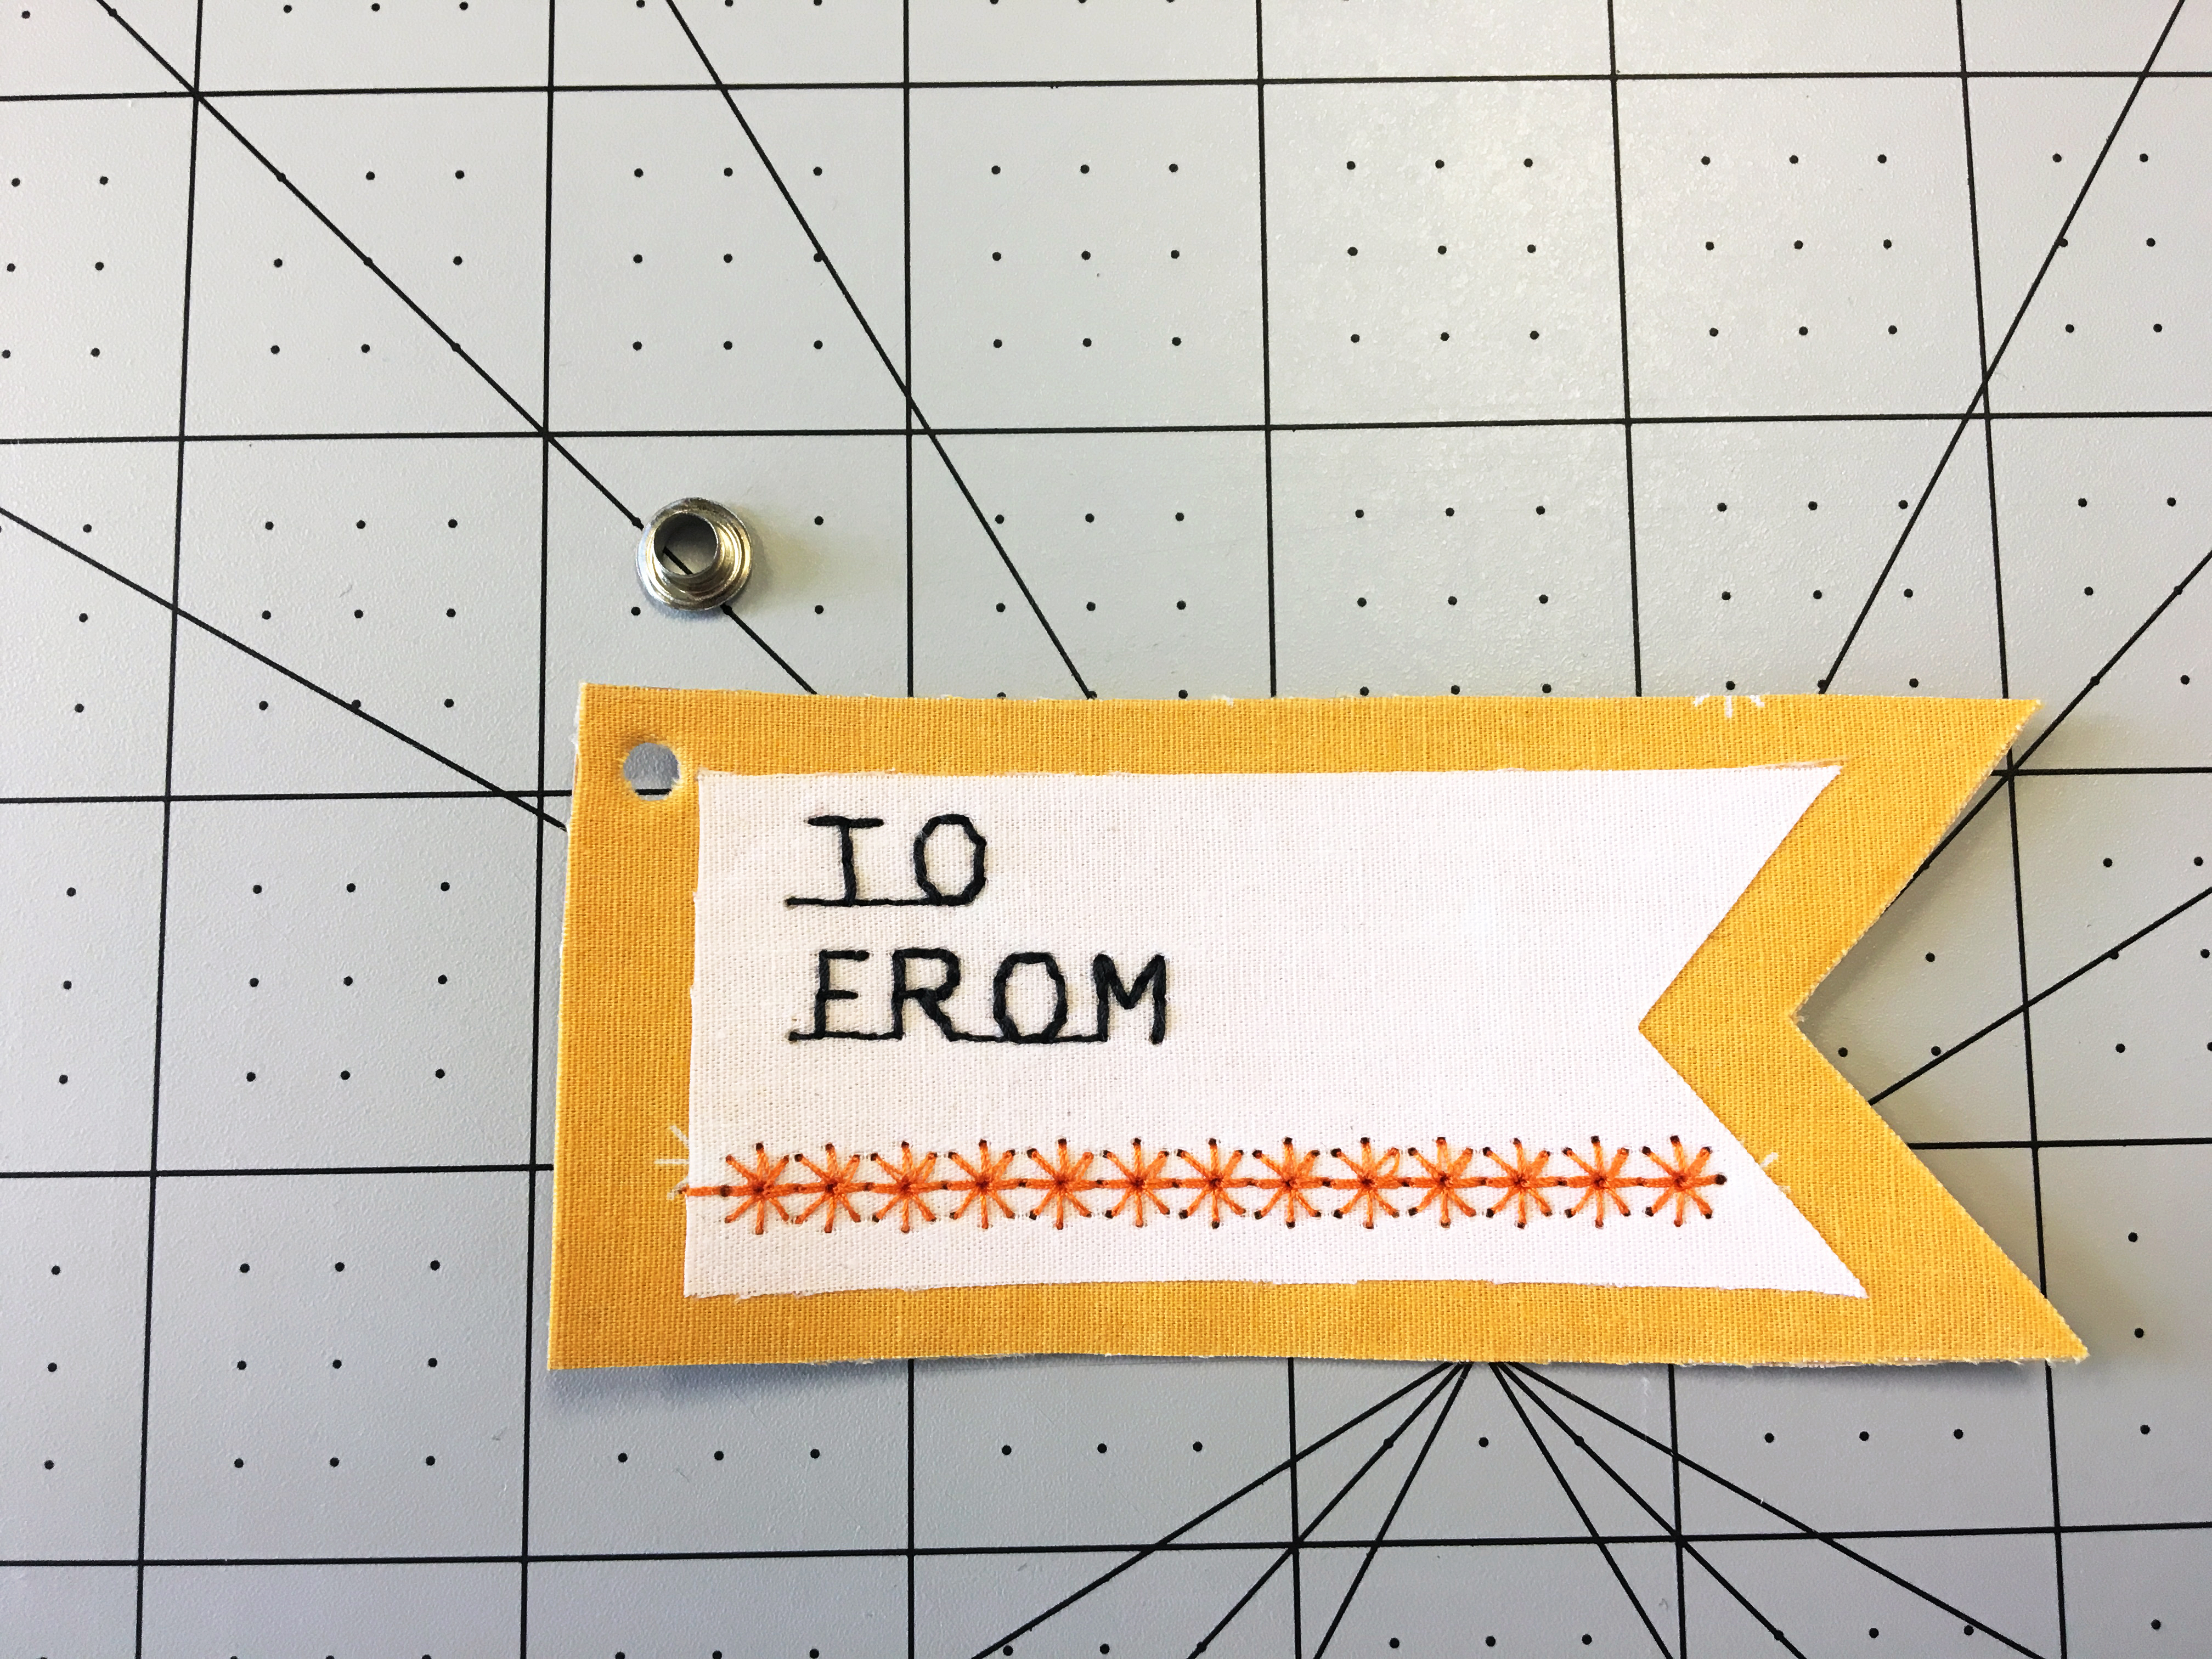
Cut string, ribbon or cord at your desired length, and thread through hole. Tie a knot and clip excess string. And voilà! It’s time to attach it to your gift !
Enjoy,
AGF