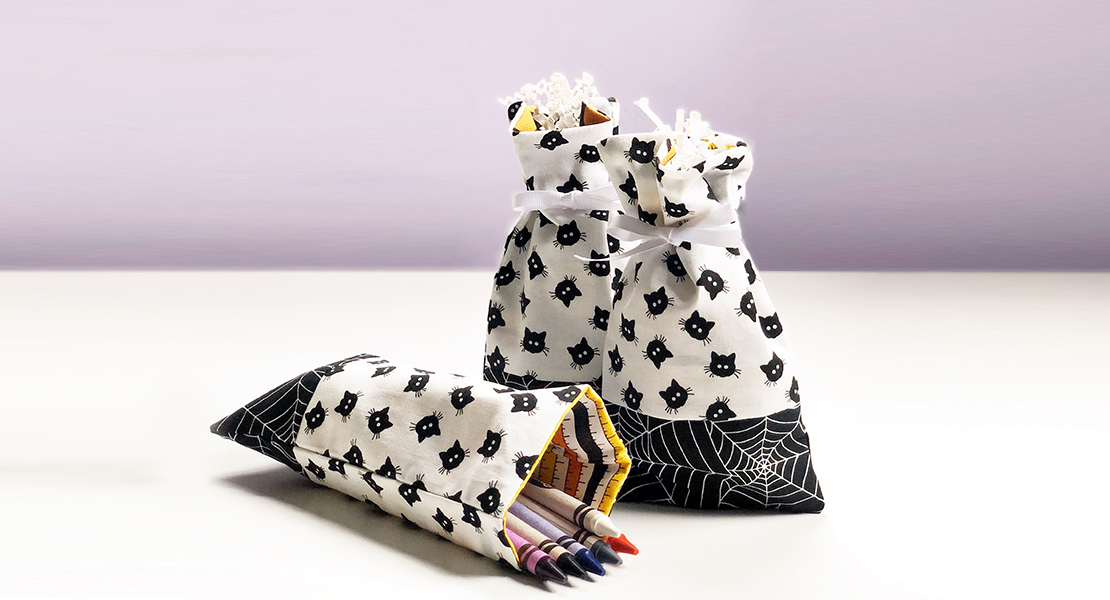
Flatlock Patchwork Trick-or-Treat Bag
Hi! I’m Kate of Tough Kitten Crafts and I empower sewists to become fearless with machine embroidery through online education, a supportive community, and fun machine embroidery projects just like this super cute Flatlock Patchwork Trick or Treat Bag.
Making things for the little kids in your life is so much fun, but let’s be real: they can grow out of them fast! Especially seasonal items. It doesn’t mean I don’t wanna make things for the littles, it just means I prefer the seasonal stuff to go together quickly and easily.
After lots of deliberating, I came around to this cute little trick-or-treat bag made specifically for the toddlers in our lives (though it’s easily adaptable for bigger kids!). This bag goes together quickly, will help you show off some fun fabrics in your stash and it uses a stitch you may not get to use much on your overlocker. Oh! It’s also self-lining. So as you work on the front, you’re creating a super cute lining as well (making the bag go even quicker).
Let’s dive in…
Supplies to Make a Flatlock Patchwork Trick-or-Treat Bag
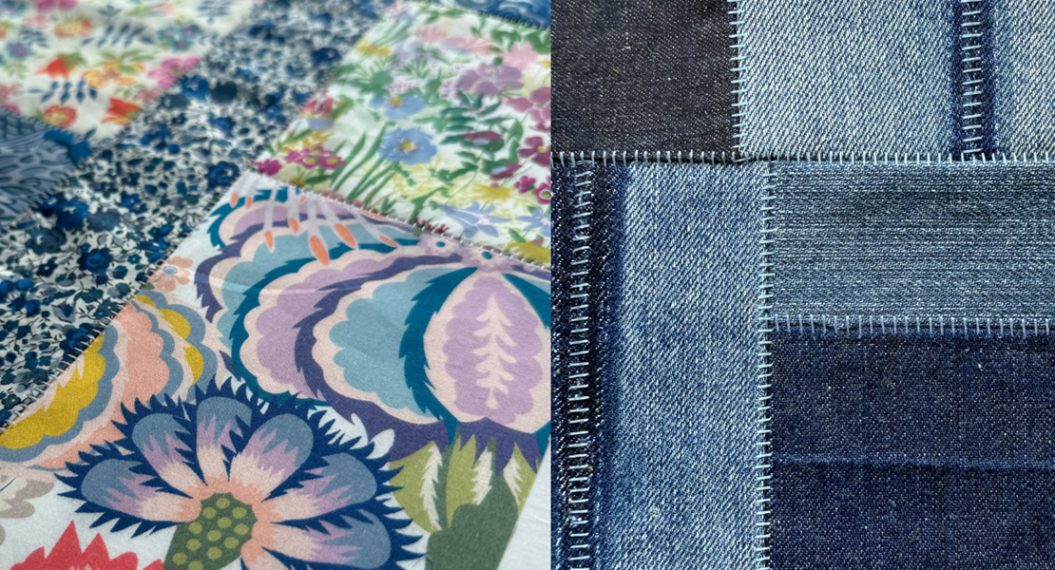
- Select prints from ‘Twilight’ from Dashwood Studio Fabric and the “Kate” Bundle from String and Story.
- See the cutting instructions for details as this could be a great scrap buster.
- 2 cones Mettler Seracor thread
- Aurifil 40 wt Cotton Thread
- OESD Expert Embroidery Thread Cone
- 75/11 Embroidery Needle
- OESD StabilStick Tear Away Stabilizer
- OESD Fusible Woven Cut Away
- Rotary cutter + cutting mat
- Clover Wonder Clips
- Fray Check or preferred tool for securing overlocker threads
- Large-eyed blunt tapestry needle
- LauraStar Smart U Ironing system (or other iron)
- BERNINA L 890 Overlock/Coverstitch Combo Machine
- BERNINA 790 PLUS Sewing and Embroidery Machine
- Large oval hoop
- Drop-Shaped Embroidery Foot #26
Cutting Instructions
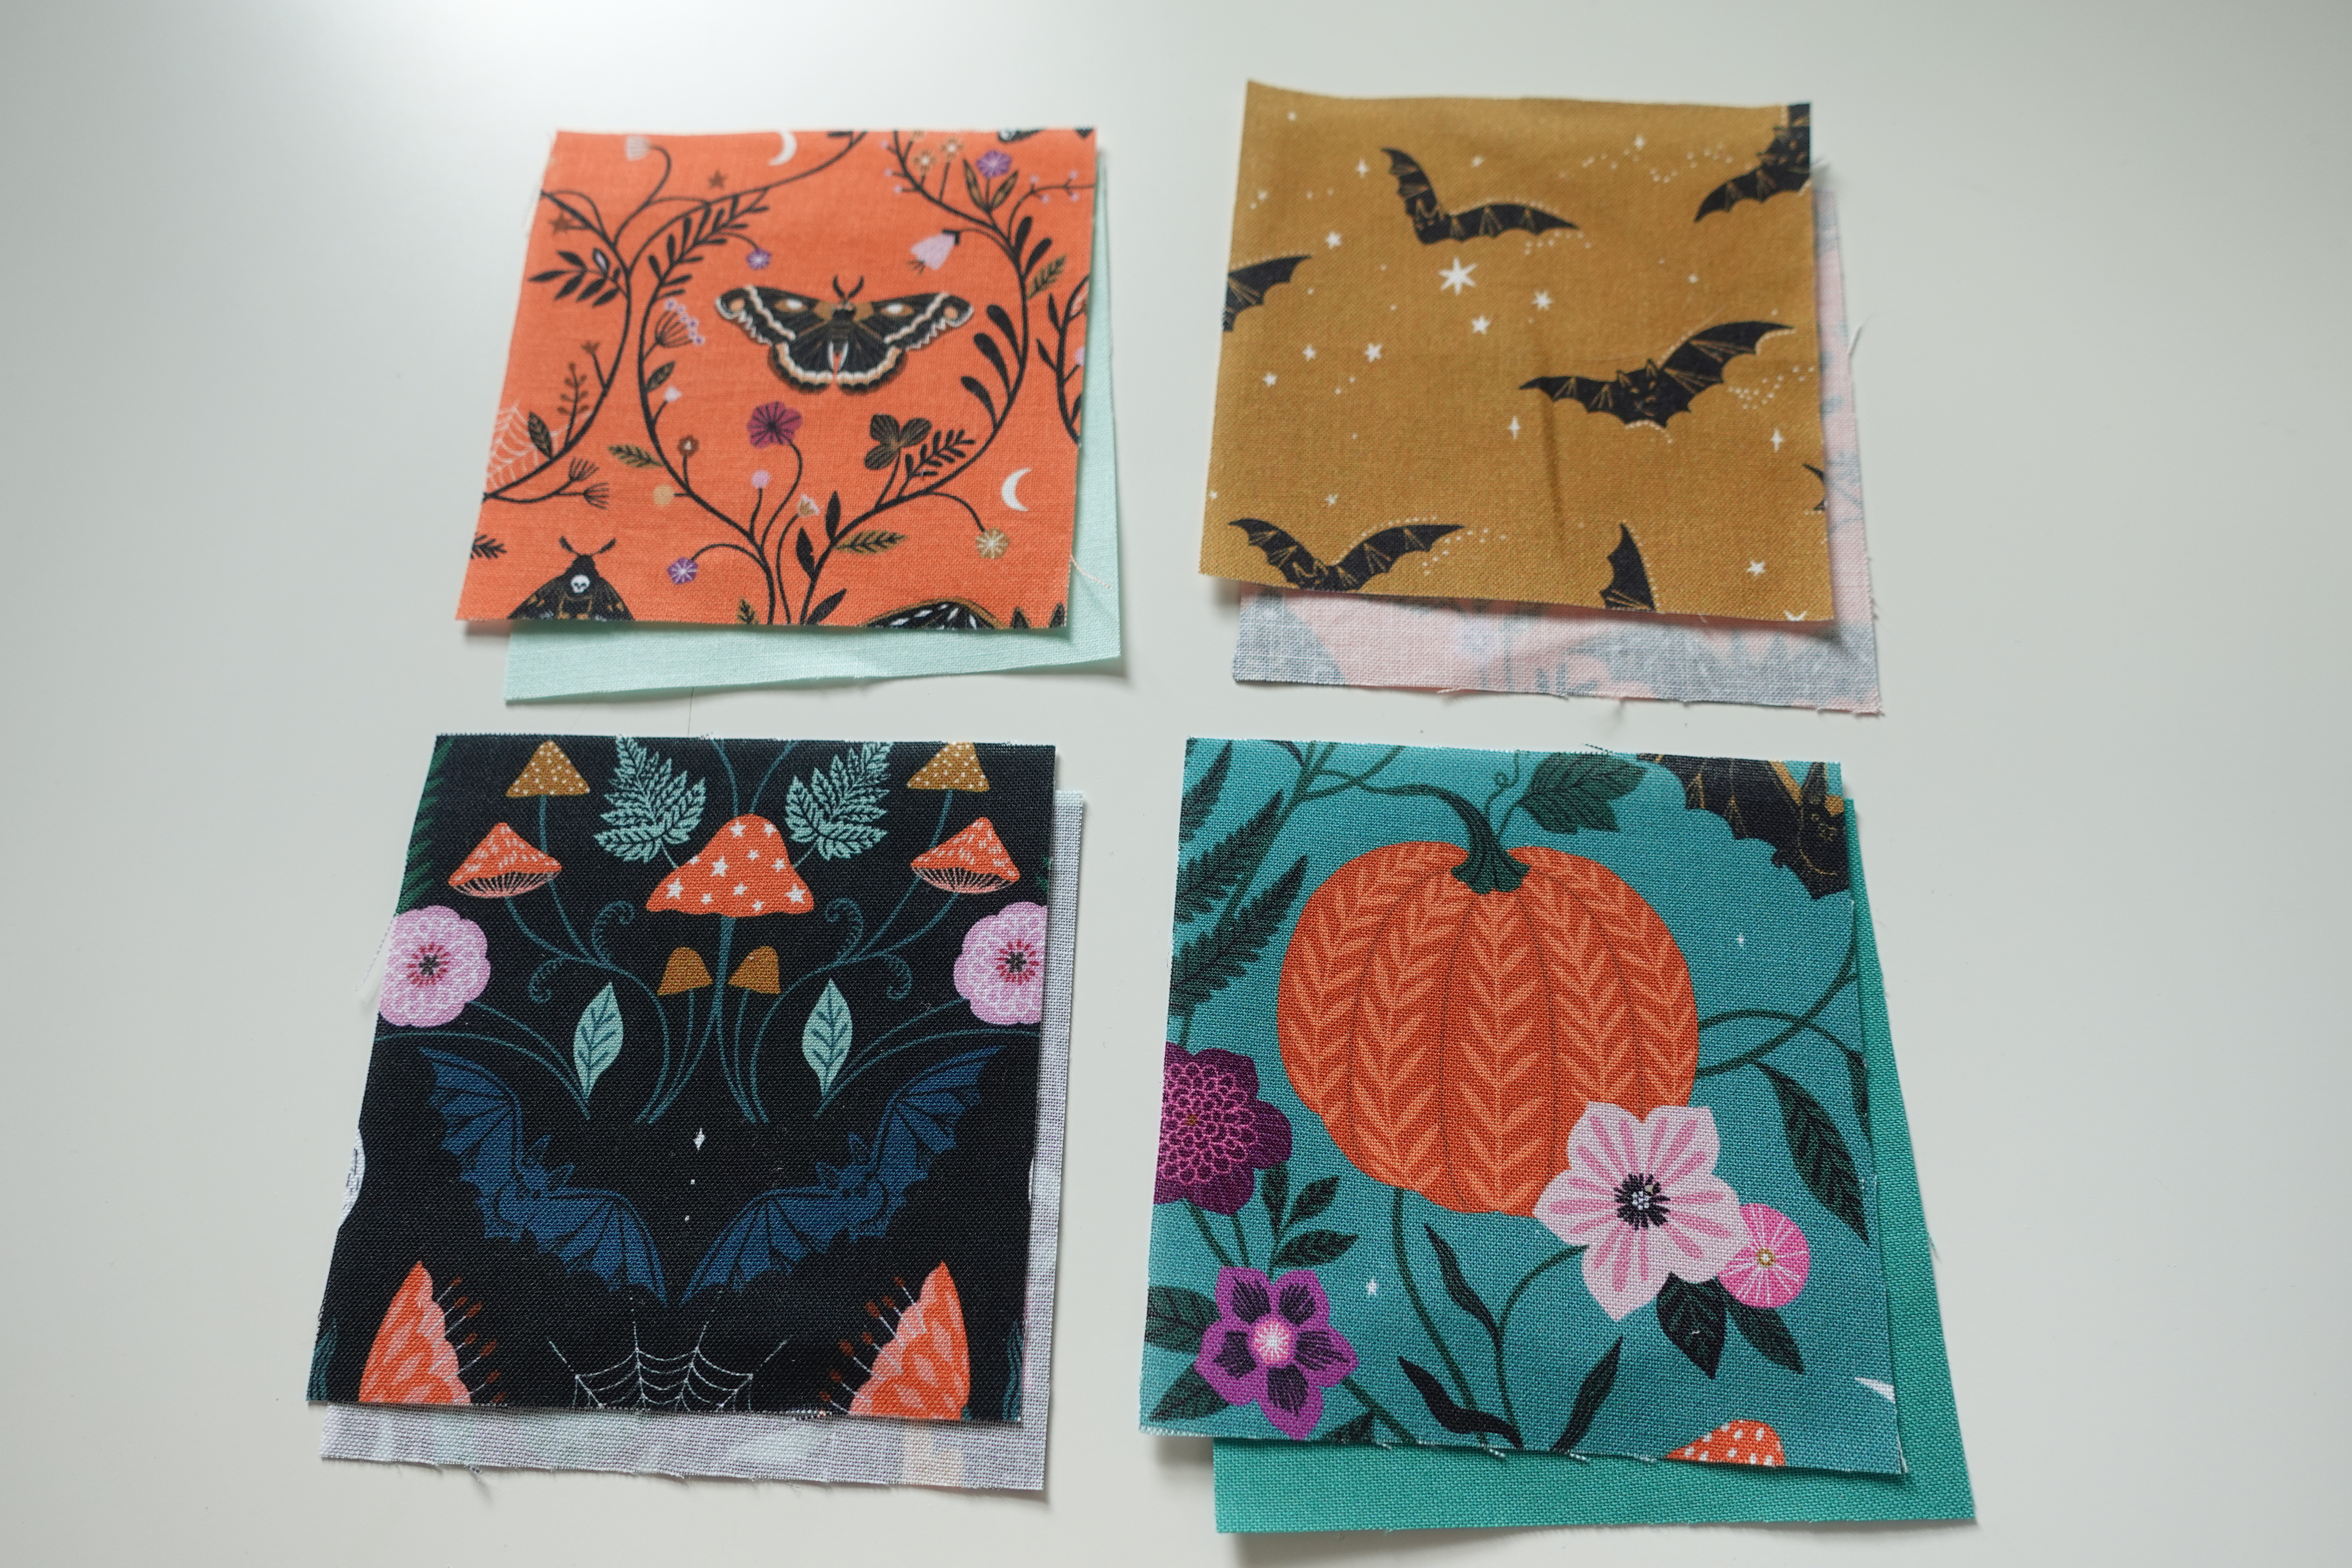
- Cut 24 3.5″ x 3.5″ squares out of your fabric. For my prints, I took care to do some fussy cutting to ensure I got the most out of the motifs on the fabric, a 3.5″ square ruler will help with this. You may want to cut an additional 8-10 squares for practice sewing.
- Cut two 2.5″ x 18″ strips from handle fabric.
- Cut one 2″ x 17″ strip from the fusible woven
- We will cut the fabric and fusible woven for the top band later, after checking the measurements of your bag.
Tip: If you use solids or other fabrics that don’t have an obvious right or wrong side, then you wouldn’t have to sew the two layers at once, as both sides would look good. However, you will lose some body to the bag that way, so I suggest double layering thinner fabric, regardless.
I recommend reading through the instructions in their entirety before you begin this project. I know, I know…I never really do that either but I truly believe it will help you test your stitches, layout your fabrics and generally understand this self-lining bag a little better.
Steps to Make a Flatlock Patchwork Trick-or-Treat Bag
Give your fabrics a good starching to start out. I start the day before I will be sewing and mix one part StaFlo and one part water. I spray my mixture on my fabric until the fabrics are damp with solution, then let them dry overnight. Feel free to use your preferred method to get your fabrics well starched.
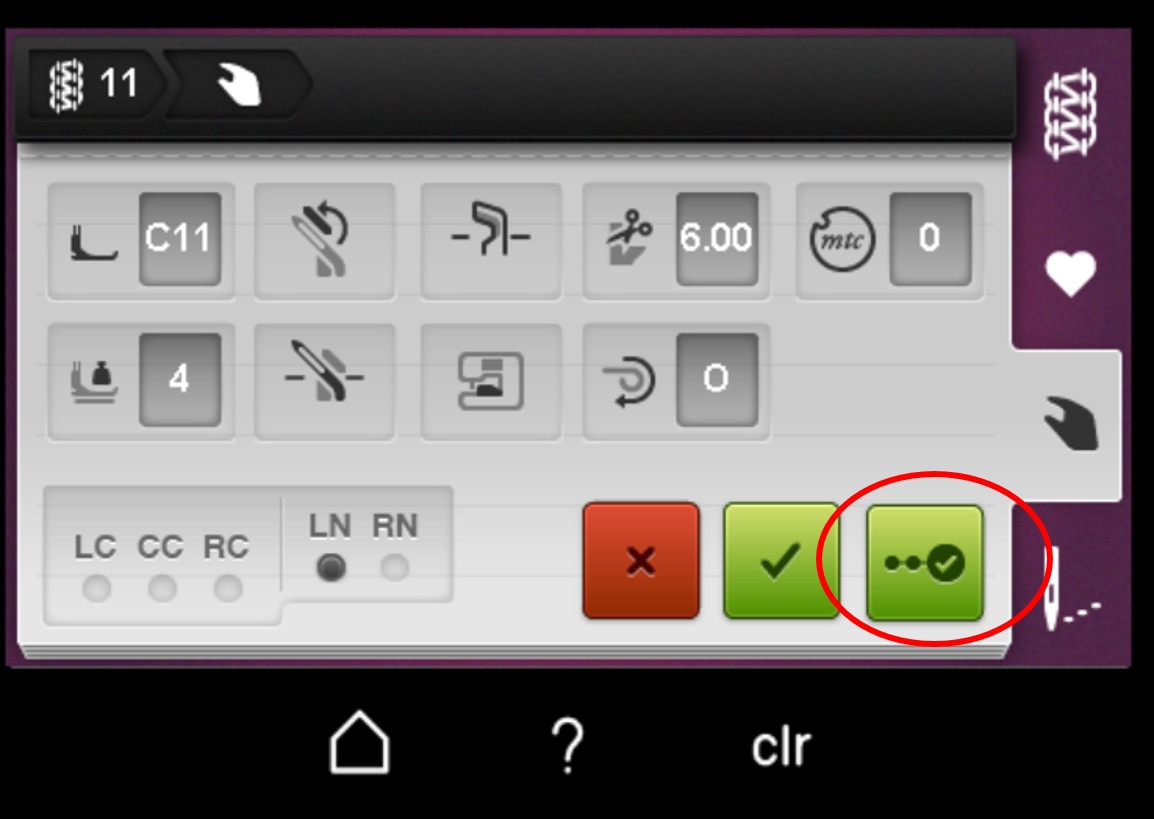
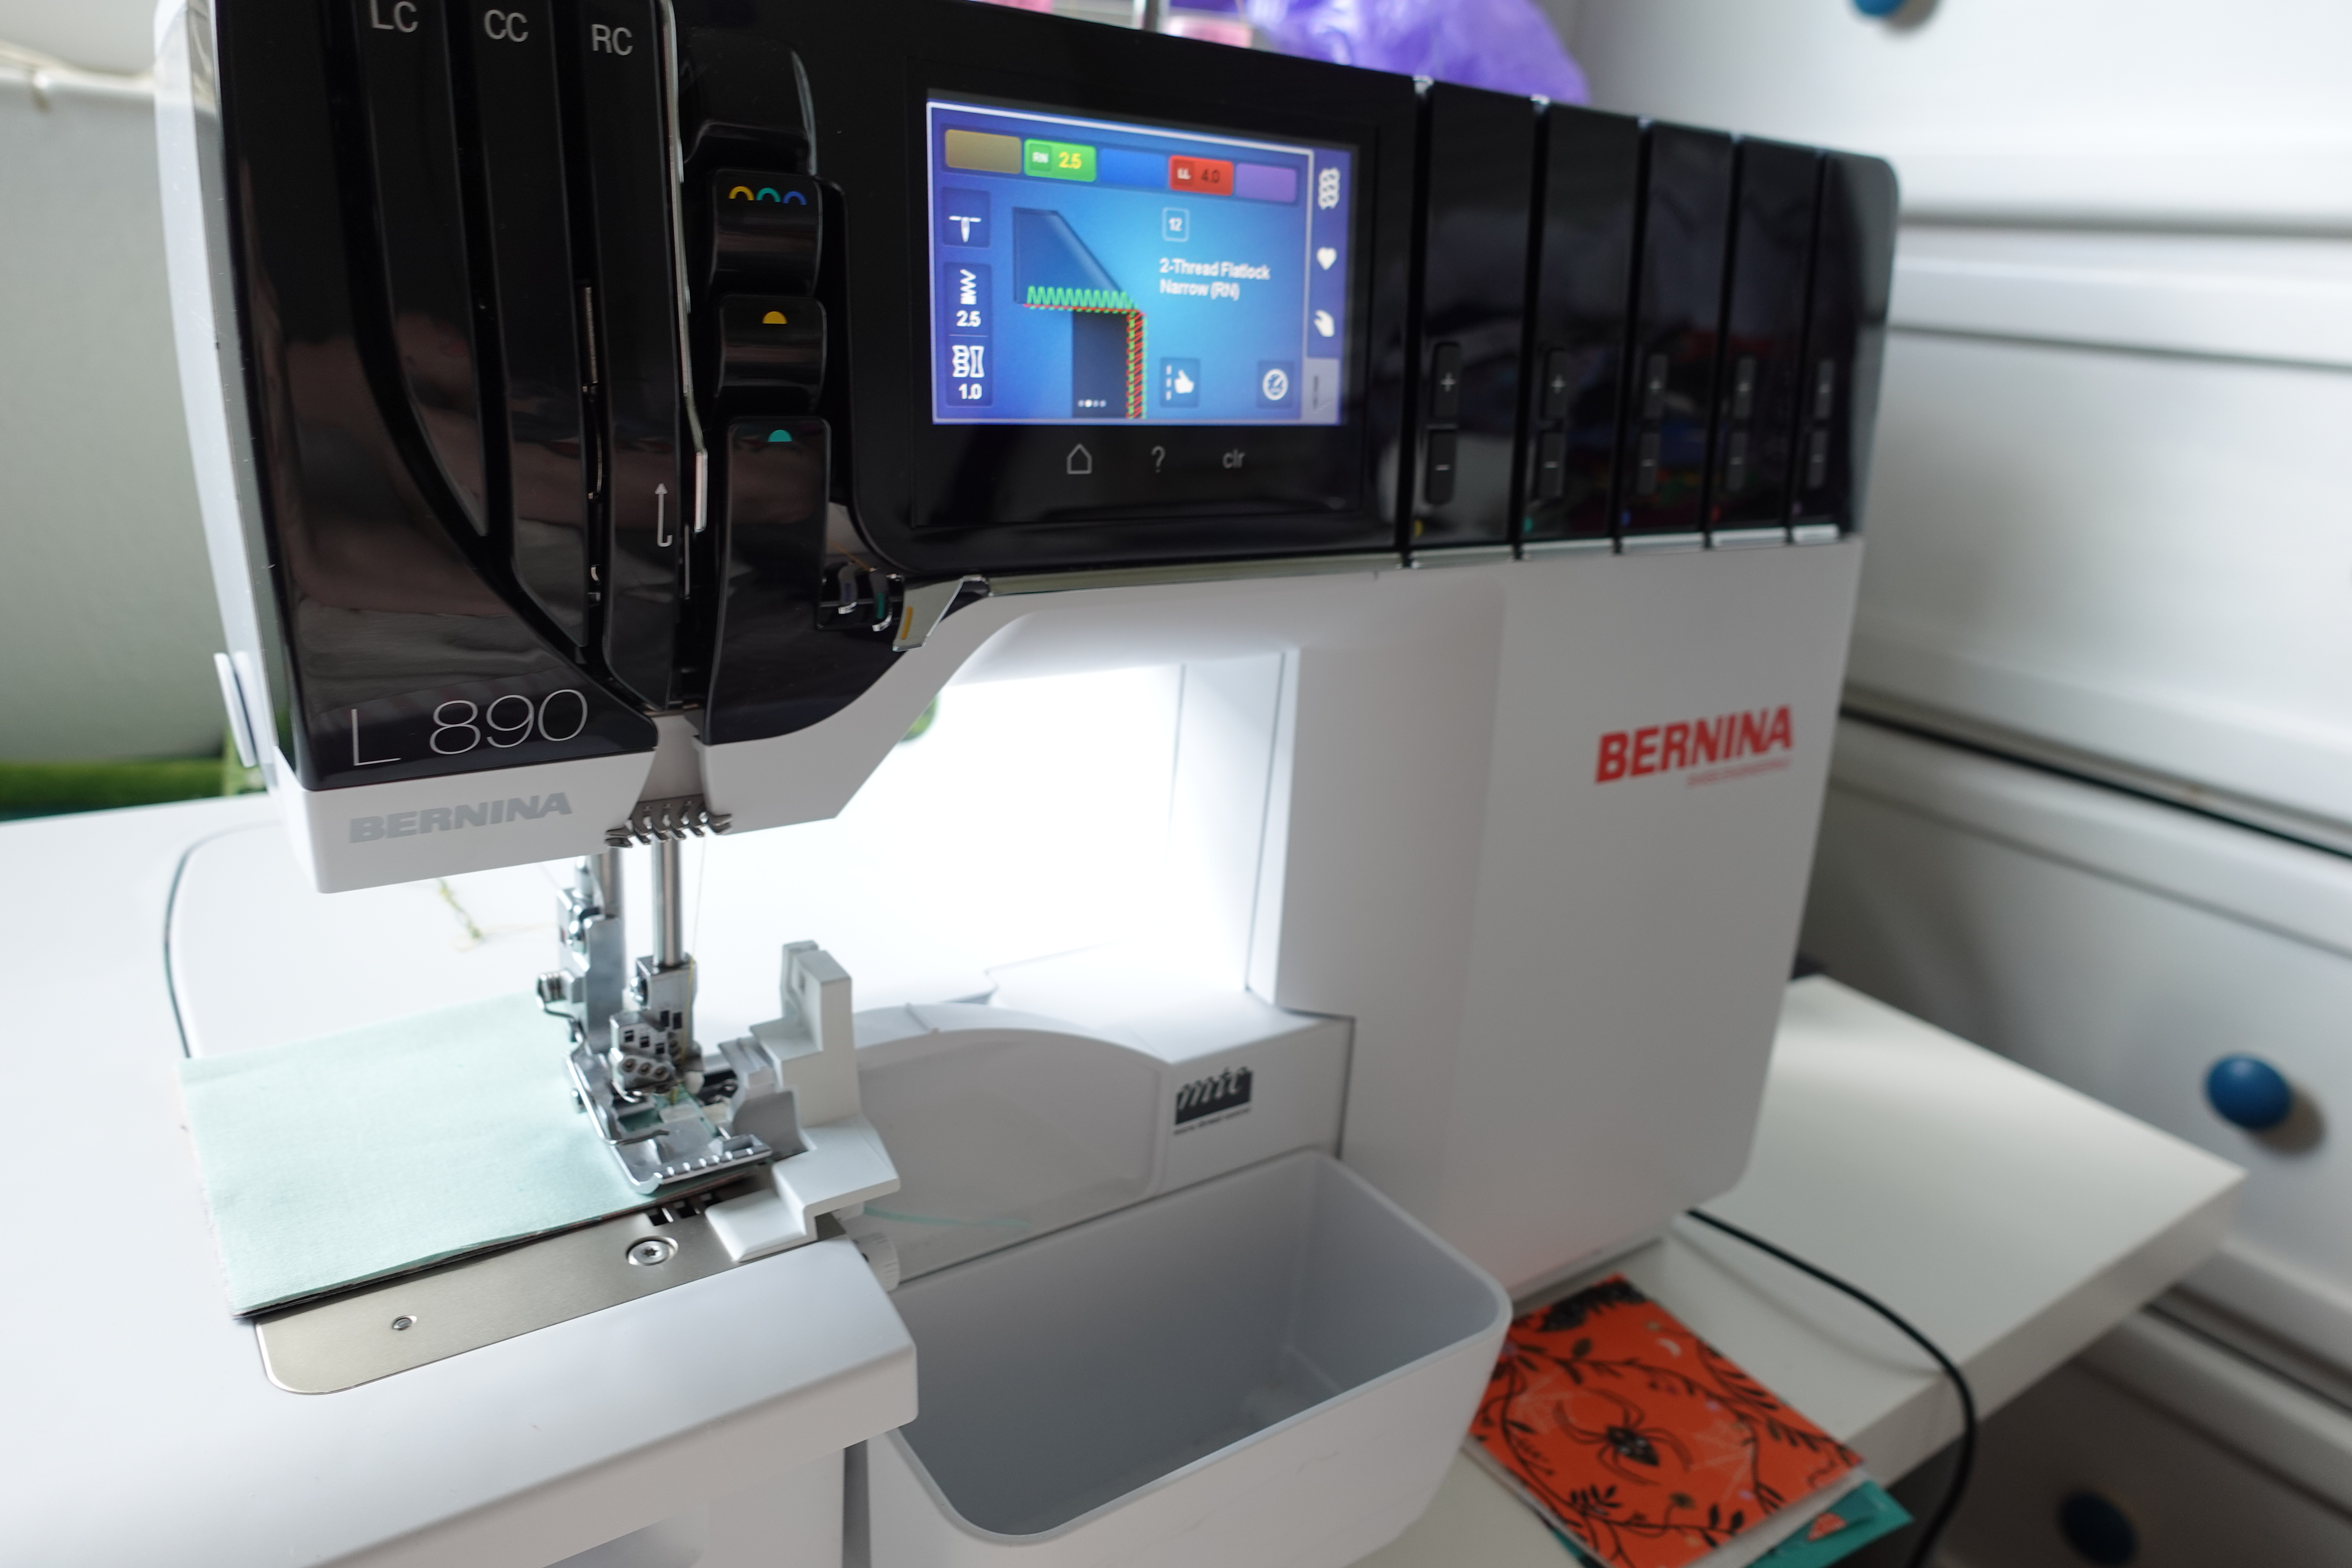
Let’s set up the machine. I am on an L 890 that I have prepped for a 2-thread Flatlock Wide (LN), stitch #11. I like using the machine wizard to help me set up the machine properly and thread correctly. Operating the machine in guided mode automatically prompts the setup wizard when you select the stitch, otherwise, you can launch the wizard anytime to check your settings and set up by selecting this icon.
I also changed the cutting width to 7 instead of the recommended 6.
Start a chain of thread, this is important to creating a proper flatlock, then test your stitch on your test squares. I tested my machine before starting the project and found that I needed to adjust my needle tension. Depending on your comfort level with sergers and flatlocking, you may want to make a test four patch to help you get the hang of this patchwork.
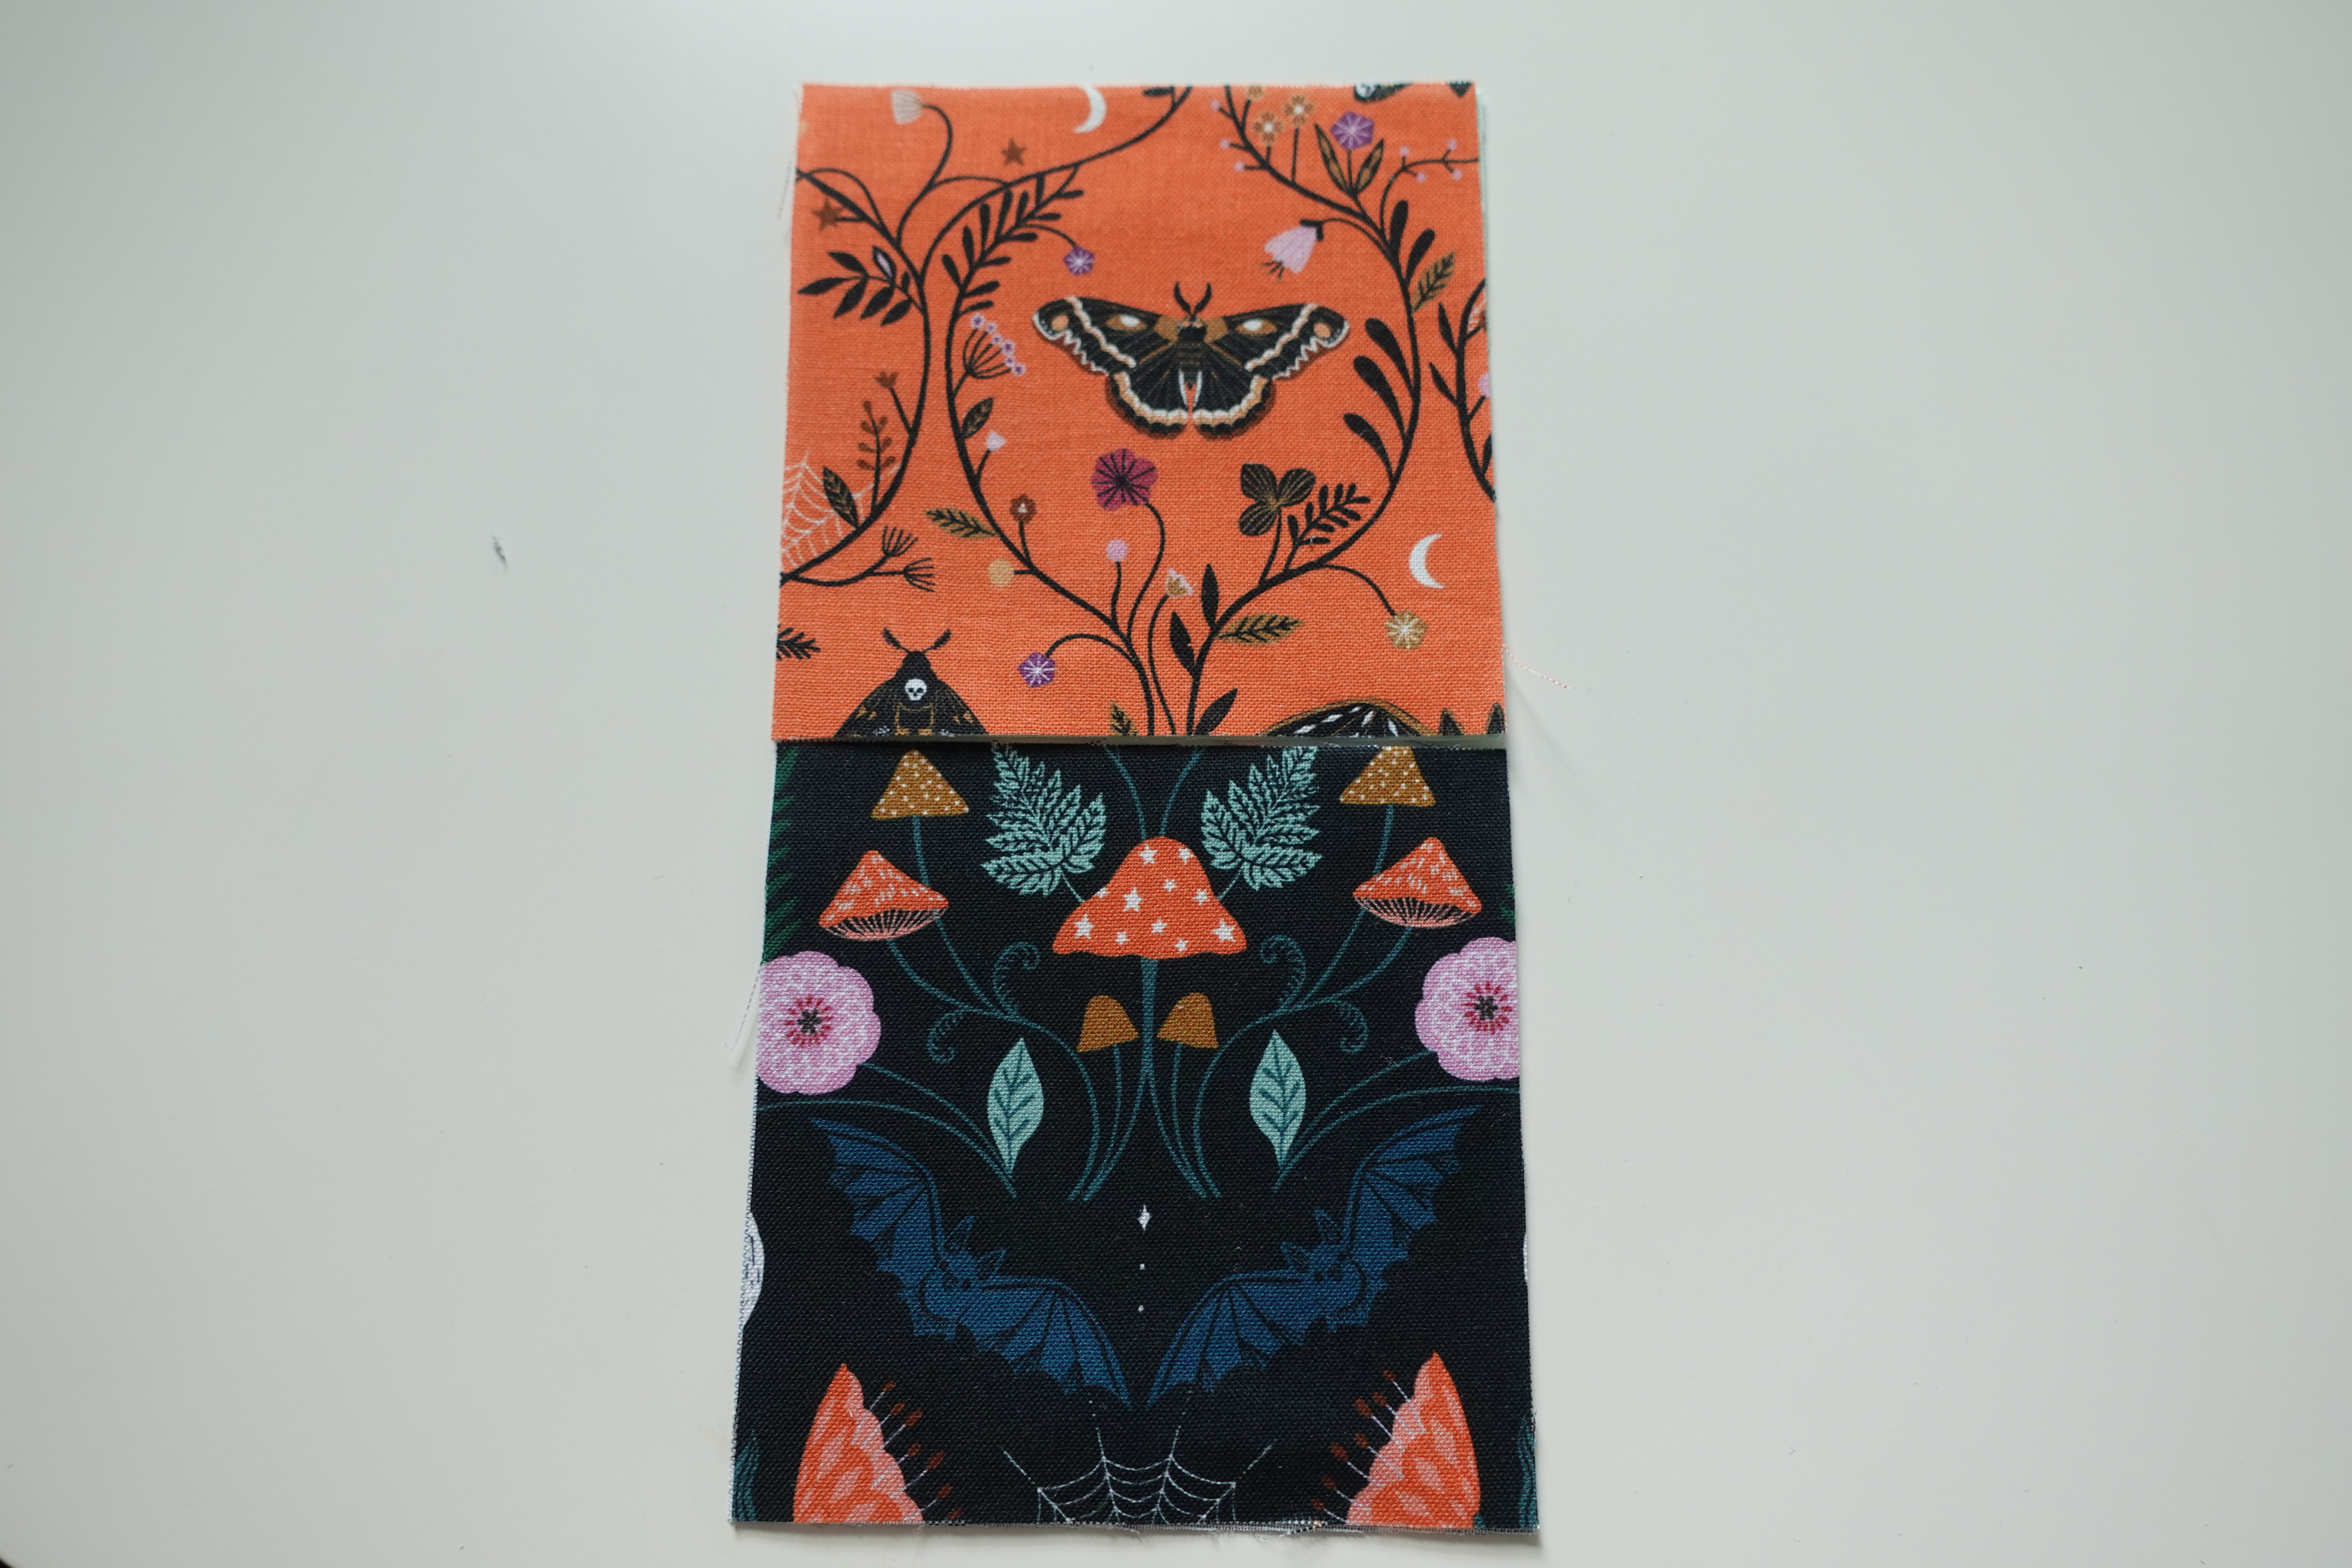
Take your time to lay out your fabrics. For this bag, we will be lining as we go so feel free to plan the inside fabrics as well to make sure you like the layout, inside and out. I used some coordinating solids inside my bag.
After choosing my layout I placed the outer fabric on top of the inner fabric, wrong sides together, to keep everything organized. We will be making (3) four patches to create the base of the bag.
Get the first four patch ready for stitching. We will first sew our four patches into vertical pairs, then sew the pairs together to create four patches.
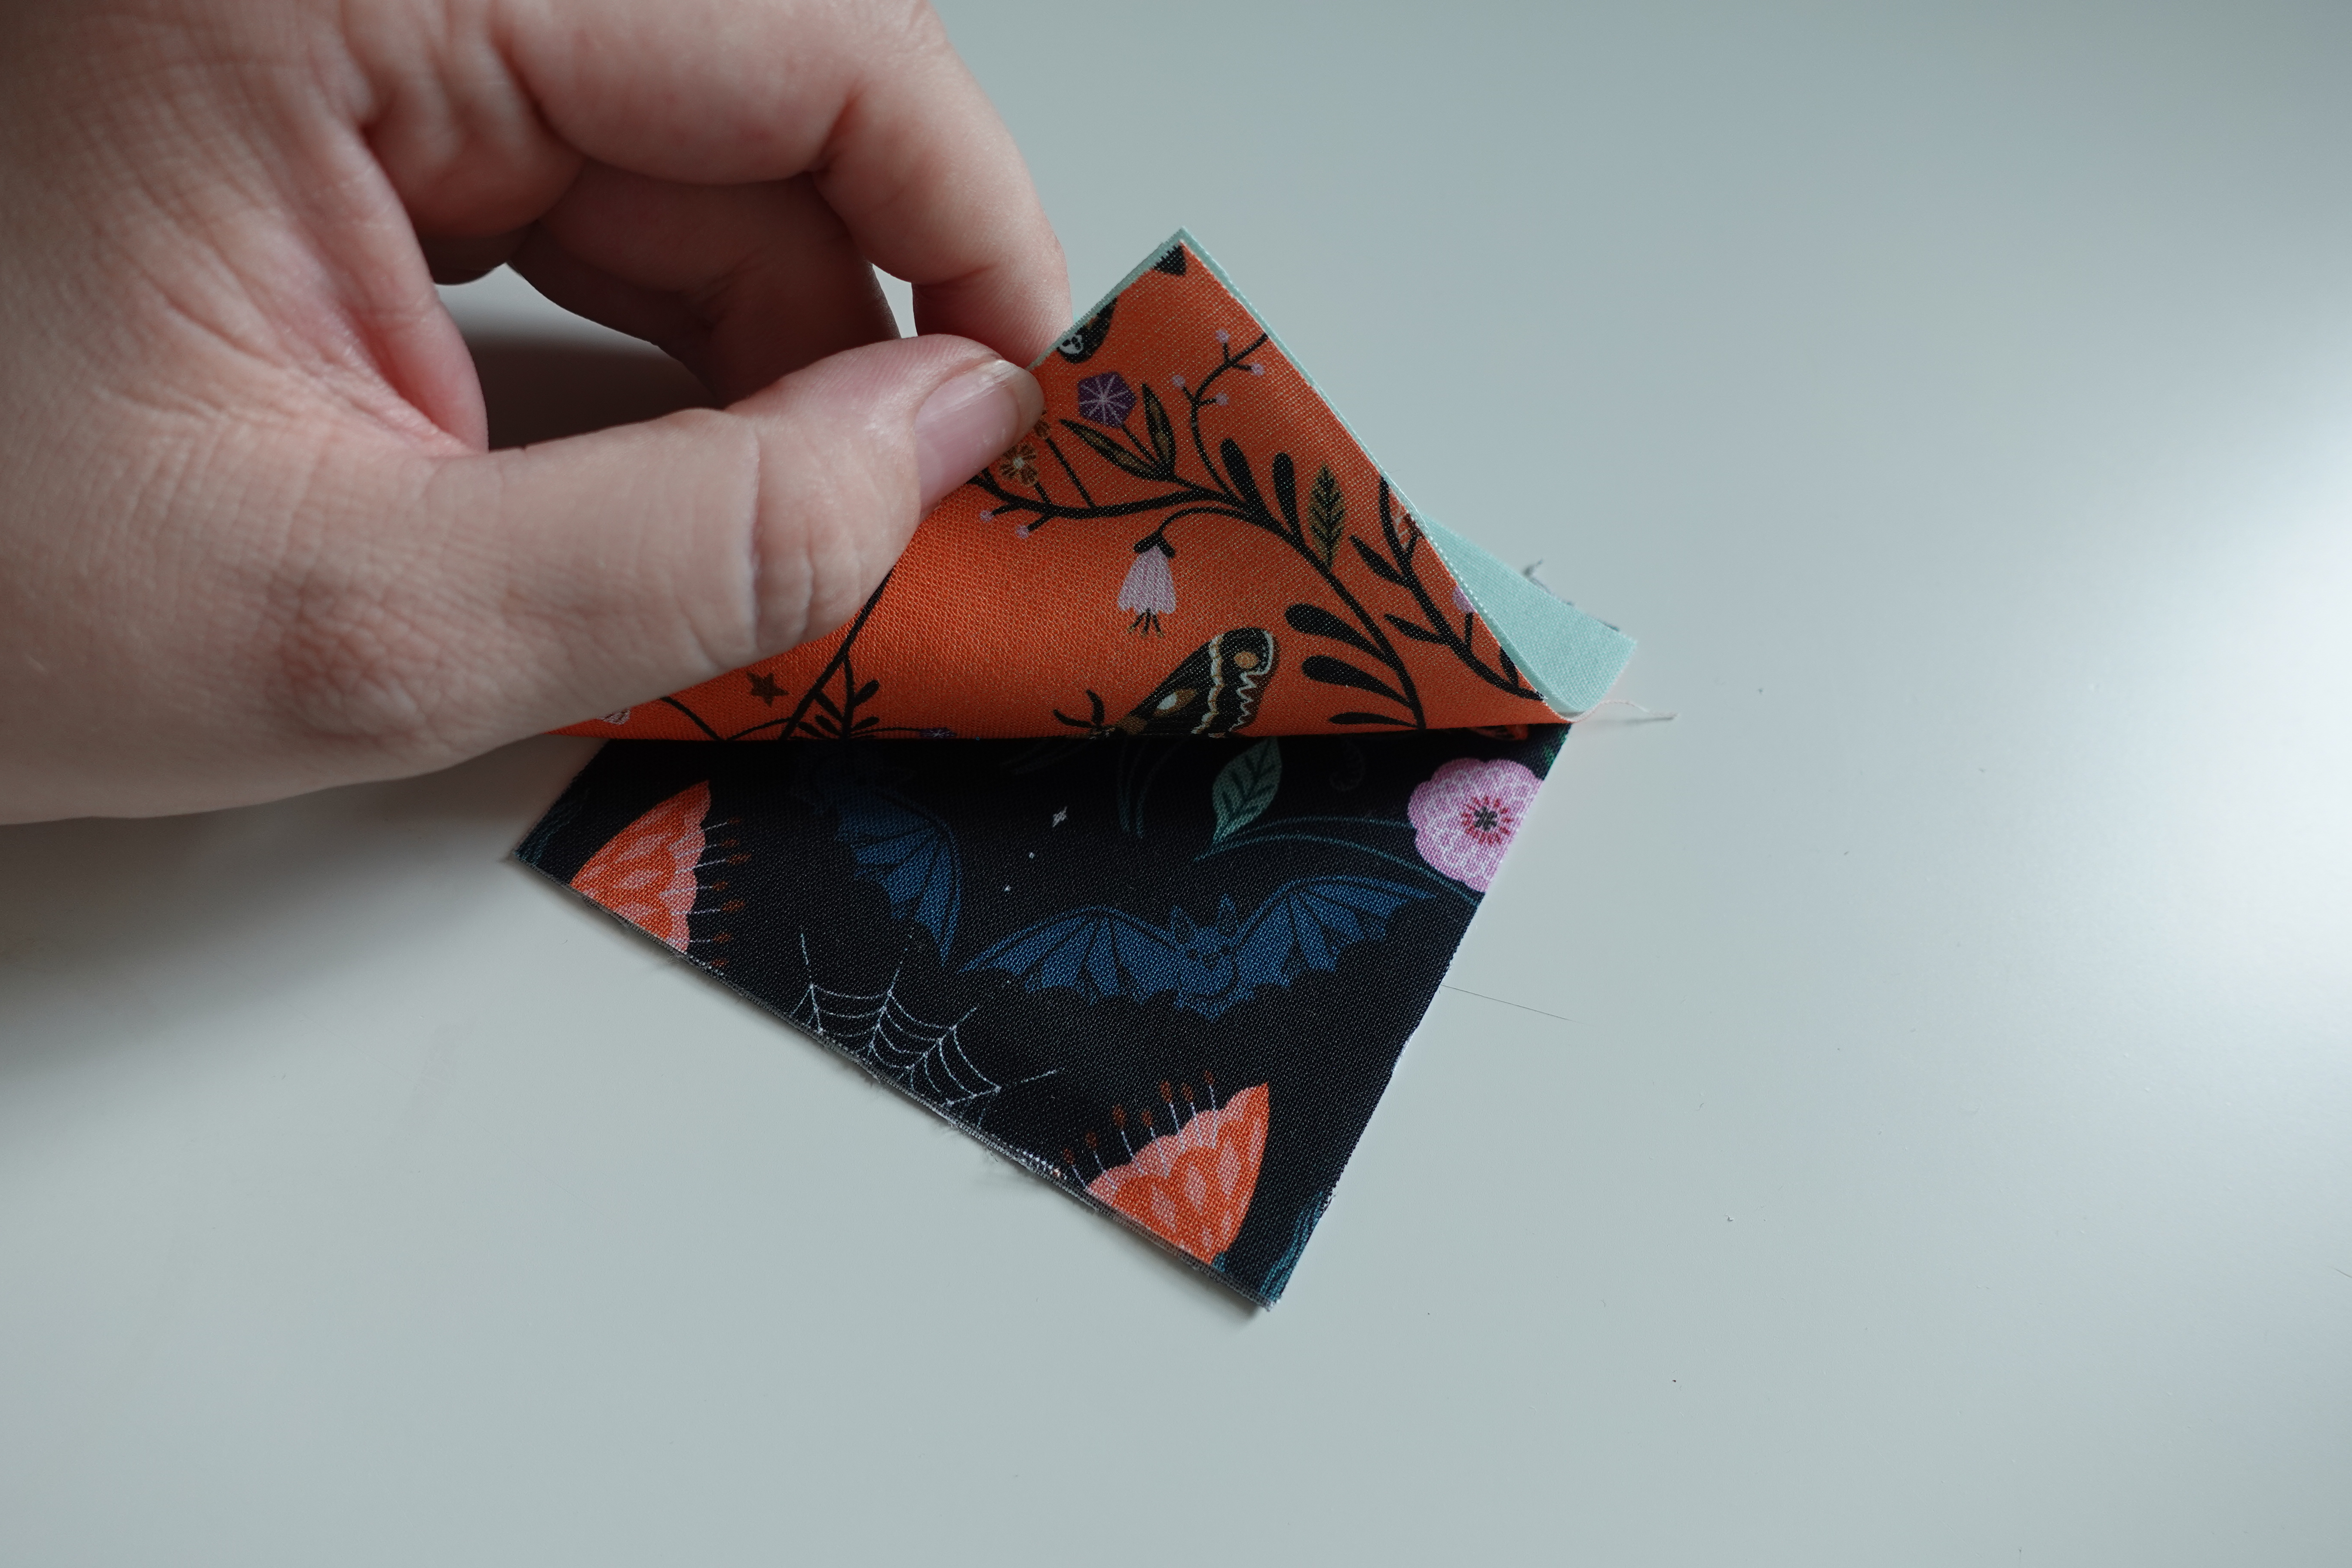
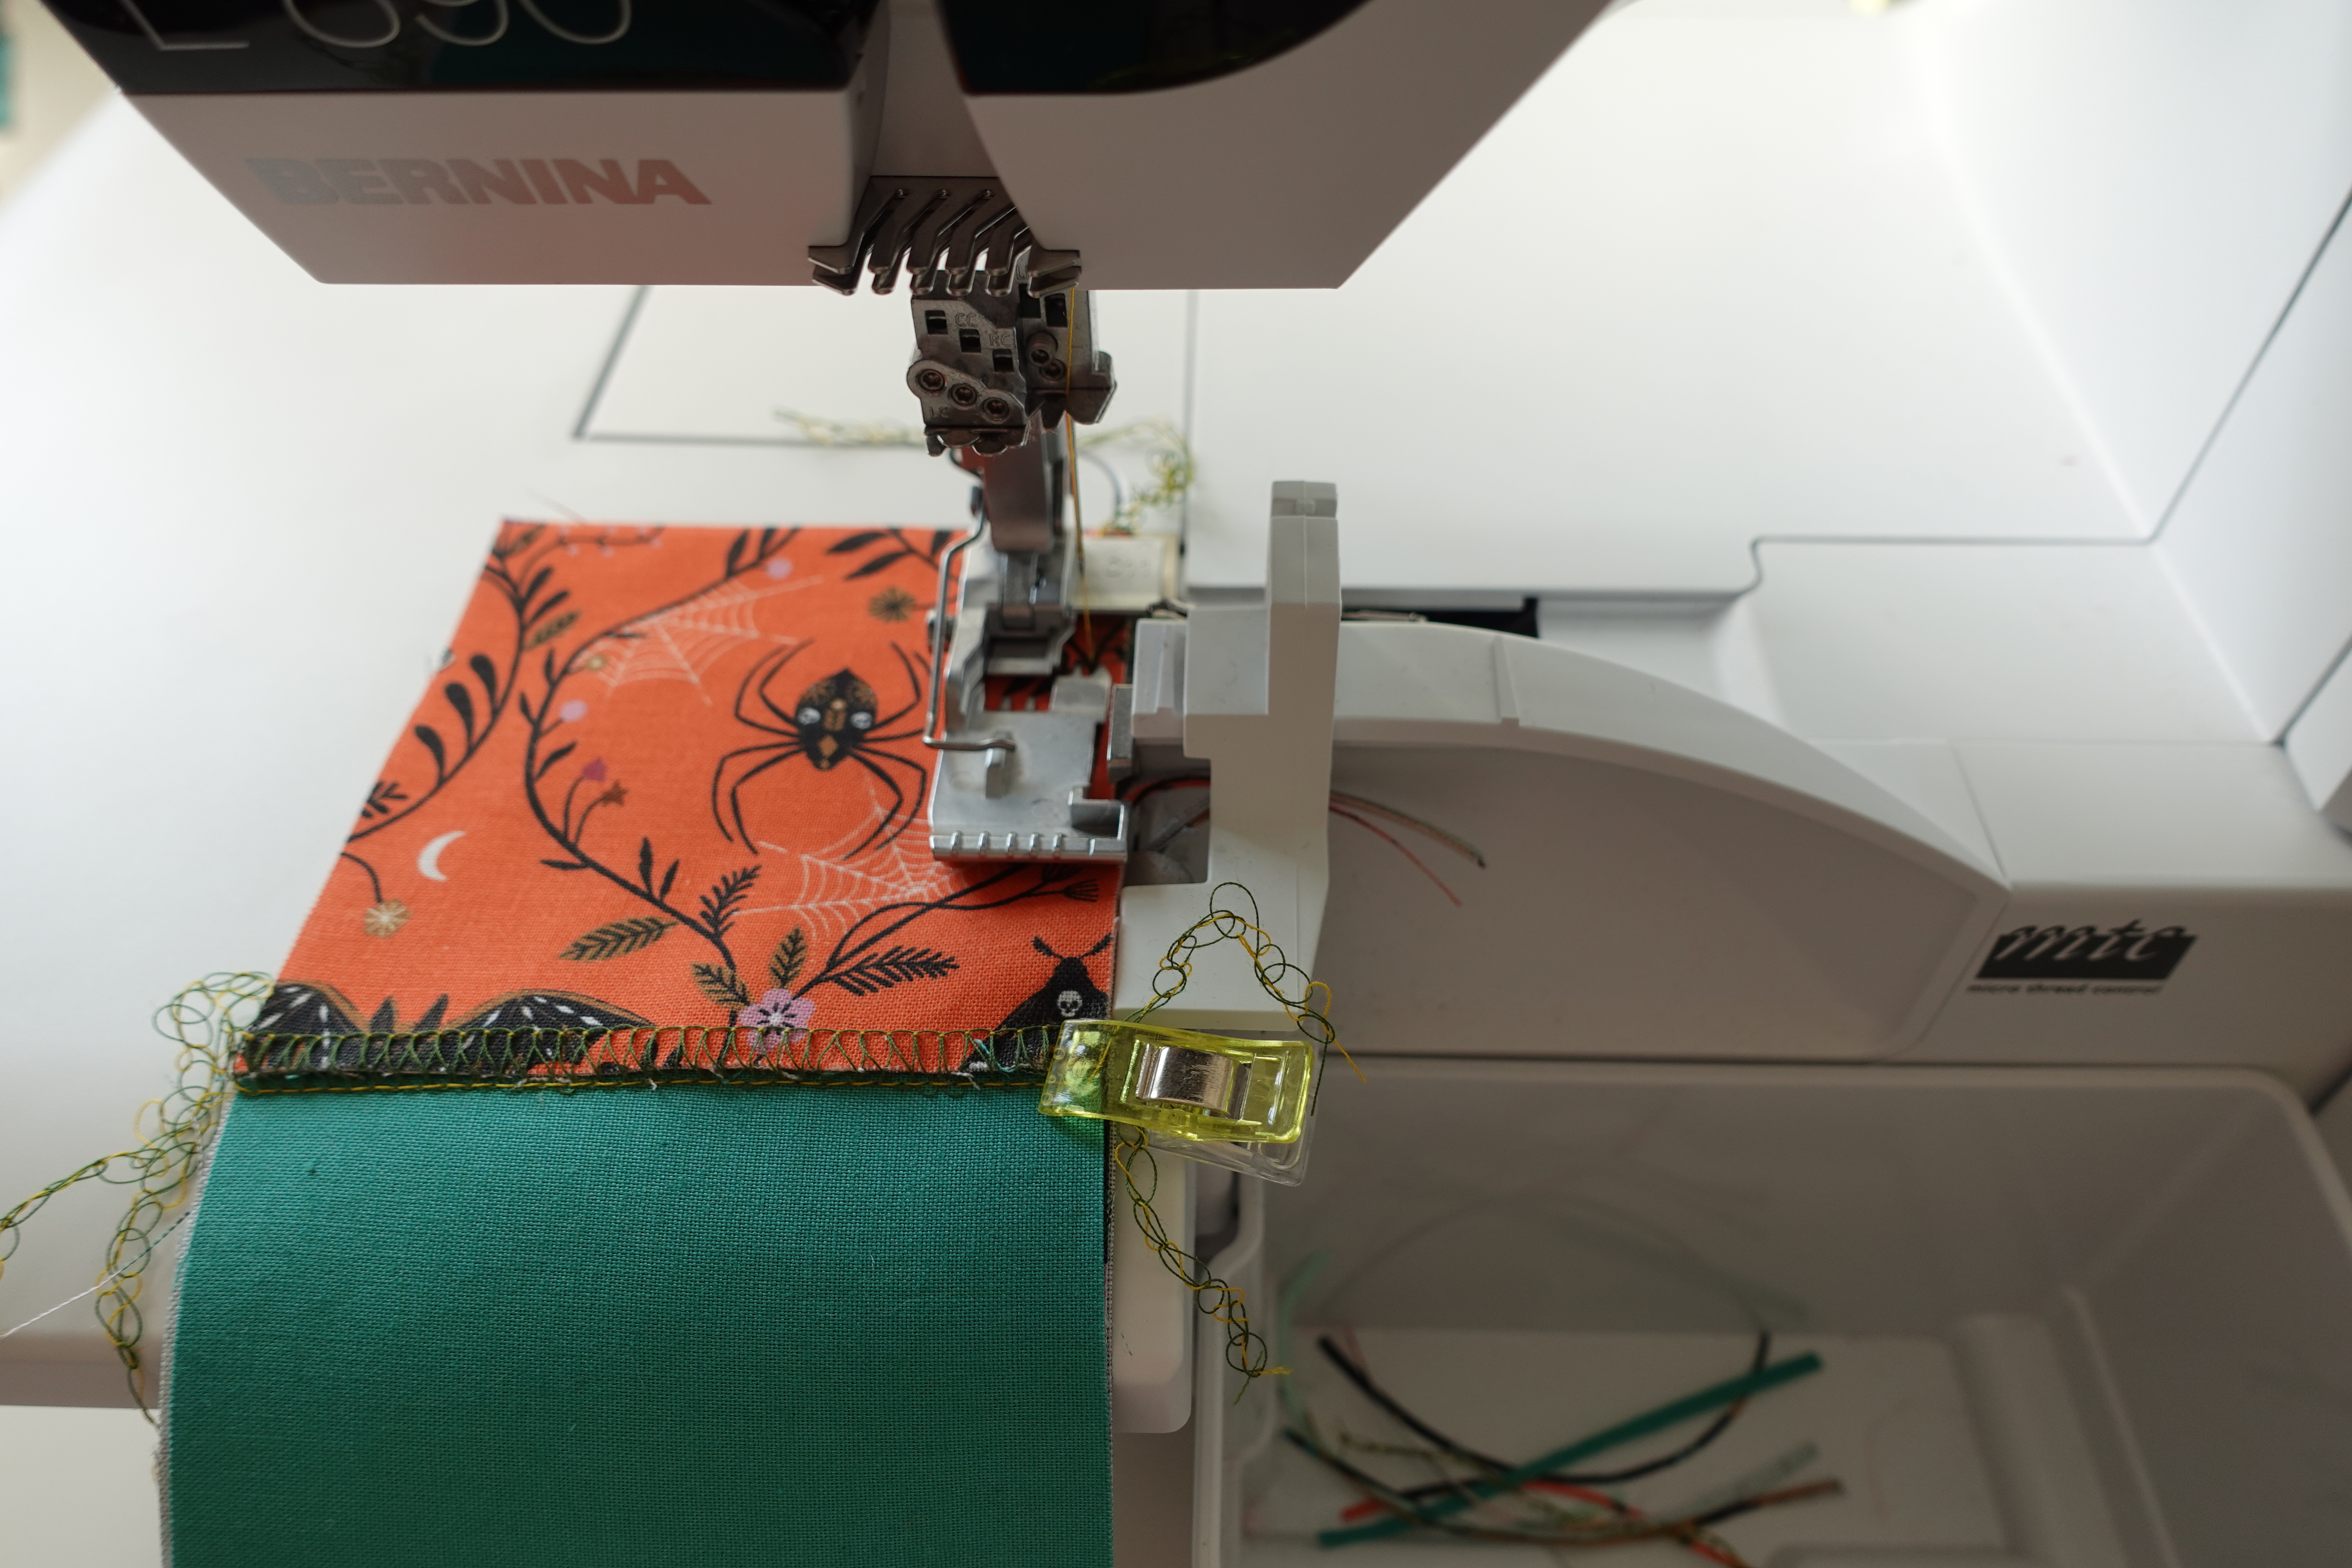
With our four patch we will take the top left squares (wrong sides together) and the bottom left squares (wrong sides together) and hold them so the top two squares are now right sides together. At this point you are holding a stack of four fabrics as one stack.
Flatlock along the seam and chain a 2″-3″ tail.
Pull the top two fabrics apart from the bottom two fabrics and adjust as necessary to get your flatlock to lay flat. You did it! Repeat this process with the other pair in the four patch. Do not cut any thread tails, I want you to leave them long.
Tip: I recommend being careful to always lay your flatlock the same way. Example: In my bag, the bottom squares lay over the top squares and the left pairs over the right, every time. This helps everything lay flat, look perfect and brings some uniformity to the project.

Now we will flatlock our two pairs together. I used my Wonder Clips to secure the centers first, this allowed me to make sure I would get perfectly aligned centers. Two thread tails will get cut off in this seam, that’s okay!
Ensure the thread tails are out of the seam and pulled to the right of the fabric as they go through the knife. This will cut your threads, breaking them open, then immediately secure them again. For this reason, be sure you don’t stop your overlocker over the seam unless it’s absolutely necessary, or you could run the risk of weakening the seam.
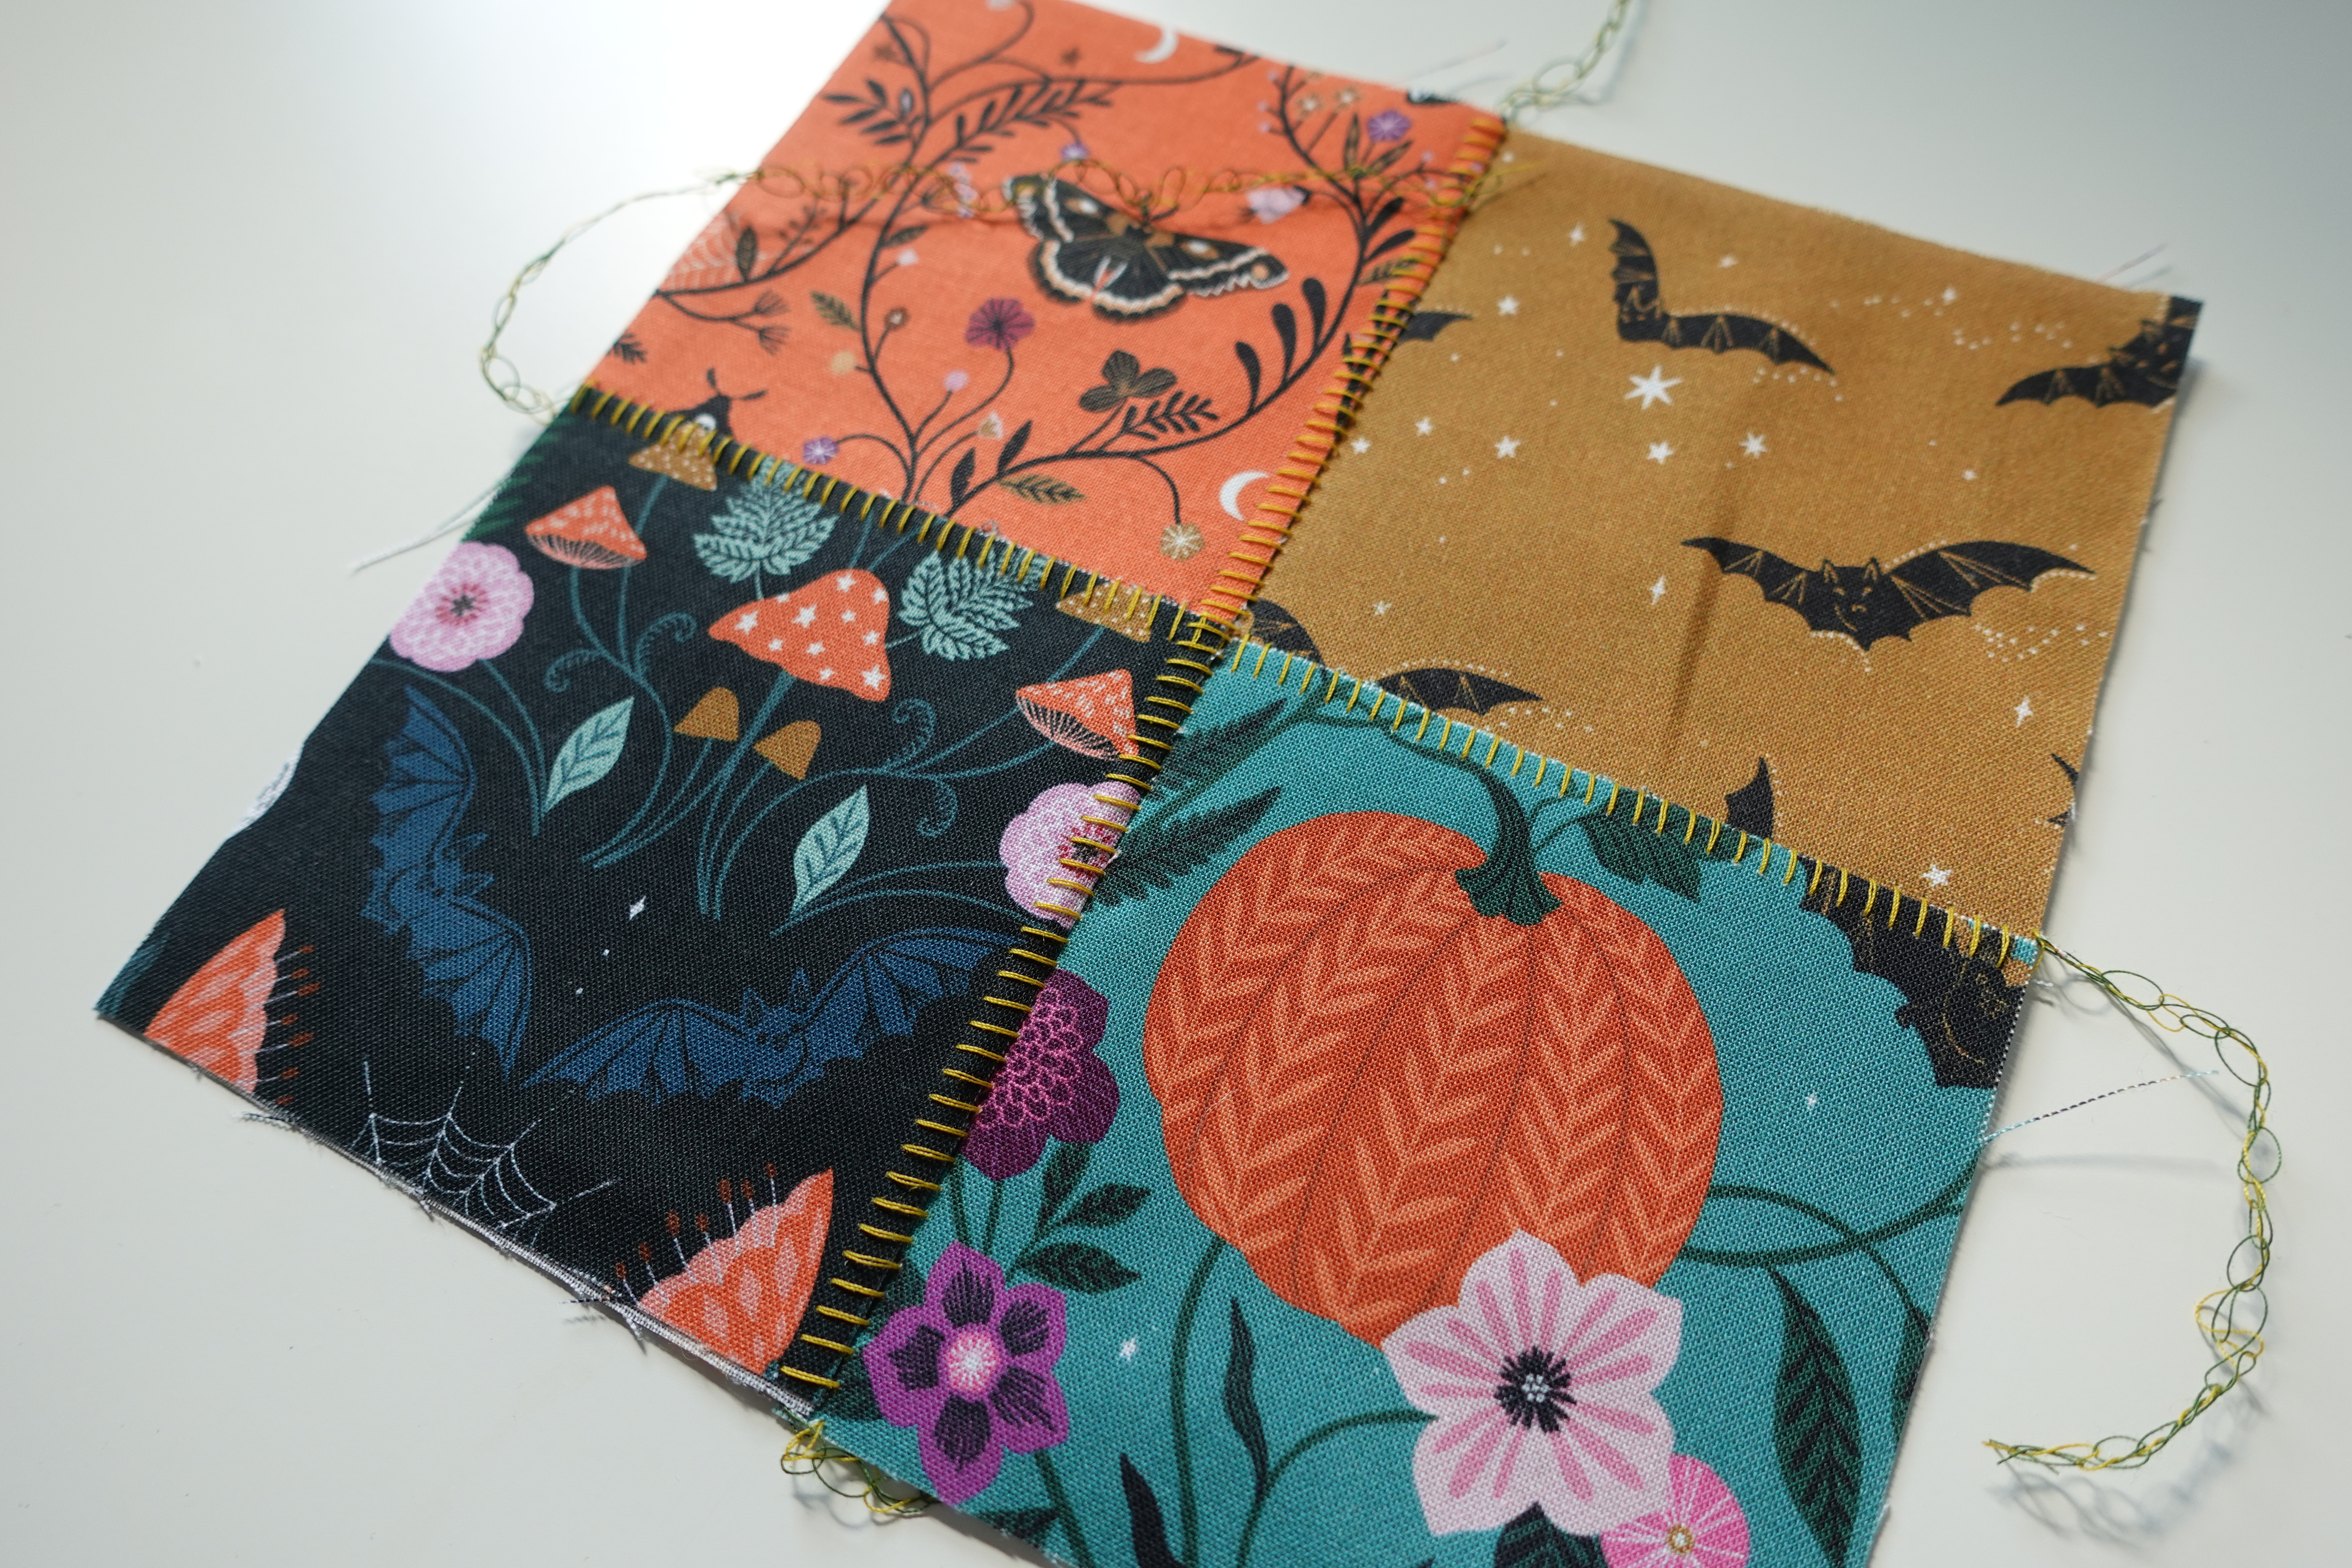
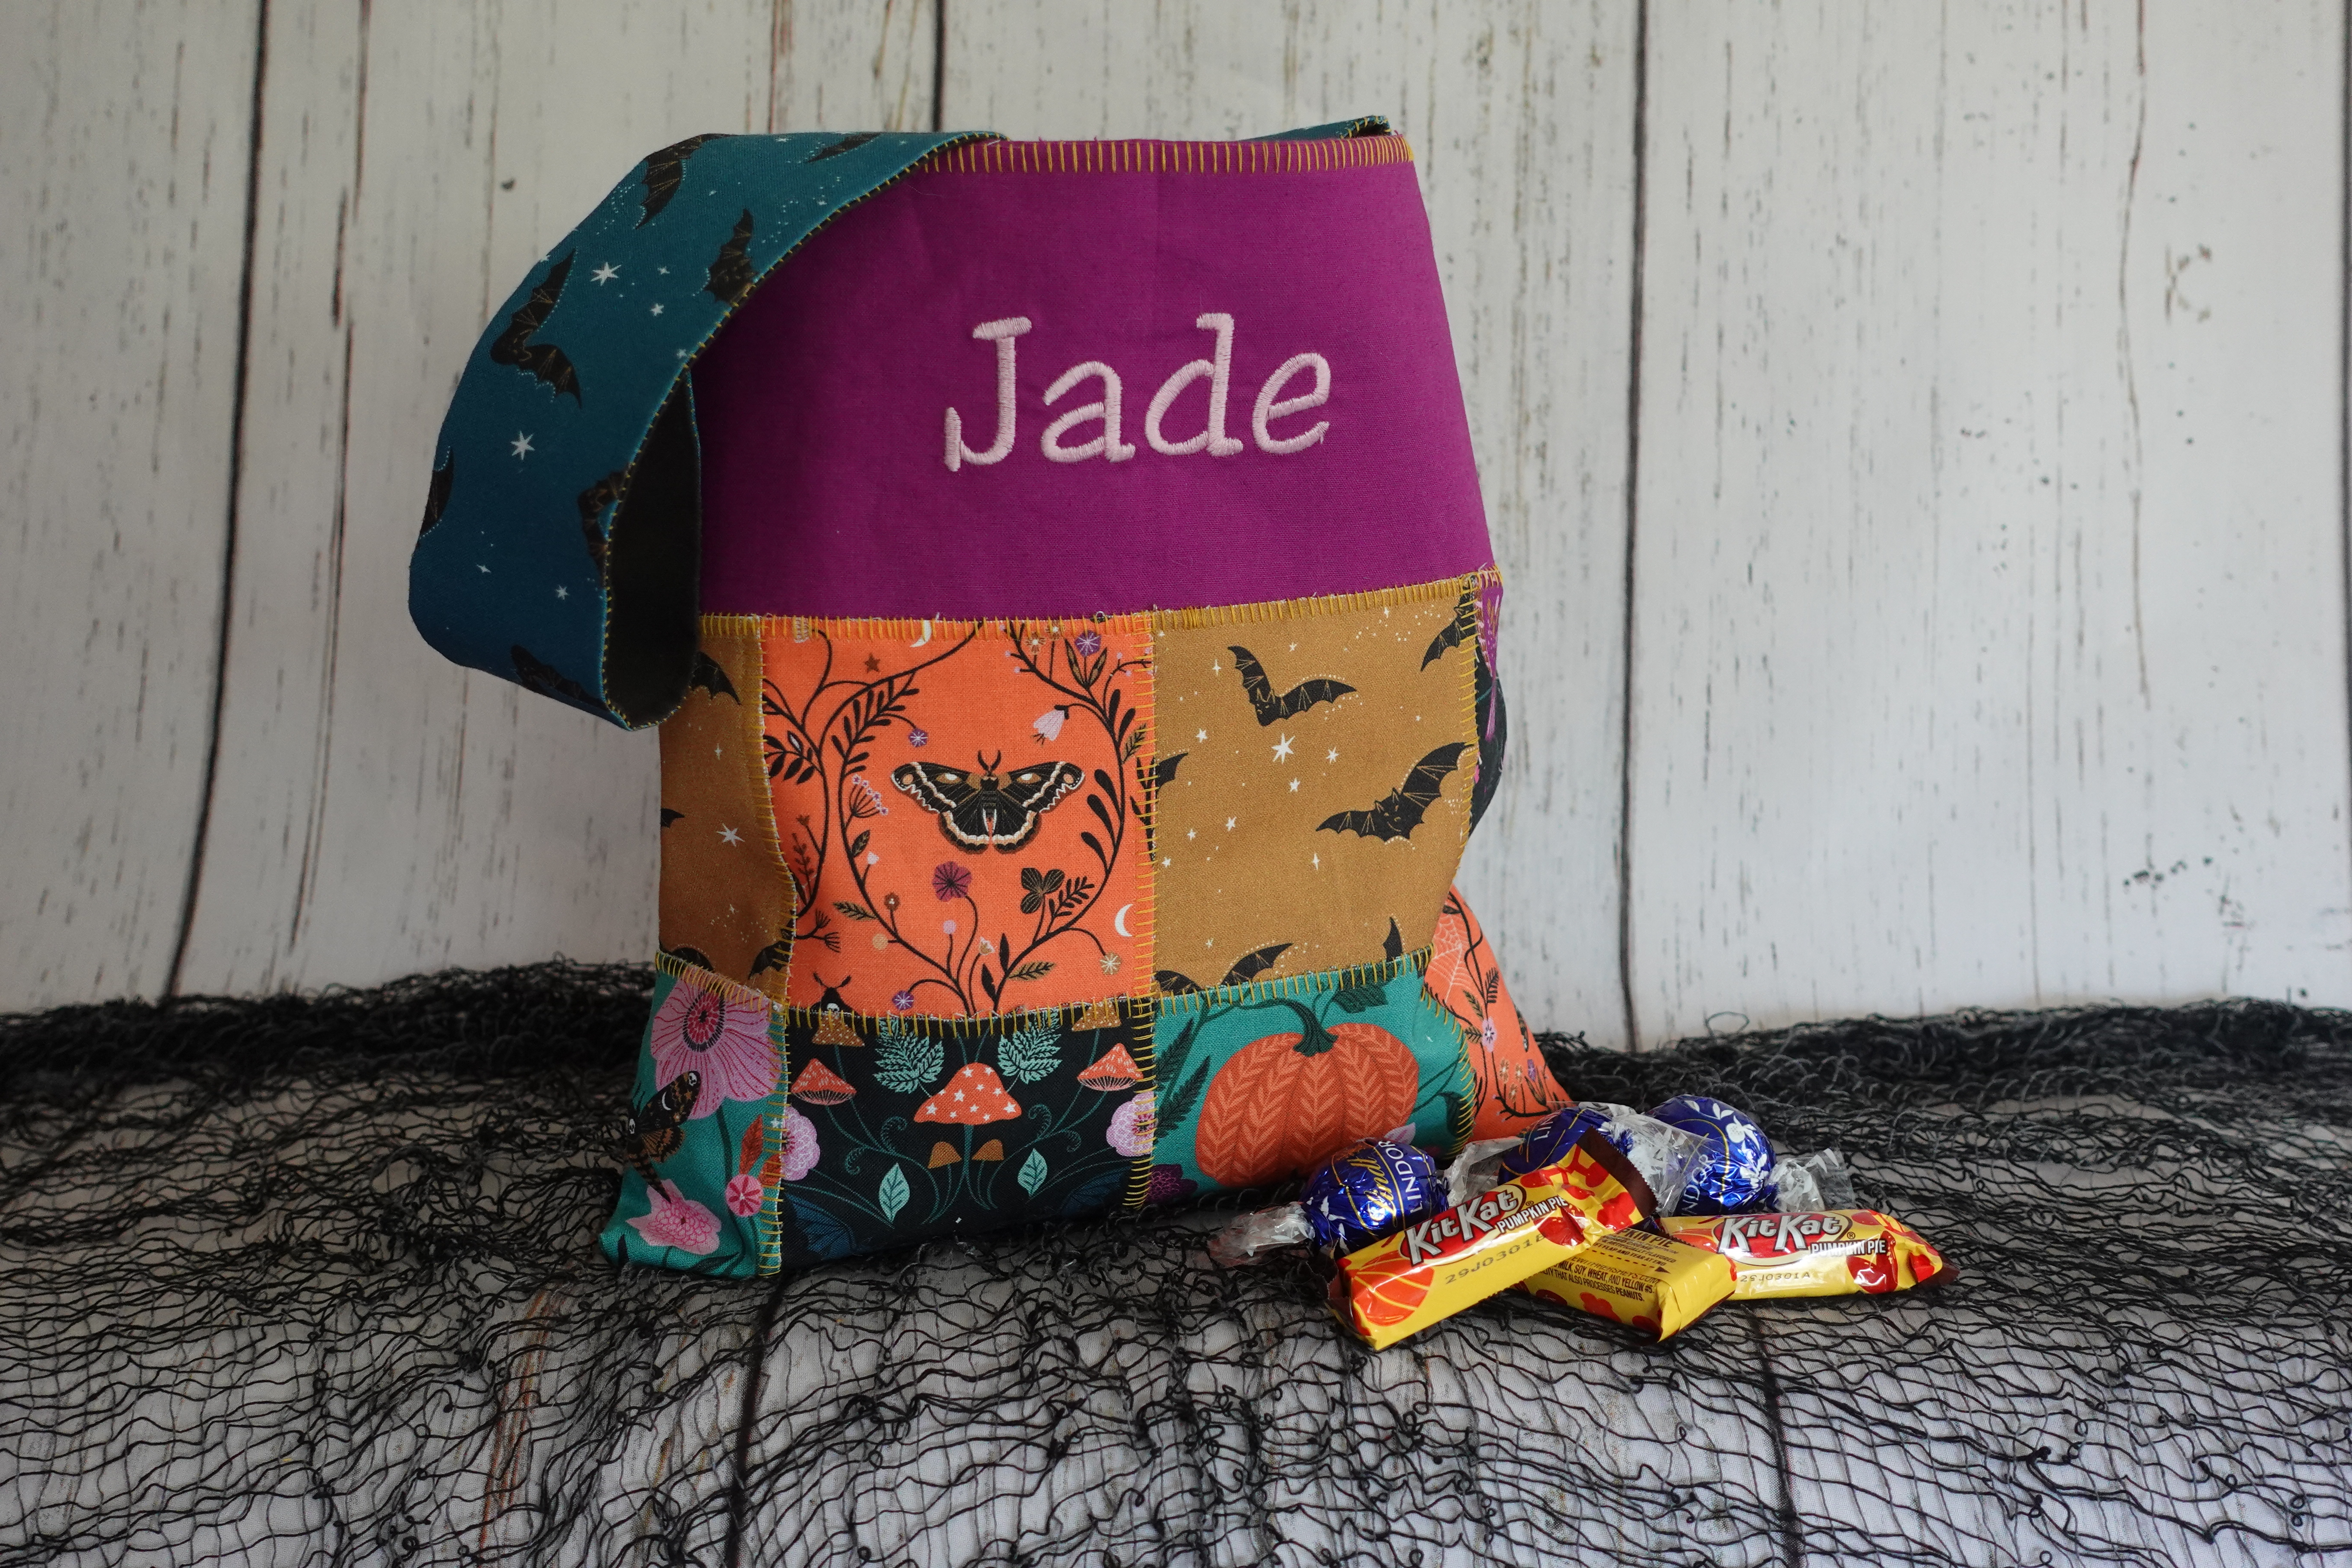
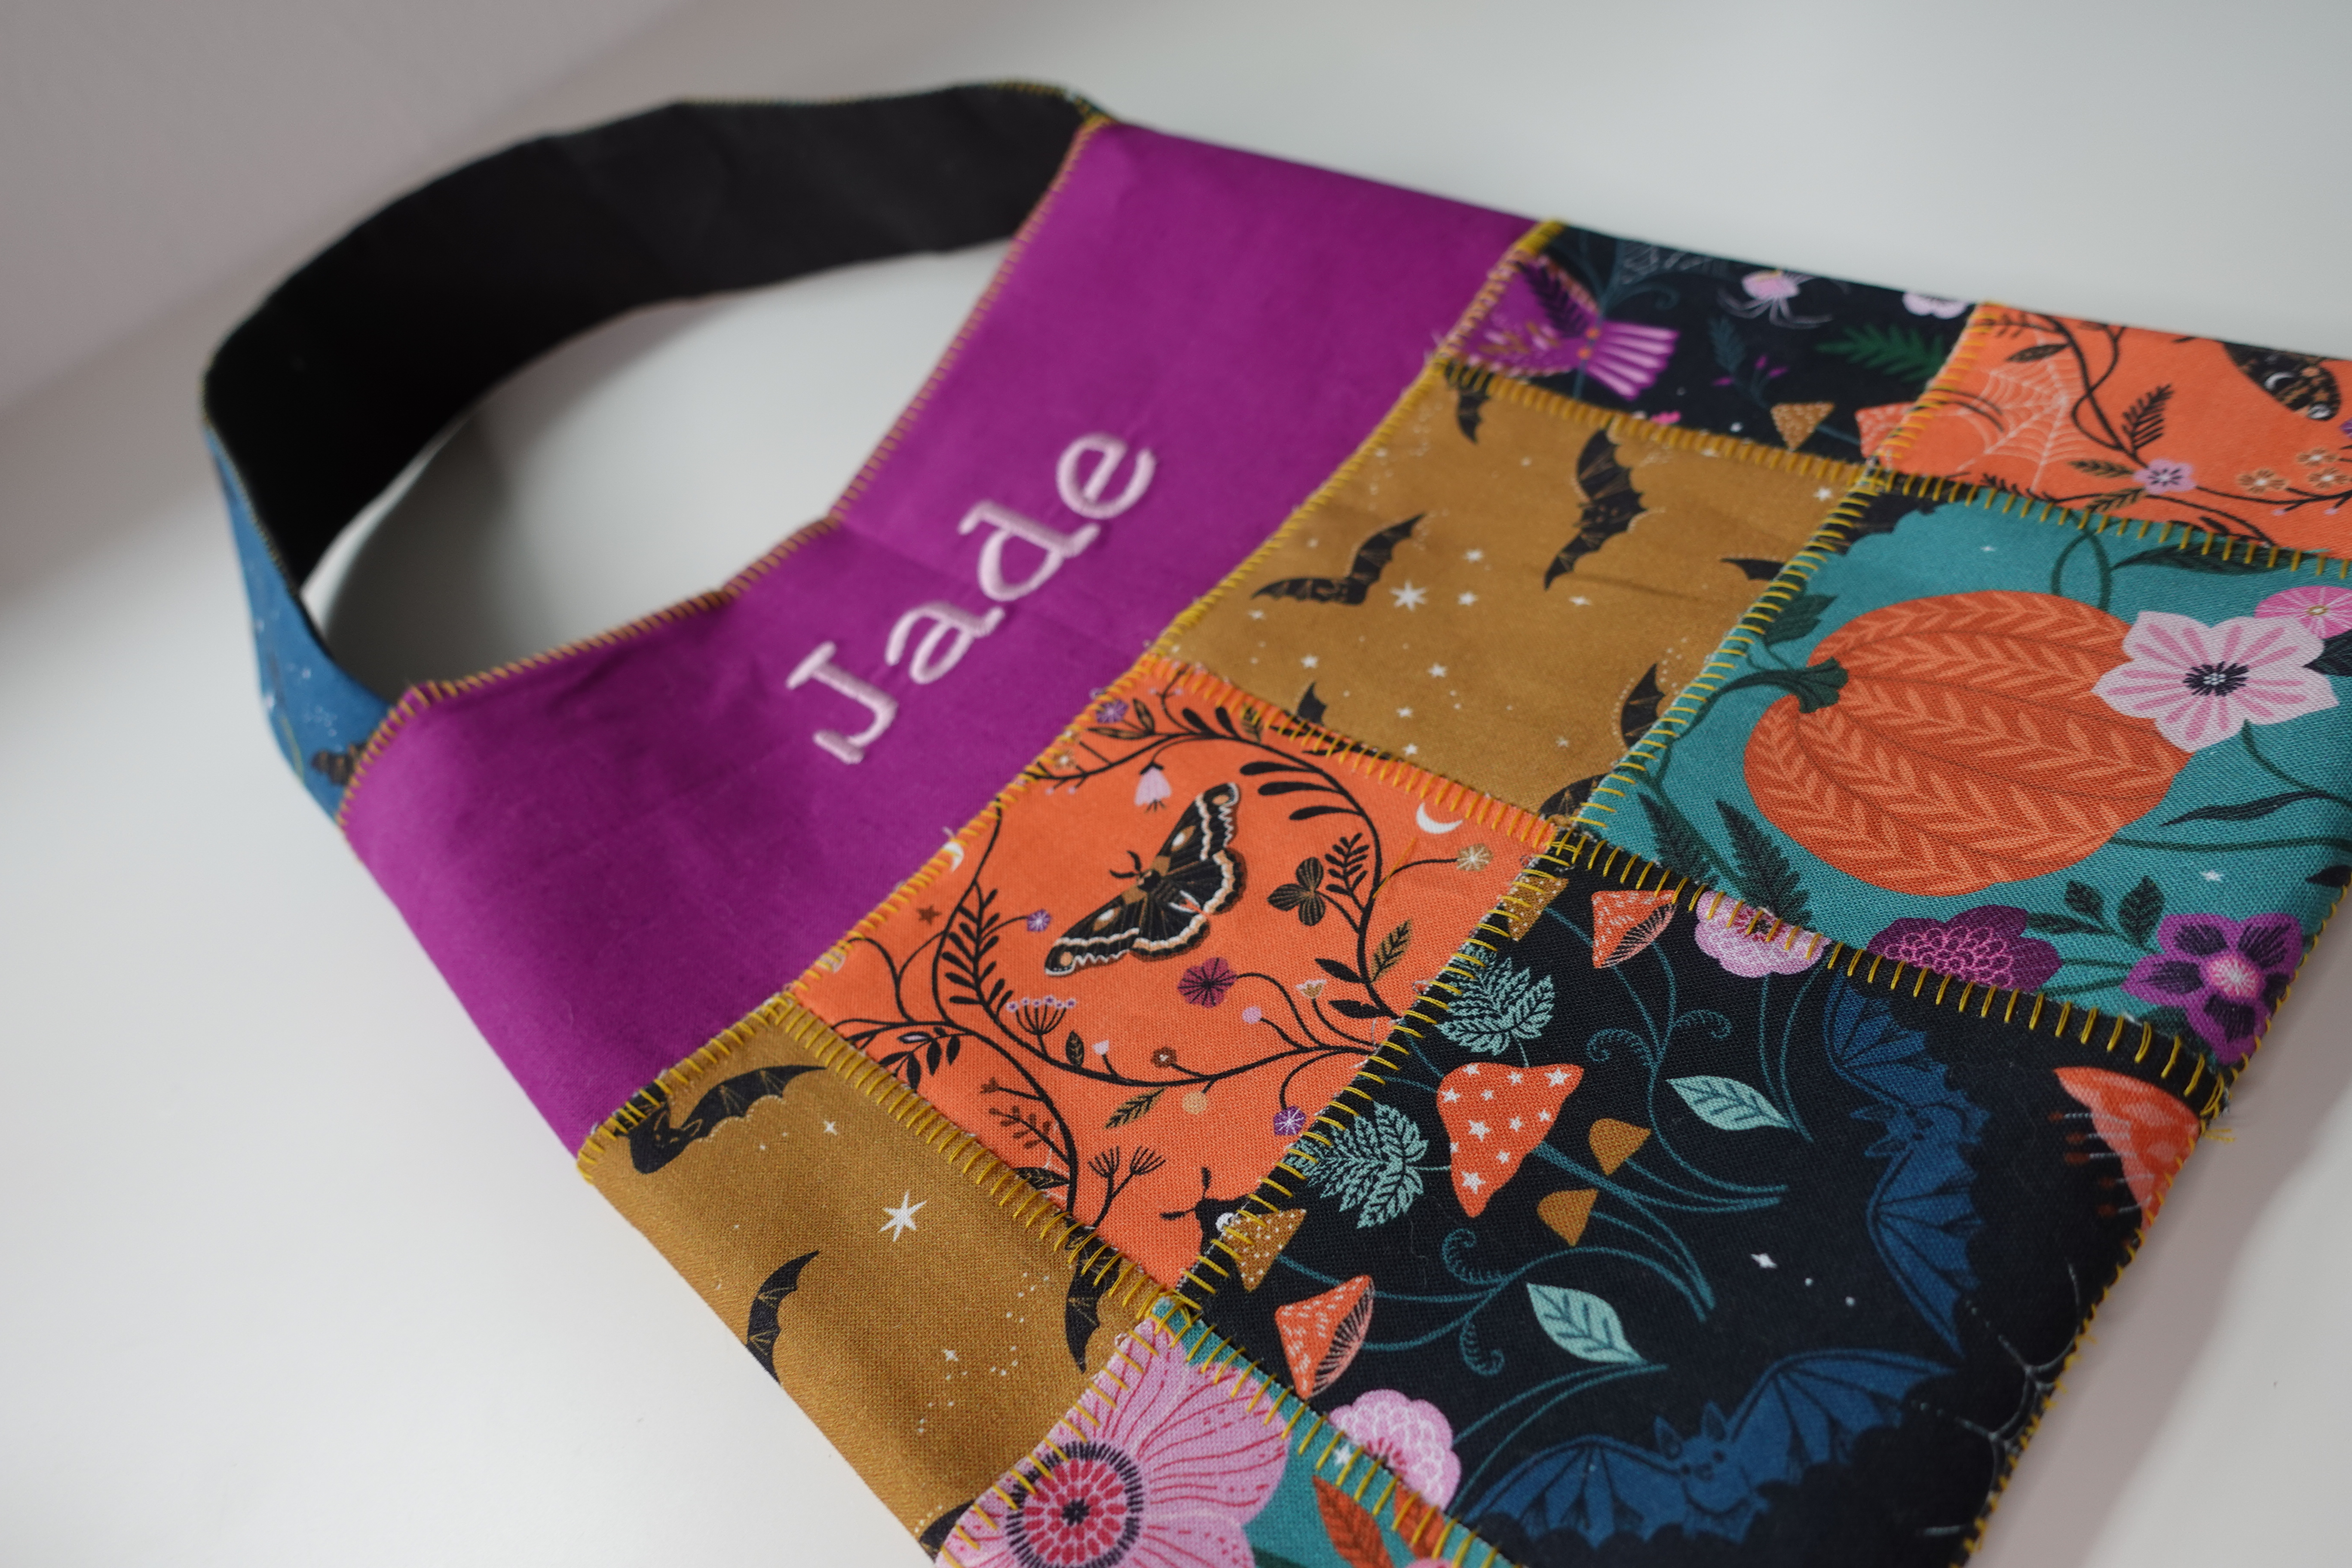
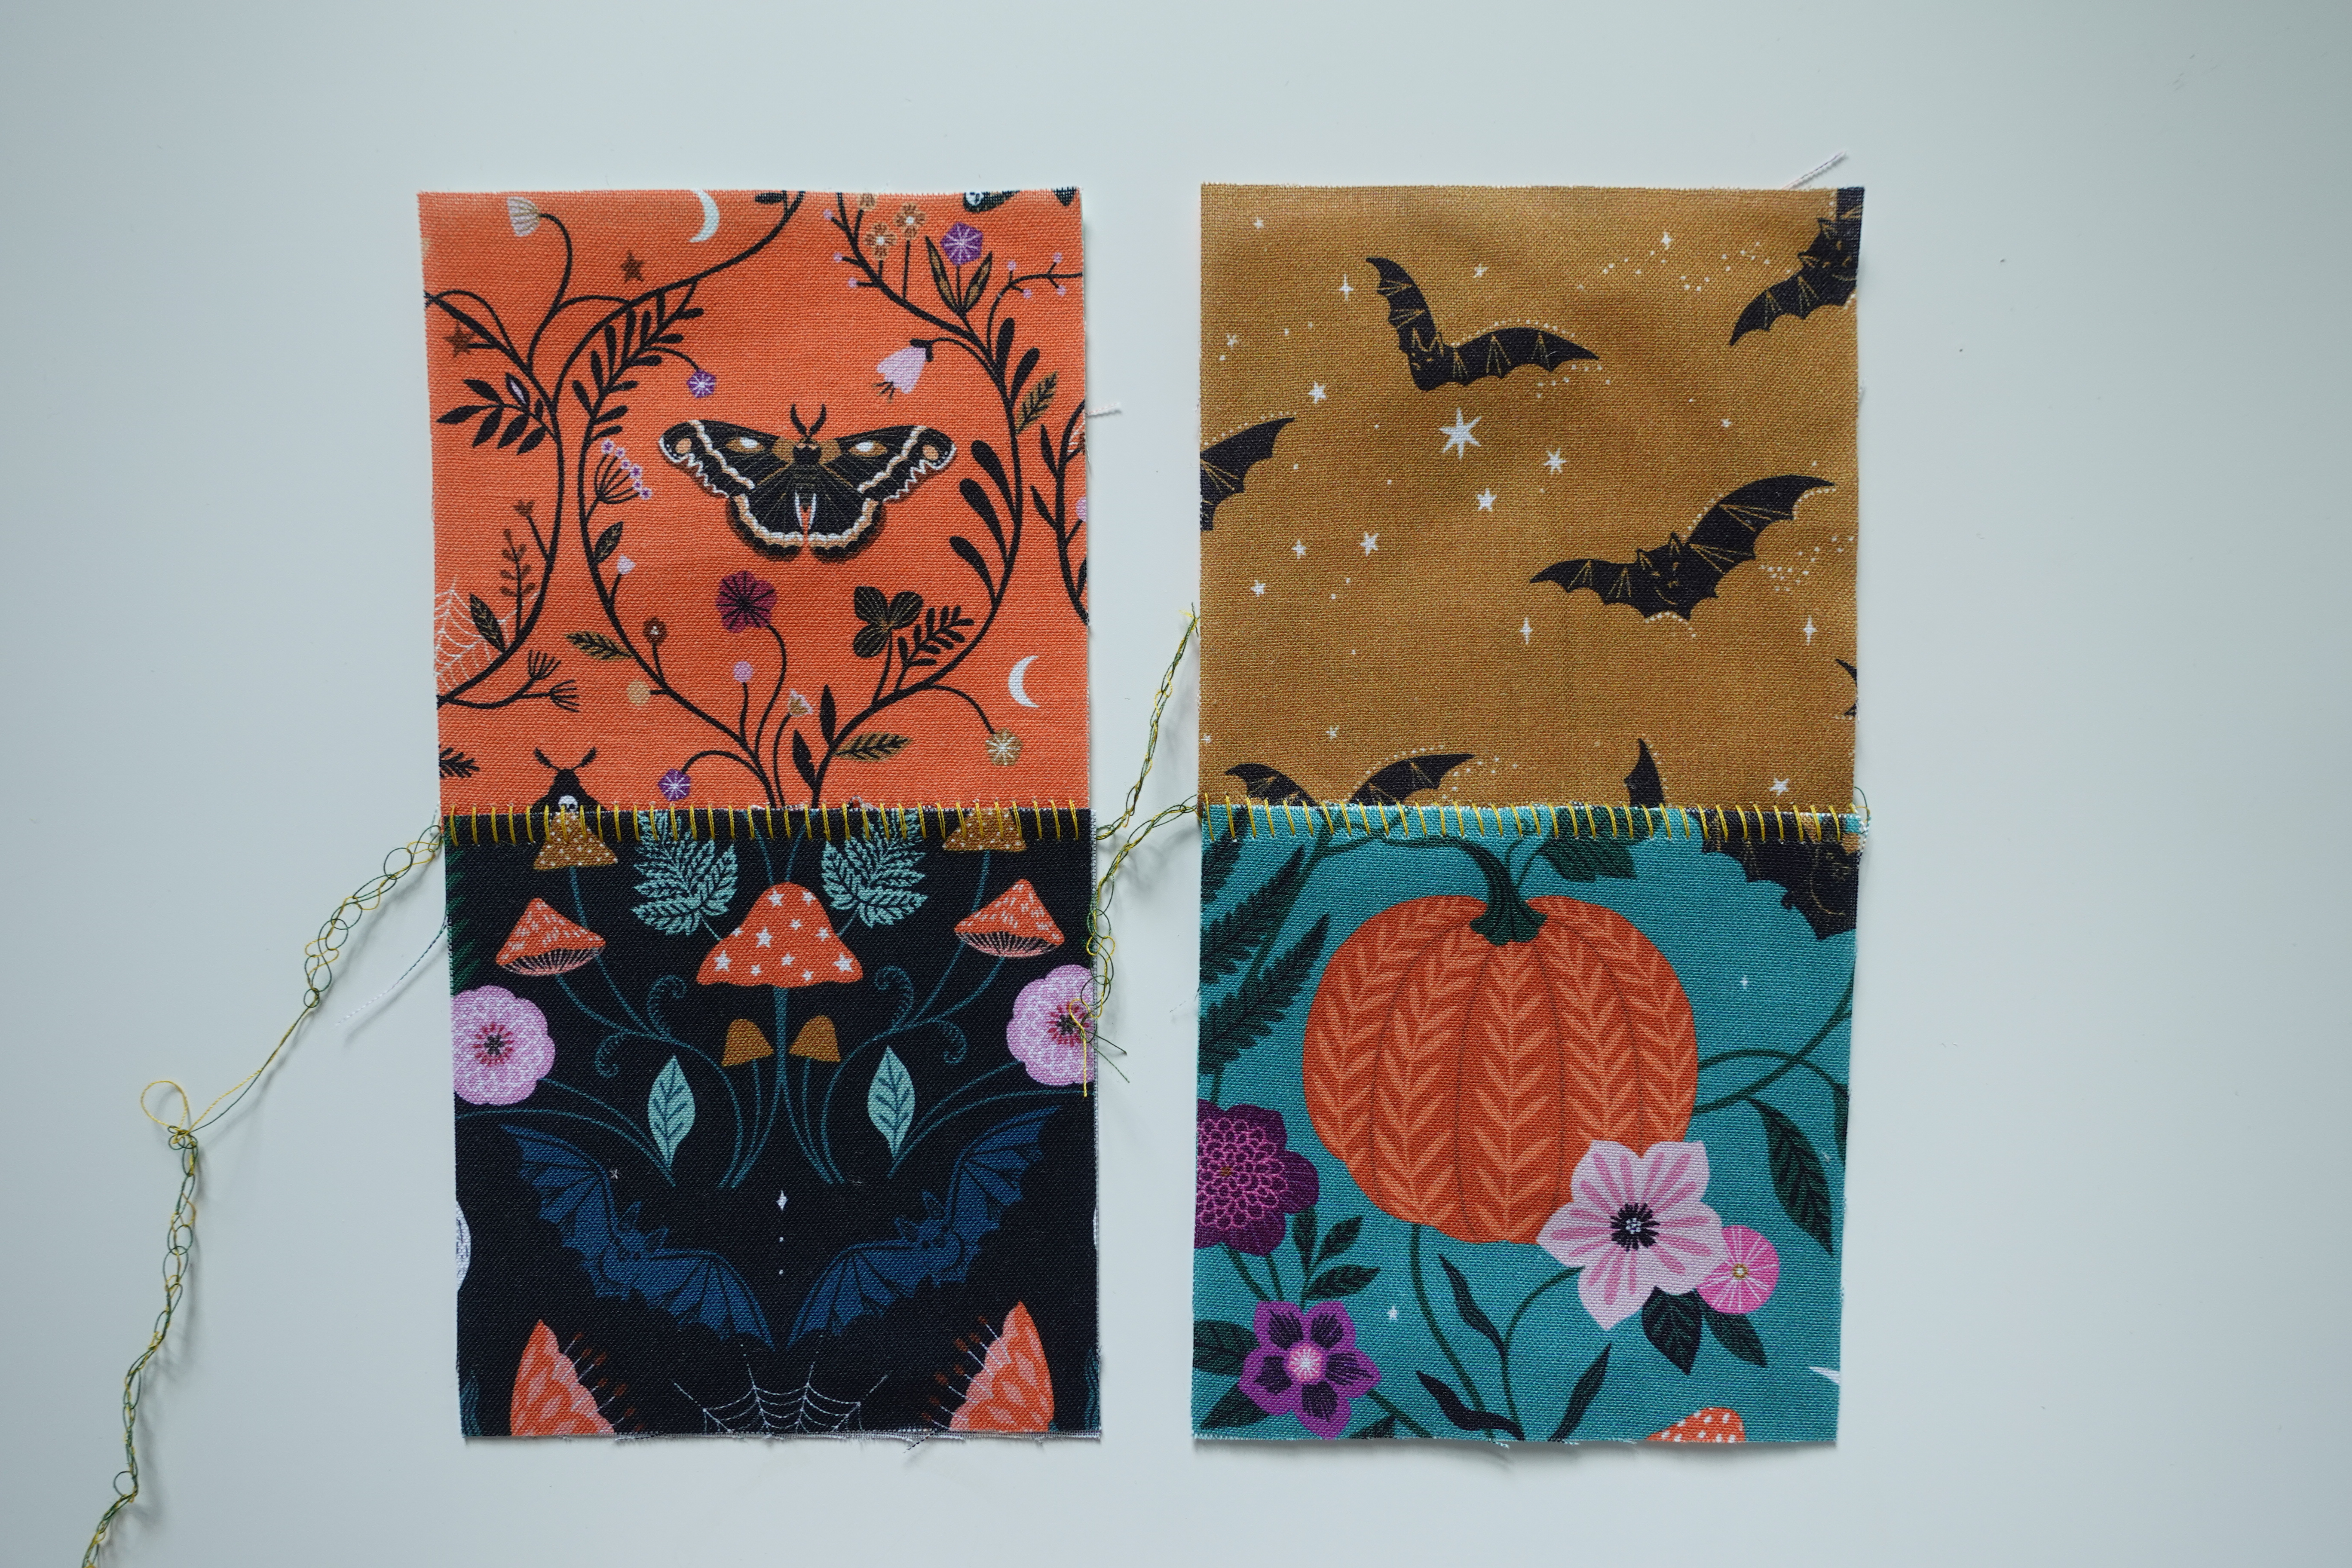
Yay! You have your first four patch! This is the right side of the bag.
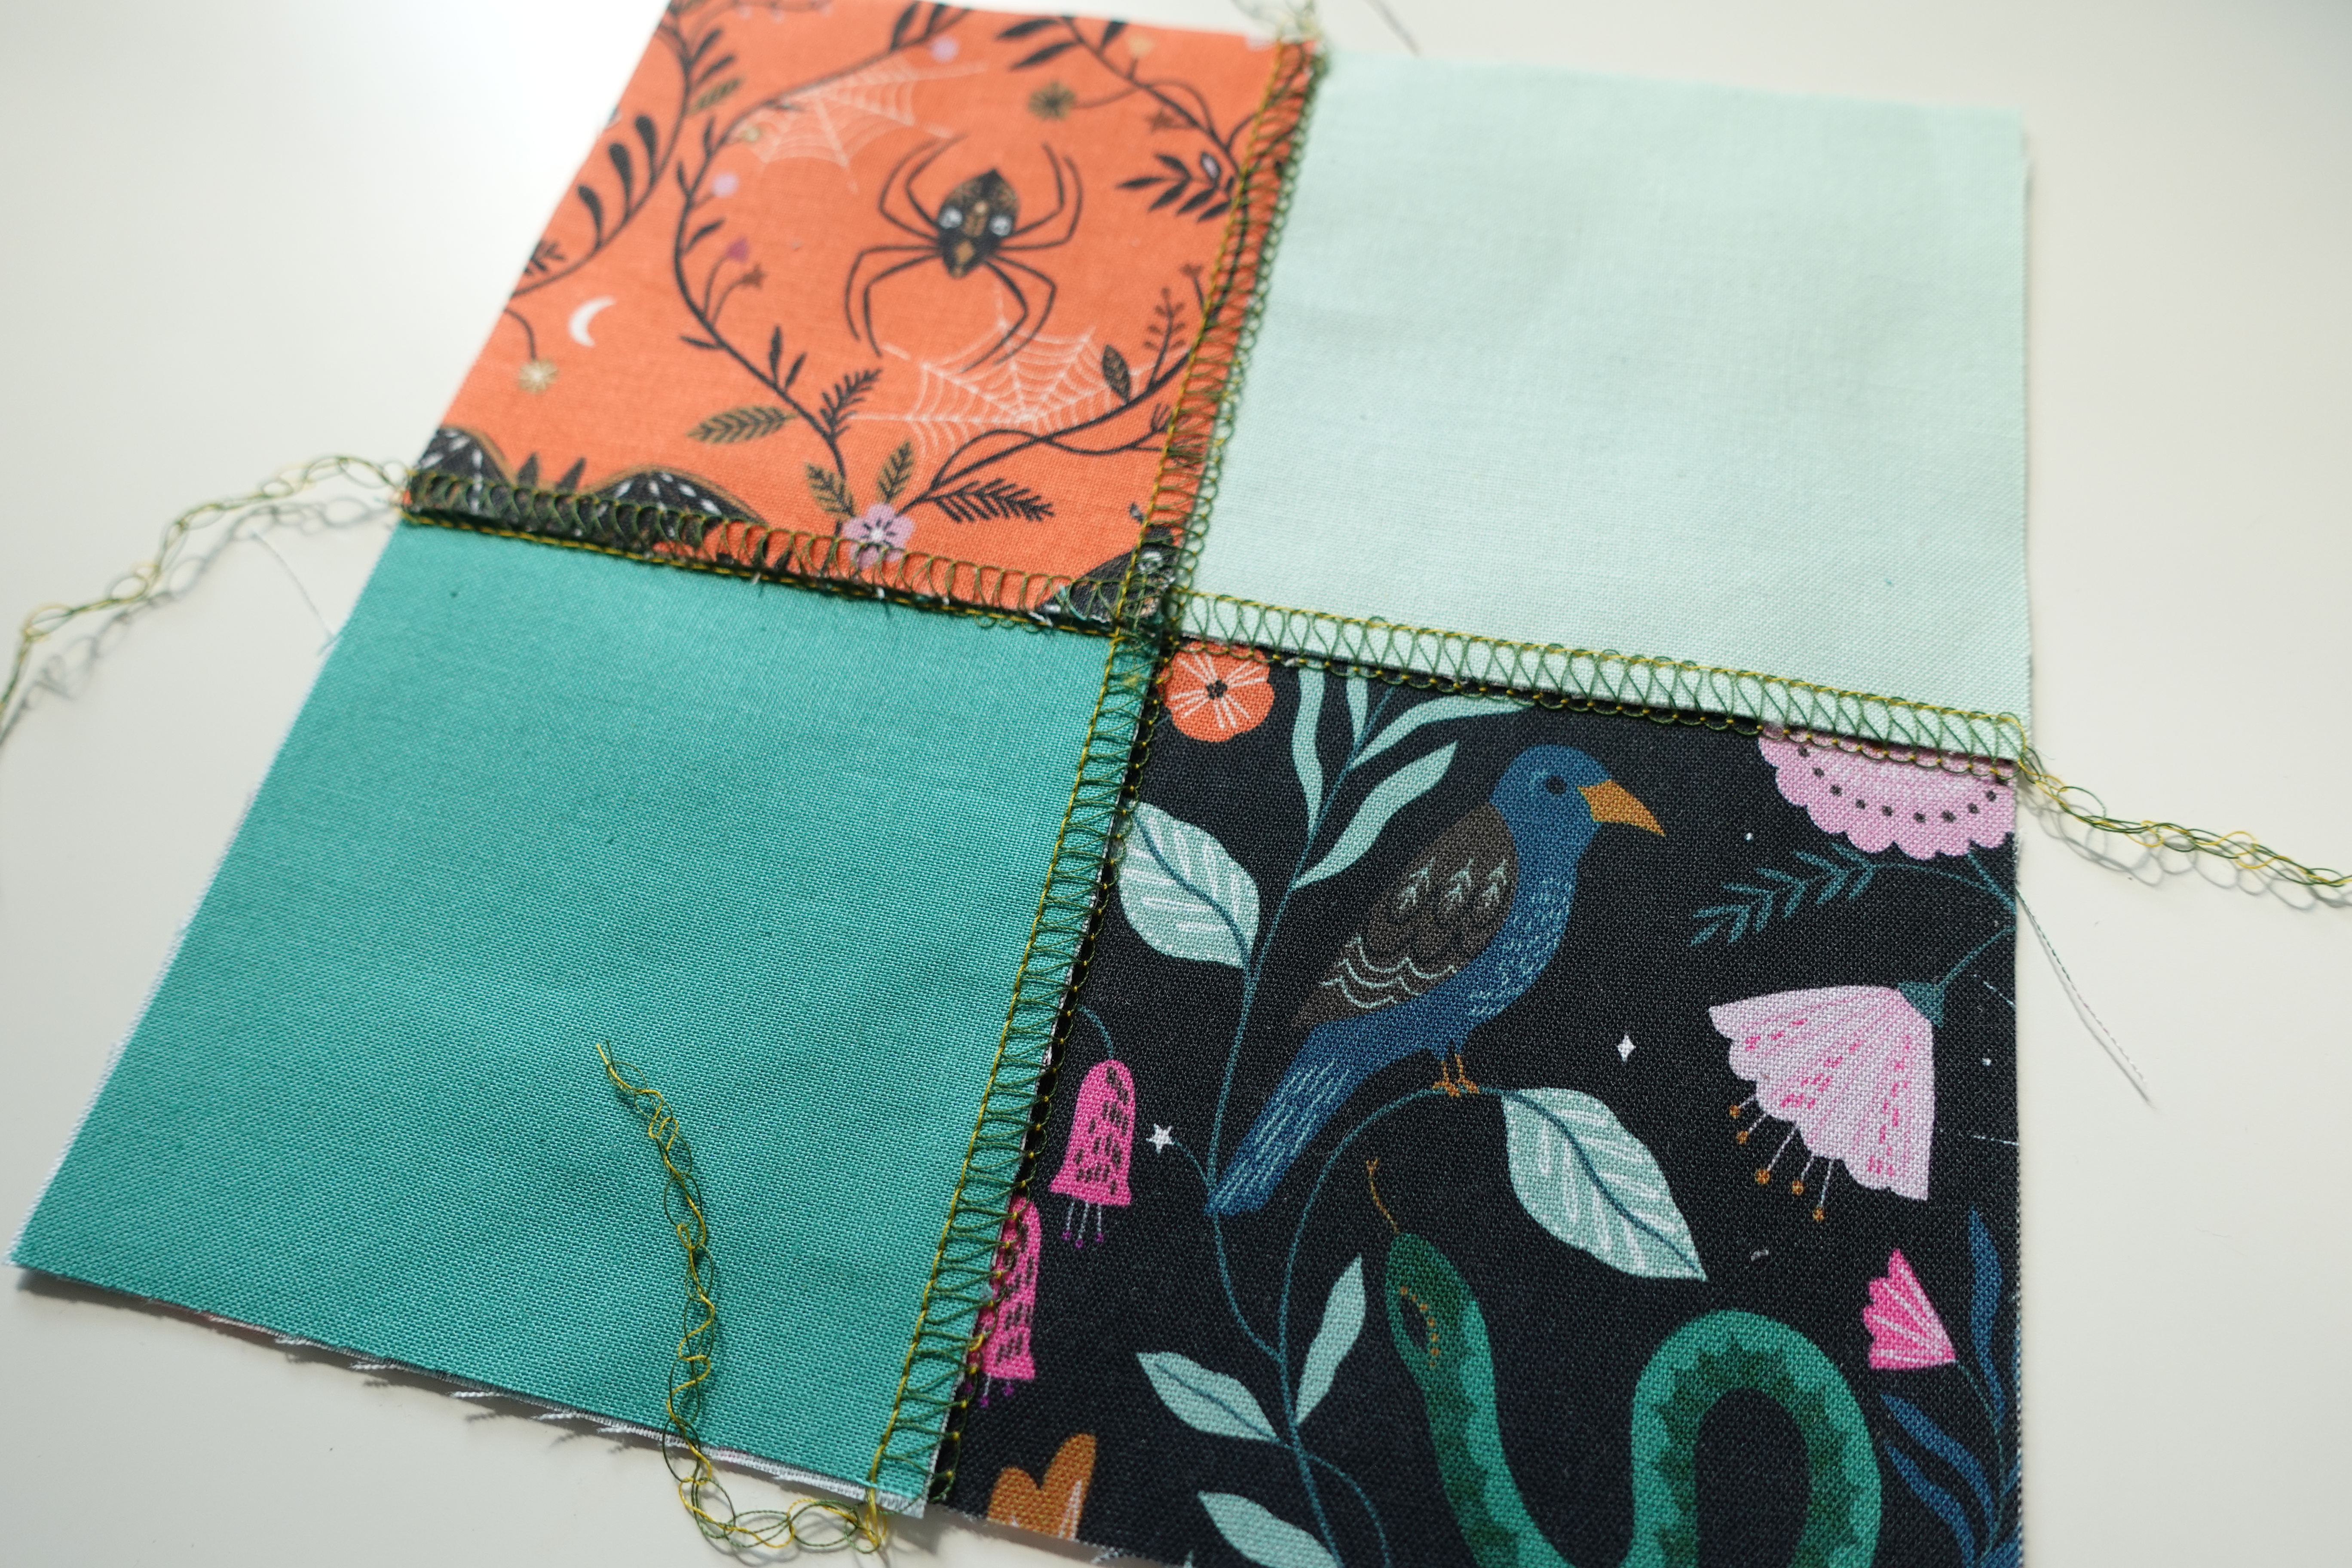
And here is the inside of our self-lining bag! See how the flatlock looks different on top and on the bottom? I liked the stitched look for the bag since it reminds me of a Frankenstein-y, hocus pocus kinda feel. But you choose which you like most! And yes, I do wish I had used the same color in my loopers as my needle. I thought the green would look good and add some interest but meh…it’s a kid’s bag! We are rolling with any and all “discoveries” (aka mistakes).
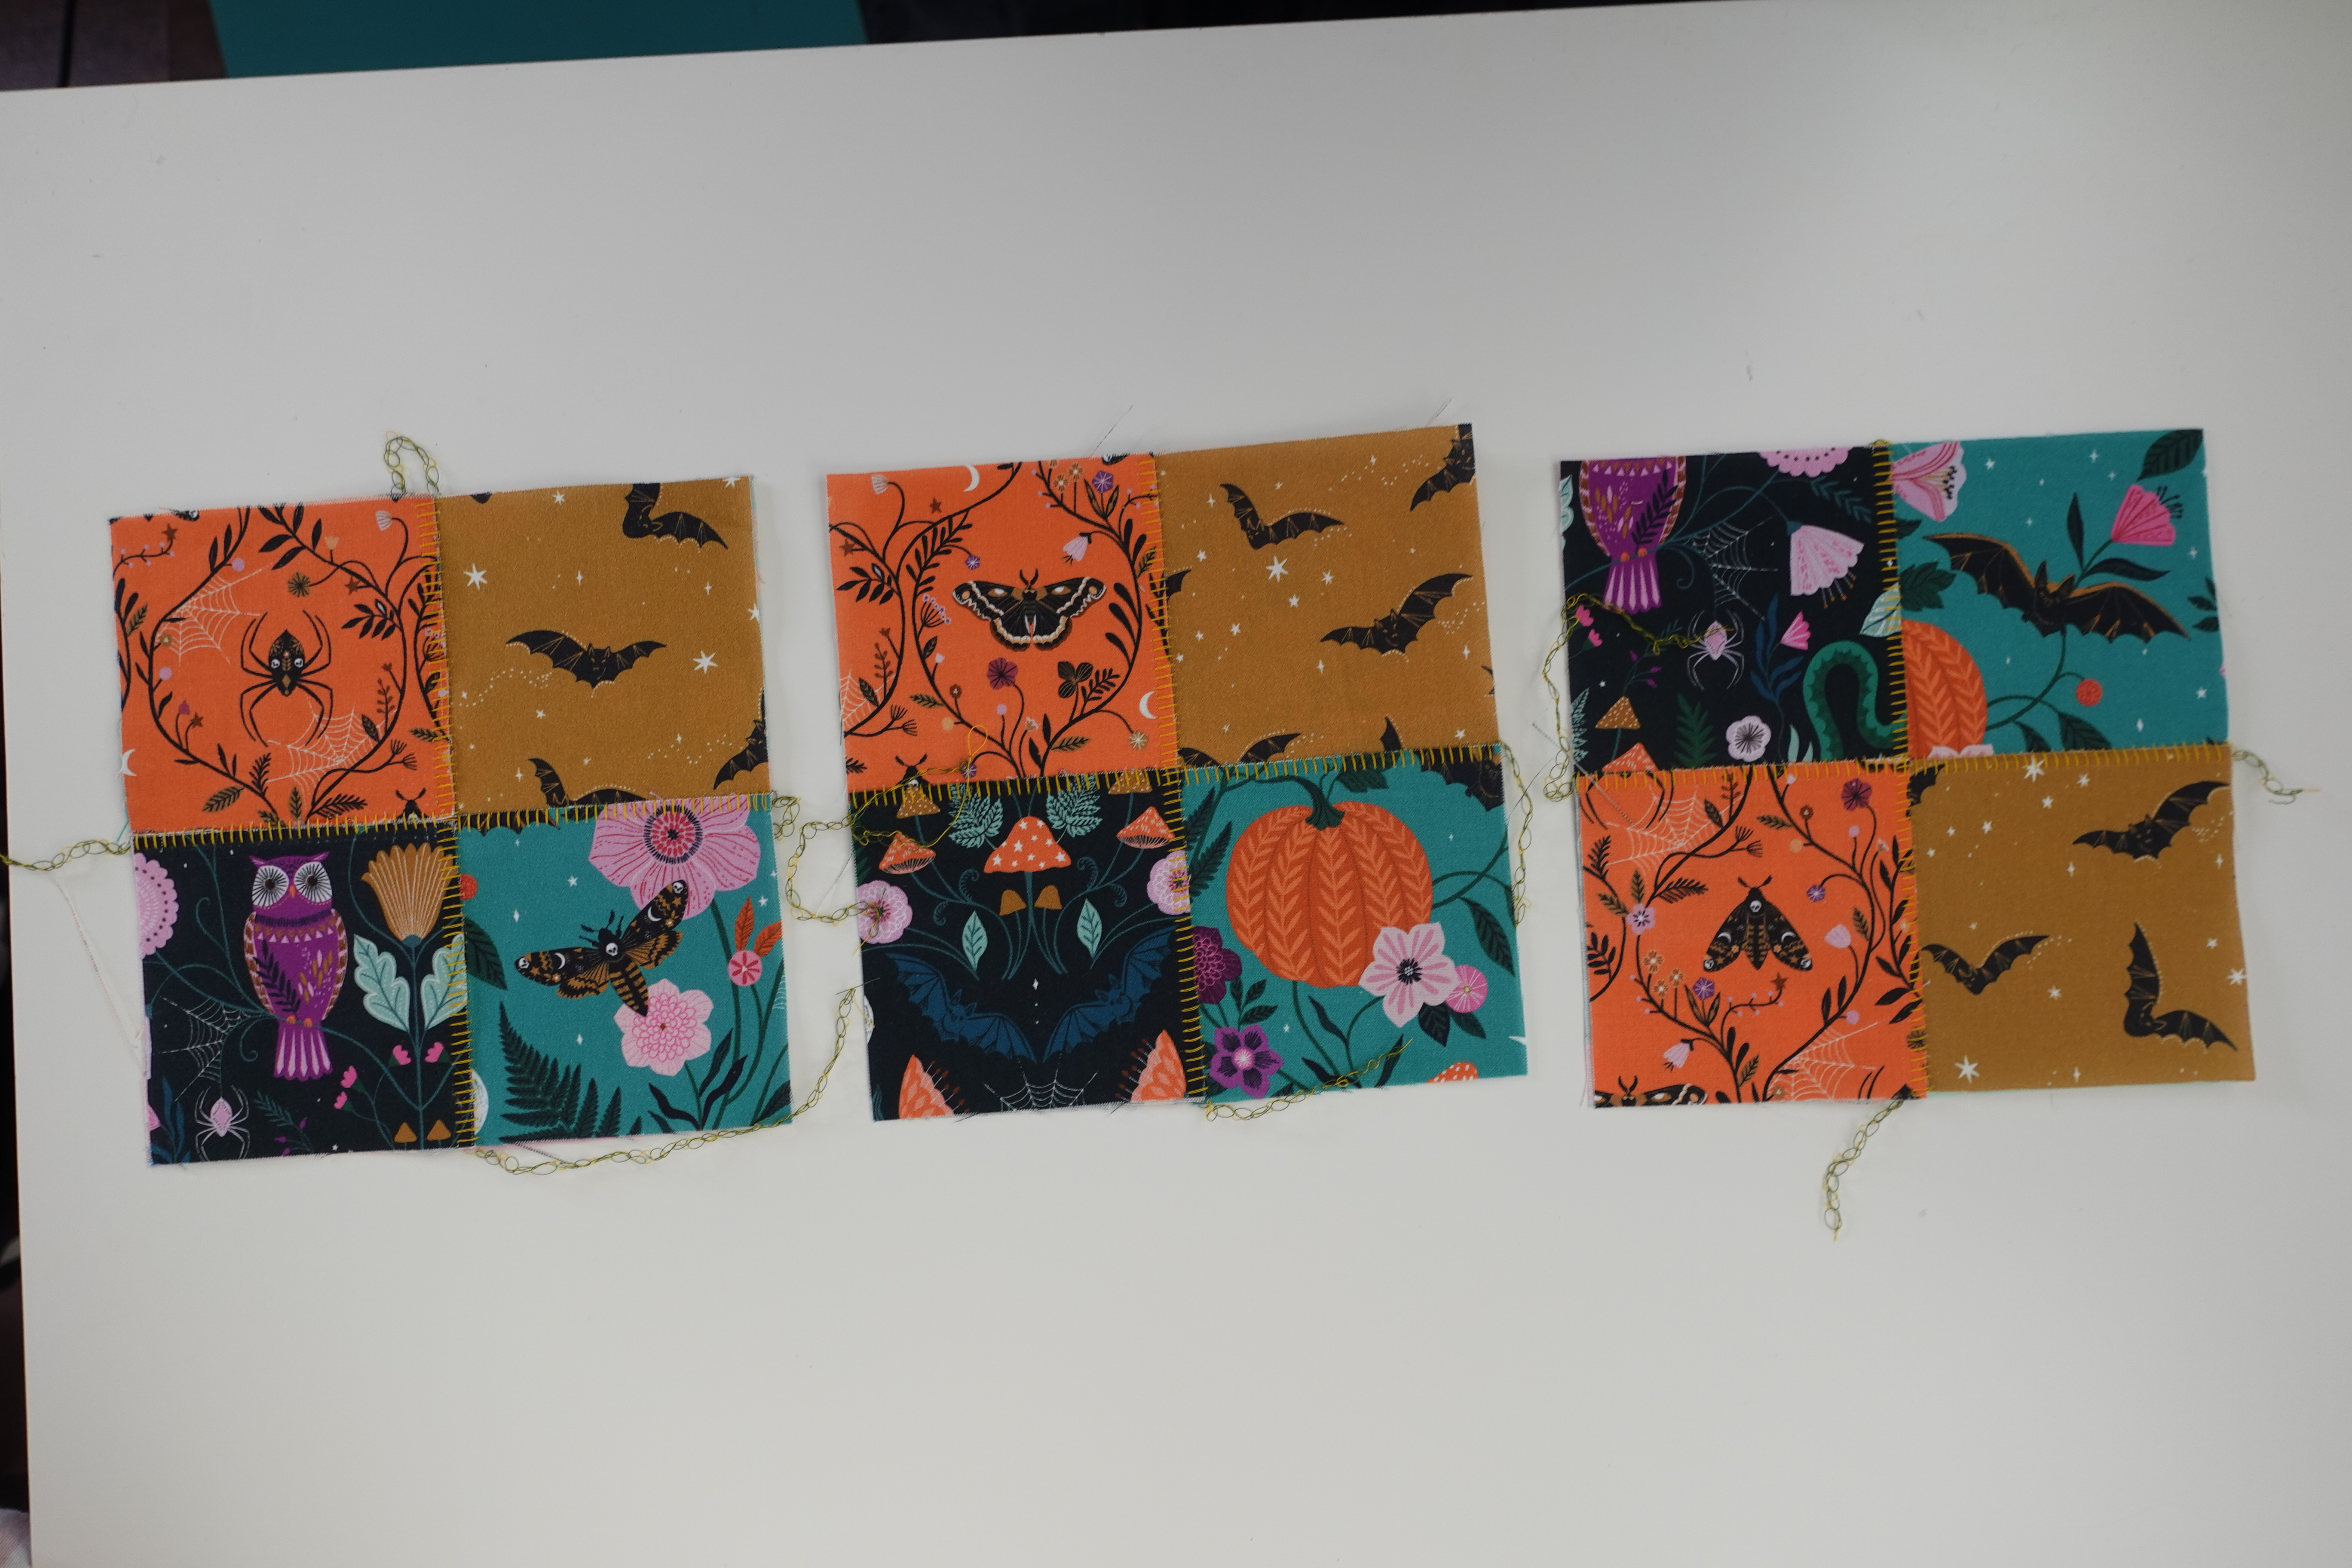
Continue to make your (3) four patches to finish the bag.
At this point, you want to be really sure you like the layout of the four patches. I got mine out of order here and didn’t notice until almost the end of the bag and it drives me a little batty (pun intended). But once again, it’s a kid’s bag and this is not the project to sweat stuff like that. 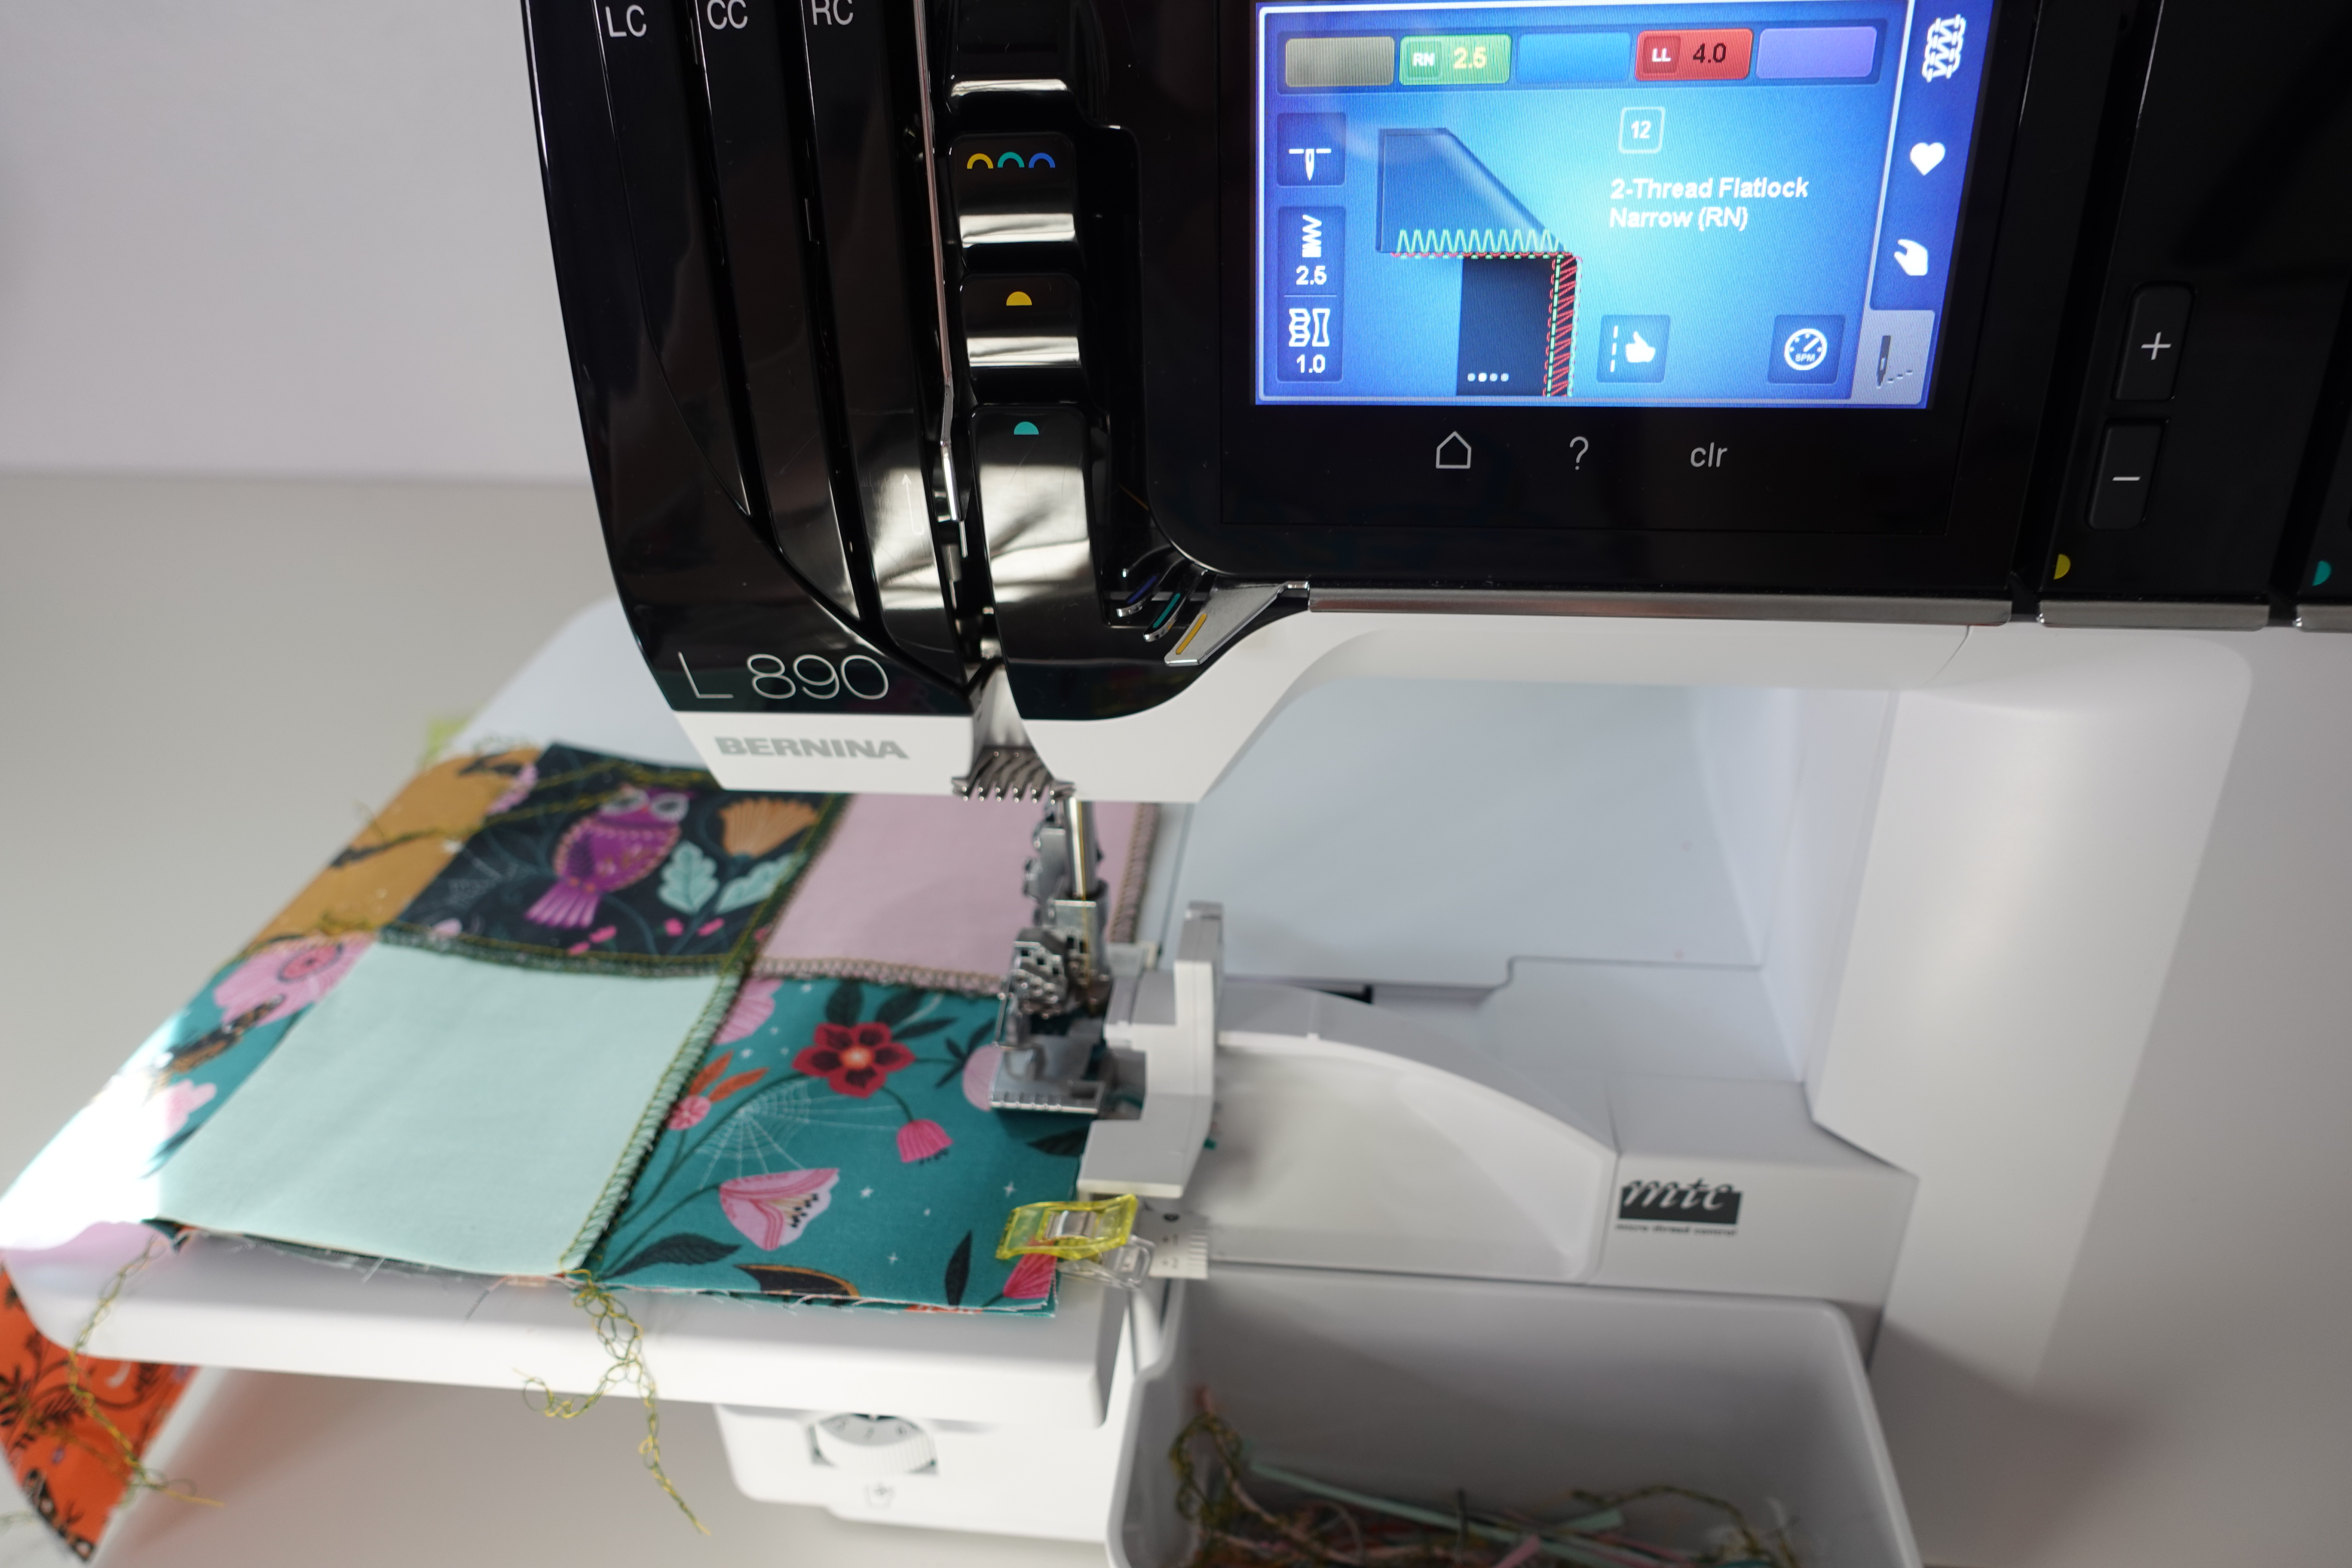
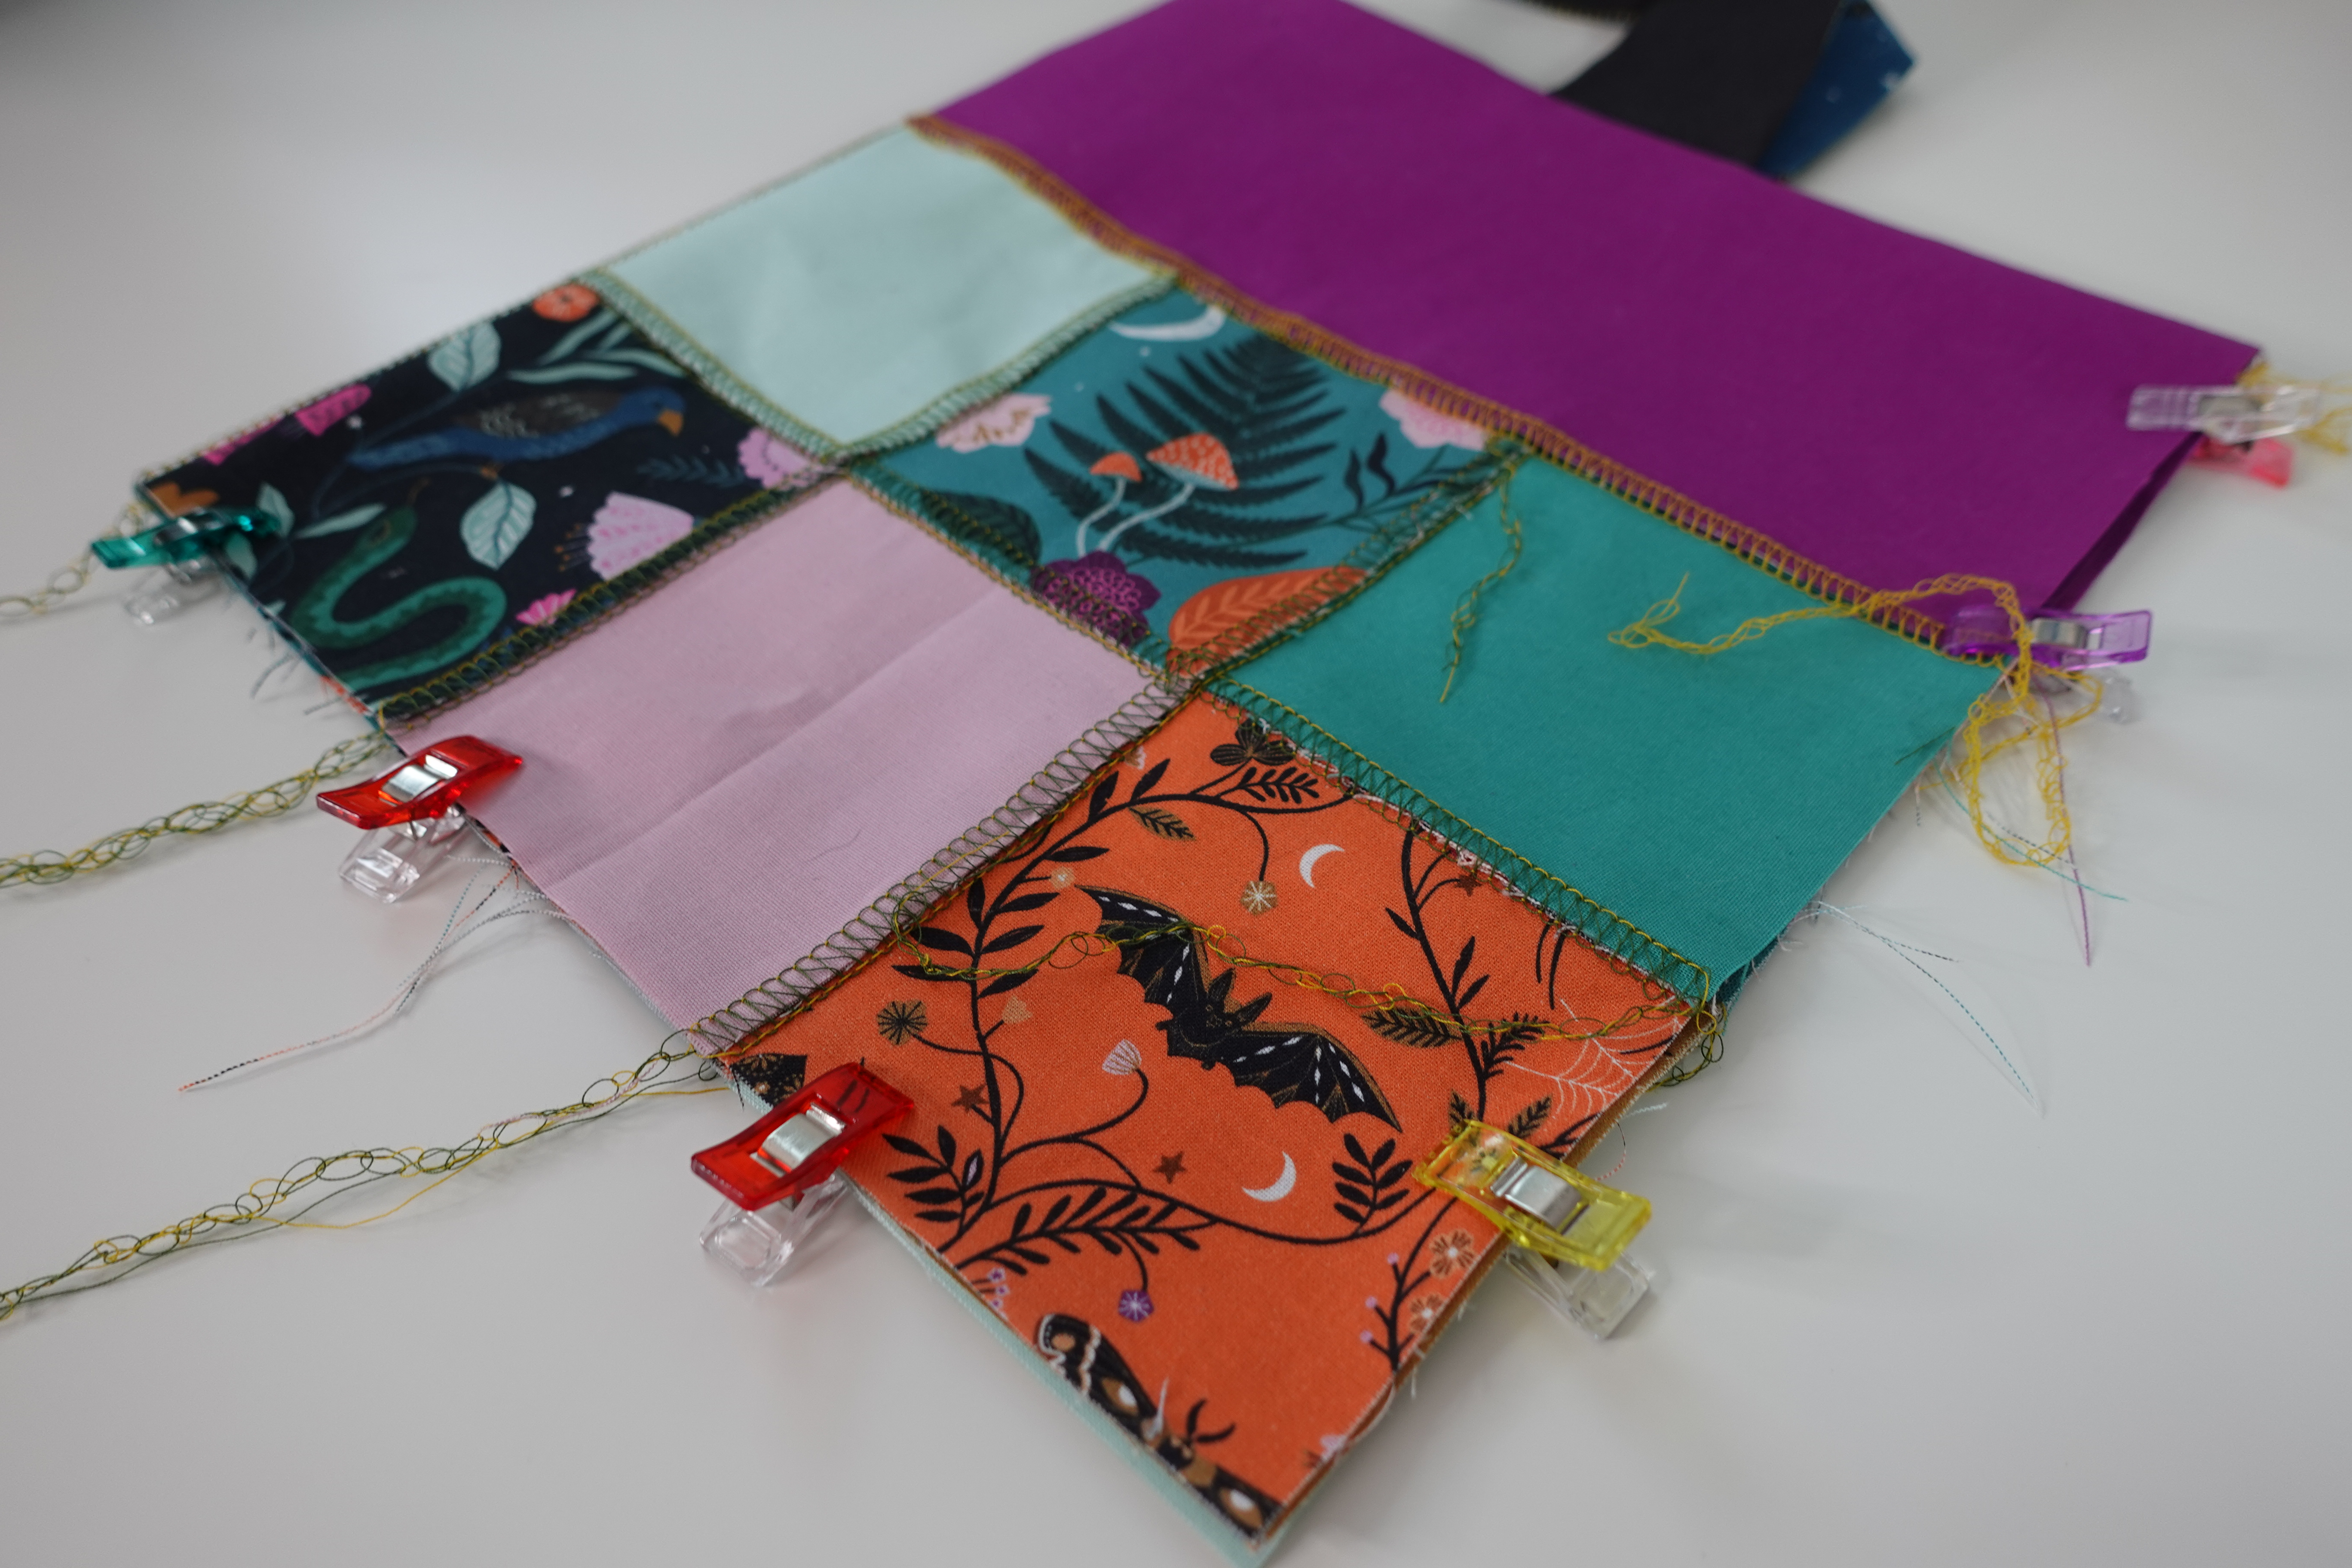
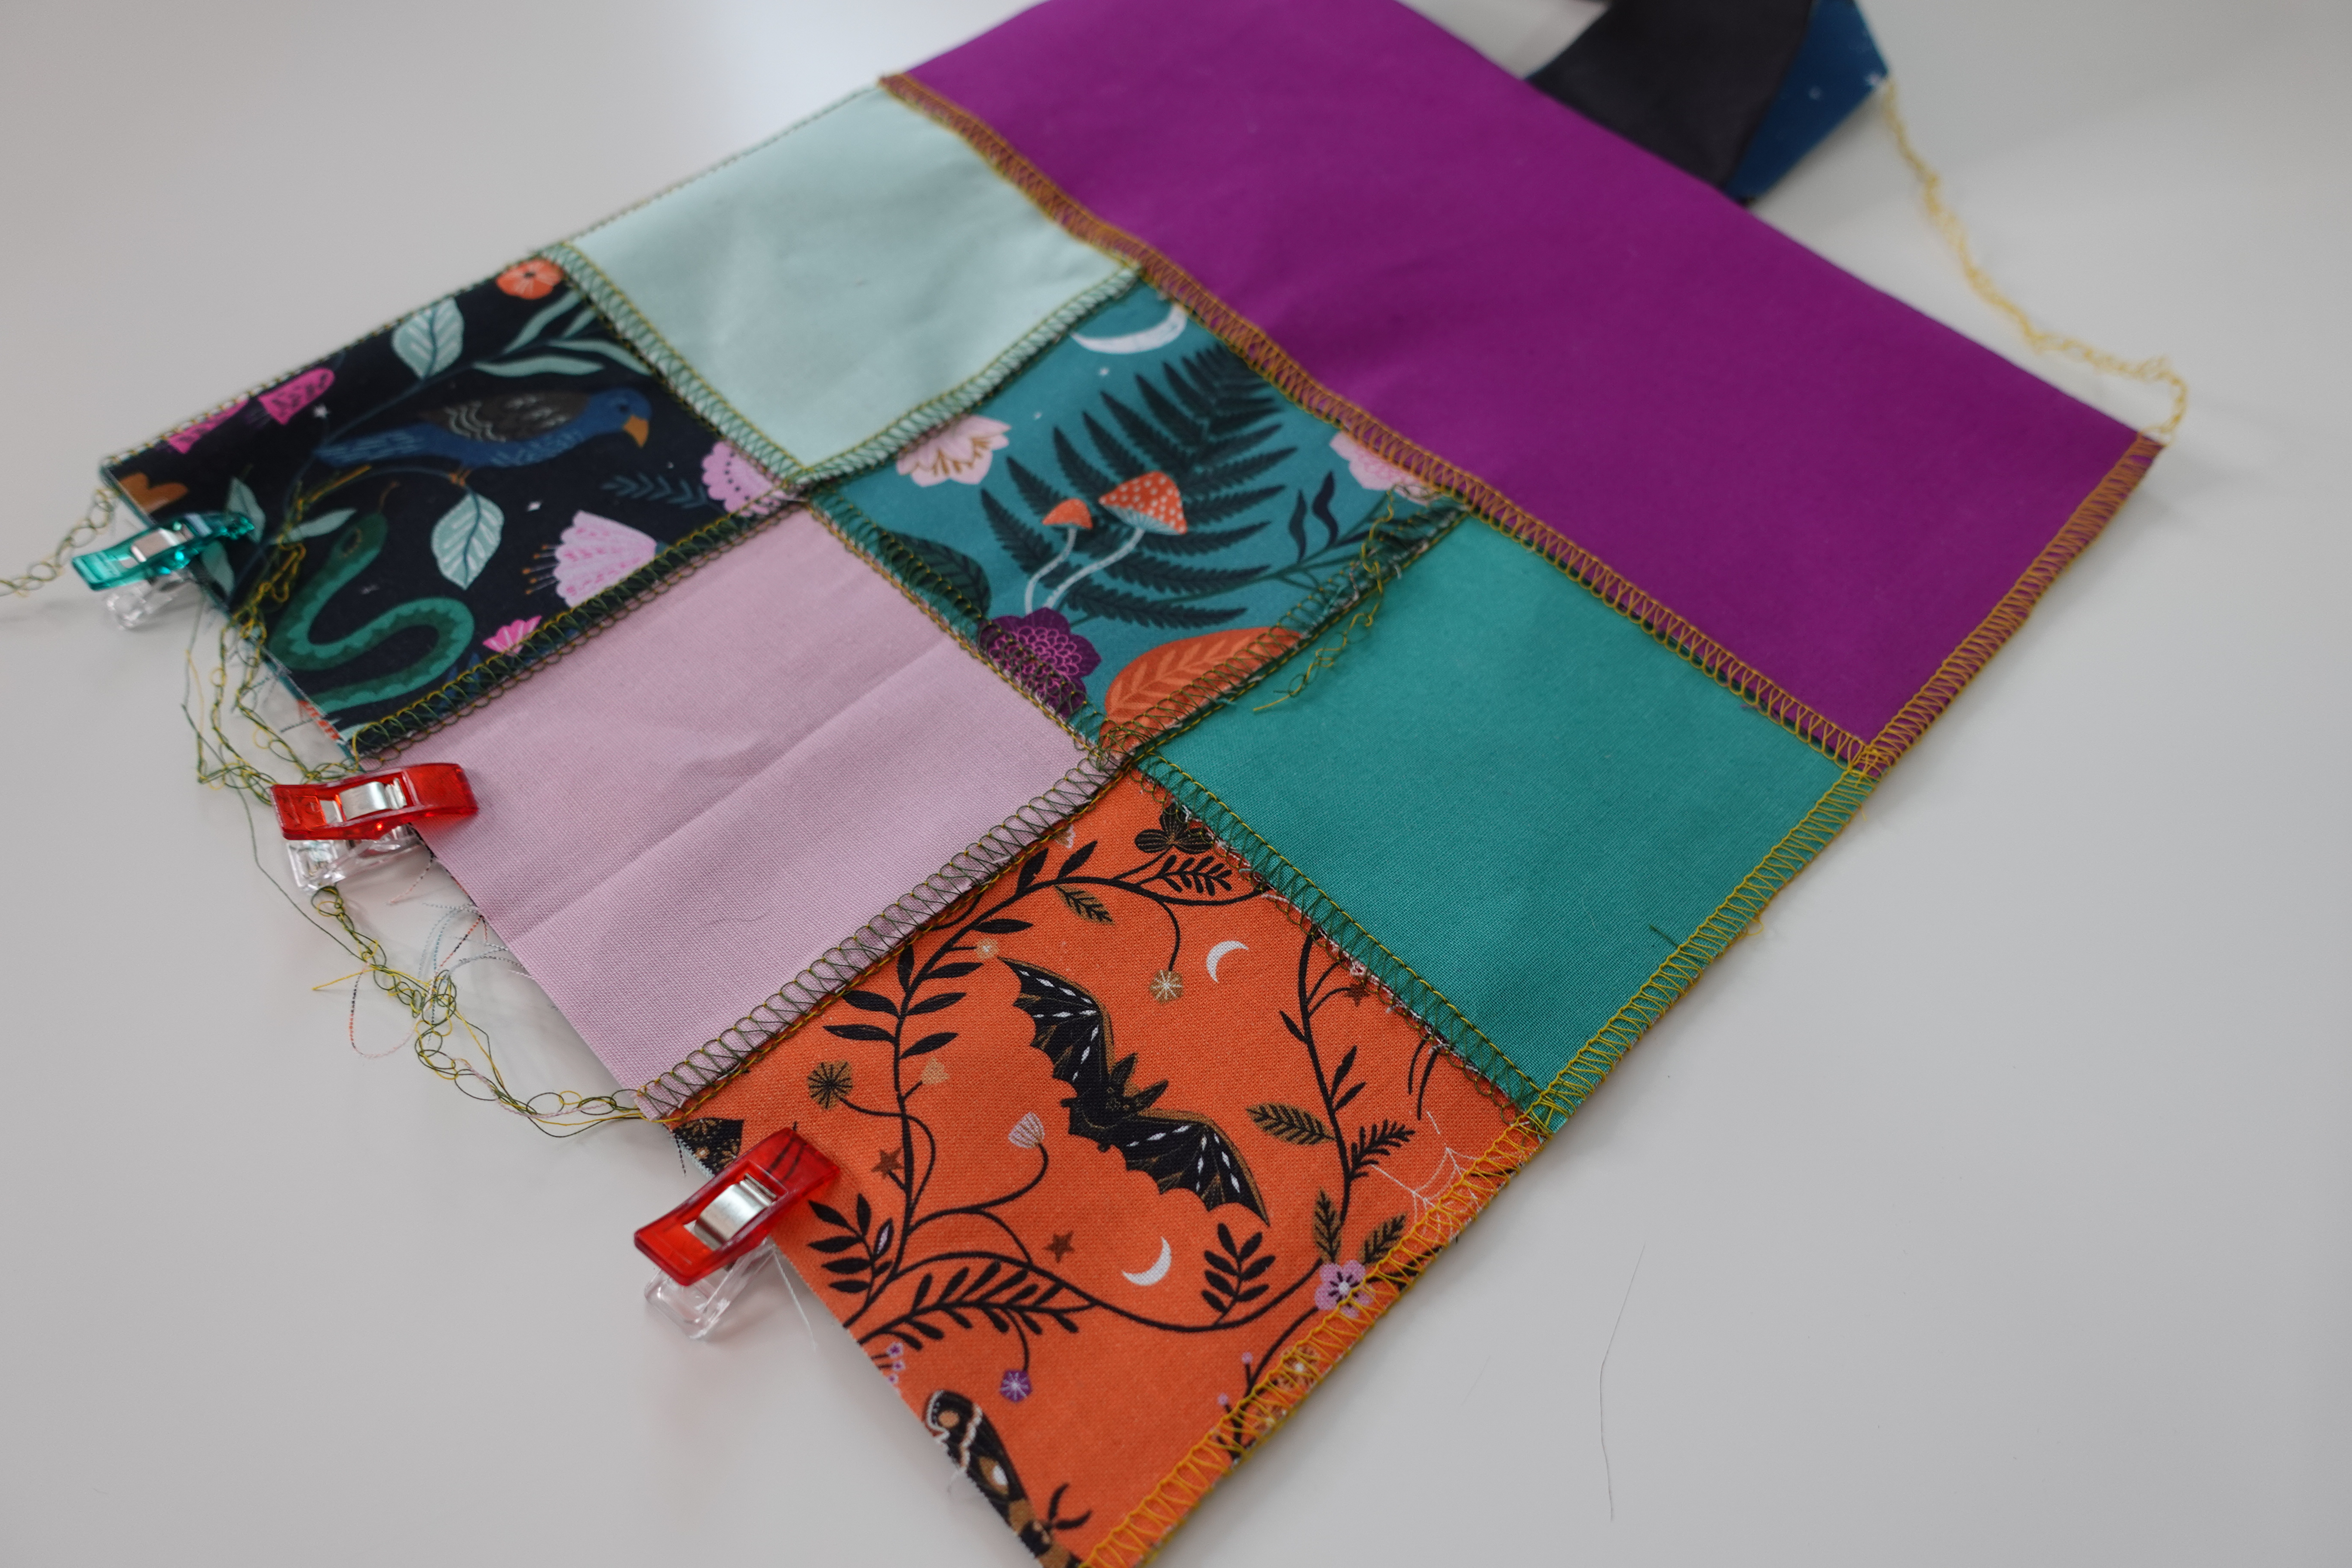
Now we will flatlock our four patches together like we made our blocks. Once finished, flatten your stitches.
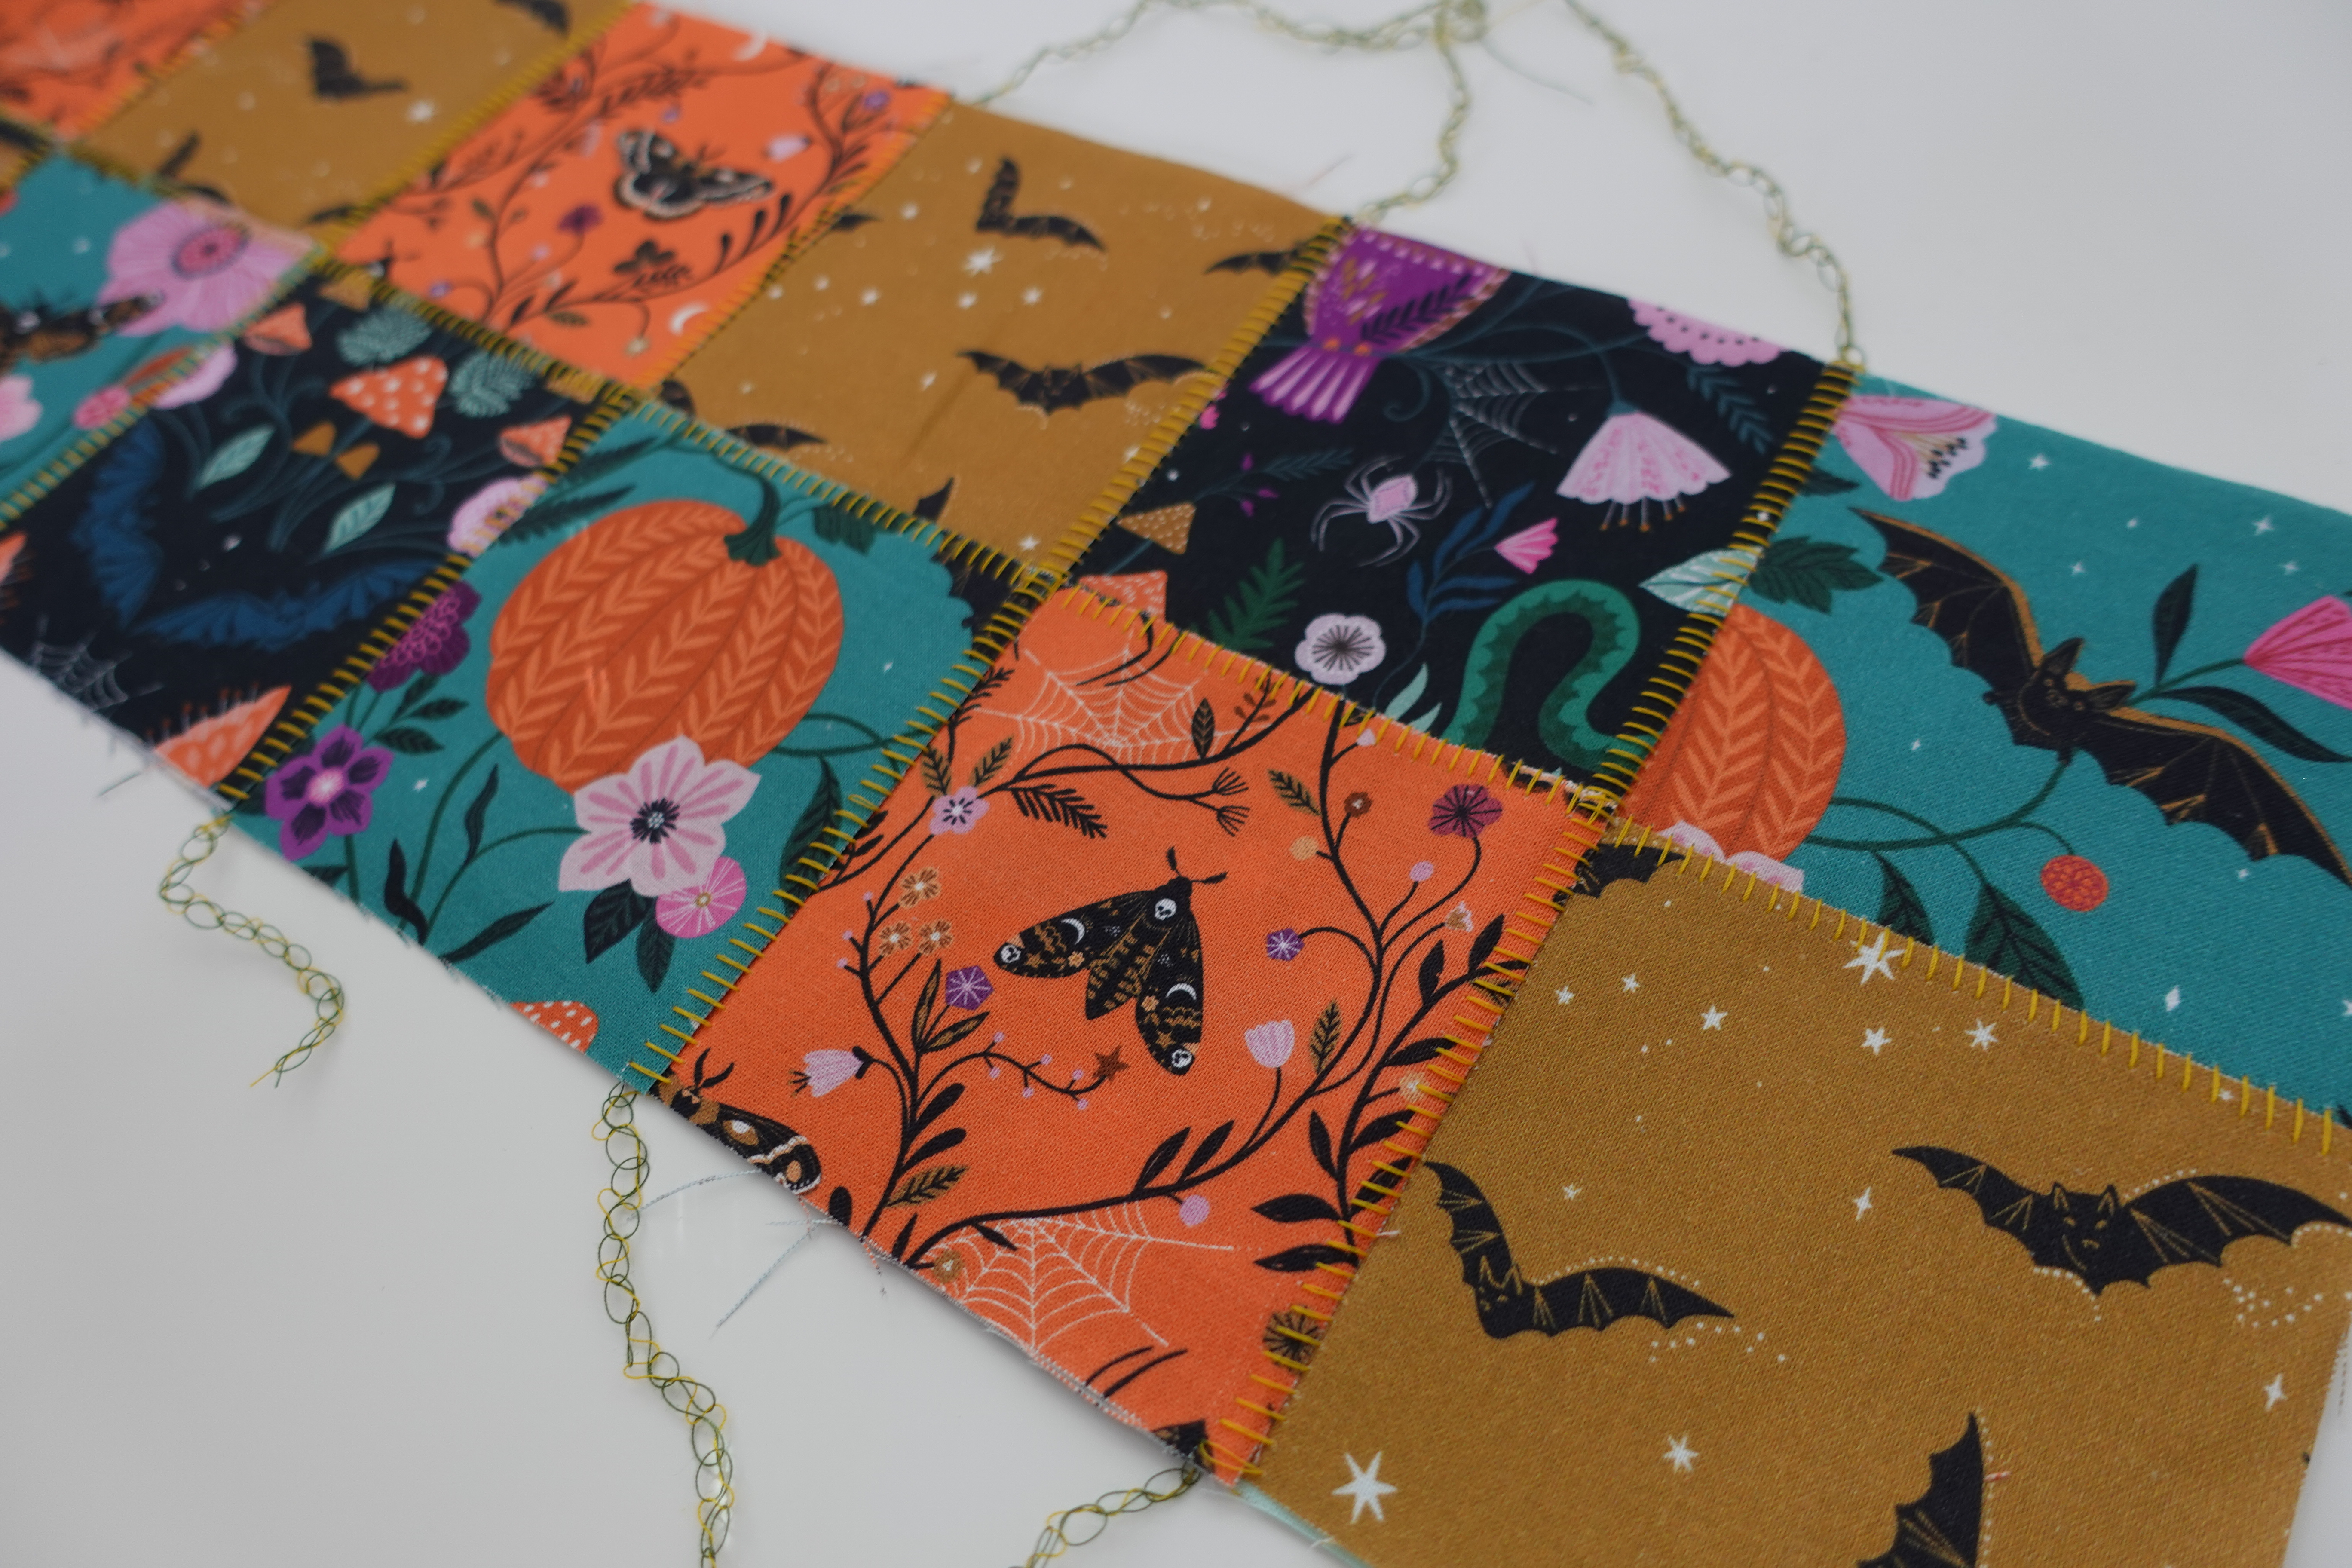
Woohoo! We have all three four patches and all 24 squares flatlocked together. Check out the front. Once again, no cutting the thread tails! We will continue to let the overlocker take care of them for us.
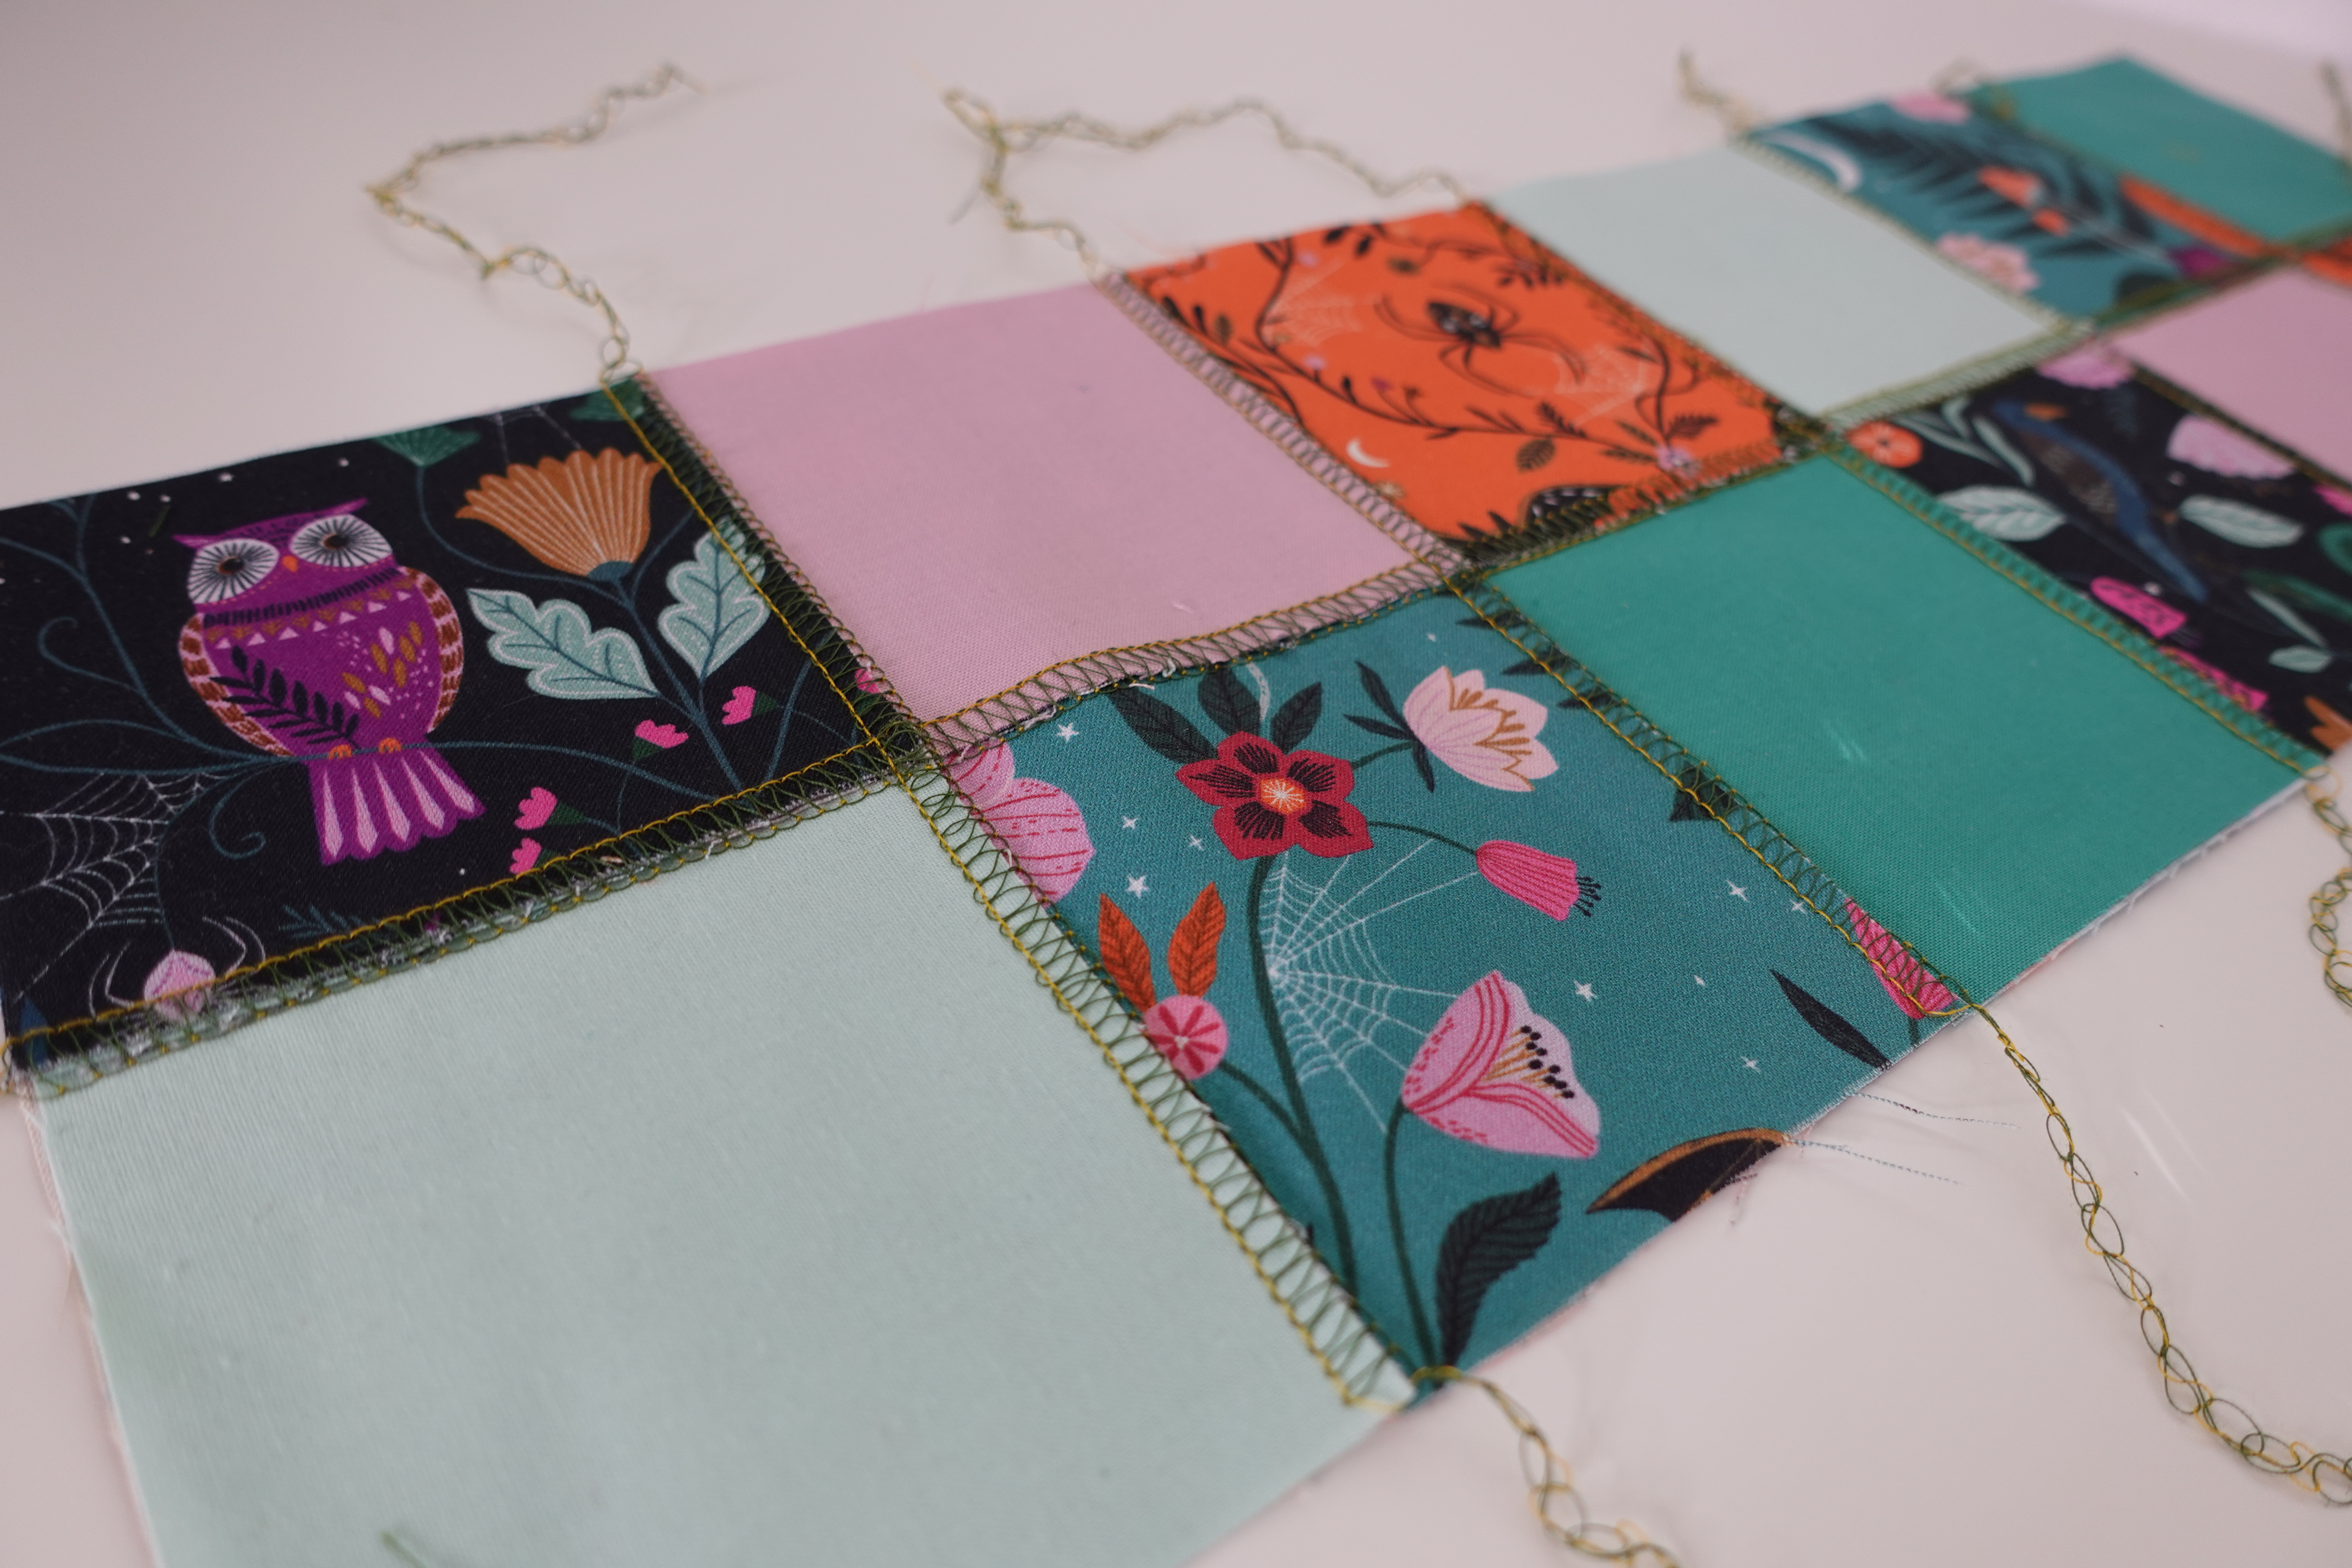
Here is the inside of my bag. You can see how cute those solids look and the other side of our flatlock.

Measure your bag body. Mine is 19.5″, so I will cut two 4″ x 19.5″ rectangles from my band fabric as well as one 3.5″ x 19″ rectangle from the fusible woven. Cut yours with a length to match your bag body but using the same heights I did in my rectangles.
Choose which rectangle you will be embroidering on, then center the fusible woven on the wrong side and fuse it.

Mark the horizontal and vertical center on the right side of the fabric rectangle you will be embroidering. I like to do this by pressing in a crease on the fabric. I will fold right sides together horizontally and press. I then open the fabric up, fold vertically and press again, taking care not to press out the first fold. Feel free to try this method or mark with your favorite disappearing marking tool (I like white chaco liners).

Cut a piece of OESD Stabil Stick Tearaway to fit your hoop.
Remove the paper backing and lay the stabilizer on your table, sticky side up.
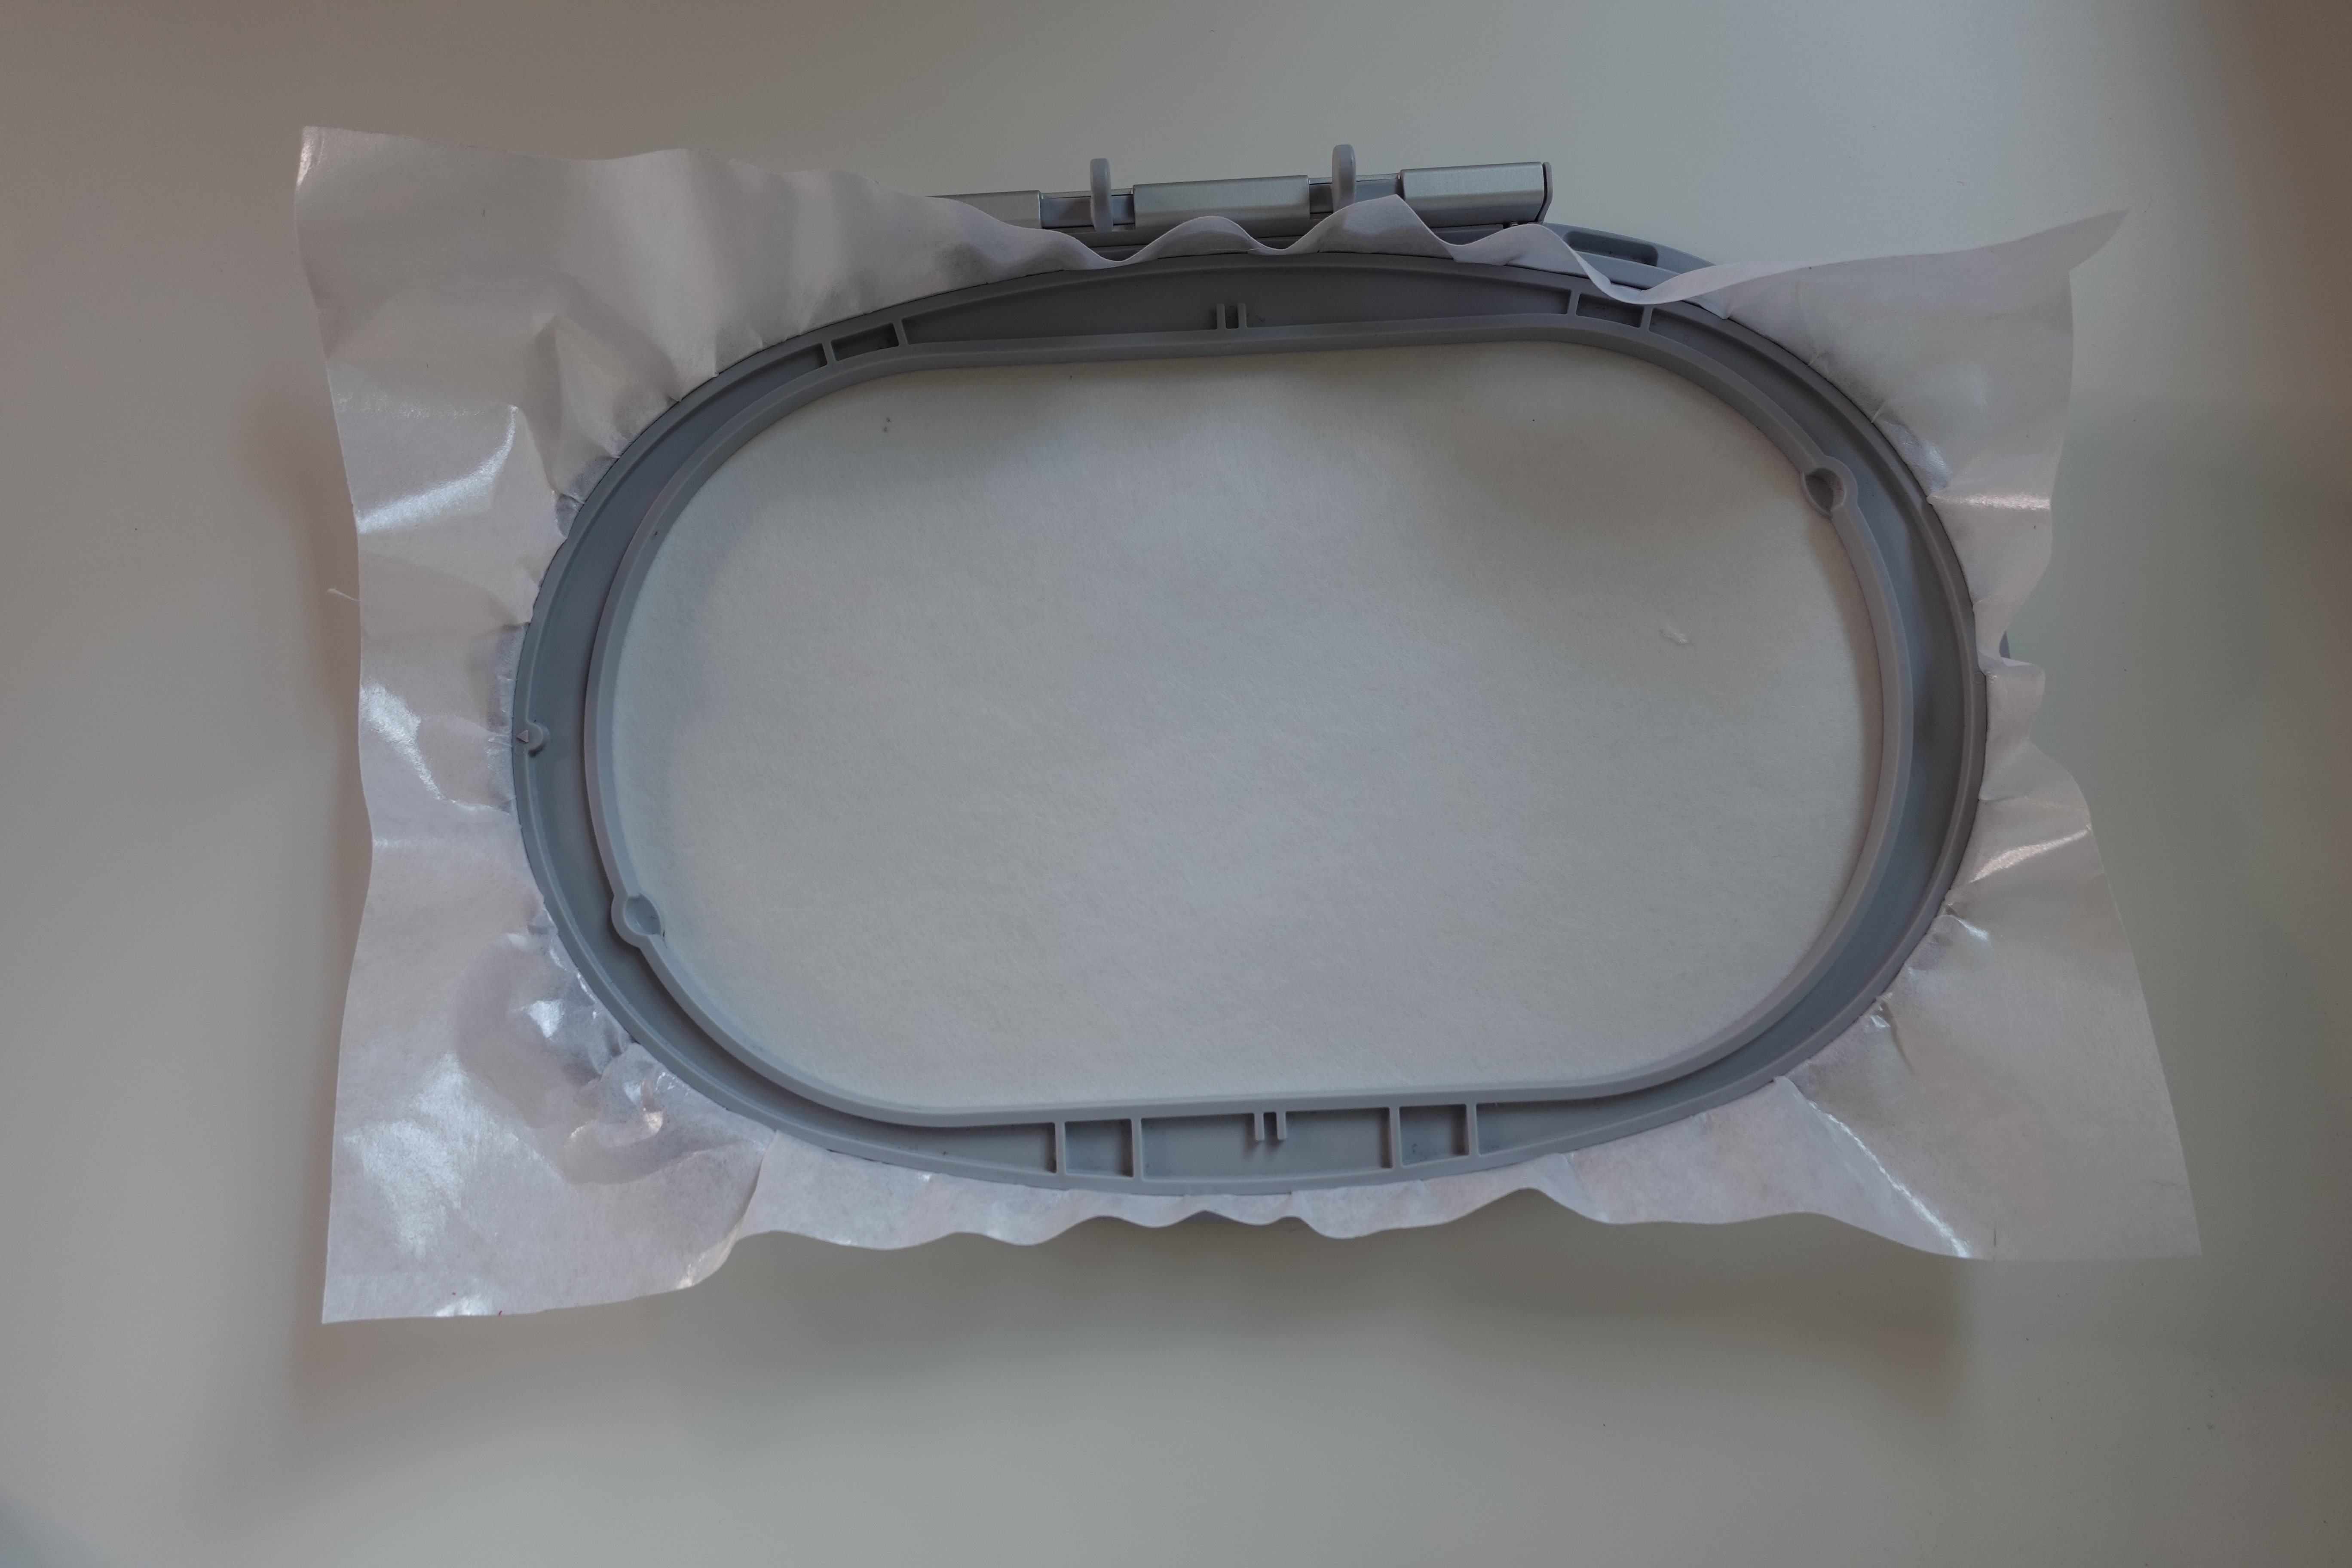
Press the inner hoop into the center of the fabric then, once secure, hoop your stabilizer.
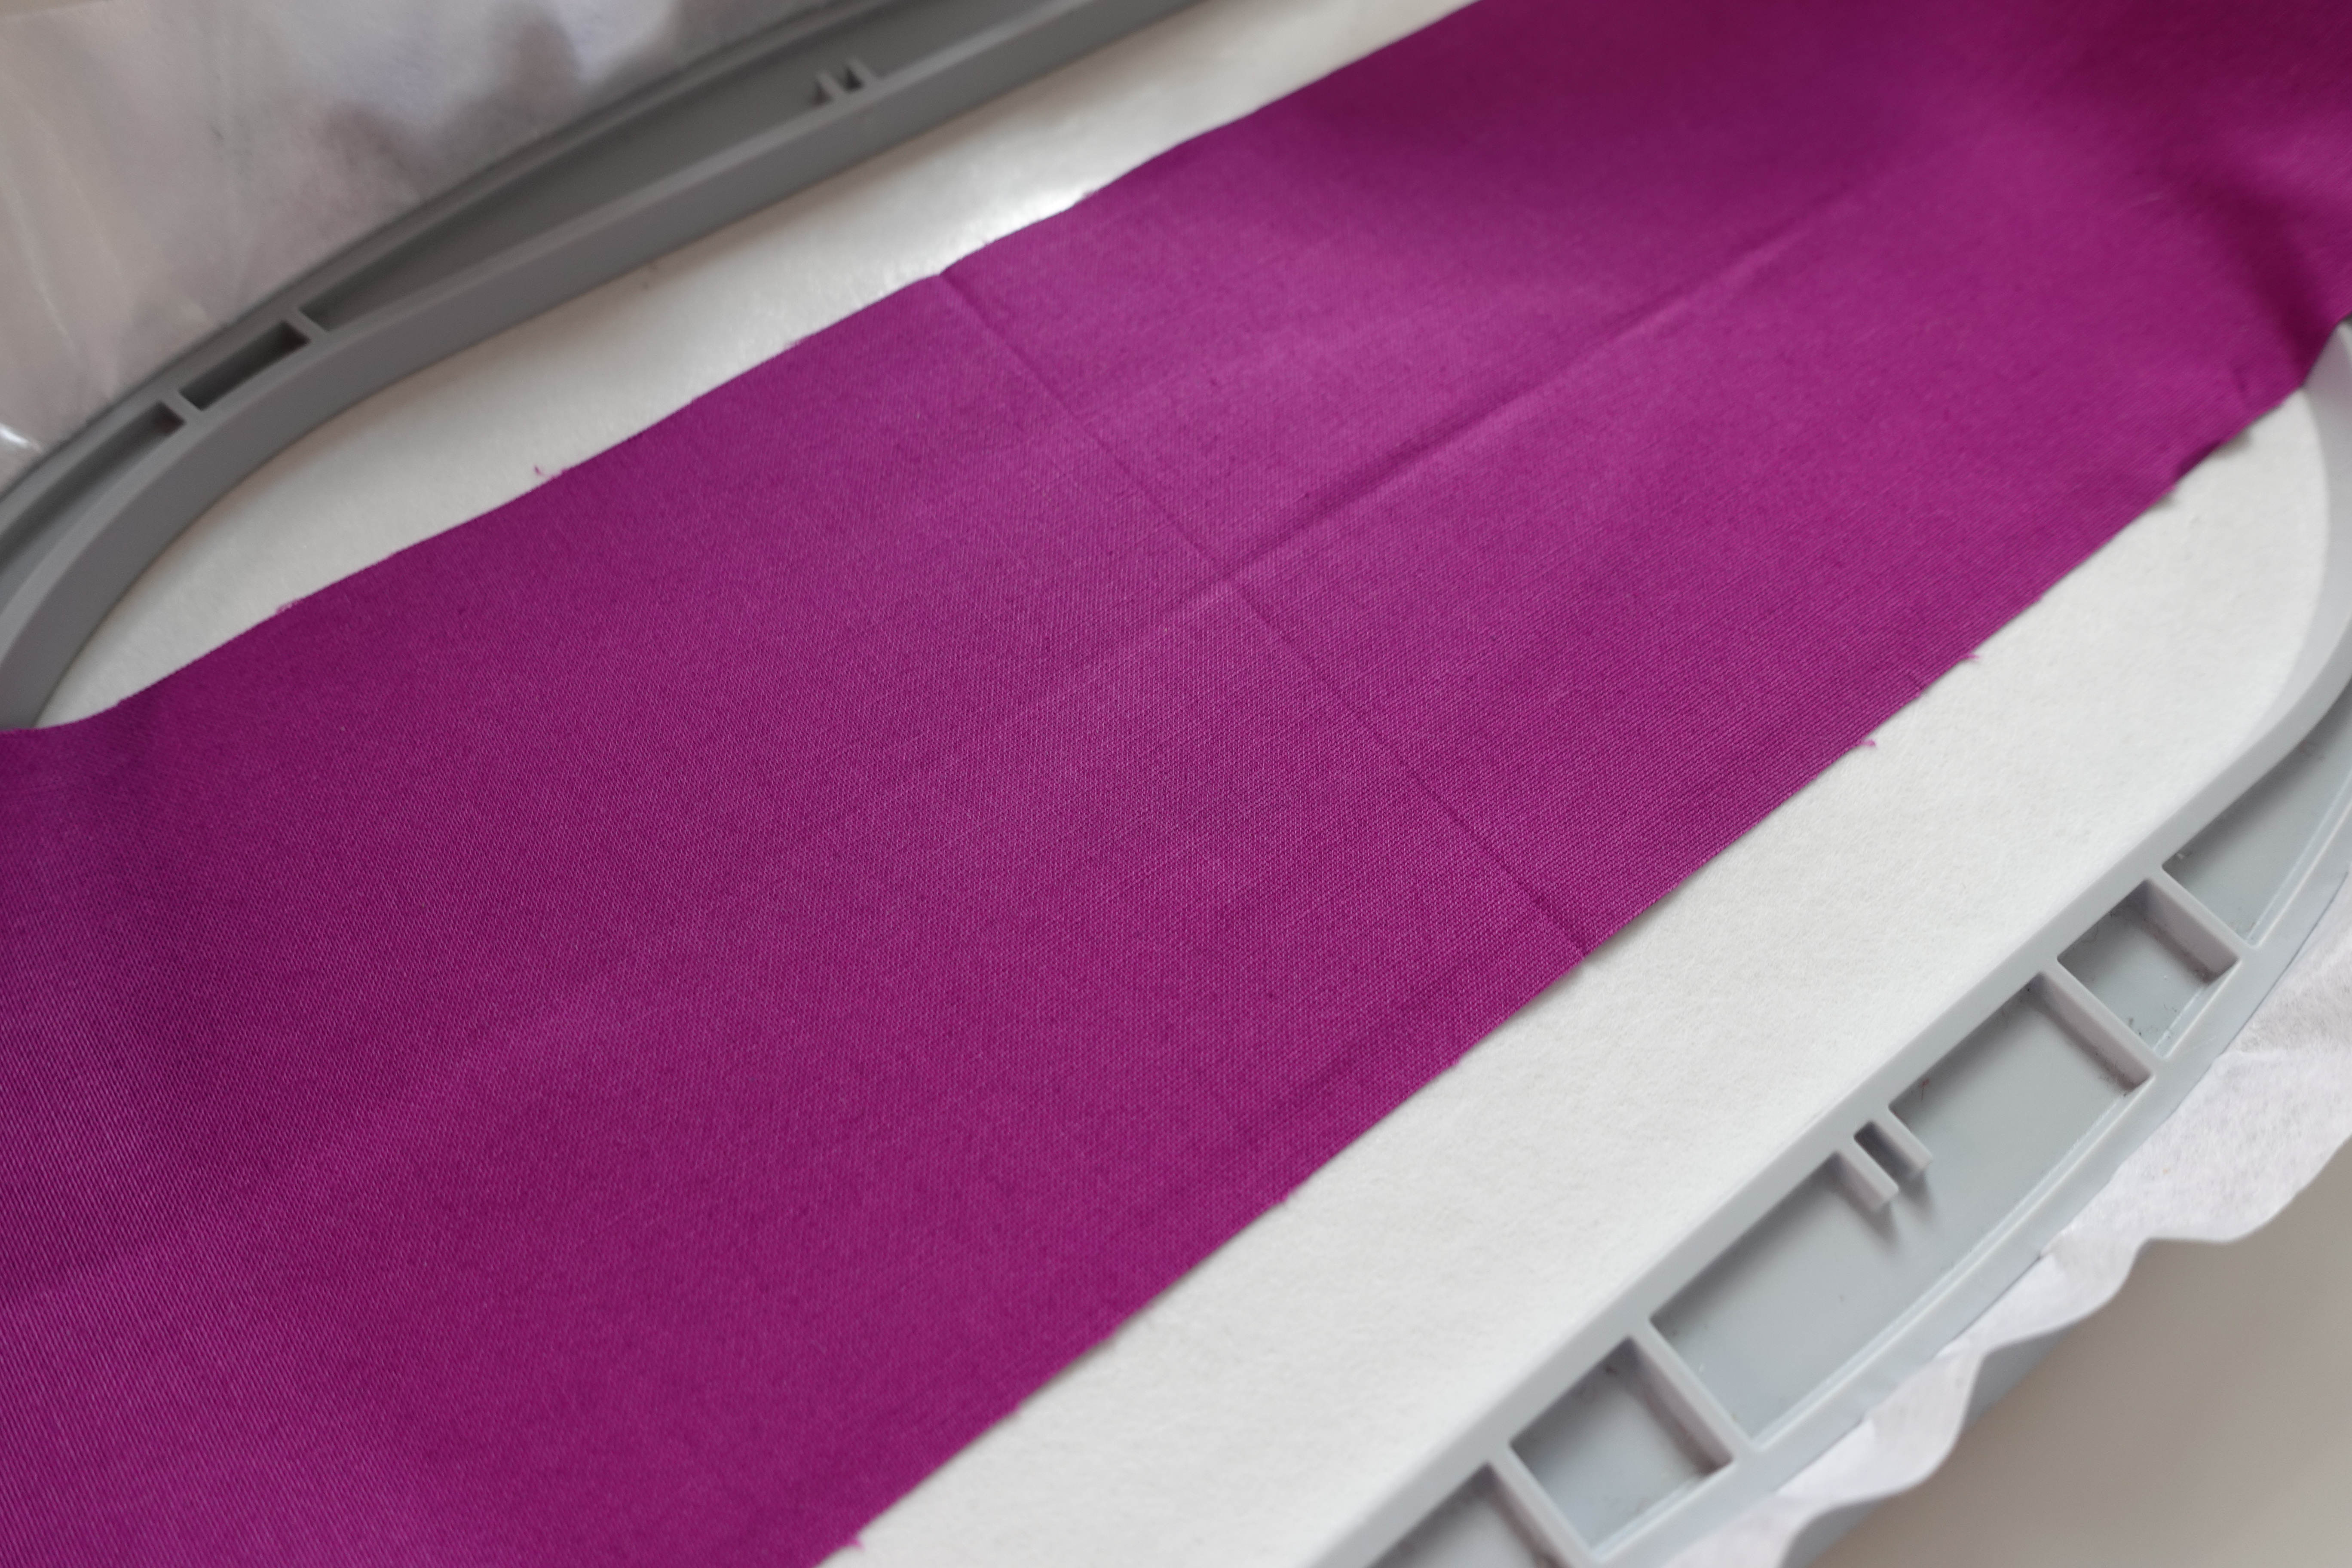
Center the fabric rectangle in the hoop (you can eyeball it!) and press it firmly to the stabilizer to secure it.
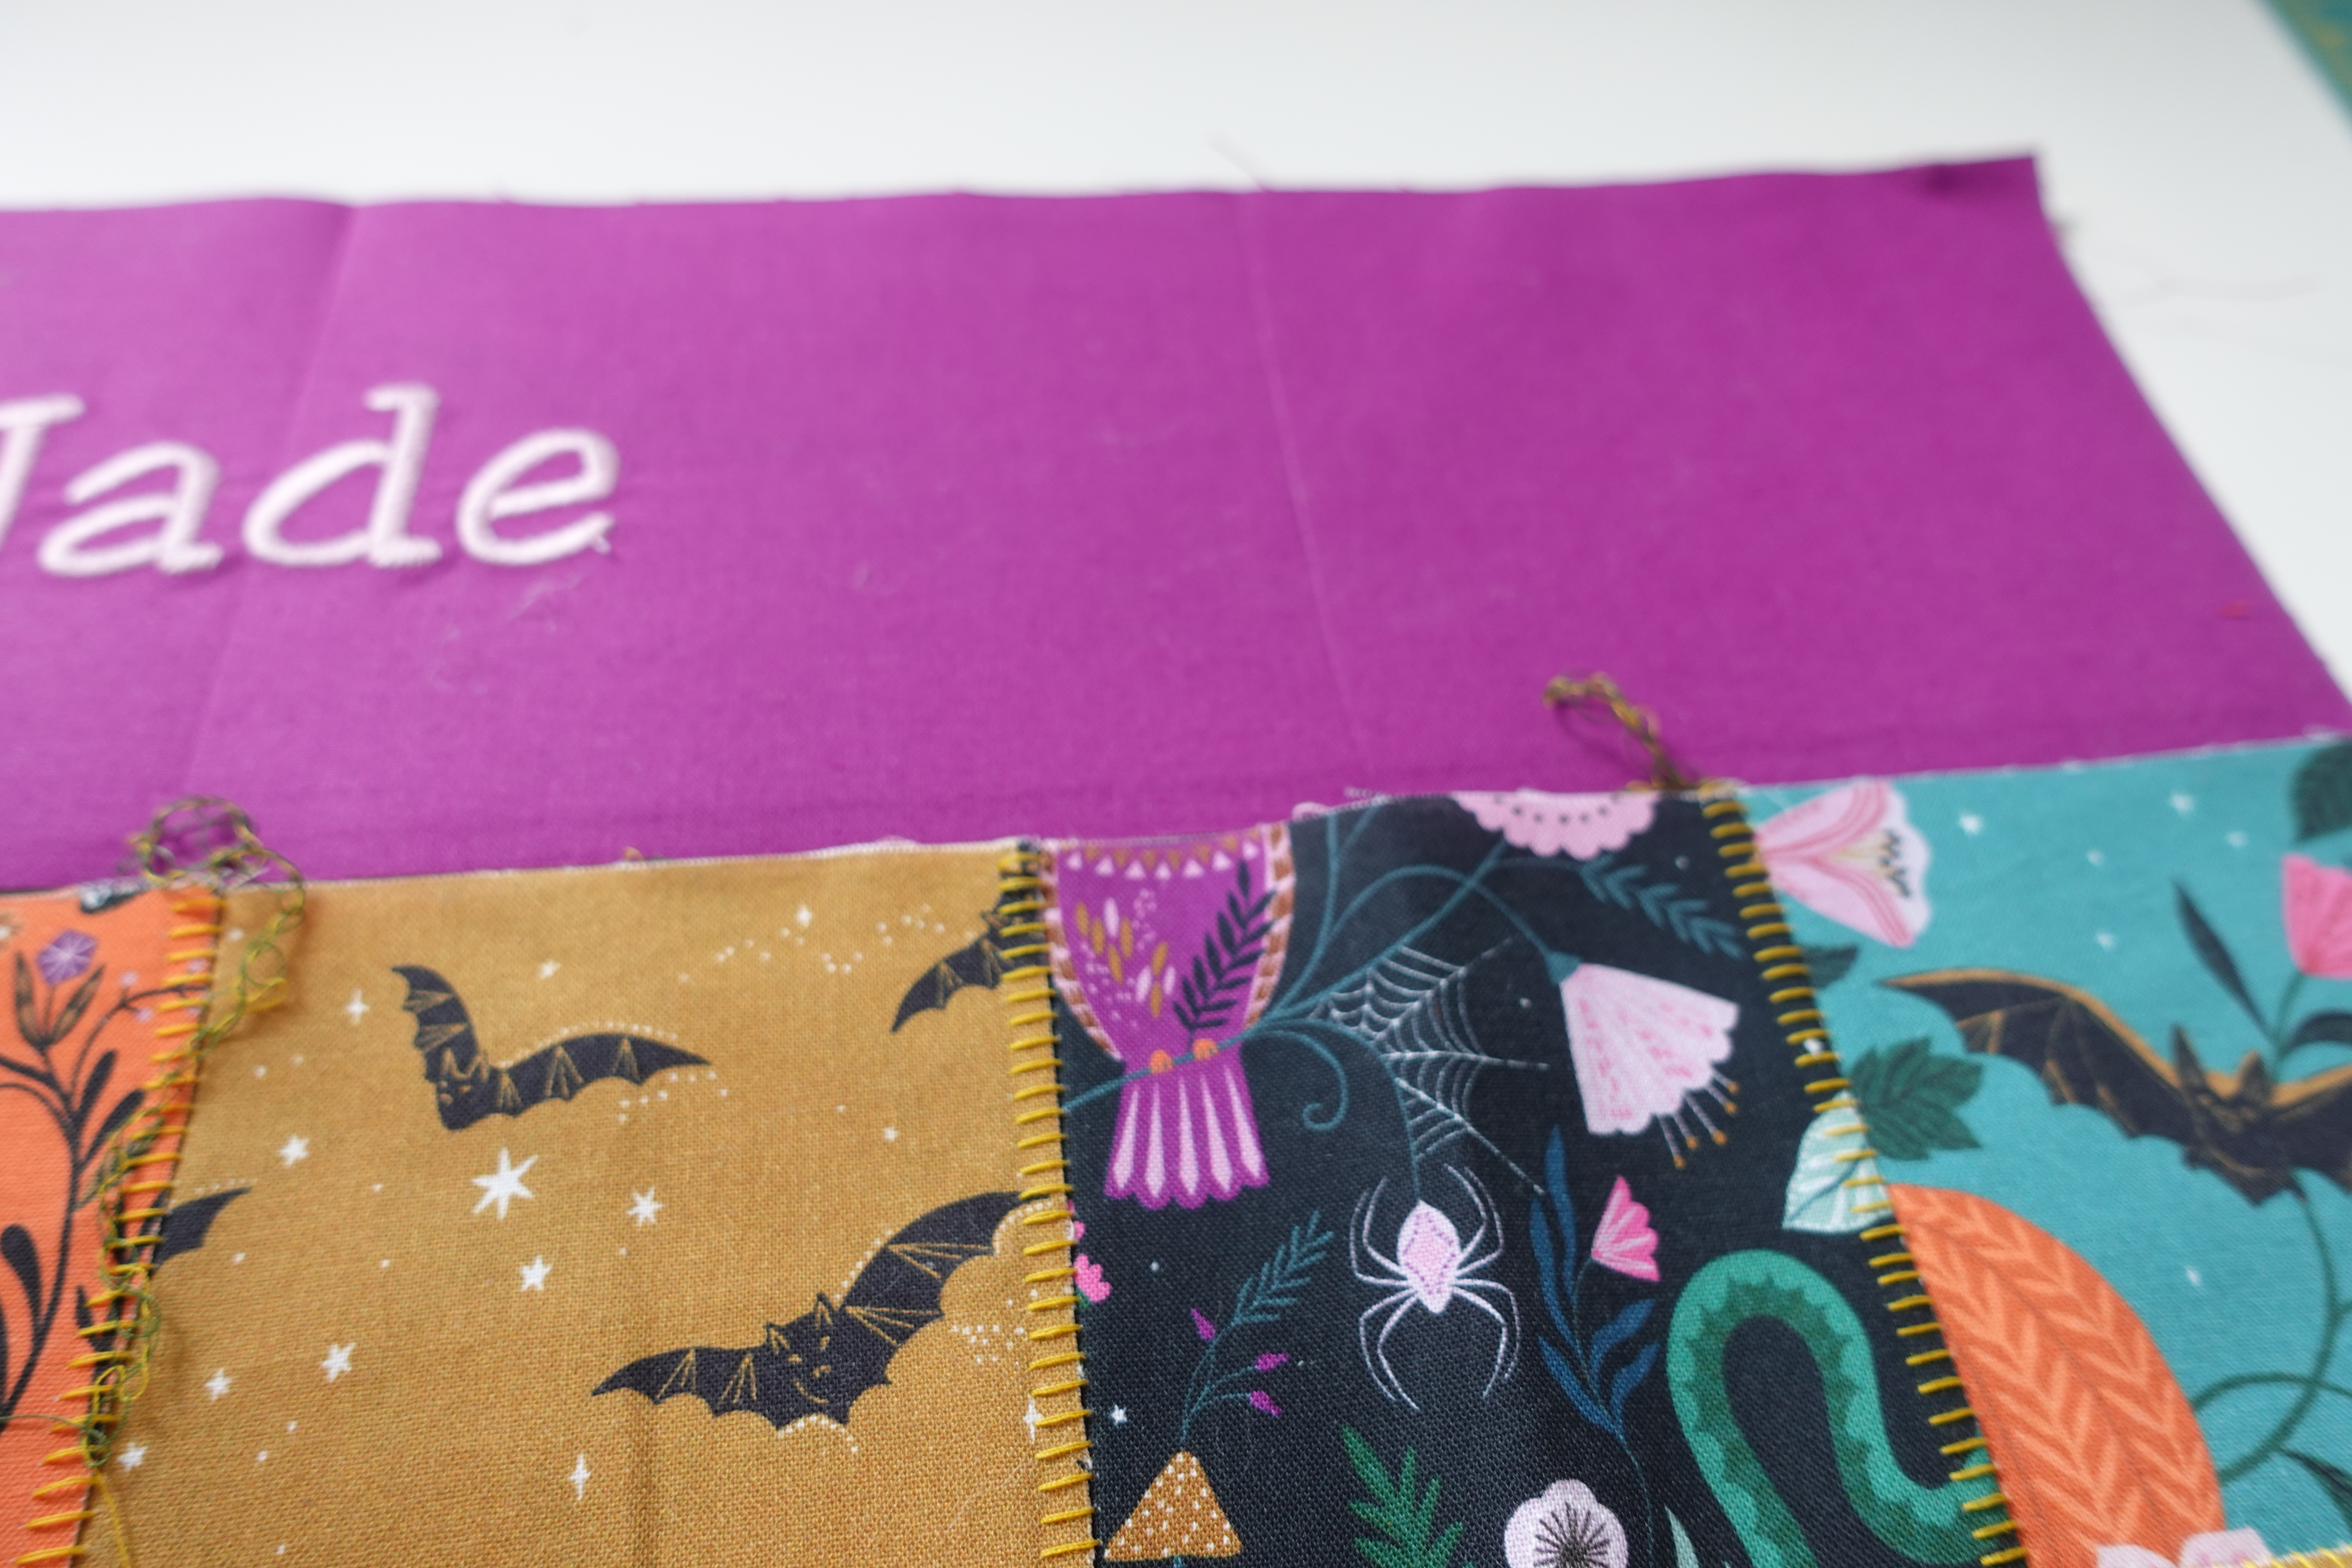
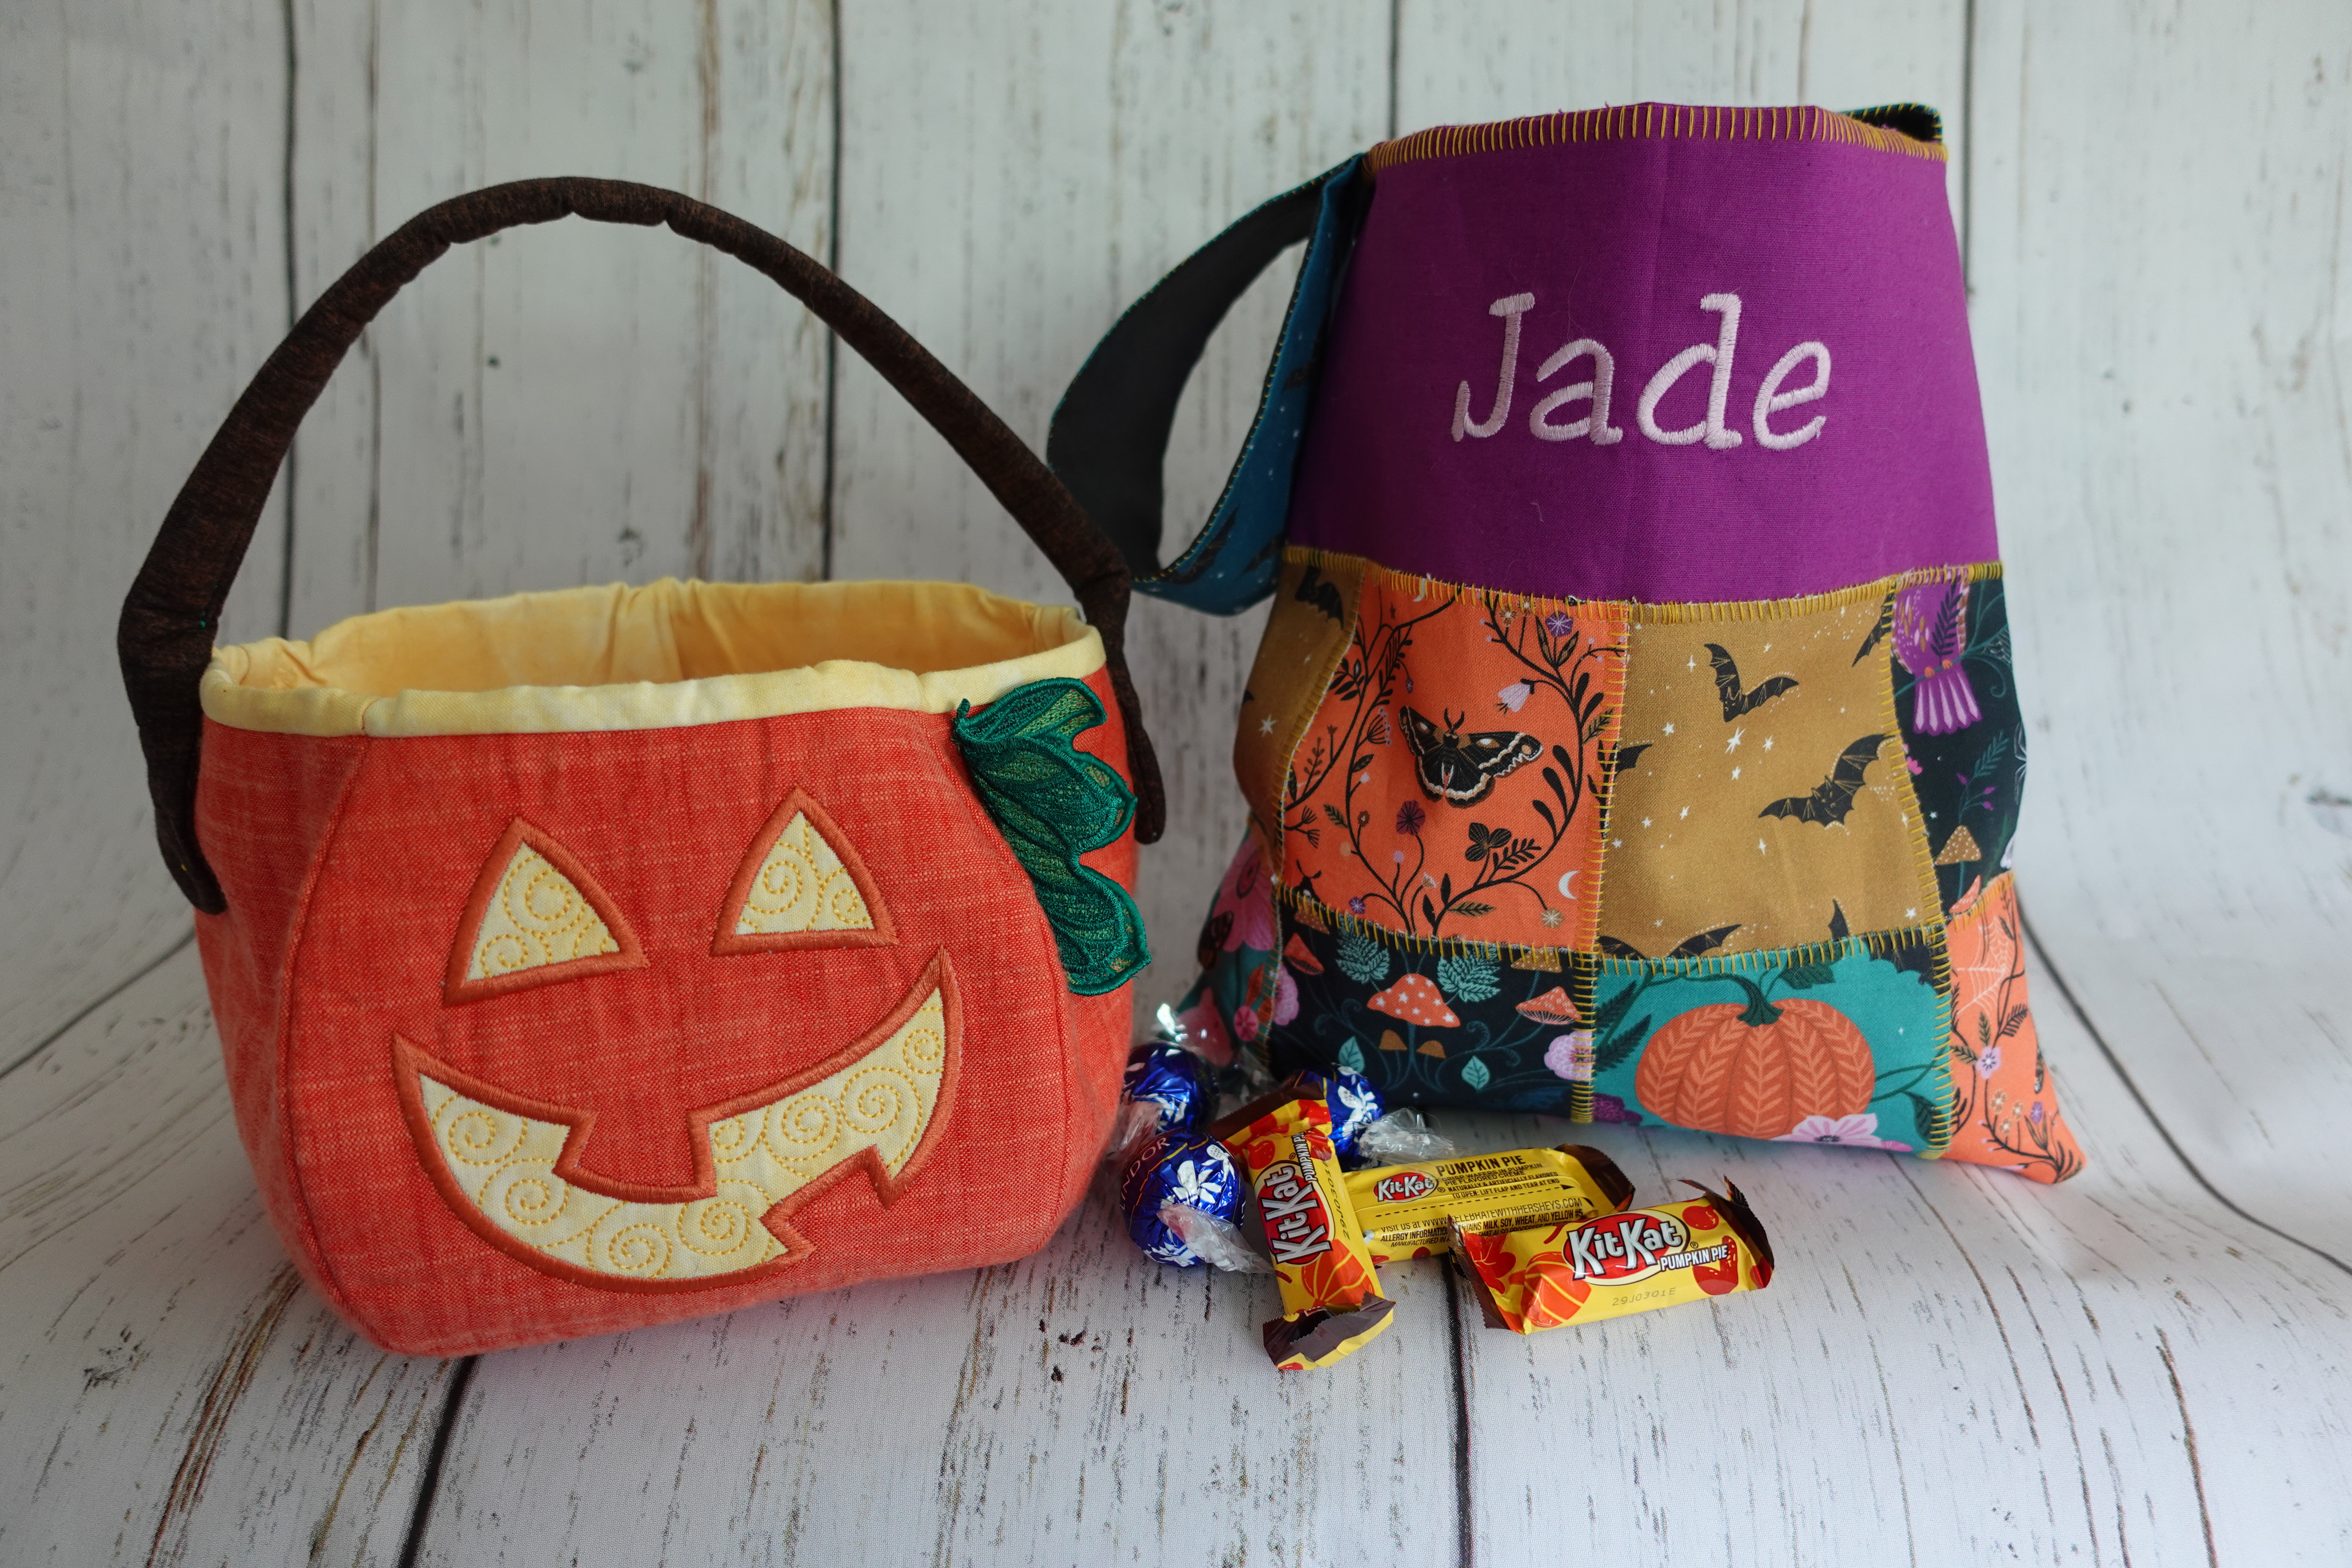
Using software or your machine, choose a font to type out the name you’d like to add to the bag. I have used my machine to add the name “Jade” to try to keep the height of the lettering to 2.5″ or less.
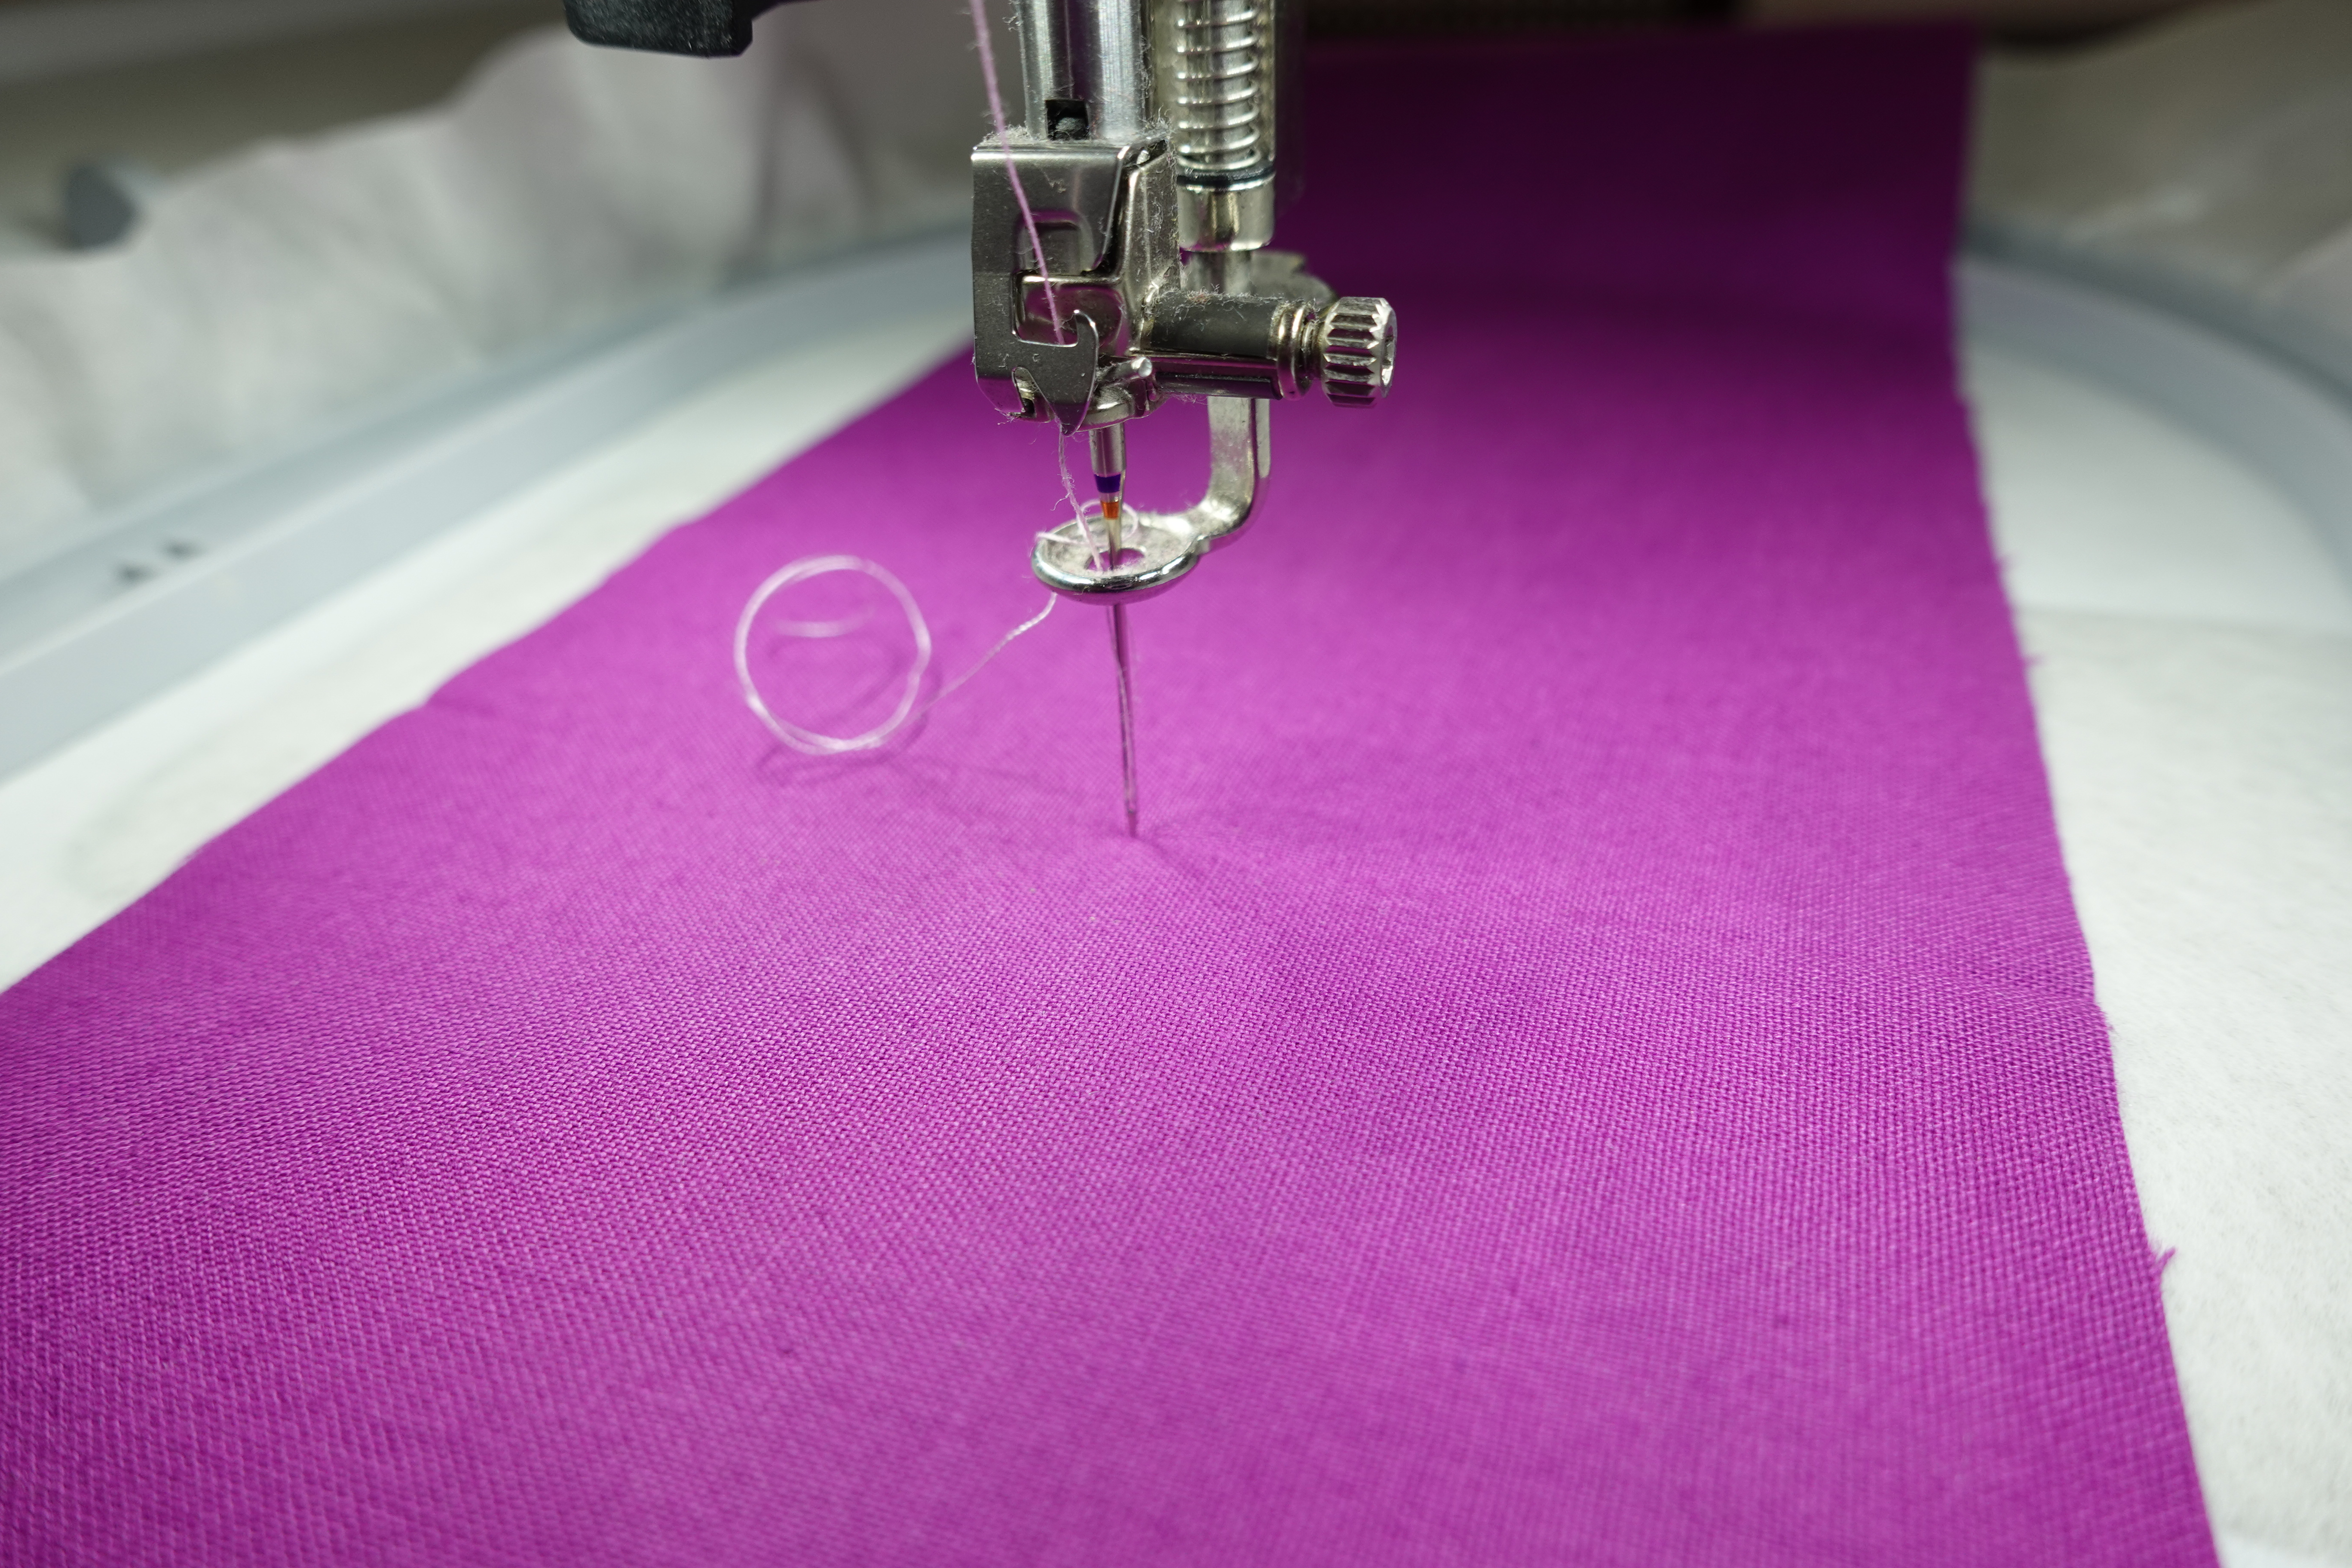
Set up your machine by installing a 75/11 embroidery needle and threading it with your preferred thread. I am using Aurifil 40 weight thread.
I rotated the design using the rotate feature, then used pinpoint placement to align the design with the marked centers of my fabric.
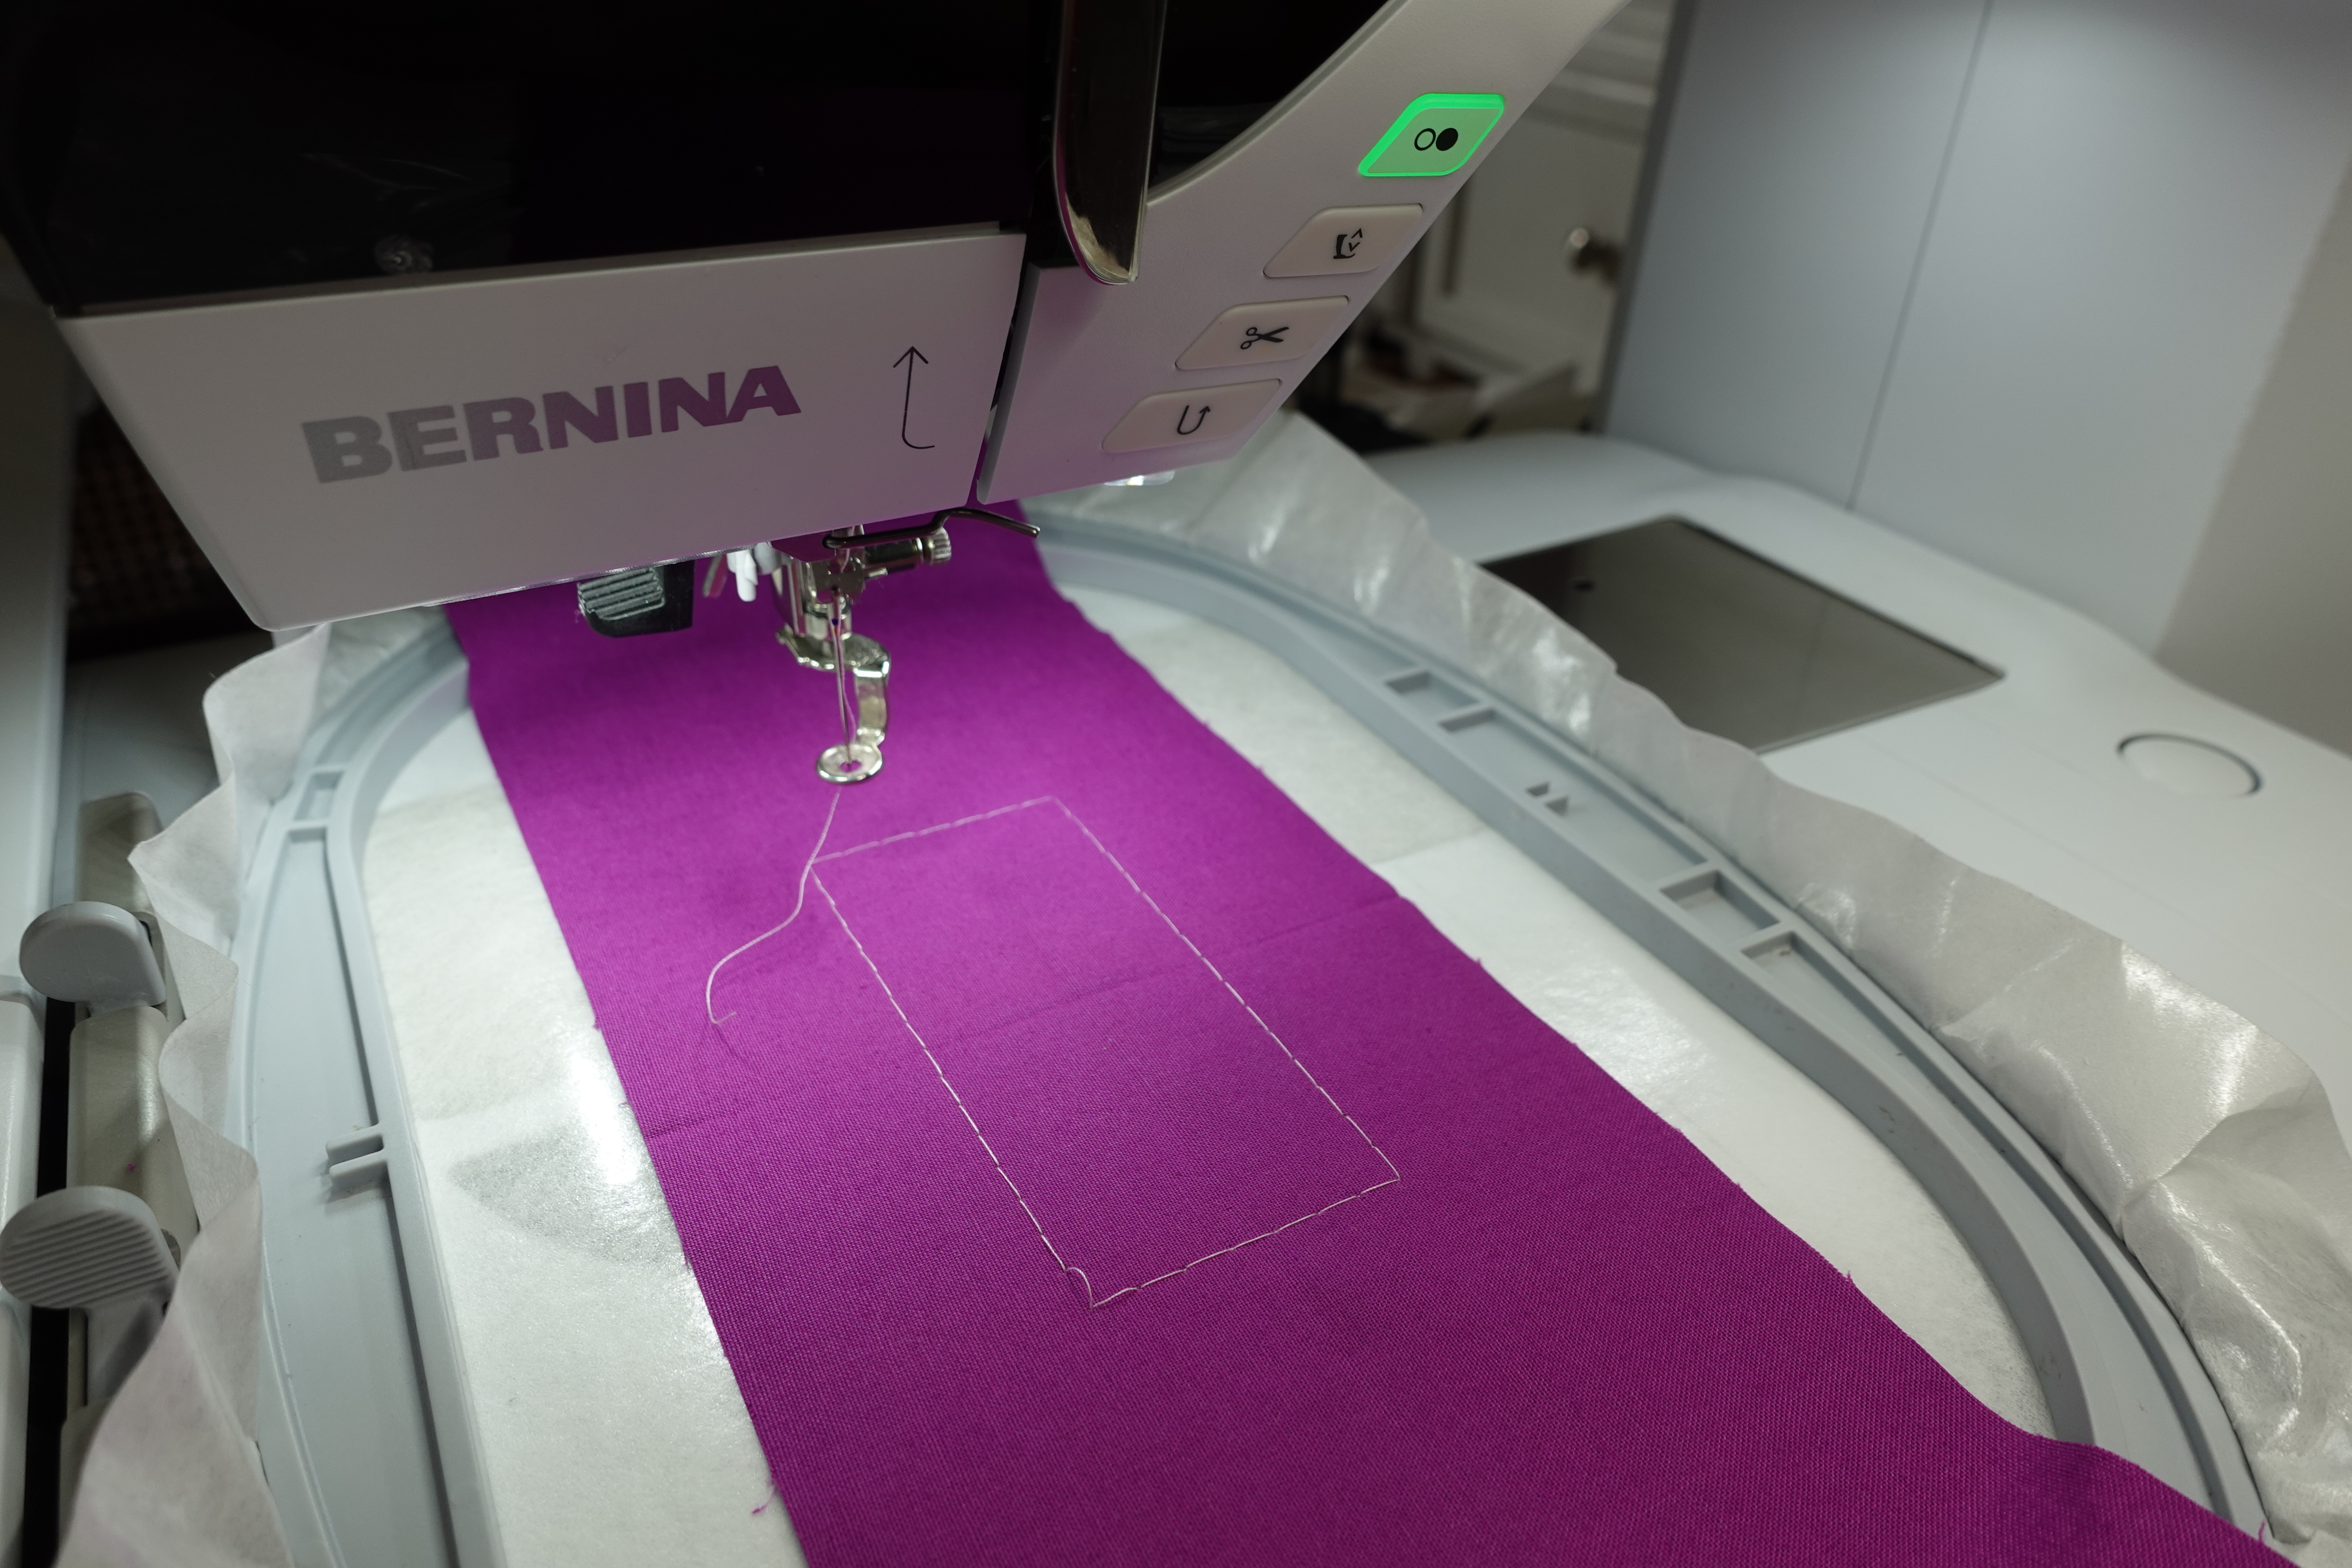
Before embroidering, stitch out a basting box around your letters to help stabilize your fabric.
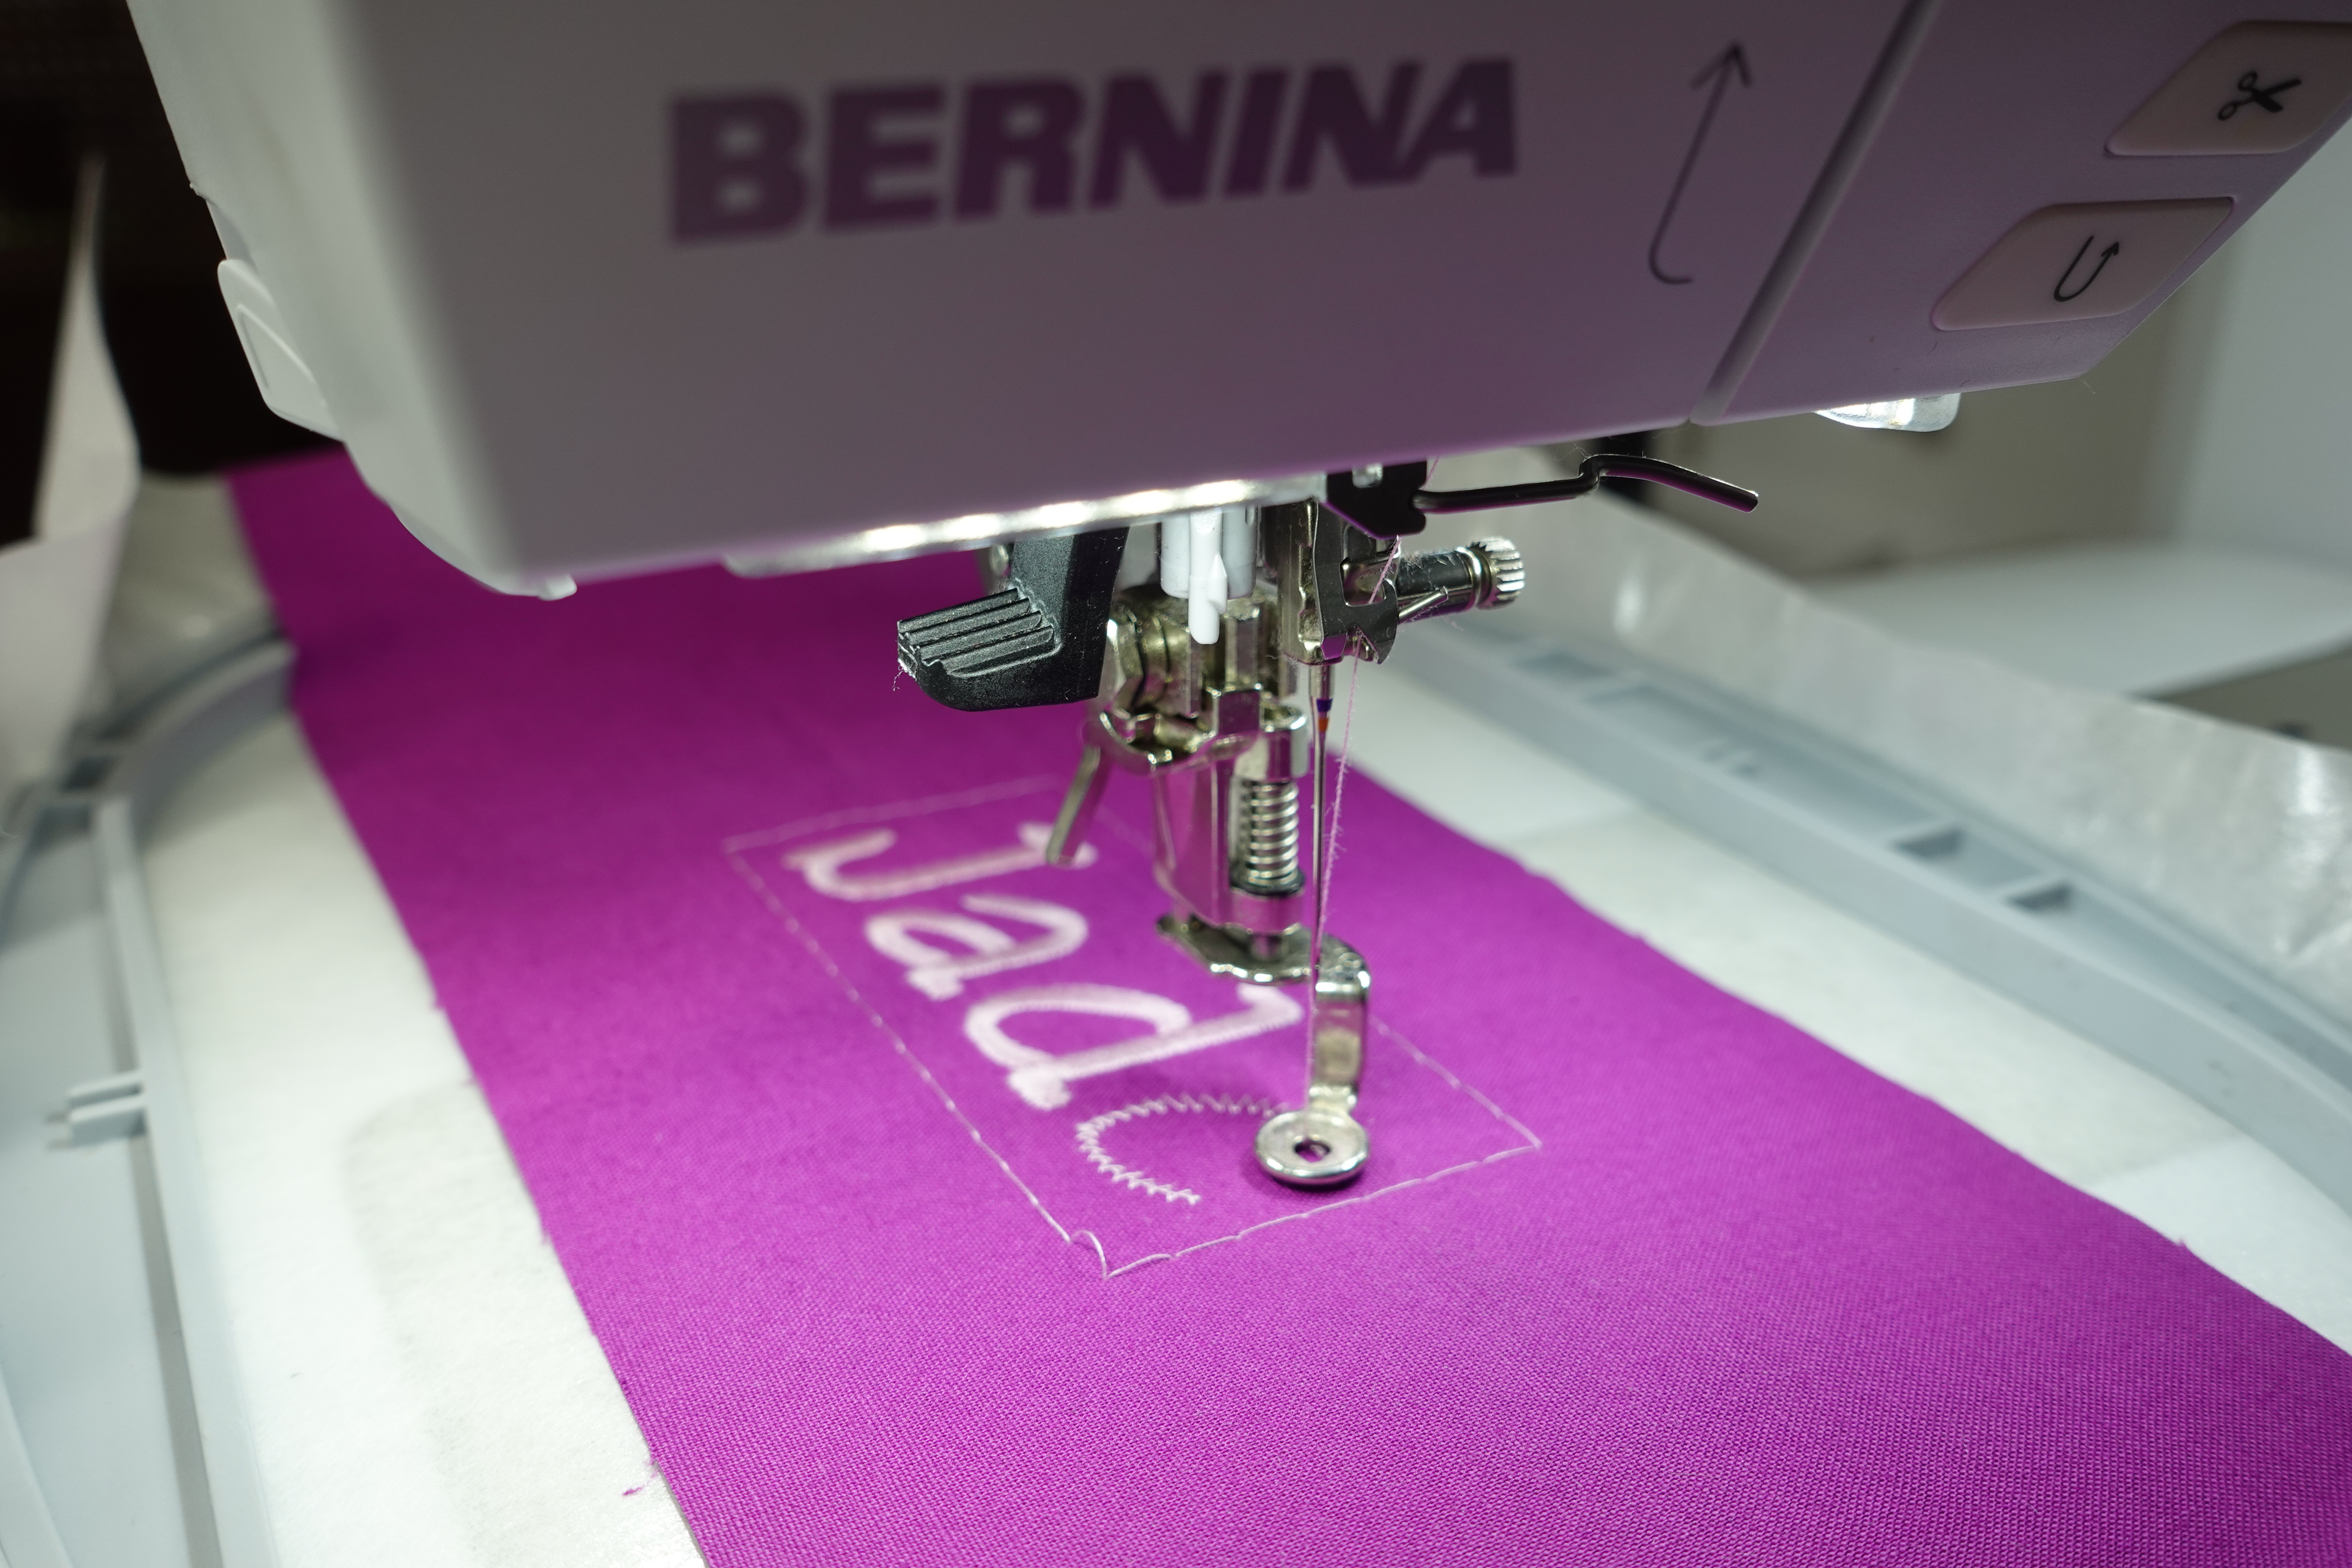
Stitch out your design.

Once complete, remove the basting box from the back of your hoop. Then gently tear the stabilizer along the perforated stitch outline. Set this piece aside while we make the handle.

Grab your two handle fabrics and the fusible woven strip.
Fuse the fusible woven, centered, to the wrong side of one handle piece.

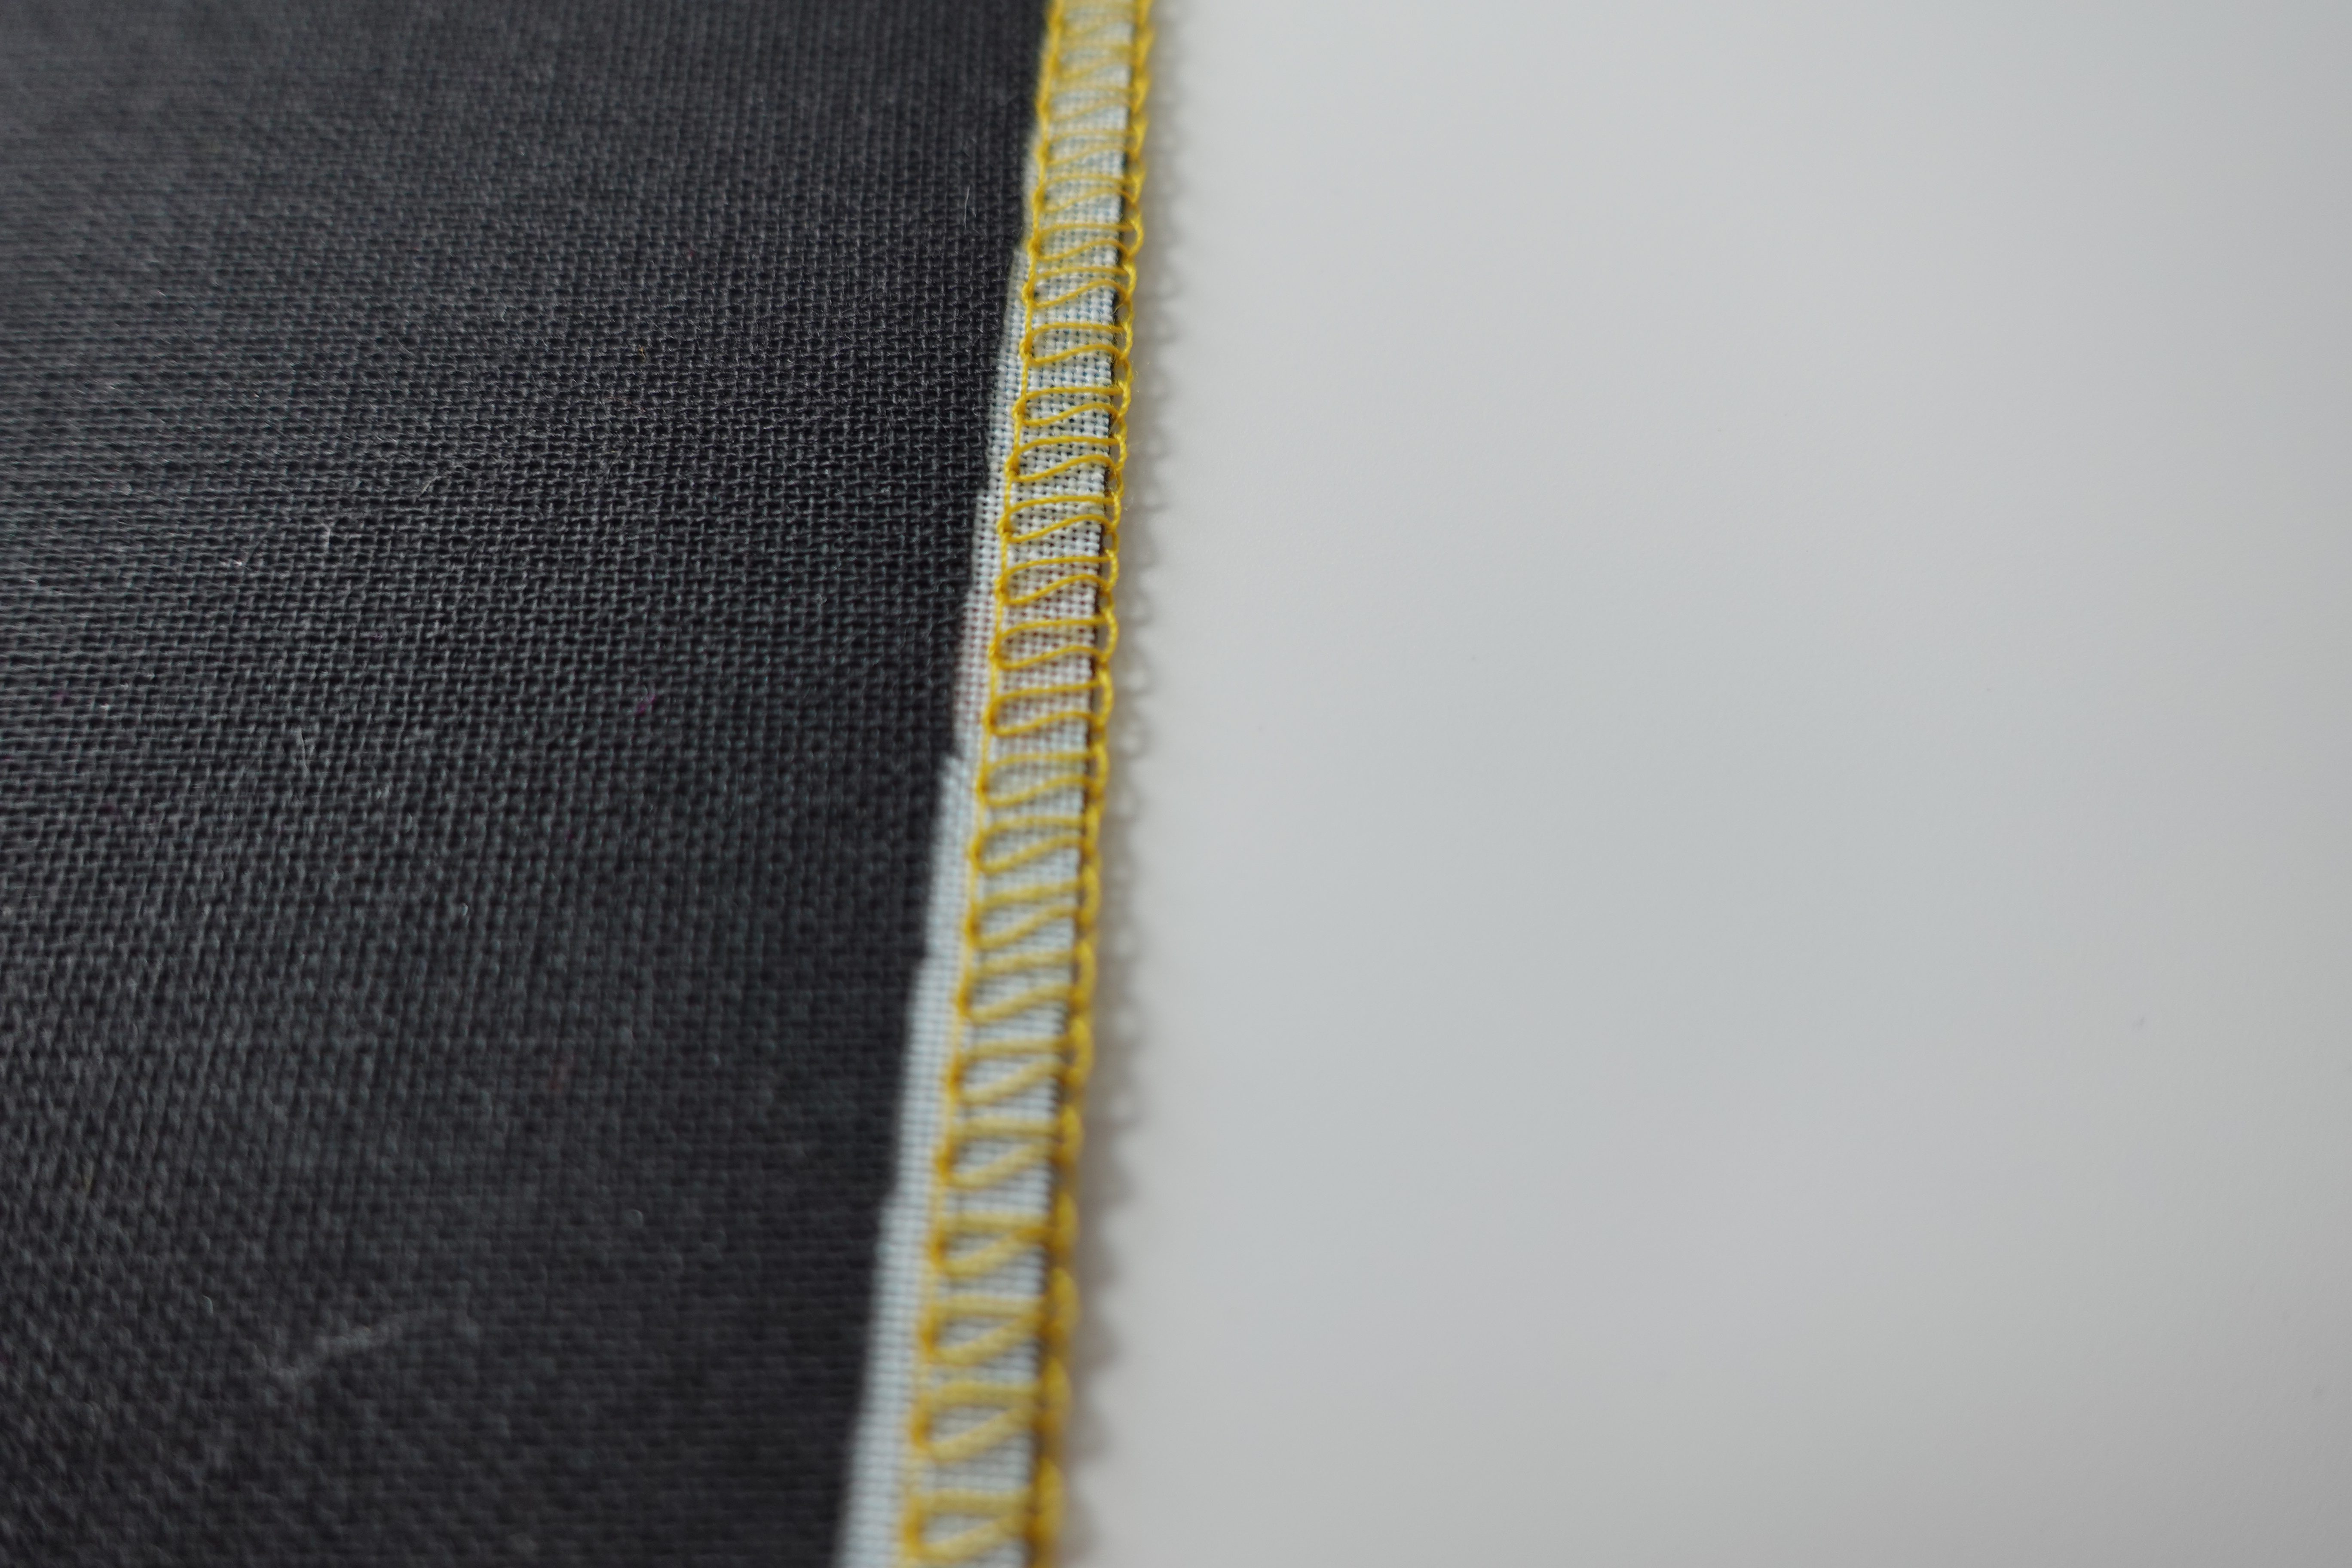
Wrong sides together, serge the two pieces together with your preferred stitch. I used a 2-thread Flatlock stitch for the ladder stitch effect, but any version of an overlock stitch would also work great. Repeat for the other side, leaving the two short edges open.

Turn your handles right side out. I highly recommend using the Easy Point and Turner from Sookie Sews for this! This tool is invaluable in your sewing room especially for turning bag handles.

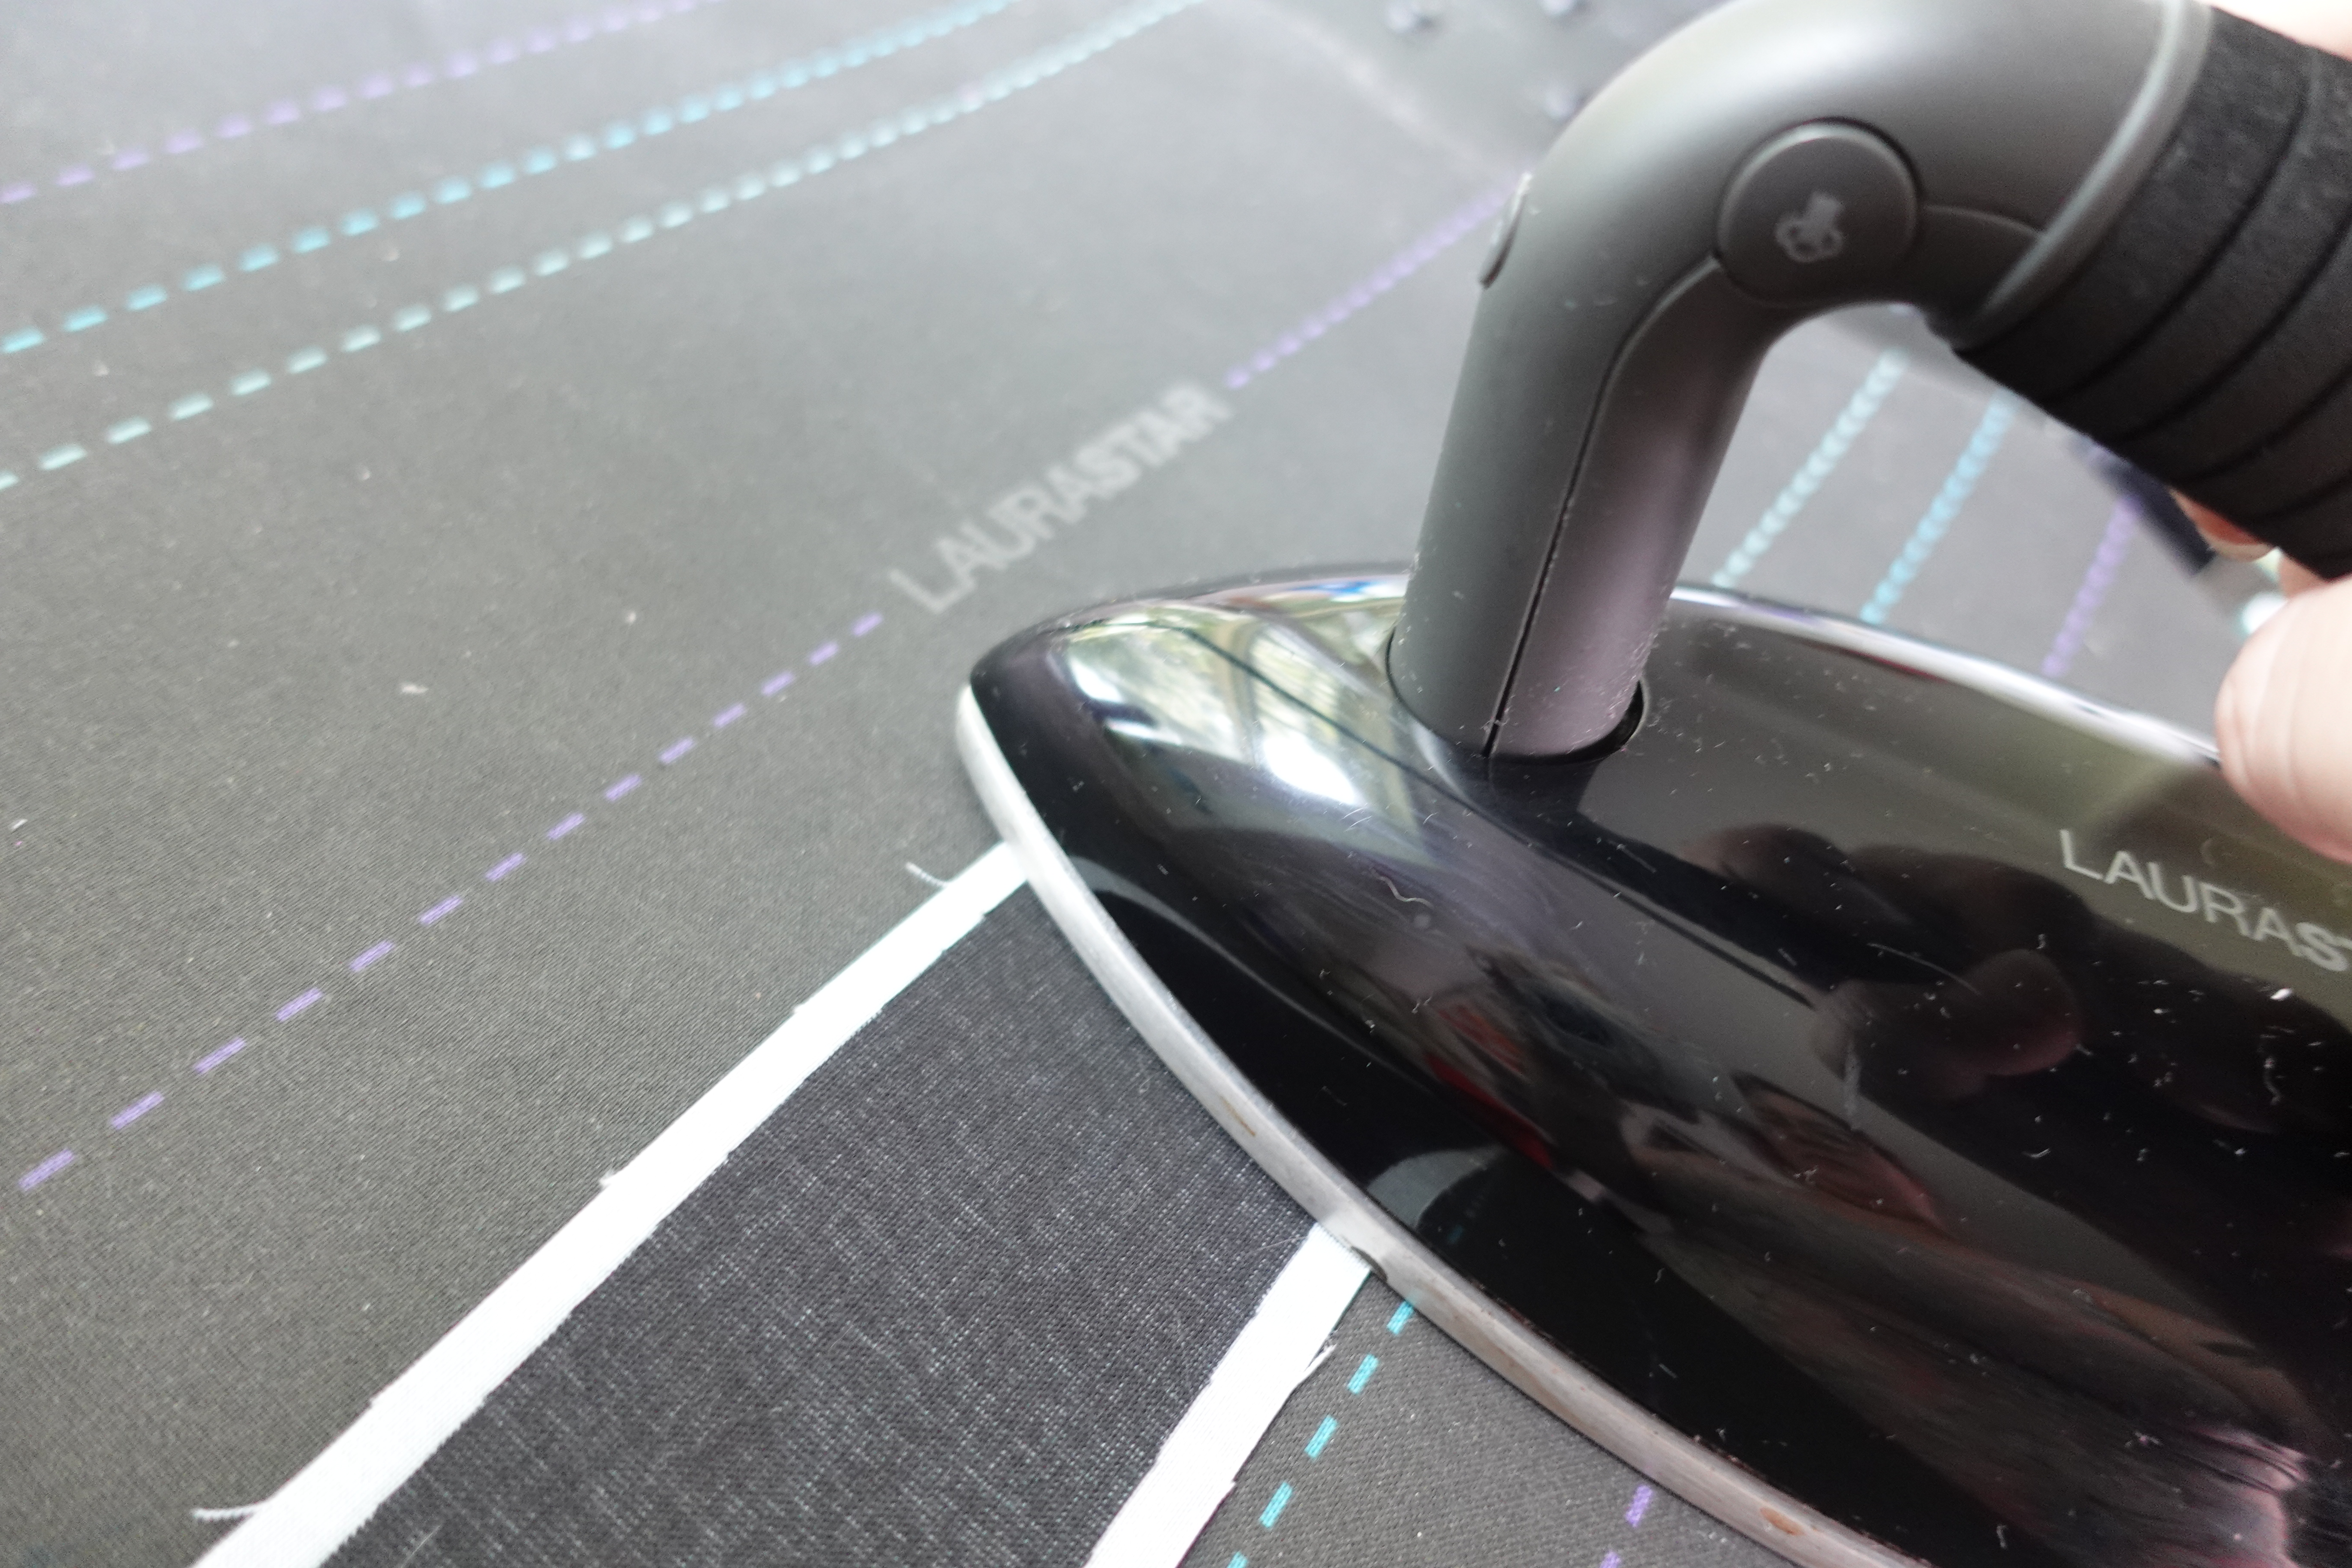
Pull your seams apart to really accentuate the ladder stitches of the flatlock on the outside of the handle. Press your handle.
Now let’s assemble the bag pieces together.
Press a crease into the center of your bag, then fold either edge to the center mark and press the bag to create a crease again. This will make three creases and four segments of the bag. Repeat with the bag top.

Find the centers of the bag handles and align them, right sides together, over the two “side centers” of the bag top. Secure with Wonder Clips.
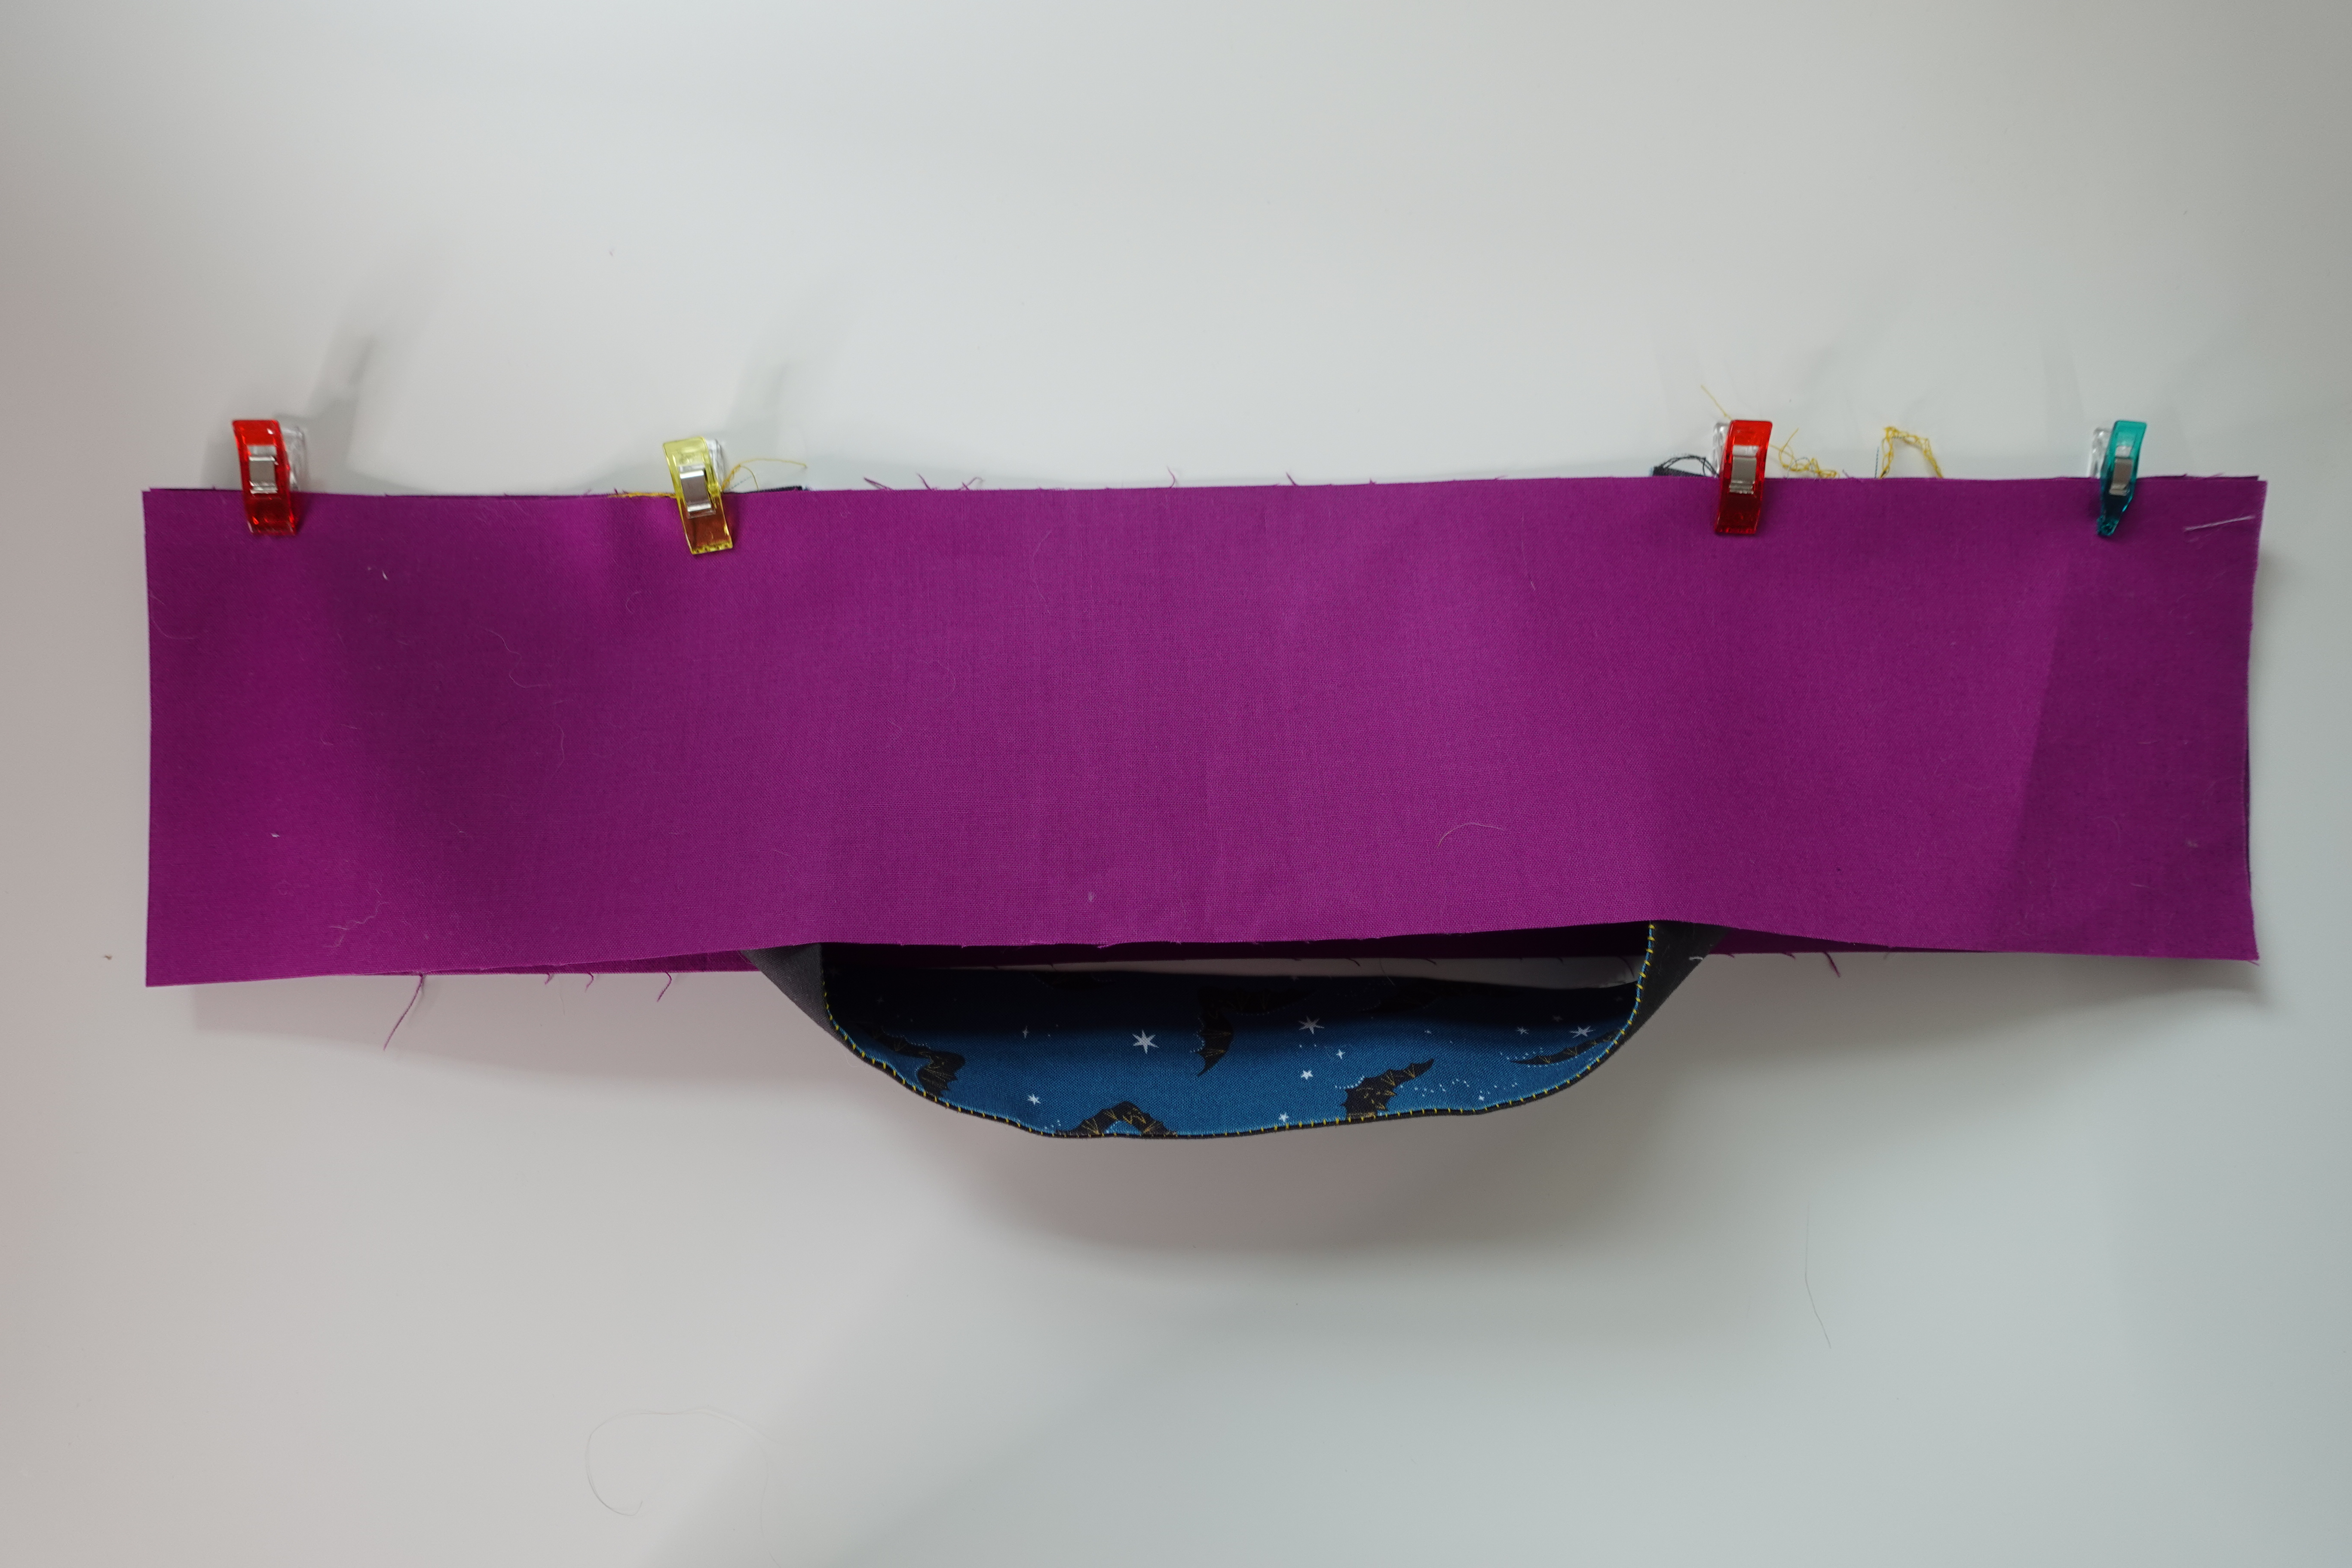
Place the other bag top pieces over the handles, align the top pieces and secure with Wonder Clips.

Serge all the raw edges together. Again, I used a flatlock stitch for this.

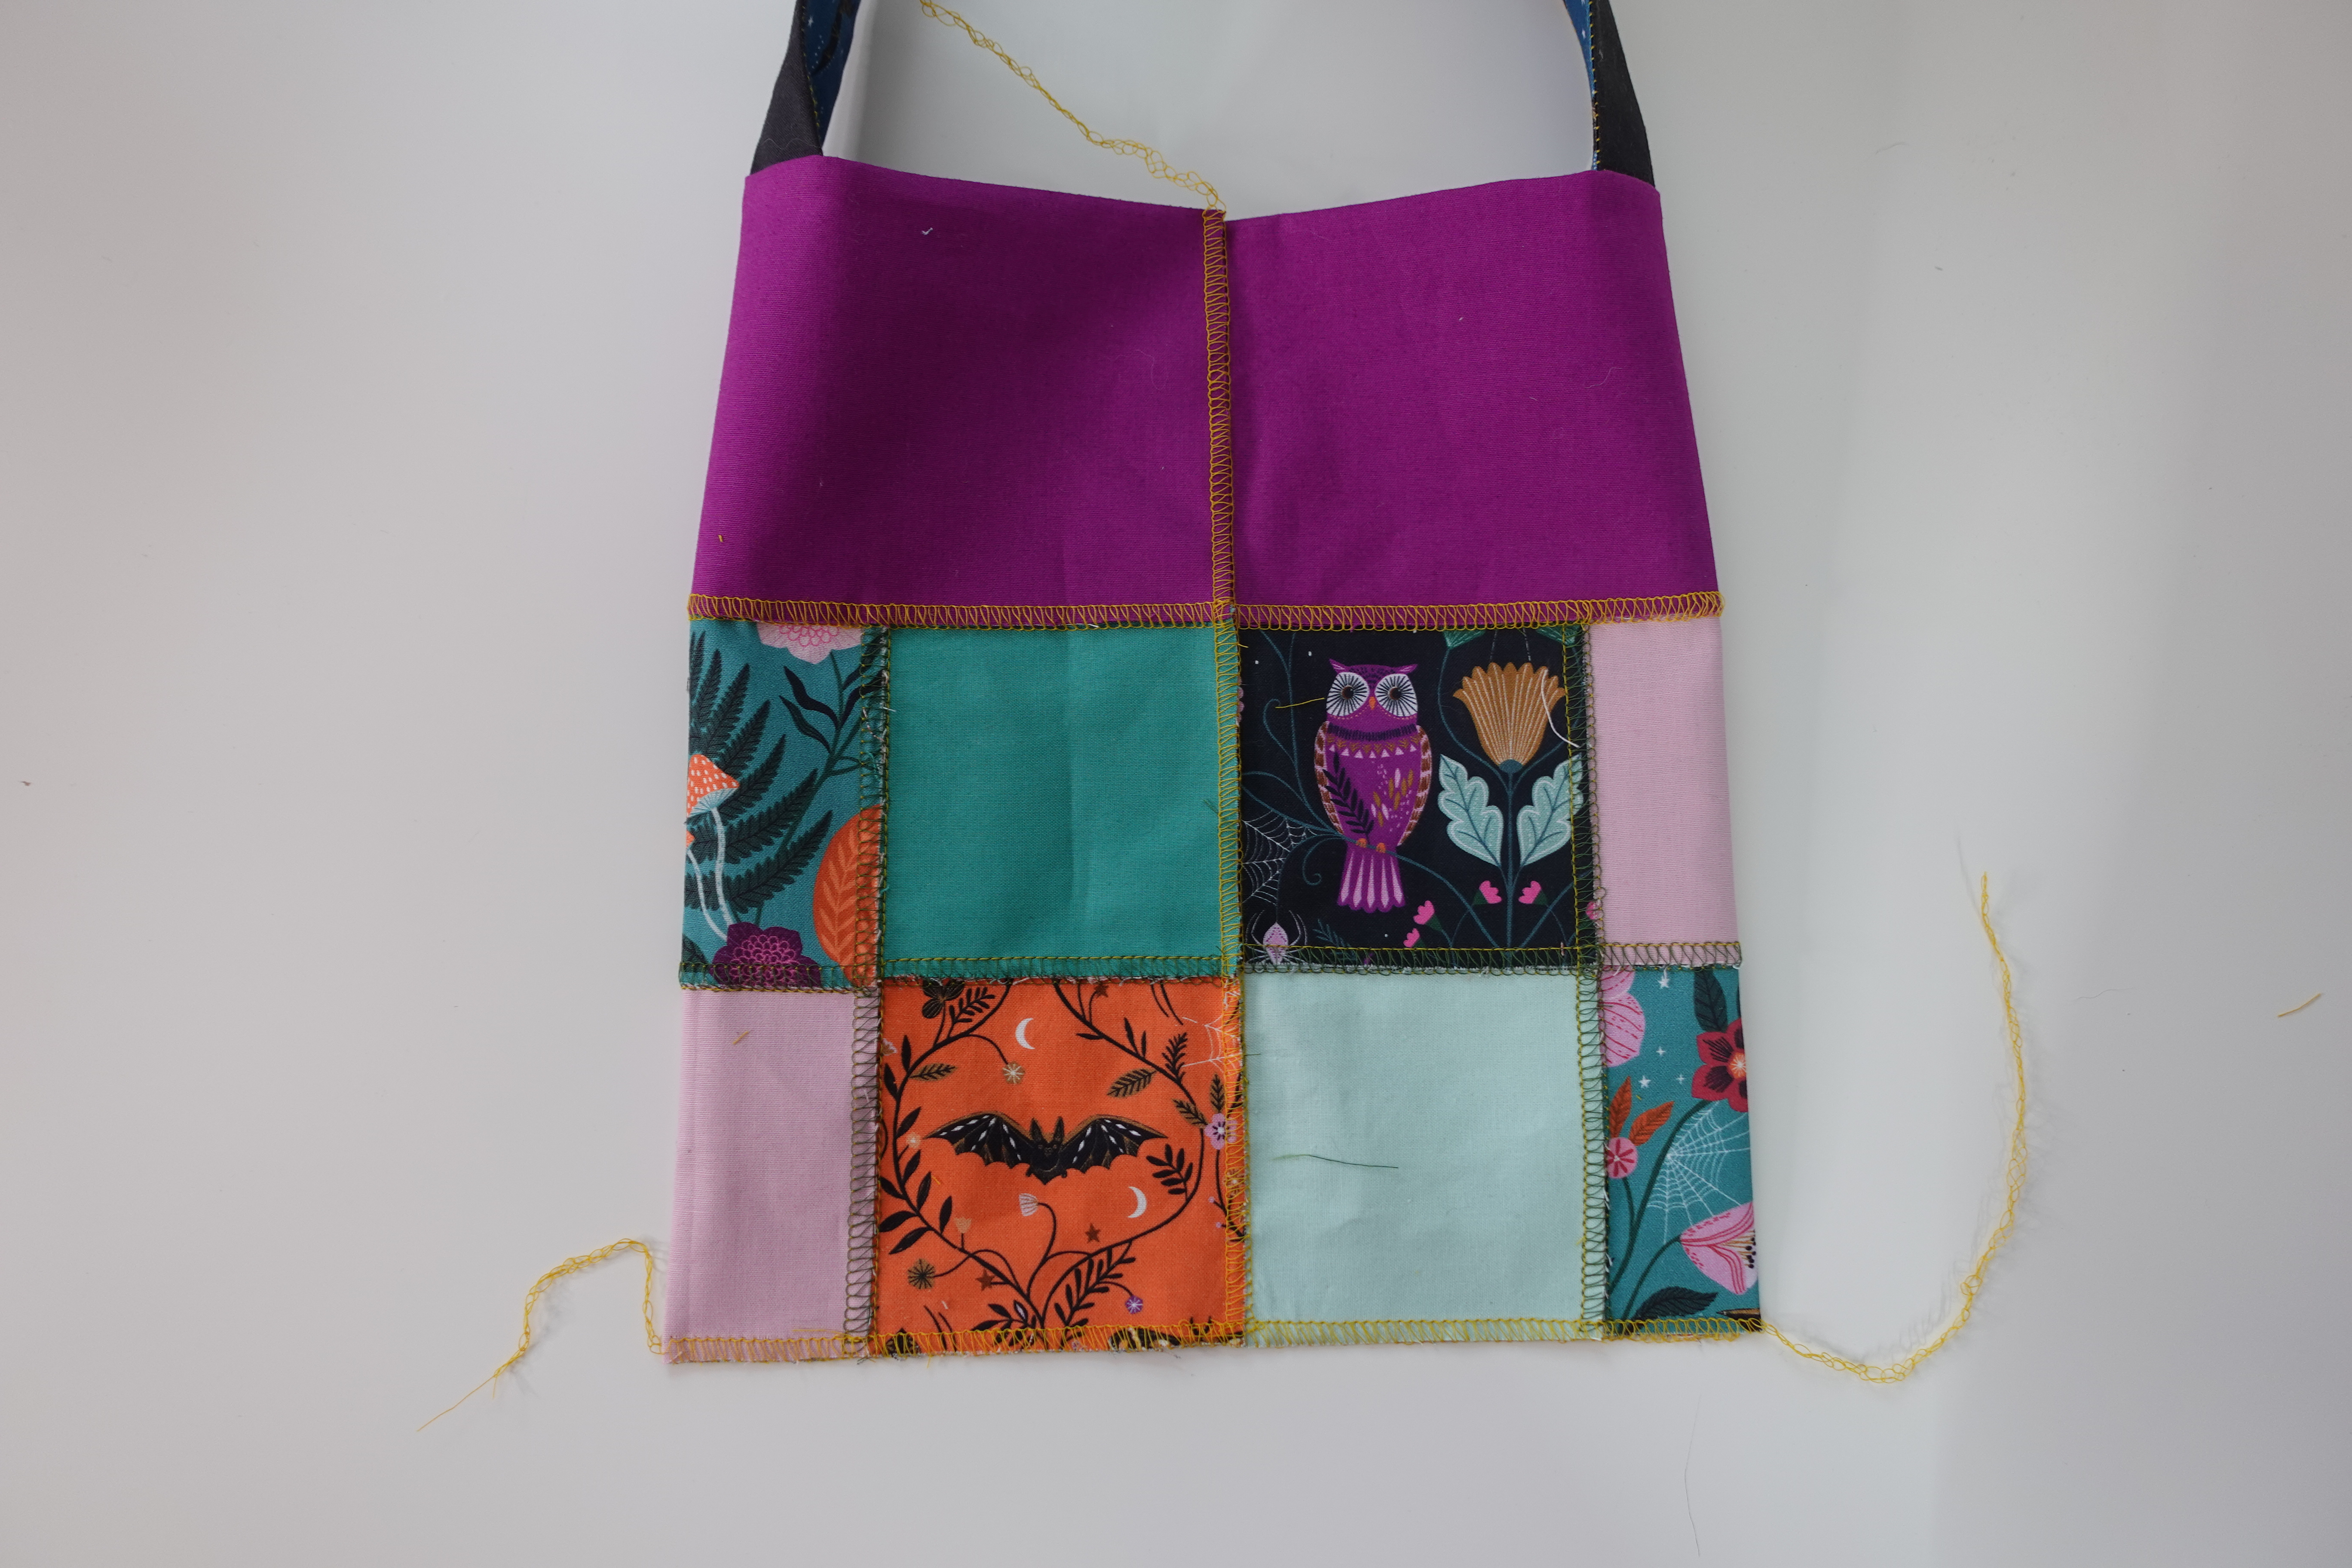
Pull apart the layers to reveal the stitches, before folding the top piece to the back.
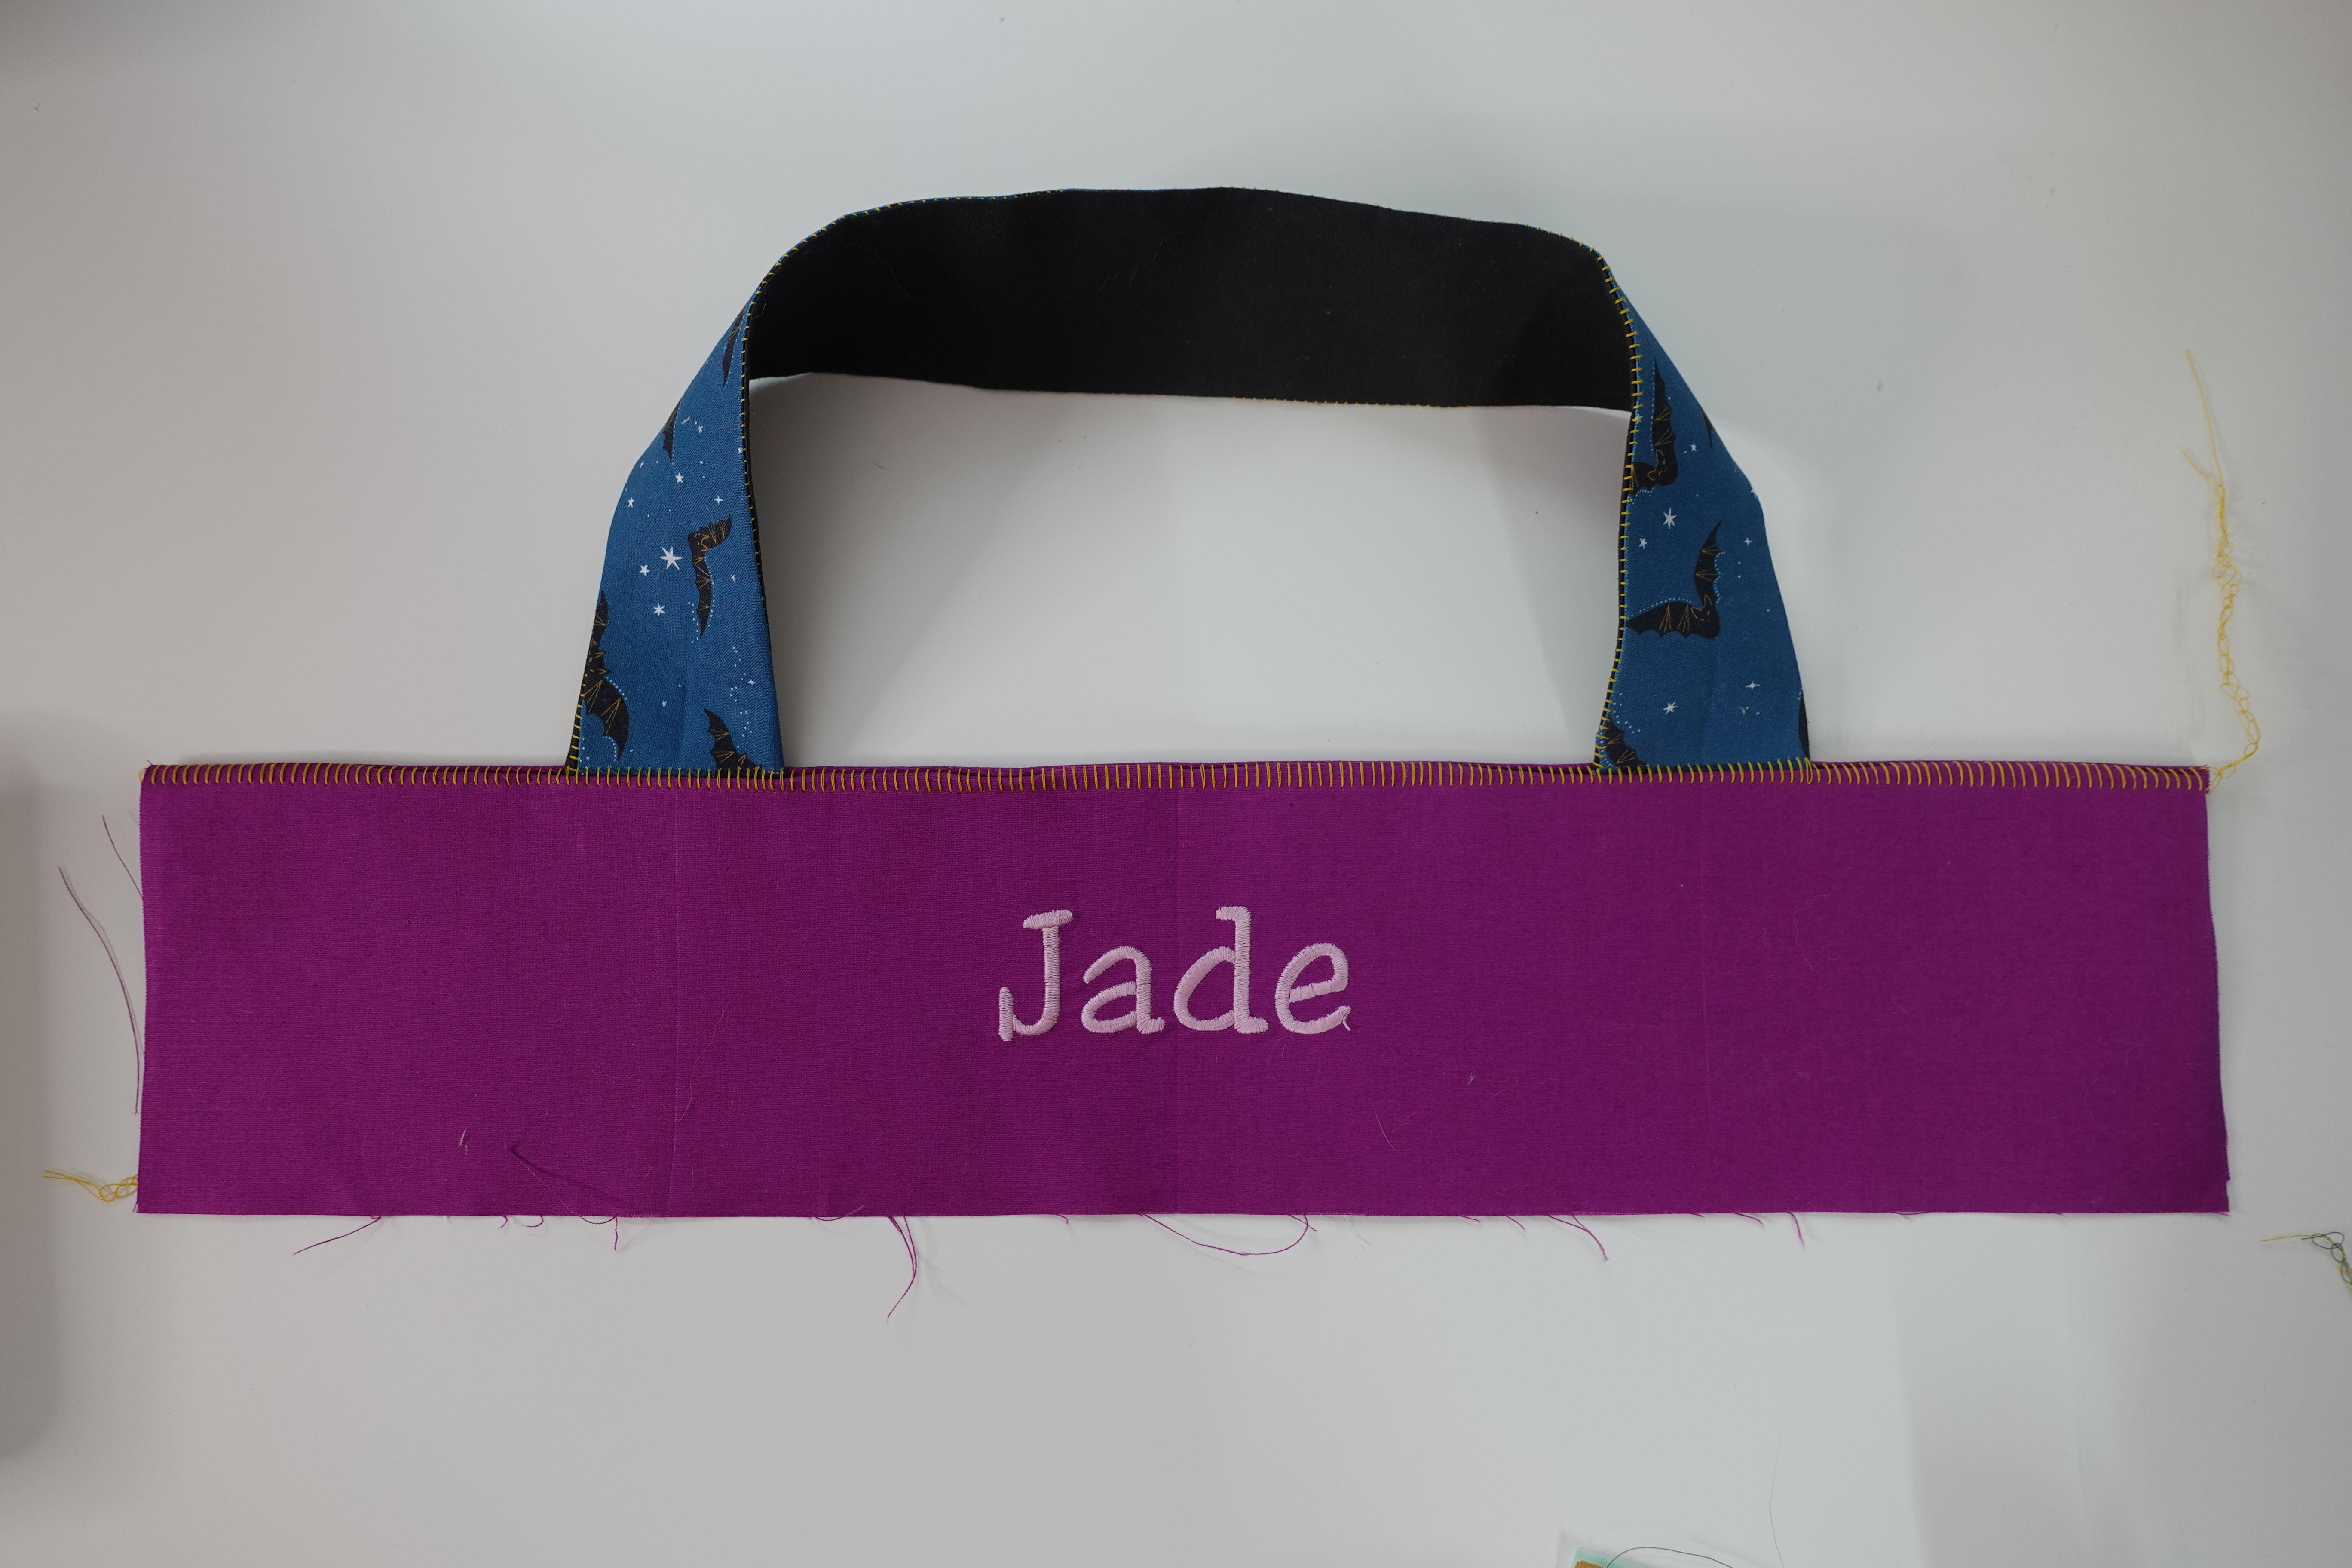
How cute! You’re almost there. You may need to trim the front piece to even up your seams.
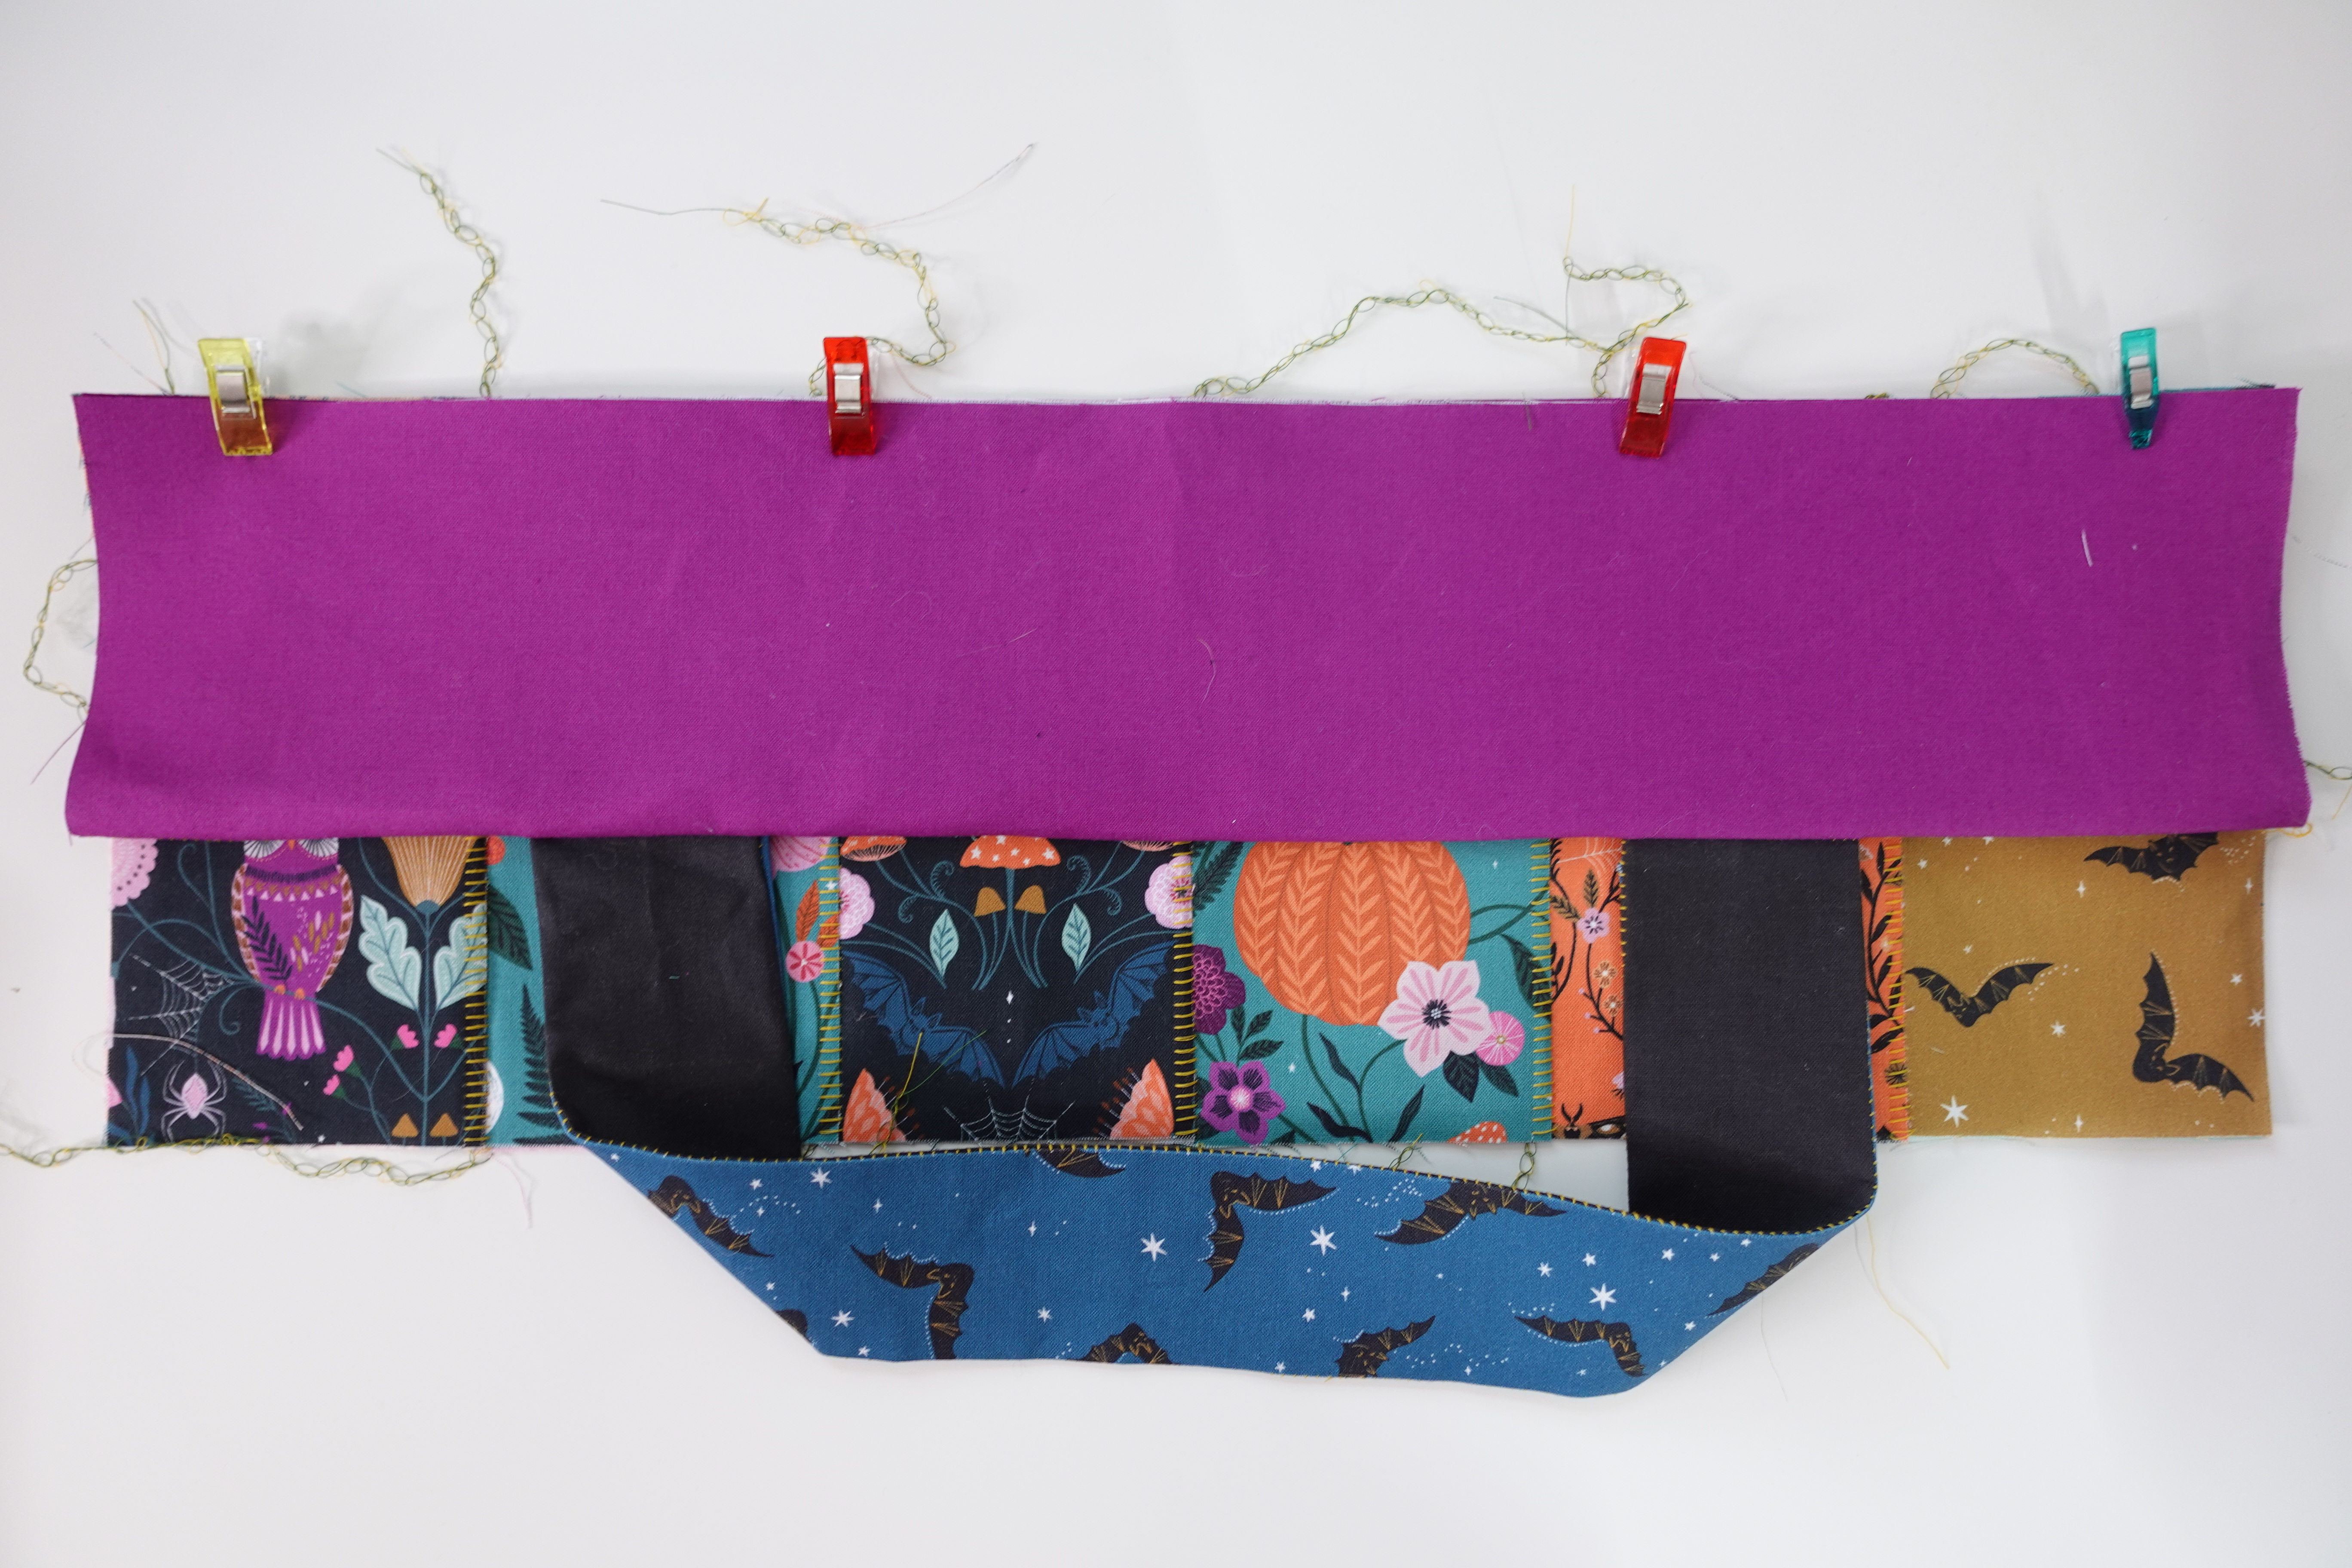
Align the top of the base with the bottom of the bag top, right sides together. Remember to pull out all those thread tails so they get taken care of by your overlocker knife.
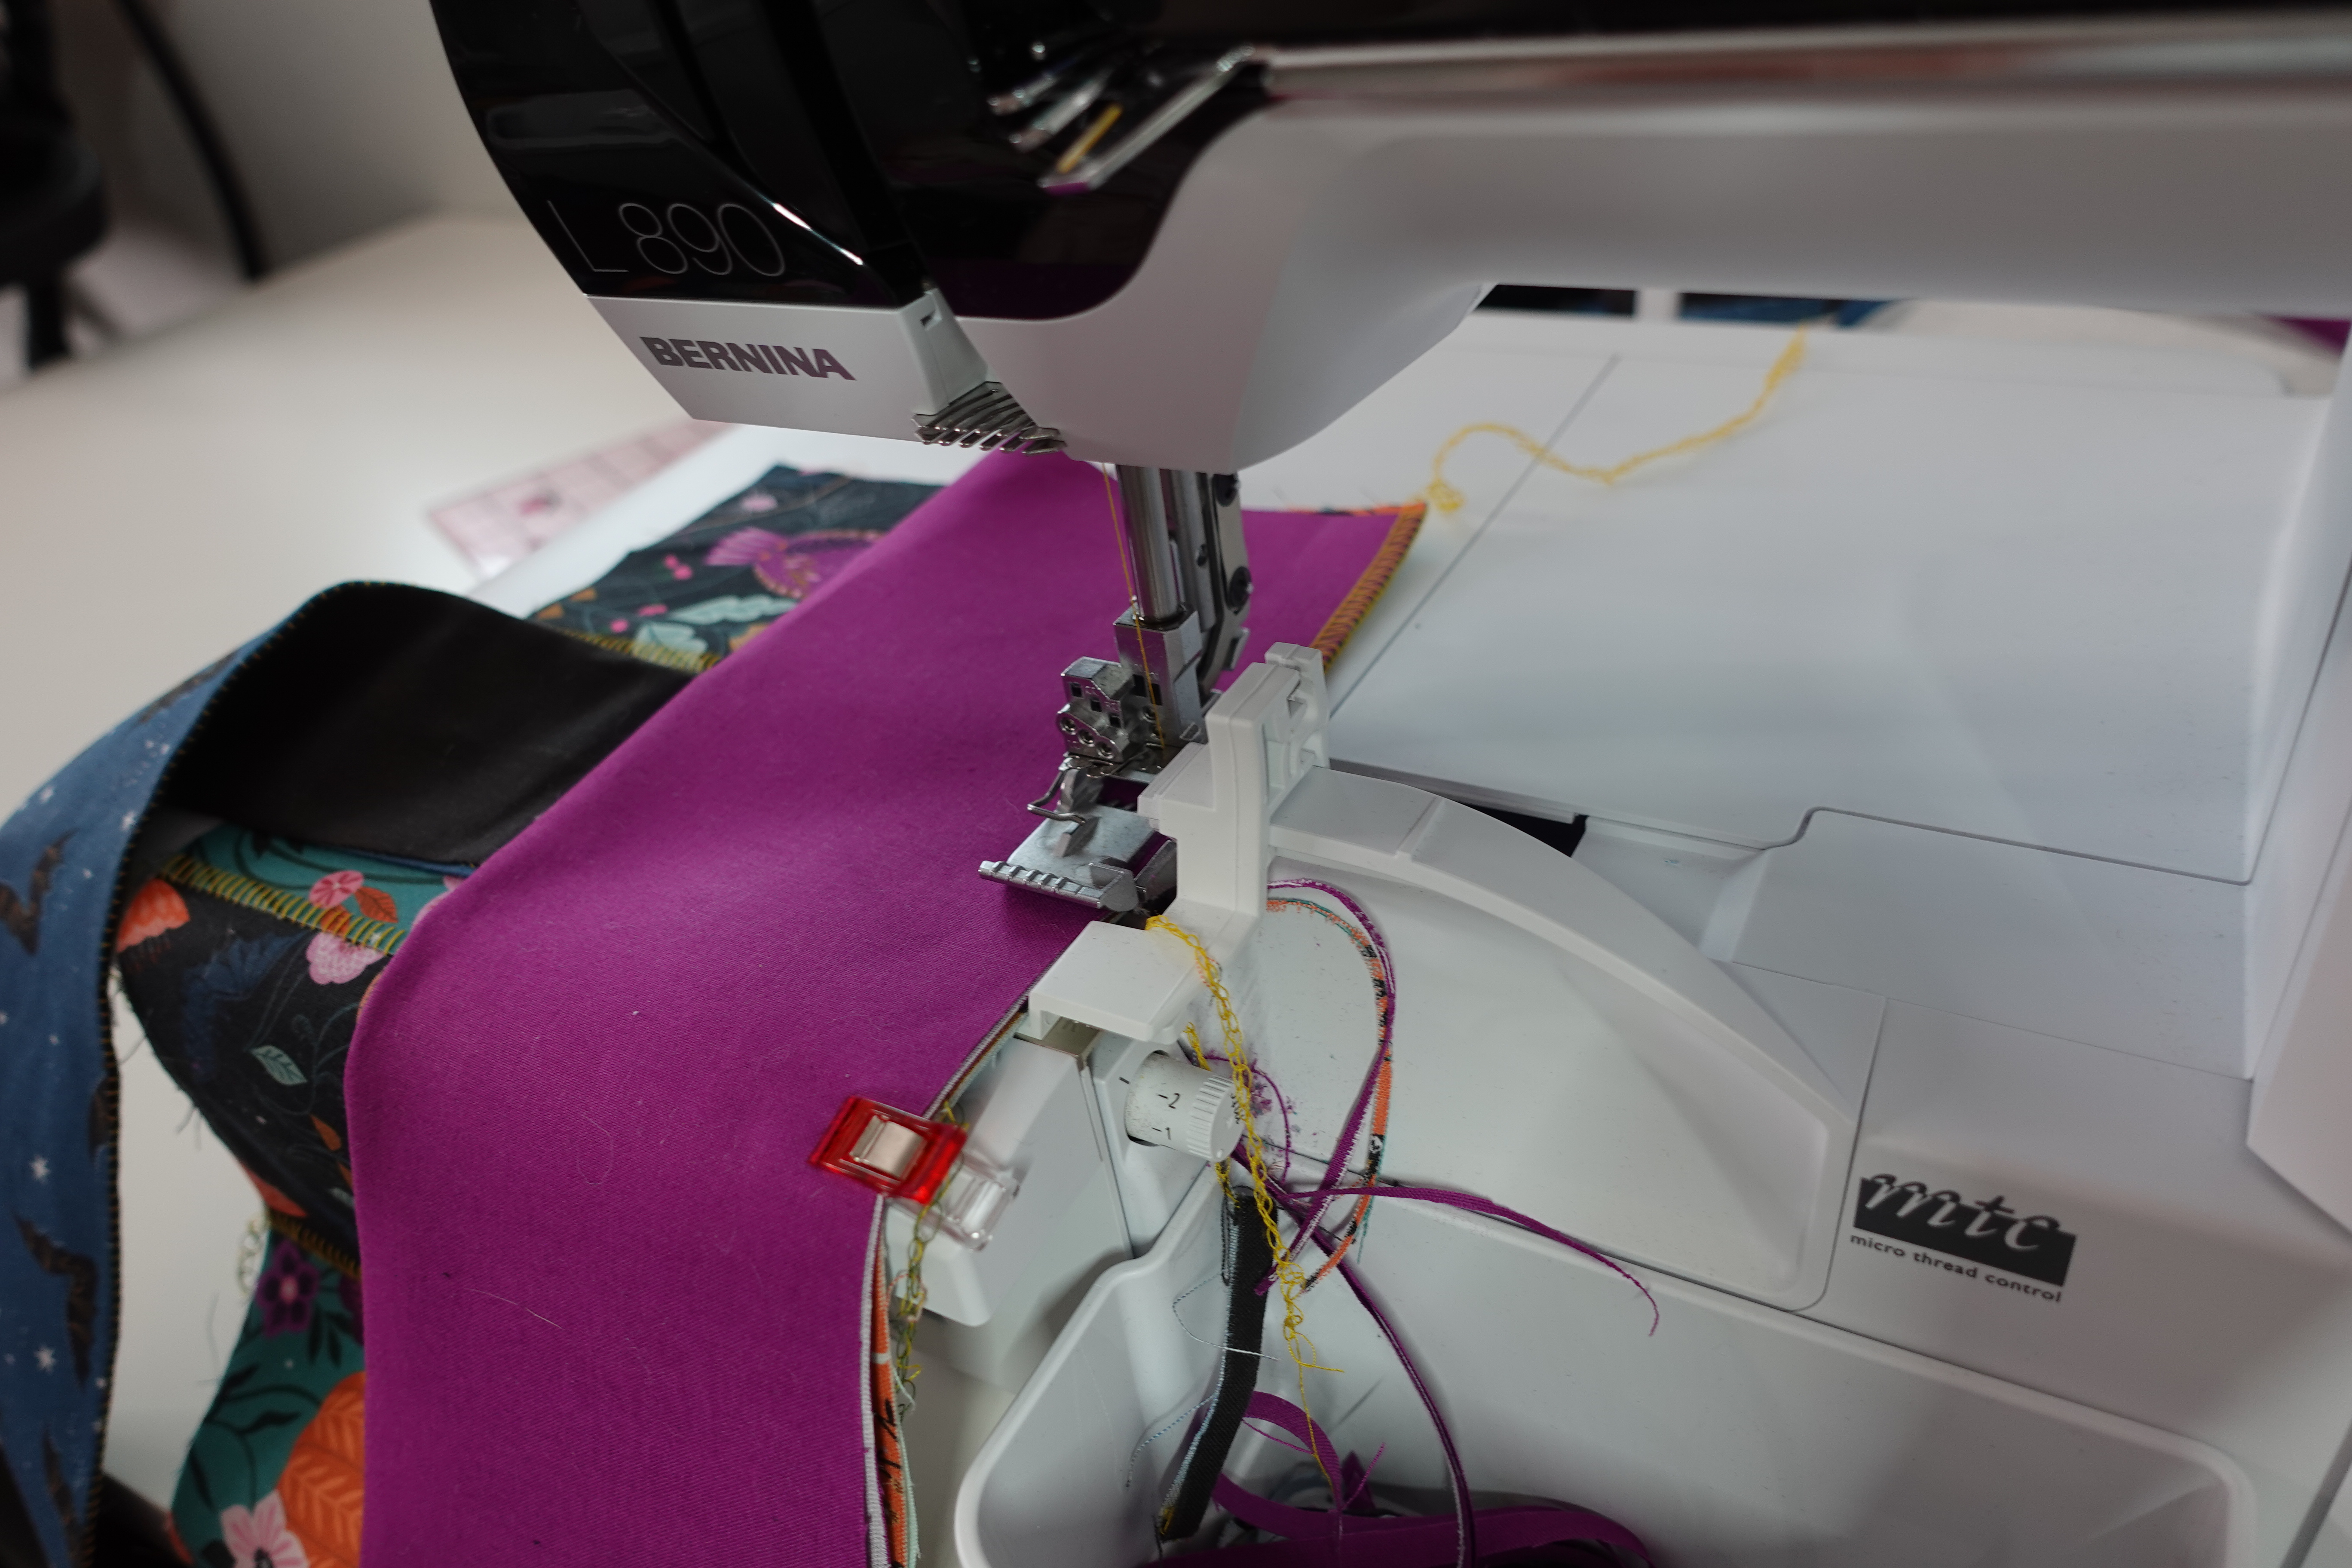
Use the 2-thread Flatlock to secure these pieces together.
Pull your your seam flat to expose the stitches for the top of the bag.
Fold your bag in half, right sides together and secure with Wonder Clips.
Flatlock along the side seam only.

Open your bag and pull your flatlock flat. Now, with the bag still inside out, fold the bag in half the other way: the seam you just made at the center back of the bag and the handle will be on either side seam. Secure with Wonder Clips before flatlocking your final seam.
Pull your flatlock flat and secure your flatlock thread tails in your preferred method. Check out this blog by Sue O’very of Sookie Sews to see How to Secure a Serger Seam

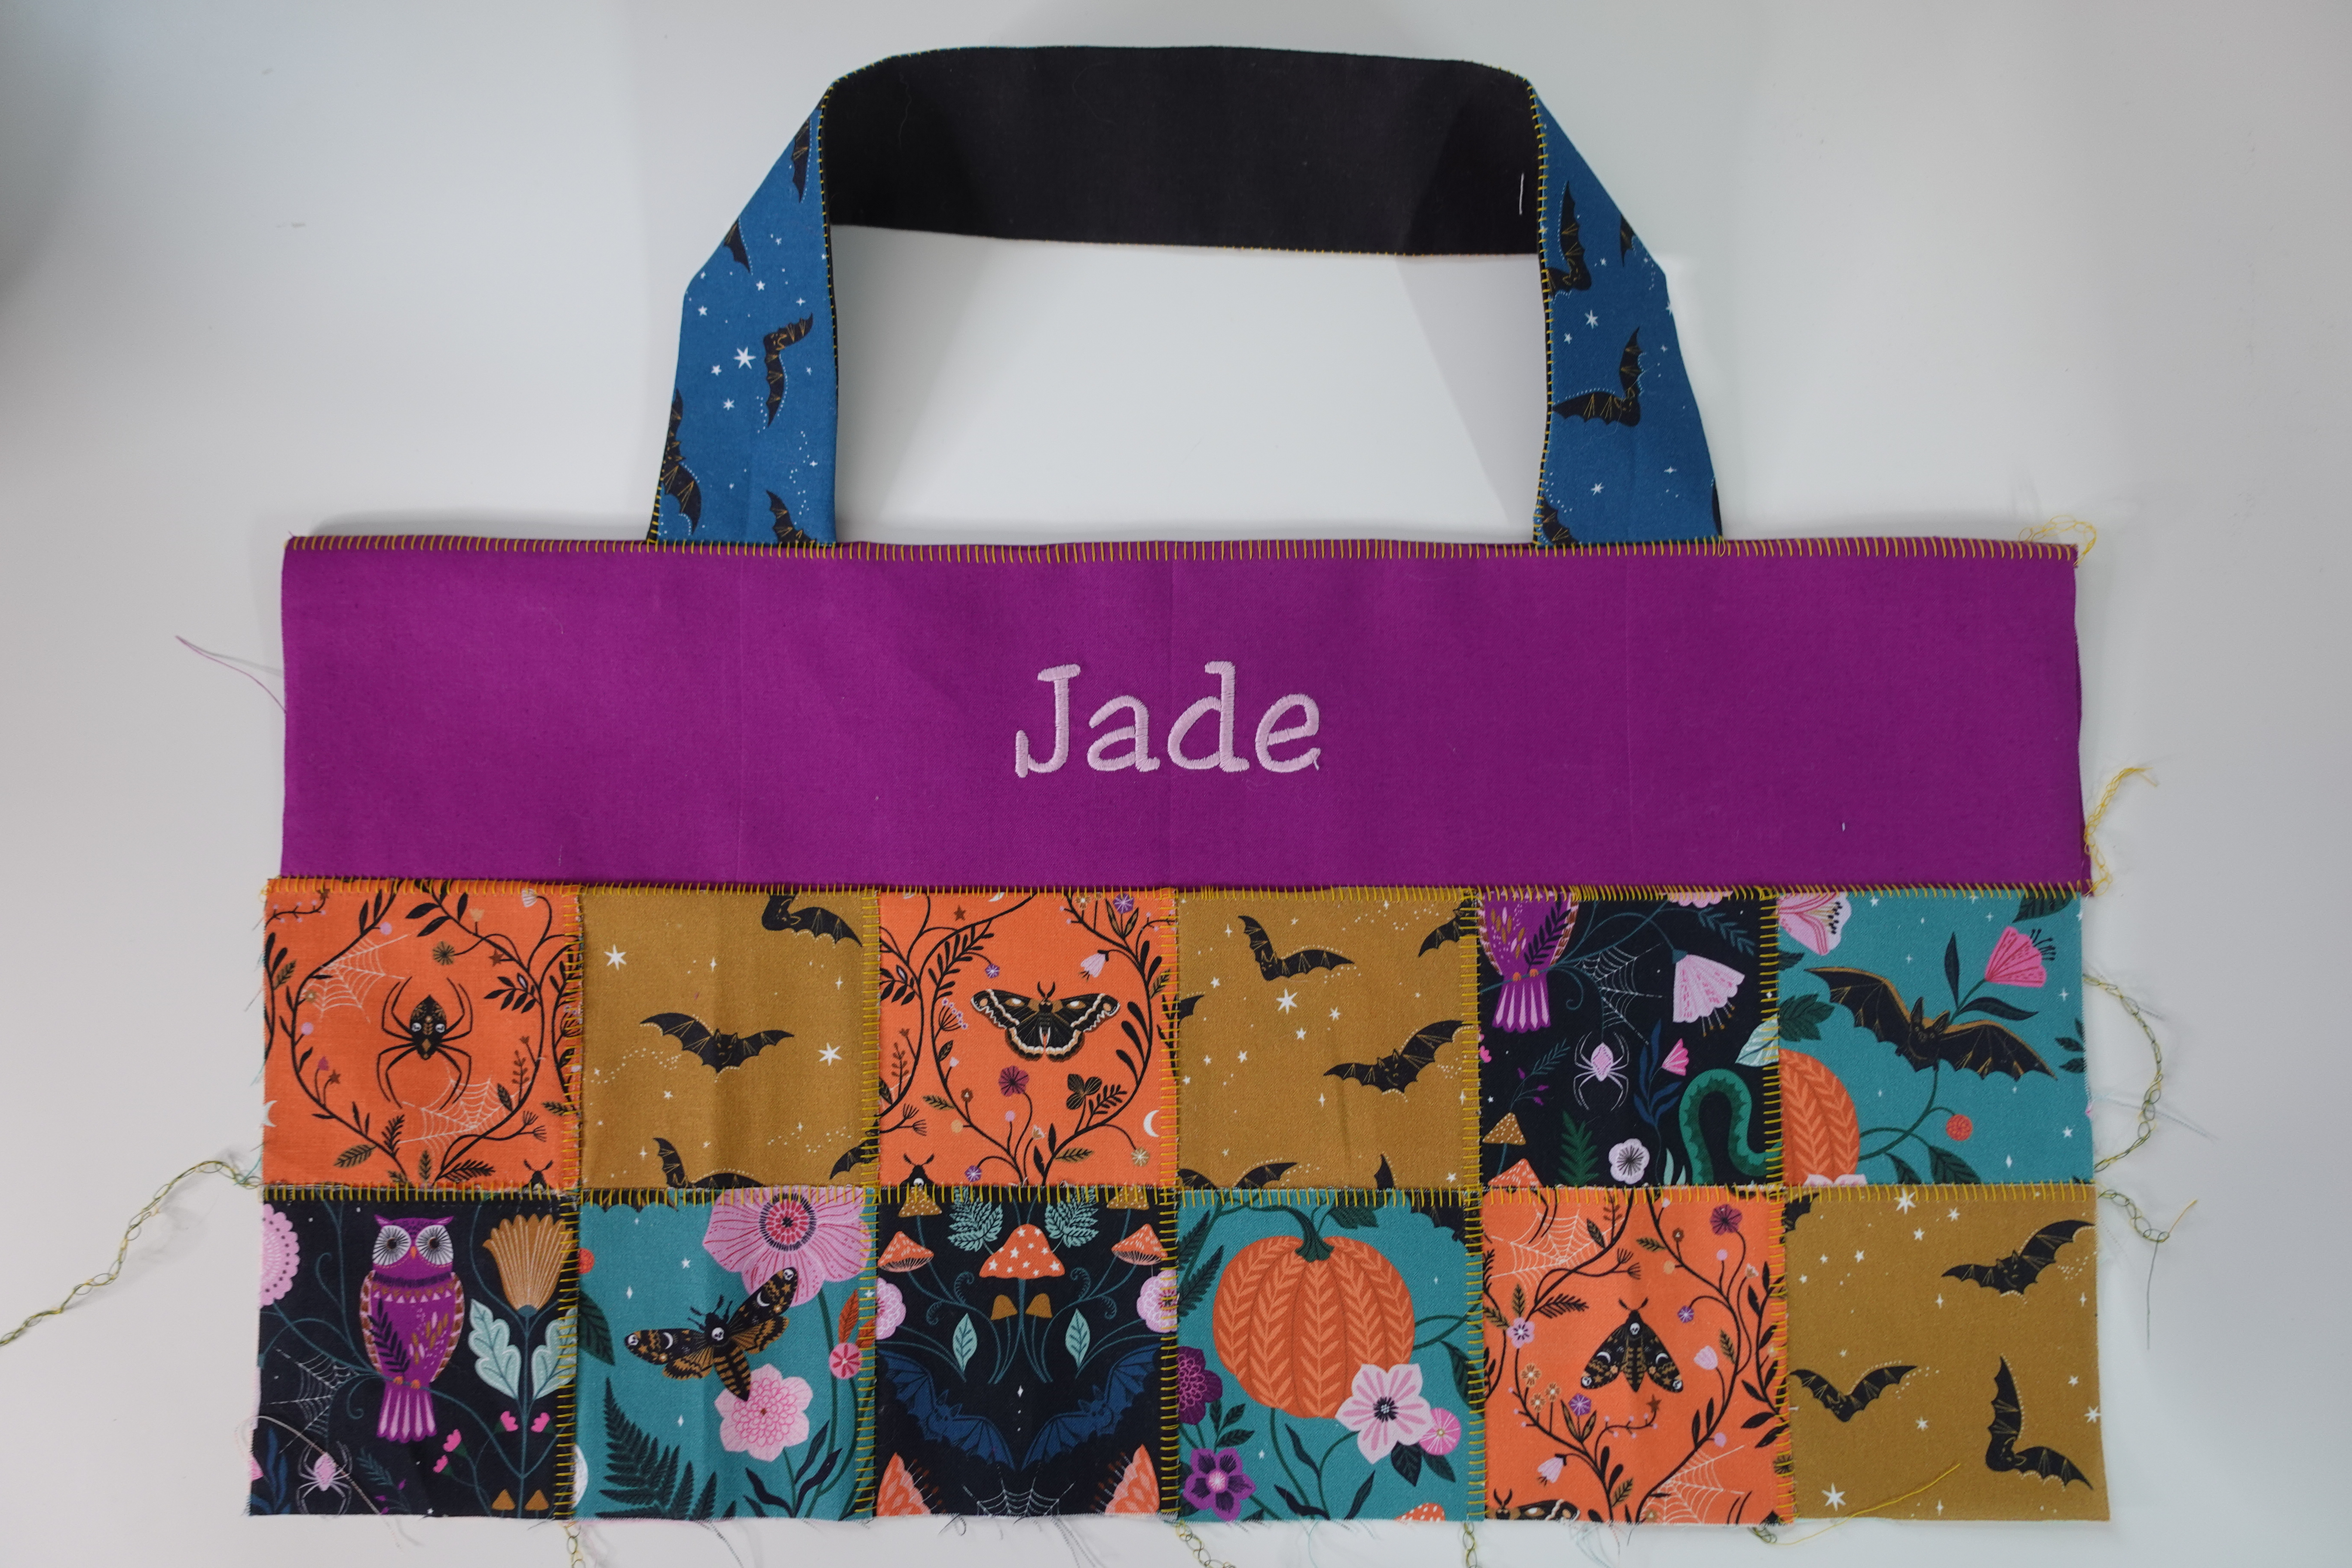
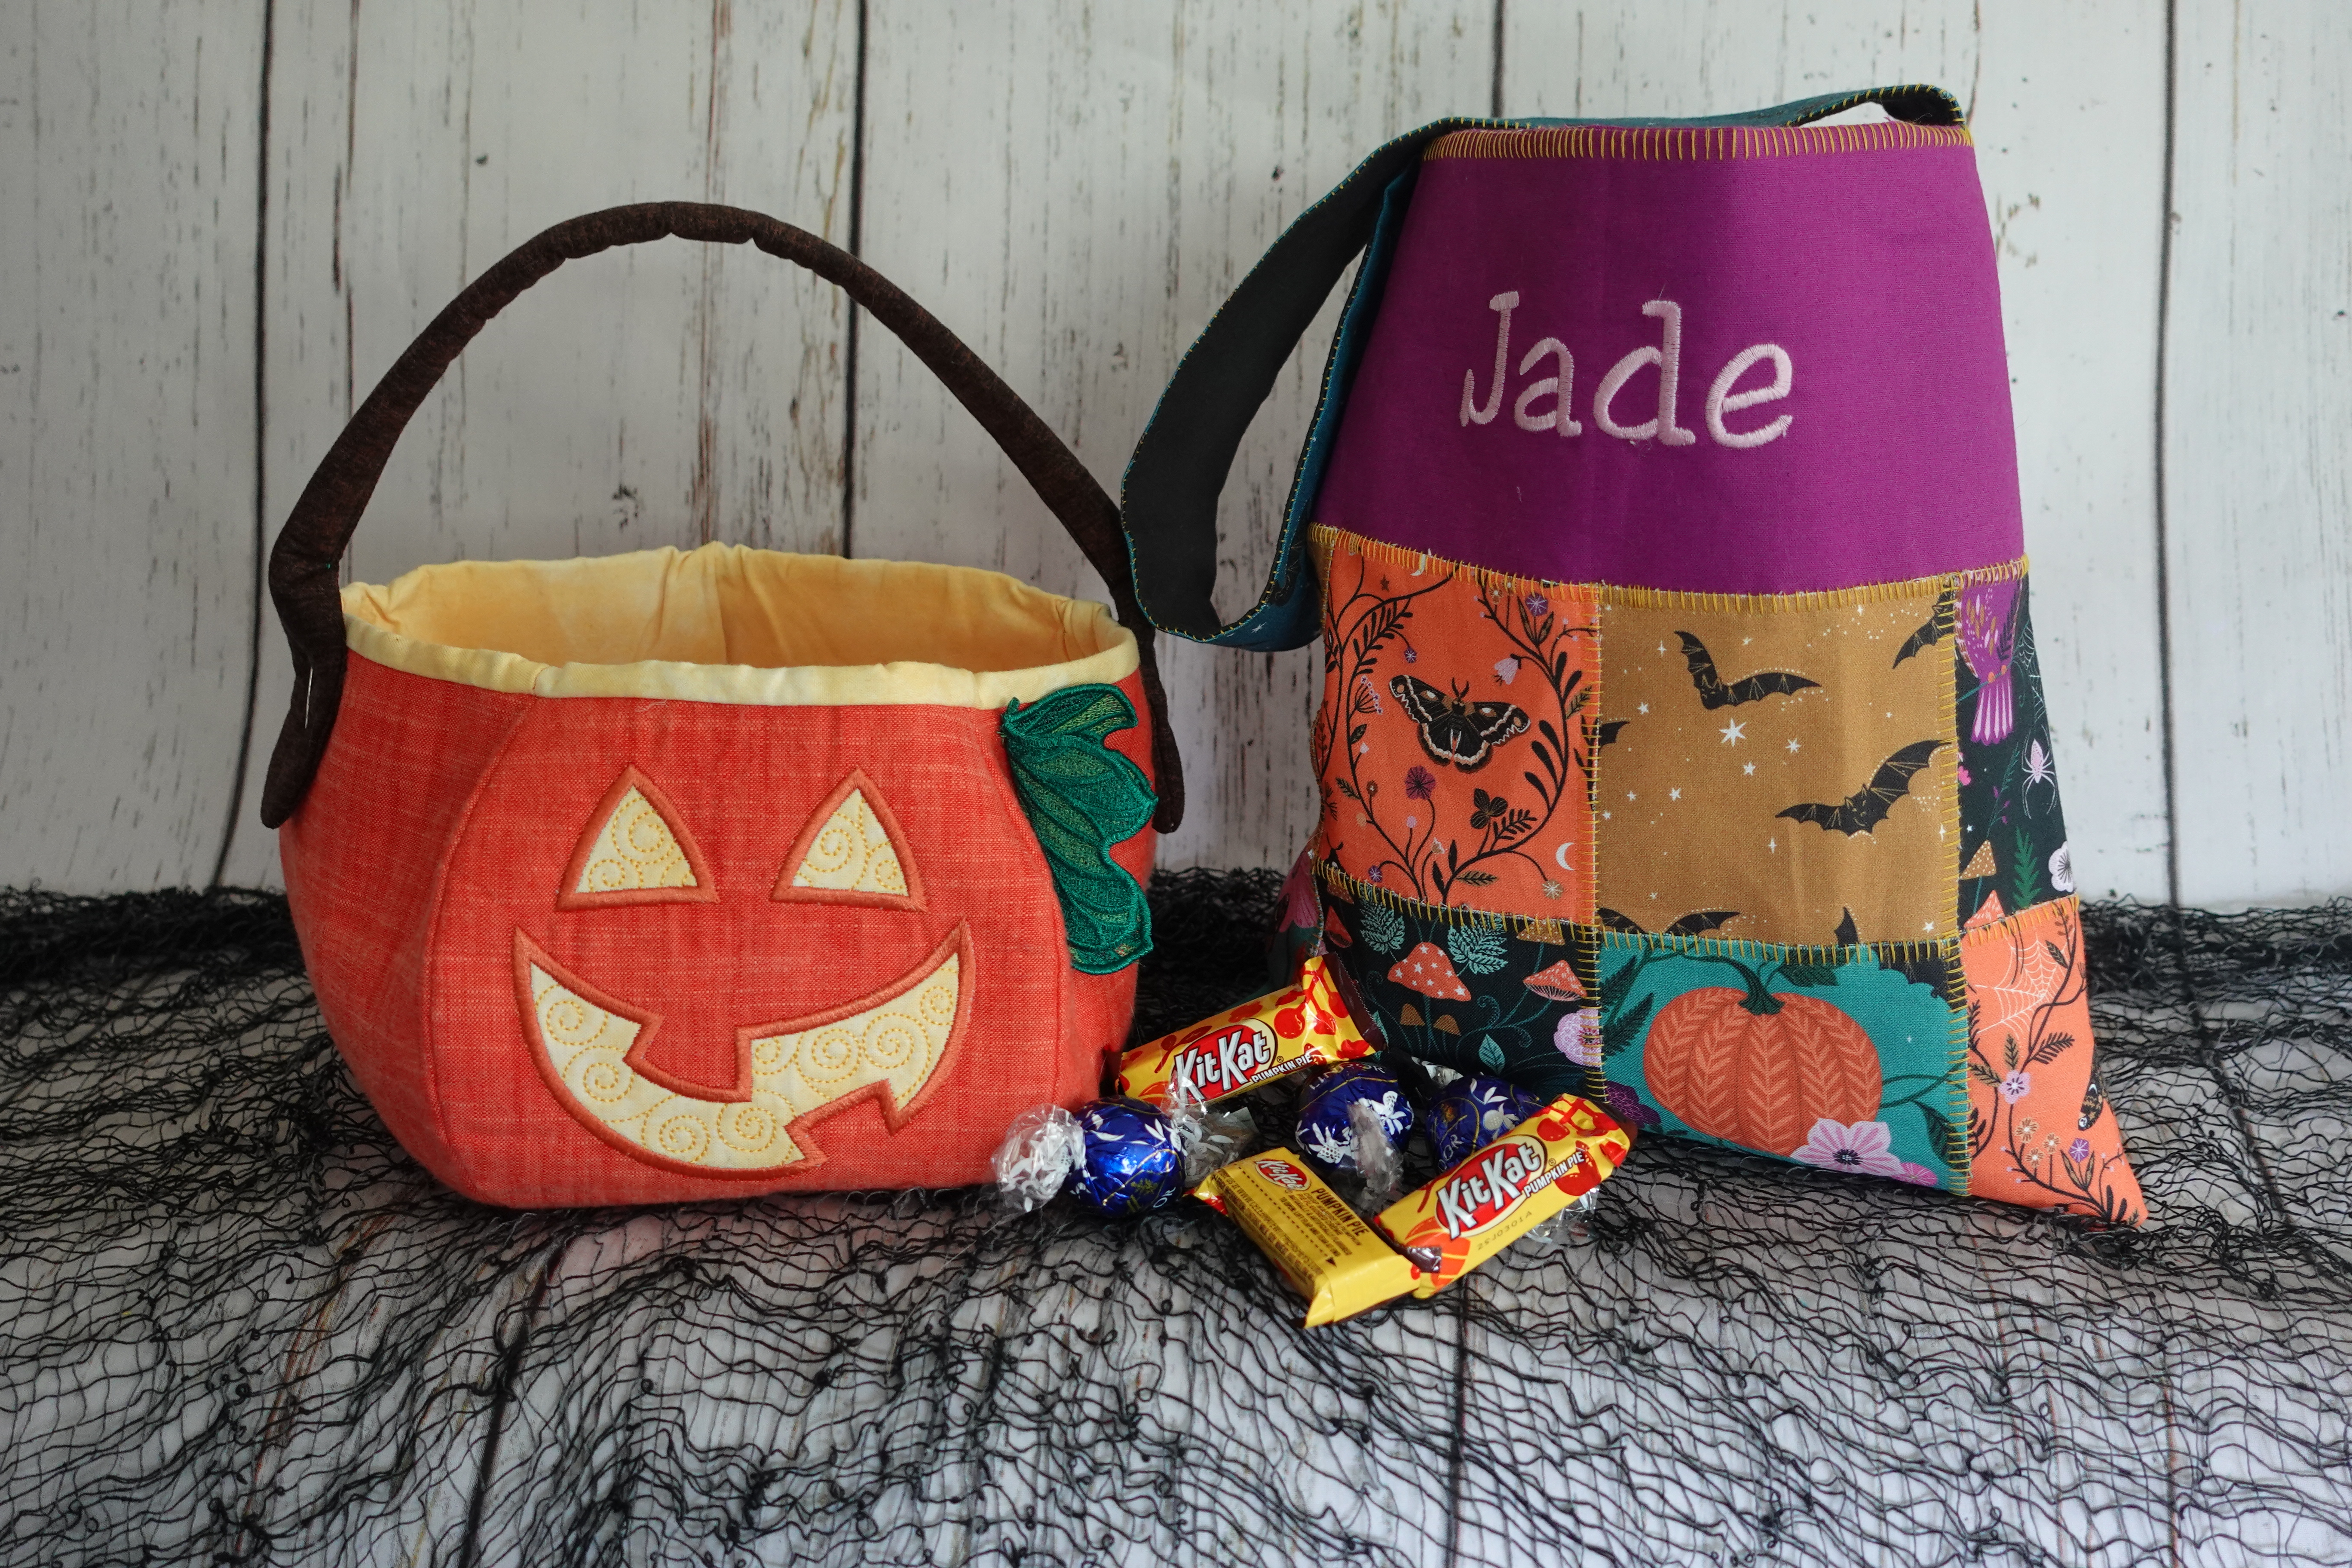
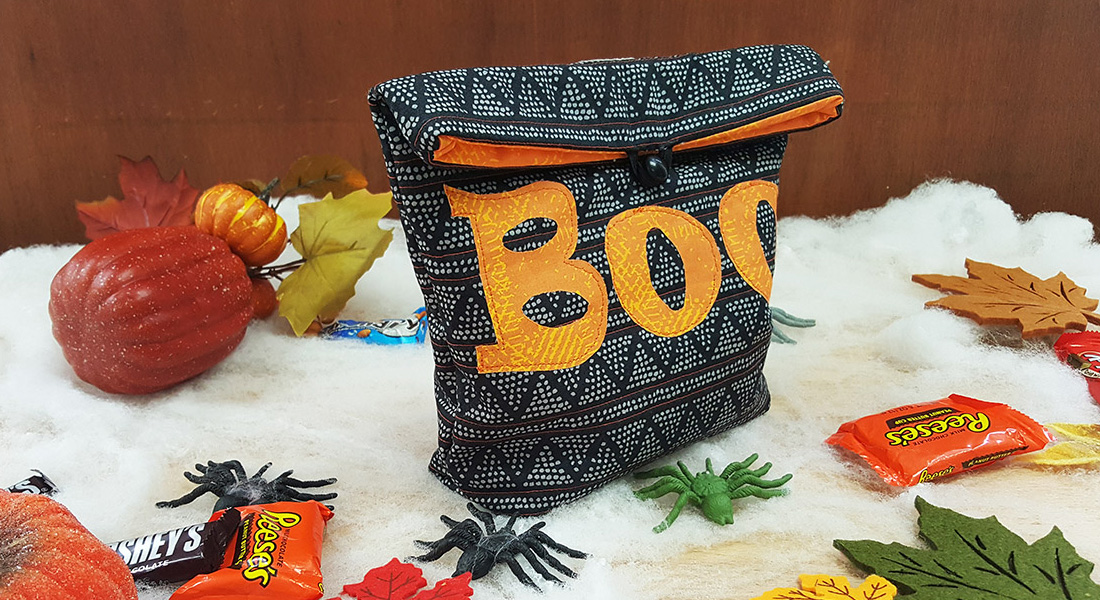
Tada! Your bag is finished and it looks so so cute!
Want to make a bigger version of the bag? Simple! Just add more rows to the bottom of the patchwork to make bigger sizes for bigger kids (and bigger candy hauls!) If you’re concerned about the bag being able to hold bigger hauls of candy you can always change the last seam to a 4-thread Overlock for extra candy security. Though I’m not worried! My flatlock held three pounds of candy weight when I tested it to see if it’d hold.
I hope you have fun and play around with different ways to make this bag! I’m thinking how cute it would be to do strip piecing along the bottom too! I think I might make one like that for my niece Ellie to go with her cute costume.

Want to make that cute little embroidered pumpkin pail? You should, it’s so much fun!
Check out my virtual class Handmade Holiday: Pumpkin’ Pail and I’ll teach you how to make it, step-by-step. This is a virtual class that you will get lifetime access to and can watch as much as you want whenever you want.
Are you needing more help with machine embroidery? I got you covered! Come check out Tough Kitten Crafts! It’s my goal to make you fearless with machine embroidery through classes, an inclusive community and lots of content covering everything from how to hoop properly to embroidery on velvet. Come join me on Instagram, over on the Tough Kitten Crafts Blog or in our wonderful Tough Kitten Crafts Community on Facebook which is made up of an incredible group of international folks. Let’s get you fearless with machine embroidery!
Tag BERNINA USA and Tough Kitten Crafts on Instagram if you make your own Flatlock Patchwork Trick or Treat Bag! I can’t wait to see what you create.
Xoxo Kate
Used Products


What you might also like


2 comments on “Flatlock Patchwork Trick-or-Treat Bag”
-
-
I liked this bag, I made 2 for the grandkids
Leave a Reply
You must be logged in to post a comment.

This bag is a really cleaver and cute project. I love that you used the overlock for the whole project. I’m going to make some of these for my family. Thanks!