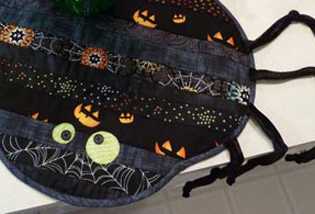
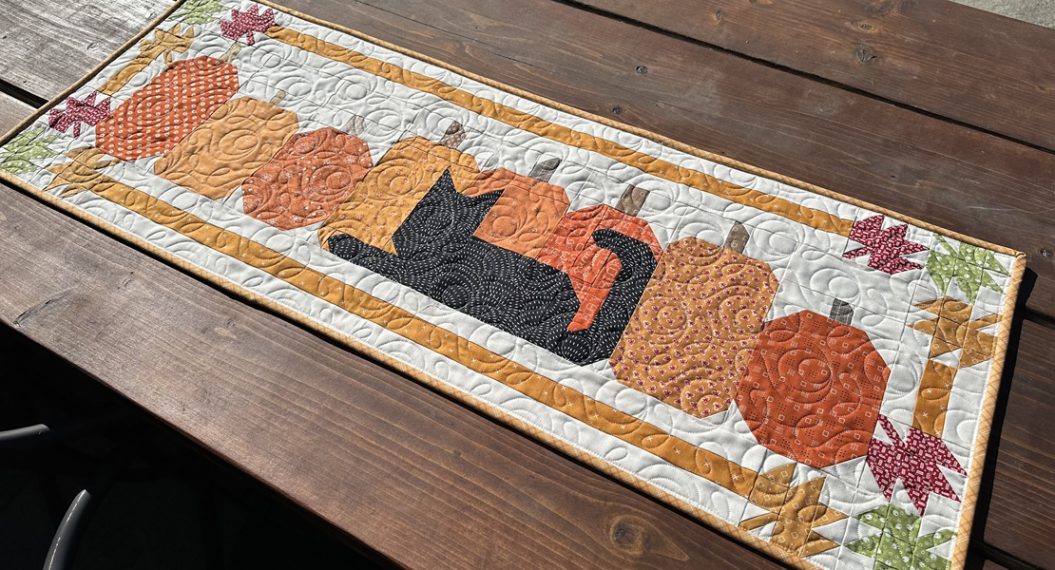
Pumpkin Table Topper Tutorial
Hello WeAllSew readers, my name is Cherry Guidry from Cherry Blossoms and I am a proud BERNINA Ambassador. I started sewing at age four, have loved creating with fabric all my life, and really enjoy hand embroidery. Fall is my favorite time of year. I love the fresh crisp air, apple cider and pumpkin spice lattes, beautiful color, and pumpkins everywhere. So I’ve designed a simple fall project to show you an easy way to do “hand embroidery” by machine with this pumpkin table topper!
I stitched out this pumpkin table topper on the BERNINA 880 with Aurifil threads and Color Weave fabrics by Benartex. You can download a copy of the pattern below in the materials list.
Materials for the Pumpkin Table Topper:
- Sewing machine (I use the BERNINA 880)
- Open embroidery foot #20D
- Patchwork foot #57 with guide
- BSR—BERNINA Stitch Regulator
- Walking foot #50
- Fabrics:
- White Fat Quarter—background/border
- Gray Fat Eighth—border
- Orange Fat Eighth—border
- Green ¼ yd—binding
- Fat Quarter—backing
- 16″ x 17″ Eversewn cotton batting
- 16″ x 17″ Hobbs wool batting (optional)
- Download the Pumpkin Table Topper Pattern
Additional Supplies:
- 90/14 Topstitch needle
- Tear-Away Embroidery Stabilizer
- 505 Temporary Spray Adhesive
- Spray Starch
- White quilting thread—#624 Superior Threads Bottom Line
- Quilting pins
- Pencil
- Light Box—Optional
- Aurifil 12wt thread in the following colors: Med brown #2372, Light brown #2930, Green #5016, Red #2230, Yellow #2145
- Aurifil 50wt white thread for the bobbin
Step 1: Cut and label all fabrics
White: 14″ x 11½”—embroidery background, (1) 1½” x 18″ strip, sub-cut into (6) 1½” x 3″—pieced border
Gray: (2) 13½” x 1″—border
Orange: (1) 3″ x 18″ strip, sub-cut into (7) 3″ x 1½”—pieced border
Green: (2) 2¼” x width of fabric—binding
Backing & Batting: 16″ x 17″
Step 2: Prepare the background fabric
Print the design layout making sure your printer is set to no scale; tape the two pages together along the dotted lines. It’s a good idea to stabilize the fabric you will be embroidering to keep it nice and flat, so I spray starch and press dry the fabric several times until it is stiff as paper; this also makes it easier to transfer the design onto the fabric.
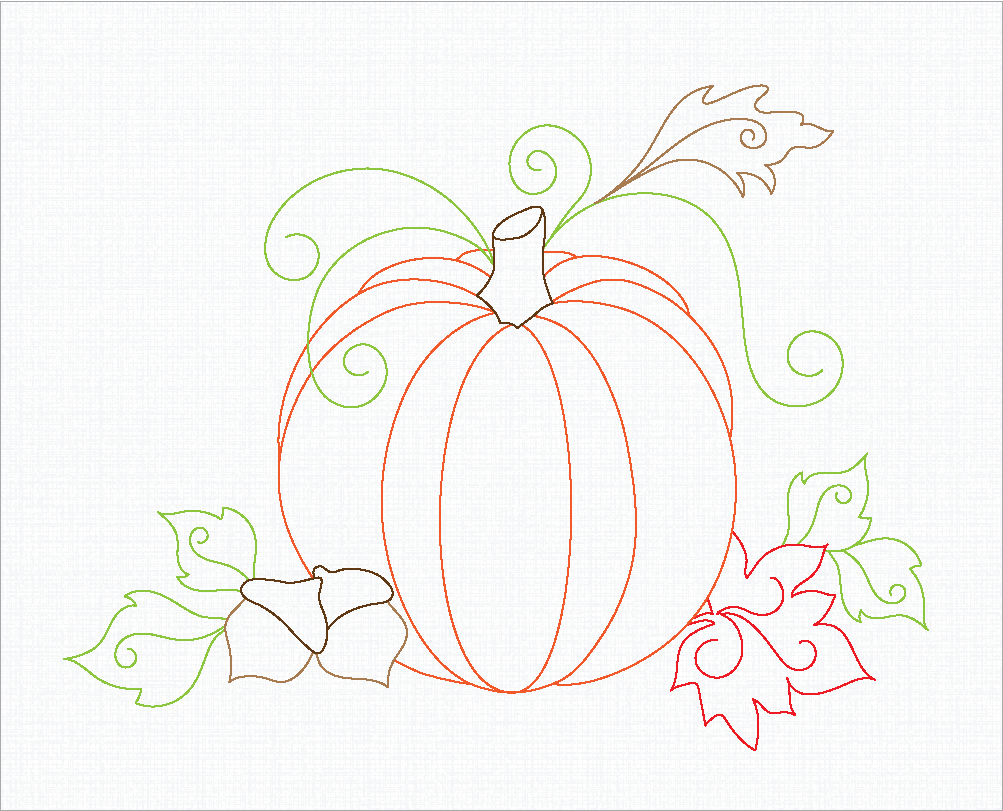
Place the background fabric, right side up, over the design layout, and using a pencil, transfer the embroidery lines onto the right side of the fabric. A light box is a great option, but you can always use a window.
The starch works great, but it’s not enough, so I like to add a layer of tear-away embroidery stabilizer to the wrong side of the background fabric with a little 505 temporary spray adhesive.
Step 3: Get your machine ready
I’ve tried several needles with Aurifil 12wt thread and have had the best results with the 90/14 Topstich, it has a larger eye and groove to accommodate thicker threads. For the bobbin I like a 50wt thread that coordinates with the background fabric.
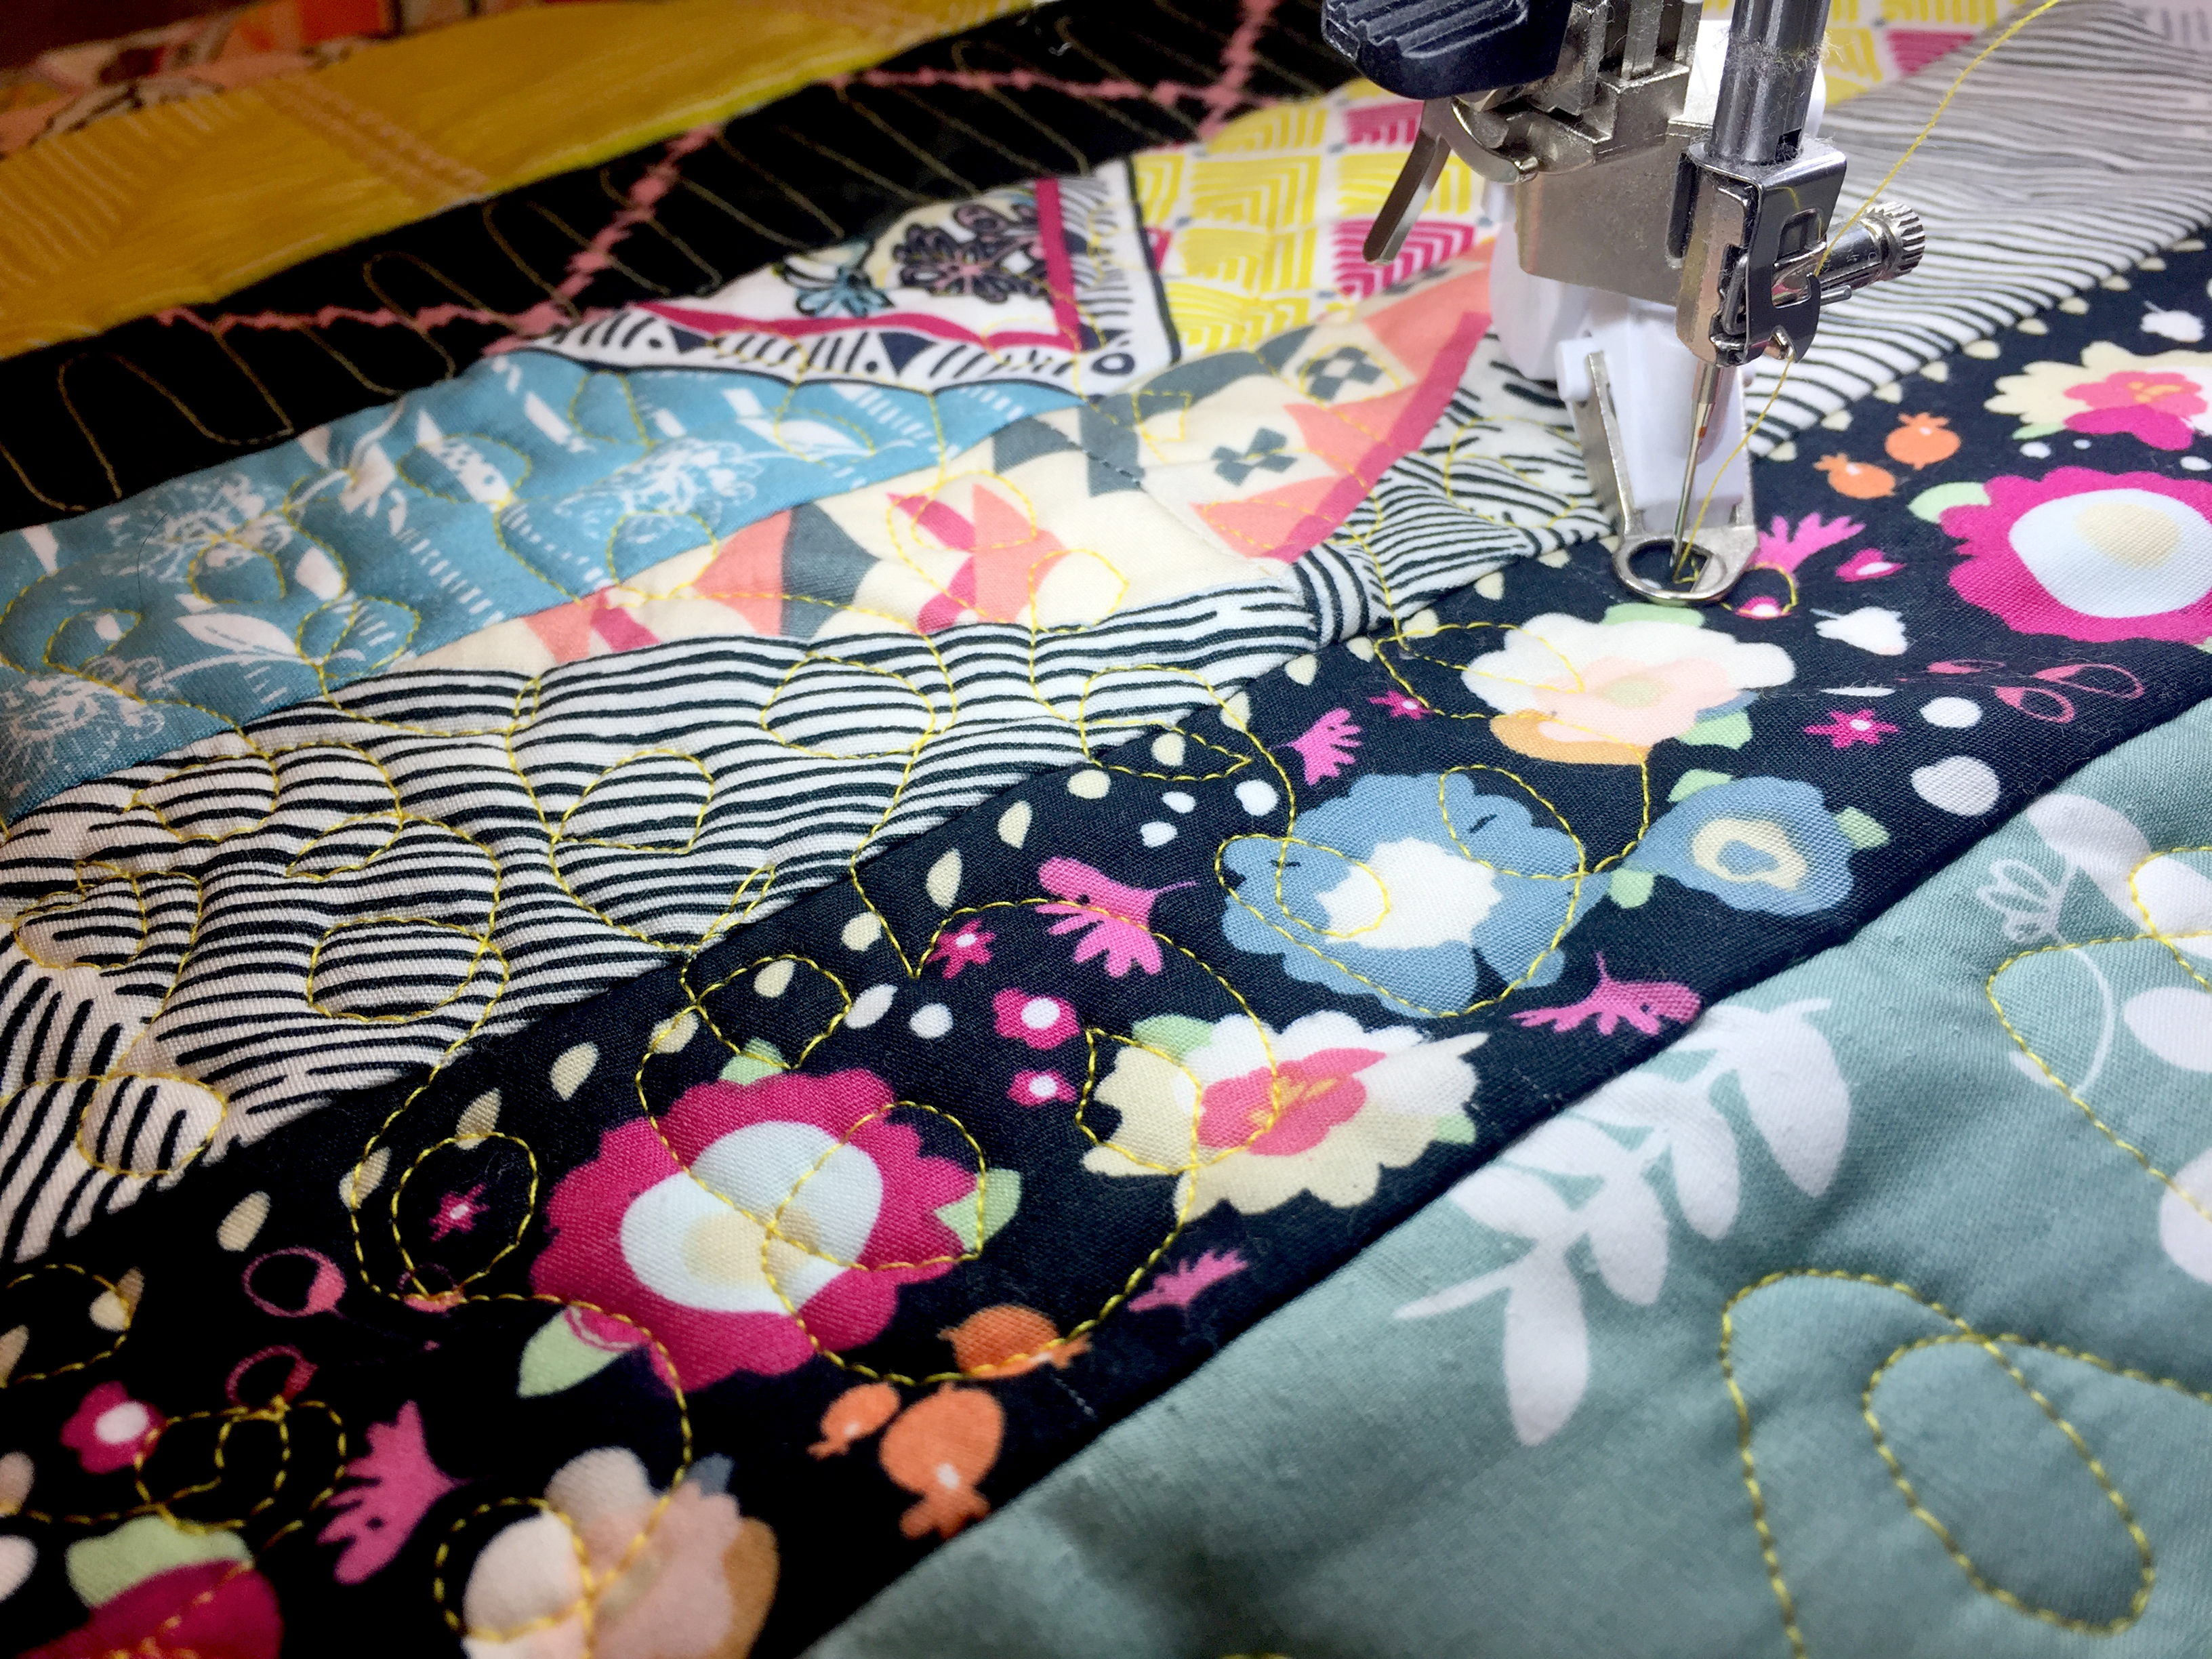
On your BERNINA, select the triple straight stitch #6 and set the stitch length to 2.85; embroider the design, changing thread colors as recommended in the design layout. Remember to leave a 3-4″ thread tail at the beginning and end of the stitching to bring the threads to the back of the project and tie a knot to prevent unraveling.
Watch this video for the stitching technique:
Step 4: Making the Pumpkin Table Topper
Trim the embroidered background to 13½” x 11″.
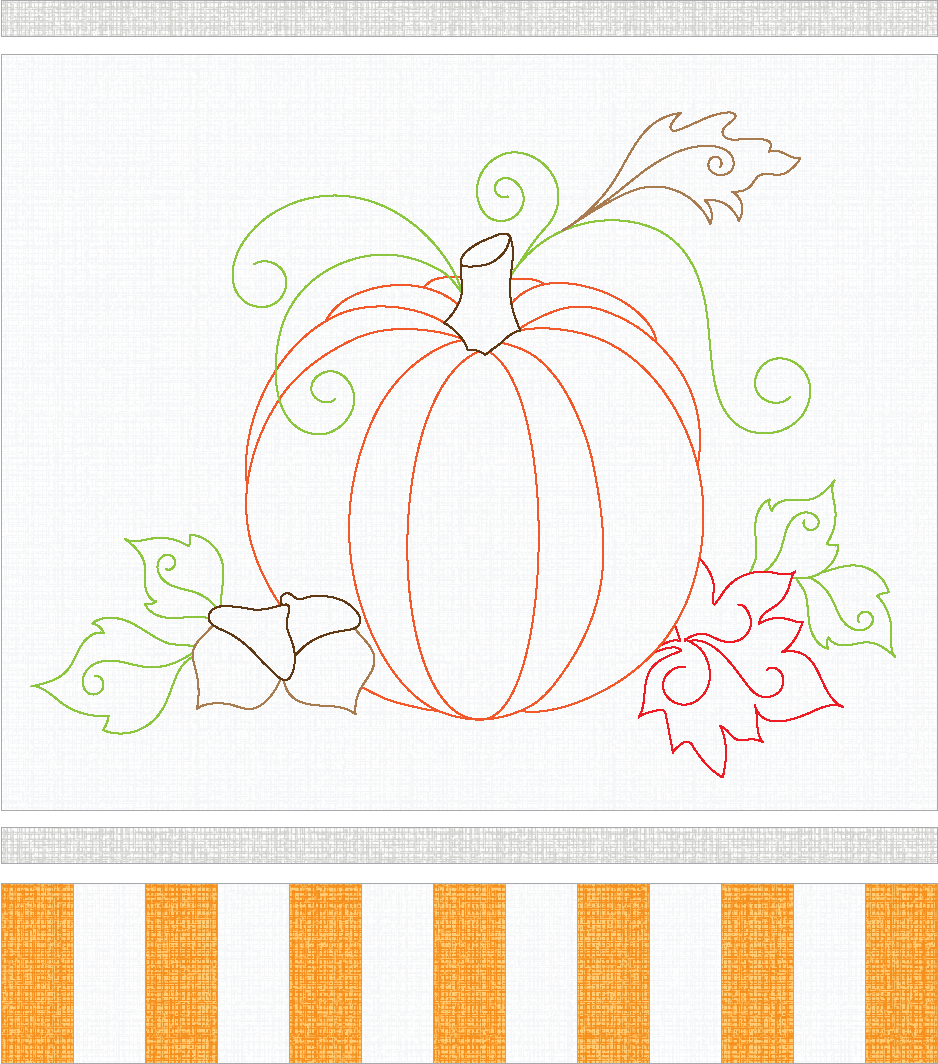
Sew the white and orange 3″ x 1½” strips on the long edge, alternating colors and beginning and ending with orange. Press to the orange.

Sew the (2) gray 13½” x 1″ border strips to the top and bottom edges of the embroidered background; press to the gray. Sew the pieced border to the bottom edge of the gray strip; press to the gray.
Place the backing fabric, right side down, layer with the 16″ x 17″ cotton batting, top with the quilt, and pin all layers together. If you’d like to achieve the look of trapunto and have the open areas in the embroidered design filled, add a layer of wool batting over the cotton batting.
Using your BSR or Embroidery foot #26 and the white quilting thread, quilt next to all the stitched embroidery lines. Follow with very tight stitching all around the design to make the embroidered design stand out.
Trim the excess batting and backing fabric. Bind with the (2) green 2¼” x width of fabric binding strips and the Walking foot #50.
Hope you enjoy your little pumpkin table topper for many falls to come!


What you might also like


10 comments on “Pumpkin Table Topper Tutorial”
-
-
Thanks so much poetrymom! I think you should seriously consider the BERNINA! The 7 series are an absolute joy to work with!
-
-
This is a great tutorial….Cherry I love every craft you do.
Thank you -
Very nice and easy to follow. Question, Why did you use the 57 D Patchwork foot instead of the 97 D on the 880? What should I use on the 770 QE? Thank you.
-
Love it – Perfect for Thanksgiving & just love the pattern
-
Lovely to see a technique that also works on older models (930). I had no idea the triple straight stitch gave such a lovely effect. Thank you.
-
This was fun to watch. I can see this technique being used in many projects. Time to get that 12 wt. thread and play! Triple stitch looks so cool.
-
Fun pattern
-
Thank you for this fantastic tutorial and for the fall pumpkin template.
-
Thank you. Struggling to finish a hand embroidered project Now I will switch to this technique!
Leave a Reply
You must be logged in to post a comment.

I am so excited to get my new machine – I’m waffling between the Bernina 770 QE and a Janome S9. Obviously you are a Bernina gal – this is a great tutorial and makes me itch to start! I am also now a new follower of your blog as well as this one.