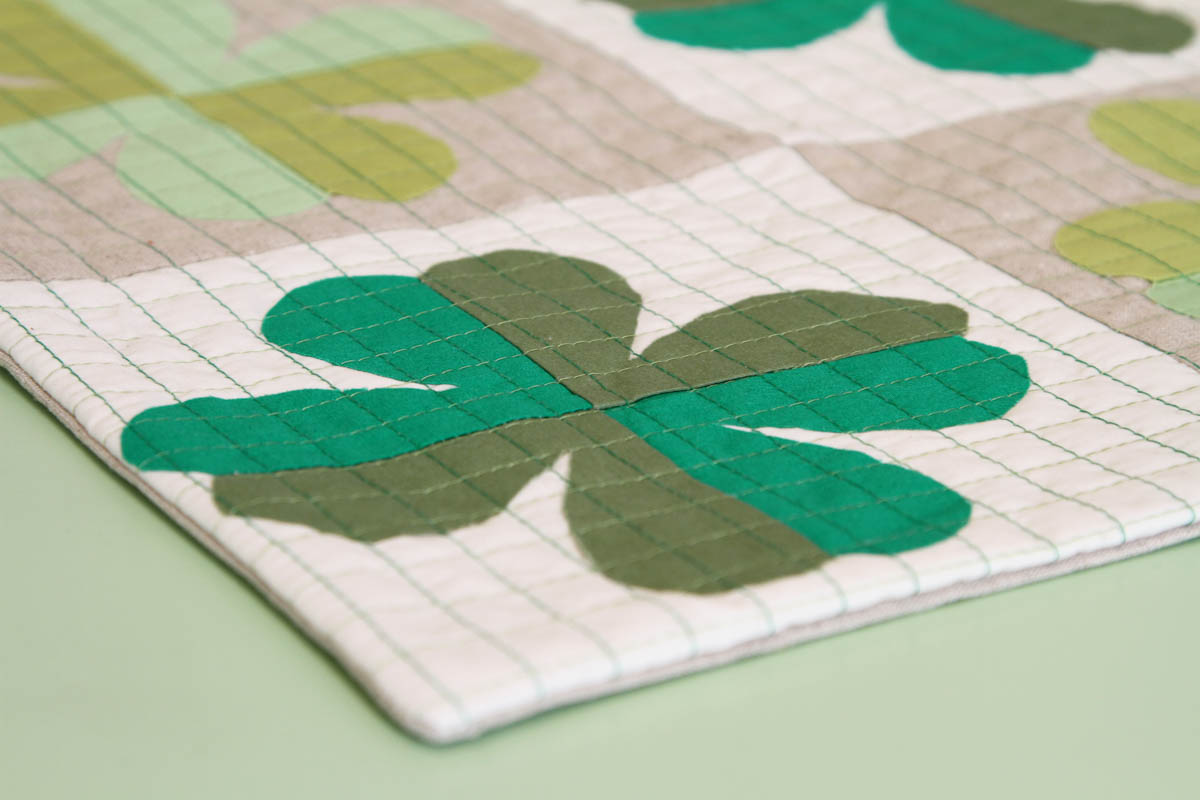
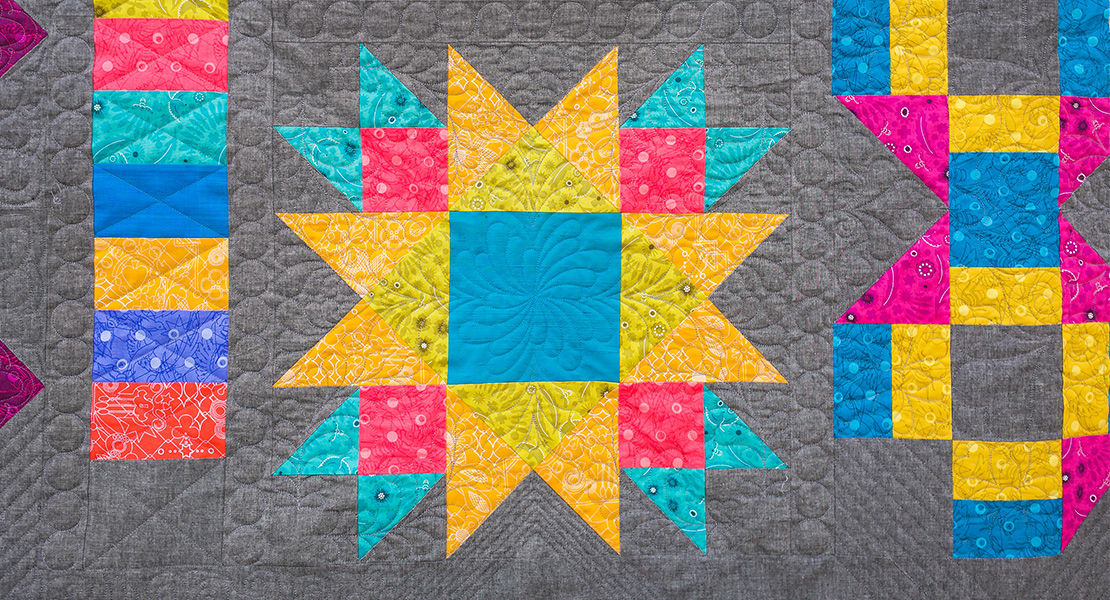
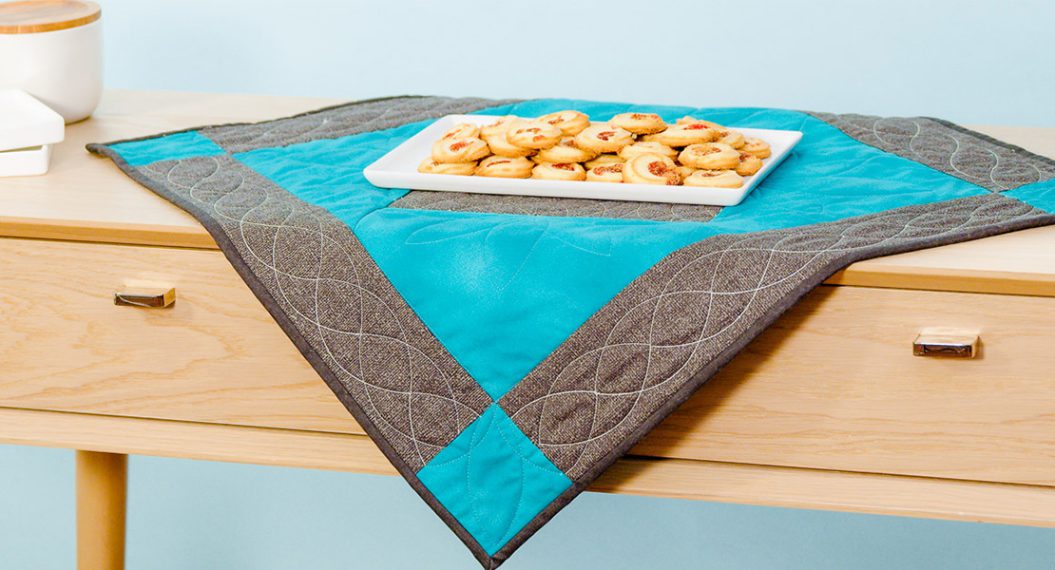
Ohio Star Variation Table Topper with Accent Binding
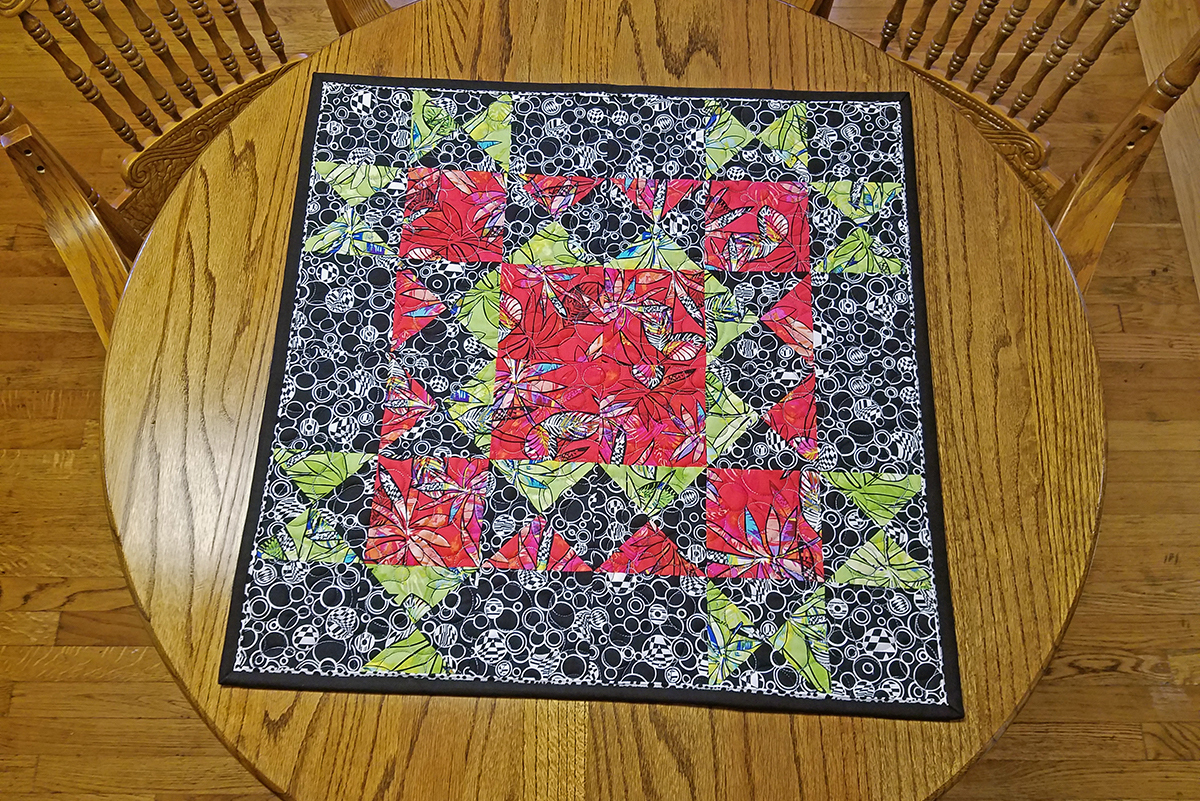
I hope you have been enjoying the BERNINA Block Party! Nina’s Block 6 Ohio Star Variation is great! My first thought for a project for this large 24″ block was to create a table topper, and add a binding that has an accent of a small flange on the folded edge. I also decided to use Q-matic, the automated quilting system from BERNINA to quilt the layers.
Supplies to Create a Ohio Star Table Topper
Three of your favorite fabrics for the block (I used the Anything Goes fabric collection by Benartex Fabric—1 fat quarter each of the red and green, and 2 fat quarters of the background fabric)
Your sewing machine. We suggest the BERNINA 570 QE
Batting: Cut 27″ x 27″
Backing: Cut 28″ x 28″
Binding:
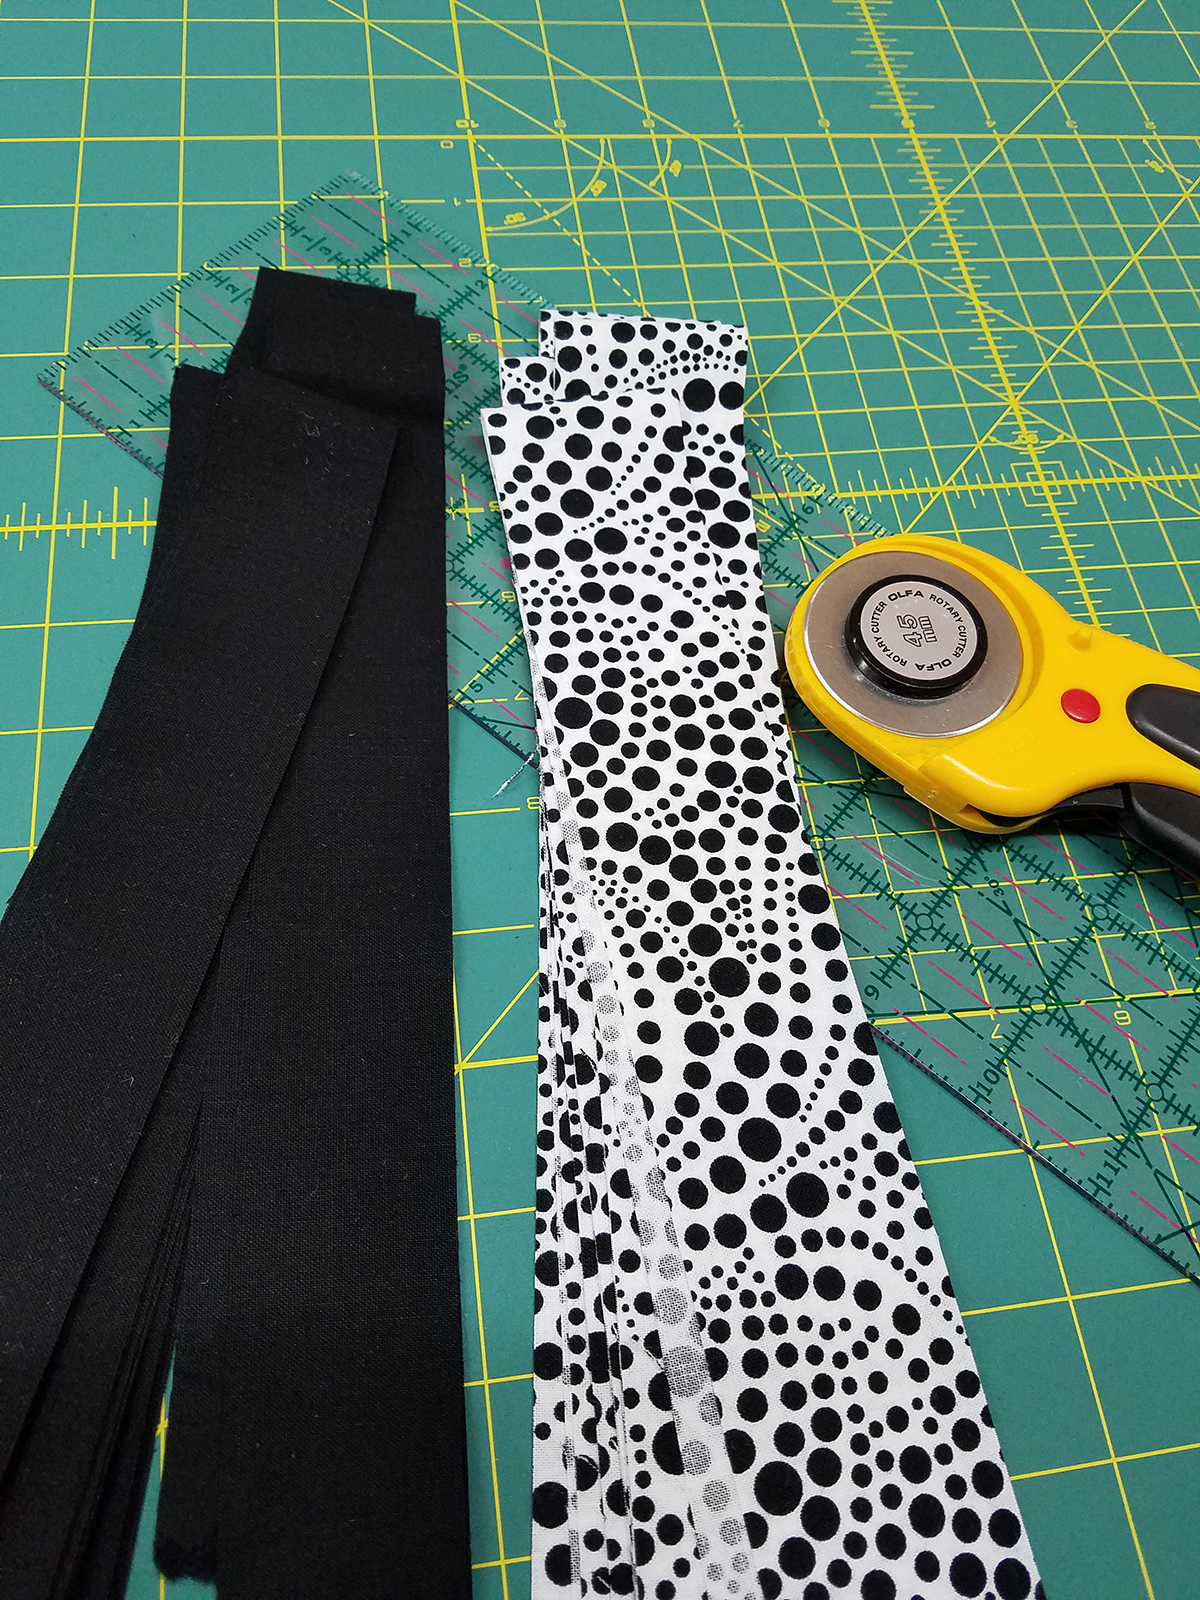
- ¼ yard of the main binding (solid black) fabric: cut 4 strips 1 & 7/16 inch wide by width of fabric (42-44″)
- ¼ yard of binding accent (white with black dots) fabric: cut 4 strips of accent fabric 1 ¾ inch wide by width of fabric (42″-44″)
Creating the Ohio Star Table Topper
Complete the piecing as instructed in the BERNINA Block Party Ohio Star Variation Block instructions.
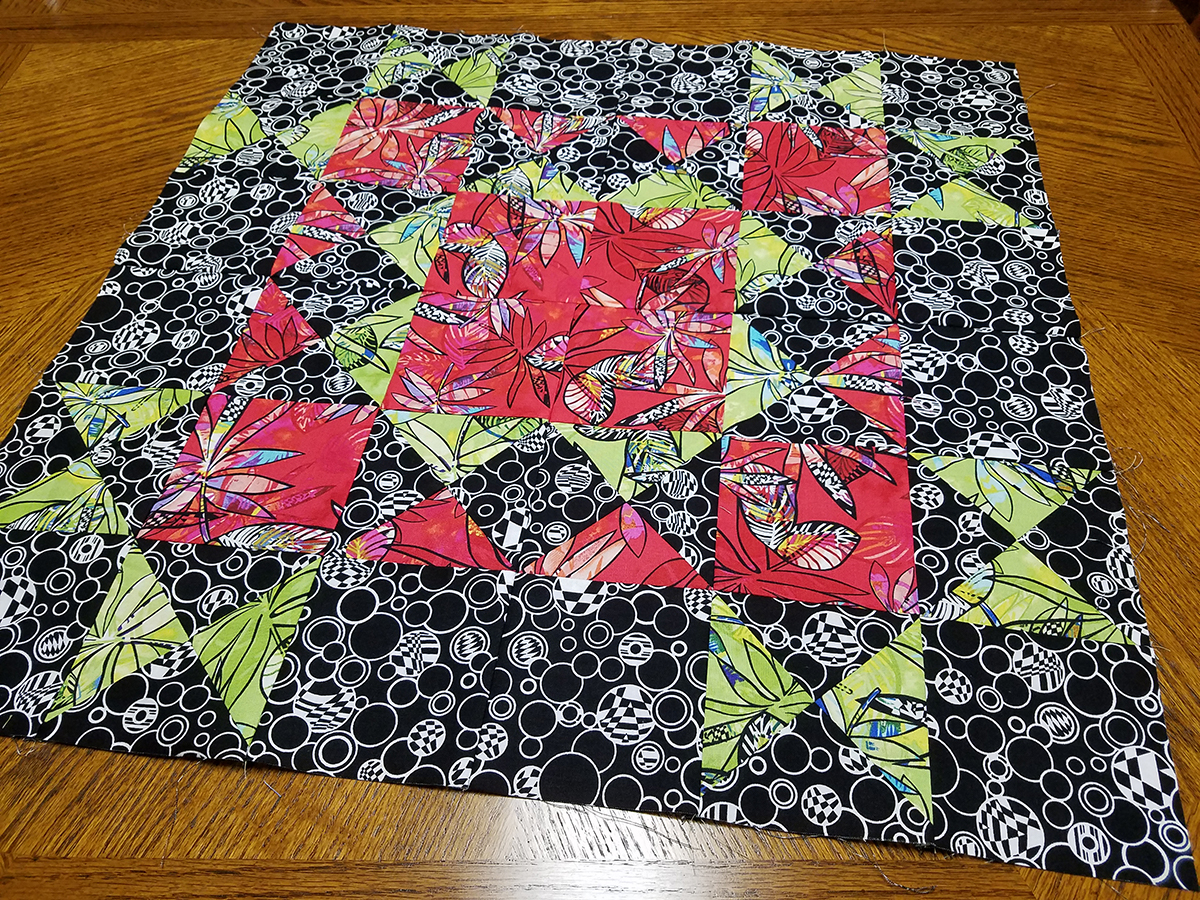
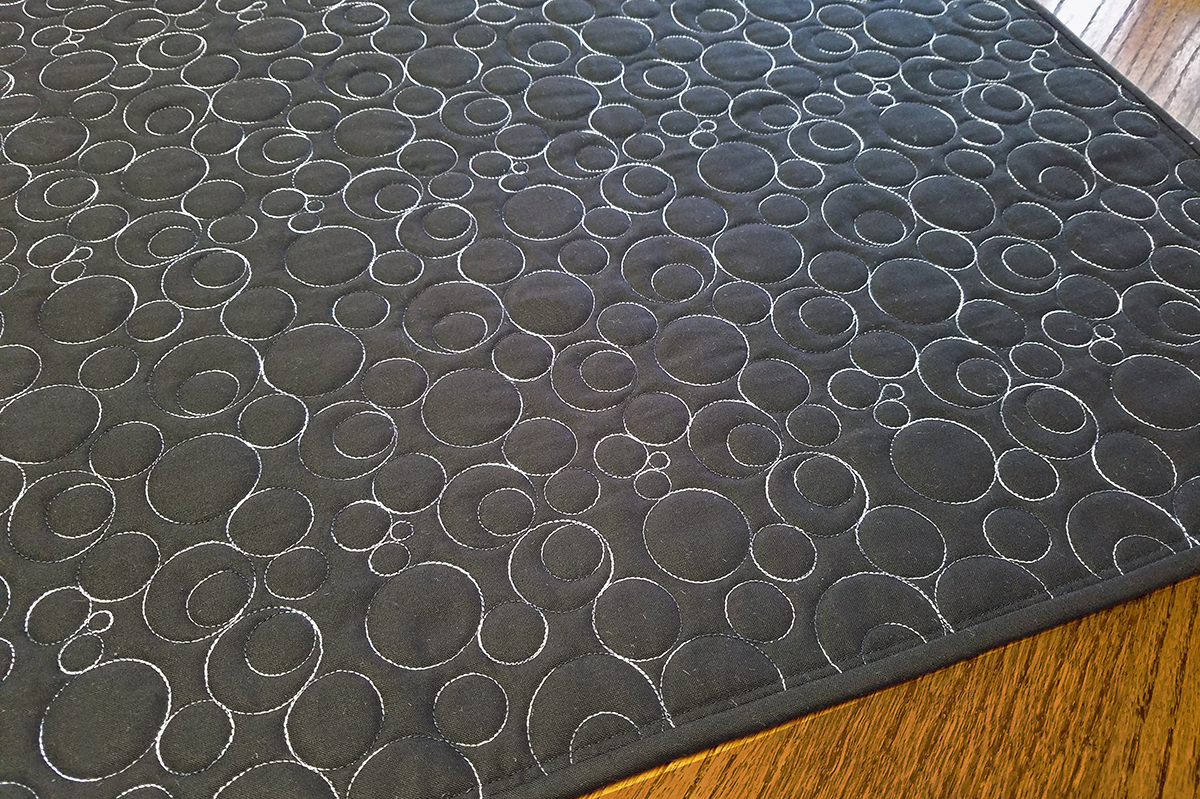
You can of course complete quilting as instructed in Quilting Lesson of Block 6’s post. But this time, I chose to do something a little bit different for my quilting. I used Q-matic, the automated quilting system from BERNINA to quilt the layers and used one of my favorite designs—the PebblesShells Panto design.
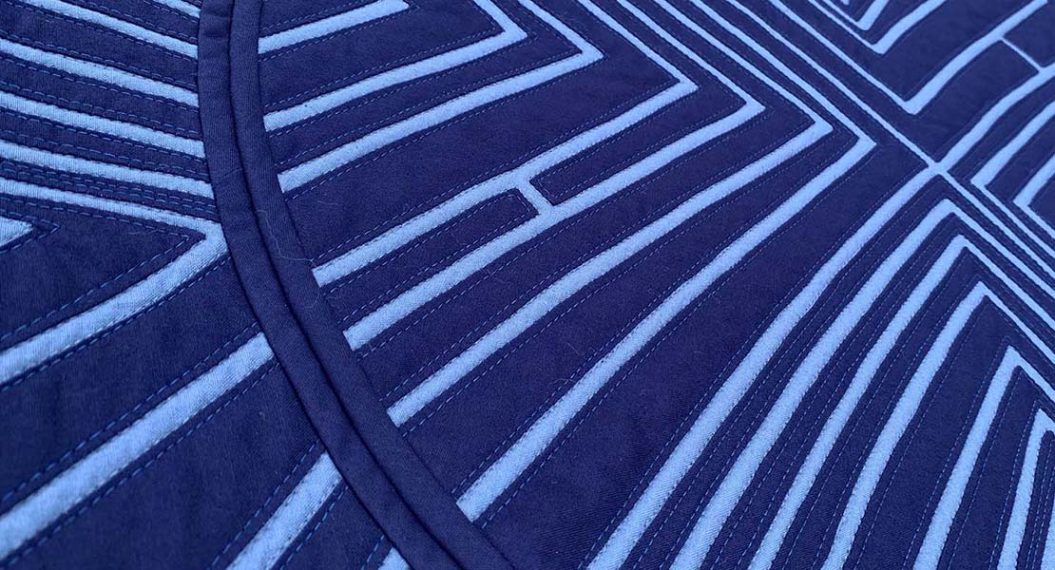
Here is a picture of the back so that you can see the quilting pattern better.

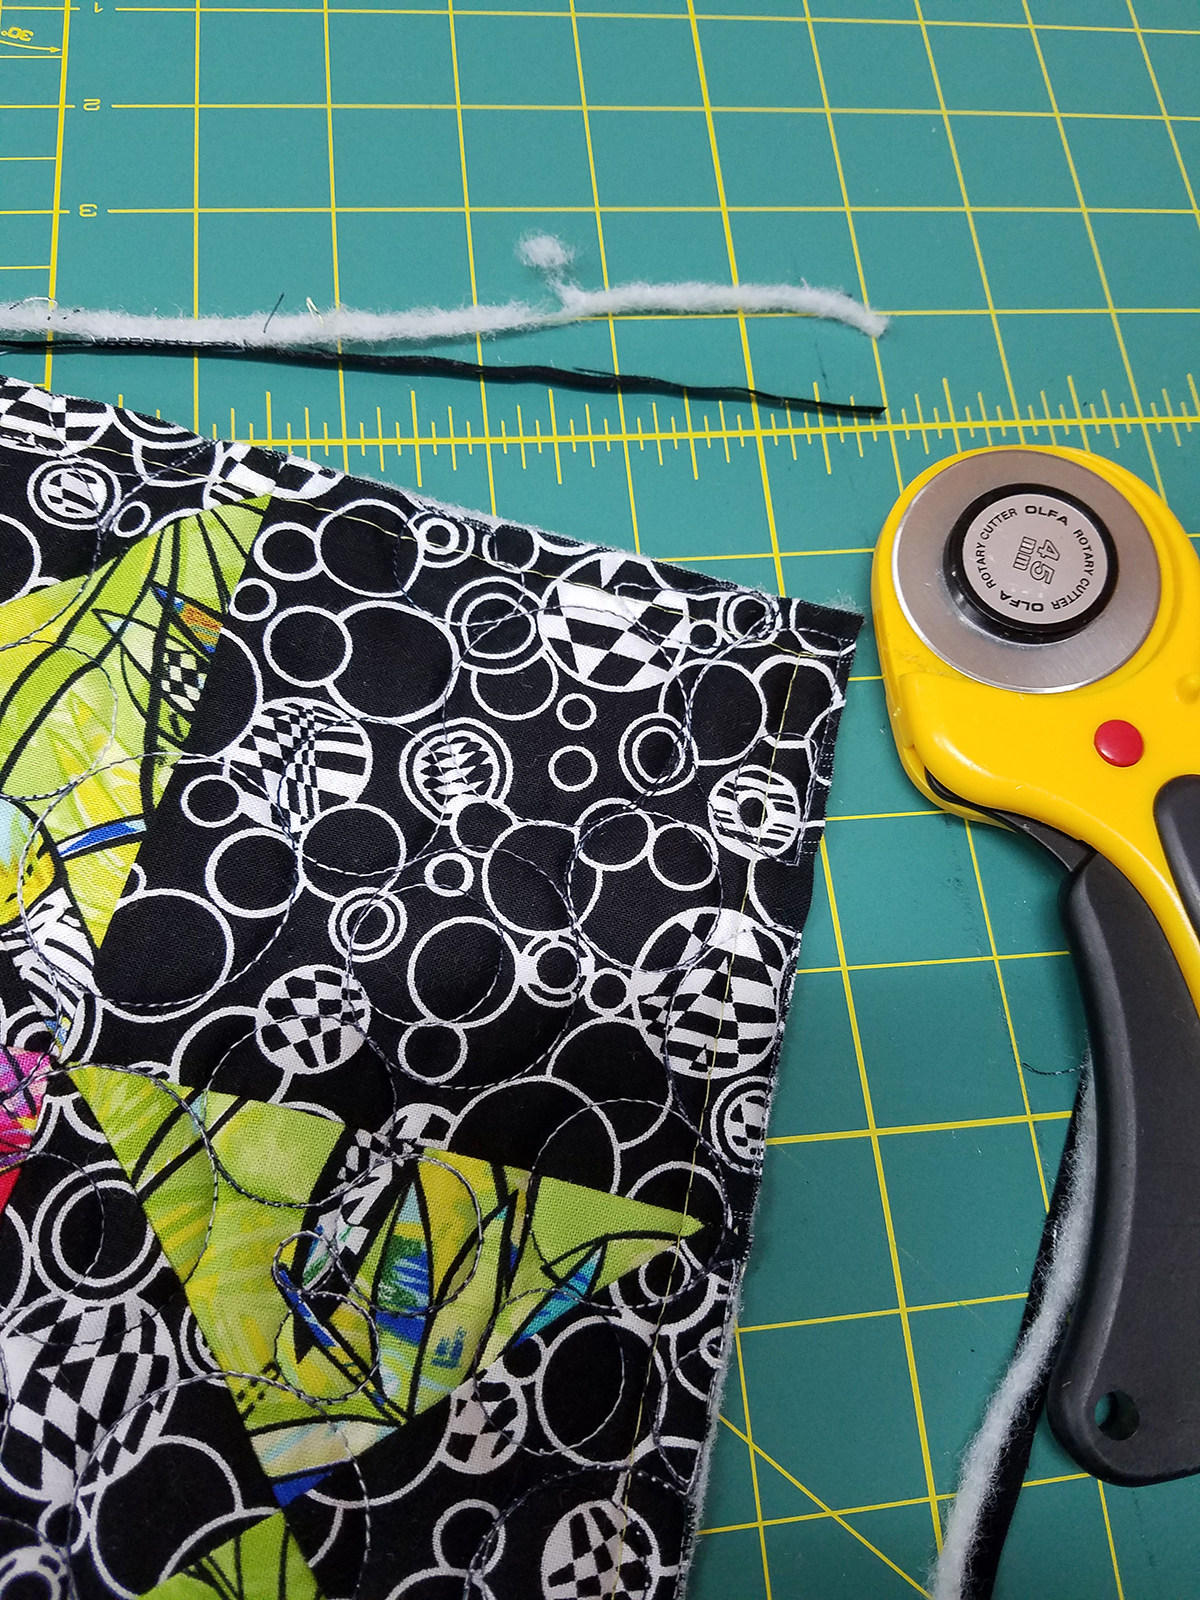
After all quilting is complete, trim to square up your block.
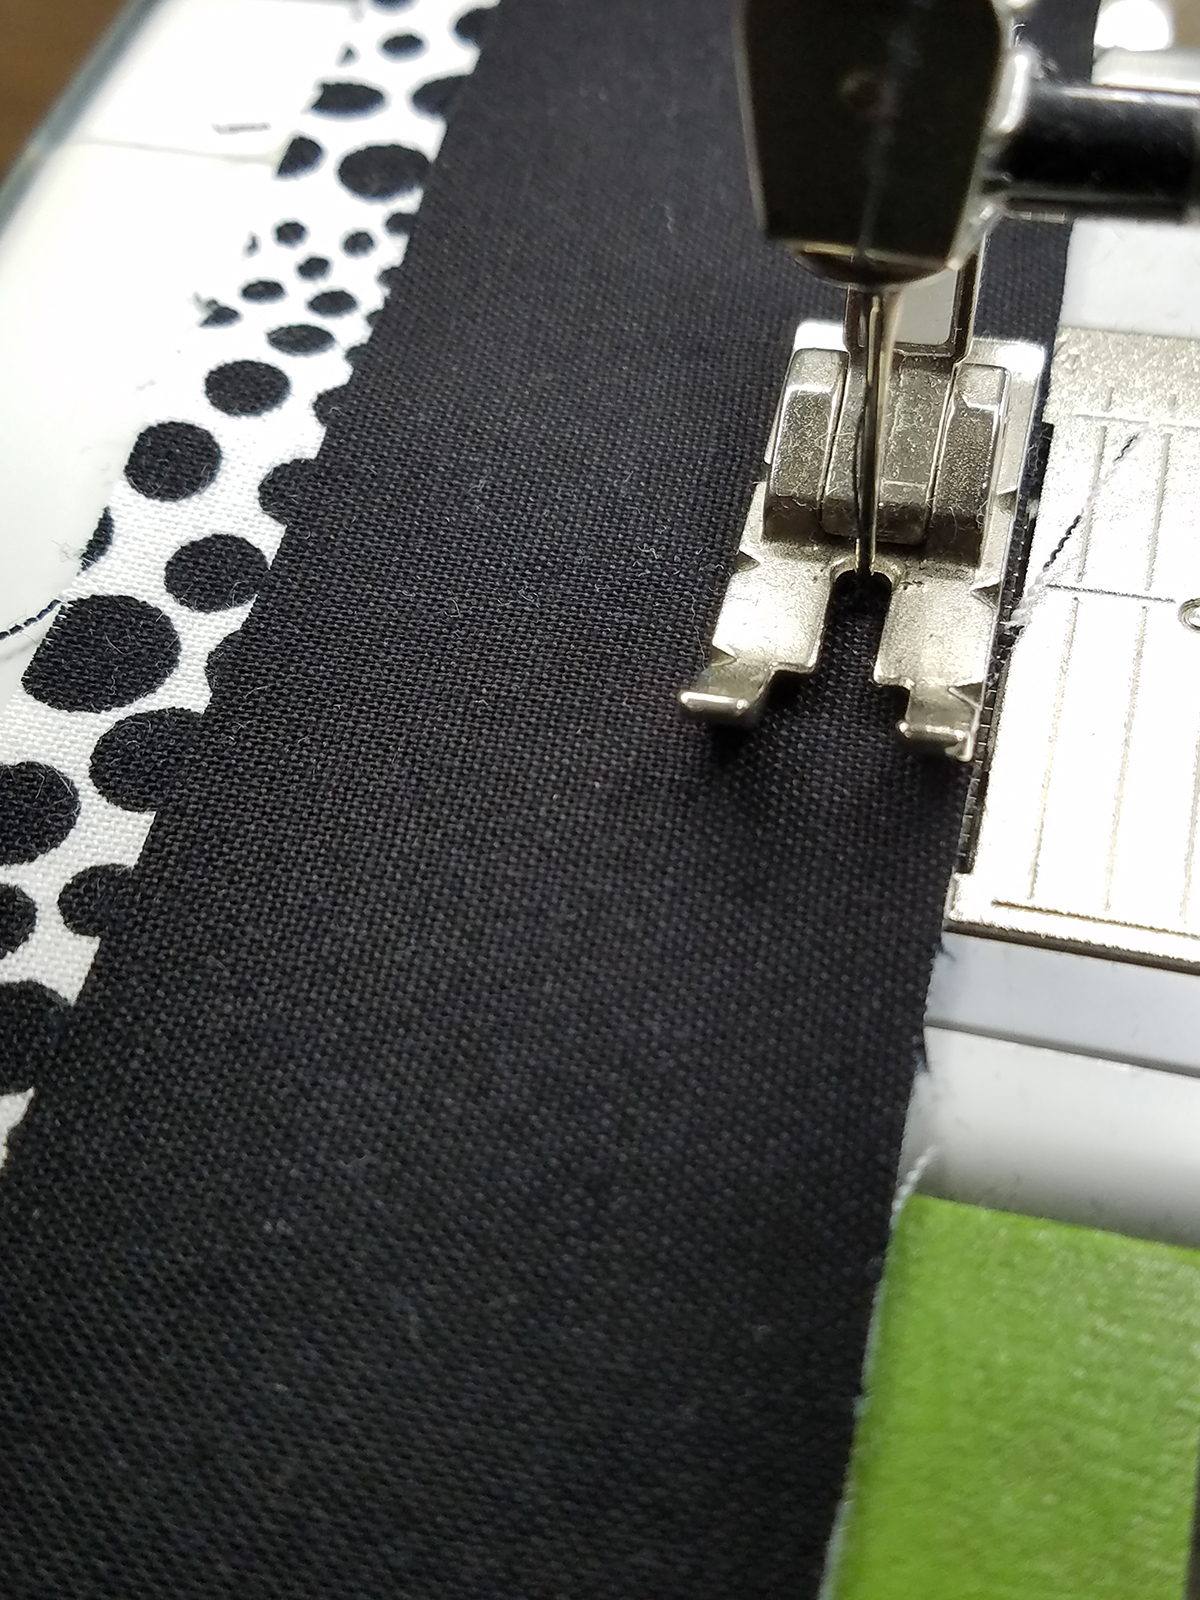
You should have two different strips cut for your binding. The black (or main binding) is cut 1-7/16″ in width. The coordinating binding is cut wider at 1 ¾″ in width.
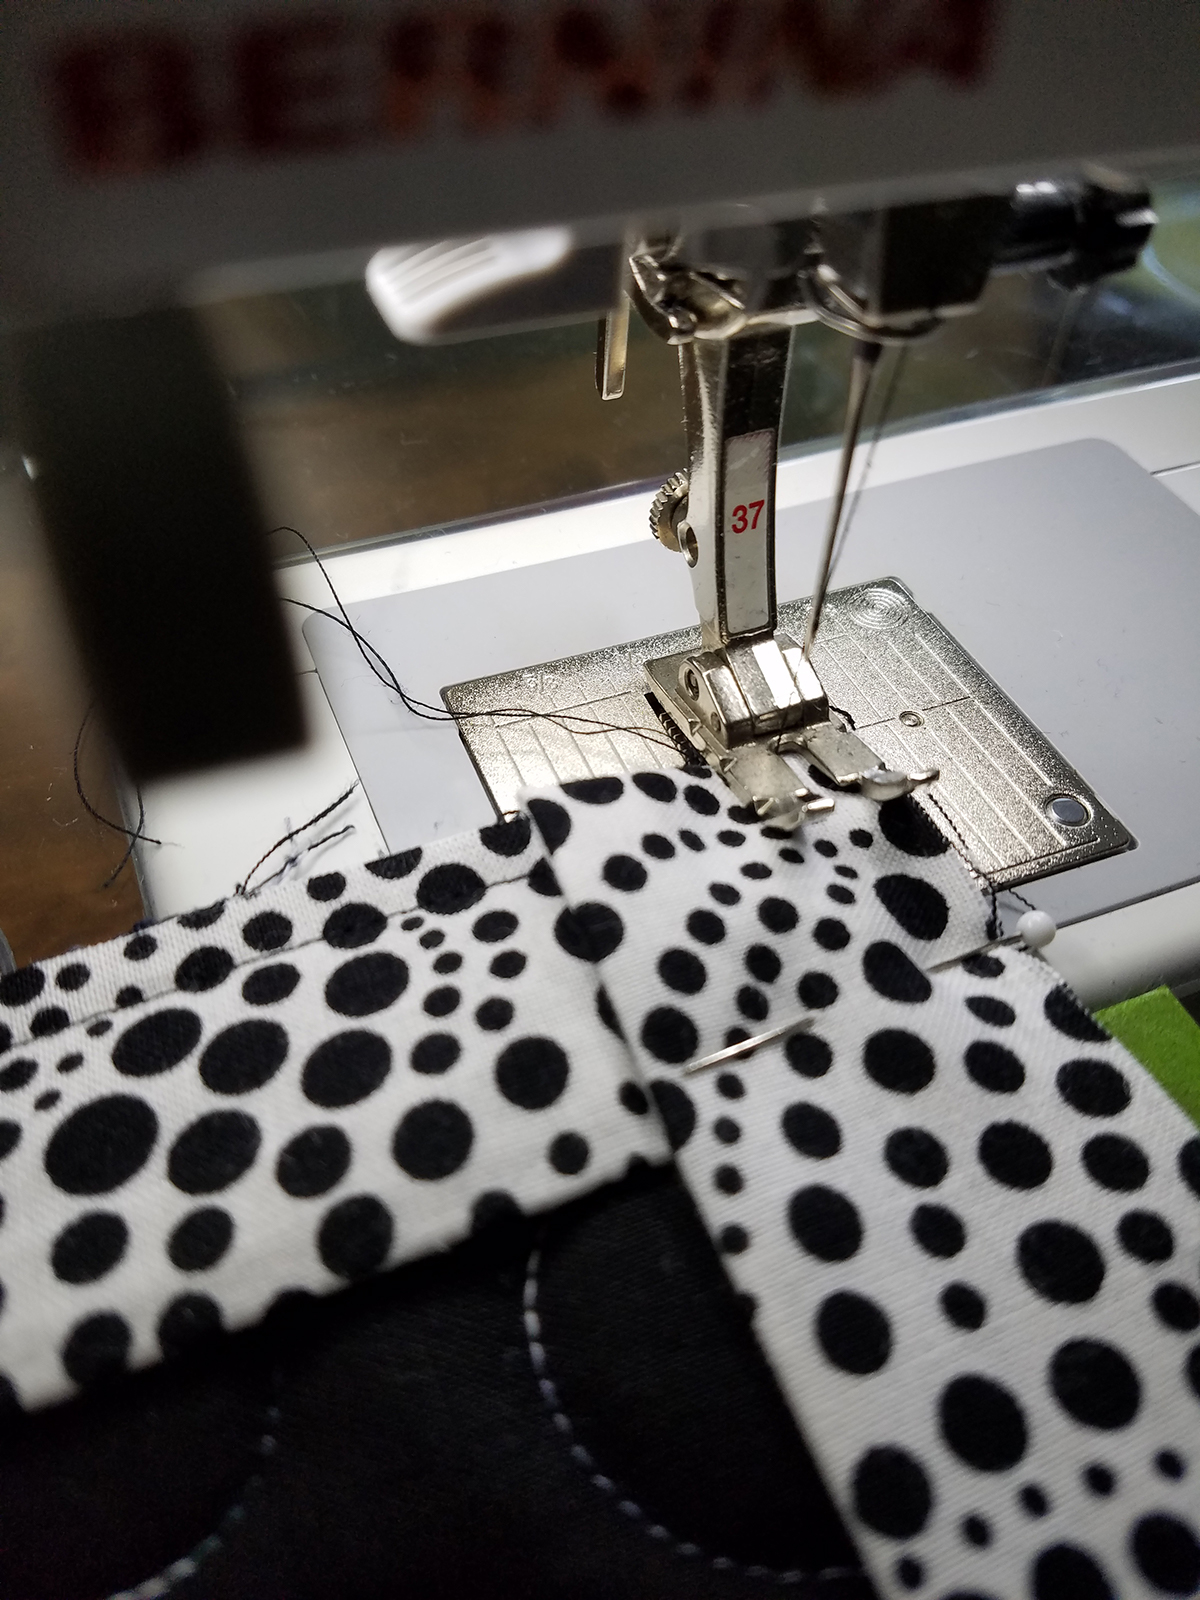
We will stitch each set together in separate sets. Start with either set, and stitch them end to end with a 45 degree angle as we have done before in other projects.
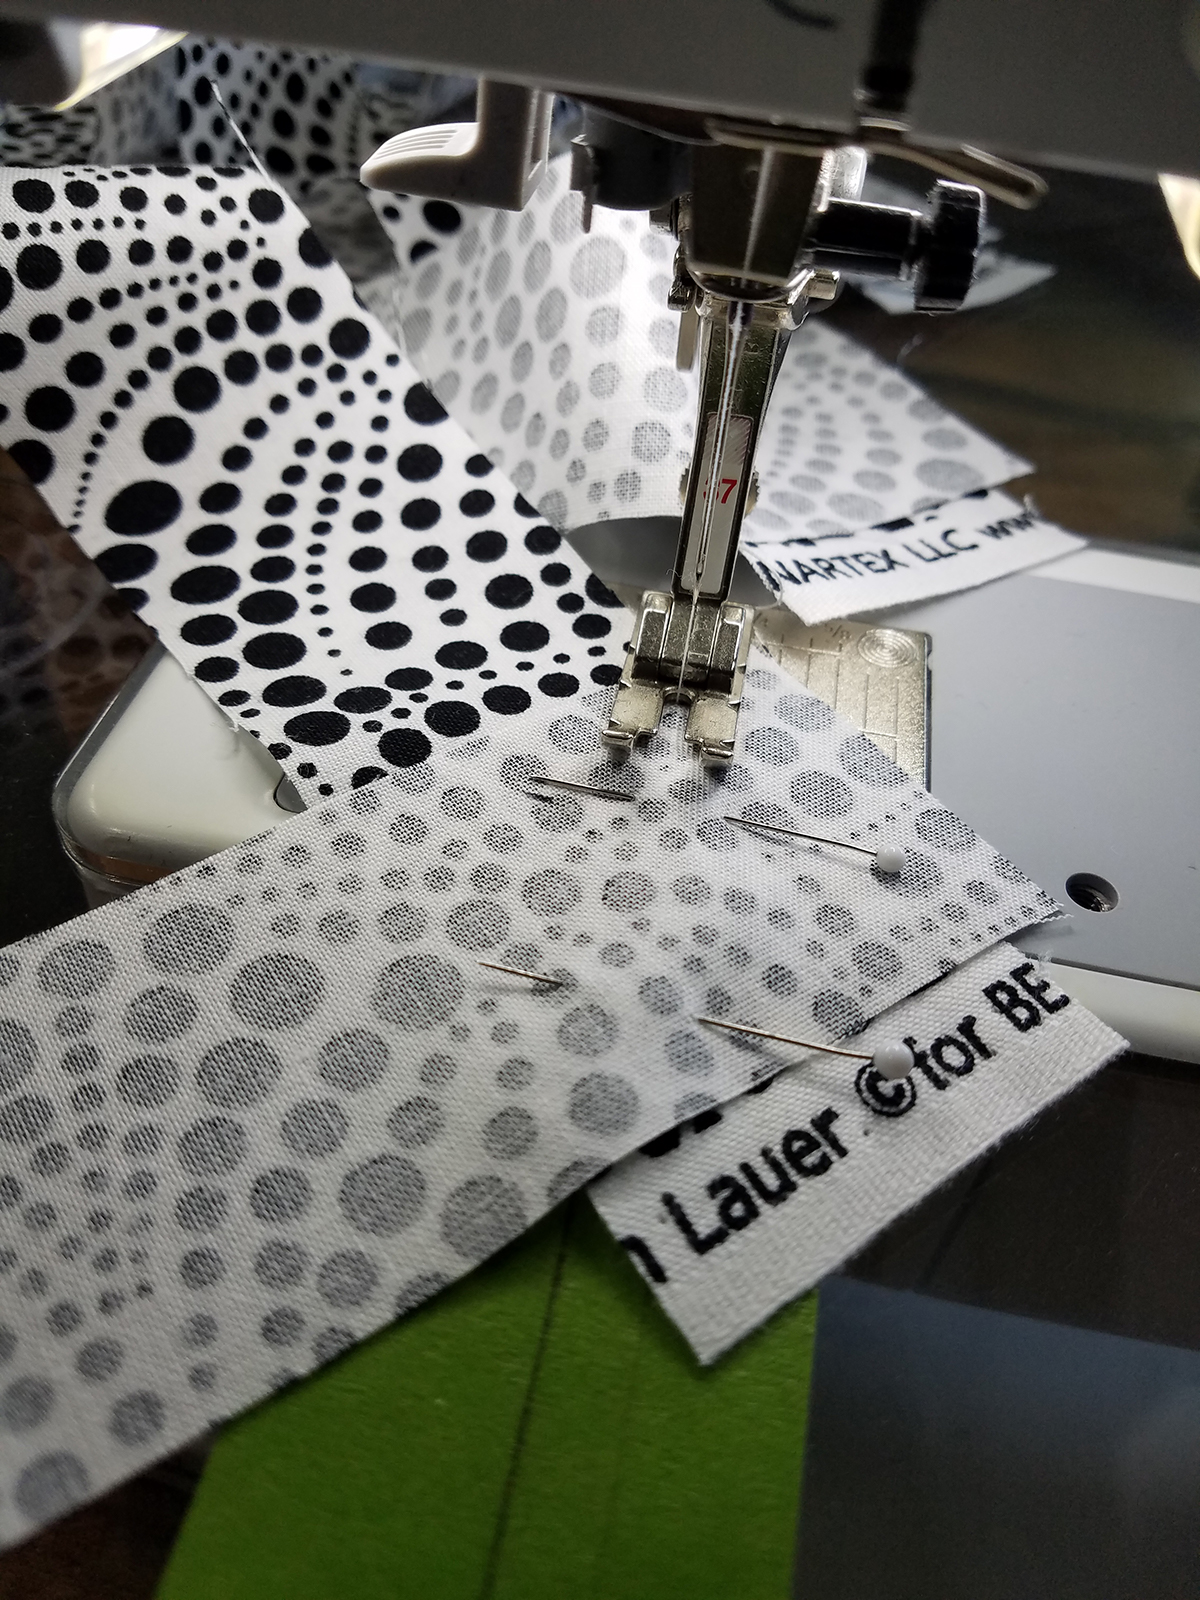
At each seam on the binding strips, trim the seam allowance to ¼″ and press the seams open.
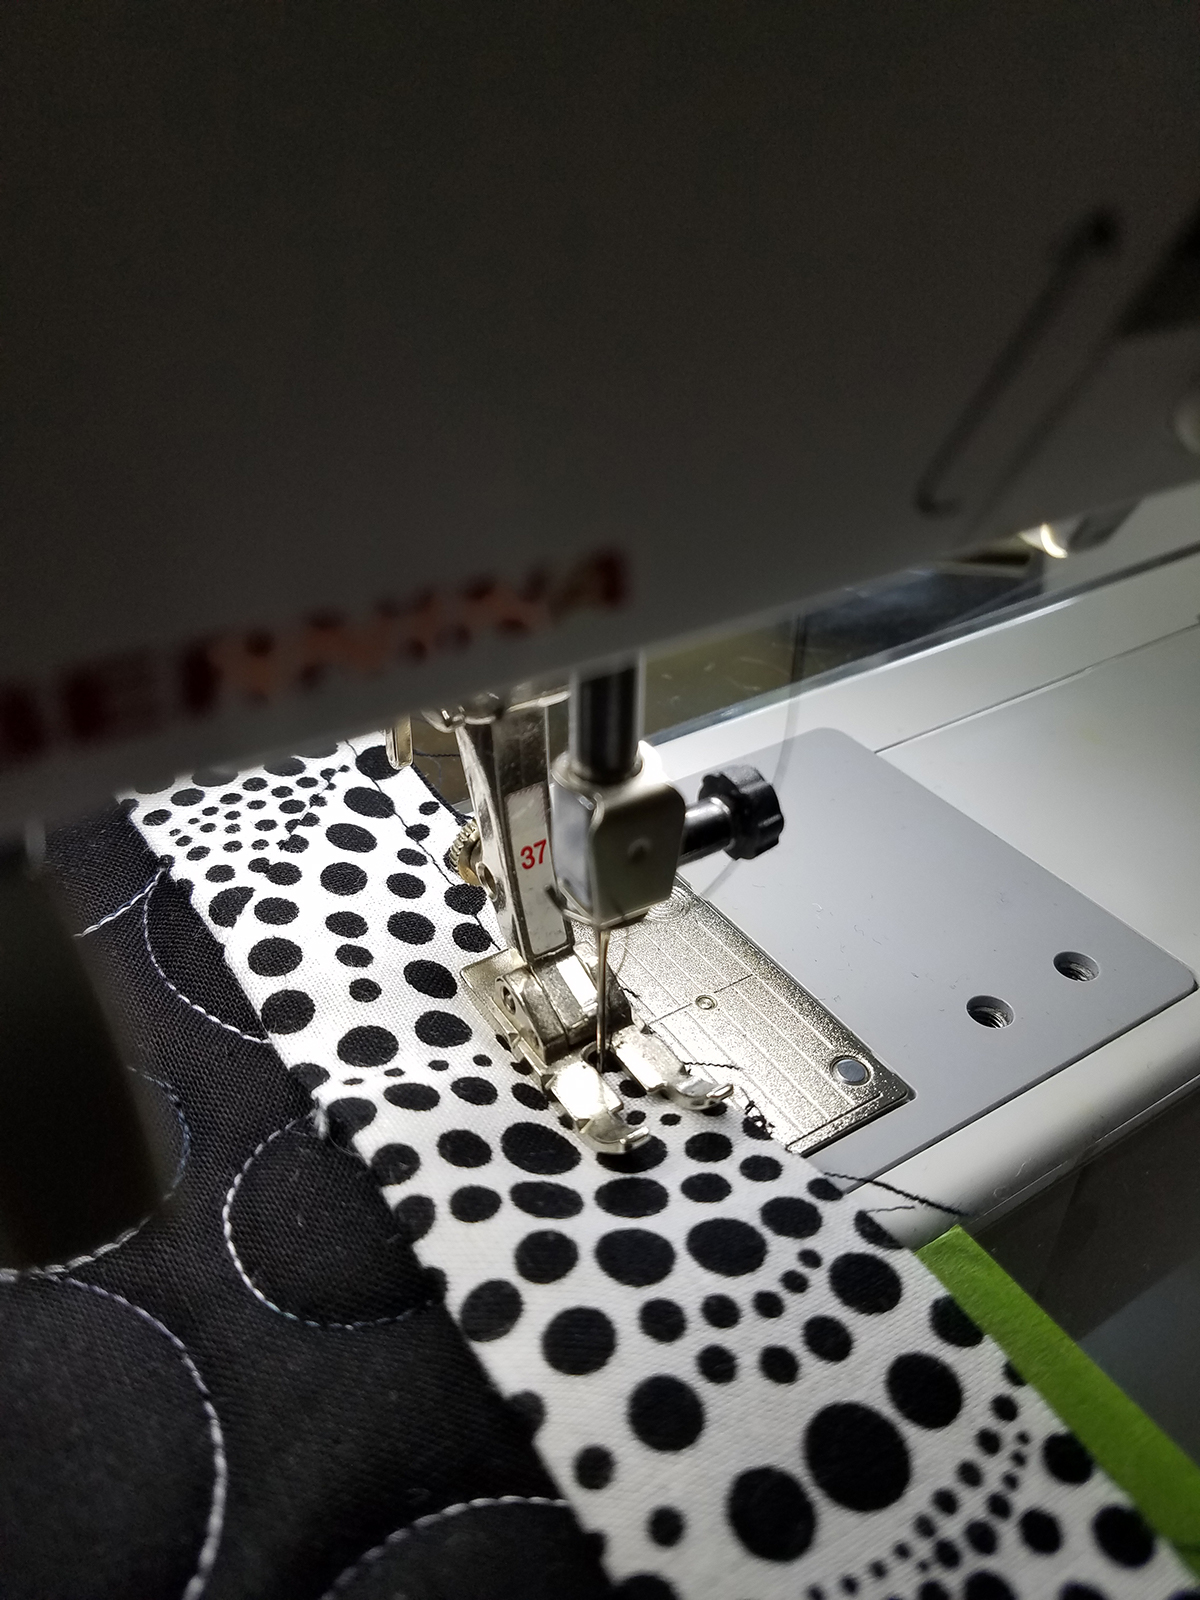
Lay the narrower strip (black main fabric) on top of the wider strip with right side together and the raw edges of the long sides even. Stitch a quarter inch seam allowance using Patchwork Foot #37/37D.
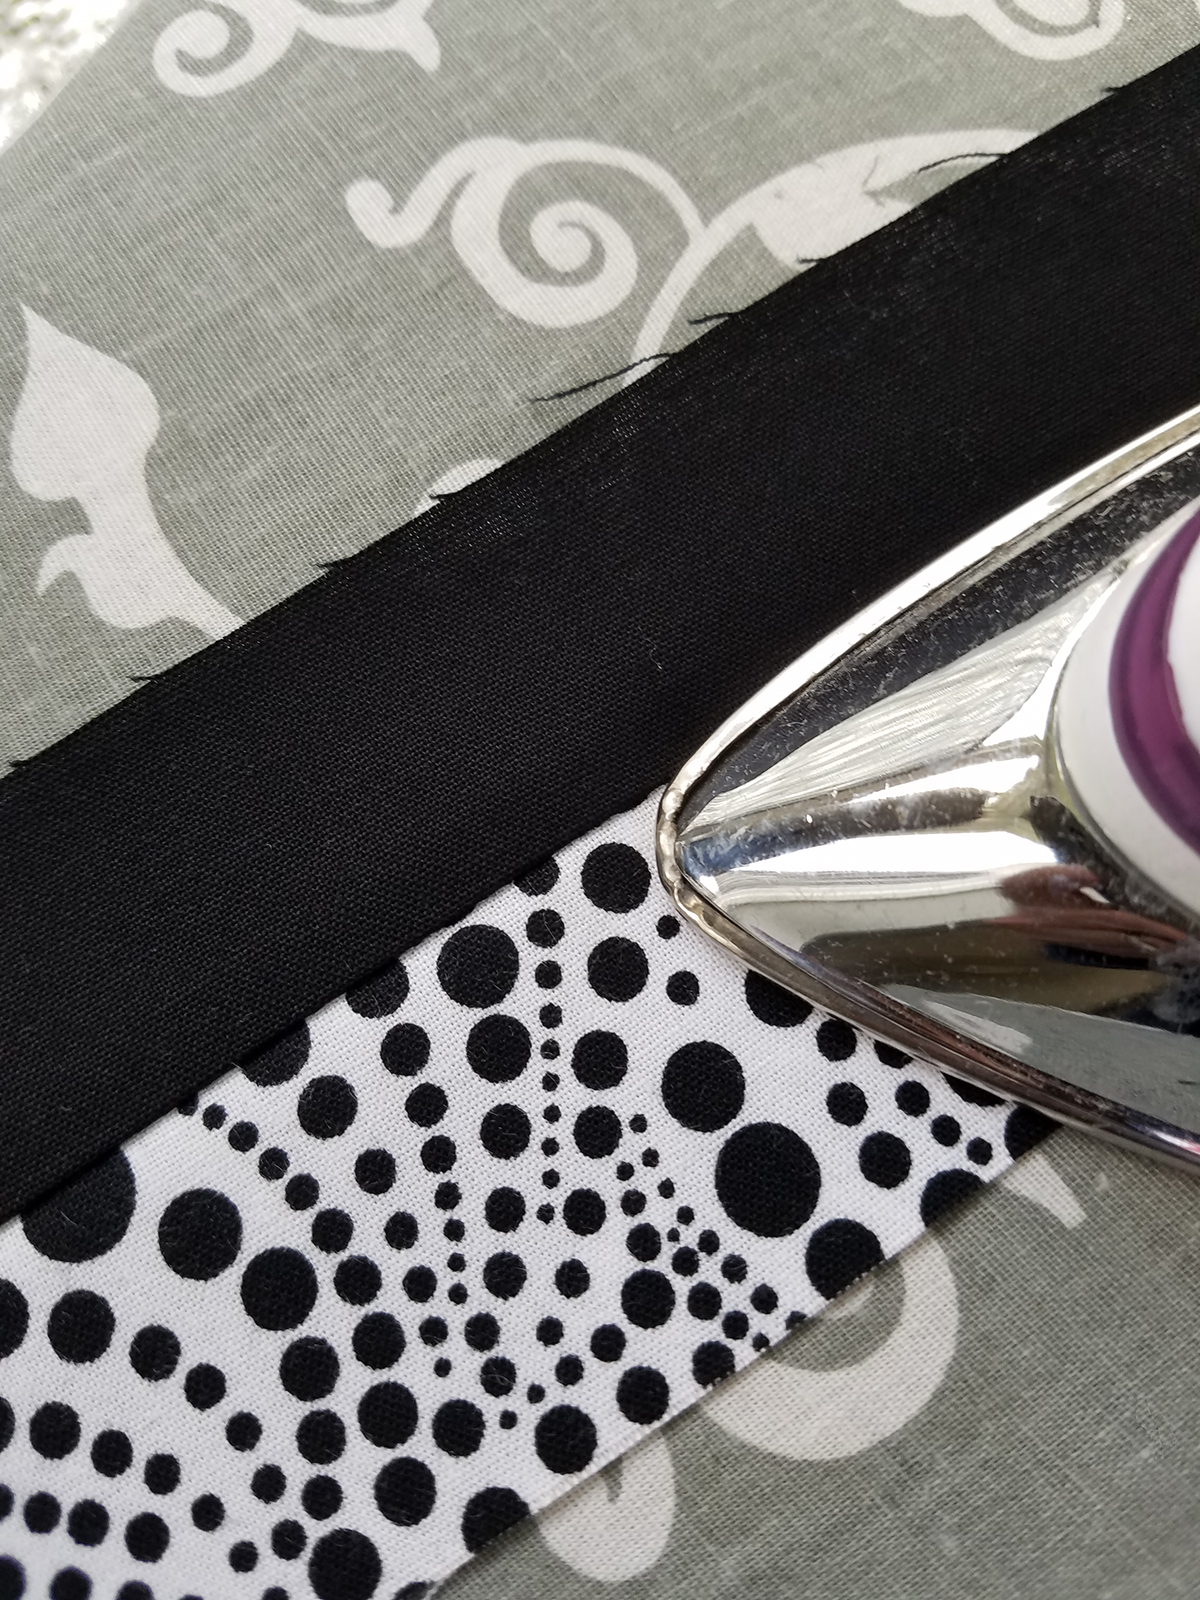
Press seam allowance toward the narrower (black) strip.
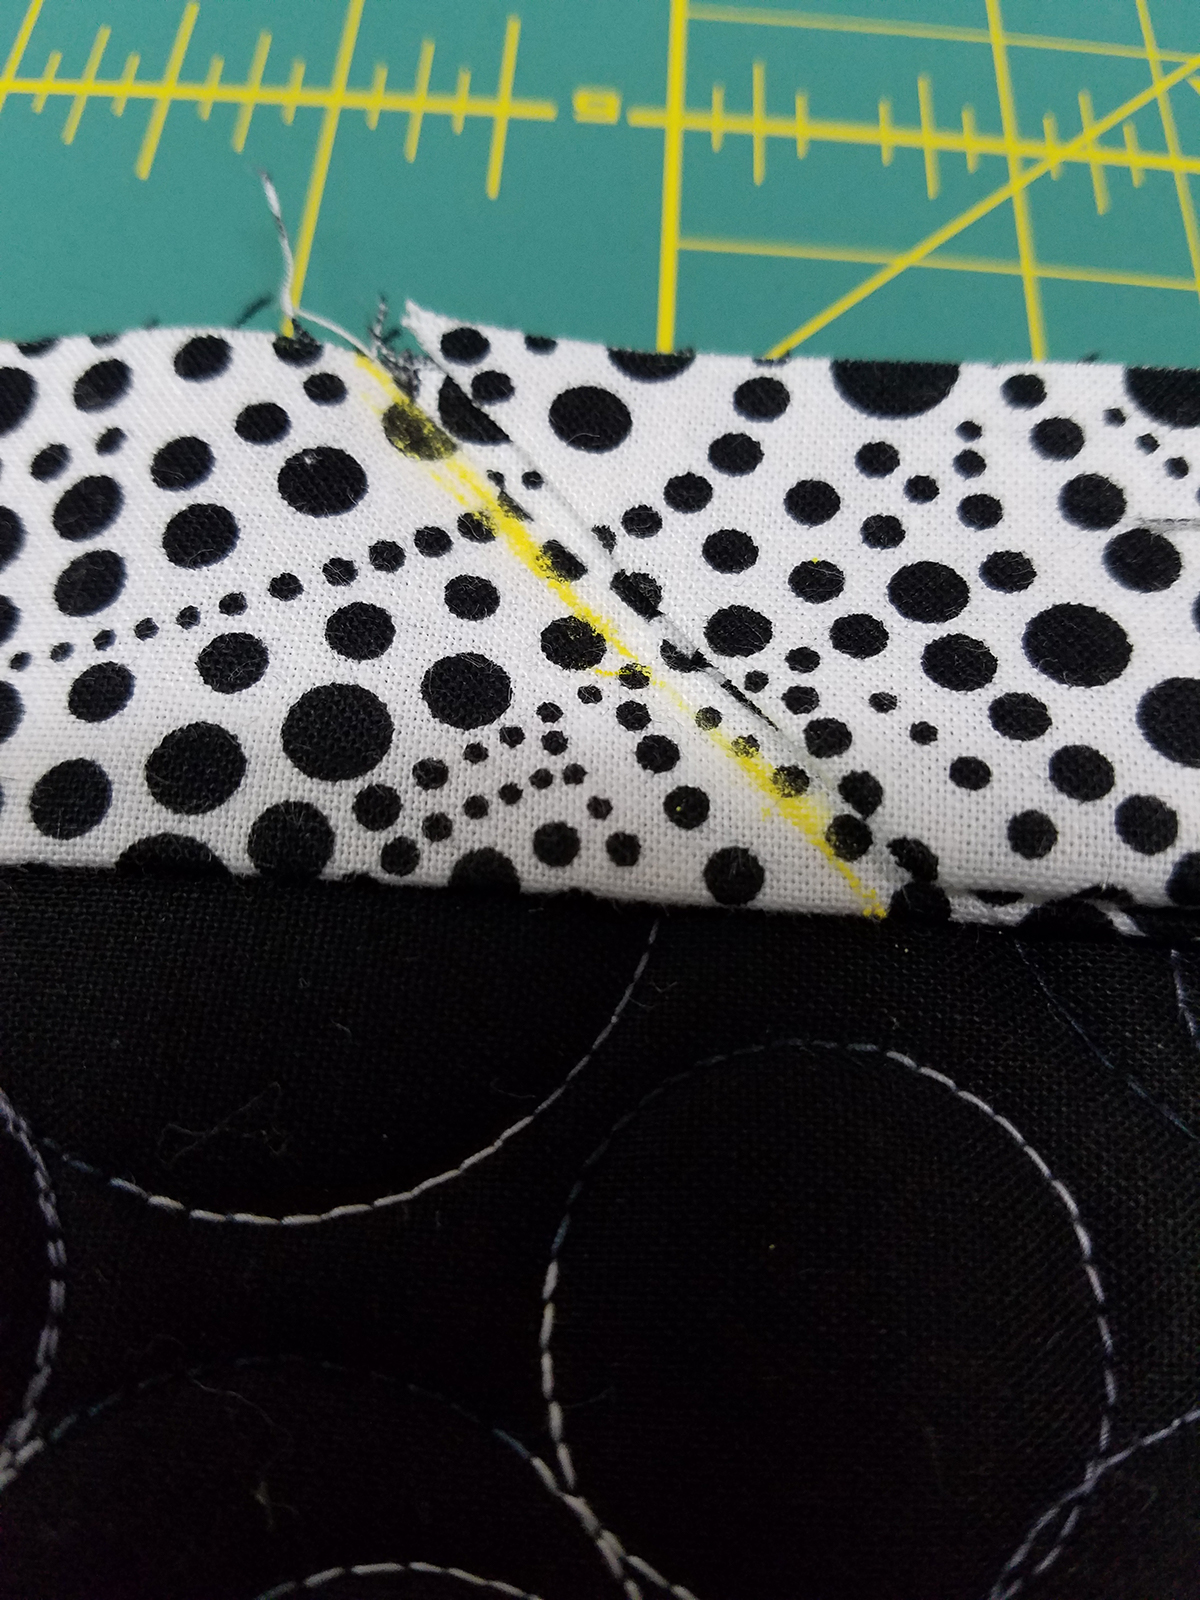
Cut the starting end of the binding at a 45 degree angle.
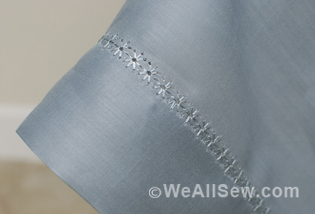
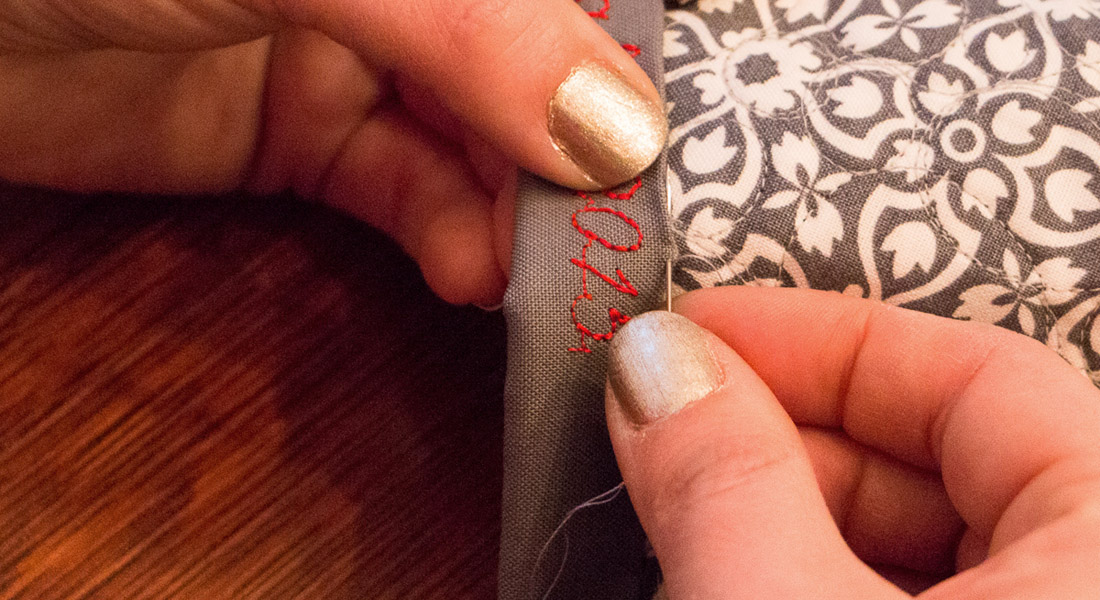
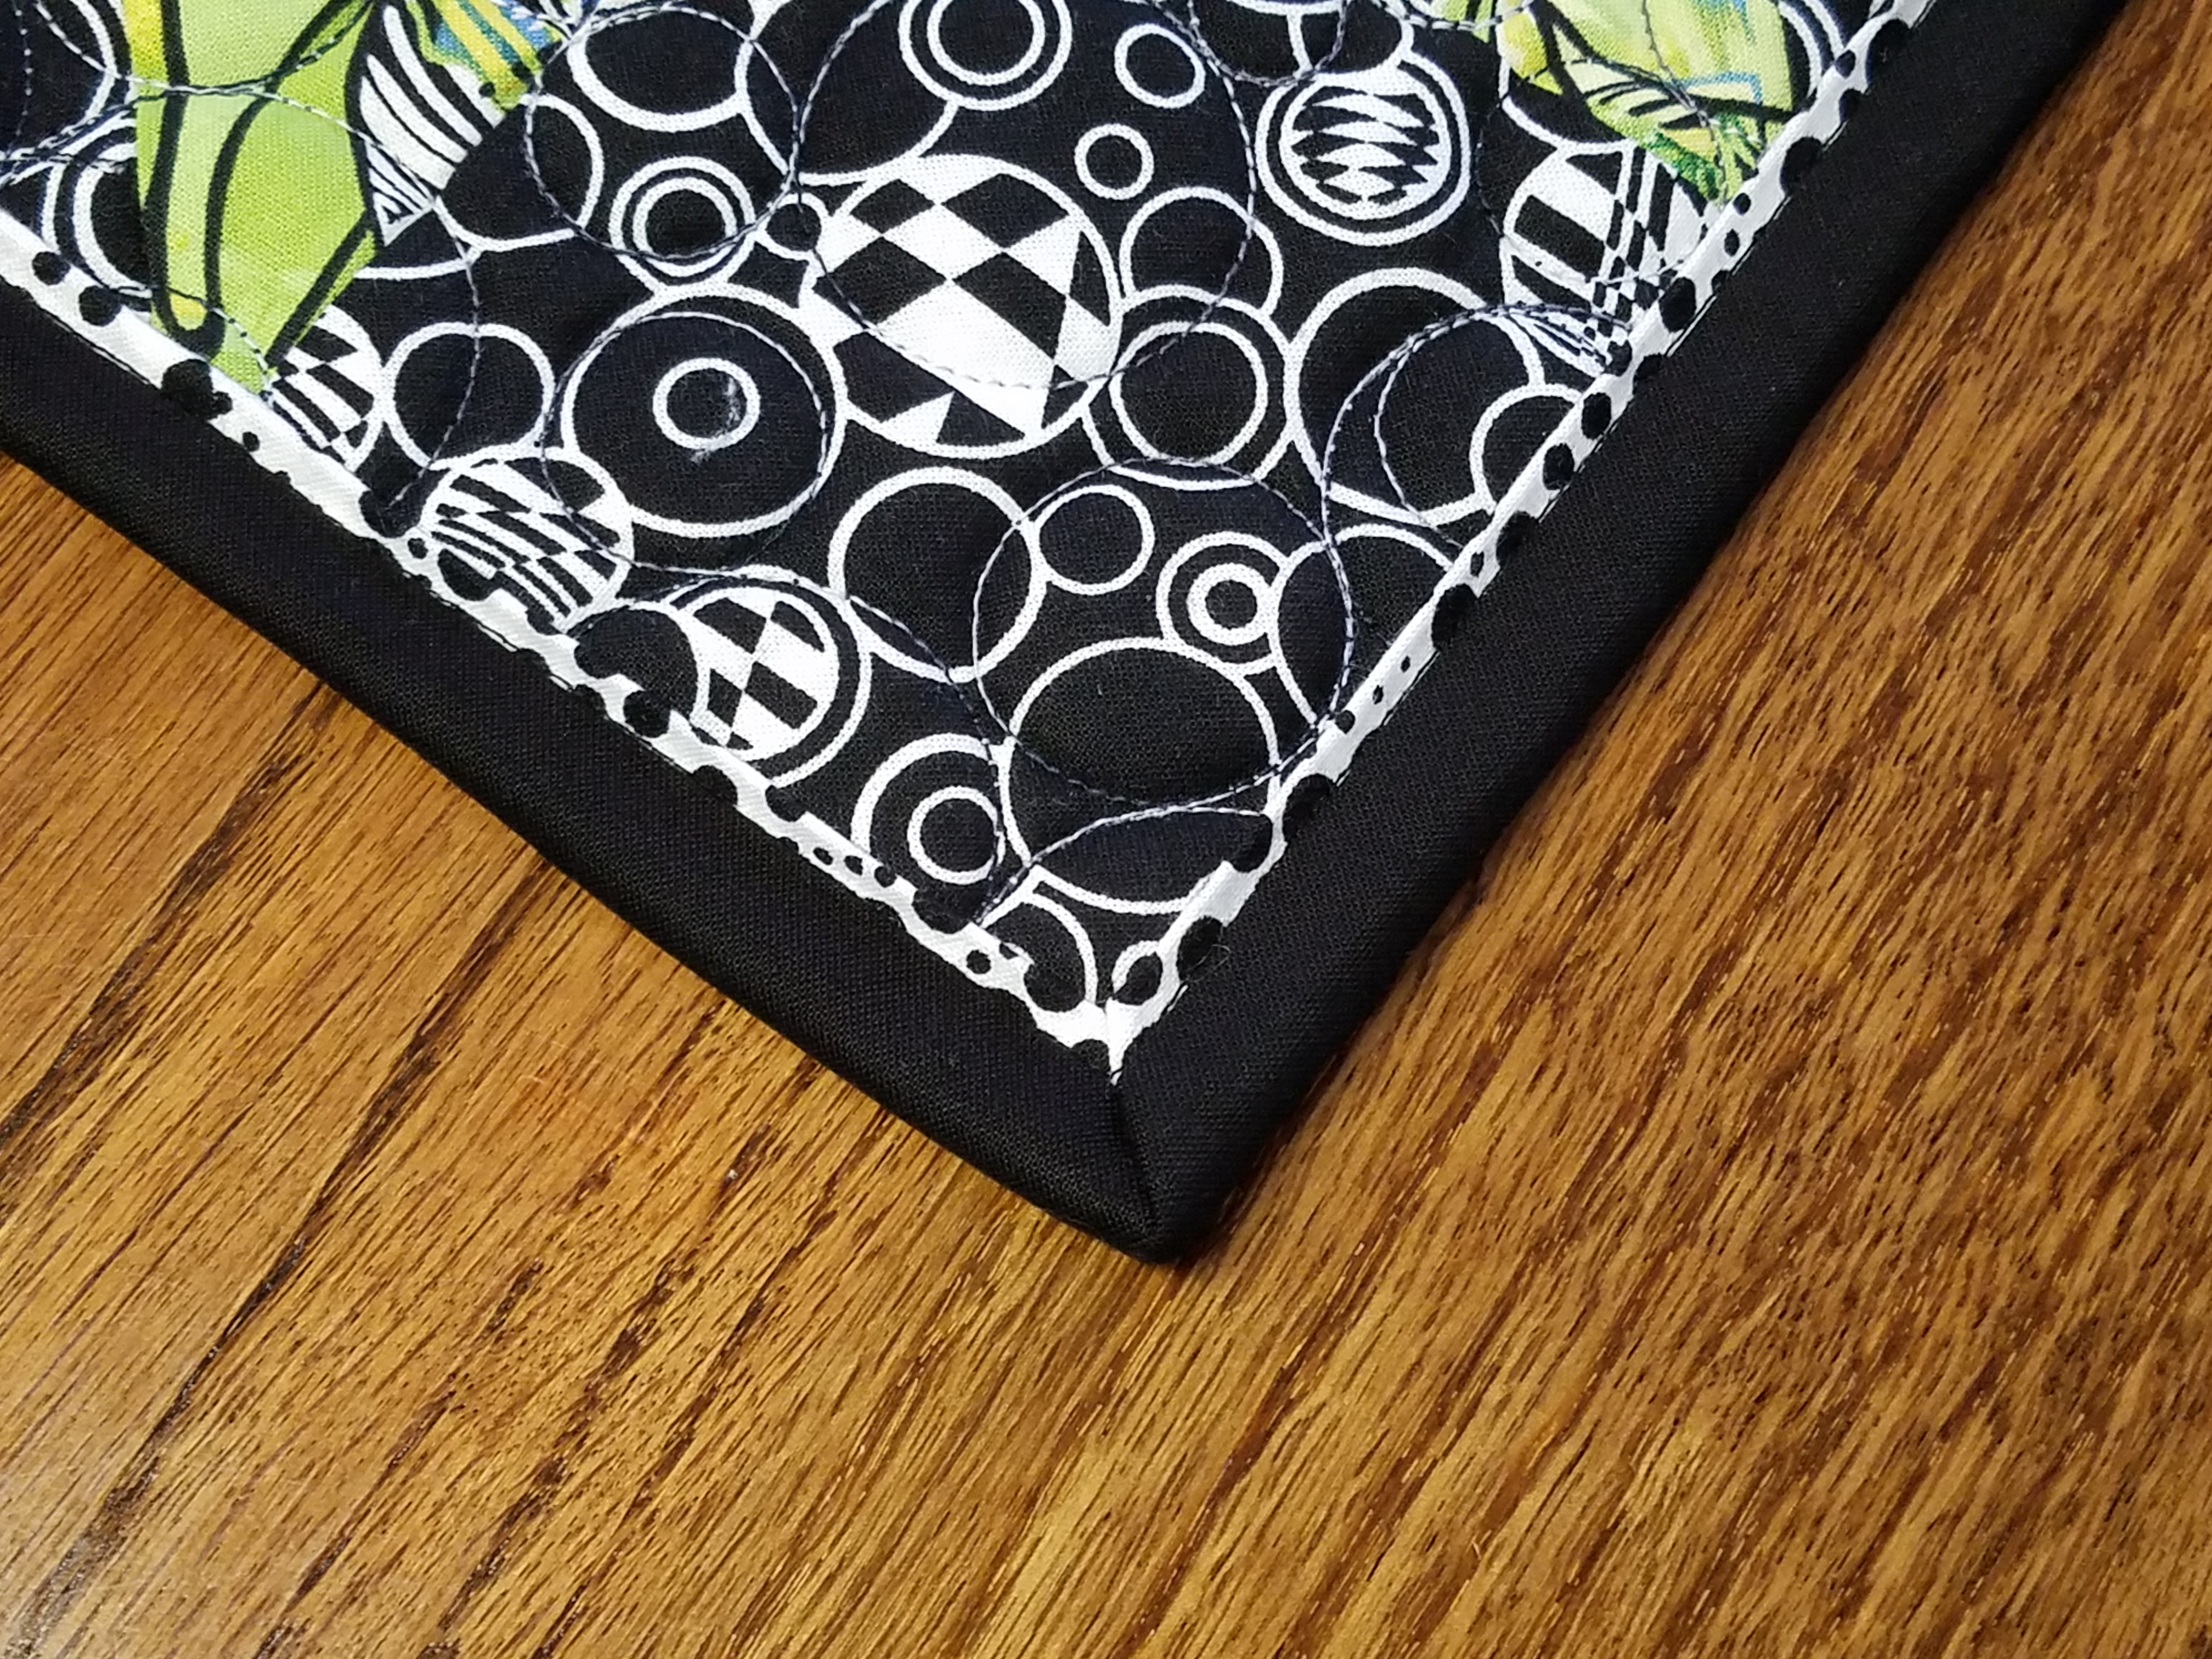
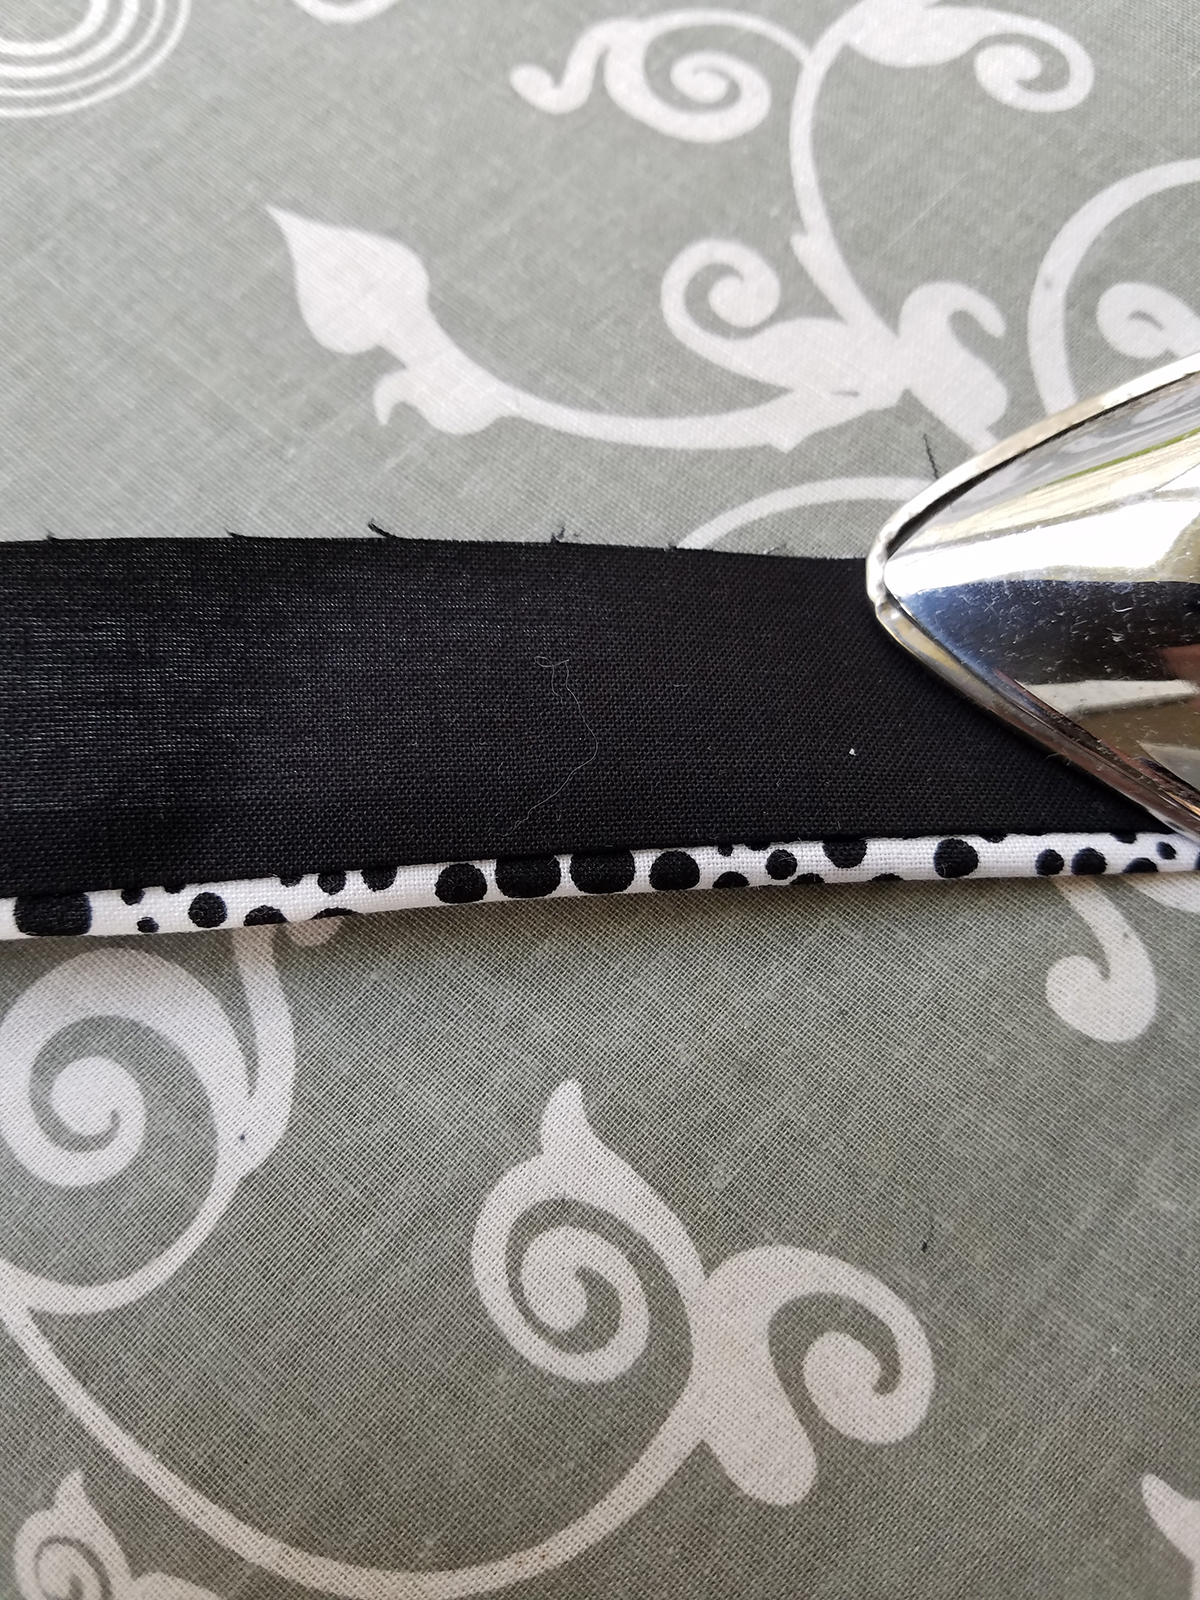
Fold binding in half with wrong sides together and raw edges even; press. You will notice a bit of the accent fabric showing along the edge.
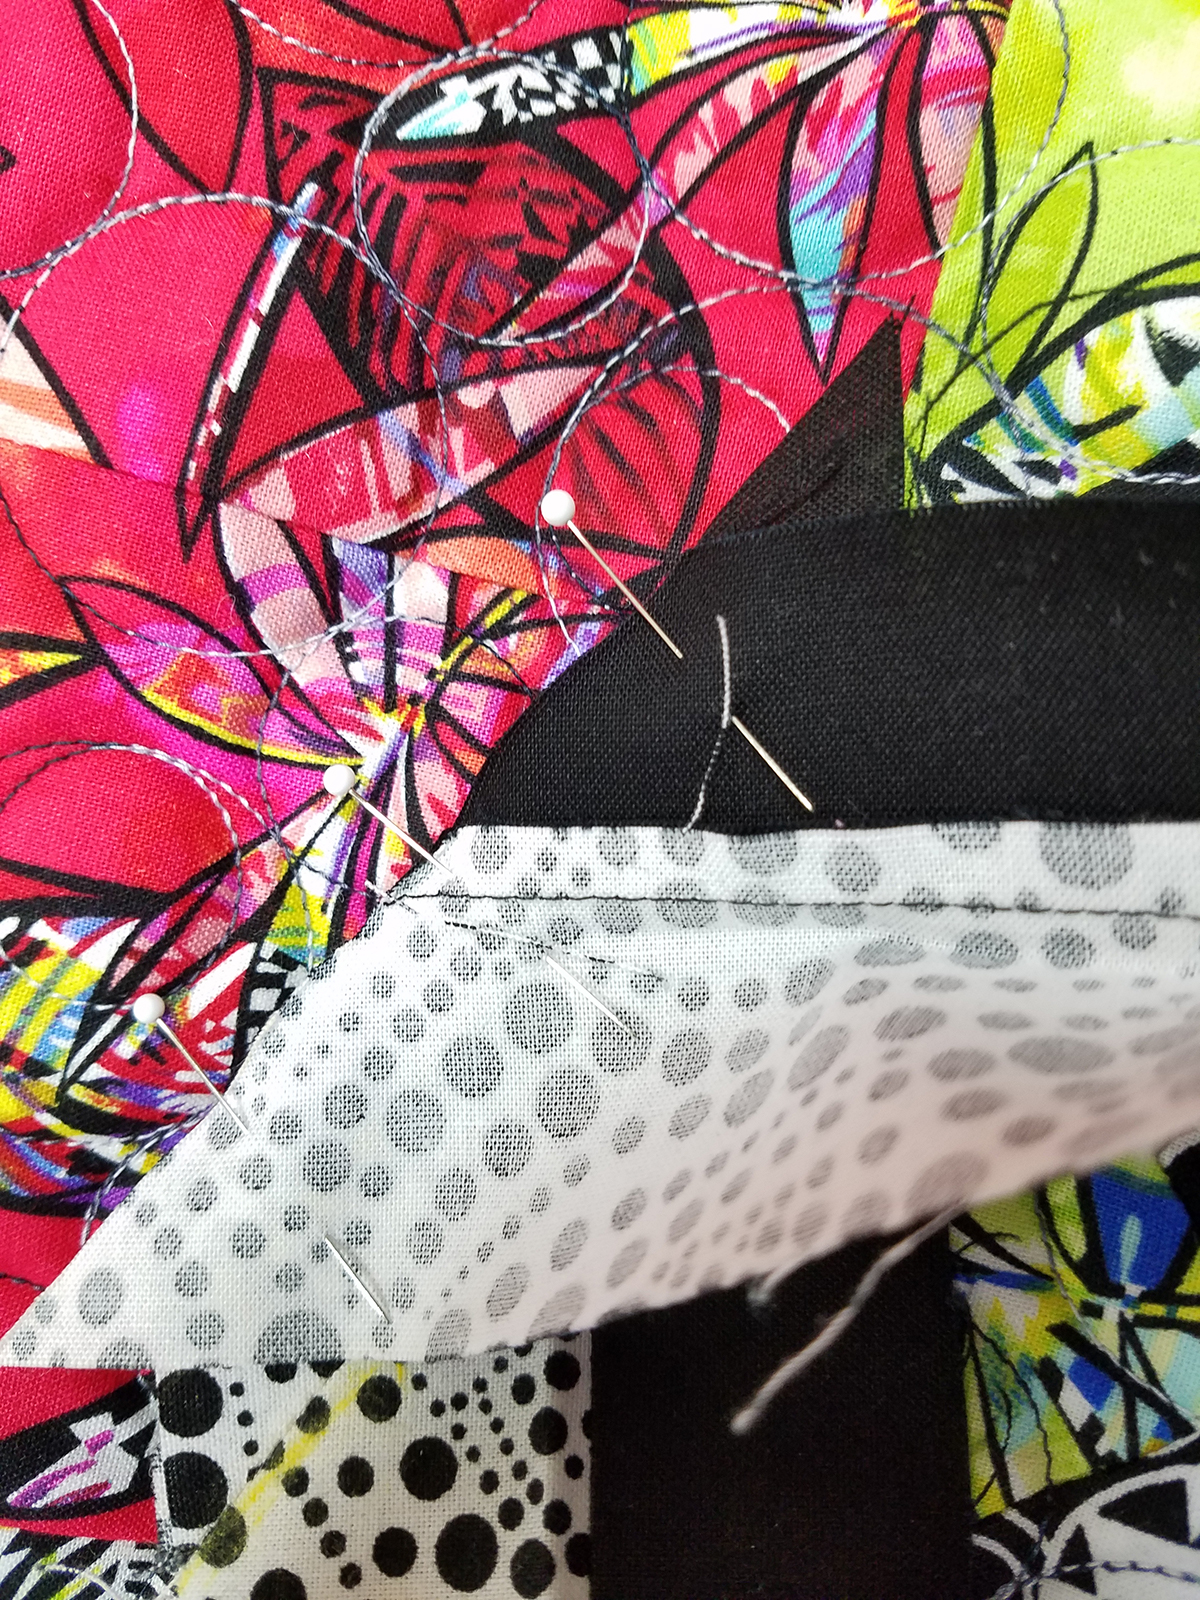
Place binding strip on the wrong side (back side) of quilted piece. The black main fabric should be toward the backing fabric. The accent fabric (white with black dots) is facing up.
Leave a tail of binding about 5 or 6 inches unstitched at the beginning and stitch the binding onto back side with a ¼ inch seam using the Patchwork Foot #37/37D.
When you get to the corner, stop ¼ inch before the end and stitch at an angle right off the corner as we did in the Shoofly Block Placemats.
Turn the quilted piece so that the previously stitched-on binding is at the top edge. Fold the binding up and then back down. Align the fold with the cut edge of the previously stitched side and the cut edge of the binding with the next side of the topper. Place the presser foot so that the needle will be at the top fold.
Start at the fold and stitch the second side, again stopping ¼″ from the end. Repeat the steps above for all remaining corners and sides. Make sure you leave about 5 or 6 inches unstitched at the end so you can join the ends together.
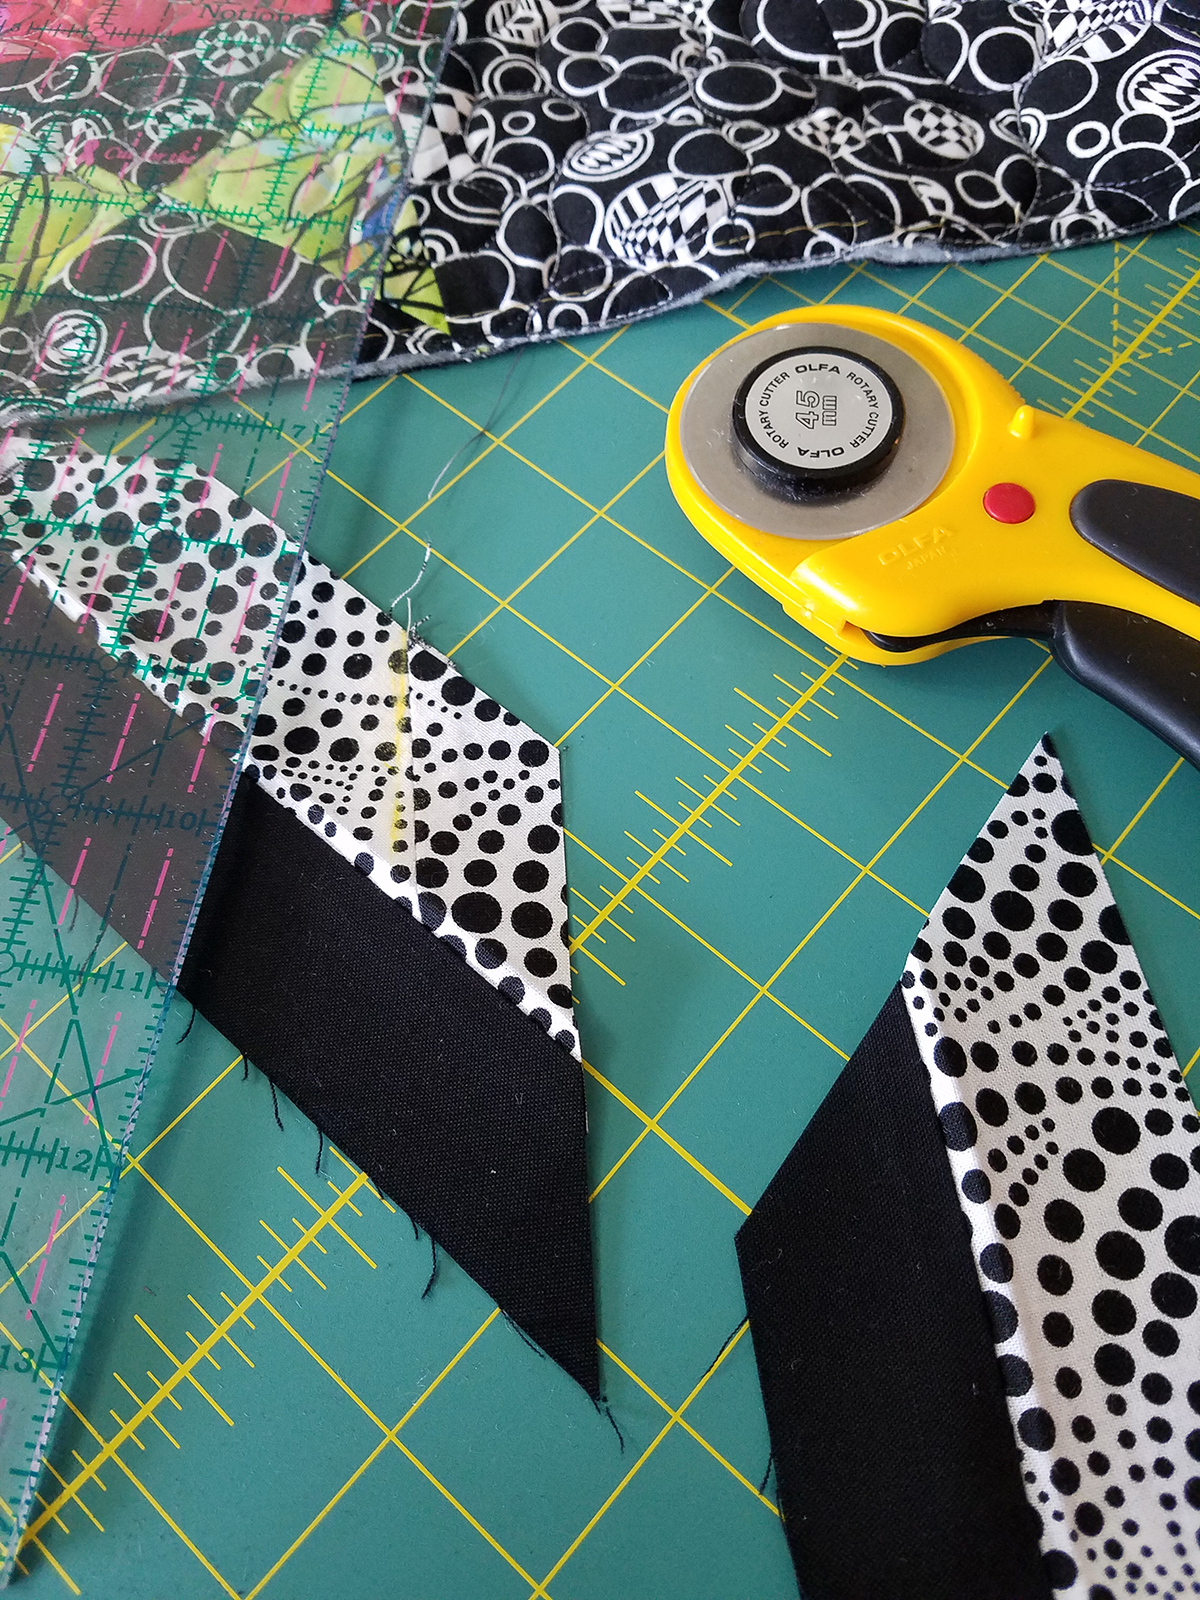
Slide the ending tail of the binding into the folded/angled end of the beginning tail. Measure and mark the angle of the ends of the binding.
Cut ending tail 1″ longer than the chalked line.
Use a marking pen or pencil to add ½ inch seam markings along each of the cut ends.

Align the cut edges of the binding and stitch binding ends together as we have done in other blocks in this series.
Press the seam open and place binding in its final position with raw edges aligned. Trim corner tips from seams, line up the raw edges and stitch the binding to complete.
Now that the binding has been stitched to the back side; it is ready to sew it to the front side. Fold the binding to the front and clip or pin in place, Clover Wonder Clips are my preferred method.

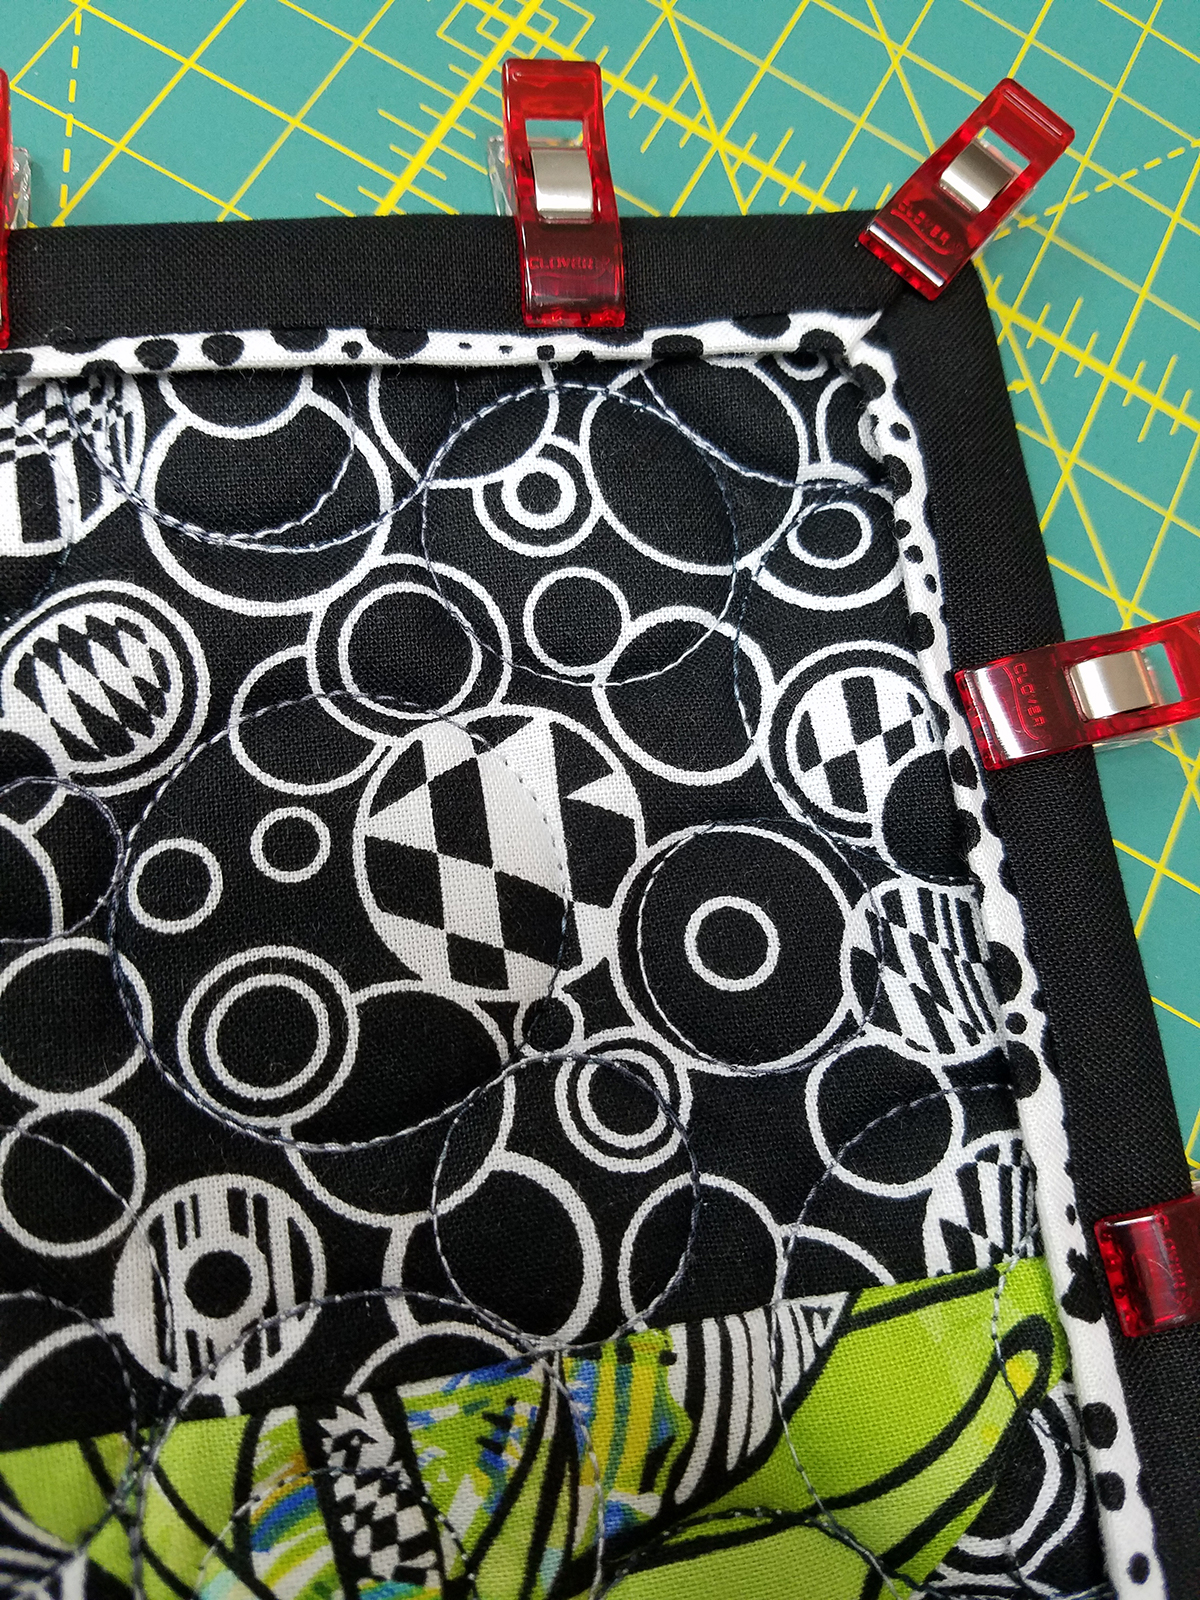
Attach Edgestitch Foot #10/10D to your machine. From the top side, stitch the quilted piece “in the ditch” between the accent fabric and the main (black) fabric of the binding. Stitch all the way around the entire topper.

Congratulations! You have now completed your binding with mitered corners and flanged edges. It looks great!
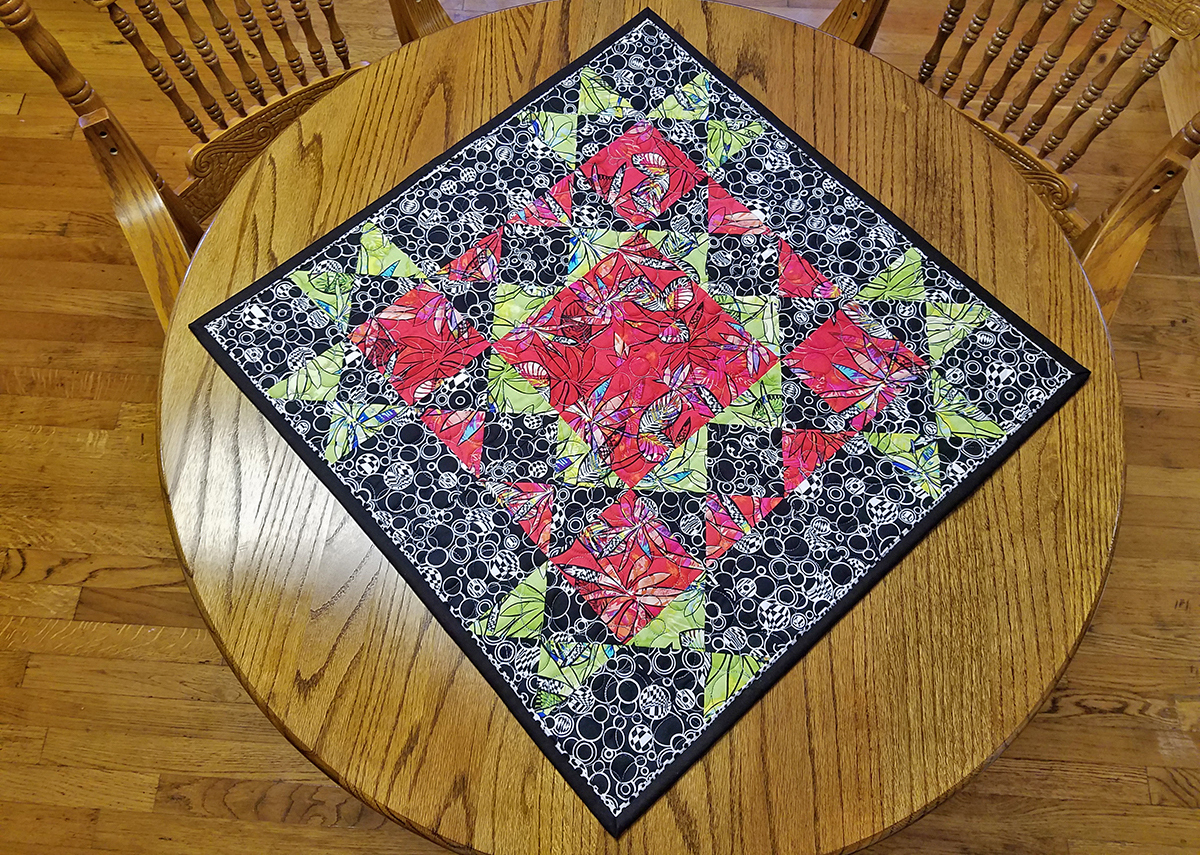
If you want an entirely different look, simply flip the table topper to the other side to show off the quilting!