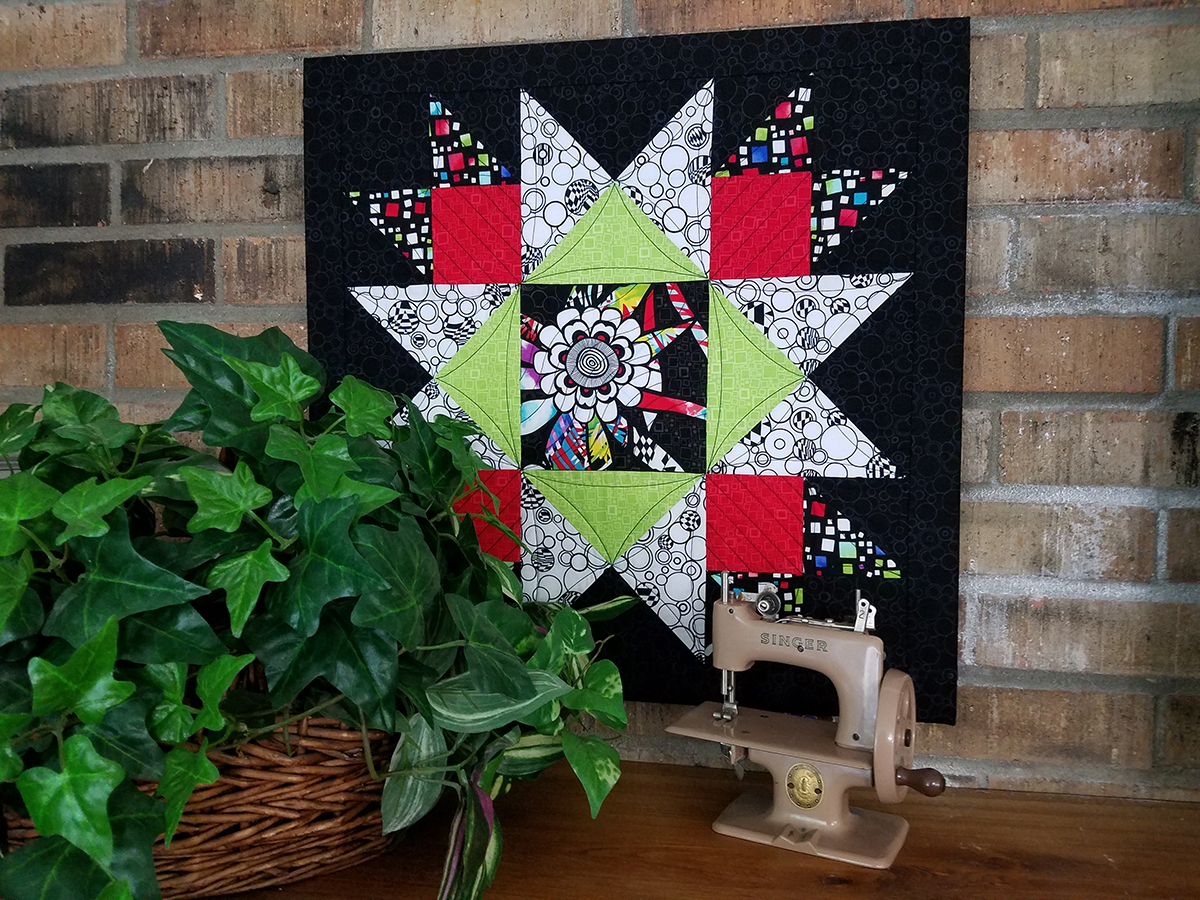
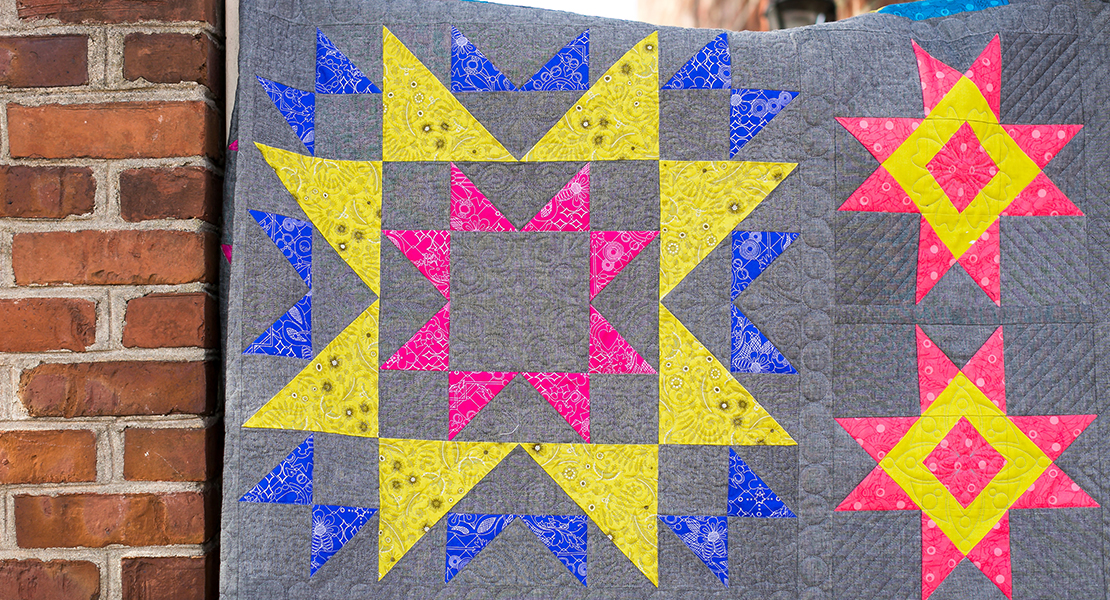
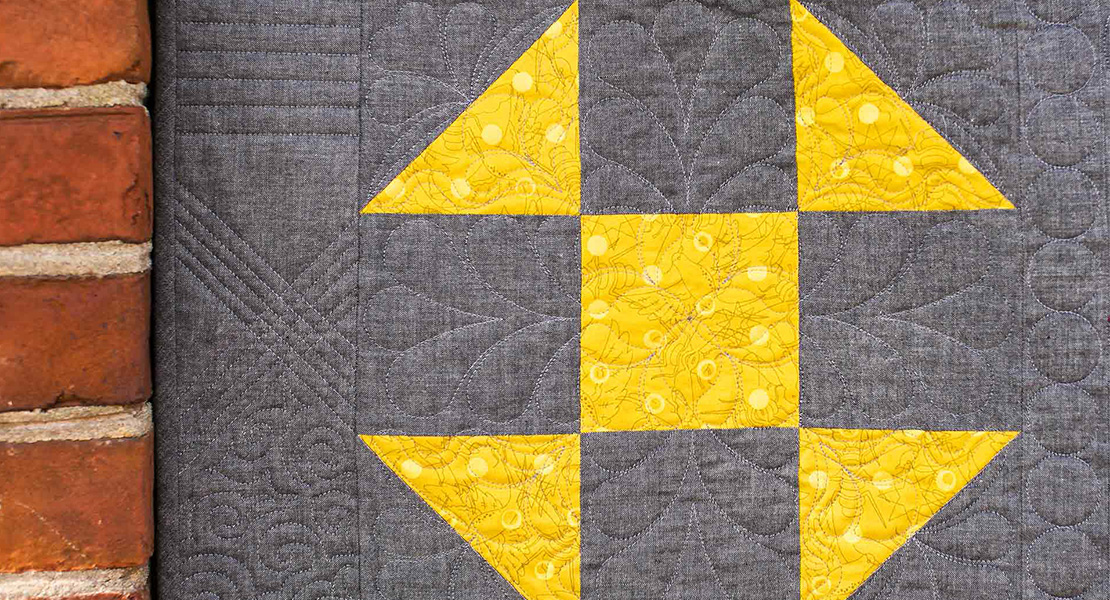
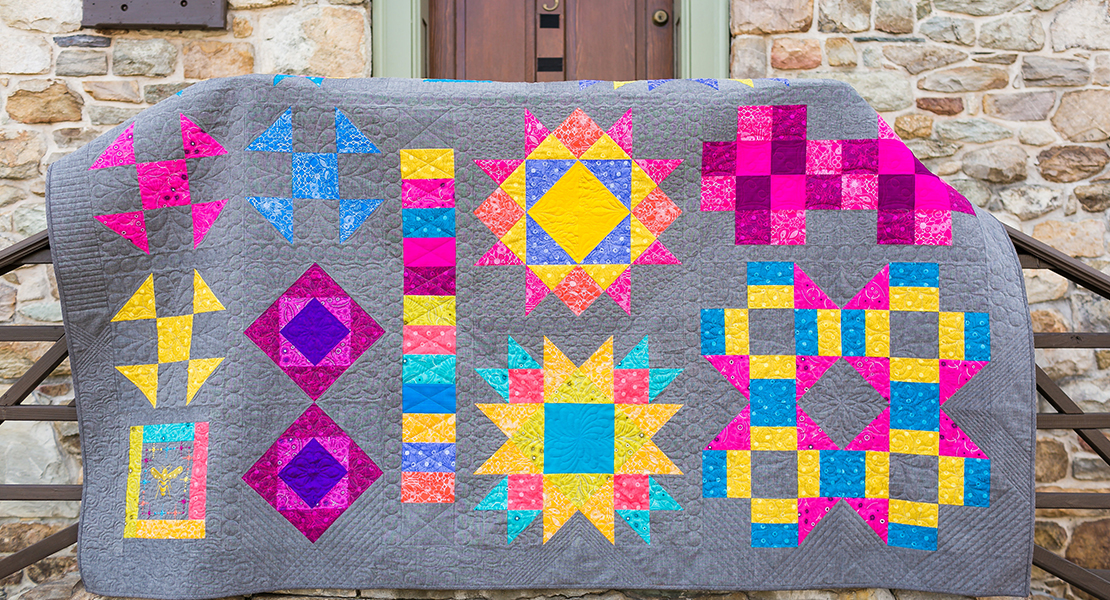
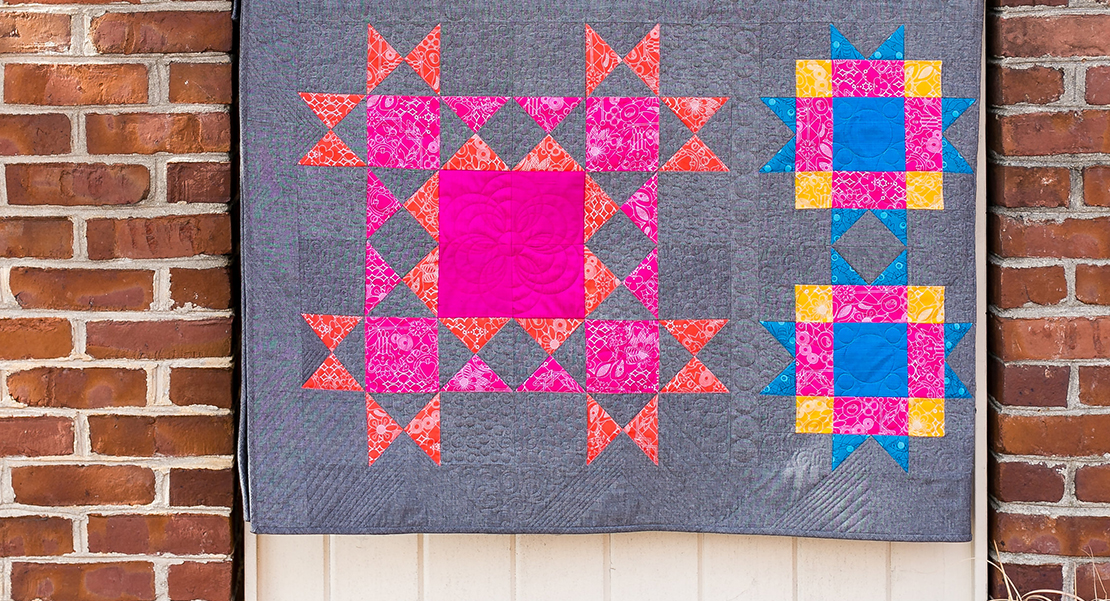
Union Square Block
This month’s block is the Union Square, which is one of the many blocks based on the Ohio Star Block. The Union Square corners dress up the basic Ohio Star that you see in the center of the block. This will be a finished 18″ square, making it a great size to be used as a pillow or table topper also.
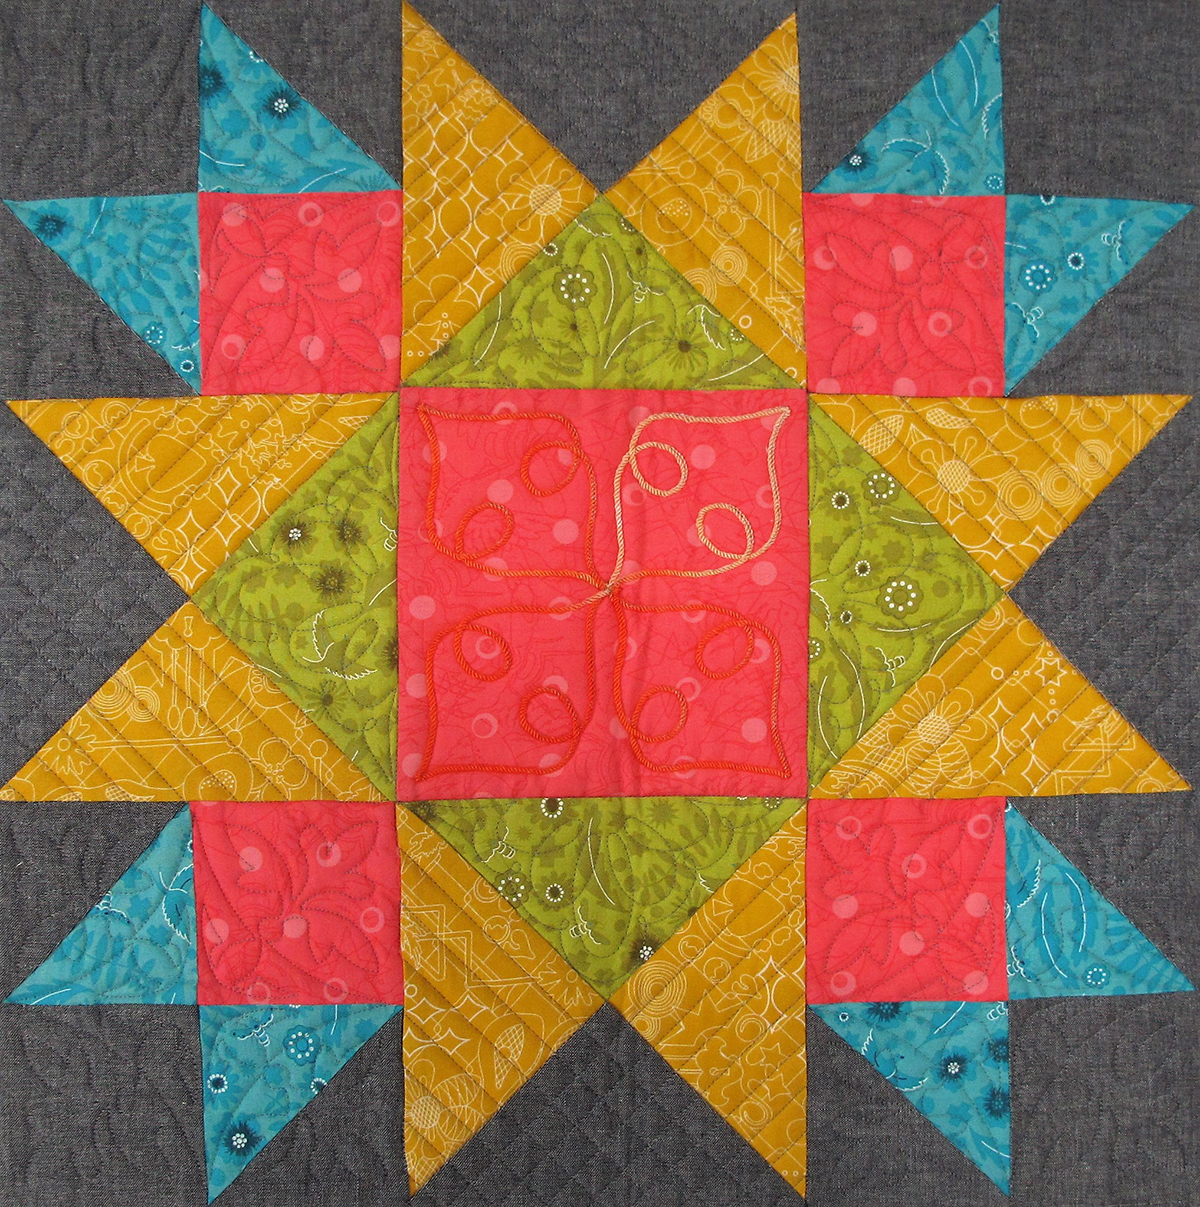
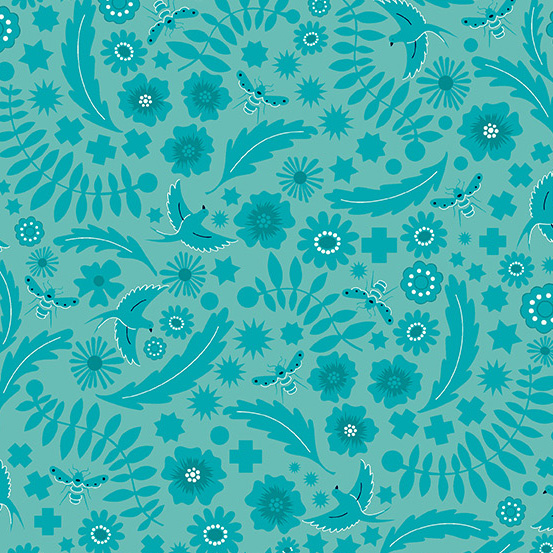
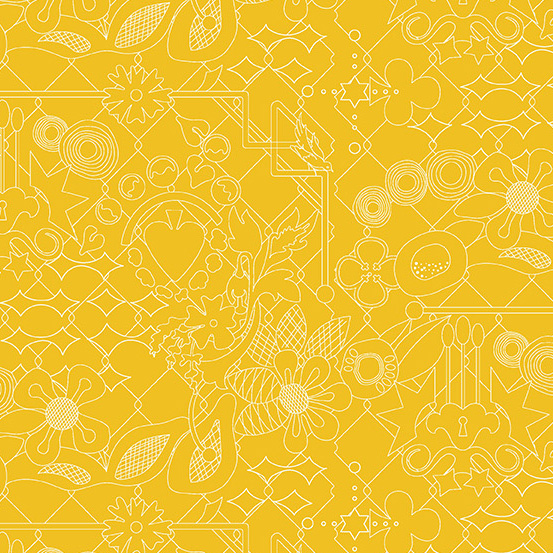
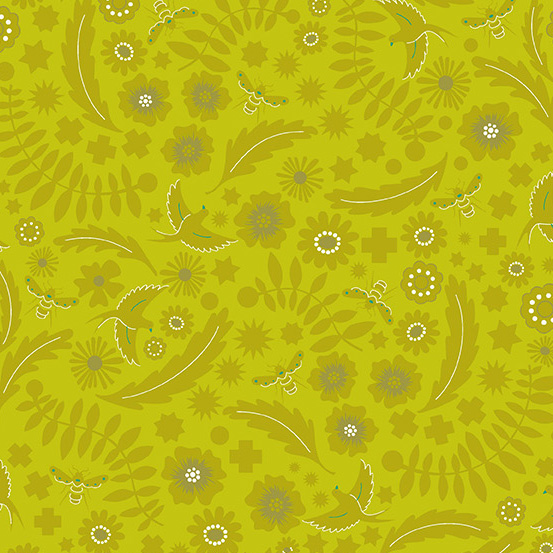
If you are buying fabric for each block on a monthly basis, you will need five fabrics for this block: a teal, a yellow, a green, a pink and the gray background fabric.
Please see more details about fabric requirements here. You will follow the Alternate Cutting Instructions below if you are cutting from a kit.
Please also download the BERNINA Block Party Fabric Chart.
If you are using the Sun Print 2017 Andover fabric line by Alison Glass, the specific colors are listed in bold:
Fabrics
Fabric A Teal A-8483-T Fat Quarter
Fabric B Yellow A-8482-Y Fat Quarter
Fabric C Green A-8483-V Fat Quarter
Fabric D Pink A-8484-E Fat Quarter

Fabric E Gray A-C-Black Fat Quarter
Supplies to Create the Union Square Quilt Block
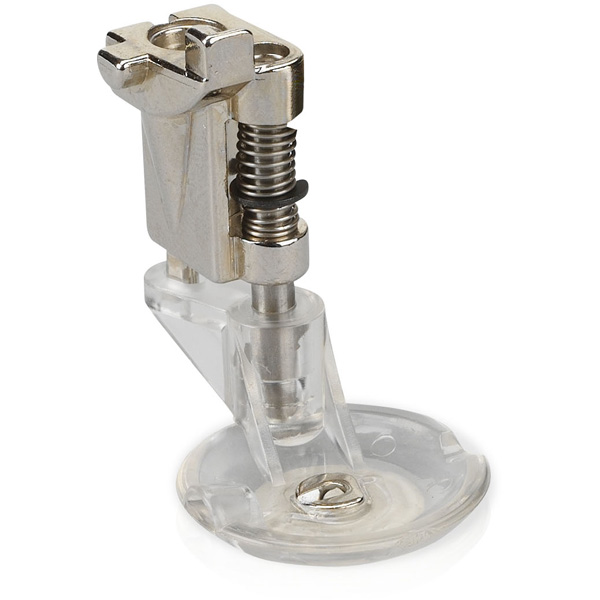
Patchwork Foot #37/37D or #57/57D or #97/97D
Straight Stitch Needle Plate for domestic machines
Machine with Embroidery Capability and Embroidery Foot #26 (if quilting with embroidery machine) or Adjustable Ruler Foot #72 (if using a BERNINA Domestic Sewing Machine for ruler work)
OR
Ruler Foot #96 (if using the Q20 Sit-down Model)
BERNINA Q-matic Longarm Quilting Automation System (optional)
BERNINA Ruler Work Kit (if using Q 24 the Q 20 Longarm Machine on a frame) includes Ruler base, Ruler foot #96 and Straight Ruler
Free Motion Couching Foot #43 (for use with either the Longarm or the domestic machine)
LaEspiga Cord #18 (your choice of color) or any other cord that works in the #43 foot
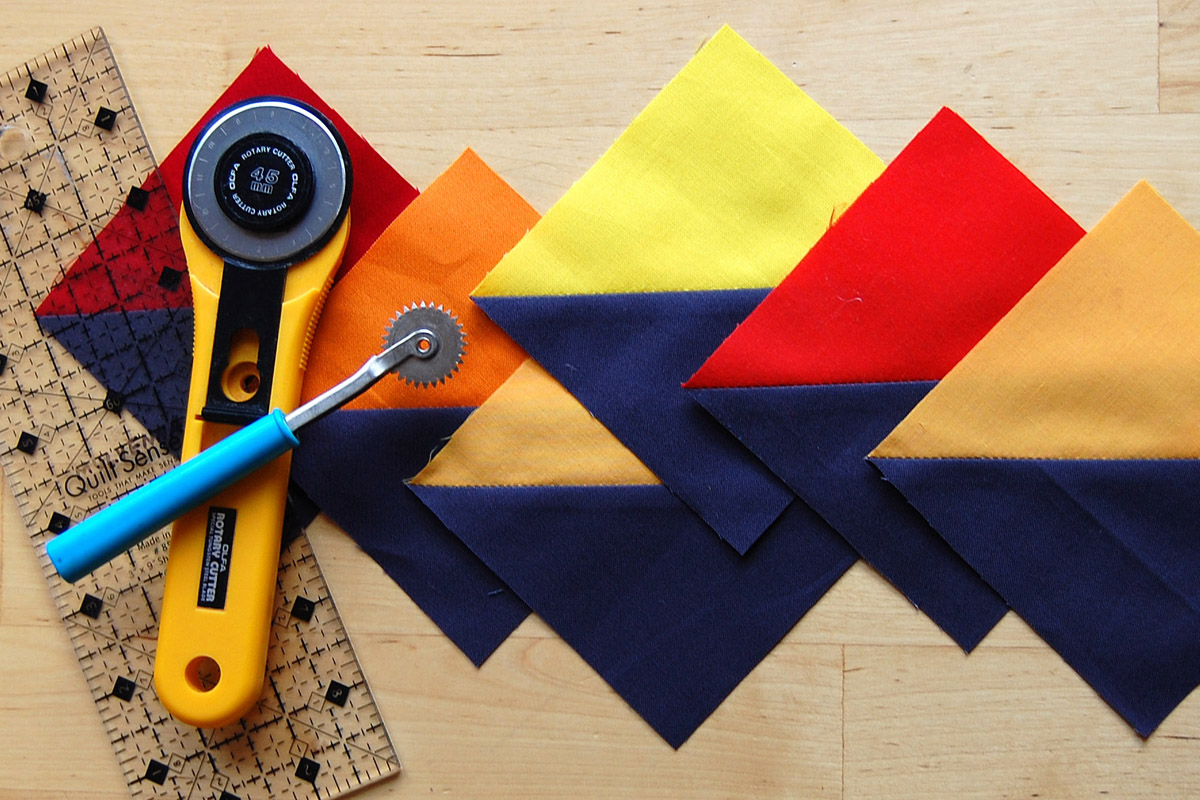
Cutting Instructions to Create the Union Square Quilt Block
Fabric A
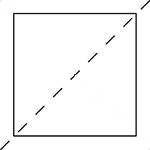
4 Squares 3 7/8″; cut in half diagonally making 8 triangles
Fabric B
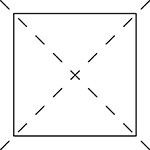
2 Squares 7 1/4″; cut in quarters diagonally making 8 triangles
Fabric C
1 Square 7 1/4″; cut in quarters diagonally making 4 triangles (Insert 02 Crosshatch)
Fabric D
1 Square 6 1/2″* (*Option: replace center with a different fabric such as silk dupioni)
4 Squares 3 1/2″
Fabric E
4 Squares 3 1/2″
4 Squares 3 7/8″; cut in half diagonally making 8 triangles
1 Square 7 1/4″; cut in quarters diagonally making 4 triangles
Alternate Cutting Instructions
Fabric A:
Cut a 3 7/8″ strip; cut 4 squares
Fabric B:
Cut 2 –71/4″ squares from left over fabric from Block 5
Fabric C:
Cut a 7 1/4″ strip; cut 1 square. 35″ of strip will remain
Fabric D:
Cut a 6 1/2″ strip; cut 1 square
Use the same strip to cut 4-3 1/2″ squares
Fabric E:
Cut a 3 7/8″ strip; cut 4 squares. Trim remaining strip to 3 1/2″ width; cut 8 3 ½” squares
Cut a 7 1/4″ strip; cut 1 square. 35″ of the strip will remain
Piecing
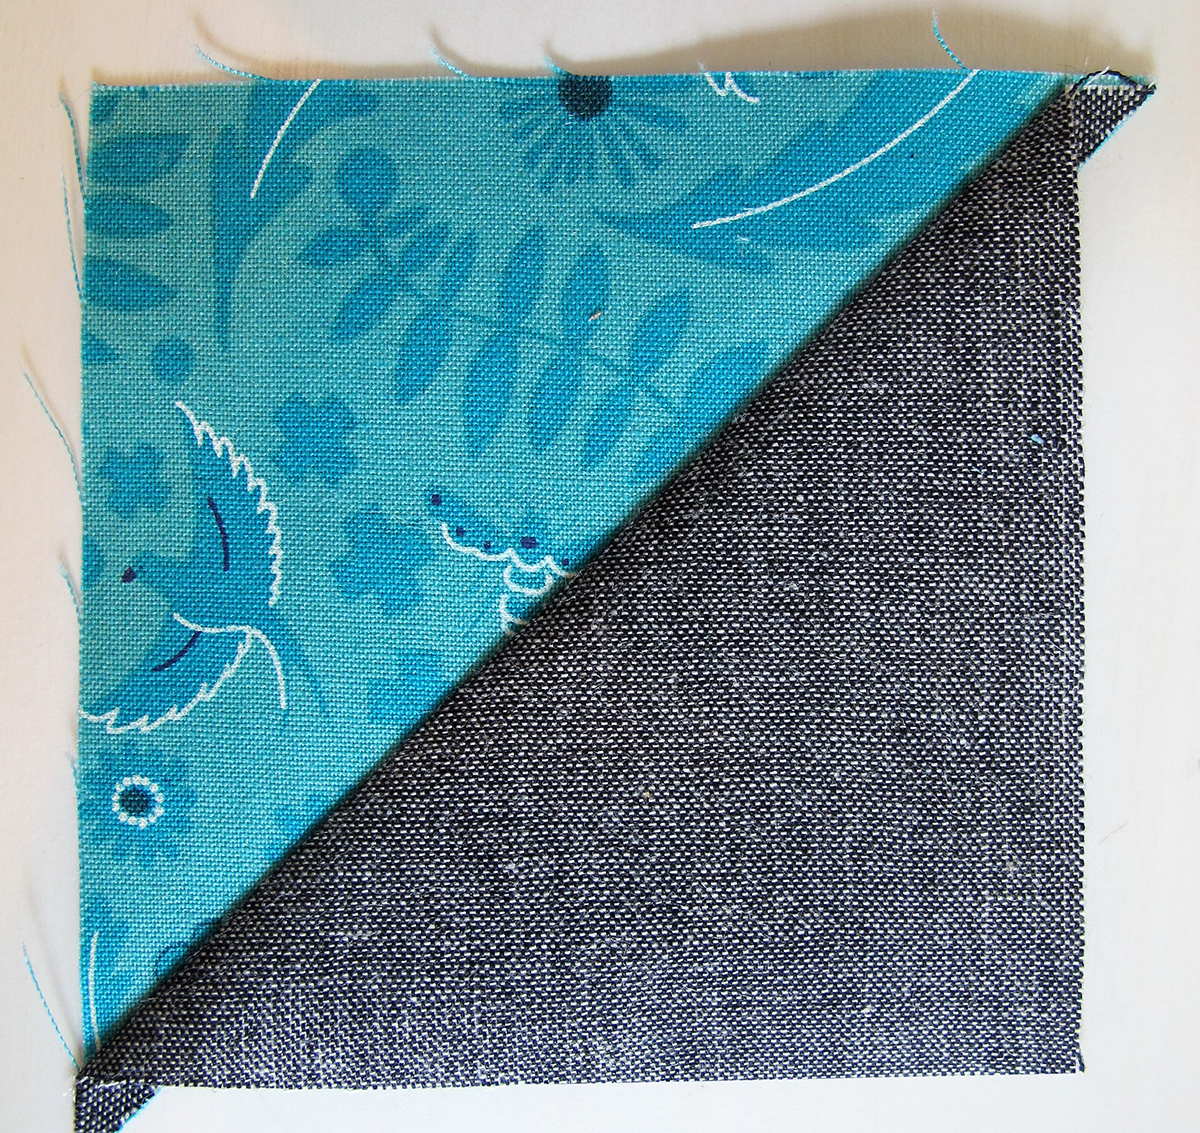
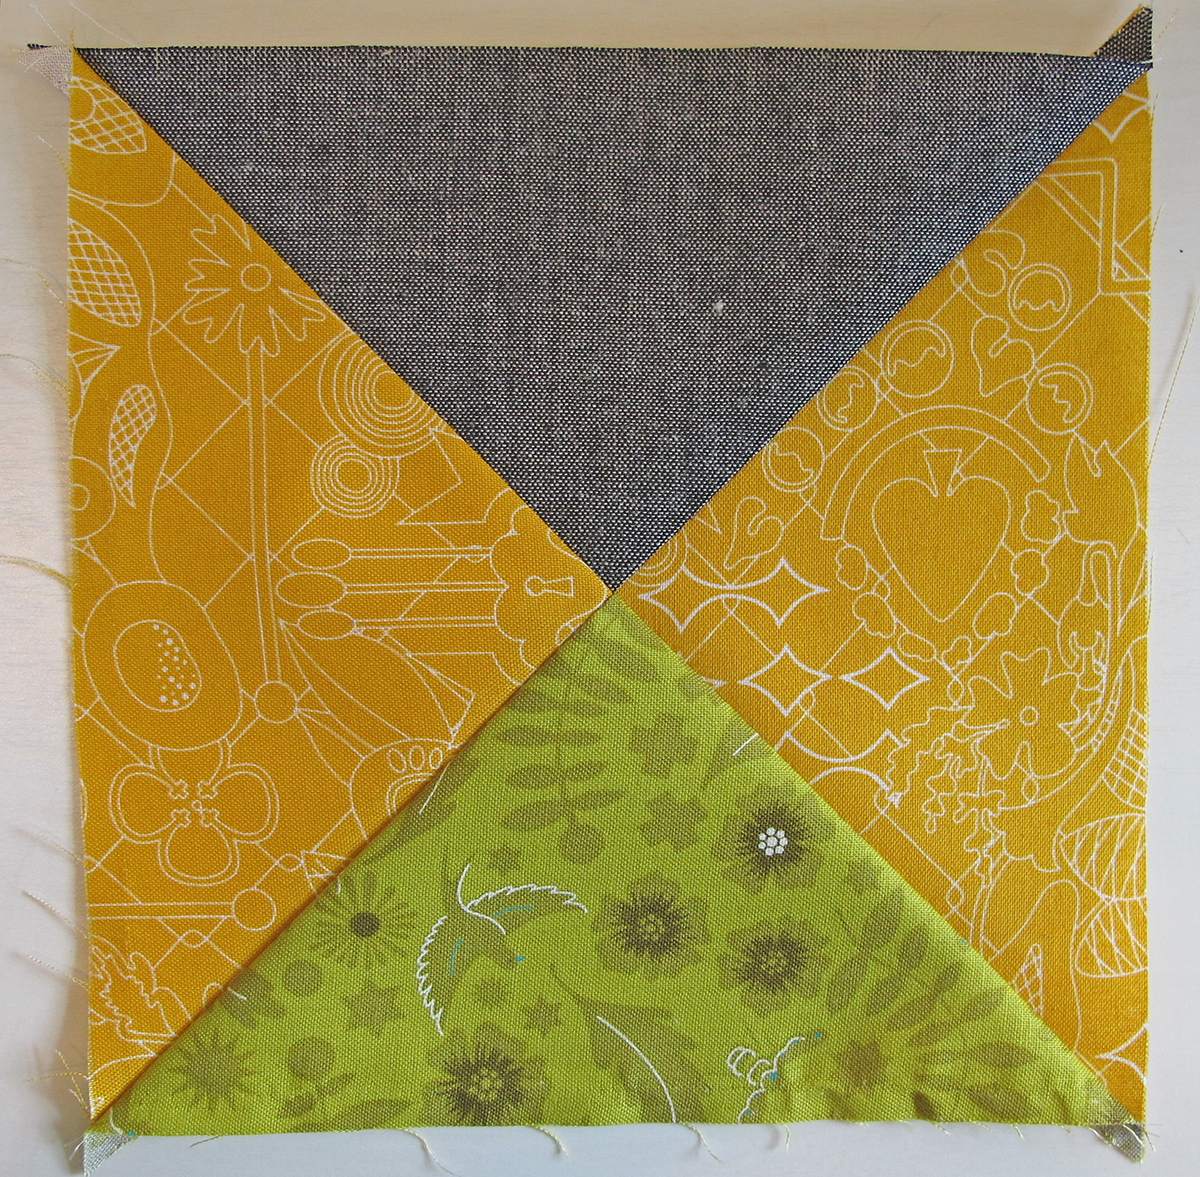
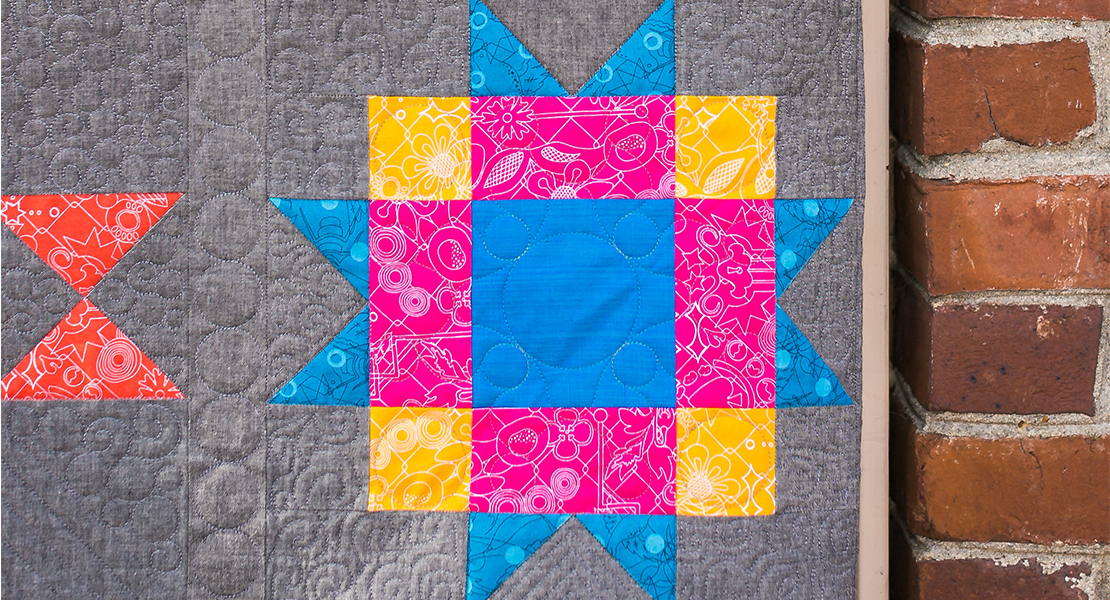
Seam together the Fabric A triangles to the Fabric E triangles to create half square triangles (HST).
Make 8 HST units.
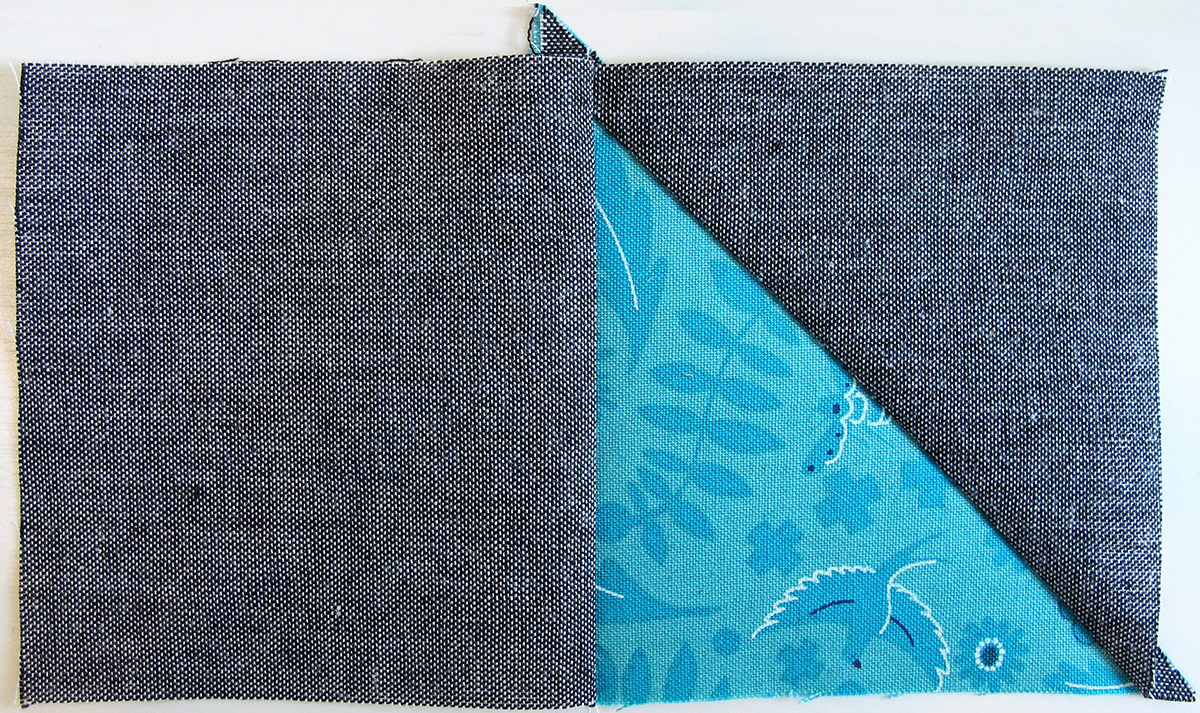
Seam together 4 of these HST units to a Fabric E (Gray) 3 1/2″ square, sewing the teal triangle edge to the gray as shown.
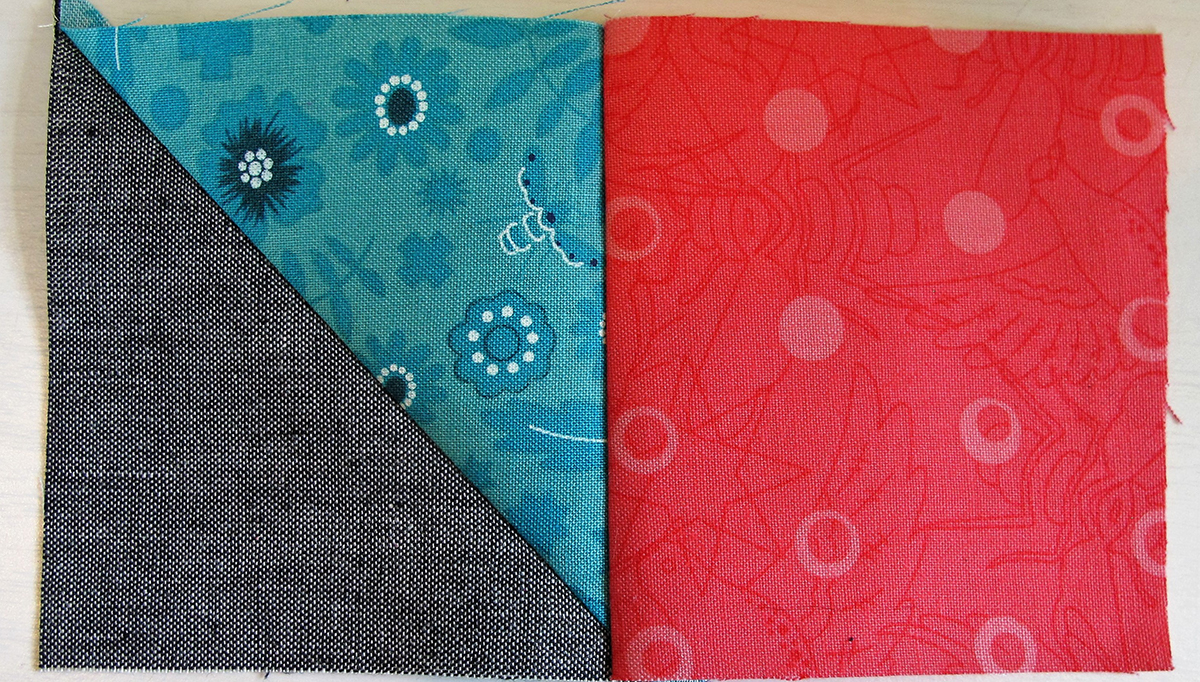
Seam together the remaining 4 HST units to a Fabric D (Pink) 3 ½” square, sewing the teal triangle edge to the pink as shown. Make 4 units.
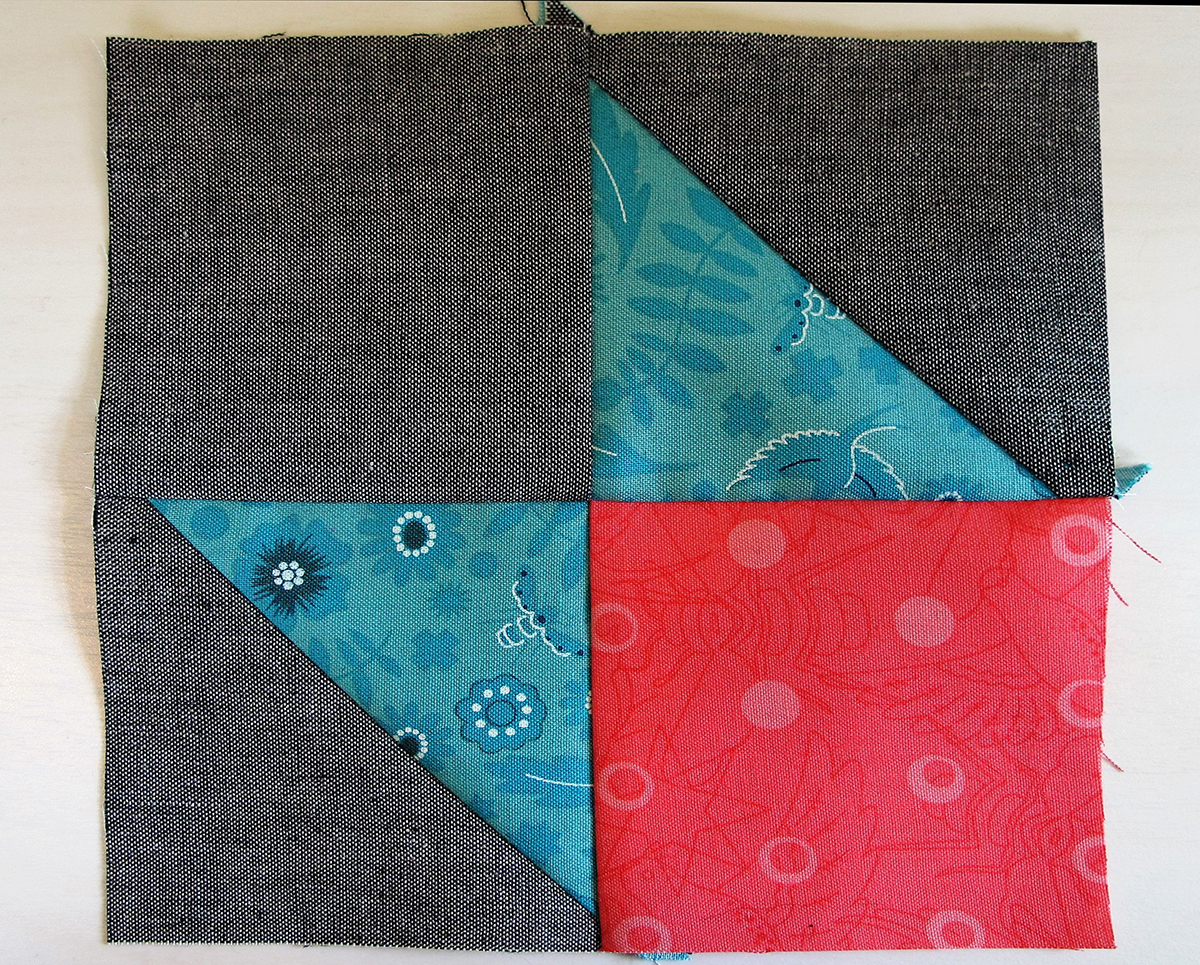
Piece together these two units to create a 6 ½” square as shown. Make 4 units.
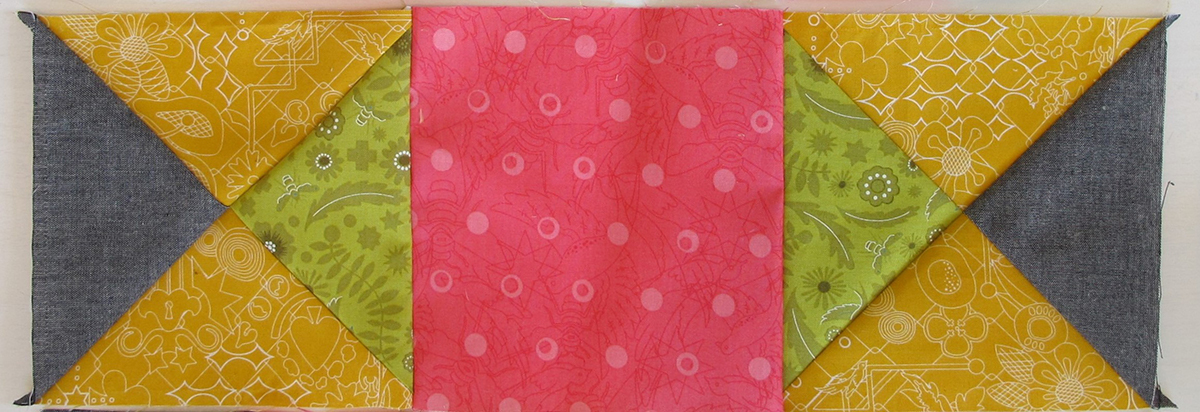
Seam together 4 Fabric B (yellow) triangles to 4 Fabric (gray) triangles.
Make 4 units.

Seam together 4 Fabric B (yellow) triangles to 4 Fabric C (green) triangles. Make 4 units of each.
Piece the triangle units together to form 6 ½” squares as shown. Make 4 units.
We are now ready to construct the three strips that make up the block.
Make 2 of the following strips for the top and bottom rows of the block.

Make 1 of the following strip for the middle of the block.
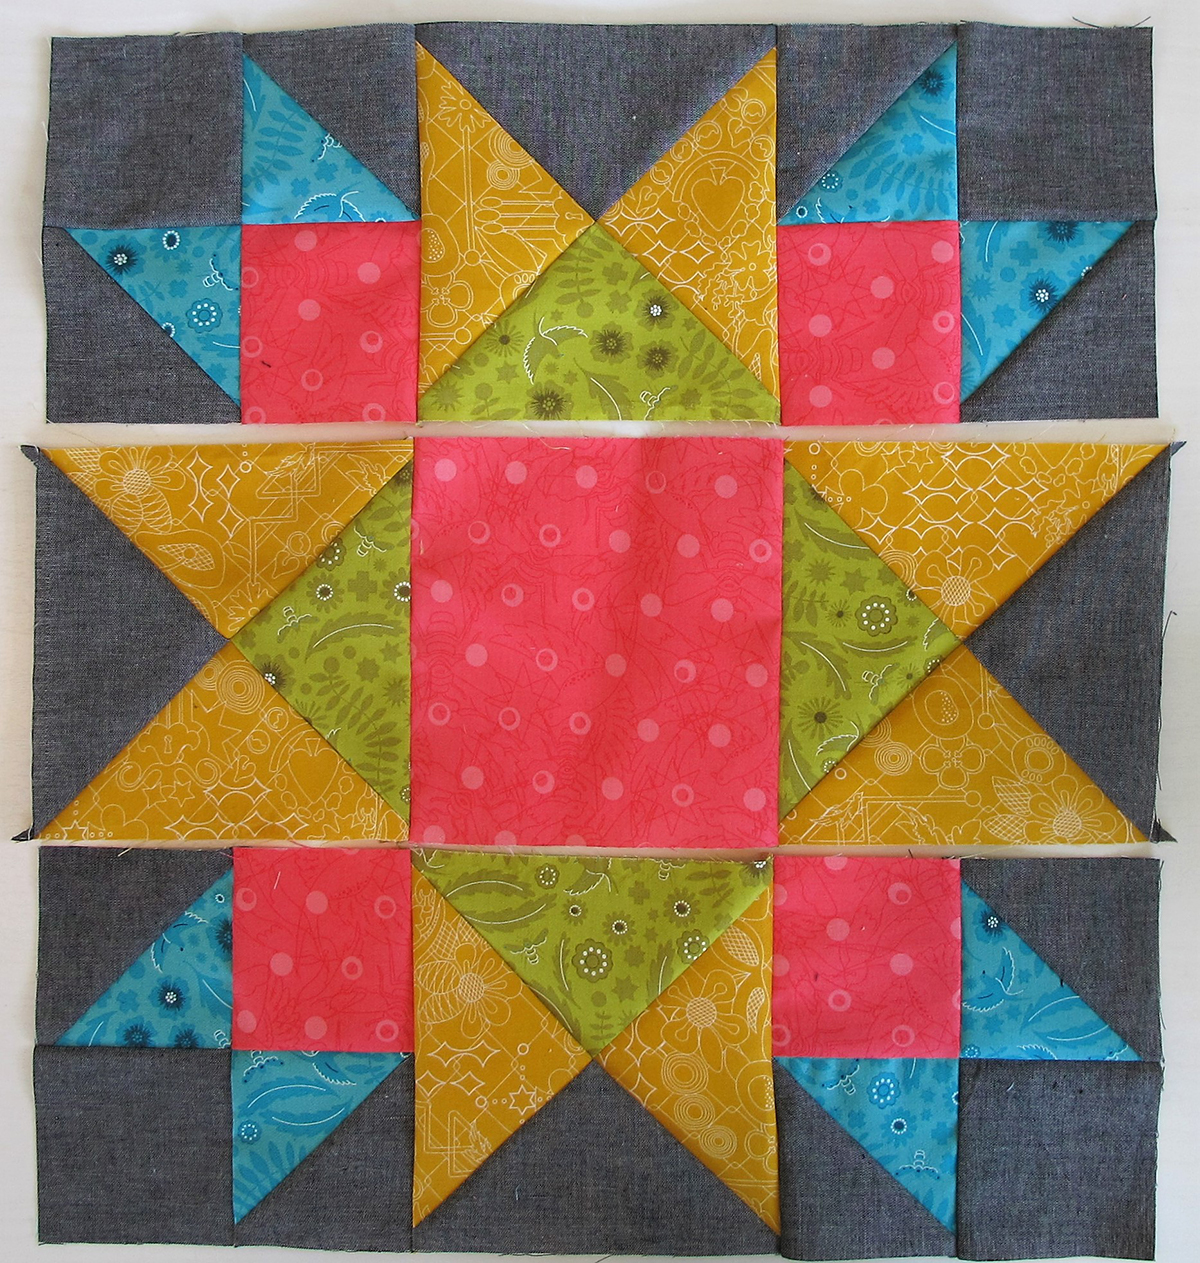
Sew the three strips together creating the Union Square Block.
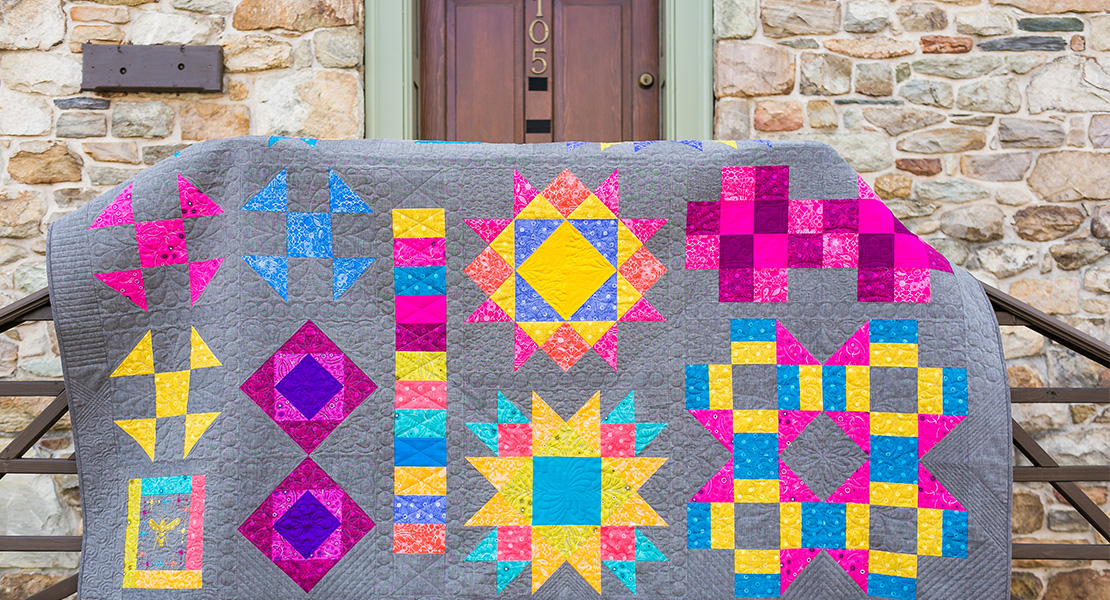
If you are going to make the entire quilt from the Block of the Month Series, set this large block aside for now. The instructions for piecing together all the blocks will come at the end of the series.
Each month, I also give you instructions for a different quilting technique so that you can experiment with different techniques. When it comes time for the final quilting, you will be ready to decide which quilting techniques you like best.
Remember to join Denise Jones later this month on Monday December 18th. Check out the great project she has coming up with for the Union Square Block.
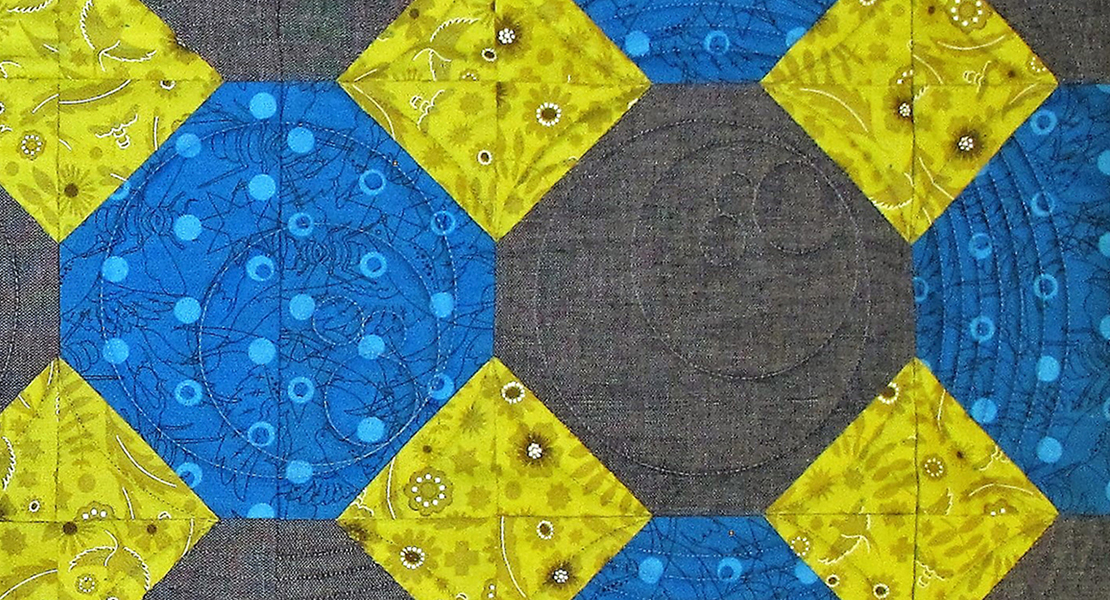
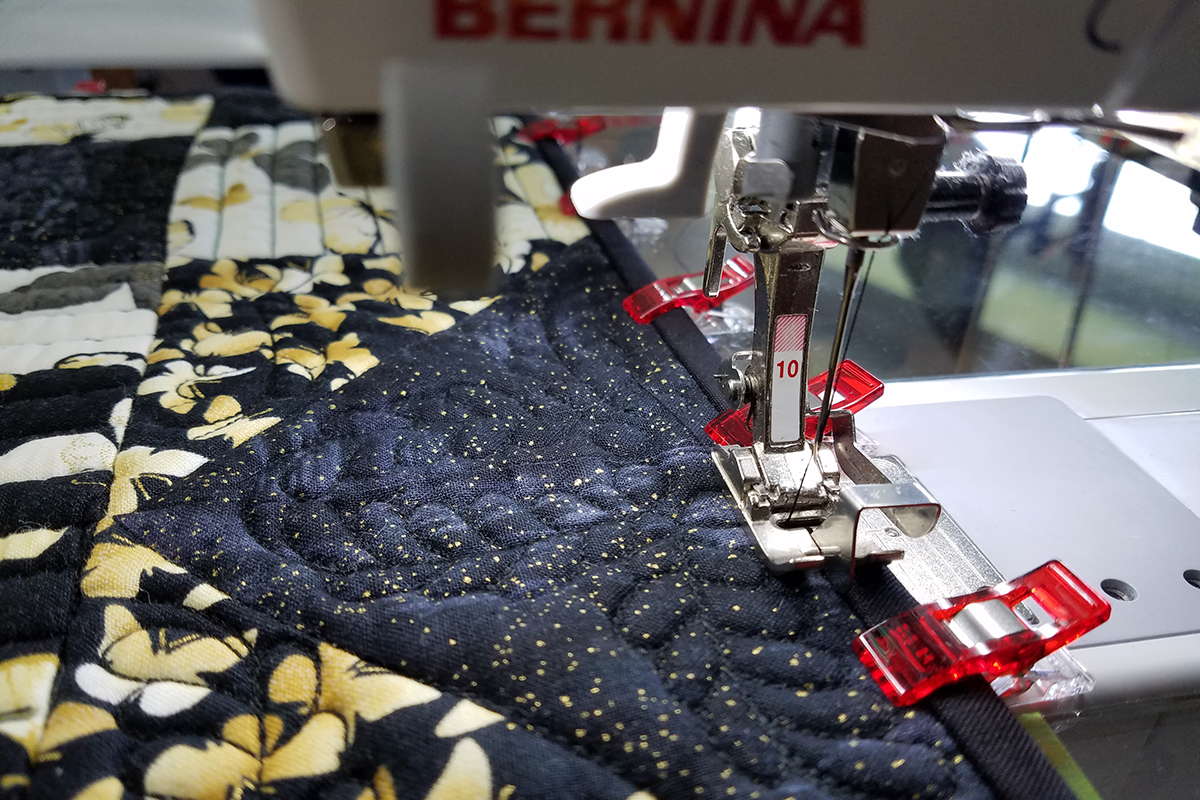
Free-motion Couching Quilting: A Quilting Lesson
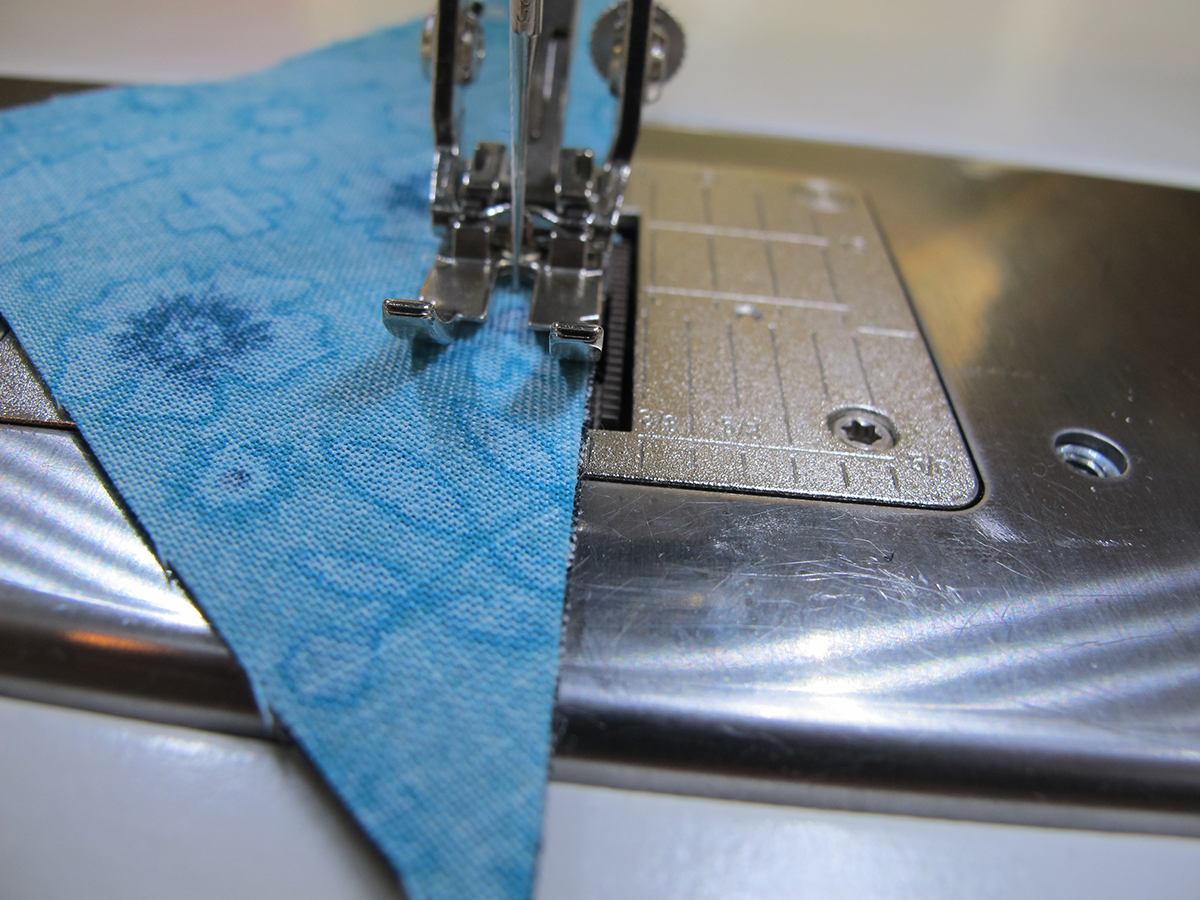
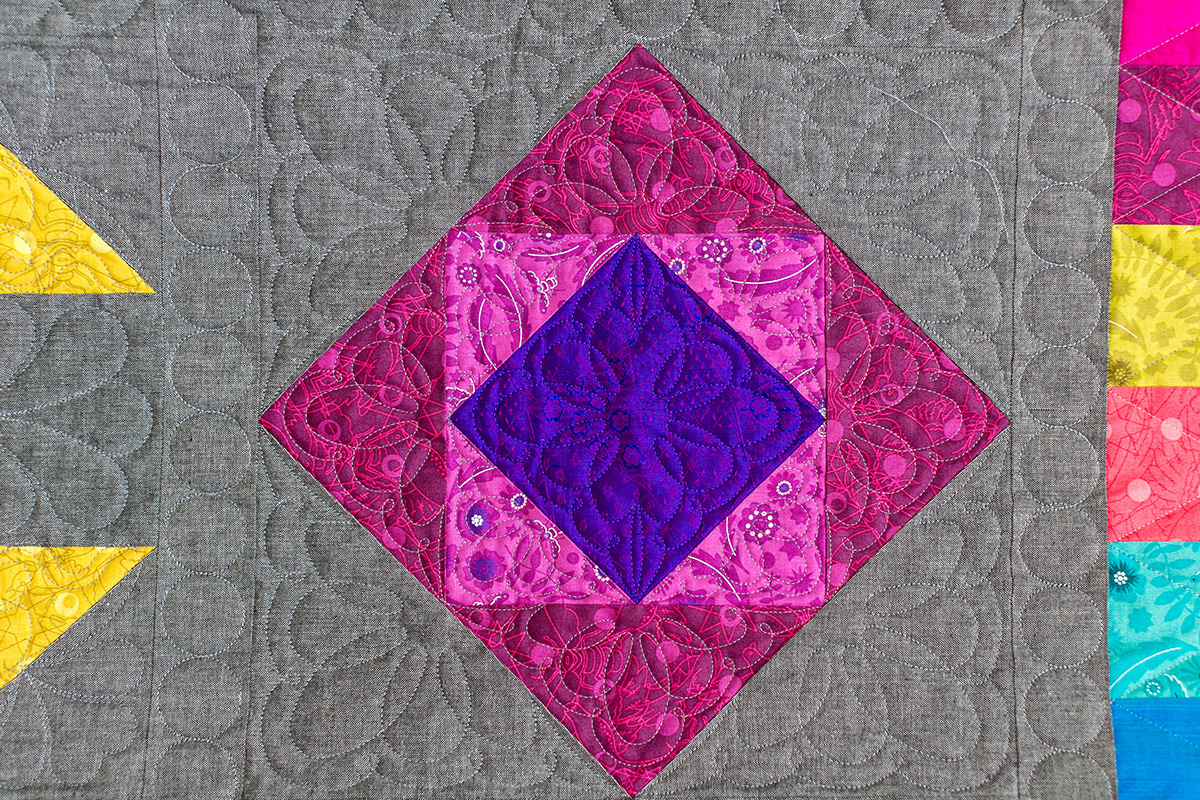
The highlight of this month’s quilting lesson is using the Free-Motion Couching Foot #43. This foot can be used with hand-guided quilting at both the domestic machine and the long arm. It can also be used with embroidery quilting designs on the domestic machine. For more information on using the foot with the domestic machines, watch Couching cords and yarns with the Free-motiong Couching Foot #43. You can also use the Couching Foot using Q-matic on the longarm frame model.
Load the foot with the La Espiga cording. For information on couching with thick cord, watch the All About Couching: Freehand, Frame Embroidery, Long Arm.
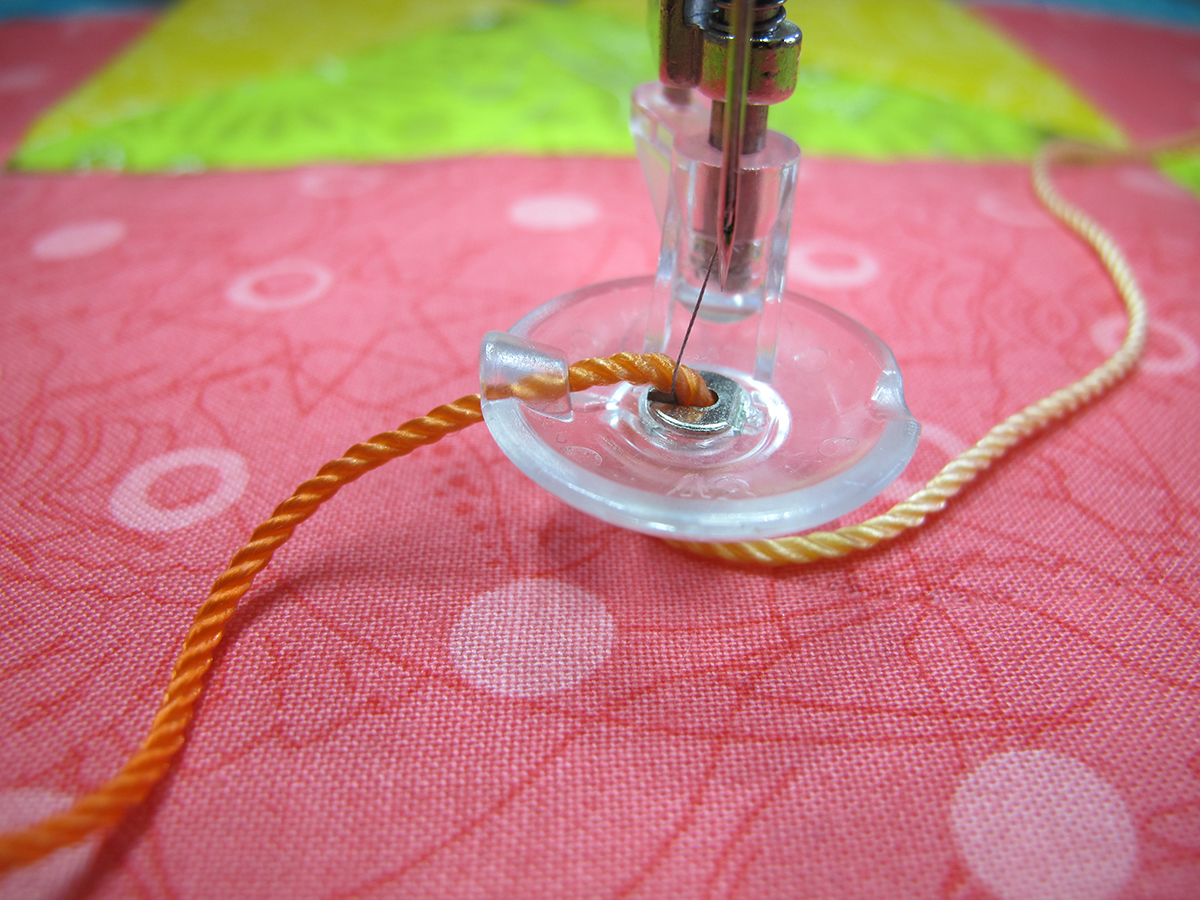
Quilt using a free-motion technique, use an embroidery design with the embroidery machine, or use a Q-matic design.
The center square of the quilt block sample shown was quilted with Q- matic using Design # Letter L5.2. If the cord is inserted properly, it will follow the foot and be stitched down with a straight stitch.
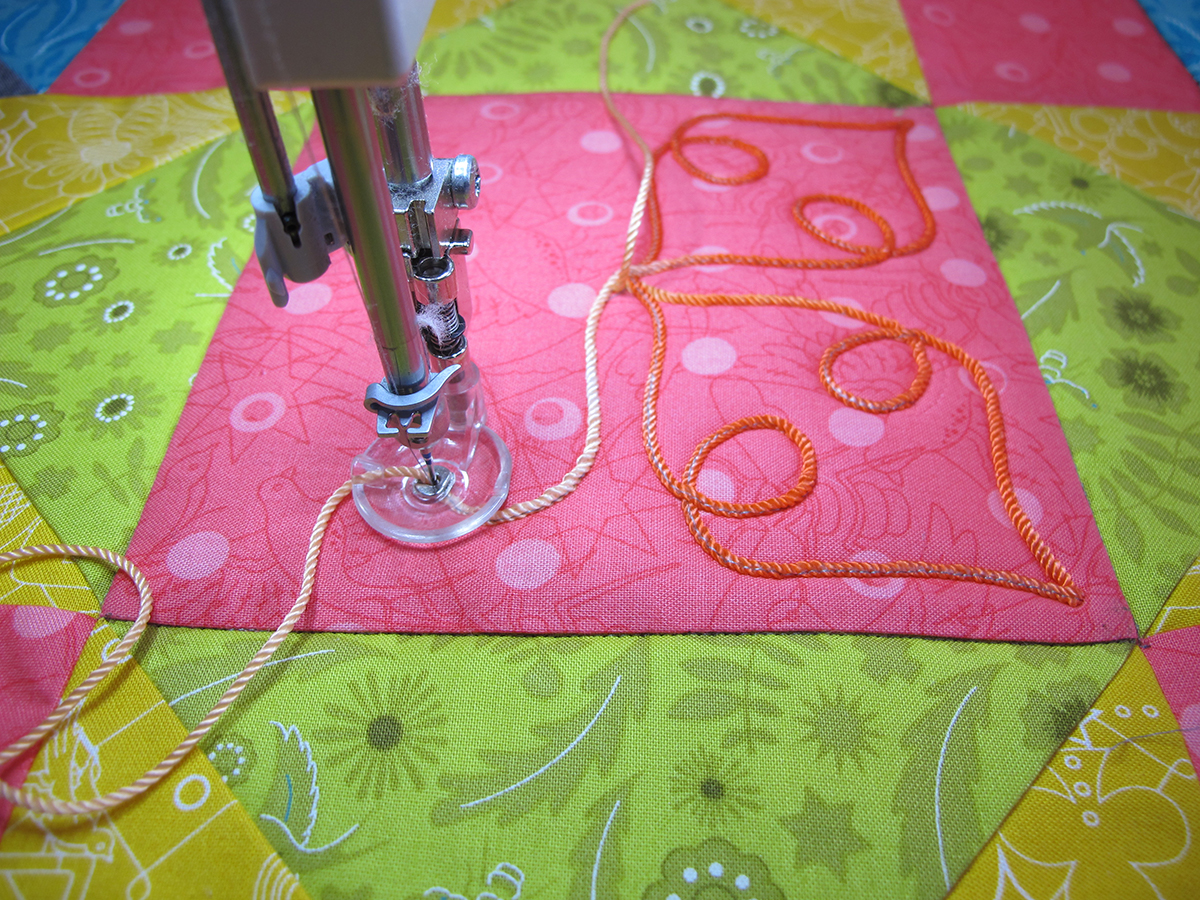
When finished quilting, the cord ends will need to be secured. Thread them through a large eyed needle, and run the tails to the back. You can also run the tails between the layers of the quilt to completely hide the tails. If running in between the layers, you may want to unravel the cord so that it is softer in between the layers.

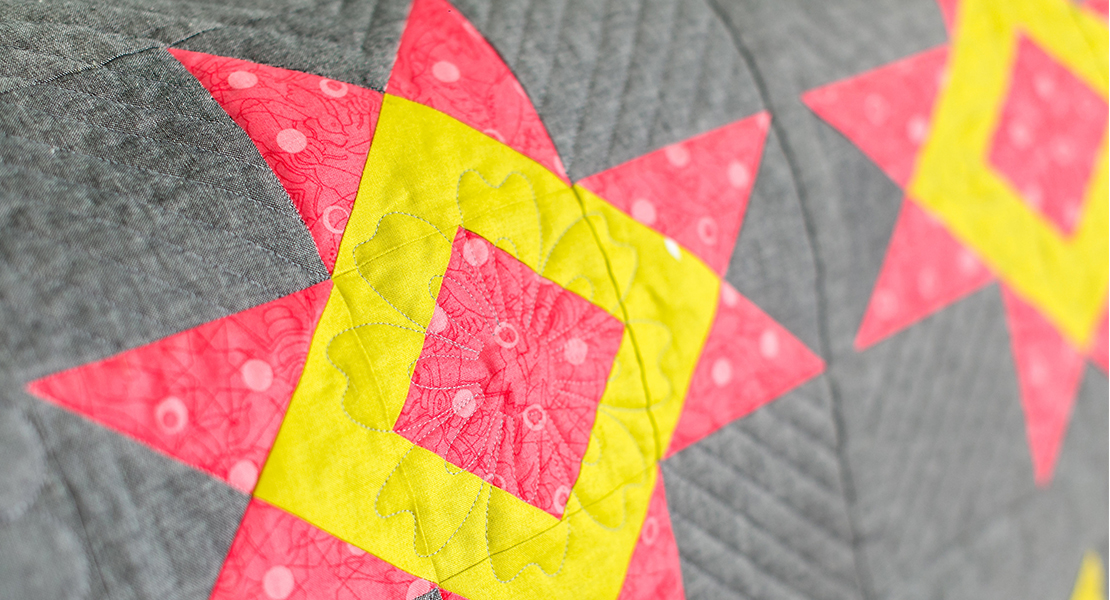
Quilt the rest of the block using your choice of quilting techniques from previous blocks. The triangles surrounding the center square and the 4 outside corners were quilted with Q-matic designs. These could also be quilted with embroidery designs, or with free-motion designs.
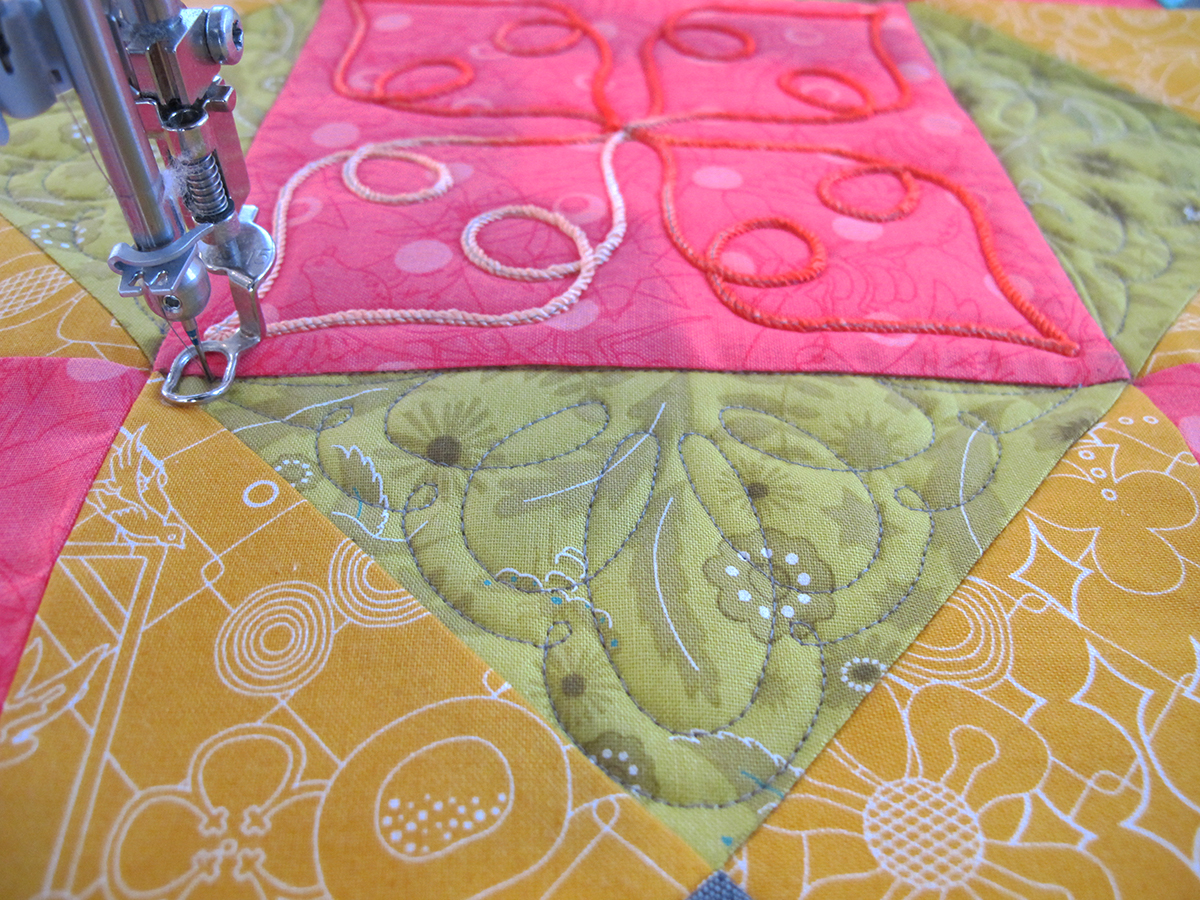
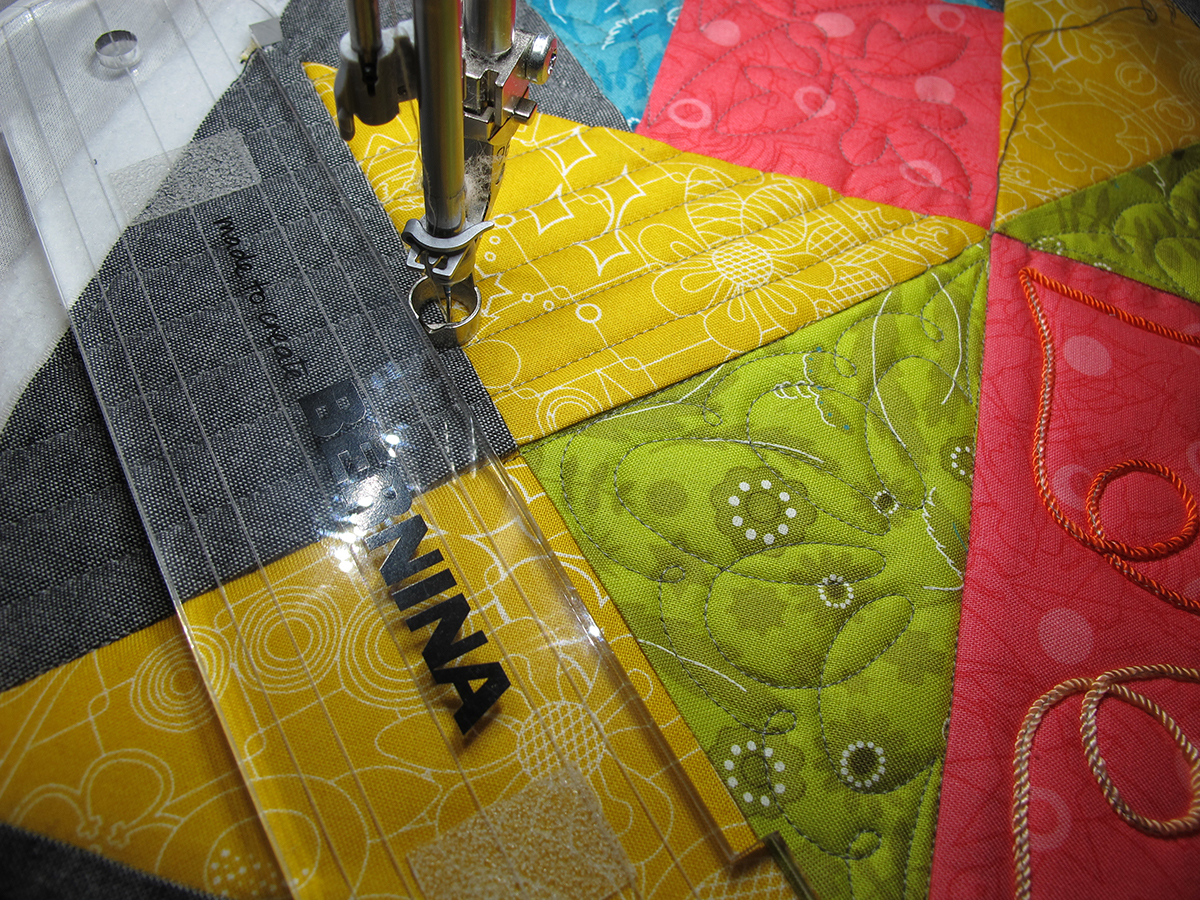
The remaining four sets of 3 triangles were quilted with a straight edge ruler. For more information on Ruler Work, refer to the Quilting Lesson from the Ohio Star Variation Block.
Enjoy quilting the Union Square block. This was a fun block to piece and a fun block to quilt.
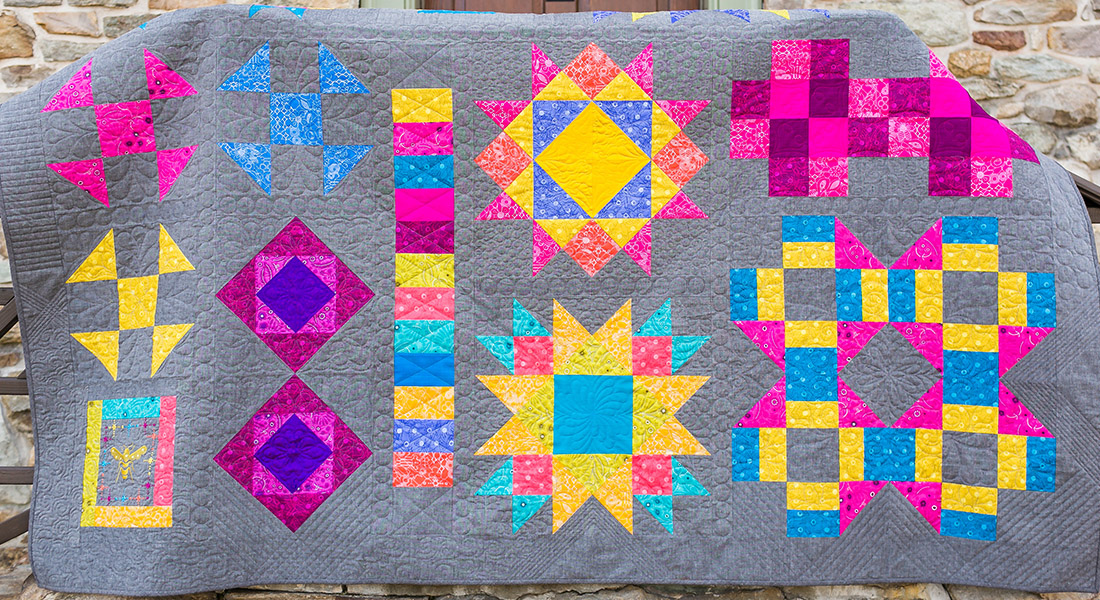
Tutorial List of the BERNINA Block of the Month Series
Block 1: Antique Mosaic Block
Block 2: Shoofly Block
Block 3: Square in a Square Block
Block 4: Magic Circle
Block 5: Card Basket Variation Block
Block 6: Ohio Star Variation Block
Block 7: Maple Star Block
Block 8: Grecian Square Block
Block 9: Union Square Block
Block 10: A Girl’s Favorite


Can’t find new block for 1/18.