Union Square Big Block Quilt-Along Part 2
Welcome to Part 2 of the Union Square Big Block Quilt-Along! This week is all about piecing the top, and we’ll look at some helpful tips for piecing large-scale blocks. If you’d like to join us, visit Part 1 to find a full materials list and cutting instructions for the Union Square Big Block, and find Part 3 here to add the finishing touches.
Gather together all of your cut squares from Part 1 and get ready to sew!
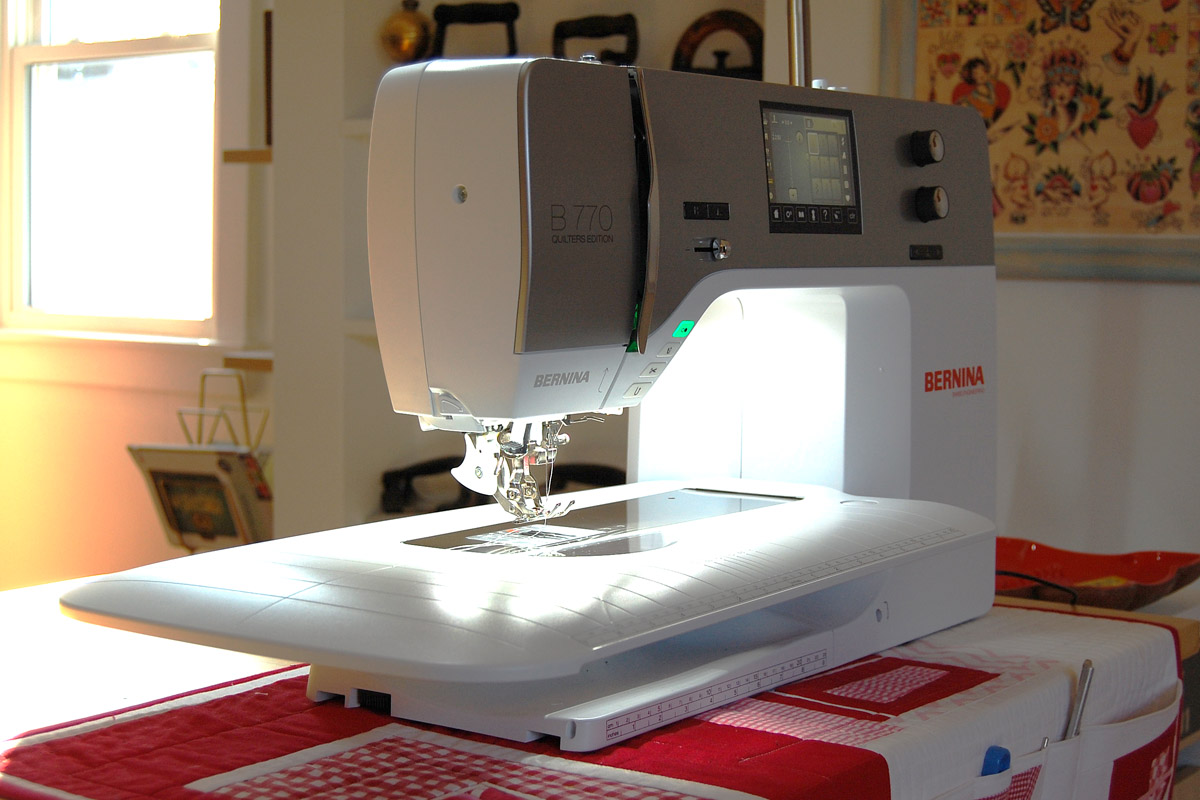
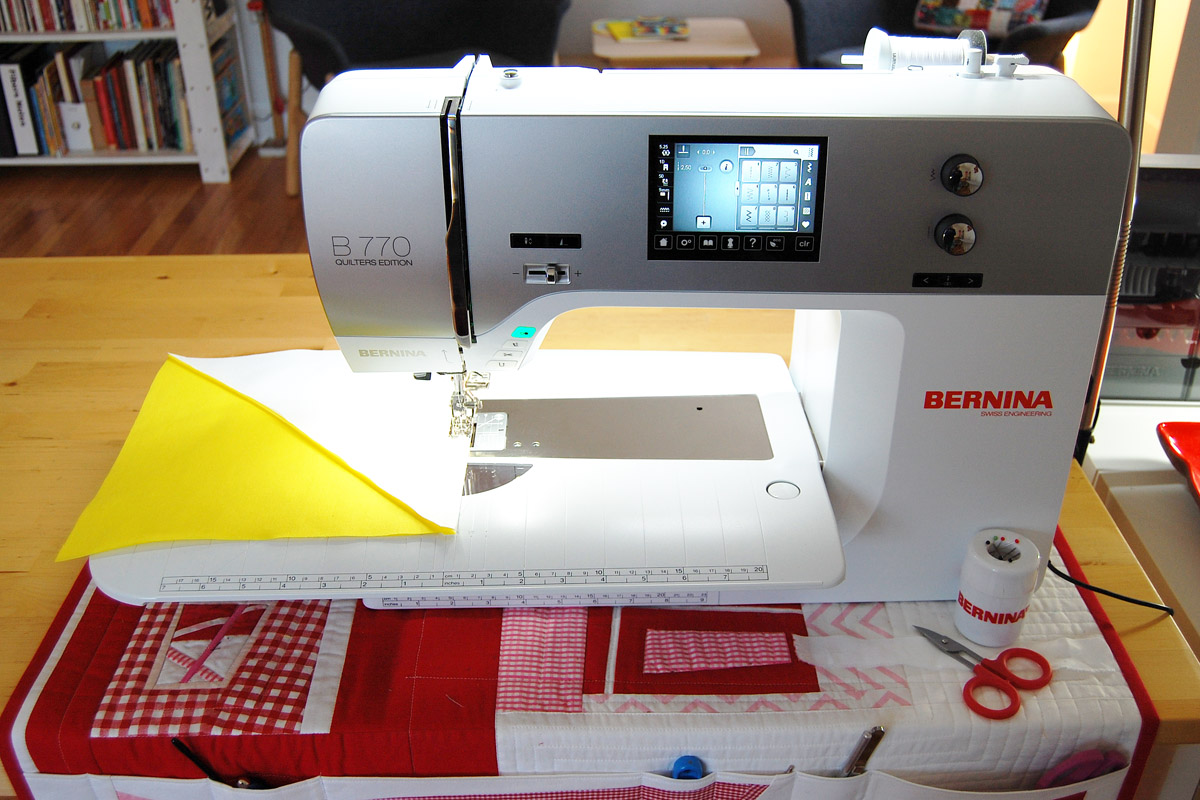
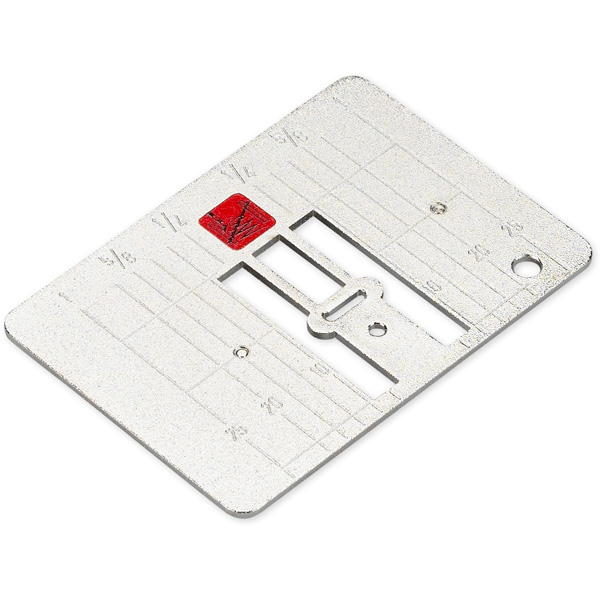
Set up your sewing machine for stitching 1/4″ patchwork seams. I am using the Patchwork foot #97D with Dual Feed engaged and the Straight Stitch needle plate. The patchwork foot and needle plate will both help support the fabric while stitching to cut down on flagging (fabric moving to far up or down with the needle), and help create even stitches.
Half-Square Triangle Block Construction
Most of the building blocks for this quilt top are made from half-square triangles (HST’s). Follow these directions step-by-step to create all the HST sets needed to complete the top. After completing the HST sets you will have 4 white and 4 magenta squares measuring 10.5″ x 10.5″ left over, DO NOT sew these squares into HST’s!
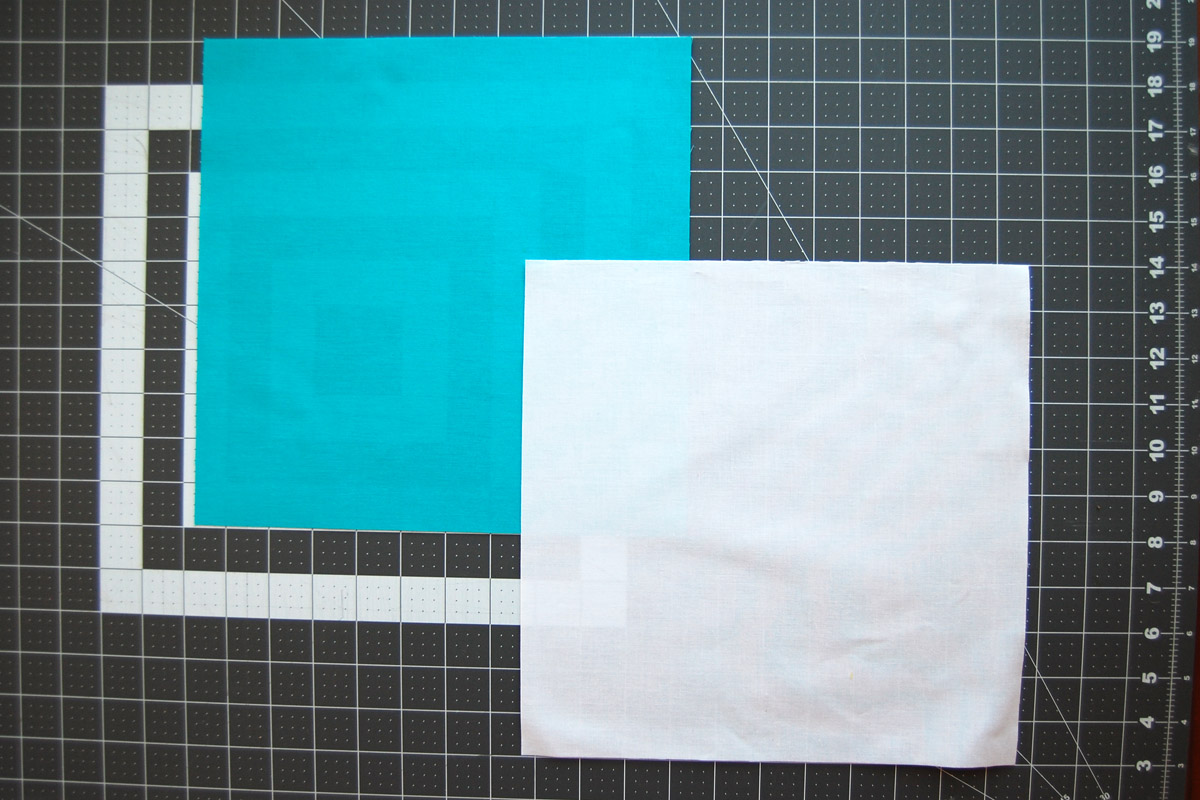
Step 1. Grab the two 11″ x 11″ squares needed to make one HST set. Check the information below to find which squares to match together to create the HST sets for this quilt.
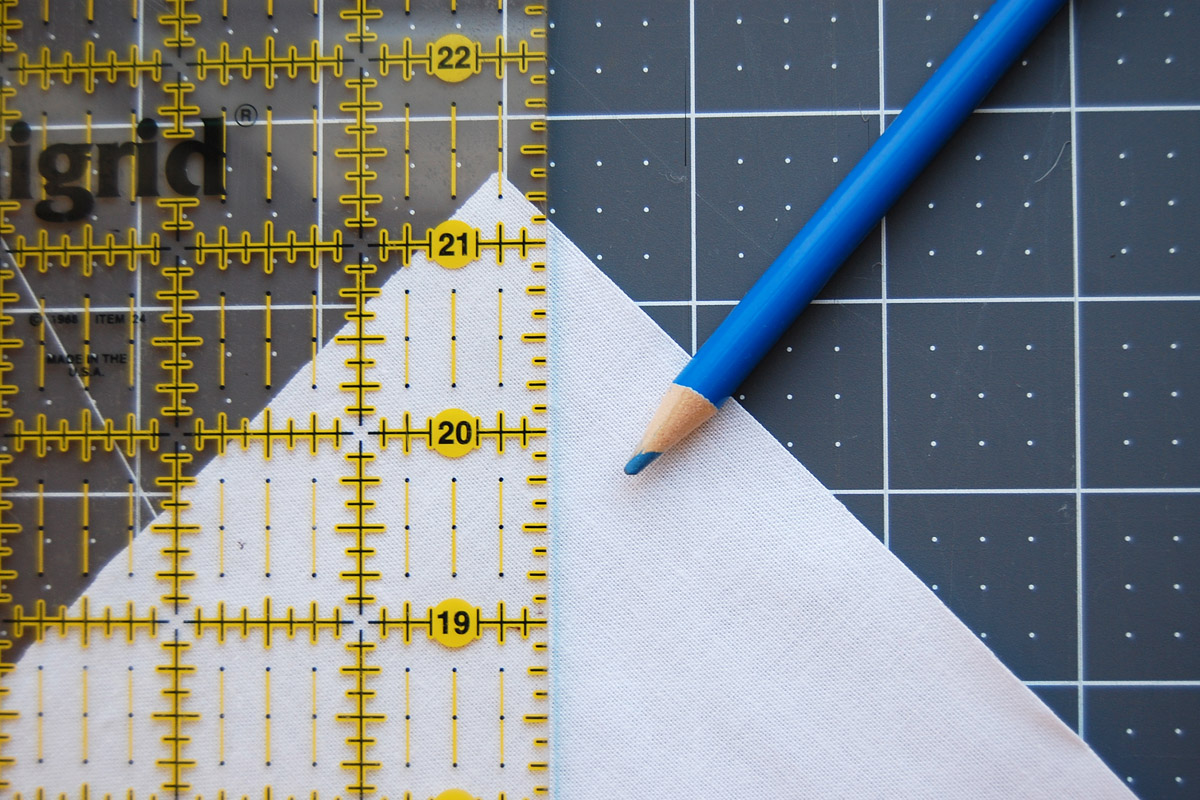
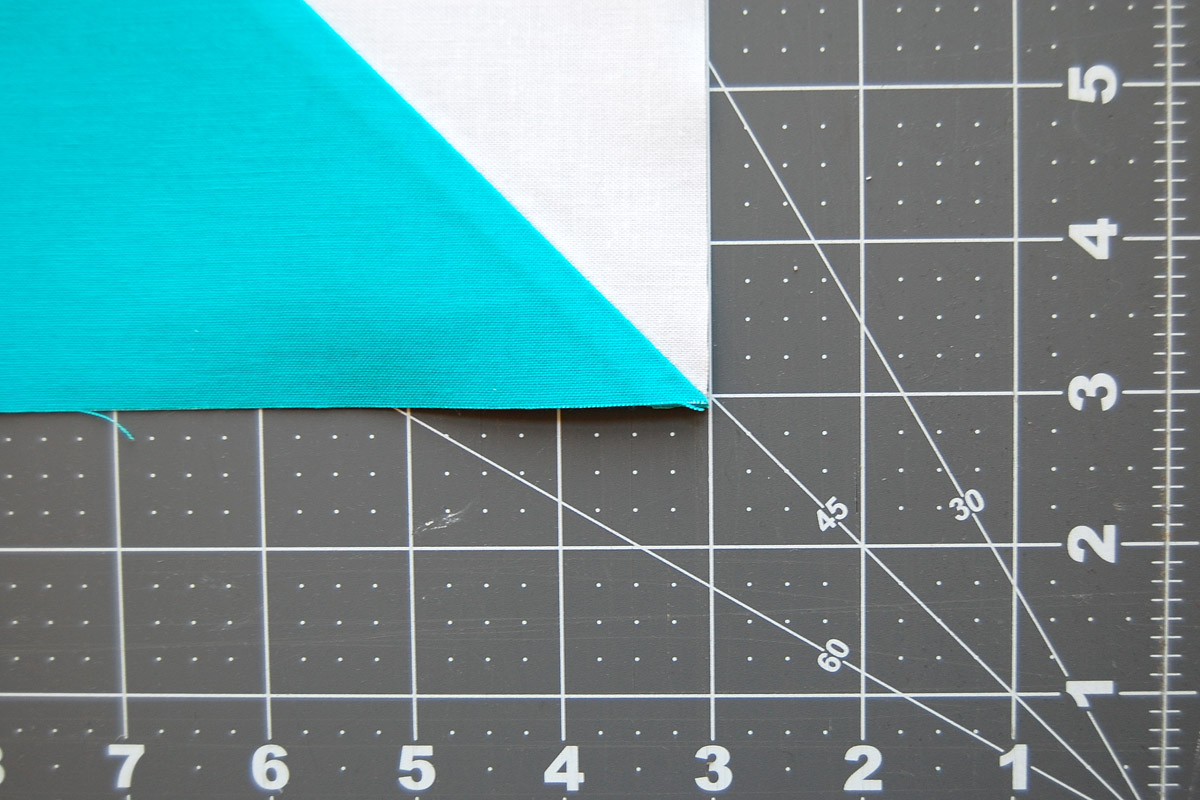
Step 2. Grab the lightest colored of the two squares, your ruler, and your fabric marking pencil. Place the ruler from corner to corner on the square. Line up the first 1/4″ mark to meet across both corners of the square, and gently add a light mark with your pencil. Flip the square to the other side and do the same.
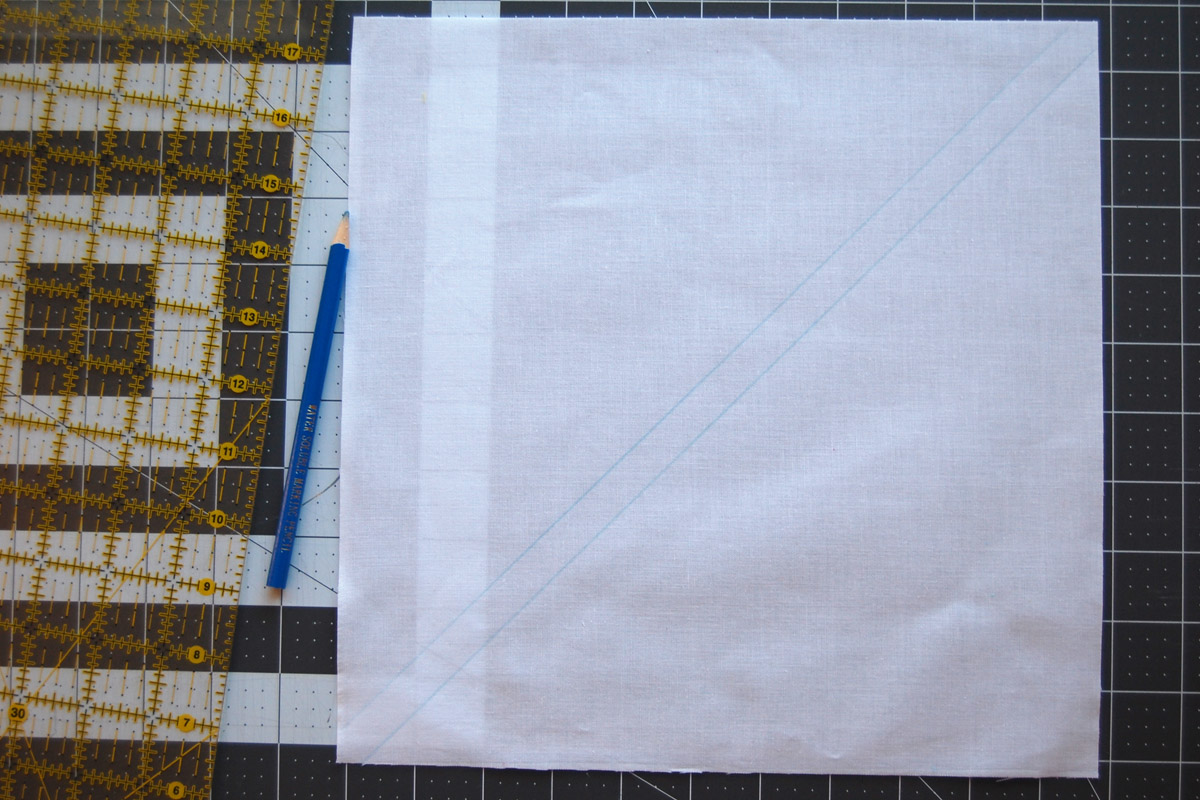
You will have two diagonal marks from corner to corner across the square, each 1/4″ from the very center.

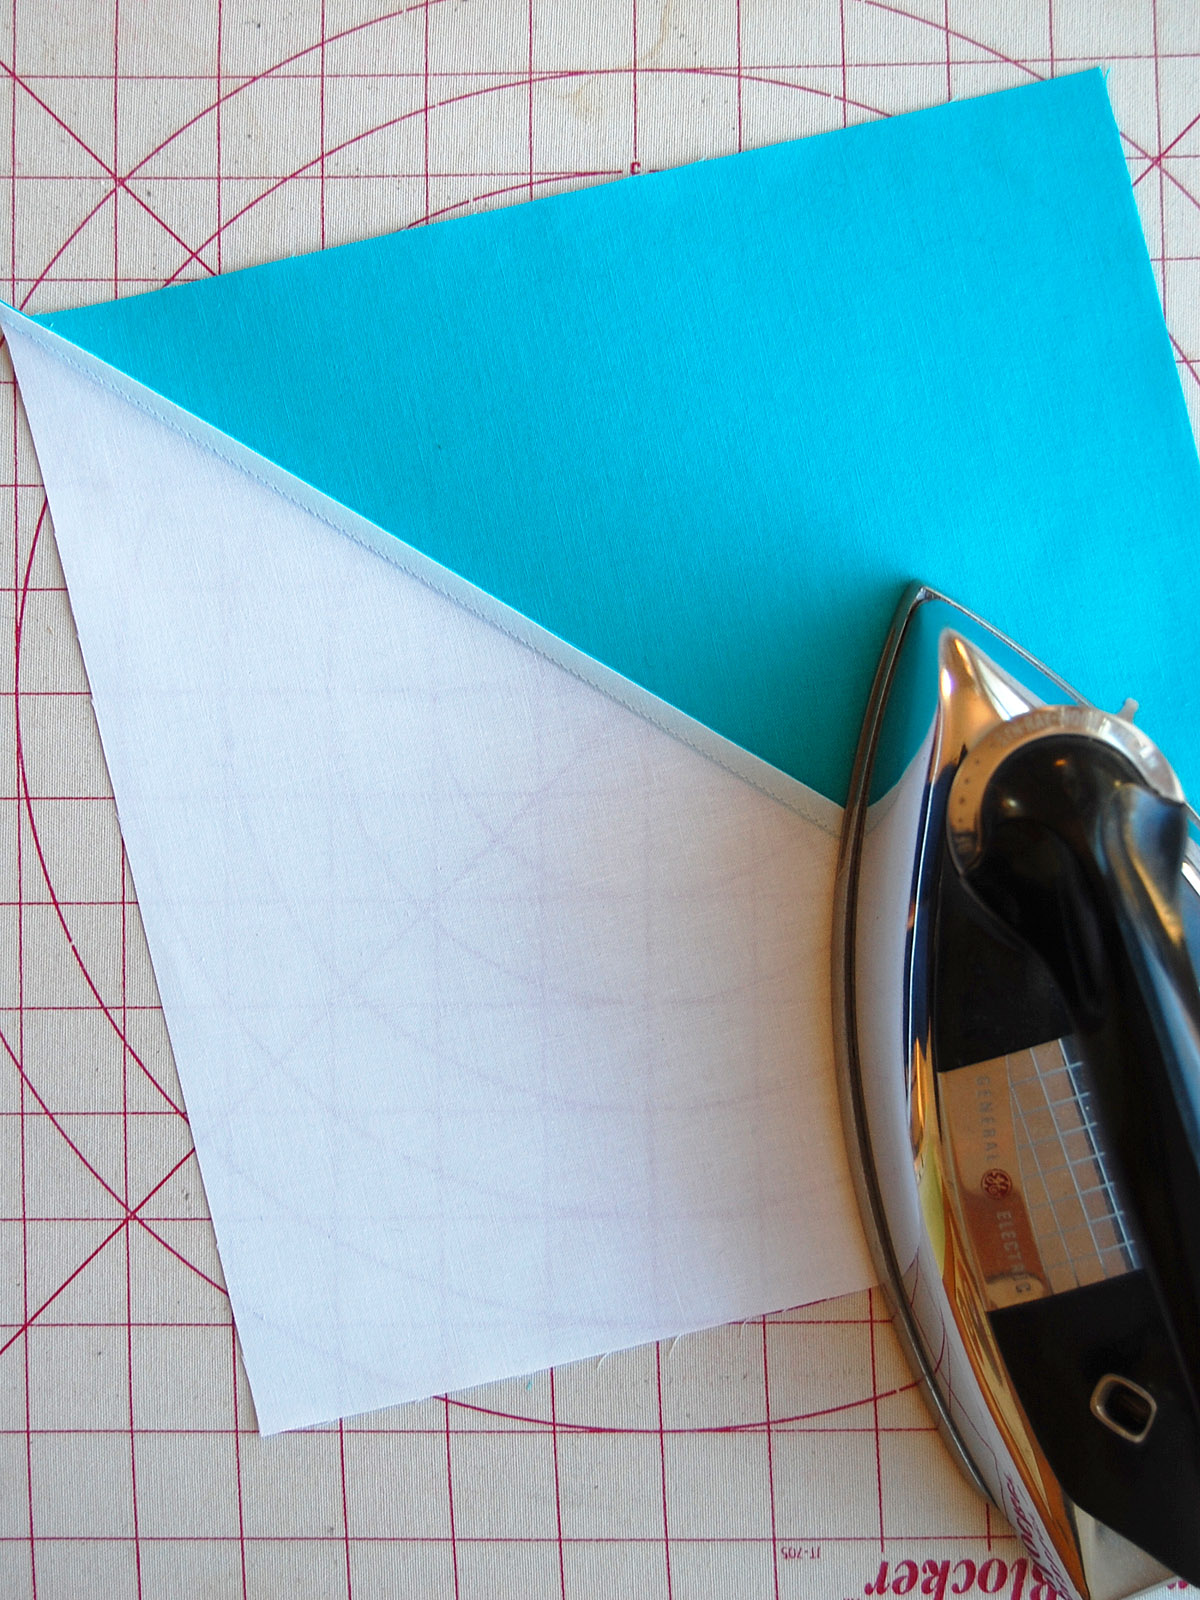
Step 3. Place the marked square on top of the darker square, right sides together if you are working with prints (it may be impossible to tell with solids).
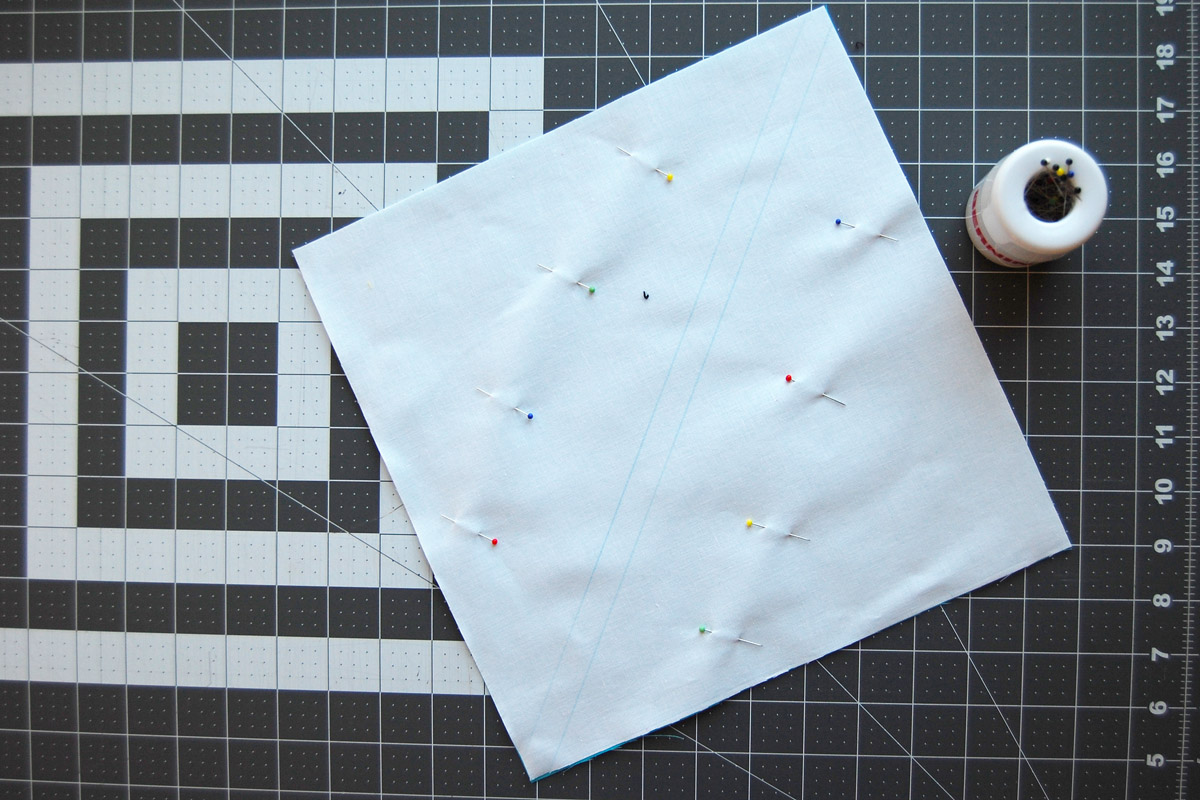
Use straight pins to hold the two fabrics together on each side of the marks. This will help keep the fabric from shifting while you are stitching.
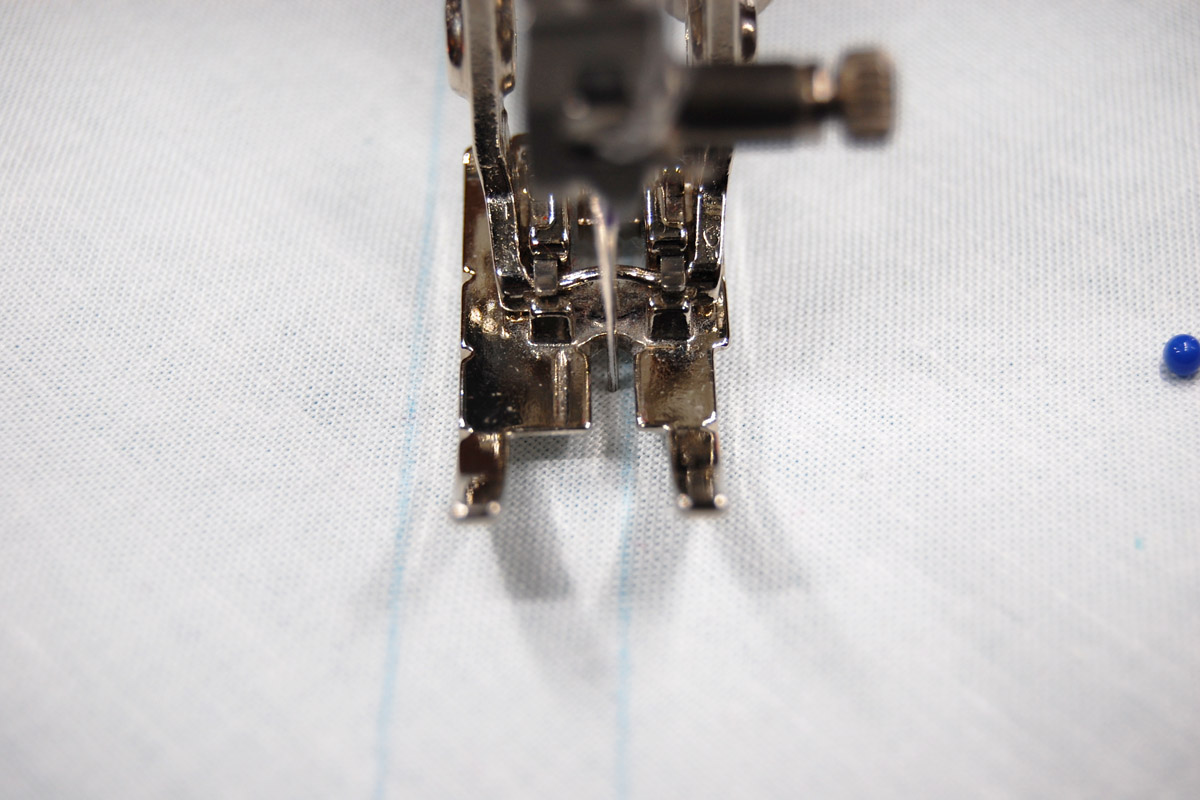
Step 4. Stitch a scant 1/4″ seam down each line. Scant means sewing a seam slightly less than 1/4″, and you can see I’ve placed my needle to the side of the line instead of sewing directly on top of the line. Sewing these large-format blocks with a scant seam means you will have a bit of fabric to square up the block.
TIPS
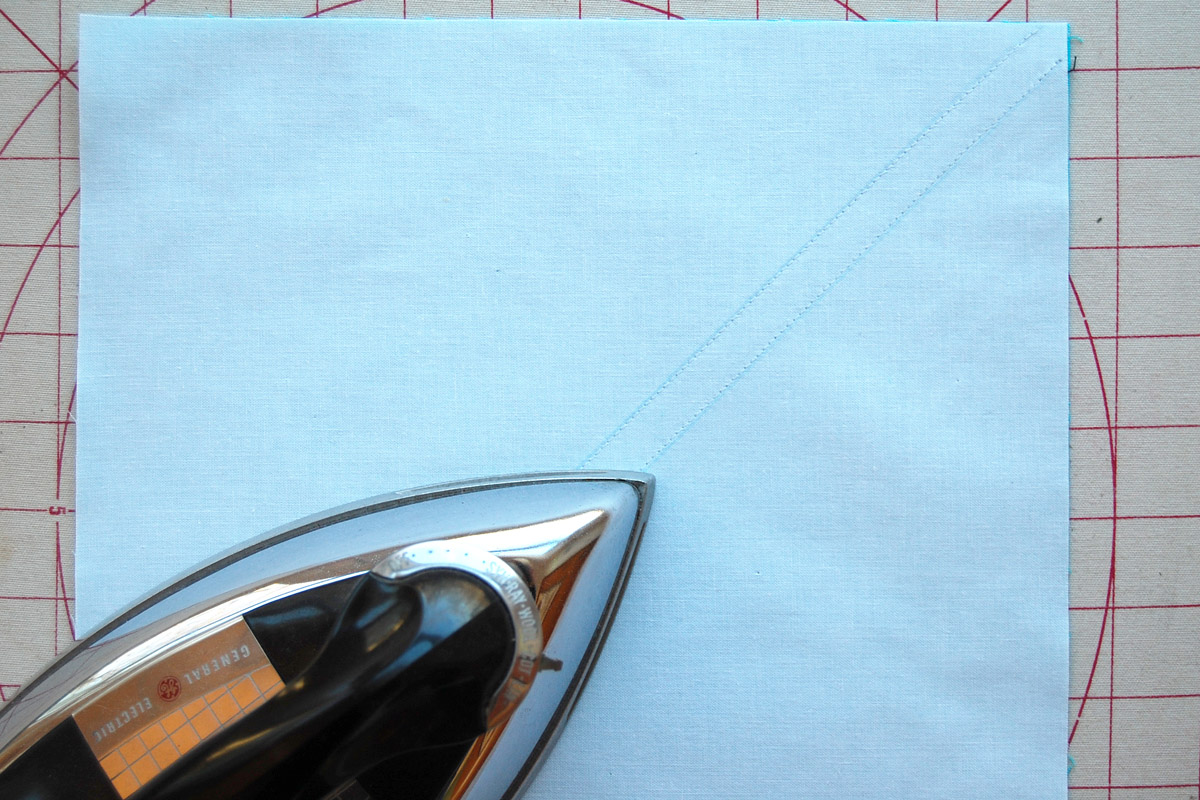
- When sewing large-scale HST’s with this method, sew both seams in the same direction. This will help the longer seam from shifting in opposite directions.
- Before cutting the two HST’s apart, give the seams a nice steam pressing. This will help set the stitching into the seam and make sure your fabric is nice and flat before cutting.
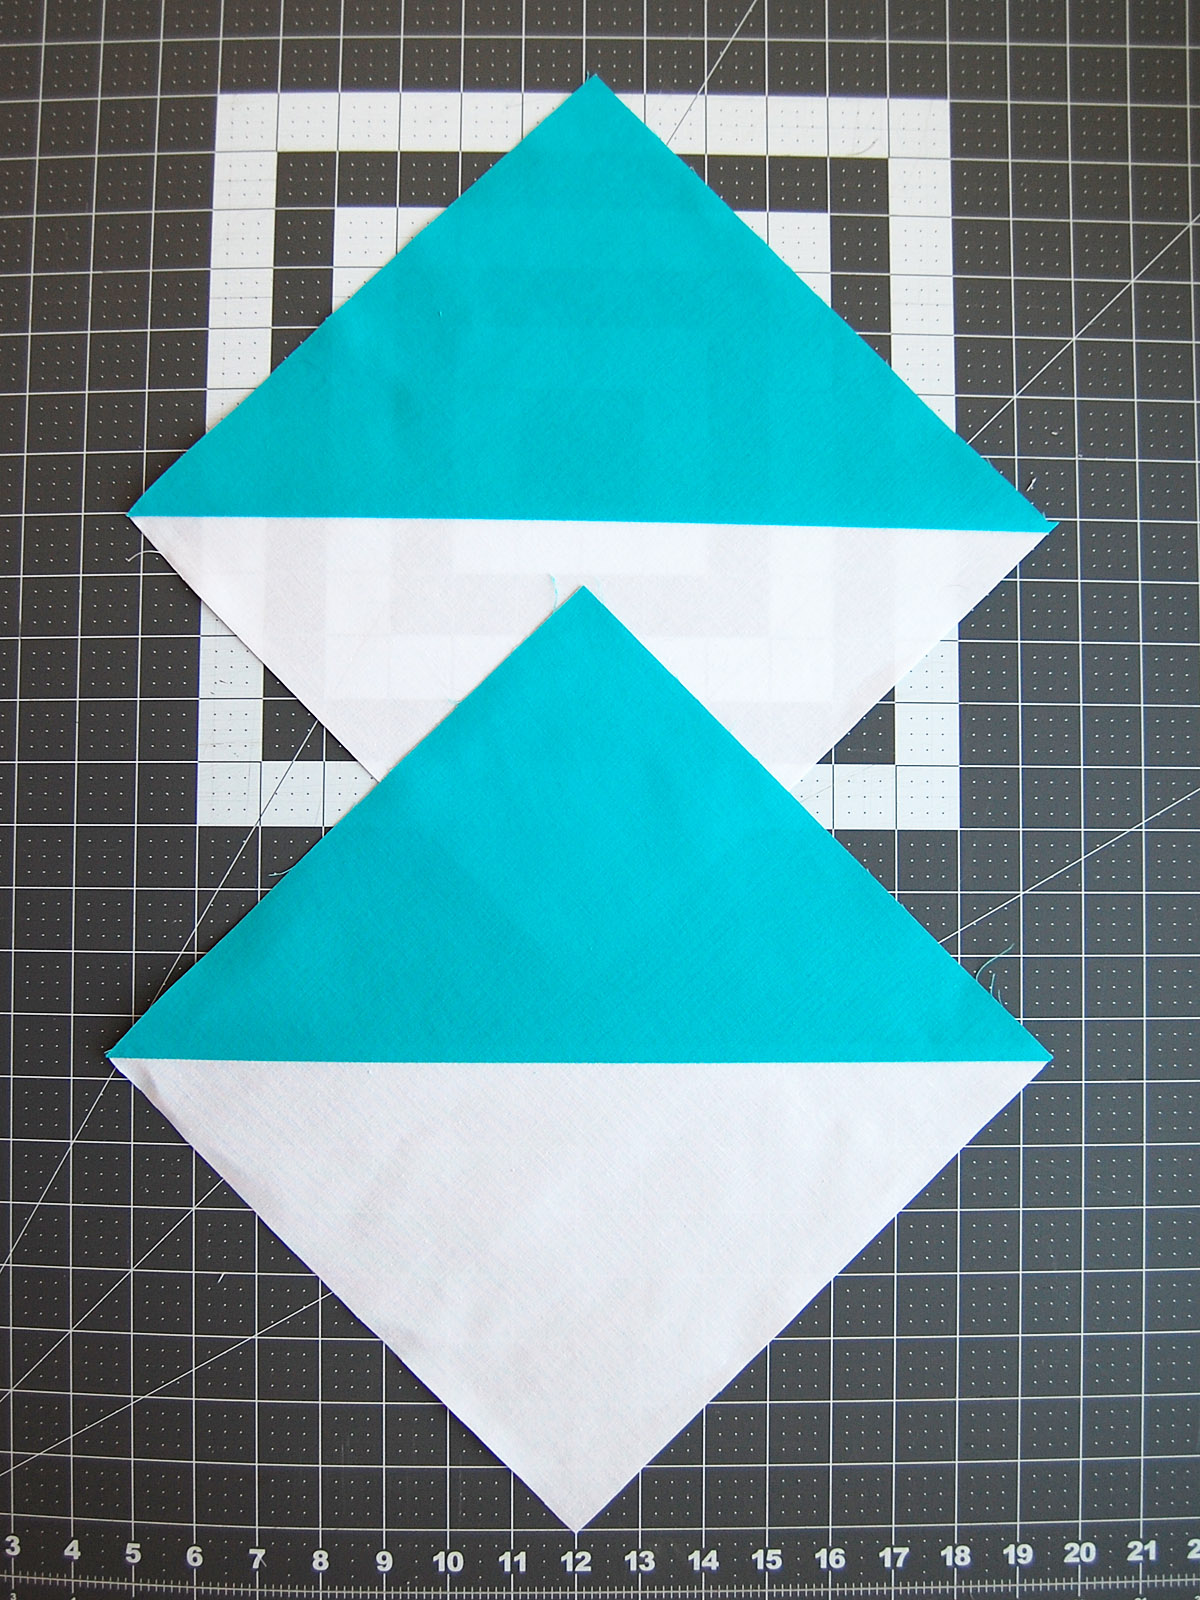
Step 5. Cut the HST set in two using a ruler and rotary cutter, lining up the ruler on the two points between the seams.
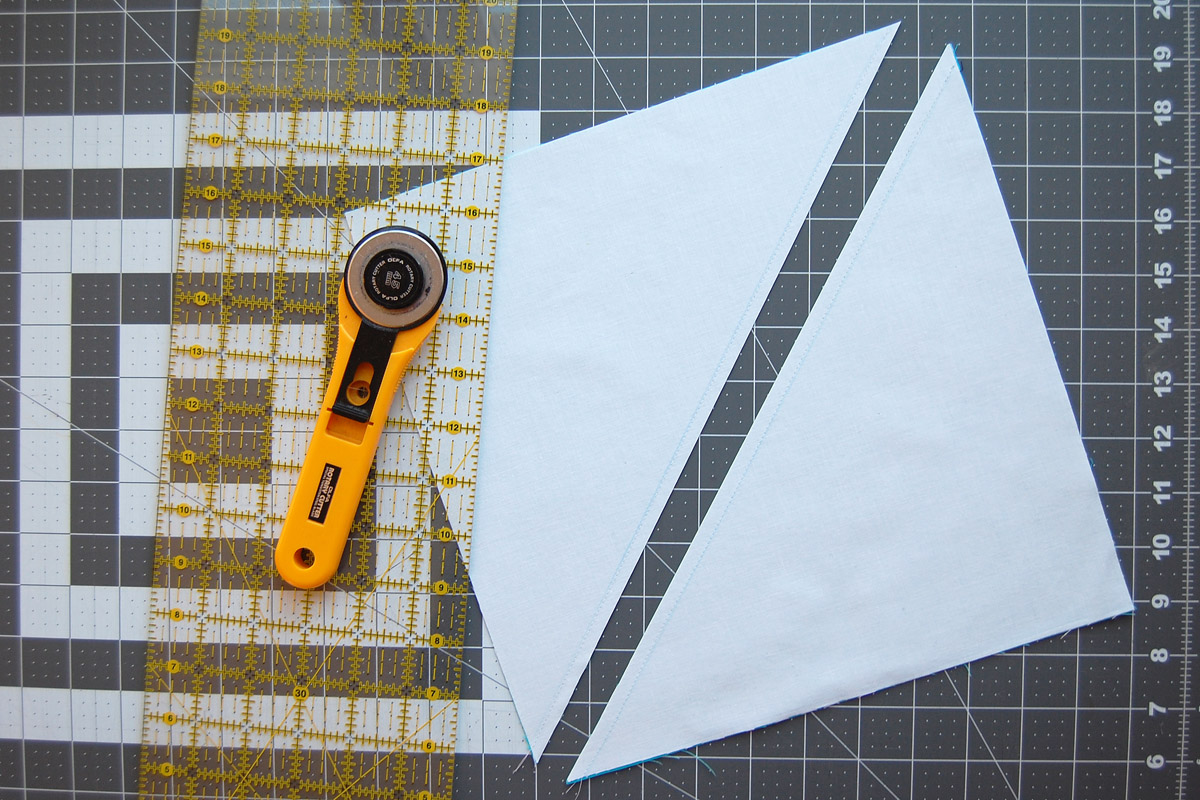
Press the seam towards the darker color.
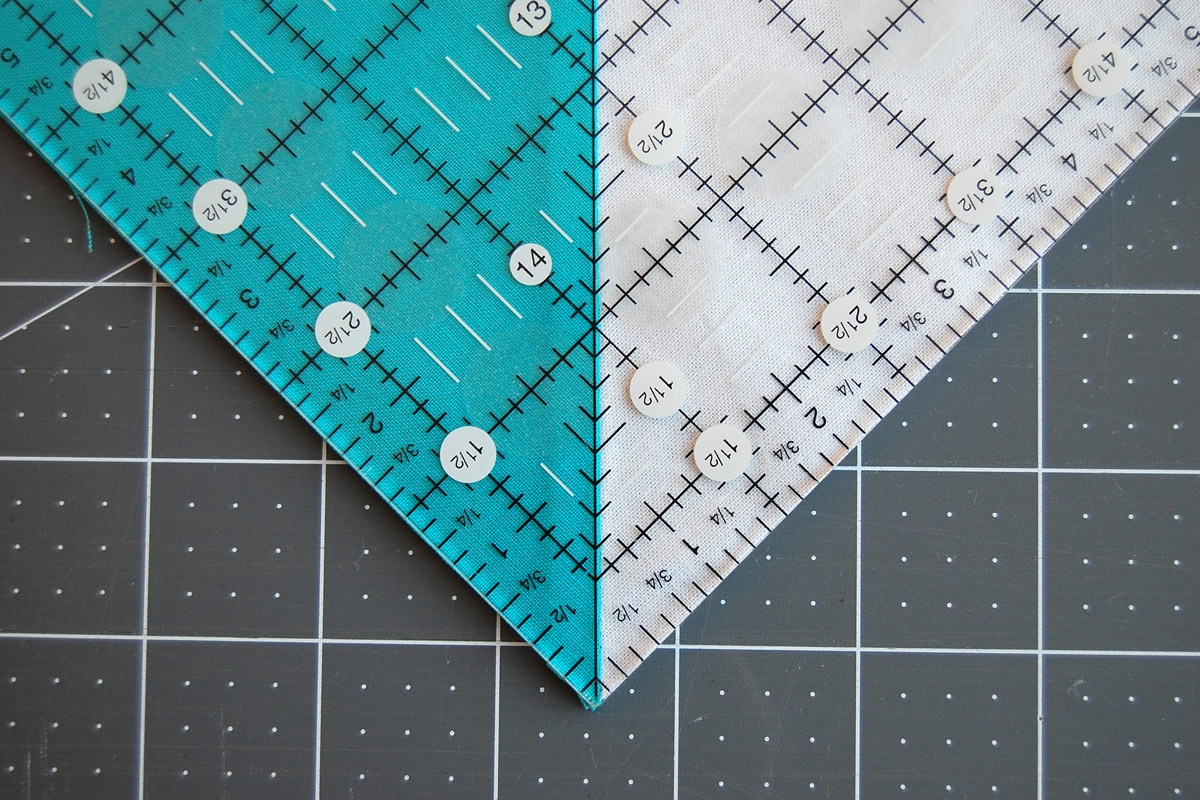
Now, trim up your blocks to make sure they are nice and square. To trim using your cutting mat, line up your seam directly on the 45 degree line, and cut the HST to exactly 10.5″ x 10.5″ square.
To use the markings on a square ruler, use the 45 degree line on the ruler to line up your seam, measuring and cutting the HST block to exactly 10.5″ x 10.5″.
You now have completed one HST set for the quilt!
Create the following HST sets:
Use 4 white 11″ x 11″ squares and 4 cyan 11″ x 11″ squares to create 4 white/cyan sets, or 8 white and cyan HST’s total.
Use 4 white 11″ x 11″ squares and 4 light yellow 11″ x 11″ squares to create 4 white/light yellow sets, or 8 white and yellow HST’s total.
Use 4 light yellow 11″ x 11″ squares and 4 medium golden yellow 11″ x 11″ squares to create 4 light yellow/medium golden yellow sets, or 8 light yellow and medium golden yellow HST’s total.
Use two red 11″ x 11″ squares and 2 dark golden yellow squares to create 2 red/dark golden yellow sets, or 4 individual red and dark gold HST’s total.
As mentioned above, you will have 4 white 10.5″ x 10.5″ and 4 magenta 10.5″ x 10.5″ squares left over – do not sew these into HST sets!
Union Square Big Block Construction
With your sewing machine still set up for piecing patchwork, construct the basic blocks from the finished HST’s as follows.
TIP
Be thoughtful of your 1/4″ seams! With bigger blocks comes longer seams, and any deviation from a straight line will show up as a wonky looking edge to your block or points that don’t line up. Use the edge of your patchwork foot, set yourself a slower speed limit by moving the slide speed control over, and watch where you are sewing.
Lay out the blocks on a flat surface or design wall. Stitch the blocks together, and press seams as you work. I prefer at this point to press seams open, but you can also choose to press seams to the side.
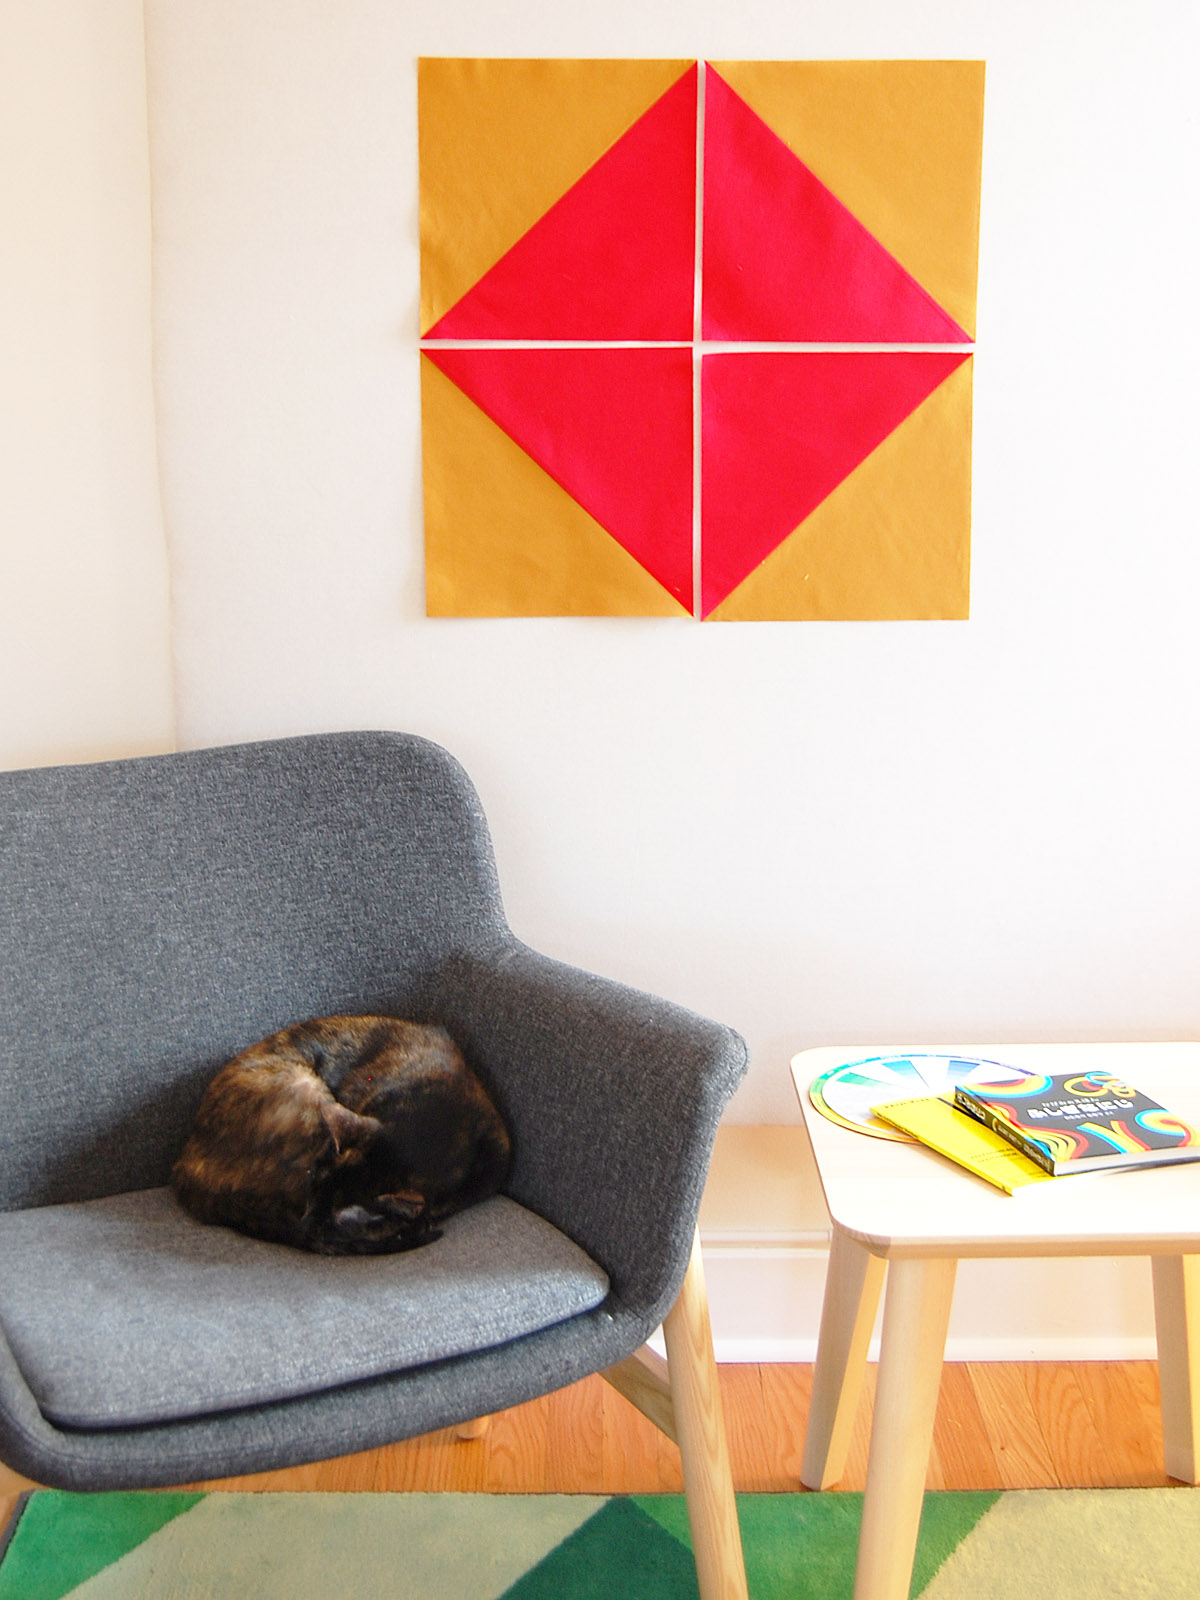
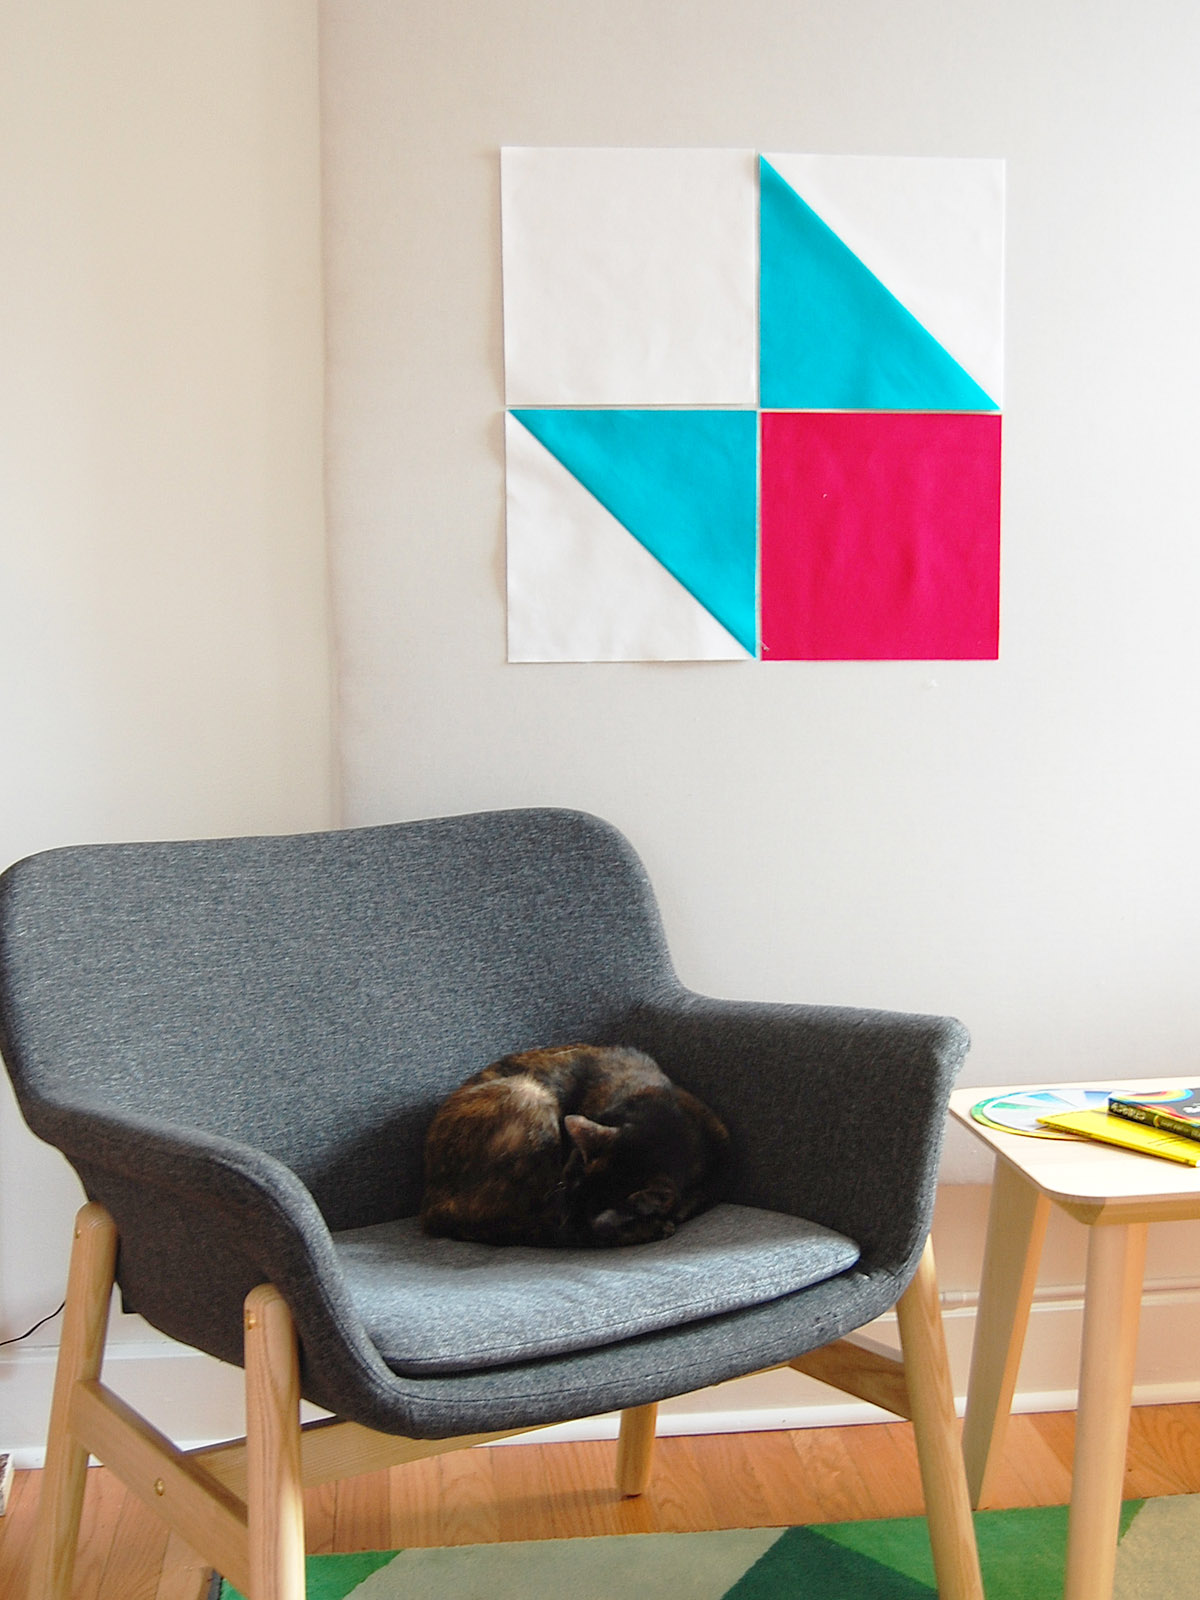
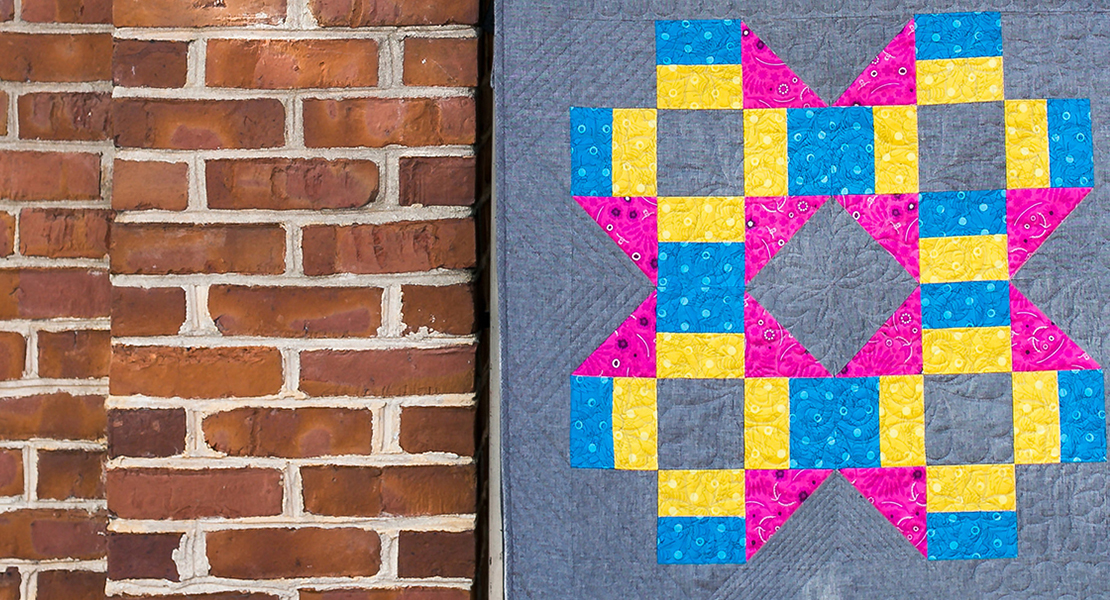
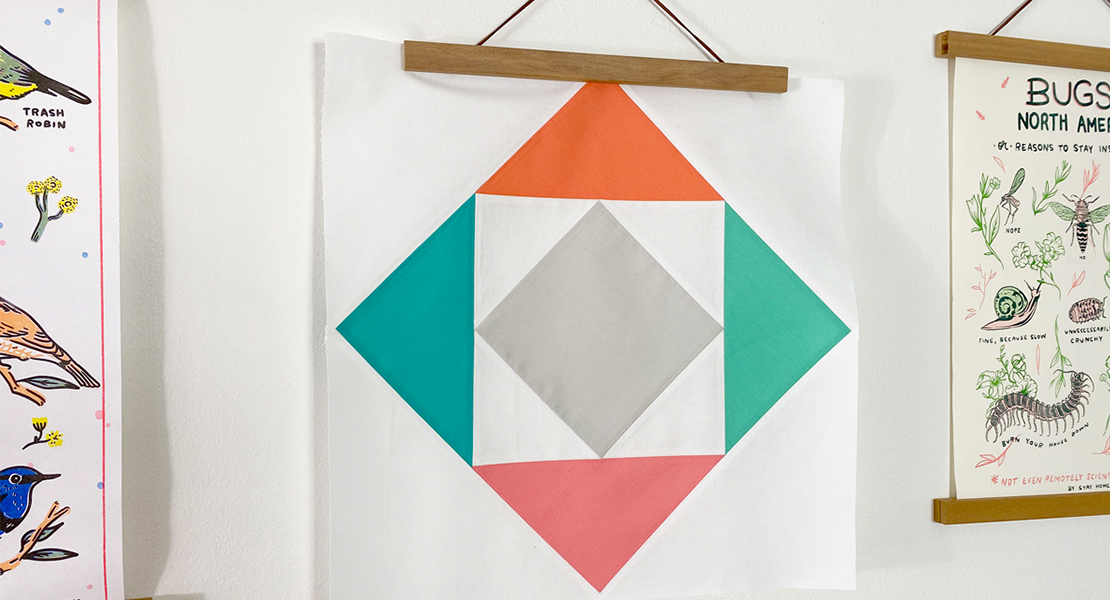
Center Block
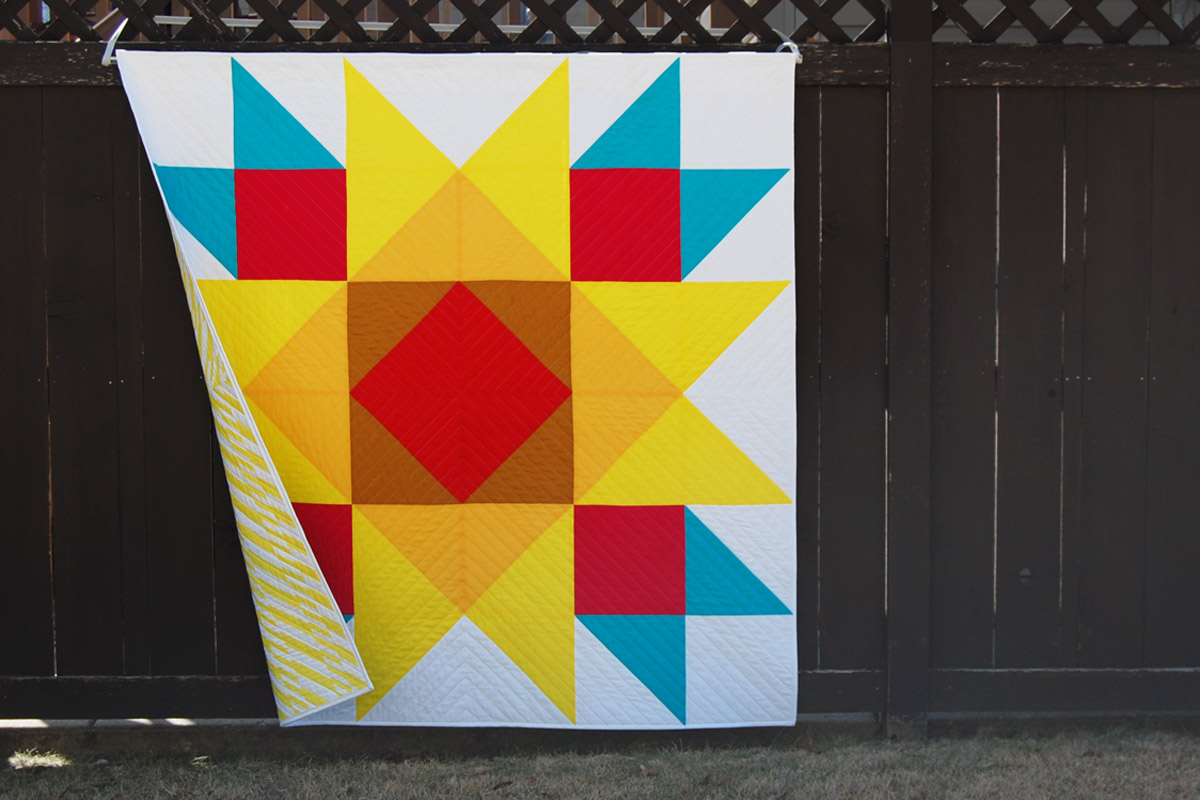
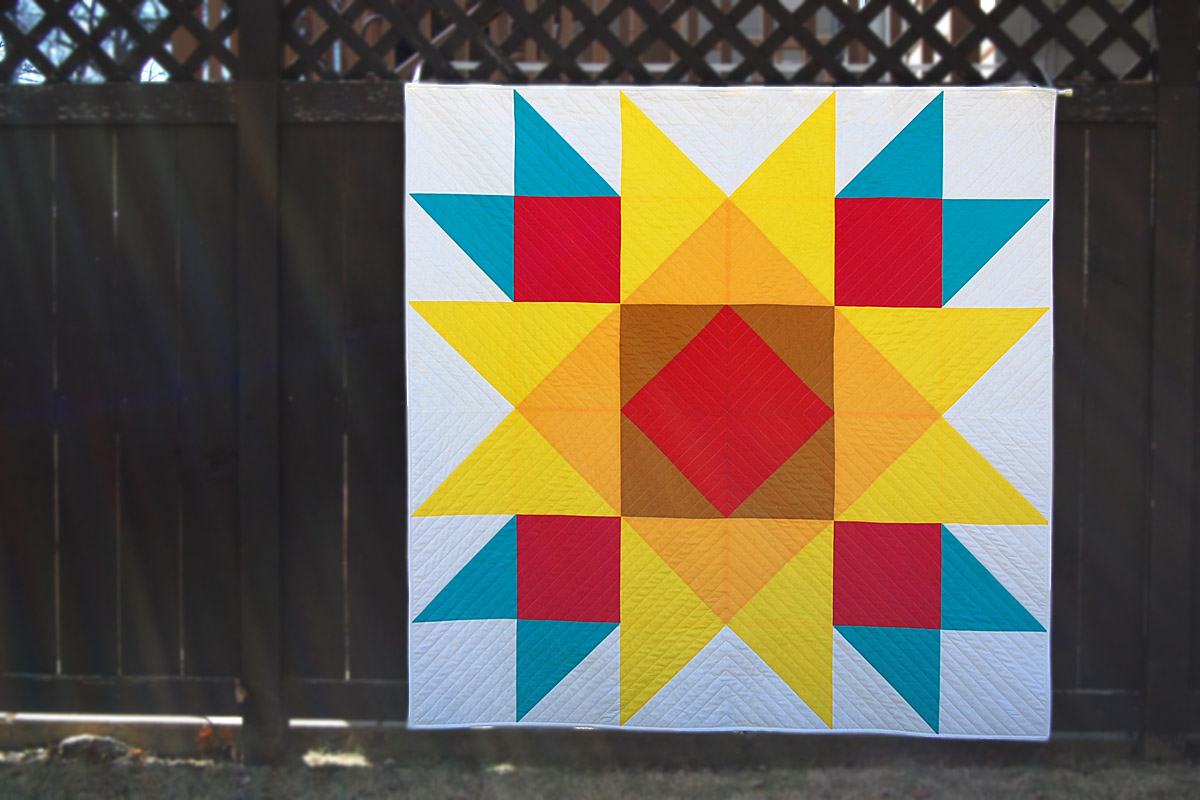
Use four red/dark gold HST’s to create a red diamond shape in the center as in the photo above. Stitch the two top HST blocks together with a 1/4″ seam, and stitch the two bottom HST blocks together with a 1/4″ seam. Press seams open (or to opposite sides). Finally, sew the top and bottom together with a 1/4″ seam and press center seam open (or to the sides). Set finished block aside.
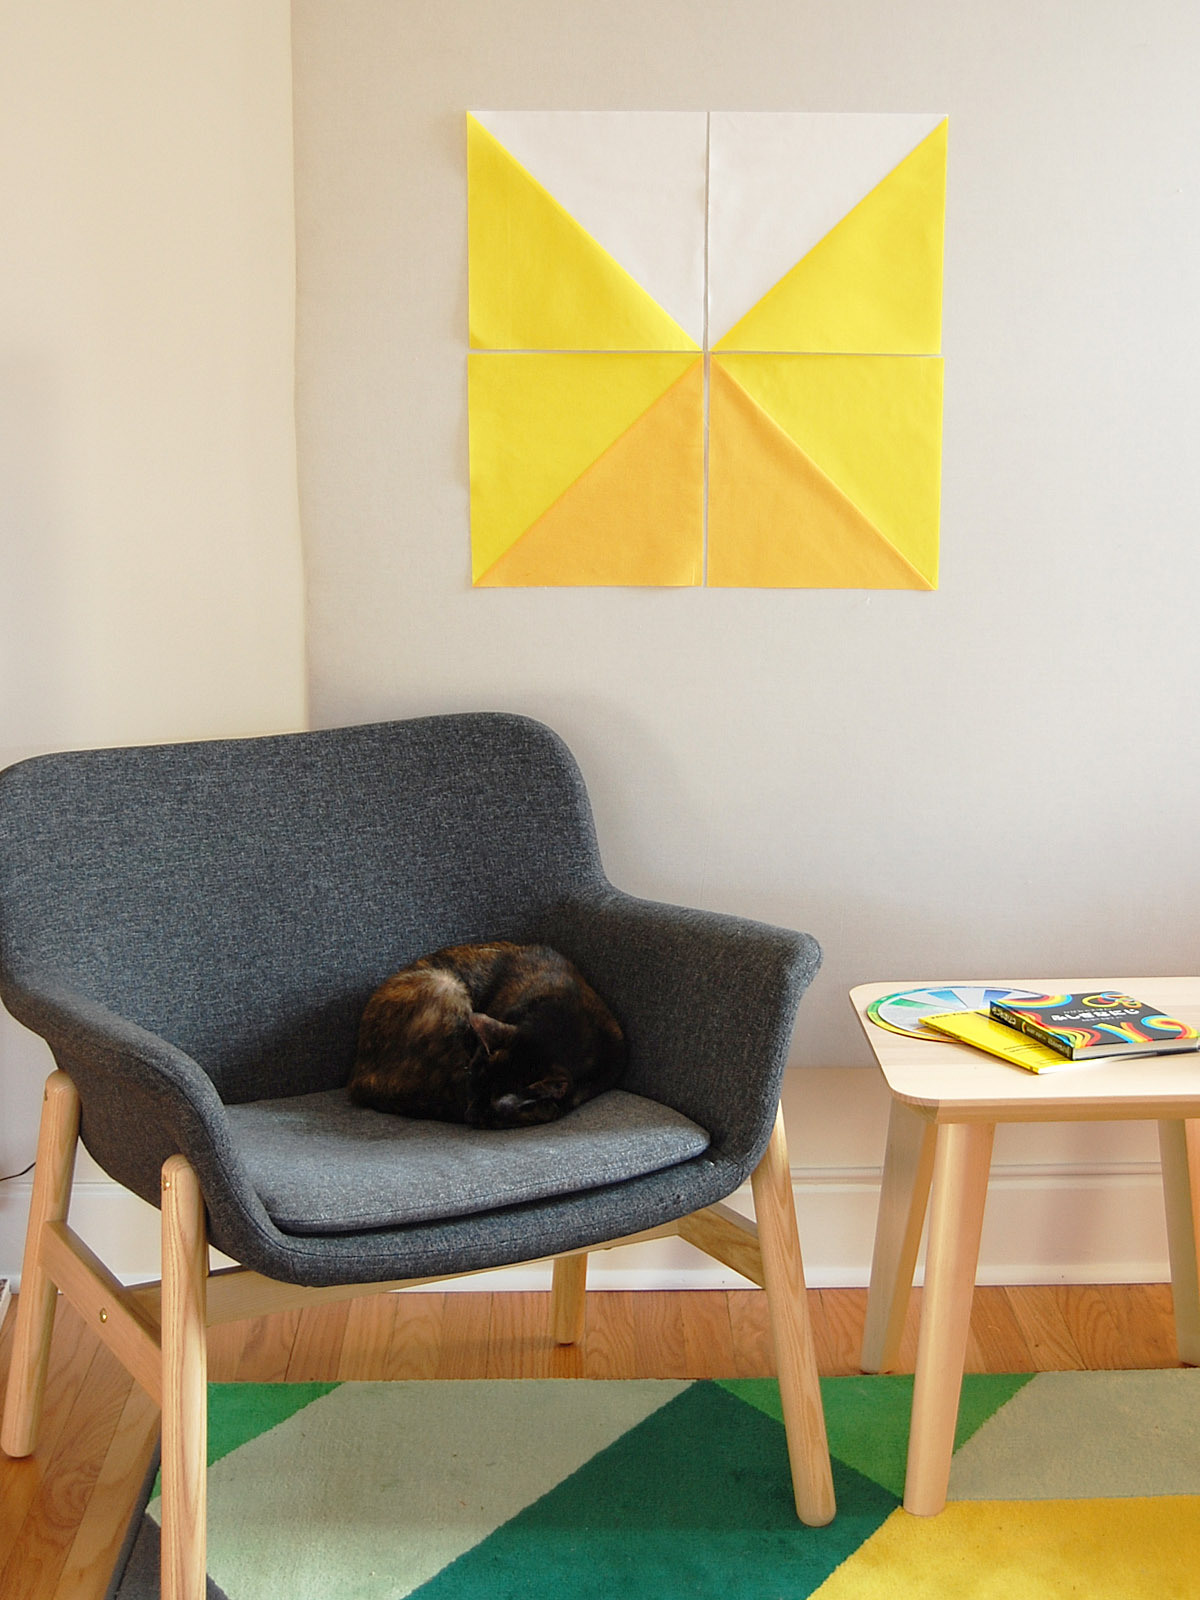
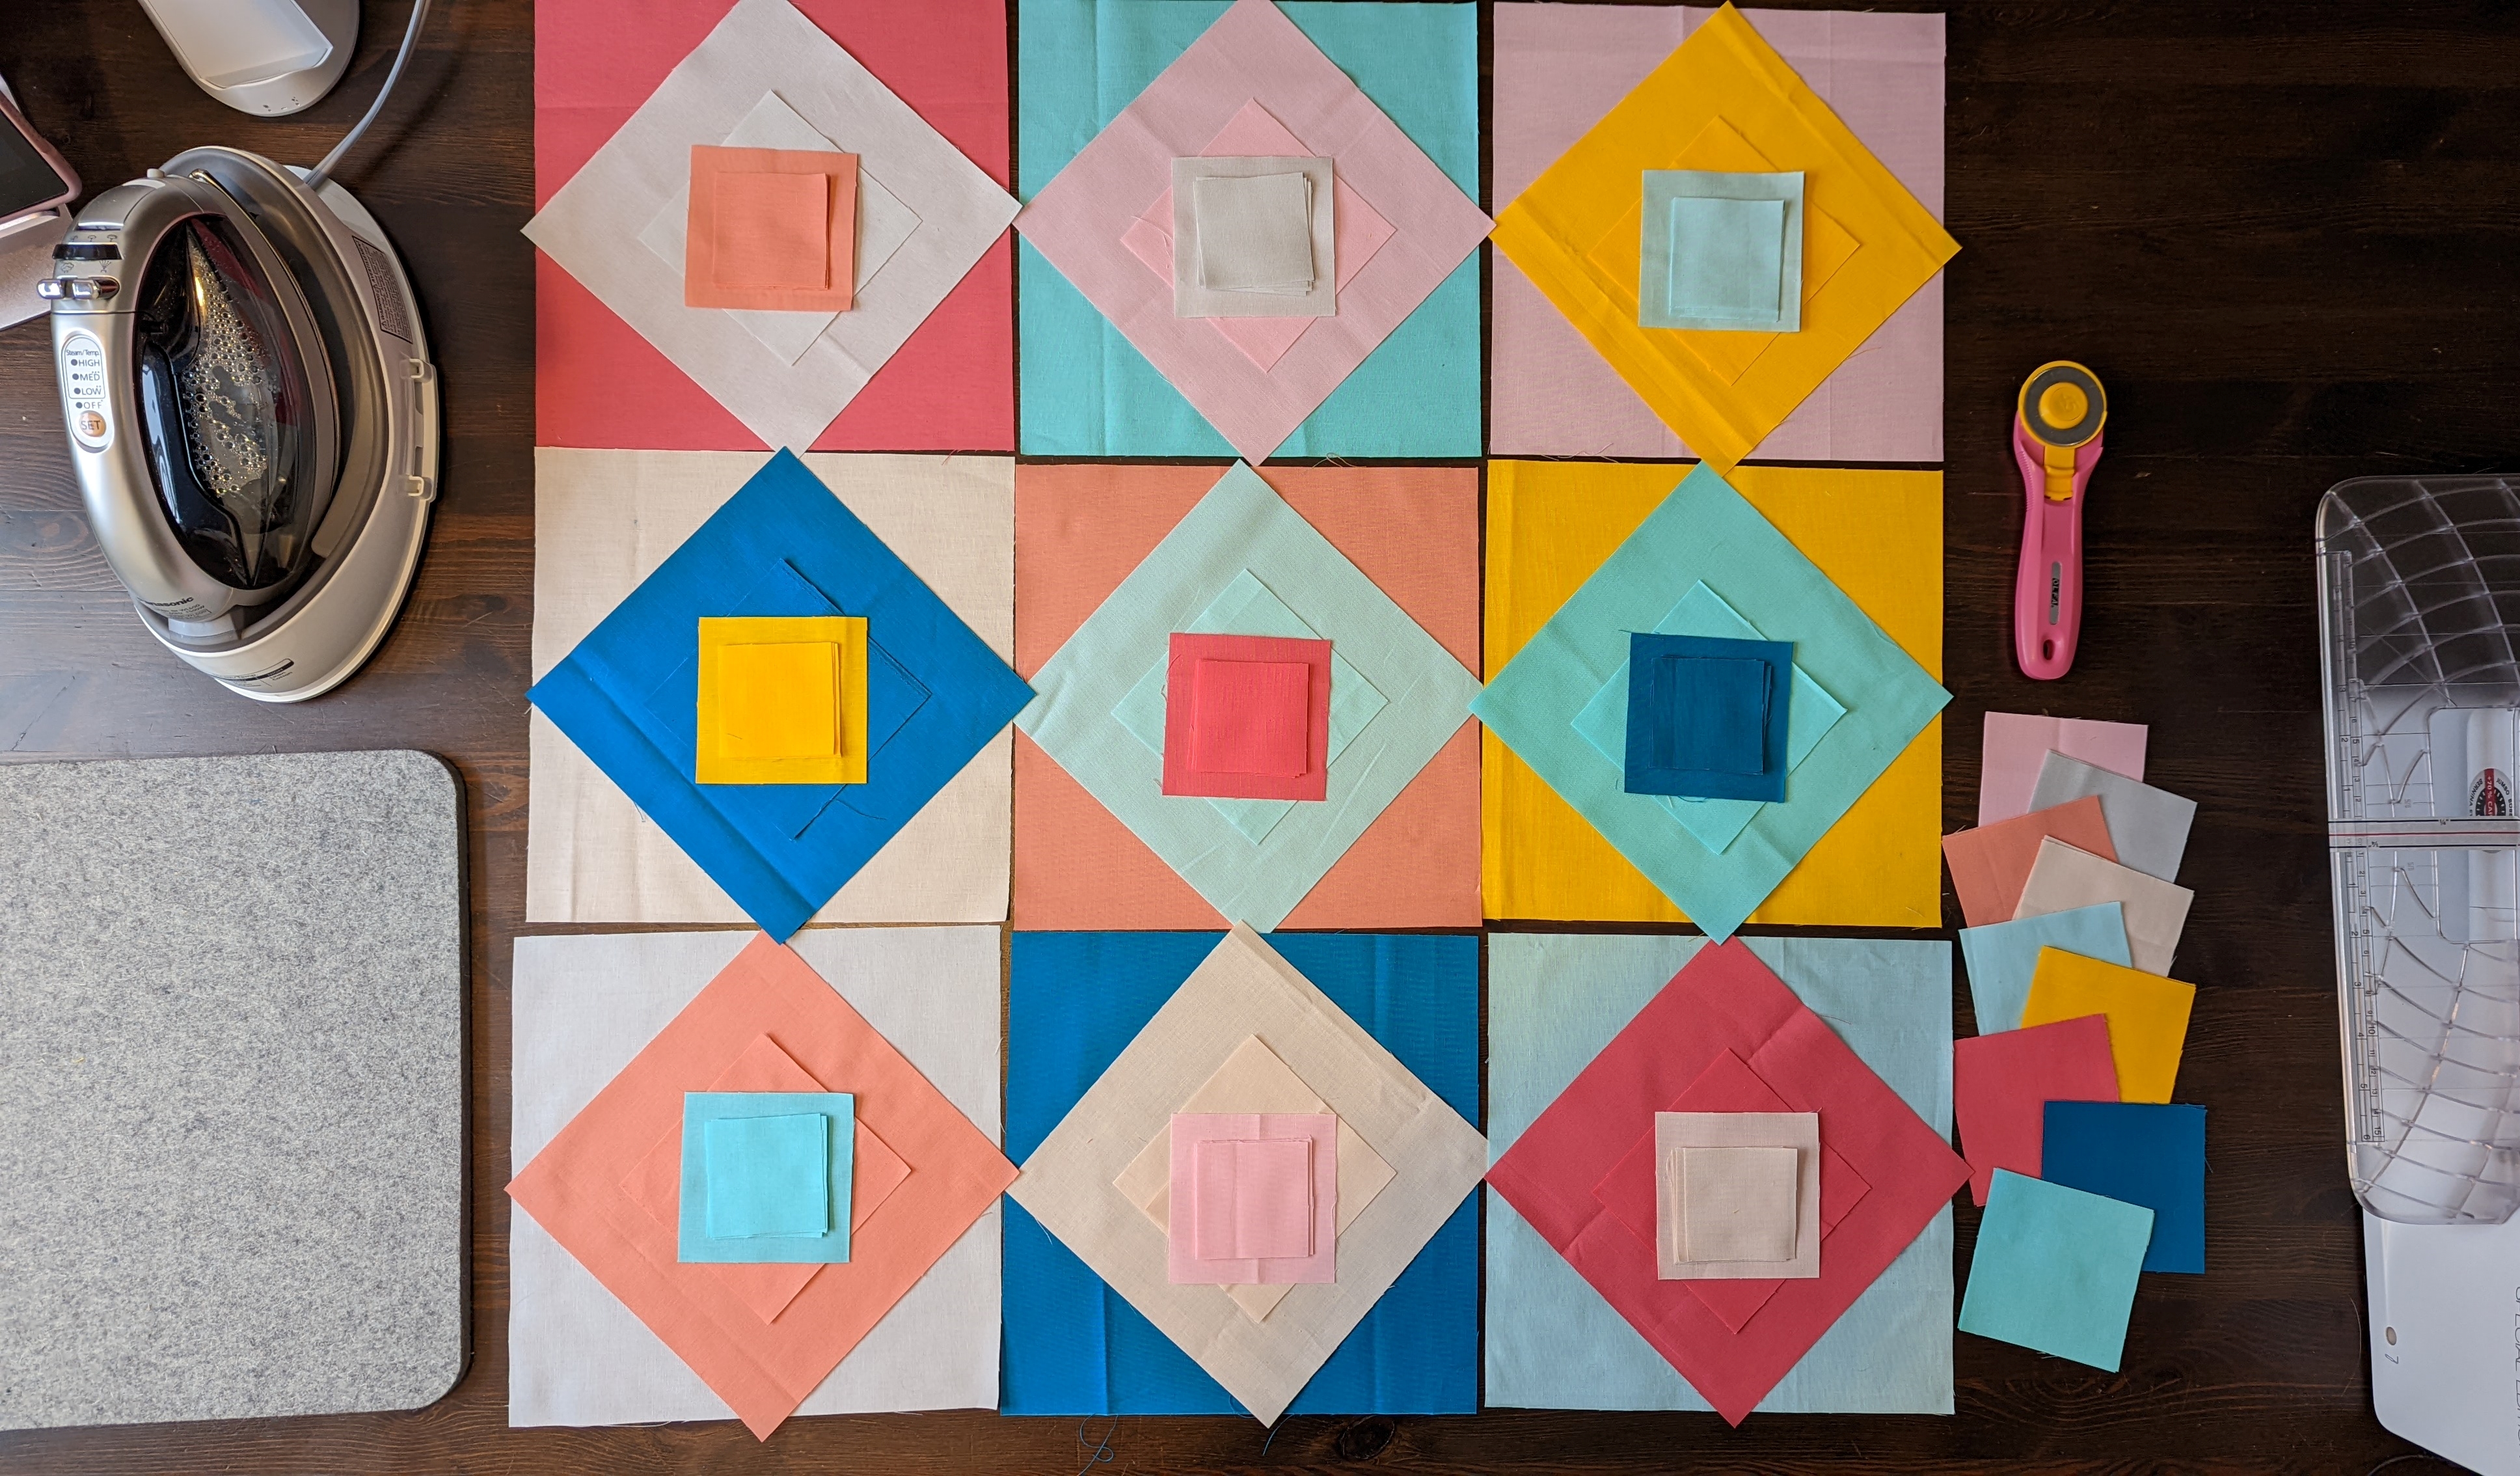
Middle Blocks
Use the eight white/light yellow HST blocks and the eight light yellow/medium golden yellow HST blocks. Use two white/light yellow and two light yellow/medium gold yellow HST blocks and layout the block as in the photo above. Stitch the two top HST blocks together with a 1/4″ seam, and stitch the two bottom HST blocks together with a 1/4″ seam. Press seams open (or to the side). Finally, sew the top and bottom together with a 1/4″ seam and press center seam open (or to the side). Set these four finished blocks aside.
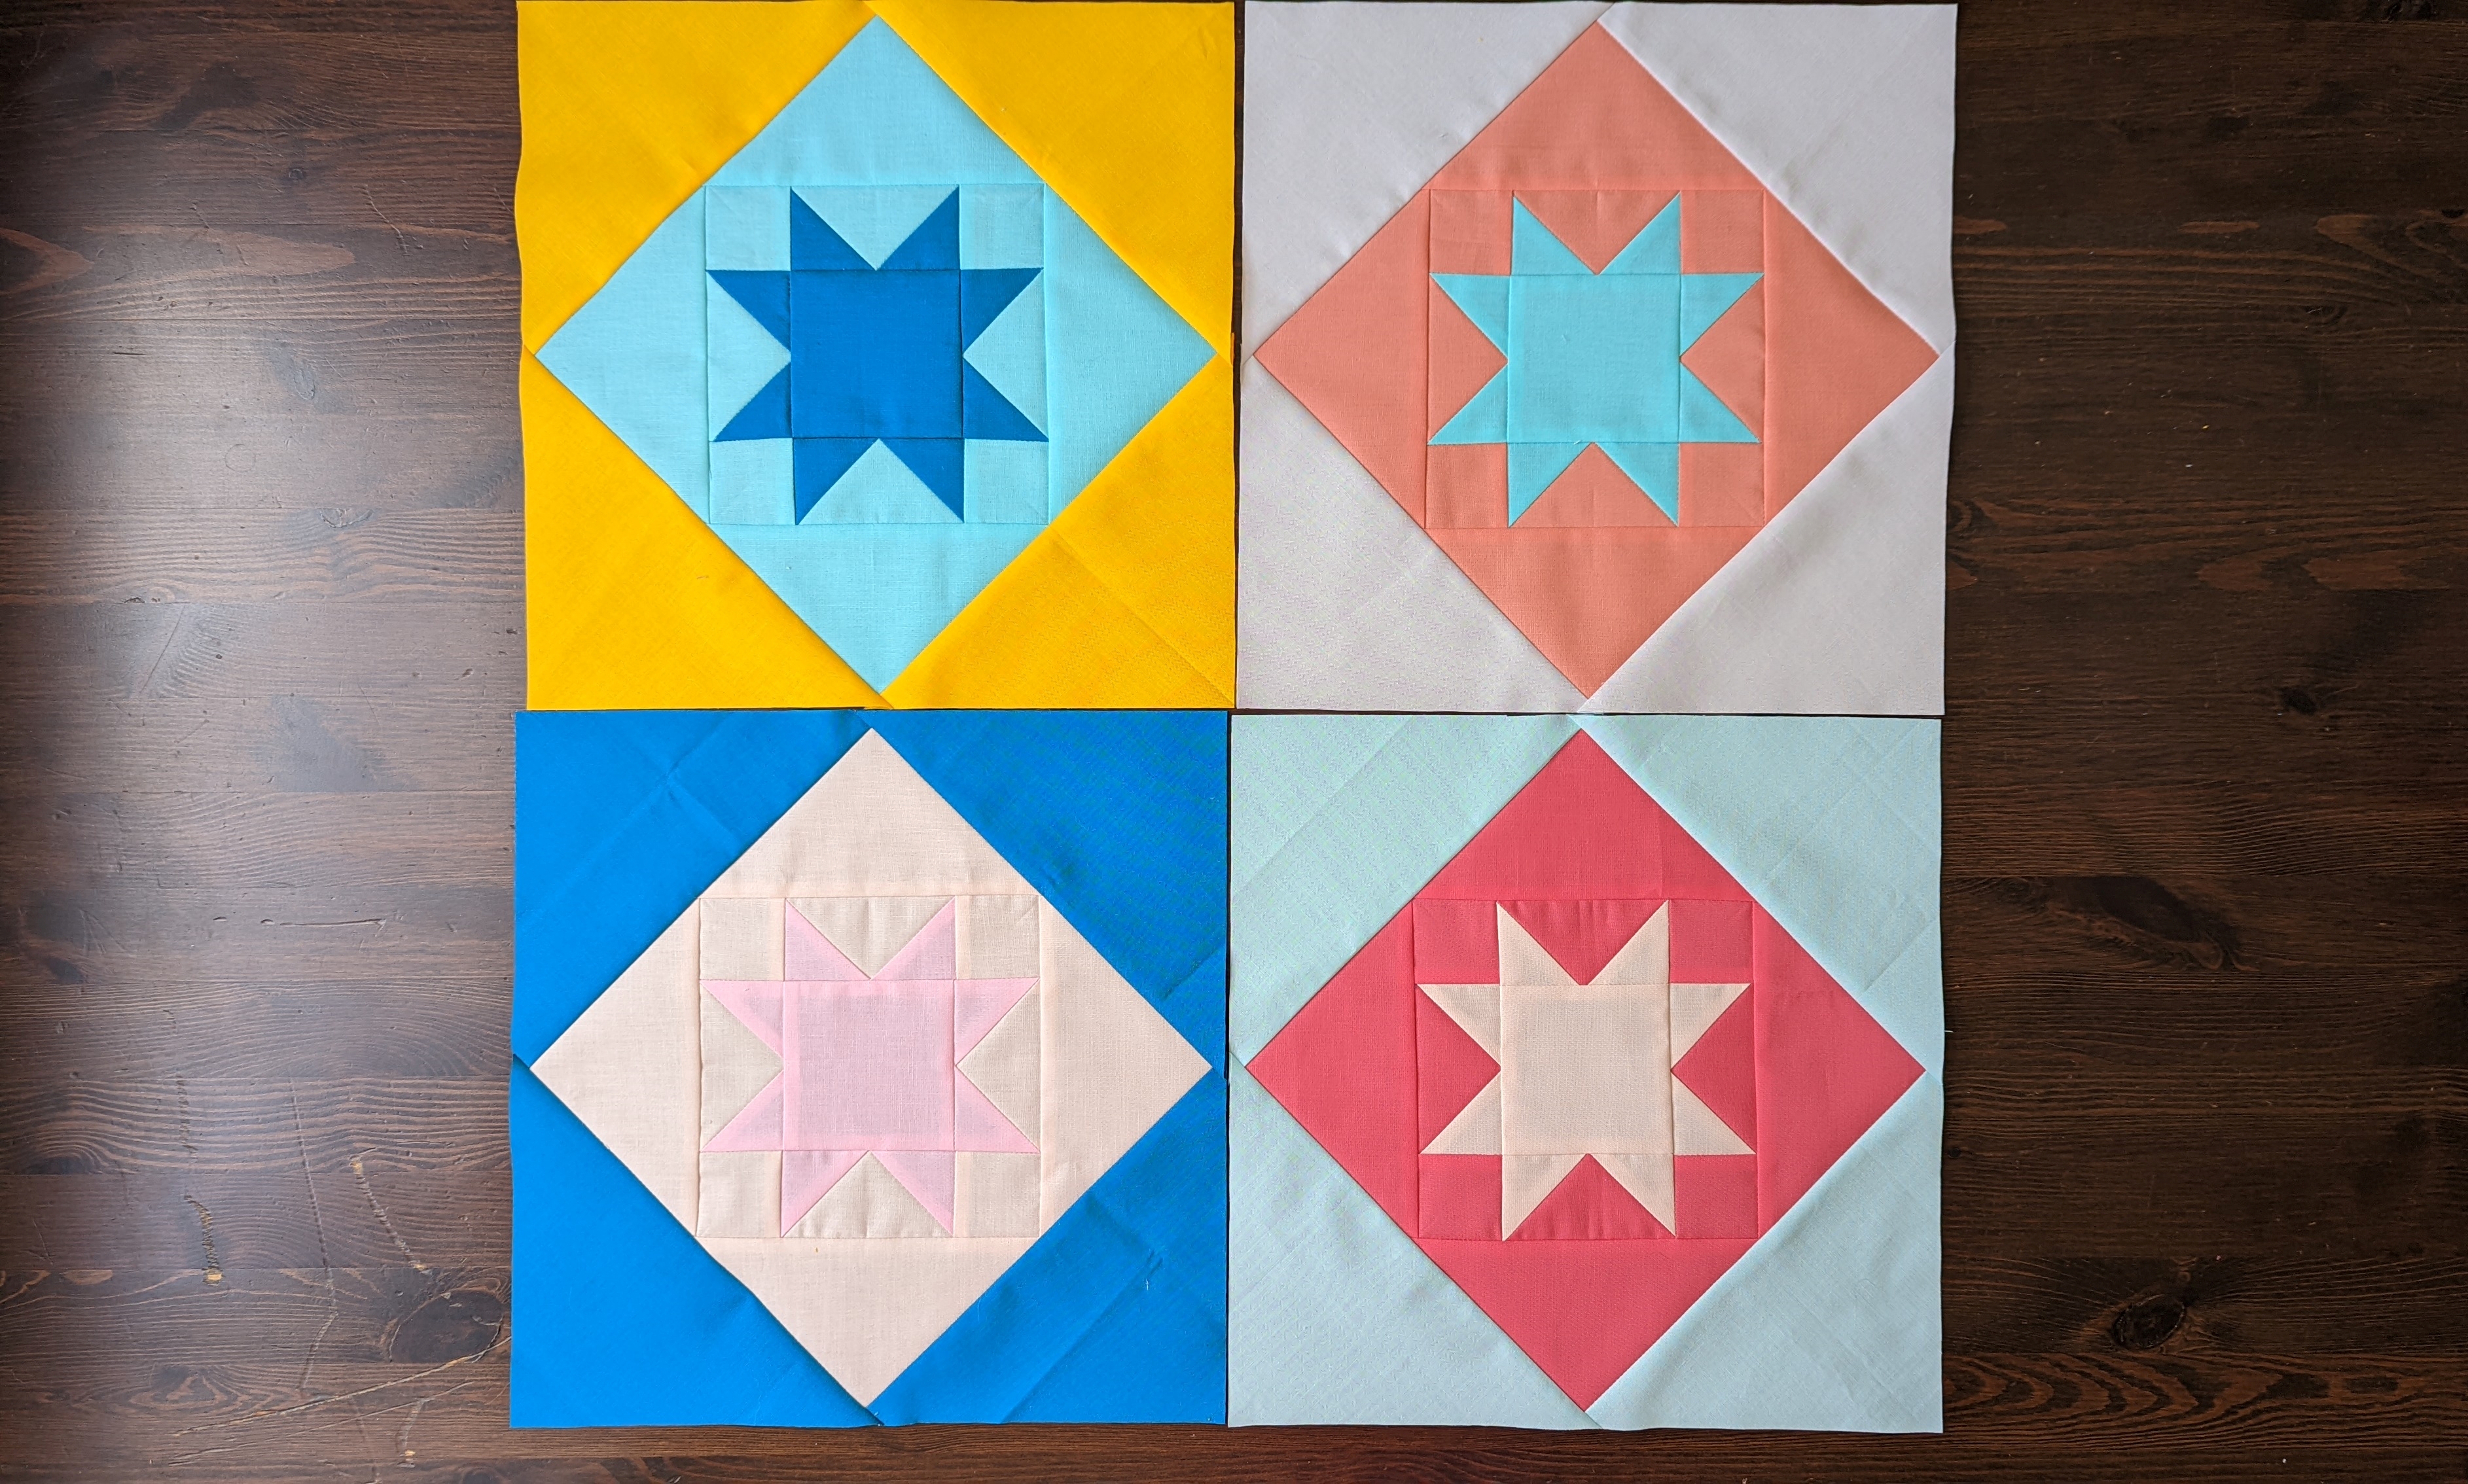
Corner Blocks
Use the four white 10.5″ x 10.5″ squares, the four magenta 10.5″ x 10.5″ squares, and the eight white/cyan blue HST blocks. Use one white 10.5″ x 10.5″ square, one magenta 10.5″ x 10.5″ square, and two white/cyan HST blocks and layout the block as in the photo above. Stitch the two top blocks together with a 1/4″ seam, and stitch the two bottom blocks together with a 1/4″ seam. Press seams open (or to the side). Finally, sew the top and bottom together with a 1/4″ seam and press center seam open (or to the side). Set these four finished blocks aside.
You should now have a total of 9 finished blocks.
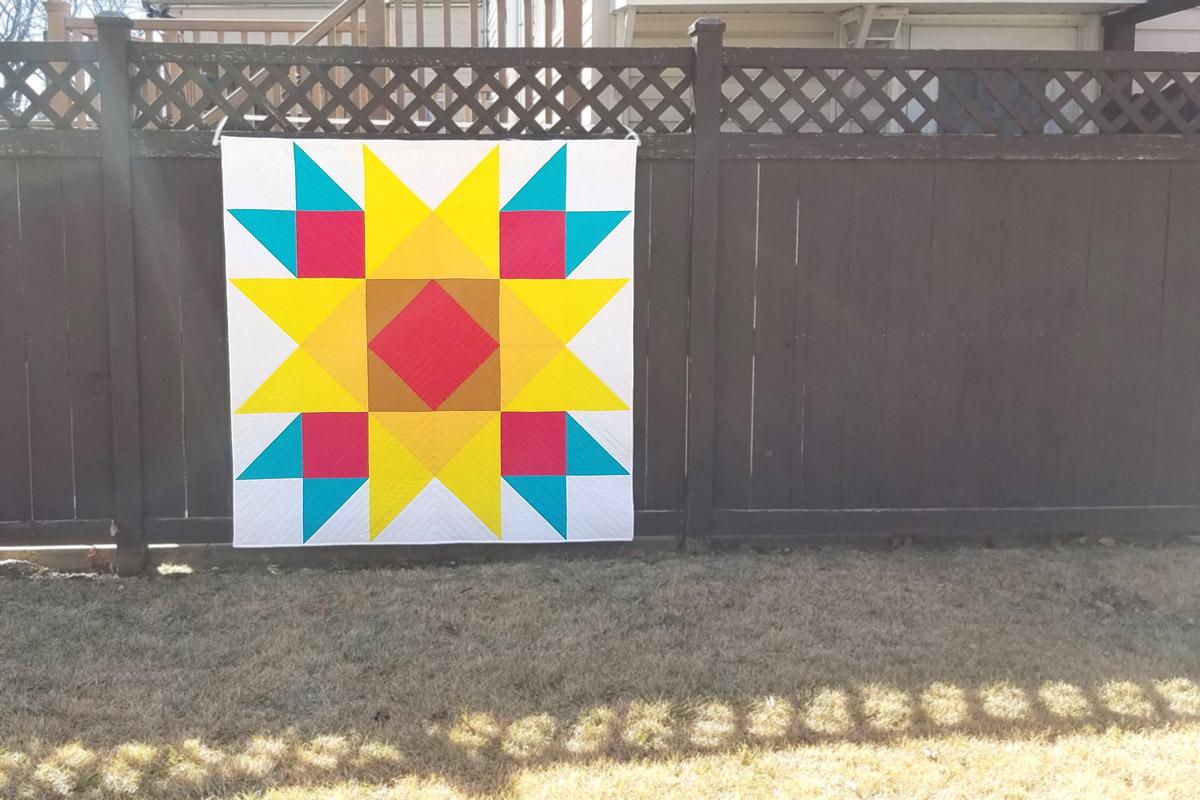
Union Square Big Block Quilt Layout
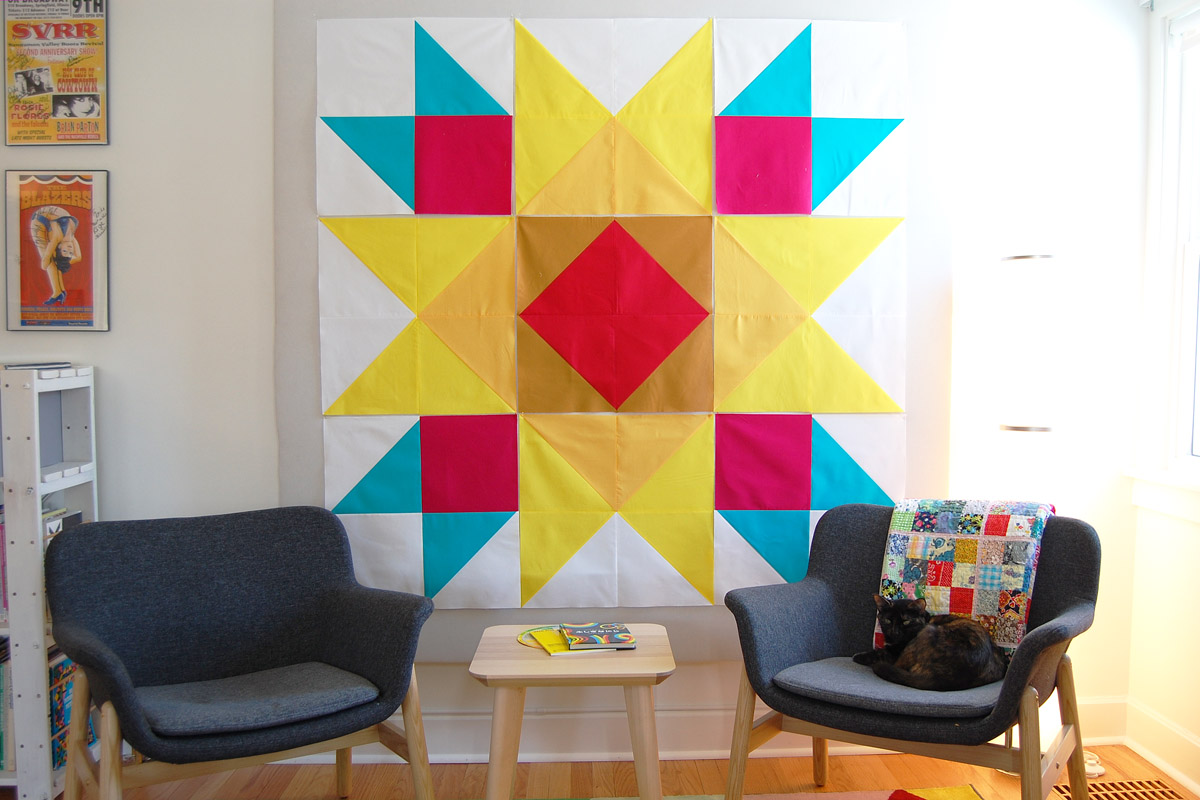
Take your 9 finished blocks and lay them out as in the photo above. It’s starting to look like a quilt!
Begin with the center block, add the four middle blocks to the top, bottom, and sides, and finally add in the four corner blocks. Take a final look to make sure all of your blocks are facing the right way, because nothing is worse than looking at a quilt you just finished to find a block sewn in the wrong way (ask me how I know!).
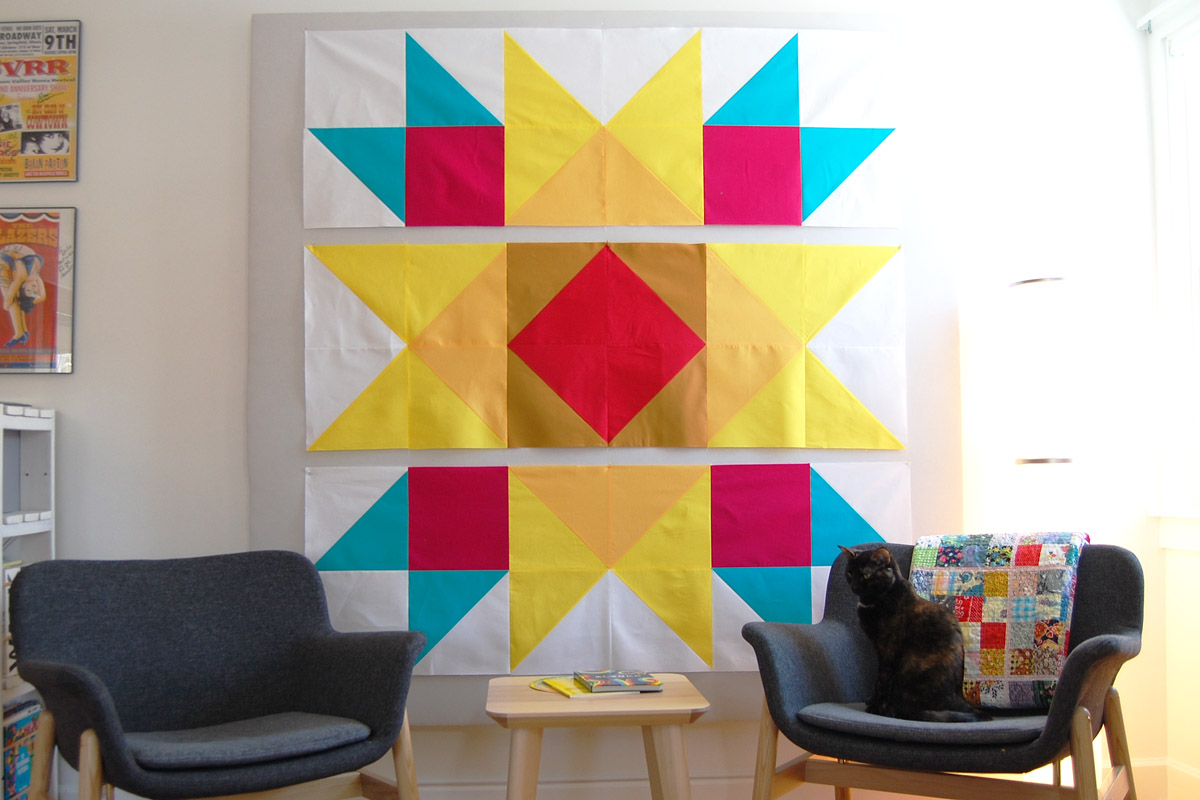
Begin by sewing the top three blocks in a row together with a 1/4″ seam, then sew the middle three blocks in a row together, and the bottom 3 blocks in a row. You can press these seams open, or press to the sides. If pressing to the sides, make sure that each row has seams pressed in opposite directions so they will nest together when sewing the rows.
Finally, sew the three rows together and press the seams open or to the side. While you’re at the ironing board, give the whole top a final pressing.
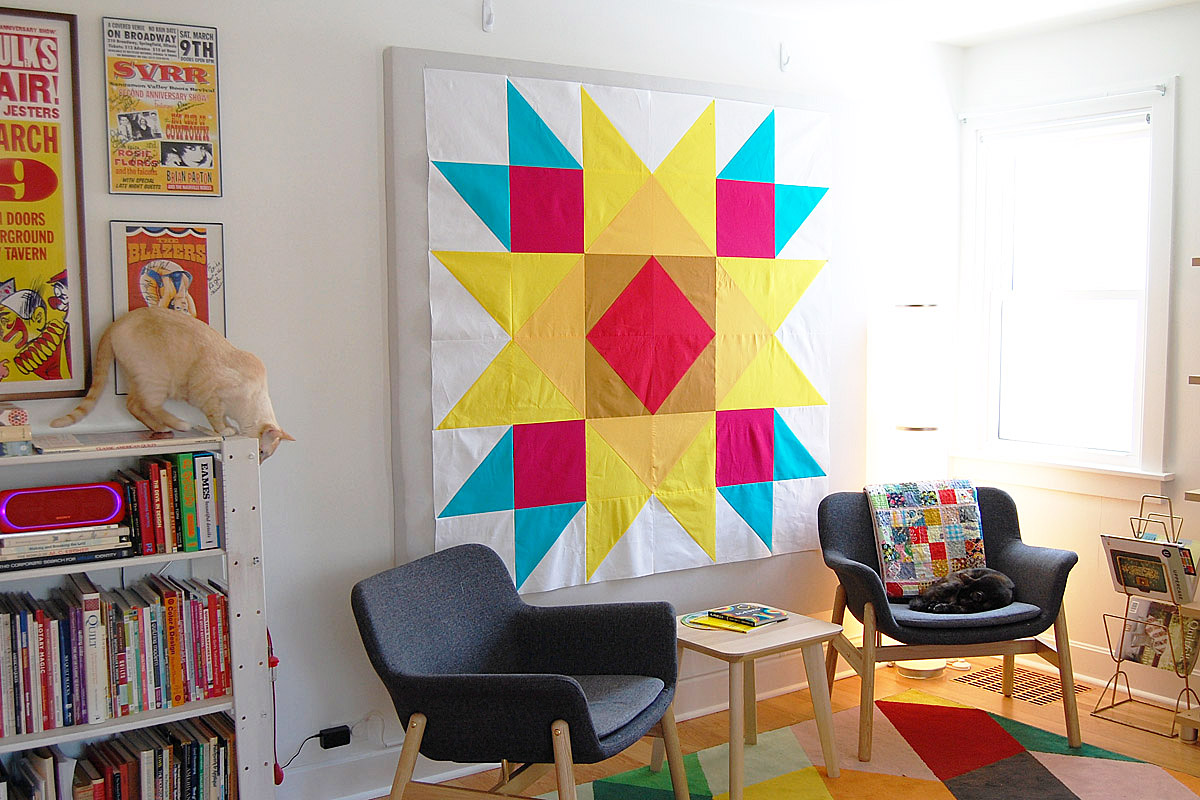
And there you have it, the top is finished! While we’re at it, let’s finish the backing so you’ll be ready to baste and quilt next week. The backing fabric should measure about 72″ x 72″ when finished. You could choose a 108″ wide cotton quilt backing and purchase two yards (to equal 72″), and cut the width down to 72″.
Or, you could use a 45″ wide fabric and piece the back to create the 72″ x 72″ square.
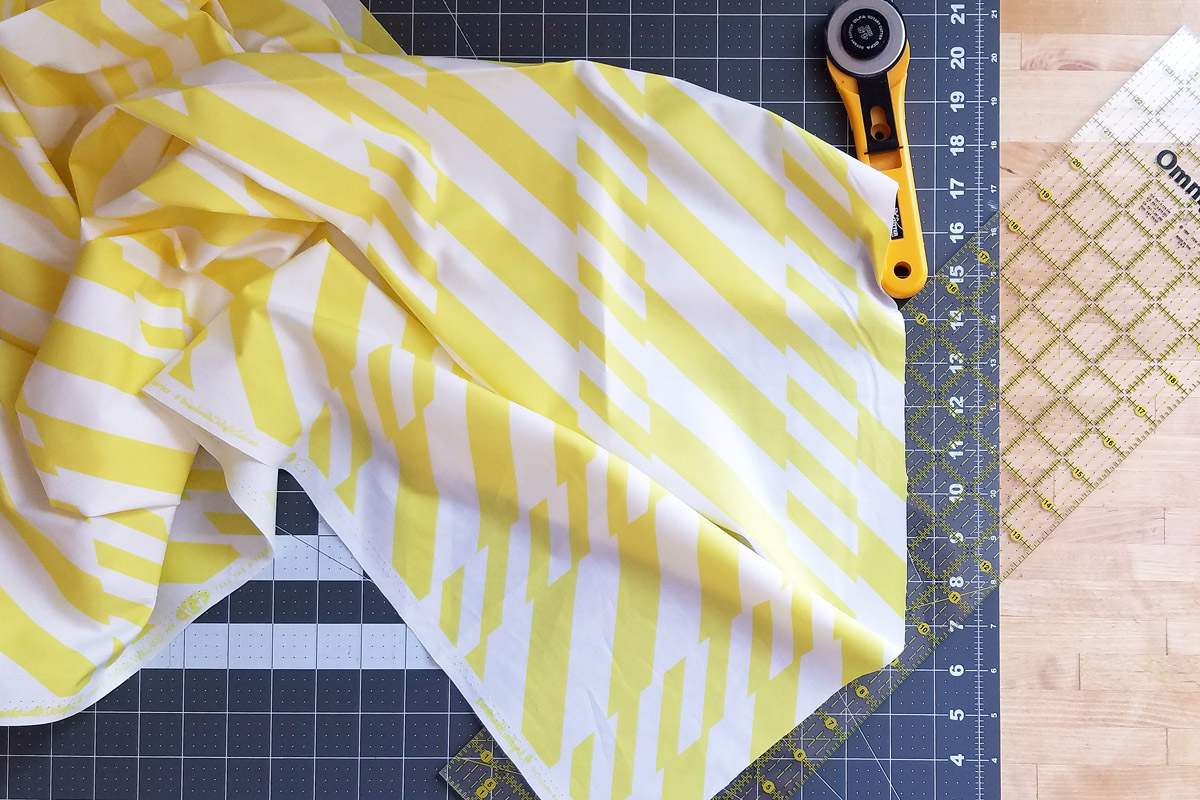
I selected a 45″ wide cotton print with bright yellow and white stripes. I purchased 4 yards total, cutting the yardage into two 2-yard pieces. I carefully squared up the ends and cut off the selvage edges.
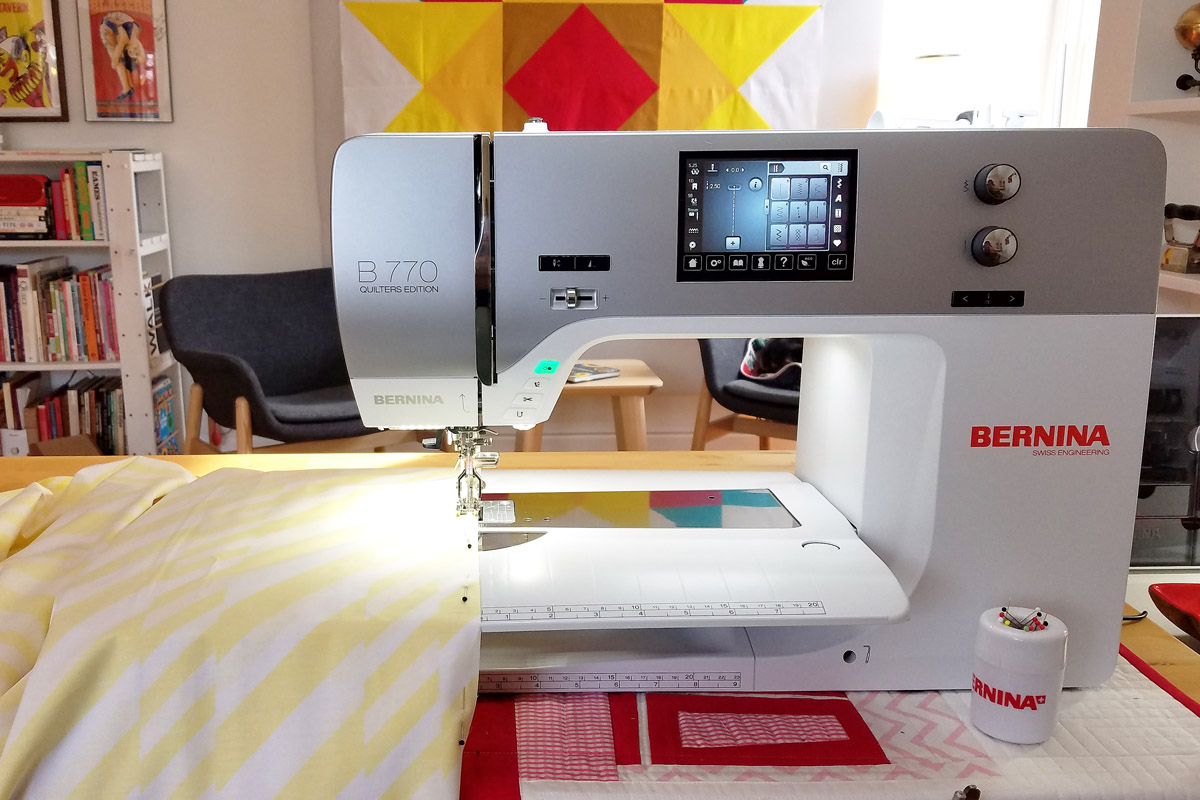
Pinning the two long pieces together on the longest edge right sides together, I sewed these together with a 1/4″ seam.
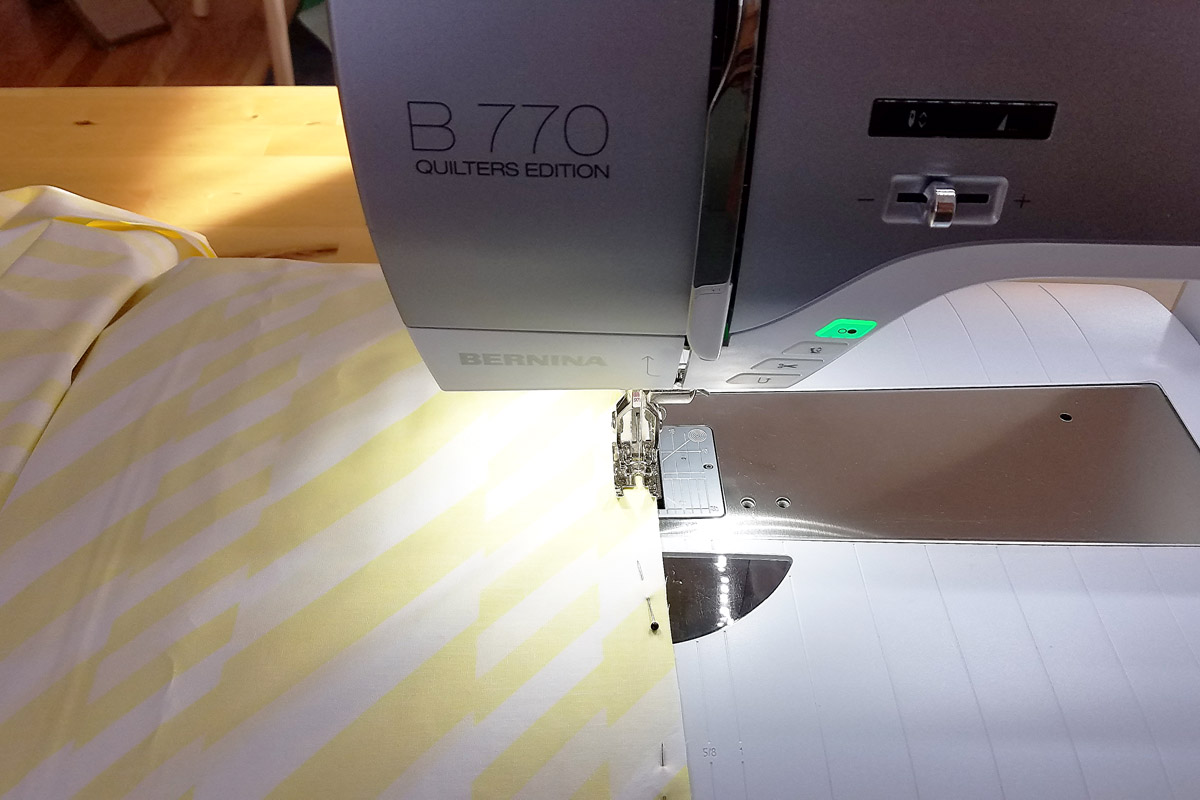
Since this is one great big long seam, I was careful to pay attention to the seam allowance and used the edge of the Patchwork foot #97D to help guide me. After stitching, I pressed the long seam over to one side, and trimmed the overall piece down to approximately 72″ x 72″.
Next week, in Part 3 we will finish up Union Square Big Block quilt with basting, quilting, and binding steps. Until then, happy stitching!


What you might also like


3 comments on “Union Square Big Block Quilt-Along Part 2”
-
-
Thank You so much for all your help. going to enjoy this site, Enjoy.
-
I am having fun making this.
Leave a Reply
You must be logged in to post a comment.

I always make my batting and backing about 2″ larger than the top so that I can trim it after it is quilted and before I bind it, unless I am using the envelope method of layering/finishing the quilt so that I can tie it.