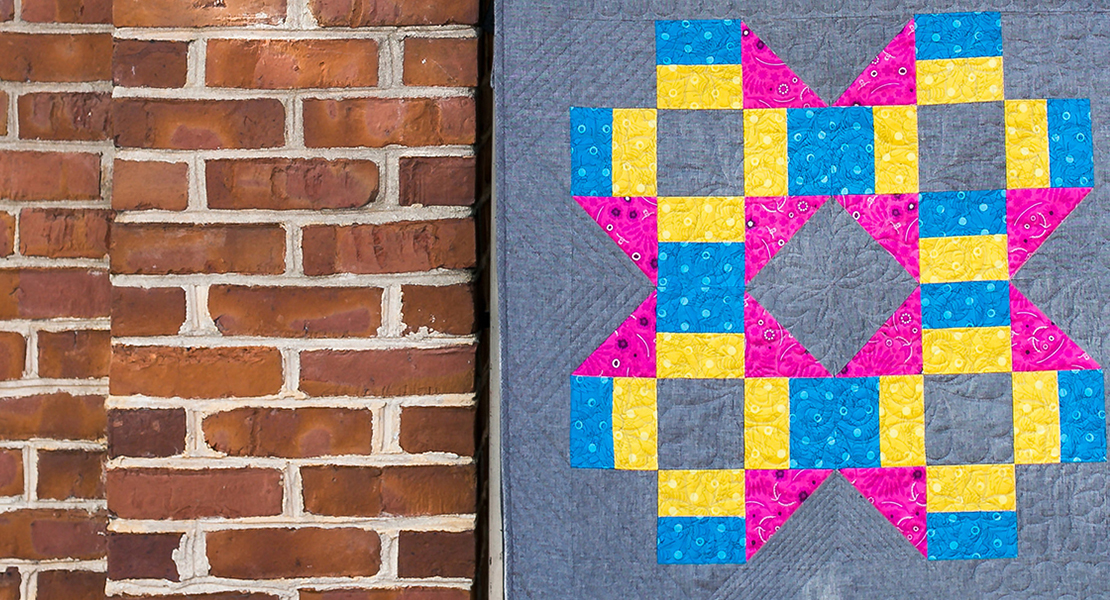
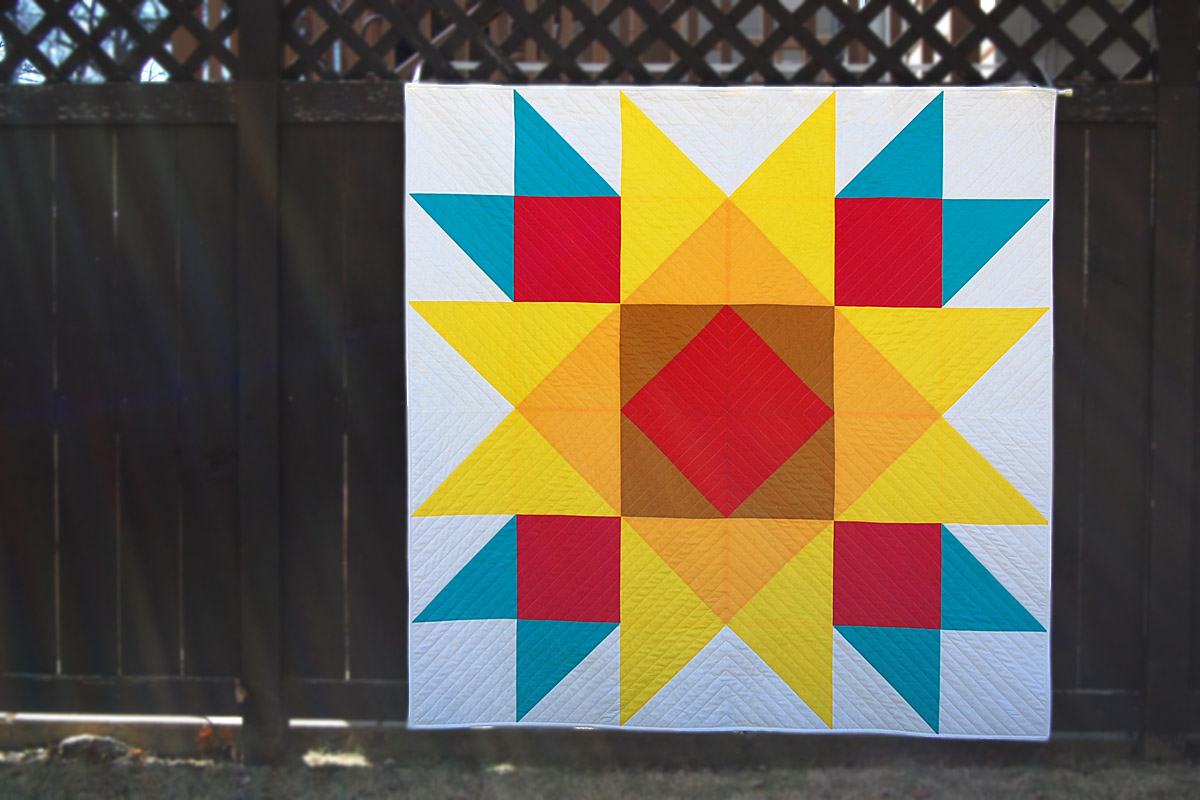
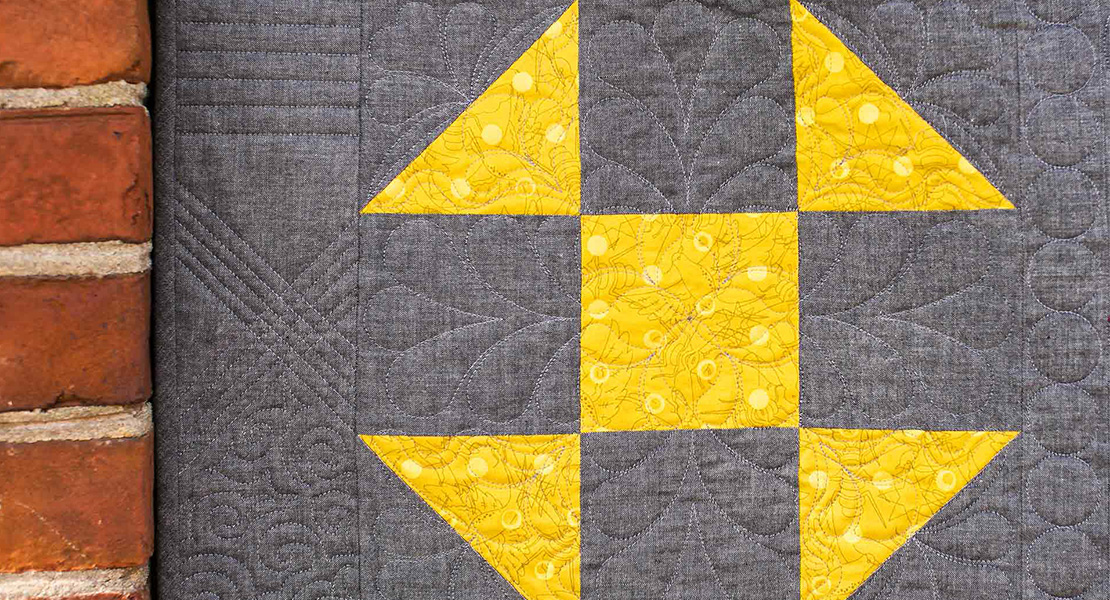
Square in a Square Block
I hope that you have enjoyed BERNINA’s Block of the Month Series so far! We are now ready to stitch the 3rd block in the series!
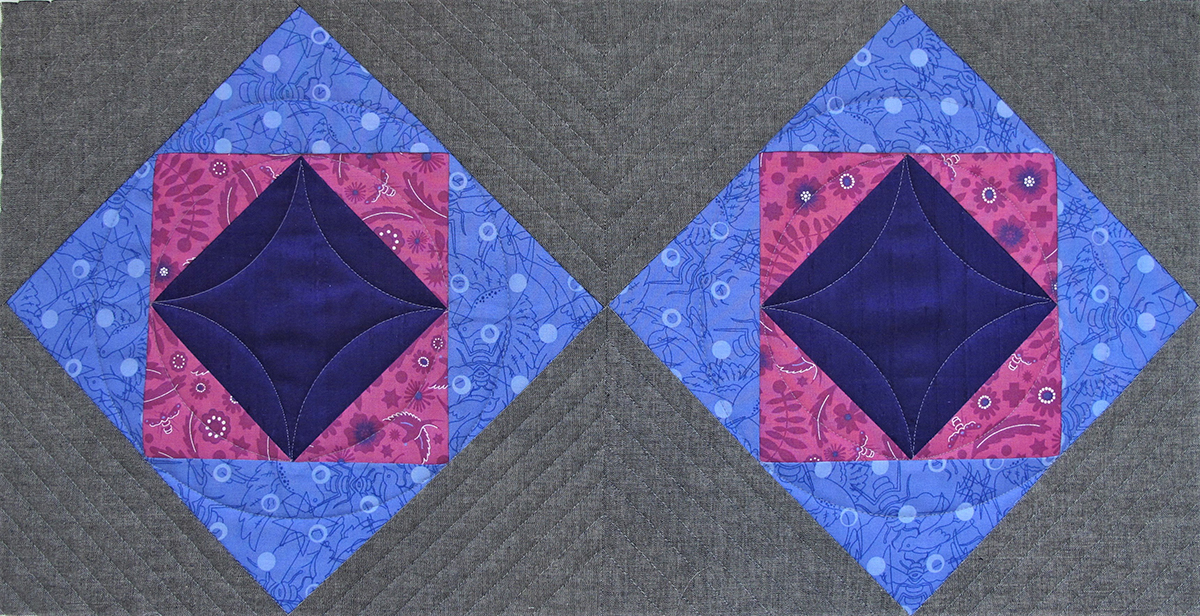
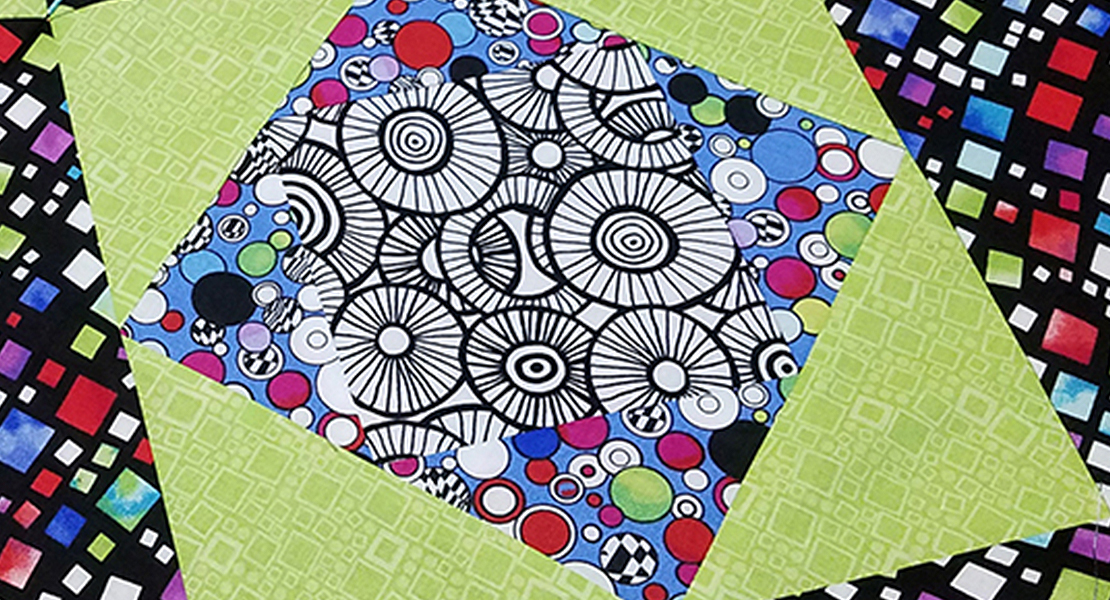
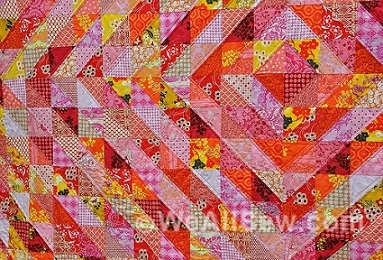
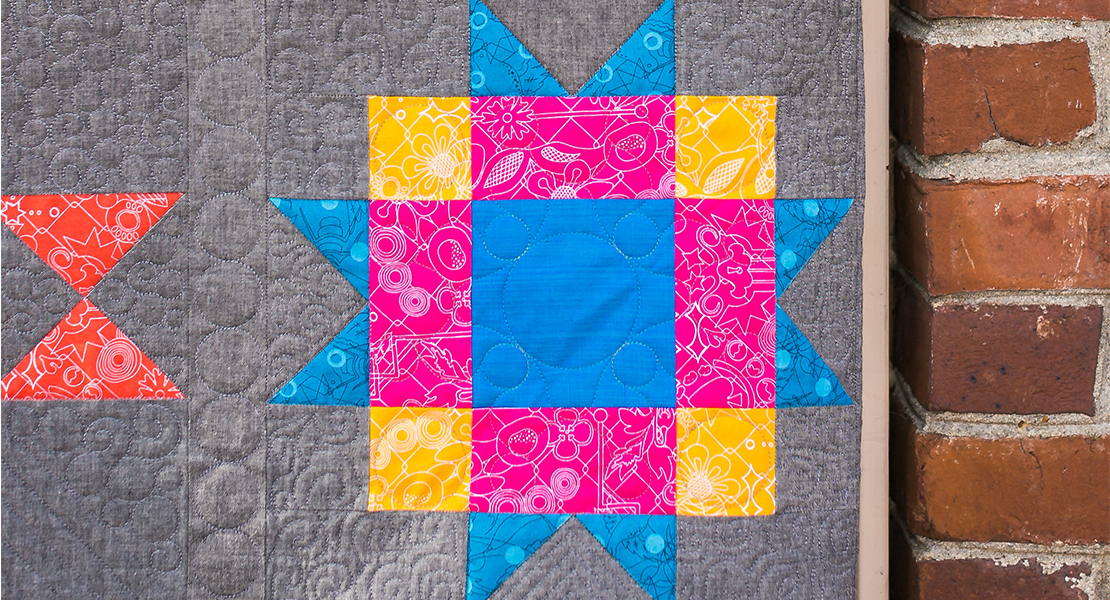
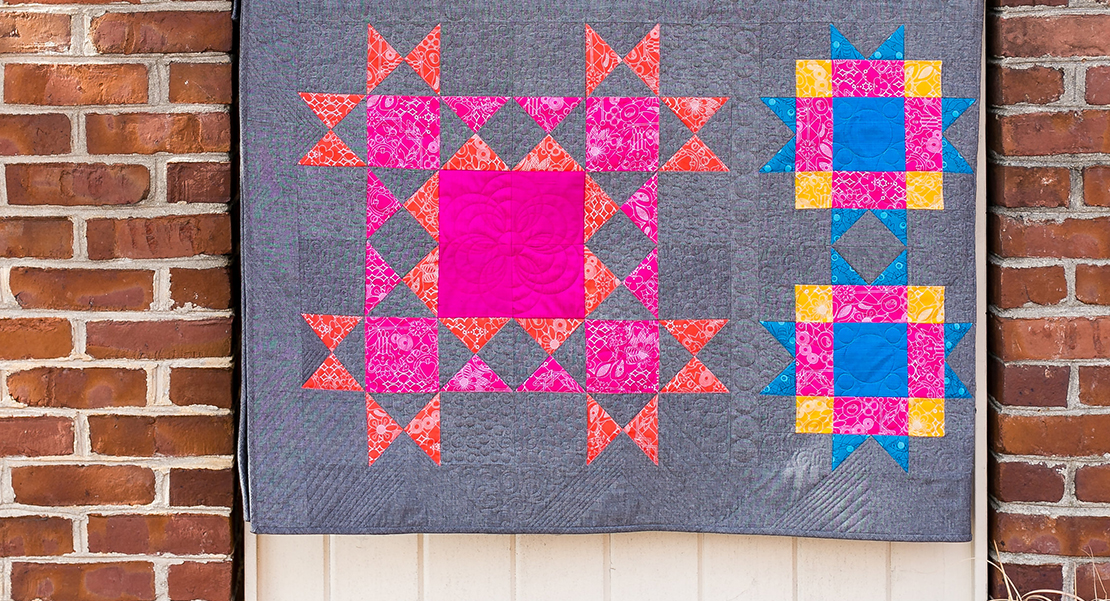
This month you will be making a total of four “Square in a Square” blocks, and then you will be sewing them together in sets of two. You get to choose the fabric to put in the center of the blocks that you will be doing. This will individualize your quilt! Because I love to quilt on silk, I have chosen silk dupioni for my center square. I think it also gives a bit more texture to the quilt block.
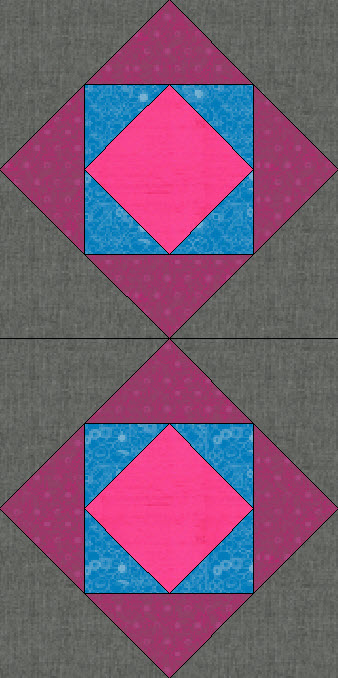
Block Set One
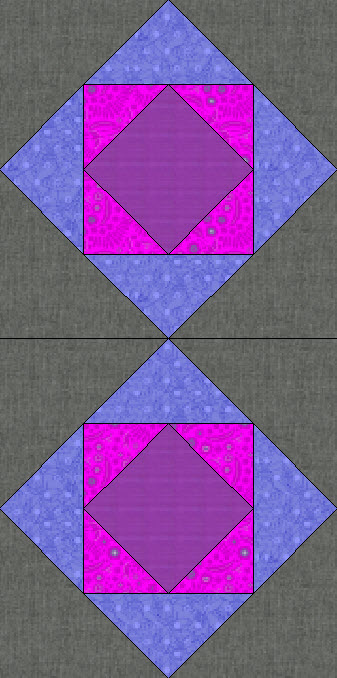
Block Set Two
Fabric to Create the Shoofly Block
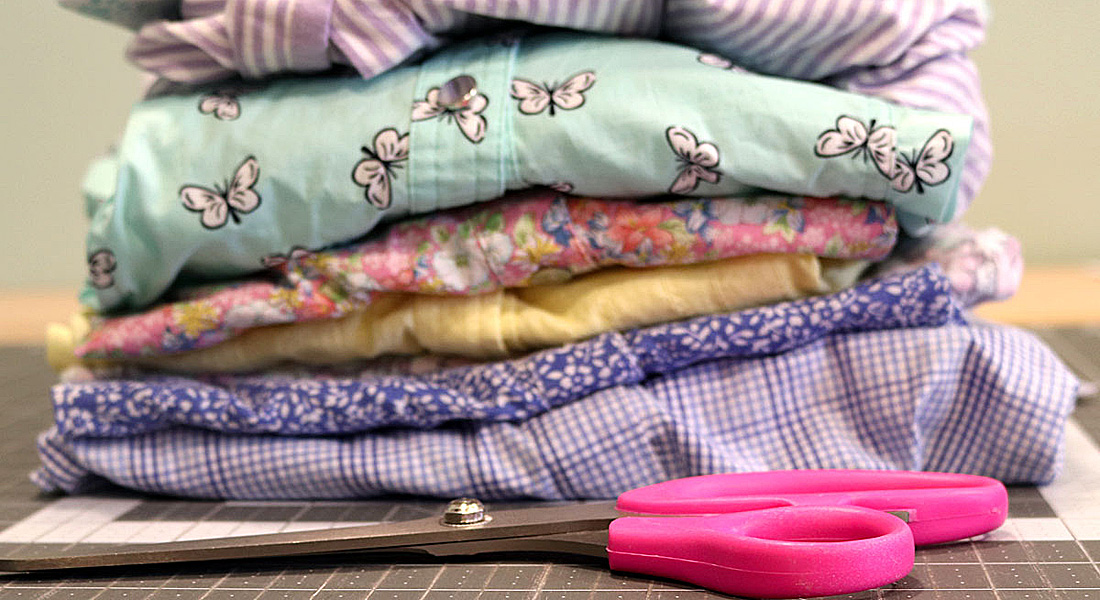
If you are buying fabric for each block on a monthly basis, you will need four fabrics for each of the two block sets. Three of the fabrics for each block set are listed in the Fabric and Batting list from the first blog post, but the fourth fabric will be a fabric of your choice! Please see more details about fabric requirements here. You will follow the Alternate Cutting Instructions below if you are cutting from a kit.
Please also download the BERNINA Block Party Fabric Chart.
If you are using the Sun Print 2017 Andover fabric line by Alison Glass, the specific colors are listed in bold:
Fabric Requirements:
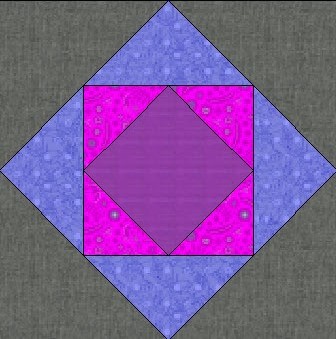
Block Set 1:
Fabric A
Fabric B

Fabric C

Fabric D
Fabric A: Fat quarter of your choice for center (This fabric is not included in kit). I used a pink silk dupioni here.
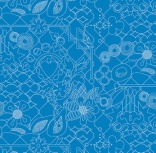
Fabric B Blue, A-8482-T, fat quarter
Fabric C Dark Pink, A-4884-R, fat quarter
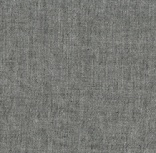
Fabric D Gray, A-C-Black, fat quarter (should be same fabric as Fabric D in Block Set 2)
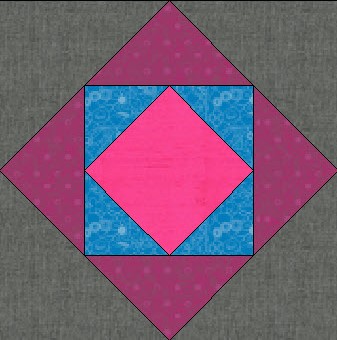
Block Set 2:
Fabric A
Fabric B

Fabric C

Fabric D

Fabric A: Fat quarter of your choice for center (This fabric is not included in kit). I used a purple silk dupioni here.
Fabric B Pink, A-8483-P, fat quarter
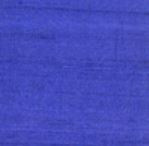
Fabric C Purple, A-8484-B, fat quarter
Fabric D Gray, A-C-Black, fat quarter (should be same fabric as Fabric D in Block Set 2)
Supplies to create the Square in a Square Block:
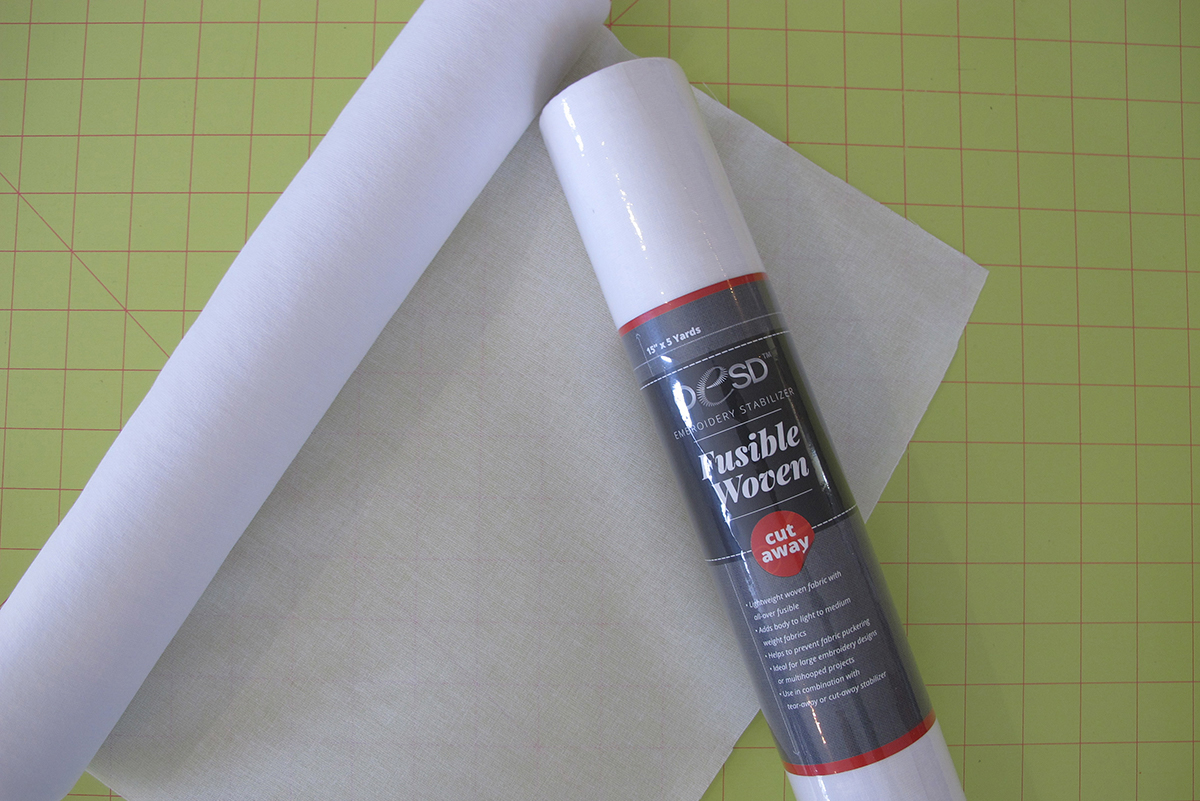
OESD Fusible Woven (needed if using for center square)
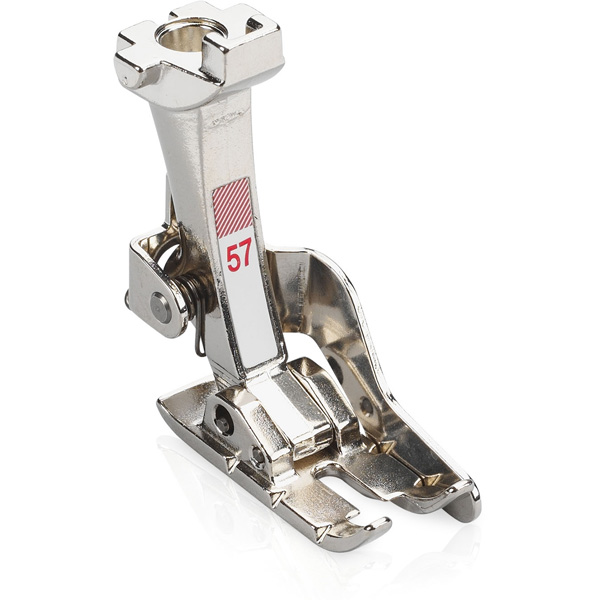
Patchwork Foot #37/37D or #57/57D or #97/97D
Adjustable Ruler Foot #72 (if using a BERNINA Domestic Sewing Machine)
Ruler Foot #96 (if using the Q 20 Sit-down Model)
BERNINA Ruler Work Kit (if using Q 24 the Q 20 Longarm Machine on a frame) includes Ruler base, Ruler foot #96 and Straight Ruler
BERNINA Straight Quilting Ruler
- Included in BERNINA Ruler Kit for Sit Down Machines (Domestic Machines and Q 20 Sit-down Model) includes Mini Straight Line Tool, Squiggle Template, Nested Mini Ovals, Nested Mini Circles, Mini 4-in-1)
- Included in the BERNINA Ruler Work Kit
Quilter’s Groove Pro Echo Rulers 6″ and 9″
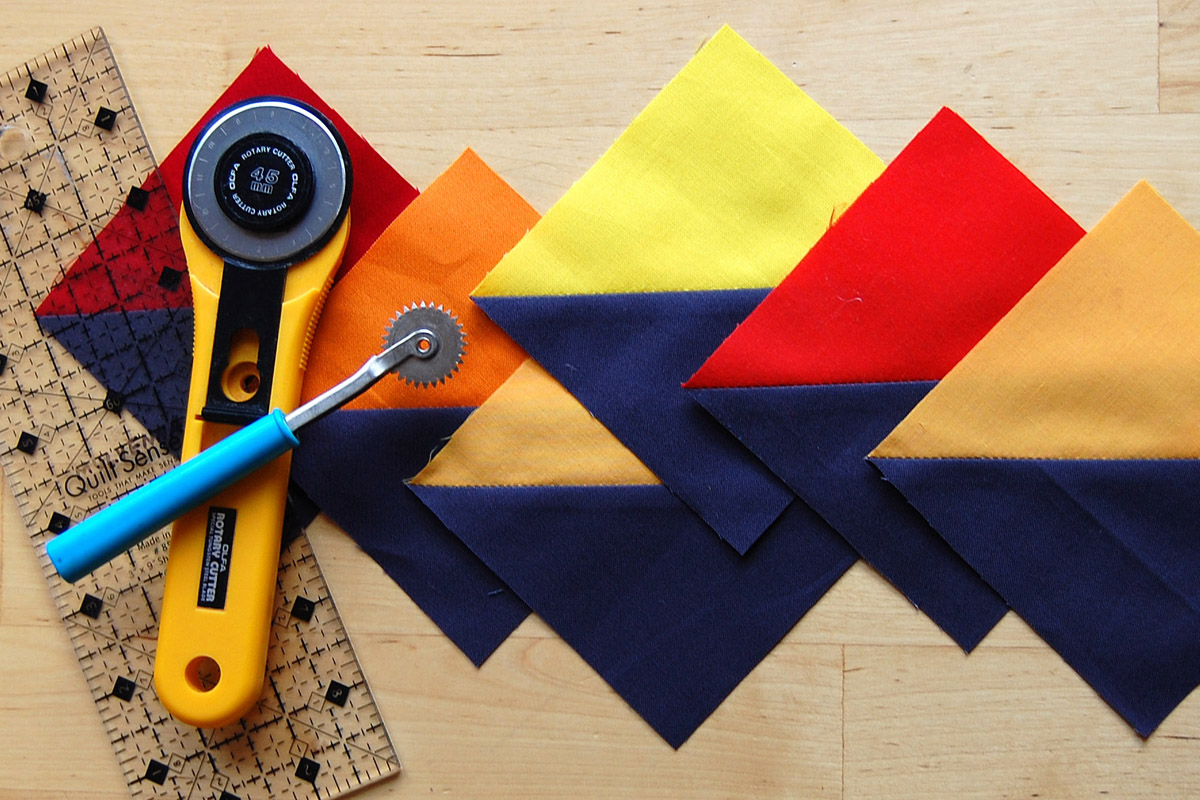
Cutting Instructions:
Fabric A*:
*This is the fabric that you will be choosing. Fabric requirements for this particular fabric are not included in the kit.
For each Block Set, cut two 6 ½” center squares (I used two pink and two purple silk dupioni squares). If you are using silk, please see *Note before cutting.
* NOTE: If you have chosen silk for the center square of your block, you will want to stabilize it before cutting the exact size. I like to use a stabilizer from OESD called Fusible Woven. You can also use Easy Knit, French Fuse or a similar product. For each silk color, cut a 7″ X 14″ rectangle of the stabilizer and fuse it to the back of the silk following the manufacturer’s directions. Then cut your two 6 ½” center squares from each of the two silk colors.
Fabric B:
For each Block Set, cut eight 3 ½” squares (8 blue, 8 pink).
Fabric C:
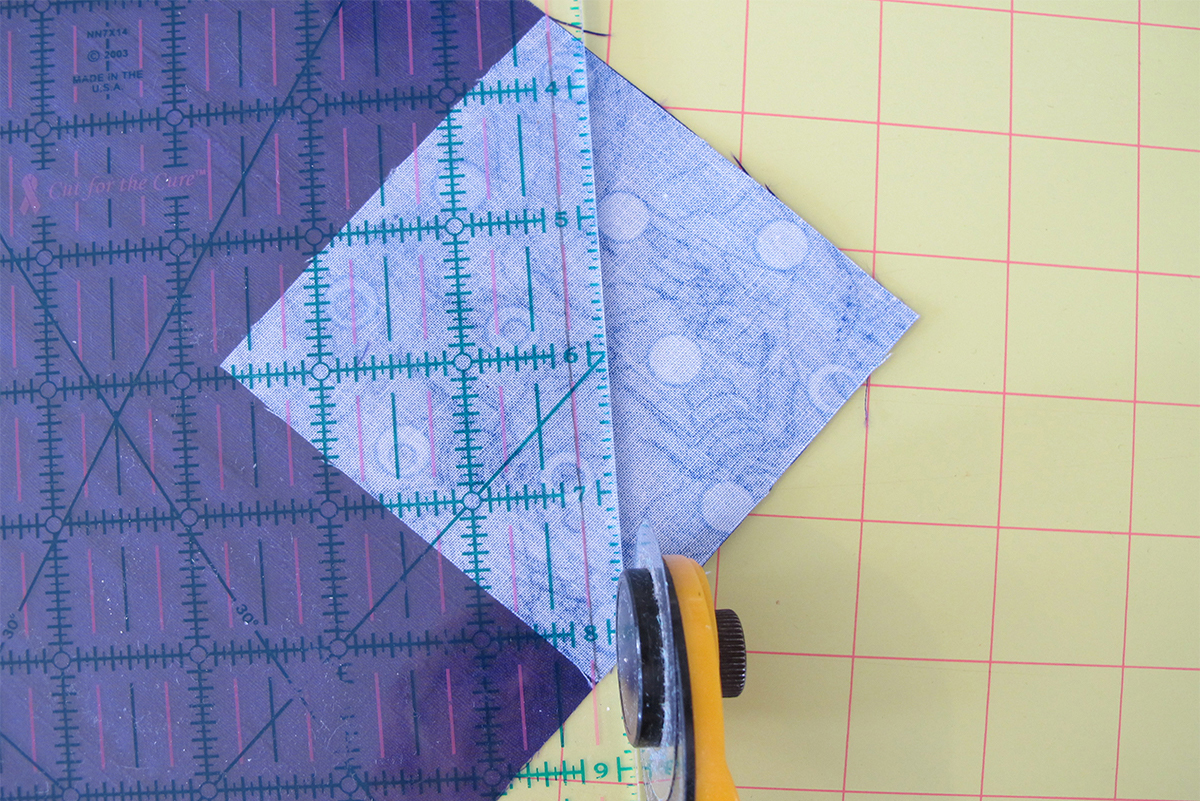
For each block set, cut two 7 ¼” squares (2 Dark Pink, 2 Purple). Cut each of the squares diagonally in both directions as shown. You should have a total of 8 triangles from each color.
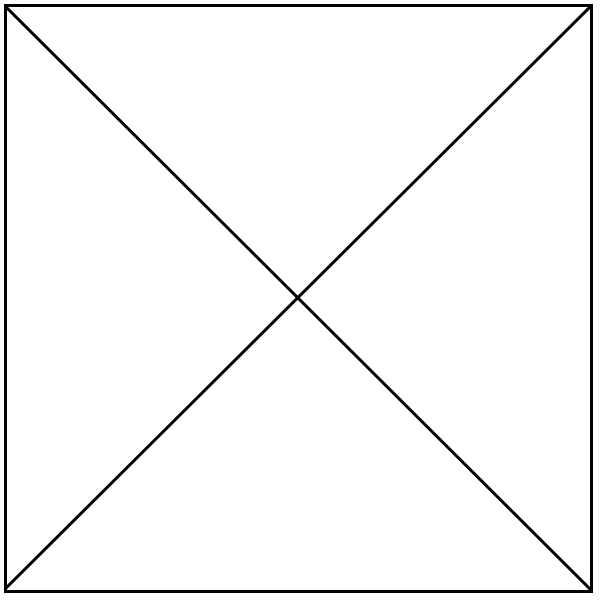
For each Block Set, cut four 6 7/8″ squares (Gray). Cut all Fabric D squares in half diagonally to create 8 triangles from each color. Note: If you have used the same fabric for each Block Set, you will have 16 triangles from this fabric.

Alternate Cutting Instructions If Cutting From Kit:
Fabric A:
Cut two 6 ½” center squares from two squares of your choice of fabric. (See Fabric A above.)
Fabric B:
Cut two 3 ½” strips from the fat eighth of Fabric B (Block Set 1 — Pink)
Cut a 3 ½” strip from remaining fabric from Block 2 for Fabric B (Block Set 2 — Blue)
Cut eight 3 ½” squares from each of these fabrics
Fabric C:
Cut a 7 1/4″ strip of Fabric C (Dark Pink – for Block Set 1) and Fabric C (Purple – for Block Set 2). Both of these fabrics are left from Block 1.
Cut two 7 ¼””squares of each fabric. Cut each of these squares diagonally for 8 triangles (See Fabric C above)
Fabric D:
Cut two 6 7/8″ strips from Fabric D.
Cut these strips into eight 6 7/8″ squares. Set aside remainder.
Cut the eight squares diagonally. You should now have 16 triangles. (See Fabric D above.)
Piecing the blocks:
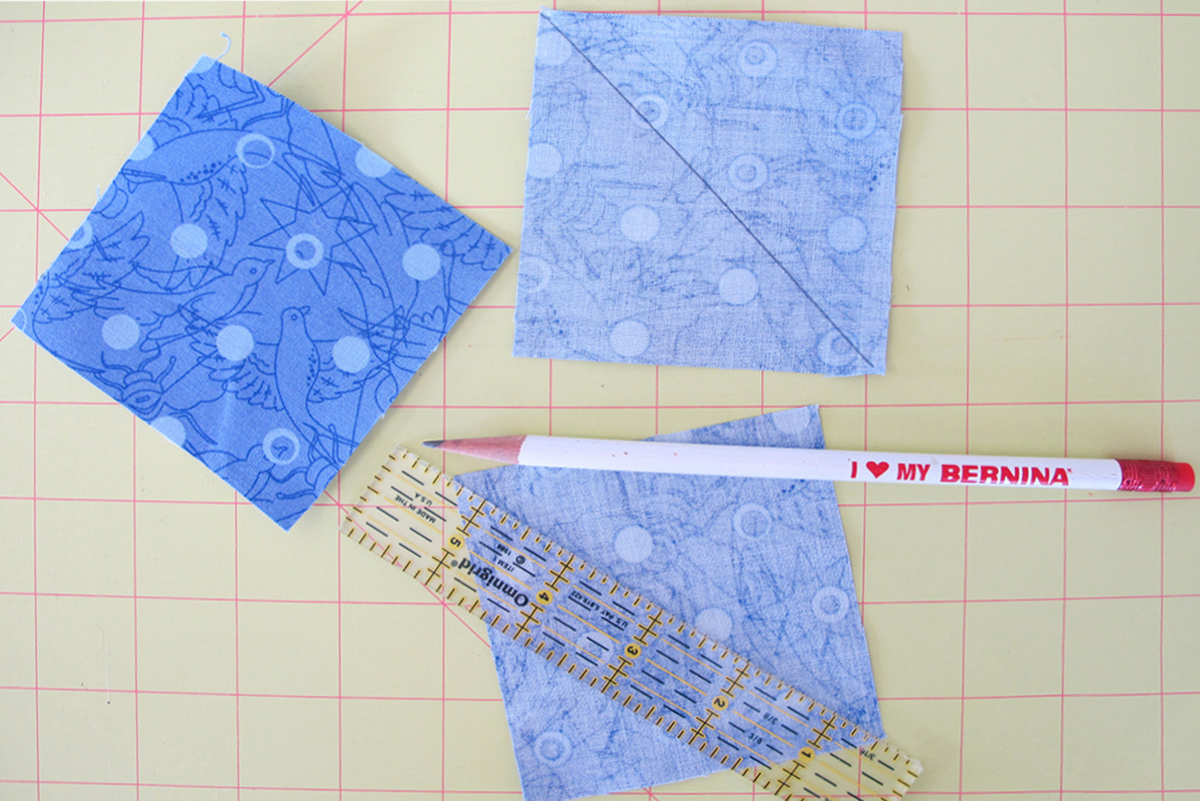
Draw a diagonal line from corner to corner across each of the 3 1/2″ squares from Fabric B.
Place the marked squares on each corner of the Fabric A square (your chosen center block) with right sides together. Stitch on the drawn line.

Trim the excess fabric ¼” past the seam.
Press the seams away from the center block.
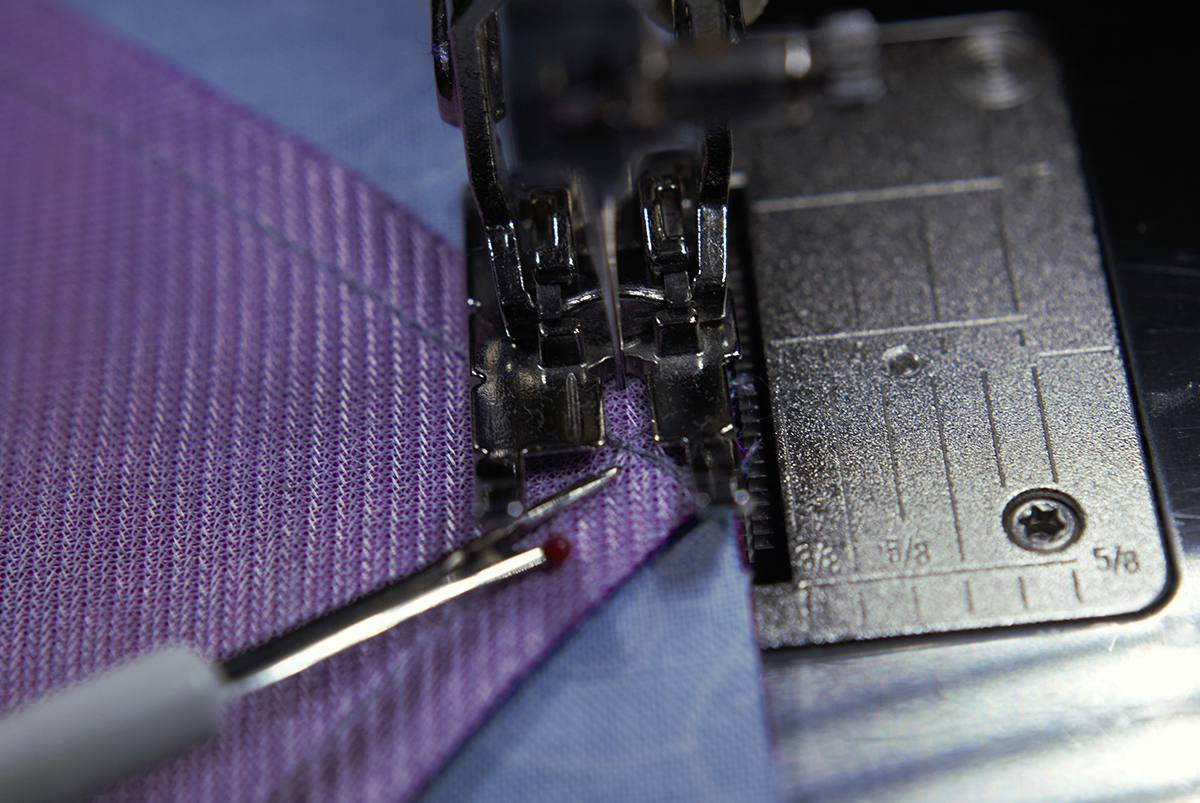
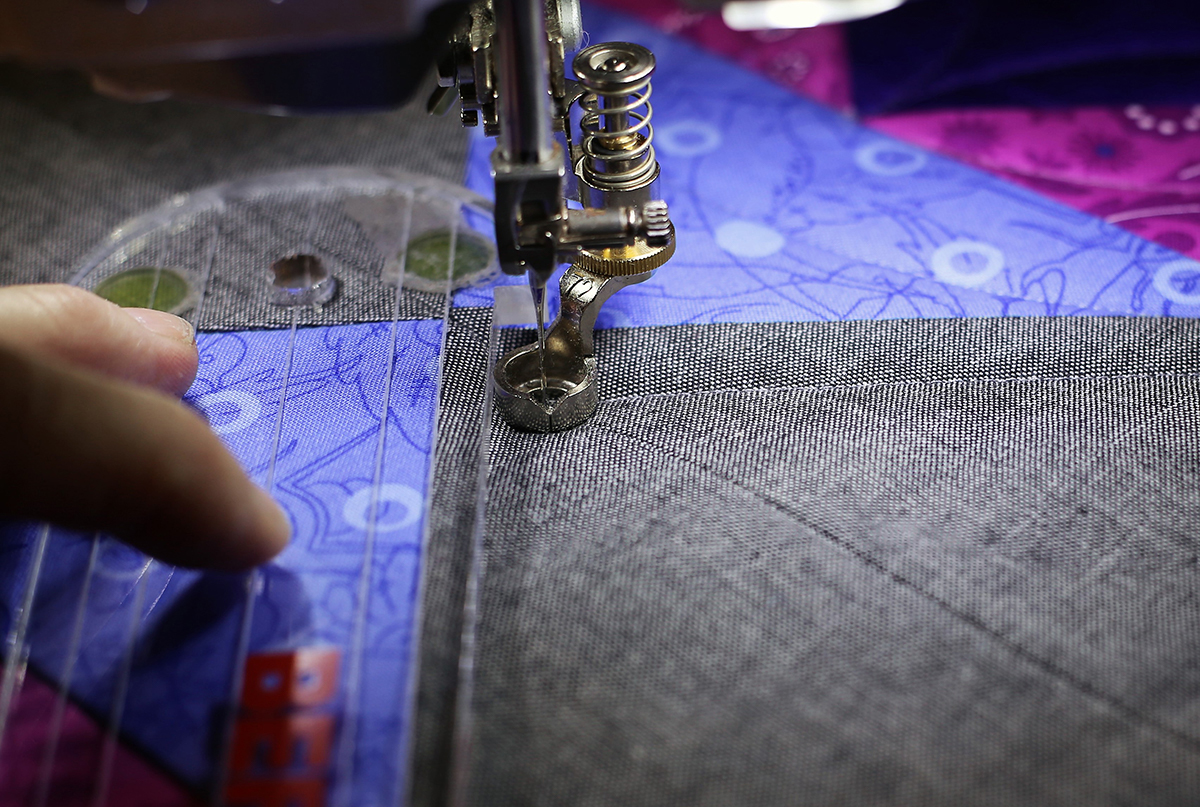
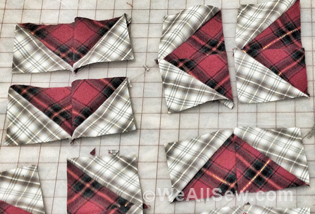
Center one of the Fabric C triangles on one side of center square and stitch. Be sure to pay attention to where the seams from the previous stitching are so that you do not cut off any of the points. The needle should cross at the intersection of the previous seams (where the tip of the seam ripper is pointing). Repeat for all four sides.
Repeat with the same process with the Fabric D triangles to complete the block. Construct two complete blocks from each color group.
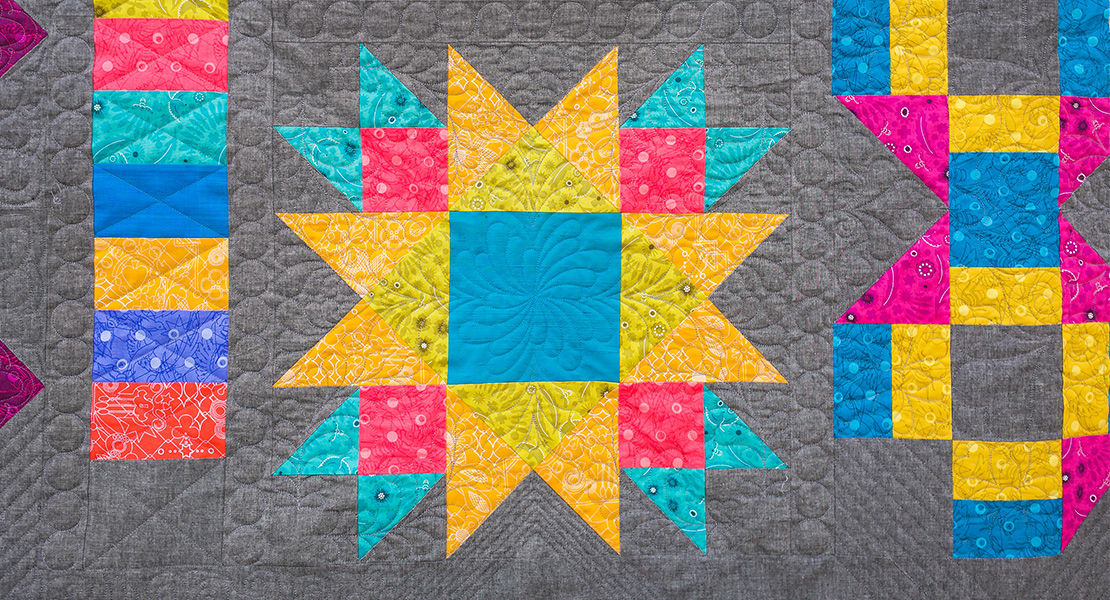
Stitch the two like blocks together. You will now have two blocks, each of which will consist of two Square in a Square blocks.
Set aside these two blocks for now if you are going to make the entire quilt. The entire quilt top will be pieced together before the final quilting of the layers is done.
As you may know, each month I give you instructions for a different quilting technique. Experiment with the different techniques, and then when it comes time for the final quilting, you will be ready to decide which quilting technique you like best.
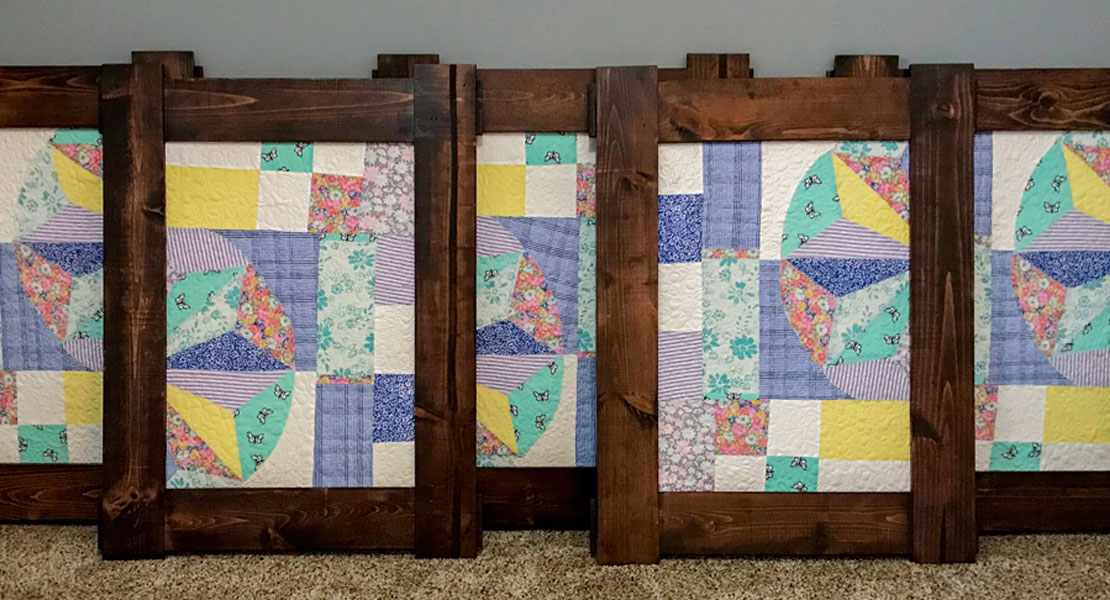
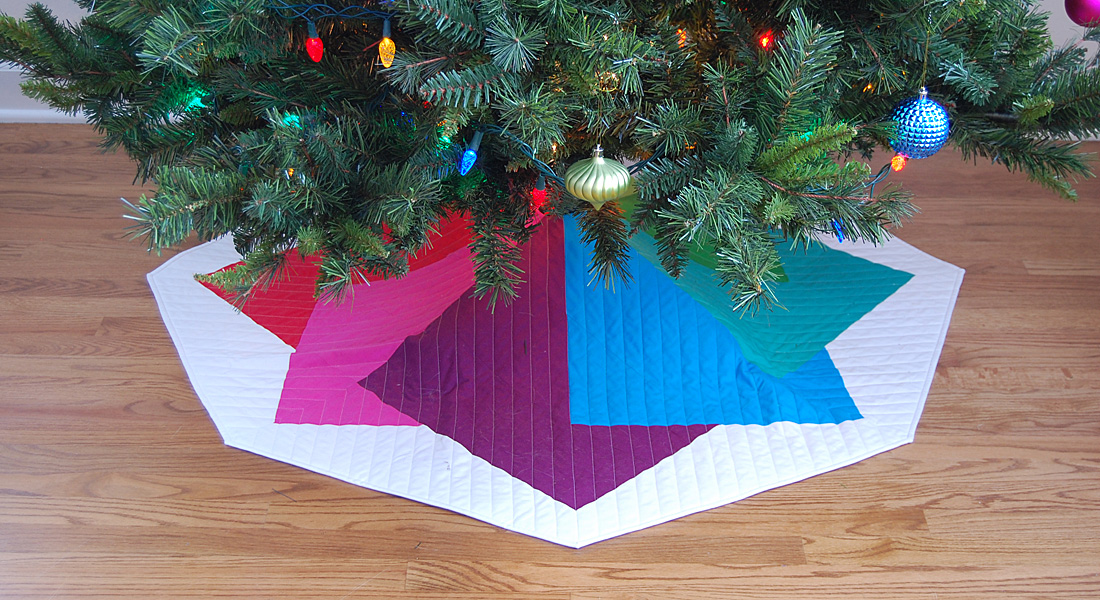
Also, join Denise Jones this month. She has a fabulous project using this block and the techniques in the quilting lesson! Her next project will post on June 17 here on WeAllSew.
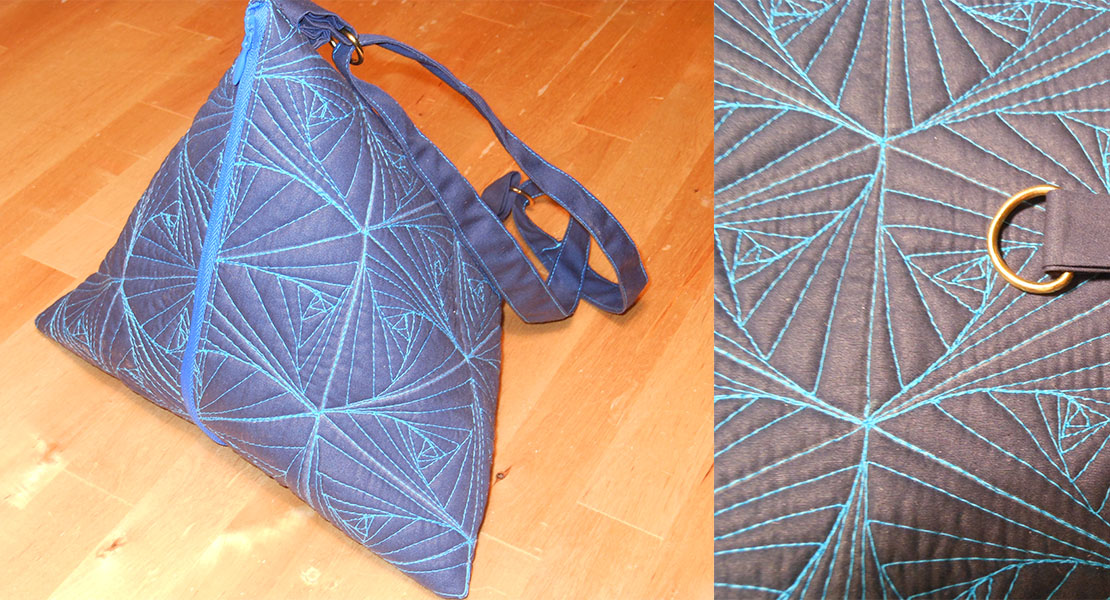
Ruler Work Quilting: A Quilting Lesson
This month we are exploring Ruler Work. Whether you are quilting on a longarm or a domestic machine, Ruler Work is great fun and will make you feel very successful.
We will go through a few of the basics here, but for more detailed information, download the Just Quilt It! Ruler Work for Quilters for both Longarm and Domestic Machines. It will give you complete instructions for setting up the machine (for longarms and for many different domestic machines), as well as give you lots of hints and suggestions for successful stitching.
You might also want to check out the WeAllSew blog post Adjustable Ruler Foot #72 Tips and Tricks by Amanda Murphy.
Begin by attaching the Ruler Foot #96 (for longarm machines only—both the BERNINA Q 24 and the BERNINA Q 20 Sit-down Model), or the Adjustable Ruler Foot #72 if you are using a domestic machine.
If you are using either the Q 24 or Q 20 on a frame, you will also need to attach the Ruler Base.
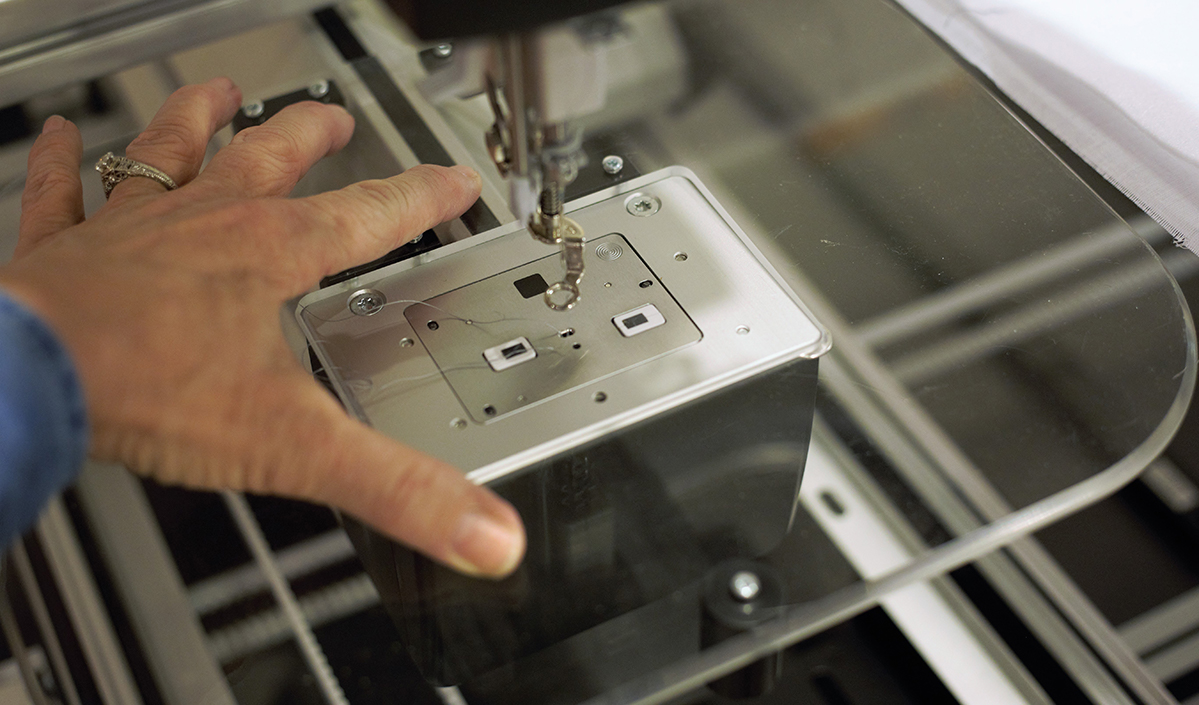
When you attach the Ruler Foot #72 to a domestic machine, you will need to adjust the height of the foot for your specific machine and for the batting you are using.
To adjust the height of the foot, place your quilt sandwich under the foot and lower the foot. Turn the small gold dial until the bottom of the foot is just above the fabric.
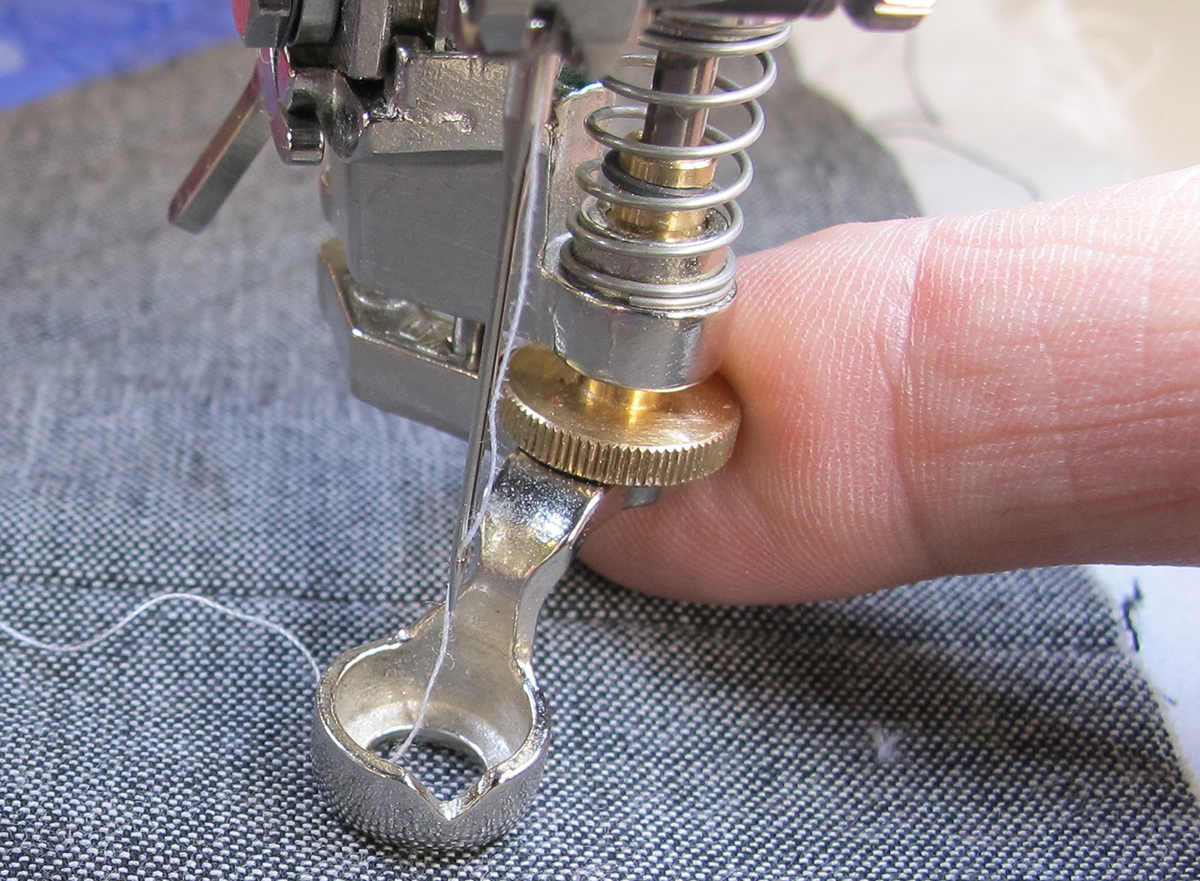
The edge of the BERNINA Ruler Foot #72 is ¼” from the needle all the way around its entire perimeter. This allows you to place the ¼” quilting ruler 360 degrees around the foot for easy and precise stitching.
There are lots of Quilting Rulers available on the market. But remember, you must use a quilting ruler, not a cutting ruler.
You will need two curved rulers and a straight ruler for this project. I used the Quilter’s Groove Pro Echo Rulers 6″ and 9″ and the BERNINA Straight Ruler.
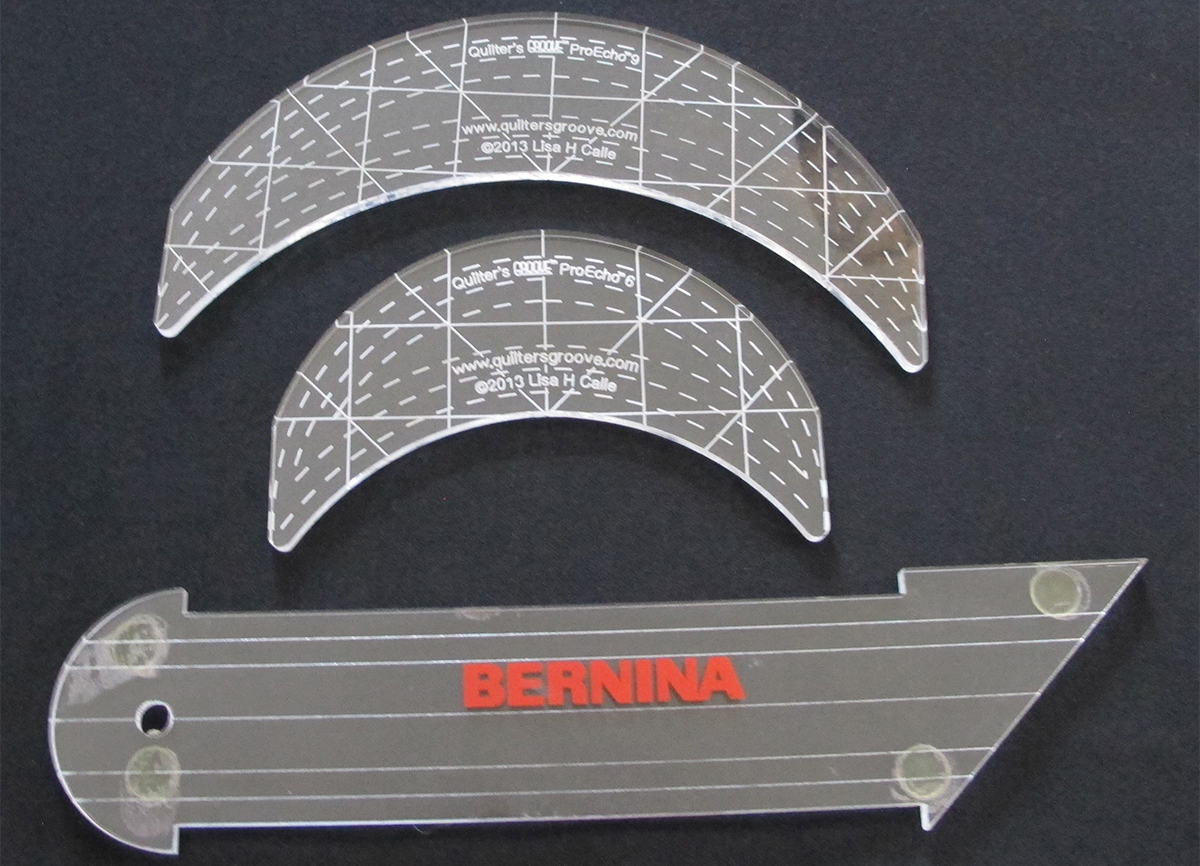
It will be helpful to put small adhesive, non-slip disks on the back of the ruler to keep it from sliding on the fabric.
On a longarm machine on a quilting frame, you will be moving the machine along the edge of the ruler. On a sit-down machine (domestic machine or the Q 20), you will be moving the ruler and the fabric. You will also lower the feed dogs if you are using a domestic machine.
Insert the needle where you want to begin sewing. In this instance, insert the needle into the corner of the center square. Lower the foot and bring the bobbin thread to the top. Secure with the desired method.
Slide the ruler so that its side rests against the side of the foot. Center the ruler on the side of the square so that its curved edge is ¼” from each corner. *In the photo, the lines you will be stitching are already stitched so that you can see where you should stitch. Stitch these curved lines on all four sides—both on the inside and outside—of the center square. Remember to refer to the eBook Just Quilt It! Ruler Work for Quilters for both Longarm and Domestic Machines for tips and tricks on how to move the fabric or rulers to get the best results.
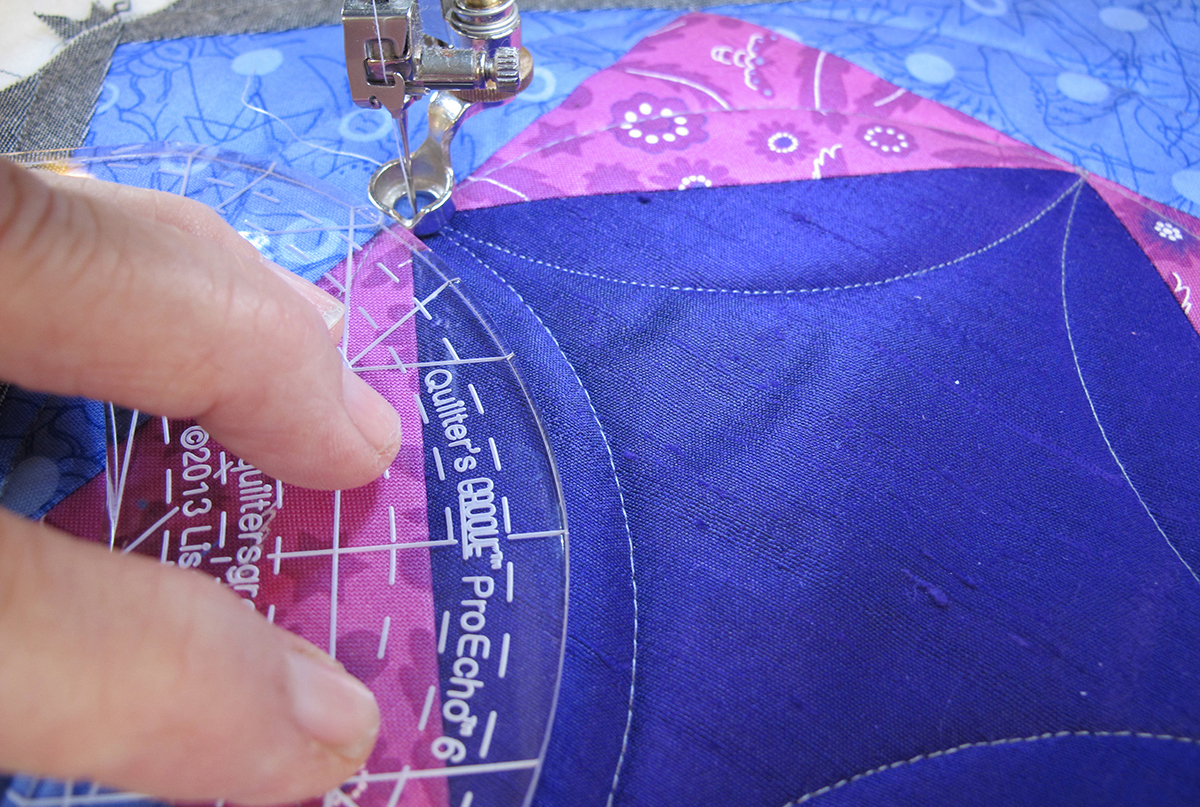
Using the larger 9″ curved ruler, stitch a curve in the outer square. Center the ruler on the edge of the middle square so that the curved part is in the outer square.

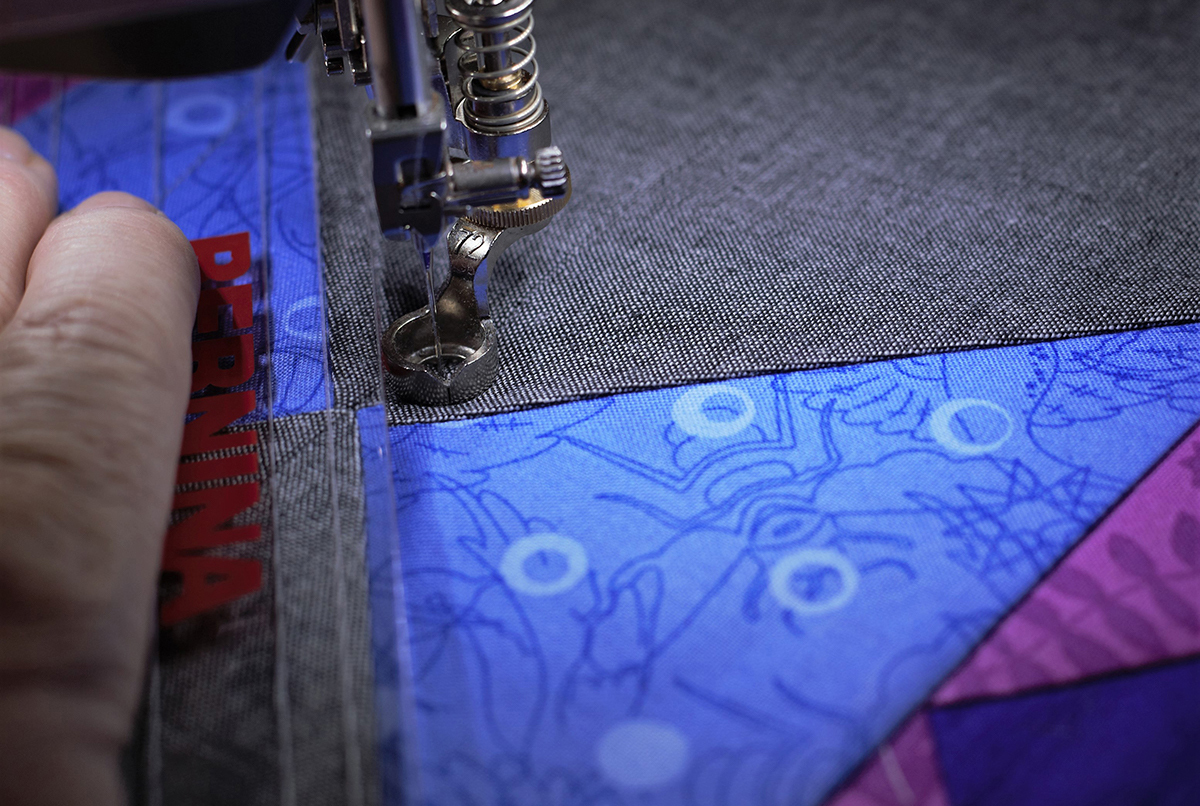
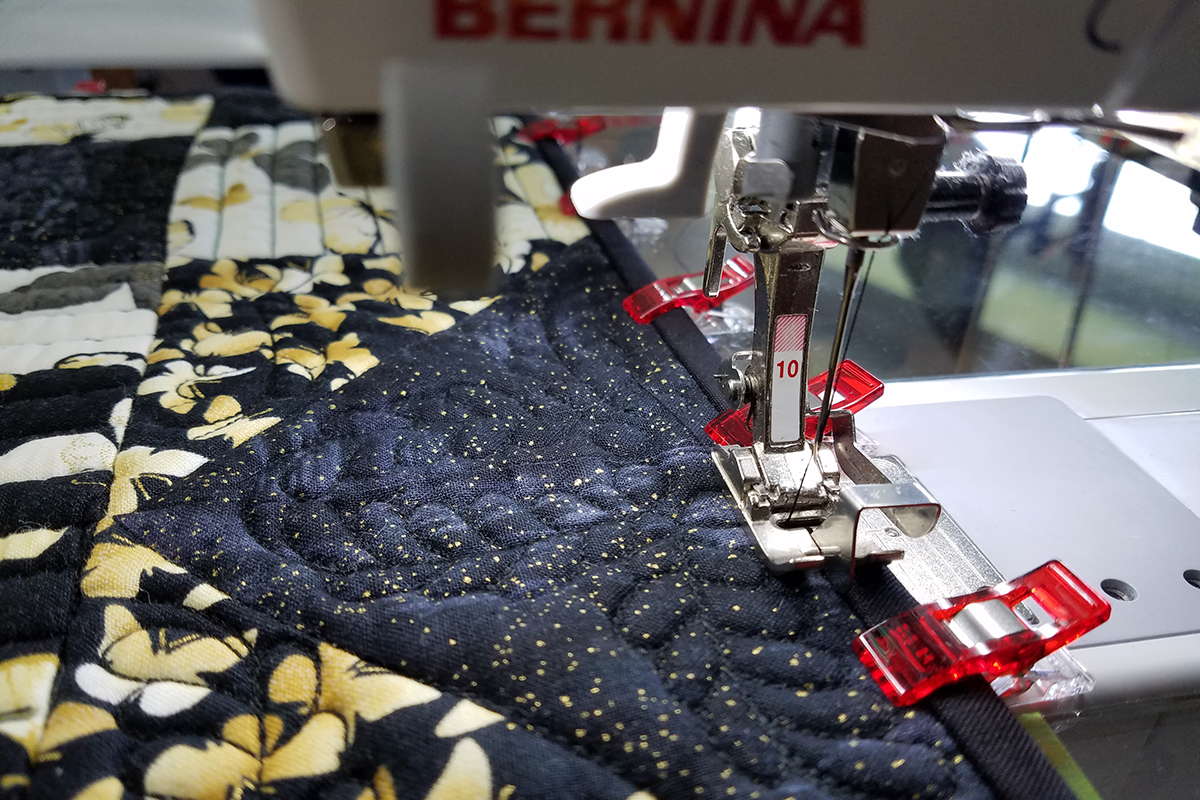
Use the BERNINA Straight Edge Quilting Ruler to sew the straight lines in the background fabric. This foot has ¼” etched lines on the ruler. Place the ¼” line on the seam with the edge of the ruler against the foot, so as you sew you will be stitching ½” away from the seam. Stitch rows ½” apart from the seam outward until each corner triangle is quilted.
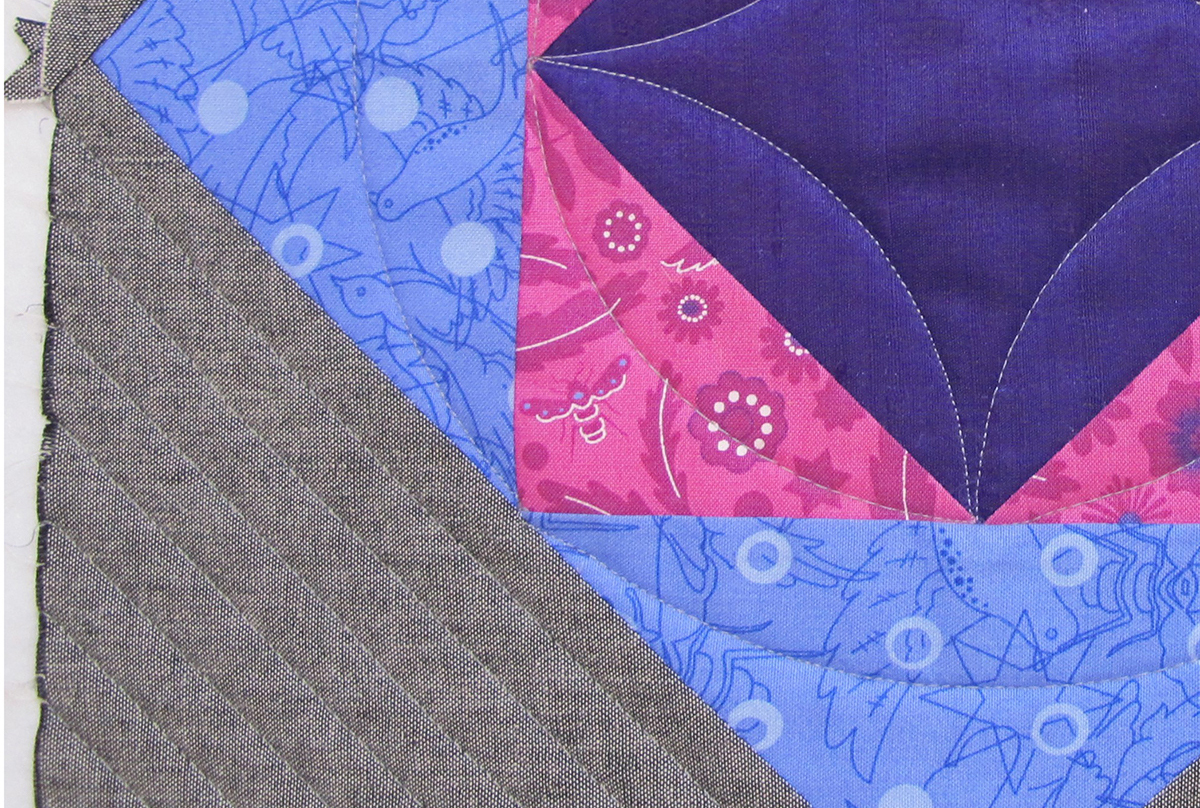
The two center triangles are quilted in the same manner. Again, place the ¼” line on the seam and begin stitching at the outside edge. When you reach the center seam in the side triangles lower the needle and pivot, setting up the next row of quilting ½” from the other seam. Continue to echo outward until the triangle is quilted.
Be sure to check back here on the WeAllSew Blog on June 19th to check out Denise Jones’ project made from this block. The BERNINA Block Party will continue with Block 4 on July 3rd.
Used Products


What you might also like


9 comments on “Square in a Square Block”
-
-
I agree with stating the unfinished block size. It would help me know if I was on the right track.
-
I absolutely will post the block size for all future blocks.
-
-
I was just trying to figure out each finished step. It would help so much.
-
Agree with stating size of each unfinished block
-
-
I am having so much fun with this quilt and I love the fabric choices. Sewitup.com has kits for this quilt back in stock! Yay
-
Will the additional center square fabrics be used in other blocks?Thanks.
-
Nina,
I am behind and am trying to save the instructions. Can you tell me how to save it to my Mac computer?
Thanks,
Sylvia -
I think it’s highly misleading to suggest that this quilt-a-long is for beginners. The instructor seems to be an expert quilter, with no idea how to communicate to beginners. She leaves out crucial steps and information. I’ve had to supplement the instructions with my own research to figure out how to piece the blocks. For example, for the third block, the instructor doesn’t even mention or illustrate with a photo or diagram that the small squares with the diagonal lines need to be oriented in a certain way, when placed in the larger block. It’s highly frustrating for beginners when an instructor is way over their head.
Leave a Reply
You must be logged in to post a comment.

Would it be possible to state the unfinished block size after step? That would be very helpful. Thank you!