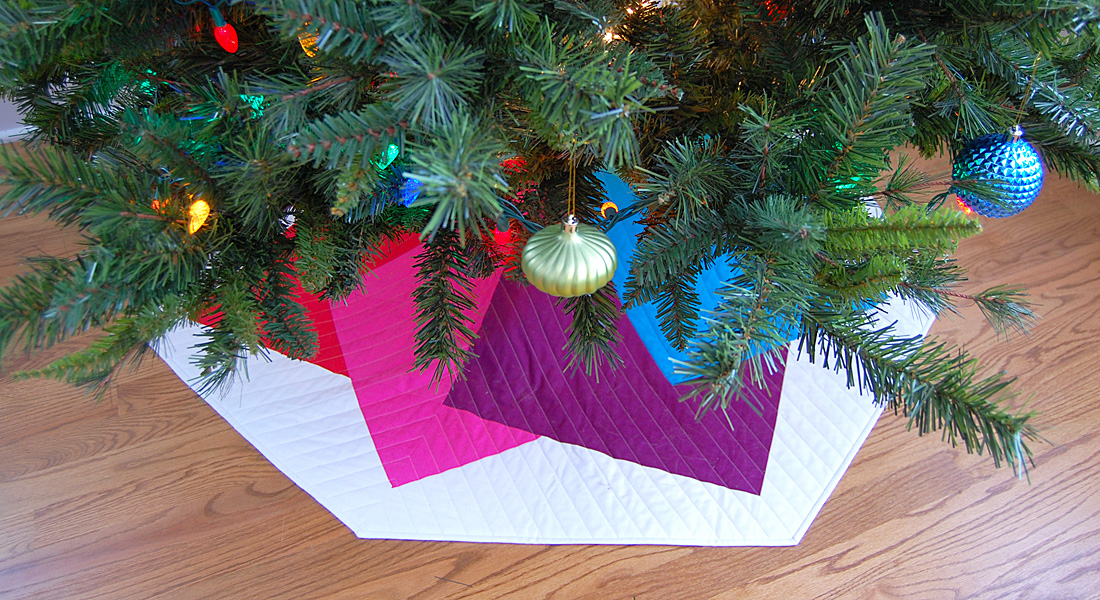
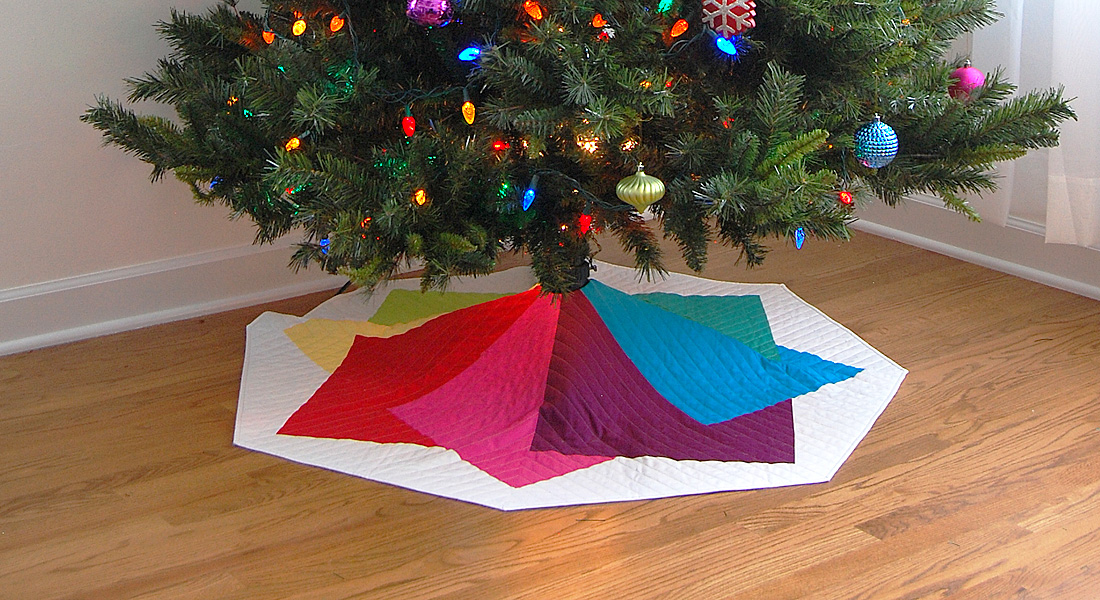
Color Tile Tree Skirt Part 2
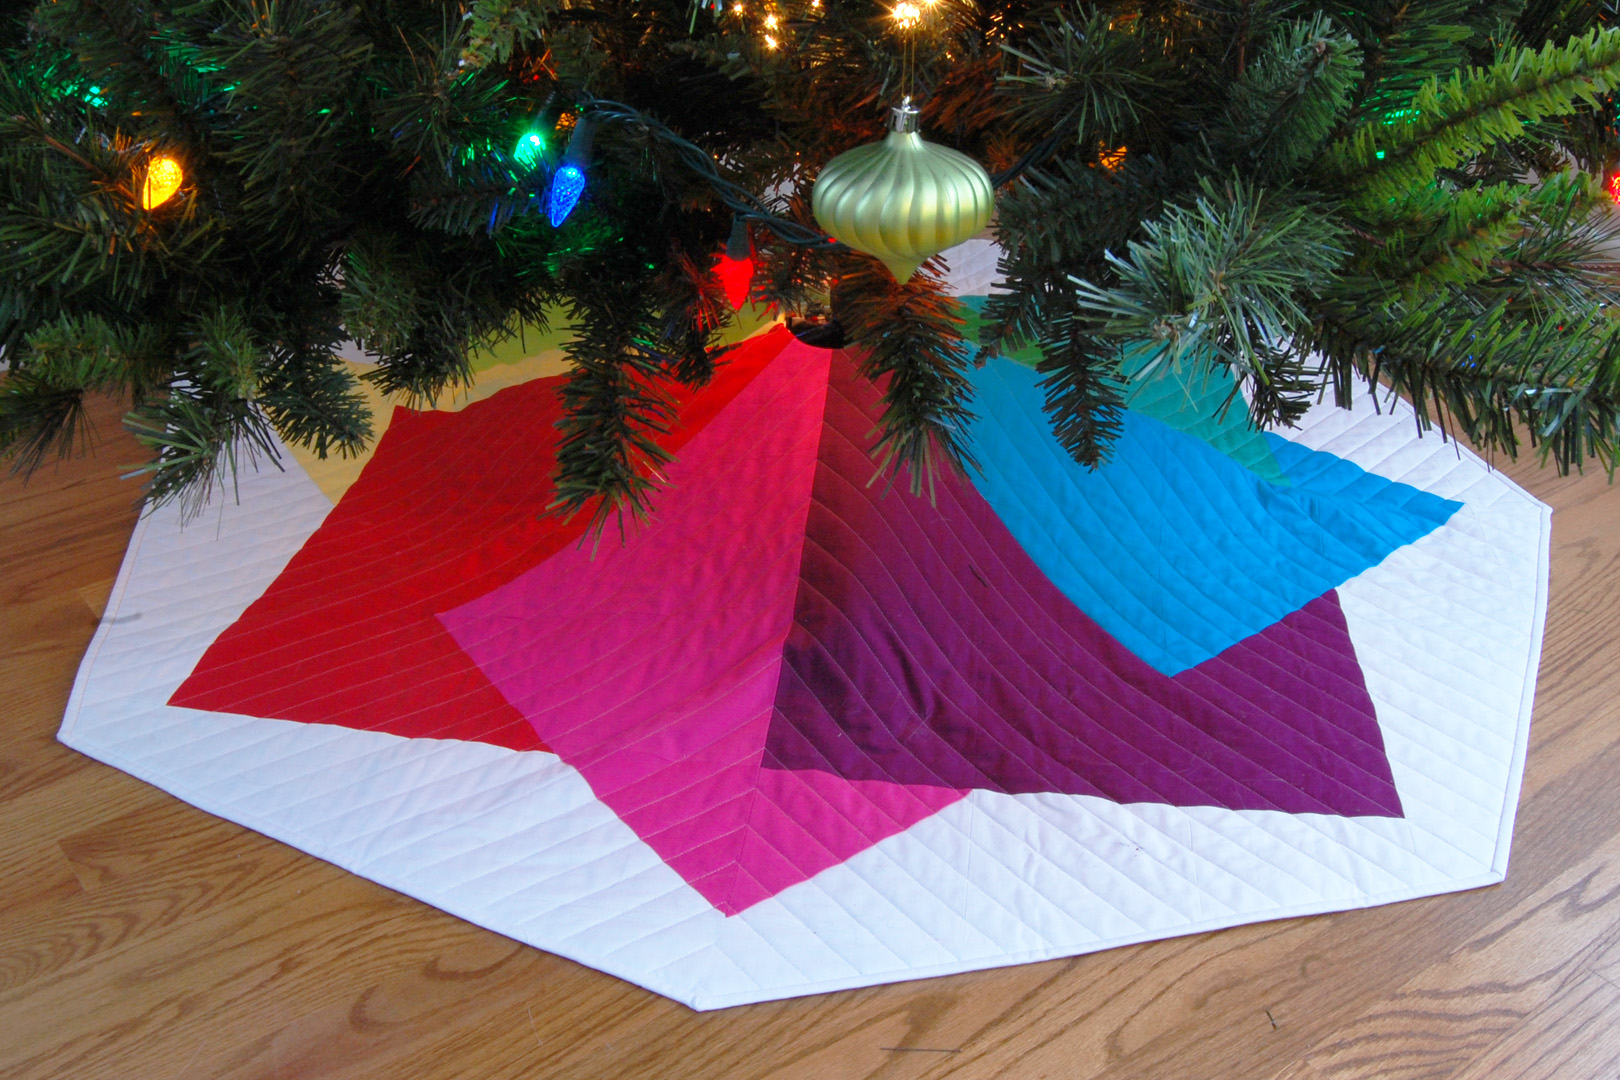
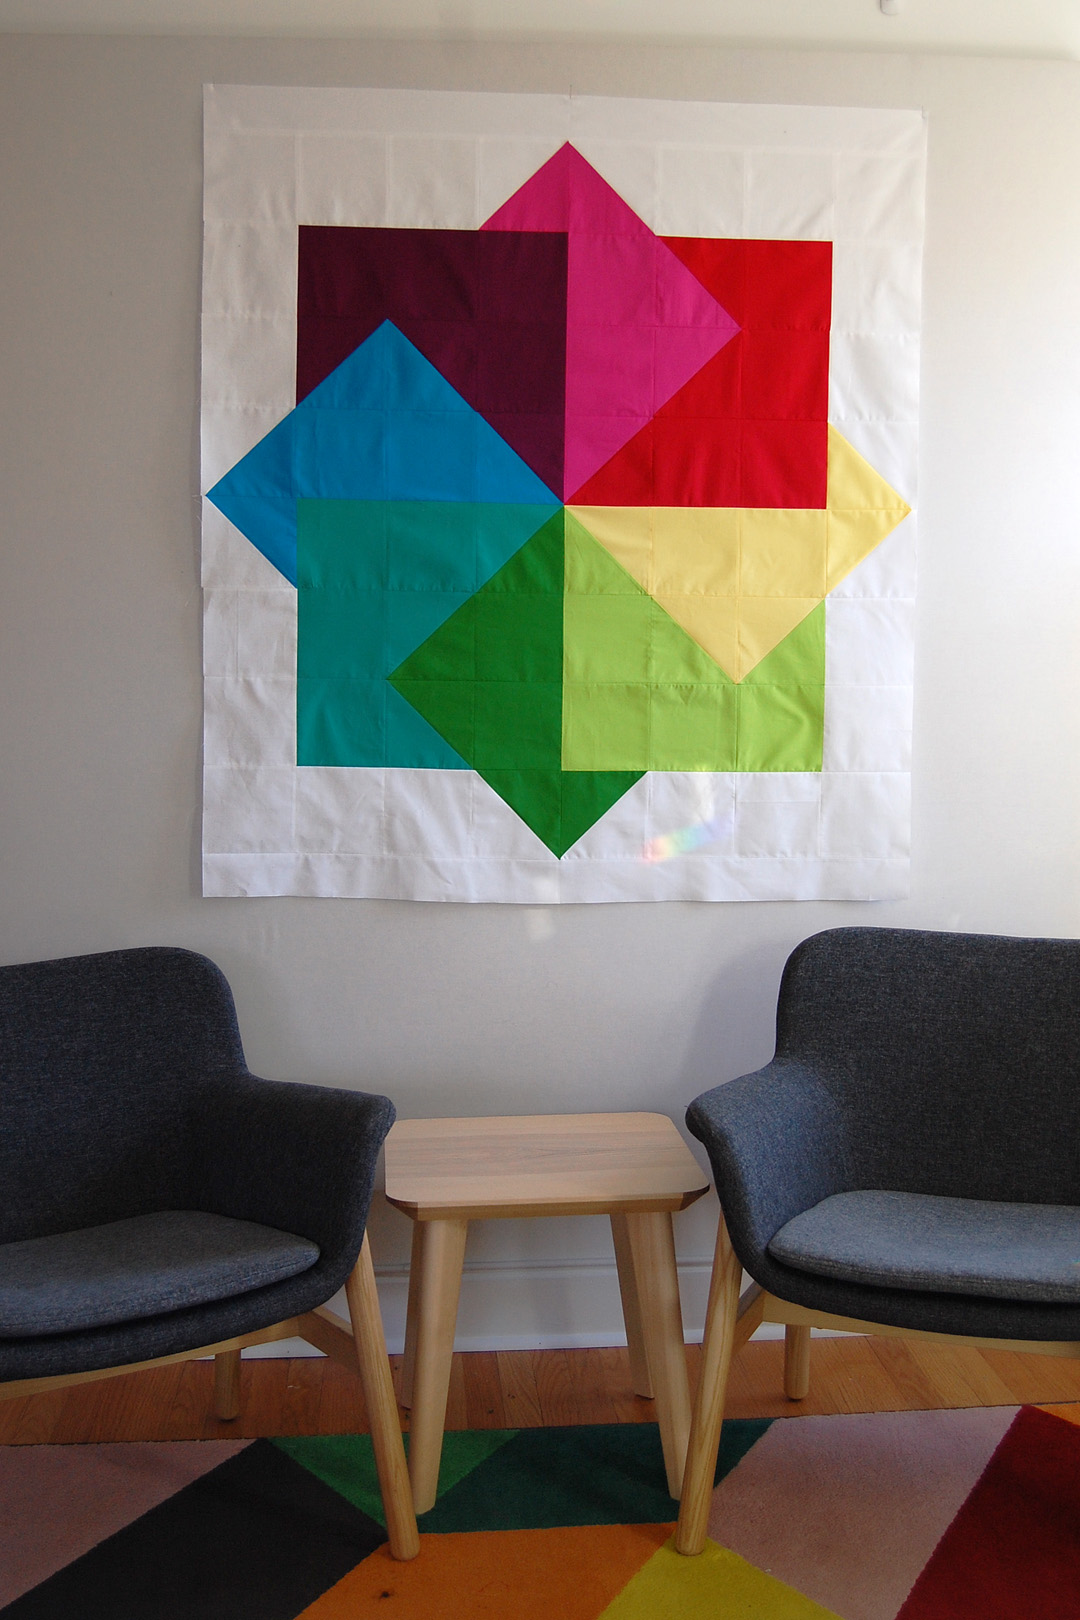
This tree skirt is a supersized version of a “super card trick” quilt block made with simple squares and half-square triangles so it’s easy to stitch together! I created this skirt to work specifically with our artificial tree, it has one central opening and no side slits (see Part 3 for instructions on how to add the skirt to your artificial tree during the set-up process). Follow along with the series to learn how to create your own Color Tile Tree Skirt. Find link to part 1 below.
December 11, Color Tile Tree Skirt Part 1: Materials and Preparation
December 12, Color Tile Tree Skirt Part 2: Patchwork Piecing
December 13, Color Tile Tree Skirt Part 3: Quilting and Finishing
In this post we’ll take our prepared HST’s and squares to create the Color Tile Tree Skirt top.
How to Piece the Color Tile Tree Skirt Patchwork
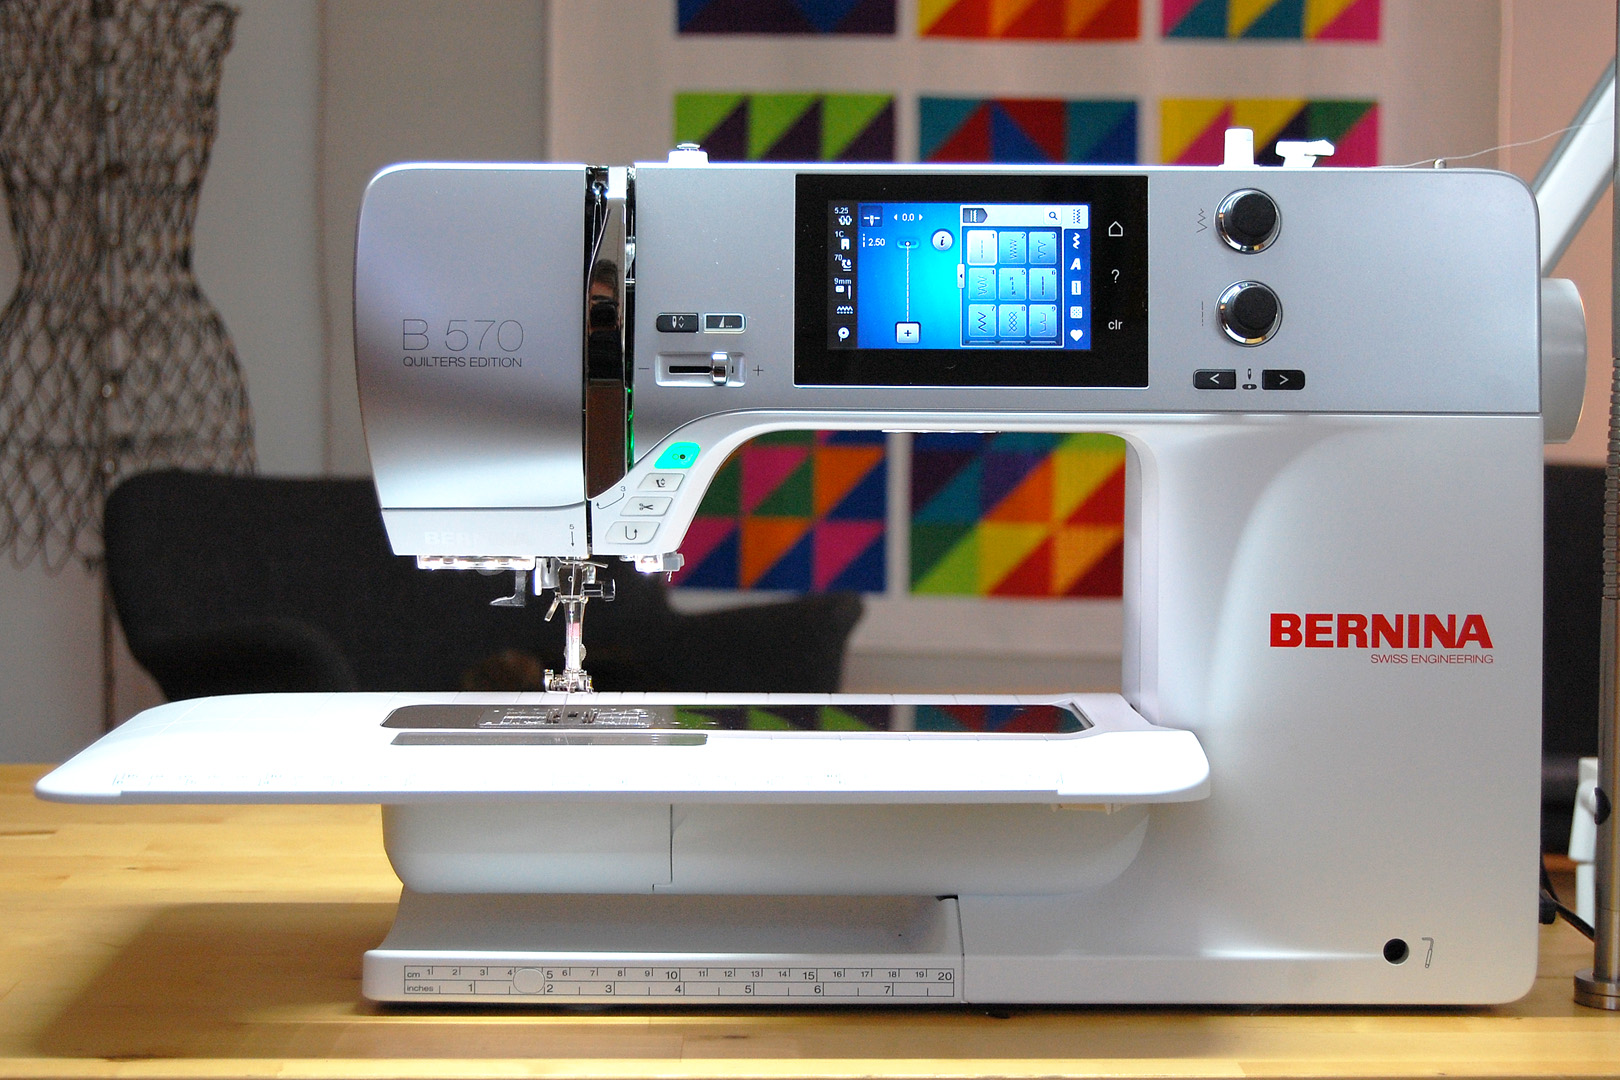
Set up your sewing machine for straight stitch patchwork sewing. I use the Patchwork foot #97 on my B 570 QE. All seams are sewn at a quarter-inch.
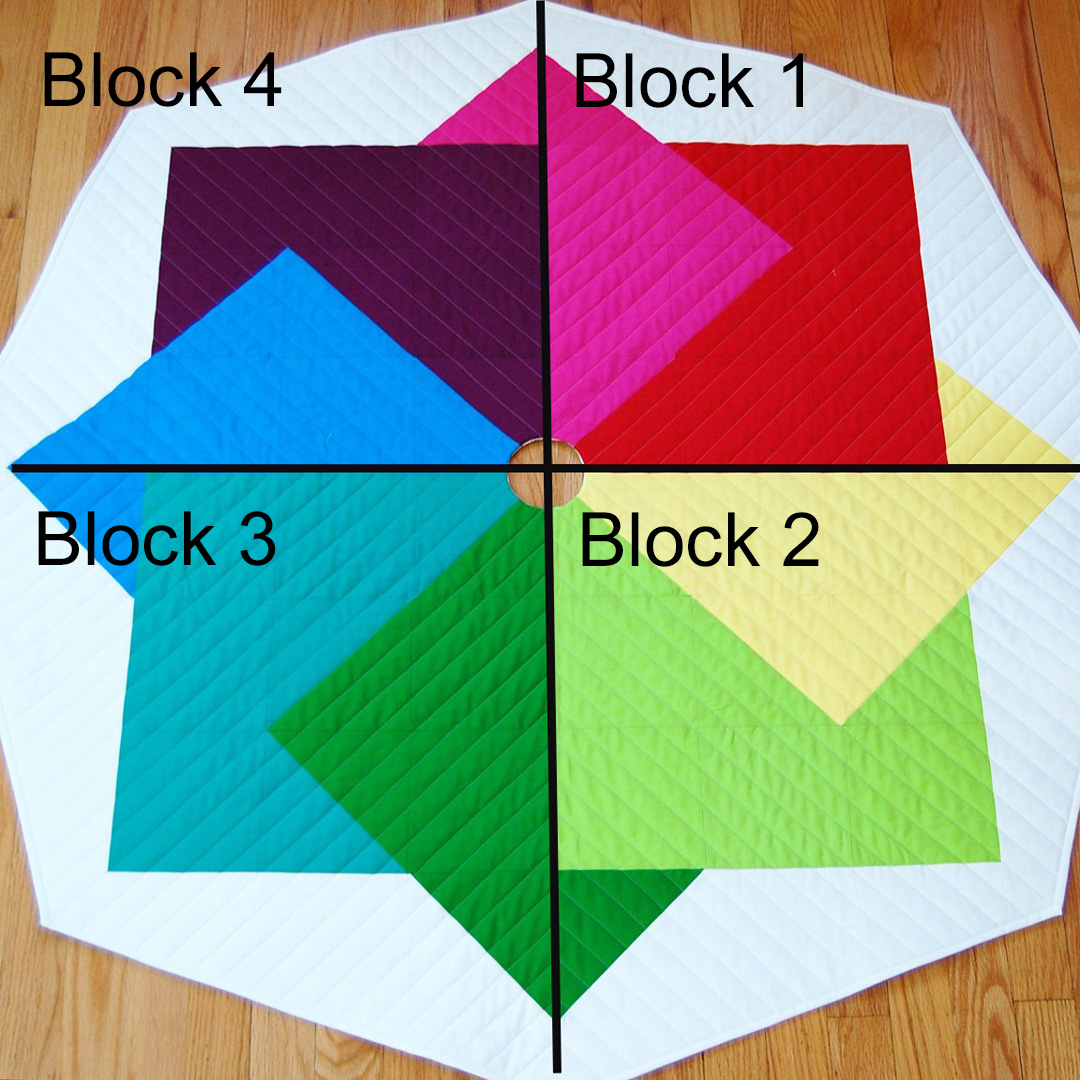
Gather together your completed HST sets and cut squares from the Color Tile Tree Skirt Part 1 tutorial, and let’s piece this top together! First we will create four separate blocks following the instructions below. These four blocks are then stitched together with a bit of border added to complete the top.
NOTE: because these blocks use only 3 of the colored HST sets made in Part 1, you will have four individual HST’s left over at the end of the project. Don’t panic!
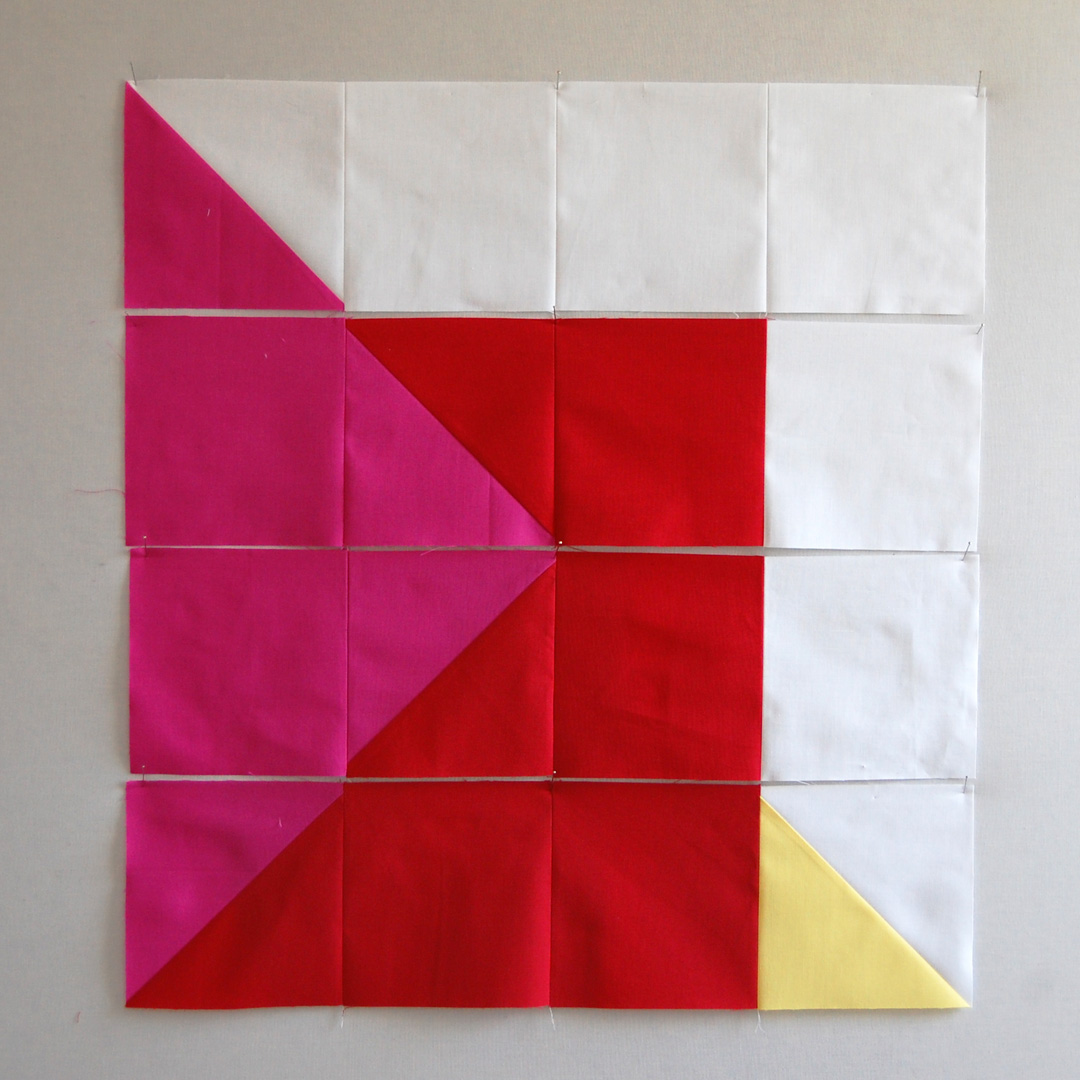
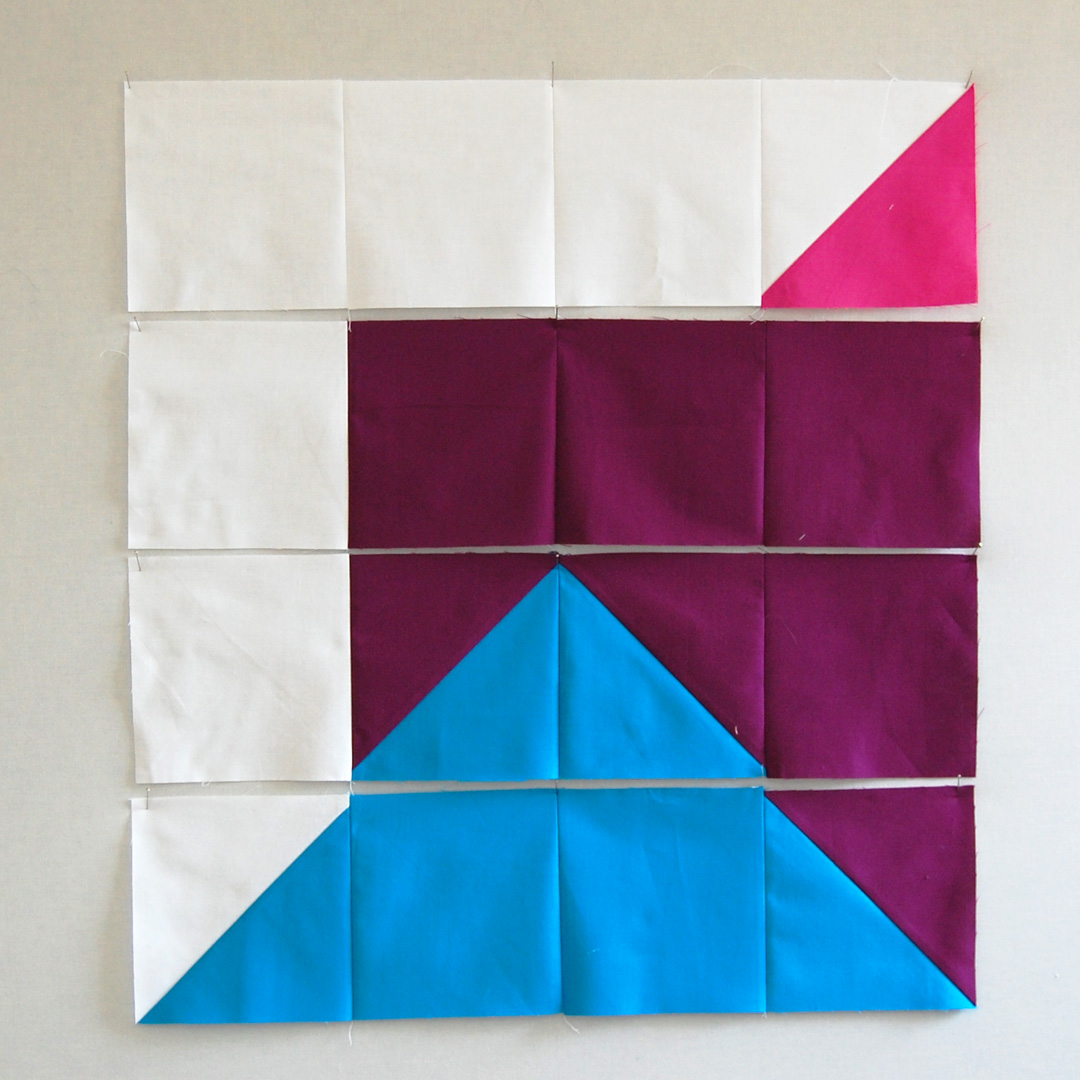
Block 1 is in the upper right quadrant of the design. Lay out as pictured below.
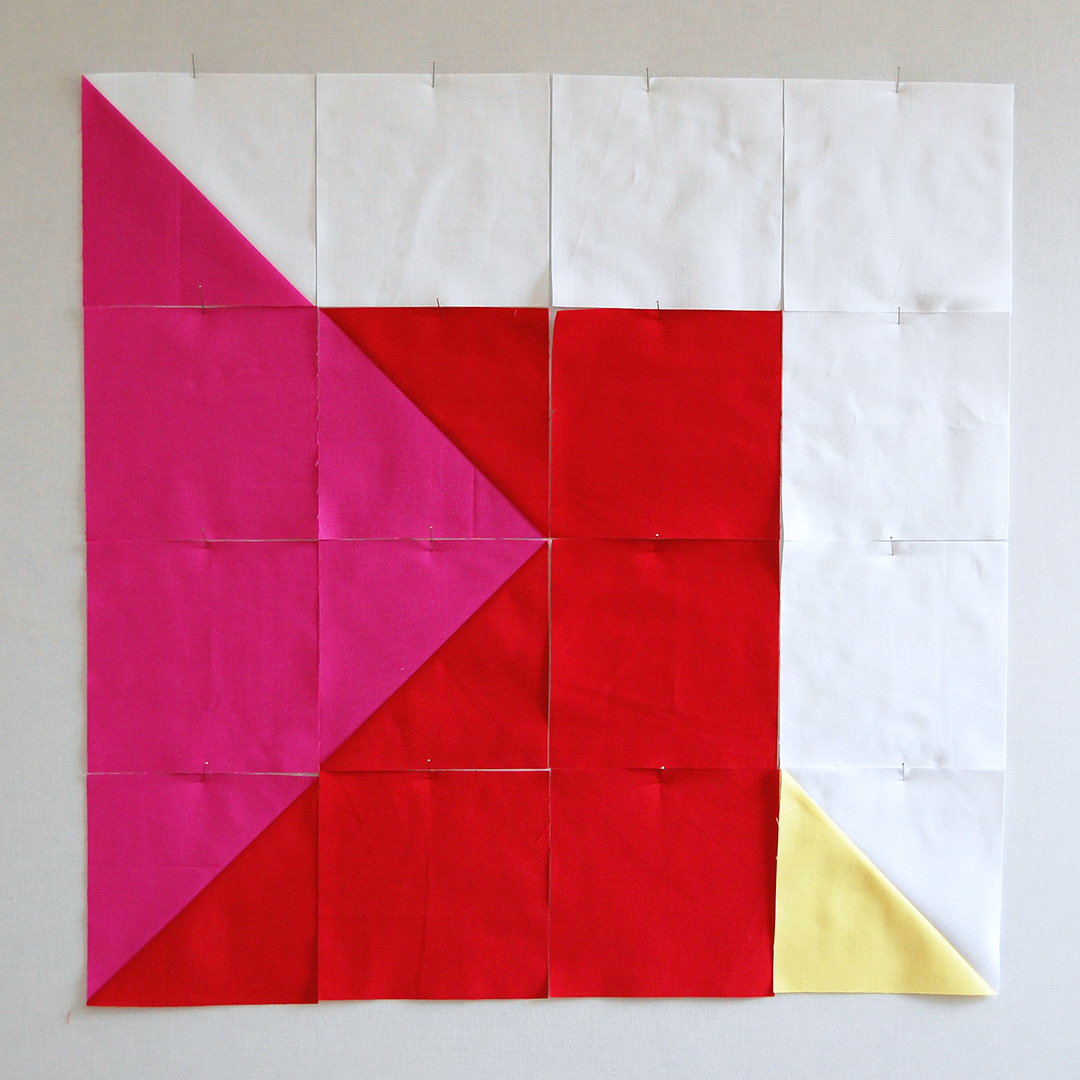
First row: background/color #1 HST and three background squares
Second row: one color #1 square, one color #1/color #2 HST, one color #2 square, and one background square
Third row: one color #1 square, one color #1/color #2 HST, one color #2 square, and one background square
Fourth row: one color #1/color #2 HST, two color #2 squares, one color #3/background HST
Sew each row across together, pressing seams as you go. You can either press seams to one side or press seams open. I prefer to press seams open in a project like this to help me match up the seams better.

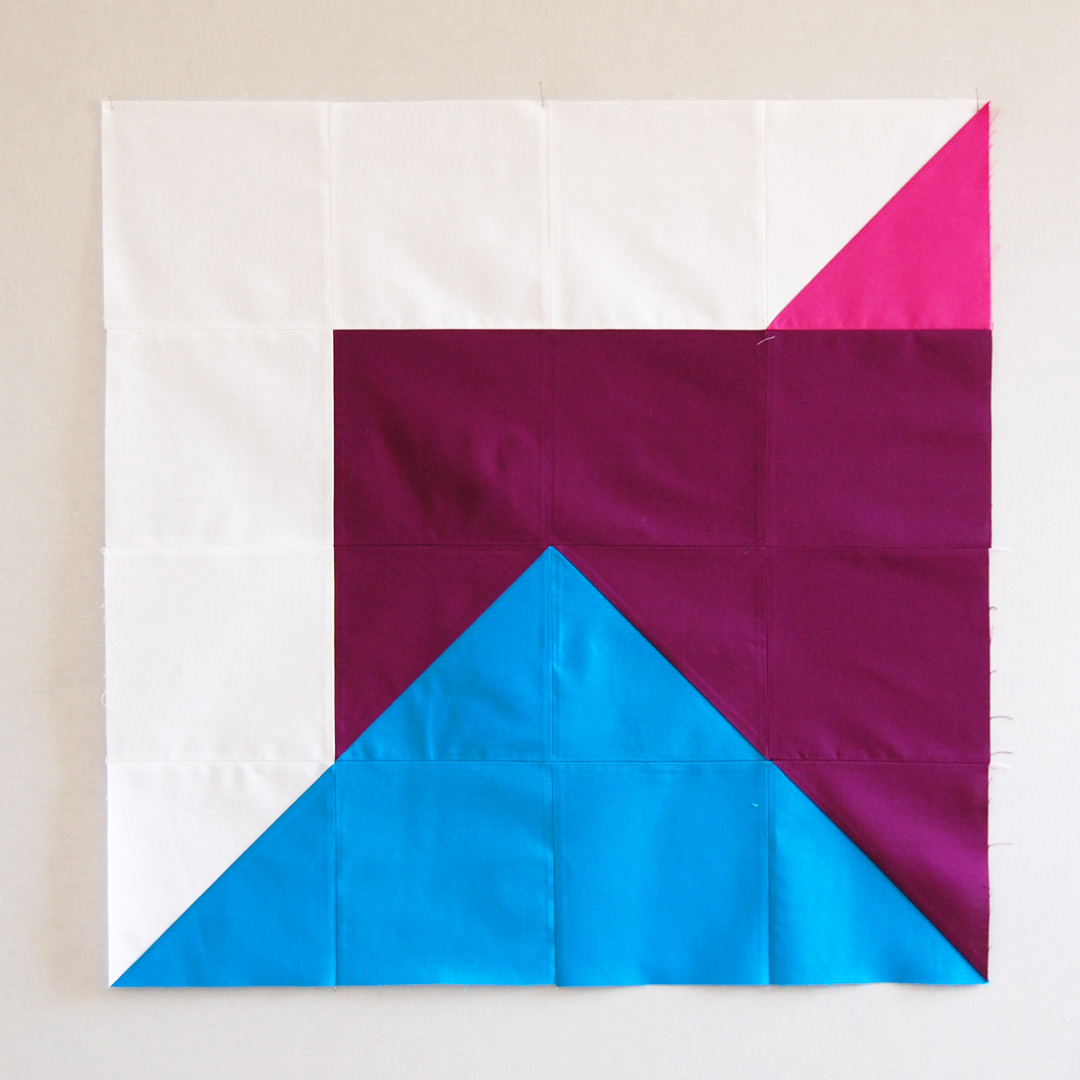
Sew the four completed rows together, pressing as you sew. You have now completed block 1, set it aside and complete block 2.
Block 2 is in the lower right quadrant. Layout as pictured.
First row: one color #3/color #4 HST, two color #3 squares, one color #3/background HST
Second row: one square color #4, two color #3/color #4 HST’s, one square background
Third row: three squares color #4, one square background color
Fourth row: one color #5/background HST, three background squares
Sew the squares into rows across, pressing as you sew.
Sew rows together, pressing as you sew. You have now completed block 2, set it aside and move on to block 3.
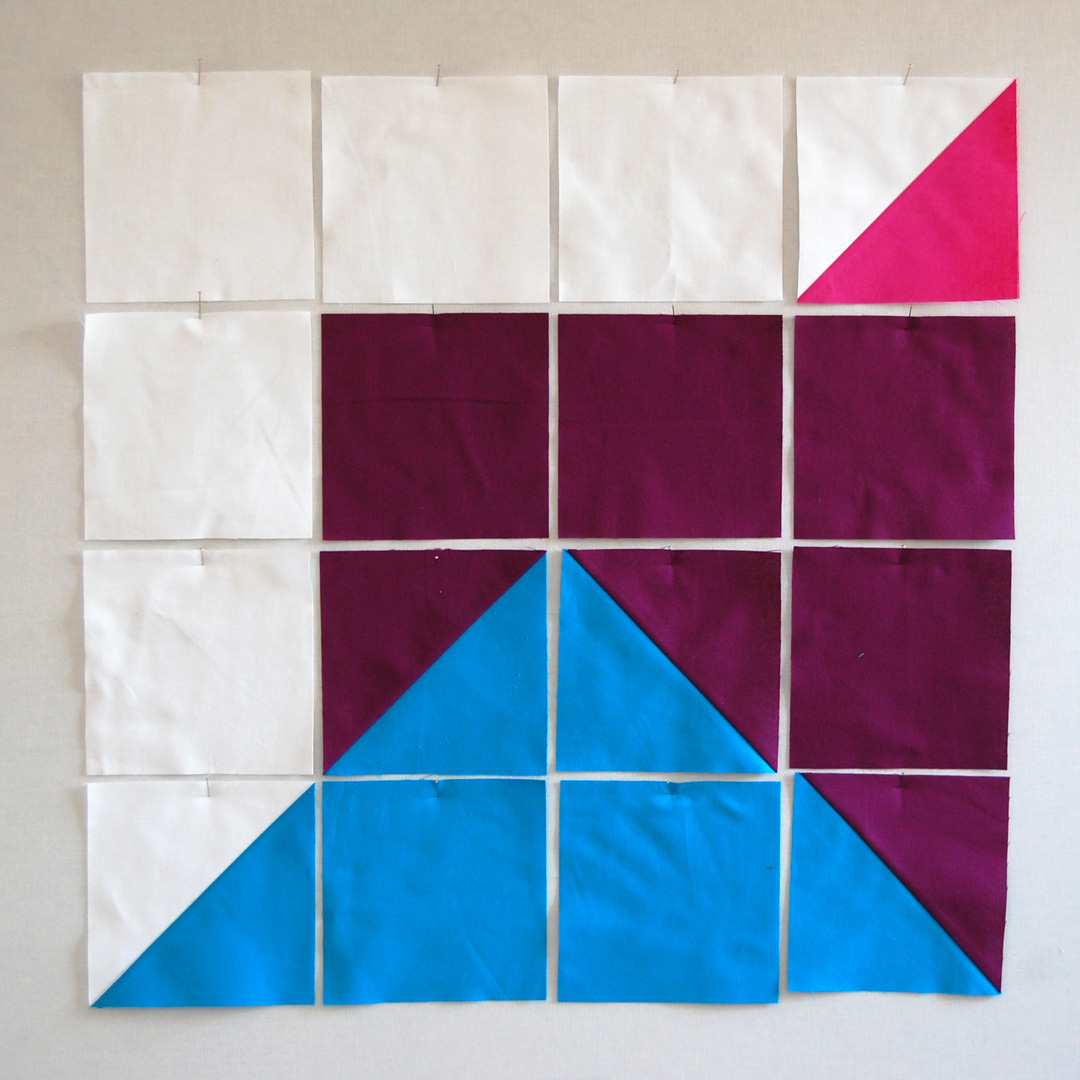
Block 3 is in the lower left quadrant. Layout as pictured.
First row: one background/color #7 HST, two color #6 squares, one color #6/color #5 HST
Second row: one background square, one color #6 square, one color #6/color #5 HST, one color #5 square
Third row: one background square, one color #6 square, one color #6/color #5 HST, one color #5 square
Fourth row: three background squares, one background/color #5 HST
Sew the squares into rows across, pressing as you sew.
Sew rows together, pressing as you sew. You have now completed block 3, set it aside and move on to block 4.
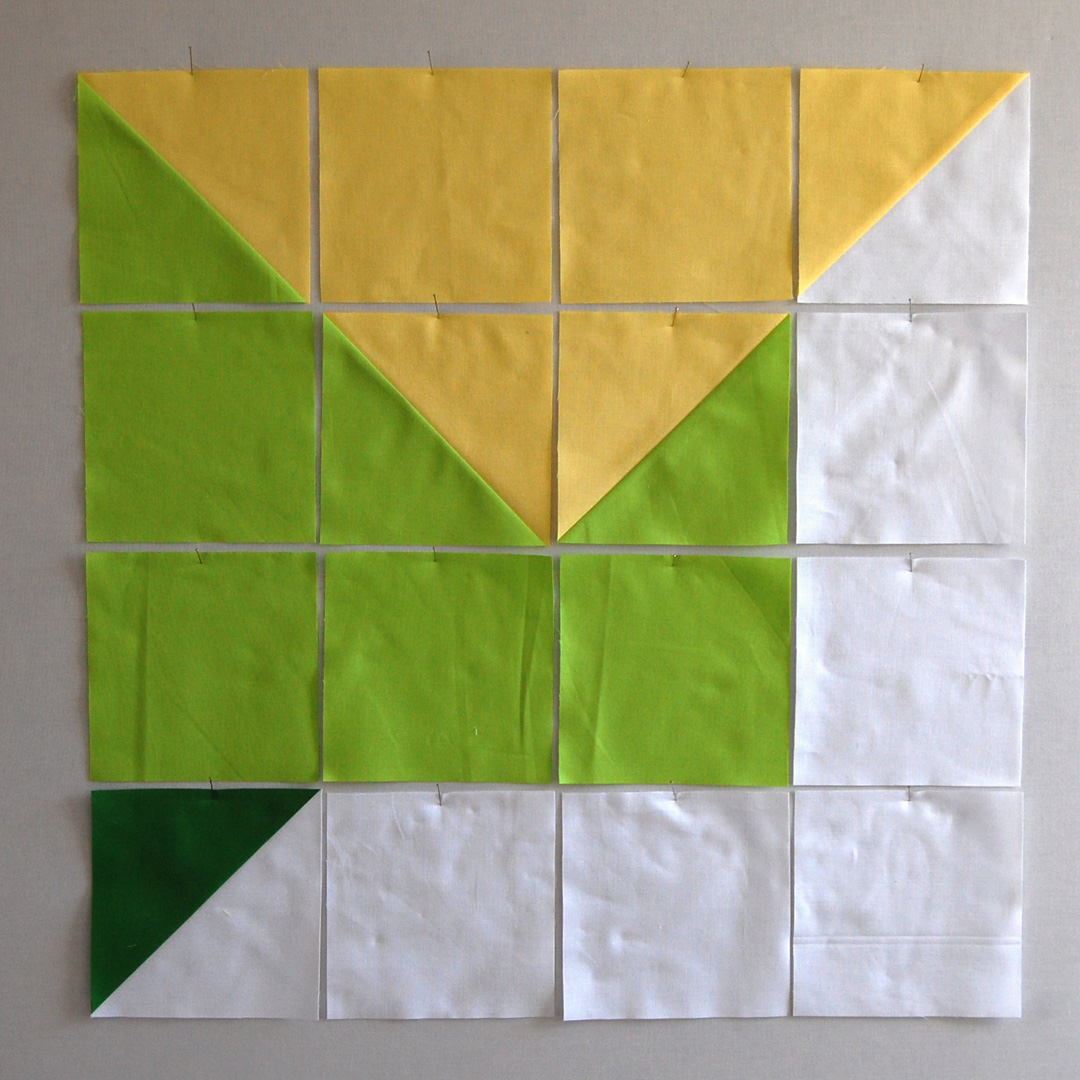
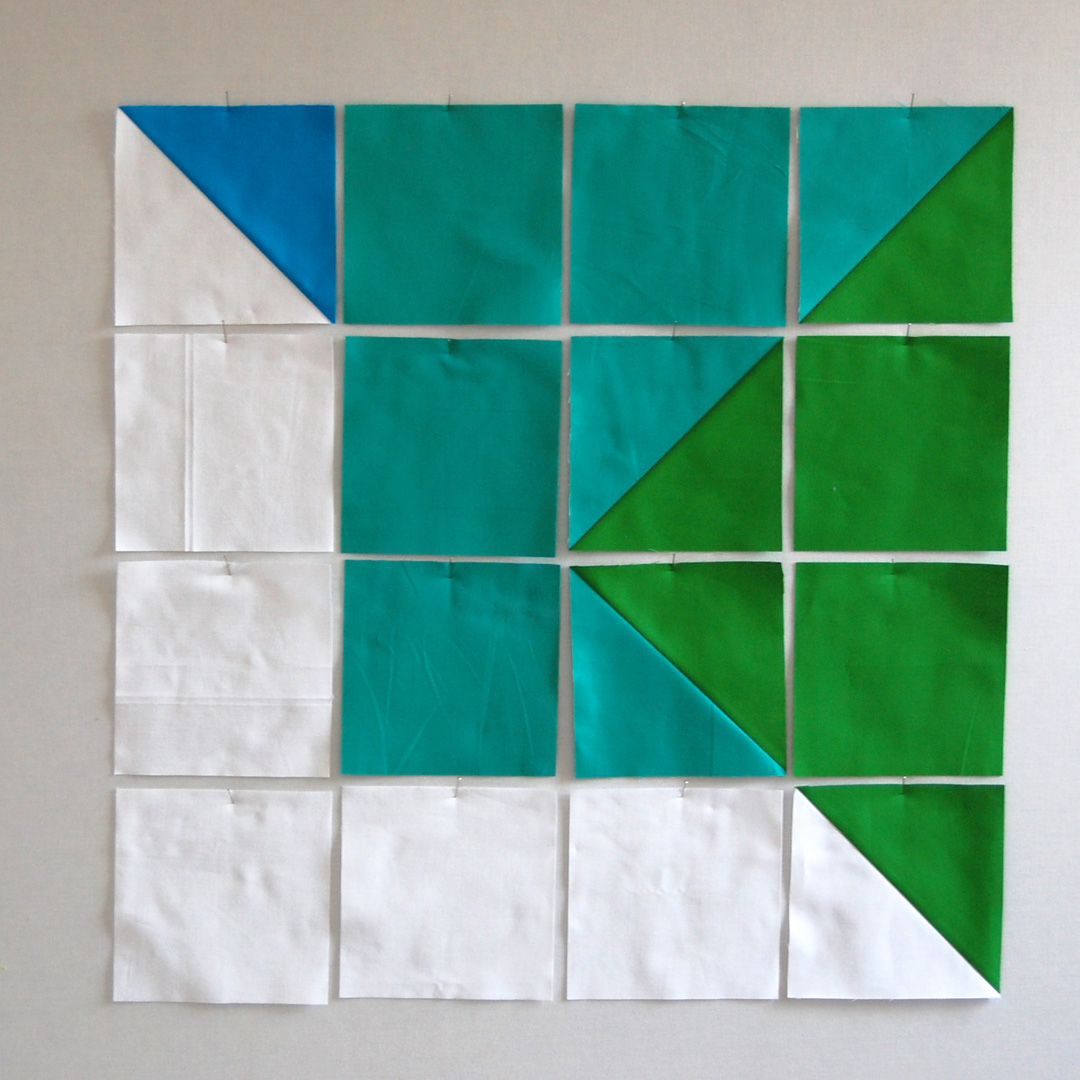
Block 4 is in the upper left quadrant. Layout as pictured.
First row: three background squares, one background/color #1 HST
Second row: one background square, three color #7 squares
Third row: one background square, two color #6/color #7 HST’s, one color #7 square
Fourth row: one background/color #6 HST, two color #6 squares, one color #6/color #7 HST
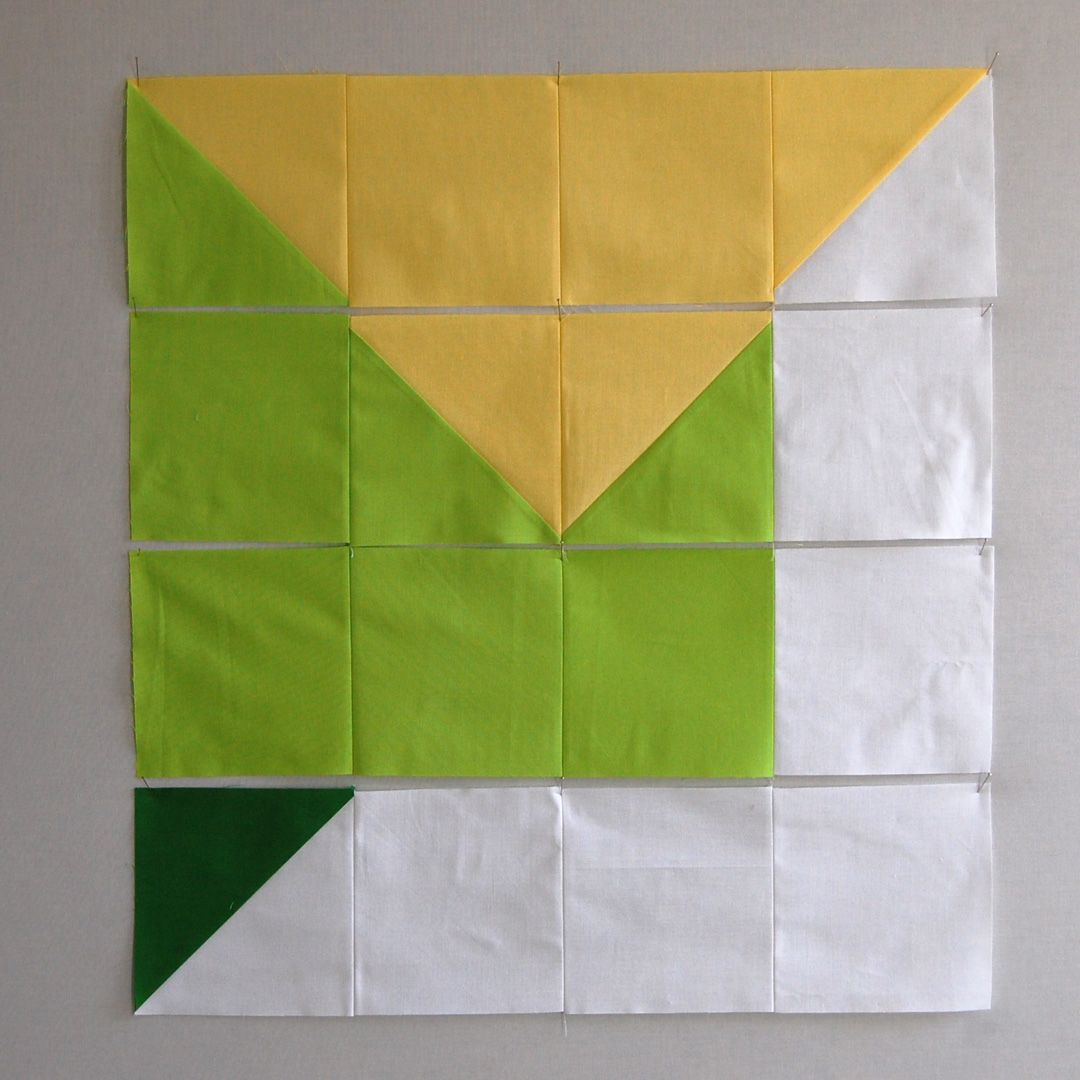
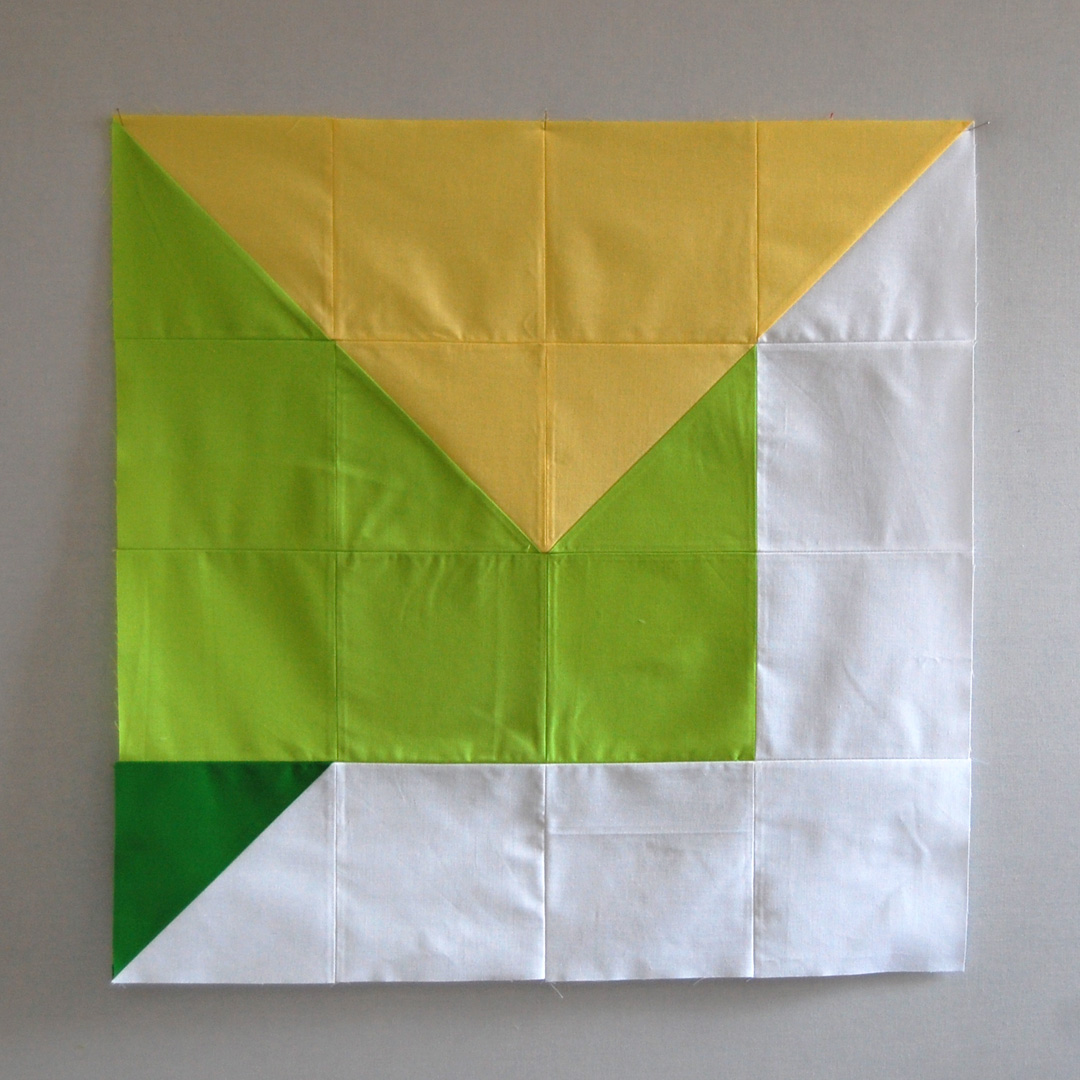
Sew the squares into rows across, pressing as you sew.
Sew rows together, pressing as you sew. You have now completed the 4 blocks needed to assemble the tree skirt top.

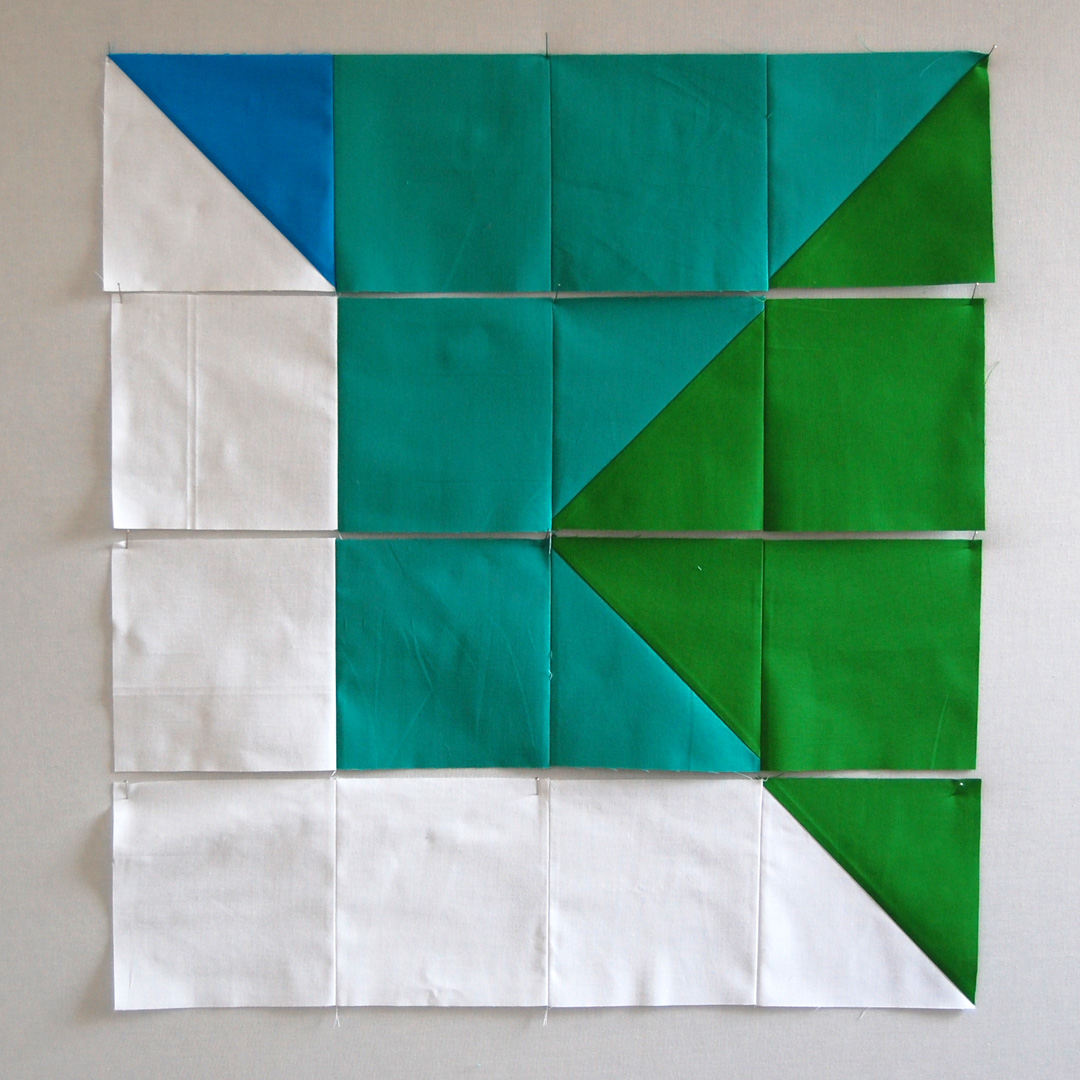
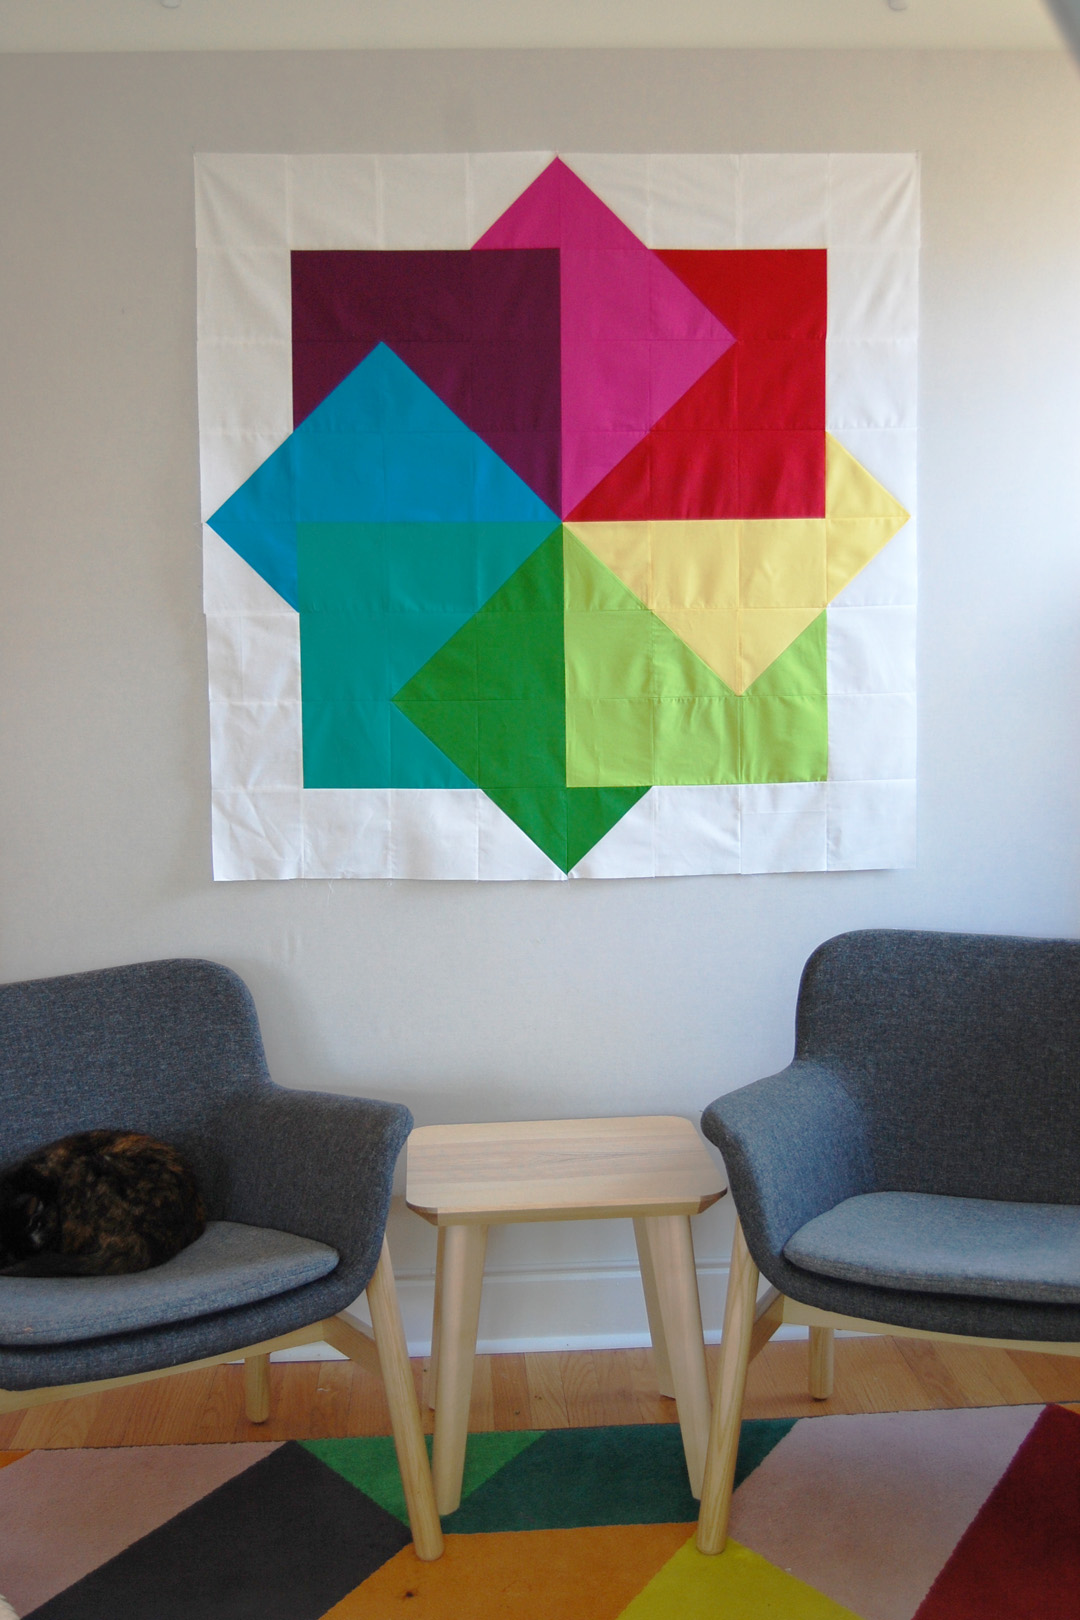
Lay out the four blocks as pictured above. Stitch block 4 and block 1 together along the side seam, and block 3 and block 2 together along the side seam. Press seams.
Next, sew the final seam to complete the one large block.
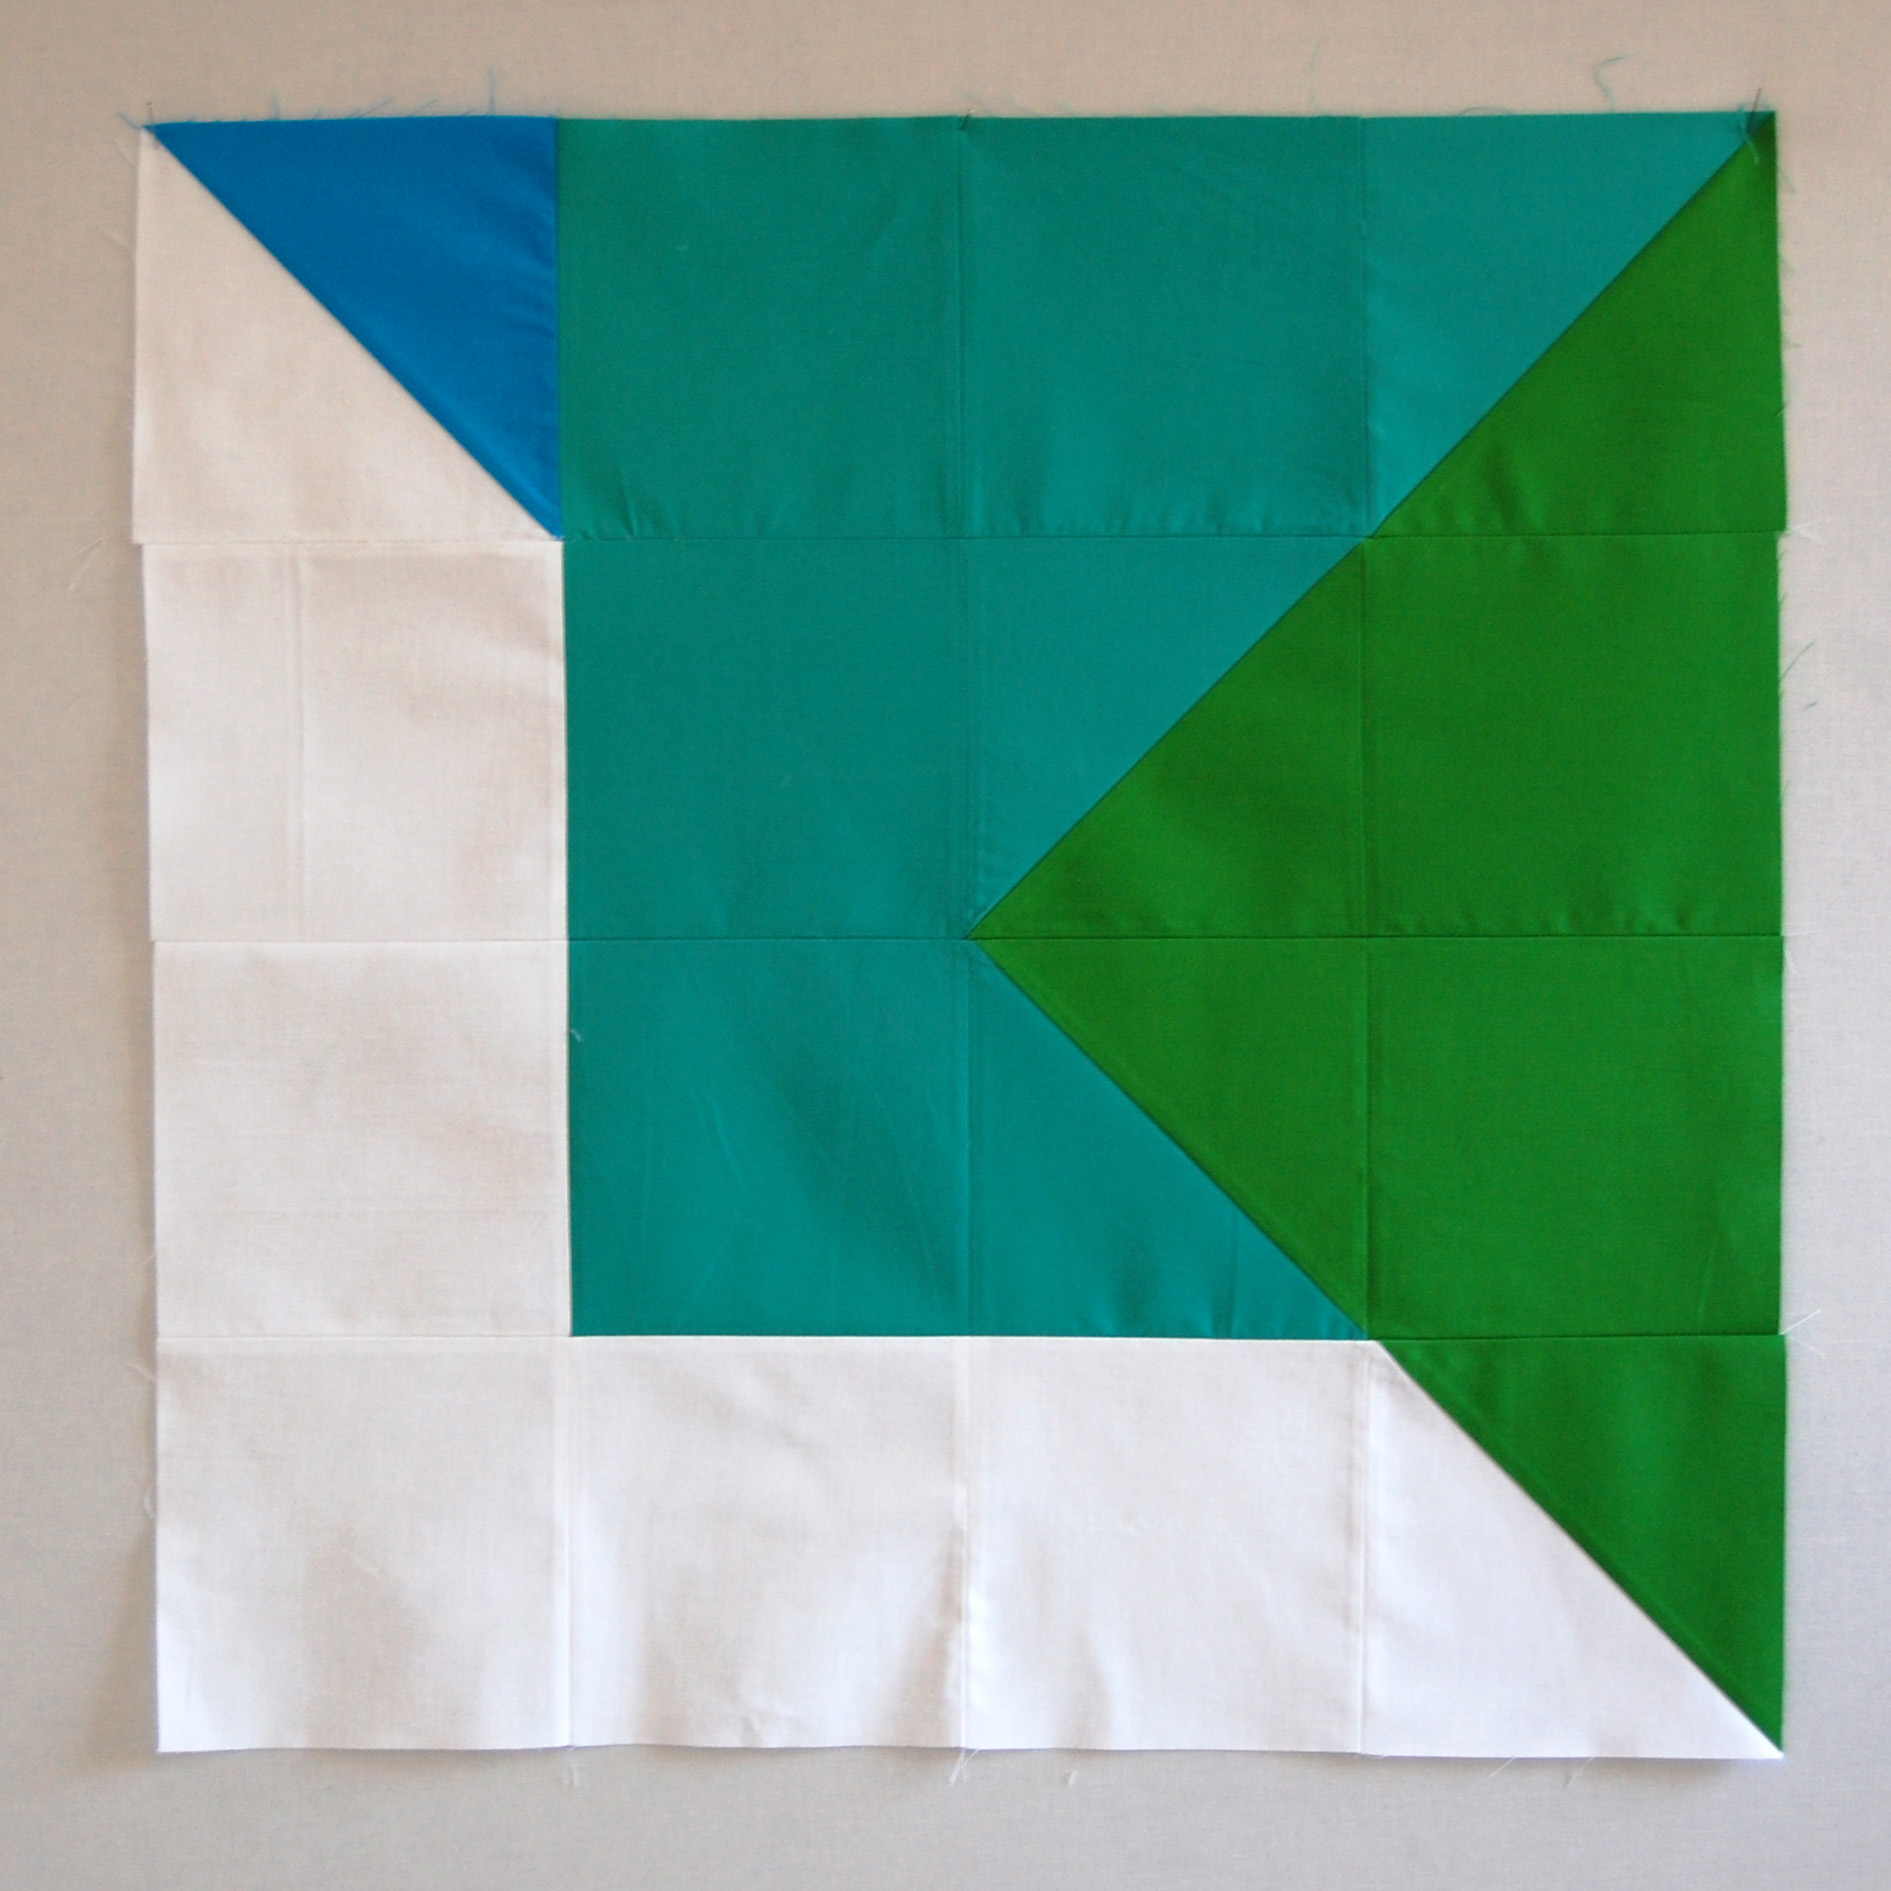
Now the four long 3″ strips will be sewn along each side to create an additional border. Note that the fabric strips will not meet perfectly in the corners of the top. Don’t panic! These corners will be cut-off after the quilting process.

Sew one long strip across the top and bottom of the large block. Press seams.
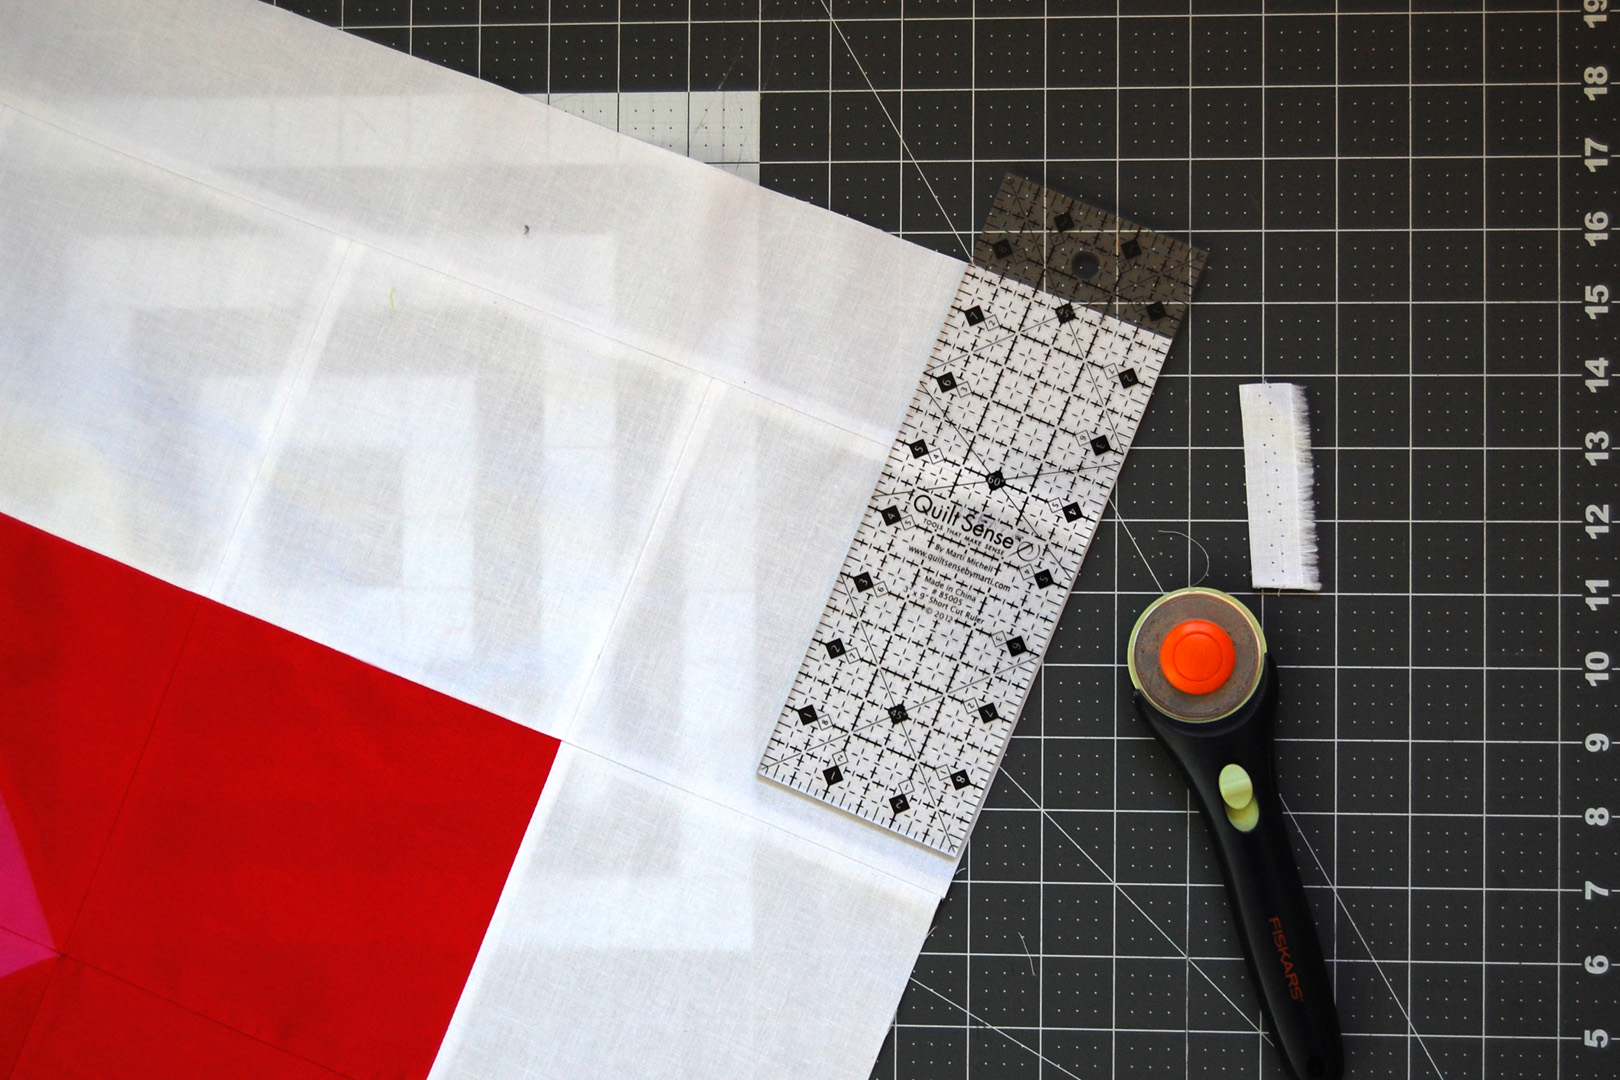
If the strips are wider than the sides of the block, trim off the extra even with the sides using a ruler and rotary cutter.
Finally, sew the last two long strips on each side of the big block. Press seams. Here is where you will definitely notice where the two strips do not meet in the corner. Don’t forget, we’re cutting this section off completely after quilting, so no worries!

Well done! You’ve completed the top and are ready to move on to the final steps of quilting and finishing your Color Tile Tree Skirt!
Used Products


What you might also like


2 comments on “Color Tile Tree Skirt Part 2”
-
-
Hi meholbert, and thanks for checking out my tree skirt tutorial! The WeAllSew blog content is posted in an open format. If you wish to print the post, you can easily print this tutorial through your web browser. If you attempt to print directly from the screen a PDF will be generated for your convenience, you can simply save the PDF file directly to your computer. Give it a try!
-
Leave a Reply
You must be logged in to post a comment.

How can I get a download of this project? I can print it but then I will lose it for sure. Thanks.