Creating an Embroidery Motif with BERNINA Toolbox Software
In this exercise, we will use the basic tools in Toolbox and quickly put together a vacation inspired embroidery motif. Featuring:
- How to create a new file
- Add an existing embroidery design into the file
- Duplicate and edit part of the design
- Add lettering: Plain, with Shape and with Text Box
 So let’s dive in!
Open BERNINA Toolbox Software
![]()
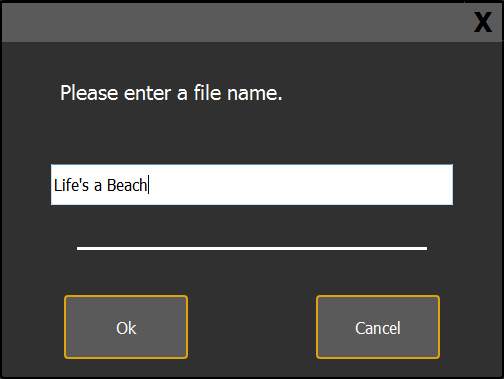
Click on New to create a new file:

- Type the file name: Life’s a Beach.
- Click
Note: Toolbox saves your design immediately and continually so that your work is always saved on disk.
The main workspace screen of Toolbox will now open up.
Preparing the screen to facilitate our work with BERNINA Toolbox Software
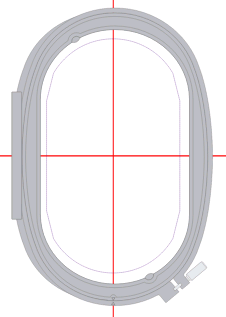
To make it easier to compose our design, we will set the screen to show the hoop and the origin (XY cross hairs).
Using the View Tools:

In the Choose Hoop section, select any BERNINA machine and Series and select the Large Oval hoop with Foot # 26.
Note: multiple brands of machines and their respective hoops are listed for use in Toolbox.

Click on Show Hoop (a white outline around the button will indicate that the hoop will now be shown).

If the hoop template is displayed, click on the Show/hide Template to hide the template, as we won’t need it.

Make sure that in the Grid/Origin section the Show Origin option is selected (a white outline will frame the button).

Note: while we won’t need the grid to display for this exercise it remains available (either in metric – mm – or imperial – inches– units) anytime you want.
TIP: The measurement system is selected in the My Toolbox > Settings screen.
In the Zoom Section, click on the 1:1 option to see your work in actual size.

Your hoop display should now look similar to the example shown.
Adding a Design to your file with BERNINA Toolbox Software
Note: we will add a design from the default selection included with Toolbox, even with the free trial version.
Using the Add Design tool:

Look in the list of designs on the right hand side and locate Africa-019.artx.
Double-Click on Africa-019.artx to insert it into your file.
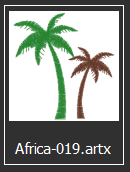
The motif is added and selected automatically for you.
Note: you can see at the bottom of your screen the Import Design The tools to Import from BERNINA Cloud and Add Design (from other formats) are located in this section.
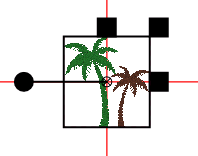
Duplicating the Design with BERNINA Toolbox Software
With the initial design still selected:
Click on the Edit Tool (left toolbar).

In the Copy/Edit/Group section on the right of your screen: Click on Copy.

Note: the selected item is automatically copied and pasted with a slight offset up and to the right. The newly created item is now selected.
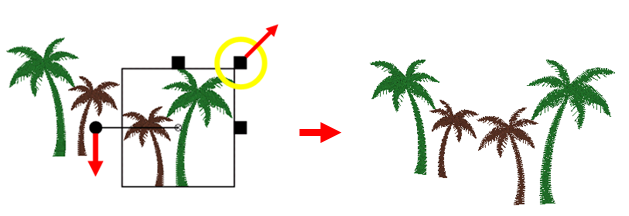
Positioning, Mirroring and sizing the second pair of palm trees
We will position the second pair of trees to the right and slightly lower on the canvas. Then we will mirror it to create more of an oasis effect.
With the second pair of palm trees still selected:
Click and drag on the design to move it to the right until it is clear of the first pair and until it’s about 1/2 inch lower than the first pair.
With the Edit tool, Mirror Section, click on Mirror Vertical.

Resize the second pair:
Using the Proportional Resize control (top right corner, circled in yellow in picture below), drag the handle (black square) outward to increase the size until the top of the taller (green) palm tree matches the of the green palm tree on the left pair.
Reposition as needed if the two middle trees are now too close to each other.
Rotate the second pair of palm trees (still selected) by -3° using the round control on the left of the selection box.
Your center motif is now complete. We need to recenter it in the hoop. To do so:
Select All (or CTRL-A on the keyboard).


Note: when selecting all, Toolbox draws a red dashed line around each design in the file.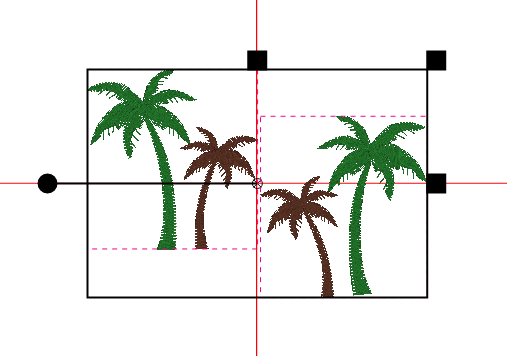 Make sure your origin lines are showing.
Drag the selection to the center.
TIP: Use the Top and Right Side sizing handles to verify you landed in the center. Note that it is not crucial for your selection to be precisely in the center. Close is good enough.
Next Steps: adding lettering to the motif.
Adding lettering to your overall design with BERNINA Toolbox Software
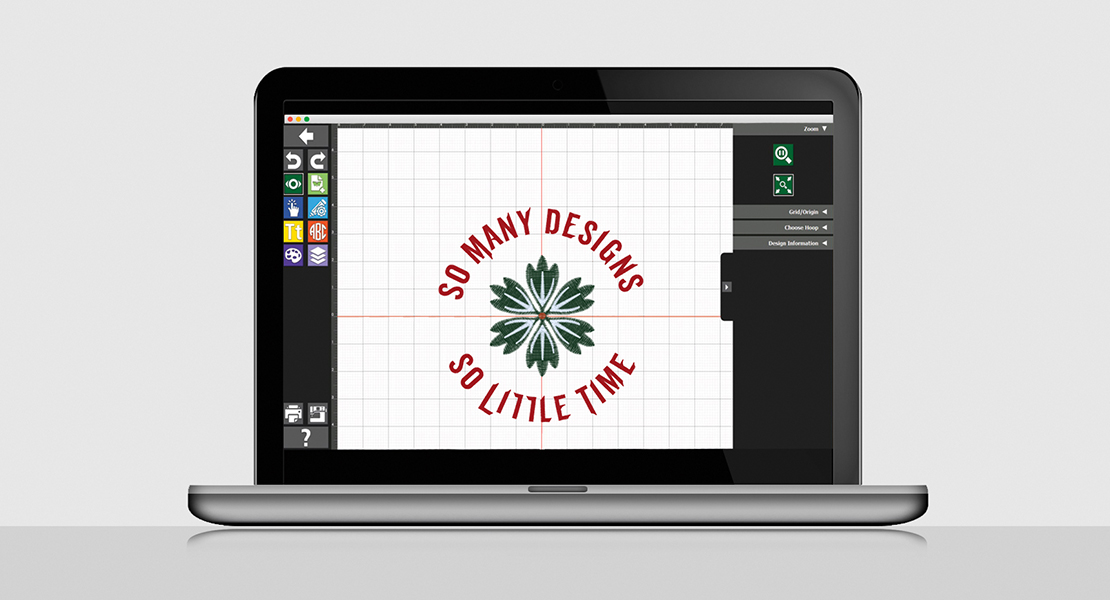
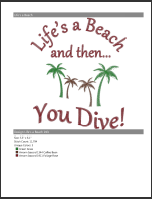
We will add the lettering in 3 separate steps (lines), allowing us to format each line as desired. The final result will look similar to the sample. Note: as you create and edit your lettering changes will be reflected immediately on screen. There is no guessing with Toolbox as to what the results will be.
Line 1: Life’s a Beach
Using the Text Tool (which automatically enables you to type the text), use the following settings:

- In the Enter Text Section:
- Type Life’s a Beach.
- In the Lettering Shape Section:
- Select the arc above ‘ABC’ shape.

- Set the radius to 2 inches (50 mm).
- In the Choose Alphabet Section:
- Select the Casual Block
Note: you can preview the alphabet, the characters included and the recommended minimum and maximum sizes by clicking on the preview button next to the alphabet name.

- In the Character Style Section:
- Type 6 “ in the first field (letter height) and press the TAB key to implement the change.
- Make sure Center Justification is selected: this will keep your lettering centered above the palm trees.

- Position Line 1 above the palm trees with about an inch of space between the L and the top of the leftmost palm tree by dragging the selected line of text in place. Deselect by clicking on an empty space on the screen.
Line 2: and then…
Repeat a similar process as above with the following settings. When generated, drag the line of text just above the top of the palm trees.
- Type Text: and then…
- Lettering Shape: straight across text

Alphabet Style: Casual Block
- Characther Style: 6” height / Center Justified
Line 3: You Dive!
For this third line of lettering we will use the Text Box feature of Toolbox. It produces great effects without any effort!
Note: Text Box is only available in the Lettering module. It is omitted in the Lettering Basic module.
To create this wavy line of text, use following settings:
- Type Text: You Dive!
- Lettering Shape: straight across text (same as for Line 2)
- Alphabet Style: Casual Block
- Characther Style: 1 ” height / Center Justified
- Text Box: Wave up and down

- Drag Line 3 until it is below the palm trees.
Voilà! You have completed your design composition.
For a final review of your work and hoop check, do the following:
Size and Hoop Check
- Using the View tool, click on Choose Hoop, then click on the Show Hoop button if it’s not active.
(if active, the icon will have a while highlight around the icon).
Note: by default, the template will also show along with the hoop, which is convenient for proofing. You can turn off (hide) the template separately by using the Show Template button.

You can now preview your design in your hoop and verify that it fits. If you need to resize the entire design at this stage, simply:
- Select All (or CTRL-A on the keyboard).
- Drag the upper right corner (proportional) sizing handle UP (to enlarge) or DOWN (to shrink) your design while maintaining the center position.
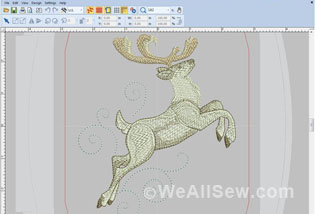
Reviewing your Sew Sequence
Objects in your design file will sew out in the order they were introduced or created into the file.
Using the Design Colors tool:

You can see that at this stage this design has 3 colors, generated by:
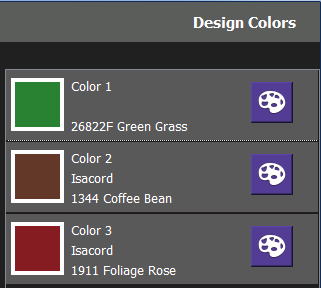
- The palm trees (2 colors: green and brown)
- The lettering (1 color: red)
However, the Sew Sequence tool reveals that the actual color sequence is a tad more complex and could use some simplifying as there are multiple objects per color, which can yield more color changes.

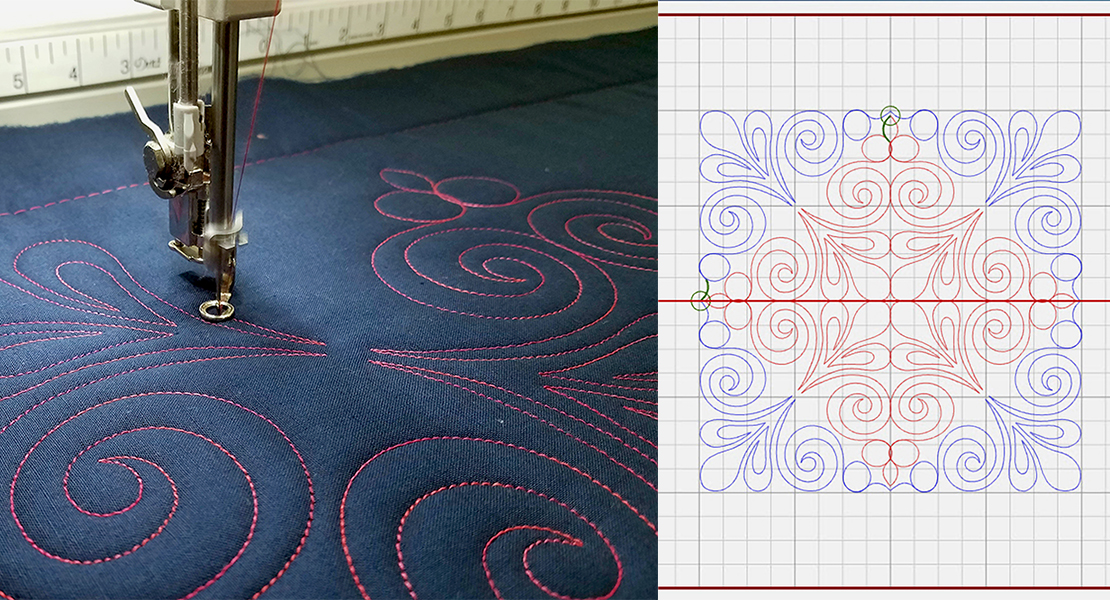
The image shown here illustrates how this design would stitch out:
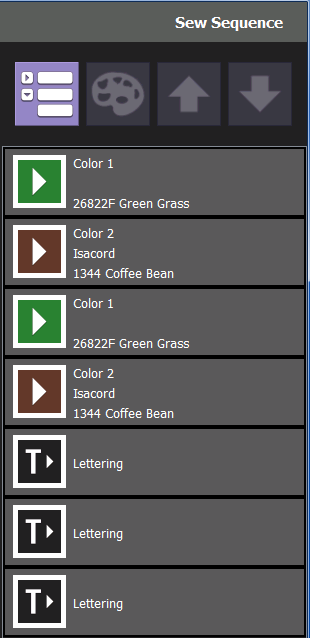
- GREEN palm tree on the left
- BROWN palm tree on the left
- GREEN palm tree on the right
- BROWN palm tree on the right
- RED Lettering – Line 1 ( Life’s a Beach )
- RED Lettering – Line 2 ( and then… )
- RED Lettering – Line 3 ( You Dive! )
We can easily optimize the stitch out by consolidating the Sew Sequence with the following guidelines:
- Combining design elements of the same color.
- If possible, it is generally preferable to embroider from the center out.
In this case, this can be accomplished easily by doing the following:
- Make sure you are looking at Sew Sequence and not Design Colors.
- Collapse each Color Block so that each one is reduced to a single tile.
- Select the Second Green tile and click on the UP arrow so that it will merge with the first green tile.
Bonus: this step will automatically merge the two brown tiles as well.
That’s it! Your design will now stitch out with the fewest possible thread color changes at the machine.
Getting ready to stitch out your design
In preparation for your stitchout there are two tools available to make this a simple task in Toolbox:
The Print tool to print out a color sheet and template of your design.

The Export Tool to save a file for your embroidery machine.

Use the Print Tool to generate a 2-page printout of your design:
Page 1 lists the color sequence
Page 2 is a positioning template
For example, for BERNINA machines:Use the Export Tool to generate the file your machine will need to stitch out the design:
- Click on the Export
- The file name will already be filled in based on how you named your file at the beginning.
- Select BERNINA EXP(*.exp) as the file Type, or the type corresponding to your particular machine.
- In the Save File dialog box: locate where you want to save the file (for most BERNINA machines that will be on a USB stick.
TIP: You can create a folder on the USB stick ‘on the fly’ while navigating the dialog box.
- Click on the Save
Note: the BERNINA EXP format will export the EXP and INF files (but not the BMP file).
Not to worrry! Your machine will do fine with these two files only, and will generate the thumbnail on screen as soon as you insert the USB stick and locate the file.
After properly removing the USB stick from your computer, you can proceed to your machine and begin the process of stitching out your design.
It’s now time to dive in!