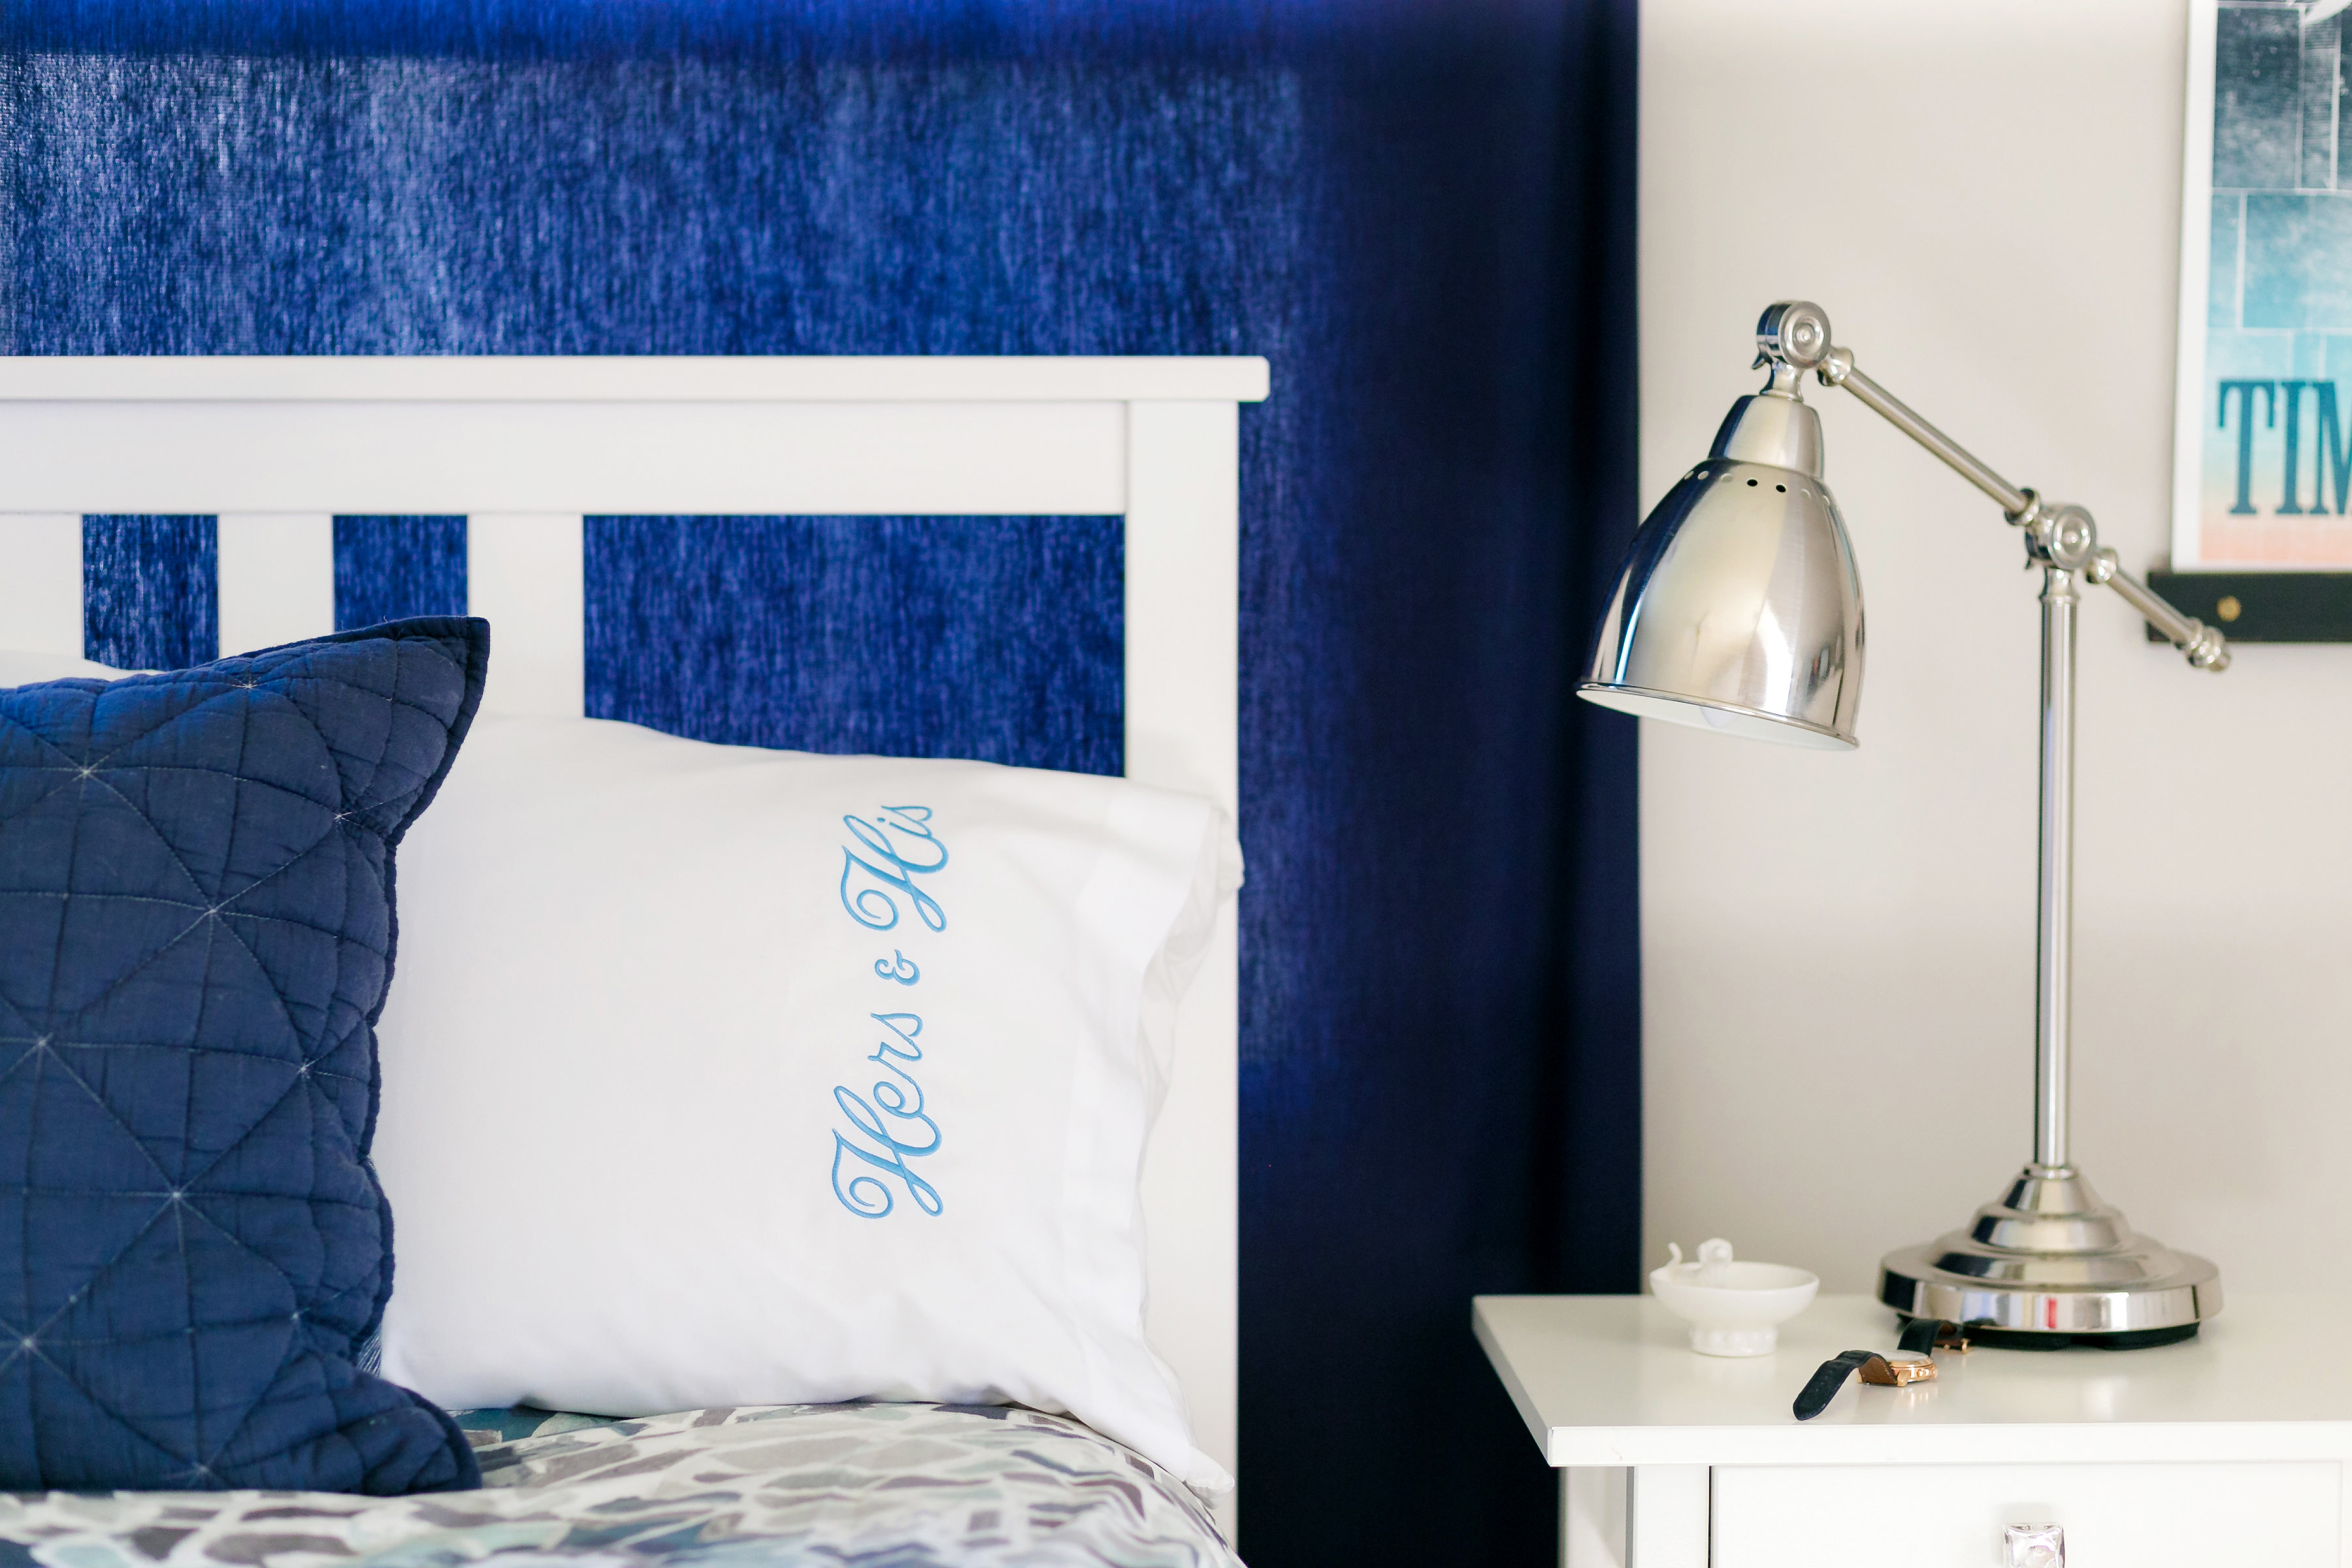
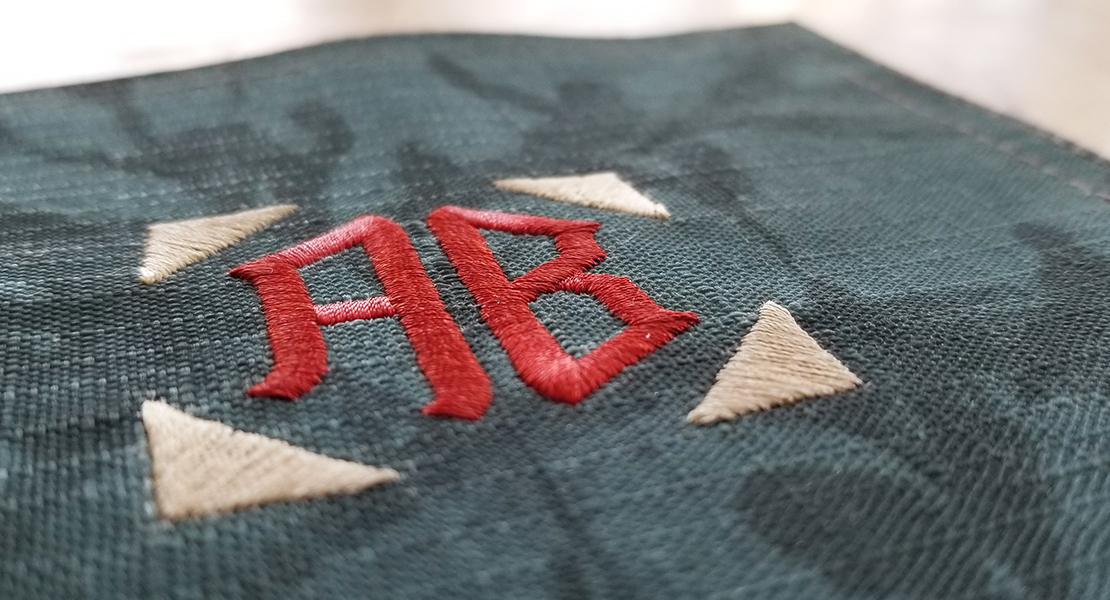
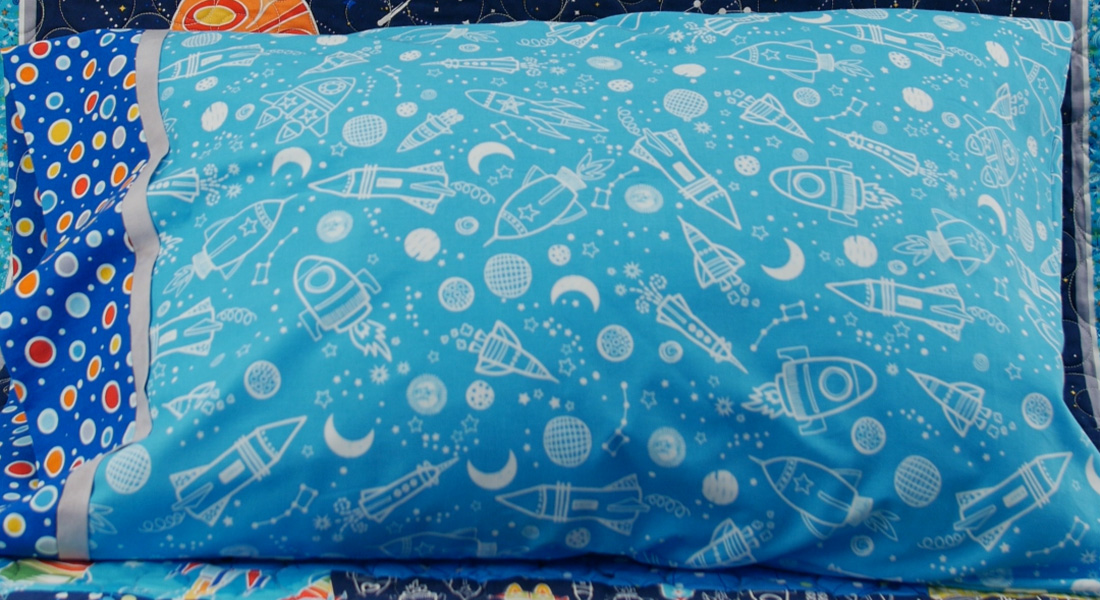
Monogrammed Pillowcases with BERNINA Toolbox

Whether you want to personalize your home or offer as a gift to a couple, monogrammed pillowcases are sure to stand out.
The process is very simple with BERNINA Toolbox:
- Pick an alphabet style you like.
- Select a lettering size that fits.
- Type in your letters.
- Adjust the overall size and position of letters at the end to taste.
My goal with Home Dec projects of this type is to spend 10% of the time with my embroidery software, and 90% actually realizing the project. BERNINA Toolbox makes it easy for me to compose my monograms and lets me proceed to the embroidery stage in short order. Toolbox has a great monogram tool that is super easy to use. However, for this project, we will actually use the Lettering tool in Toolbox and create a free-form monogram. This makes it possible to mix alphabets, and it works well for longer wordings (see suggestions at the end of this post for more whimsical ideas).
General notes:
For this project, we are aiming for a monogram that is about 3 inches tall by 5-8 inches wide, depending on the lettering. This way, it will fit well within the pillow case cuff. This size range will fit in a BERNINA Large Oval Hoop.
Although hoops are generally designed taller than wide, we will still lay out the monogram horizontally to make it visually easier to position the letters. We will rotate the monogram at the end to fit it back into the hoop.
This project assumes that your Toolbox is set to Imperial measurements (inches). If you need to, change the measurement system in My Toolbox > Settings > Measurements.
Let’s make a Couple Pillowcase Monogram!
Open BERNINA Toolbox Software
![]()
Click on New to create a new file:

Type the file name: Couple Pillowcase Monogram.
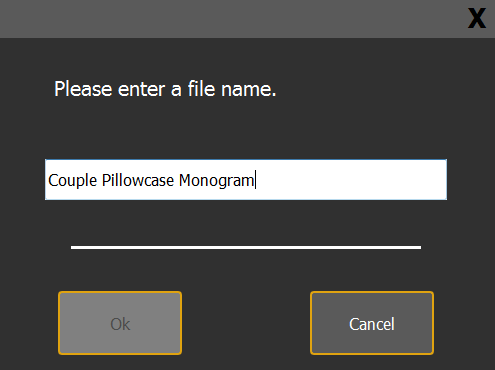
Click OK.
Note: Toolbox saves your design immediately and continuously so that your work is always saved on disk.
The main workspace screen of Toolbox will now open up.
Preparing the screen to facilitate our work.
To make it easier to compose our design, we will set the screen to show:
- the hoop
- the origin (XY cross-hairs)
- the grid (counting the squares will make it easy to size our work)
Using the View Tools:

In the Choose Hoop section, select any BERNINA machine and Series and select the Large Oval Hoop with Foot #26 (embroidery foot). Note: multiple brands of machines and their respective hoops are listed for use in Toolbox.

If the hoop is showing, click on Show Hoop to turn it off (there should be no white outline around the button, indicating that the hoop will not be shown).

By turning off the hoop display the hoop template is automatically hidden.

Make sure that in the Grid/Origin section that both the Show Grid and Show Origin options are selected (a white outline will frame the buttons).


Adding lettering to your design.
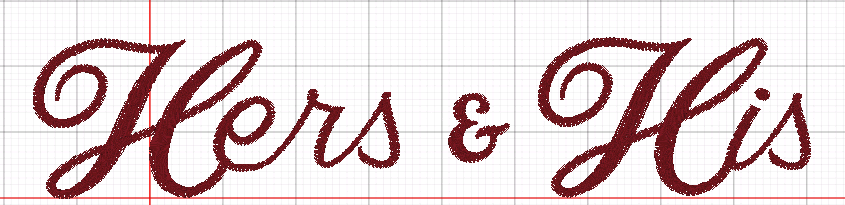
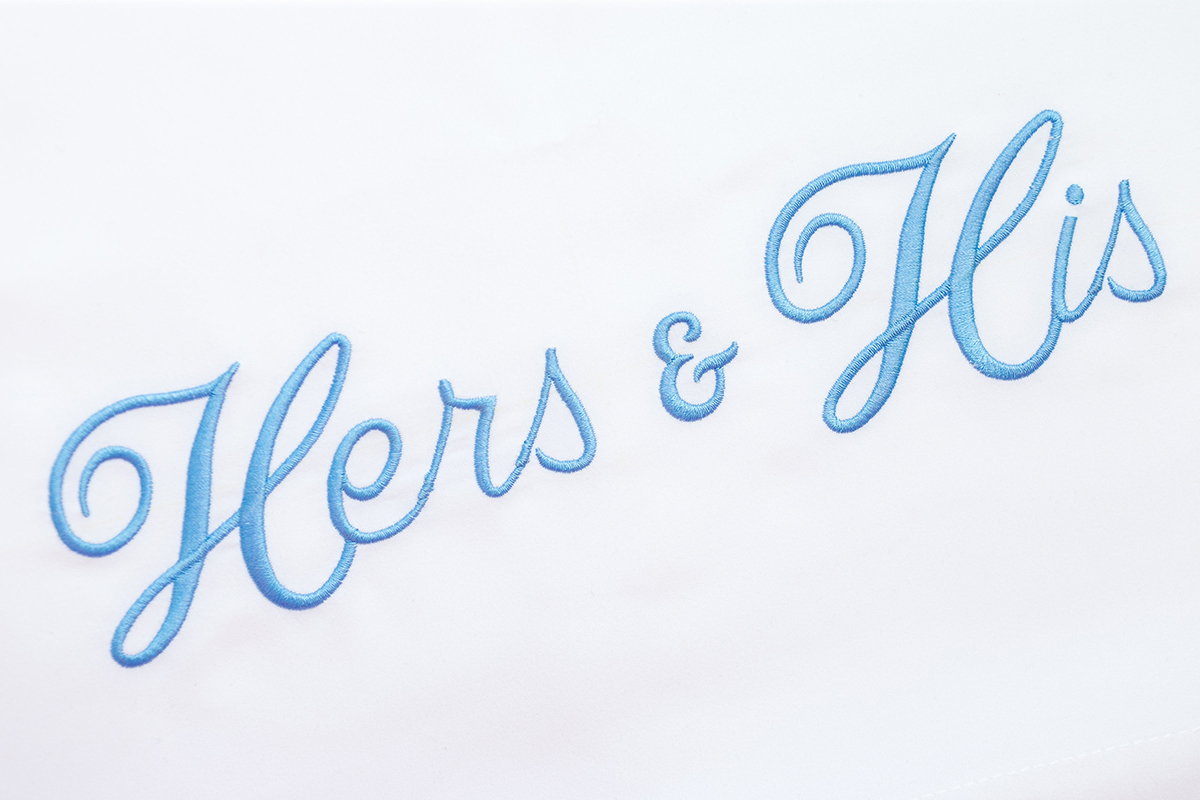
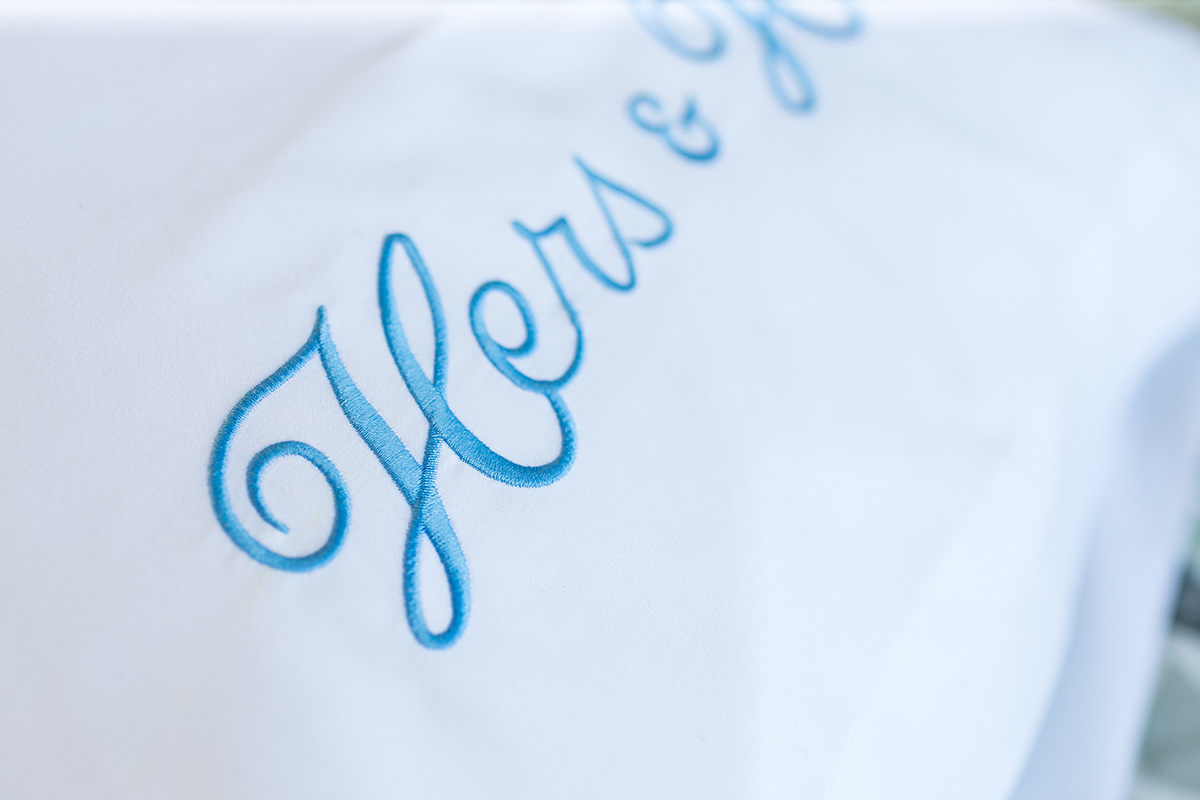
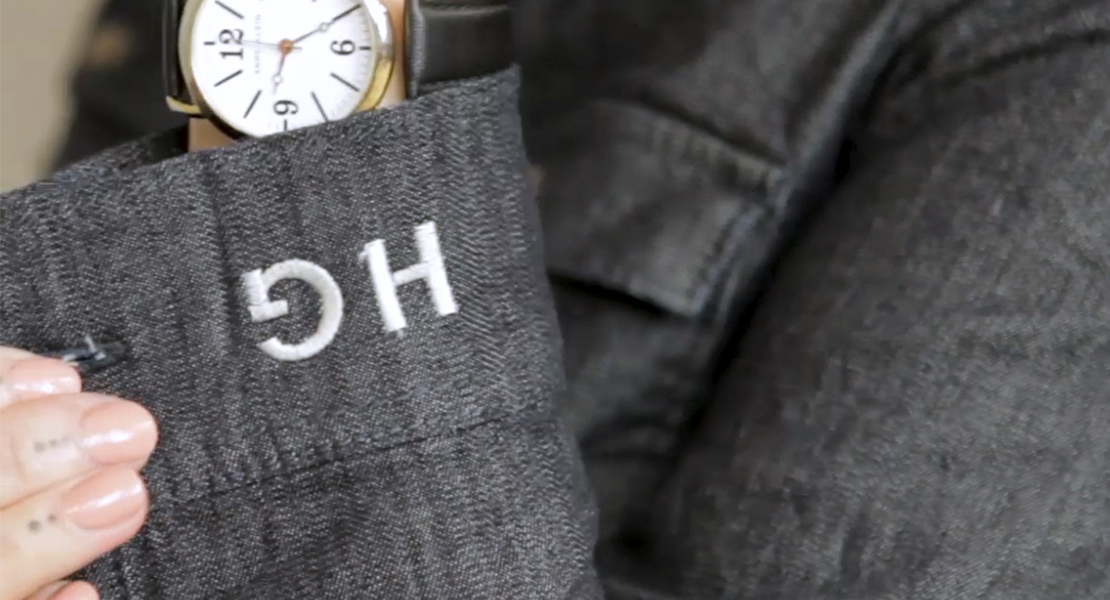
The lettering used for this monogram will be Hers & His, where:
- The leading H’s will be larger, in a script-like alphabet.
- The remaining letters will be in a smaller, plainer alphabet (for legibility).
- The & will be in a large, script-like alphabet.
Adding the word “Hers”
Typing in the uppercase H.
Using the Text Tool (which automatically enables you to type the text), use the following settings:

In the Enter Text Section: Type the uppercase letter H.
In the Lettering Shape Section: Select the Straight Across ‘ABC’ shape.

In the Choose Alphabet Section: Select the Zelda Script alphabet (this alphabet style stands alone very well for single uppercase letters).
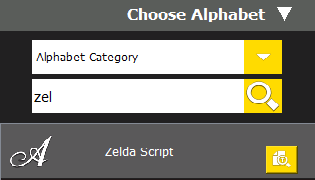
TIP: by typing the first letters of an alphabet name in the search field (e.g. zel), Toolbox will jump to the first match in the list of alphabets. This is very convenient when you know which alphabet you want to use!
Note: you can preview the alphabet, the characters included and the recommended minimum and maximum sizes by clicking on the preview button next to the alphabet name.
![]()
In the Character Style Section:
Type 2.4″ in the first field (letter height) and press ENTER to implement the change.
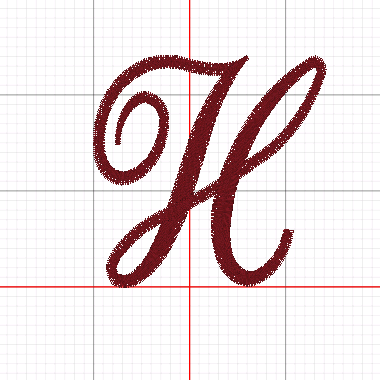
Use Center Justification: this makes your lettering more predictable as it lands in the center (measured between left and right) of the hoop.

Deselect the letter H by clicking away from it on the screen.
Typing in ‘ers’:
Following the same method as above, use these settings:
Type in the Text box: ers.
The Lettering shape stays the same (Straight Across).
Choose Alphabet: Melanie. (This alphabet style has a nice clean script style.)
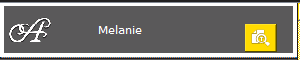
Choose Character Style / Letter Height: 1.5″. Press Enter.
The new letters will be generated automatically and laid top of the previously created H. Note that only the new lettering is selected.
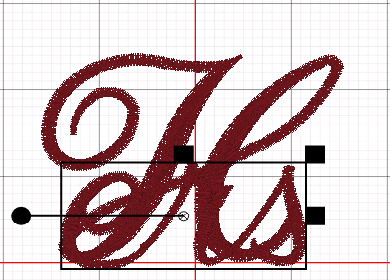
With the ‘ers’ still selected, click and drag it to the right an up until the e overlaps the trailing edge of the H (see picture below).
The result will be as follows:
This will yield a more stylish monogram compared to the simple word Hers all on the same baseline.
Now it’s “His” turn
There are two easy ways to create the word His:
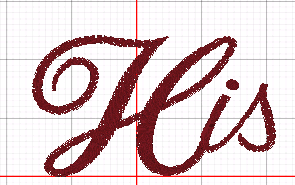
1. Repeat the same process followed to create Hers, changing the ‘ers’ to ‘is’.
2. Easier yet: duplicate the Hers and edit the ers to is.
Duplicating and editing the lettering:
TIP: This method has the advantage of preserving alphabet choices, sizes, etc.
Select All (or CTRL-A).


Click on the Edit Tool (left toolbar).

In the Copy/Edit/Group section on the right of your screen, click on Copy.

Note: the second Hers (copy) will be:
- Overlaid on top of the first
- Offset to the right and above
- Selected
TIP: At this stage, you may need to zoom out in order to view a larger working field. This is easily done by rolling the mouse wheel down toward you (the opposite motion would zoom in). If you need to re-center your work, simply click on an empty area of the design grid and drag it around to bring the existing design to the center of your screen.
With the second Hers selected:
Click and drag the design to move it to the right until it is clear of the first and generally aligned on the bottom with the original.
Leave a space between the two Hers for the Ampersand (&).
Click on an empty area to deselect.
Click on the ‘ers’ portion of the second word to select it.
Using the Lettering Tool,
Re-type the lettering and change it to ‘is’. Note: the letters ‘is’ have now moved away from the ‘H’.
Click and drag the ‘is’ toward the ‘H’ until if overlaps the trailing edge just like the ‘ers’ does on the first word. Note: with the dot of the ‘i’ you can position the ‘is’ a bit lower than the ‘ers’ so that the dot doesn’t get too close to the ‘H’.
Playing it Safe: Grouping the words
At this stage, we do not want the words to be separated (H from ers or H from is), so we will group each word as a single unit. This will make it a cinch to finish placing the words to form the final monogram.
To Group a ‘word’:
Use the Select Tool / Select All.
Click on an empty area of the grid to deselect all.
Click on the Select Designs tool.

Click on the H of Hers.
Holding the Shift Key down, click on the ‘ers’ to add to the selection.
With the Edit tool, click on the Group tool.

Repeat the grouping process with the His.
Deselect the His.
Click in an empty area (this will deselect all).
Adding the Ampersand (&)
Using the Lettering Tool as with the ‘H’:
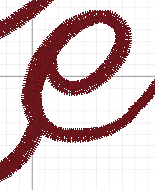
Type & in the Enter Text field. Note: as soon as you type the character it will appear on screen, over the H of Hers (which is the original center area of the design).
Click and drag the & so that it is separated from the word Hers to see it better.
Lettering shape (stays the same).
Select Chloe Script as the Alphabet.

Character Style / Letter Height: 1.0″.
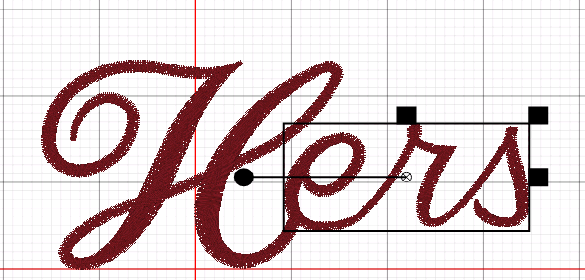
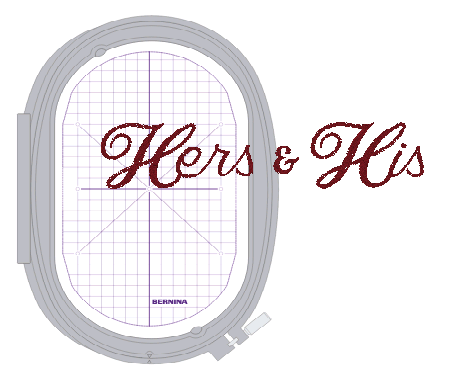
You are now ready to line things up. To do so, simply use the horizontal origin line as your baseline and move the His and the & to the right of the Hers until you like the result. It should look like this:
Grouping the whole thing:
Now that the design is composed and laid out, it’s time to group everything together so that everything stays in place. (Grouping is like electronic basting spray!)
Use the Select Tool / Select All.
With the Edit tool, click on the Group tool:
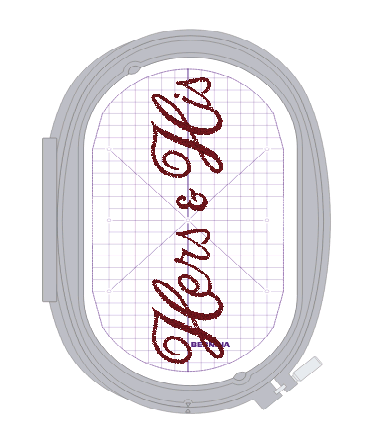
Note that the design is now nearly 10 inches wide. So it’s time to line it up with the hoop to verify fit. We will also be able to size it to taste with the actual pillowcase cuff in mind.
To prepare the design for hooping:
Click on Show Hoop (View>Choose Hoop); a white outline around the button will indicate that the hoop will now be shown.
Notes:
- This will automatically activate the template also.
- The grid and origin lines will be turned off as the template has its own grid lines.
Your design will look something line this:
It is obvious at this point that we need to rotate the design to fit it in the hoop.
TIP: when hooping a pillowcase, it will be preferable to have the bulk of it to the left of the hoop clamp so that it won’t get in the way while embroidering. This means that rotating the design counter clockwise (to the left) will orient it for easier embroidery.
To rotate the design:
Select All (or CTRL-A).
Click on the Edit Tool (left toolbar).
In the Scale / Rotate section, Click on Rotate Left (45 degrees) twice.

Click and Drag the design to center it in the hoop. It should now look like the image below.
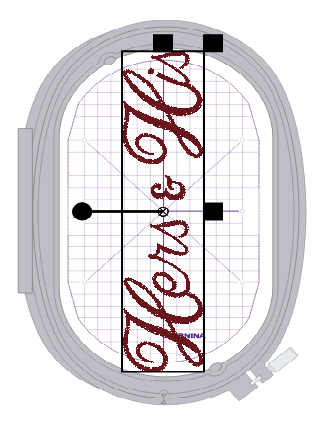
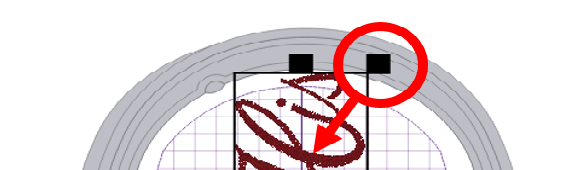
TIP: use the sizing controls on the selection ‘box’ (the black squares sizing handles and the black circle rotation control) as easy guides to align with the center of the hoop template.
Final Sizing
Your current design may not quite fit in the hoop at this stage. Even if your result ended up ‘just fitting’ in the hoop, I generally prefer to reserve a bit of wiggle room in my hoopings. A slight downsizing, leaving a grid square’s worth of spacing at both the top and bottom will do the trick.
Note: if using longer text/words, downsizing may become a necessity.
To downsize the Monogram:
With the entire monogram still selected (or CTRL-A):
Click on the top right (black square) sizing handle and drag it toward the center until the motif reduces in size by the desired amount.
Note: Toolbox will resize the motif while maintaining the position of its center so you won’t have to reposition it.
Your motif should now look something like this:
Final Touch: reviewing the stitch out sequence:
Using the Sew Sequence tool,

The current sequence should reflect the order in which we created the text elements:
- H
- ers
- H
- is
- &
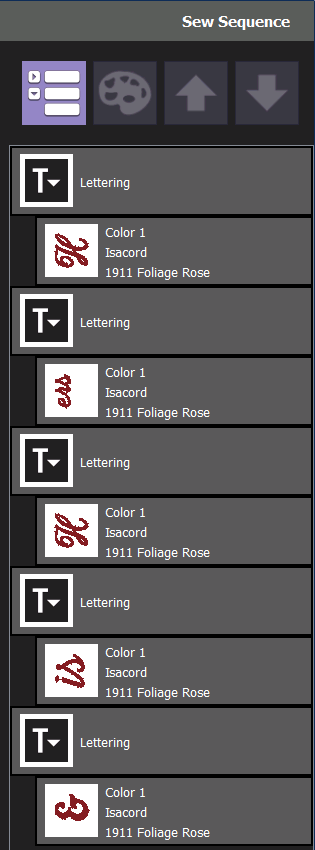
We need to move the & so that it stitches between the Hers and His:
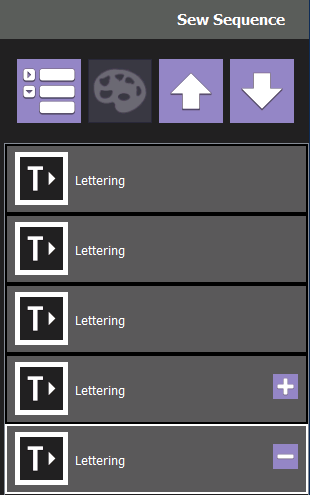
Click on the bottom Lettering tile ( the one immediately above the &).
The tiles will all collapse to show only the words Lettering however the last tile (&) will remain selected.
This will activate the Up and Down moving arrows used to resequence.
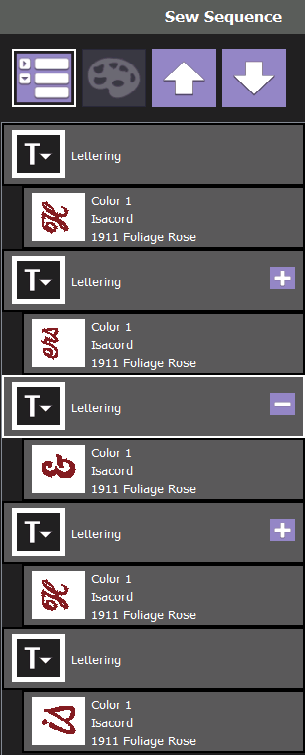
With the last tile selected, we need to move it up in the sequence (using the Up arrow tool) twice (so that it will leapfrog the full ‘His’.
![]()
To verify that you have the right sequence you can click on the T> button on each tile to expand it and to reveal the details.

Your final sew sequence should look as follows:
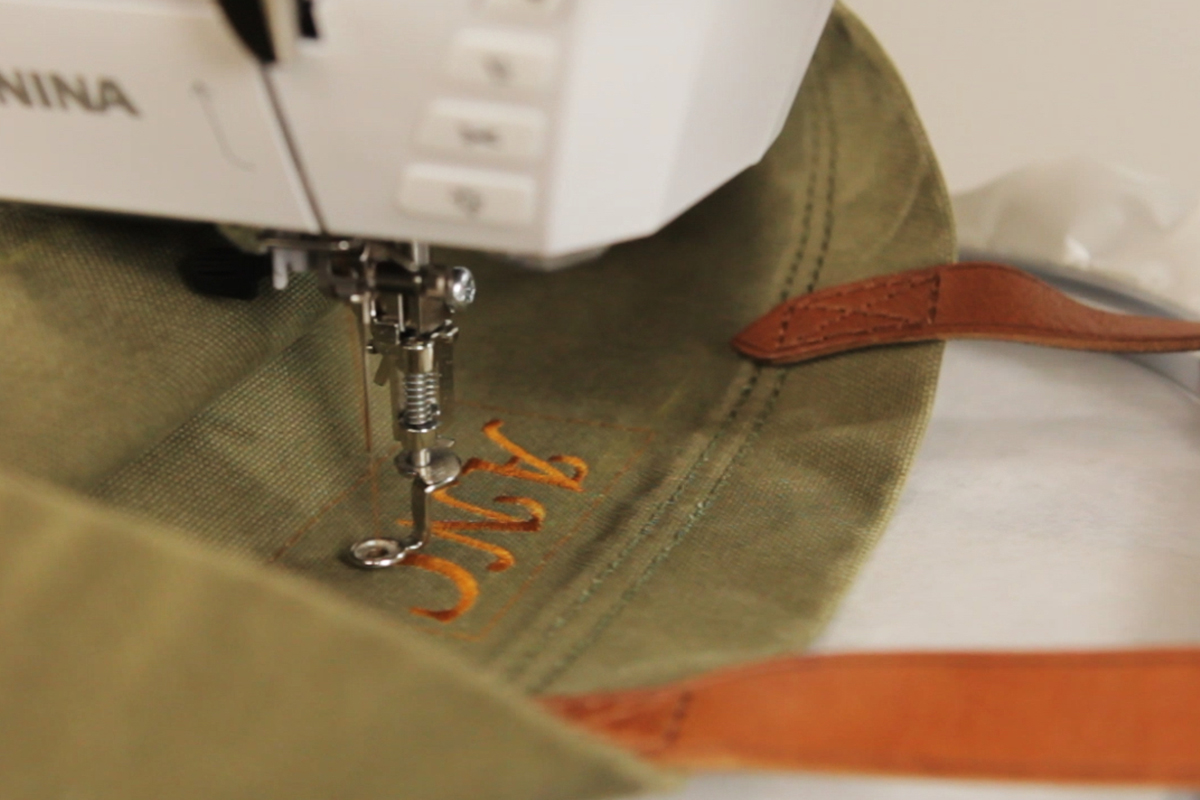
Your Monogram is now ready to stitch out.
Getting ready to stitch out your design
In preparation for your stitchout there are two tools available to make this a simple task in Toolbox:

1) The Print tool to print out a color sheet and template of your design
Use the Print Tool to generate a 2-page printout of your design:
- Page 1 lists the color sequence.
- Page 2 is a positioning template.
2) The Export Tool to save a file for your embroidery machine
Use the Export Tool to generate the file your machine will need to stitch out the design.

Alternate versions of the Monogram:
There are so many variations possible on this type of monogram. Use your imagination, and have fun tailoring them to the recipient couple!
- Hers not His
- His not Hers
- Hers & Hers
- His & His
- Mine not Yours
- Get Your Own Pillow!
- Etc.
Used Products
What you might also like

One comment on “Monogrammed Pillowcases with BERNINA Toolbox”
Leave a Reply
You must be logged in to post a comment.

Excellent step by step demo of the product. So easy to learn from this vs. your on-line help instructions. Please do this with some other projects.