How to Digitize Embossed Embroidery
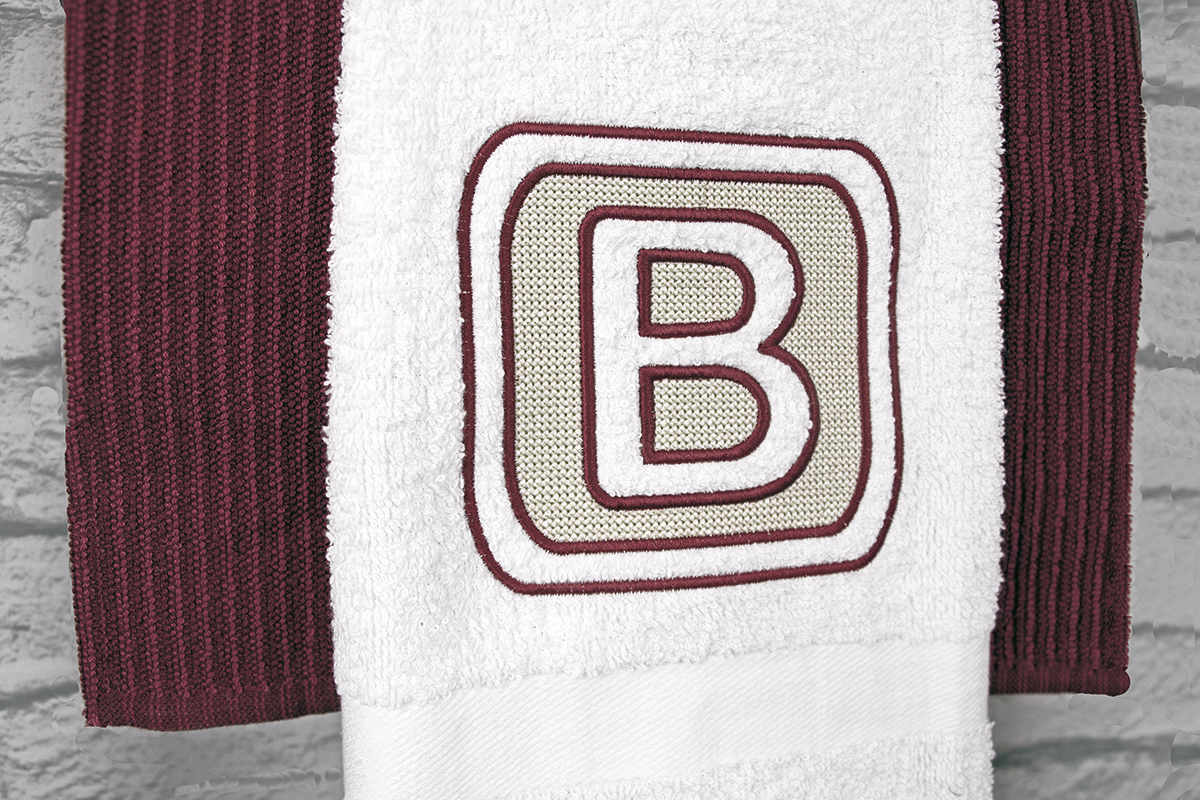
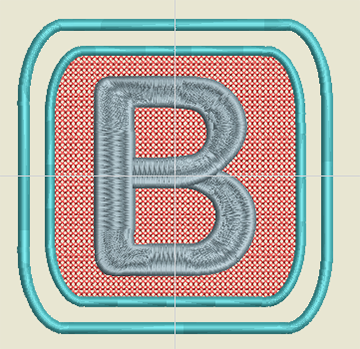
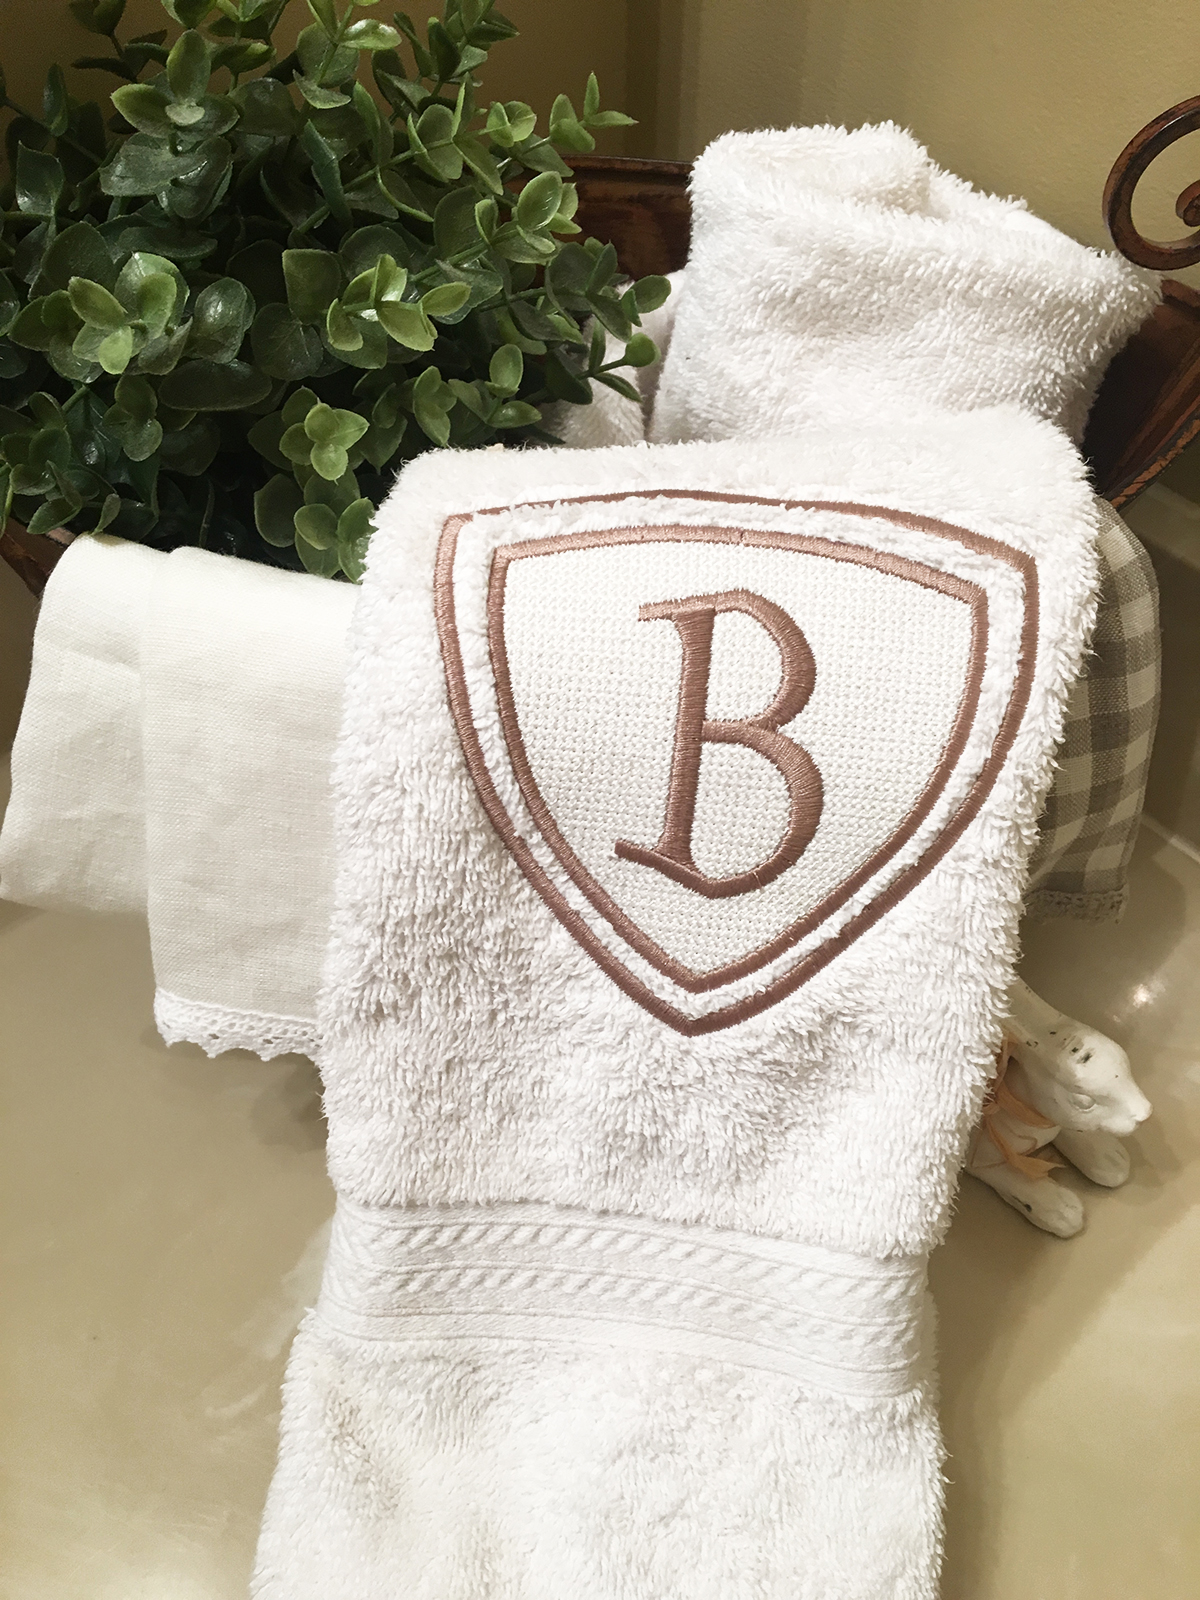
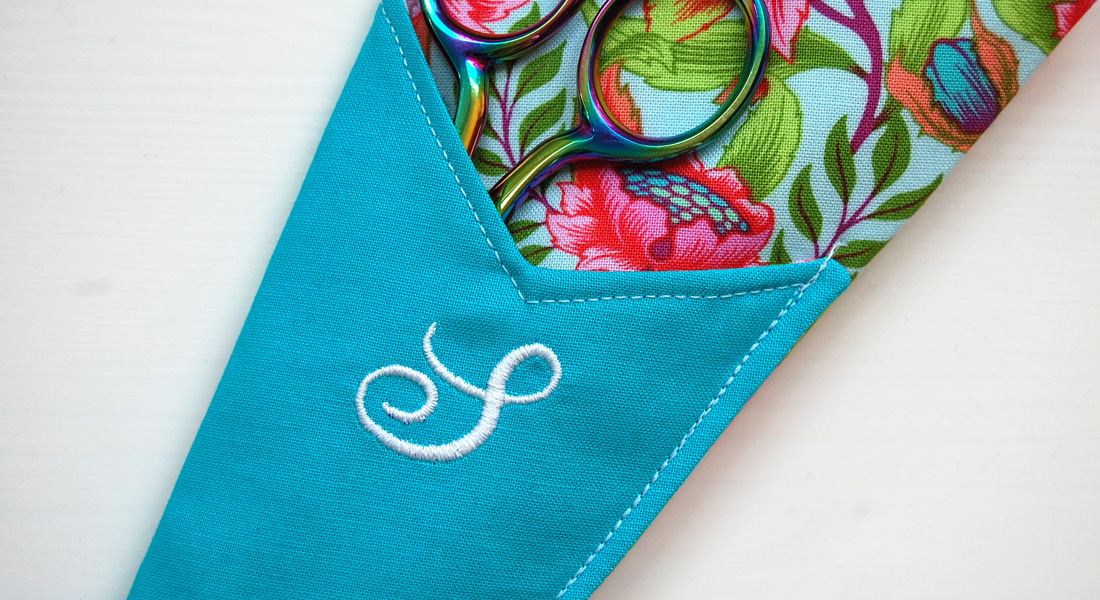
Monogrammed towels…been there, done that. To create something a little different this time, I digitized this monogram in BERNINA Embroidery Software v8.1 so that parts of the toweling were compressed flat with stitches and the parts that were left unstitched puffed up, giving the design a little more dimension. My guests will take a second look the next time they dry their hands!
Here are the software directions:
- In BERNINA Embroidery Software V8.1 open a new design.
- In the Digitize toolbox, click on Monogramming.
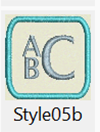
- Select Style 05b in the Monogramming Docker.
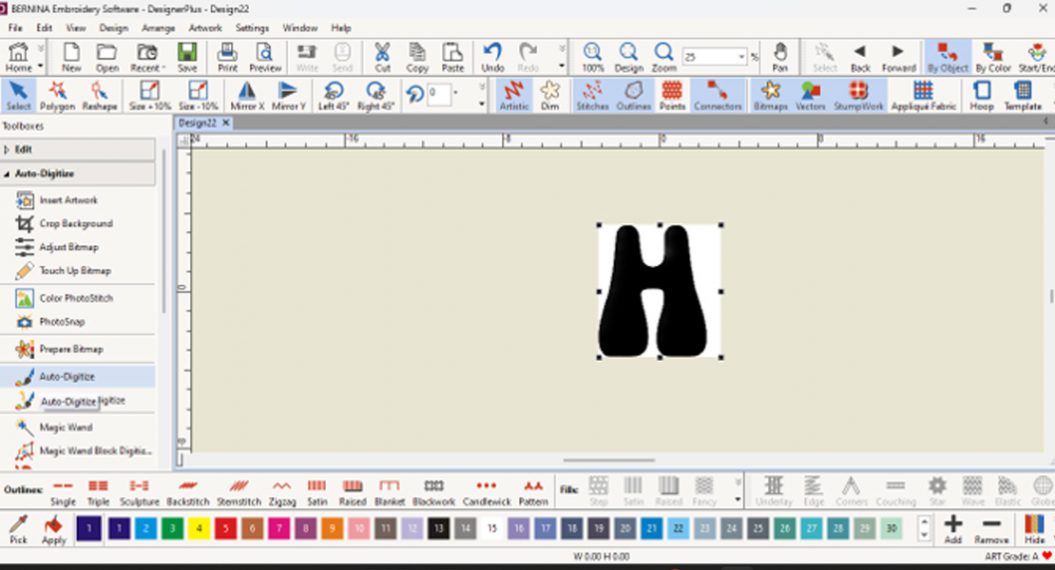
- In the Monogramming Docker, select the Letters tab. Swipe across the ABC to delete the 3 letters; replace with the capital letter of your choice (I chose the letter B). In the work area, you will see the monogram frame with the capital letter centered inside.
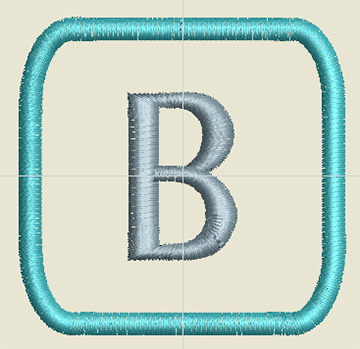
- Select the frame and the letter (Edit > Select All). Turn off the Proportional Lock and resize to 4” square (100 mm).
- In the Edit toolbox, select Break Apart.
![]()
- Select the frame only and open Object Properties. Change the Satin Width to 0.118” (3.0 mm). Click OK.
- Copy and Paste the frame. Click on the Size +20% icon two times for the new frame.
- Select Edit > Select All. Select the Arrange toolbox; click on Align Centers.
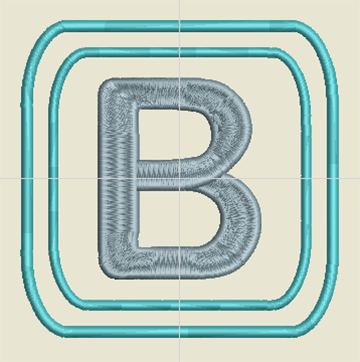
- Select the letter and change the font to Rounded Block in Object Properties > Lettering. Enlarge to 3” (76.20 mm) tall. Click OK.
- Select all and align centers again. The letter is centered mathematically, but some letters look better if adjusted a little. Adjust the center position of the letter visually if you do not like where it is.
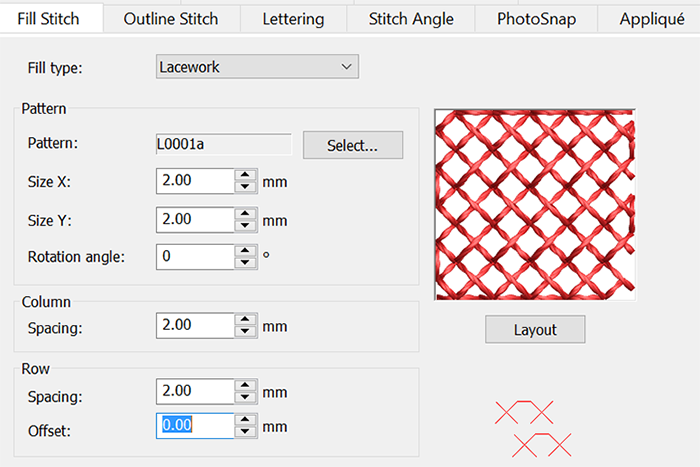
- Select the inner frame; copy and paste. Select Lacework Fill in the Fills Toolbar below the Workspace. Assign an unused color to the fill.
![]()
- In Color Film, move the Lacework Fill to the first position. Move the two frames to the second position. The letter is in the third (last) position.
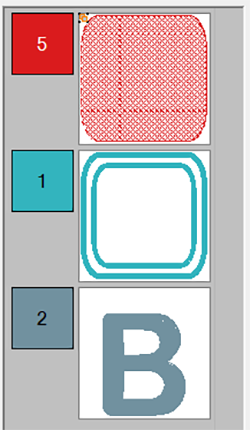
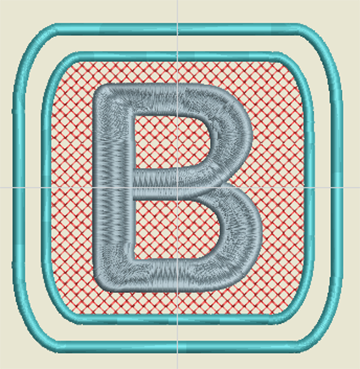
- Select the Lacework Fill on the Workspace and open Object Properties. Change both X and Y to 2.0 mm, and both the Column Spacing and the Row Spacing to 2.0 mm. Click OK.
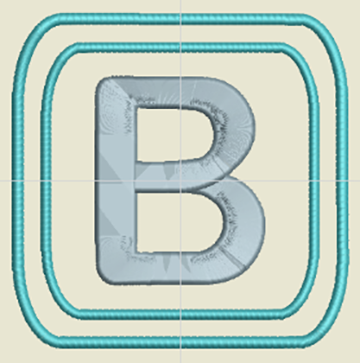
- Select only the letter on the Workspace. Click on Remove Overlaps in the Edit Toolbox.
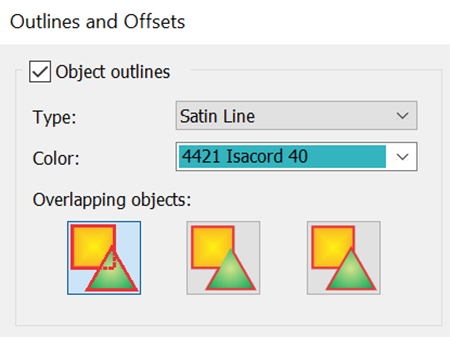
- While the letter is selected, click on Outlines and Offsets in the Edit Toolbox. Check the box next to Object outlines, and select Satin Line for the Outline. Under Overlapping Objects, select the first box, Individual Outlines. Deselect Offset Outlines if it is checked. Click OK.
- Select and delete the solid filled letter.
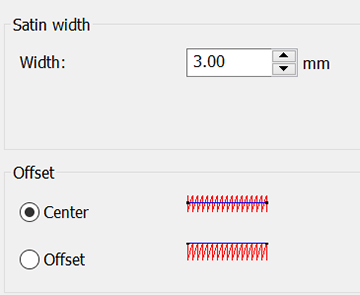
- Select the outlines of the letter (don’t forget the inner outlines!) and open Object Properties. Change the Satin Width to 3.0 mm and the Offset to Center. Click OK.

- Save the design as Embossed Monogram.
- I recommend printing an actual size template of your design at this point.
Time to embroider:
- If you are using a new towel, pre-wash before embroidering.
- Hoop OESD Heavy Weight Tear Away Stabilizer by itself in your embroidery hoop.
- Place the printed template on your towel to preview placement. Mark placement lines.
- Spray the top of the hooped stabilizer with a temporary adhesive spray and place towel on the stabilizer. The towel is NOT hooped.
- Use placement tools (such as Pinpoint Placement on the BERNINA machines) to make sure the design is straight.
- Cover the design area with OESD StitcH2O. This holds down the loops of the towel and prevents pokies from showing through the satin stitching.
- Use the basting function to hold everything down to the stabilizer.
- Stitch the design. The color choice is up to you. Thread matching the towel gives a subtle effect, or go bold with stand-out colors.
- When finished, carefully clip basting stitches and remove stabilizers. Washing will remove any remaining stabilizers.
I hope you enjoy this fun technique and make some extra-ordinary monograms! Experiment with your own fonts and shapes to get totally different looks!
Used Products
What you might also like
3 comments on “How to Digitize Embossed Embroidery”
-
-
I would like an answer to the same question. I want to embroider a bouquet on a terry towel with a knock down stitch around it.
Leave a Reply
You must be logged in to post a comment.

How do I digitize a name to have the knock down stitch around it? I want to put a name on a towel