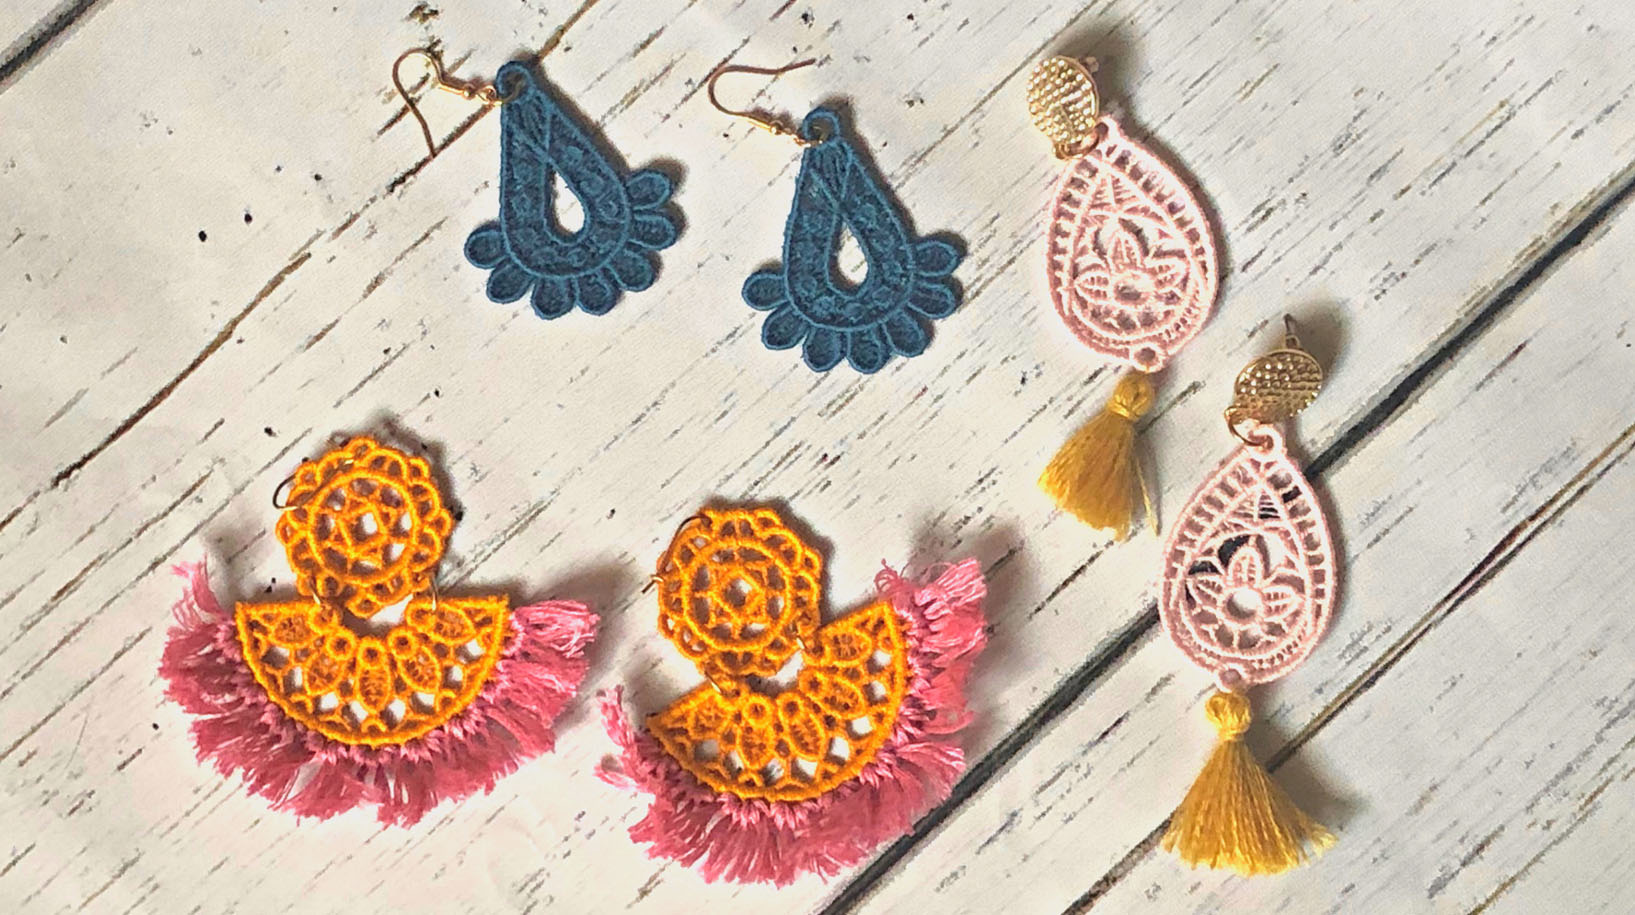
Digitize Your Own NYE Earrings
I’m always thinking of new ways to integrate embroidery into my wardrobe. In a past blog post I made Free Standing Lace earrings, which are still my favorites to make and wear, but I was ready for a new style to add to my accessories.
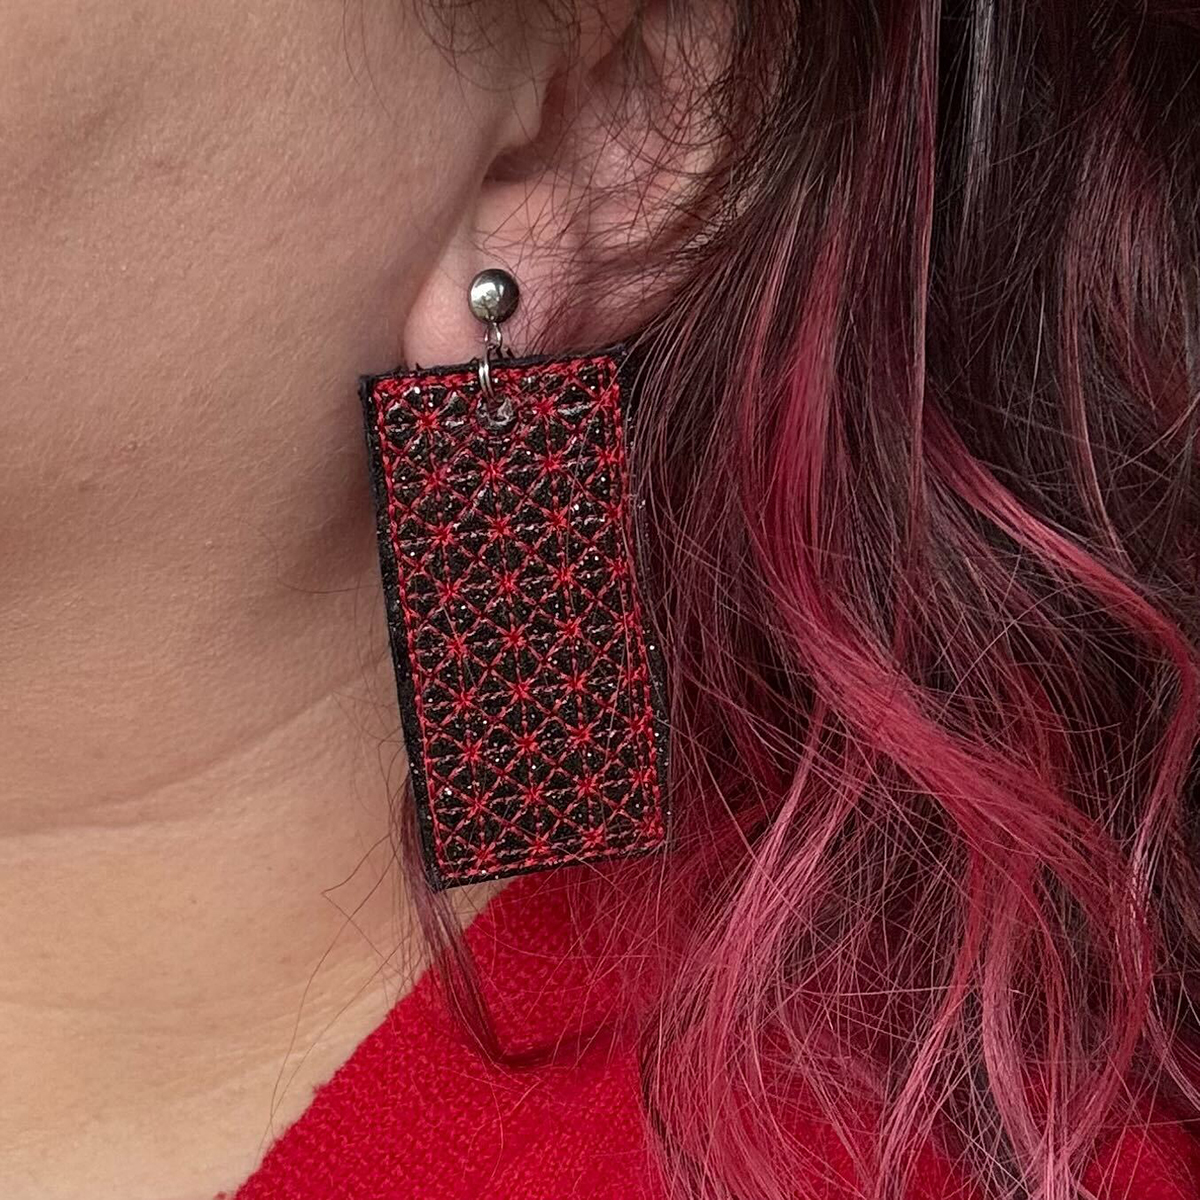
That’s when I saw my stash of OESD Luxe Sparkle Vinyl and thought this could be the perfect way to use it up and add some extra sparkle to my NYE look.
Once I had the idea in my head I reached out to our software expert, Debbi Lashbrook, to see how I could best complete the idea I had in my head. Debbi had just the thing I needed in previous Software Inspirations class on fancy fills! I watched the class and was so excited to start creating. If you have BERNINA Designer Plus software you should absolutely ask your local dealer about Software Inspirations classes to help you broaden your skills with the BERNINA software!
Let’s make some earrings!
Machine and Products Featured
Materials Needed
- OESD AquaMesh Wash Away
- 80/12 Microtex needle
- Embroidery Thread
- OESD Luxe Sparkle Vinyl
- You can also use cork and some leathers or faux leathers depending on how thick they are
- Earring wires
- Jewelry making pliers
- OESD Embroidery Tape
- OESD Perfect Punch Tool
- OESD MiniMat (optional)
Step 1: Create the Embroidery Designs
Open BERNINA creator software and from the ‘Digitize’ toolbox choose the Rectangle option.
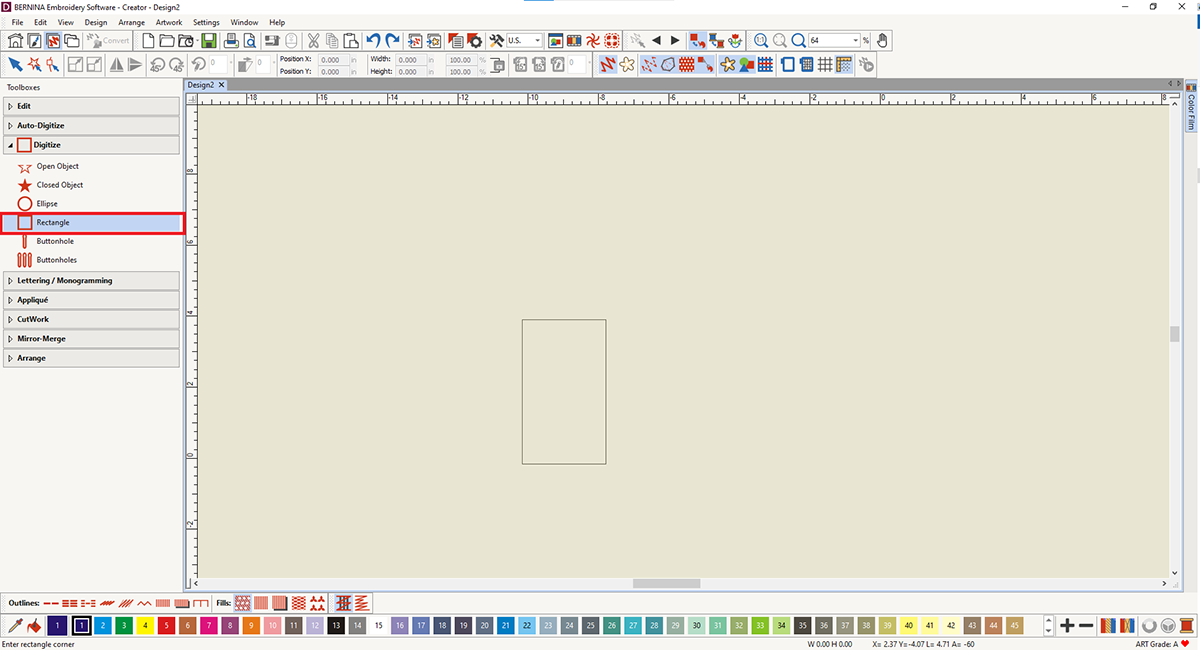
Drag the cursor and touch enter on the keyboard to create a rectangle. Choose the Select Object icon (the arrow) and select the Rectangle. In the Docker, unlock proportions using the Lock icon and change the dimensions to your preferred size. I love big earrings, but for this first pair, I kept it on the moderate side with 1.0 X 2.25 but have fun playing with all sorts of shapes and sizes.
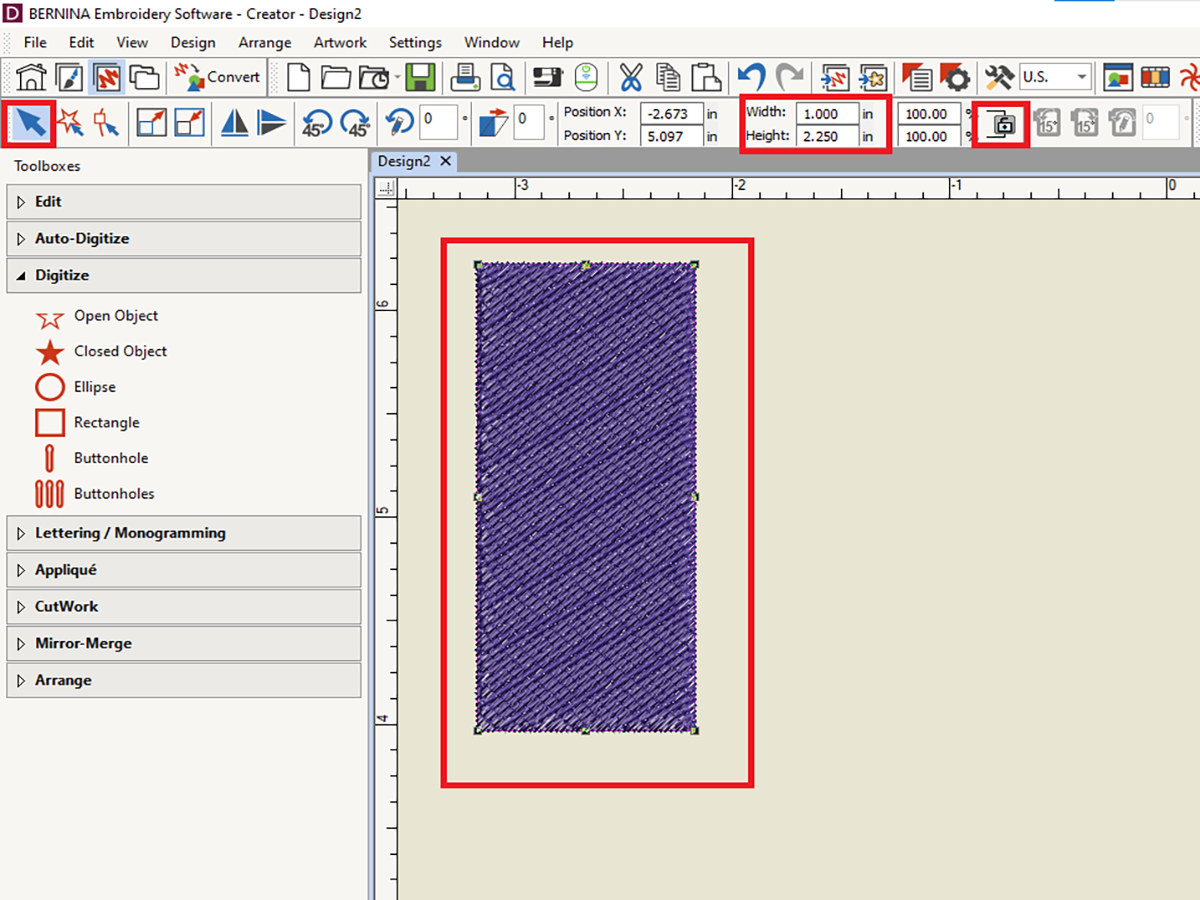
With the rectangle still selected, right click on the Fancy Fill icon in the bottom Fills Docker.
This will open the Object Properties dialogue box to the Fill Stitch tab.
Click Select.
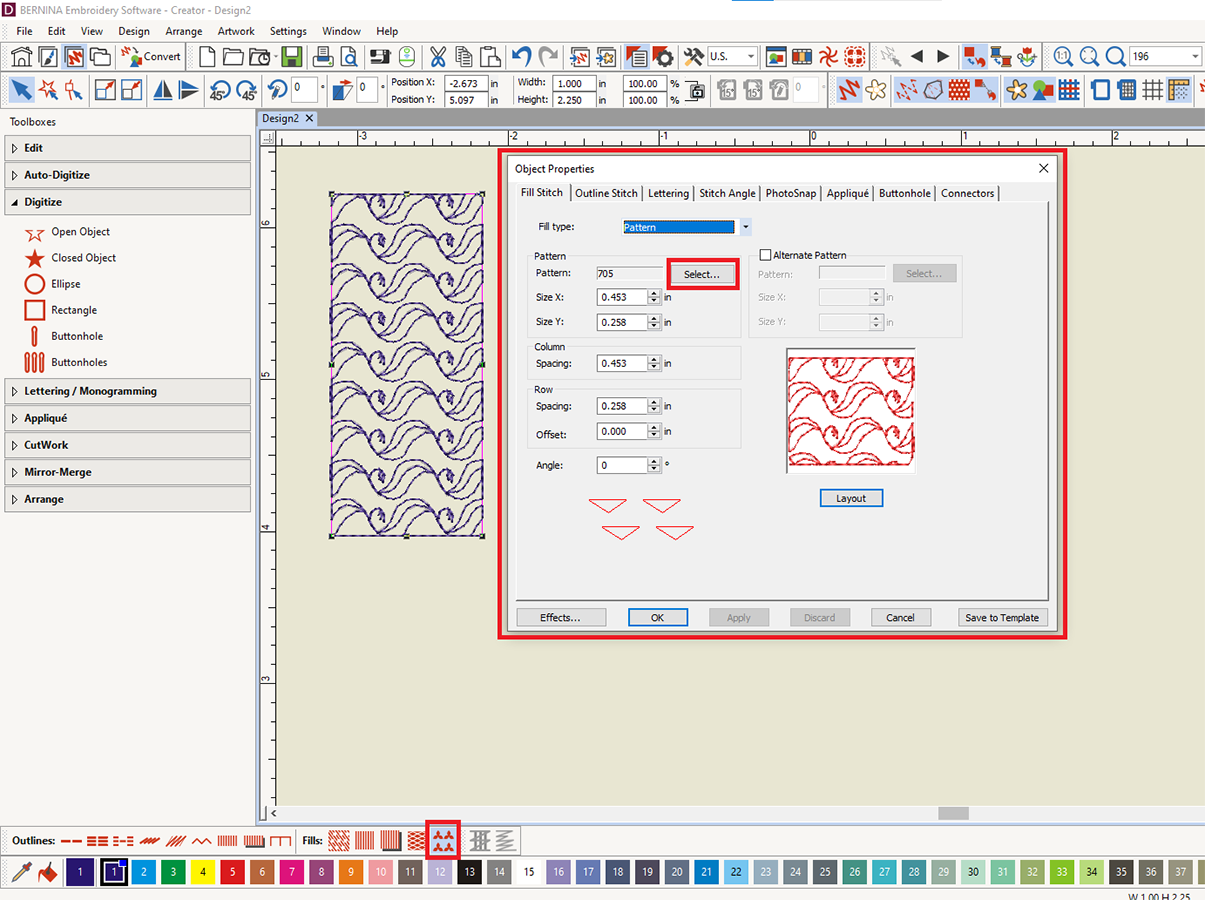
From the Heirloom Pattern set, select Stitch 711 and then hit Ok.

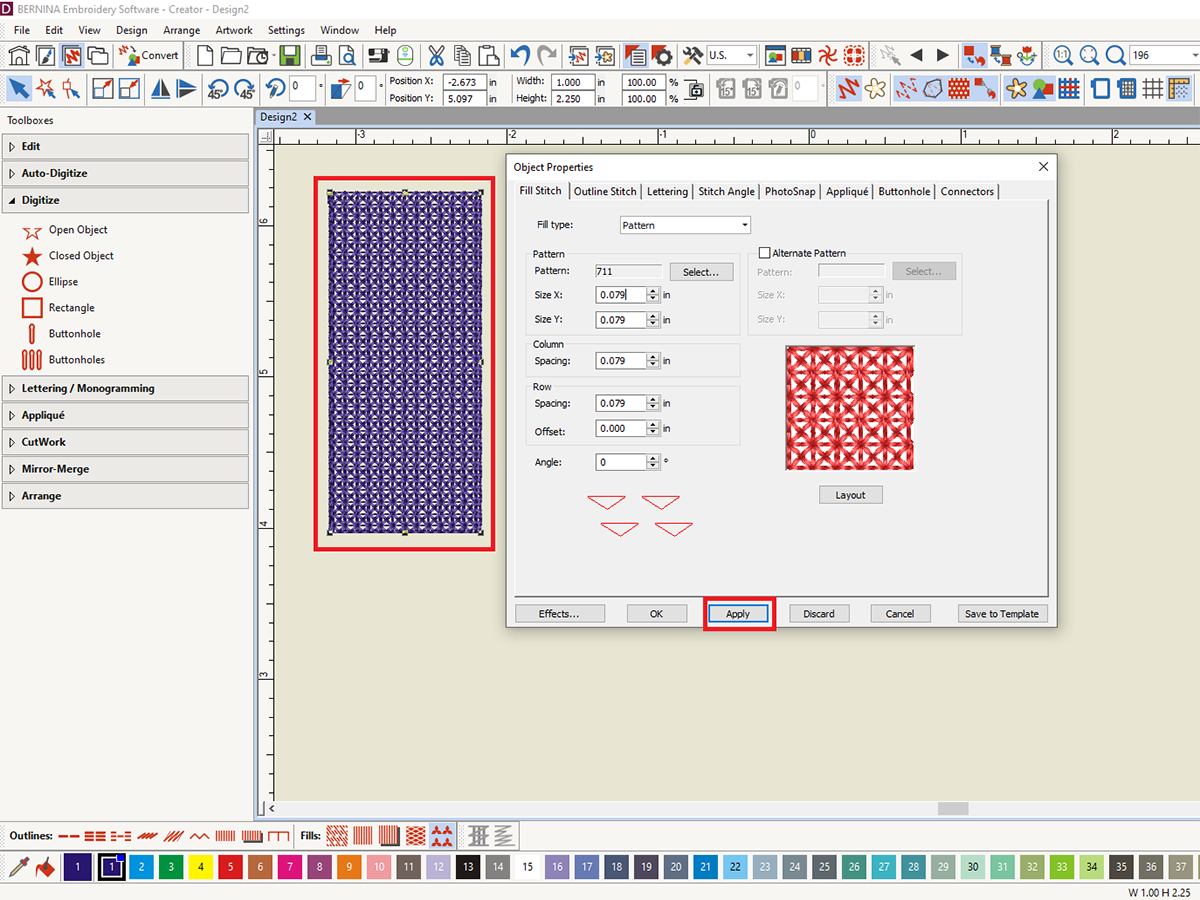
Click Apply to see what your design with look like in the rectangle. While I love the look of the dense stitching, I want to open it up a little for these earrings.
I adjusted my pattern settings to the following:
Size X: .25
Size Y: .25
Column Spacing: .25
Row Spacing: .25
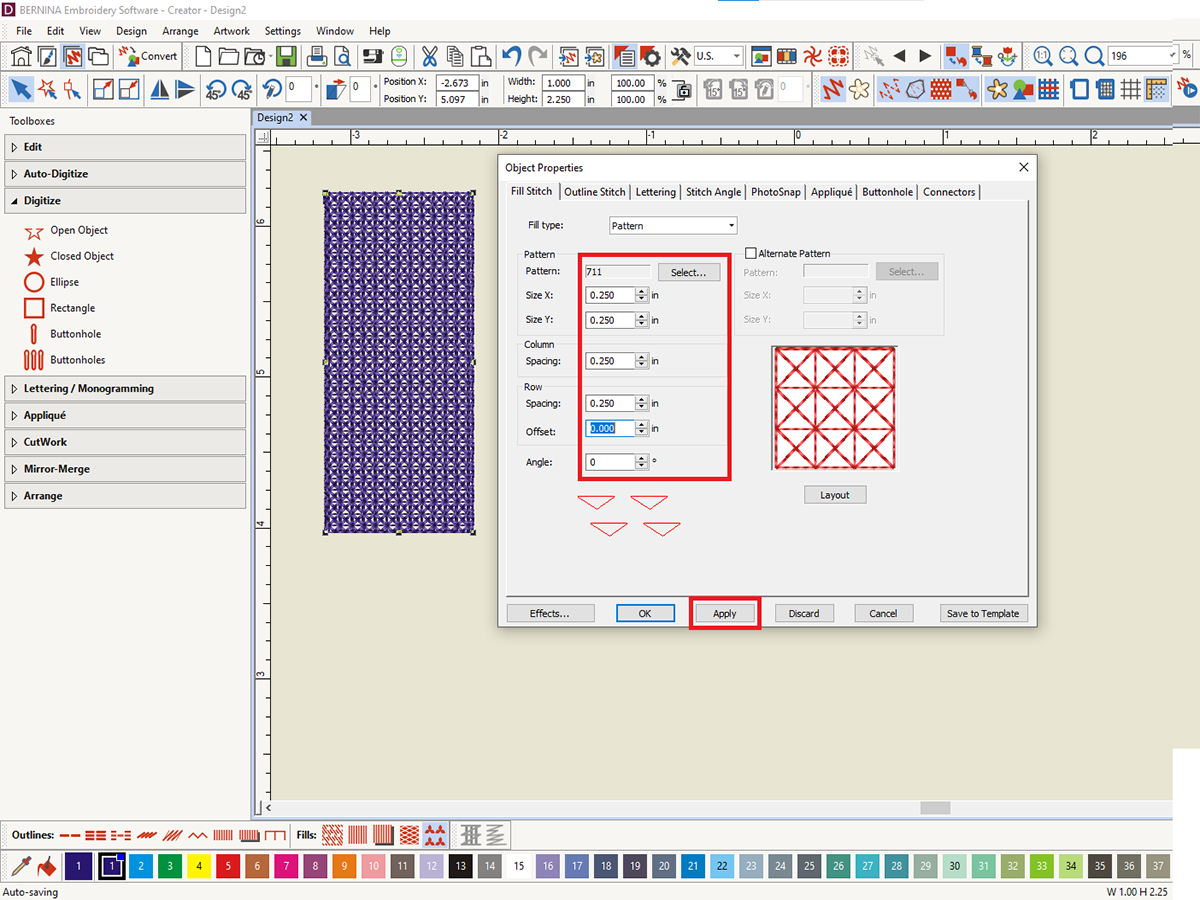
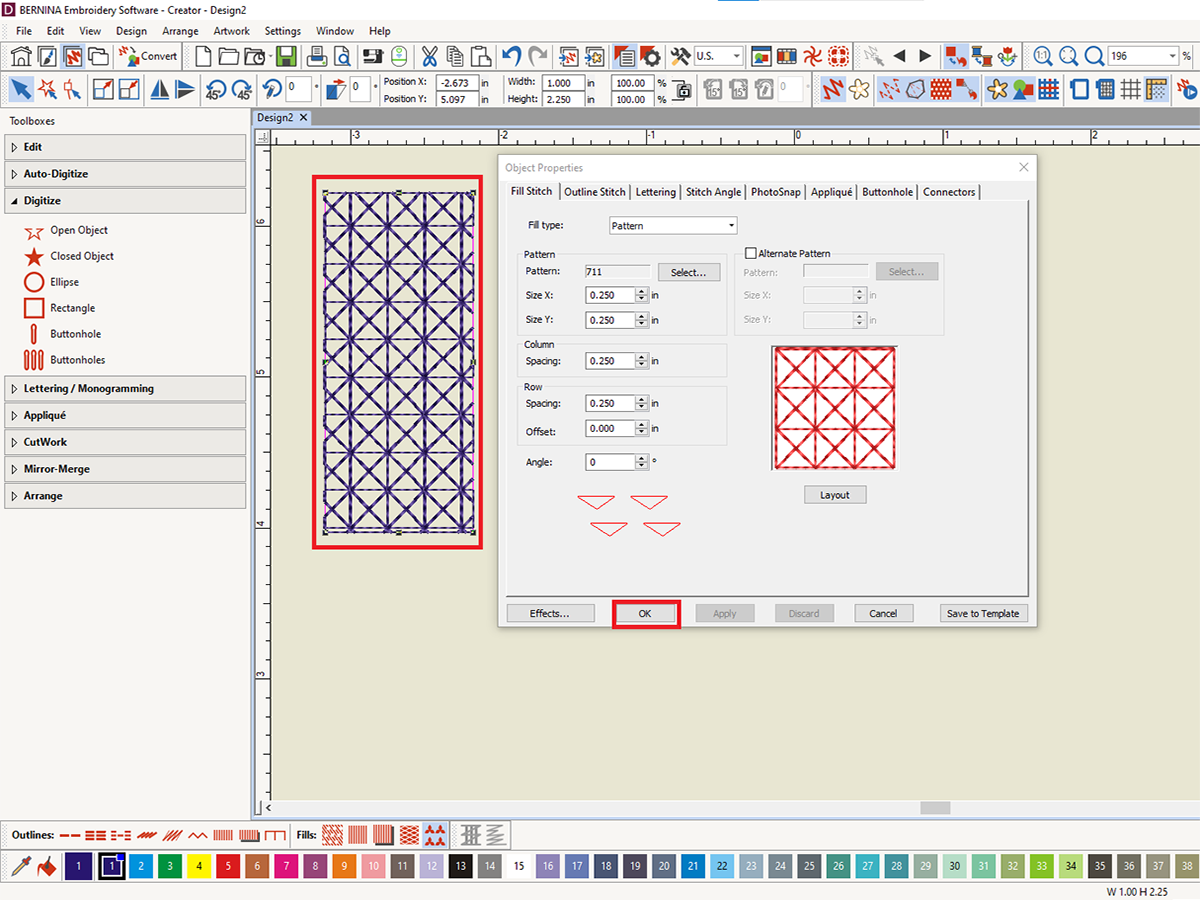
Have fun playing around with the settings to get the stitch to look exactly how you like. When you’re satisfied with the earring, click OK.
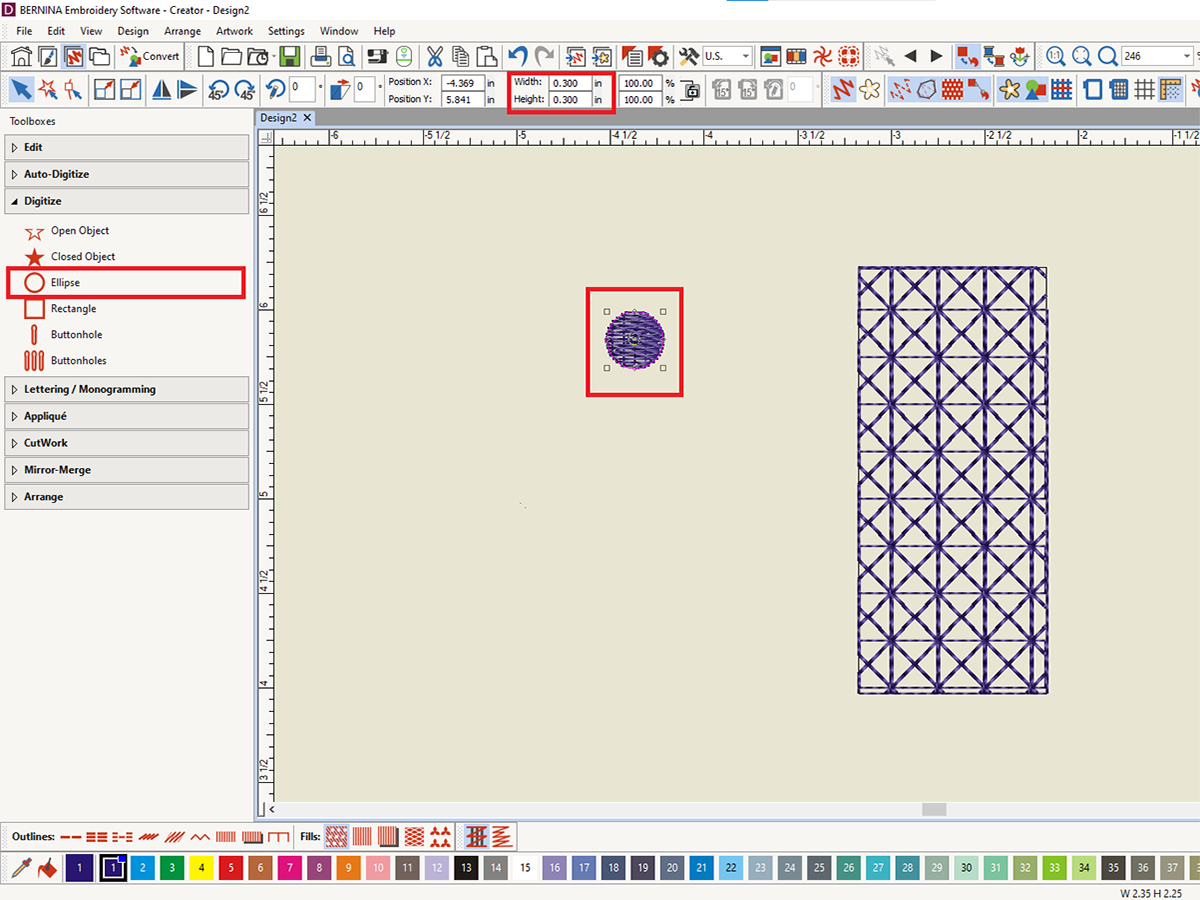
Now we will create a circle the same way we created our rectangle. In the Digitize Toolbox select the Ellipse tool. Click twice to create your ellipse, then hit enter. Once again, choose the Select Objects icon (arrow) and select your circle.
With the Proportions icon unlocked, enter ‘.3 for the height and width.
Now is a great time to save if you haven’t already. Don’t forget to save and save often when working in software. Selecting Save As will allow you to name the design.

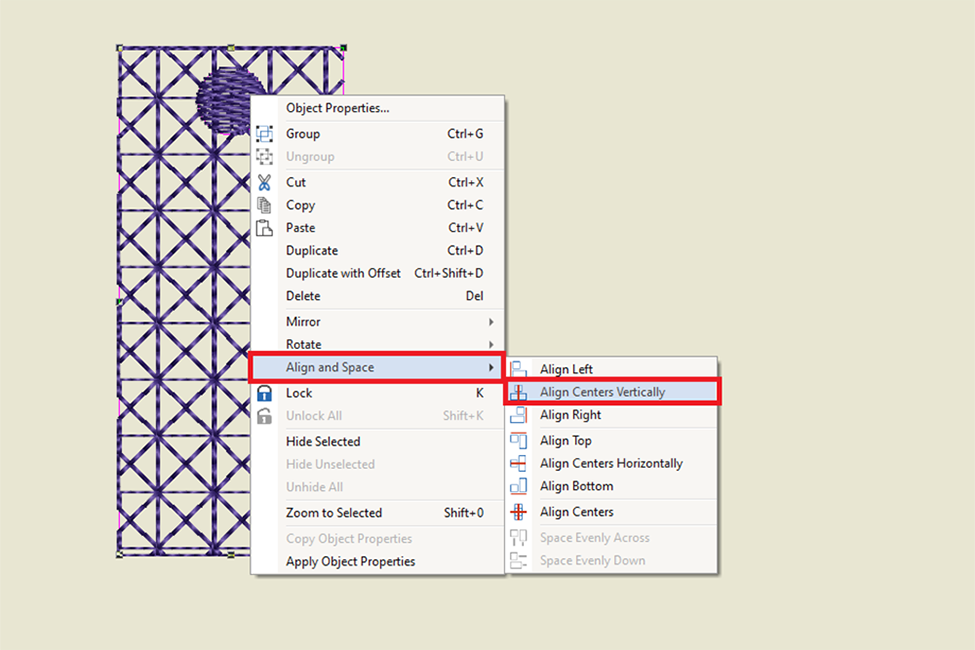
Next we will create a hole for the jewelry hardware. Drag the circle over the rectangle, leaving approximately .125 from the top of one earring. You can then select both objects, right click and choose Align and Space and then Align Centers Vertically. This will ensure the opening is centered in the earring.
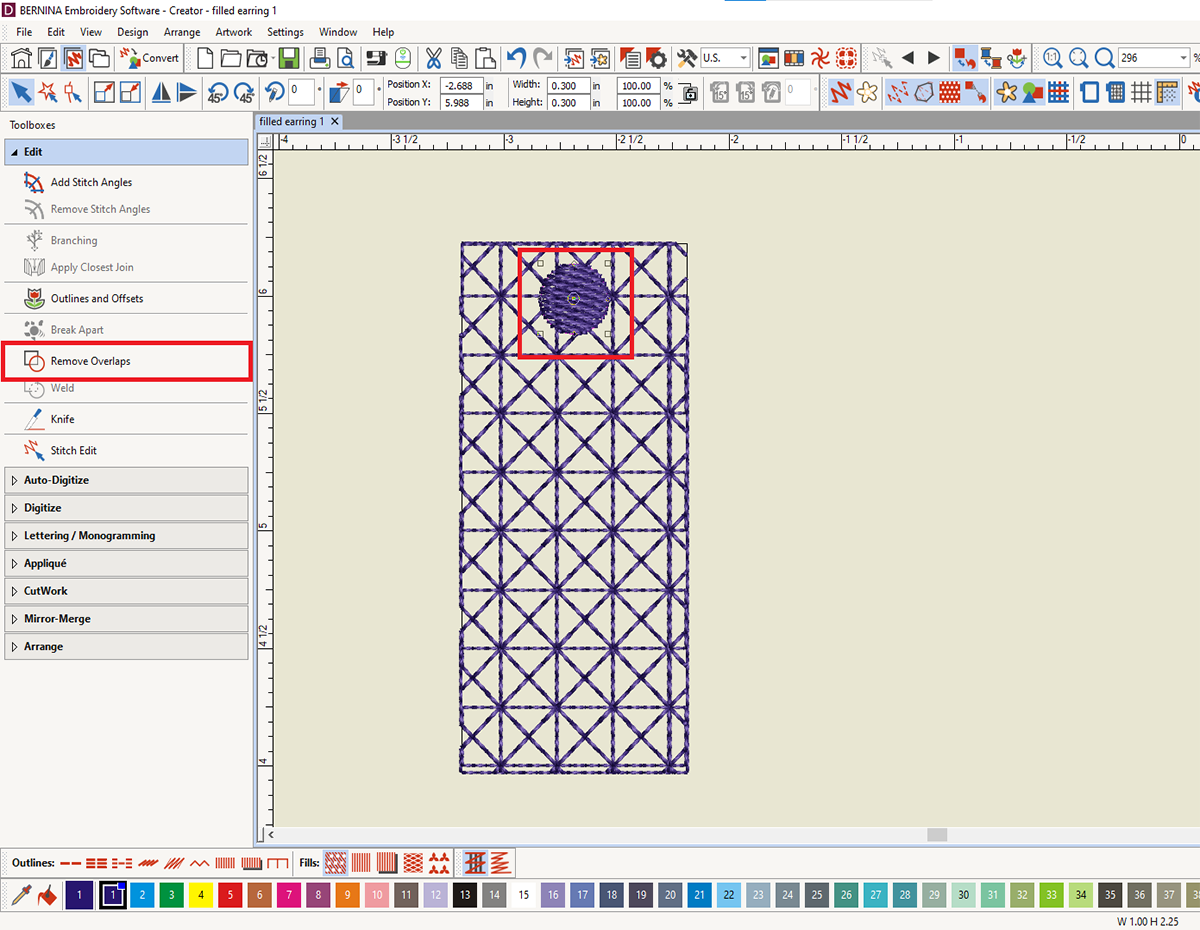
Now select the circle and select Remove Overlaps from the Edit menu. You can then delete the circle, and you will have a cutout in the earring design.
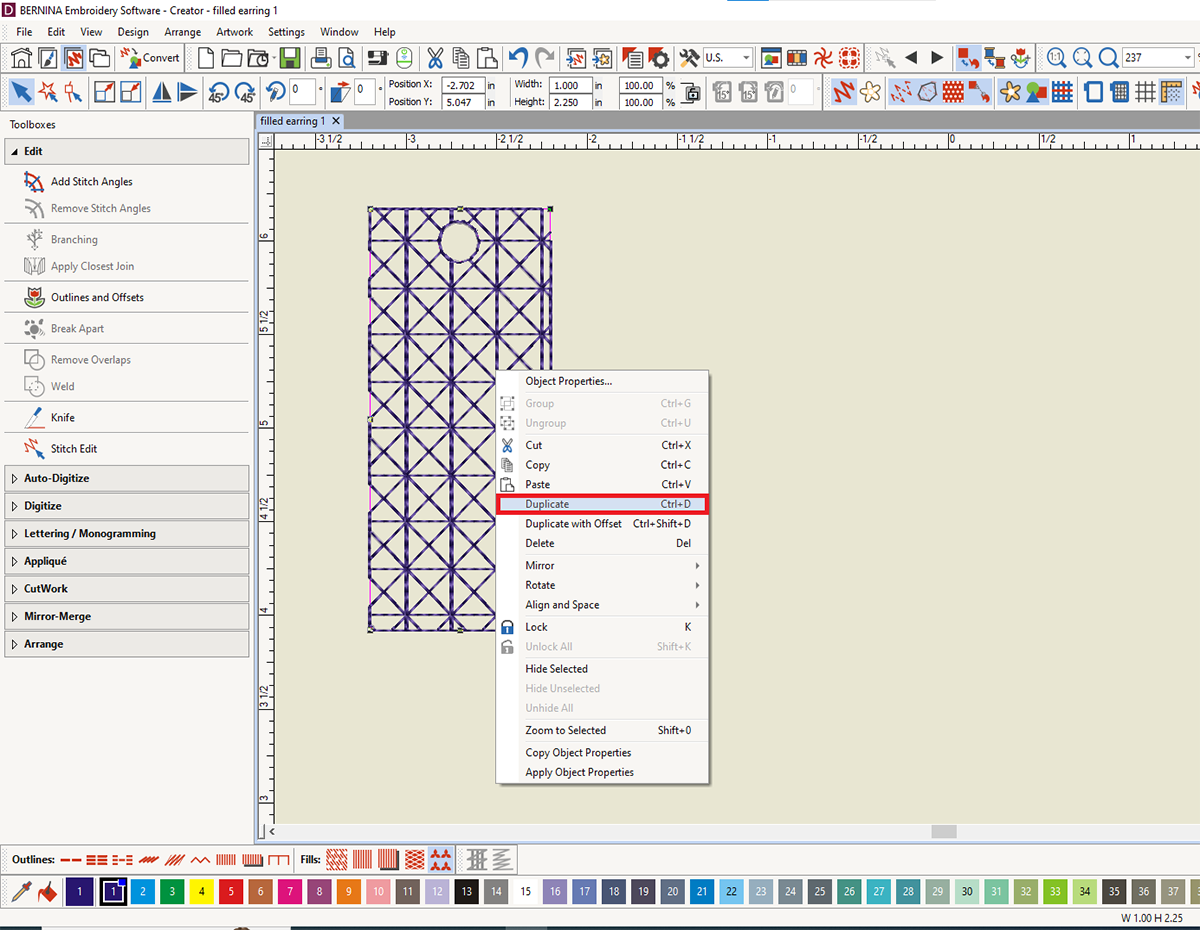
Right click on the earring and select Duplicate.
Now select the Triple Stitch icon from the Outline toolbar. You’ll notice this creates an outline for your earring and the opening. This will create a gorgeous finish for our earrings! But we also need a placement line, so let’s create that now.
In the Color Film window, select the rectangle outline. Right click and select Duplicate, once again.
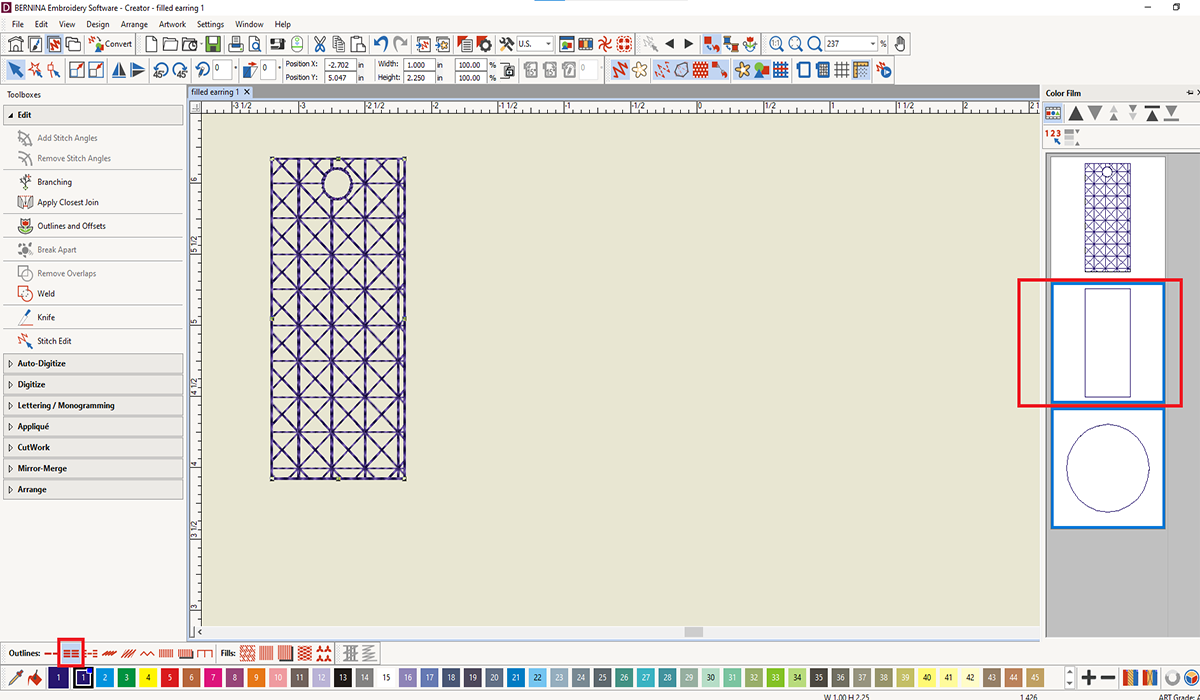
Click on the new rectangle at the bottom of the Color Film window and drag it to the beginning of the sequence, above the fill design we created.
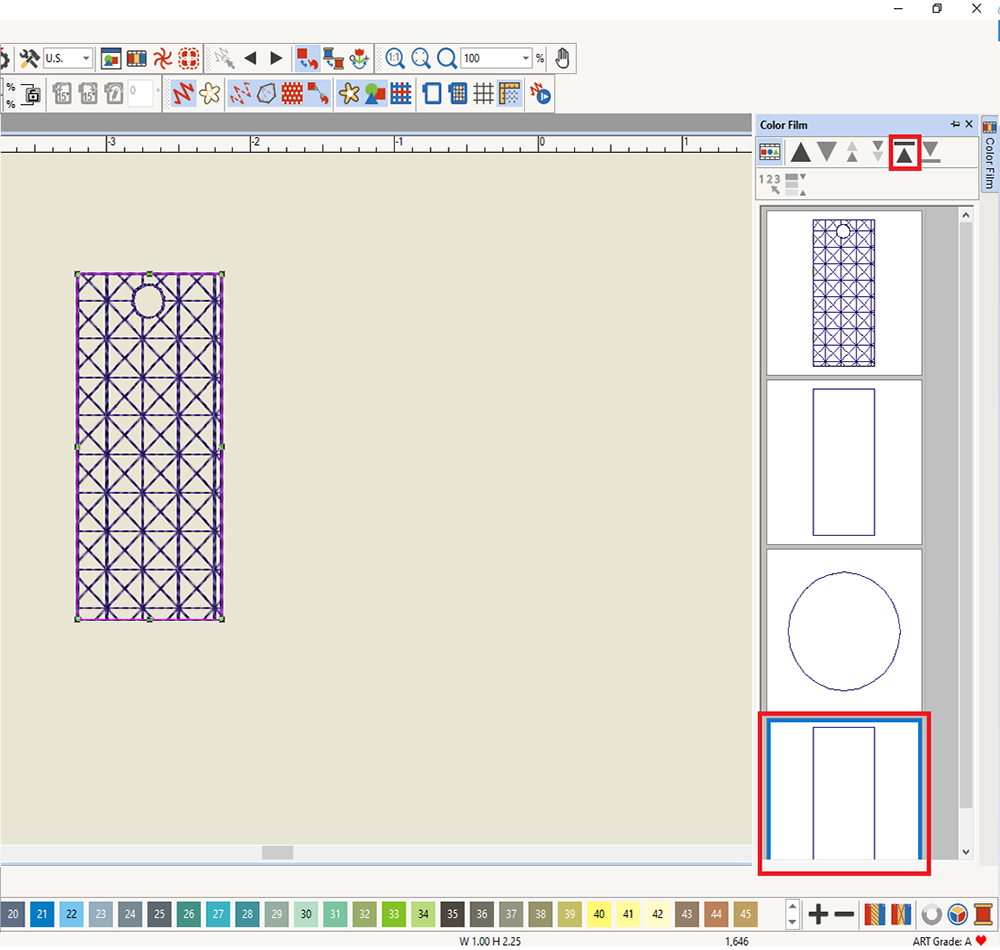
With the new rectangle at the top selected, choose the Single Stitch outline for this shape. Now this will work as our Placement Stitch for the sparkle vinyl!
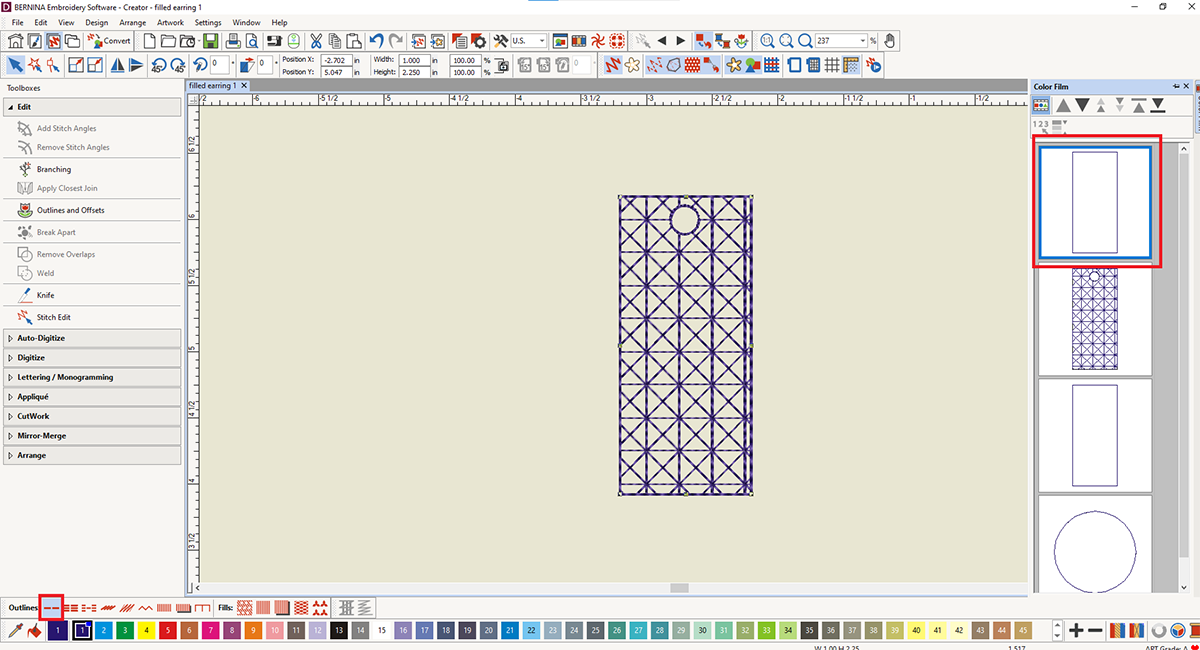
I like to recolor my layers at this point, even though I will stitch everything in one color. This helps me with the stitching and editing process.
Select the whole design and then select Duplicate with Offset from Object Properties.
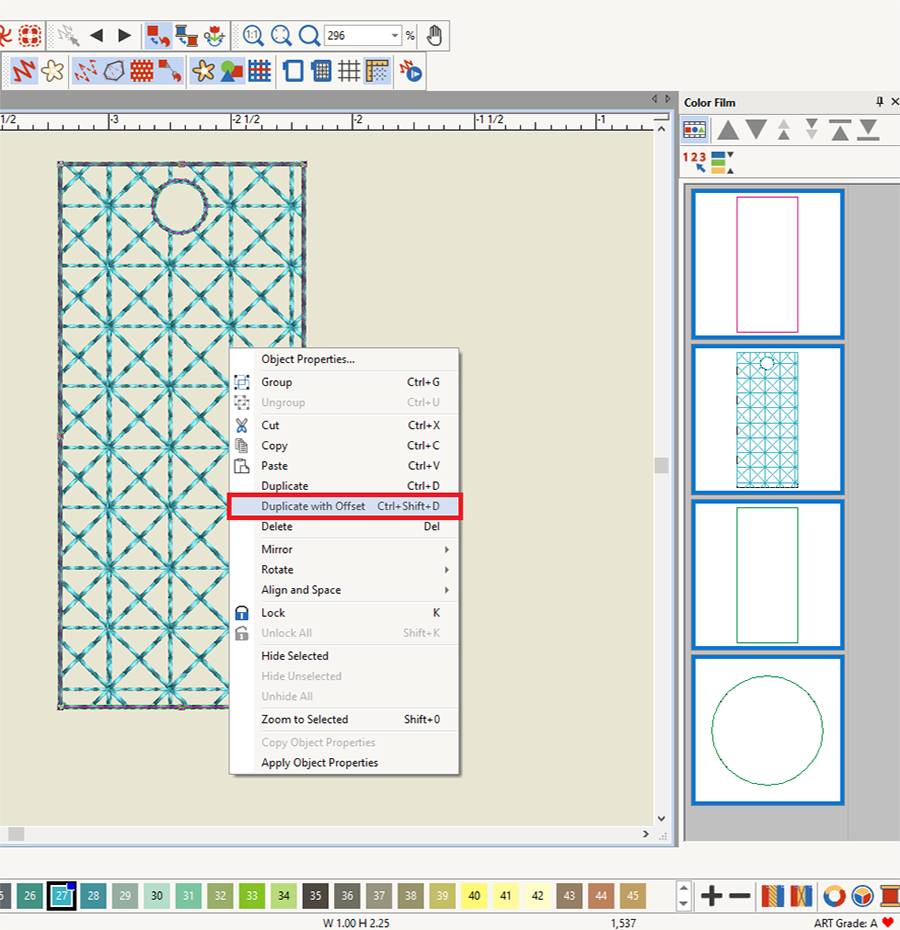
Drag the second earring to the side of the first.
Tip: Leave more space than I did here. You’ll want to have at least a half inch between the two shapes for ease of cutting out the earrings.
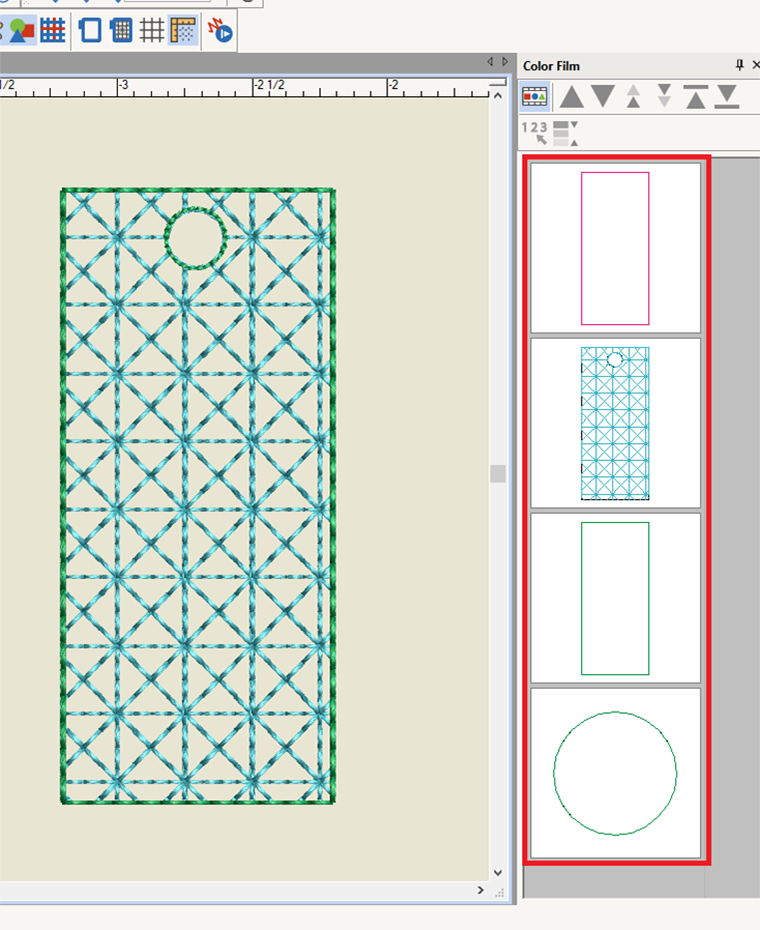
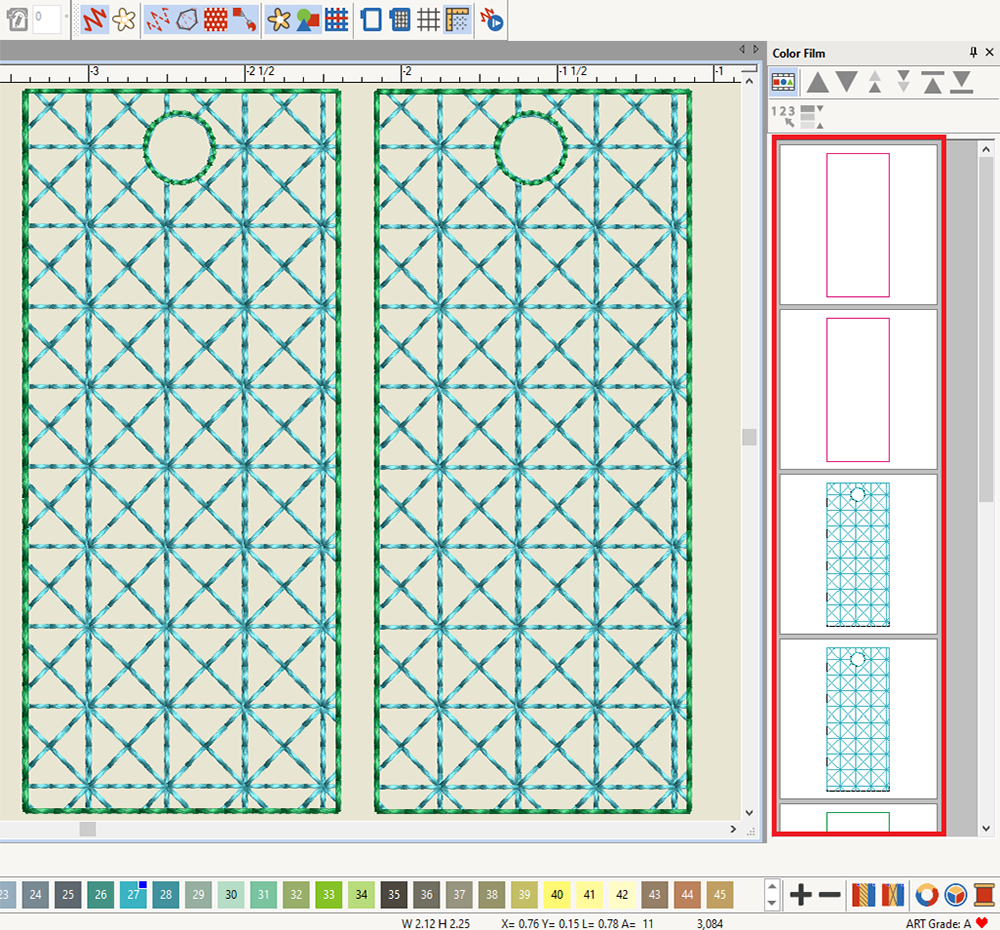
In the Color Film Docker, drag the different color layers so they are together.
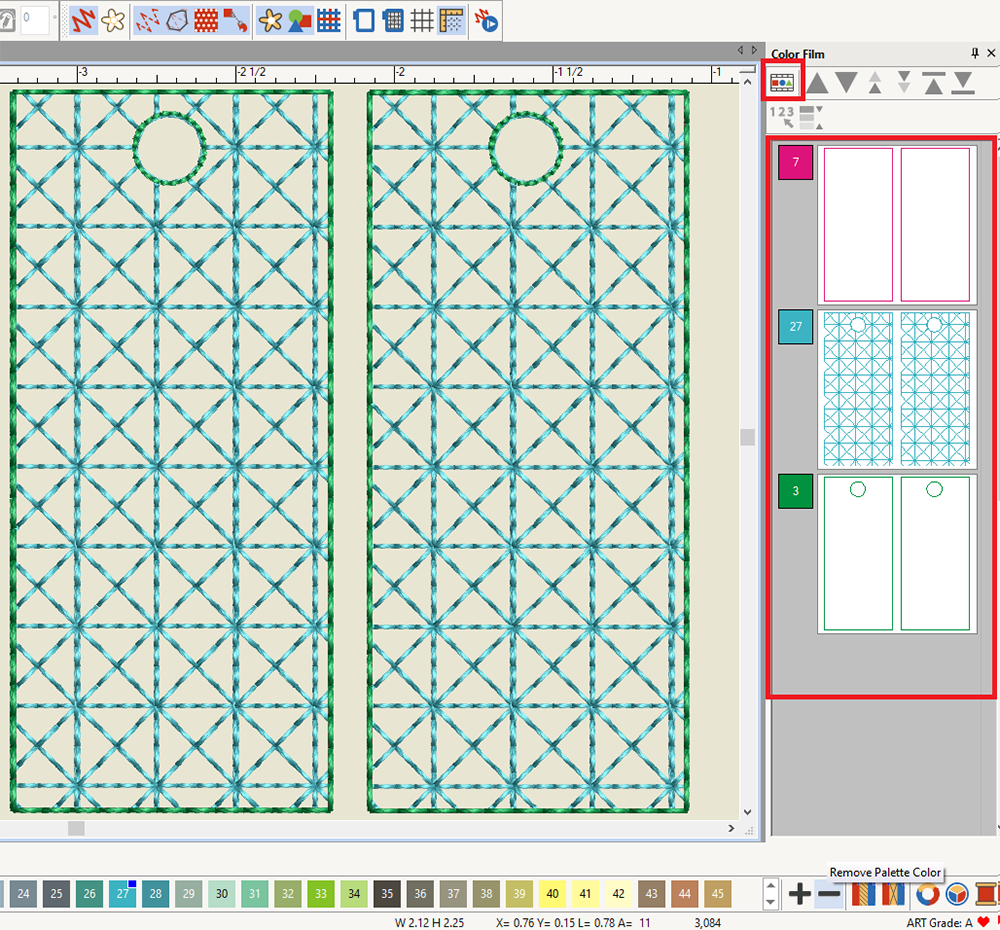
Toggle Show Objects off to double-check that our placement stitches, fills and outlines are all grouped in the Color Film window. This step isn’t totally necessary, but it will help make the stitching much easier and cut down on how many times we will have to rethread the machine.
See how the Color Film window shows the three distinct phases of our project? That means we are ready to stitch!
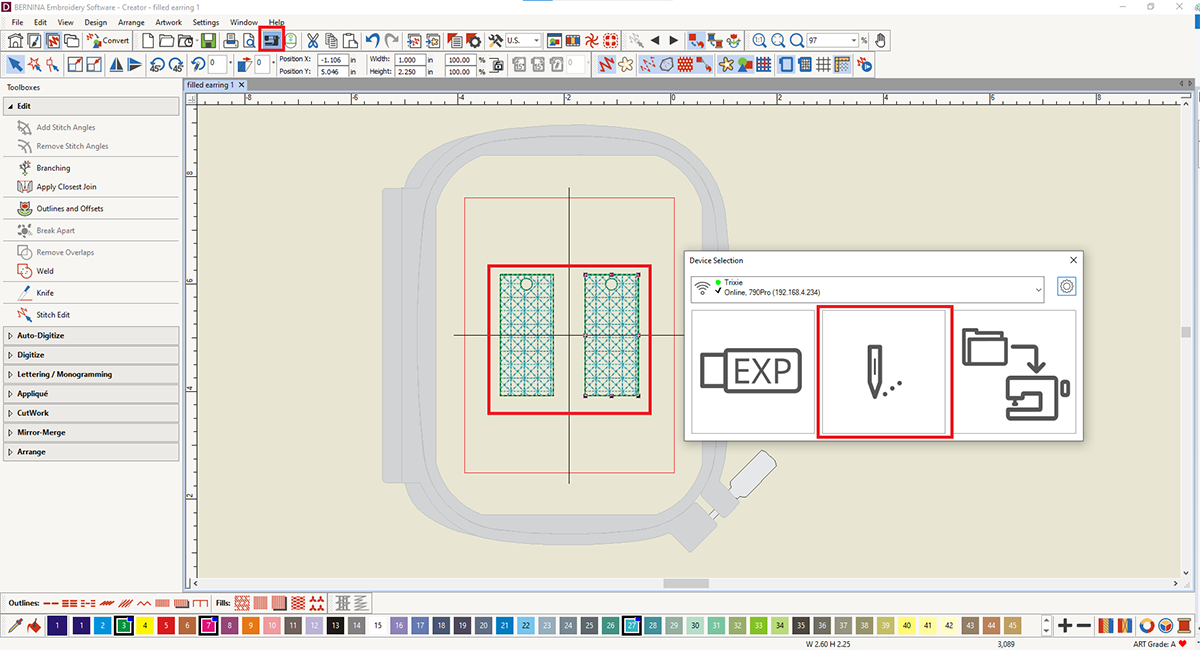
Send the design to your machine. I am sewing with the 790 PRO so I will use the wireless connection to send it to my machine.
Step 2: Embroider the Earrings
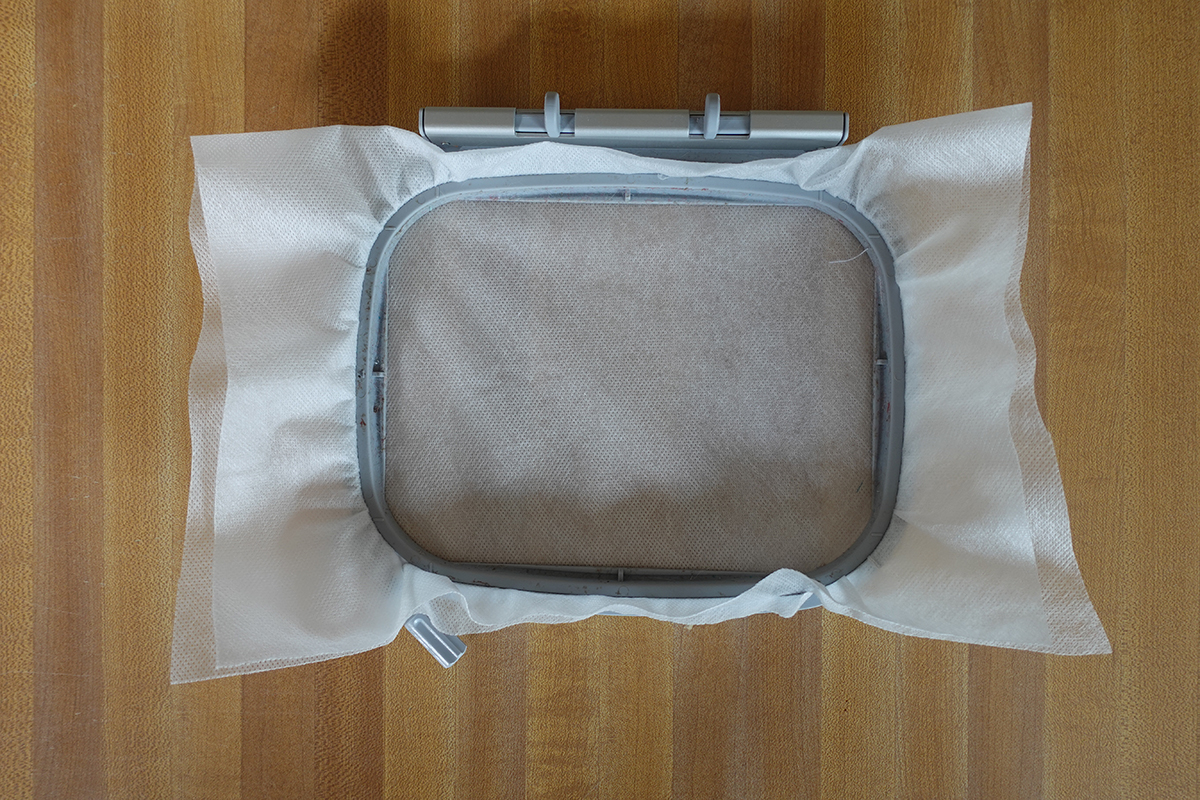
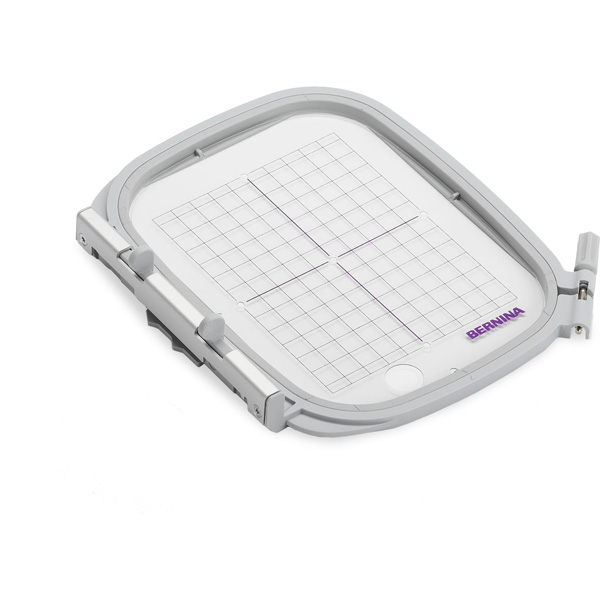
Hoop two layers of AquaMesh in the Medium Hoop.
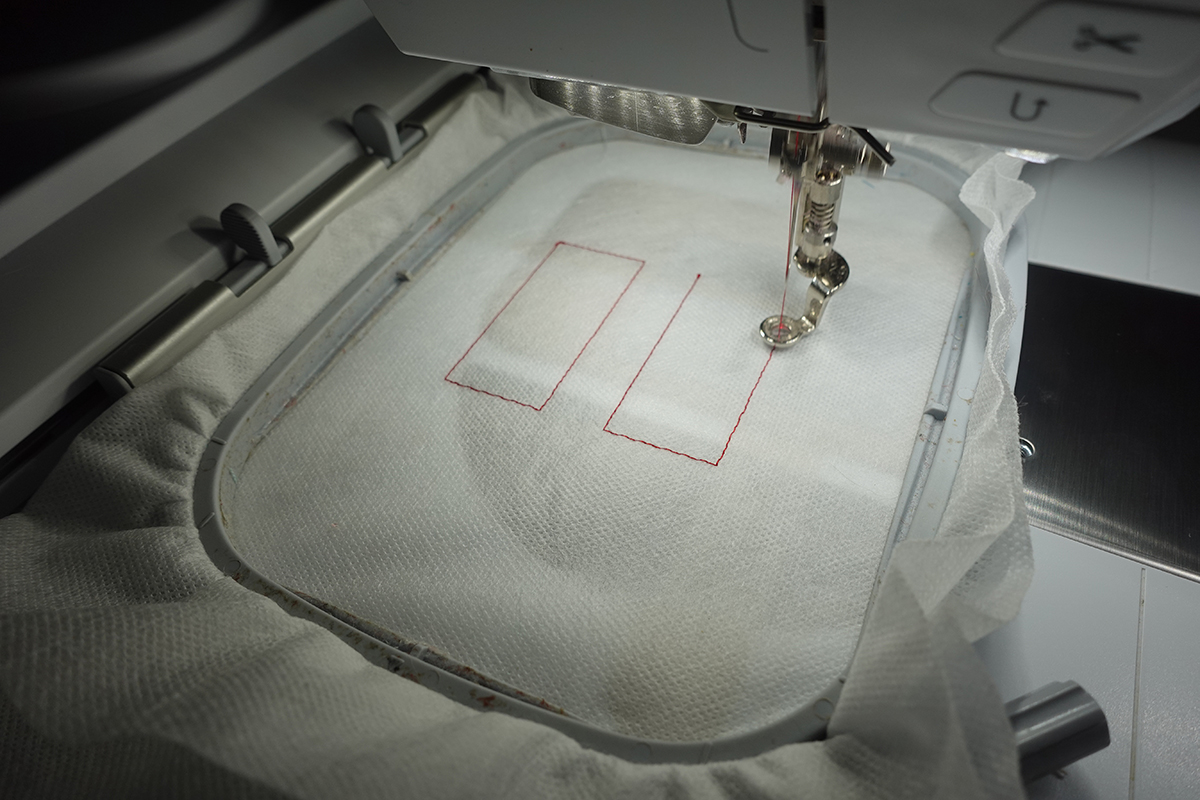
Stitch out the placement lines
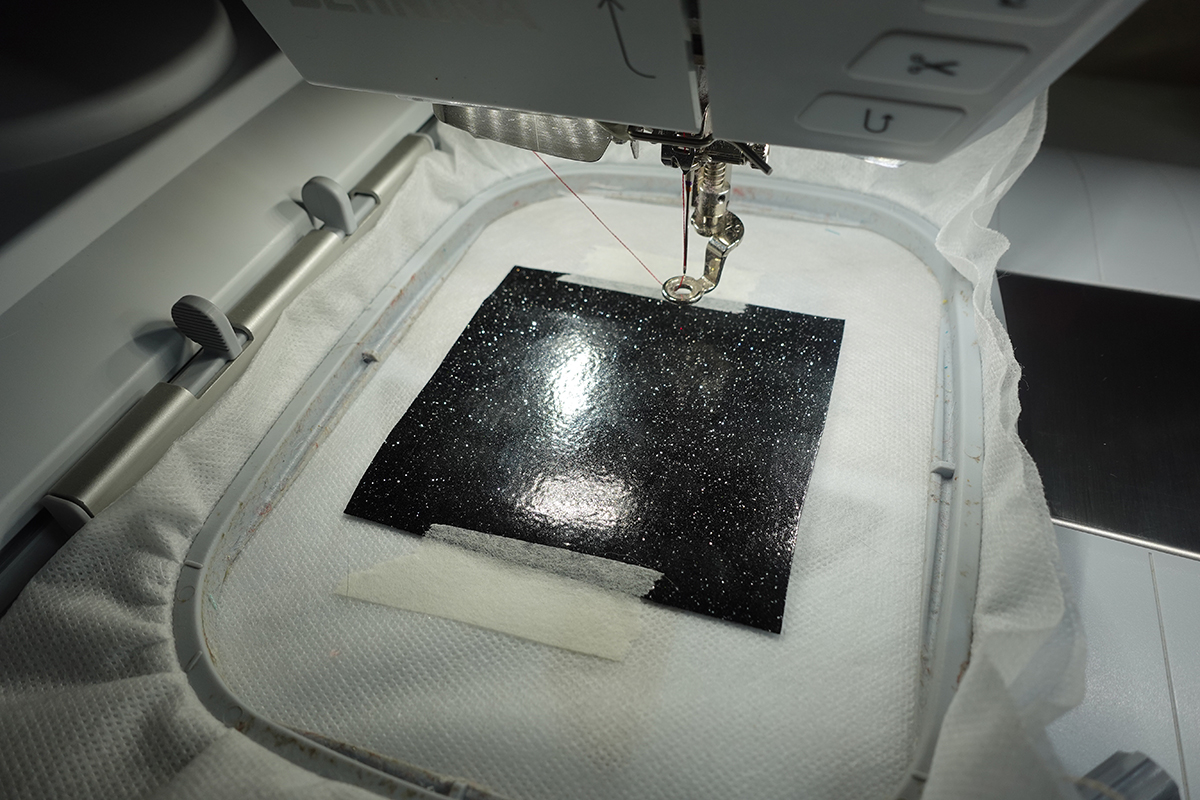
Cut two squares of Sparkle vinyl to cover your placement stitches plus approximately ½ around all four sides.
Use the OESD Embroidery Tape to secure one Sparkle vinyl square over the placement lines.
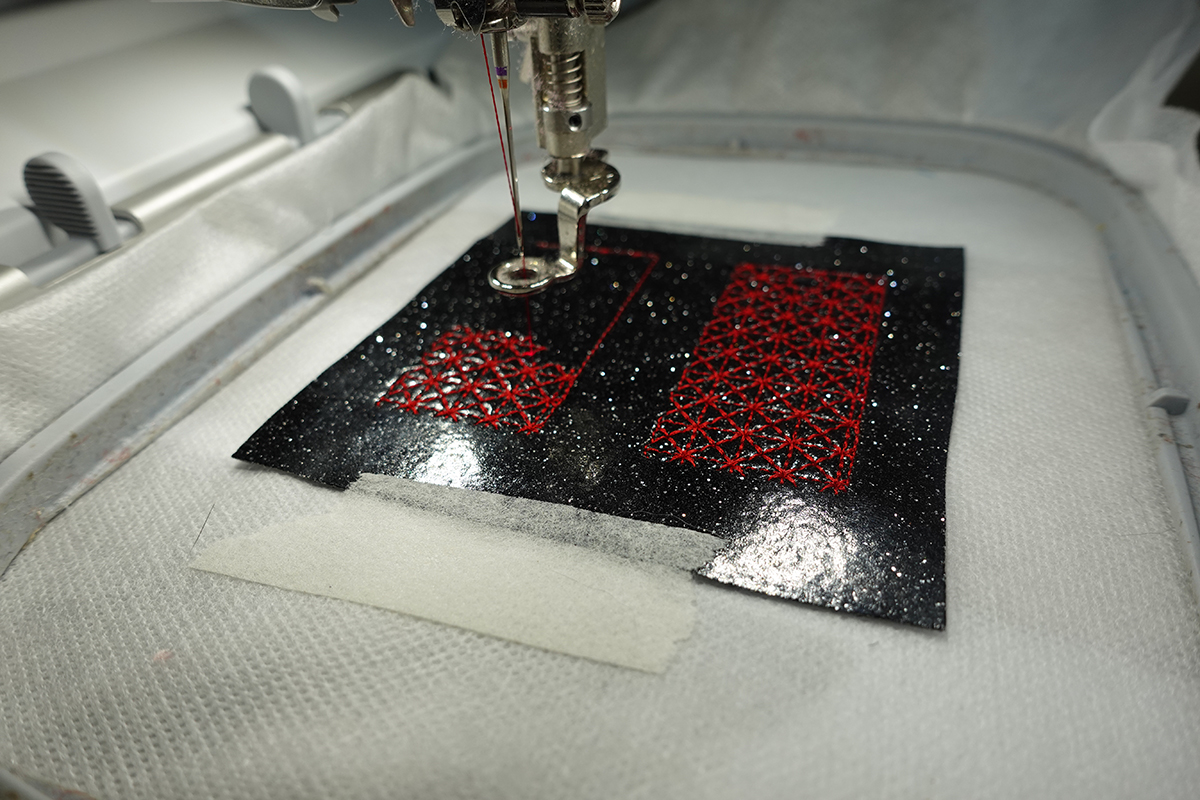
Before stitching the outlines, remove the hoop from the machine and tape the second Sparkle vinyl square over the placement stitches and tape in place.

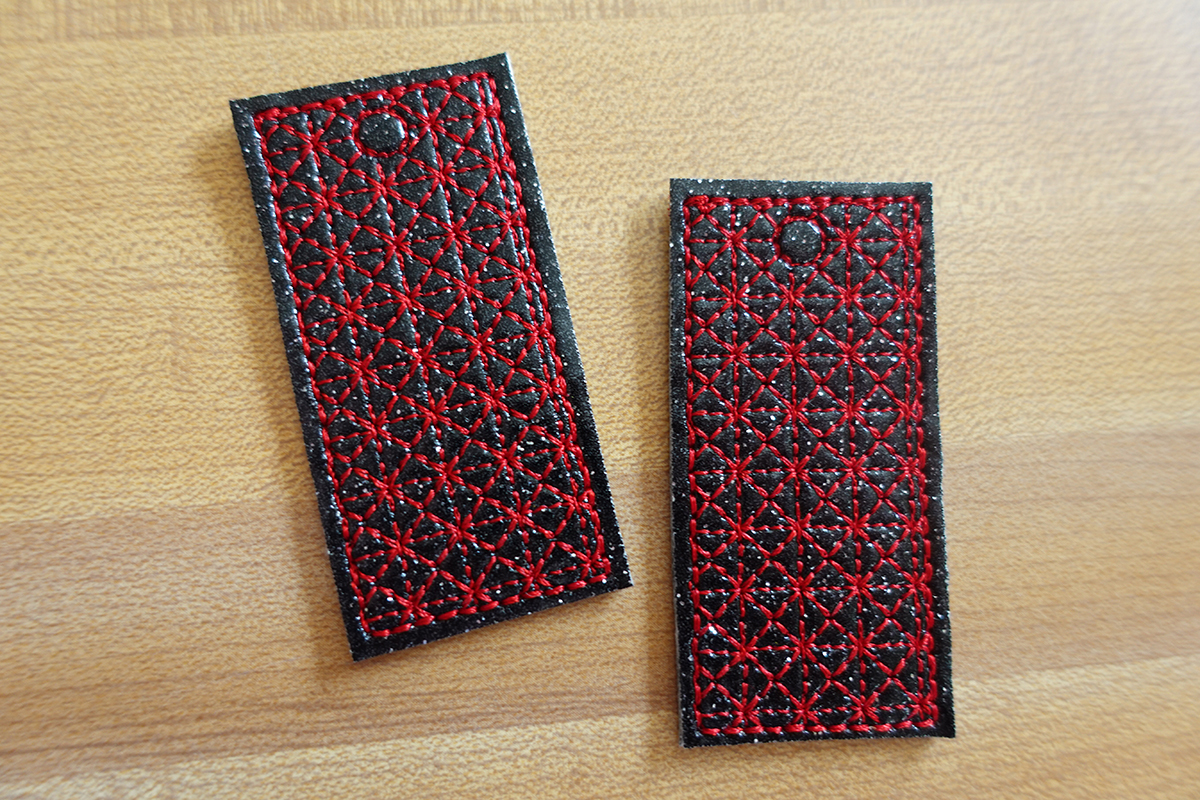
Stitch out the Placement Lines and finish stitching the fill stitches.
Step 3: Assembling the Earrings
Once the earrings are finished stitching and you have unhooped them, cut the earrings out. I liked mine cut as close to the stitching as possible without cutting the thread (Roughly 1/8) but feel free to cut them as you like.
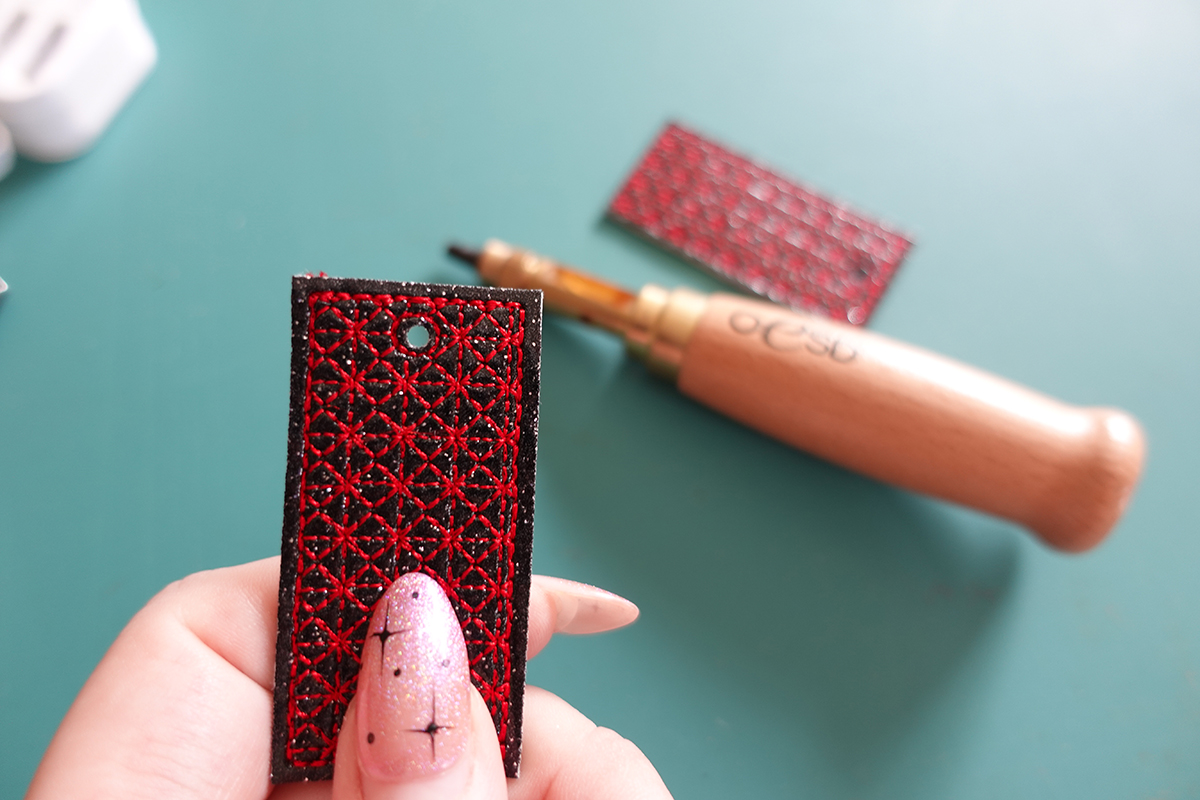
Place the earrings on the OESD Minimat and use the OESD Perfect Punch Tool to cut out the hole in the earrings.
Finish your earrings as desired and head out for your night on the town!

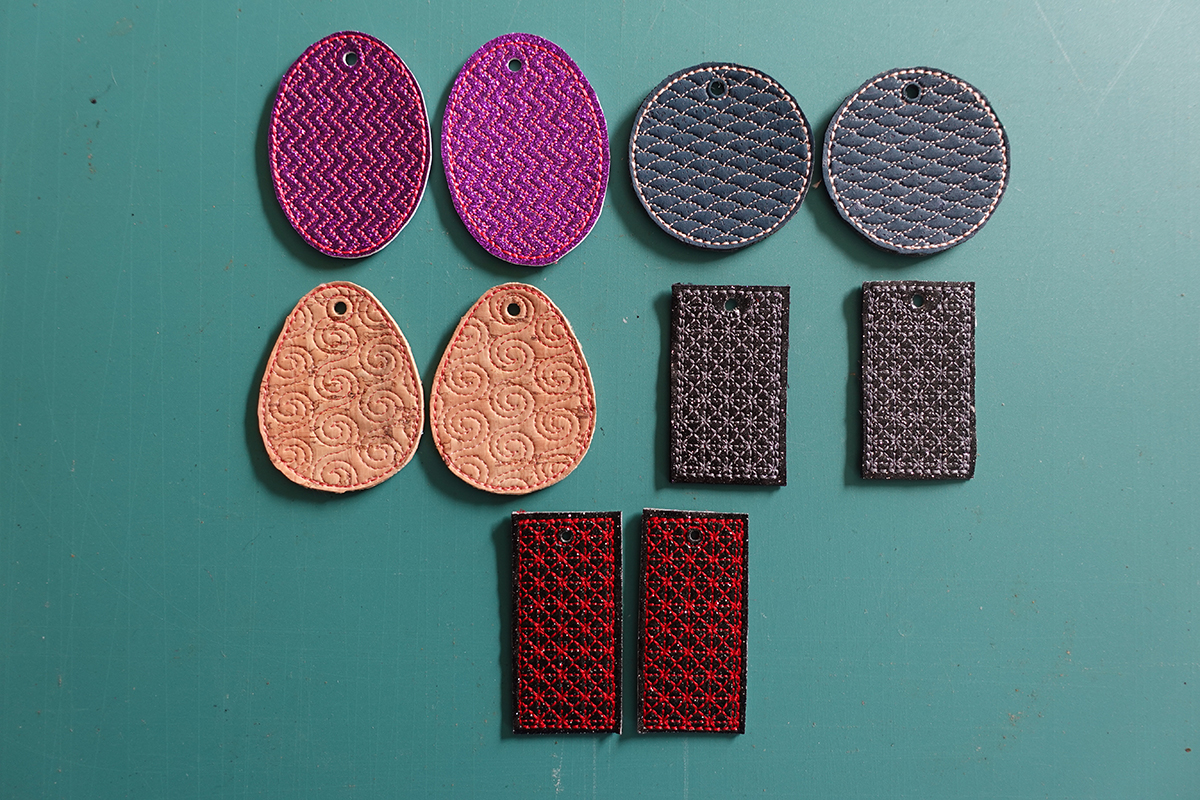
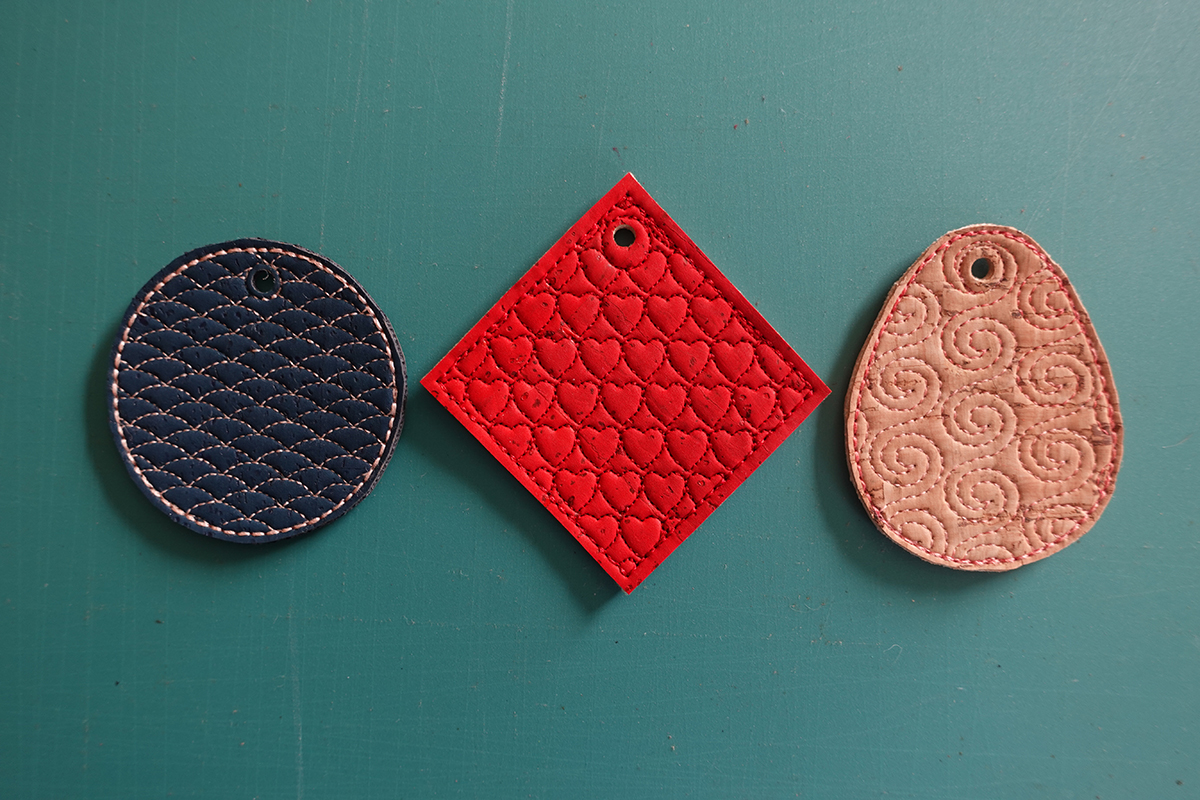
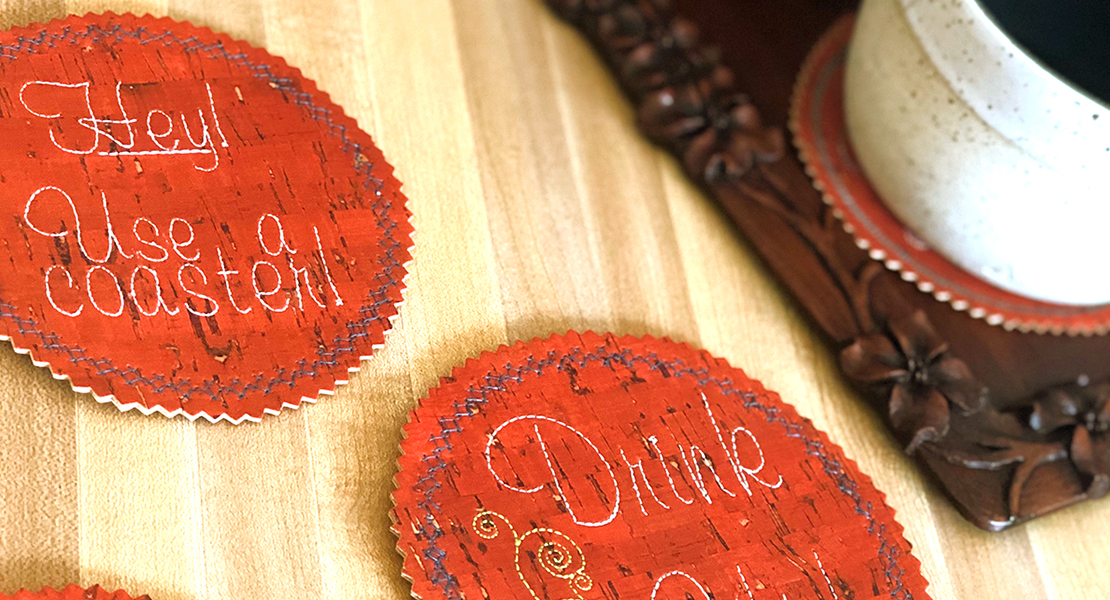
Have fun playing around with different fills, fabric and thread different materials. I loved how these earrings looked in cork!
Looking for more creative uses of BERNINA Designer Plus? Check out Software Inspirations at your local BERNINA dealer. These classes are an incredible way to stretch the limits of your digitizing and to get inspired to create even more gorgeous embroidery designs. I’m always stunned to learn just how much the BERNINA Embroidery Software 9 can do and see how much my skills grow.
I can’t wait to see what you create!
Used Products


What you might also like


2 comments on “Digitize Your Own NYE Earrings”
-
-
Reduce my stack of WIPs
Leave a Reply
You must be logged in to post a comment.

Improve my free motion quilting skills.