Sew Your Own Weighted Comfort Bunny
Hi everyone, I’m Kerry Goulder also known as @KidGiddy and have been sewing as a Bernina Ambassador since last year. I am also an author, pattern designer, martial artist and a metalsmithing hobbyist among other things.
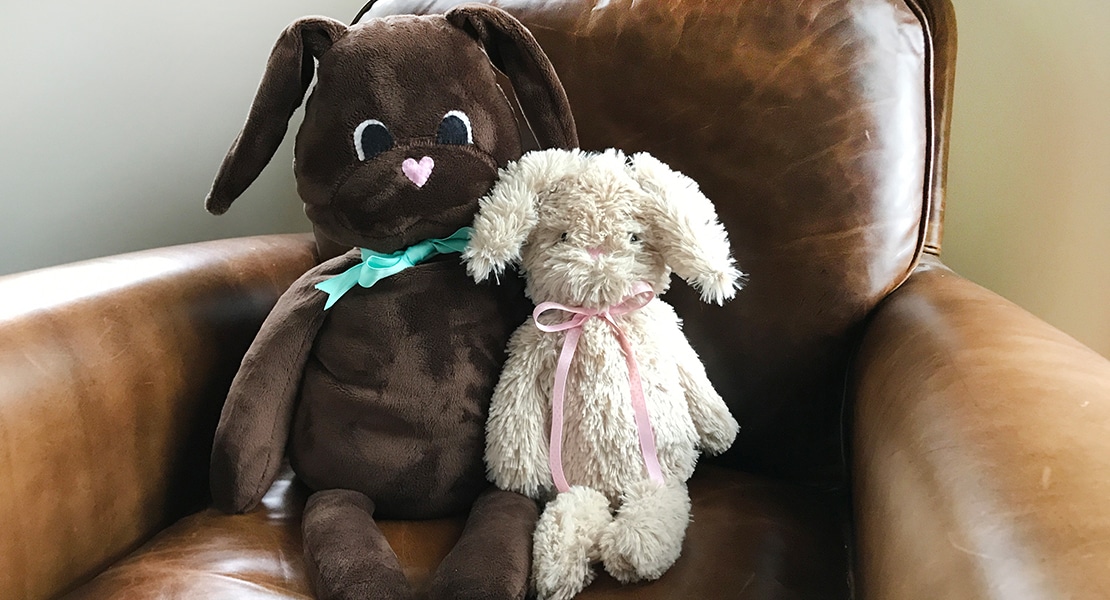
More than 20 years ago I found myself laying in a hospital during the springtime while in college covered in hives and miserable. Everything started a couple of days earlier, but I was eventually hospitalized and alone for at least a day (until my mom arrived). As I got better I was allowed to have some visitors that brought me a sweet little bunny stuffed animal from the gift shop. It’s the only reminder I have from my time in the hospital. In the months and years that followed, any time I got sick…”Sick Bunny” came out for cuddles. When I had my two girls and one of them got sick…Sick Bunny again came to the rescue.
Although we now have a real bunny (Lola), she’s not exactly a cuddle on demand animal. There’s no denying that animals (even stuffed toys) provide comfort in times of need. During this spring season, I want to share a sewing tutorial with all of you to help you make your own comfort bunny, with a little weight. The weight helps to feel like a constant hug. Just having it sit on your lap, or a child’s lap, can be of great comfort. If you or someone you know is struggling with anxiety or depression during these very difficult and challenging times, this comfort bunny could be a wonderful gift to make and share. I make no medical claims or guarantees, but believe that this spring is that time to get sewing and try anything and everything to help our loved ones while in isolation. So let’s get started.
Materials to create your Weighted Comfort Bunny
- 1/2 – 3/4 yard Minky of Furry fabric
- 3” sqr scrap acrylic or wool felt in white, black and pink
- 3 – 6 lbs Craft pellets (millet/rice grains are not recommended due to potential moisture issues and bug infestations)
- Polyfil stuffing
- Aurifil thread to match
- Safety Eyes (optional)
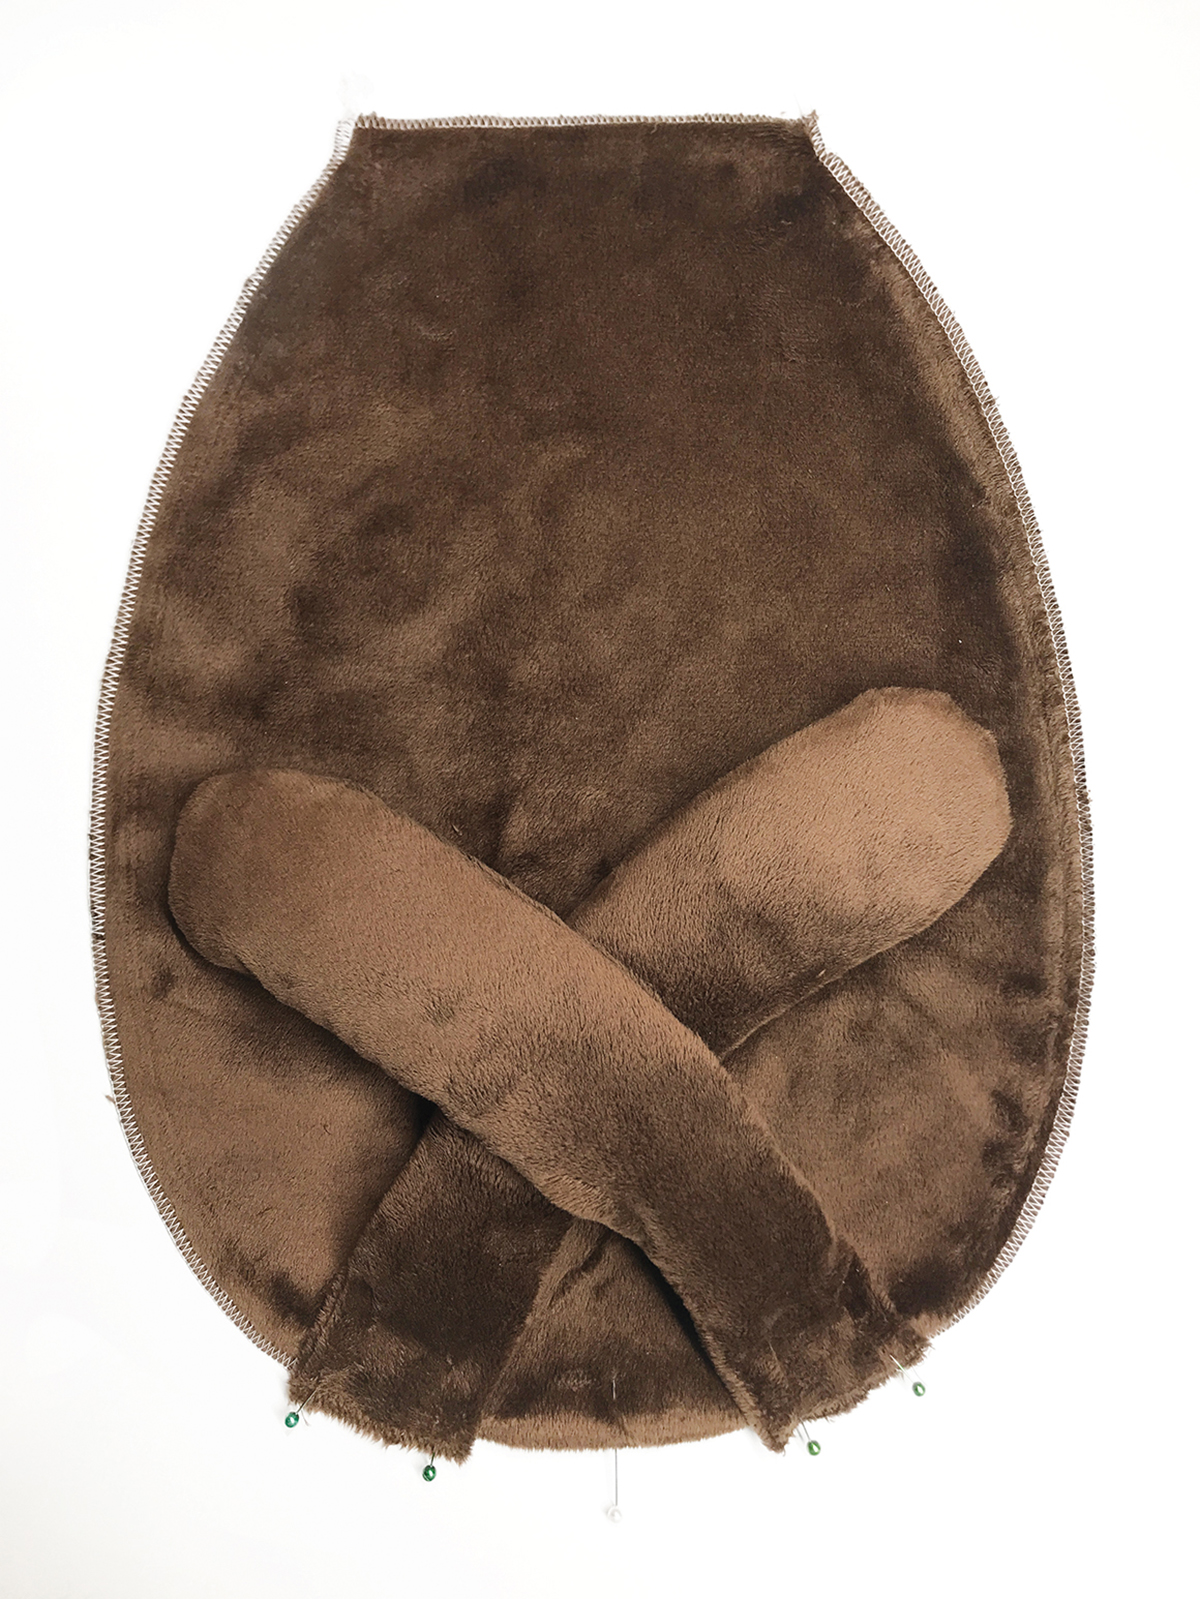
- Printed pattern pieces (printed, cut and taped together accordingly)
- Turning tubes
Download the bunny pattern here
Please read through all instructions prior to beginning.
Important notes:
- This bunny will not be safe to put in the microwave, or warmed in any way, other than with genuine cuddles.
- As many of us are unable to get out to buy fabrics or materials, try to get creative with what you have at home. (Instead of using a minky fabric, find an old soft sweater or sweatshirt with meaning and use it for making your bunny). Sweaters may require a 4 way stretch lining (like a tshirt) so the pellets don’t fall out.
- In some areas you may also be able to order online or order for curbside pick up.
- All seam allowances are 3/8″
Instructions to create your Weighted Comfort Bunny
Make the Arms, Legs, and Ears
1: Layout all pattern pieces for your Weighted Comfort Bunny, matching the nap of the fabric with the arrows on the pattern and cut pieces out (not shown).

TIP: Use the Bernina Walking Foot when sewing with cuddle to prevent the fabrics from slipping and pushing one layer off course.
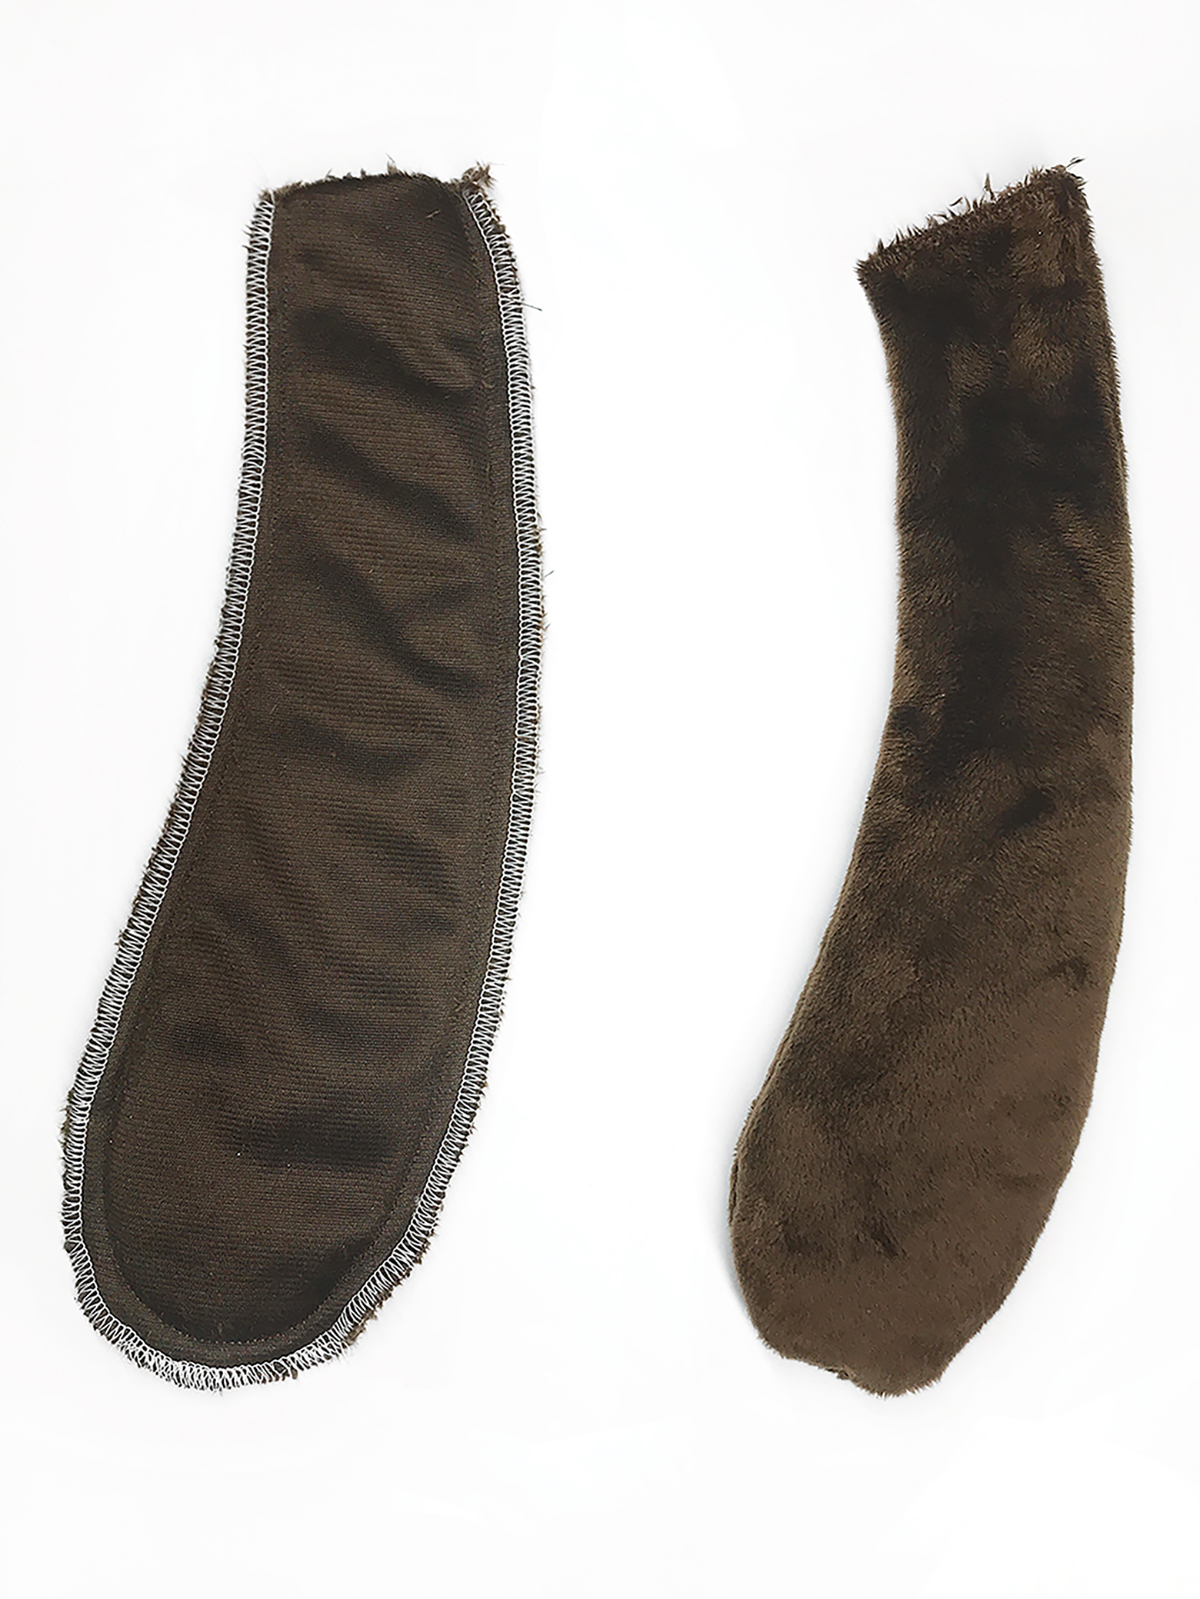
2: Serge (or zig zag stitch) the arm, leg and ears, each with two pieces right sides together and then sew a regular 3/8″ seam. Sew 2 arms, 2 legs, and 2 ears.
3: Turn the arms, legs and ears right side out using the turning tubes. Fill all arms and legs with approx 3-4 ozs of craft pellets and stitch to close. (TIP: for less weight stuff the arms and legs with only polyfil).
4: Fold the open raw edge corners of each ear inward and stitch to close (not shown). The ears will not be filled but stitching the ends closed will help prevent the raw edges from slipping around during the next steps.
Make the Head

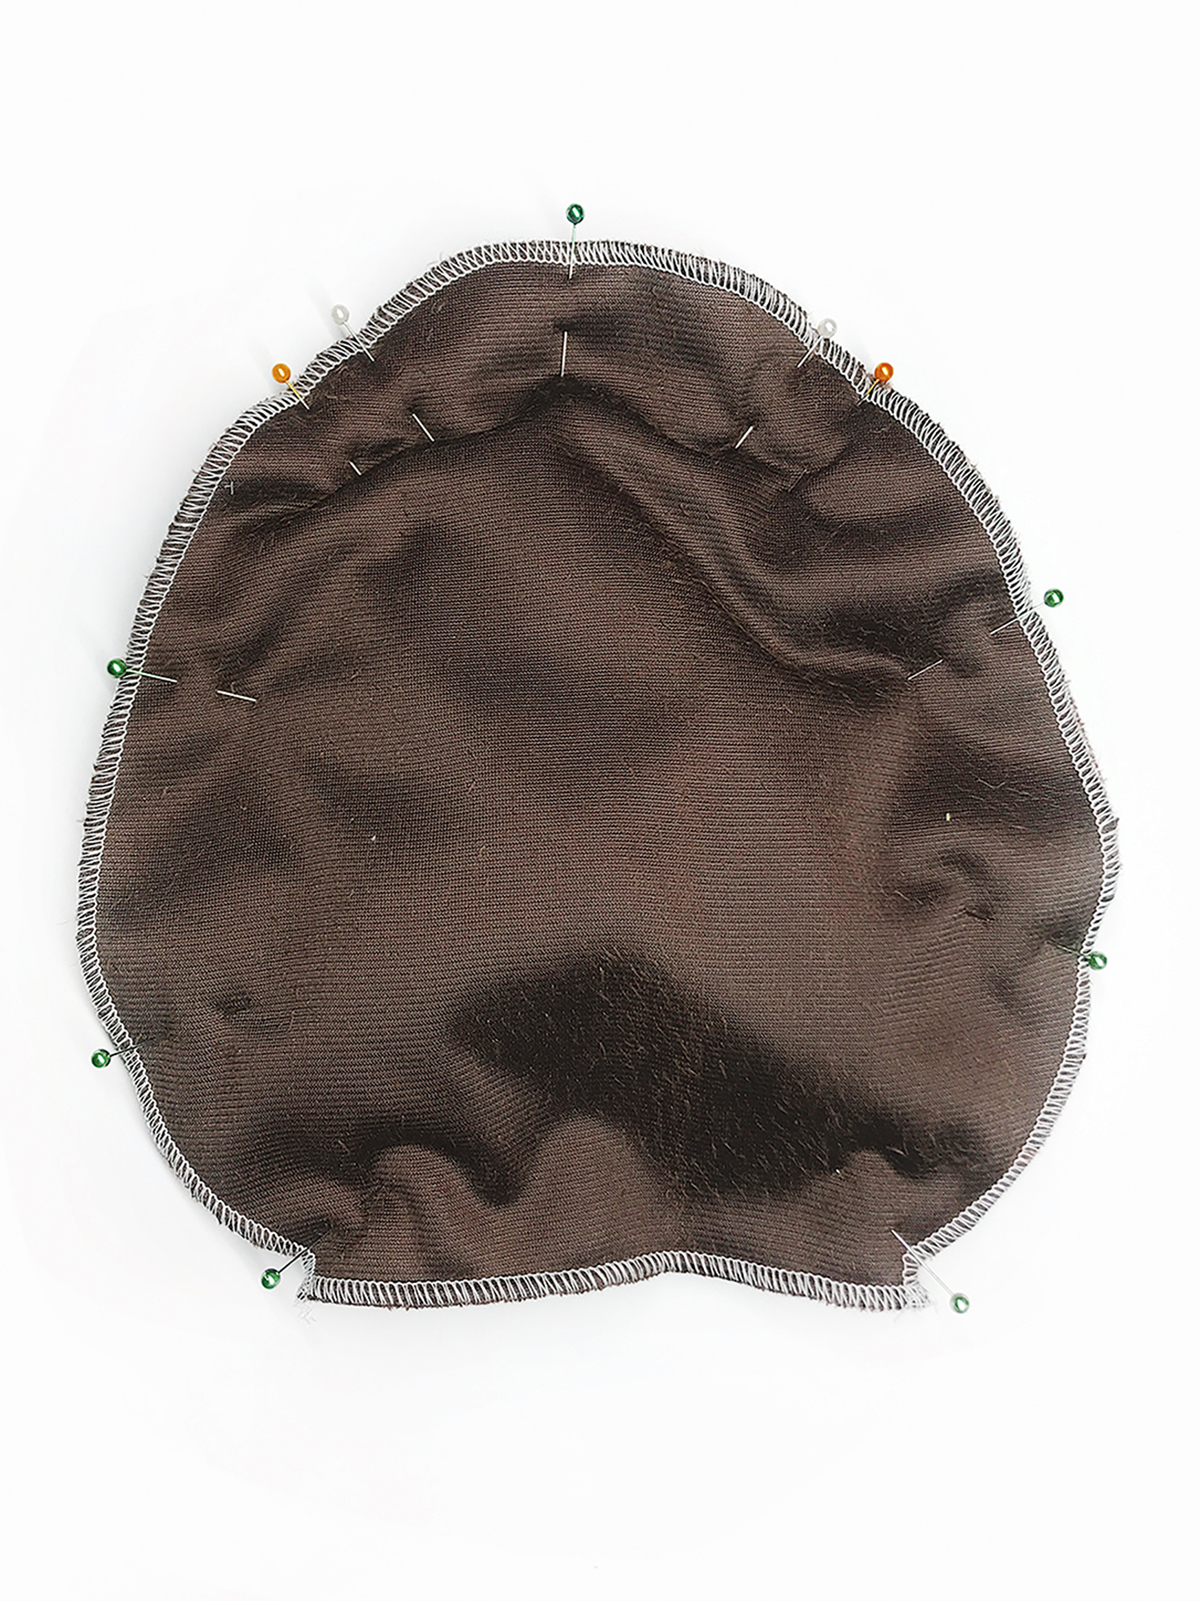
5: Serge the two bunny face panels, and both body panels separately. (TIP: As noted later in Step 26 – if you prefer to sew the eyes, and nose on by machine and not by hand, sew them on as part of this step).
6: Place the cheek piece onto one face panel, both right side up. Pin in place and zigzag stitch around the edge leaving a one inch opening.
7: Carefully stuff polyfil stuffing inside the bunny cheeks and finish stitching closed.
8: Pin the ears front side down onto the face panel, with the raw edges lined up.
9: Place the back head panel right side down on top and pin together.
10: Sew all the way around the head leaving the straight bottom edge open for turning. Lock in the stitches at the beginning and end.
Make the Body
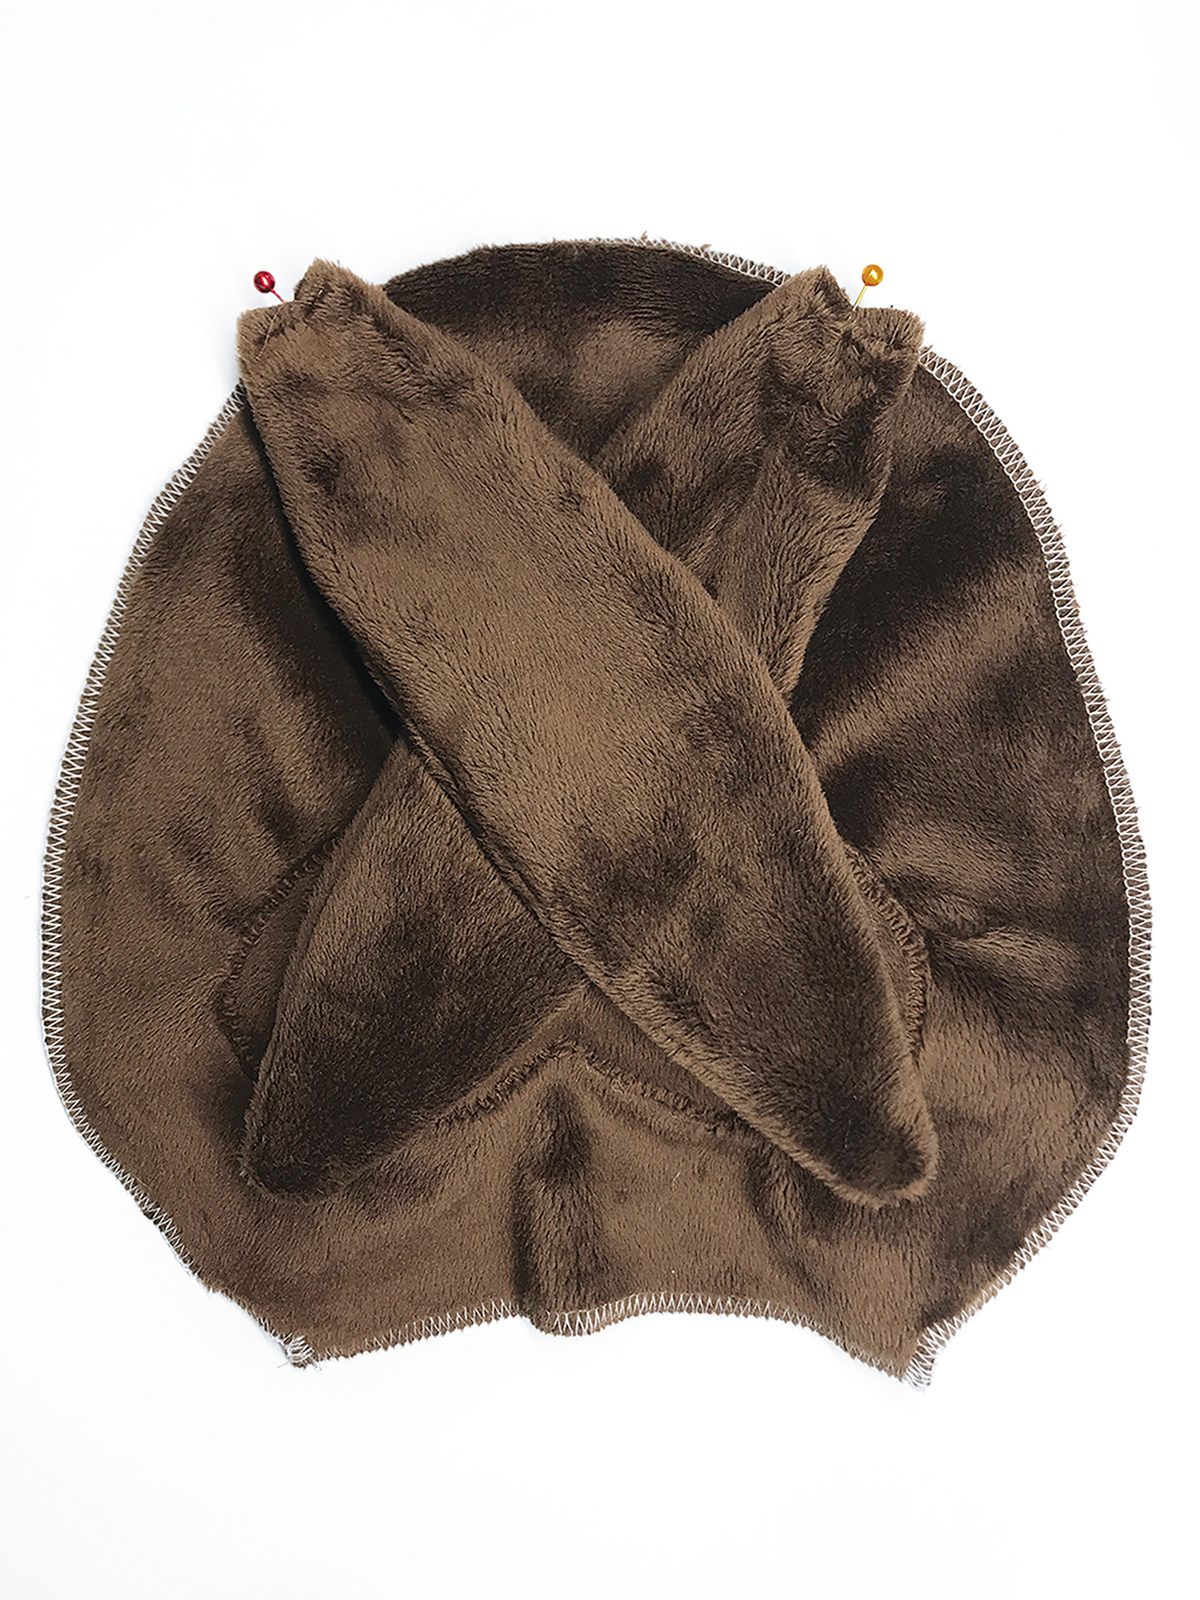
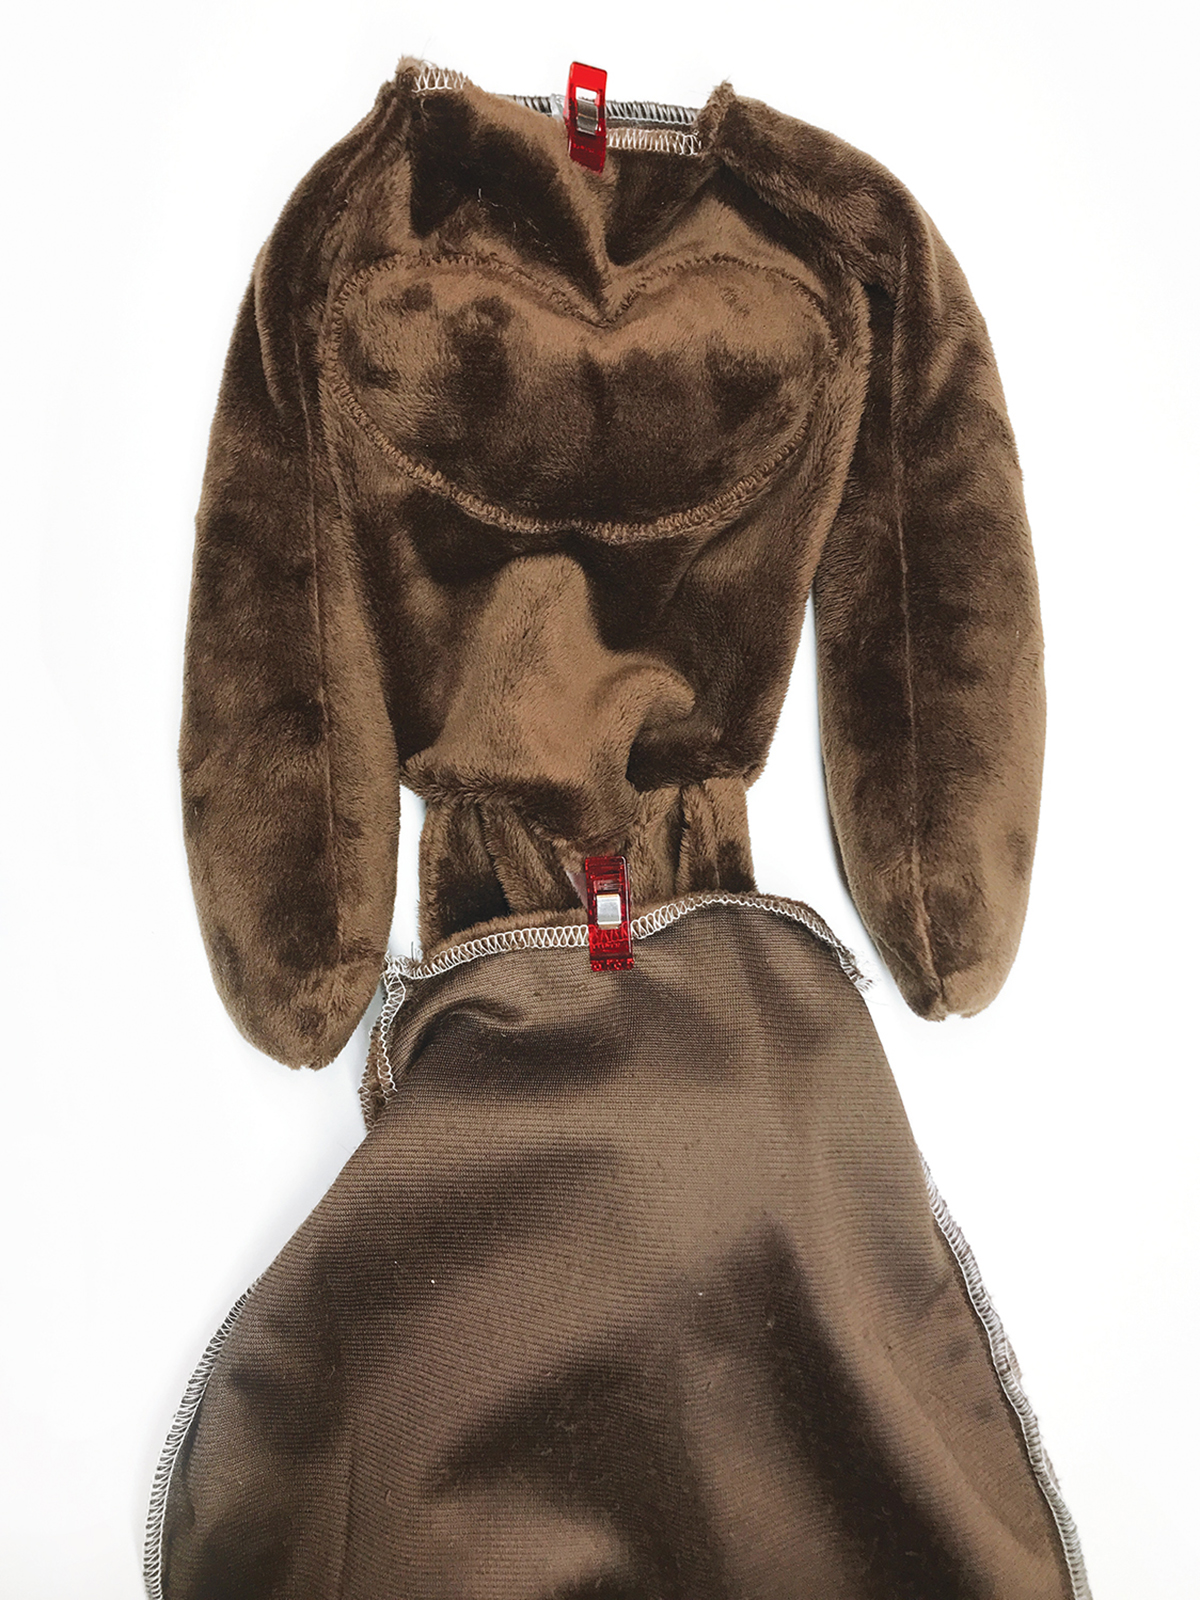
11: Pin the legs down onto the body panel, with the raw edges lined up and curving inward. They will cross over each other temporarily in order for them to lay in the proper position.
12: Place the back body panel right side down on top and pin together (as in Step 9 for the head).
13: Sew all the way around the body leaving the straight bottom edge open for turning. Lock in the stitches at the beginning and end.
Put the Comfort Bunny together

14: Turn the head right side out.
15: Clip or pin the arms to the raw edge of the head so the arm is centered to the side seams of the head. (TIP: Arms should curve upwards as the face is also right side up.)
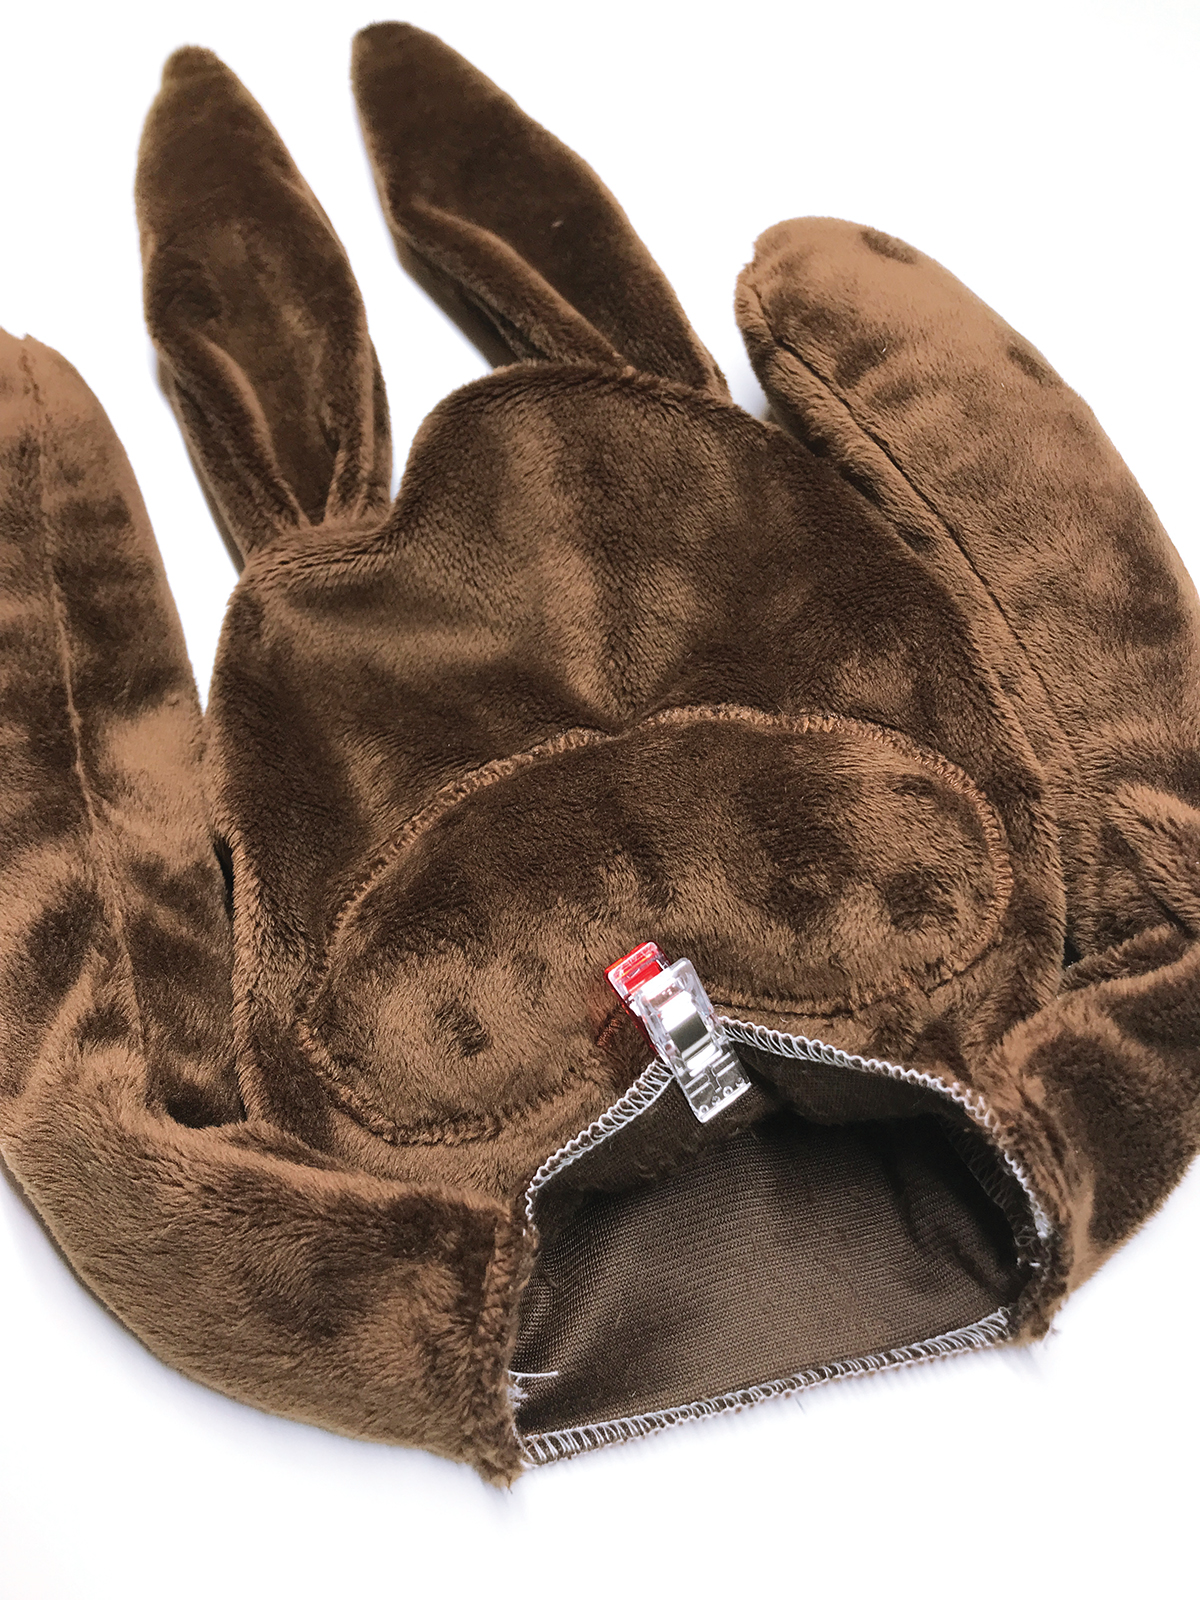
16: Sew the arms to the raw edge of the head to prevent them from shifting during the next steps. Place a clip on the center edge of the neck to denote the face side of the head. (TIP: If you sewed a fun belly piece onto your bunny body, be sure to place a clip on the neck edge of the body to match both fronts.)
17: Place the head and arms inside the body opening so the front of the head faces the front of the body.

18: Line up the neck edge of the head to the neck edge of the body. Be sure both side seams match up.

19: Sew the neck from one arm around the front to the other arm. Leave the back of the neck open for pulling the arms and legs out, and turning right side out.
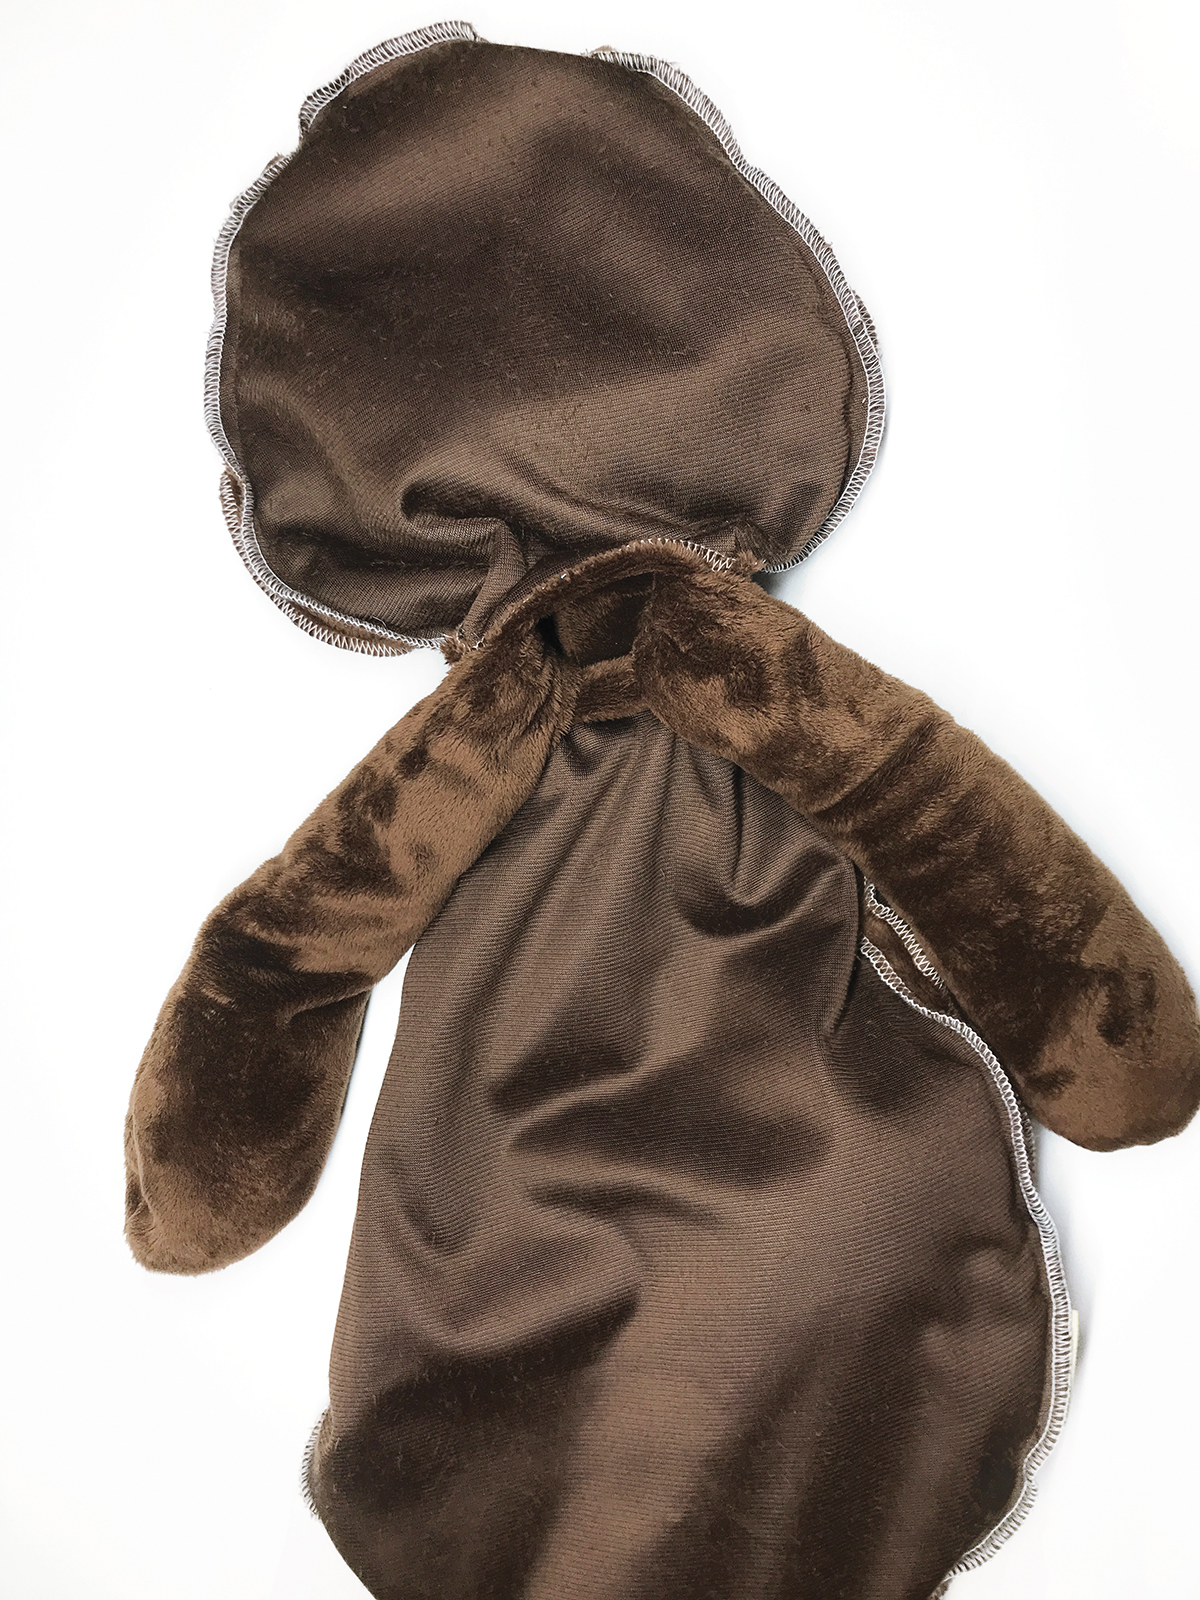
20: Carefully pull out the head, and then the two arms one by one.
21: Carefully pull out each leg one by one and finish turning the bunny right side out.
Finishing sewing the Comfort Bunny
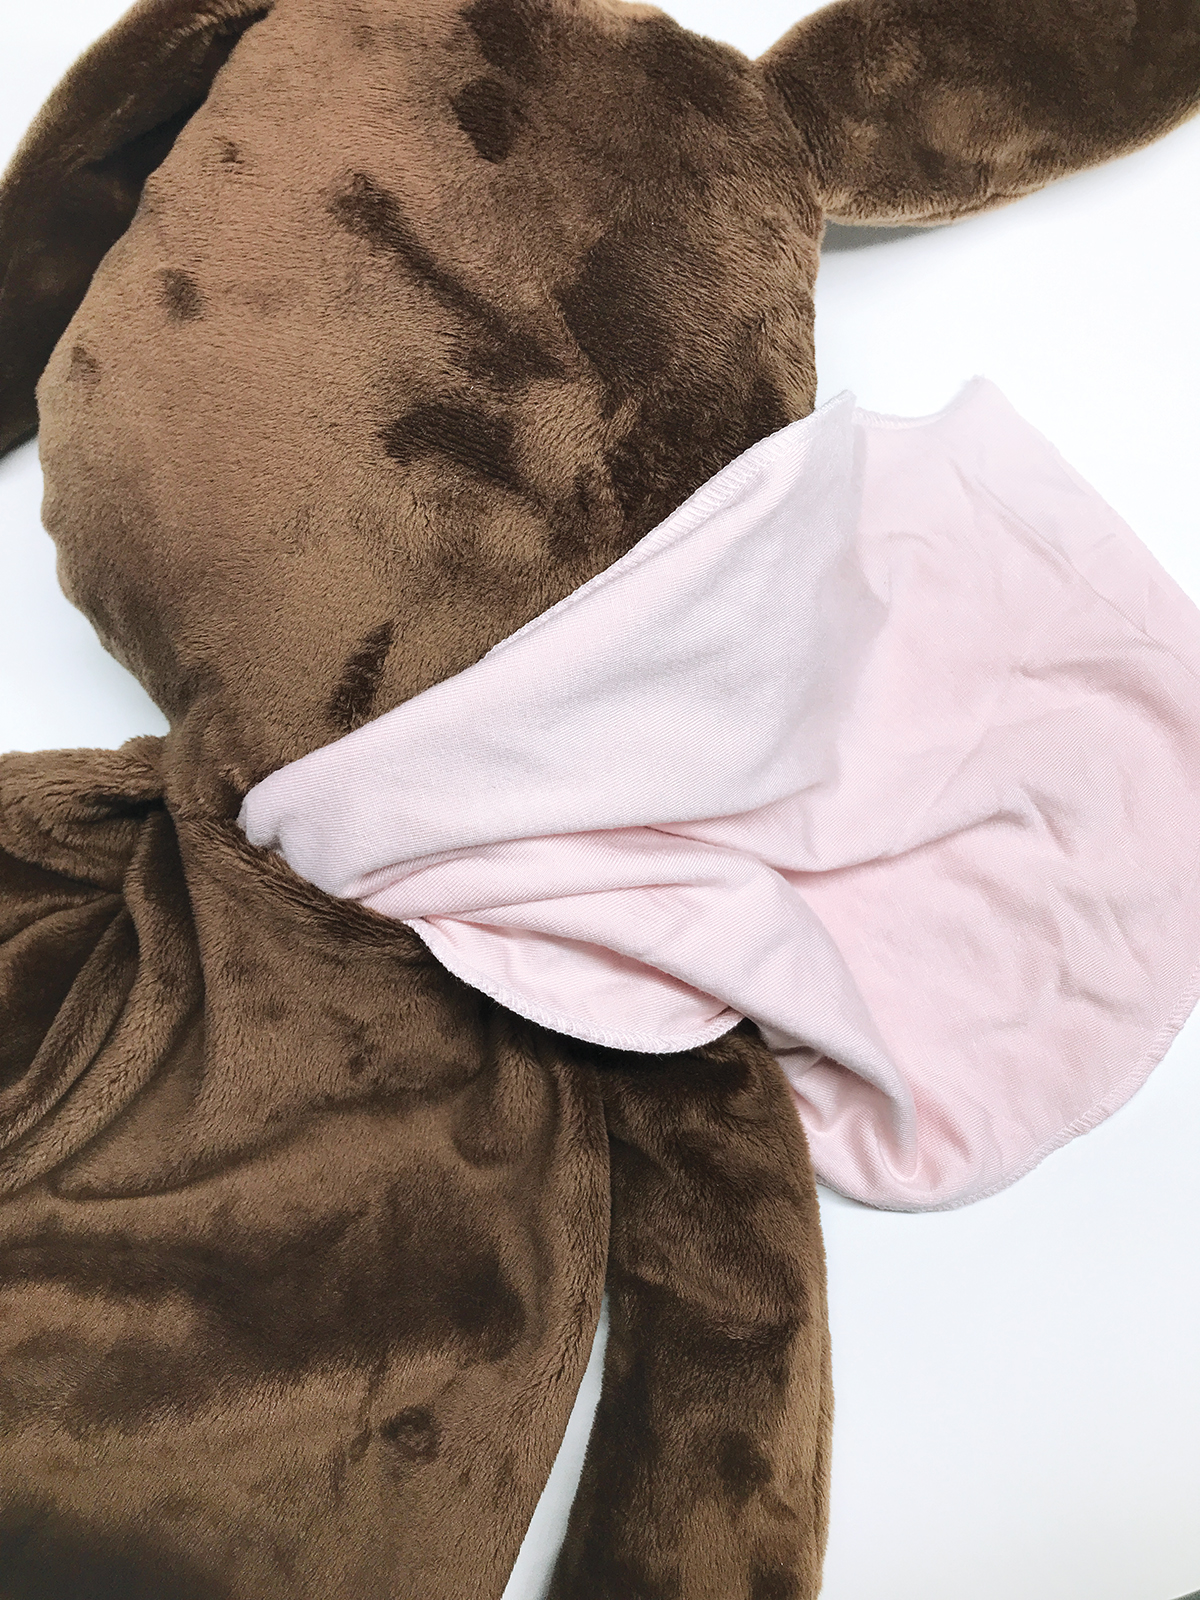
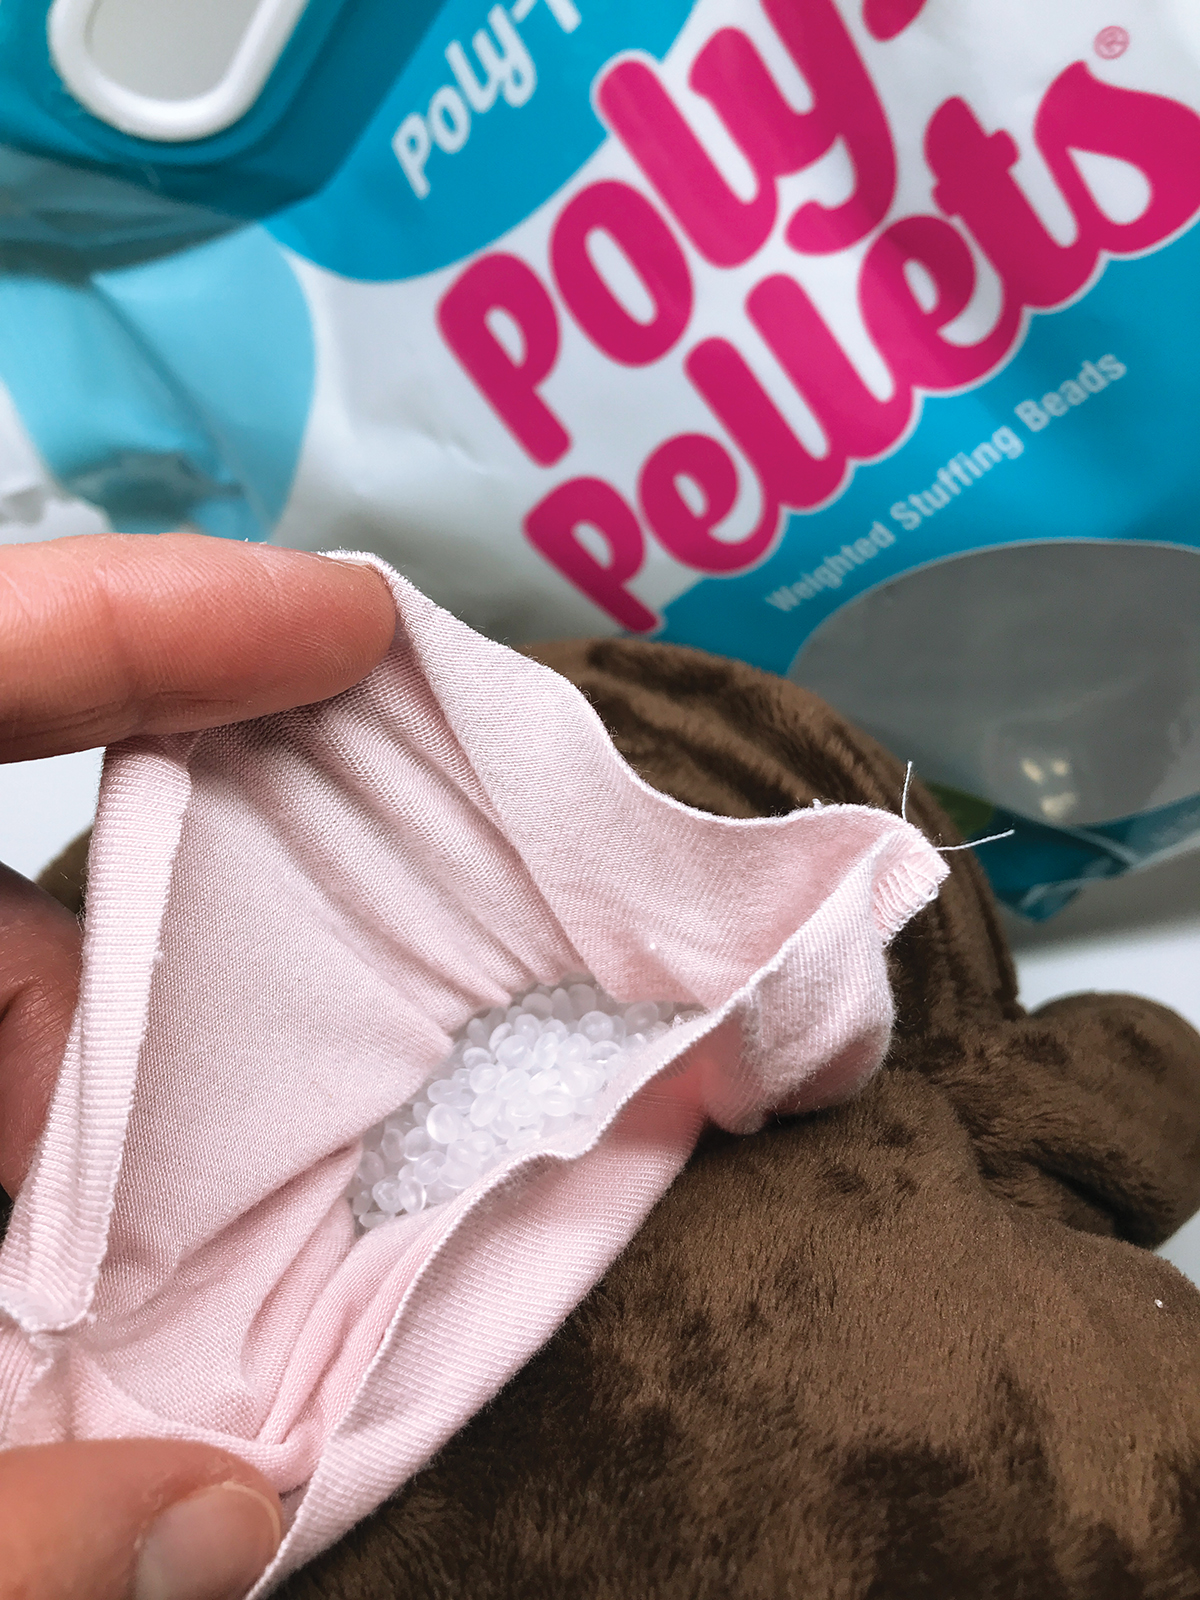
22: Make a t-shirt insert to place inside the body for added seam protection when using pellets. Serge or sew both the front and back together leaving the top open to fill.
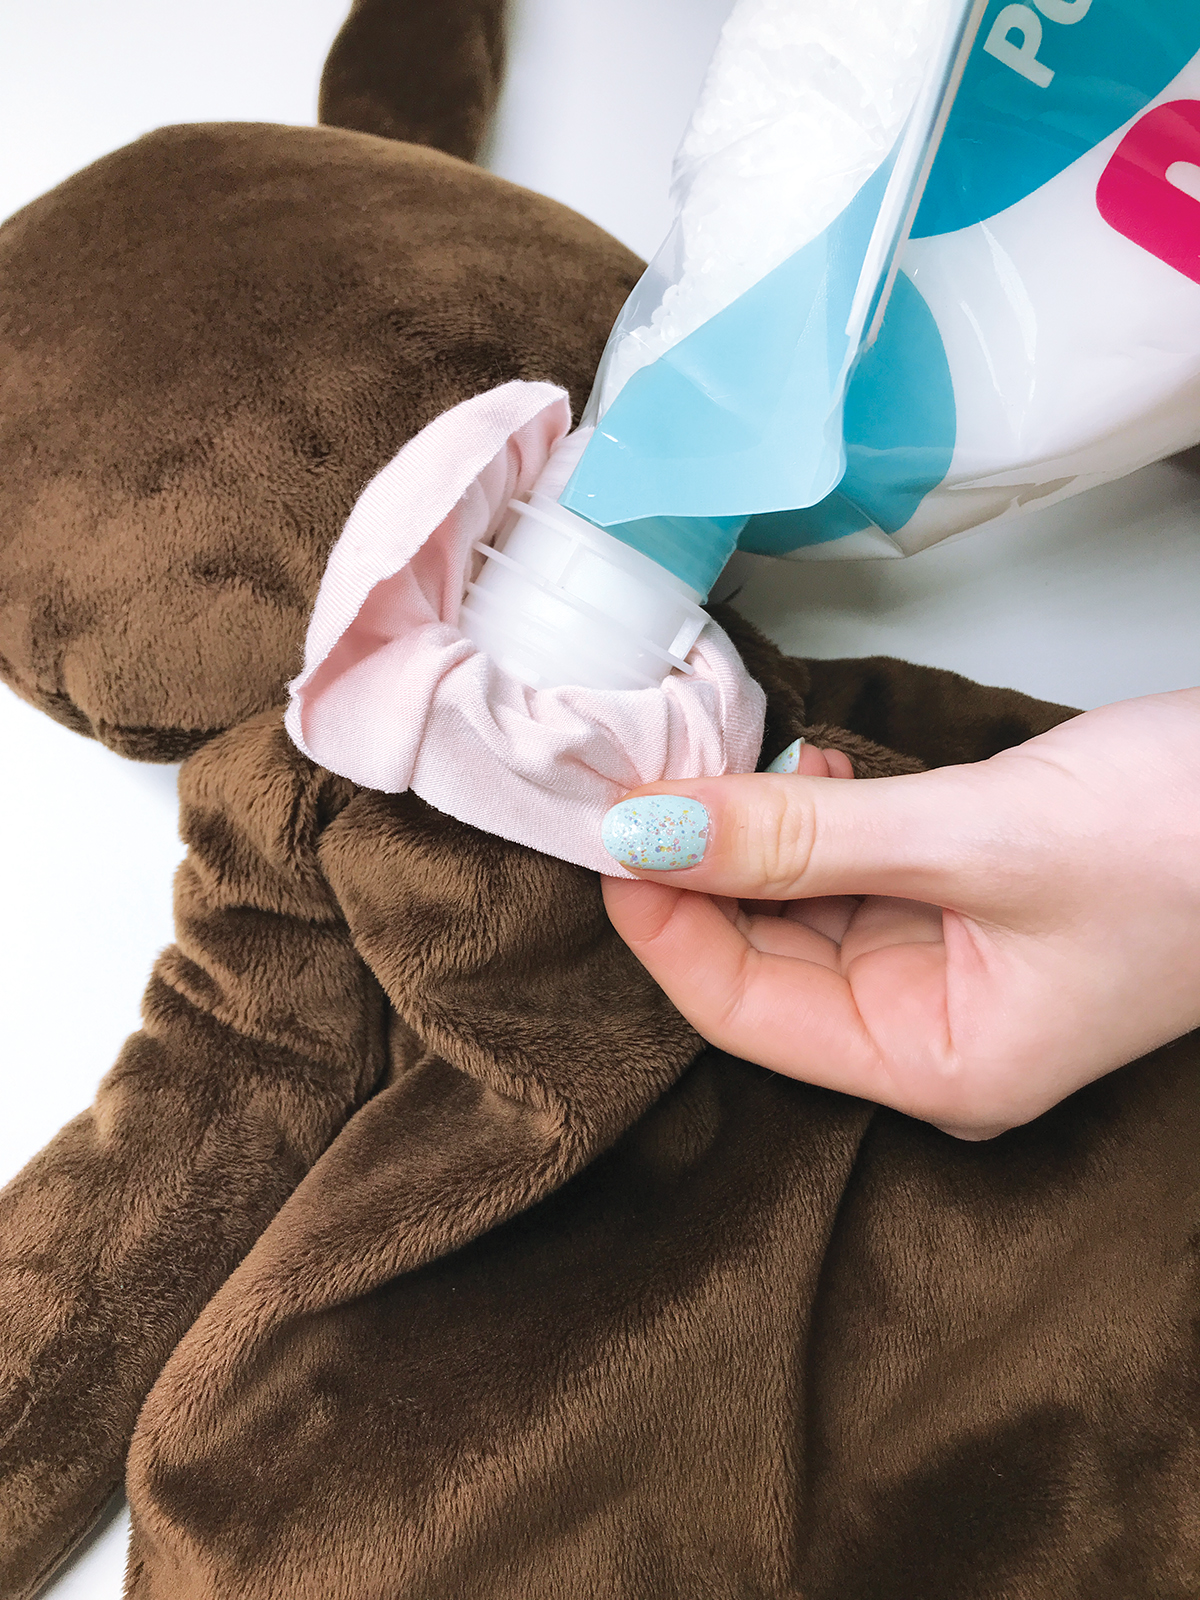
23: Place the insert into the bunny body and pour in 3-6lbs of craft pellets.
(TIP: We used the full 6lbs in the body of our bunny because the materials stretched (a lot). Consider using less if the bunny is for a small child. If making the smaller size bunny, you will surely need less and may vary with fabric choices and desired weight.)

24: Close the straight neck edge of the t-shirt insert with a serge or zigzag stitch.
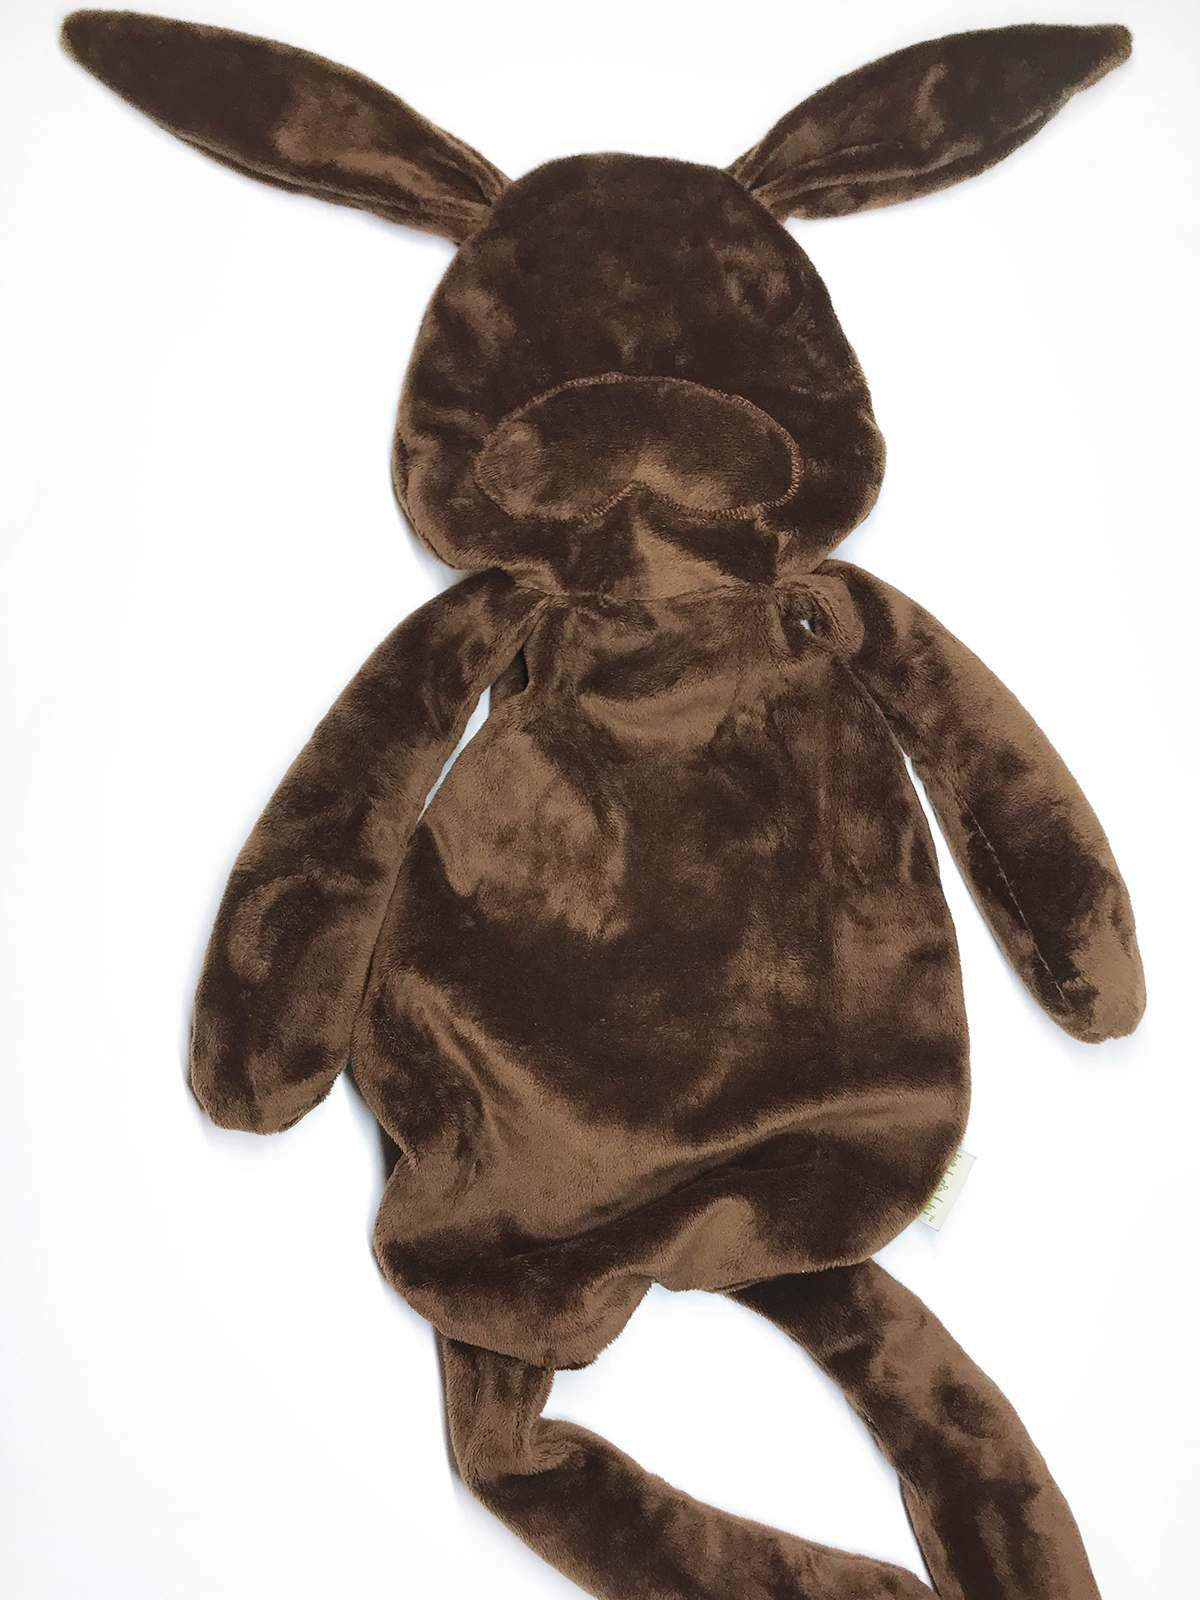
25: Stuff the head with polyfil stuffing.
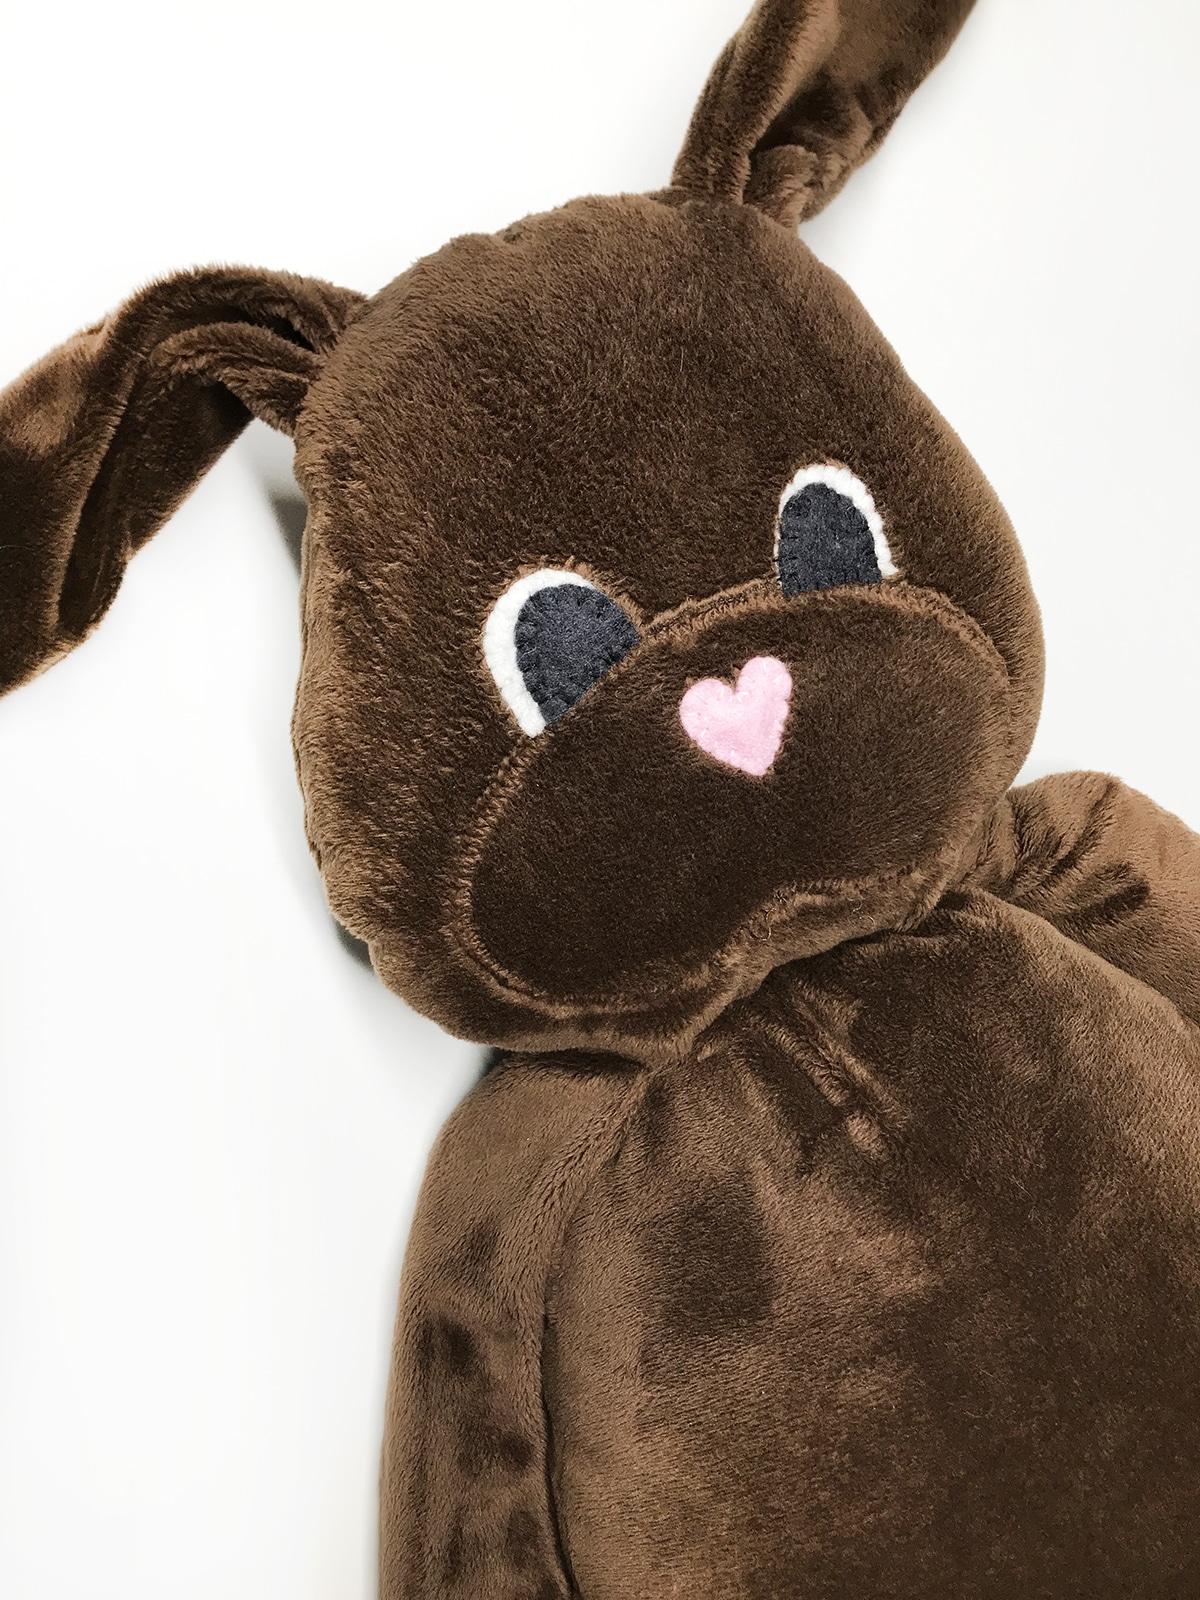
26: If you didn’t already machine stitch the eyes, and nose onto the face of your bunny, do so now by hand. Add a yarn pompom tail to the backside..
27: Stitch the back of the neck closed with a ladder stitch.
28: Give the bunny a name when finished and cuddle for comfort.
Other Tricks:
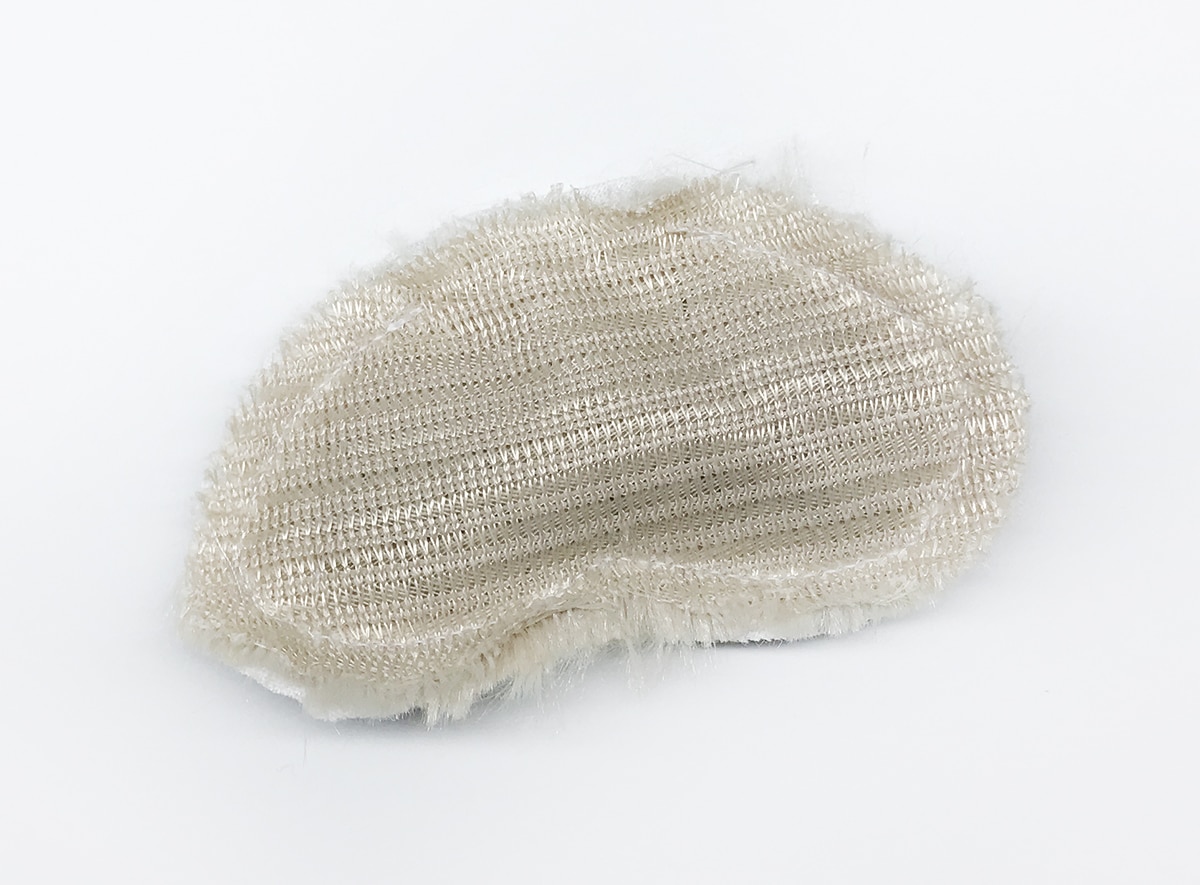
29: When sewing with a very furry fabric take the cheek piece and cut an extra fabric piece. Sew them right sides together leaving an inch open on the top to turn and stuff.
30: Close the opening with a ladder stitch and hand stitch the stuffed cheeks to the face. The stuffed cheeks will add a little more dimension to to a very furry bunny face.
Other options: Instead of using felt eyes, use buttons or even safety eyes (felt or safety eyes are strongly recommend for children toys). Add potpourri like Lavender or Balsam Fir to add a calming scent to your bunny. As sewing with minky or furry fabrics can be difficult, use quilters cotton fabrics for beginners.
Thank you so much for sewing with me. I look forward to seeing your sweet Comfort Bunnies and hope that you enjoy making them and cuddling with them. Please share your weighted comfort bunnies with me by tagging me on Instagram @kidgiddy.