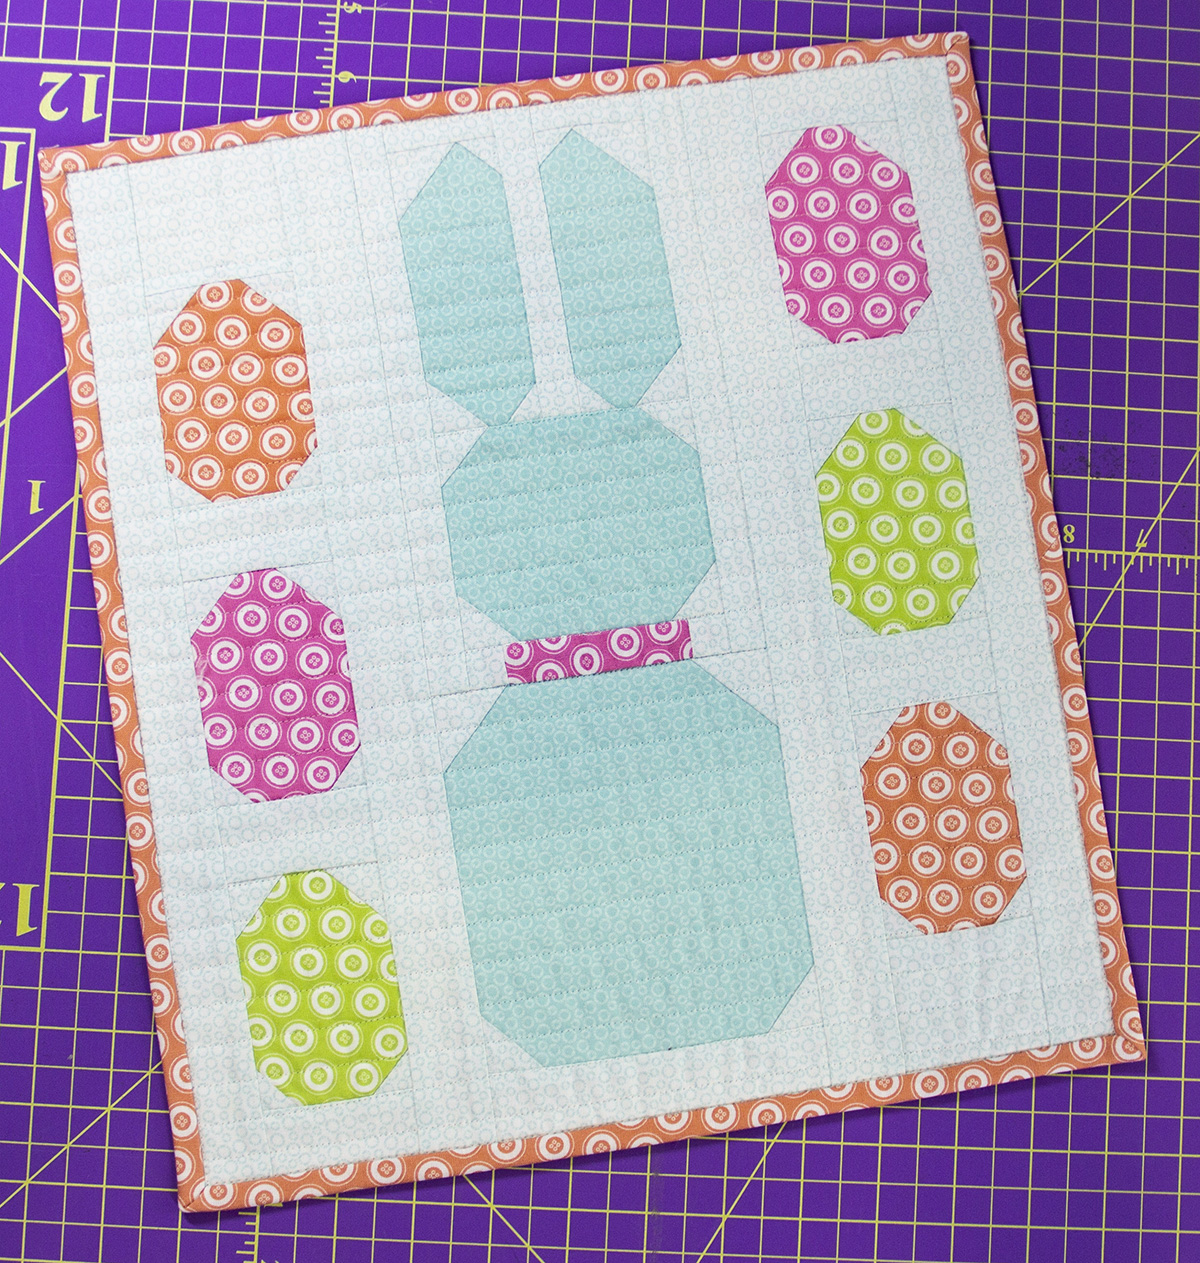
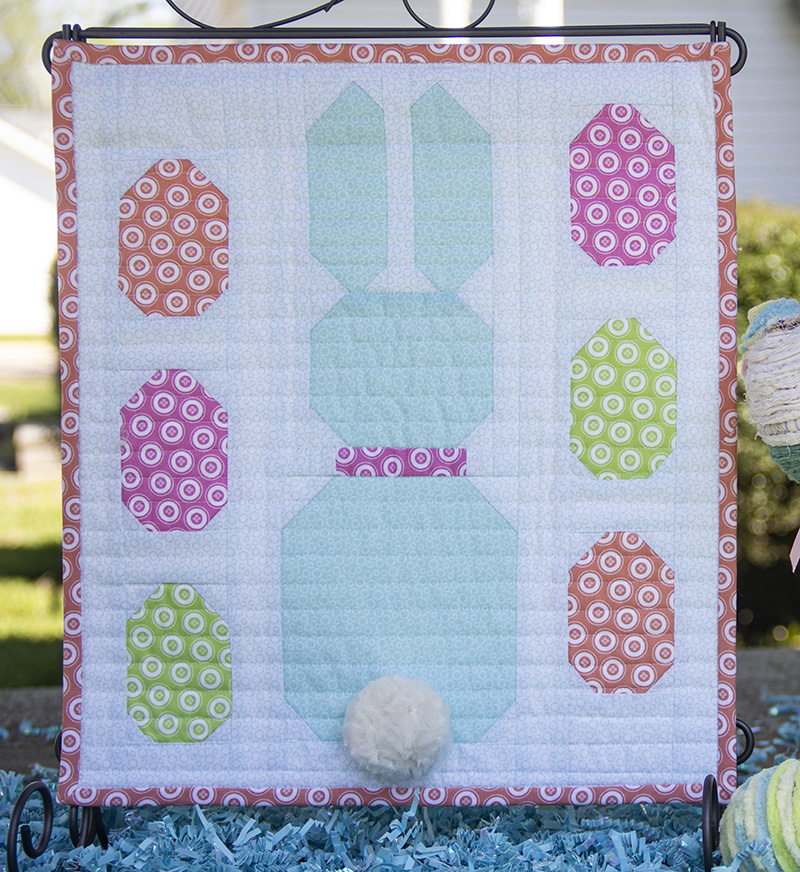
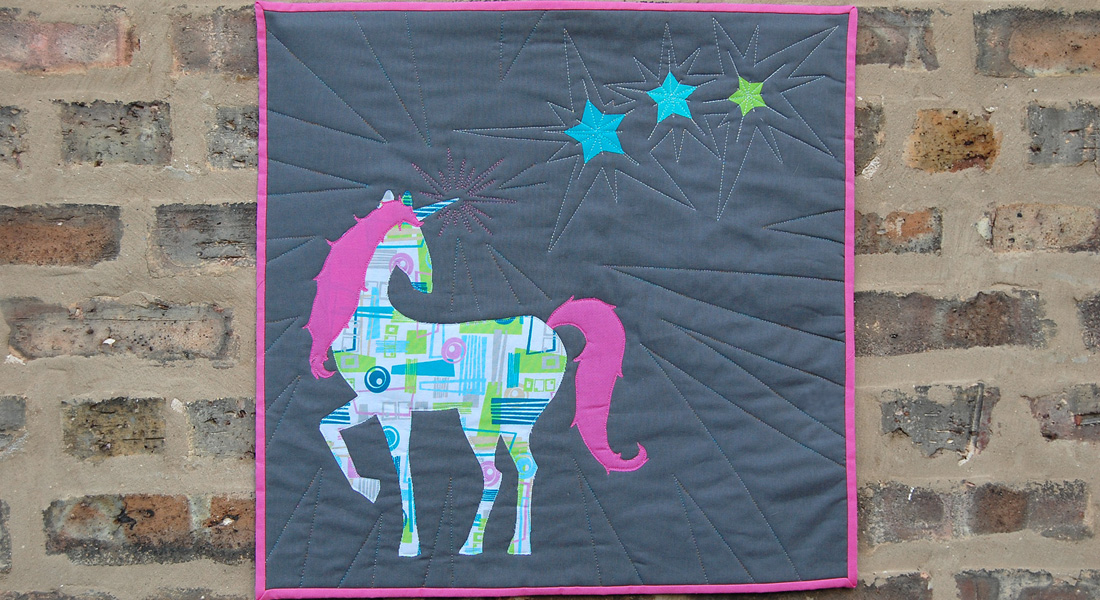
Easter Bunny Mini Quilt
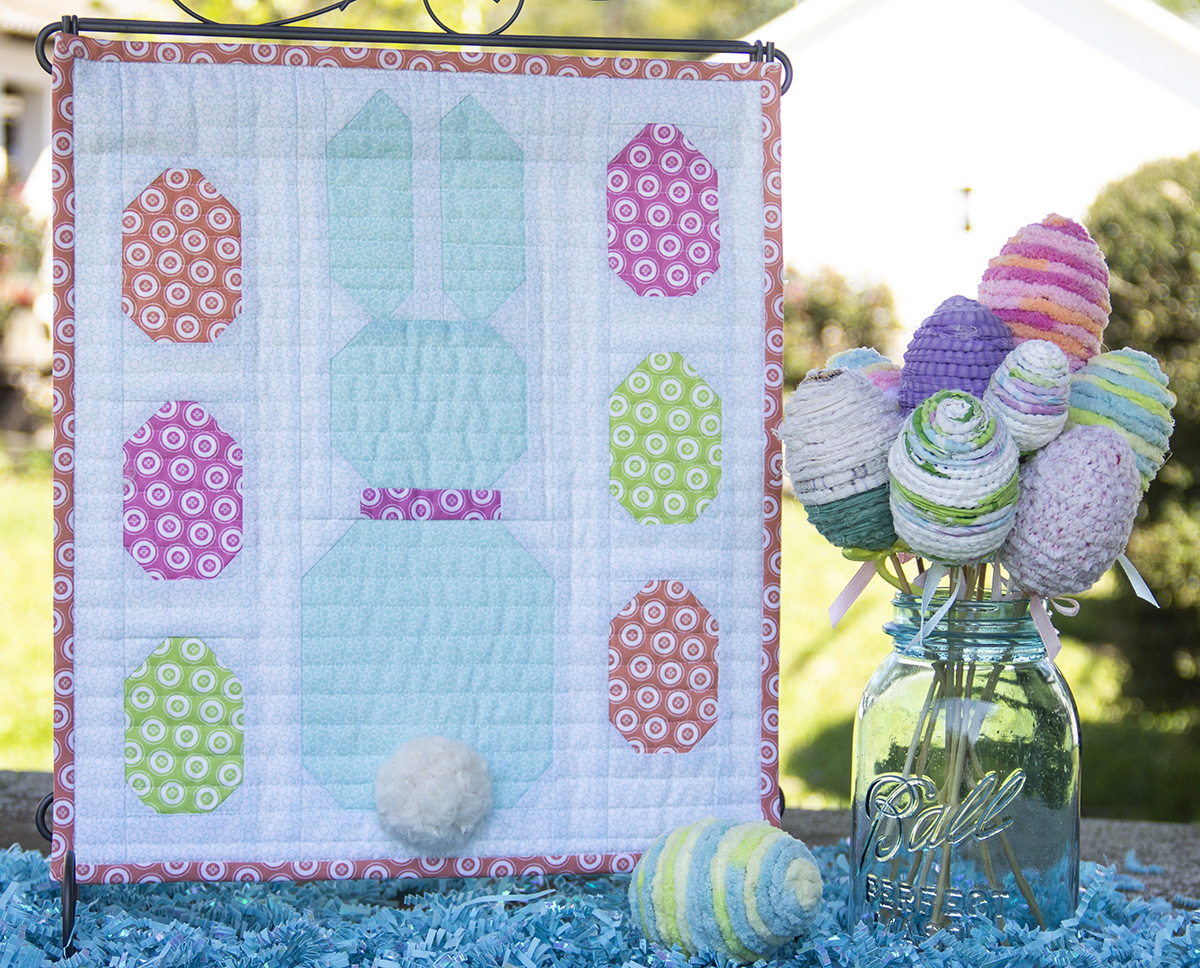
Hi, I’m Cherry Guidry of Cherry Blossoms and am so happy to be back to share my Easter Bunny Mini with ya’ll! This sweet little quilt finishes at 12 1/2″ x 14″ and makes a great a table topper that can be sewn and quilted in an afternoon.
Step 1: Gather your Supplies to Create a Eater Bunny Mini Quilt
I used My Happy Place fabric for Contempo Studio of Benartex to make this sweet Easter Bunny Mini.
Supplies:
- Piecing thread
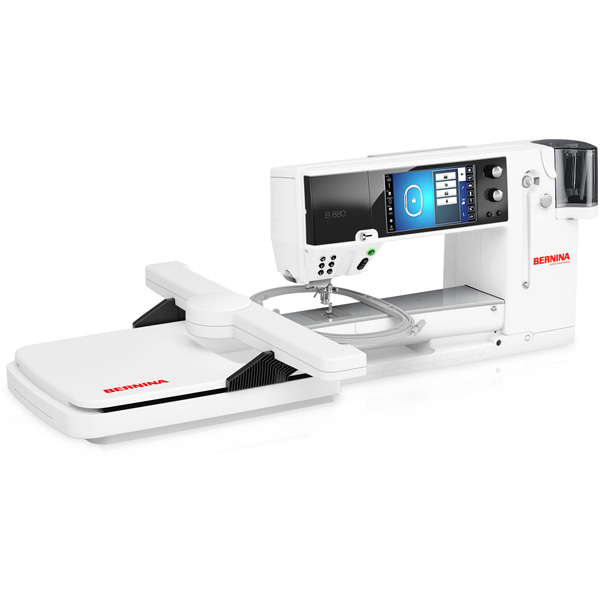
- Sewing machine, I love sewing on a BERNINA 880
- BERNINA Patchwork Foot with guide #57
- BERNINA Reverse pattern foot with clear sole #34D
- 1 Fat Quarter tone-on-tone background fabric
- 7″ x 9″ Aqua print
- 1/4 yd Orange print
- 5″ x 3 1/2″ Green print
- 6″ x 3 1/2″ Pink print
- Piecing & quilting thread
- Fat-quarter for backing and hanging sleeve
- 14″ x 16″ piece of batting
- Fabric scissors
- Paper scissors
- Faux Fur yarn for pompom
- 8 1/2″ x 11″ sheet of paper
- Tape
Step 2: Cut and label all fabrics
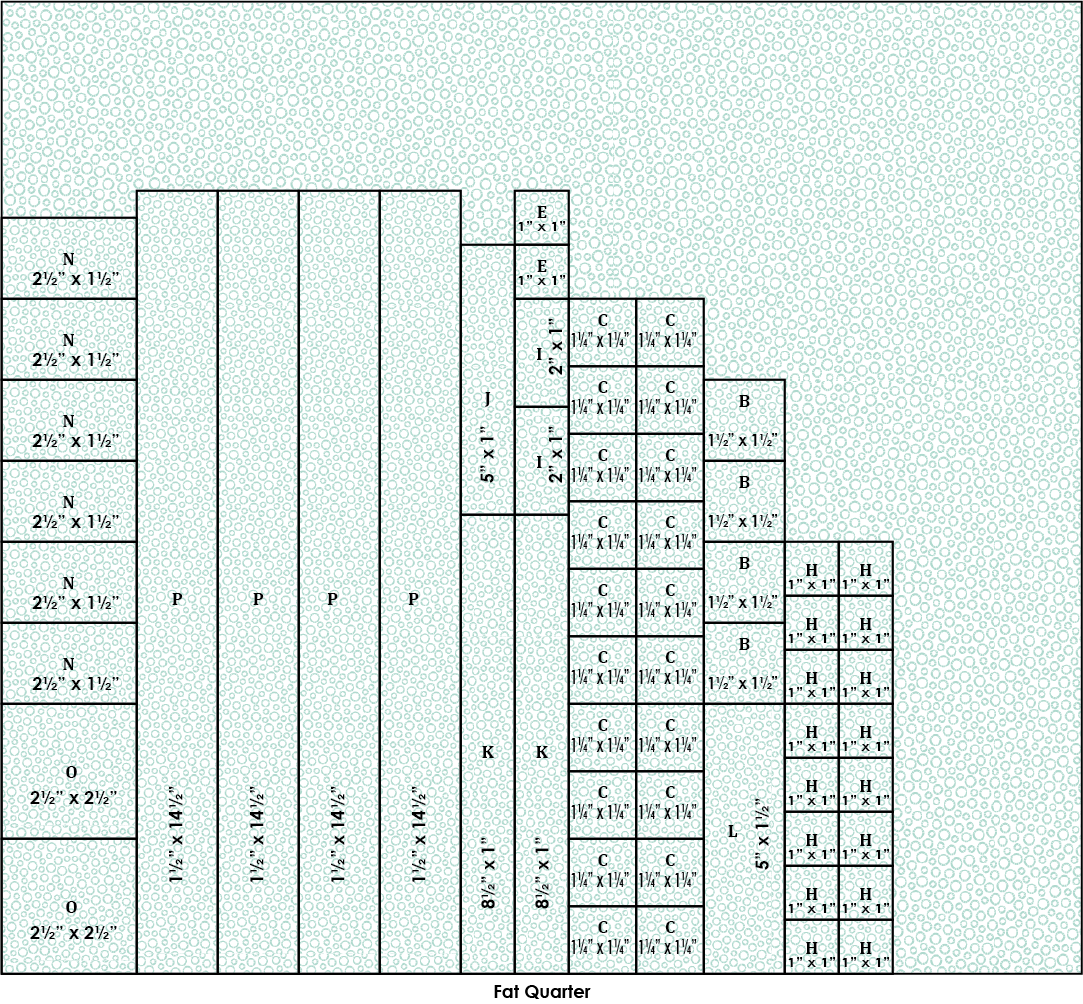
1 Fat Quarter tone-on-tone background fabric:
(6) 2 1/2″ x 1 1/2″ N rectangles
(2) 2 1/2″ x 2 1/2″ O squares
(4) 1 1/2″ x 14 1/2″ P strips
(2) 1″ x 8 1/2″ K strips
(1) 1″ x 5″ J strip
(2) 1″ x 2″ I strips
(2) 1″ x 1″ E squares
(20) 1 1/4″ x 1 1/4″ C squares
(1) 1 1/2″ x 5″ L strip
(4) 1 1/2″ x 1 1/2″ B squares
(16) 1″ x 1″ H squares
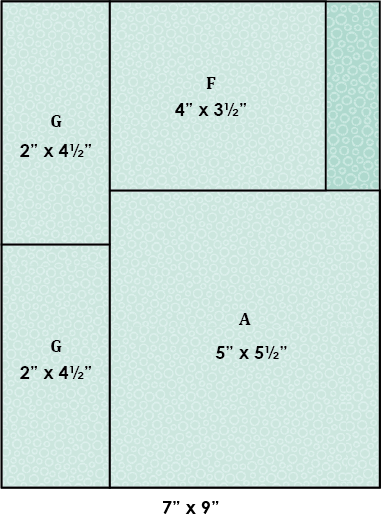
7″ x 9″ Aqua print:
(2) 2″ x 4 1/2″ G rectangles
(1) 5″ x 5 1/2″ A rectangle
(1) 4″ x 3 1/2″ F rectangle
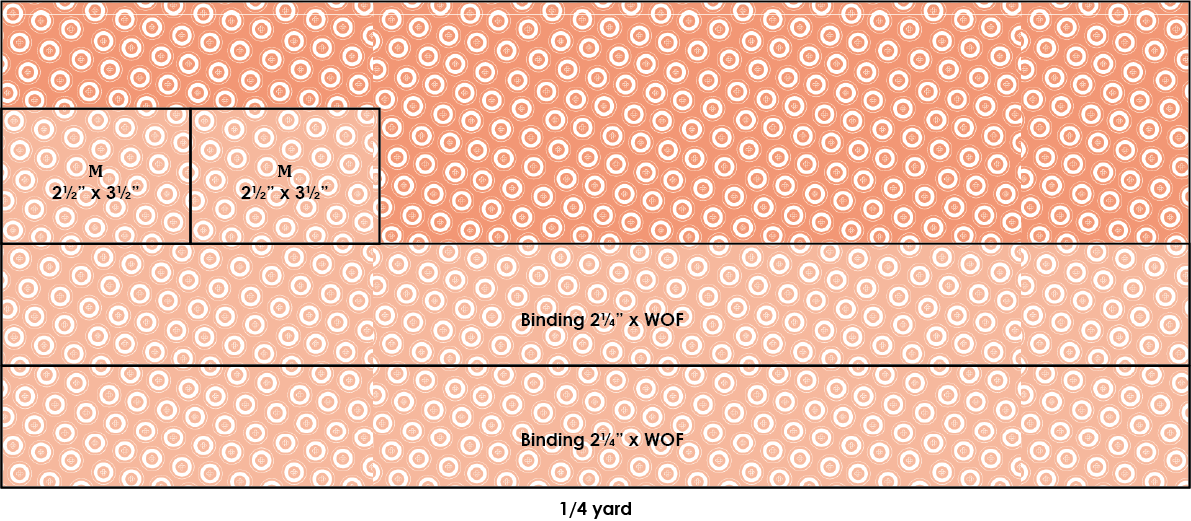
1/4 yd Orange print:
(2) 2 1/2″ x 3 1/2″ M rectangles
(2) 2 1/4″ x WOF binding strips
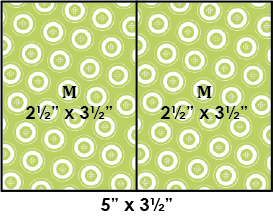
5″ x 3 1/2″ Green print:
(2) 2 1/2″ x 3 1/2″ M rectangles
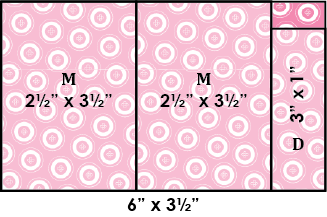
6″ x 3 1/2″ Pink print:
(2) 2 1/2″ x 3 1/2″ M rectangles
(1) 1″ x 3″ D rectangle
Step 3: Let’s make the egg columns!
Using a marking pencil, draw diagonal lines on the wrong side of all the H, C and B squares.
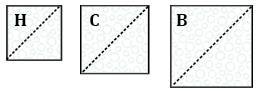
The Reverse Pattern Foot with clear sole #34D is one of my favorites, with an easy to see clear sole and red markings perfect for accurate stitching on traced lines!
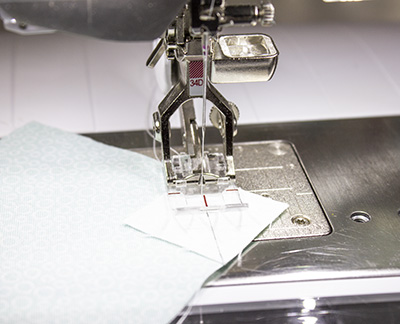
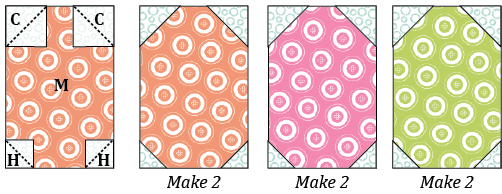
Place C squares, wrong side down, on the upper left and right corners of an M rectangle, and H squares on the bottom left and right corners.
Sew on the drawn line, trim the excess fabric leaving a 1/4″ seam allowance, and press the triangles out.
Repeat for a total of 2 orange, 2 pink and 2 green eggs.
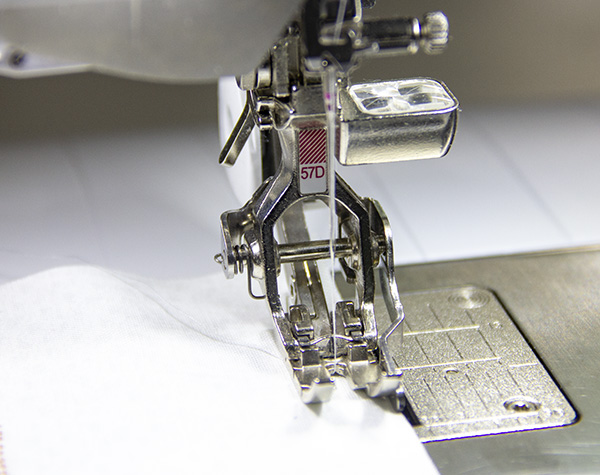
Install a Patchwork Foot with guide #57 on your machine and use a 1/4″ seam allowance for all the piecing.
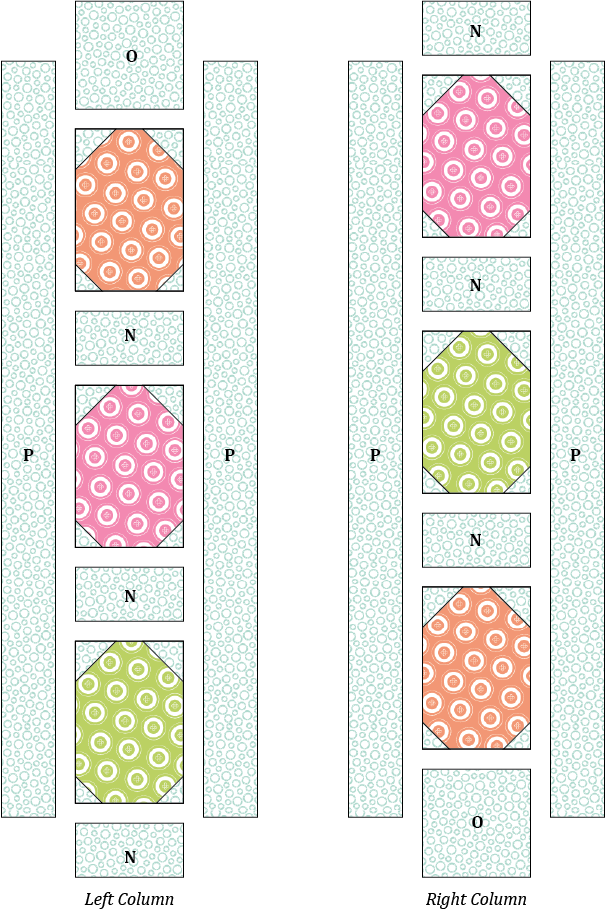
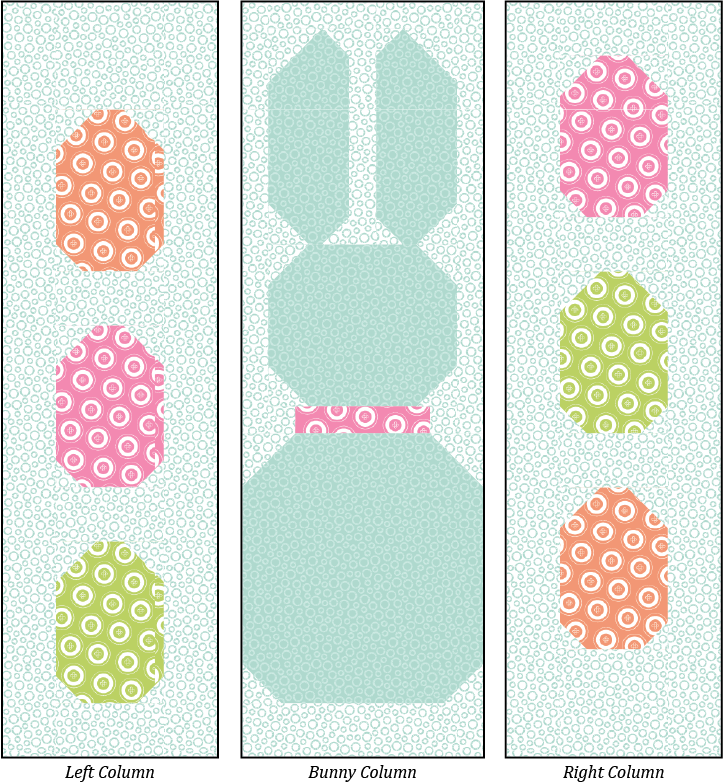
Gather the six N rectangles, the two O squares, and the four P strips and assemble the left and right columns following the diagram below.
Start by sewing the eggs, N and O pieces together, then sew the P strips to the left and right edges; press all seams to the tone-on-tone fabric. Make one left and one right egg columns.
Step 4: Now let make the bunny column!
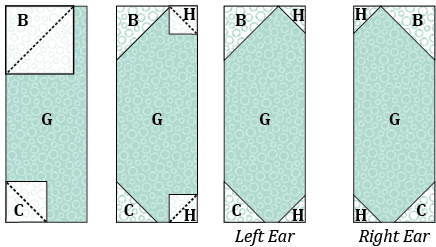
Let’s begin with the left ear: sew a B square, wrong side down and on the traced line, onto the top left corner and a C square onto the bottom left corner of a G rectangle; trim the excess fabric leaving a 1/4″ seam allowance and press the triangles out.
Now sew H squares onto the top and bottom right corners, trim and press; repeat the process following the diagram below to make the right ear.
Sew I strips to the top of the ear units.
Sew the ear units to the left and right edges of the J strip; press to J.

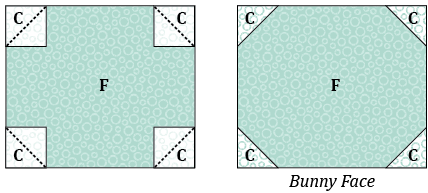
To make the bunny’s face, sew four C squares onto the corners of the F rectangle, trim the excess fabric and press the triangles out.
For the body, sew two B squares to the top and two C squares to the bottom corners of the A rectangle, trim and press triangles out.

For the bunny collar, sew E squares to the left and right edges of the D strip; press to E.
![]()
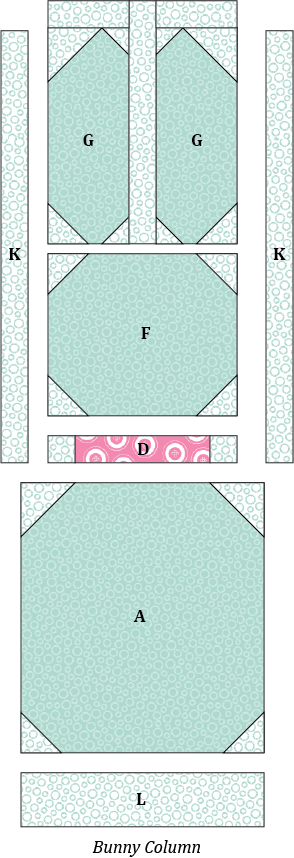
Follow the diagram below to assemble the bunny column: sew the ears (G) to the top edge of the face (F), and the collar (D) to the bottom edge of the face; press to F.
Sew the two K strips to the left and right edges of the ears/face/collar unit; press to K.
Sew the L strip to the bottom edge of the body (A); press to L. Sew this unit to the upper unit to make the bunny column.
Step 5: Assemble the mini:
Sew the three columns together and press to the eggs columns.
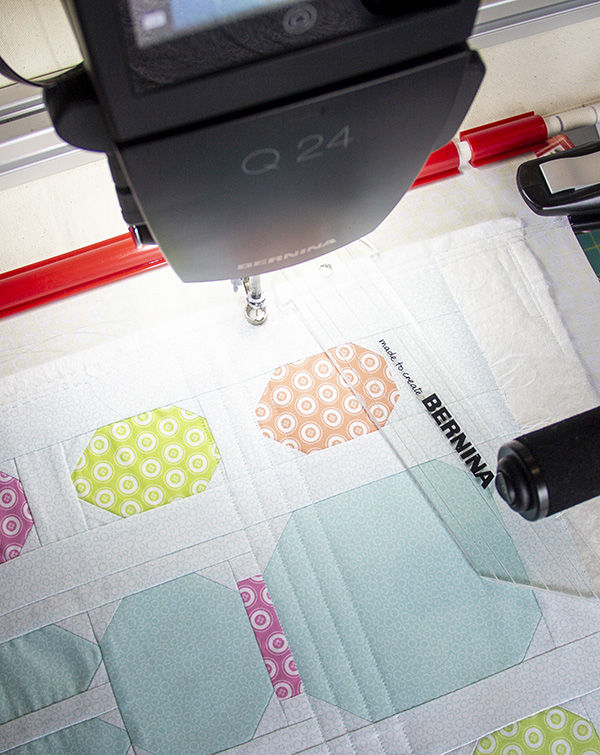
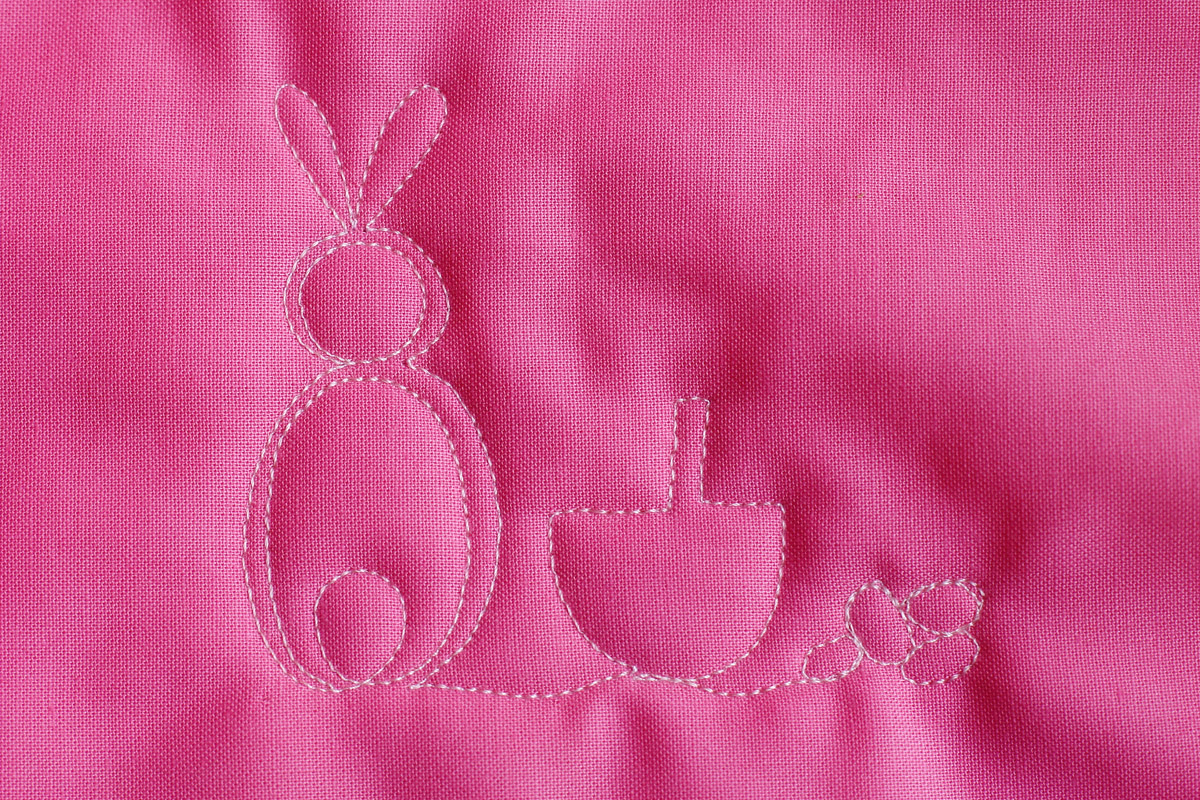
Step 6: Quilting the mini
Straight-line quilting is so easy and the results are fantastic. I quilted the mini on my BERNINA Q 24 longarm using the Ruler foot #96 and a straight ruler, and spaced the quilting lines about 1/2″ apart.
Make a quilt sandwich with the backing fabric, batting and quilt top, and quilt as desired.
To add a hanging sleeve follow Step 6 in my Winter Table Topper post found here.
Bind your mini with the (2) orange 2 1/4″ x WOF binding strips.
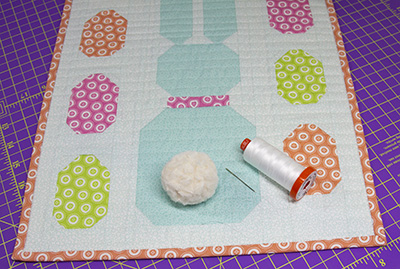
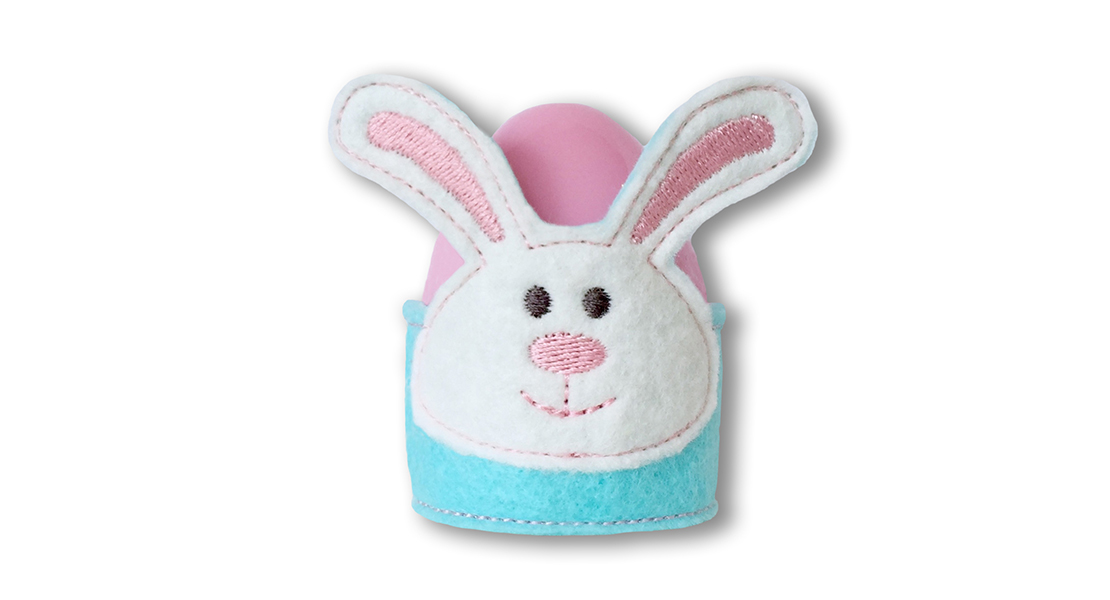
Step 7: Bunny Tail!

Have you ever made pompoms with yarn? If not, you’ll love it!
This is what you need to make the bunny’s pompom tail:
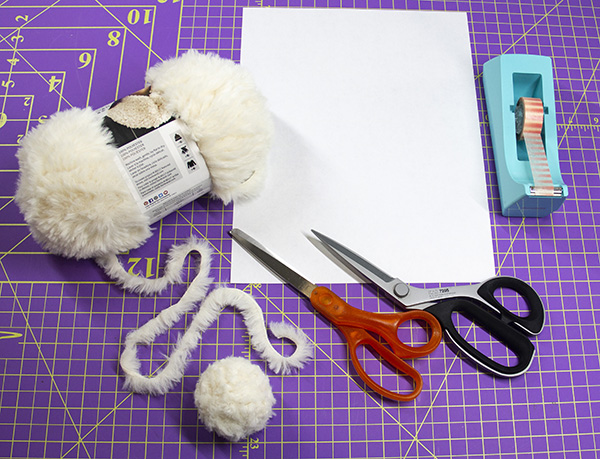
I found this “fur” yarn at my local big-box store, perfect for the fuzzy tail.
First, fold the 8 1/2″ x 11″ piece of paper three times to measure 2 3/4″ x 4 1/4″.
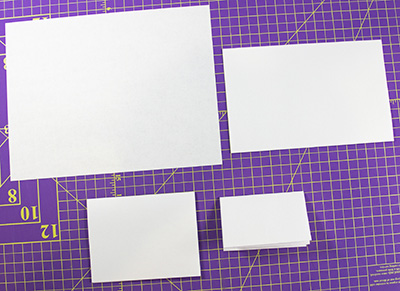
Cut a slit on the middle, stopping about an inch from one end and use a little tape to hold the cut sections together.

Cut a piece of yarn 8″ long and set it aside.
Loosely wrap the yarn around the paper.
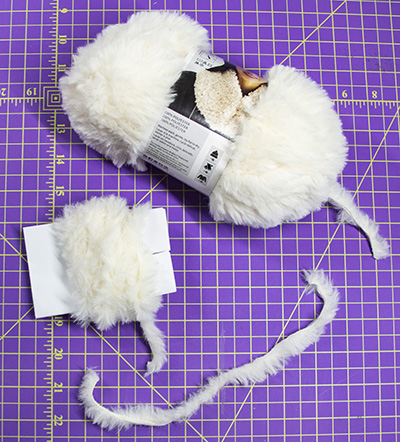
Slide the 8″ piece of yarn through the slit in the paper and around the wrapped yarn and tie it together.
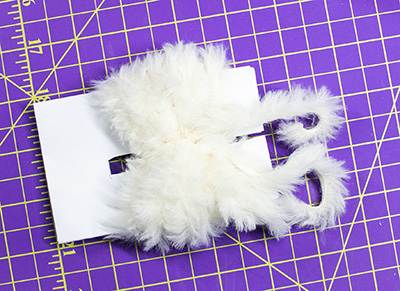
Remove the wrap from the paper, hold the pompom from the tie tails, and give it a shake.
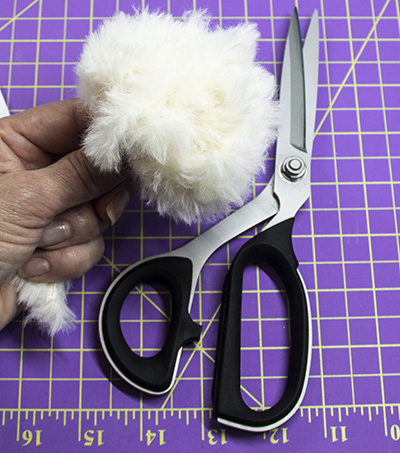
Use fabric scissors to give it a “haircut”.

Isn’t this fun?
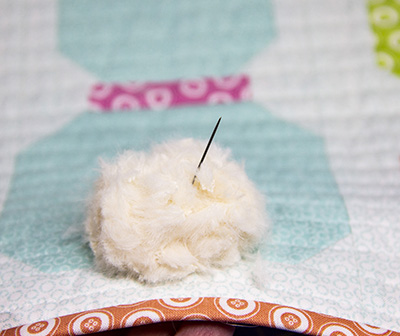
Attach the pompom tail onto the mini with a coordinating thread, sewing through the center of the pompom.
I hope you enjoyed this tiny project and will share pictures of your Easter Mini in the WeallSew Community page!
Hugs,
Cherry
Used Products


What you might also like


7 comments on “Easter Bunny Mini Quilt”
-
-
Am I missing the PDF for this pattern?
-
What a fun project. Thank you!
Wish I could share my pic. -
Loved making this, used 6 fabrics for eggs and warm and natural piece for tail as wanted flat for table. Fun project!
-
Is there a pdf?
-
the C squares meet at the top of M squares. are the dimensions correct? picture shows a gap between them
-
I couldn’t find the PDF either. I wish there was one!
Leave a Reply
You must be logged in to post a comment.

Is there a PDF of this pattern that I could print>