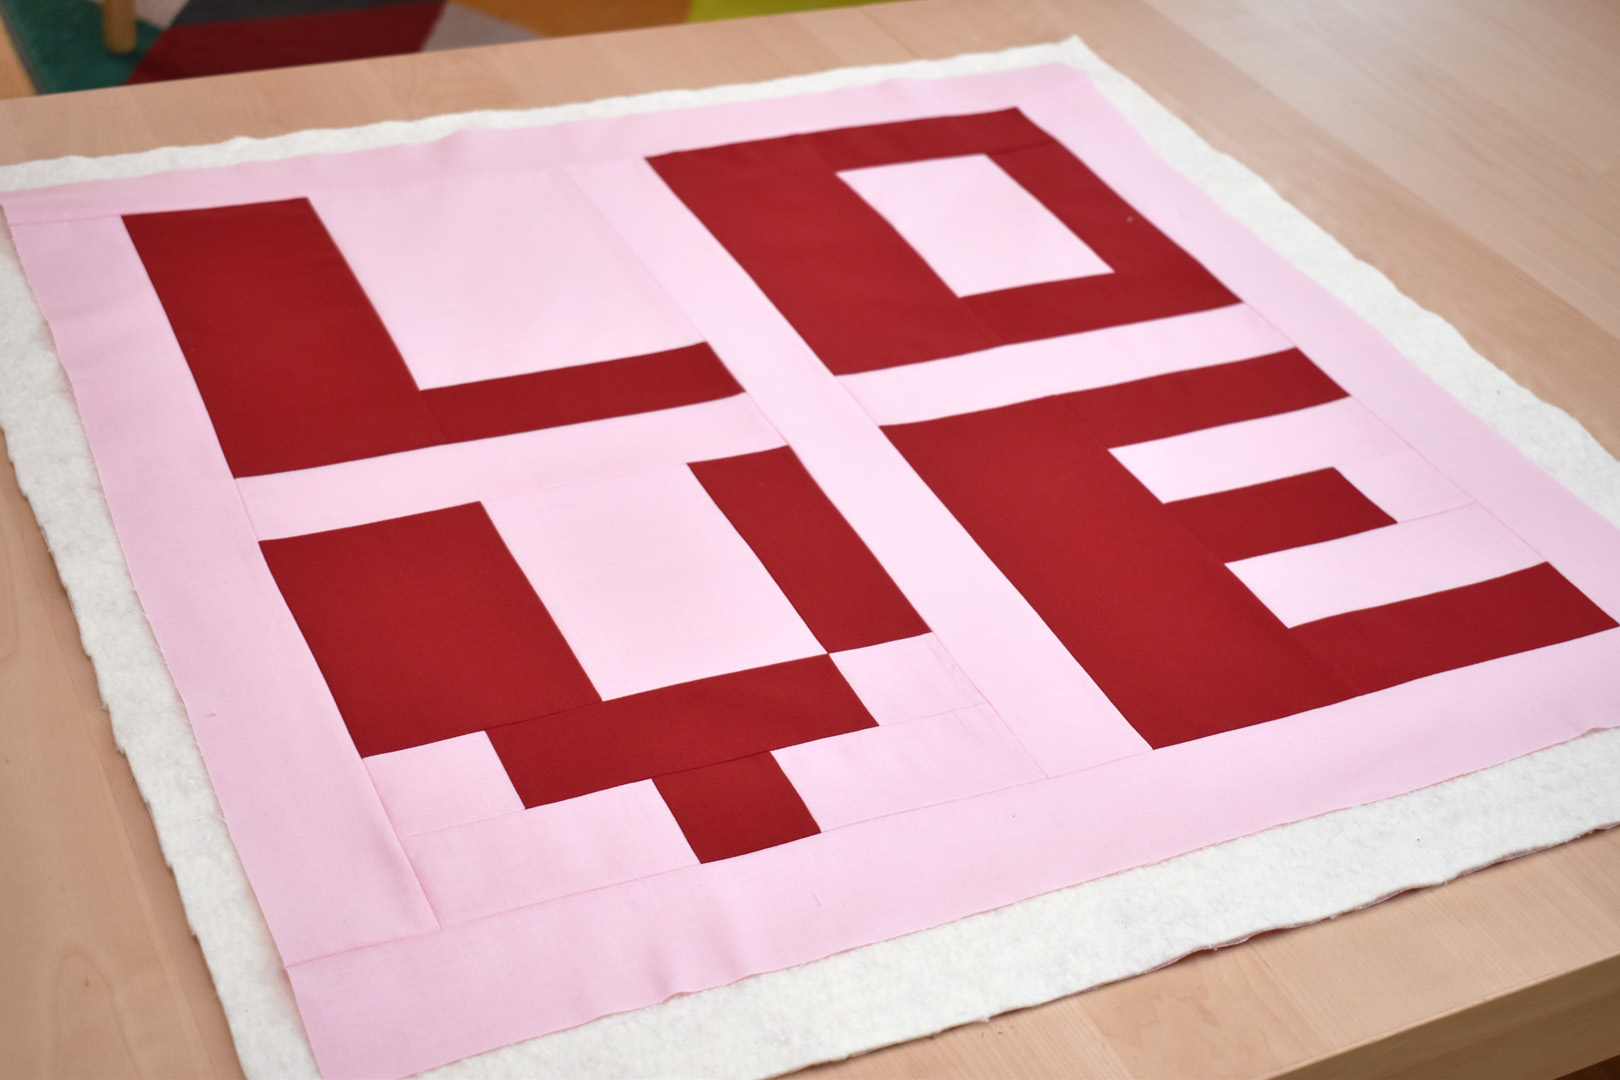
Modern Love Mini Quilt
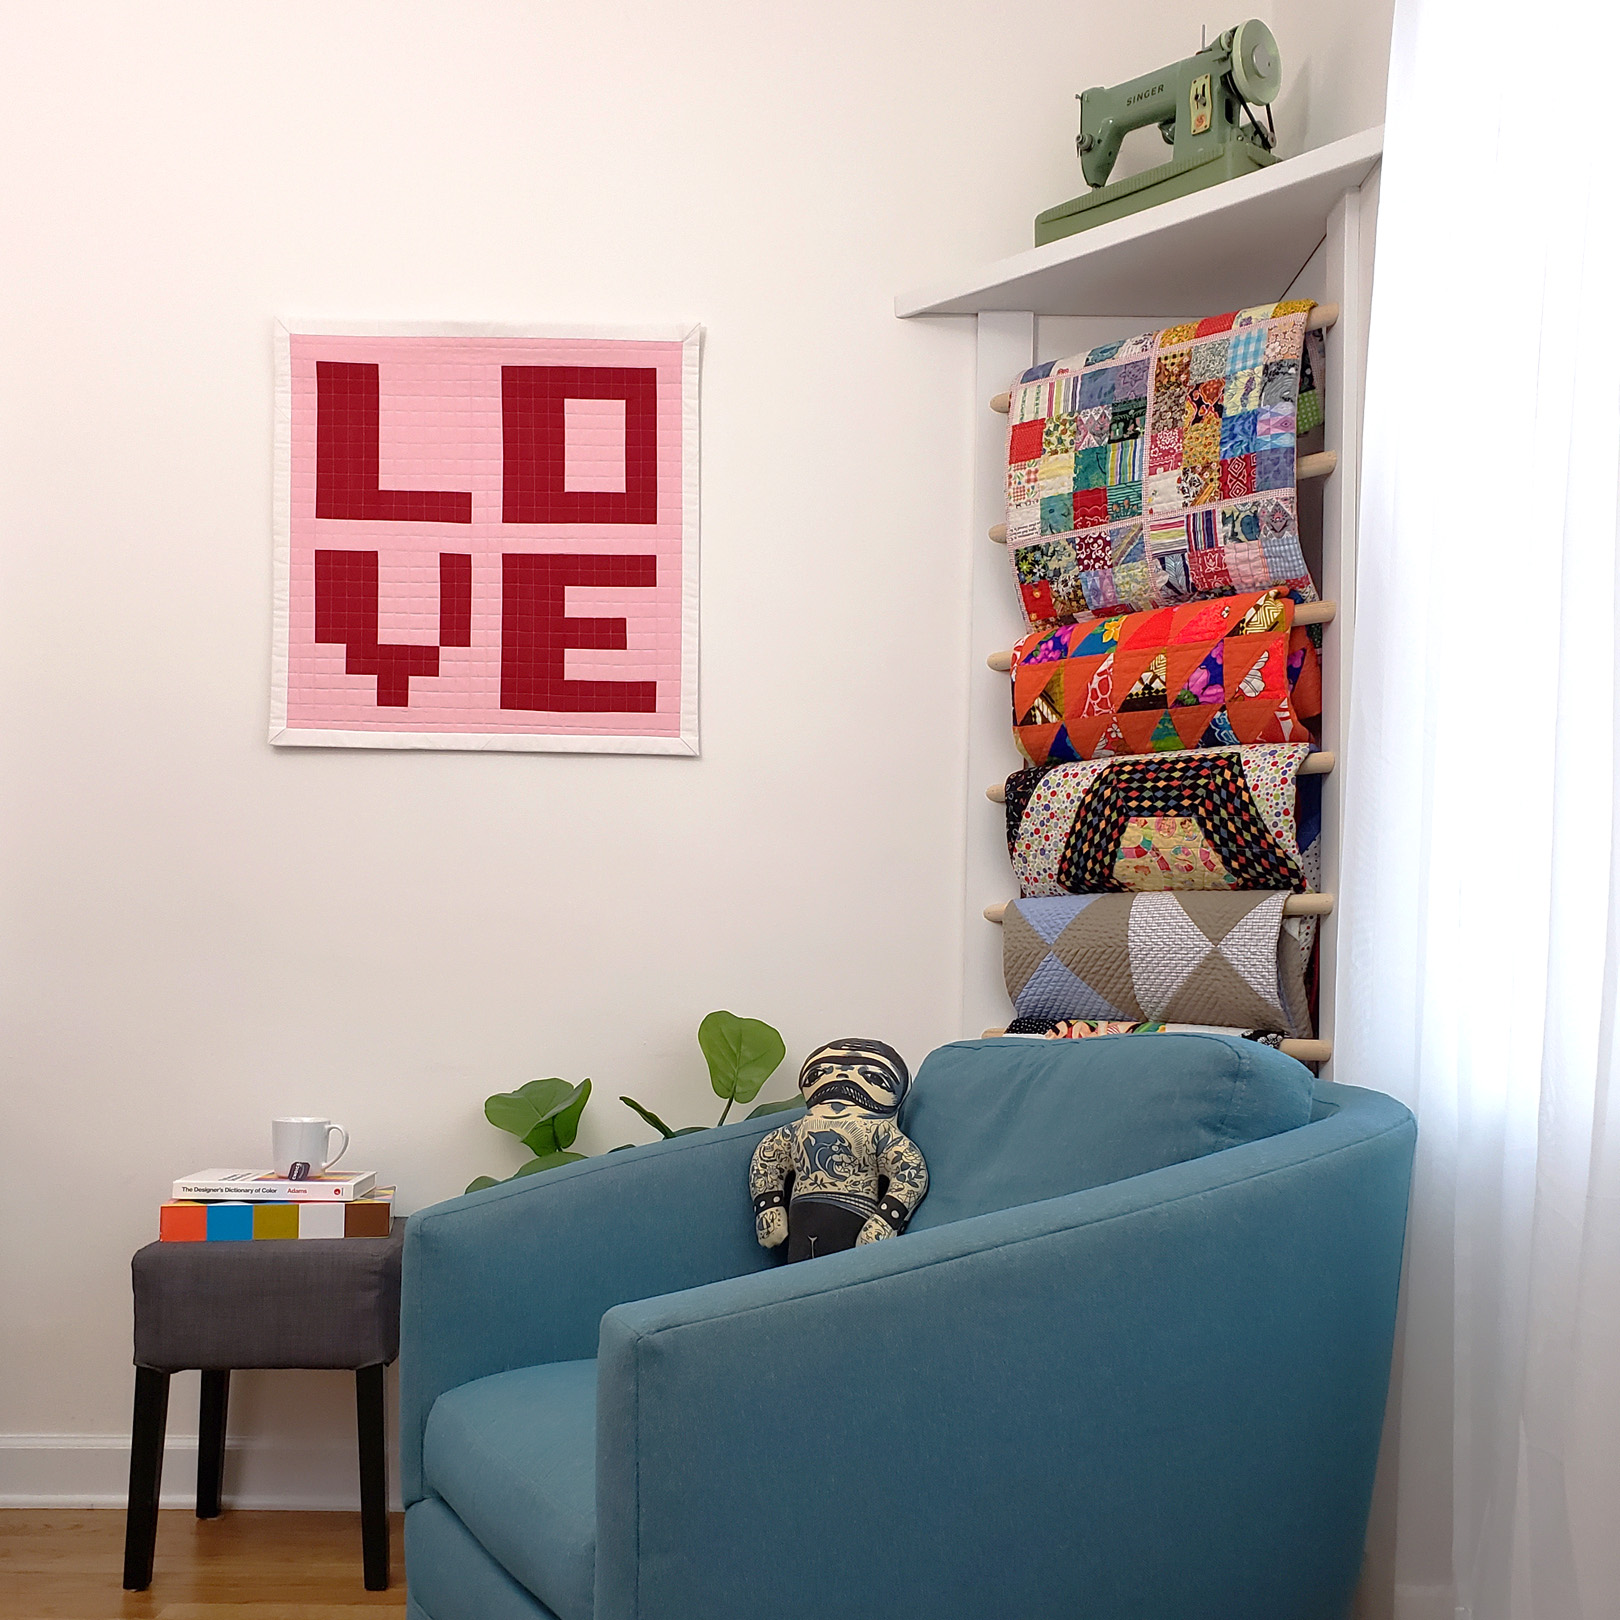
Make a Modern LOVE mini patchwork quilt to celebrate Valentine’s Day! This mini wall hanging has a retro vibe with an 8-bit graphic lettering style, inspired by Robert Indiana’s famous “LOVE” sculptures. Hang it anywhere you need a little love; on your front door, family room, or kid’s playroom. If you’re confident in your basic quilting skills, you can tackle the patchwork and quilting in this project and learn how to make an extra-wide “picture frame” binding on any quilt.
Materials to Make a Modern LOVE Mini Quilt
Fabrics (solid or near-solid colored 100% cotton quilting fabric):
- 1/2-yard red for letters (I used Kona cotton in Rich Red)
- 5/8-yard pink for background (I used Kona cotton in Baby Pink)
- 5/8-yard white for picture frame binding (I used Kona cotton in White)
- 5/8-yard for backing (I used a novelty cotton Valentine’s Day print)
Other materials and tools:
- Sewing machine (I use a BERNINA 570 QE)
- Patchwork foot (I use Patchwork Foot #97D)
- Walking Foot #50
- Straight stitch needle plate
- Sharp sewing machine needle size 80/12
- All-purpose sewing thread in neutral color (I use a light tan color)
- Quilting thread in light pink (I use Isacord embroidery thread in color #2160)
- 100% cotton quilt batting approximately 30″ x 30″ square
- Iron and pressing surface
- Rotary cutter, cutting mat, and 6″ x 24″ acrylic ruler
- Basic sewing supplies
Cutting the fabrics to make a Modern LOVE Mini Quilt.
Cut the fabric needed to make the quilt top in the following measurements.
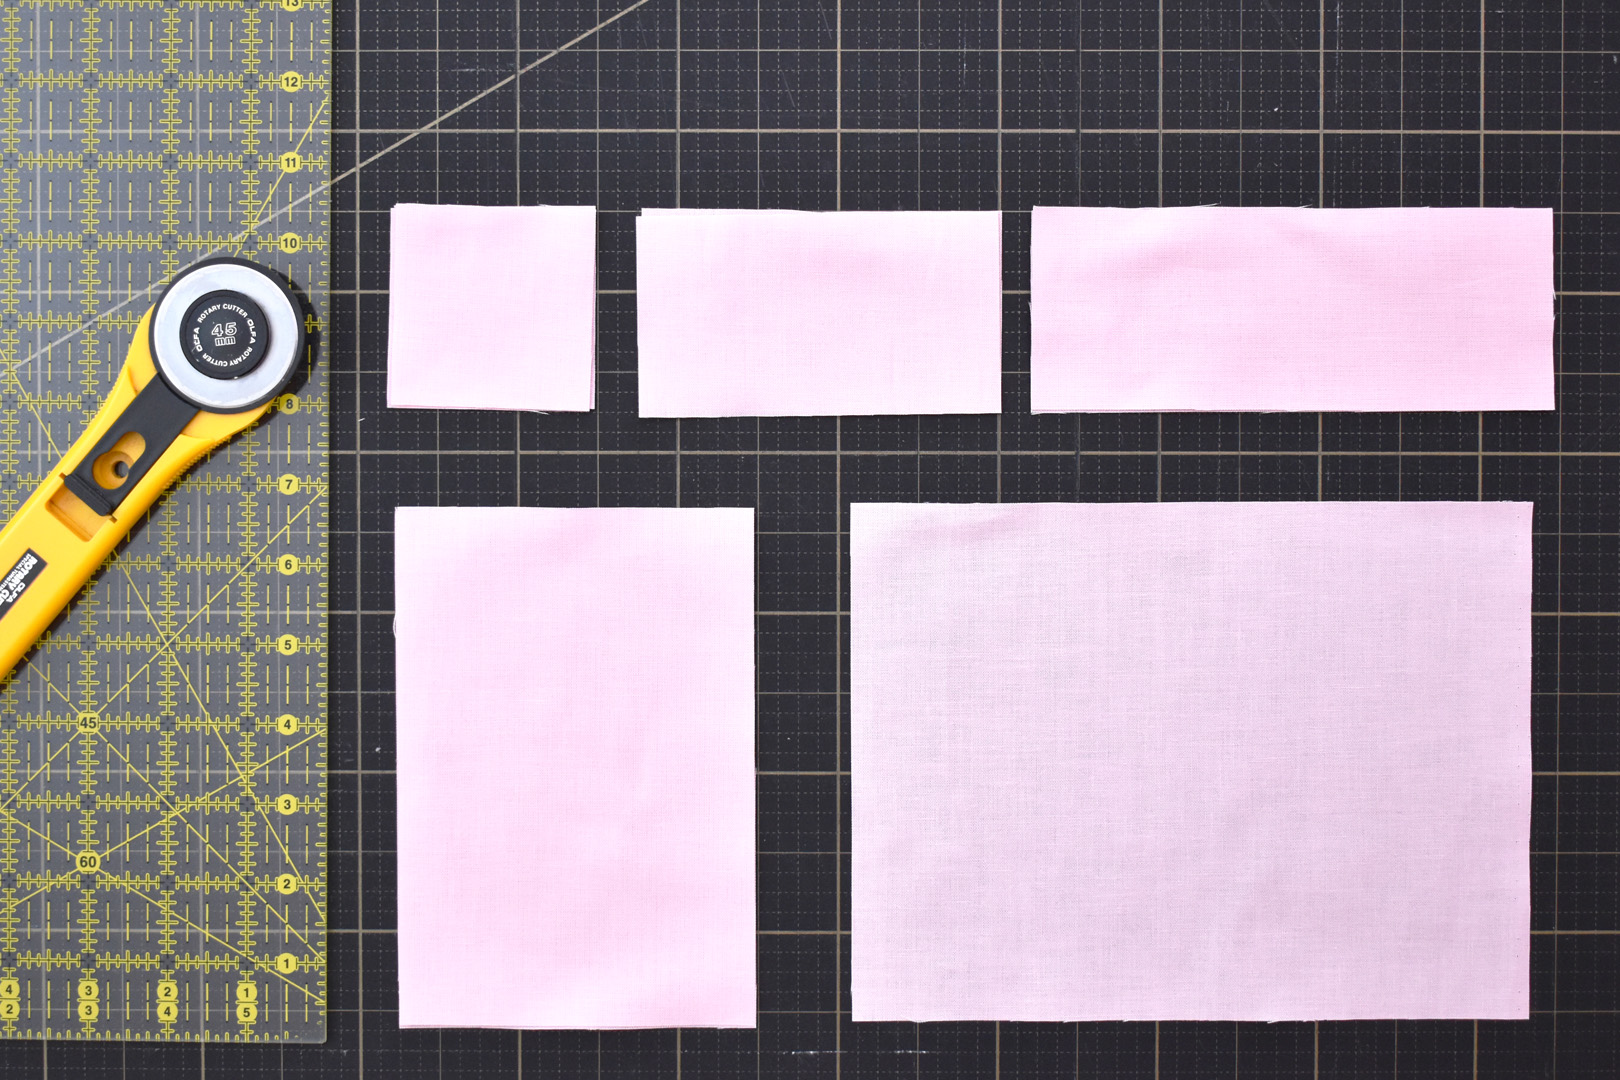
Kona Baby Pink:
- Cut six (6) strips 2.5″ WOF (2.5″ wide by the width of the fabric)
- Cut one (1) strip 6.5″ WOF
Kona Rich Red:
- Cut two (2) strips 2.5″ WOF
- Cut two (2) strips 4.5″ WOF
Kona White:
- Cut three (3) strips 6.5″ WOF
Backing print or solid:
- Cut to a 29″ x 29″ square
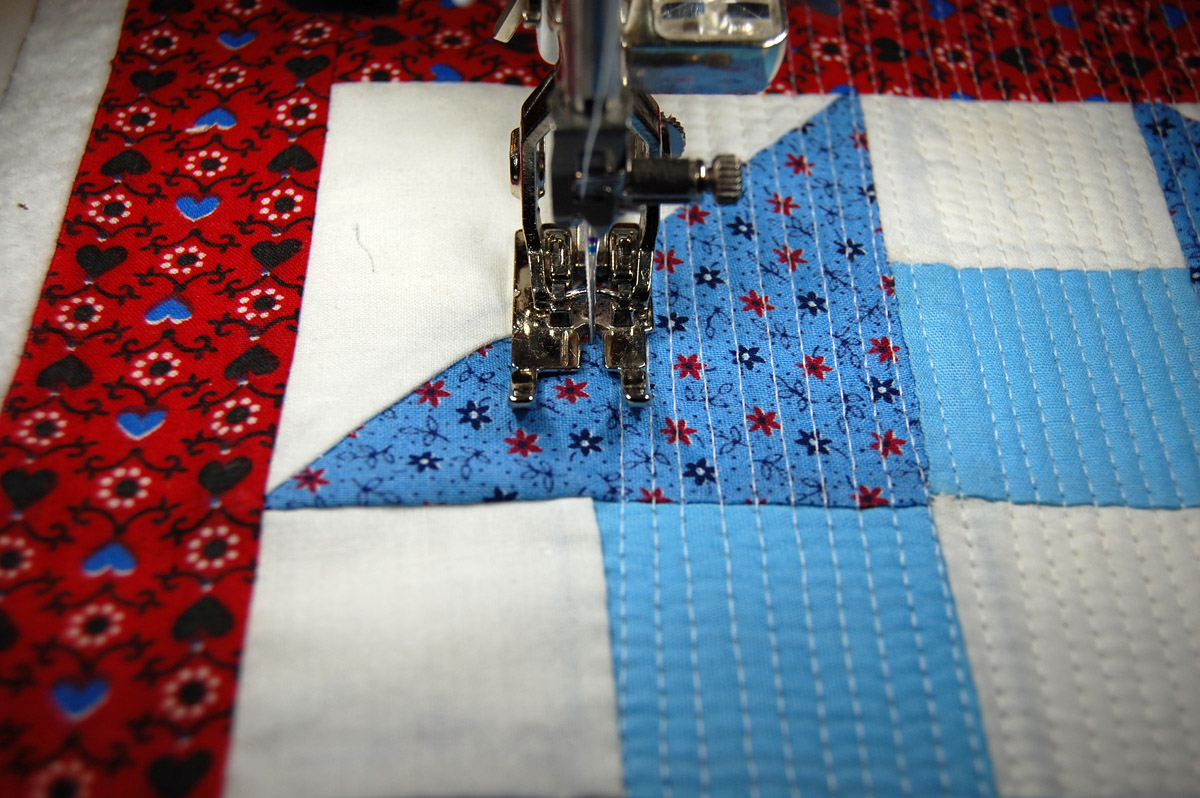
Get ready to cut patchwork and sew each individual letter. Set up your sewing machine with a quarter-inch patchwork foot, a straight stitch needle plate, a sharp needle size 80/12, and regular all-purpose sewing thread in a neutral color.
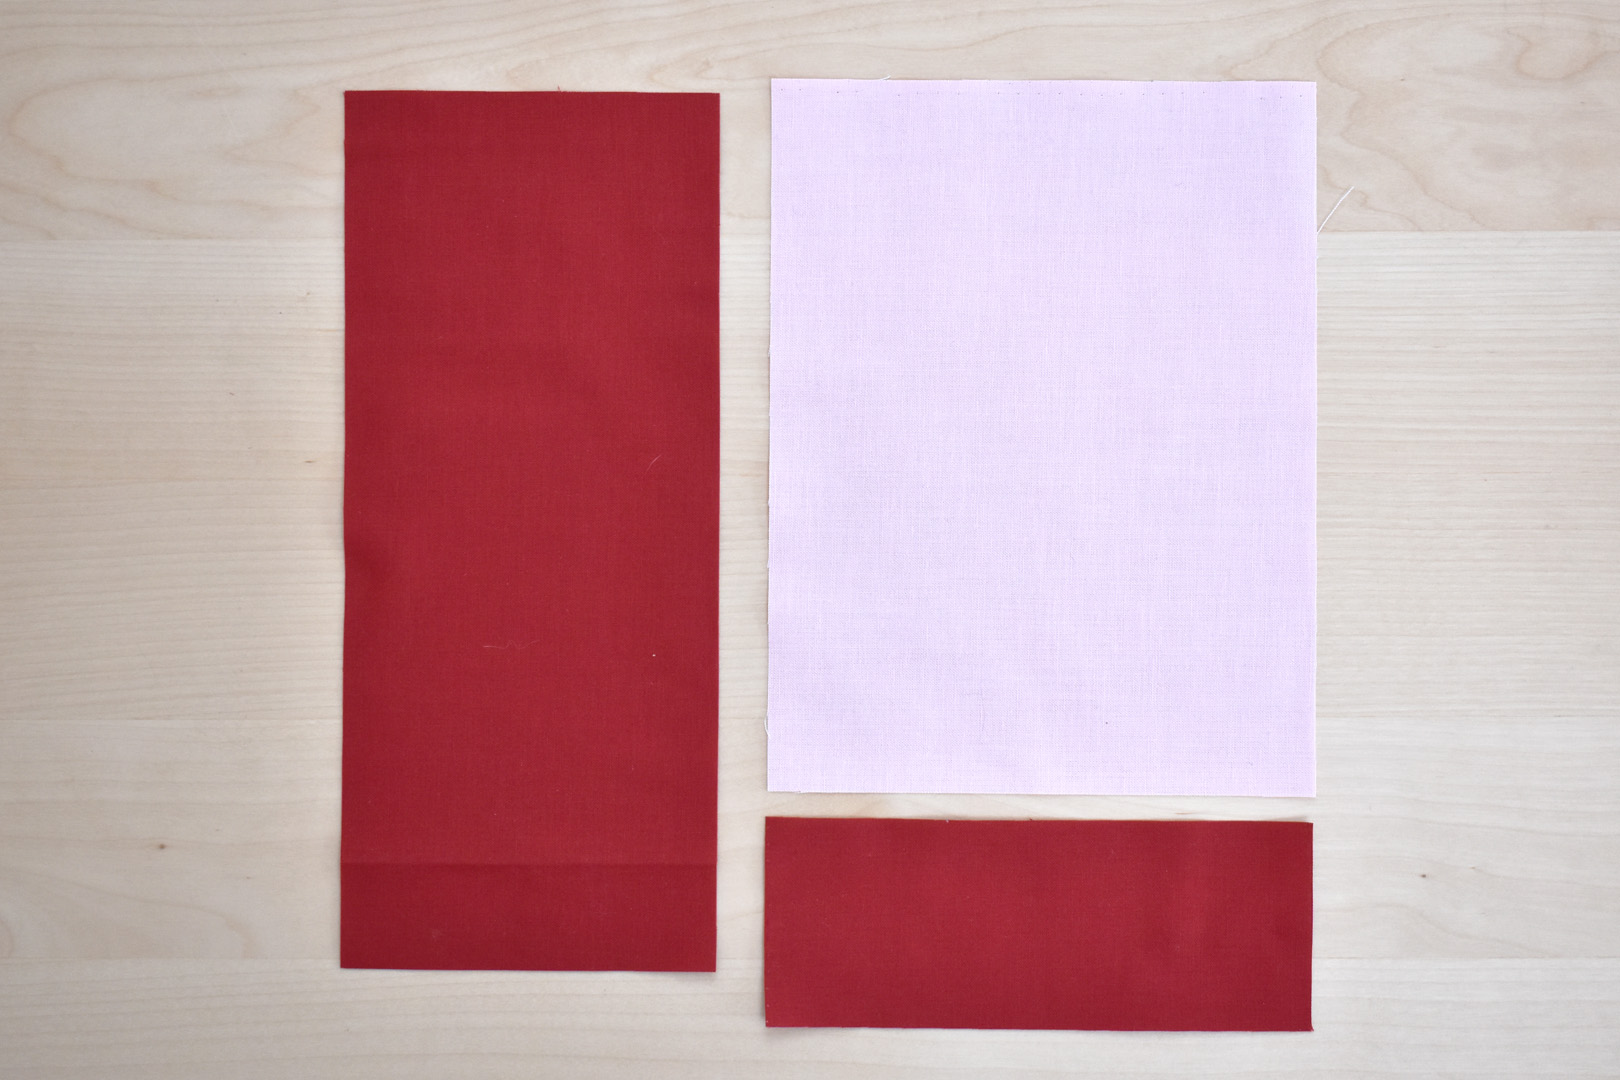
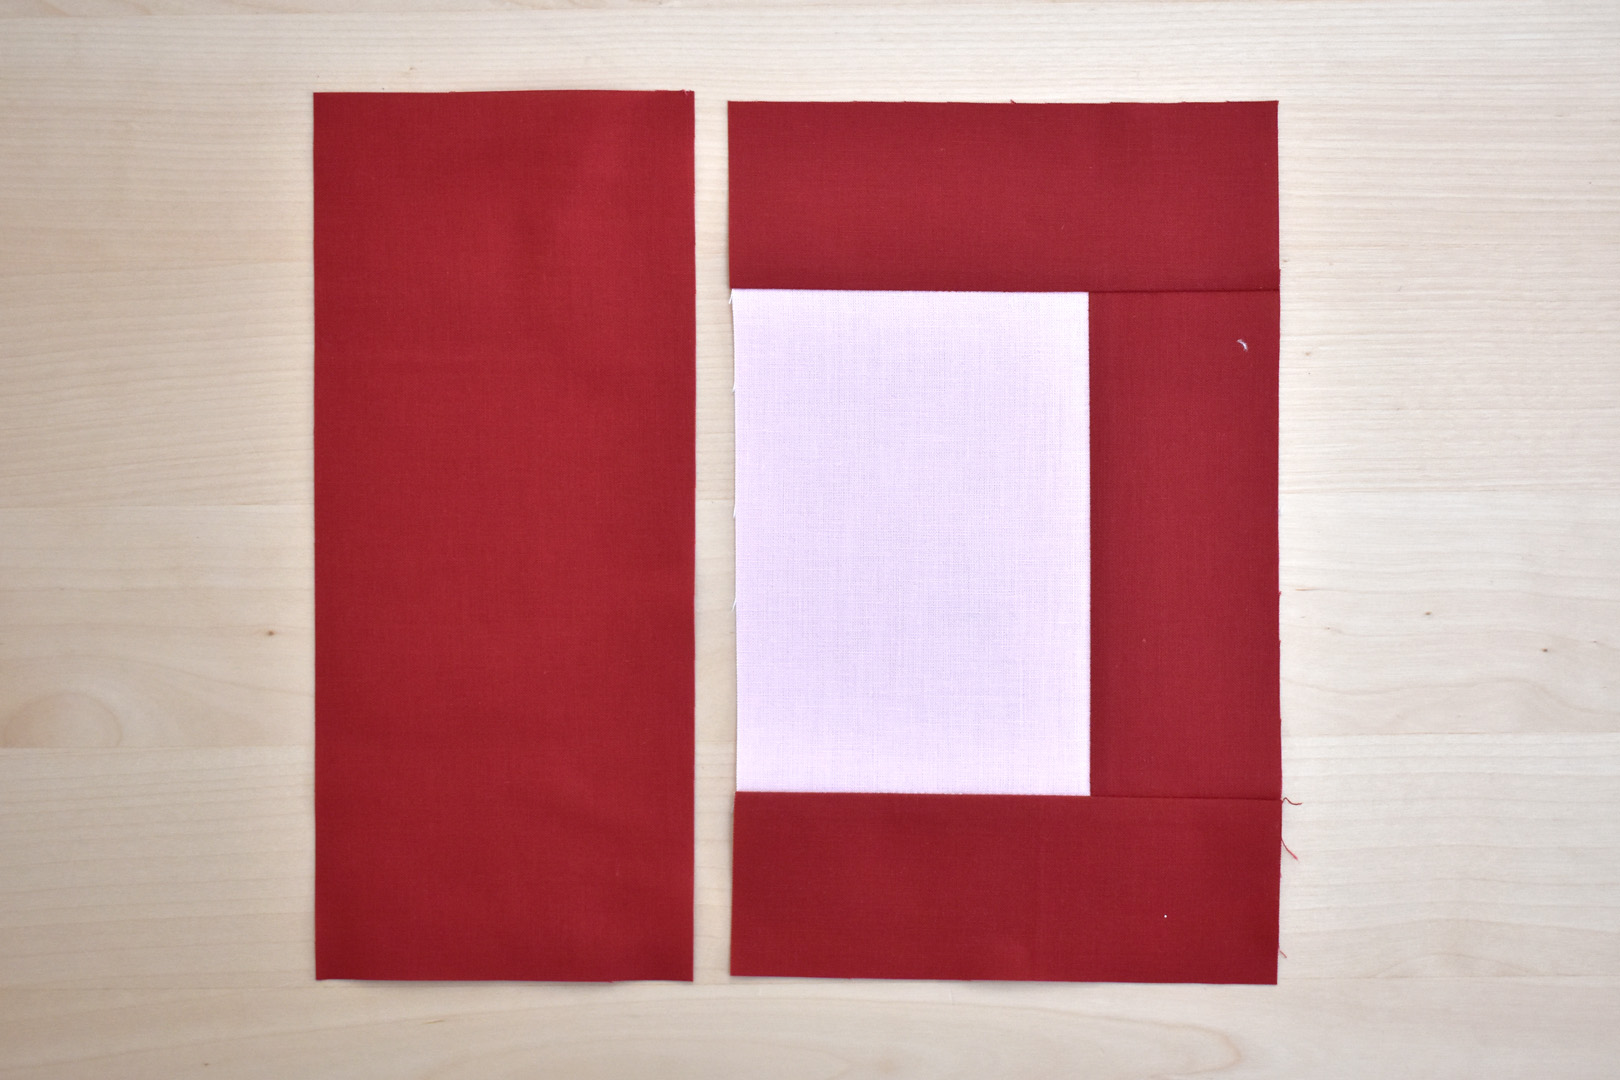
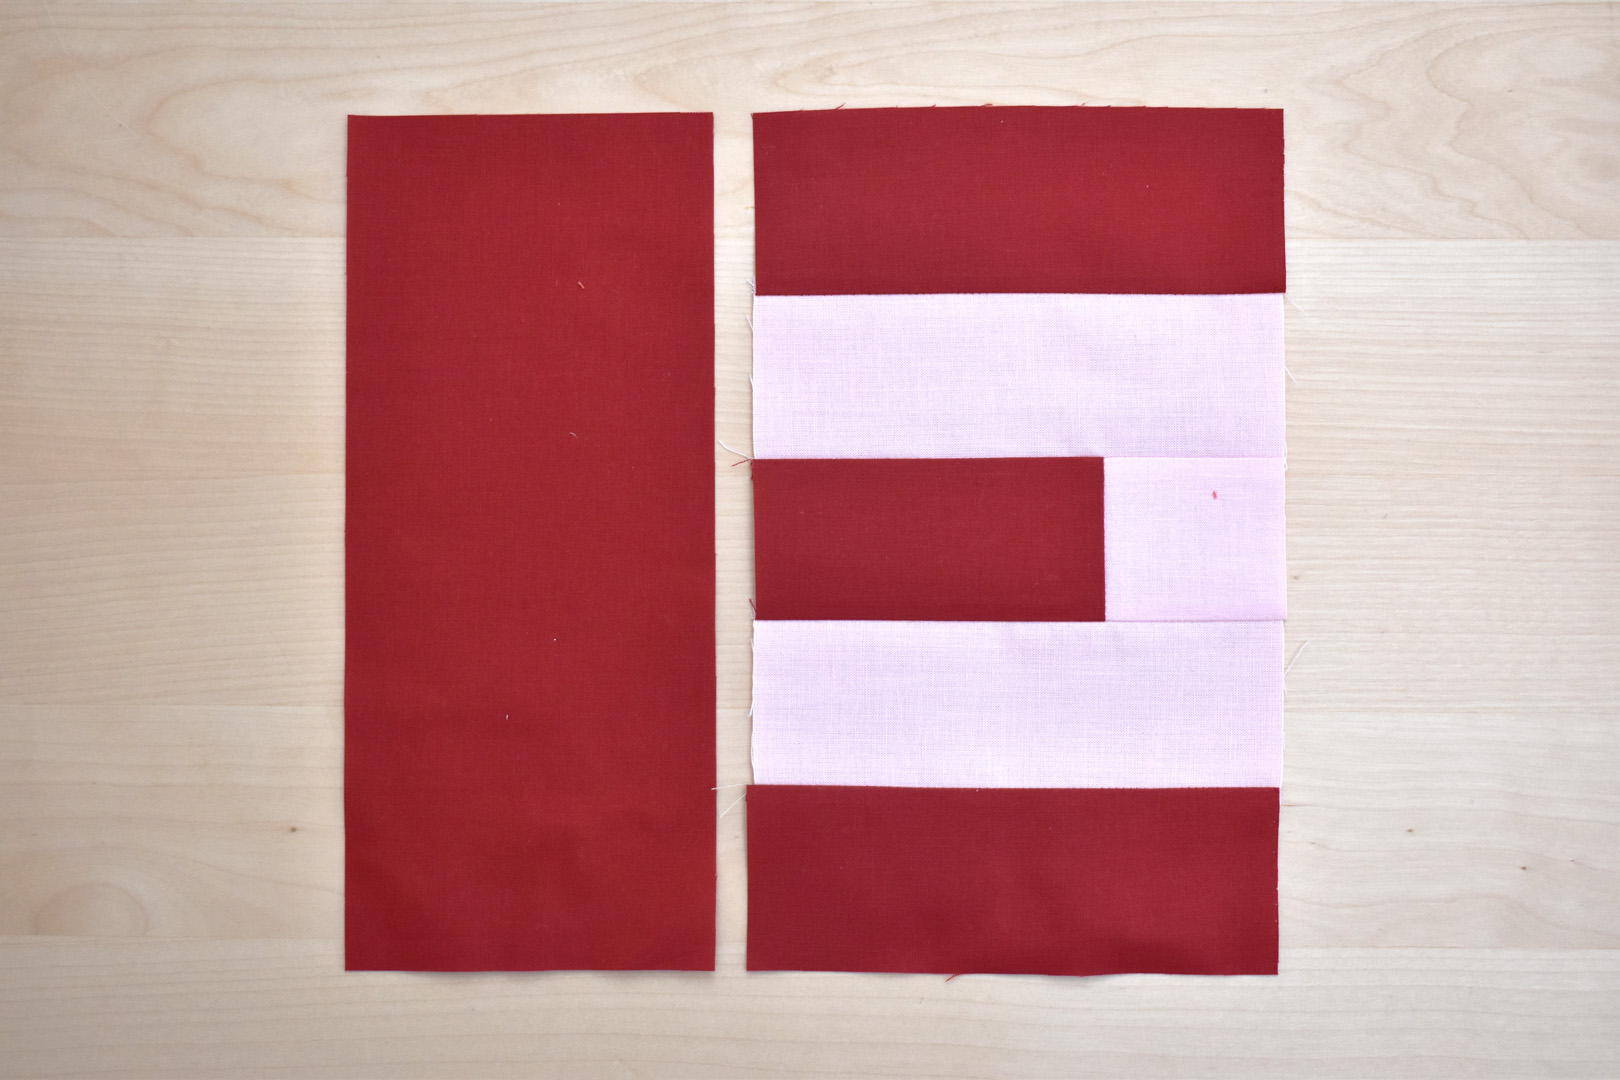
Create the patchwork “L”. From one red 4.5″ strip, cut one piece 10.5″ long. From one red 2.5″ strip, cut one piece 6.5″ long. From one pink 6.5″ strip, cut one piece 8.5″ long. Arrange as pictured above.
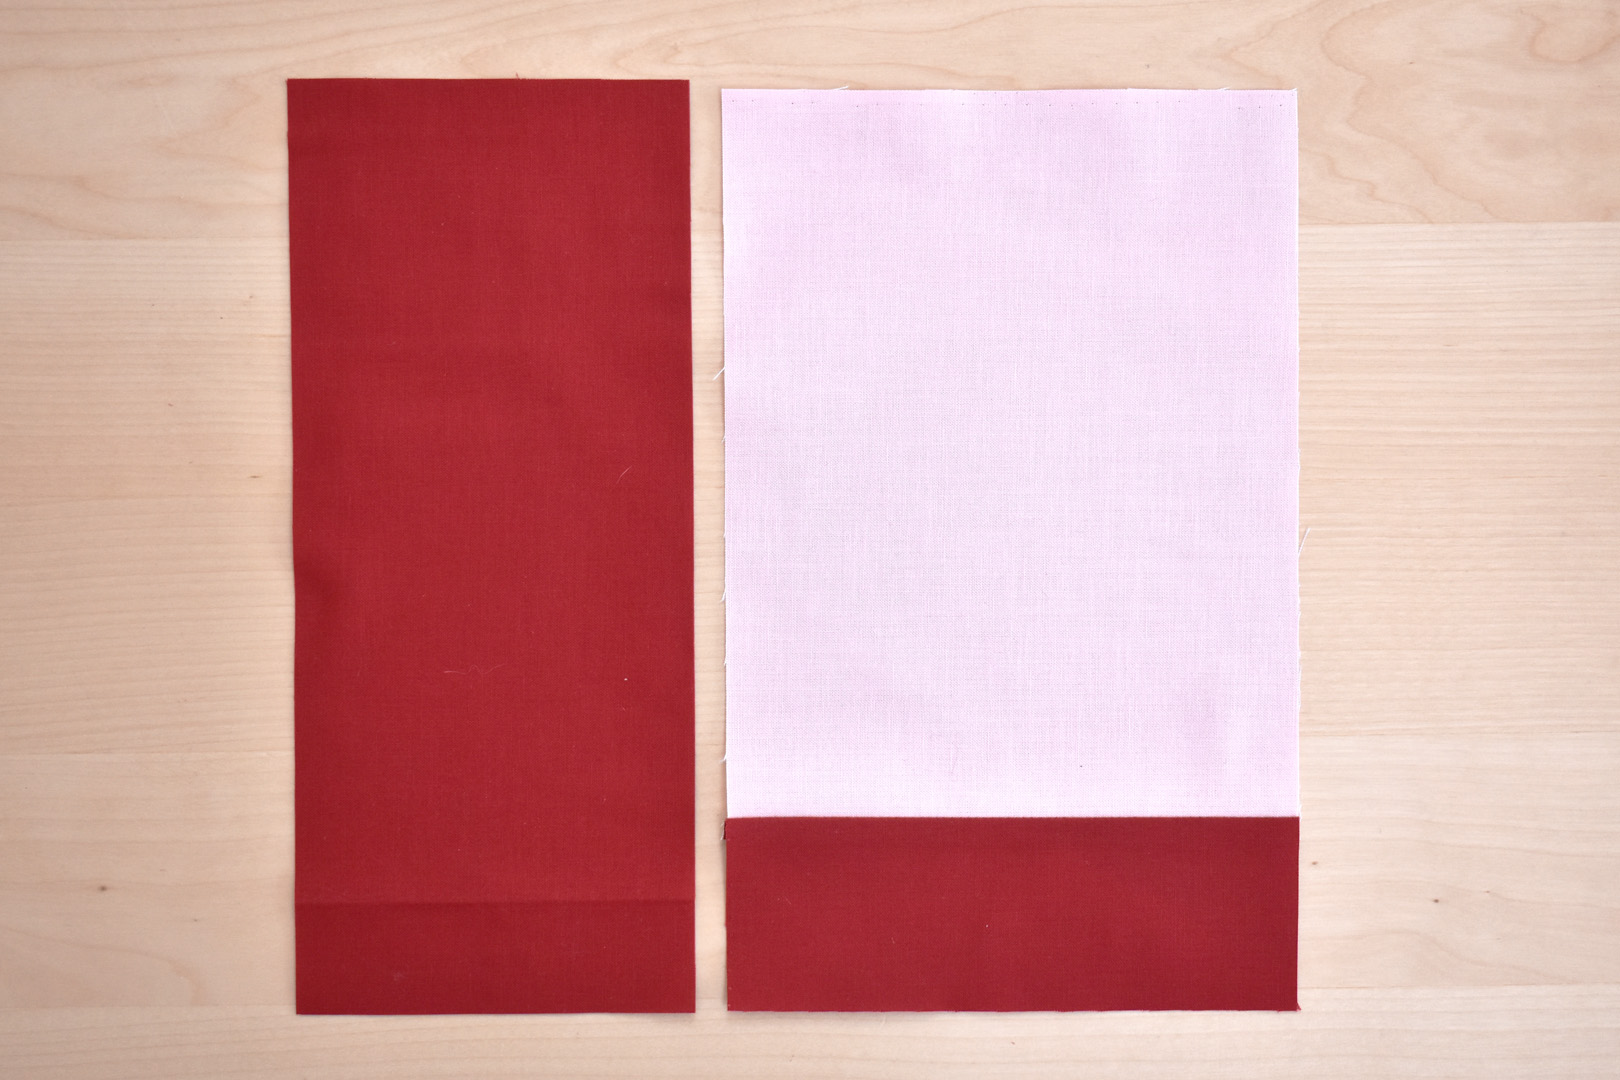
First, sew the edge between the pink background and bottom of the “L” with a quarter-inch seam. Press seam allowance toward the darker red fabric. Then sew the final seam to create the “L”, pressing seam allowance towards the red fabric.
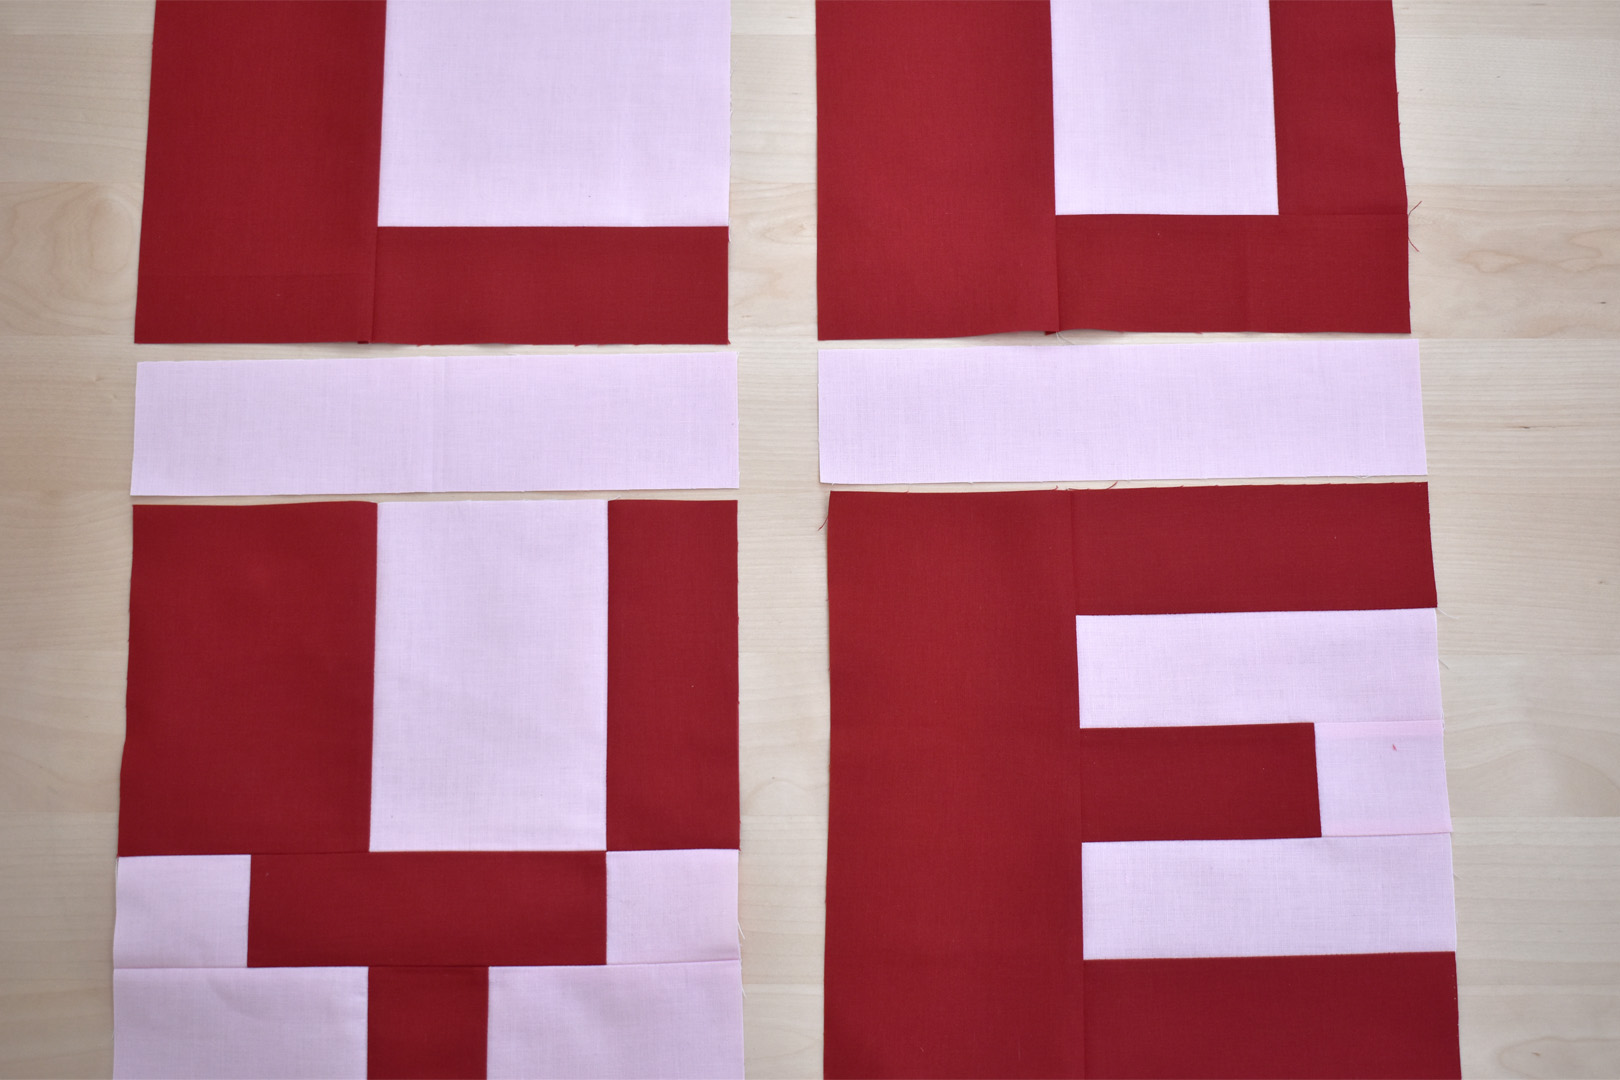
Create the patchwork “O”. From one red 4.5″ strip, cut one piece 10.5″ long. From one red 2.5″ strip, cut three pieces 6.5″ long. From one pink 6.5″ strip, cut one piece 4.5″ long. Arrange as pictured above.
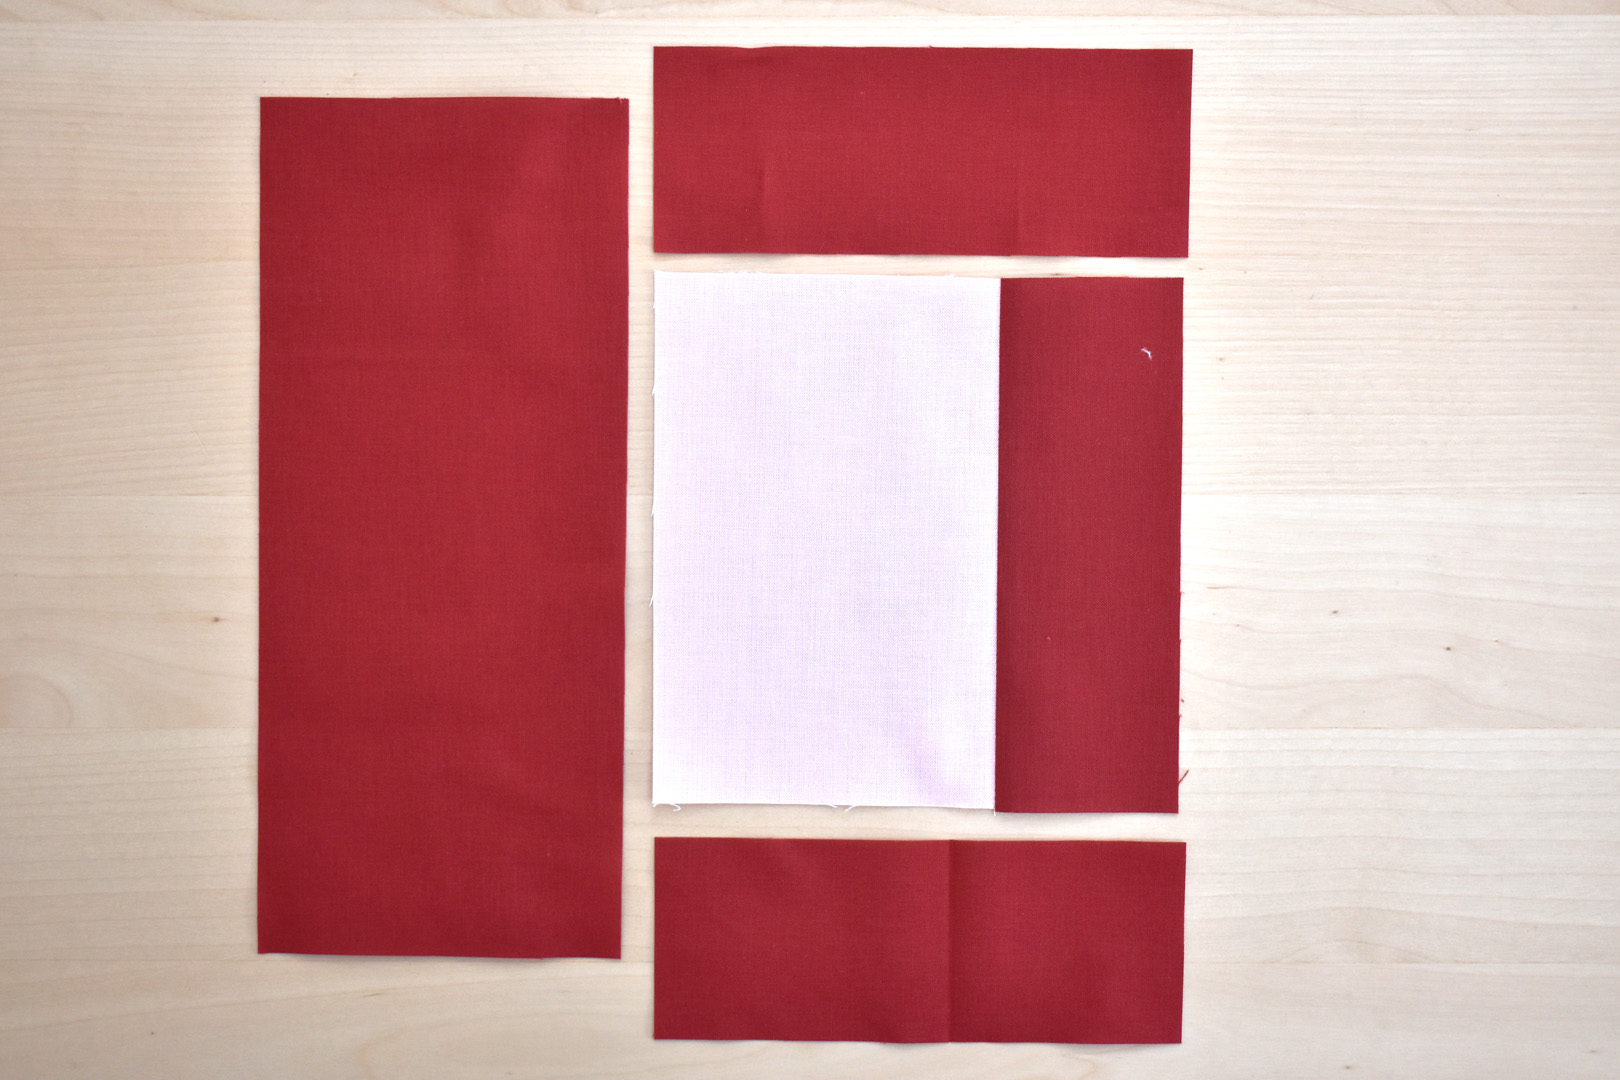
Begin by sewing the right side of the “O” to the pink background, and press seam allowance towards the red.
Then sew the top and bottom of the “O” to the middle piece, pressing seams towards the red. Sew the final seam to complete the “O”, pressing seams towards the red.
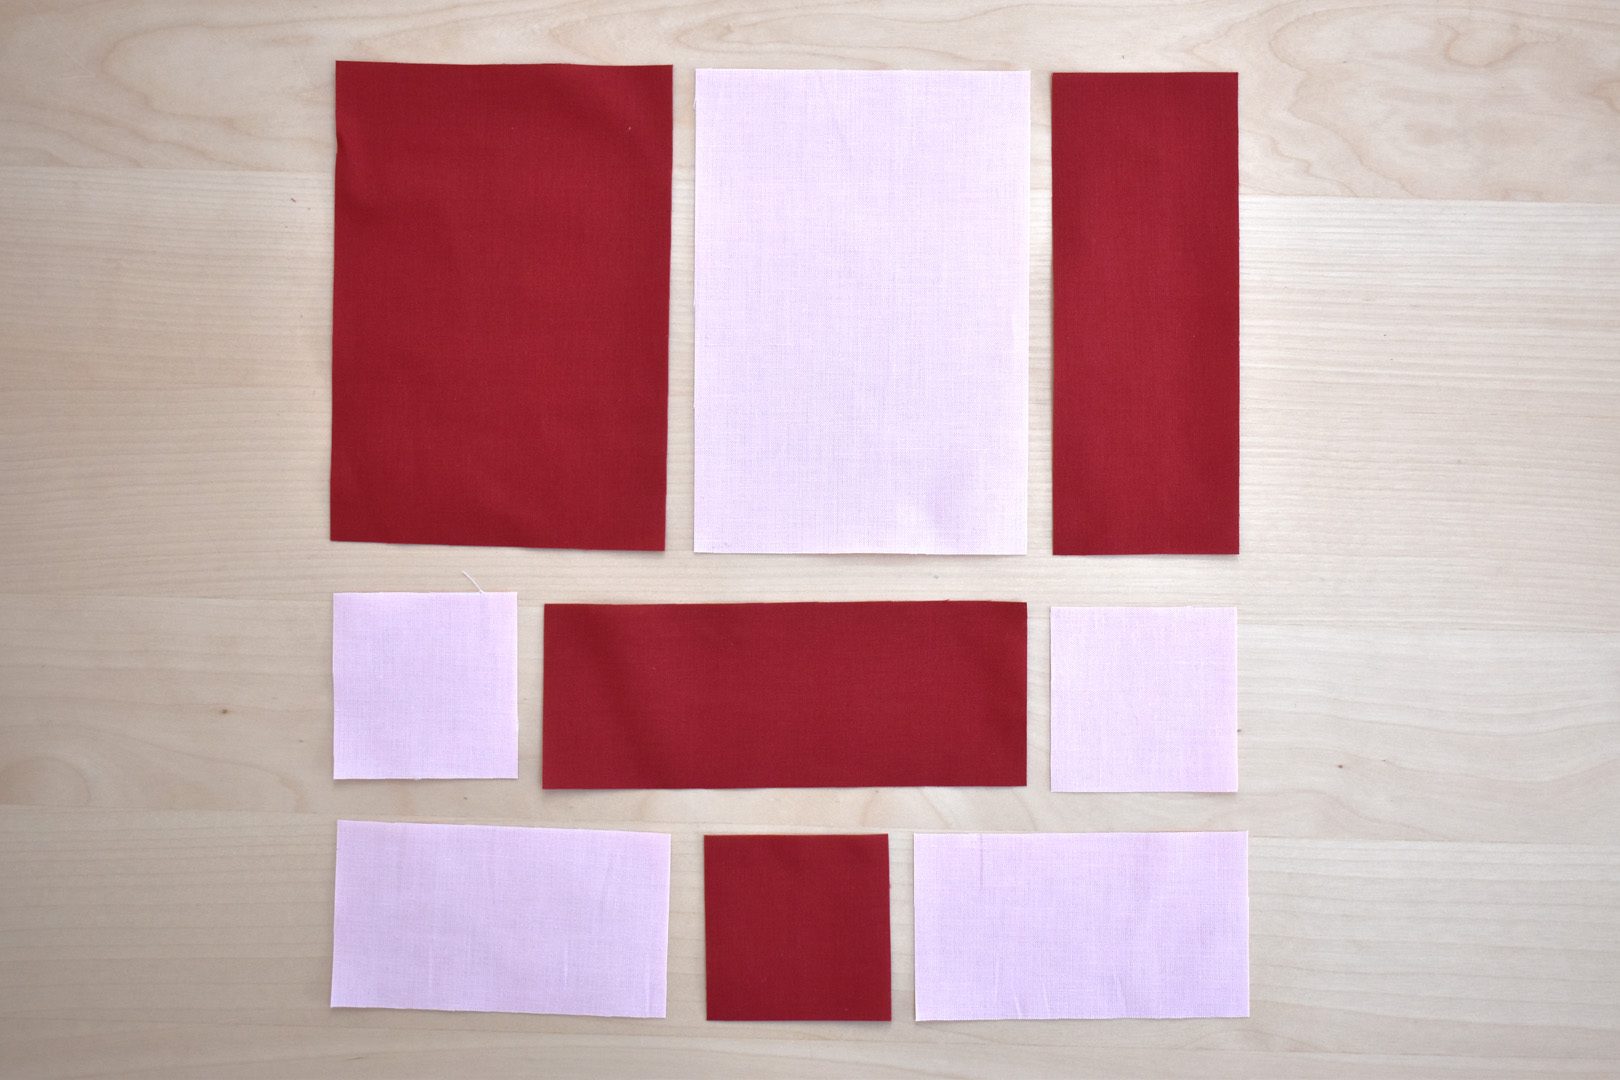
Create the patchwork “V”. From one red 4.5″ strip cut one 6.5″ piece. From one red 2.5″ strip cut two 6.5″ pieces, and one 2.5″ piece. From one pink 4.5″ strip, cut one 6.5″ piece and cut two 2.5″ pieces. From one pink 2.5″ strip, cut two 2.5″ pieces. Arrange as pictured above.
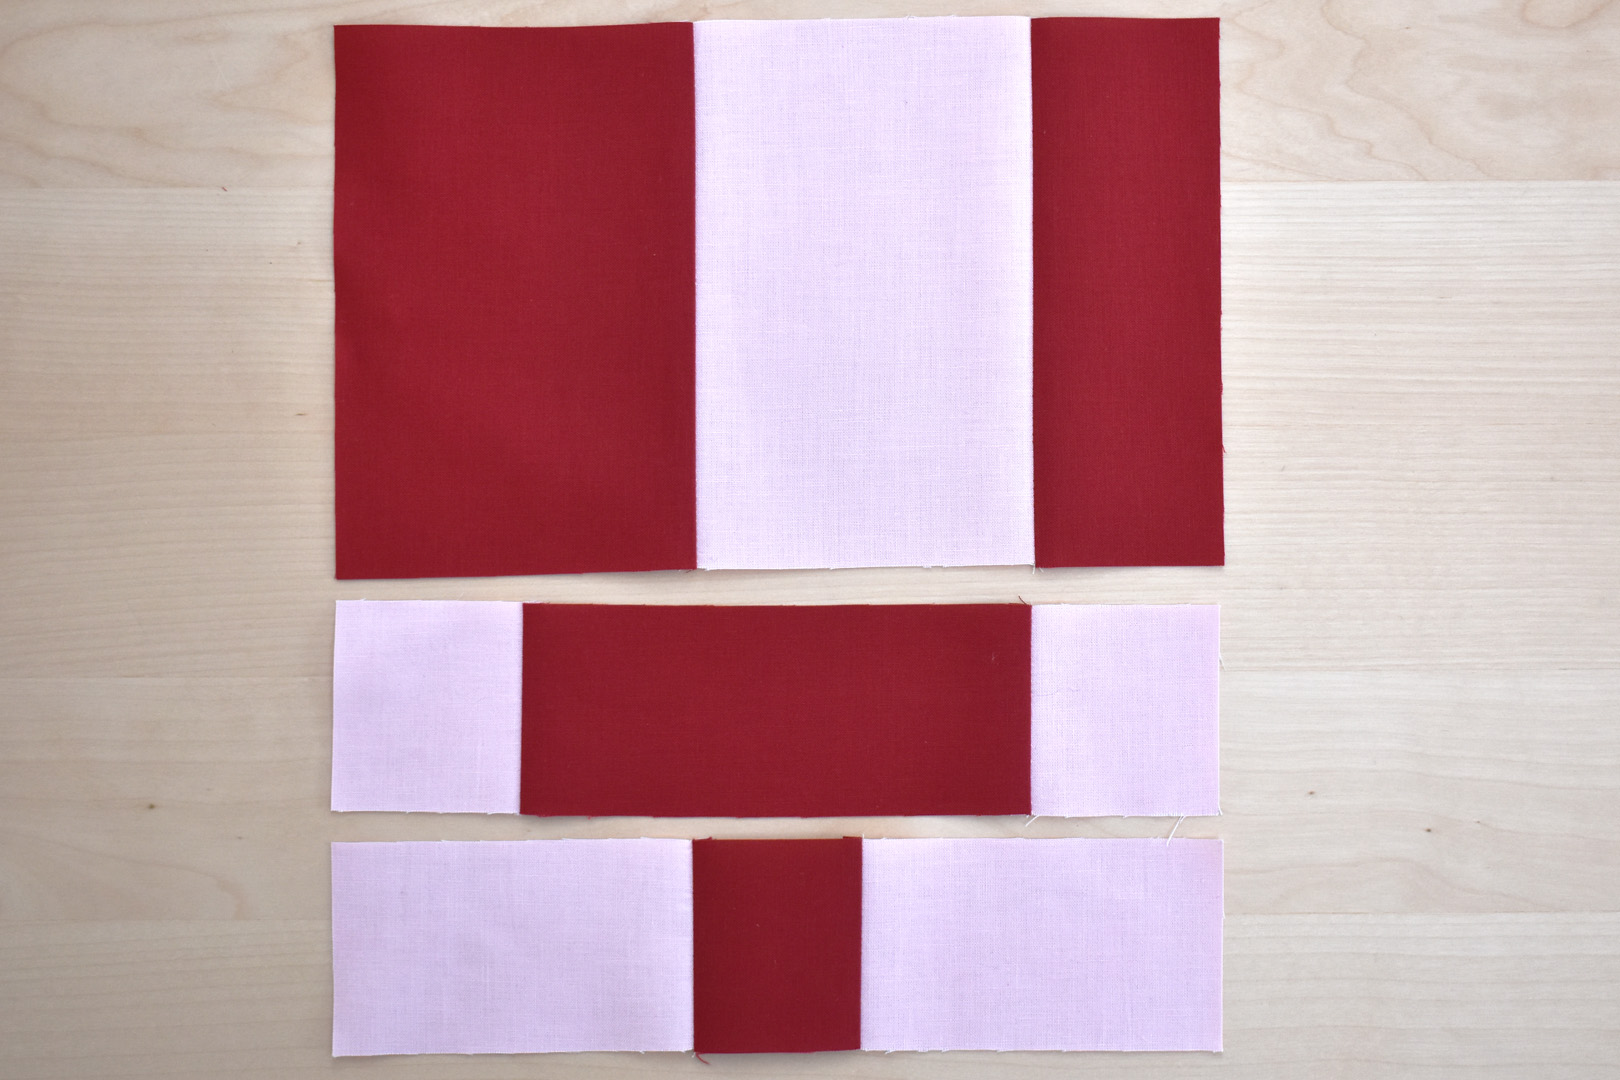
Begin by stitching the patchwork together across in rows: sewing the top 3 pieces together, the middle 3 pieces together, and the bottom 3 pieces together. Press seams towards the red.
Sew the rows of patchwork together to complete the “V”, pressing these seams open as pictured above.
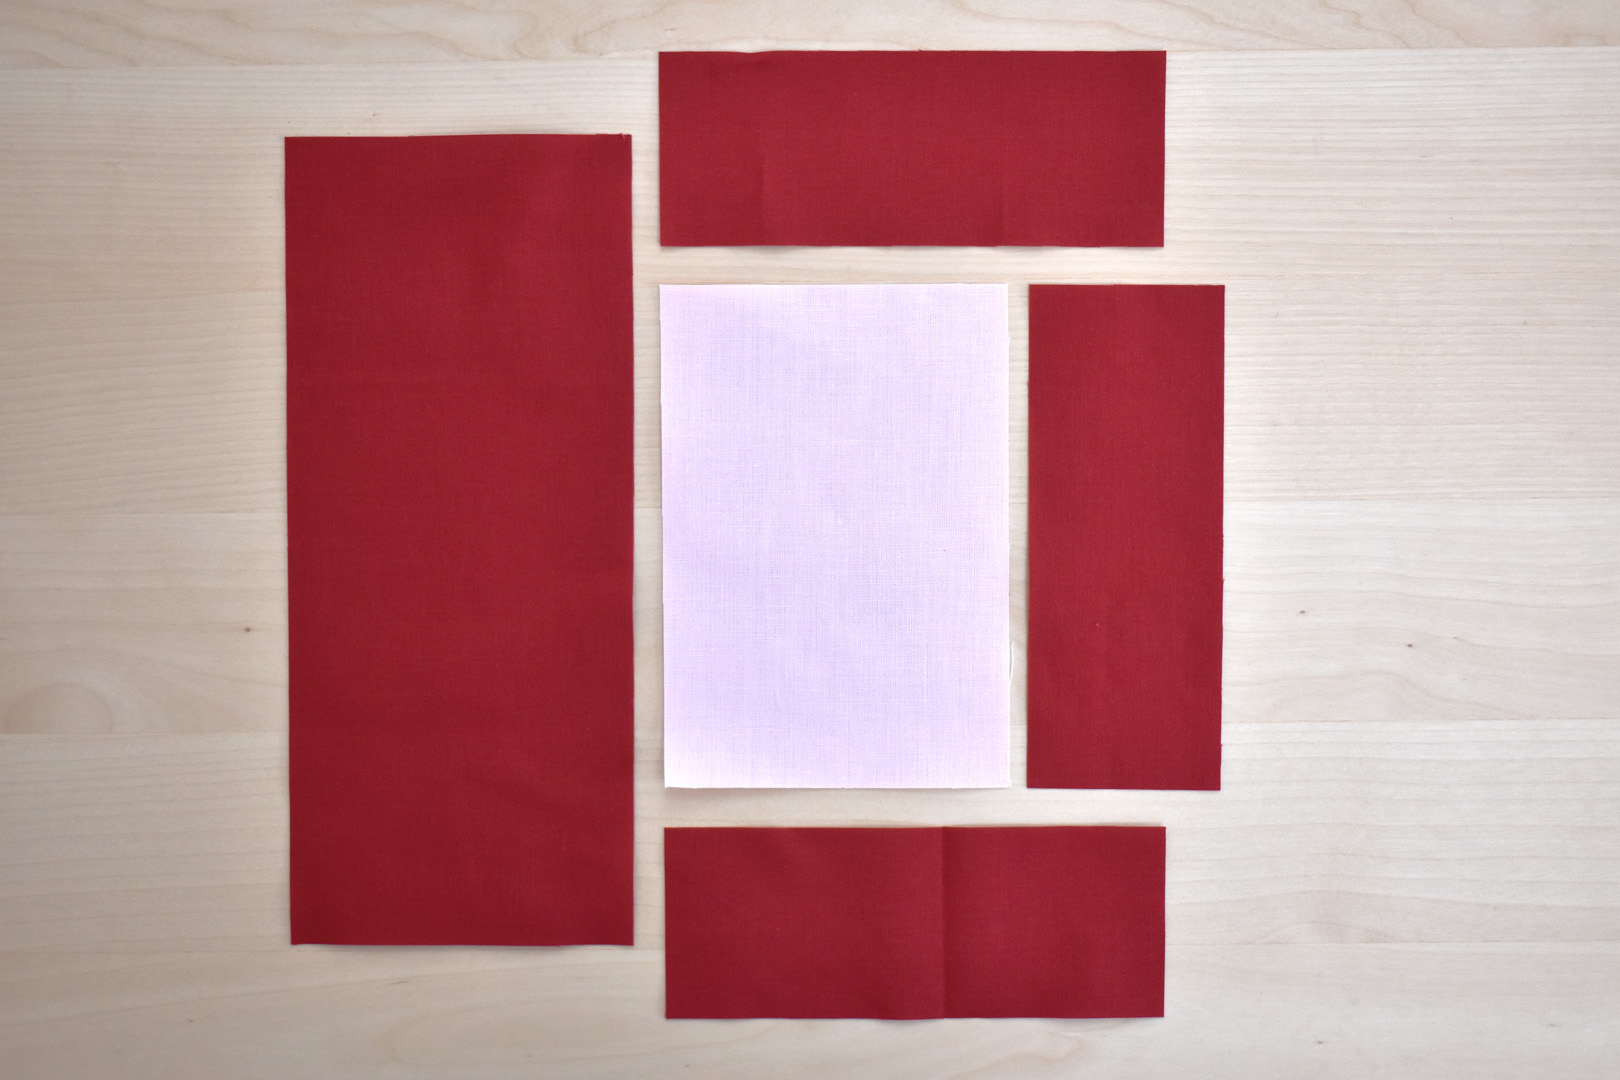
Create the patchwork “E”. From one red 4.5″ strip, cut one 10.5″ piece, and one 2.5″ piece. From one red 2.5″ strip, cut two 6.5″ pieces. From one pink 2.5″ strip, cut one 2.5″ piece and cut two 6.5″ pieces. Arrange as pictured above. First, sew the small pink square to the end of the small middle arm of the “E”, pressing the seam toward red.
Sew the 5 pieces of stacked patchwork in the “E” together, pressing seams towards the red fabric. Sew the last seam together to complete the “E”, pressing seams towards the red.
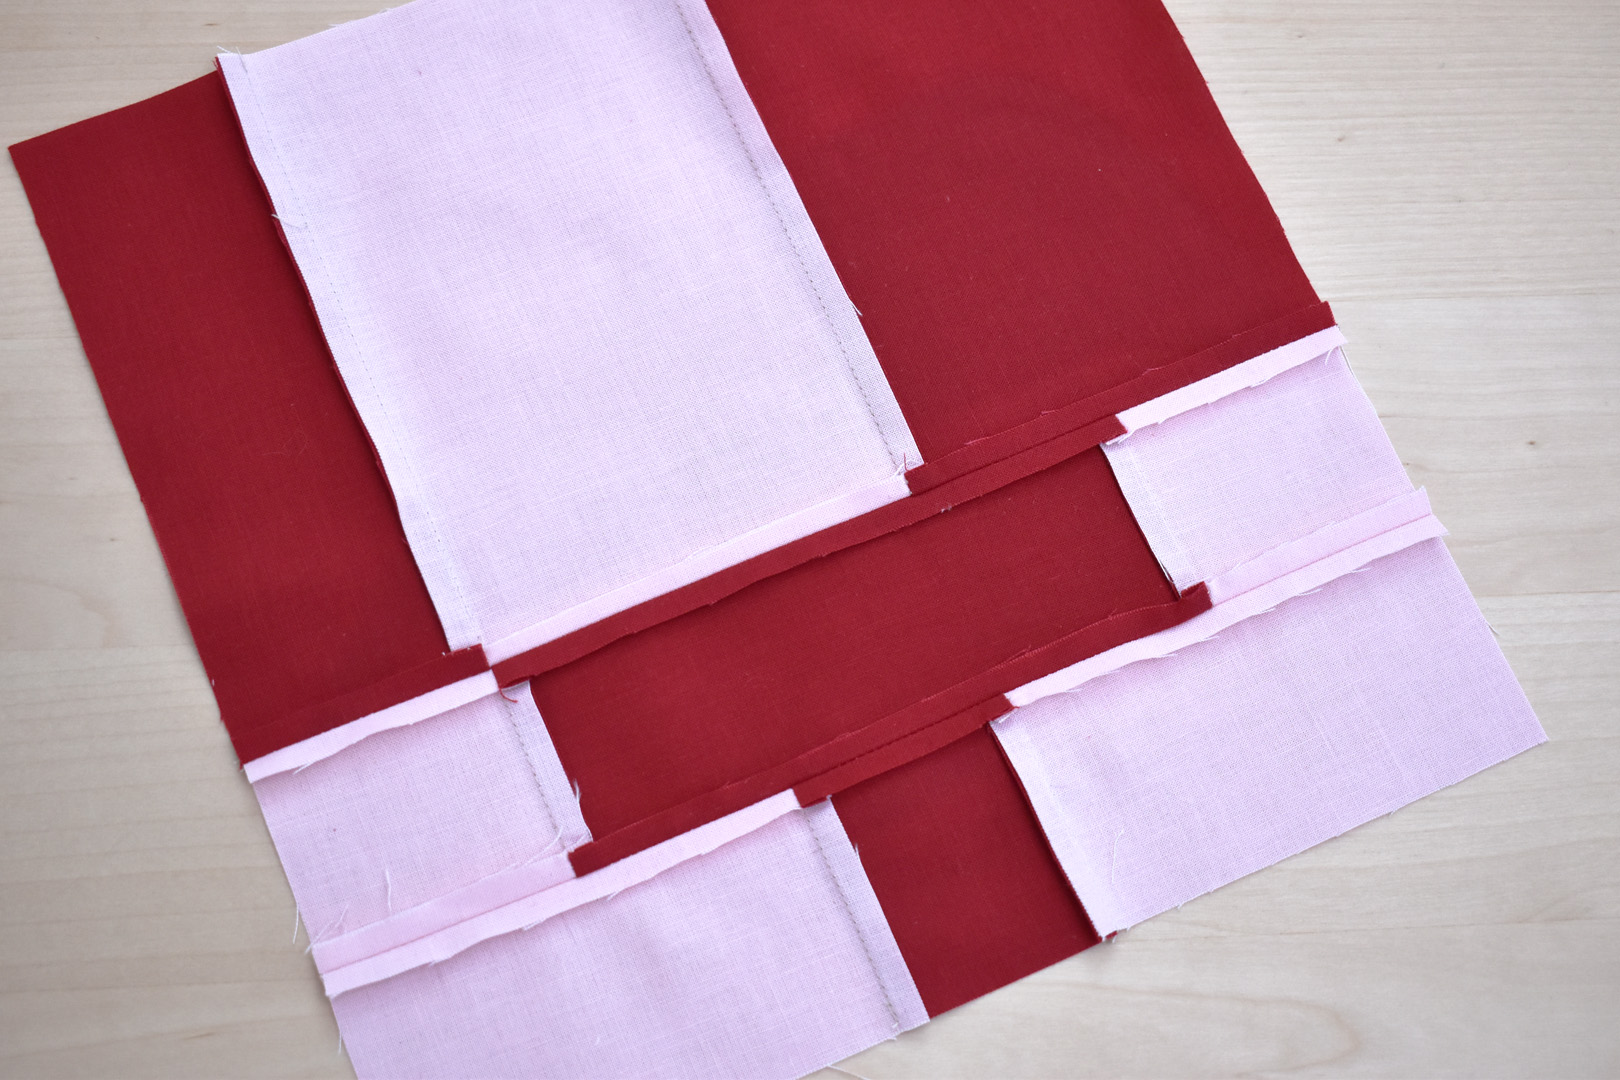
Create the sashing between the letters. From the pink 2.5″ strips of fabric, cut two 10.5″ strips and one 22.5″ strip. You should have enough left over from one pink 2.5″ strip to cut at least one of the 10.5″ sashing pieces.
First, attach the shorter sashing pieces between the letters “L” and “V”, and between the letters “O” and “E” as show. Press the sashing seams open.
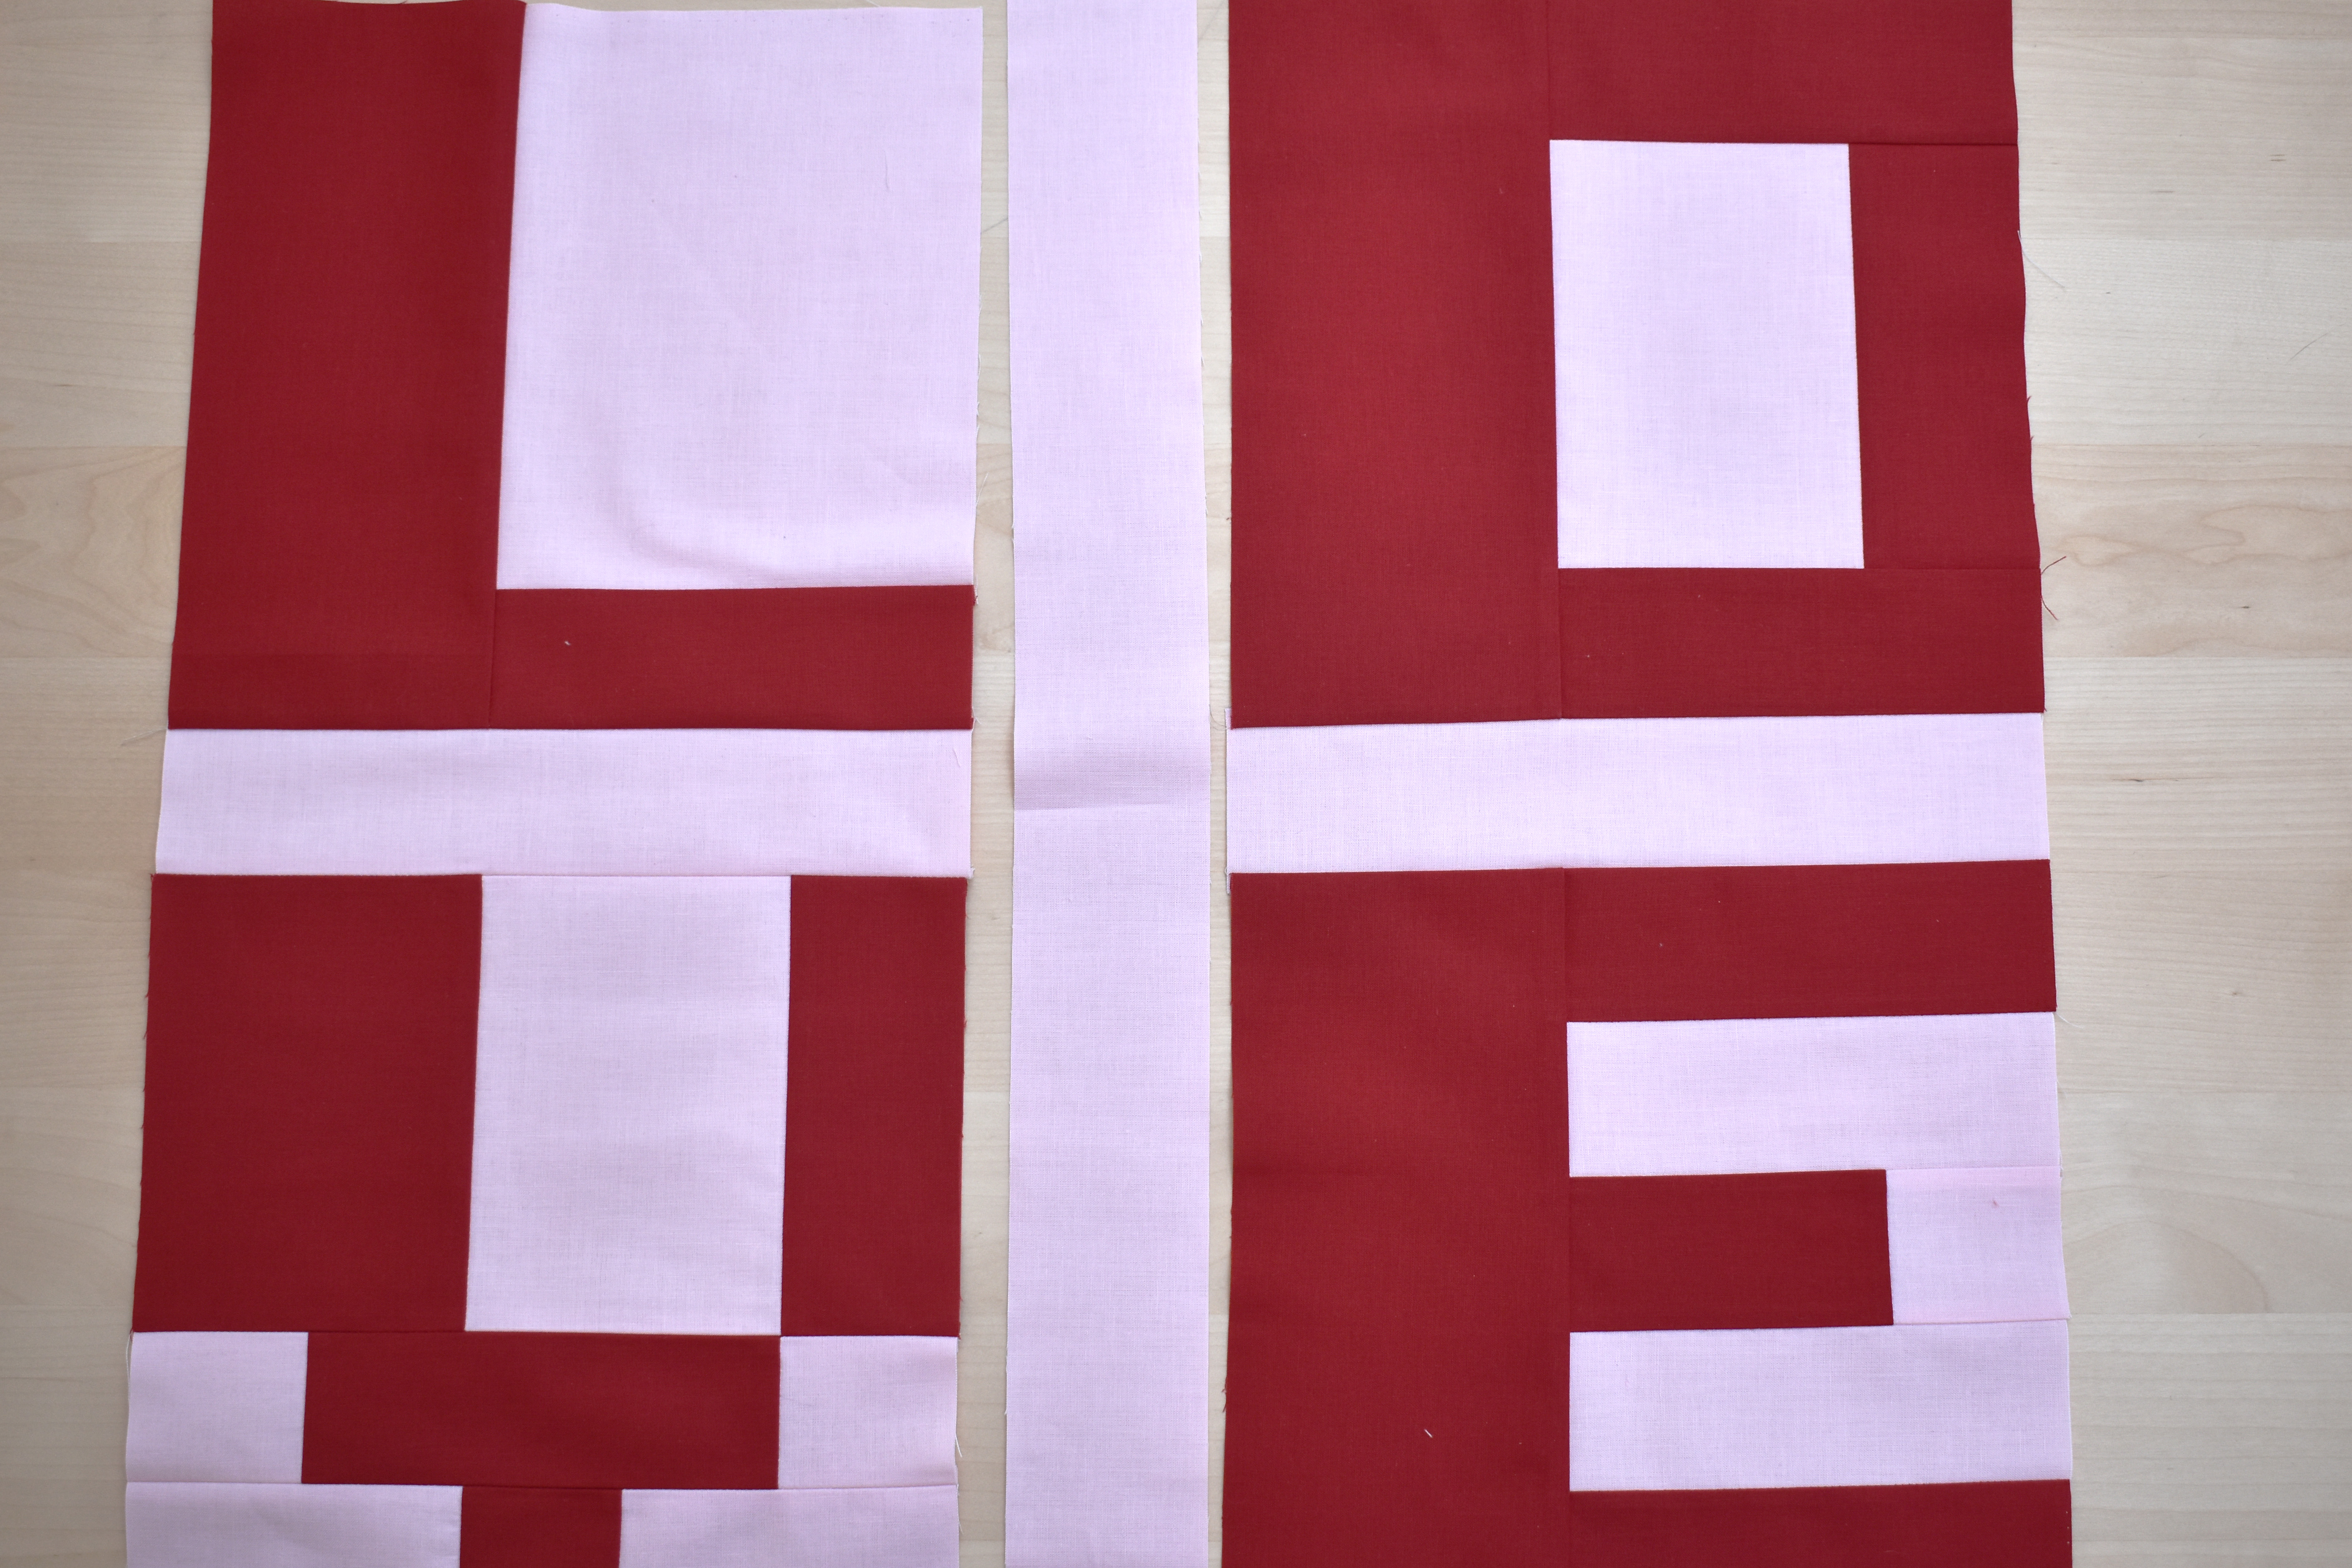
Sew the final sashing piece in between the patchwork to complete the sashing. Press sashing seams open.
Create the border. From the remaining pink 2.5″ strips, cut two strips 22.5″ and two strips 26 1/2″.
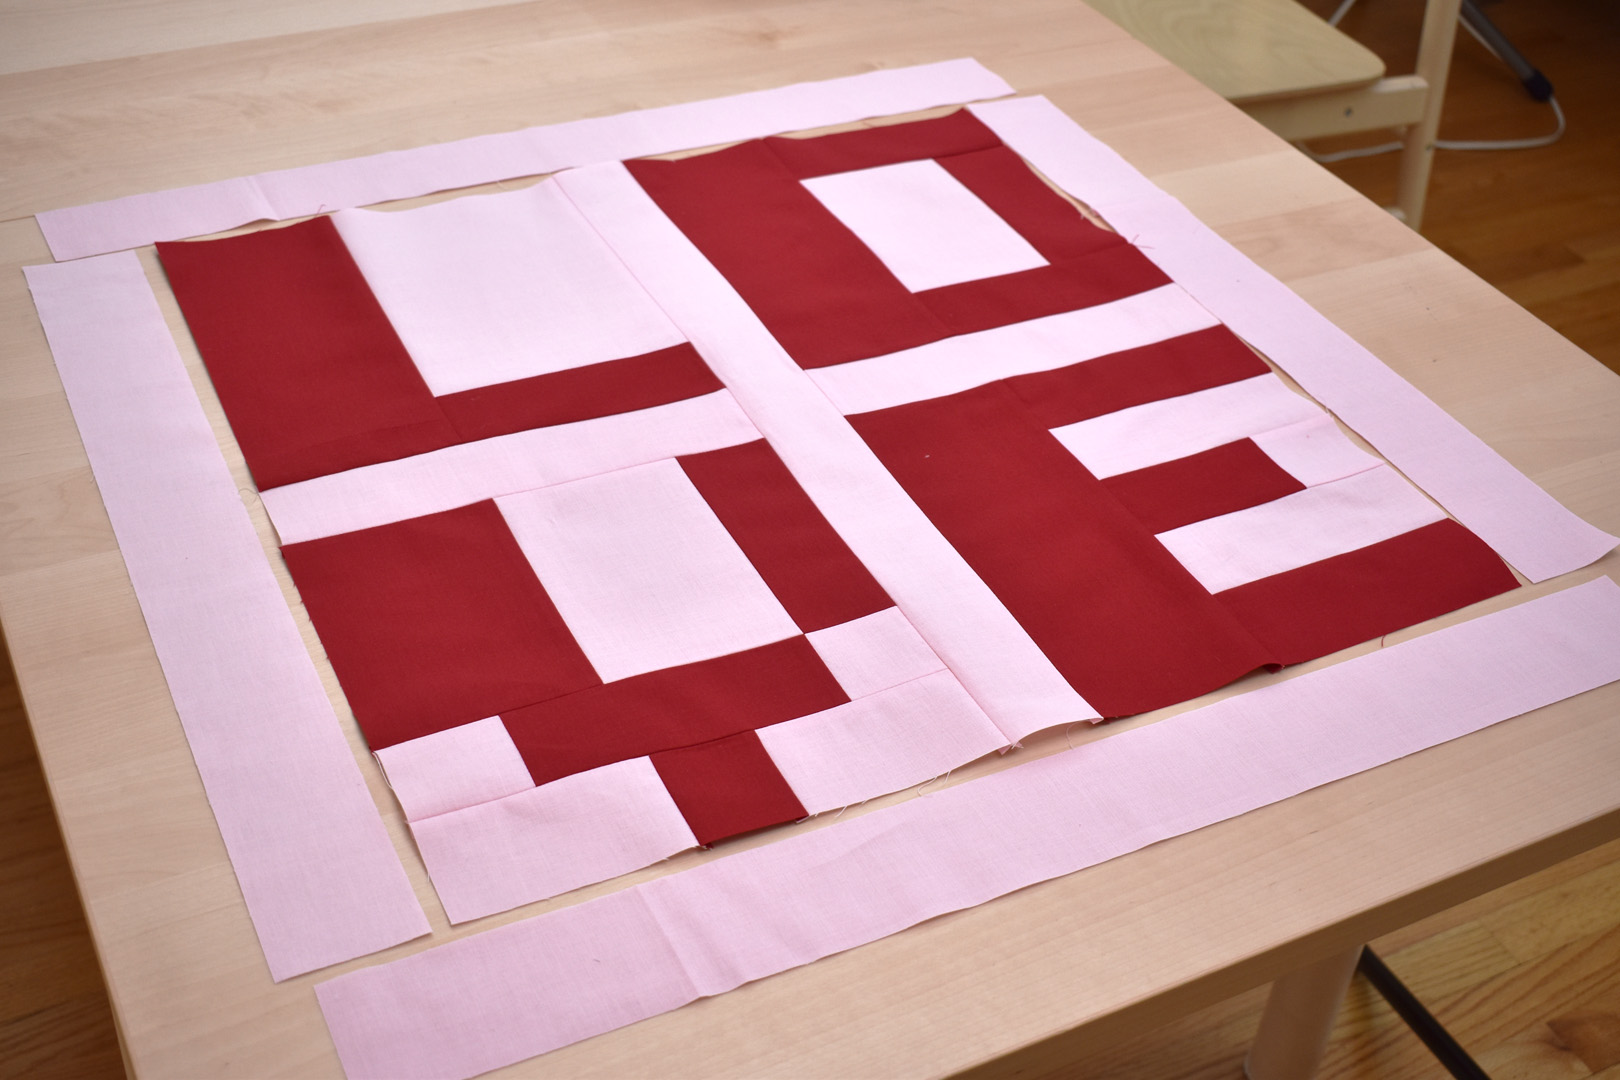
Sew the shorter border strips to the sides of the quilt, pressing seams open. Last but not least, sew the final border strips to the top and bottom of the quilt, pressing seams open.

Give the final top a light pressing and store in a safe place until you are ready to baste the backing, batting, and top together.
Cut the backing fabric to 29″ x 29″, and cut batting the same size as the backing. Layer the backing wrong side up, smooth out the batting on top of the backing, and carefully center the top on the batting. Smooth out any wrinkles from the center out to the edges.
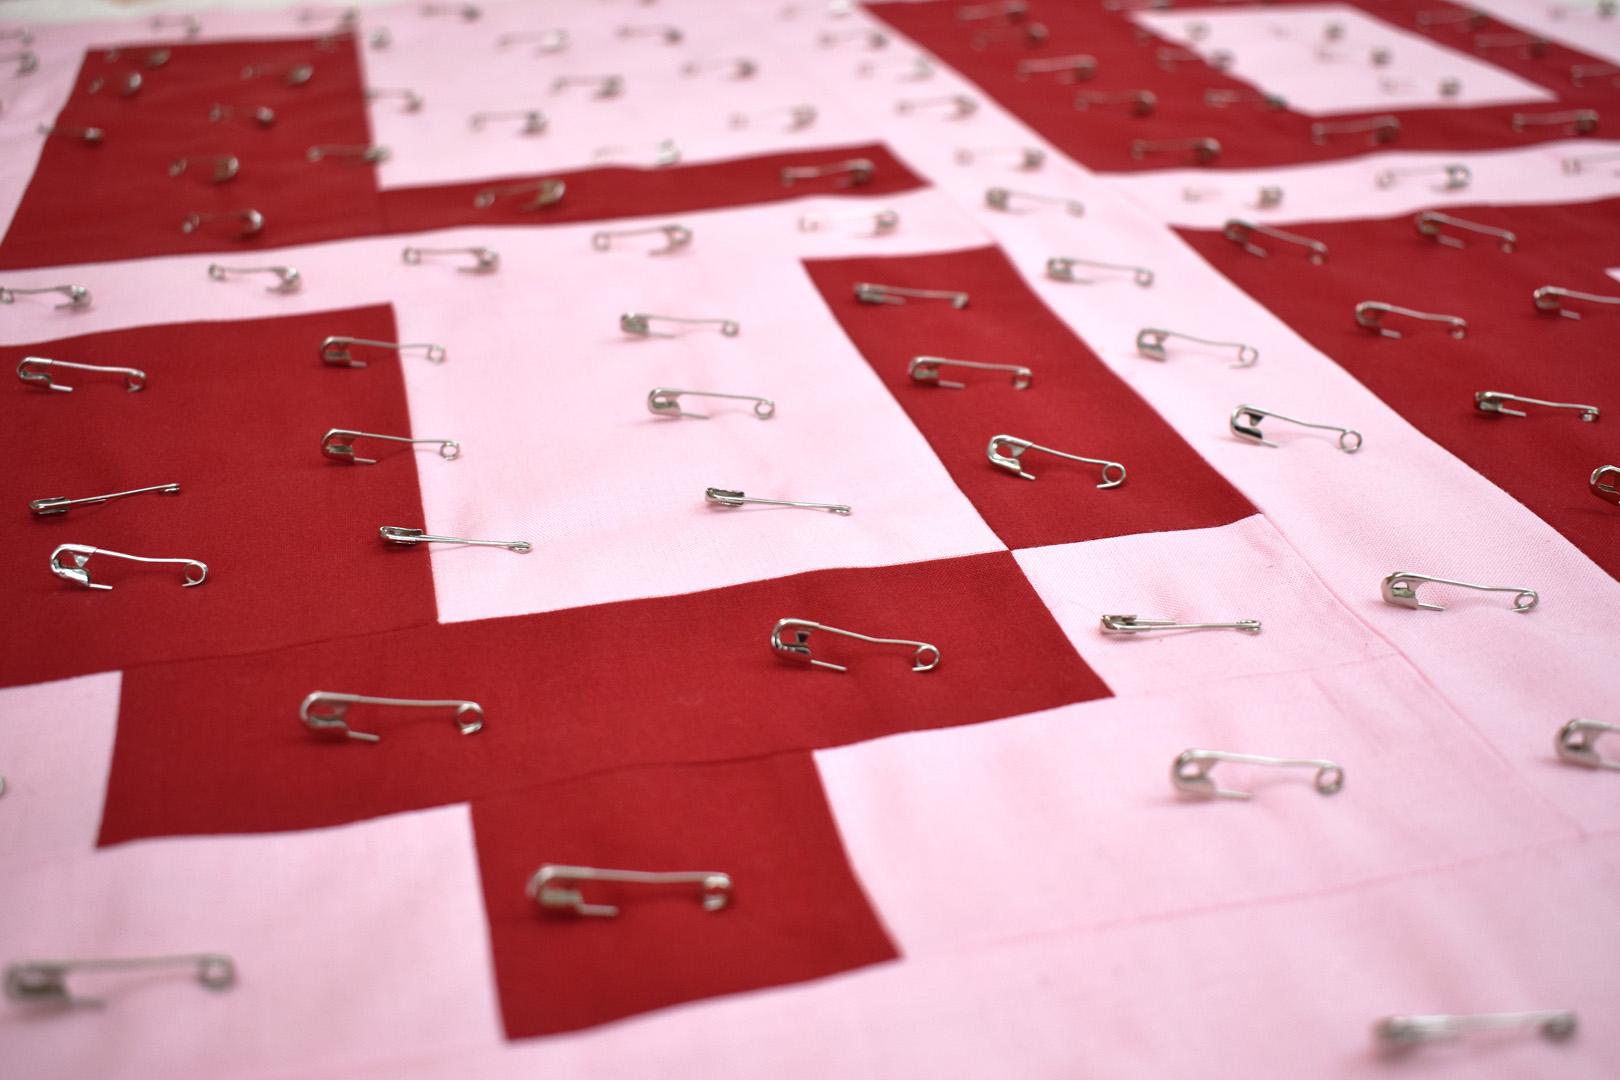
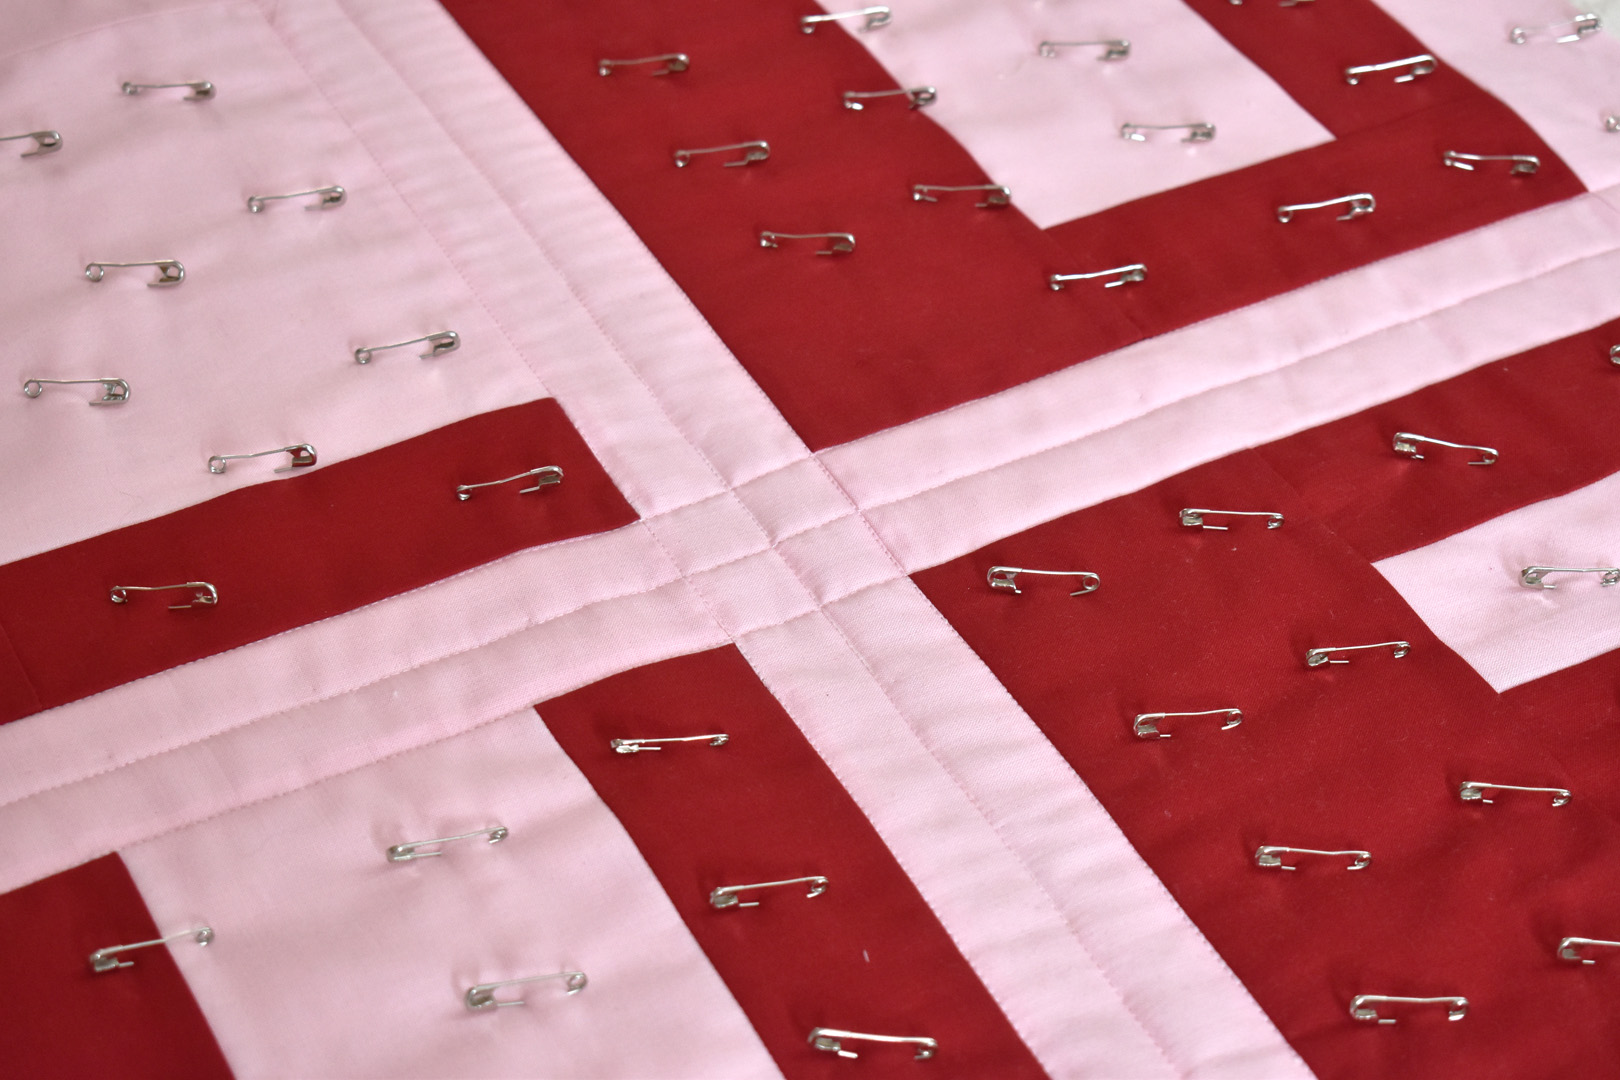
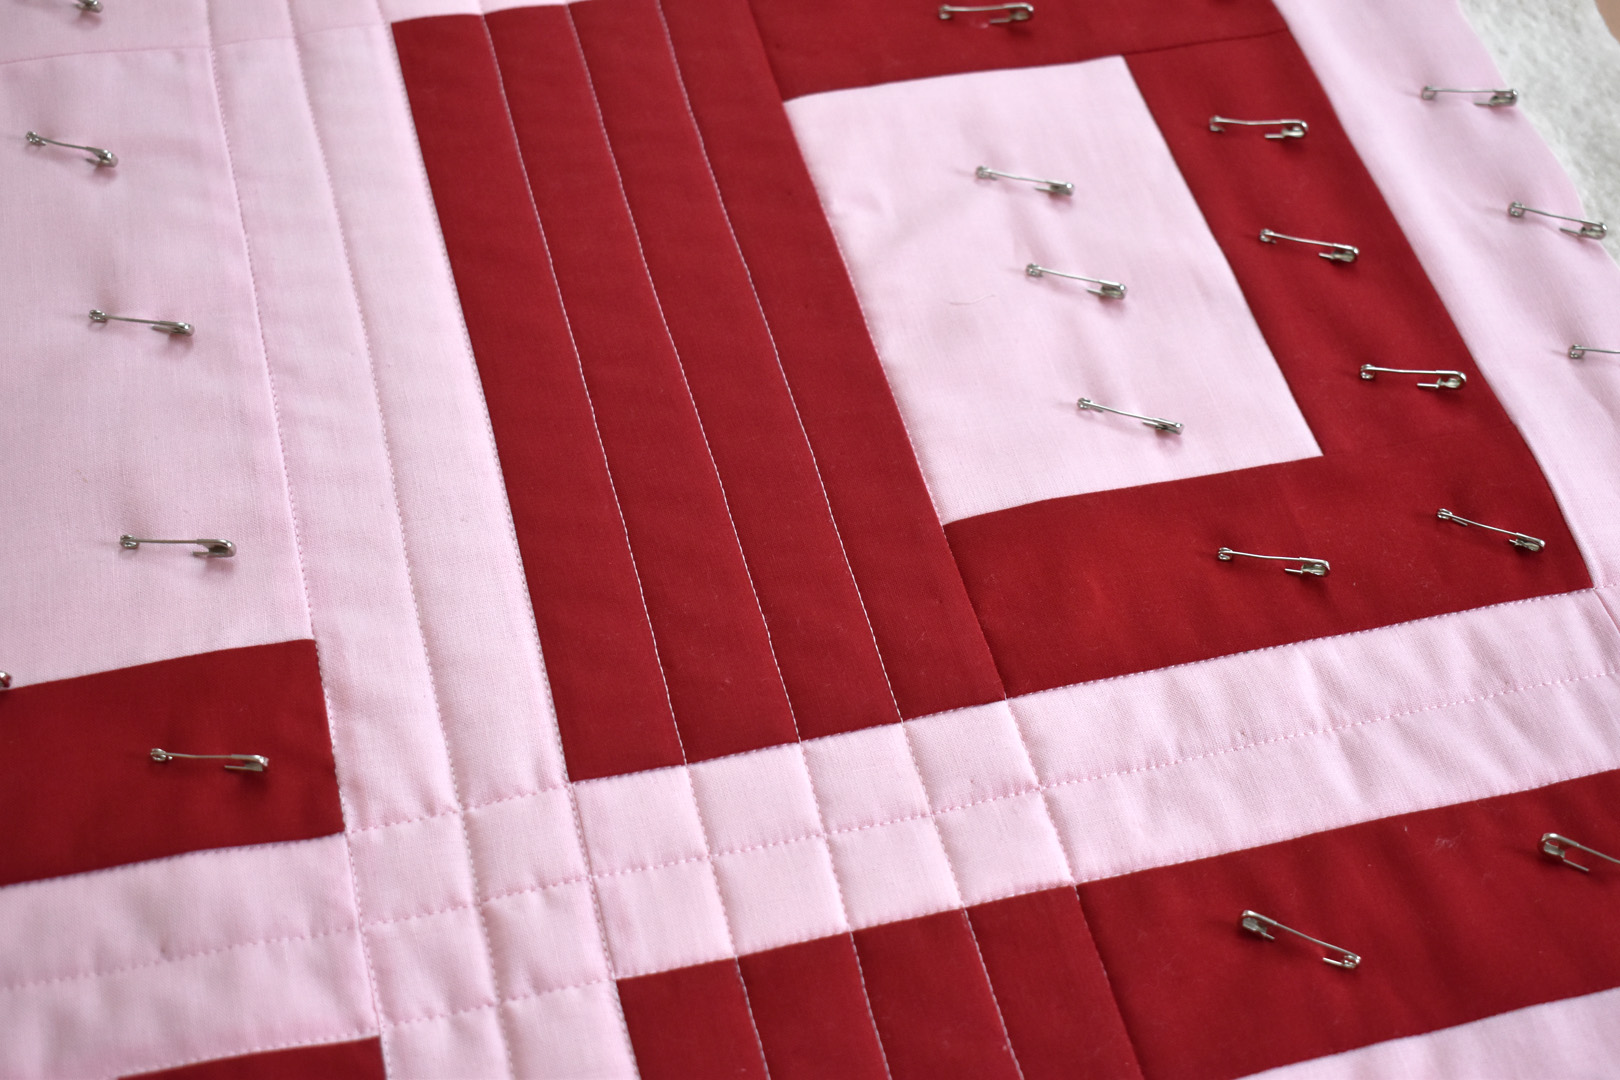
Pin baste through all layers.
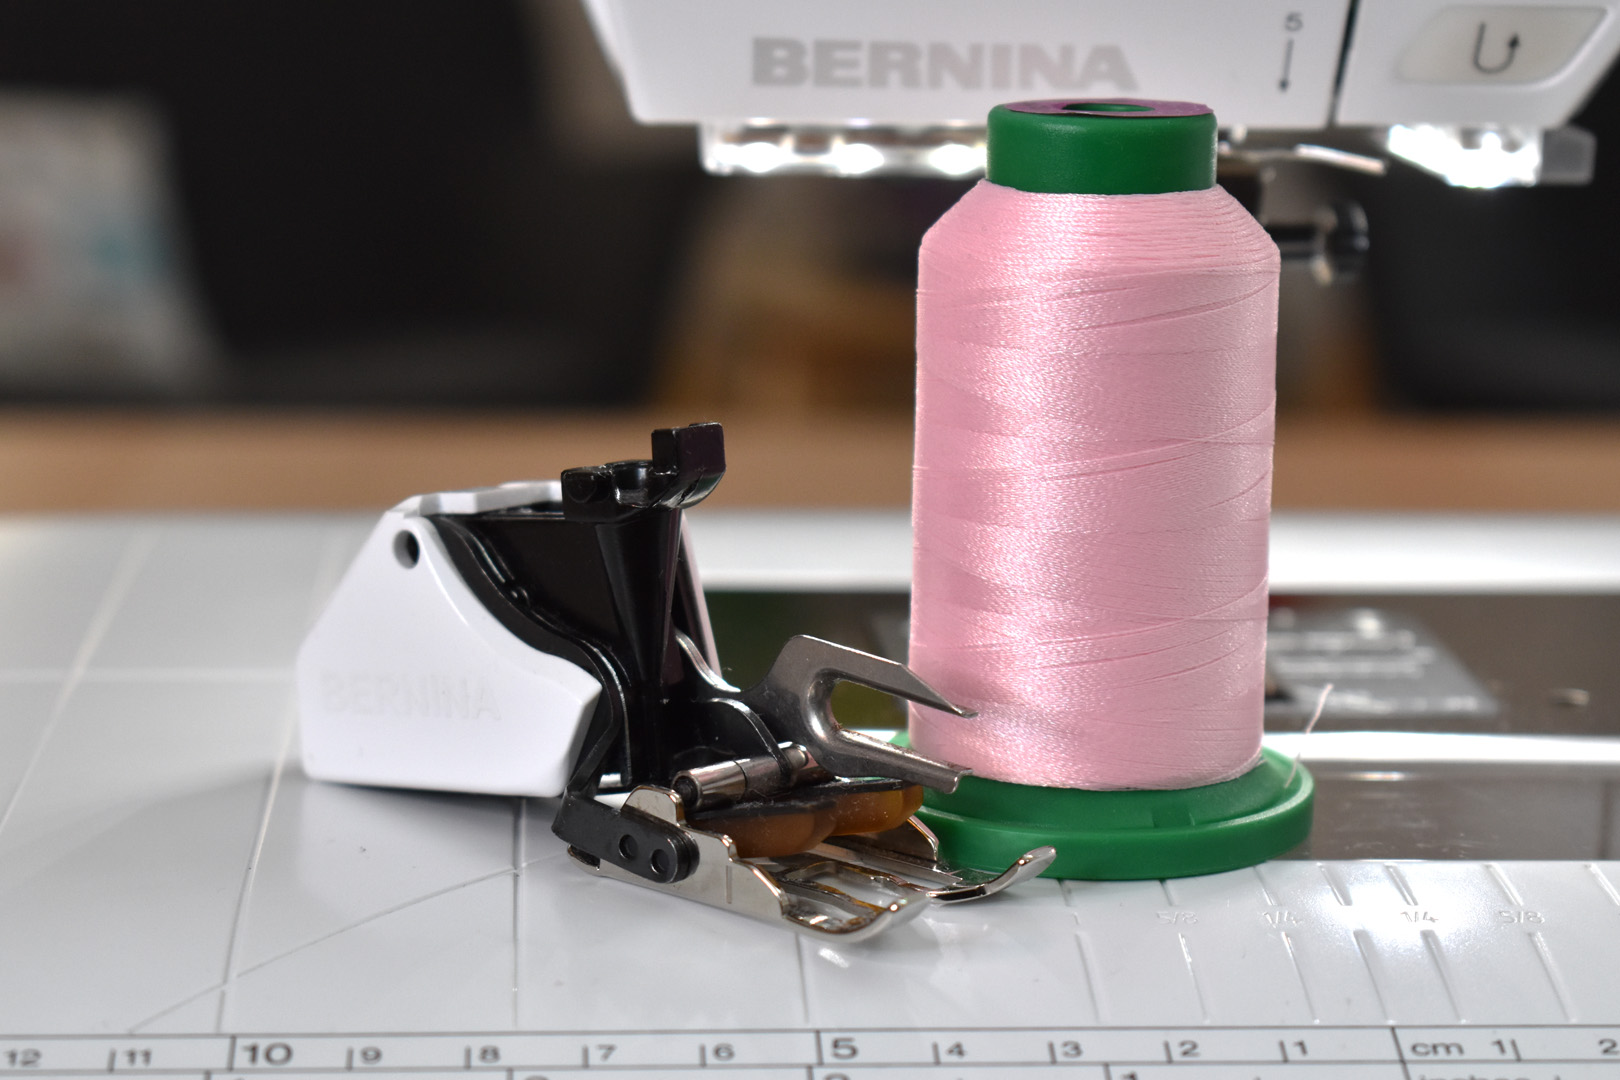
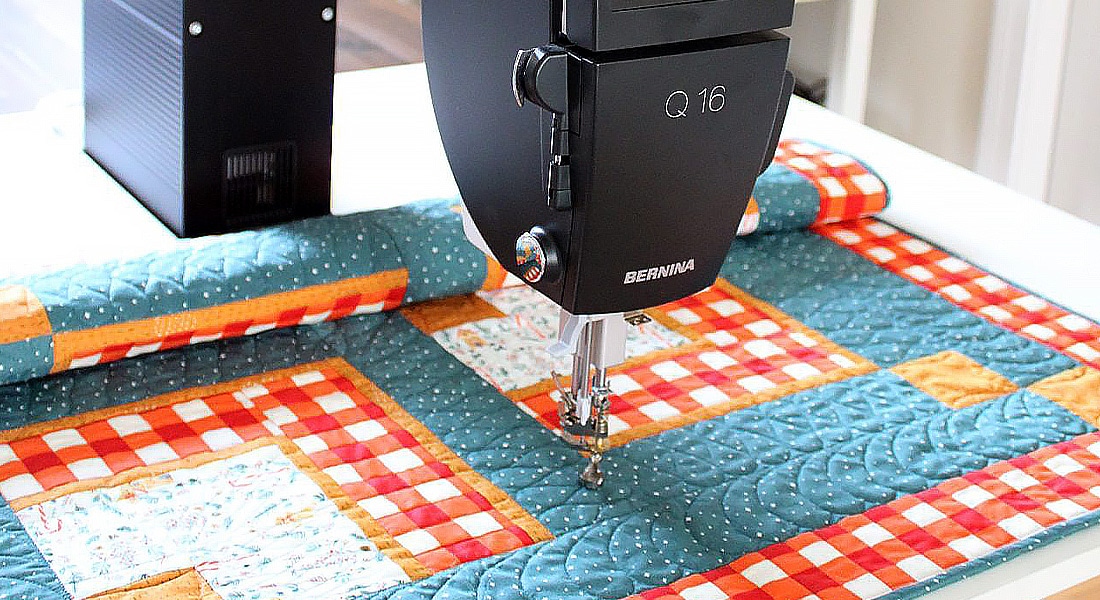
Set up the sewing machine for straight line quilting with the Walking Foot #50, the straight stitch needle plate, and thread the machine with Isacord 40 weight embroidery thread in the bobbin and needle.
NOTE: I demonstrate an extra-wide picture frame binding in this tutorial. Adding a very wide binding will take a bigger bite out of the edges of the quilt than a normal quarter-inch binding. One way to plan ahead for the extra-wide binding is to add 1″ to all outer edges when piecing the top. If you have a quilt top that you think would benefit from a picture frame binding, but didn’t add extra to the edges, you can add a bit of width with the batting and backing without losing a lot of real estate from the edges of your quilt. This is the trick I am demonstrating for you here!
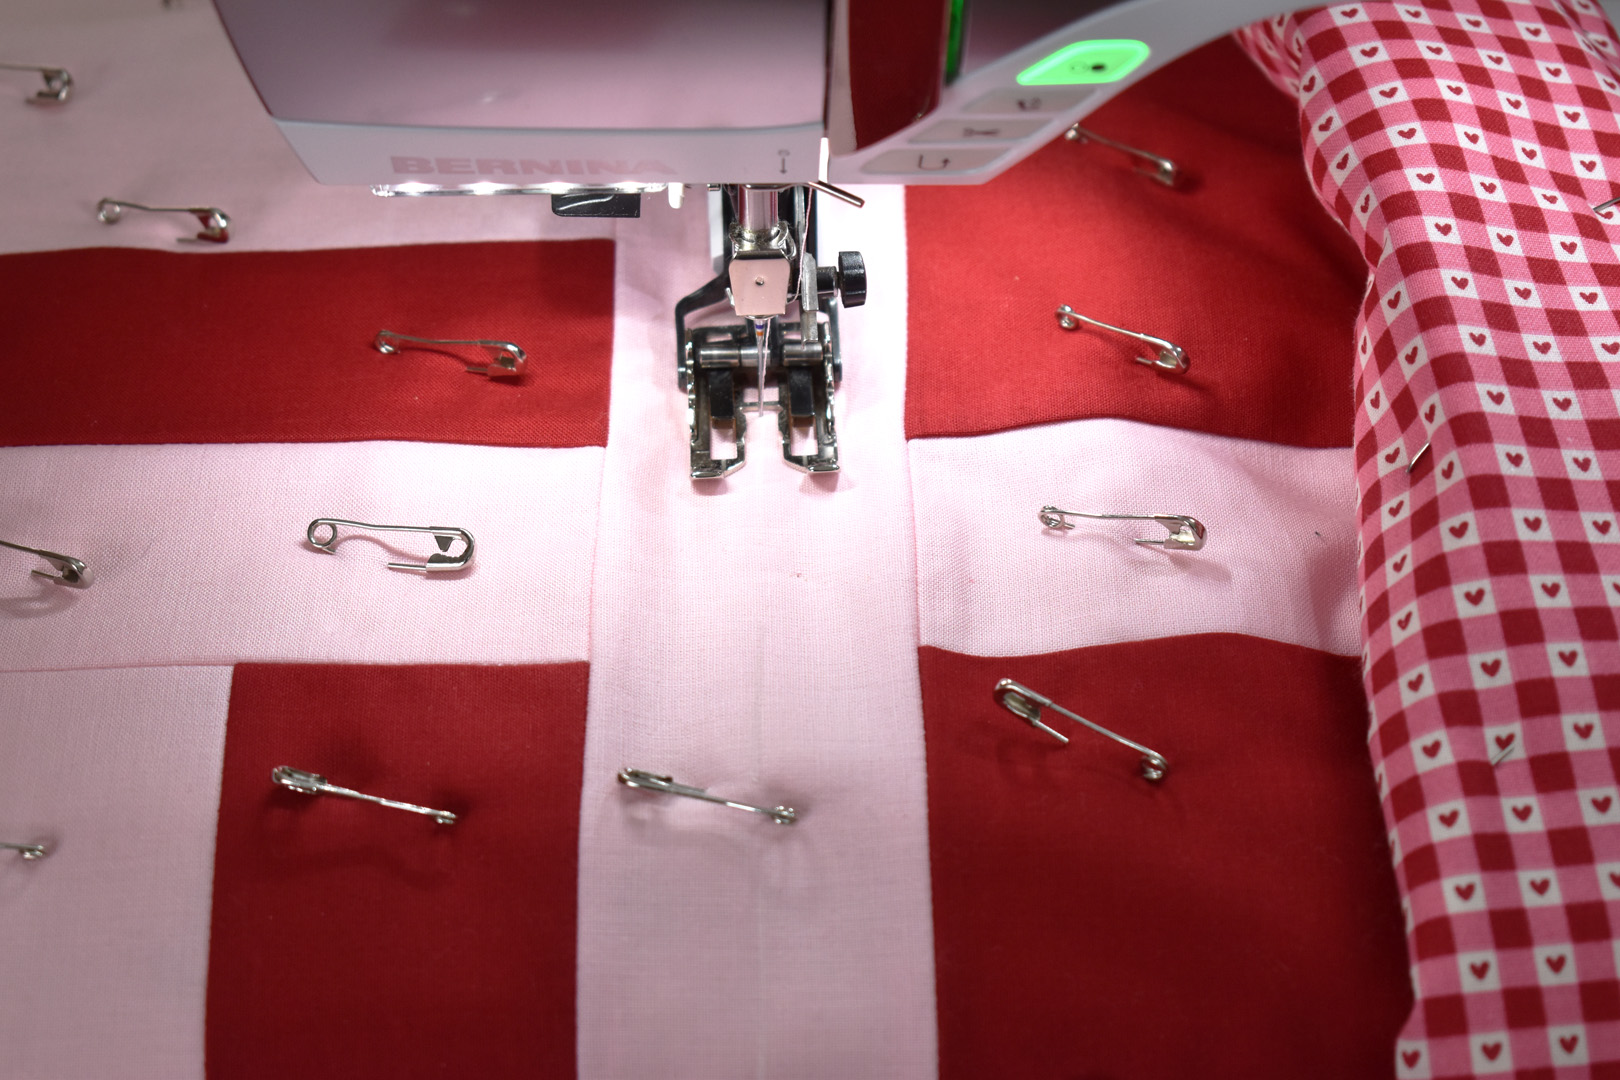
Quilting the Modern LOVE Mini Quilt. I created quilting in a 1″ grid across the quilt, following the seams in the patchwork. There are many ways to create straight line quilting such as using a seam guide attached to Walking Foot #50, marking directly on the quilt top, or using blue painter’s tape. My preferred method for this quilt is to use a light-colored fabric pen that disappears with heat (tested on the fabric ahead of time to make sure it will, in fact, disappear!). You can use whichever method you prefer.
NOTE: In order to prepare the edges of this quilt for the picture frame binding, you will need to extend the quilting beyond the edge of the top. Remember to extend the quilting all the way through the outer edges of the batting/backing beyond where the quilt top ends.
Begin by quilting straight lines in the center of the quilt. I start in the center, and quilt down each side of the sashing seams.
Here is what the first few straight lines of quilting looks like pictured above.
Next, I continue quilting straight lines in 1″ intervals across the quilt, moving out from the center in each direction.
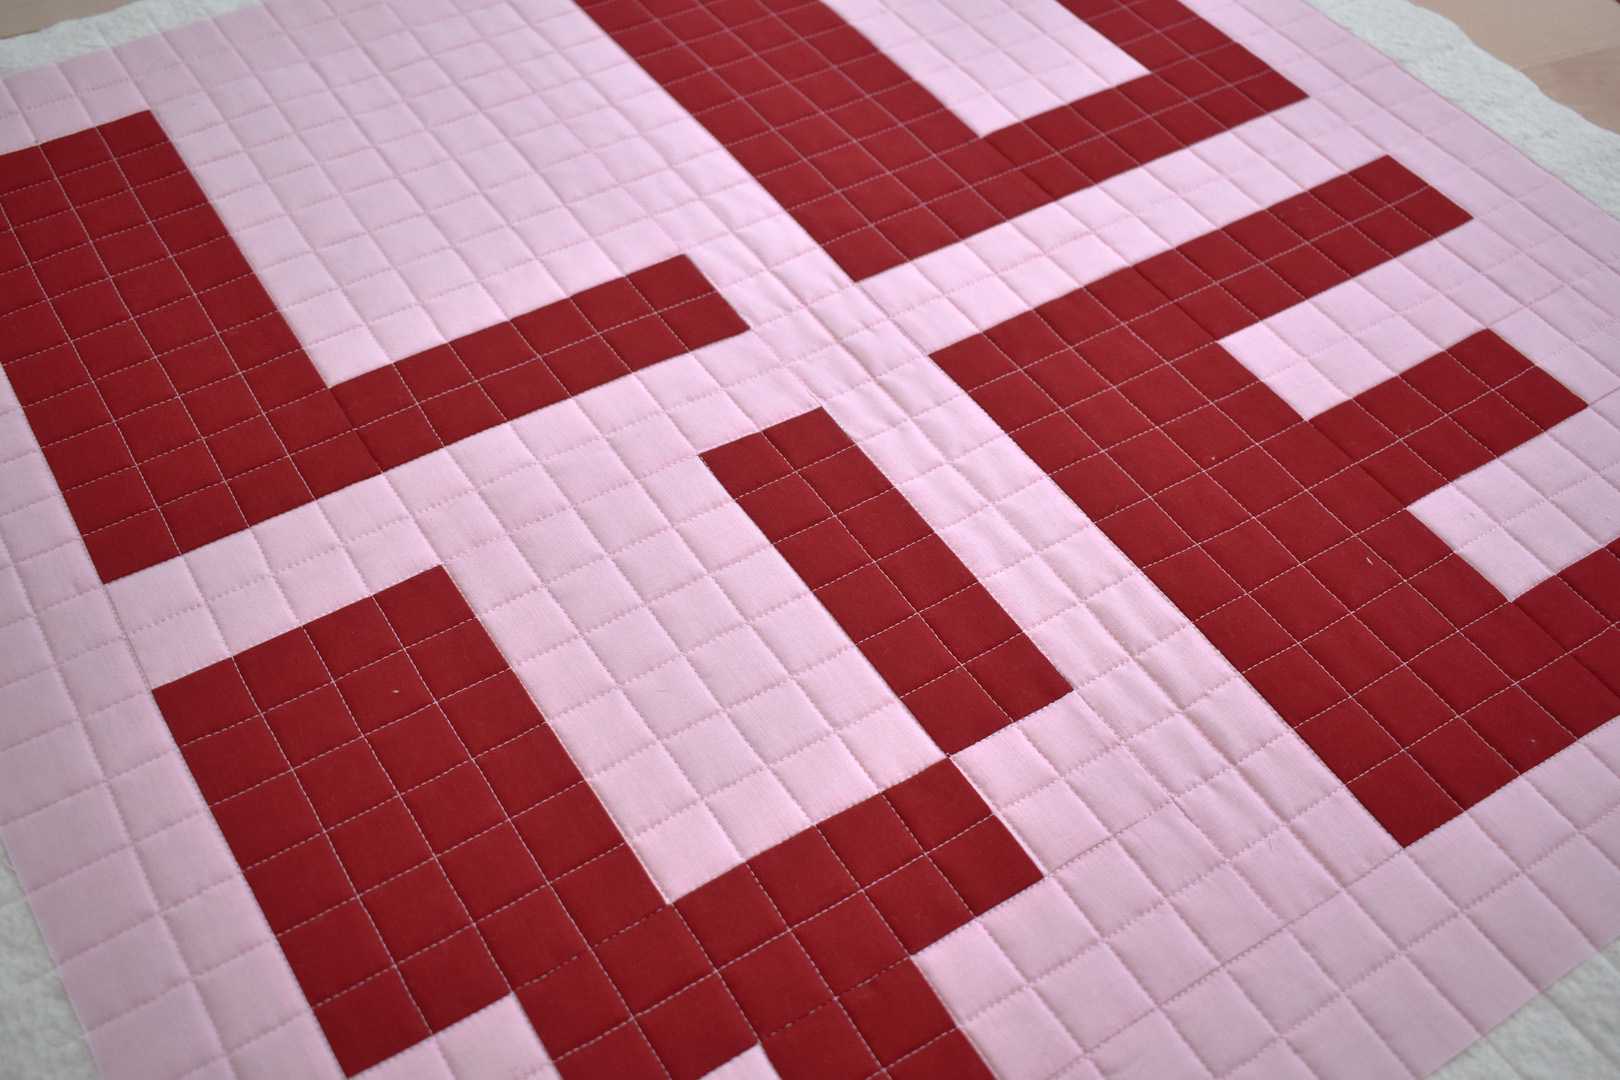
Continue until the entire top is quilted.
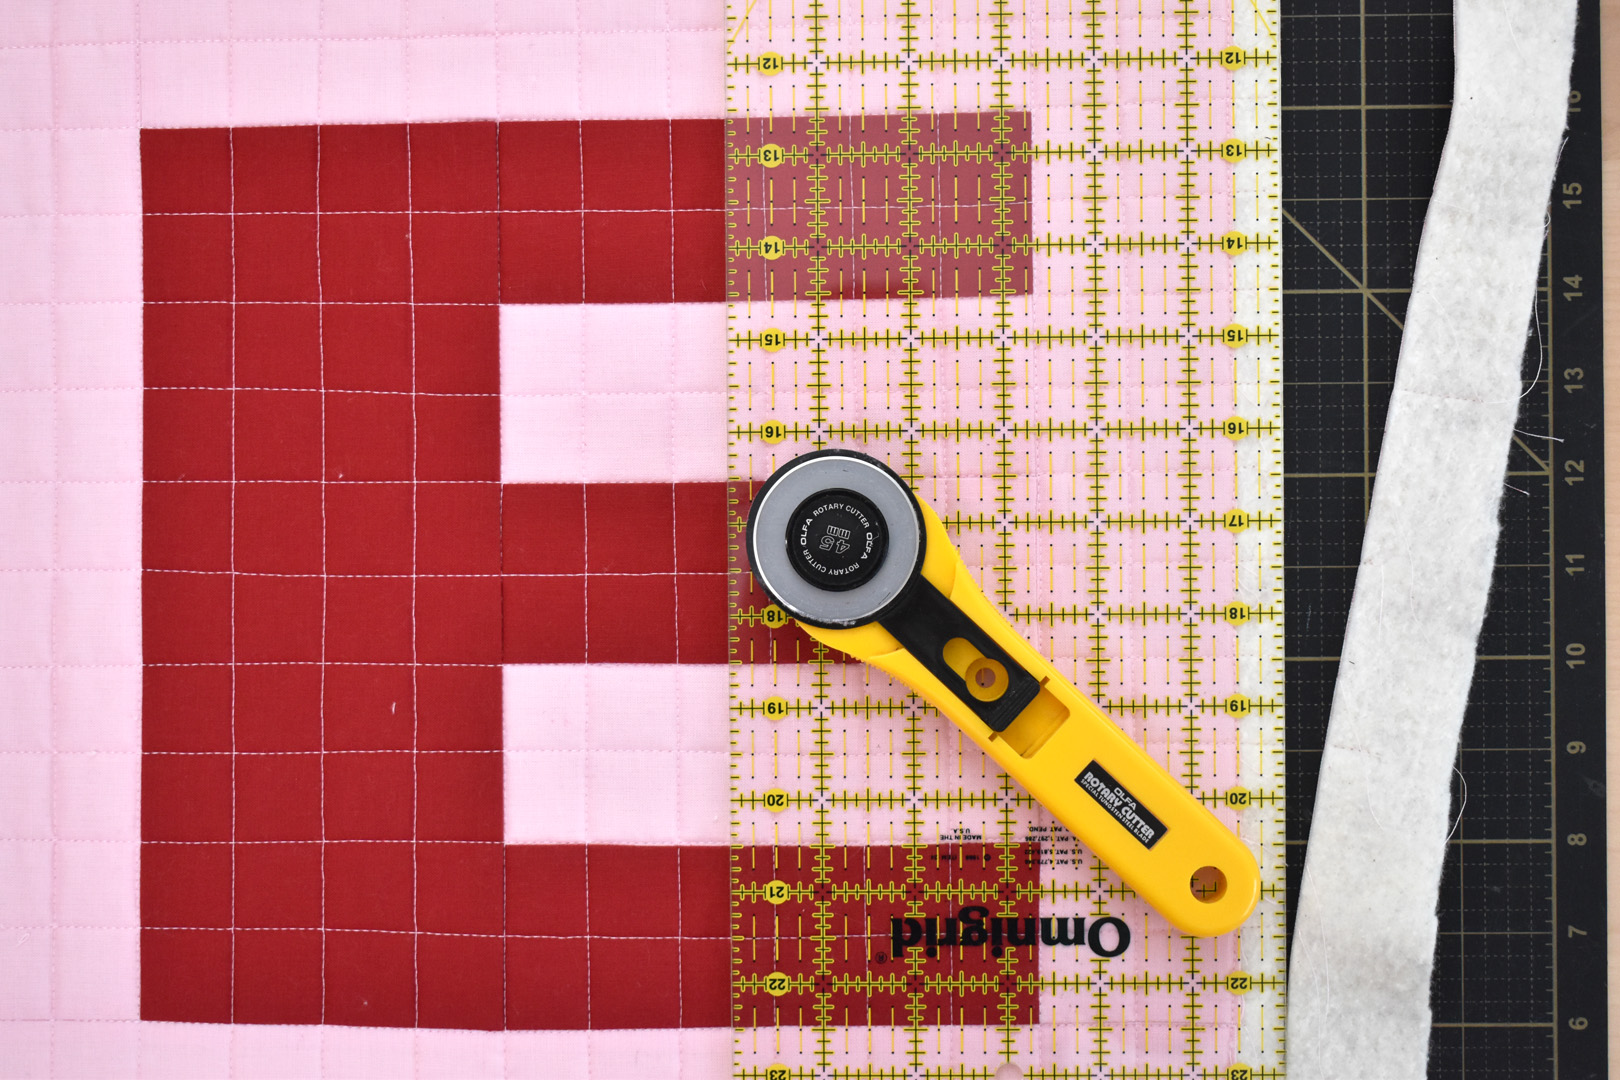
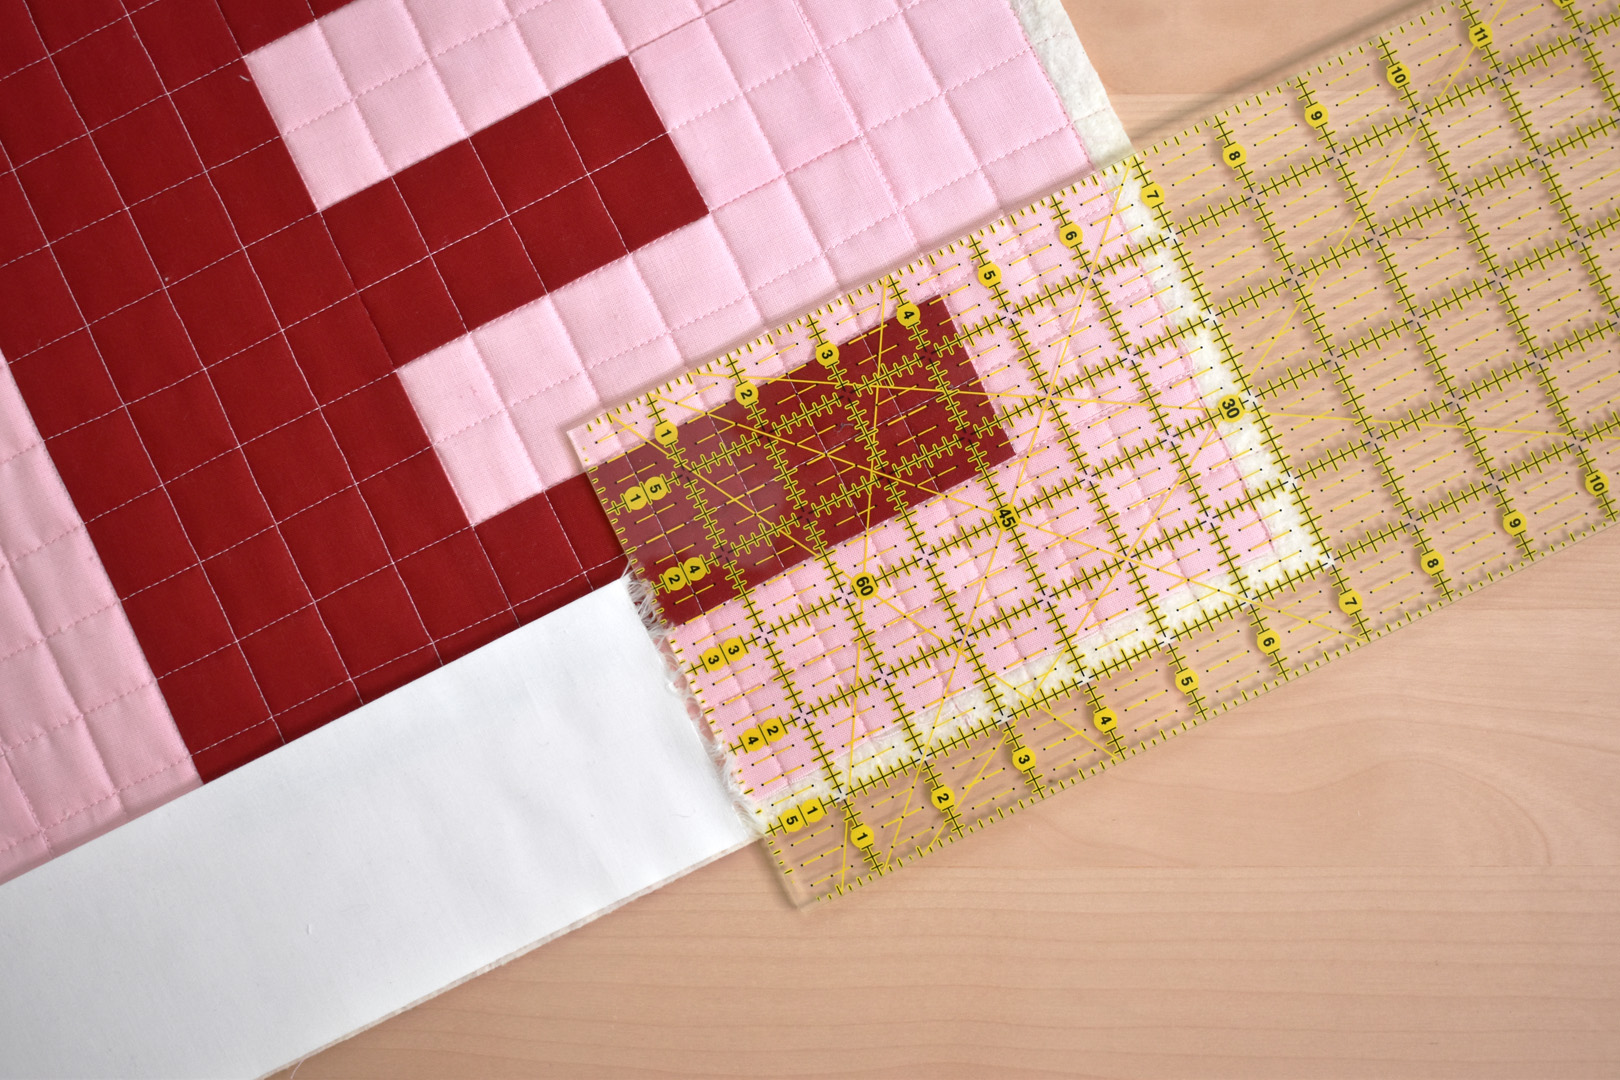
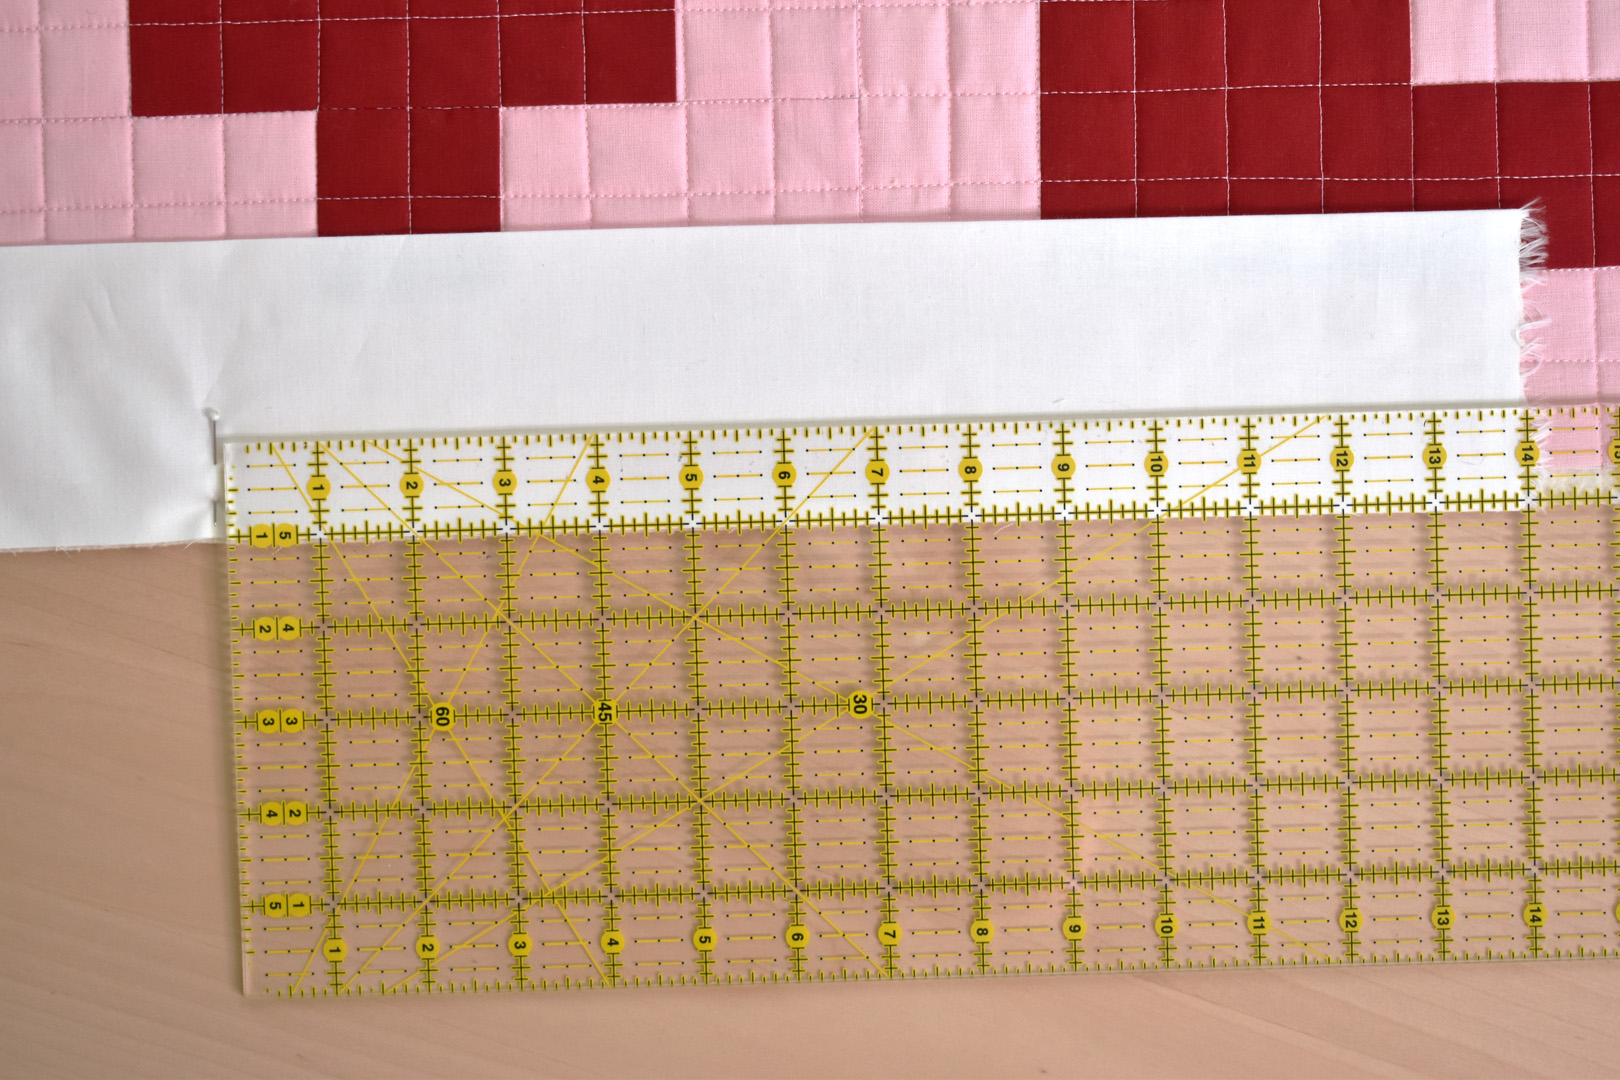
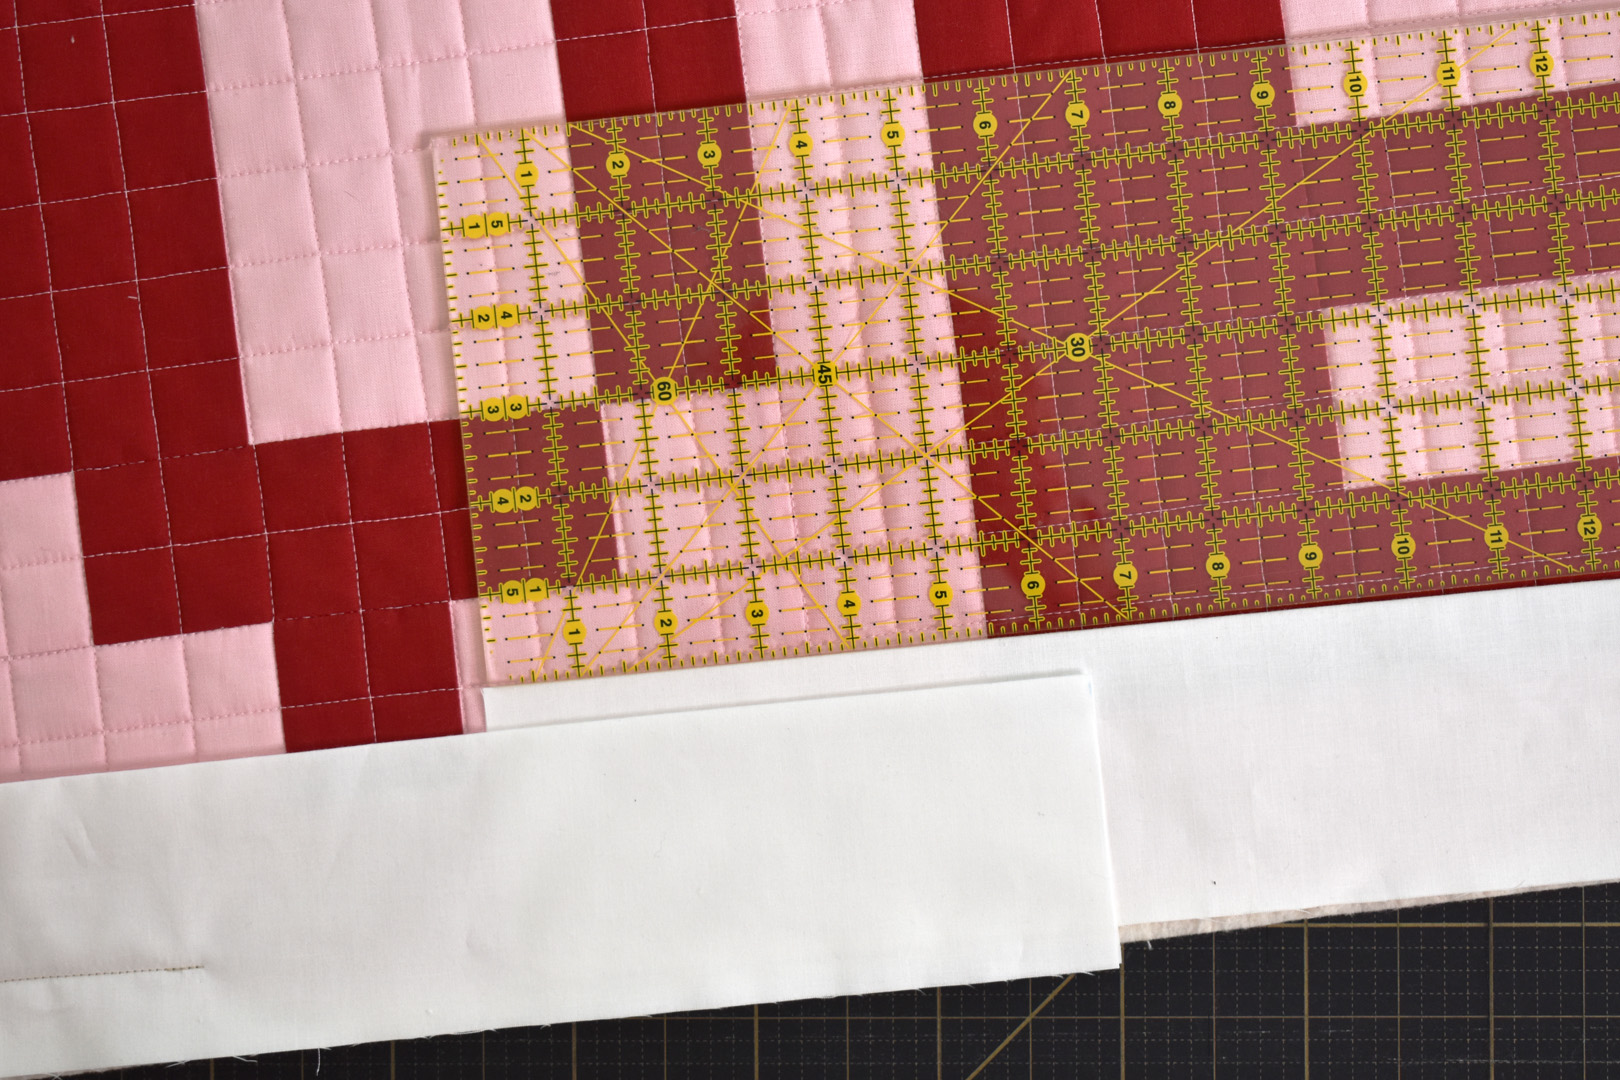
Take note of this step! When trimming the edges of the quilt, cut 1/2″ over from the edge of the top to allow for the picture frame binding. DO NOT TRIM the quilt even with top (unless you wish to continue with a traditional binding or facing).
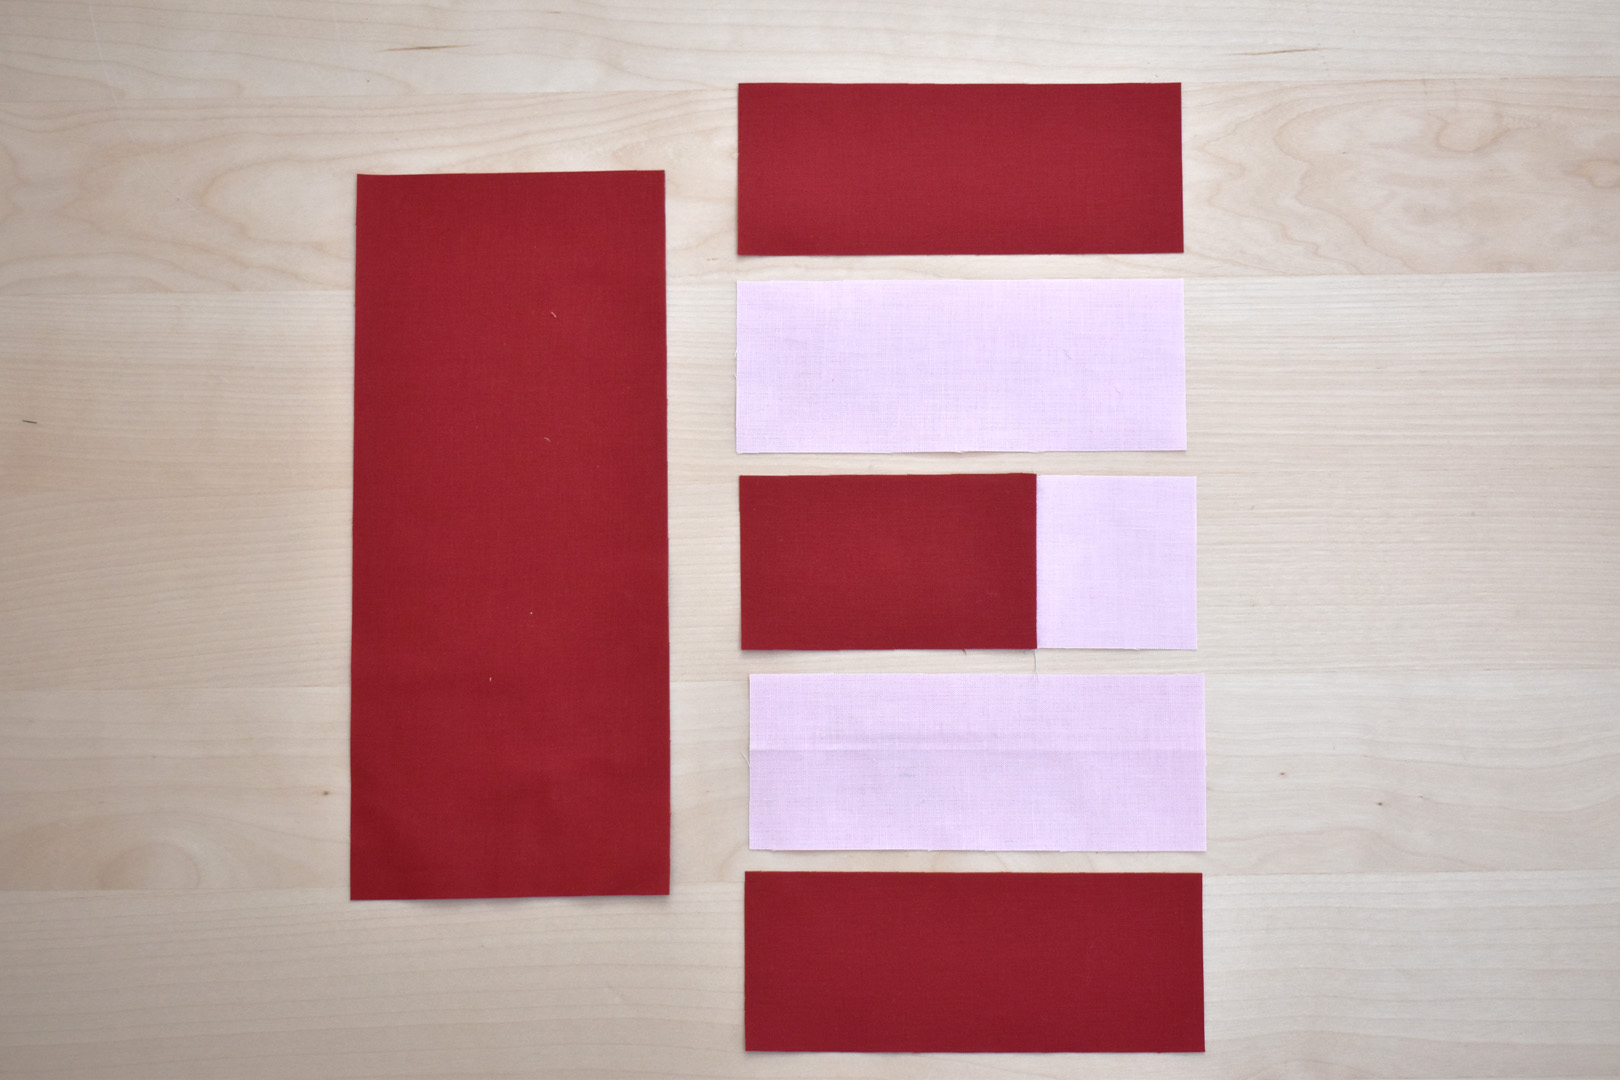
Make the binding for the Modern LOVE Mini Quilt. Picture frame binding is made in the same way as regular double fold binding, but cut much wider and sewn 1″ from the edge. My philosophy on binding is to use binding cut on the bias for anything that will get a lot of wear and tear, or a larger project. For small wall hangings, especially pieces like this that won’t get a lot of wash and wear, I use binding cut on the straight grain. Grab your 3 pieces of white fabric cut 6.5″ wide from WOF.
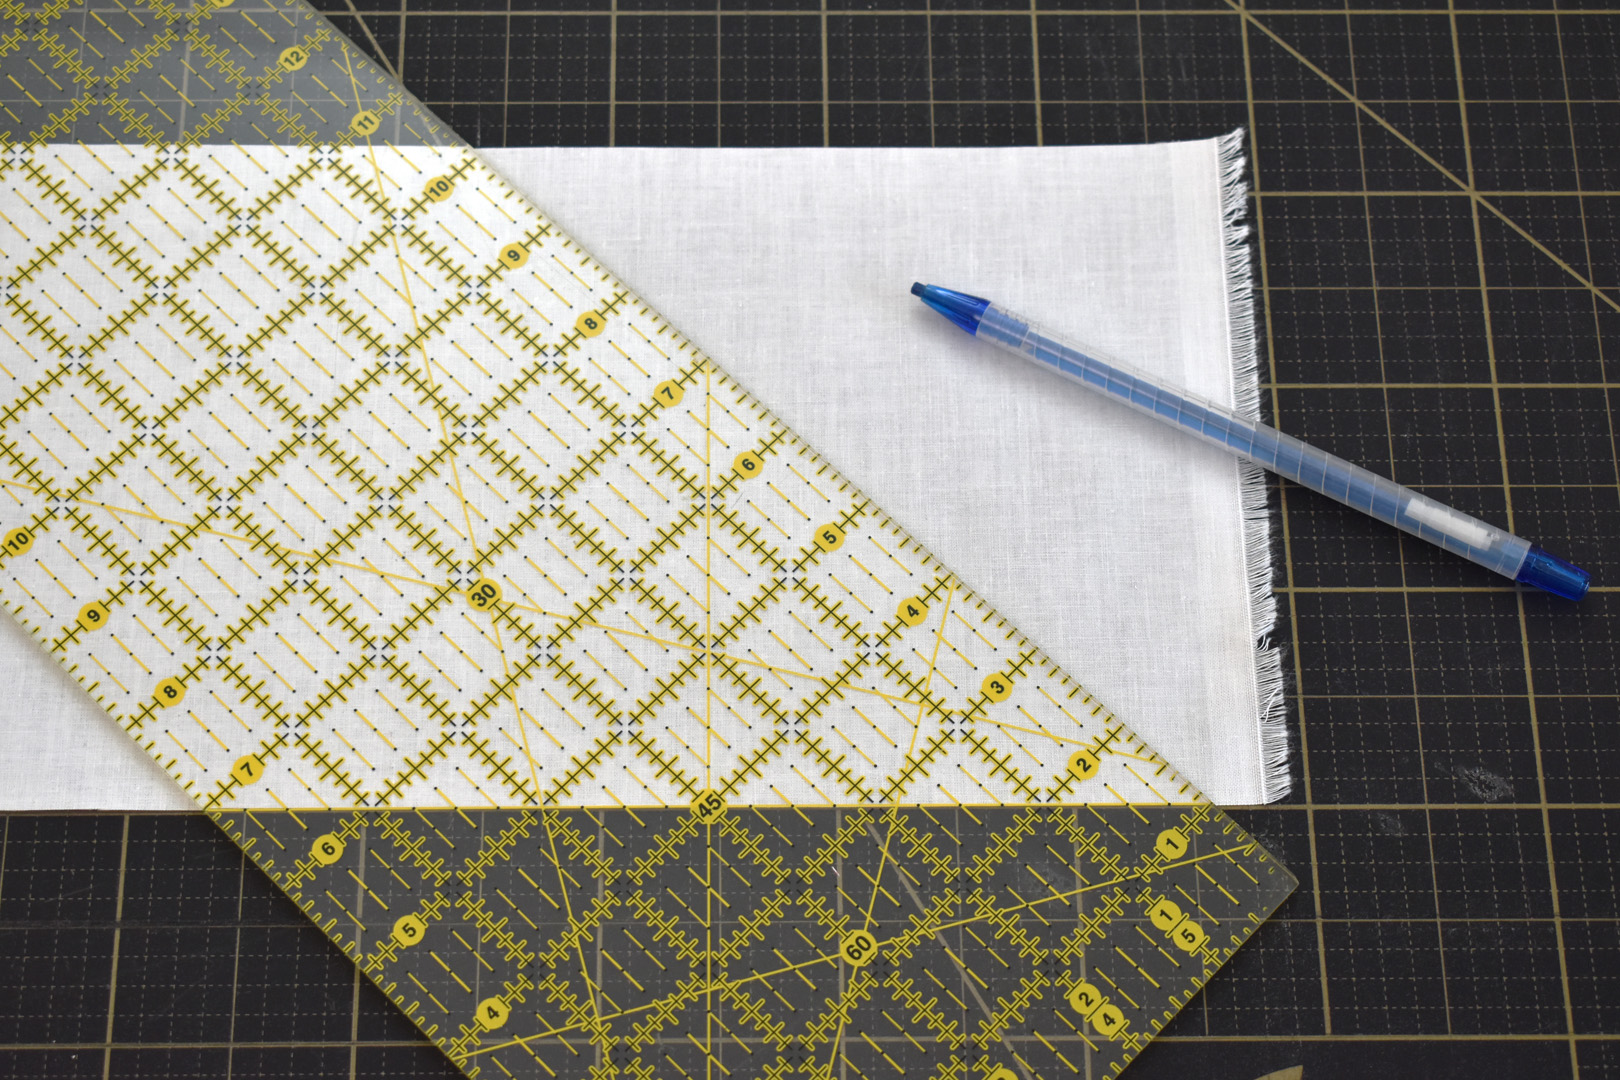
Mark the end of one fabric strip with a 45° angle, starting just below the selvage edge. A good 6″ x 24″ quilting ruler will include a 45° angle, which you can see above is placed on the straight edge of the fabric to create the angle.

Next, place the end of the marked strip across the end of another strip just below the selvage edge. You should see the marked 45° angle hitting right in the corners where the two pieces of fabric overlap. Pin in place

Change the thread in the sewing machine back to the neutral color, all-purpose thread, and sewing along the marked line with Walking foot #50.
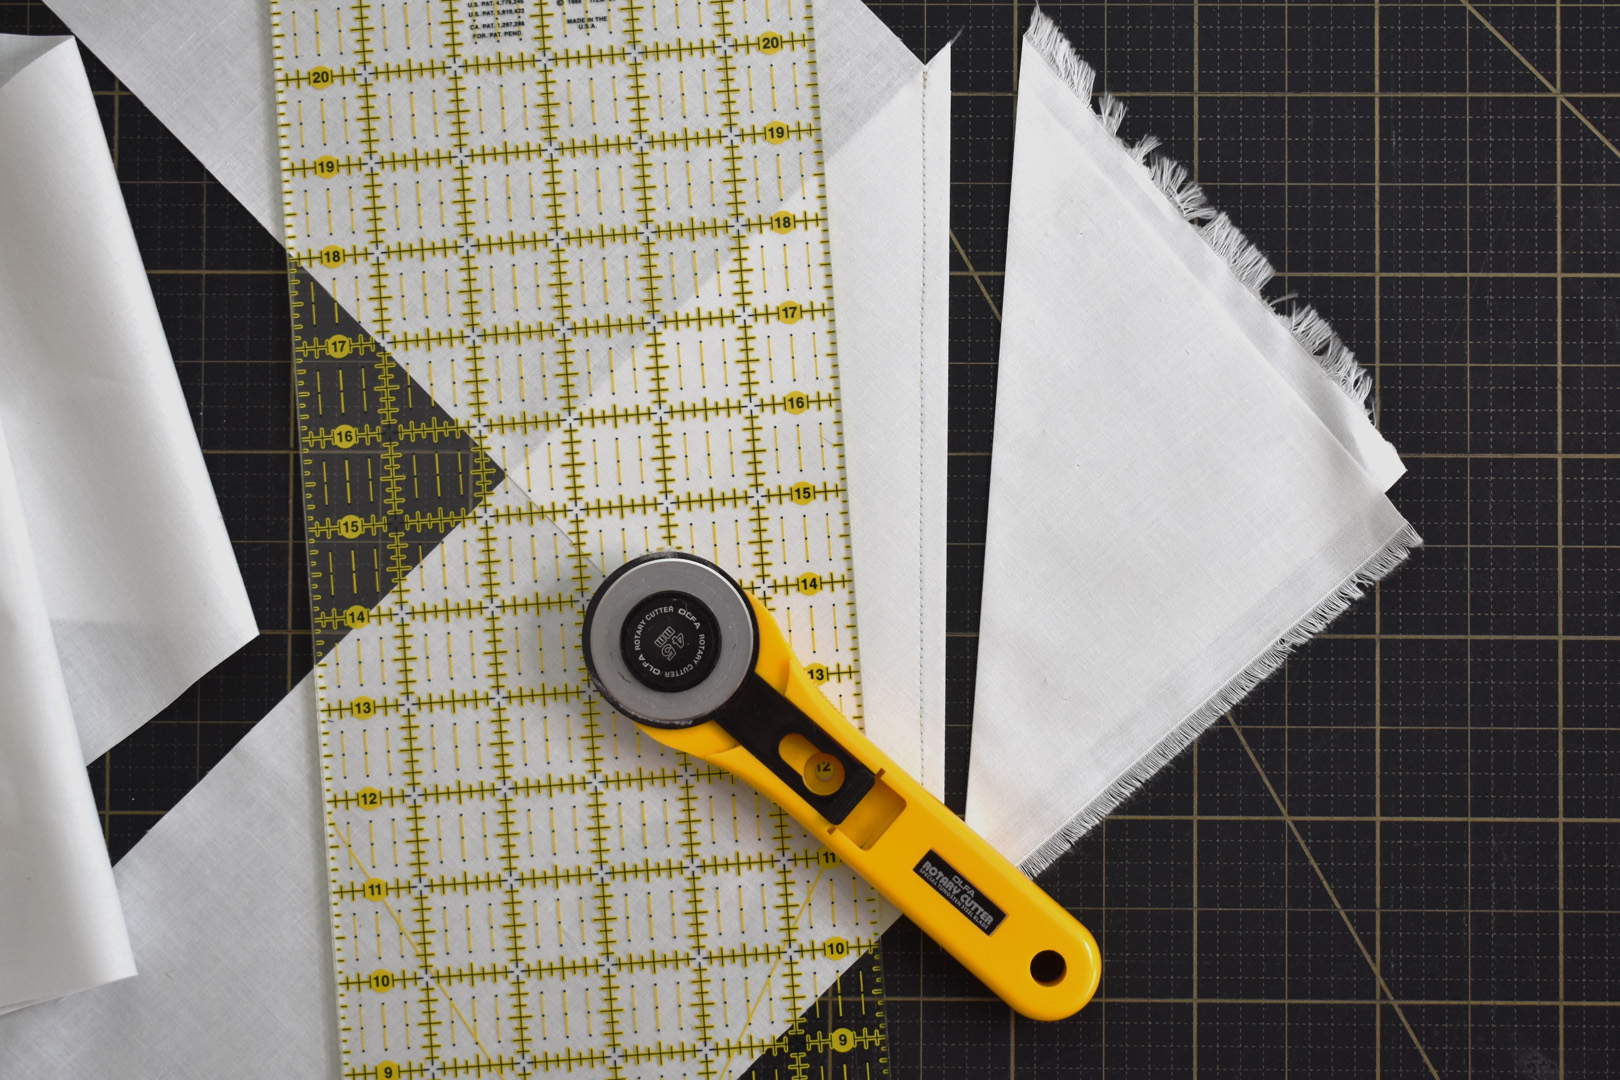
After sewing, cut the extra fabric 1/4″ from the seam, and press seam to one side. Trim any dog-ears from the seam. Repeat the above steps to attach the last strip of binding fabric.
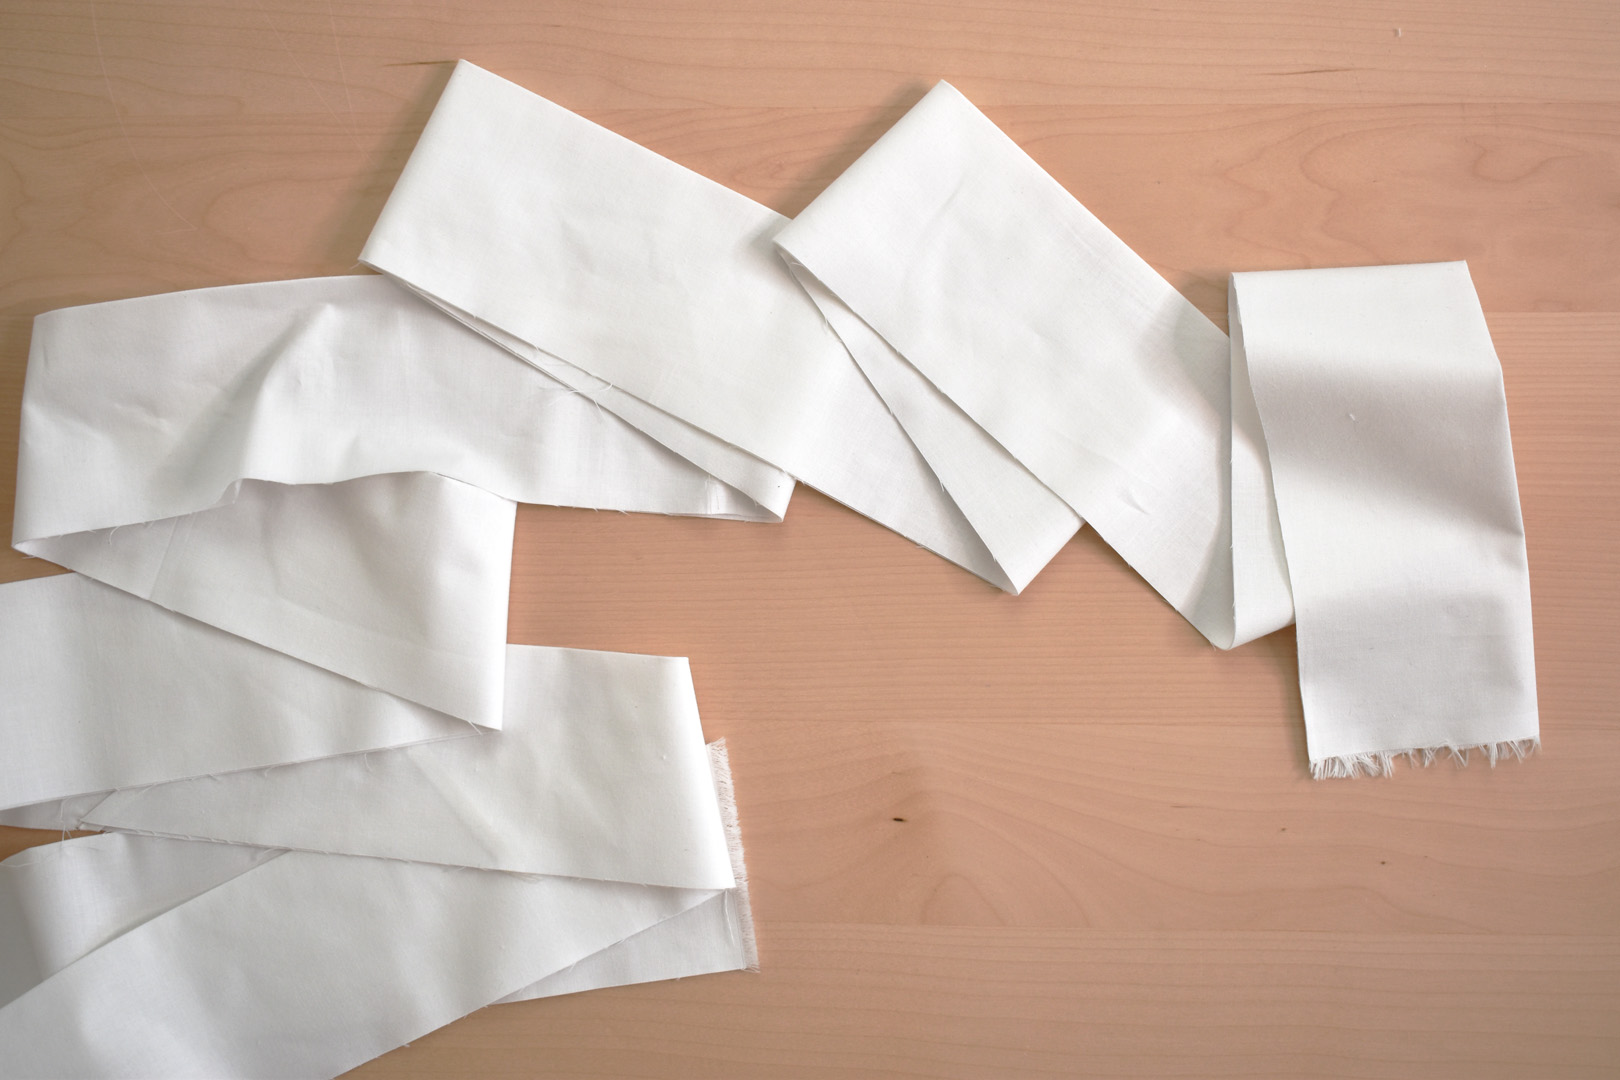
Fold the binding strip in half lengthwise, wrong sides together, and press.
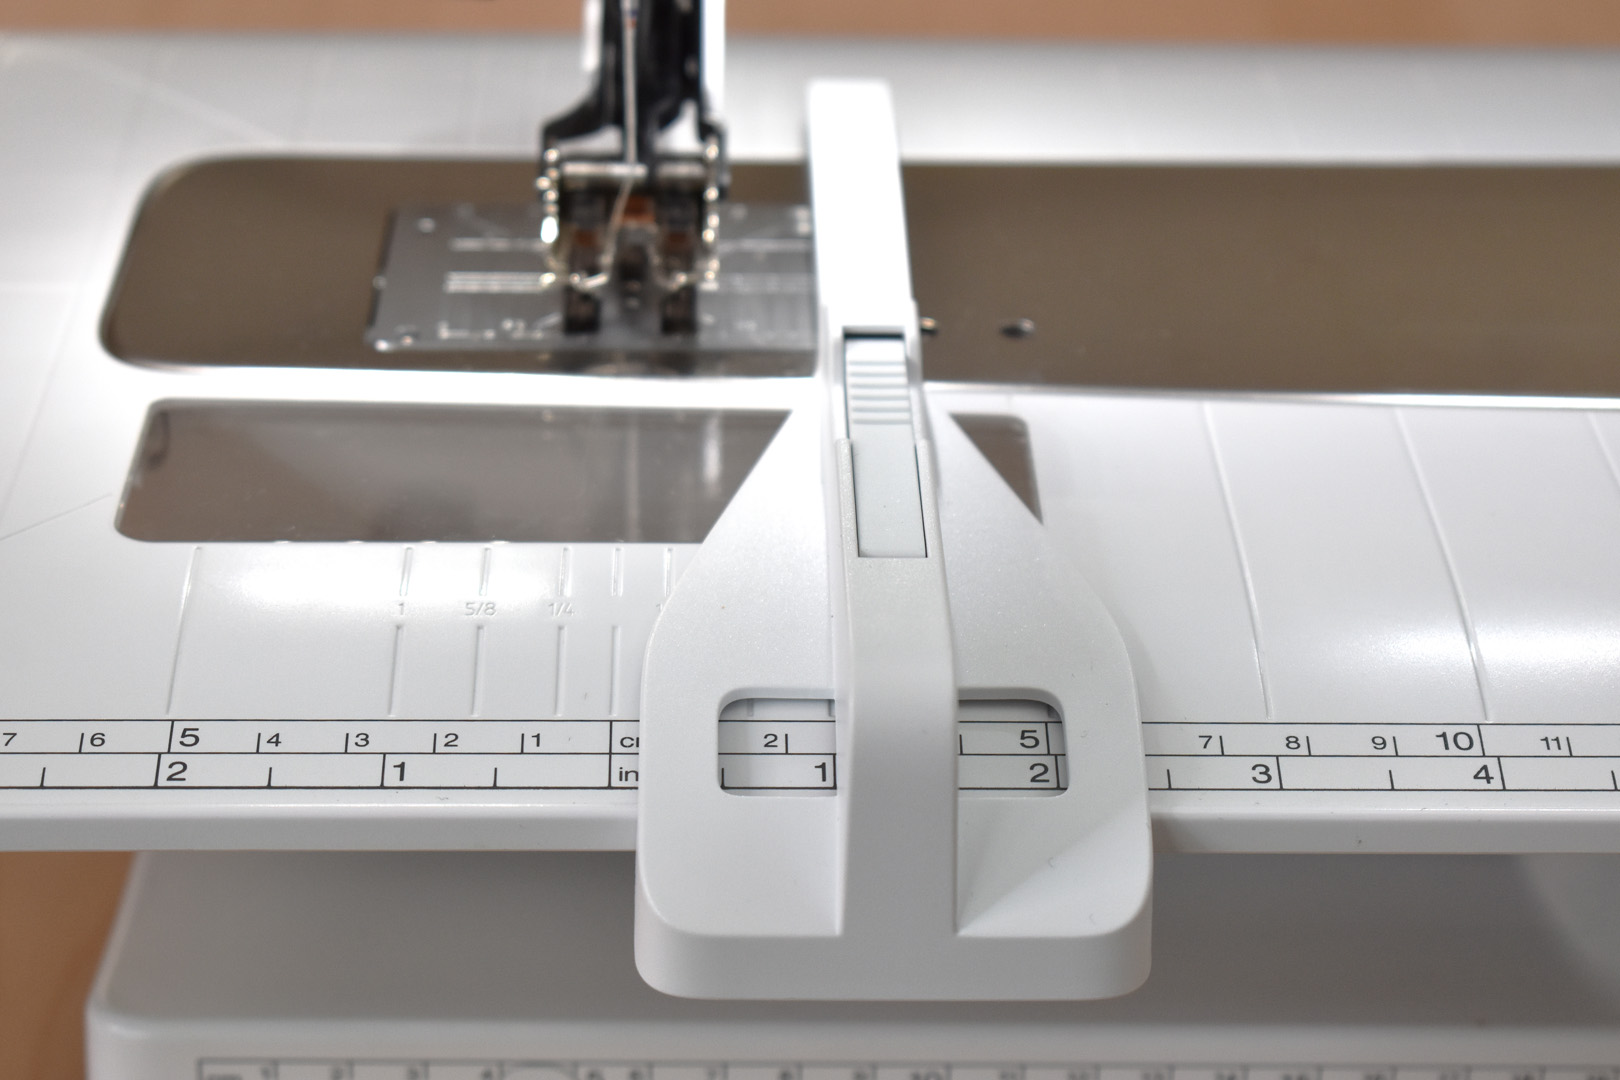
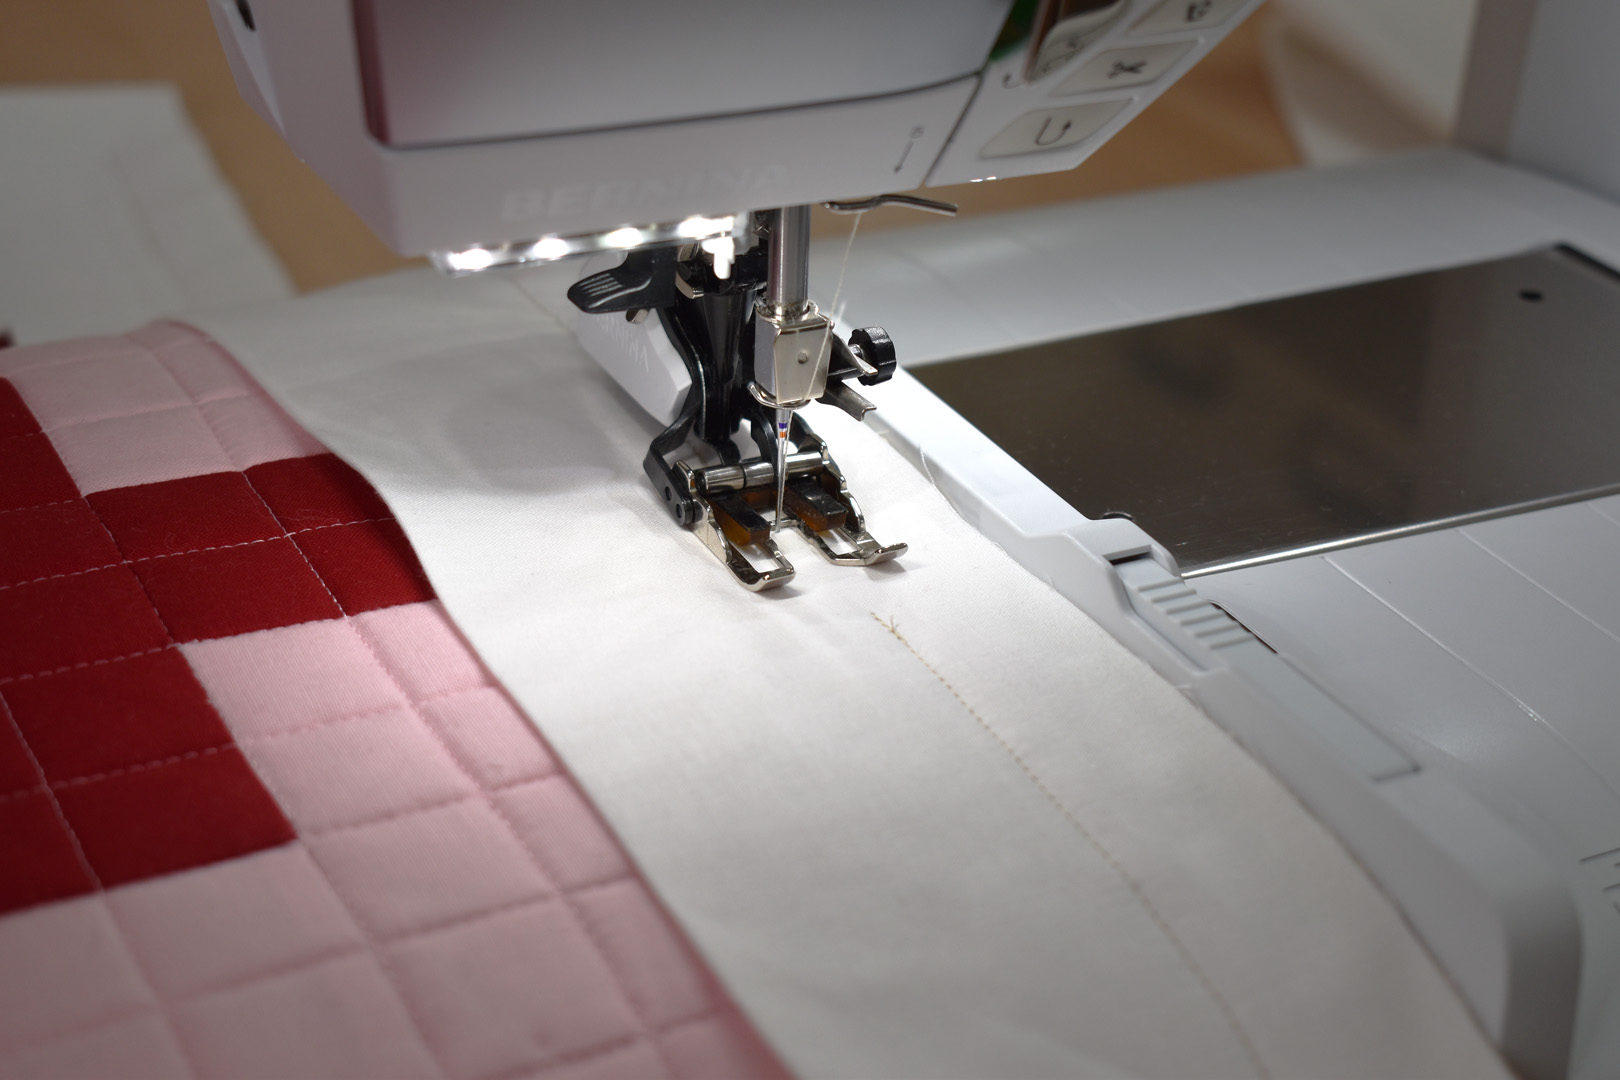
Use the sewing table seam guide to help you sew the picture frame binding to the quilt. Attach the seam guide and set it to sew a scant 1″ seam. Tip: use the stitch plate markings to set the seam guide as this is can be more accurate than the markings on the sewing table.
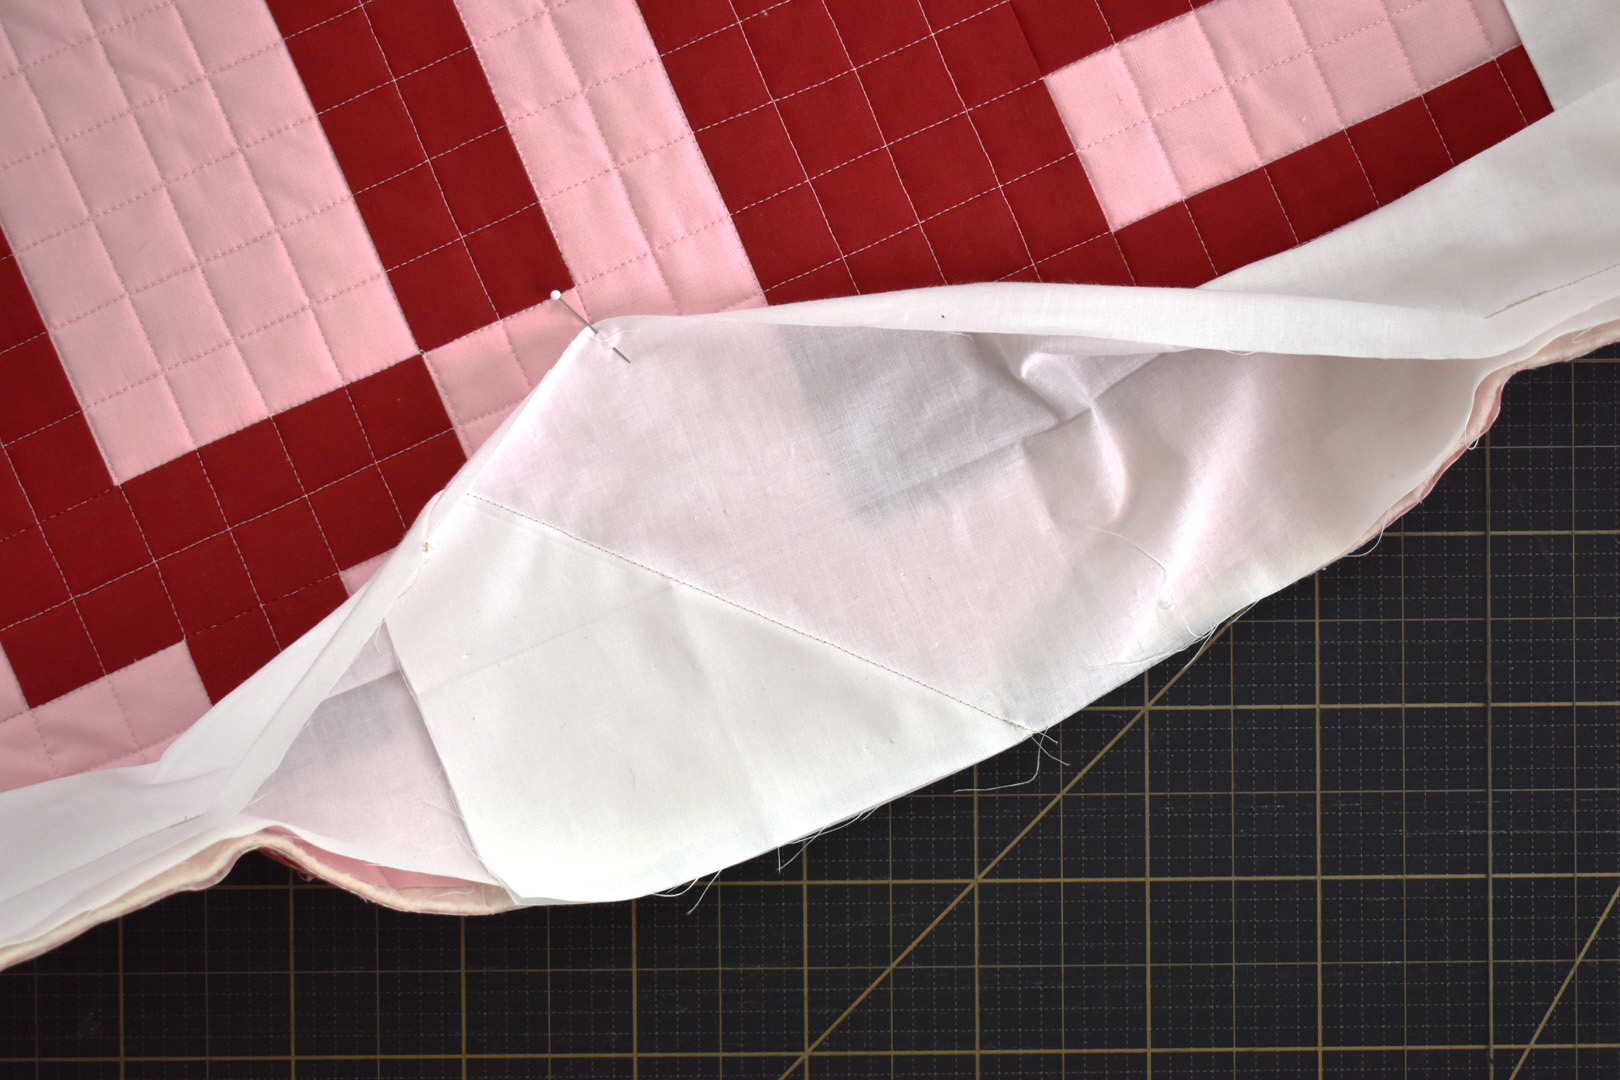
Line up one end of the binding strip to the bottom edge of the quilt, raw edges together, 7″ from the right-side end of the quilt.
Measure 14″ from the end of the binding strip and pin in place, this is the starting point for stitching on the binding. Stitch the binding to the quilt top, just as you would with a regular double fold binding, by lining up the edge of the quilt with the seam guide. When reaching a corner, stop sewing when the needle reaches 1″ from the edge, backstitching. Remove the quilt to miter the corner and start stitching again 1″ from the edge. Watch the video below to see this process in action.
Notice that I use a seam gauge to help determine when the needle is about 1″ from the edge, where I backstitch and cut the threads to miter the corner.

After turning the last corner of the quilt, sew a few inches and stop, backstitching at the end. To attach the binding ends, follow the same procedure as finishing regular double fold binding (read a detailed tutorial on this method here).
In the open area of the quilt, cut the ends of the binding to overlap exactly 6.5″ (give yourself a few inches from the stitching on each side of the binding to allow freedom of movement when sewing the ends together).
Pin the ends, right sides together, perpendicular to each other. You will be stitching on a 45° angle, and it helps to draw a line across the fabric (from one corner to the other) with a fabric safe marker, similar to sewing the binding strips in above step. Sew across the 45° line.
Before cutting the extra fabric, open the strip and test to make sure it is sewn correctly. Use your seam ripper to try again if the ends were sewn incorrectly. Trim extra fabric and press the binding back into shape after sewing correctly.
Sew the remaining bit of binding in place.
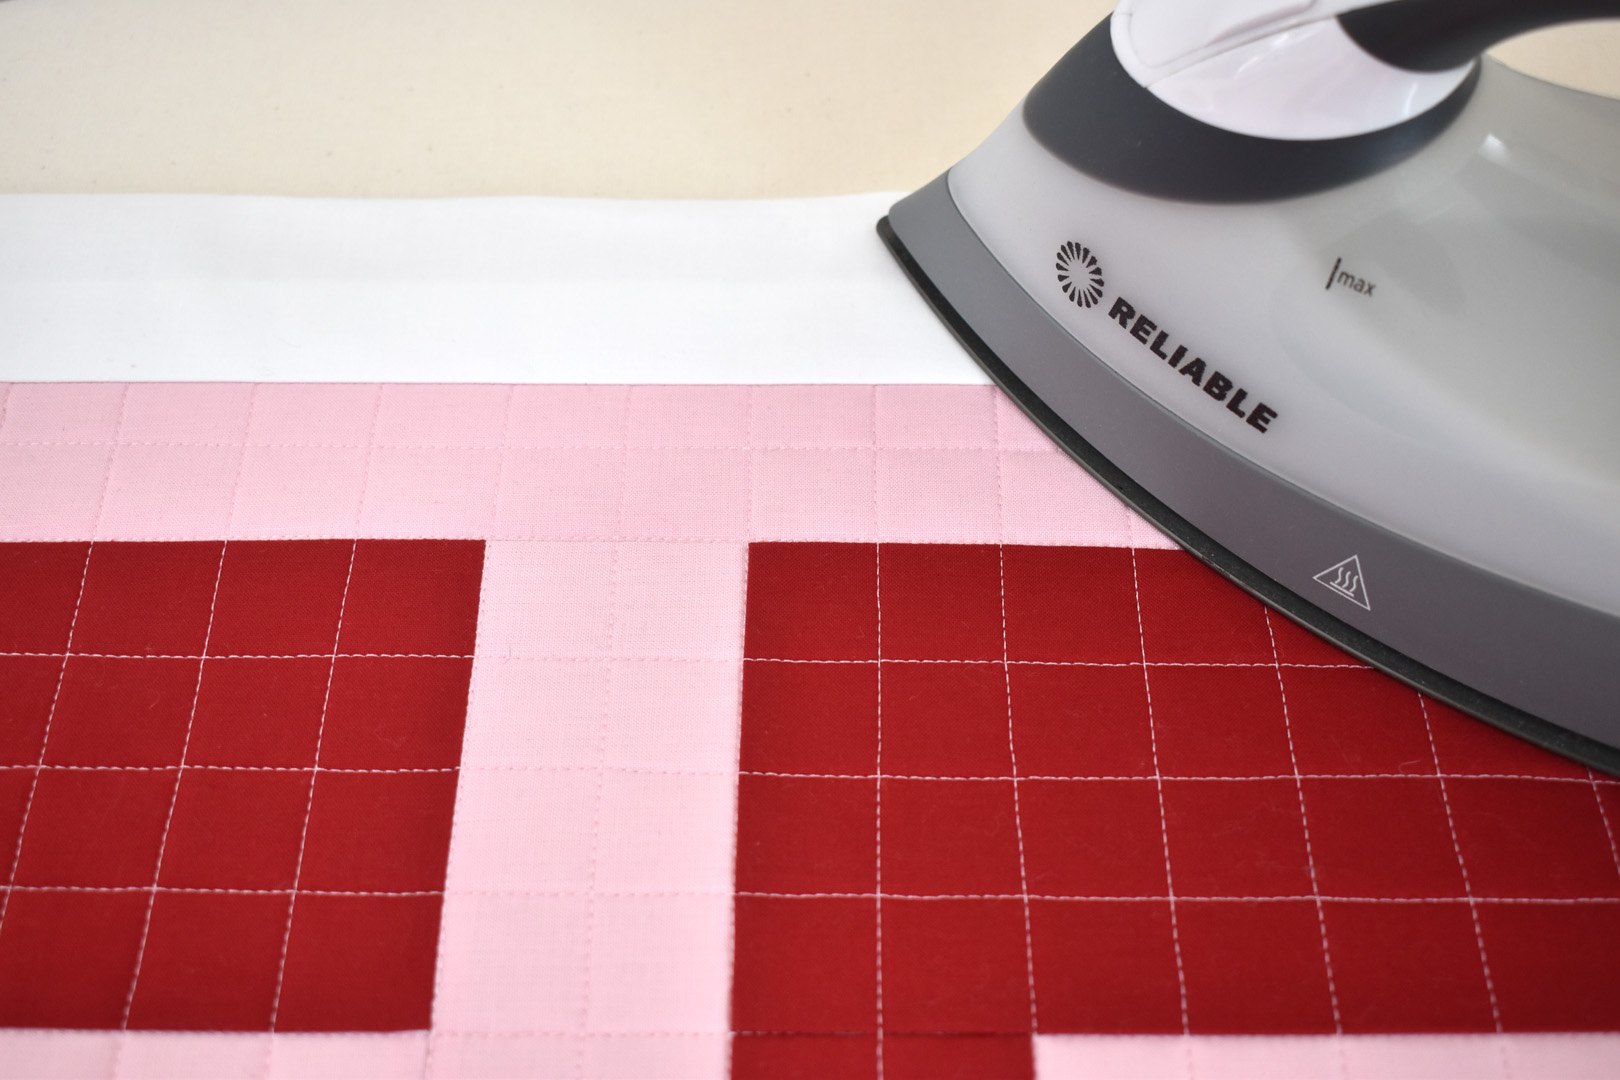
Press the binding away from the quilt. Turn the binding to the back, folding corners in a miter, and clip in place.

Hand sew the binding in place with matching thread. Give the finished mini quilt a final pressing. Enjoy the mini as it is, or read on below to learn how to create a small hanging sleeve.
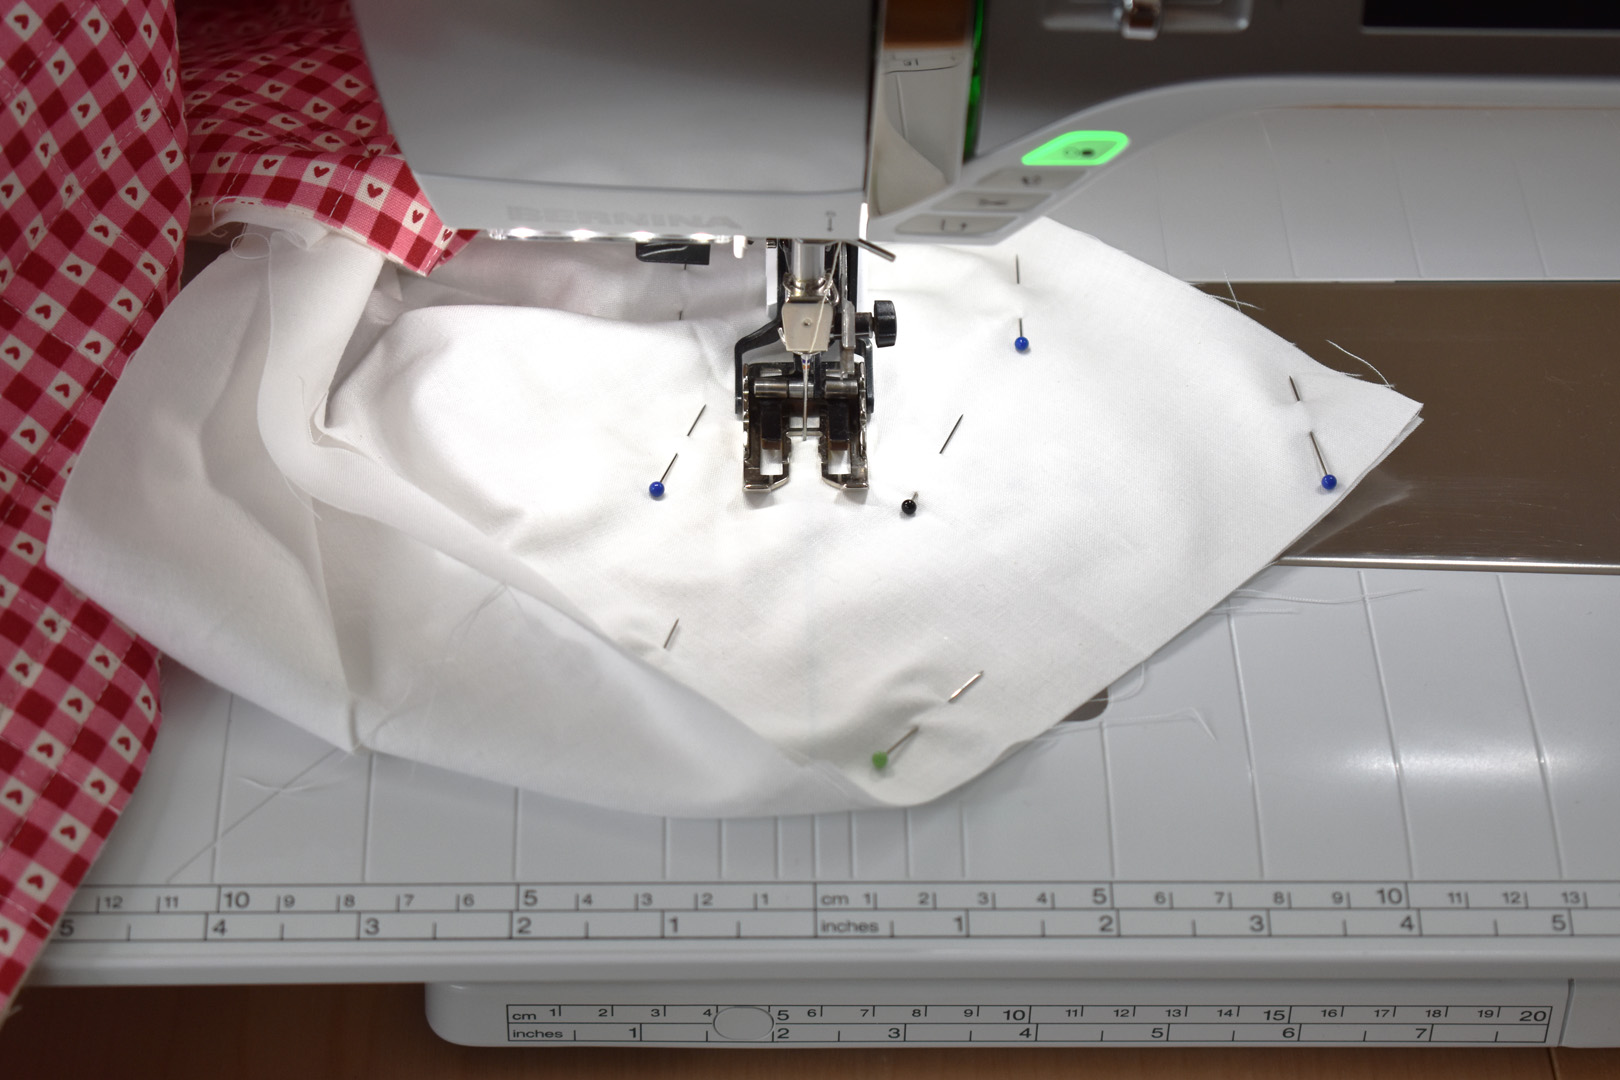
Make a hanging sleeve for the Modern LOVE Mini Quilt. Find that scrap of fabric from cutting the backing to size, and cut one piece 6″ x 25″ to make a little hanging sleeve following these steps. Press the short ends over 1/2″ and stitch in place close to the folded-over edge. Fold the strip in half lengthwise, right sides together, and sew down the long edge with a 1/4″ seam.
Turn the strip inside-out, pressing the seam flat as pictured.

Set the sleeve seam side down on the pressing surface. Leave the top edge flat, fold up the bottom edge 1/2″ from the pressed edge. This will create a little “tunnel” with the sleeve. Use your iron to press this folded edge well.

Pin the sleeve 1/2″ below the binding on the top edge of the quilt, centered between the two edges. Hand stitch the top and bottom in place.
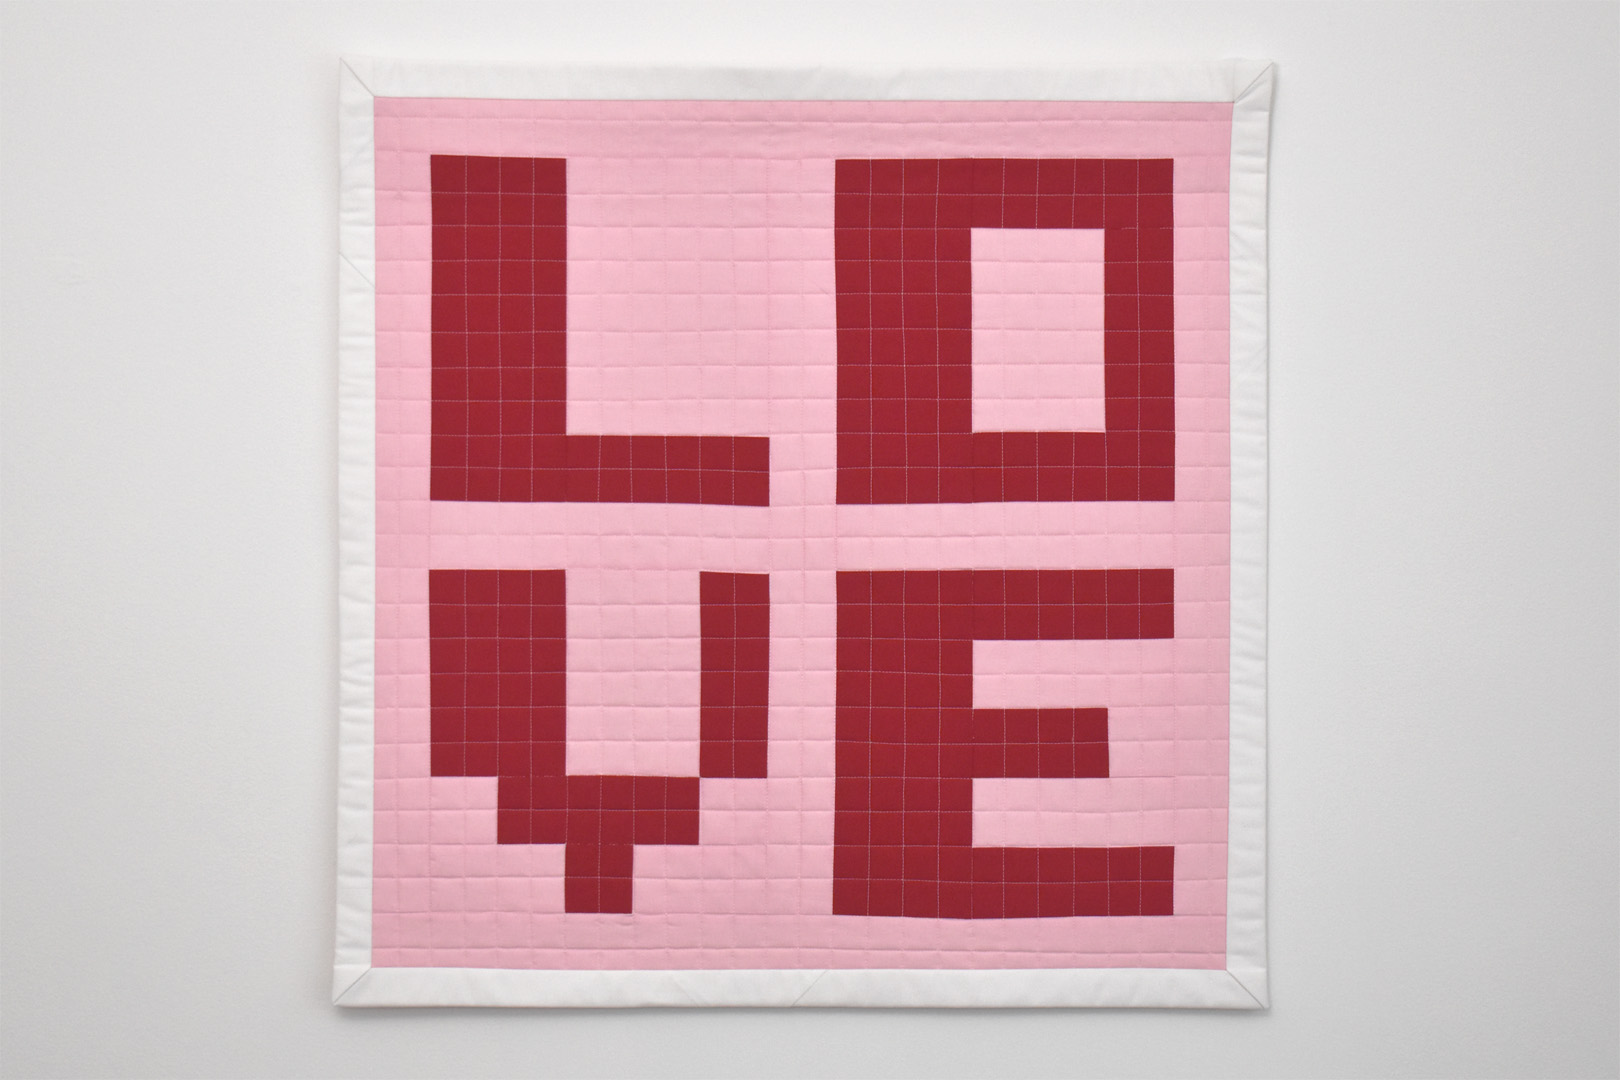
Your LOVE mini is ready to hang and enjoy!

Used Products


What you might also like


3 comments on “Modern Love Mini Quilt”
-
-
Ohmygosh @sarap1979, you are so right! I’m getting connected with the WeAllSew team right away to have the error updated. I hope you can find a way to complete the project, and I am so sorry about the error in the initial cutting instructions.
-
-
All went well until the end. My wof binding strips left me with only 5 1/2 inches overlap and not enough to cut the 45 degree ending. So….???? (You lose a lot of fabric length joining up the 3 strips in a mitered fashion) . I just simply folded over over one end and stitched. Not so elegant. Did like the picture frame binding, however.
Leave a Reply
You must be logged in to post a comment.

The cutting directions say to cut 4″ strips of red, but then in the piecing directions it says 4.5″. I’ve already cut my red 4″ strips, so I guess I’ll have to adjust everything, but please correct the post for others.