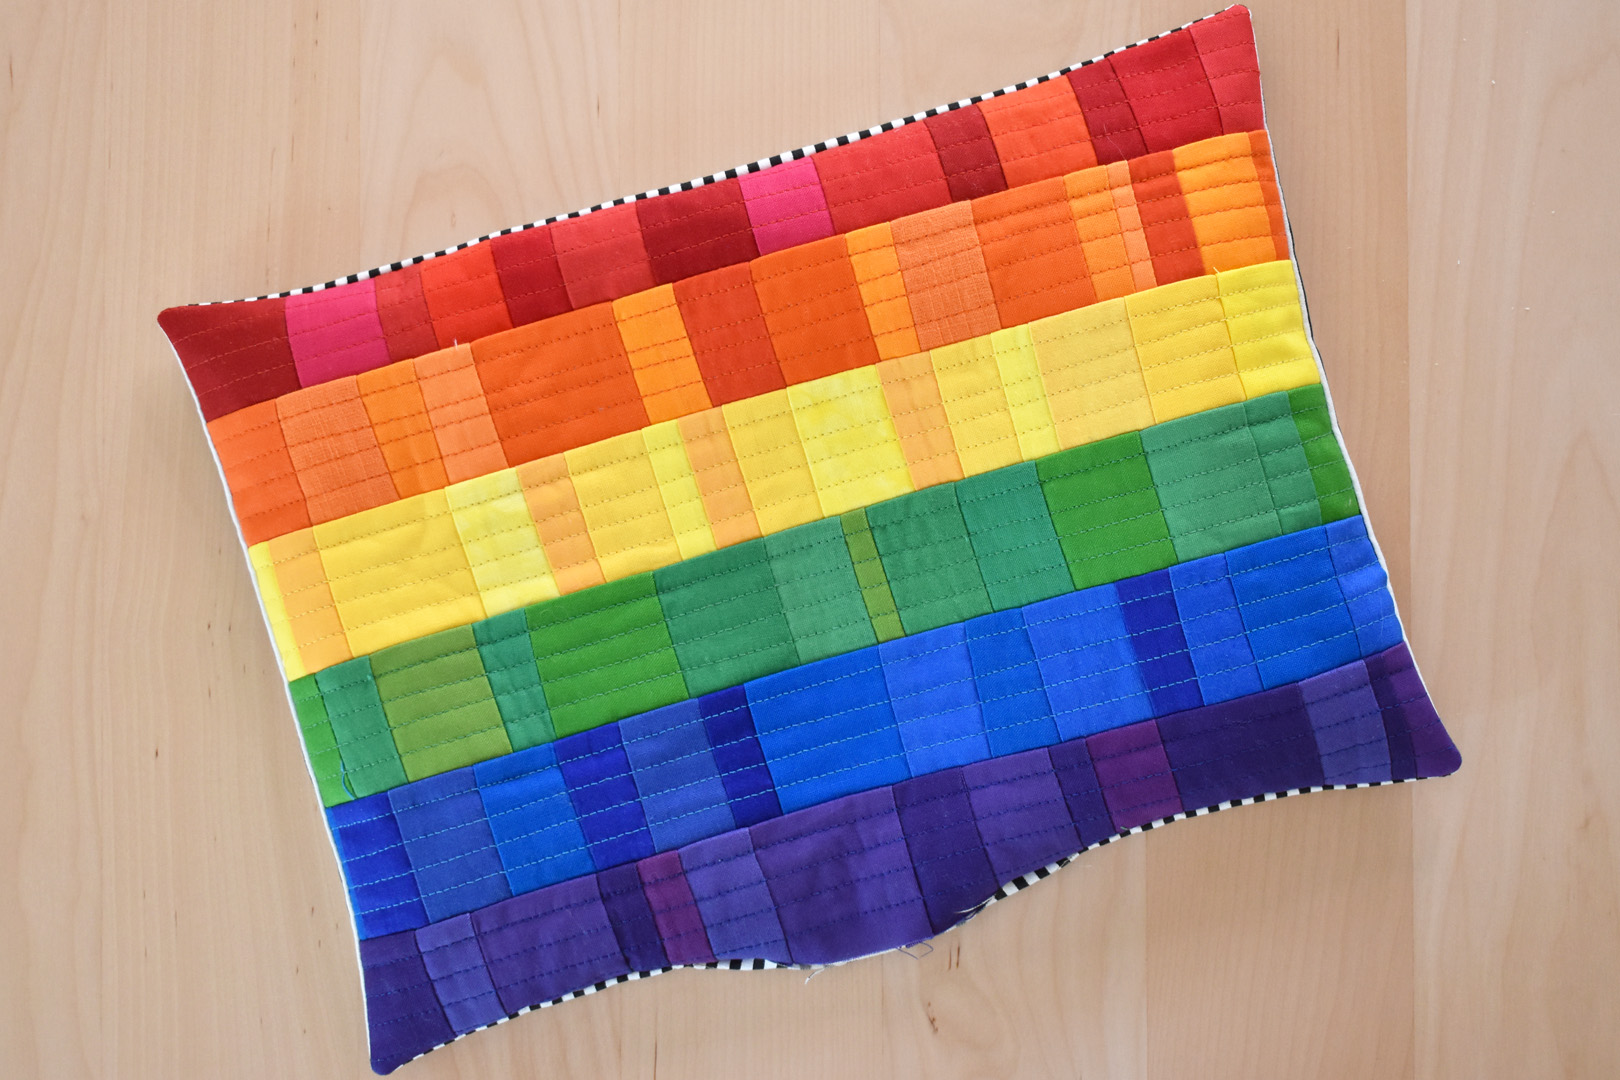
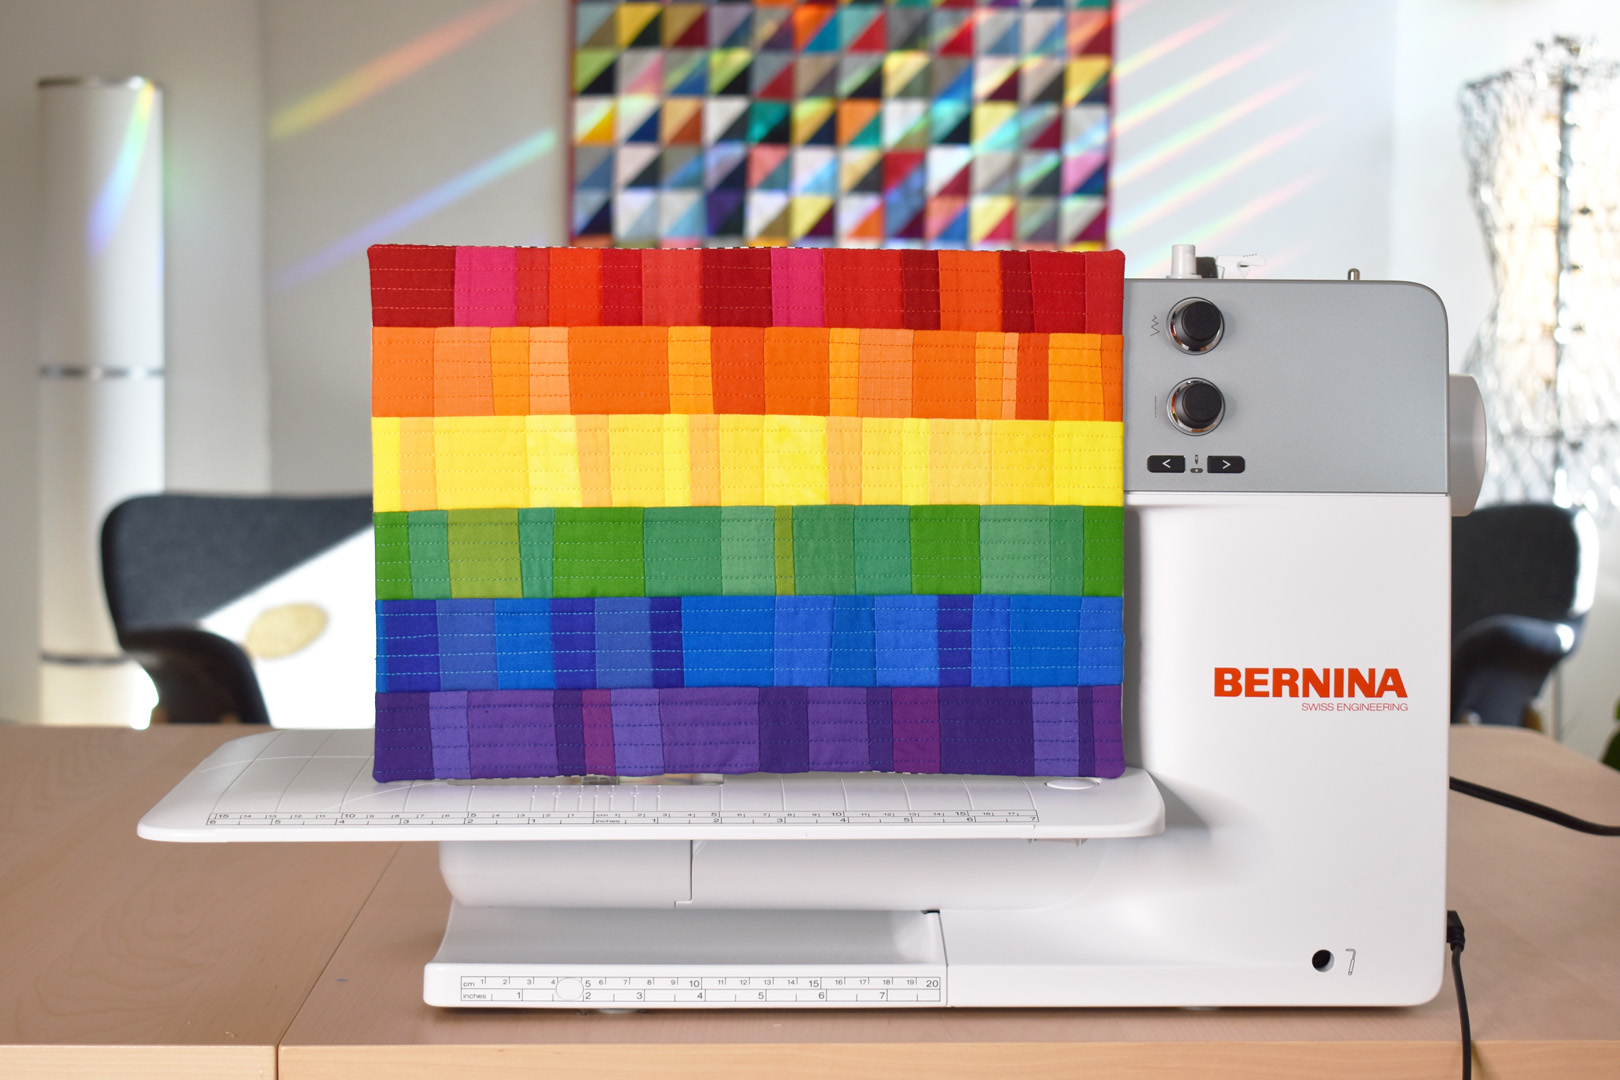
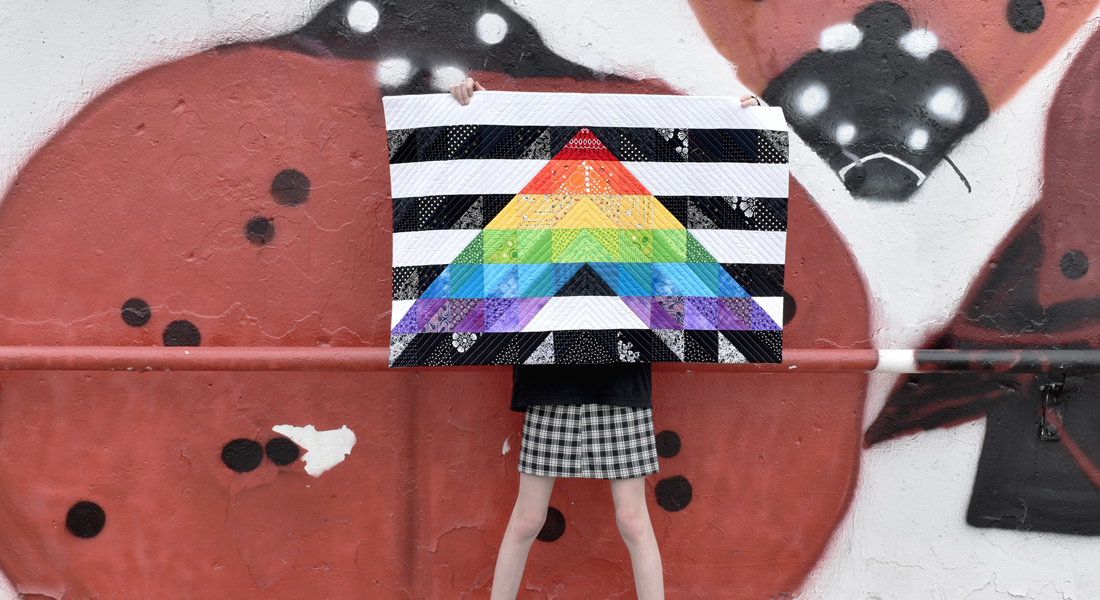
How to Sew a Pride Flag Mini Quilt
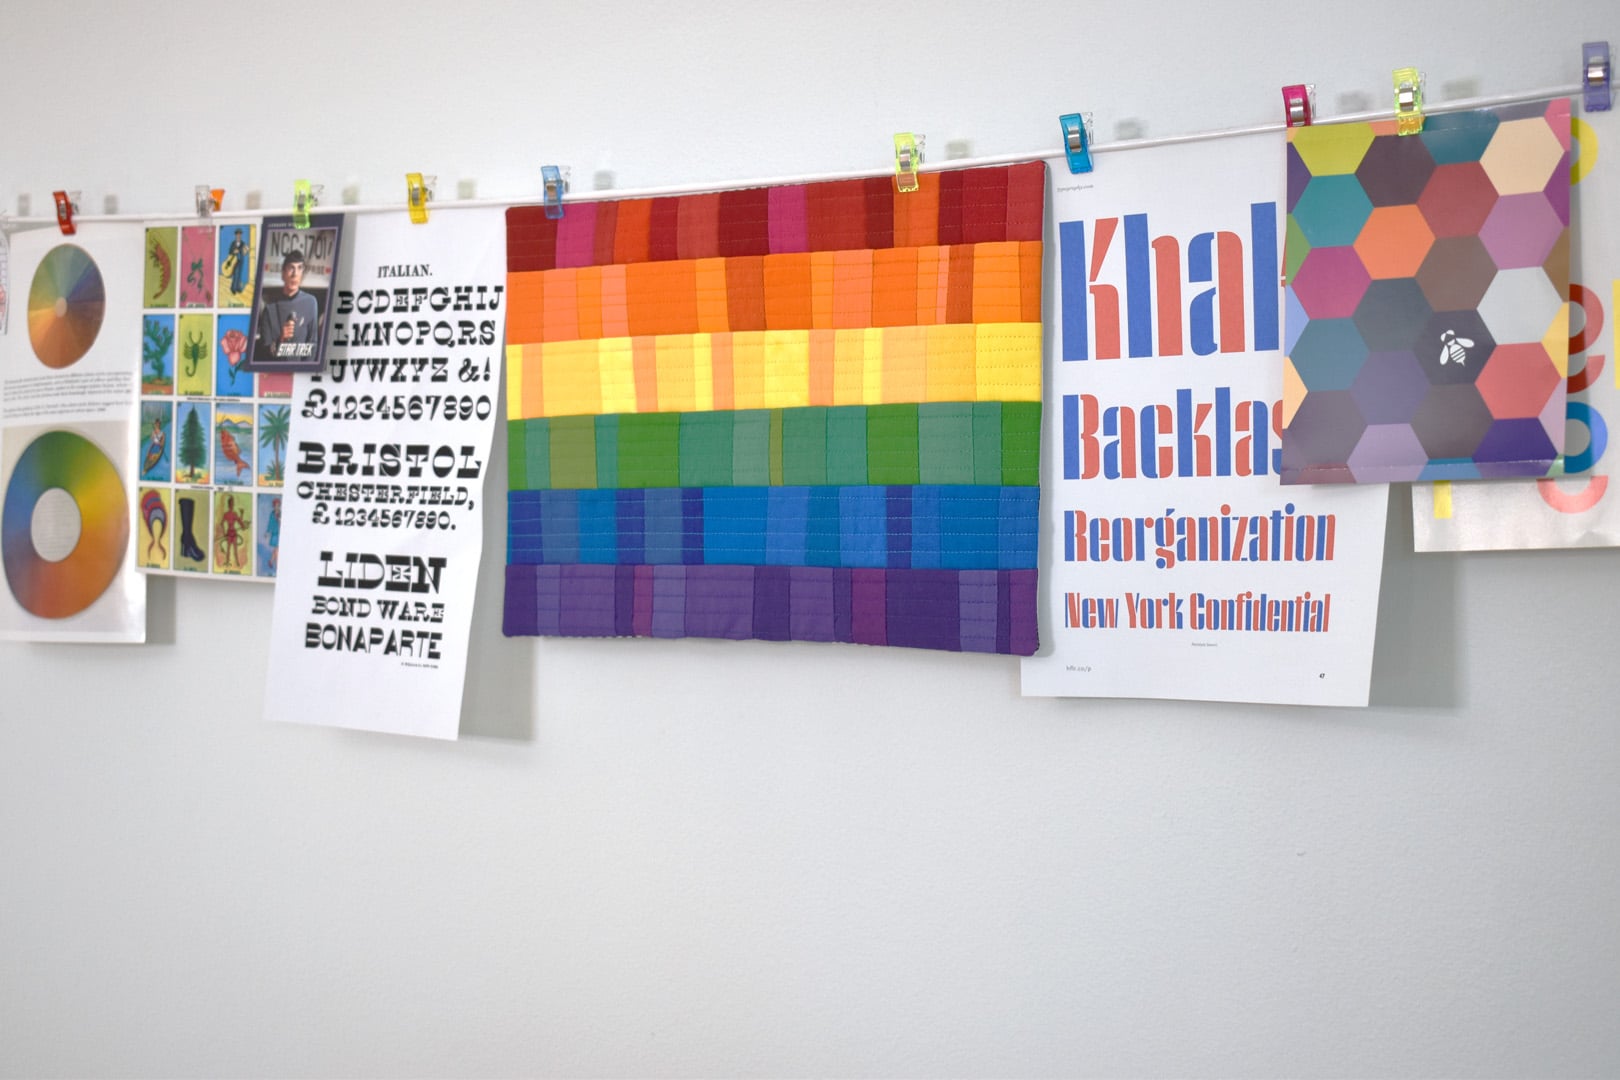
June is National Pride Month, a time to focus on the LGBTQ+ community. Although I don’t identify as LGBTQ+, I believe in equality and diversity, and in learning to be a better ally for the community. I created this mini version of the 6 color Pride flag in the spirit of continuing to learn about and support the LGBTQ+ community during Pride month.

This rainbow mini quilt is made using a foundation piecing technique, a method that makes it easy to sew with those teeny tiny scraps of fabric you’ve been holding on to. Learn about tools and techniques used for foundation piecing in the Pride flag mini quilt tutorial.
Materials to Sew a Pride Flag Mini Quilt
- Sewing machine (I use a BERNINA 570 QE)
- Straight stitch or patchwork presser foot (I use the BERNINA Patchwork foot #97D)
- Dual Feed foot or Walking foot #50
- Straight stitch needle plate
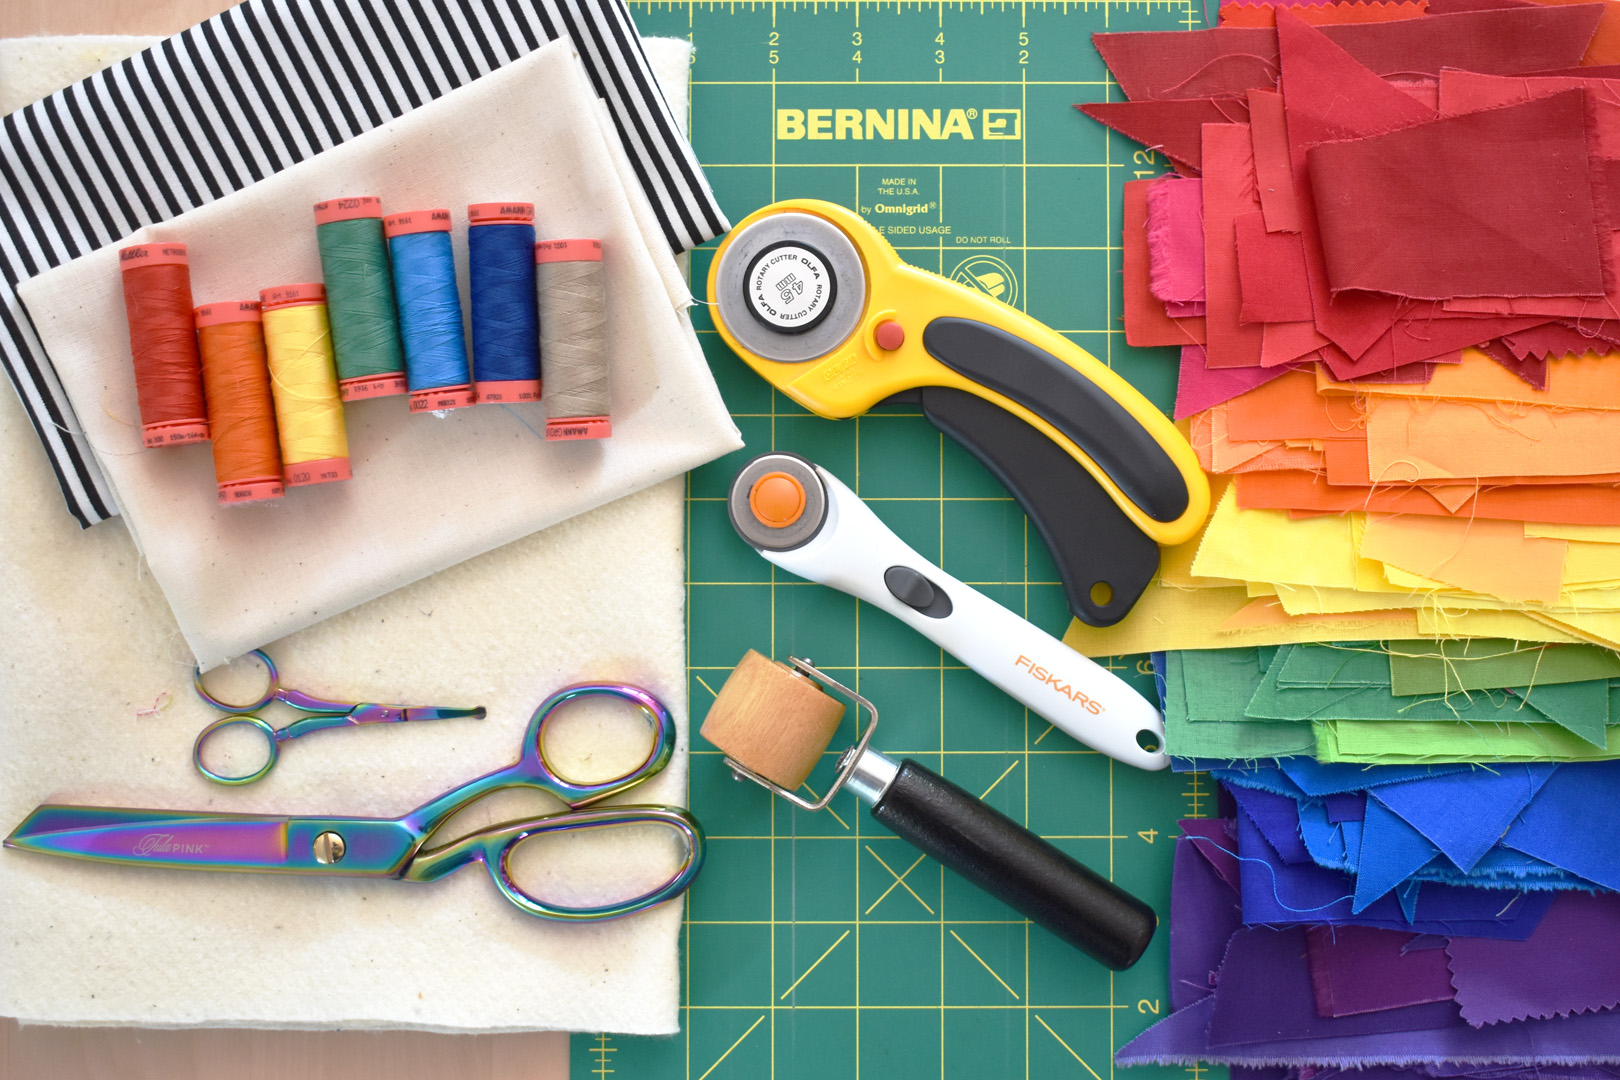
- Large and small rotary cutters, cutting mats, and rulers
- Dressmaker’s shears or fabric scissors
- Thread snips
- Seam roller (optional)
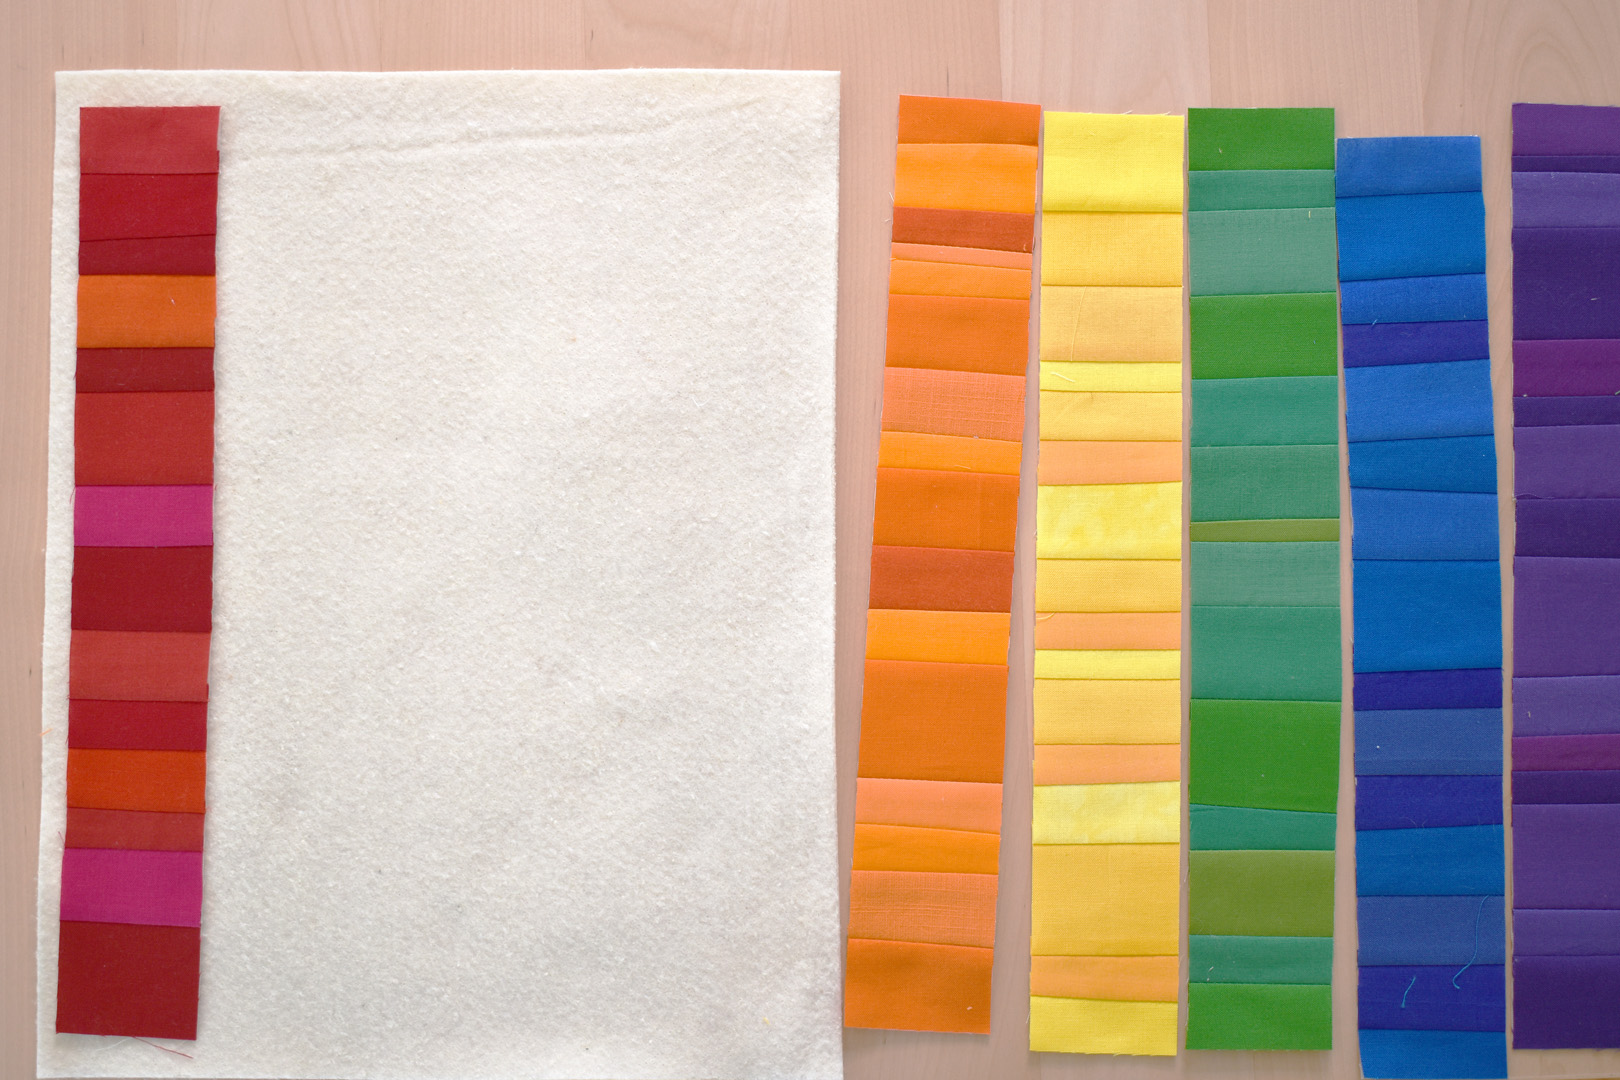
- Scraps of fabrics in red, orange, yellow, green, blue, and violet
- Scrap of 100% cotton quilt batting about fat quarter sized
- Backing fabric about fat quarter sized
- About one fat quarter sized piece of 100% cotton muslin
- All-purpose sewing thread in red, orange, yellow, green, blue, violet, and a neutral color tan (I use Mettler Metrosene)
Prepare to Sew a Pride Flag Mini Quilt
When using the technique of foundation piecing, you can use either a paper that is later removed or a piece of fabric that will remain in the final patchwork. In this project, we’re using a very thin, 100% woven utilitarian fabric called muslin as the foundation for the patchwork. The muslin will act as a foundation to sew very small scraps on top of, scraps that otherwise might be difficult to sew with.
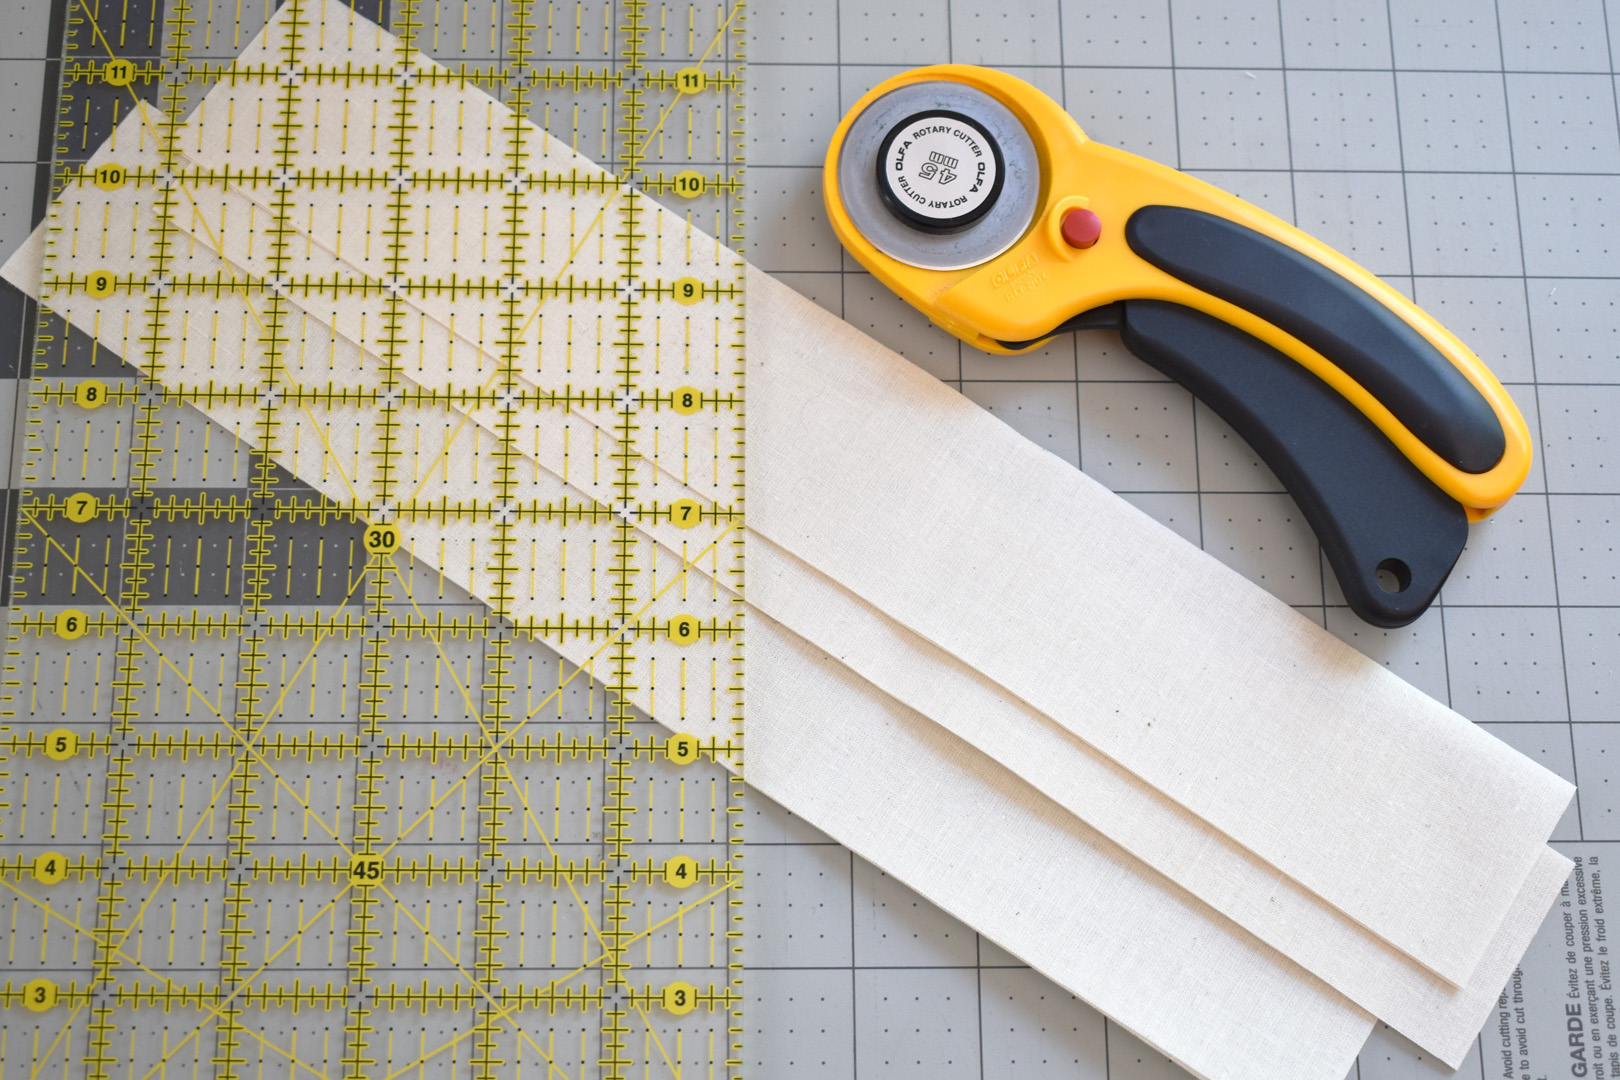
Press the muslin well with a hot steam iron, and then cut into 6 2″ x 13″ strips. Also make sure to press all of your little fabric scraps, no matter how tiny, to make them easier to sew with.
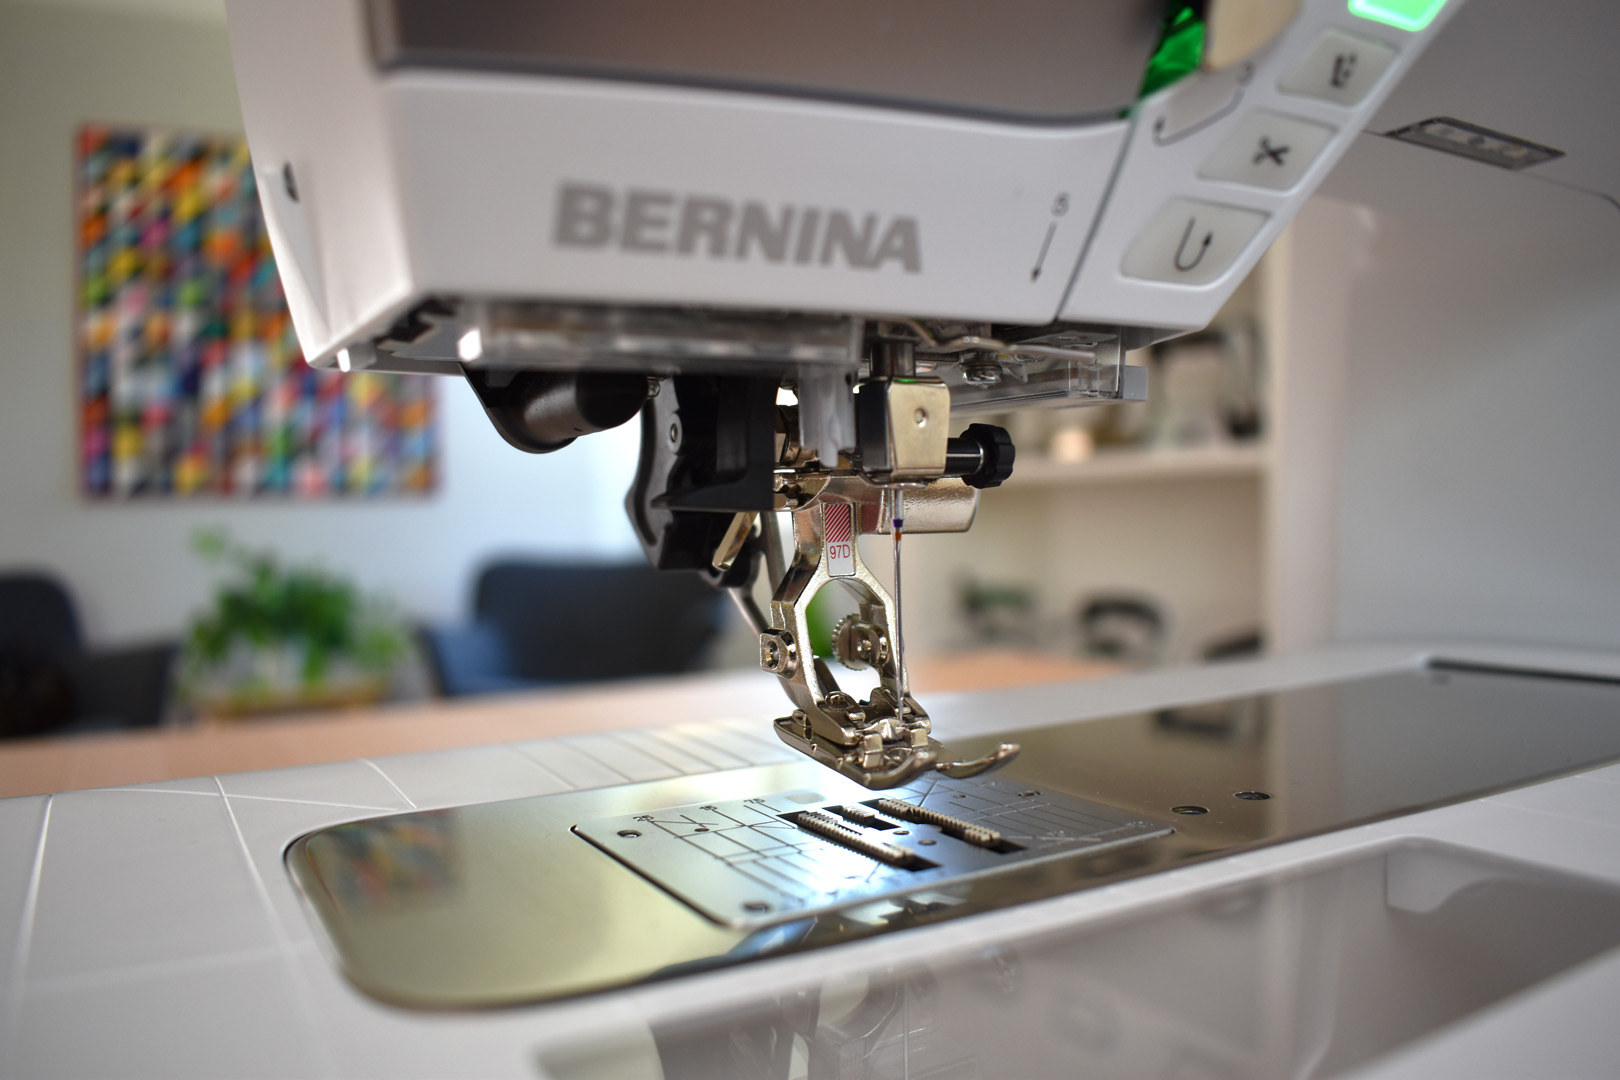
Set up your sewing machine using a straight stitch needle plate, a patchwork or straight stitch foot, and a new Sharp or Microtex needle in size 80/12.
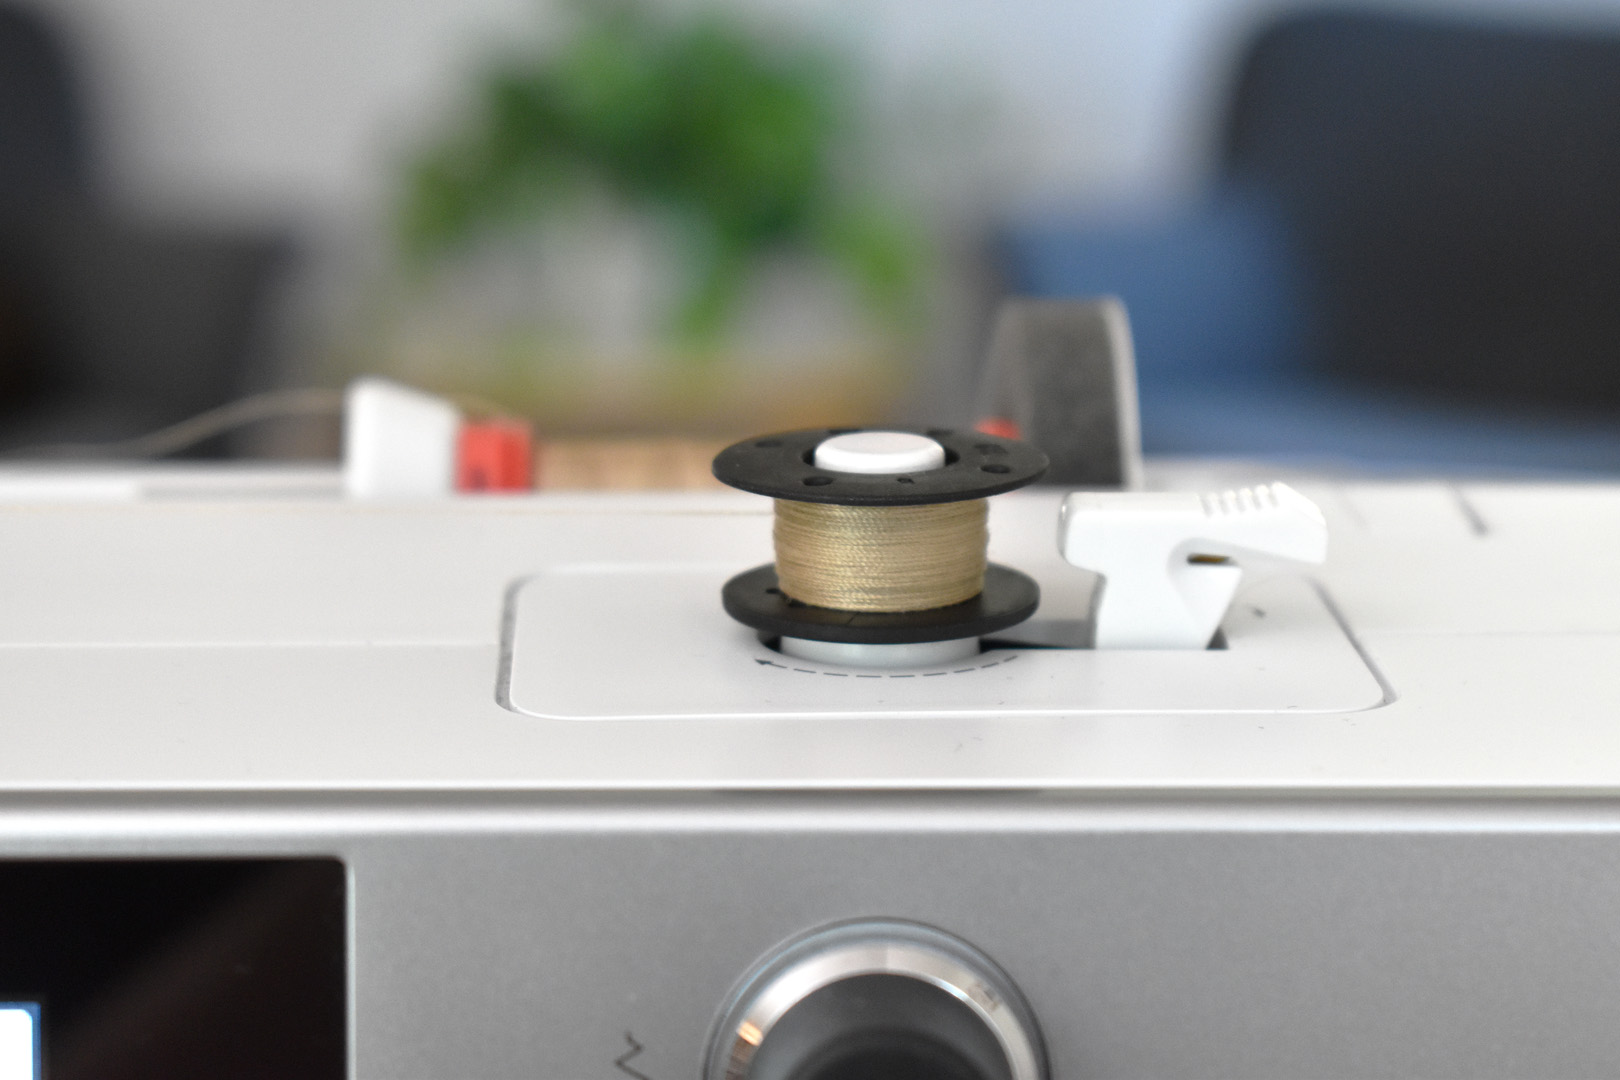
Wind a bobbin in the neutral tan-colored thread. We’ll be changing the top thread to match the color of scraps we’re sewing, but using a neutral color in the bobbin means we don’t have to mess around with winding 7 different bobbins for this project or changing the bobbin 8+ times!
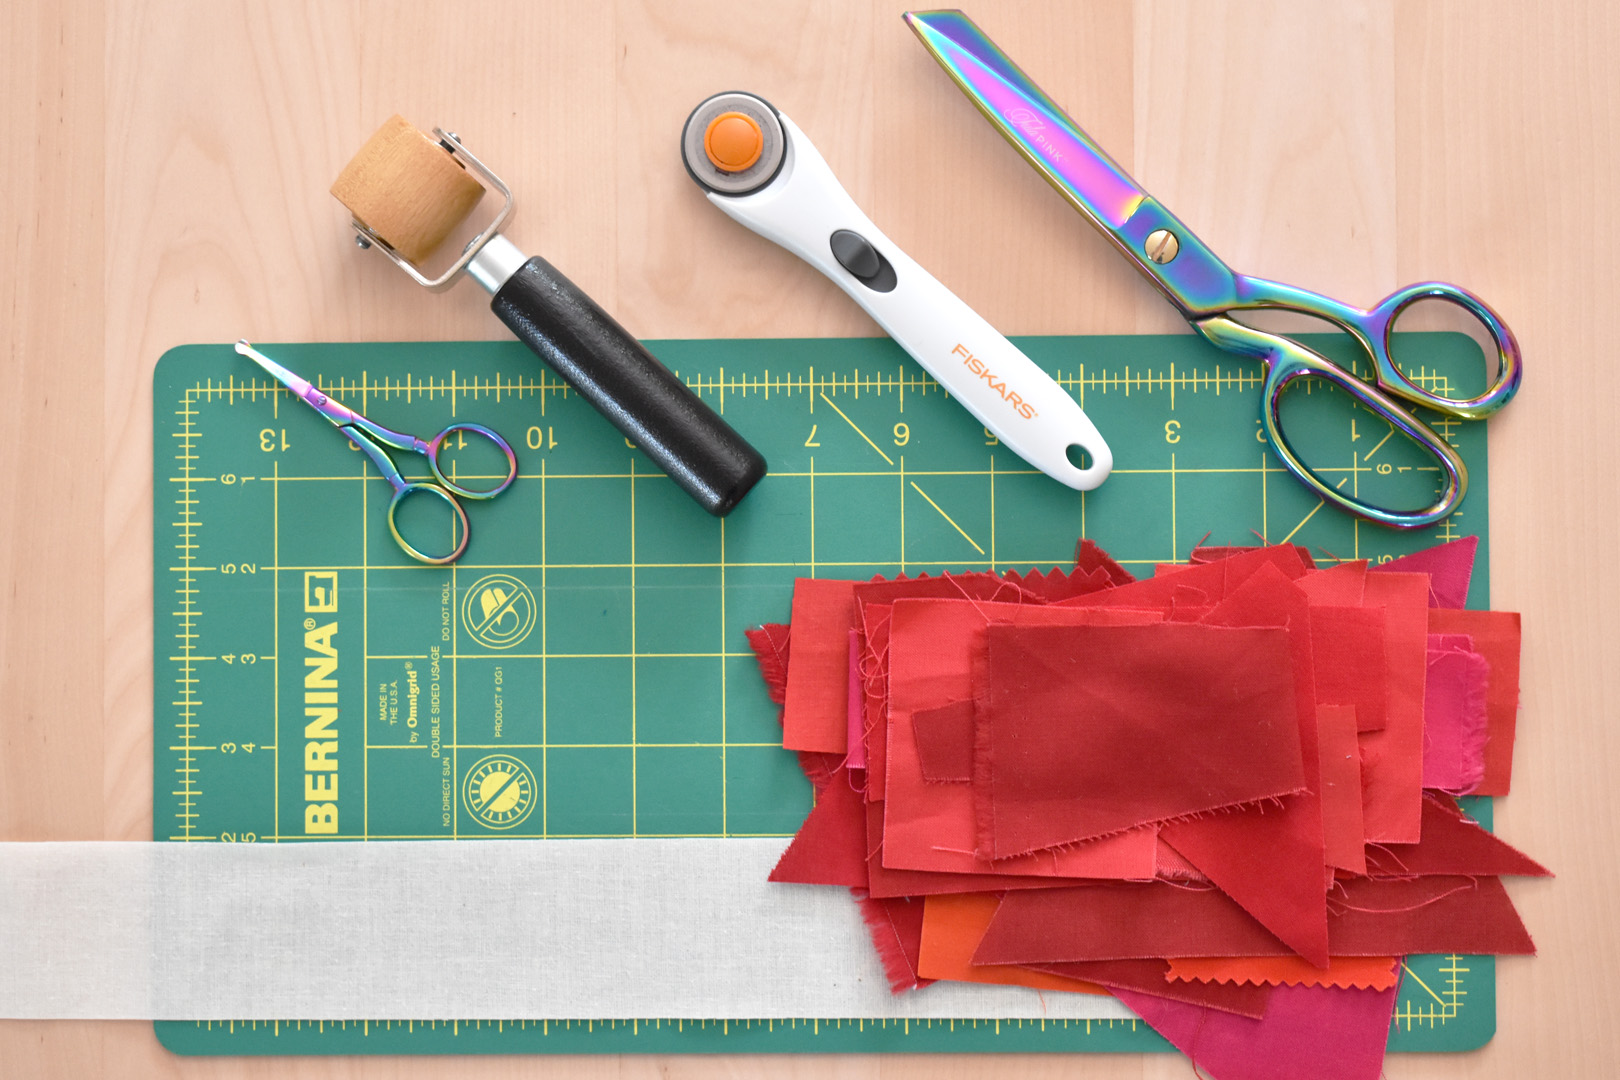
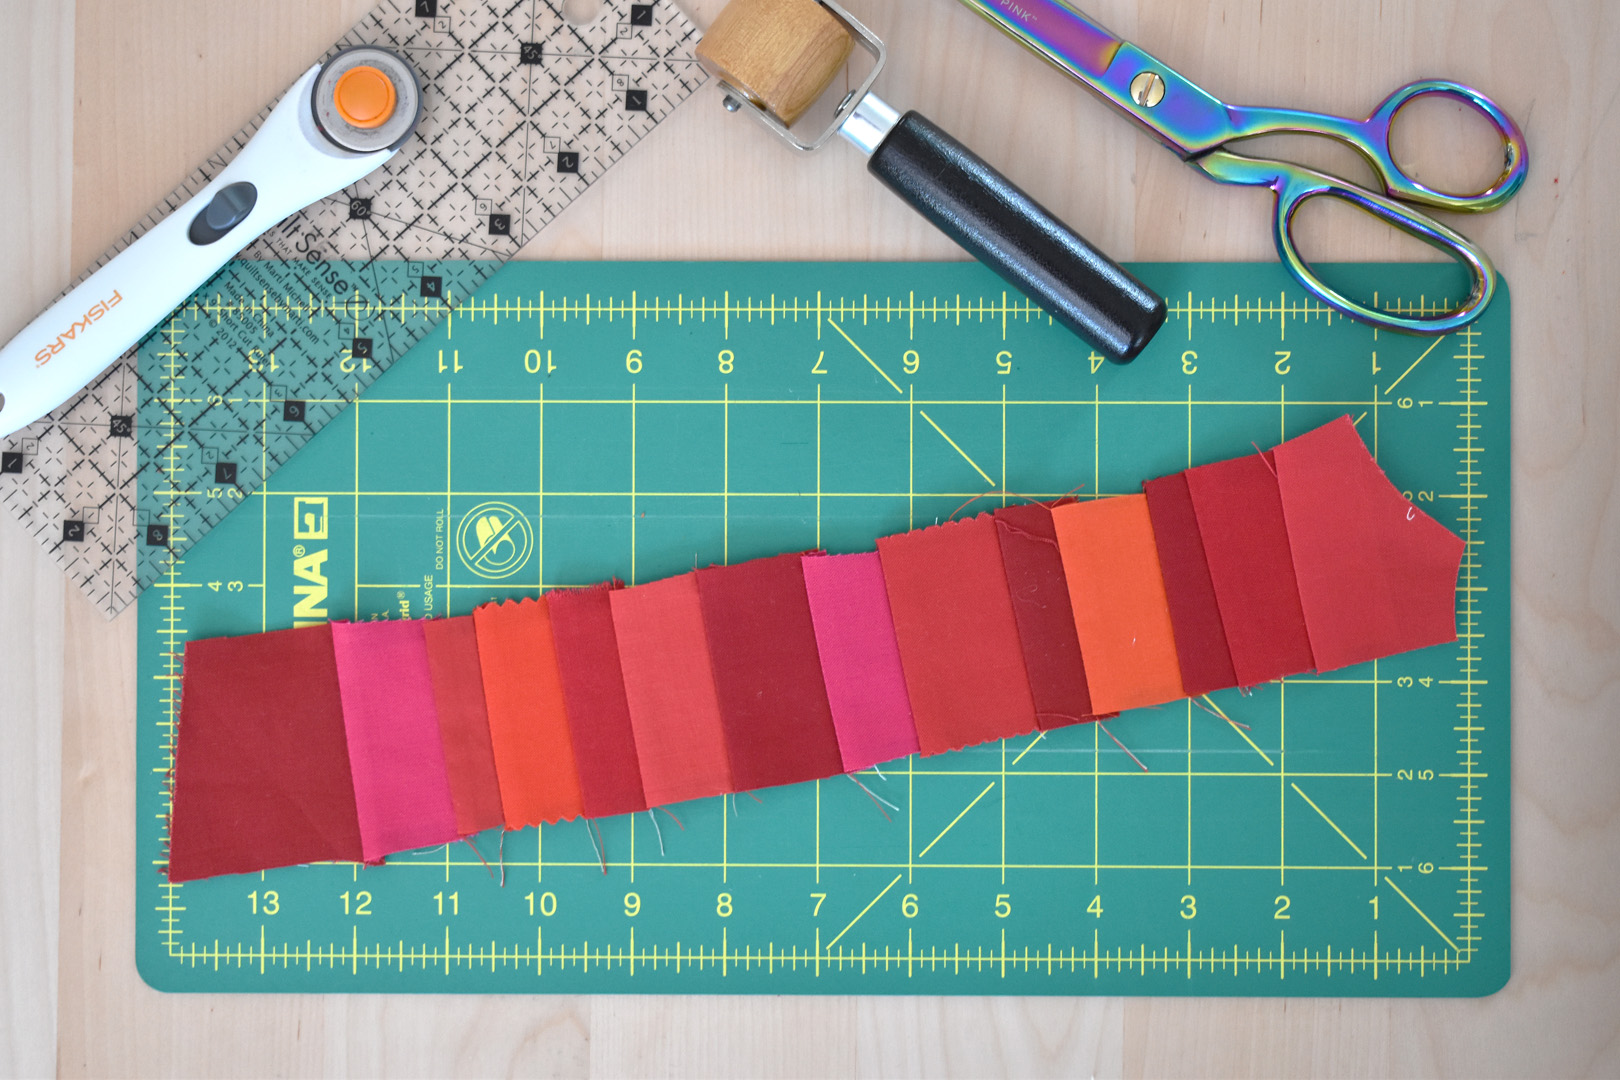
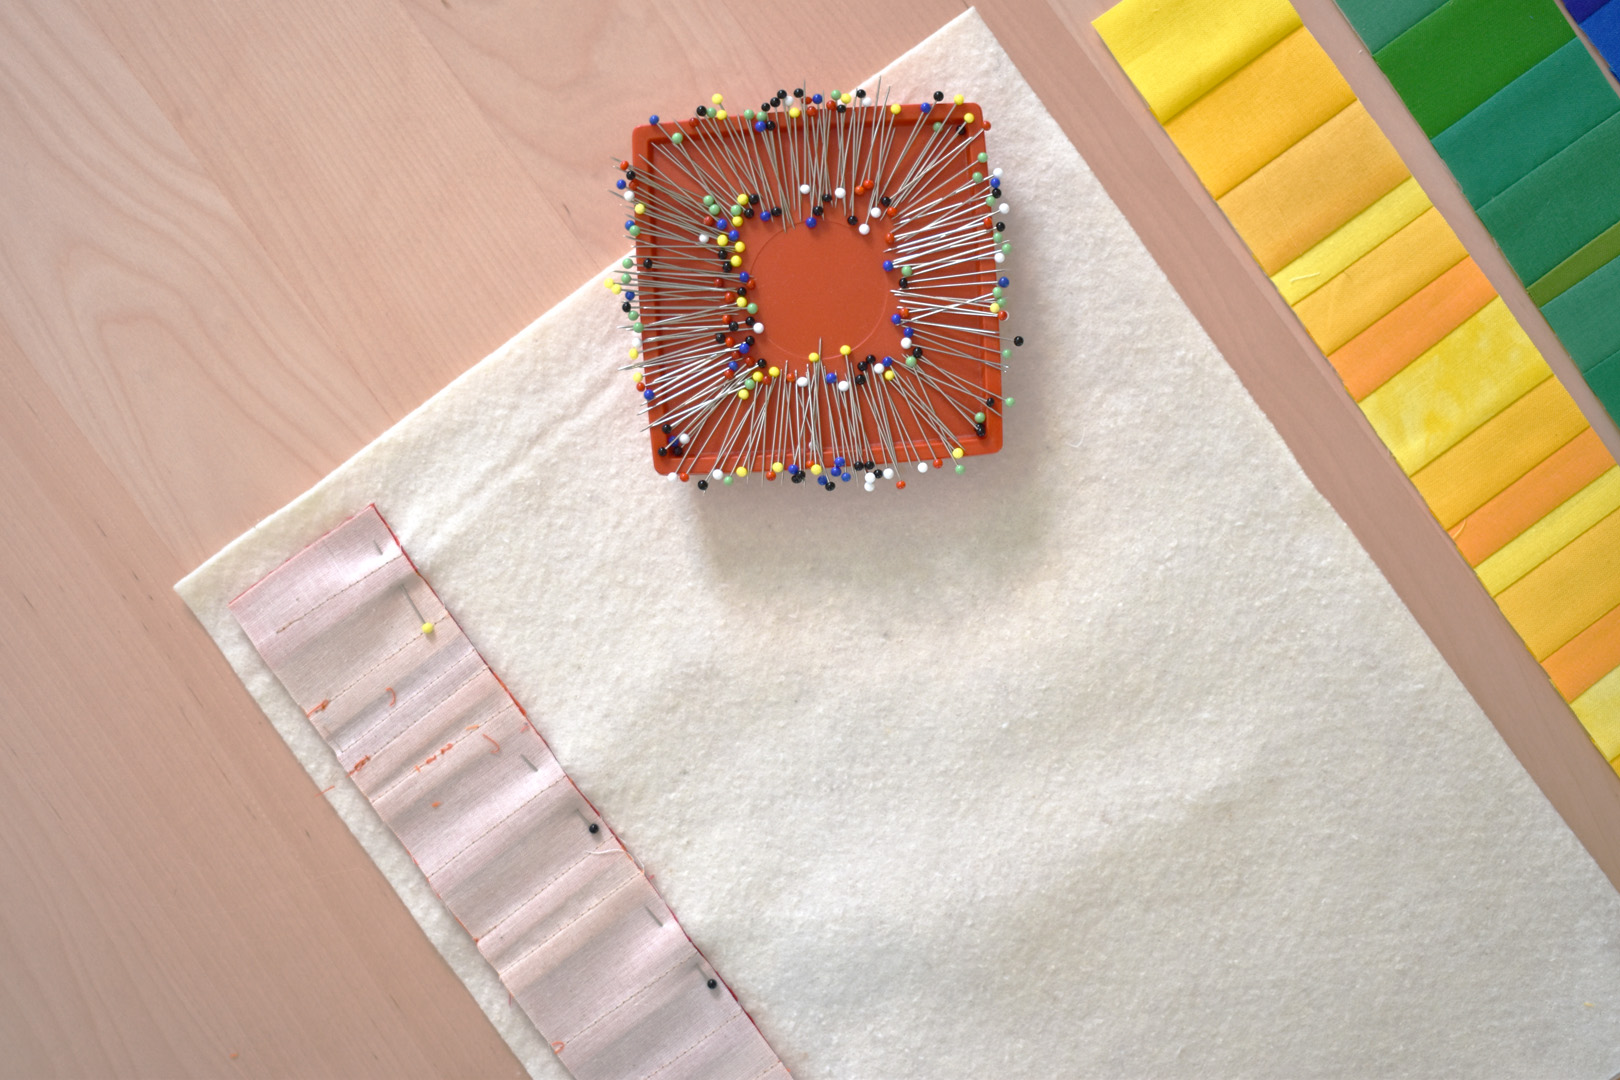
Set up all the tools you’ll need next to your sewing machine. One muslin strip, scraps of one color, a small acrylic quilting ruler (not shown), scissors, thread snips, a small rotary cutter, and seam roller. You might have the ability to set up an iron and small pressing board right near your sewing machine instead of using the seam roller – do whatever works best for you. Now you’re ready to get started!
How to Foundation Piece With Scraps
In this technique, the muslin strip is the foundation for sewing the small colored scraps. The process is a bit improvisational in that you select each colored scrap to sew as you go. Read through the basic steps in the photos below, and then watch the video clip to see how I finish off the red scrap strip.

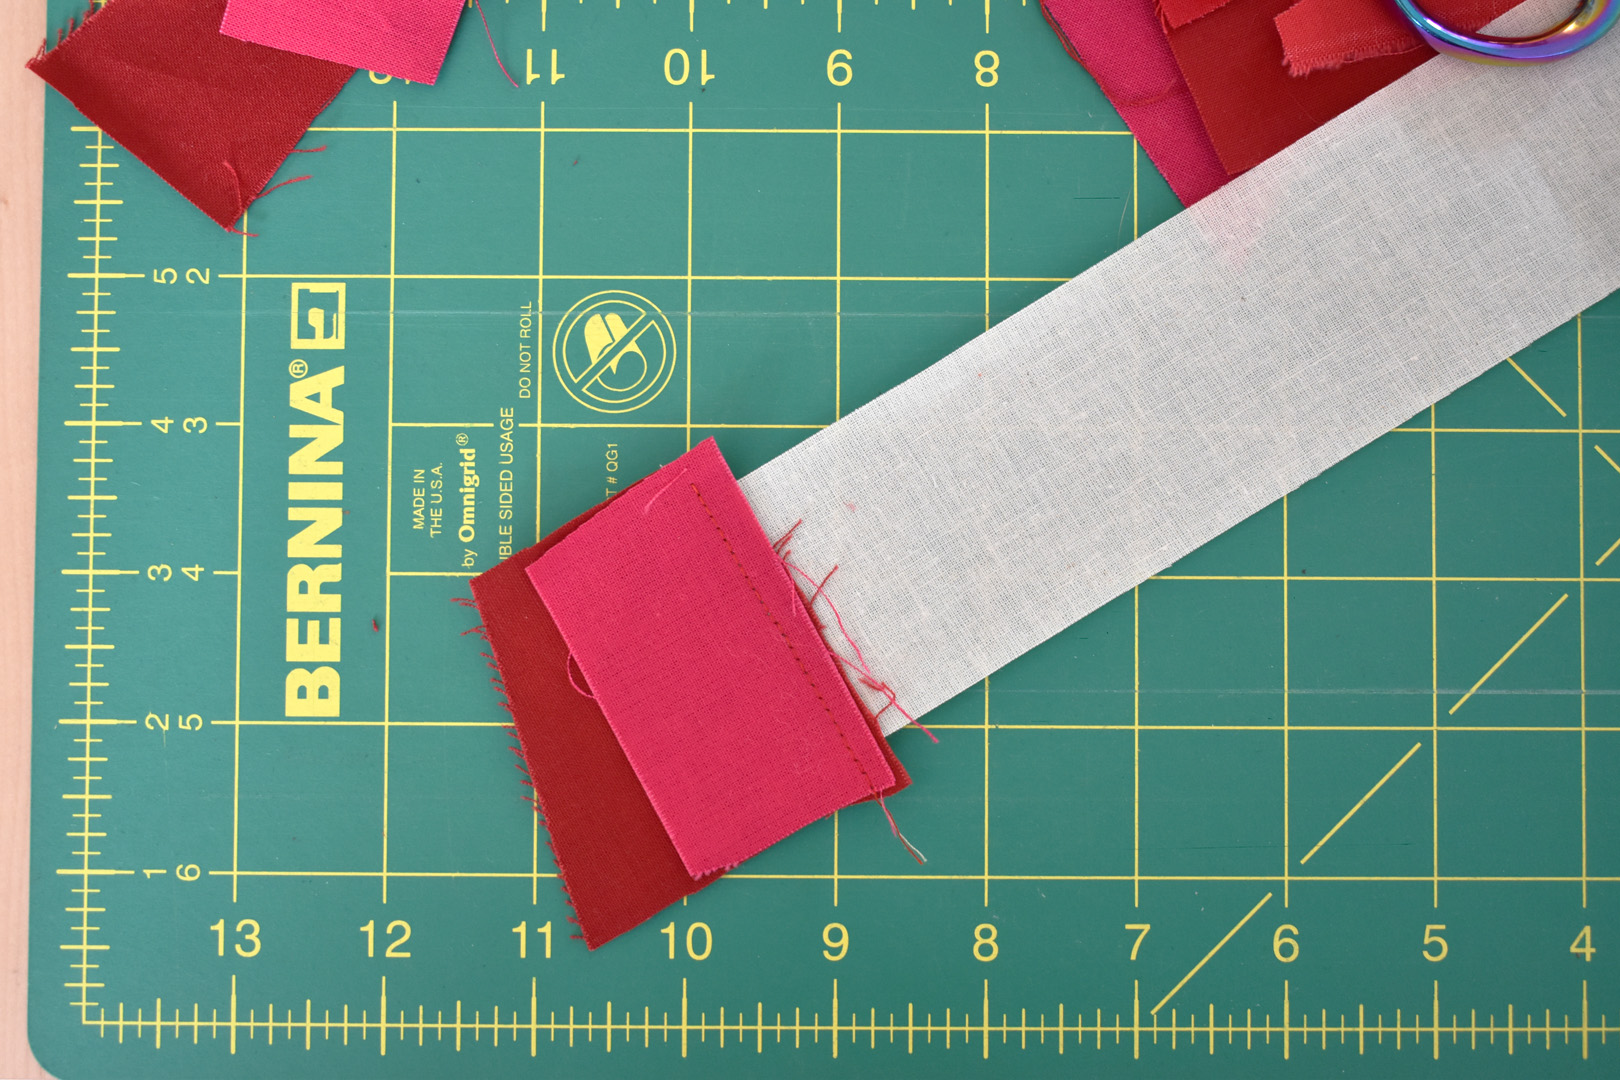
Step 1: Select the First Scrap to Begin the Strip
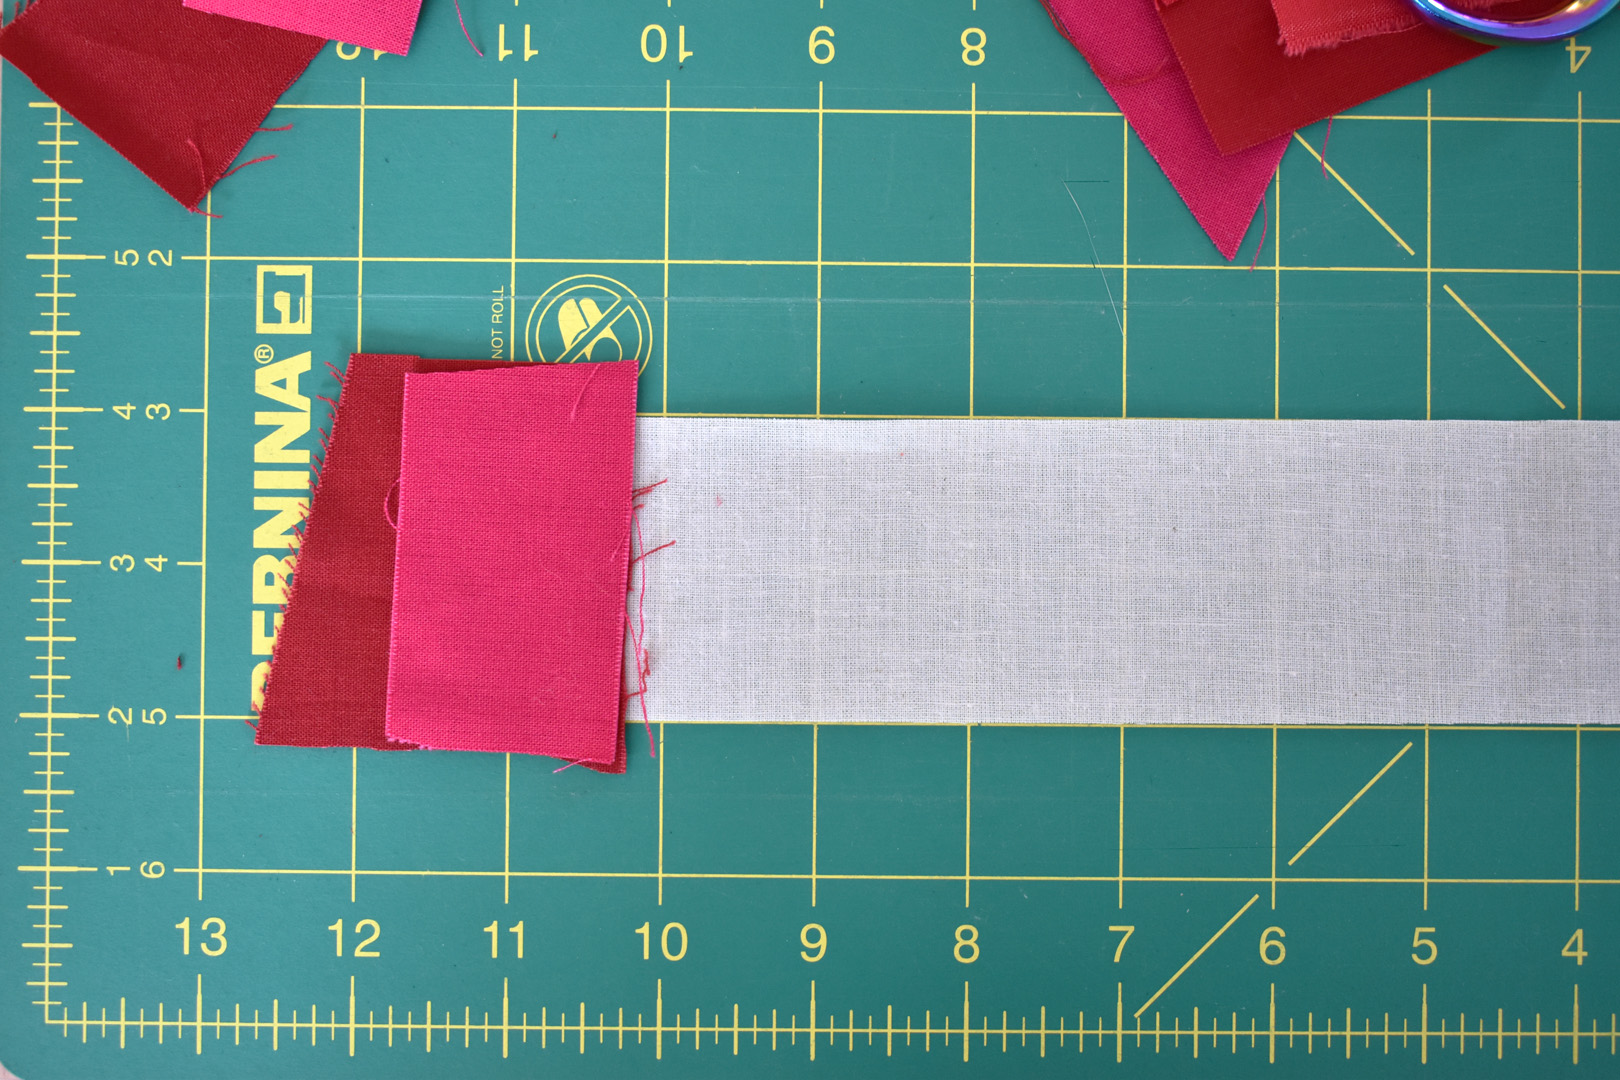
Pick one scrap that will cover the end and overlap the strip by about 1/4″ on all ends. Use scissors to trim to shape and place the strip right side up over the end of the muslin strip. The leading edge of the strip should be trimmed fairly straight. I’m not 100% concerned about the edges of these strips when I sew because I can trim them later (see below steps).

Step 2: Add the Next Scrap
Select the next scrap to sew on the strip. I usually try a few different colors out to see what I think will work best. Cut the scrap to size with the scissors, and place the scrap right side down on top of the previous scrap, with the leading edges fairly even. This will be the edge that you are sewing.
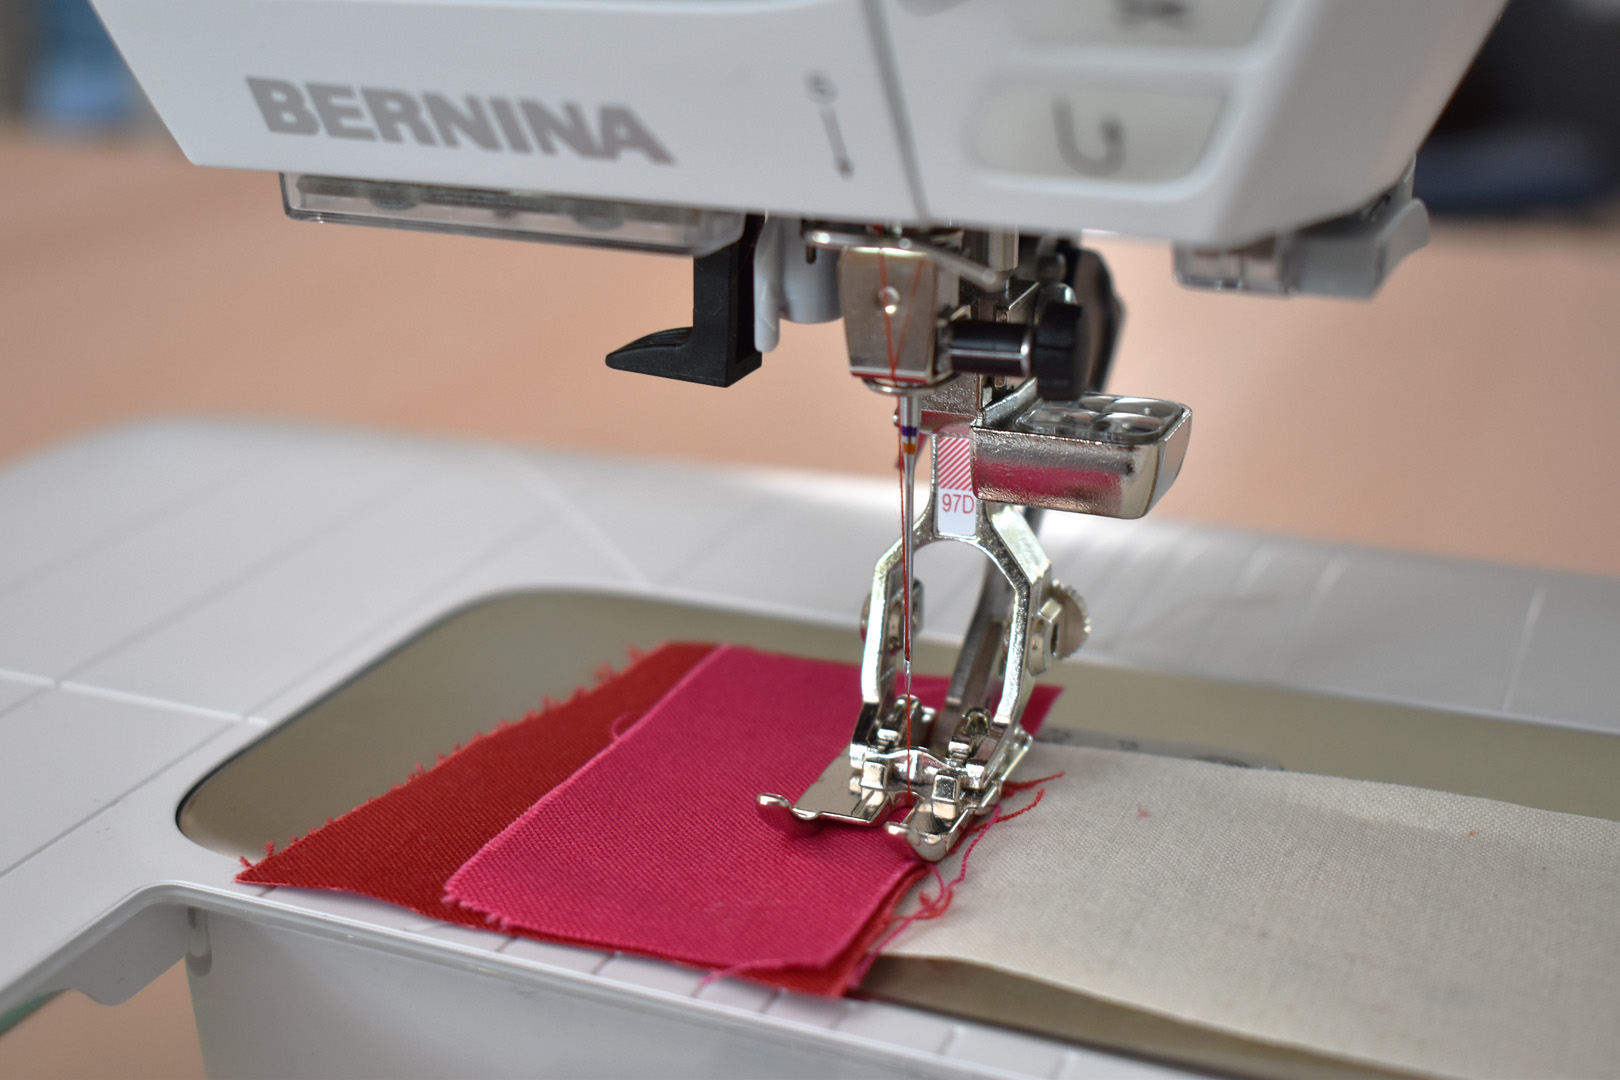
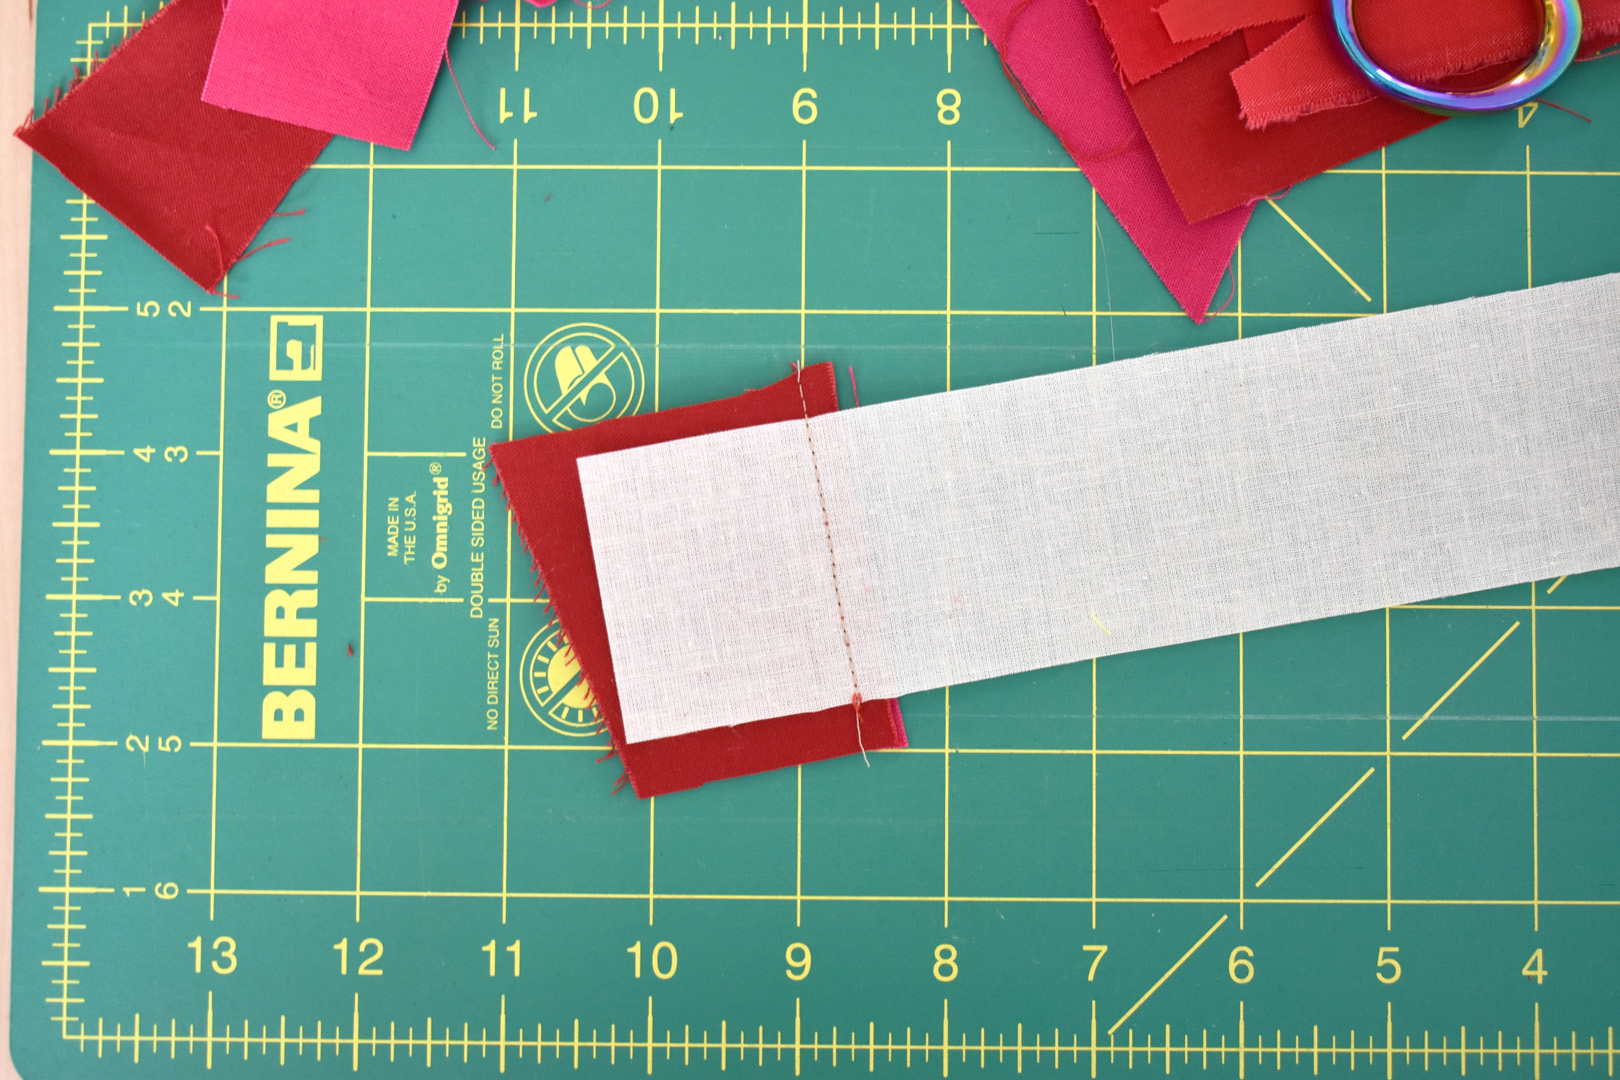
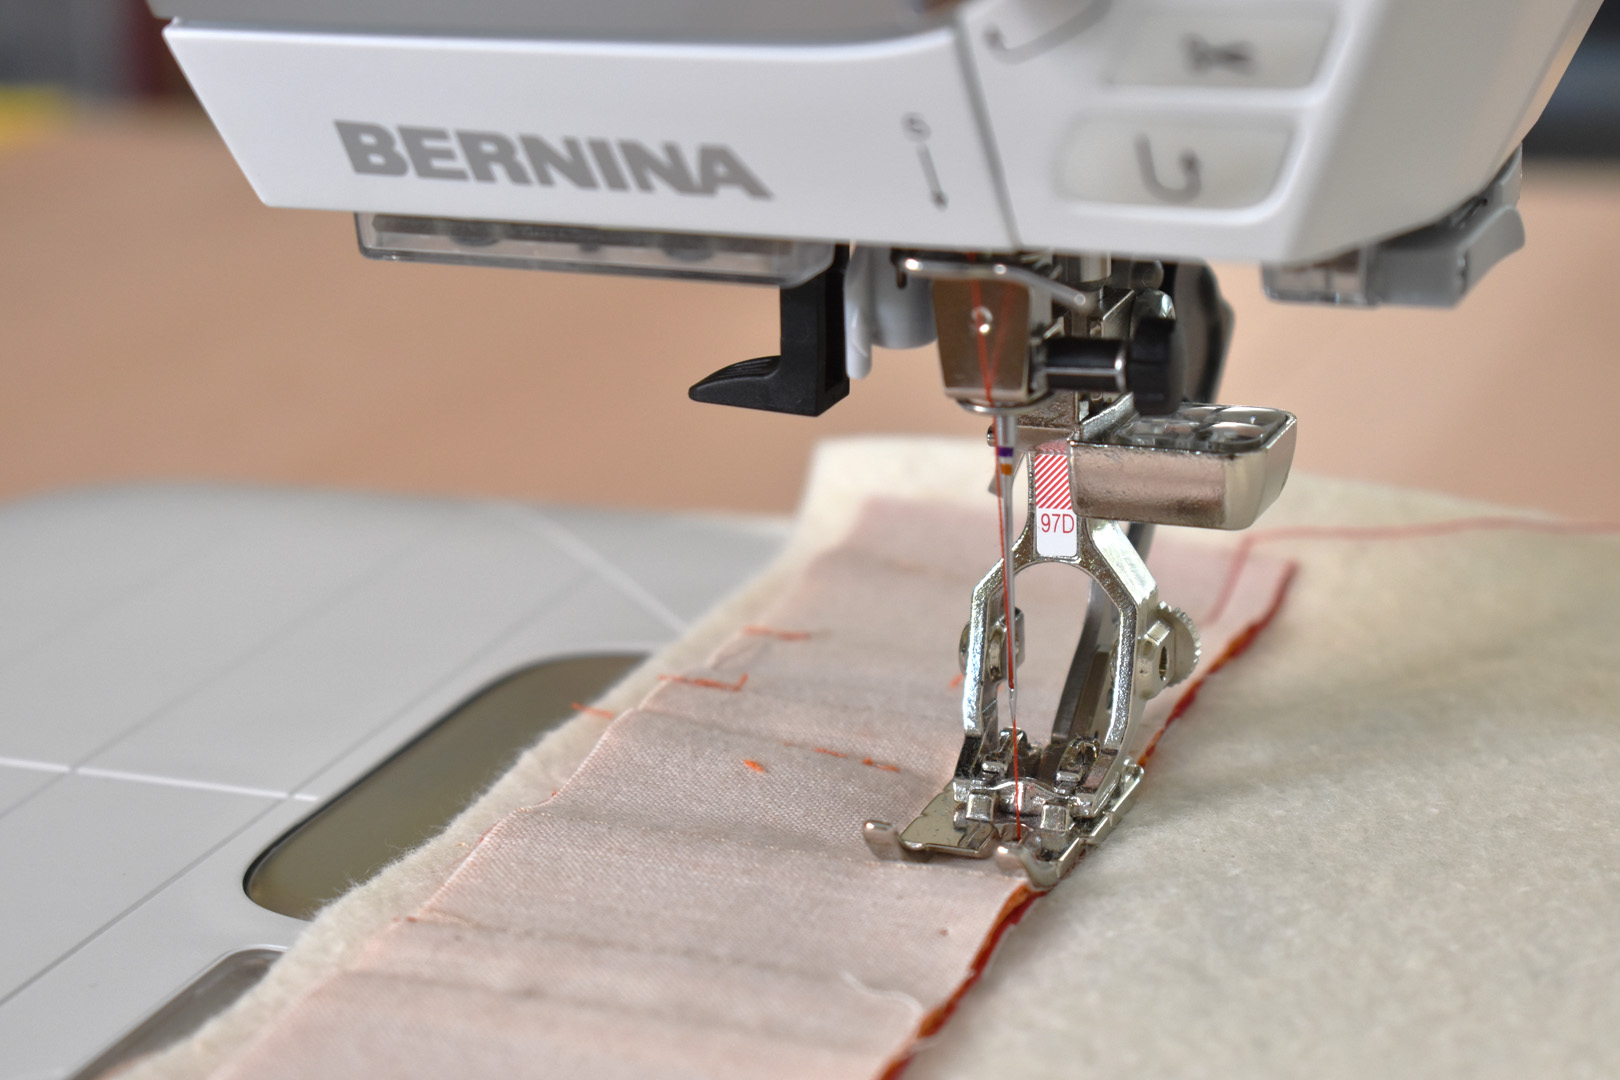
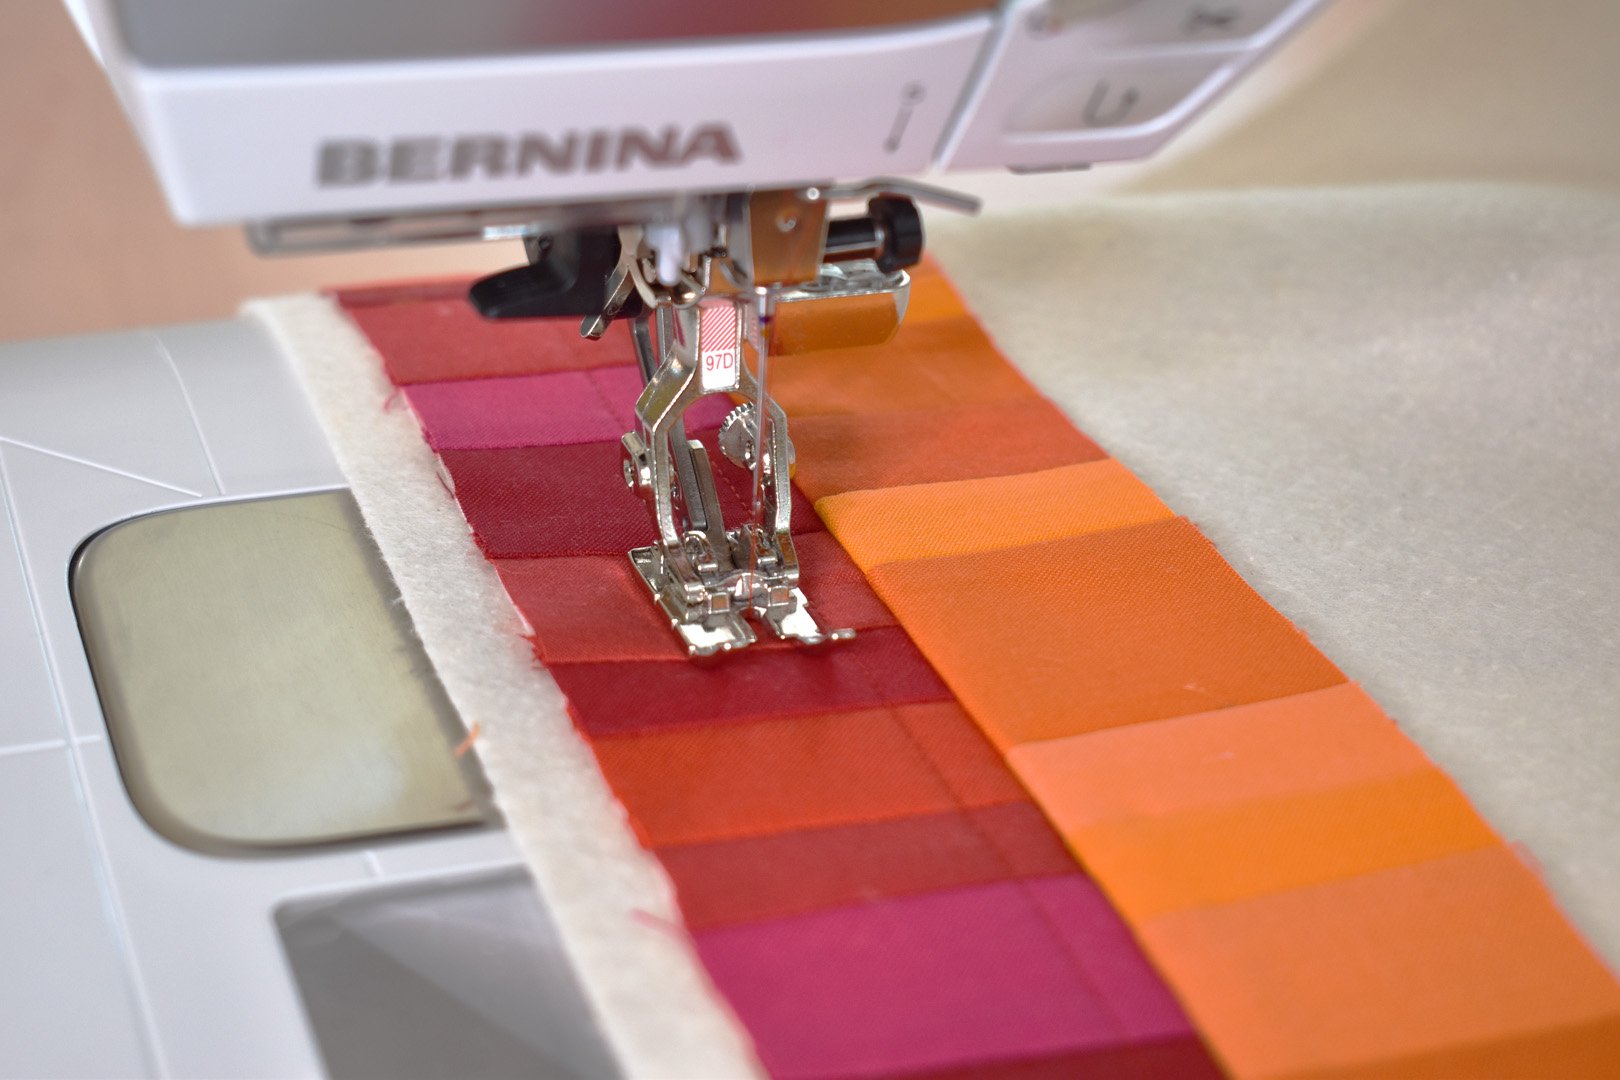
Step 3: Stitch the Scraps
Load your machine with top thread that coordinates with the colored scraps you are sewing, remembering that the bobbin is wound with a neutral color. Each time you sew a different colored foundation pieced strip, just change the top thread with the coordinating color.
Sew a 1/4″ seam along the leading edge where the two scraps are overlapping. Again, I’m not super concerned that this seam is sewn exactly perpendicular to the edge of the strip, and you can see the slight variance in the direction the scraps are sewn in my finished quilt. Just be sure not to get too far off on an angle when sewing these seams, as this may cause the scraps to go off at an angle and no longer cover the foundation strip after sewing.
After stitching, check to see if the seam allowance needs to be trimmed.
Turn the entire strip over so you’re looking at the muslin side.
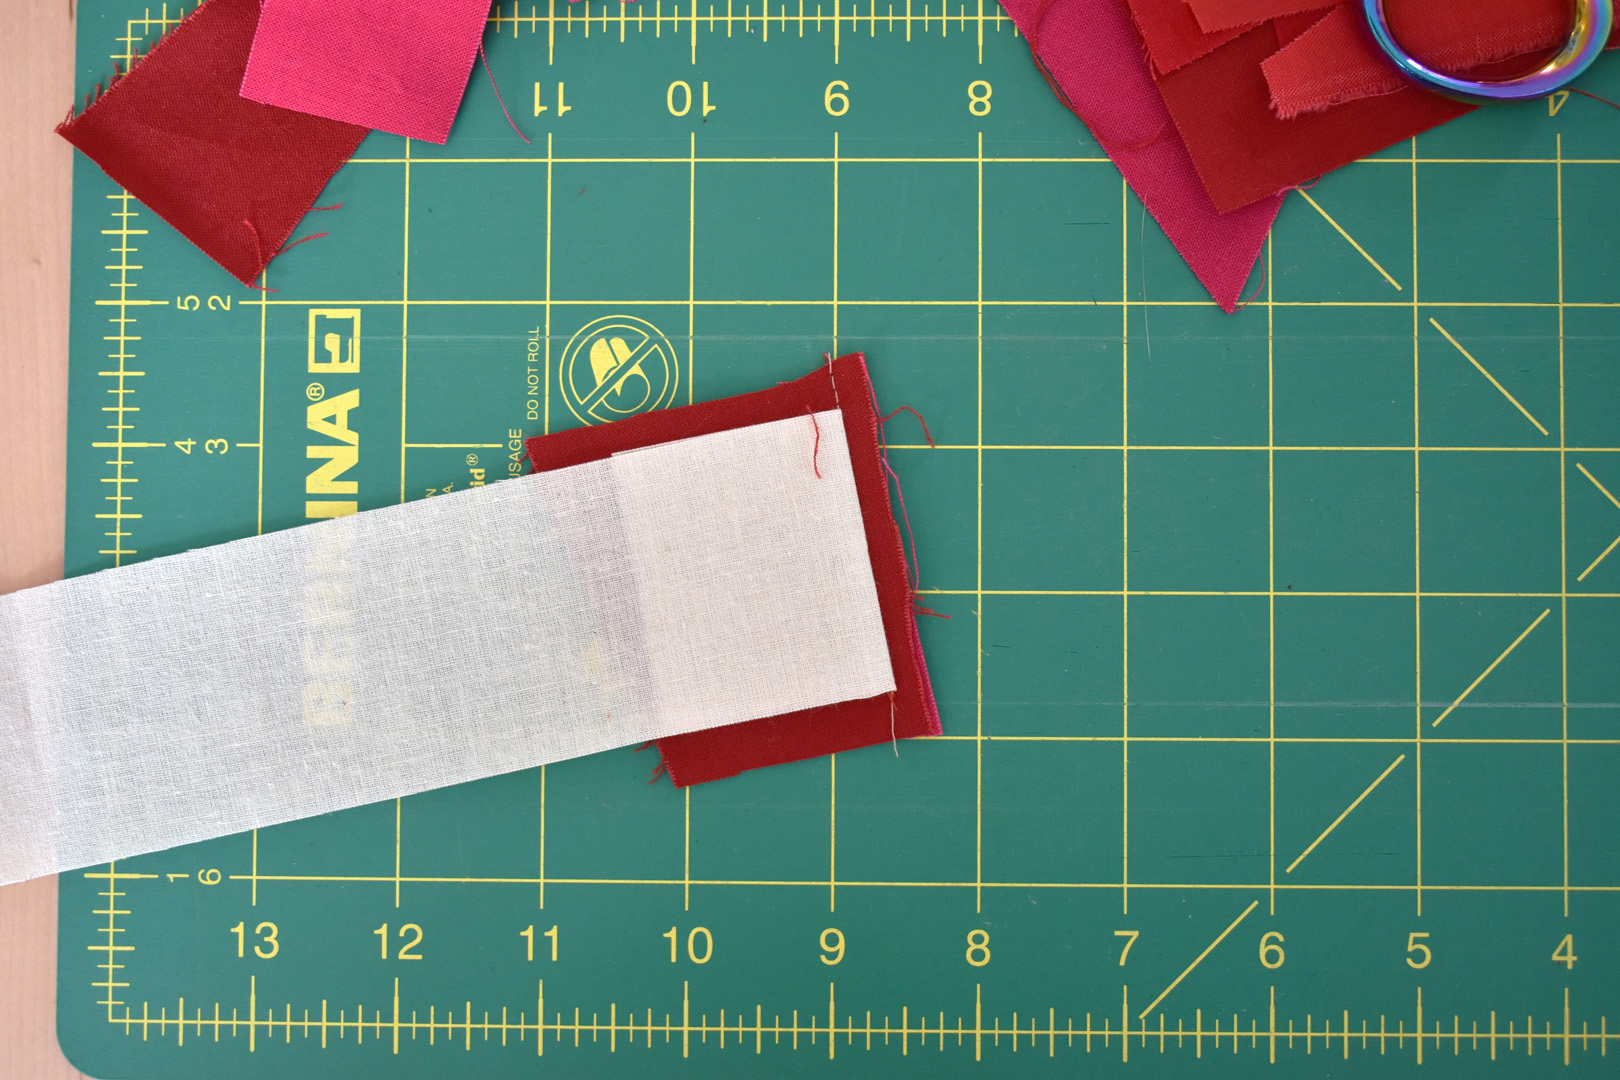
Flip the muslin strip back over the scraps you just stitched to reveal the seam.

If needed, use the small ruler and rotary cutter to trim the seam to 1/4″.
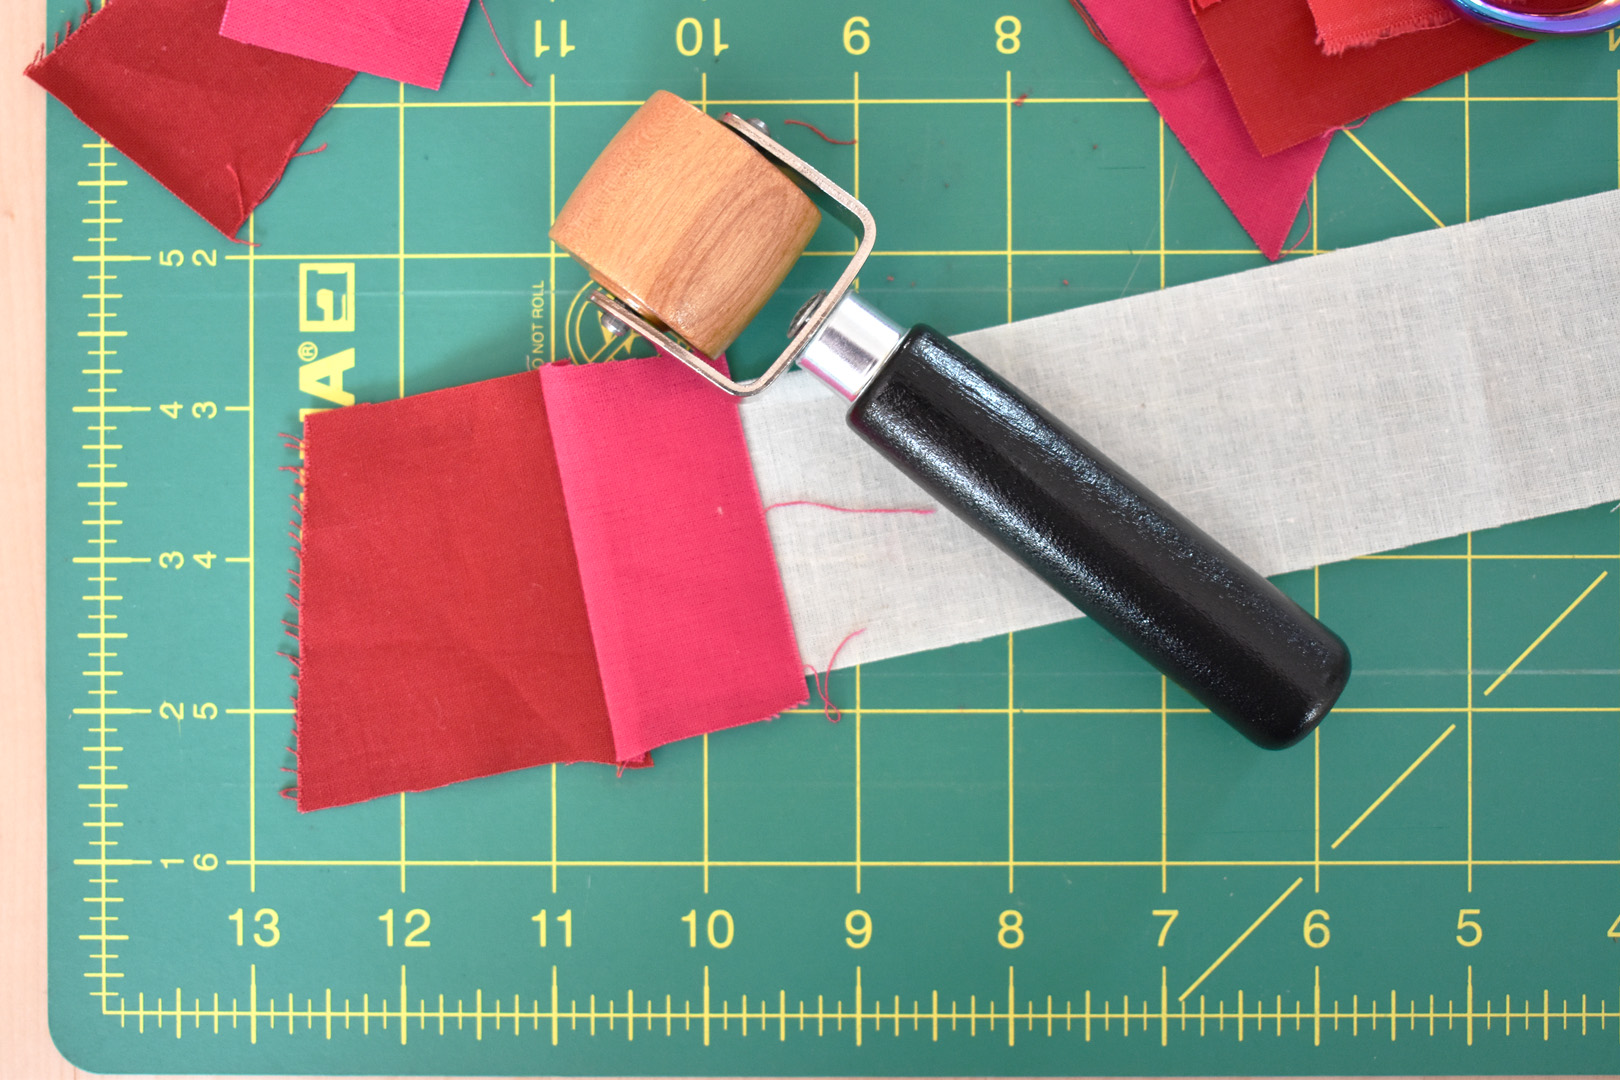
Step 4: Press Seam Open
I use a seam roller to press the seam open right next to my sewing machine. You might also use an iron/pressing board next to your sewing machine, whatever works best for you!
Repeat the above steps until the foundation strip of muslin is completely covered by the scraps of fabric. Watch the video below to see more of my process!
Step 5: Trim the Extra Scrap Fabric from the Strip
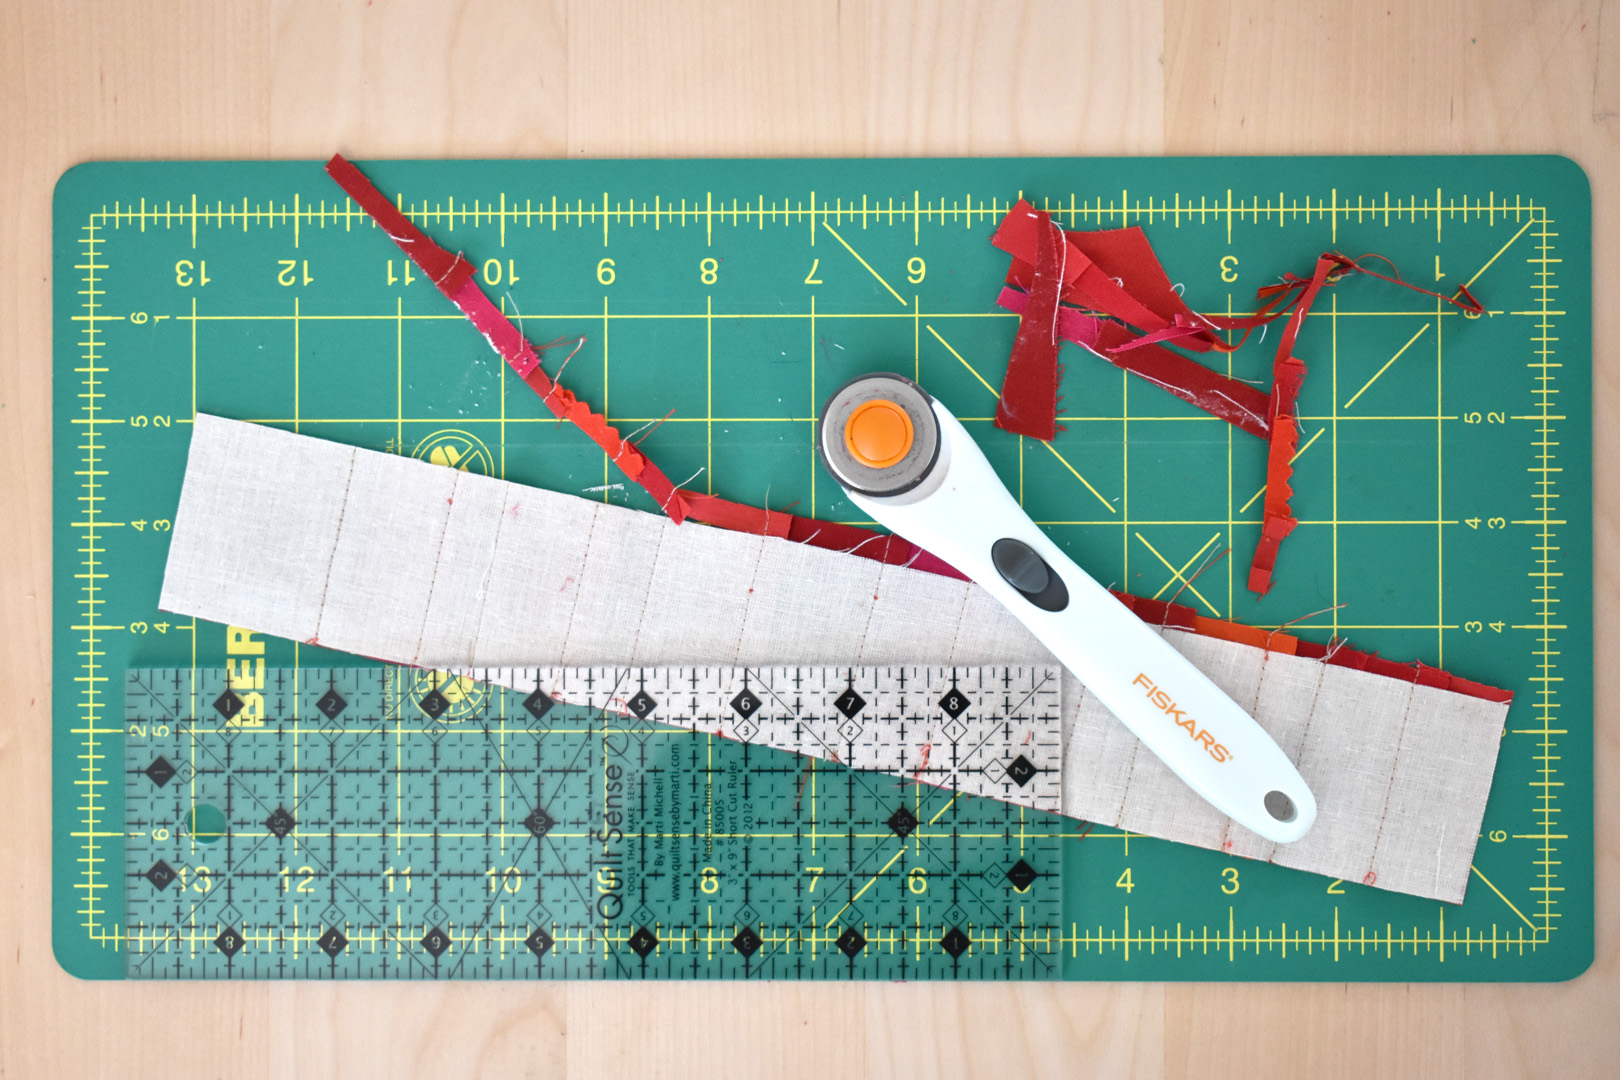
Flip the strip over and carefully trim the overlapping scrap fabric even with the muslin strip.
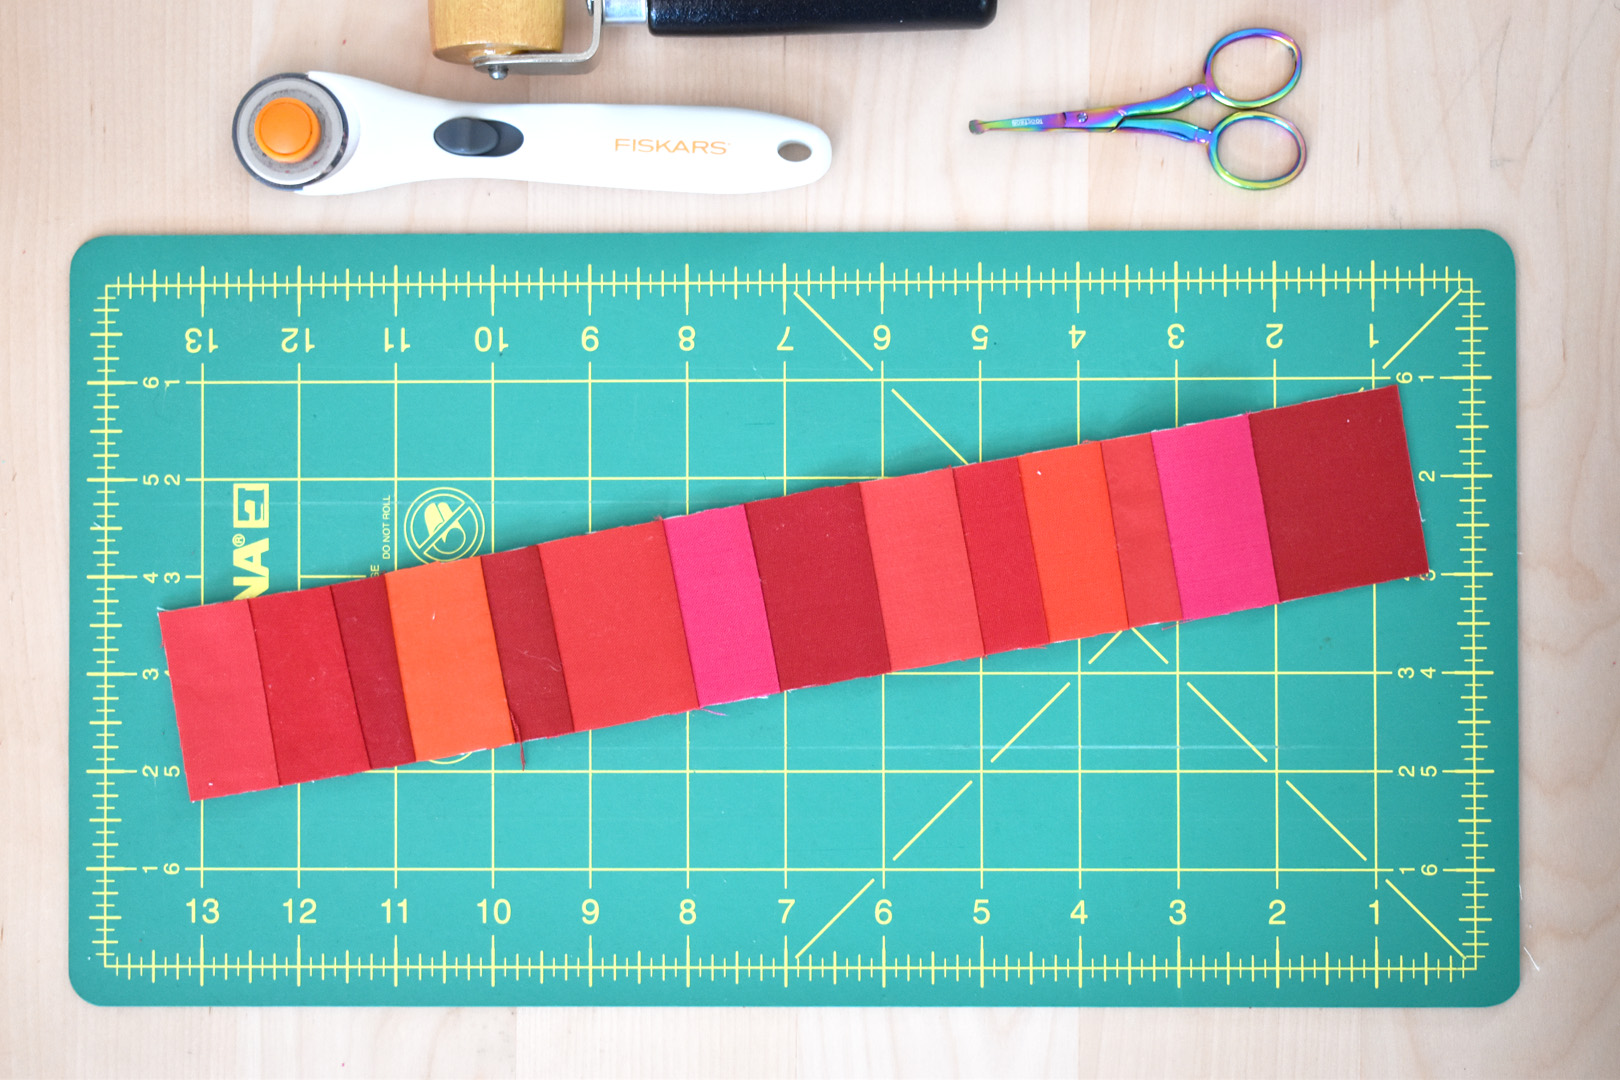
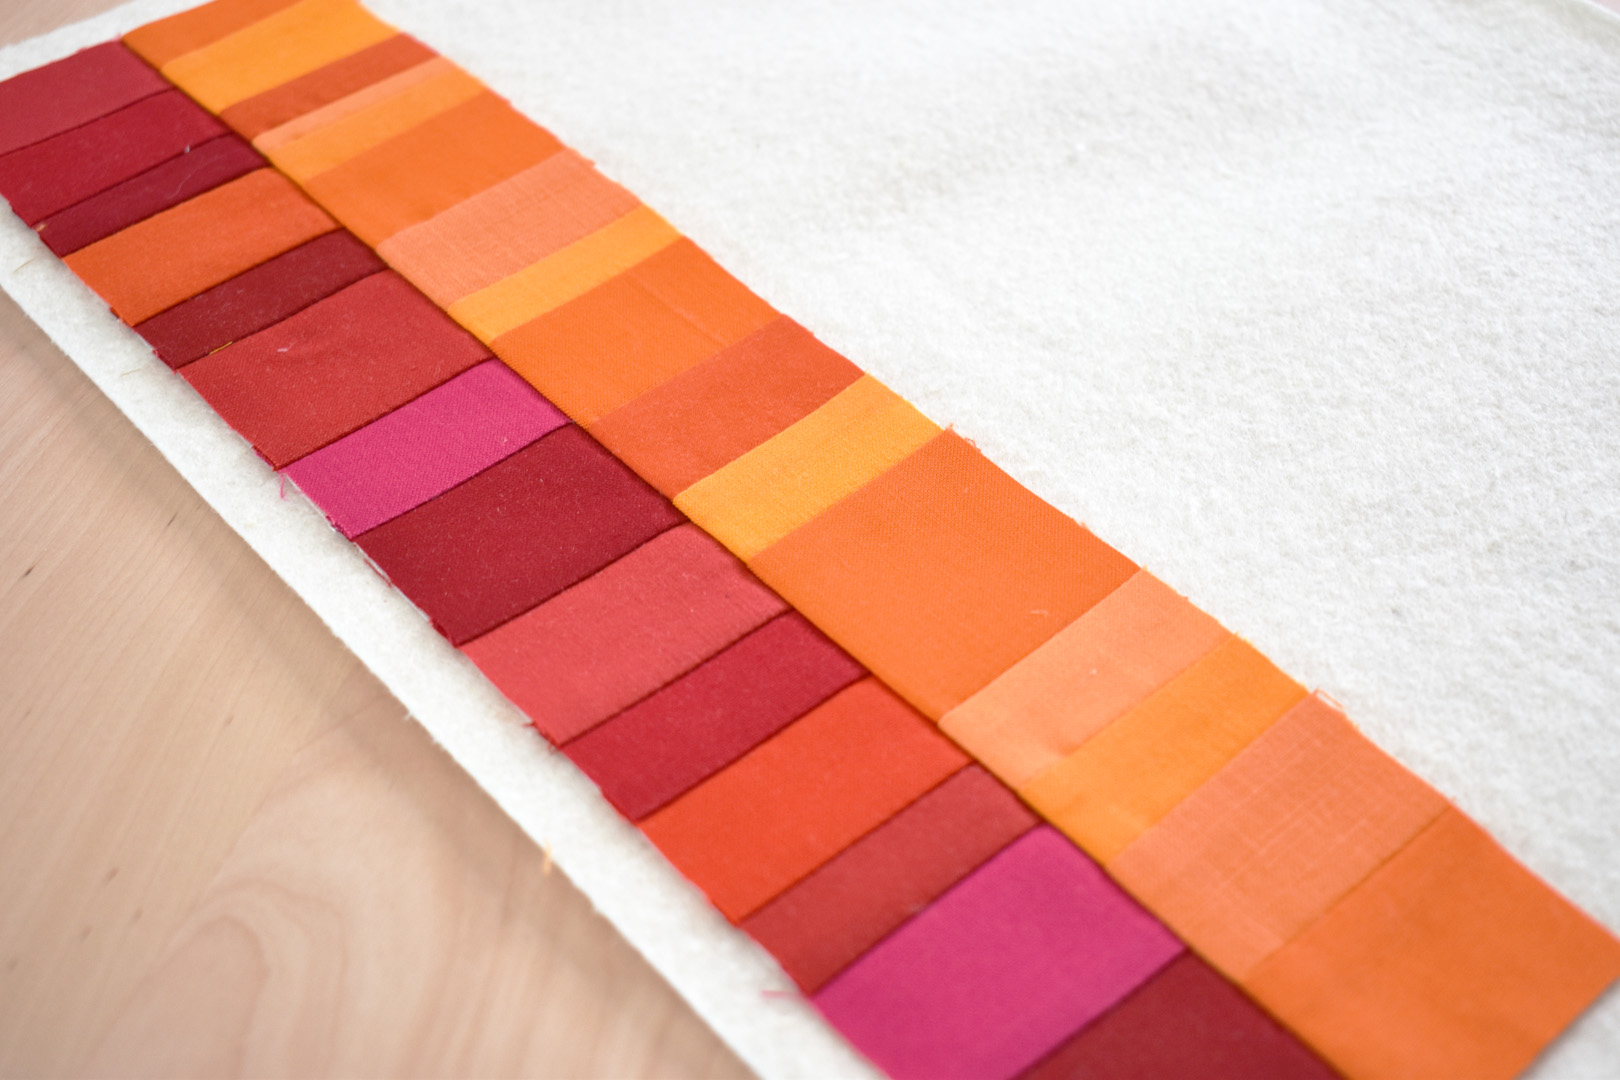
Your foundation pieced scrap strip is finished! Repeat the process for creating each strip with the orange, yellow, green, blue, and violet scraps. Make sure to load your machine with coordinating thread color when piecing each scrap strip. When all 6 strips are finished you are ready to complete the mini quilt.
Making the Pride Flag Mini Quilt
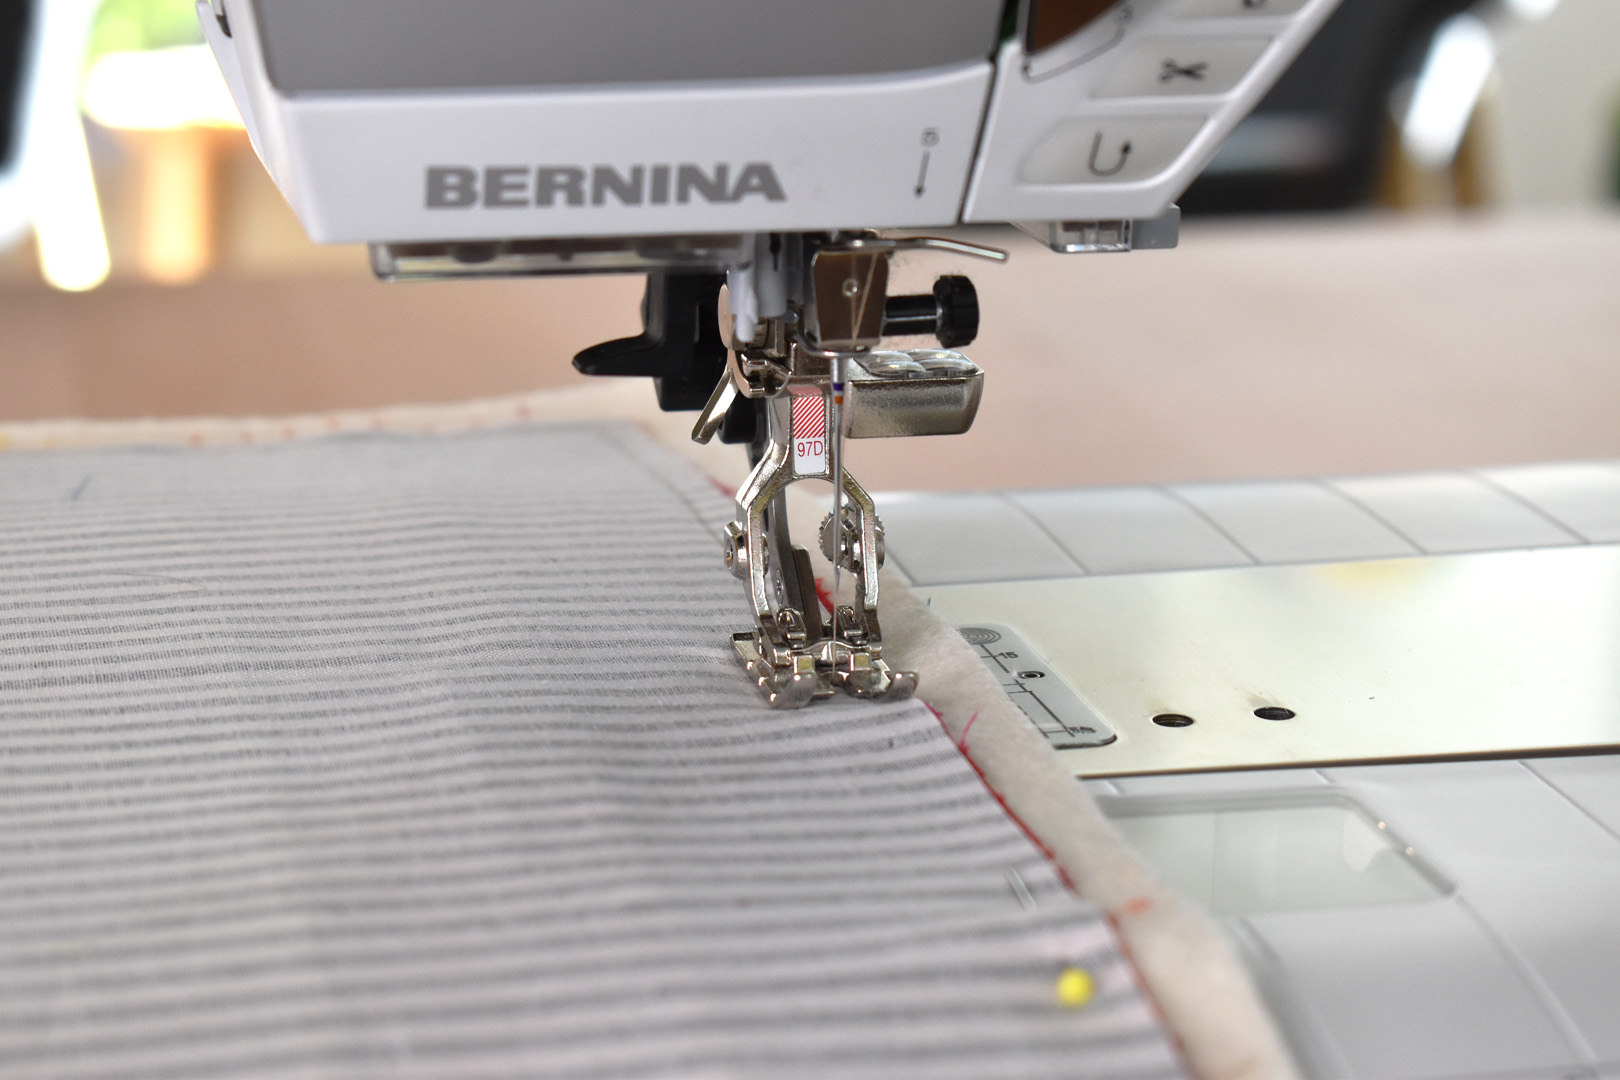
You will need the 6 completed scrap pieced strips and the piece of quilt batting for the next steps. Make sure your sewing machine is still loaded with the neutral color bobbin thread, and that your straight stitch needle plate is still in place along with a Dual Feed foot (I am using #97D), or an even feed foot such as Walking foot #50.
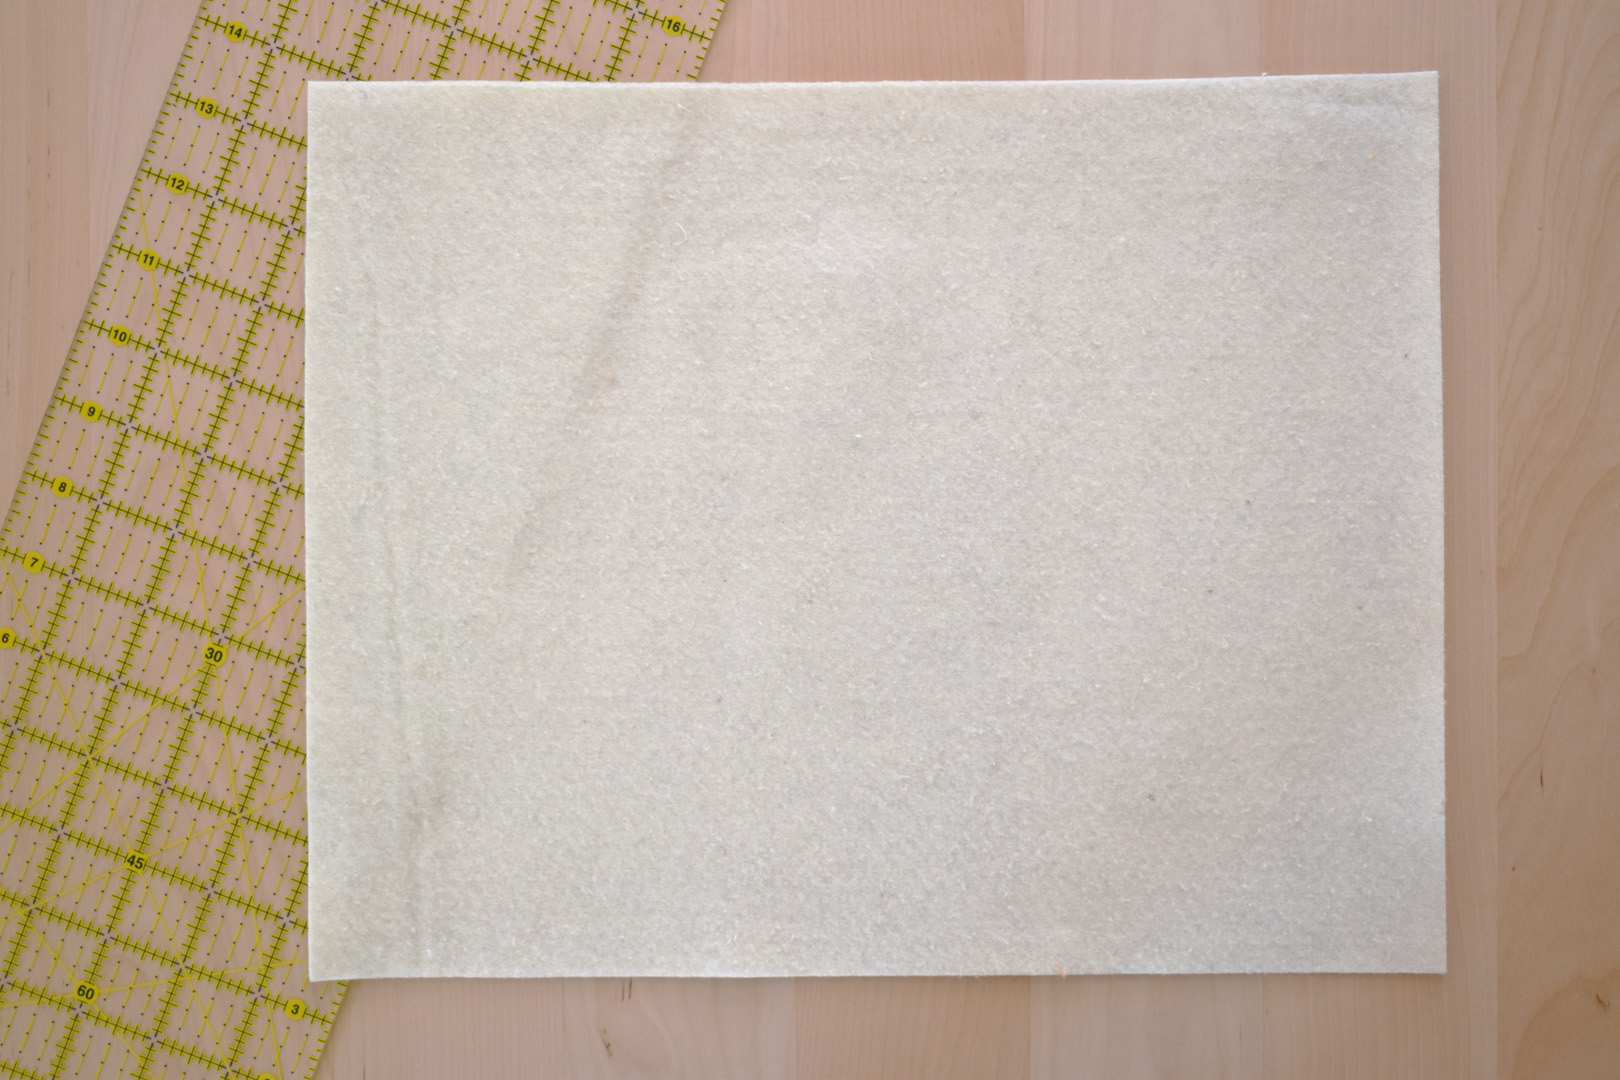
Step 1: Cut the Batting Scrap
Cut the batting scrap to 11″ x 14″.
Step 2: Layer the Strips
Begin with the red strip. Center the strip along one long edge of the batting, making sure there is about 1/4″ to 1/2″ of batting surrounding the edges of the red strip.
Pick up the orange strip and lay it right sides together on top of the red strip. Pin through all layers on the long edge laying next to the large area of the batting.
Step 3: Stitch Through All Layers
Load your machine with red thread, and sew along the pinned edge through all layers with a 1/4″ seam.
Steam press the seam open, pressing the orange strip away from the red strip.

Add a few straight lines of stitching over the red strip to quilt the strip to the batting layer.
I’m simply using the edge of the #97D foot to help guide me along the way. As usual, I’m not super worried about my stitches being exactly straight. If you’d like to make really straight lines try marking a line to follow with a straight edge and fabric marking pen or pencil.

Now to add the next strip in the sequence. Remember, sew them in color order from red to orange, yellow, green, blue, and violet.
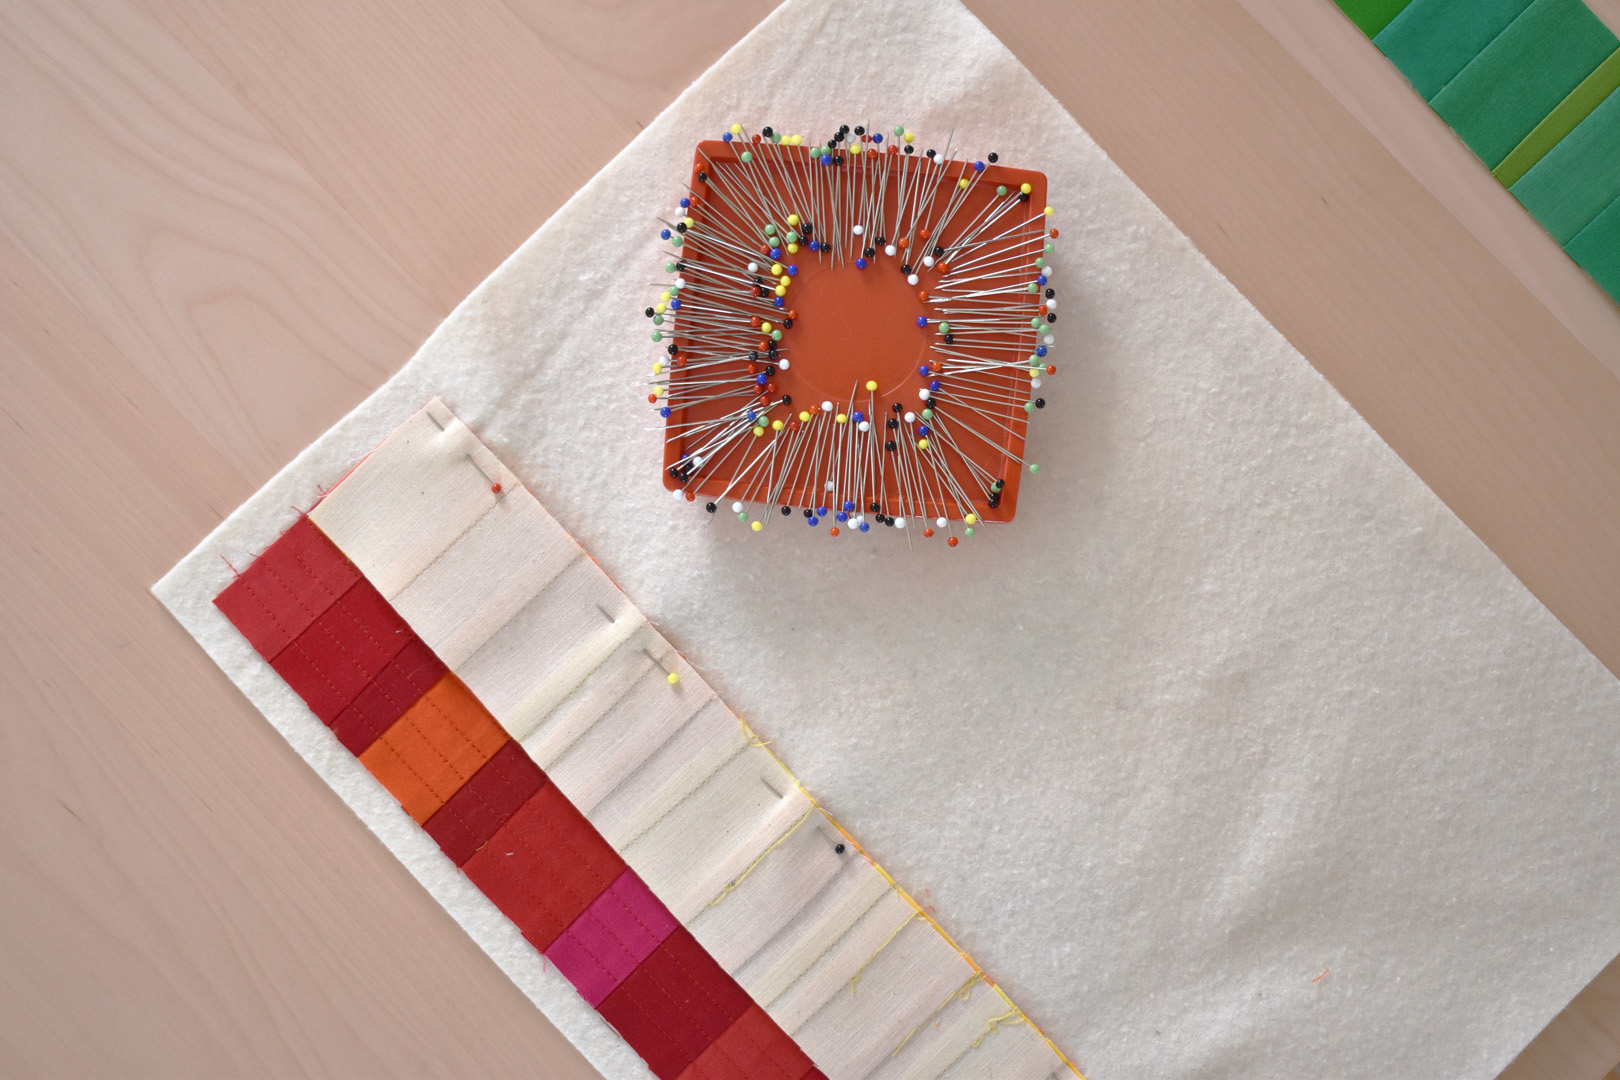
Pin each strip right side down on the previous strip, sewing with a 1/4″ seam, and following up with some straight lines of quilting on the previous strip. Don’t forget to change the top thread color each time you sew so that the quilting stitches will match the color of the strip!
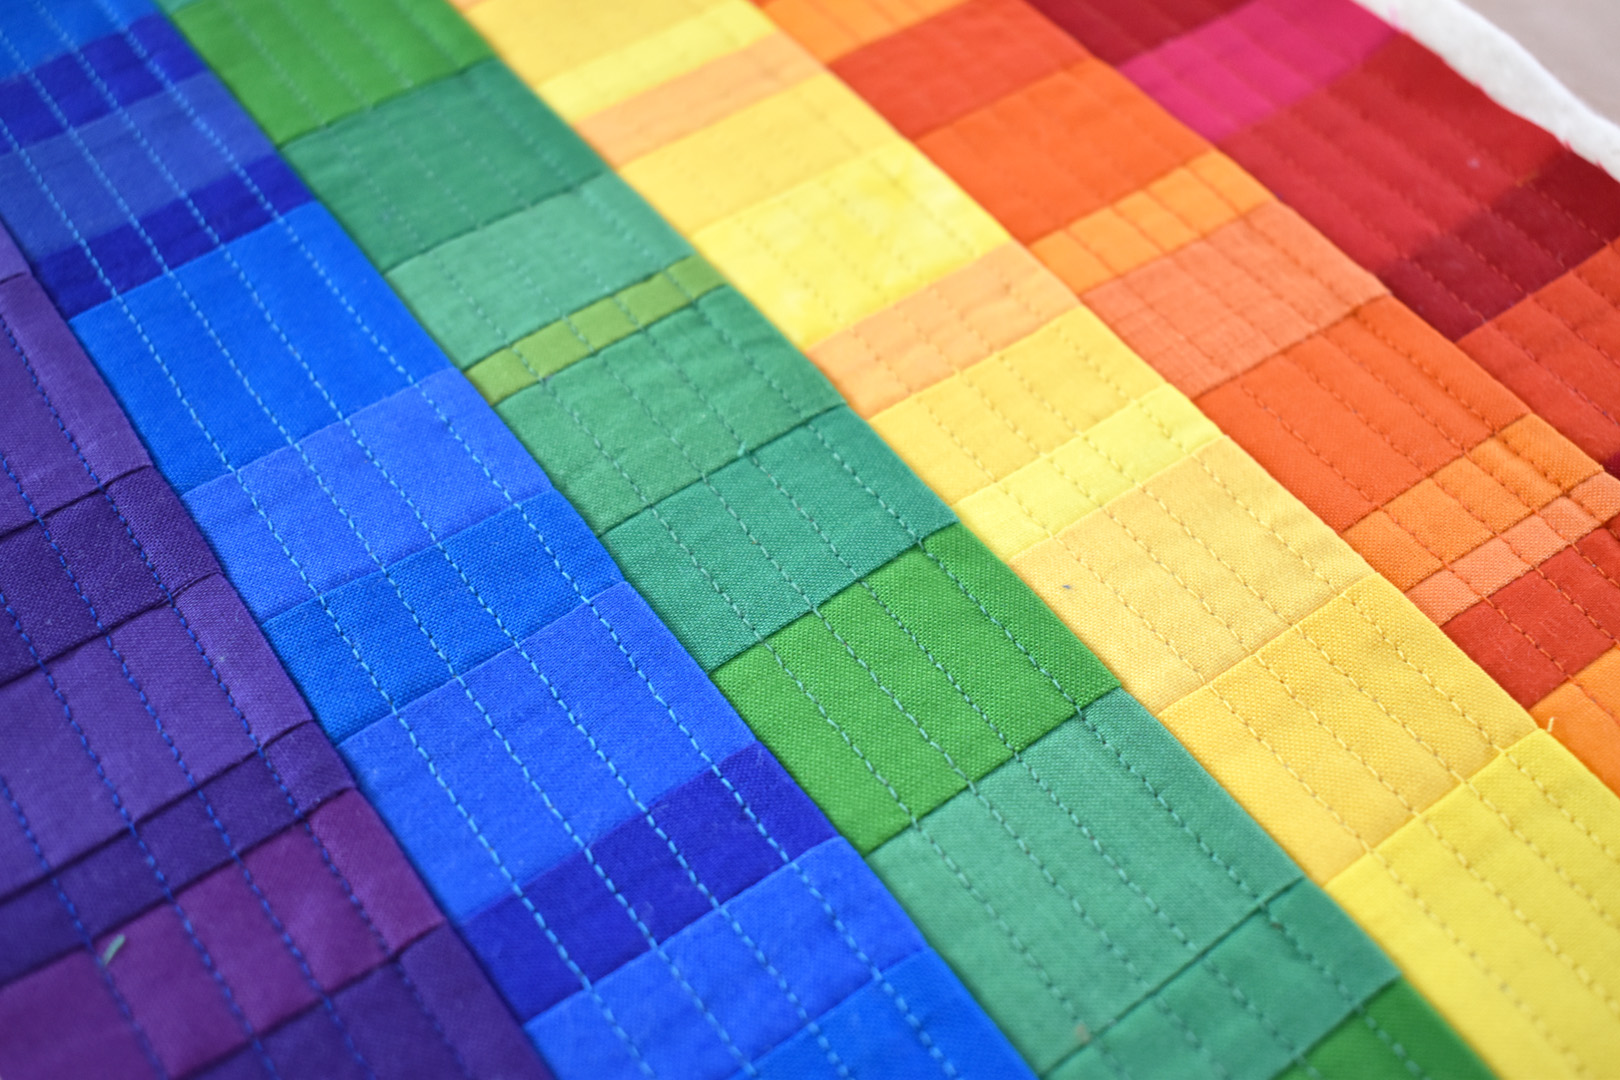
After sewing and quilting all the strips, give the piece a little steam press before moving on to the last step. Almost finished!

Step 6: Cut the Backing Fabric
Measure your finished piece to double-check measurements as sometimes seam allowance may vary a bit. Cut the backing to match; mine measures 13″ wide by 9 1/4″ tall.
Step 7: Staystitch the Opening
Load your machine with the neutral-colored thread in the needle for this last step. Sew along the bottom, long edge of the backing fabric with a straight stitch, a scant 1/4″ away from the edge. This stitching will help stabilize this edge and keep it from stretching or distorting when turning the quilt inside out.
Pin the backing to the quilt top, right sides together. No need to trim the batting at this point. Be sure that the staystitched edge of the backing fabric is pinned along the bottom, violet edge of the top. Be sure to leave an opening about 4″ wide in the middle of the bottom (violet-colored strip) long edge.
Step 8: Stitch All Layers
Sew all around the edges, backstitching at both ends of the opening to create a strong seam. Use the edges of the backing fabric as your guide to sew a 1/4″ seam.

Now trim the batting even with the backing fabric, and clip the corners close to the stitching.
Step 9: Turn the Quilt Inside Out Through the Opening

Press the quilt flat, making sure to press seam allowance to the inside along the opening.

Step 10: Hand Stitch the Opening Closed
Finished!
Used Products


What you might also like


One comment on “How to Sew a Pride Flag Mini Quilt”
Leave a Reply
You must be logged in to post a comment.

Erika,
I love this! It blows my mind how similar we are.