Freestanding Lace Tutorial: Butterfly Shadow Box
Hi! I’m Kate of Tough Kitten Crafts and I empower sewists to become fearless with machine embroidery through online education, a supportive community, and easy machine embroidery projects just like this beautiful Freestanding Lace tutorial.
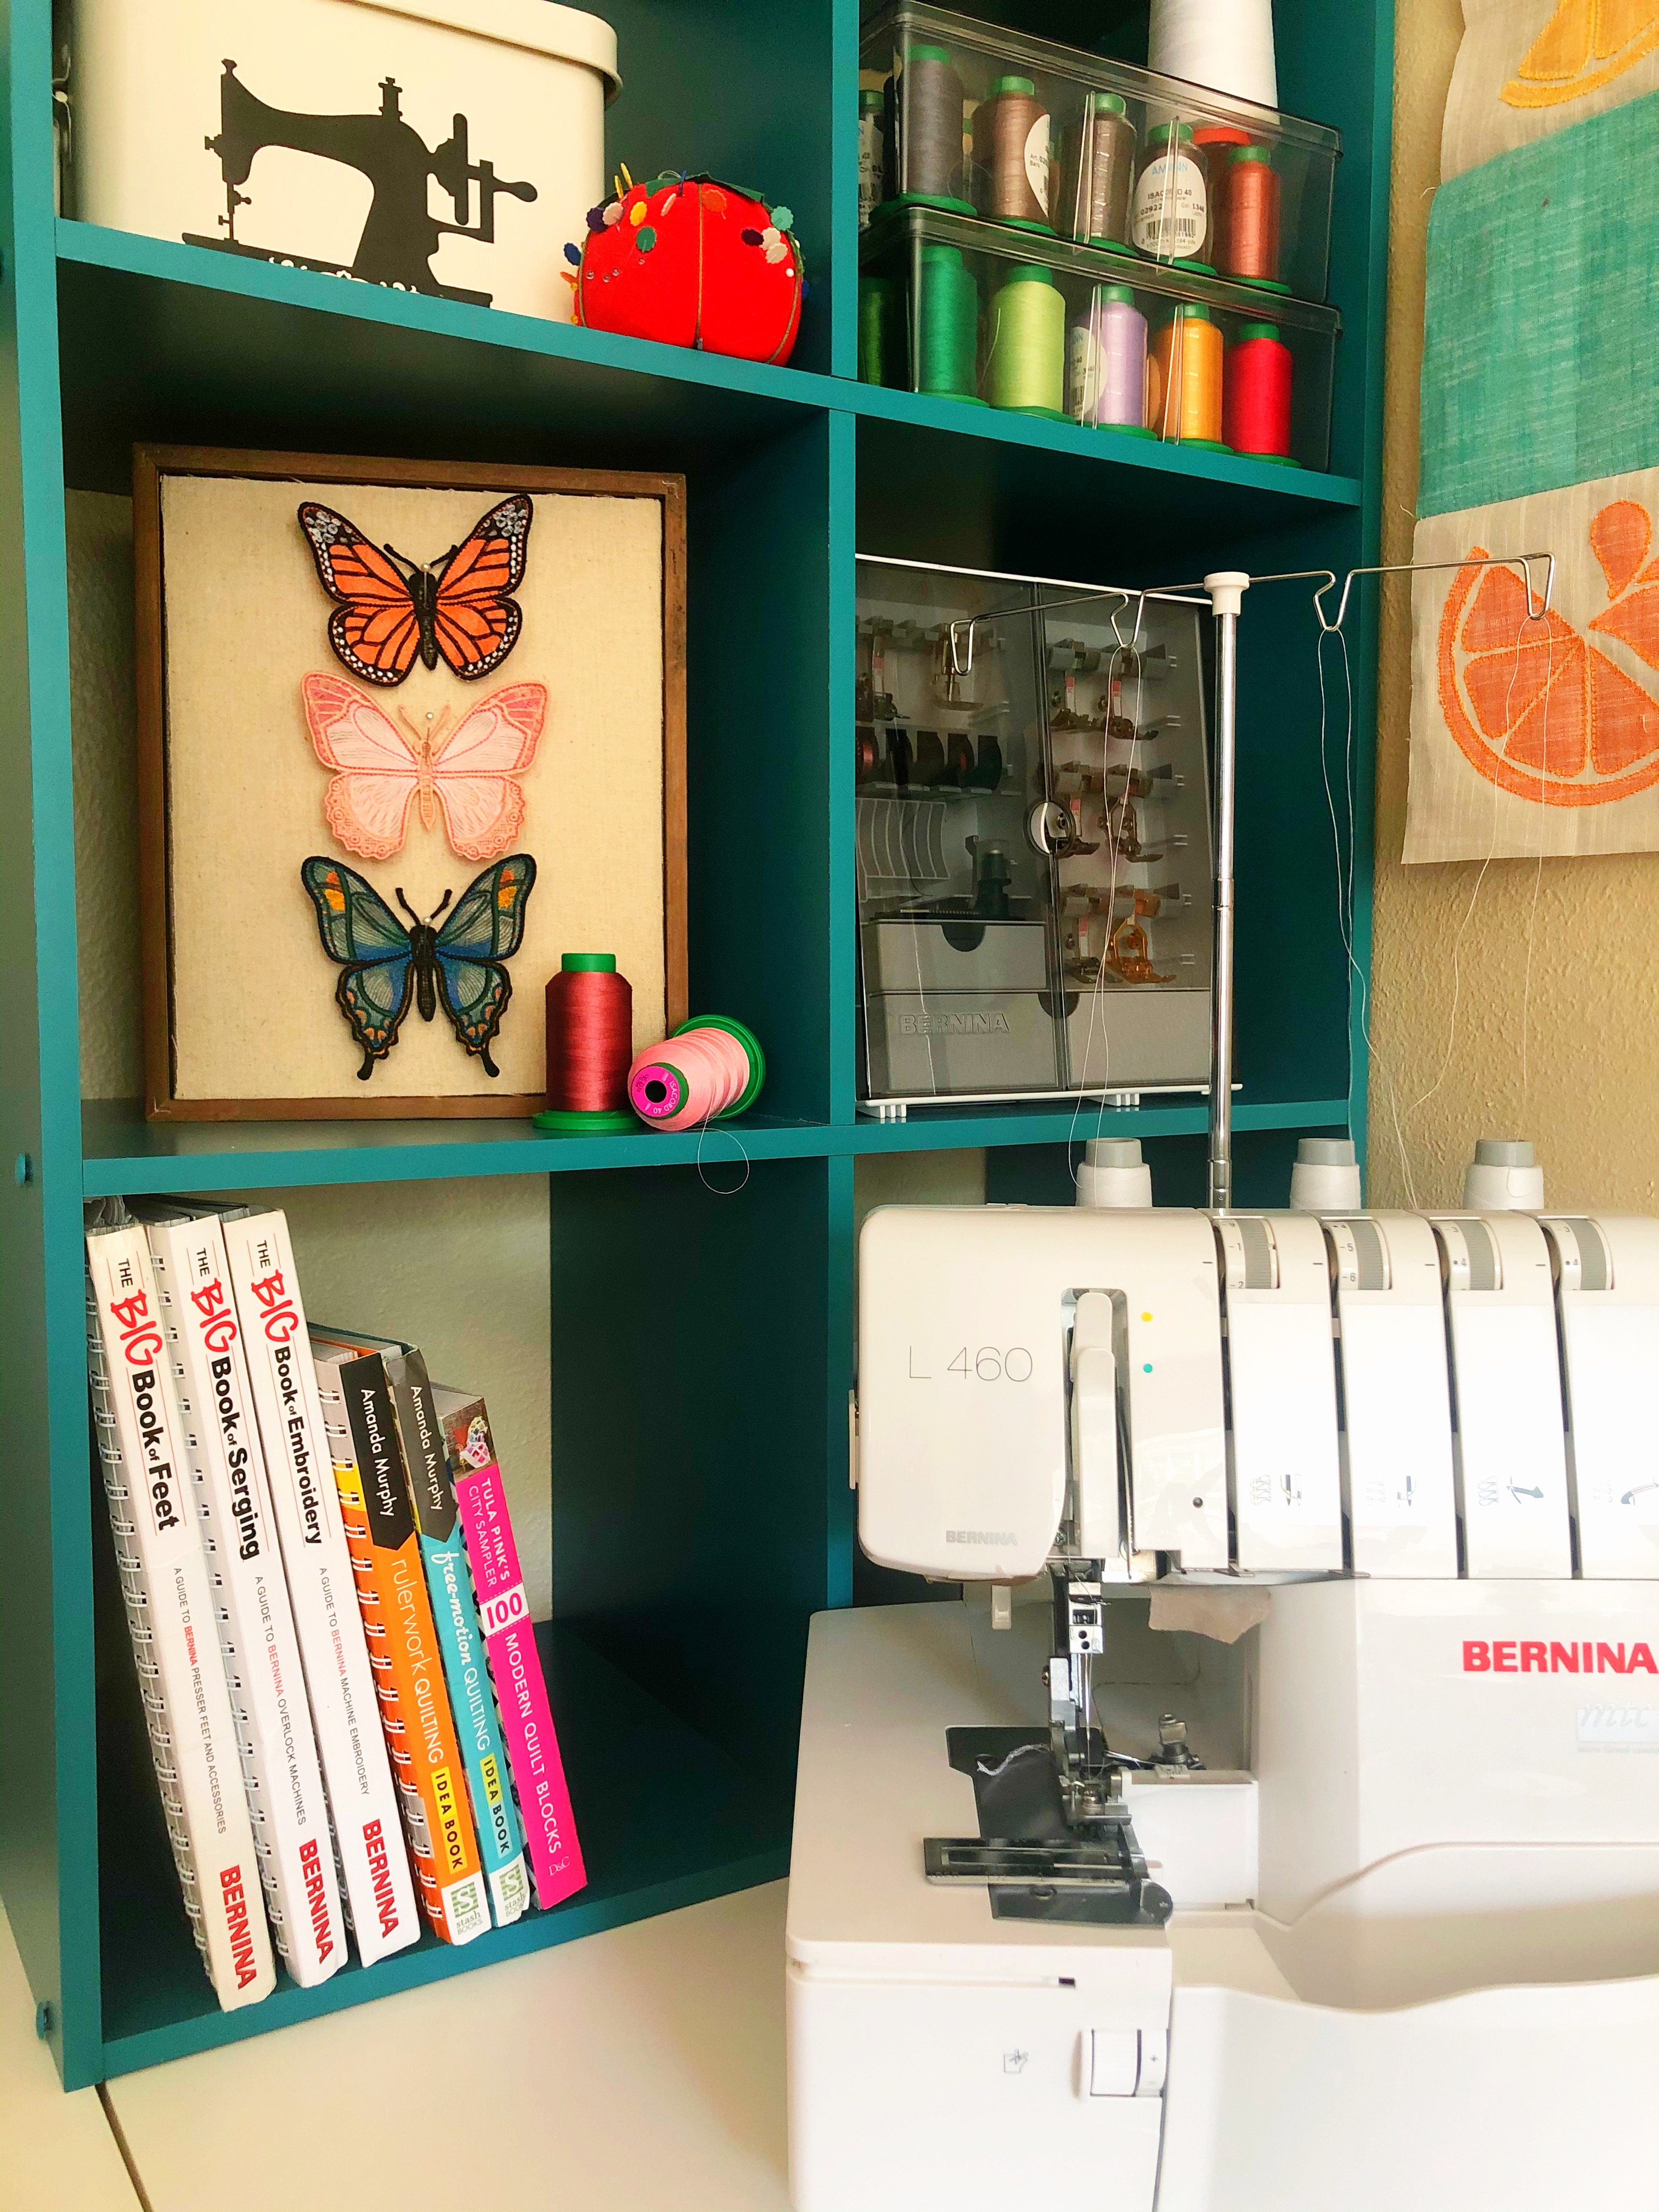
I love filling my home with cute second-hand and vintage finds from thrift shops, antique stores, and estate sales. I have been wanting one of these beautiful butterfly frames but somehow I only run into ones that are hugely expensive or in very sad shape.
I made a set of these beautiful freestanding lace butterflies to show off an Aurifil thread collection for a booth at a quilt show. They turned out so pretty and I have been looking for a great reason to make more. One day it hit me . . these freestanding lace butterflies would be so cute in a shadow box! I could make my own cute little butterfly frame.
I based my butterflies off my favorites from a poster I have in my sewing room but you, of course, can choose whatever colors you like; whether they are rooted in reality or made up to fit your fave color scheme, the possibilities are endless.
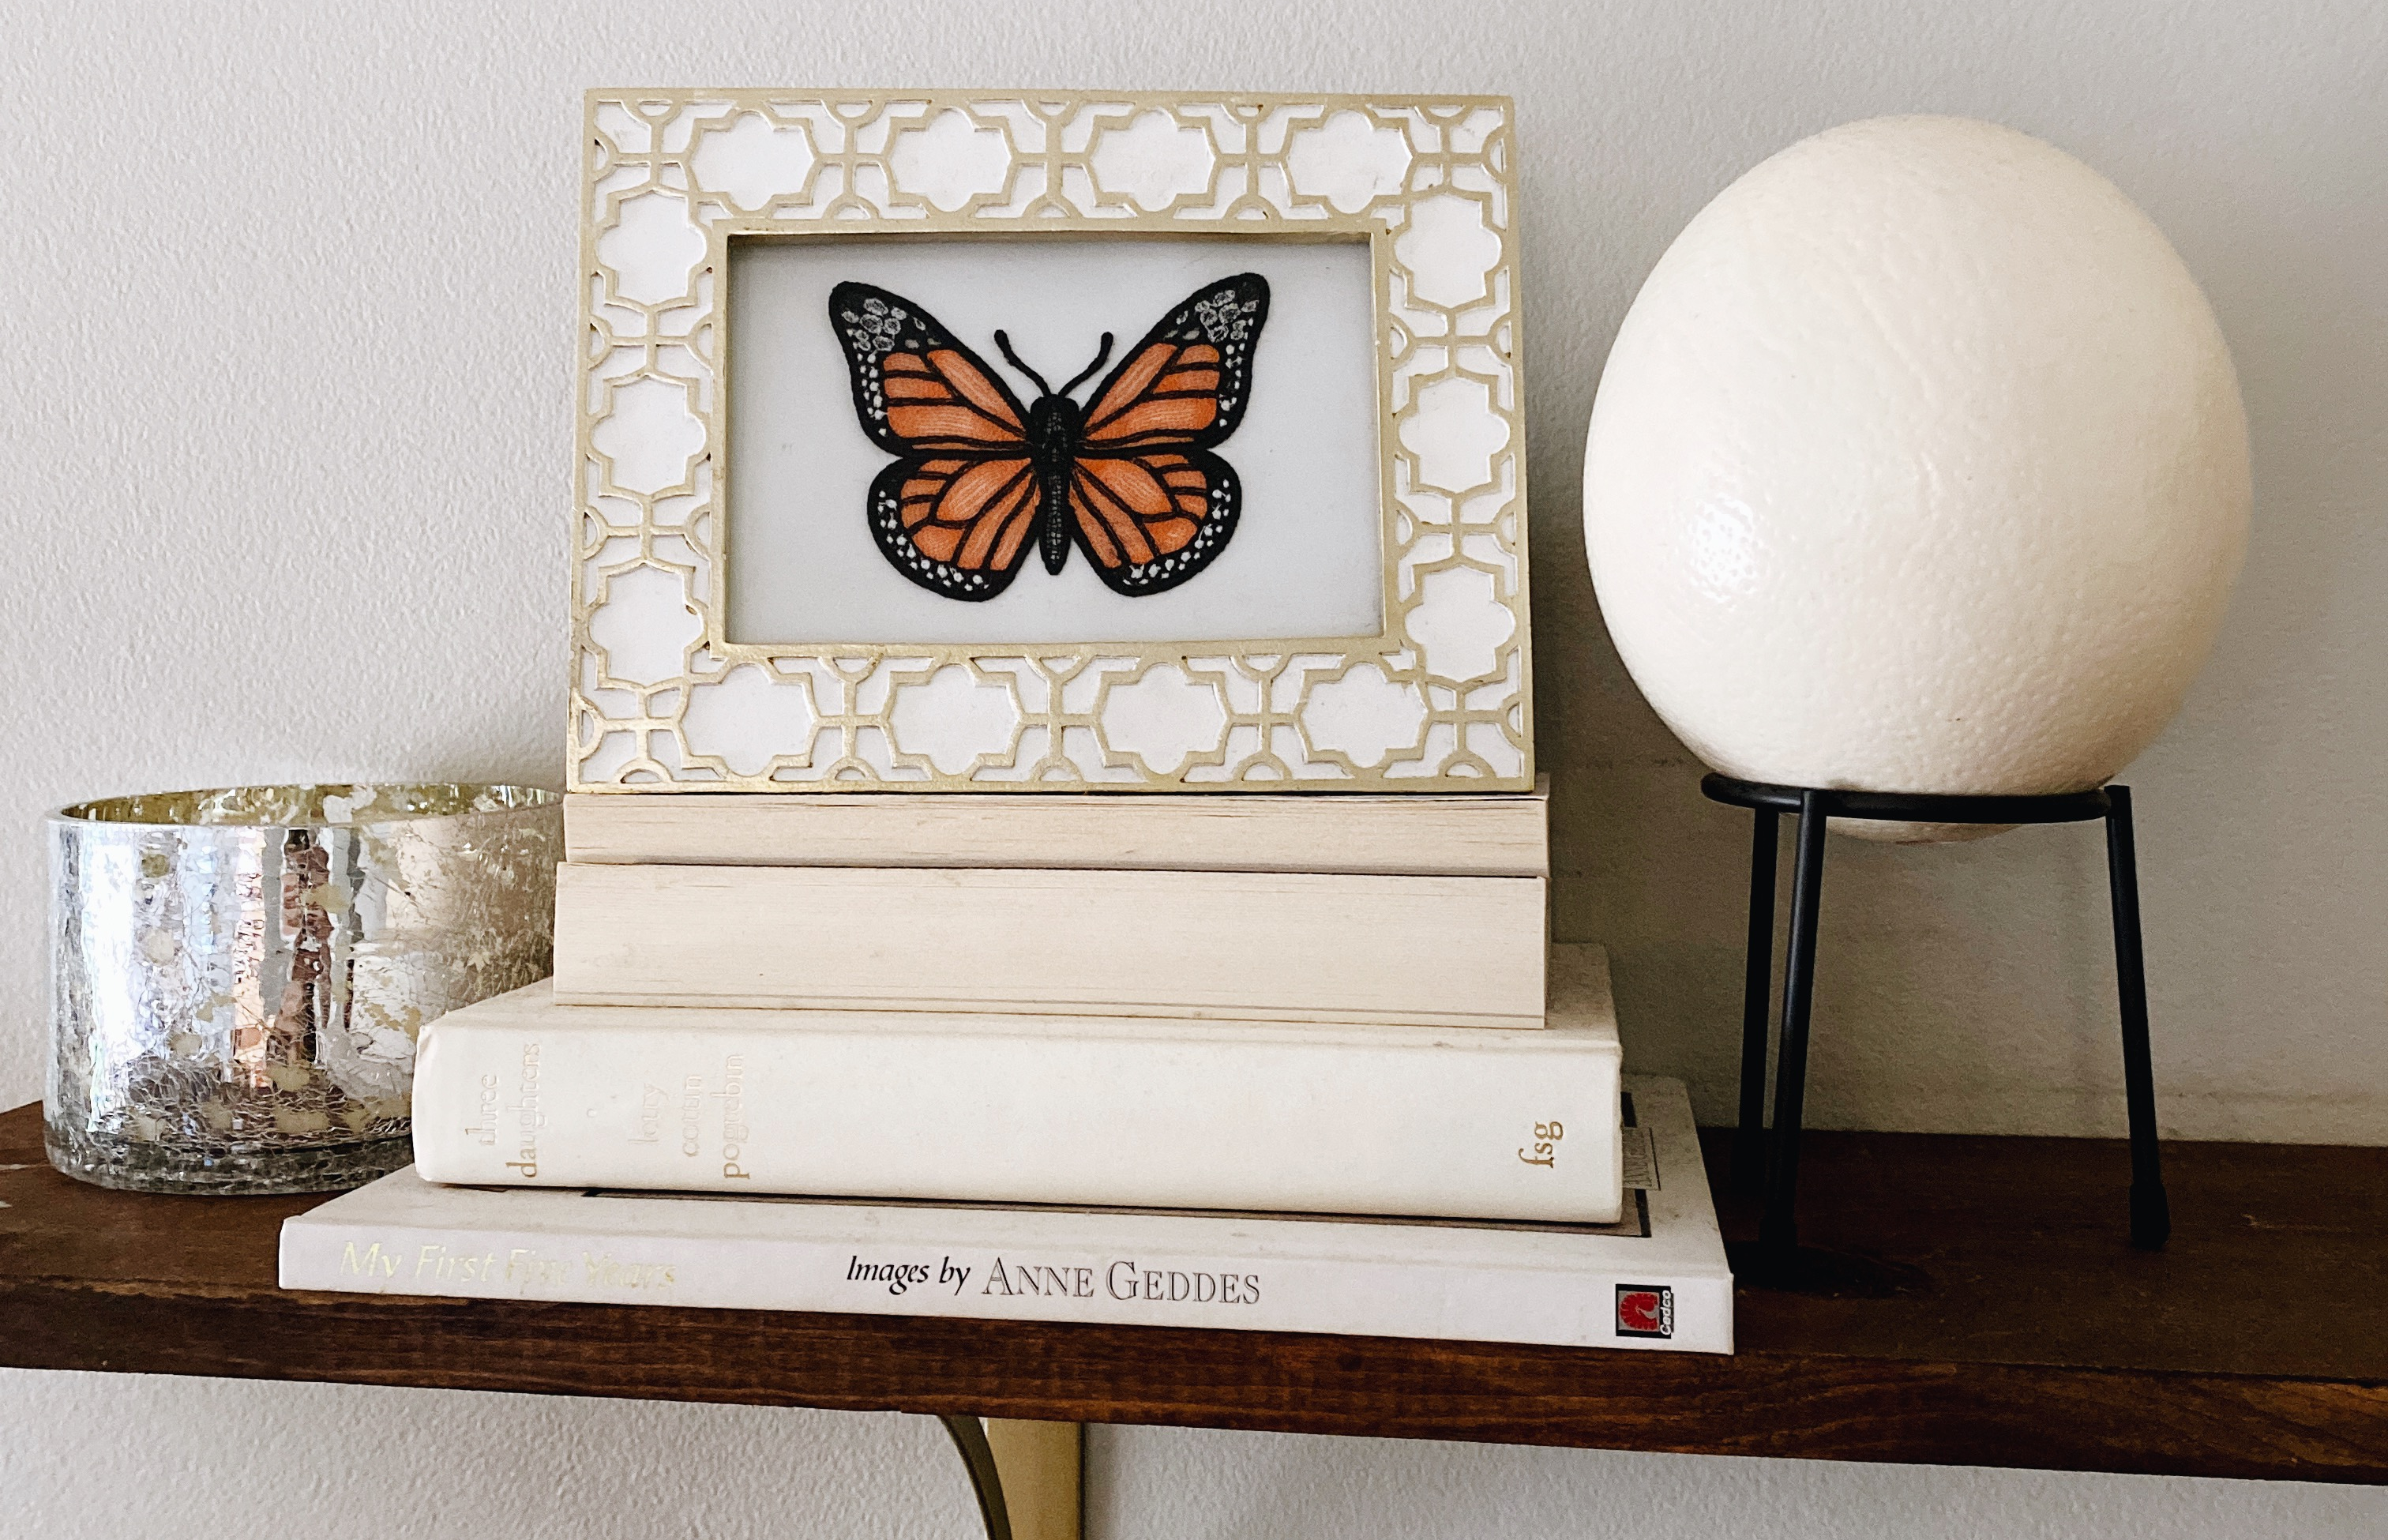
Below you’ll see the more minimalist version I made for my sister-in-law:
This project combines my two absolute favorite elements in a handmade project:
- Big impact
- Fast and simple to make
And as a bonus, you get to practice some fun techniques in your BERNINA!
Let’s jump in . . .
Supplies to Make a Freestanding Lace Butterfly Shadowbox:
- Frame or shadow box to fit your butterflies (mine came with pins for the inside)
- 6″x6″ scraps of organza per butterfly (I used a blush color)
- OESD Aquamesh WashAway Stabilizer
- OESD Luminous Butterflies collection
- OESD Expert Embroidery Tape TearAway
- Assorted thread (I used Isacord here but have used Aurifil 40 wt before)
- T-Pins
- 80/21 Microtex Needle
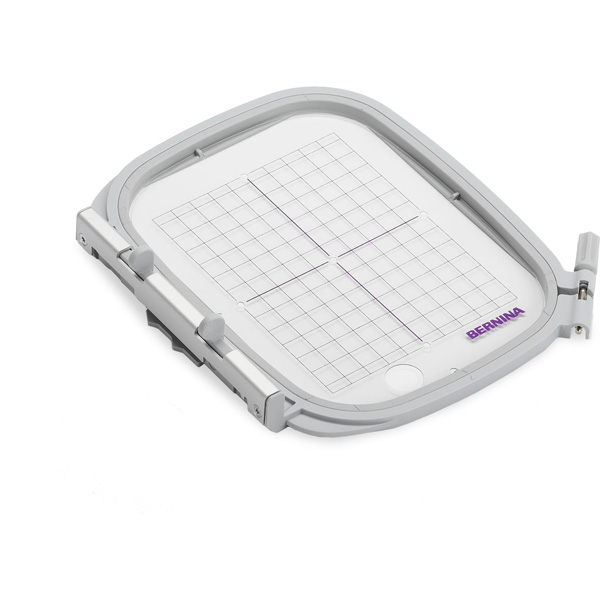
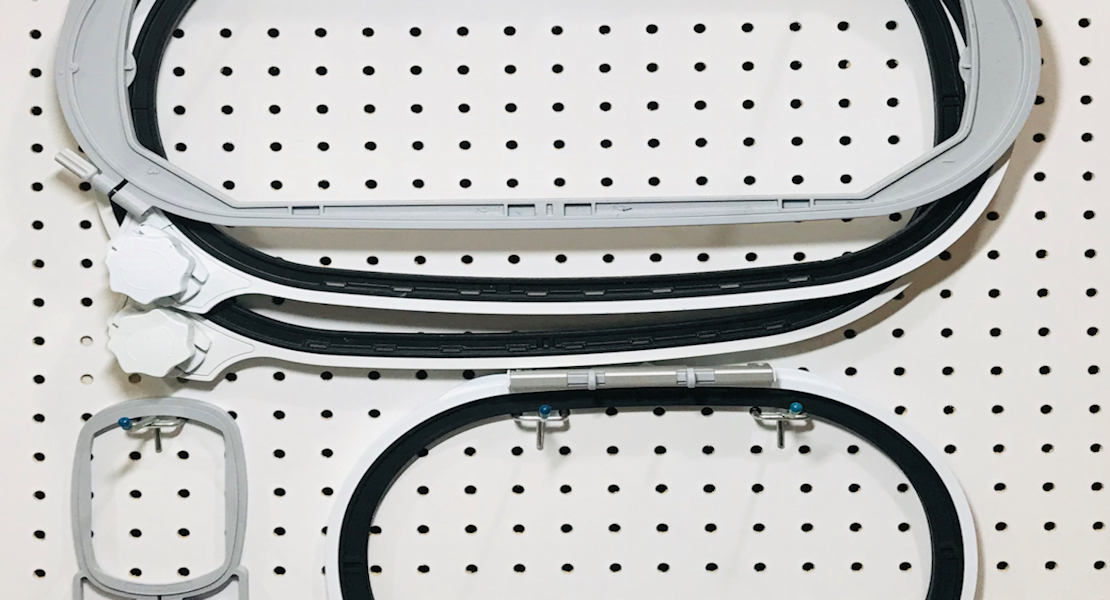
- Medium Hoop
- Microtex Needle
- Scissors
Instructions to Make a Freestanding Lace Butterfly Shadowbox:
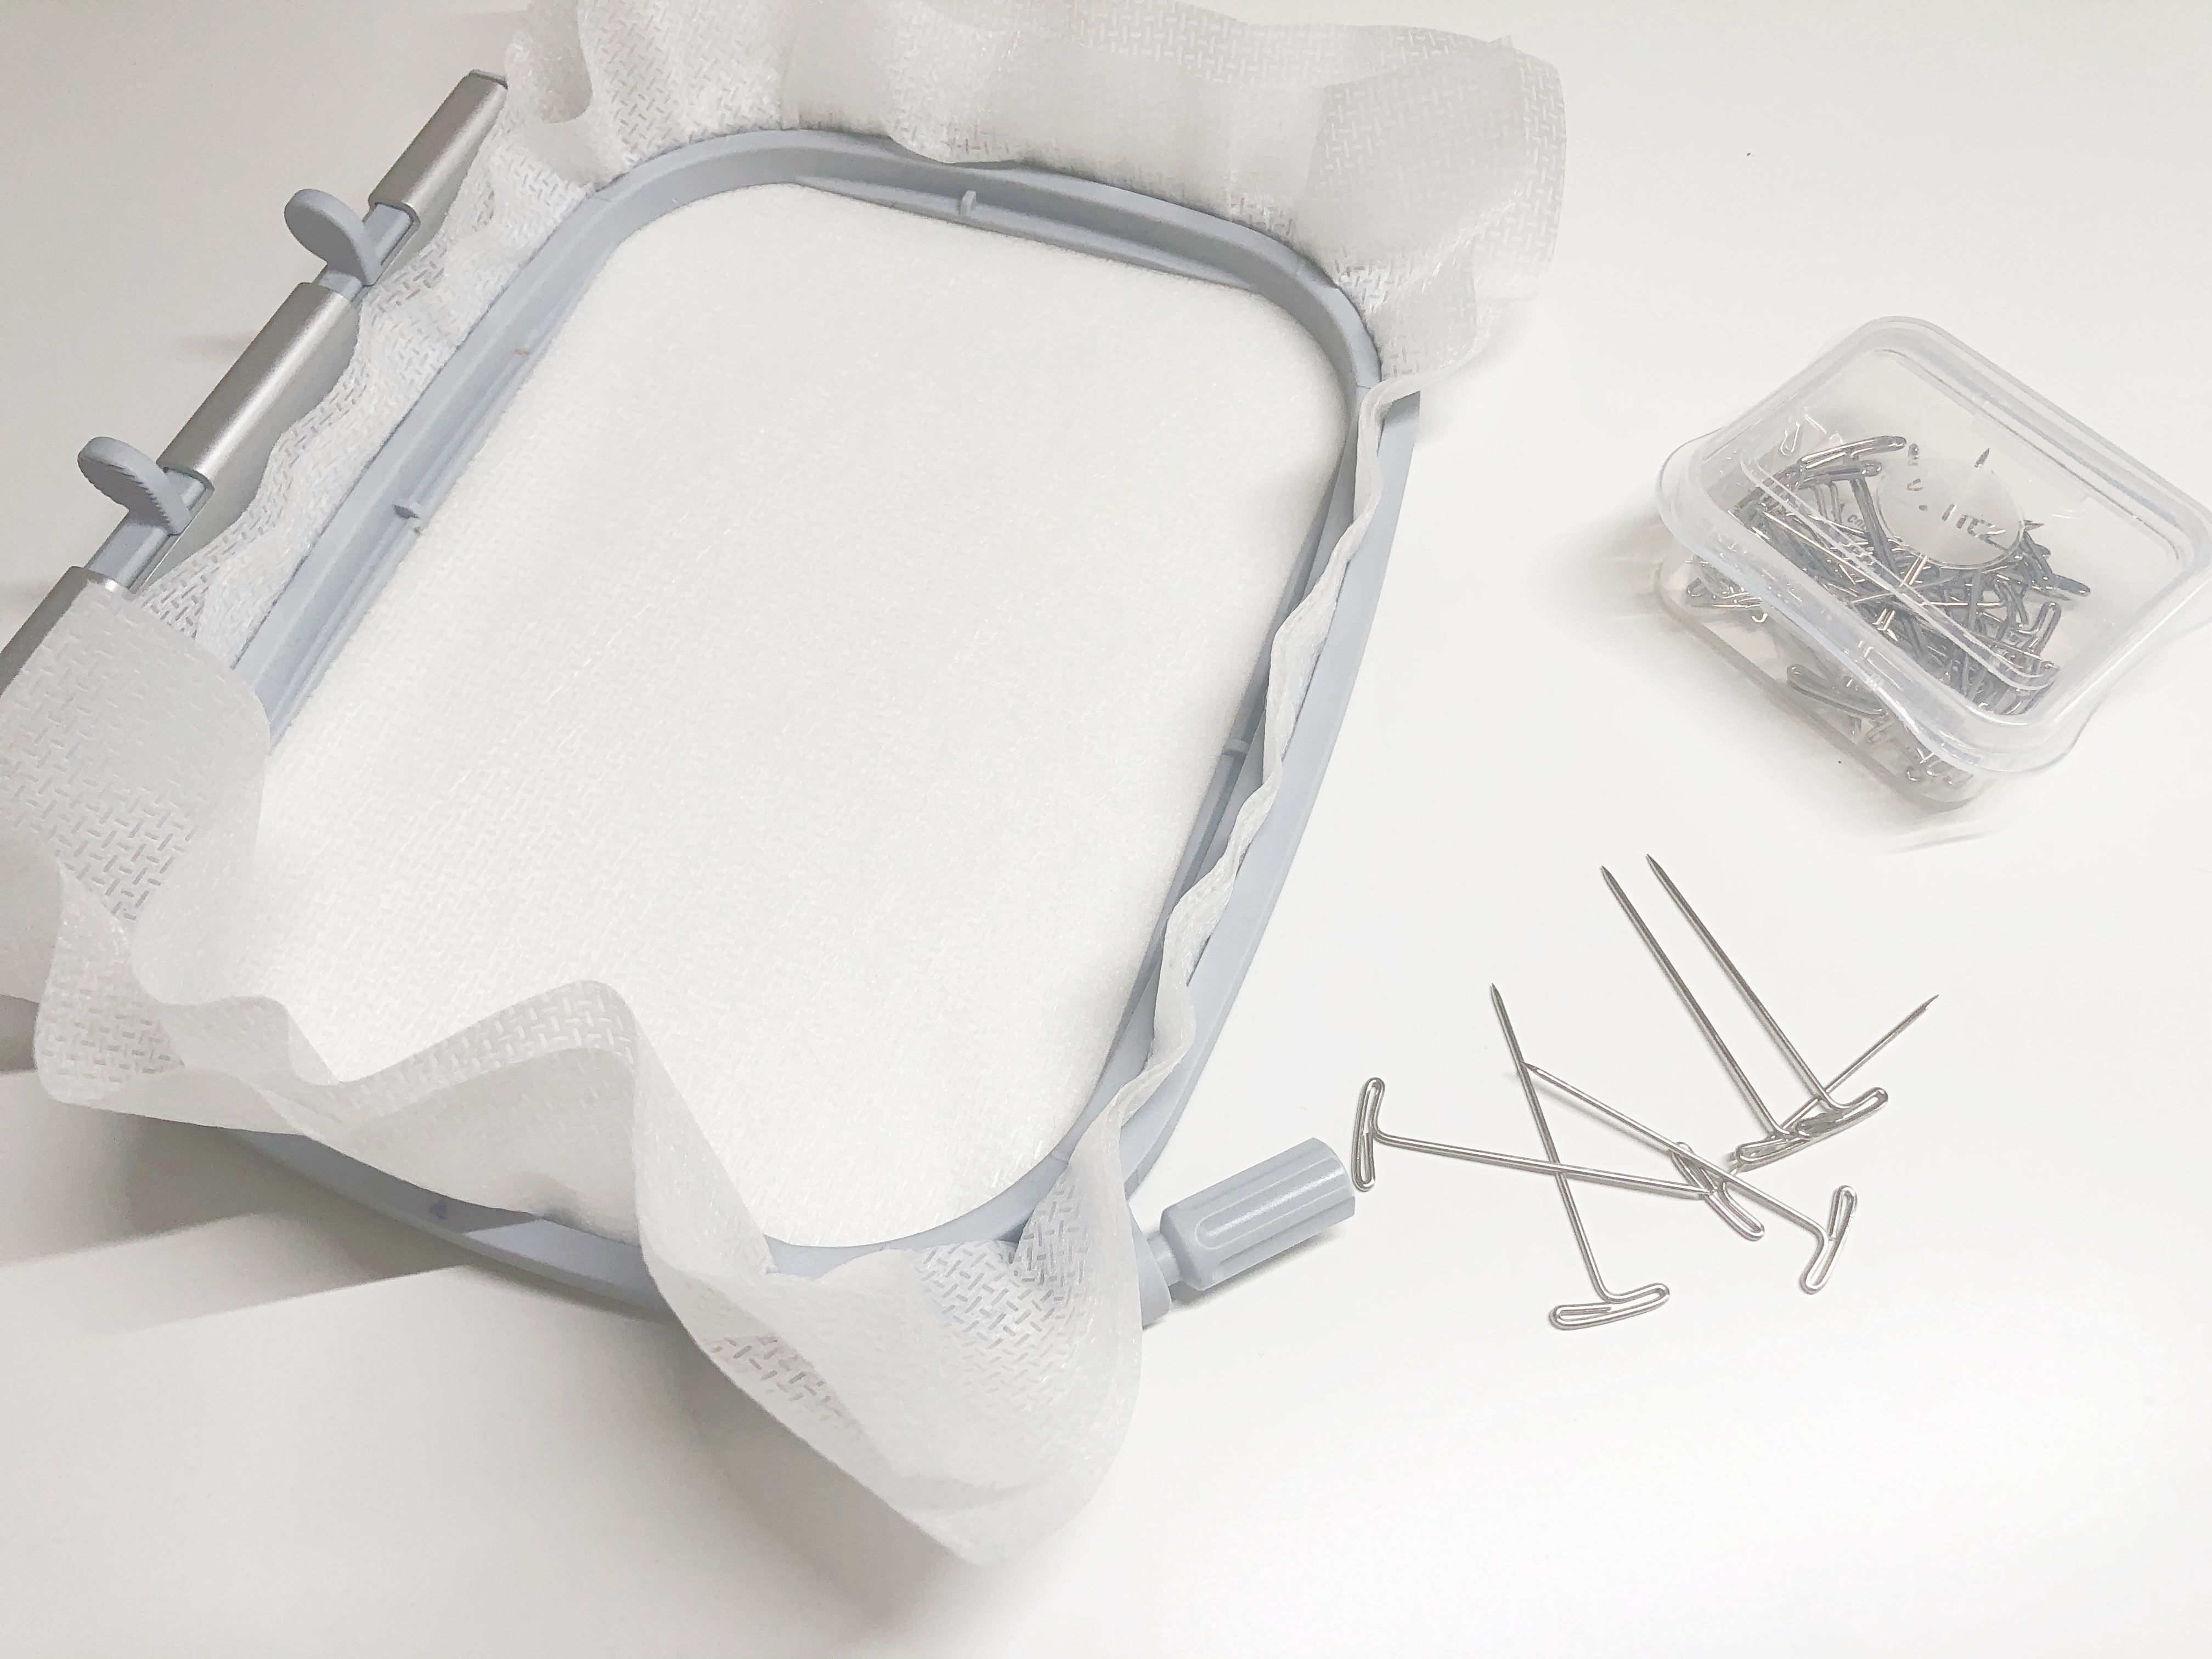
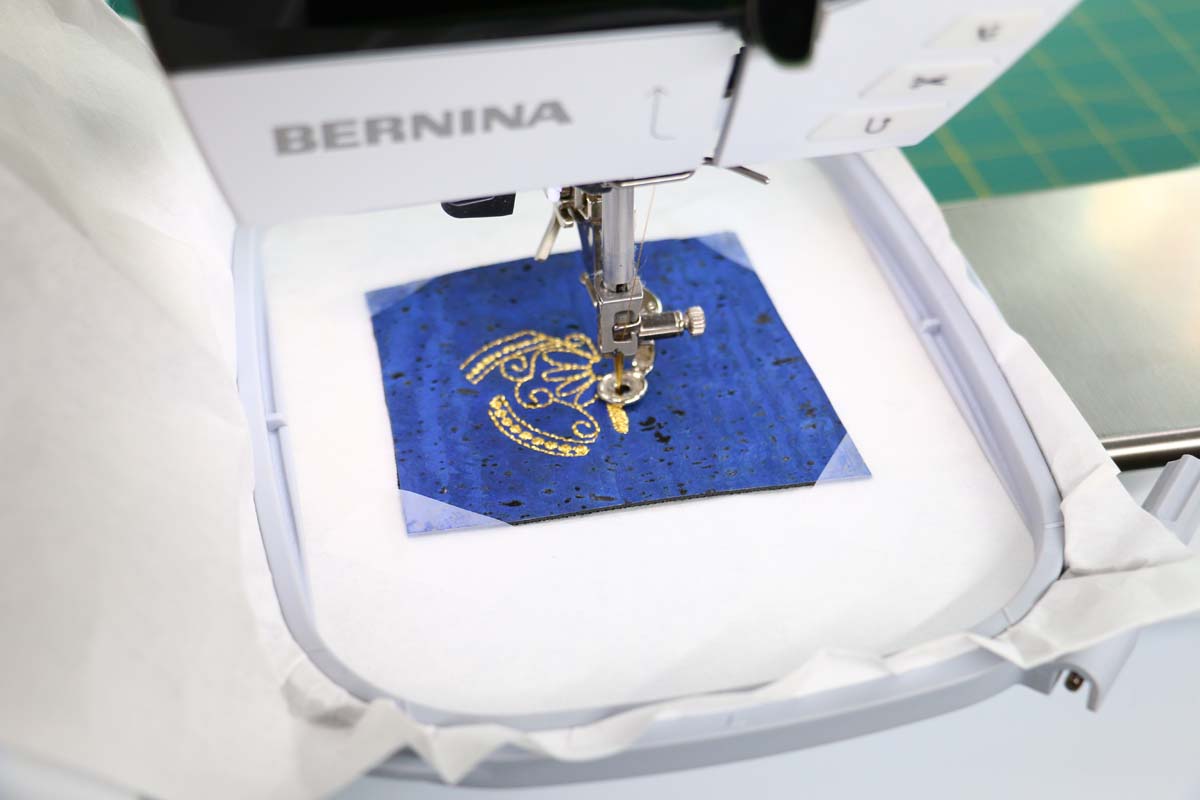
Cut two layers of OESD Aquamesh to fit the size of your hoop. You want at least 1.5” on each side of the hoop.
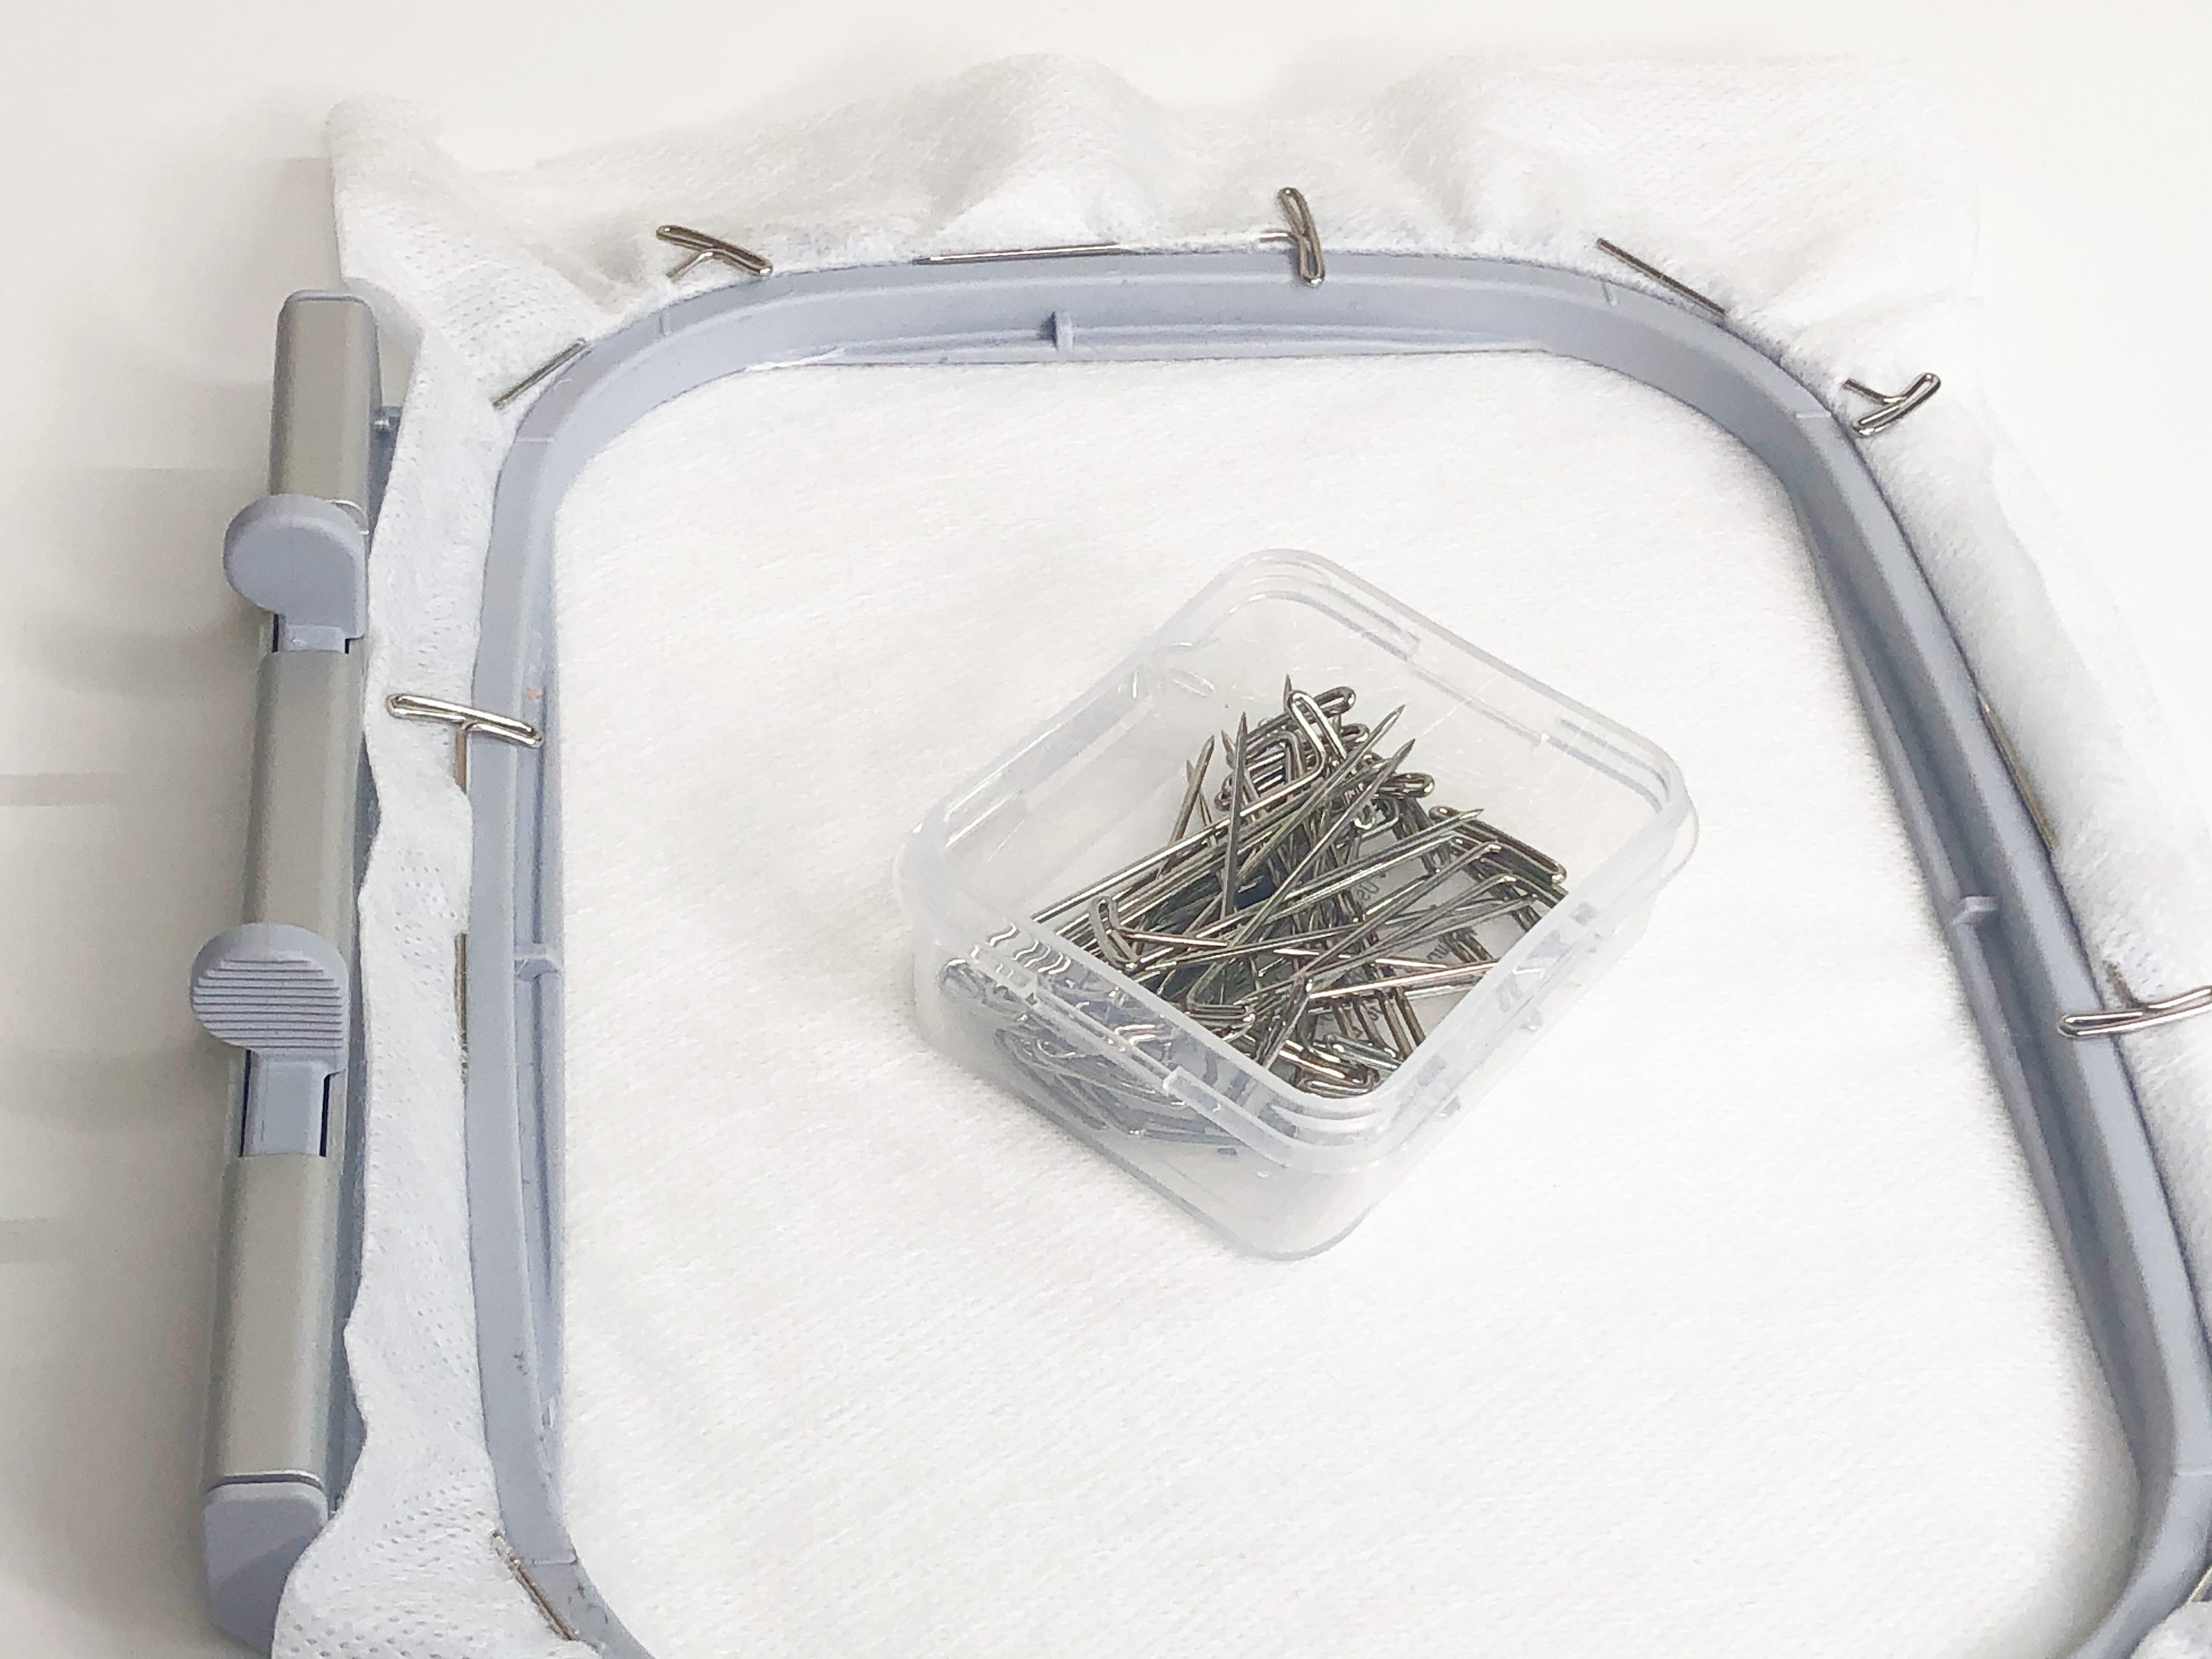
Once you have hooped your stabilizer, we are going to secure our stabilizer with T-Pins. To do this, take your dressmaker T pins and pin them through the stabilizer, on top of the hoop, as close to the hoop as possible. Make sure you do this on all four sides of the hoop and the corners of your hoop to really secure your stabilizer for stitching. The heavy pins essentially lock our stabilizer in place during the stitching process.
This technique is particularly helpful if you are doing multiple butterflies in one hooping or one big freestanding lace (FSL) design. FSL designs consist of thousands and thousands of stitches which can cause slippage in your stabilizer throughout the stitching, slipping stabilizer means your design can have registration issues which are not great on any design but can be detrimental to the final design on FSL.
Now that we are hooped, let’s set up our machine.
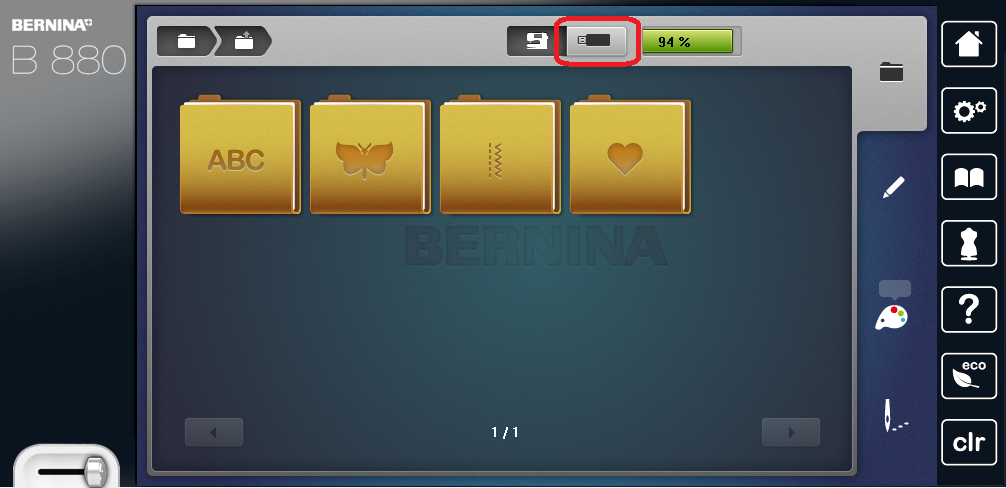
To bring up our design from our USB stick, go to the USB Folder on your machine.

Select the butterfly of your choice. Most of the butterflies populate into an oval hoop because of their size, but I am going to use a medium hoop, so let’s make it fit.
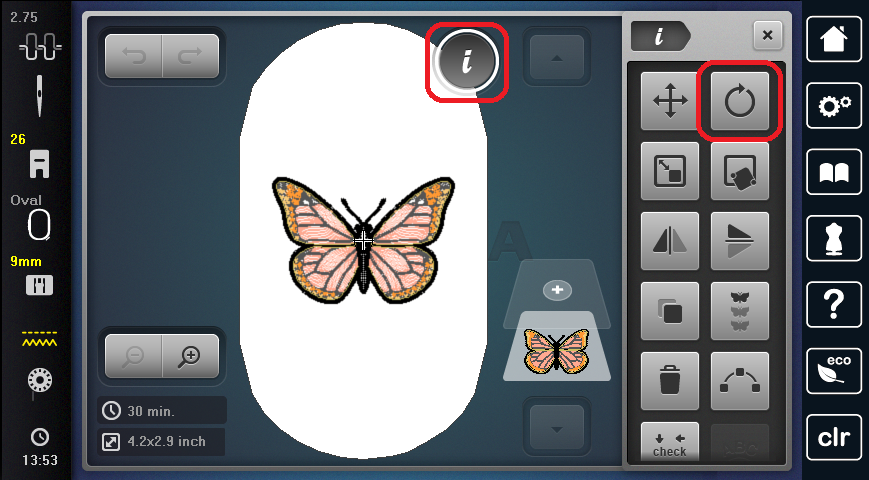
Tap the “i” Information icon, and select the rotate icon.
The information icon is where we do most of the editing of our embroidery designs. So if you’re ever feeling lost as to where to find the editing feature you’re looking for, there’s a good chance it’s in the “i” icon.
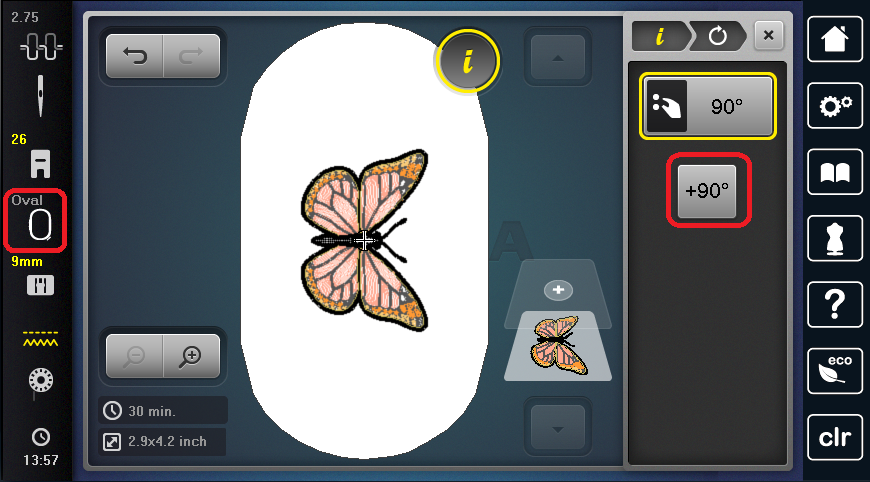
Tap the 90-degree icon to turn the butterfly sideways.
Then select the hoop selector icon.
Did you notice that when we edit things on the screen they turn yellow? I love this feature because I always know just by looking at my screen what I have changed, so I can adjust or undo with ease.
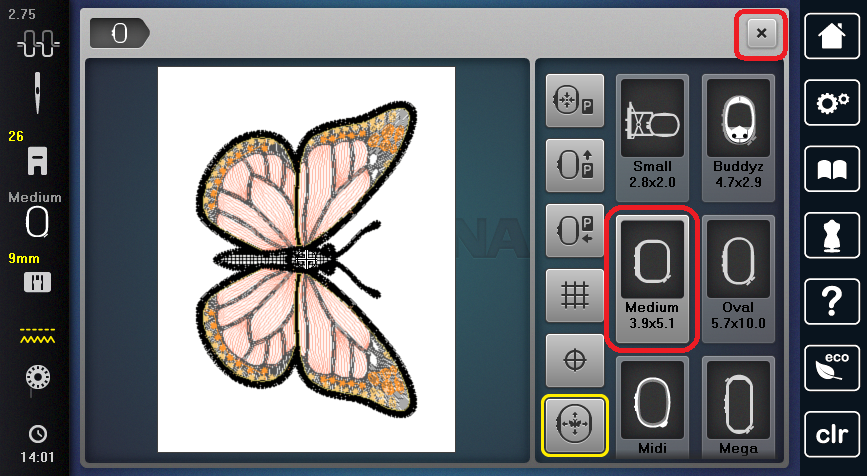
Select the medium hoop and then tap the “x” to exit the screen. If your “I” icon menu is still up, exit out of that as well.
You typically want to choose the smallest hoop possible for your design not only to save on stabilizer but it also helps give you the best tension possible.
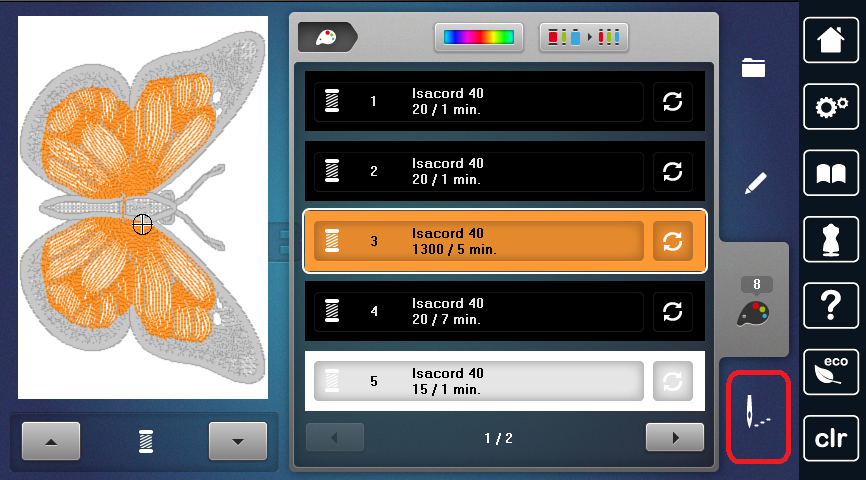
I then chose my butterfly colors by selecting the color number tab on the right. This helps me “audition” my colors and gets them all sorted in the machine before I ever start embroidering.
For a full tutorial on this check out my other We All Sew tutorial about editing your designs in your machine.
Click here to check out my “Embroidery with Word Art” post.
When you’re done adding your colors, select the OK Embroidery icon at the bottom right.
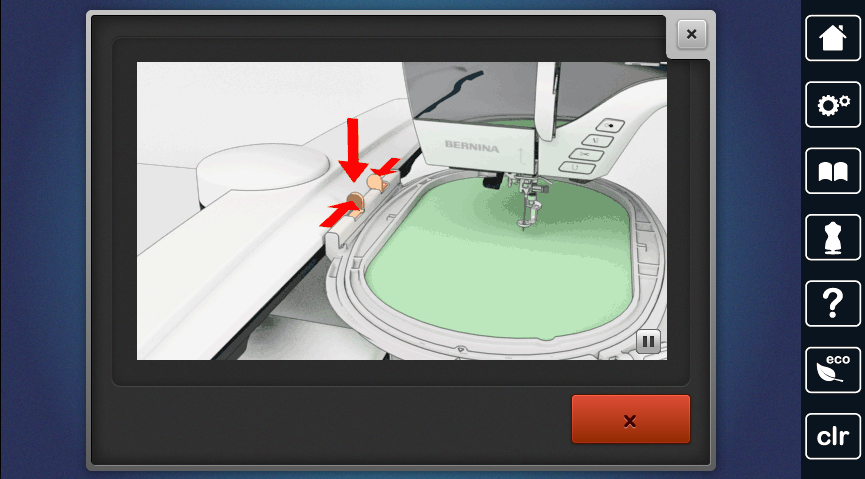
At this point, your machine will prompt you to put on your hoop, if you haven’t already.
If you have, go ahead and take off your hoop, hit the green check, and then put your hoop back on the machine when prompted. Hit the green check again, if prompted.
Do not hit the red X without doing what the machine asks or you’ll get caught in a tedious loop. It might seem ridiculous at first
It’s tempting to put the hoop on the machine immediately but I always wait until my machine prompts me to put the hoop on, otherwise, I might end up just having to take it off and put it back on again (a dance I affectionately call the “hokey pokey”). It can seem frustrating but all the machine is trying to do is protect you both and make sure it’s all connected correctly. You can save yourself that back and forth by not putting the hoop on until the machine asks you to.
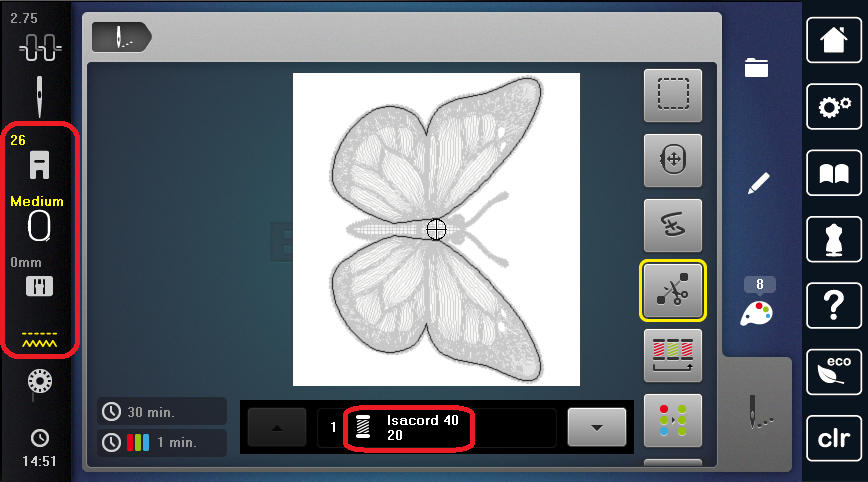
Before hitting go I always double-check everything, particularly the menu to the left of the screen, to make sure my machine is set up correctly.
See how the bottom center of the screen shows you which threads to load up now that we have put them in the machine? I love that! Taking the time to put the threads you want to use in the machine is totally worth it!
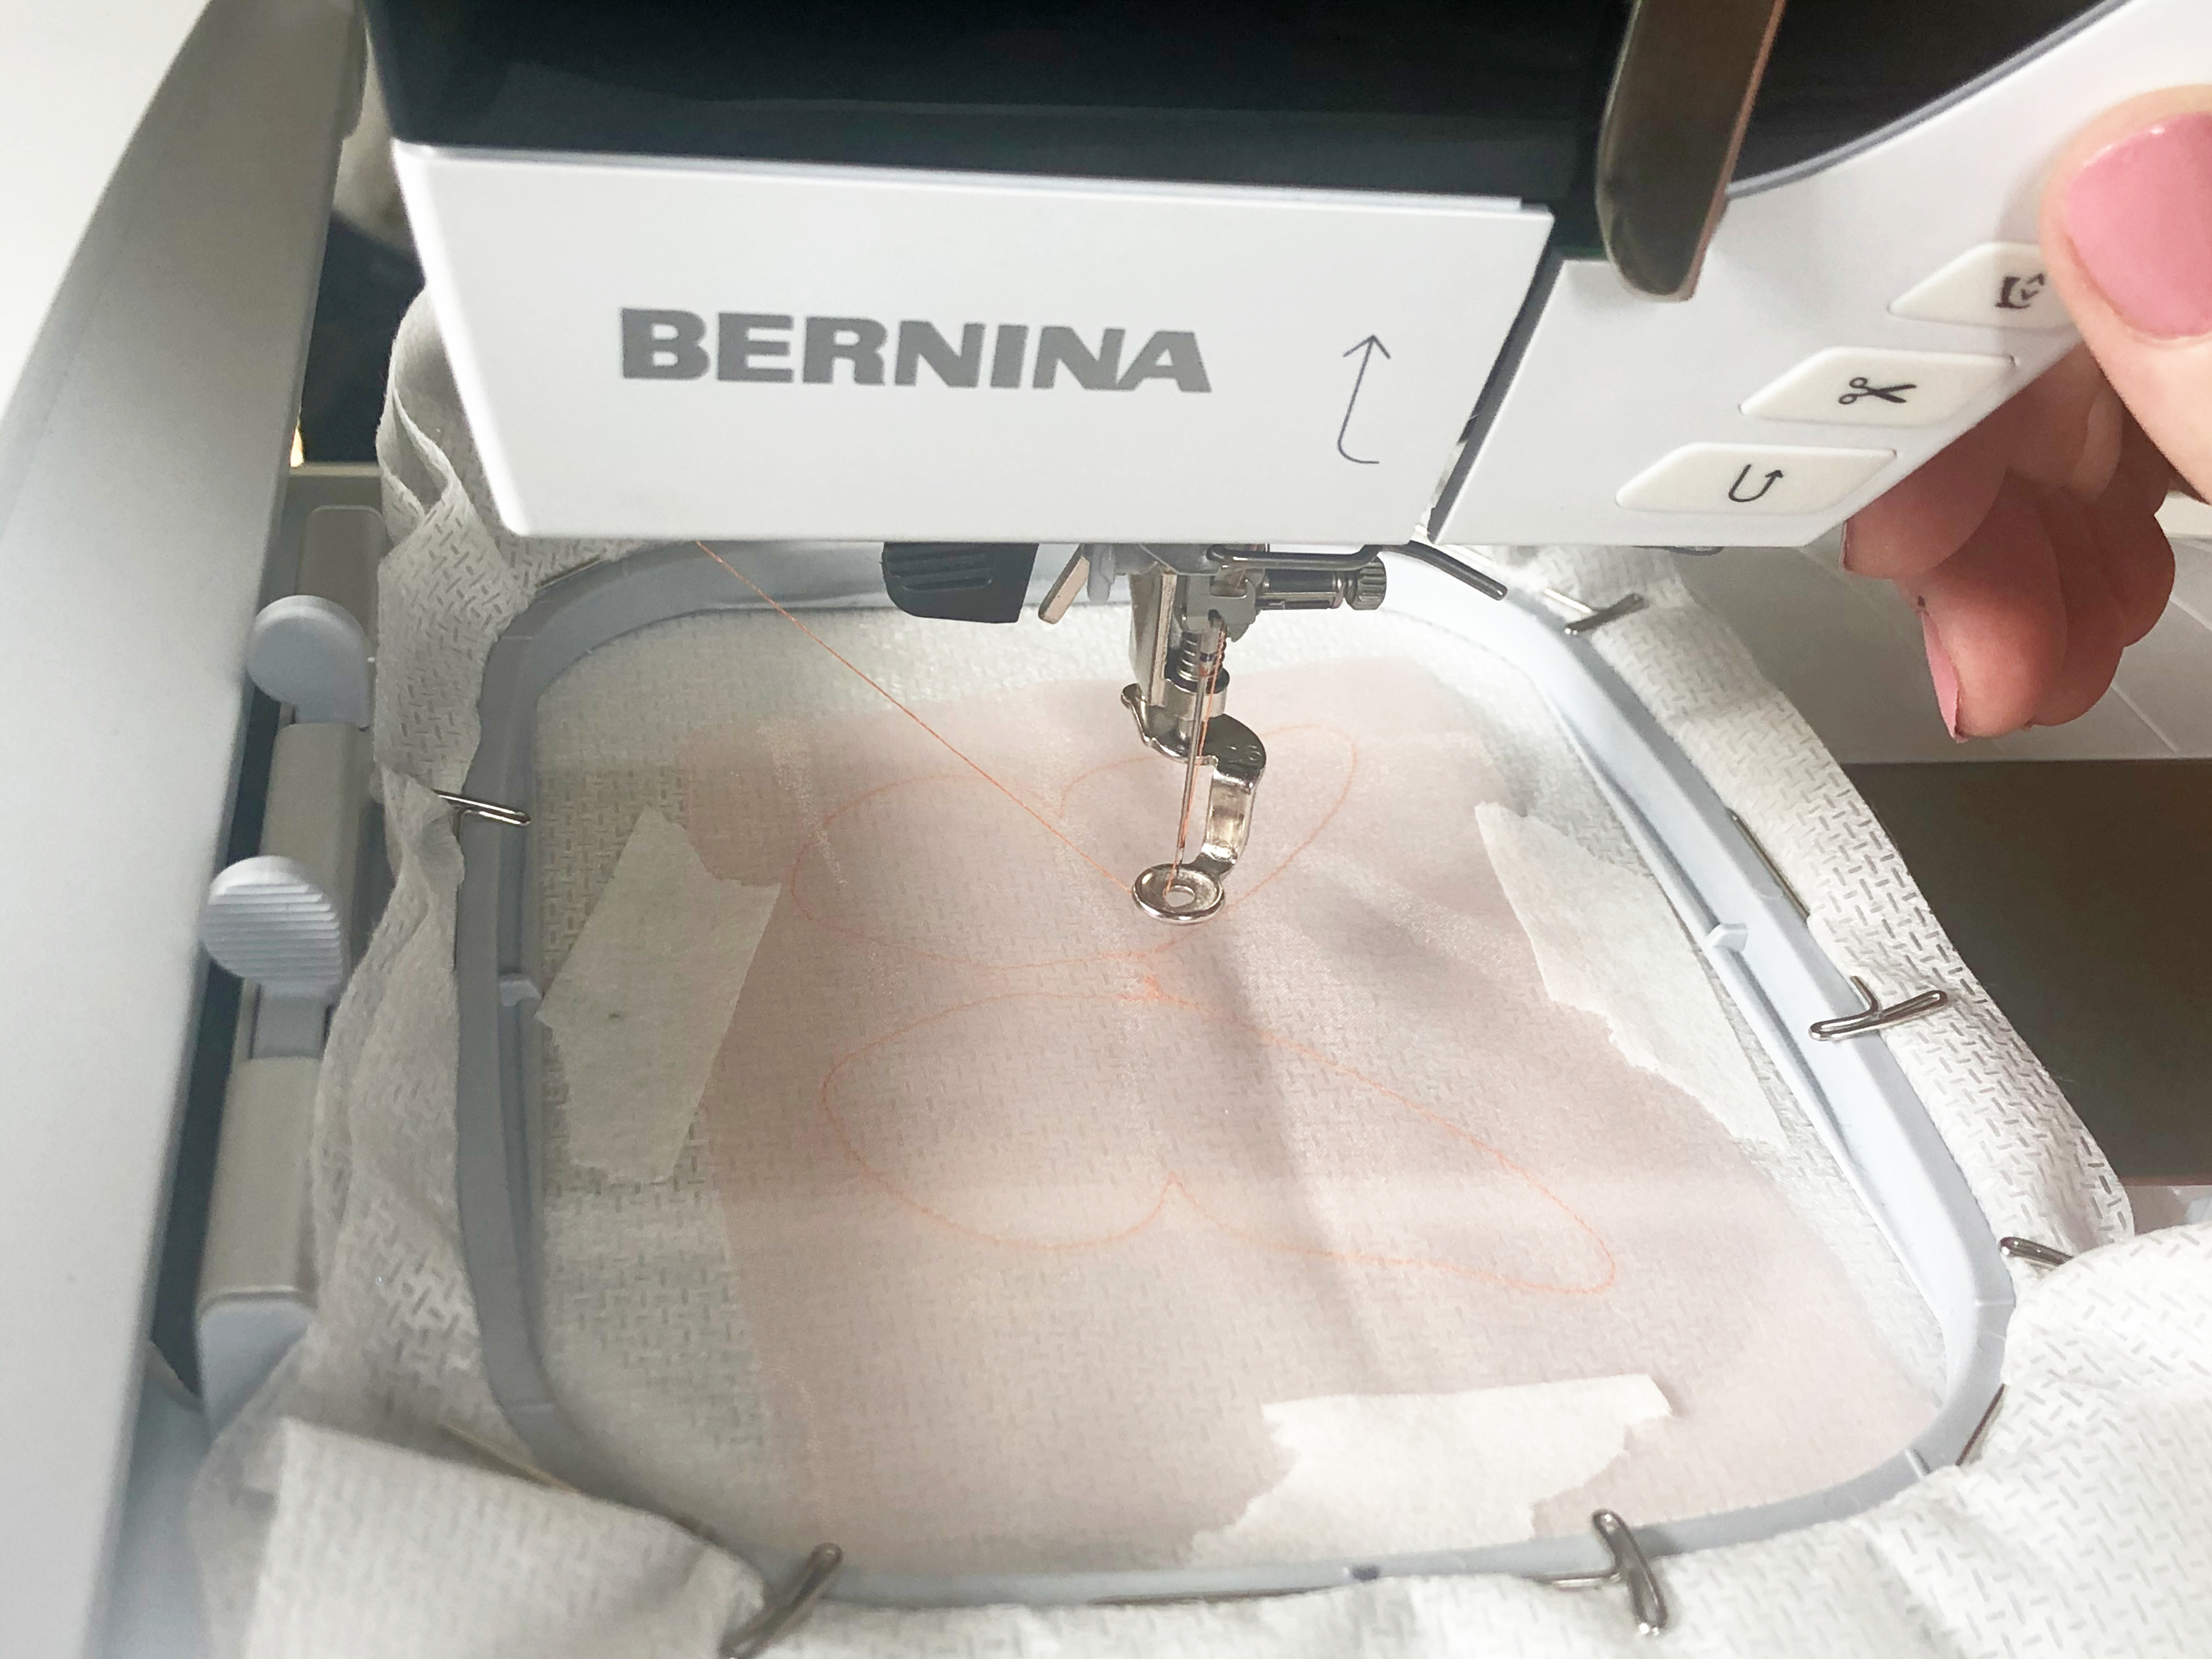
The first stitch is a placement stitch. This will show you exactly where to place your organza in the next step (I did mine in Orange for less color changes)
Cut out 1 layer of organza and place it so it covers the placement stitch entirely. I used OESD Tear Away Embroidery Tape to help keep it from shifting during embroidery.
I used the same blush-colored organza on all my butterflies and found that it gave them all a really nice warmth and made the final result even better. I highly recommend color organza versus straight white organza.

Stitch out the tack down stitch.
Take your applique scissors and cut away the excess organza on the outside of your butterfly design. Cut as close to the stitching as possible, being careful not to cut the stitches as you go.
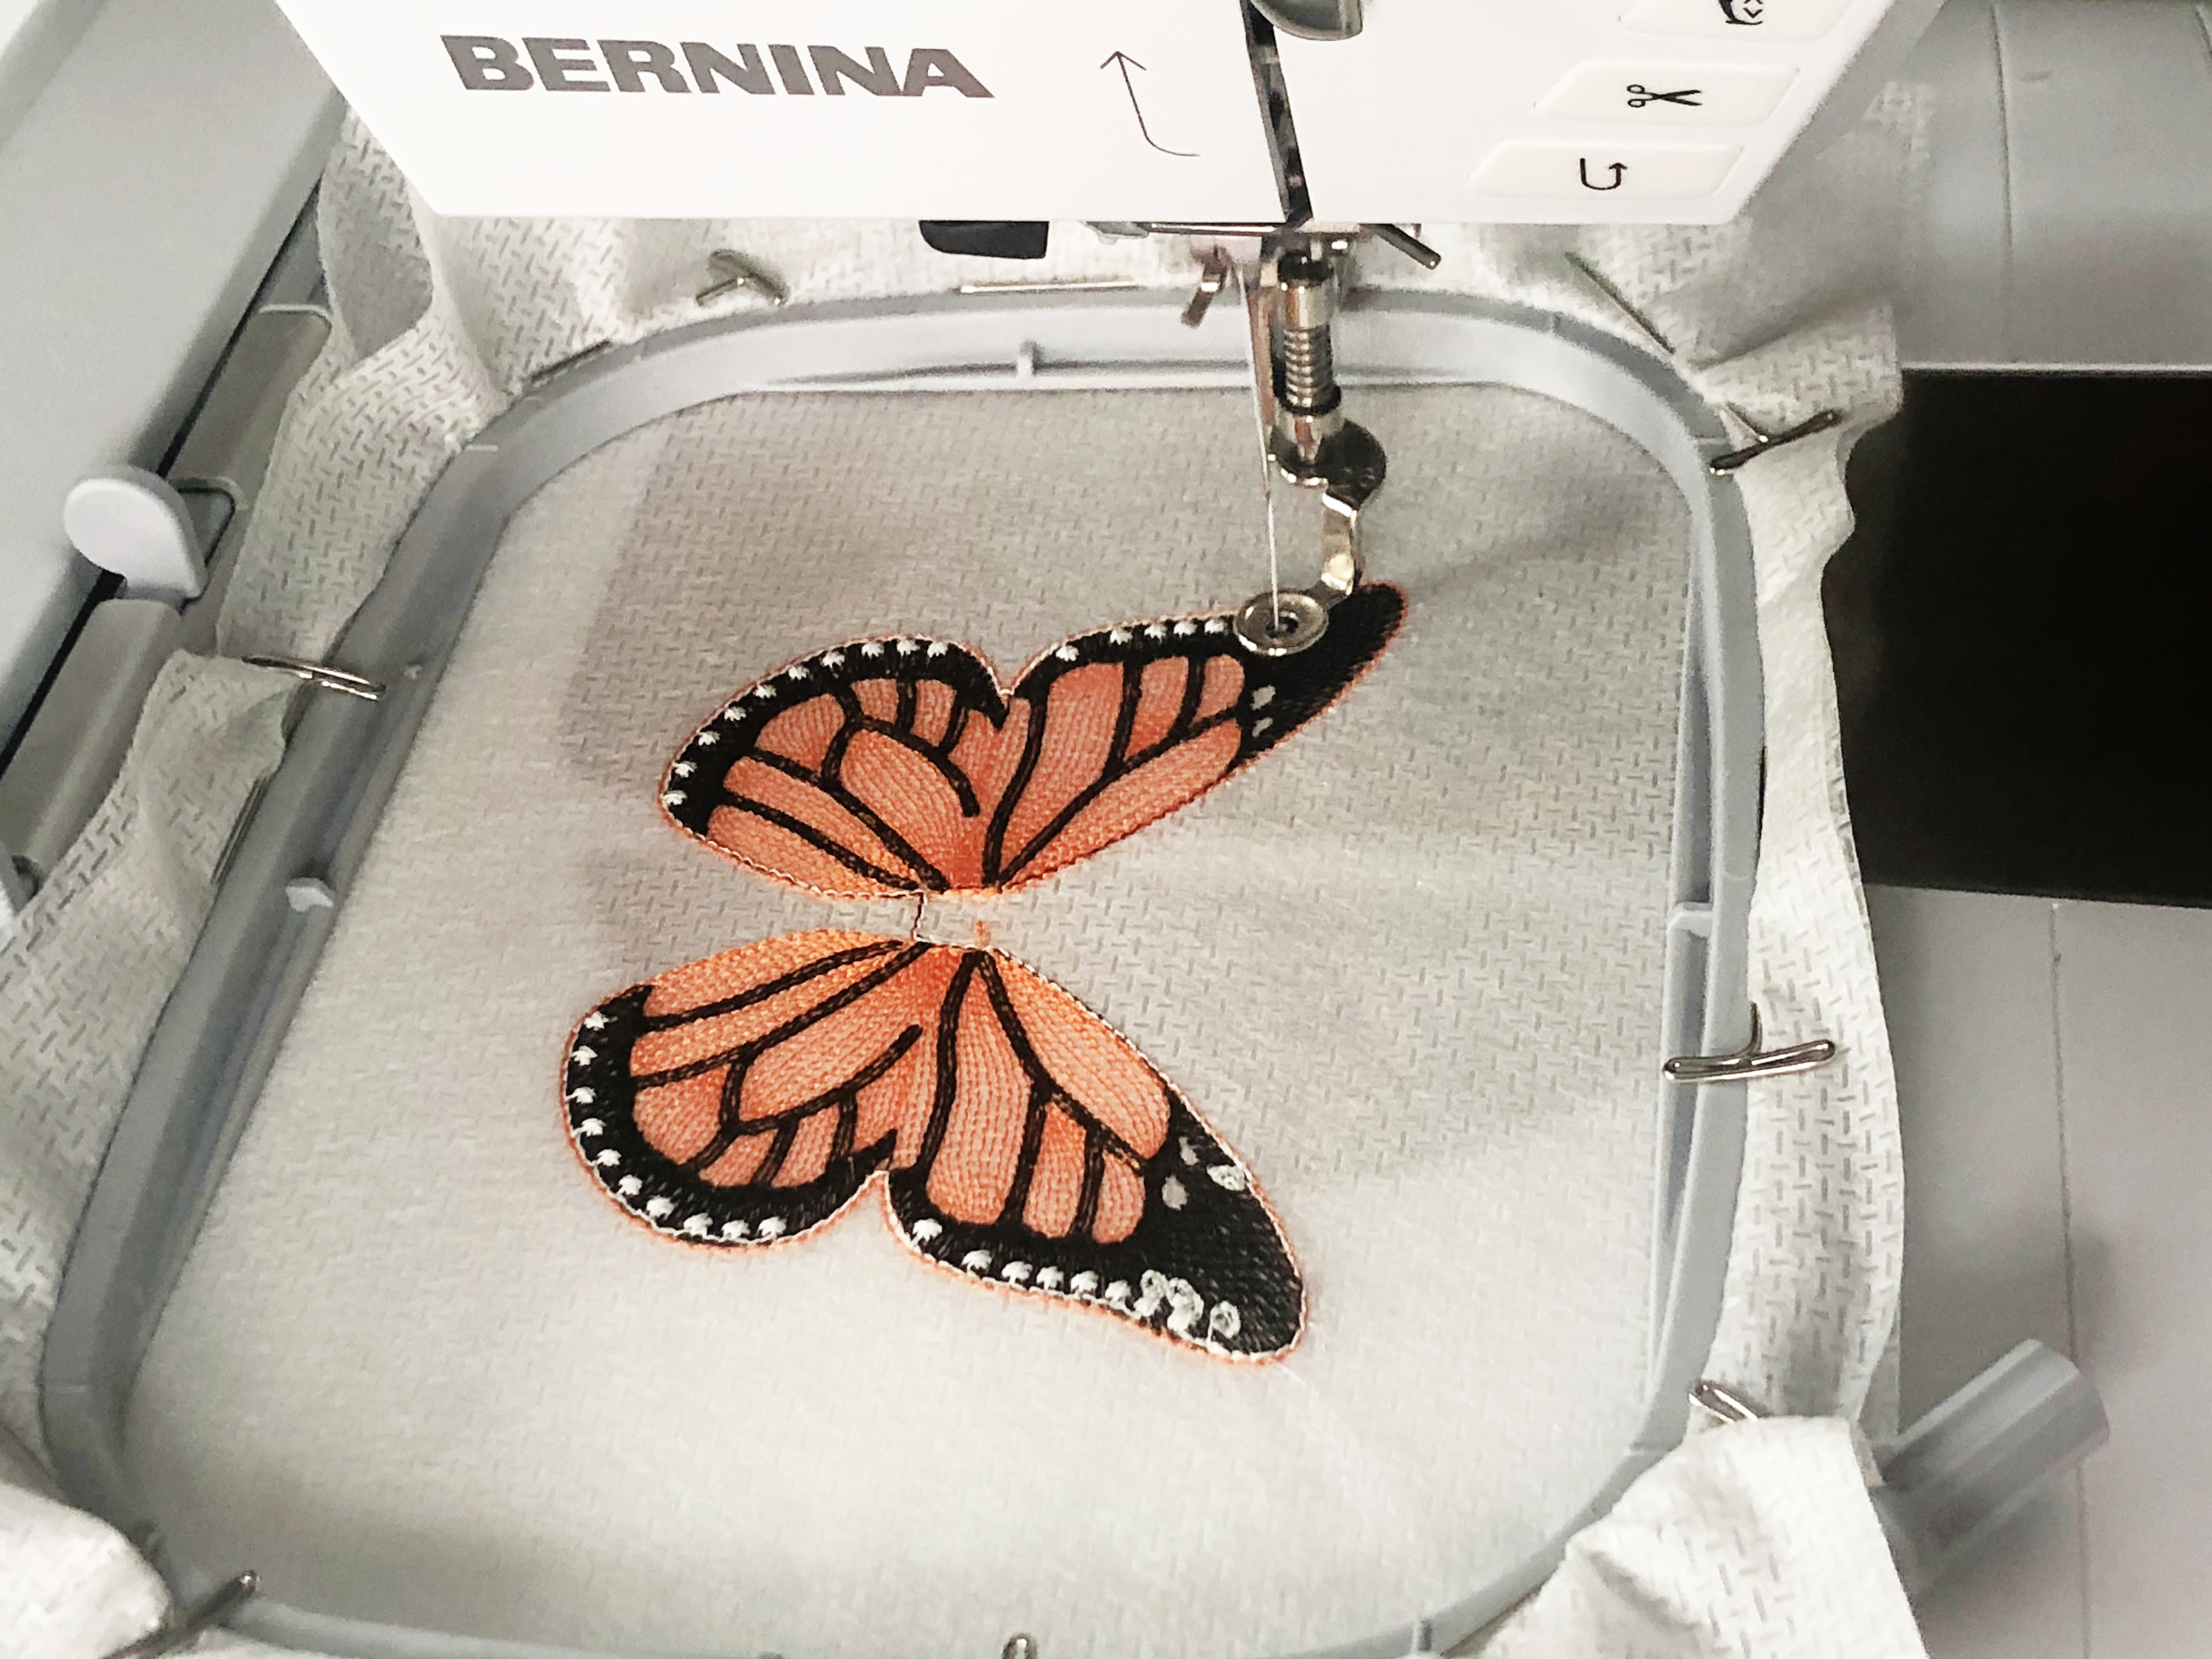
From here you can continue stitching the rest of your butterfly, just like any other design.
Don’t forget to match your bobbin thread to the top thread, so your butterfly looks as good from the back as the front.
I like to double-check the back of my design every few color changes to be sure the back looks as good as the front, to trim away any stray threads and generally keep an eye on things.
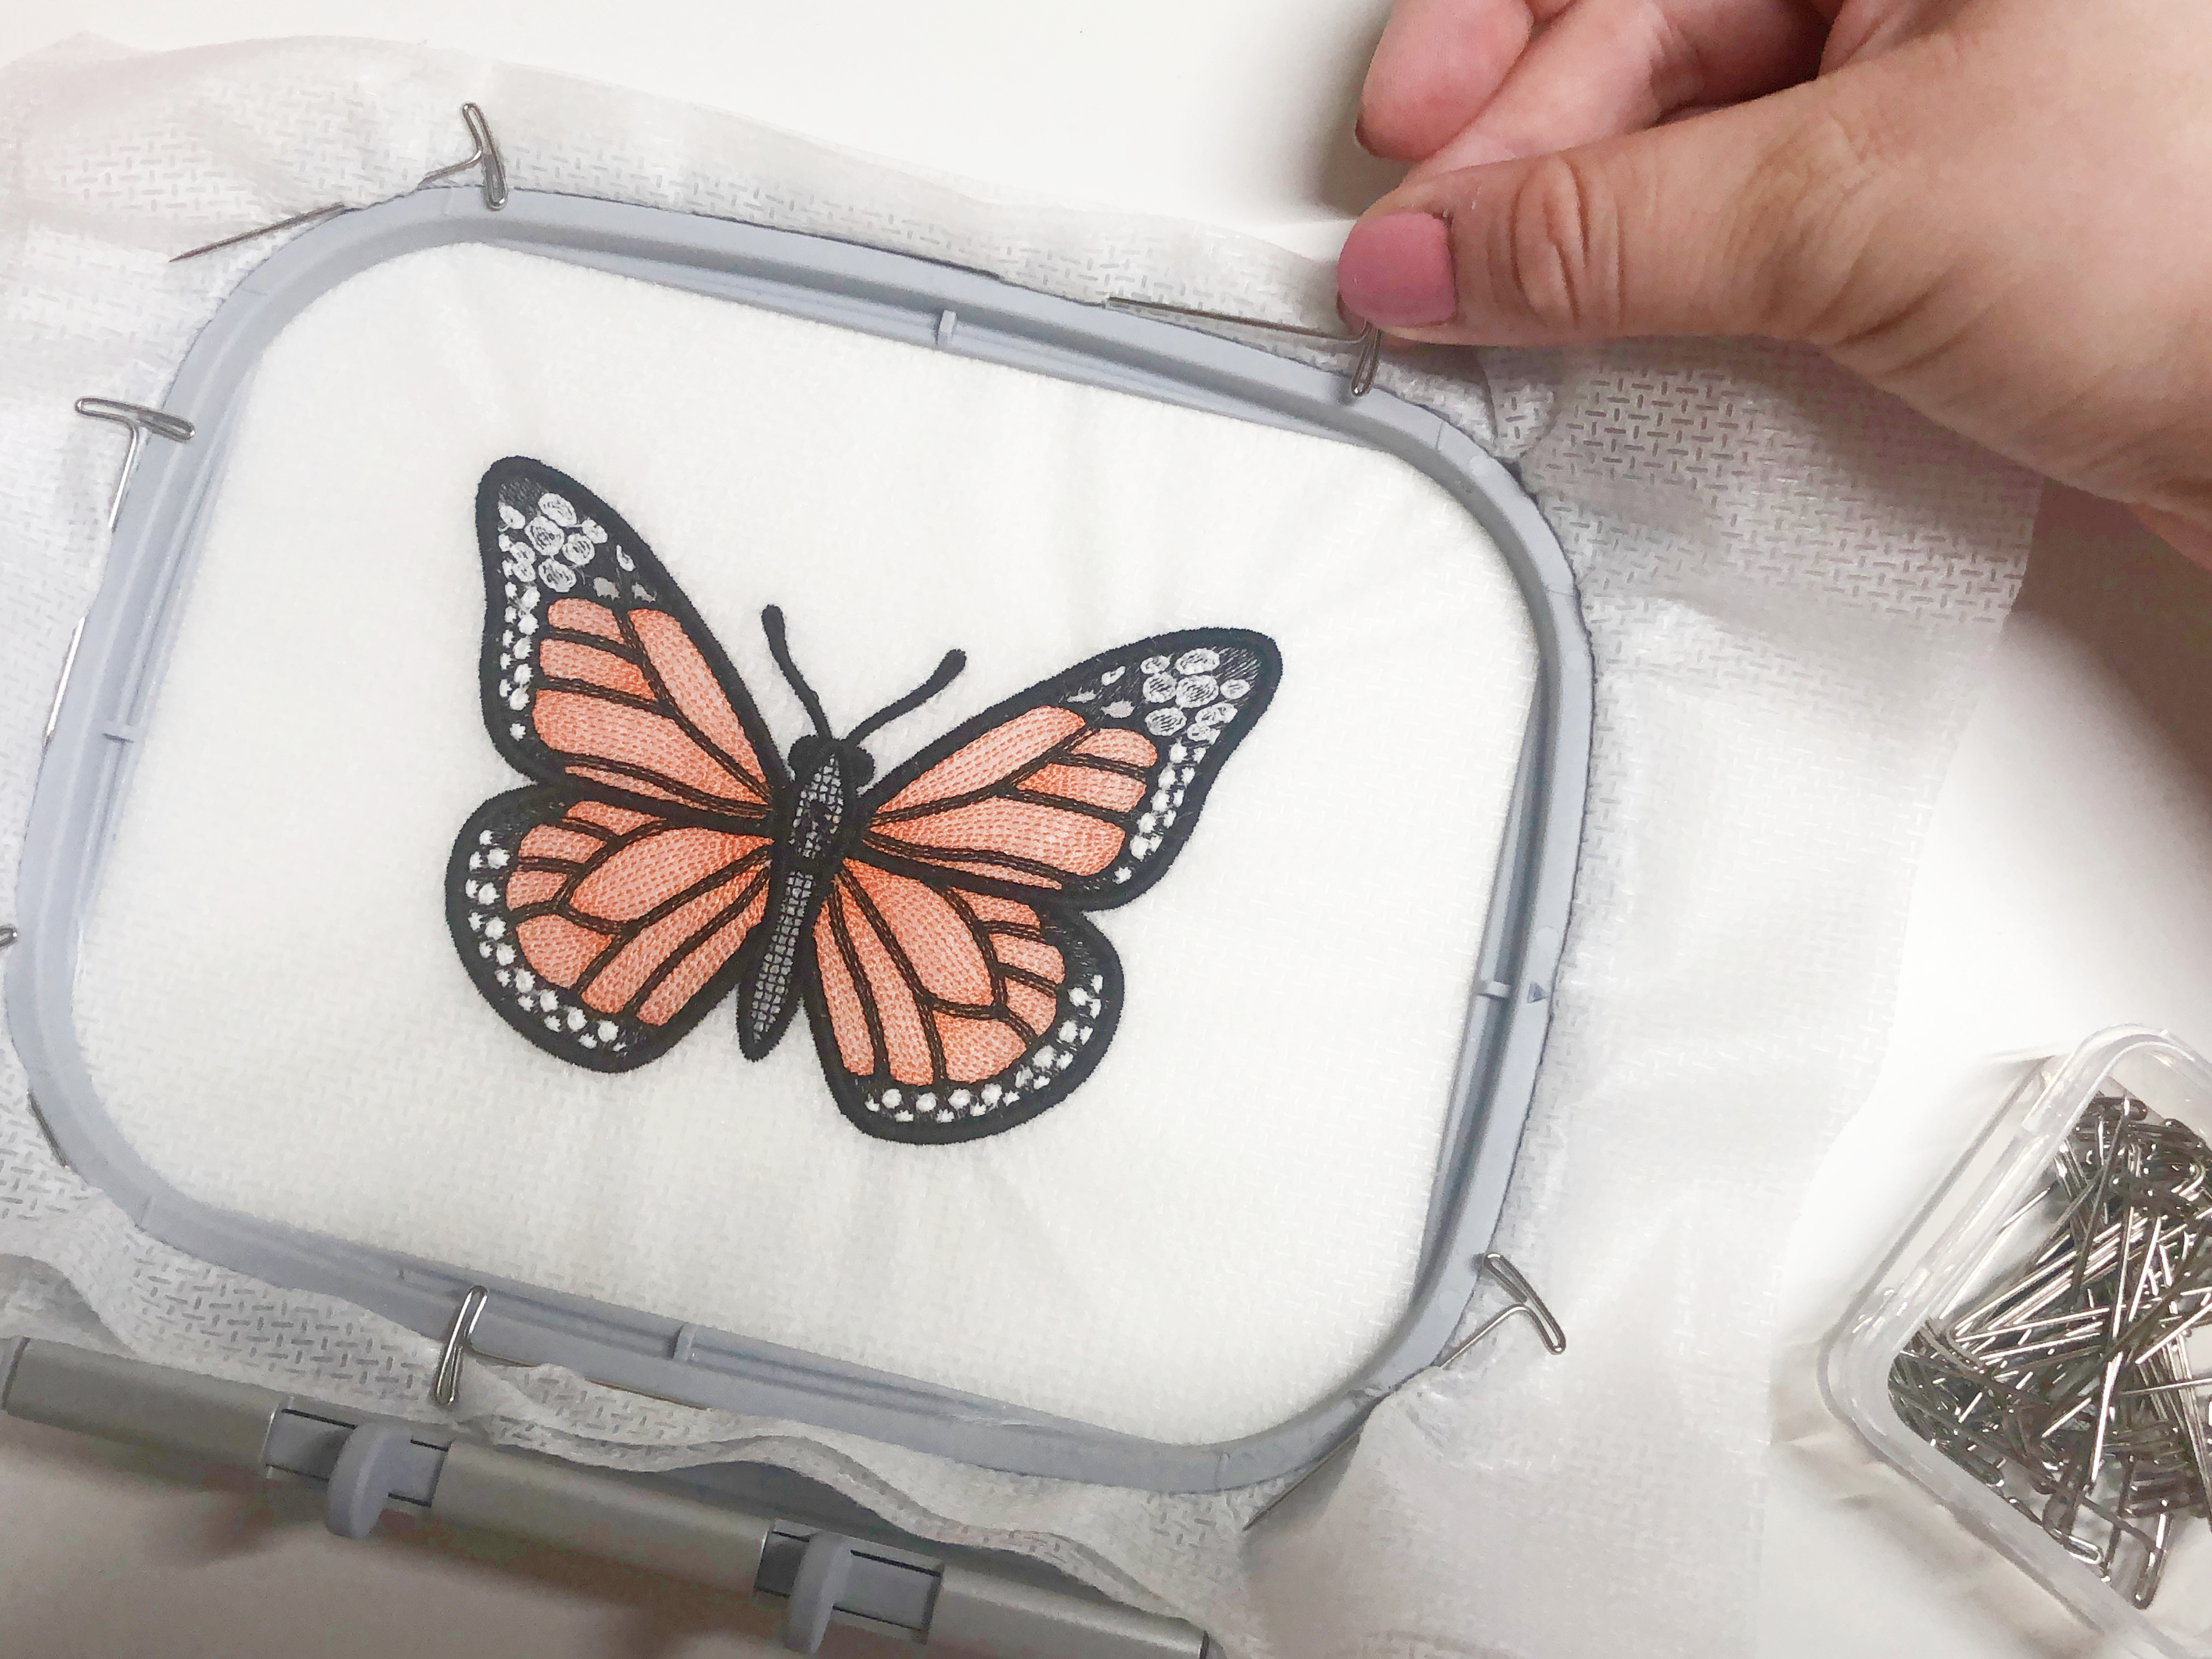
Once you’re finished with all your stitching, remove the hoop from the machine and start removing your T pins (carefully!)
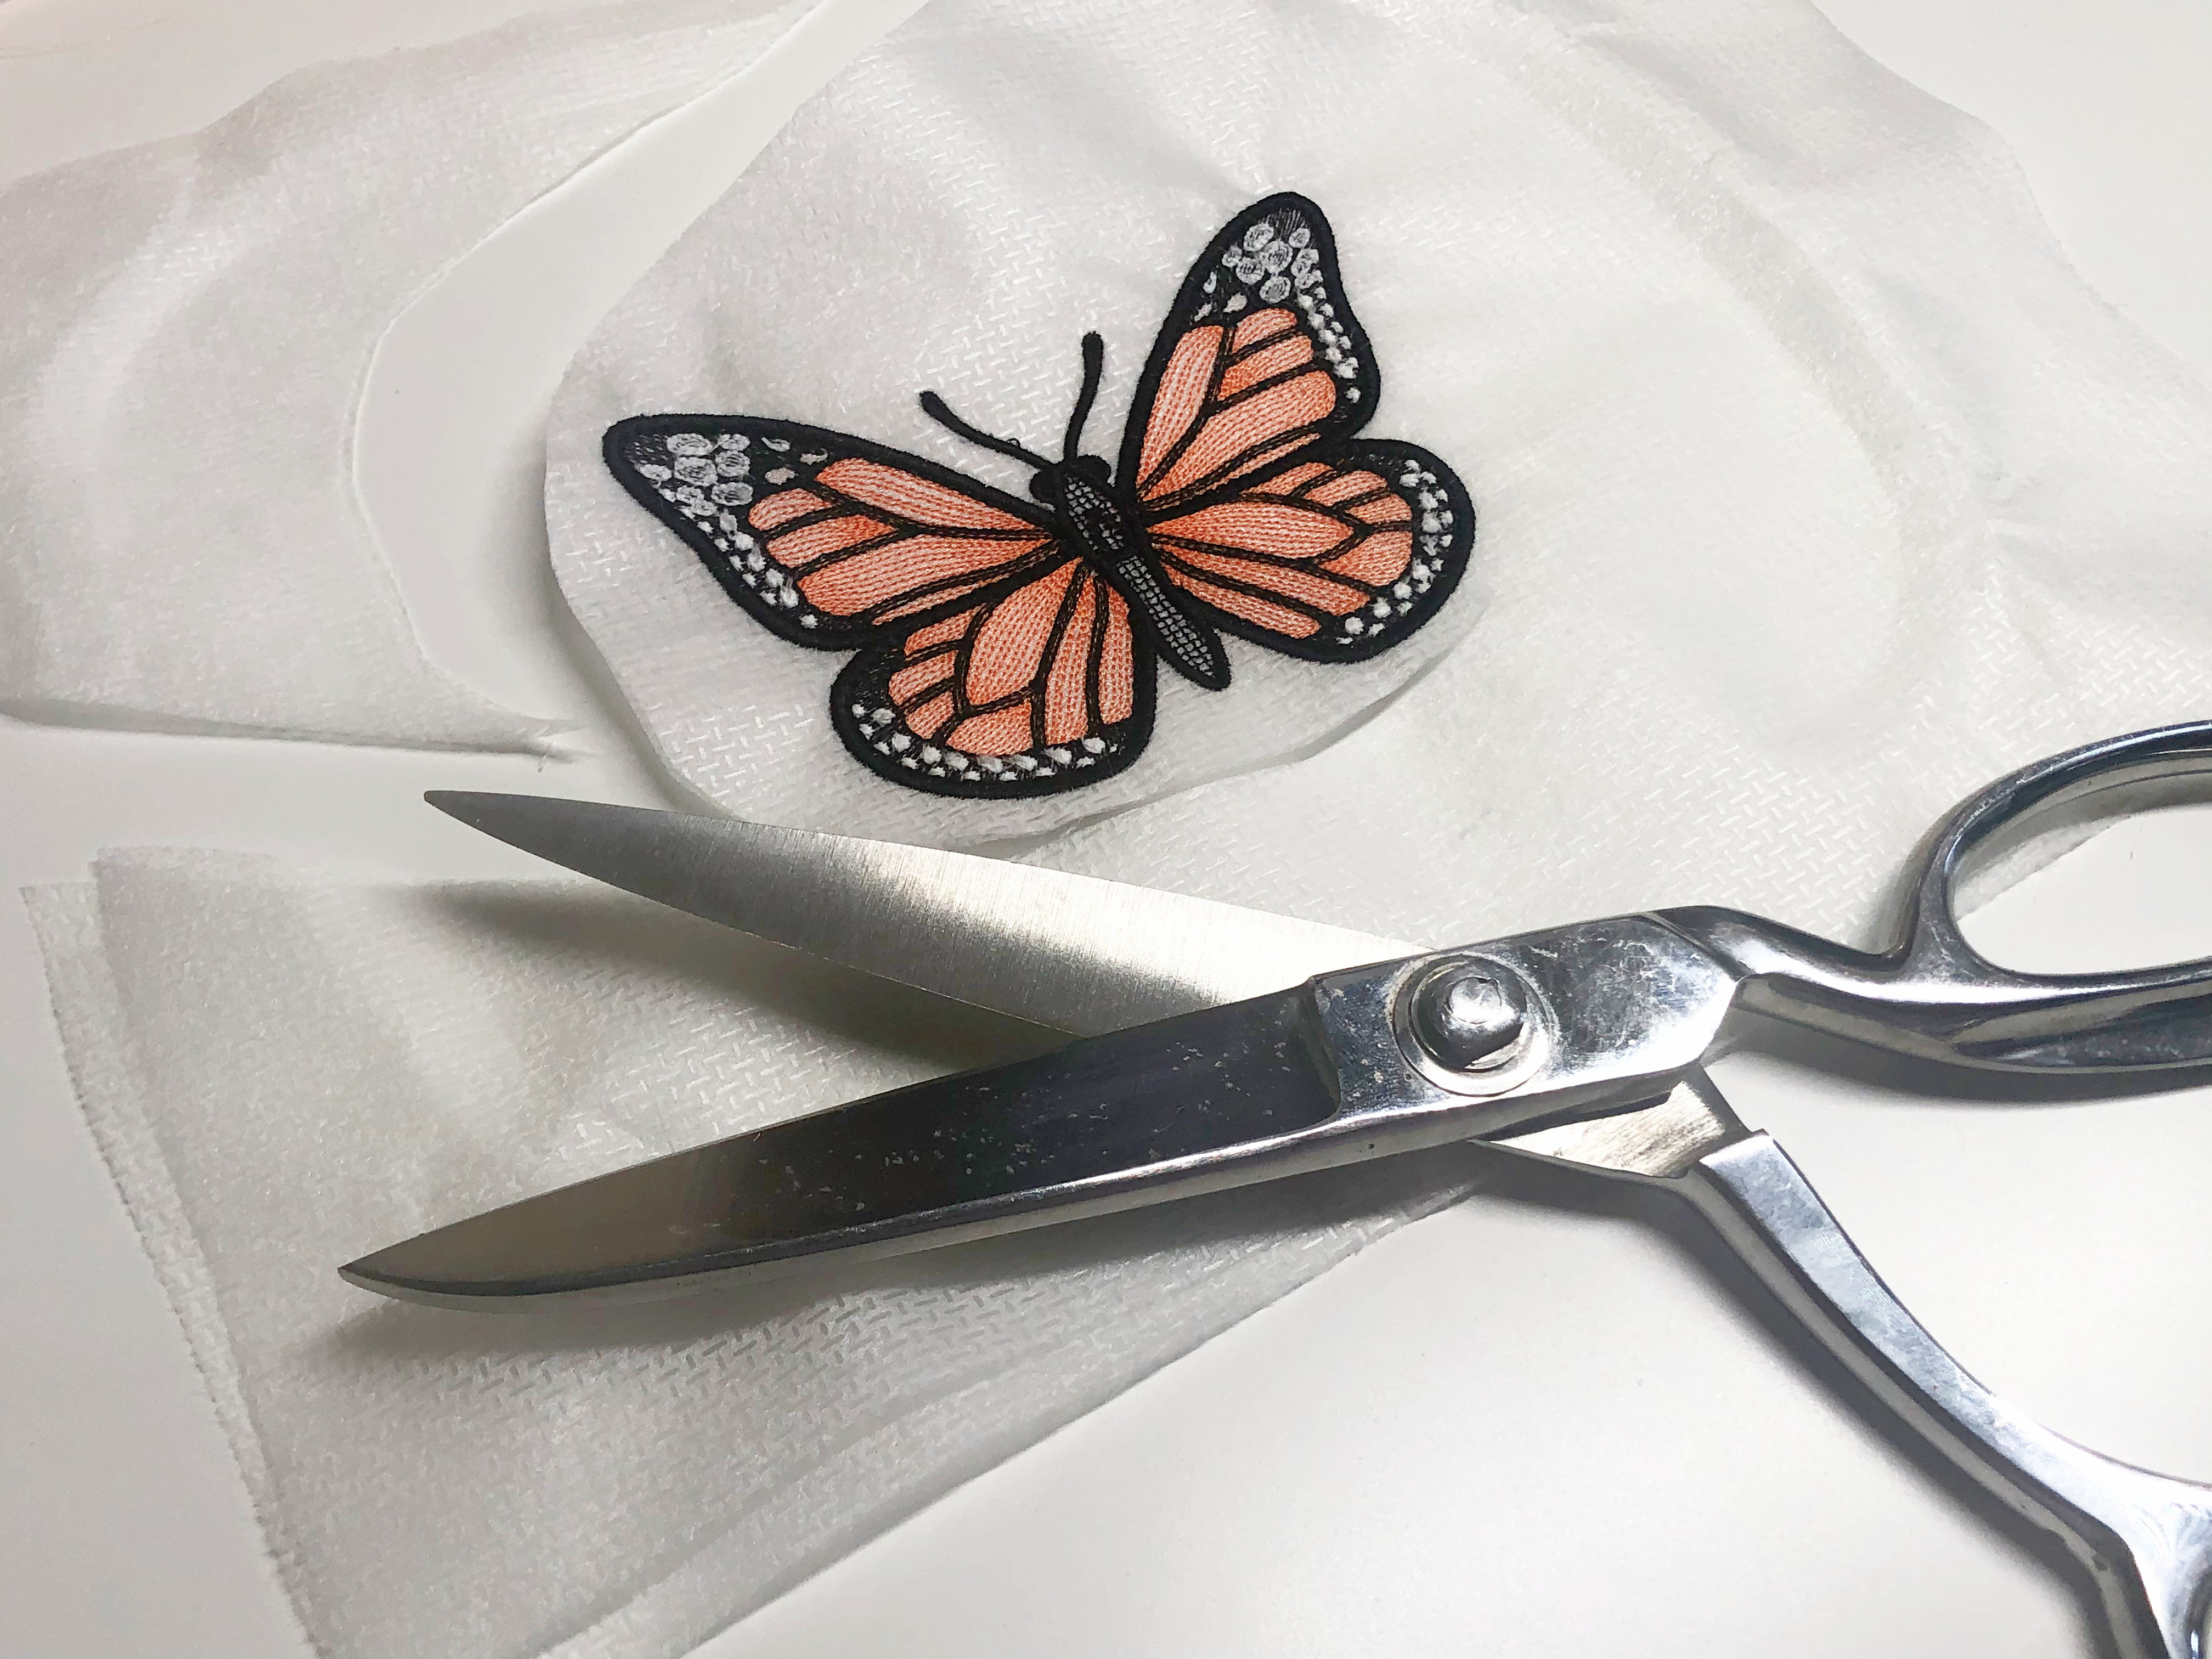
Un-hoop your stabilizer and butterfly and cut away the excess stabilizer. I always save my wash-away stabilizer odds and ends because I can use them to re-starch my FSL if I wash away too much stabilizer or to make my own spray starch!
To learn more about making your own DIY Spray Starch with Stabilizer Leftovers check out the Tough Kitten Crafts blog post by clicking here.
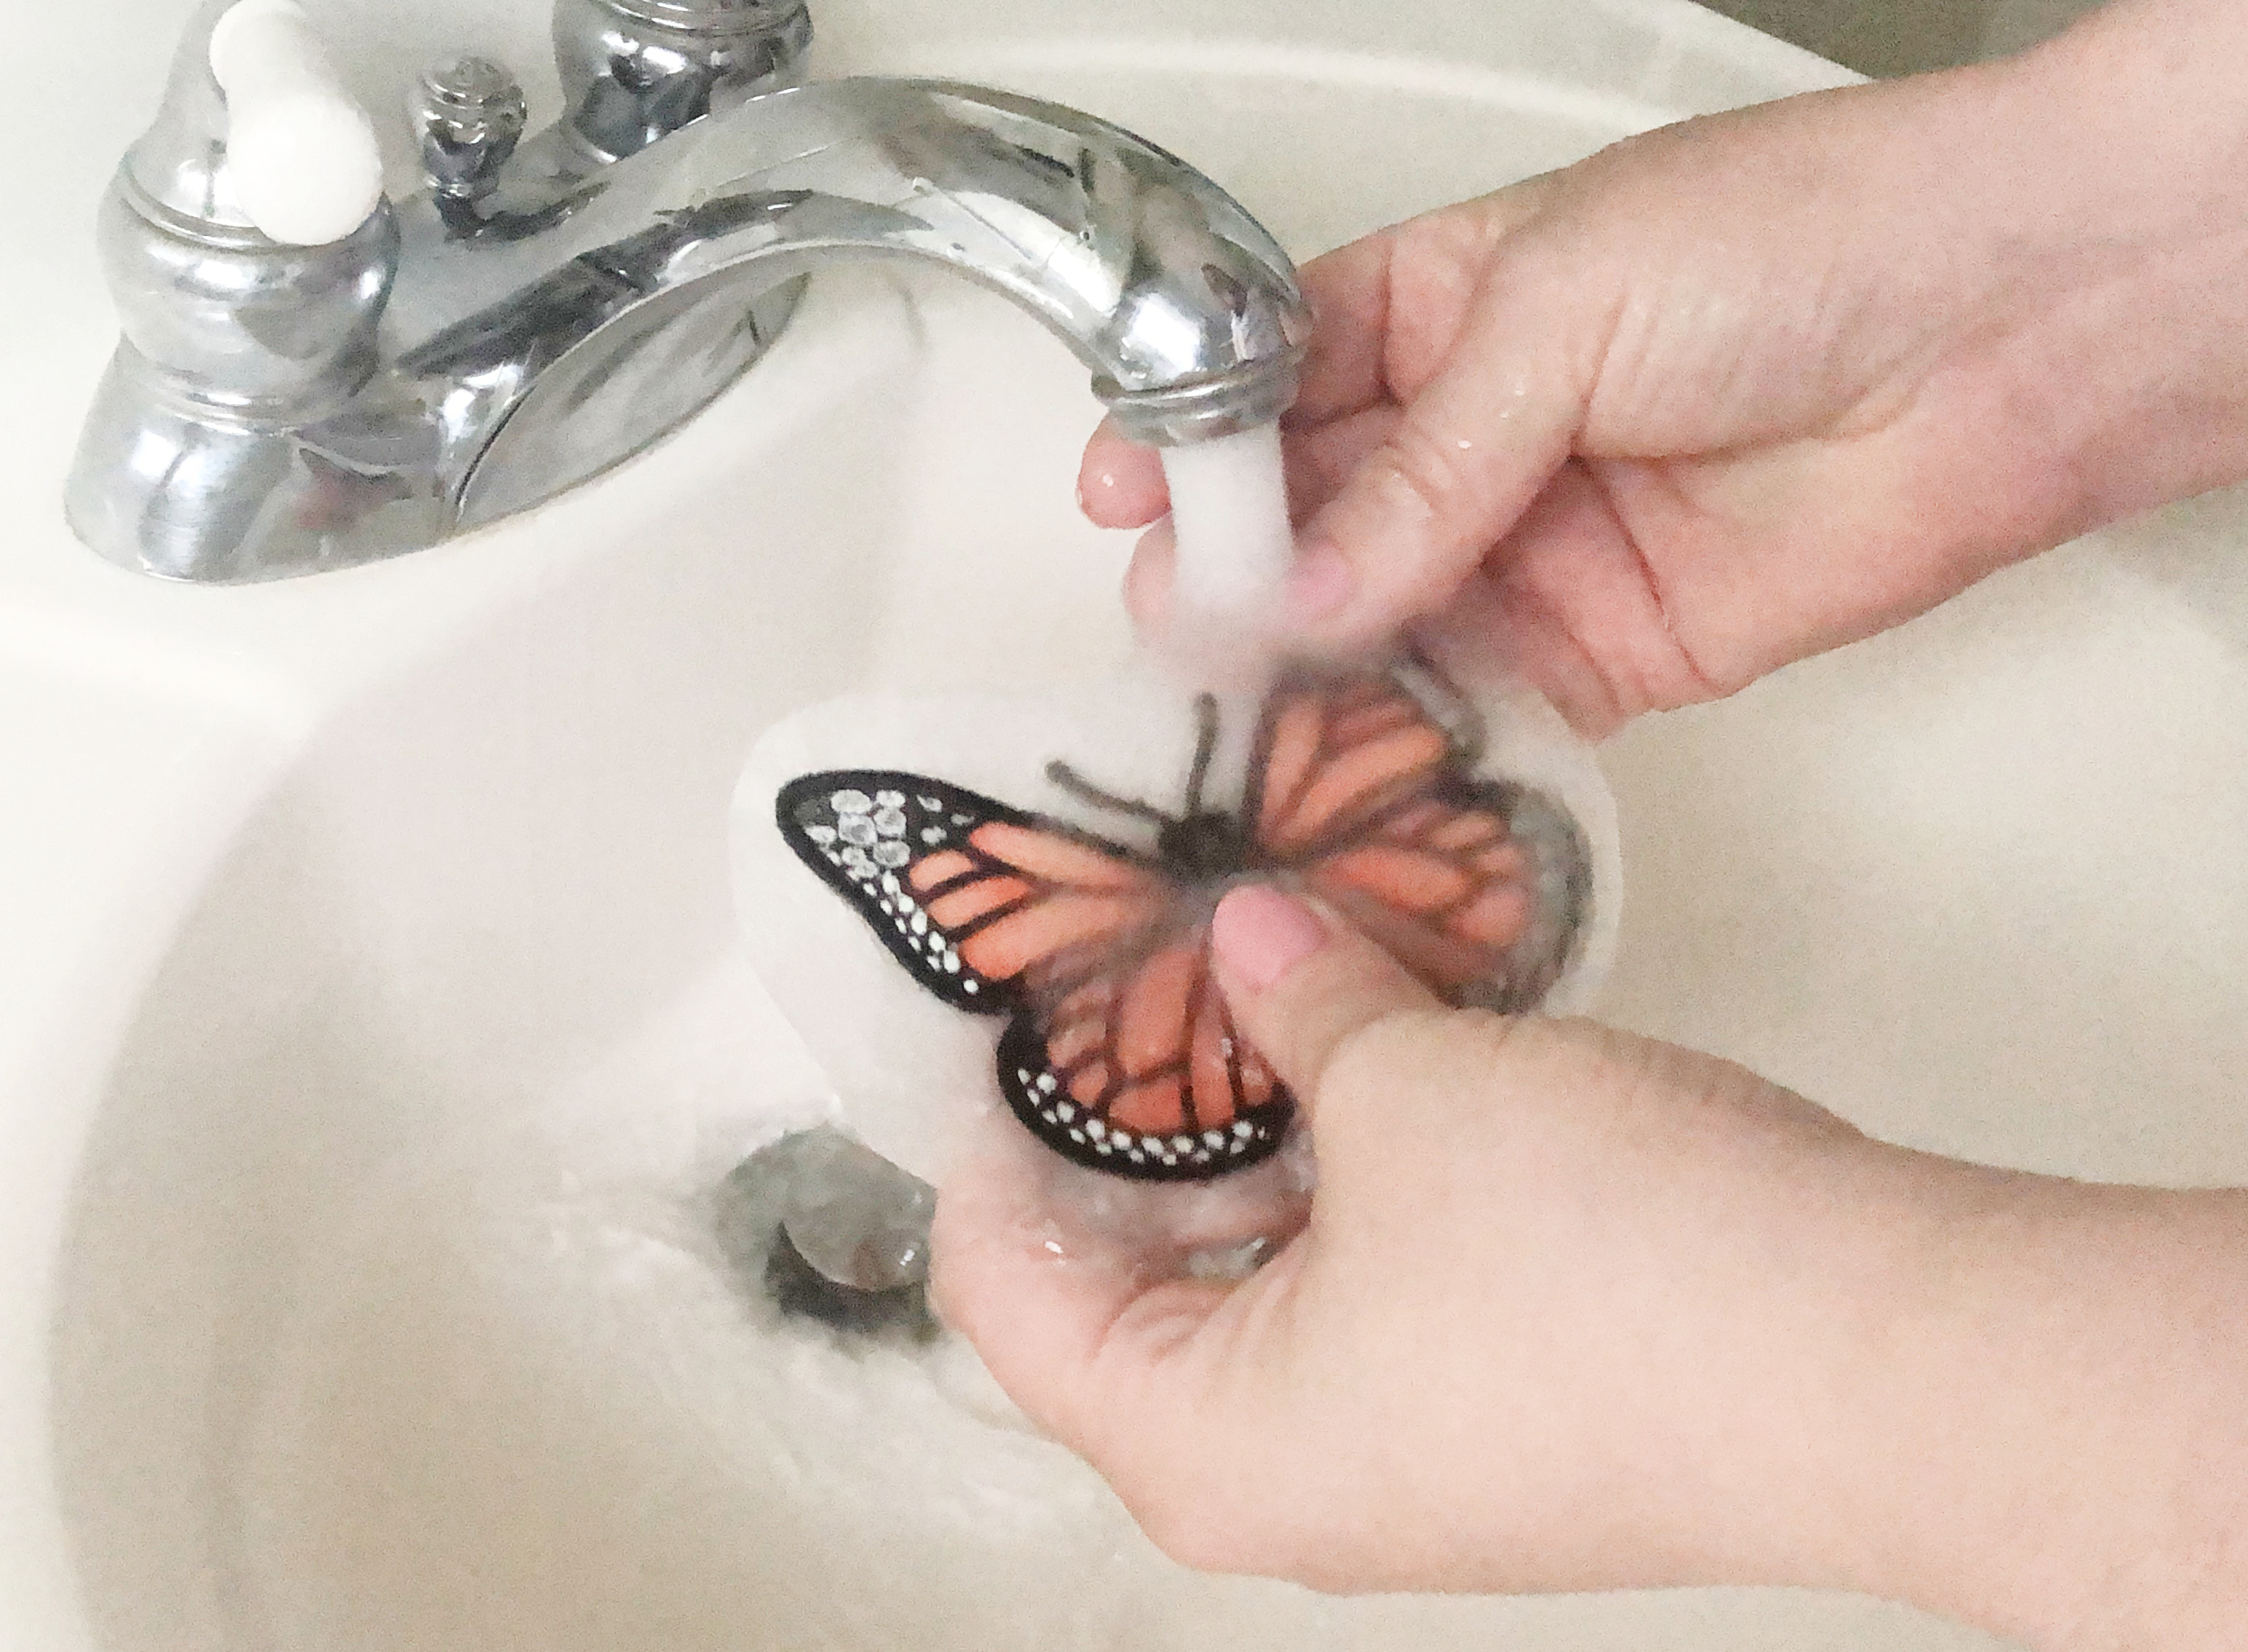
Take your butterfly to the sink and run some lukewarm water. Gently rinse away your Aquamesh, making sure that all the stickiness is rinsed away without removing all of the stabilizer. Pat dry with a clean white towel.
How much stabilizer you rinse away directly correlates to what the piece will be used for. Freestanding lace pieces that are a part of a construction, like a freestanding lace house, should keep as much wash away in the project as possible for stability. FSL projects that will be used in clothing or in décor like this, can be rinsed of all their Wash away stabilizer without any issues.
Click here to check out my live YouTube class all about freestanding lace, where I talk about rinsing your stabilizer, as well as what to do if your stabilizer dries sticky.

Allow your butterfly to lie flat to dry. When I want a FSL piece to dry fast I will put it in front of an oscillating fan while pinning it to a pressing mat or towel, otherwise, I let it dry on its own time.
Right now you can let it dry naturally (it doesn’t take very long) while you embroider your other butterflies! Make as many butterflies as you like to fill your shadow box or frame.
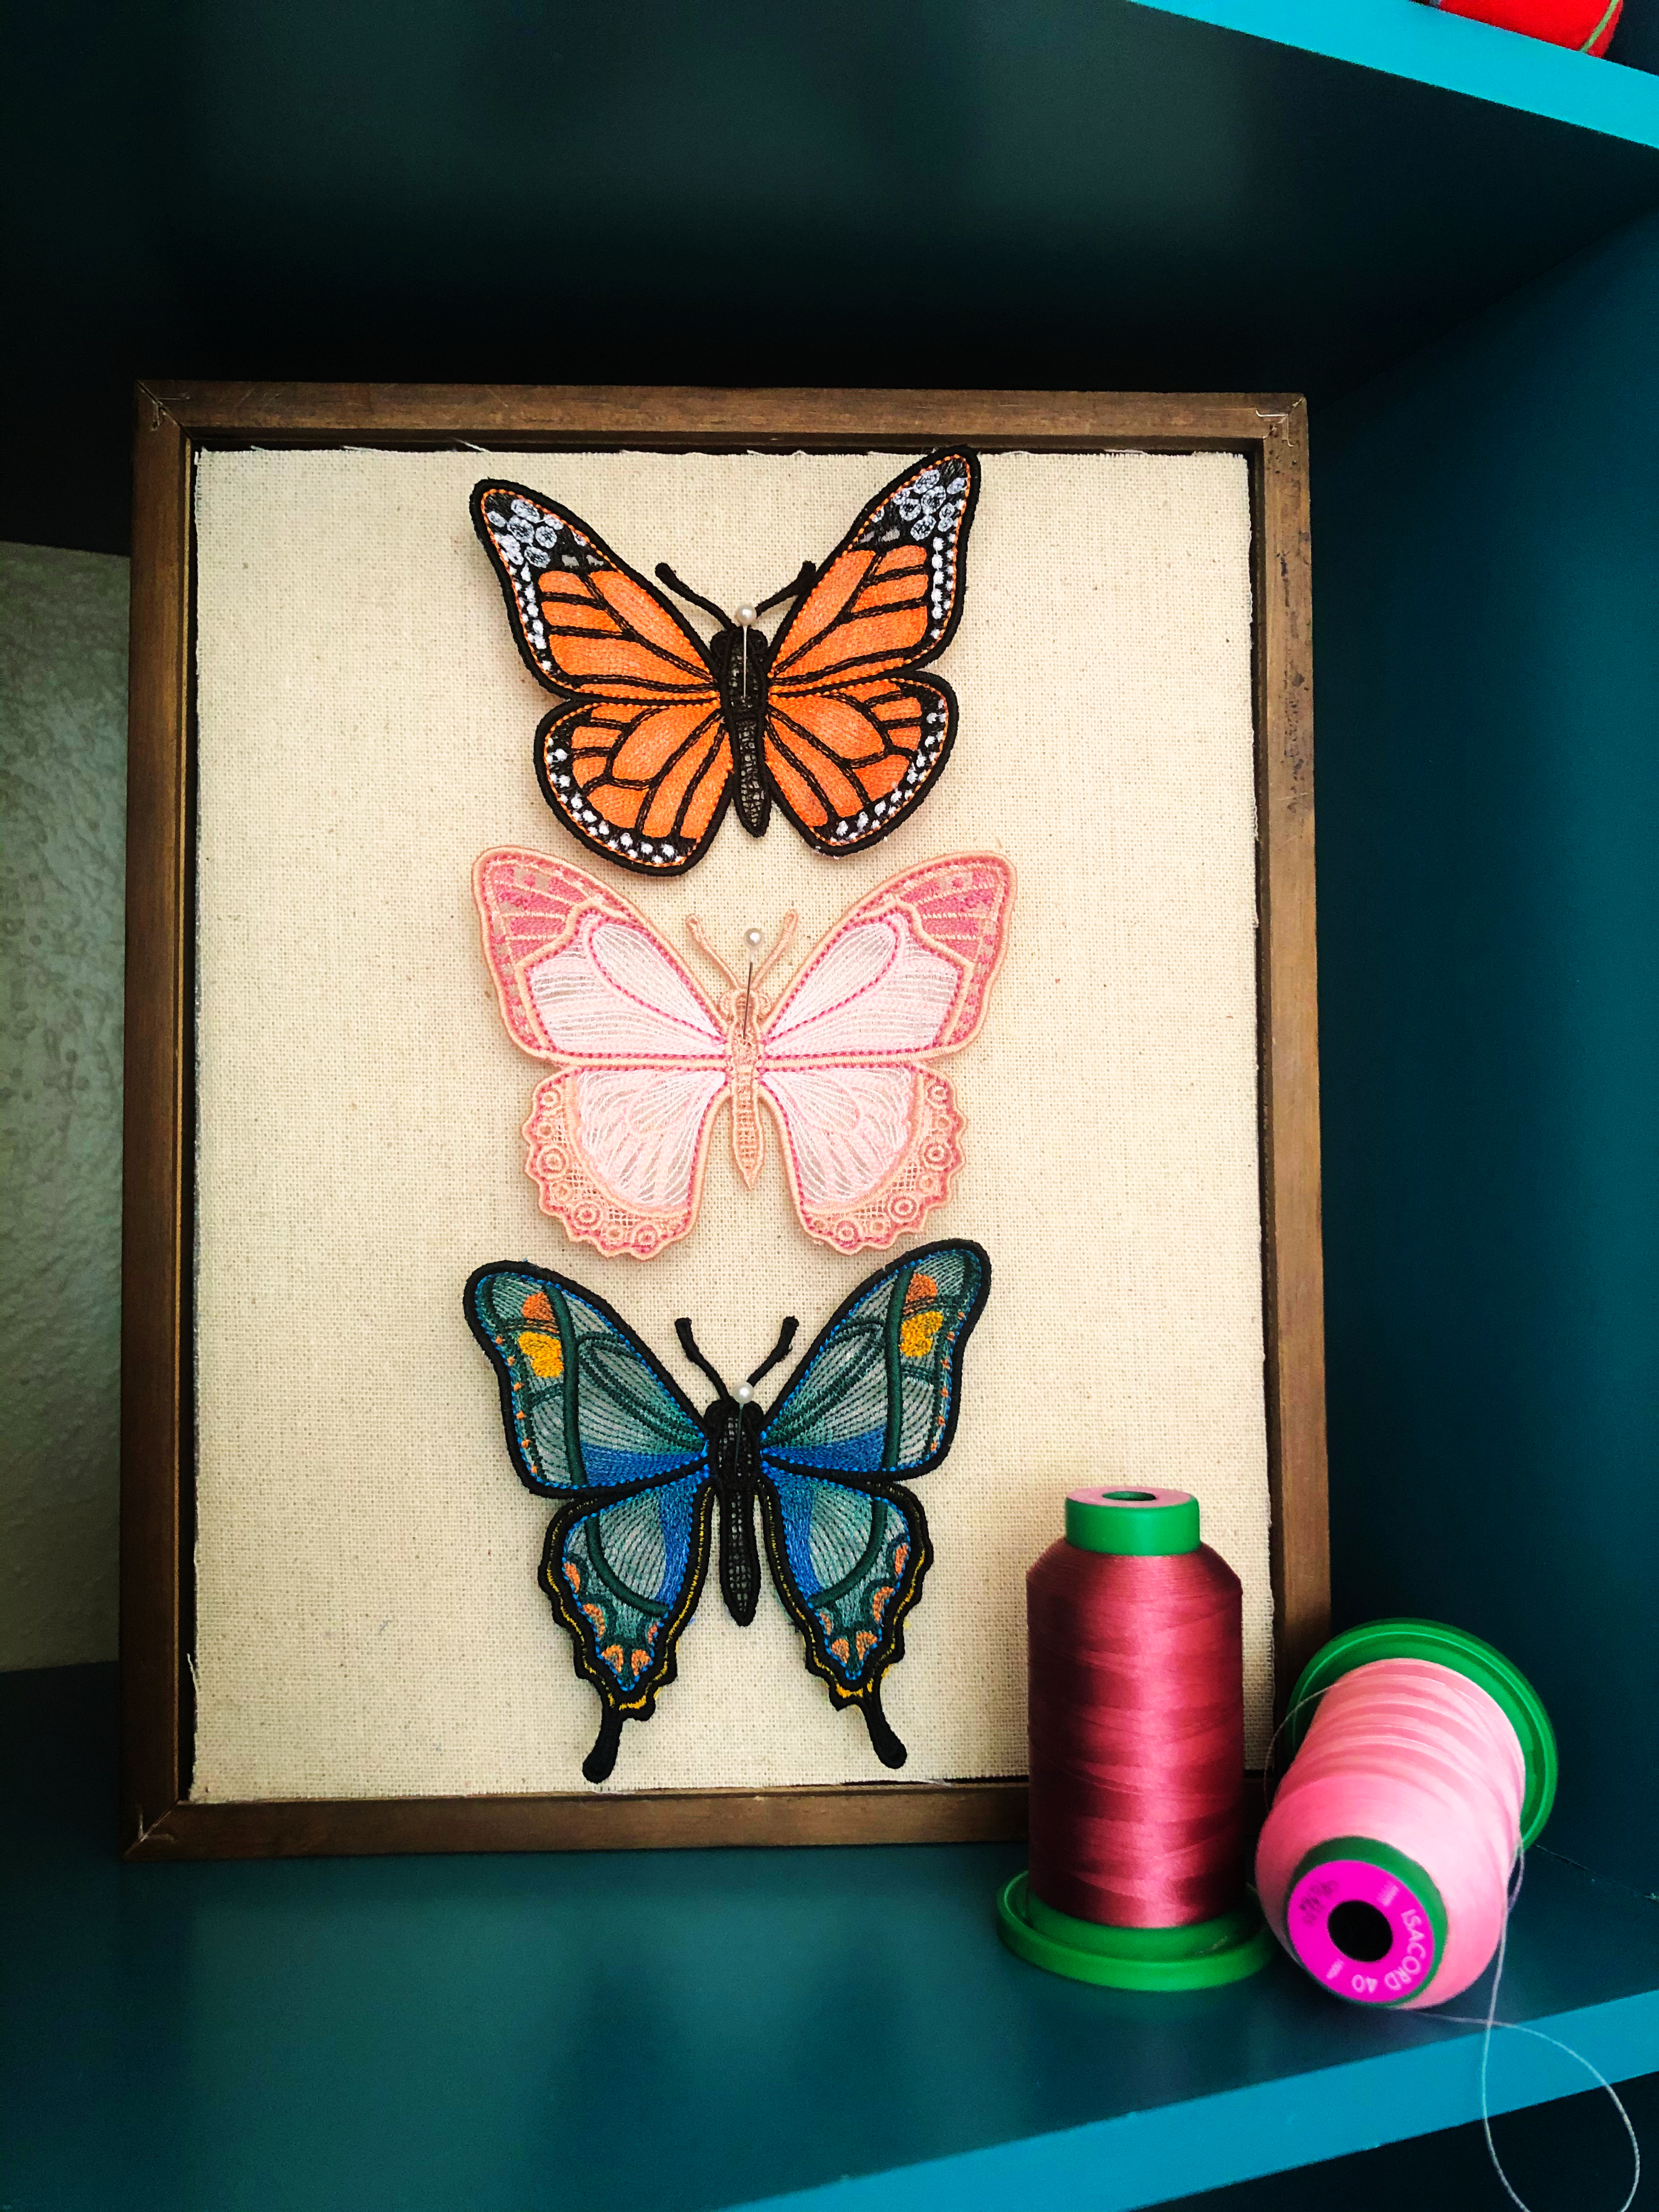
Once your butterflies are all stitched out and dry you can start to pin them in your shadow box. My shadow box came with these cute glass head pins but you can use whatever you like for yours.
And you’re done! Be careful showing this project off because it’s a big hit and you will absolutely be flooded with requests to make some for family and friends. The good news is, it’s fun and easy make!
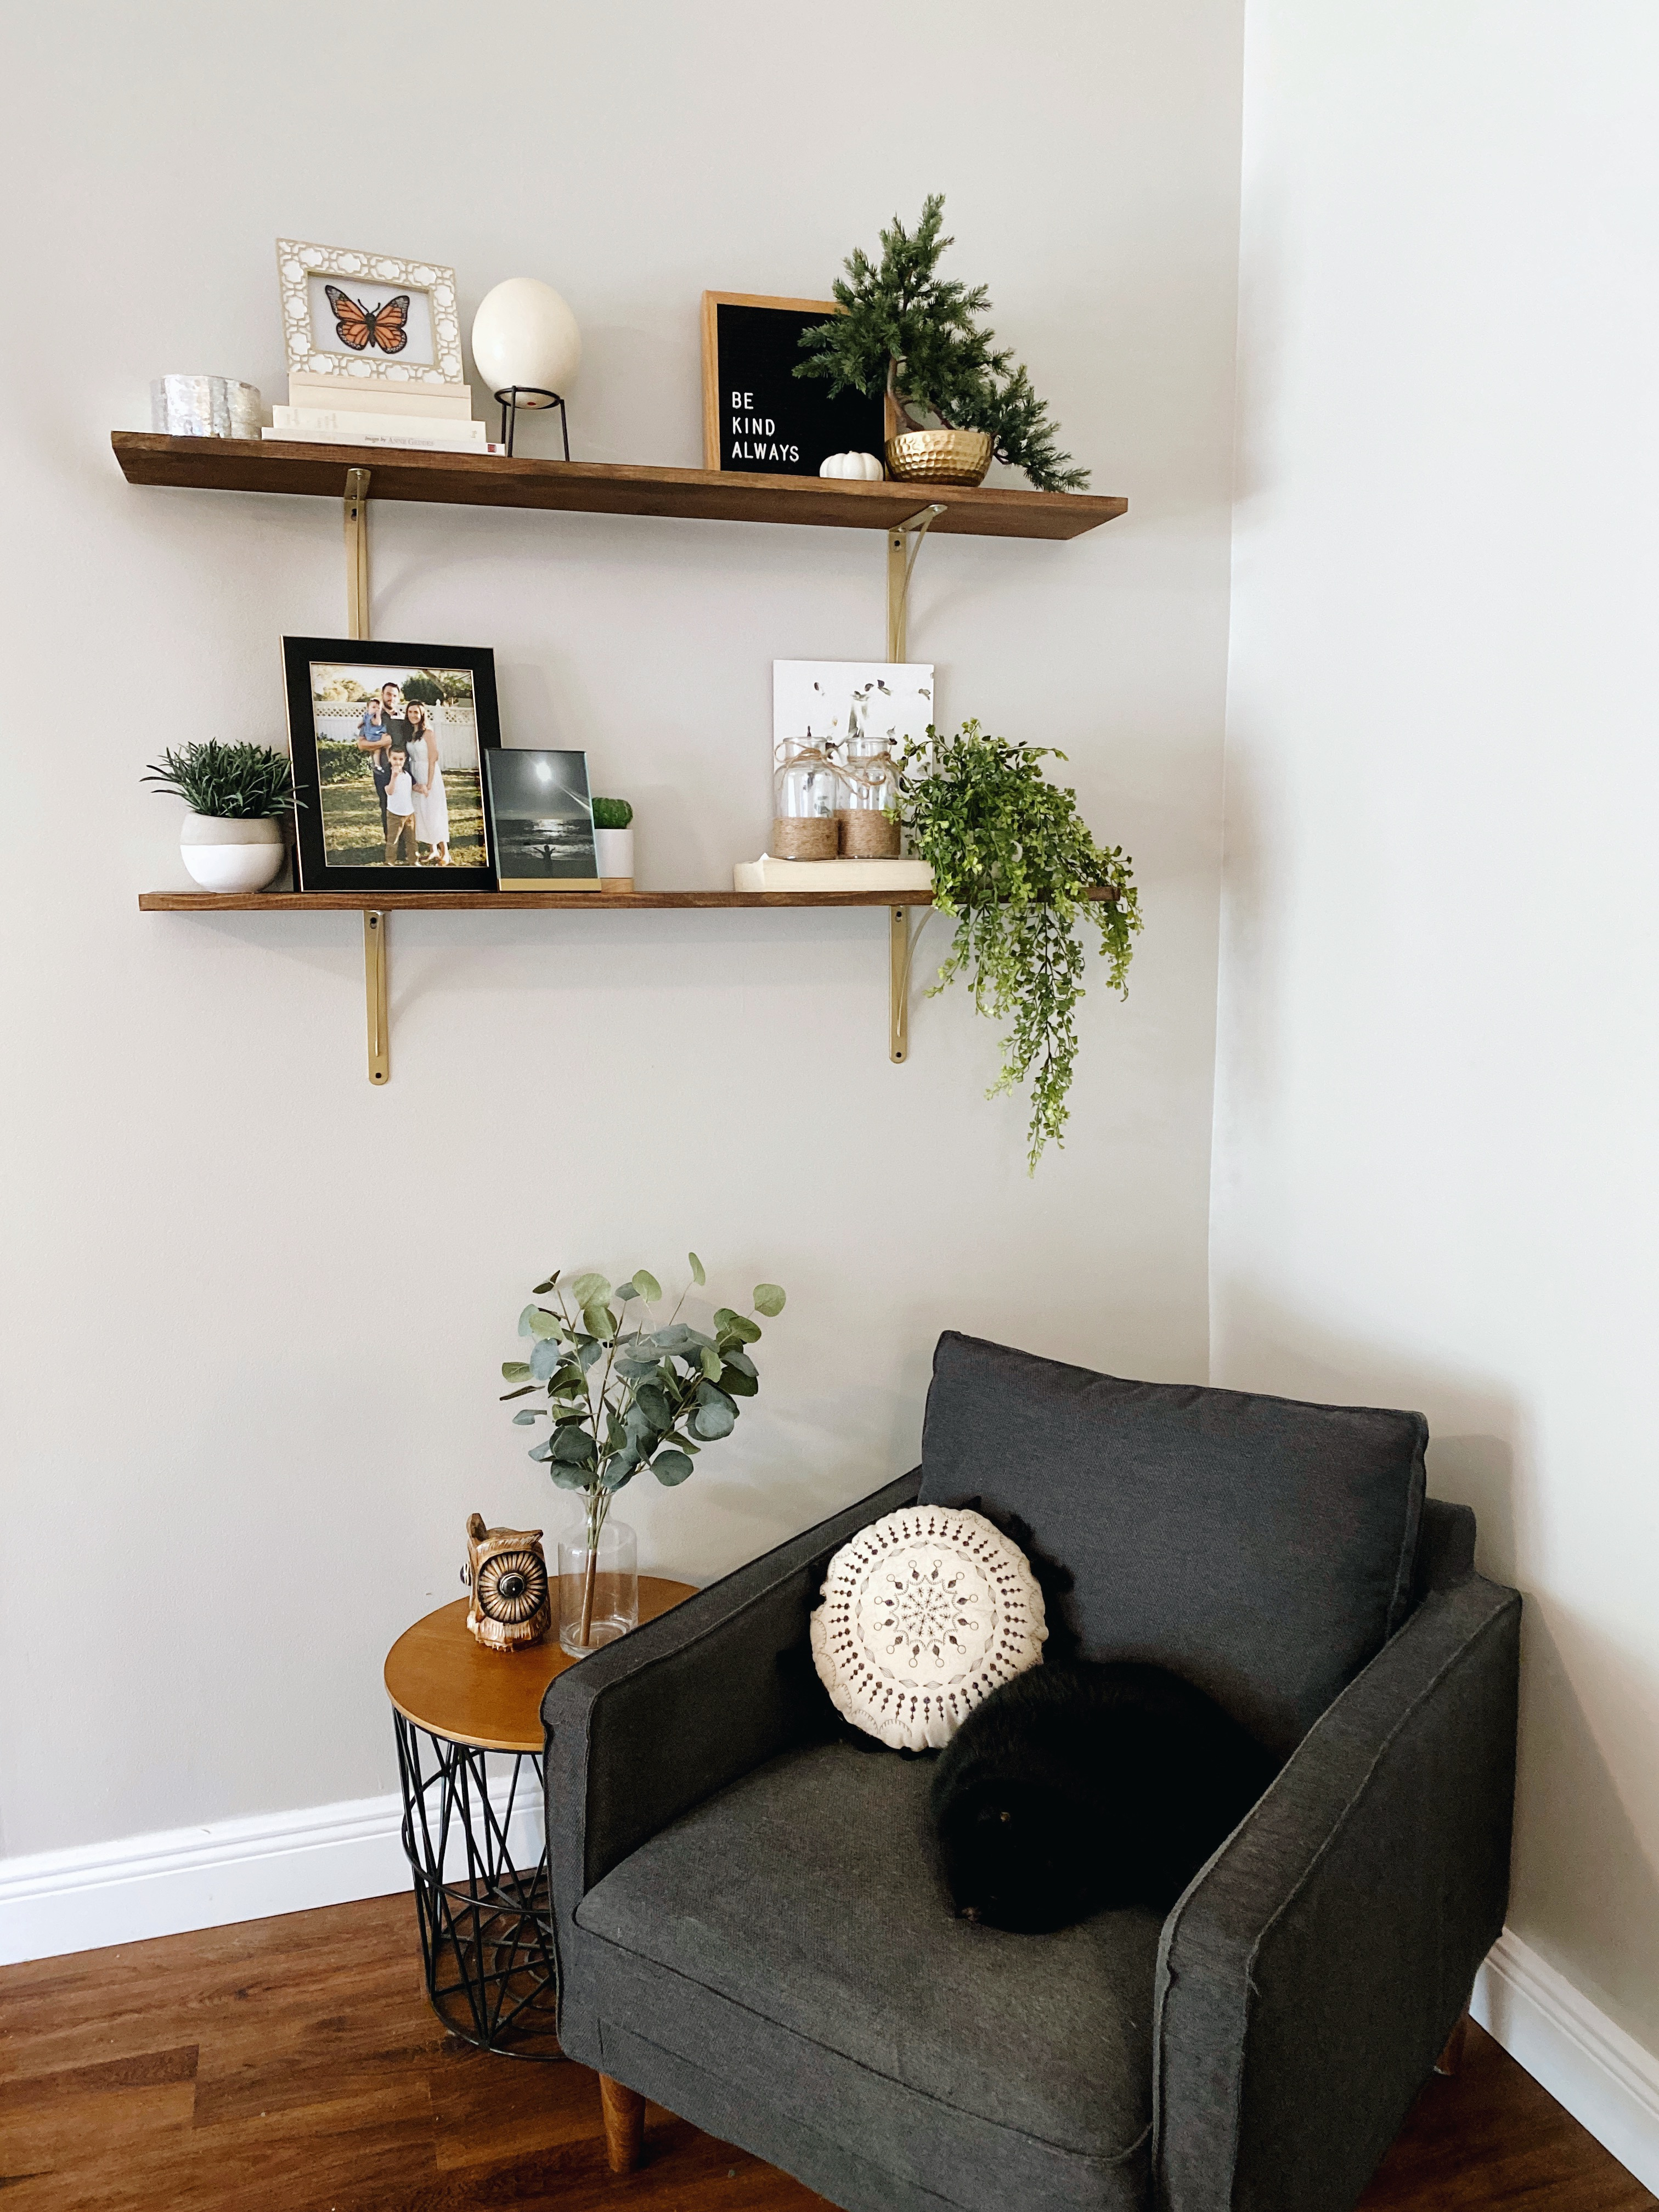
I was immediately asked to make one for my sister-in-law who raises monarchs. I hopped right on it and I’m thrilled I did; It’s so cute in her sweet little frame! I love that this corner of her house has embroidery projects of mine that she loved and wanted in her home, too. And no, that little black floof is not another pillow, it’s a cat that was totally unbothered by the camera.
Click here to check out the directions on how I designed and embroidered this gorgeous pillow using the shaping feature on my B880 PLUS.

Thank you so much for checking out this FreeStanding Lace tutorial! I can’t wait to see what you make! If you make a butterfly shadow box for your house please tag me in it on Instagram (@ToughKittenCrafts), so I can see what you have created. Click here to follow ToughKittenCrafts on Instagram.
Don’t forget to check out the DIY Starch Spray from Leftover Stabilizer! If you’re looking for more information on machine embroidery then check out ToughKittenCrafts.com for more projects, information, and more!
If you have any questions about freestanding lace or machine embroidery please feel free to ask them in the comments so I can help guide you to make your own FSL butterflies and to start feeling fearless with machine embroidery!
See ya soon.
– Kate
Used Products


What you might also like


4 comments on “Freestanding Lace Tutorial: Butterfly Shadow Box”
-
-
I changed things a bit I set it up to do 3 at a time in an oval hoop so could get better use of my stabilizer and my fabric! Hope it works?
One done 2 more to go… -
could the butteflies sit on a shelf alone
-
I bought these designs from OESD. They direct customers to a We All Sew blog in German. I couldn’t get it to translate, but did a search and found this excellent tutorial. Thanks!
Leave a Reply
You must be logged in to post a comment.

Pretty!