Kaffe Cross-Stitch Tips & Tricks
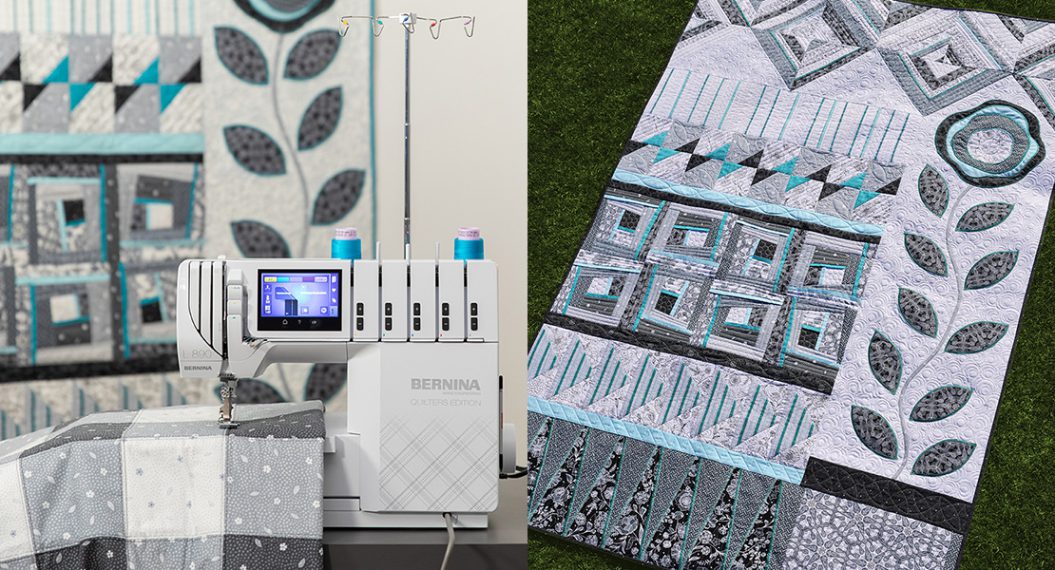
Last summer, BERNINA introduced a new collaboration with one of our favorite artists, Kaffe Fassett! We added the BERNINA 770 QE PLUS Kaffe Fassett Edition and the B 475 QE Kaffe Fassett to our portfolio. There is a fantastic interview with my colleague Andrea Goddard discussing her role in bringing these machines to life, which you can find here on the BERNINA International blog.
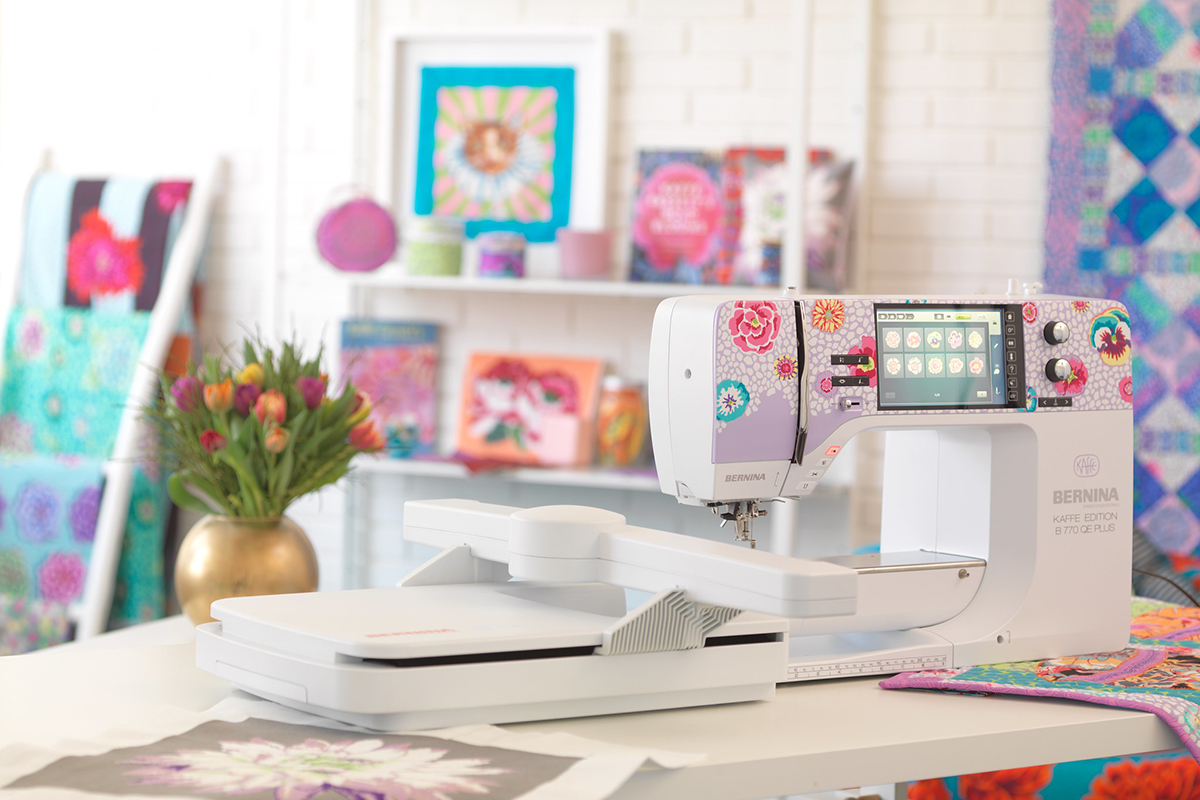
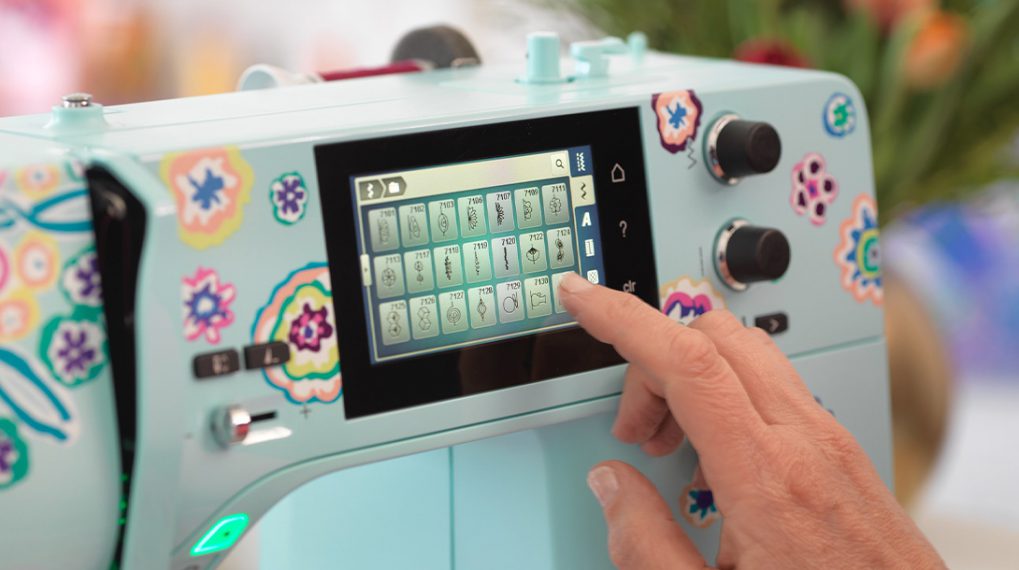
In addition to the beautiful, colorful design of these machines, they have some fun, unique features. One of my favorite features about the B 770 QE PLUS Kaffe Fassett Edition are the embroidery designs included on the machine. There are 64 exclusive Kaffe designs built into the machine, many of which are floral motifs inspired by his fabrics digitized to have a unique texture, nearly appearing hand-stitched.
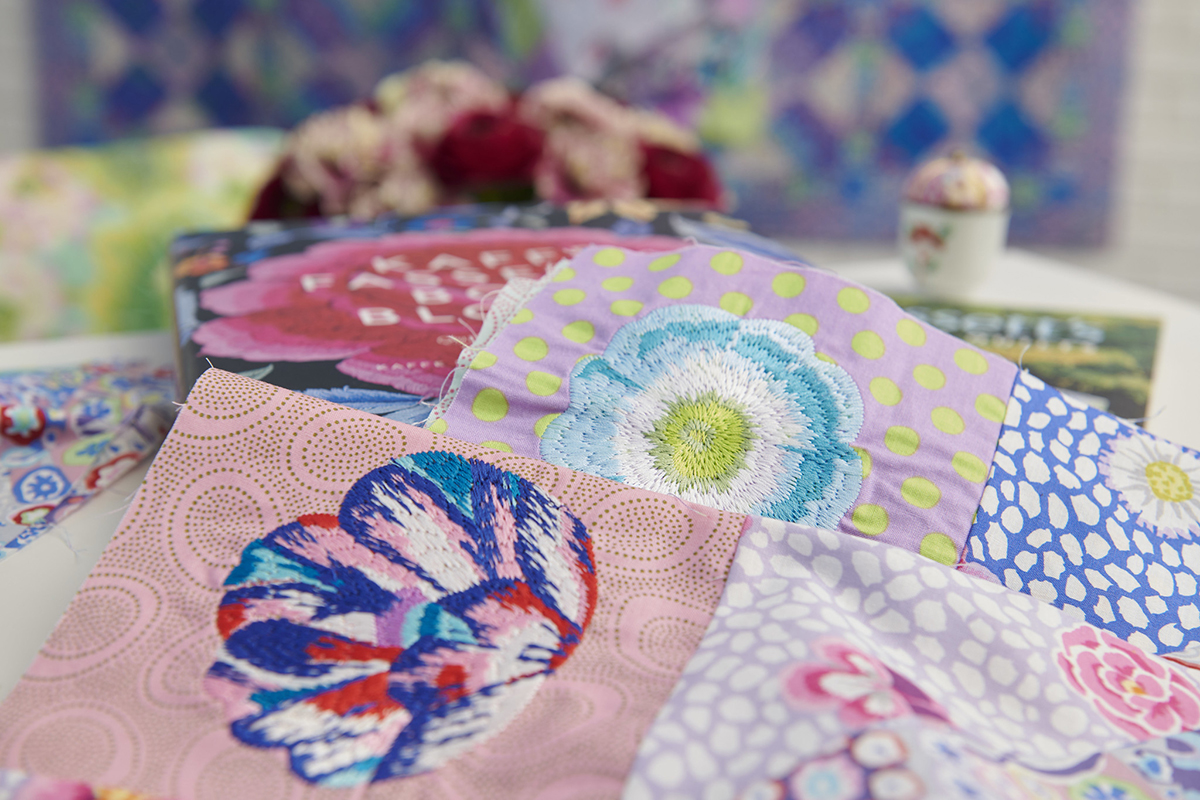
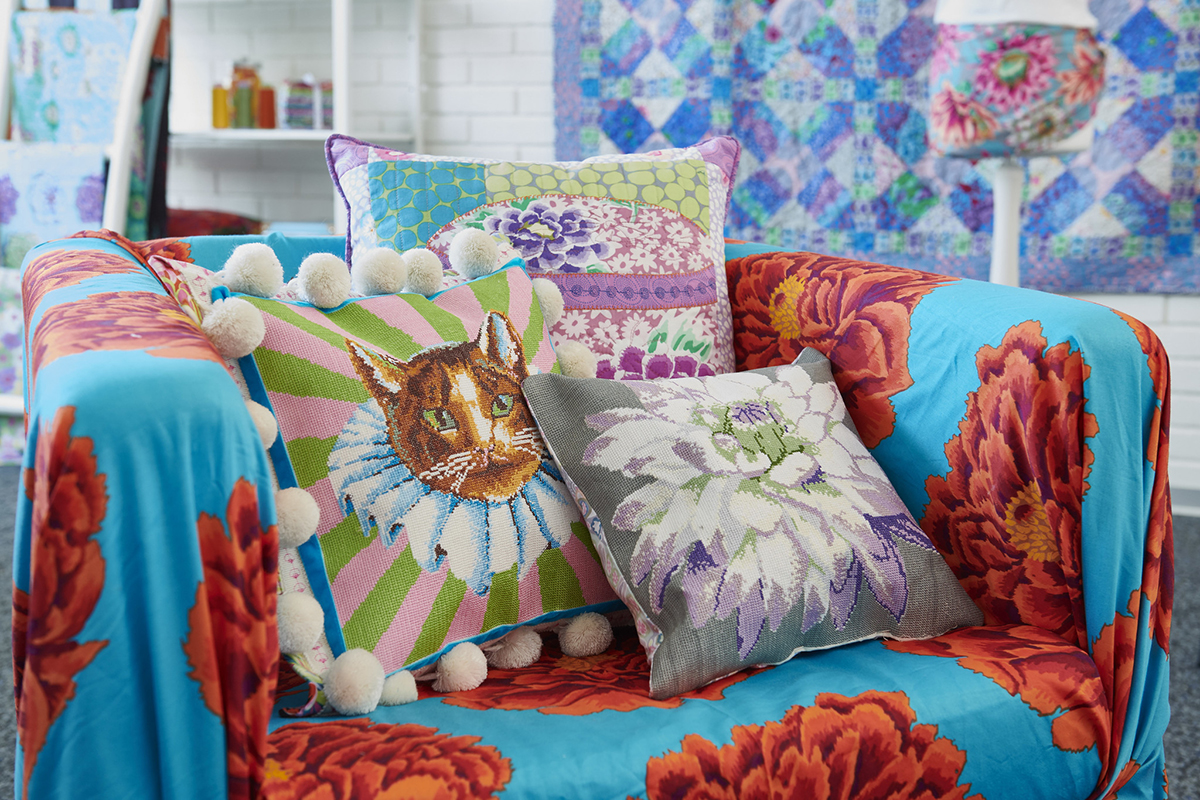
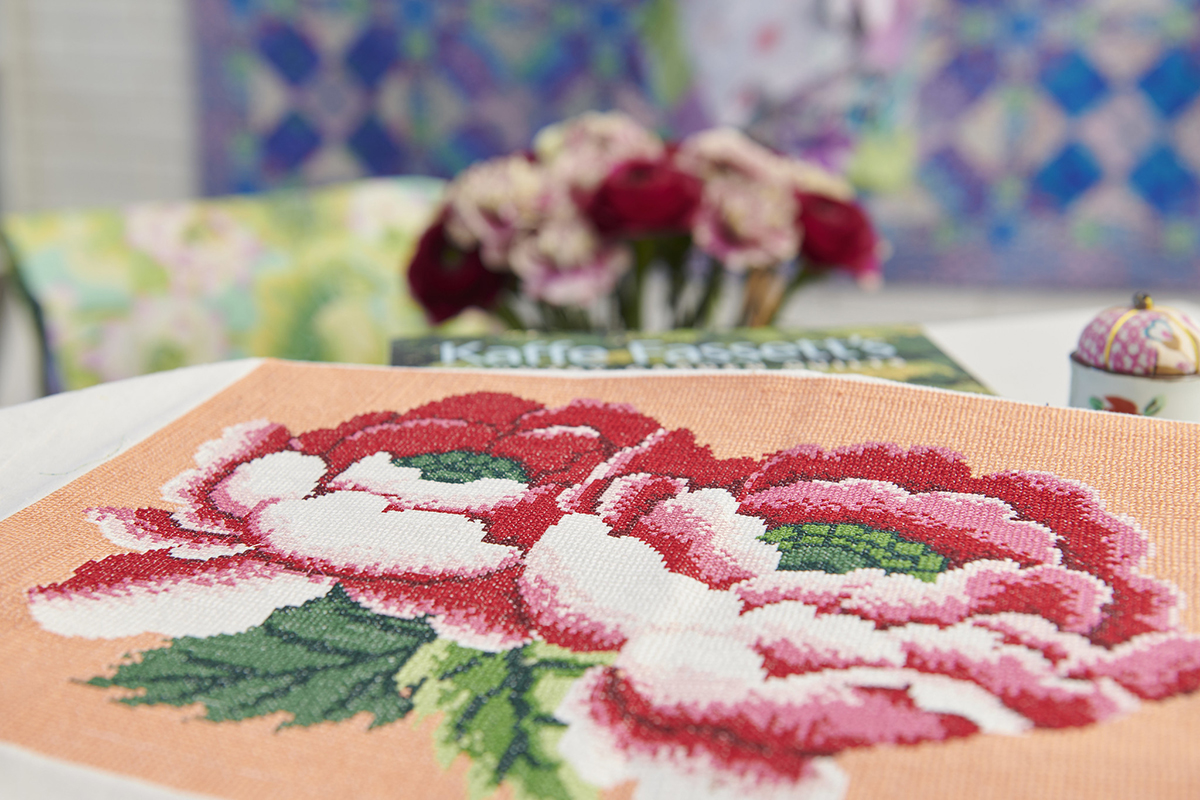
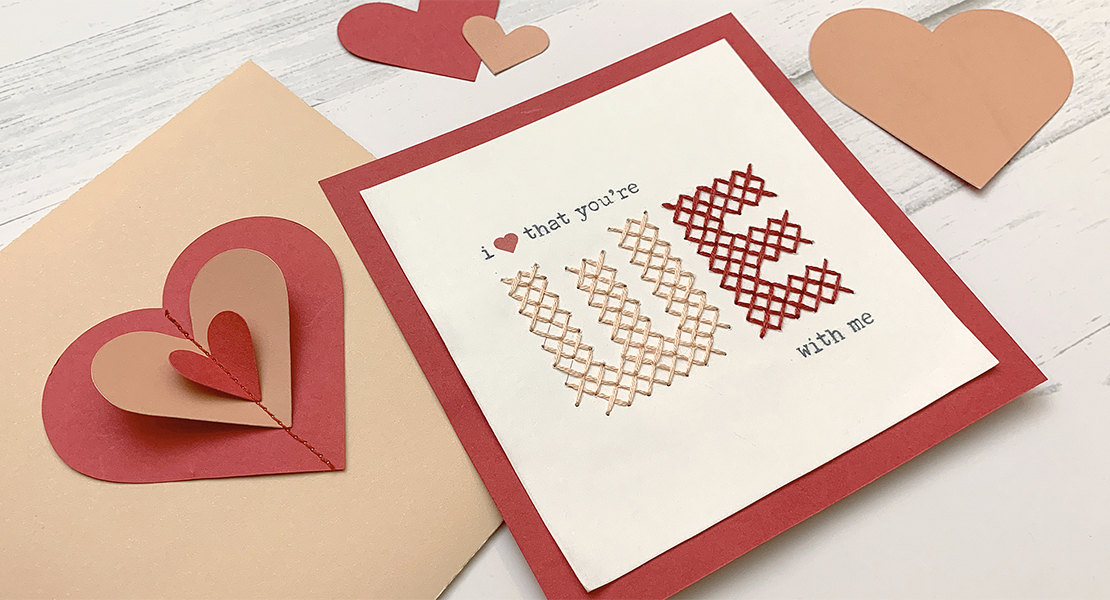
In addition to the florals are three multi-hooped cross-stitch block designs. Each of these is composed of four parts that all come together to create a seamless design up to 13 1/2” square. There is a peony flower, a dahlia flower, and an adorable tabby cat in an Elizabethan ruff collar. Beautiful, colorful, and whimsical in true Kaffe fashion!
I immediately fell in love with these designs. The texture and detail is incredible! But these cross-stitch designs are not embroidery designs for the faint of heart—they are very stitch intensive and require careful precision (and lots of time!) to stitch out. The peony design I’m stitching has 362,478 stitches digitized as double cross-stitch. That’s a ton of stitches! However, with the right materials and tools, anyone can stitch these designs out like a pro. Today, I want to share my tips for stitching these designs out with success.
Supplies:
- 1/2 yard of woven fabric
- OESD StabilStick TearAway – 15” roll or larger
- OESD Heavy Weight TearAway – 15” roll or larger
- Flatter pressing spray (or other starch-alternative)
- 505 Spray Adhesive
- OESD Bobbin Thread
- Isacord embroidery thread in necessary colors
- Fabric marking pen
- Acrylic ruler
- Medium Clamp Hoop
- BERNINA 770 QE PLUS Kaffe Fassett Edition
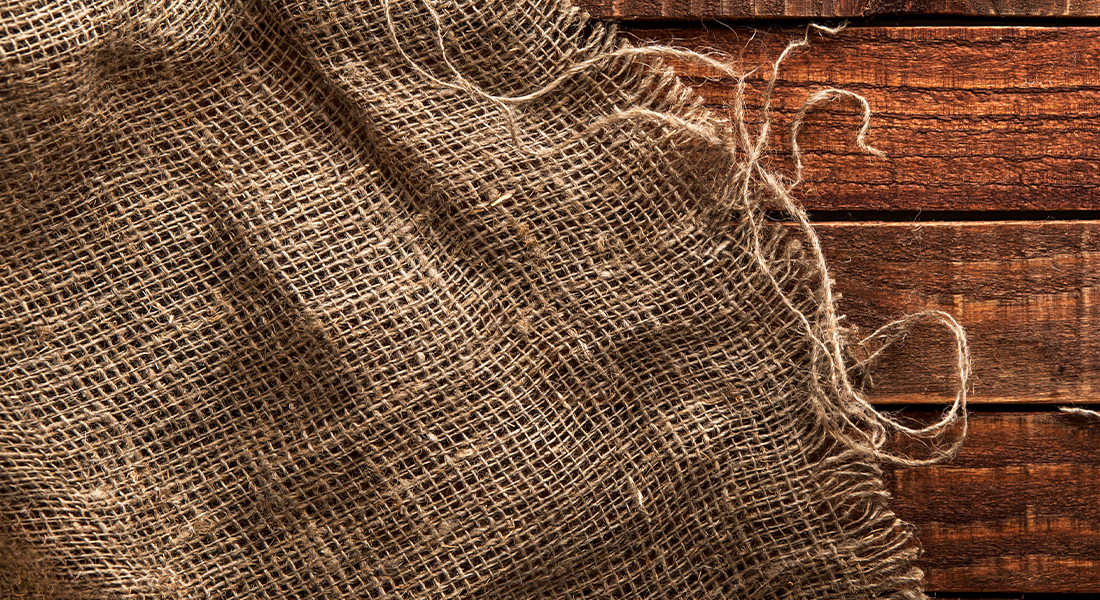
Tip #1: Choose the right fabric
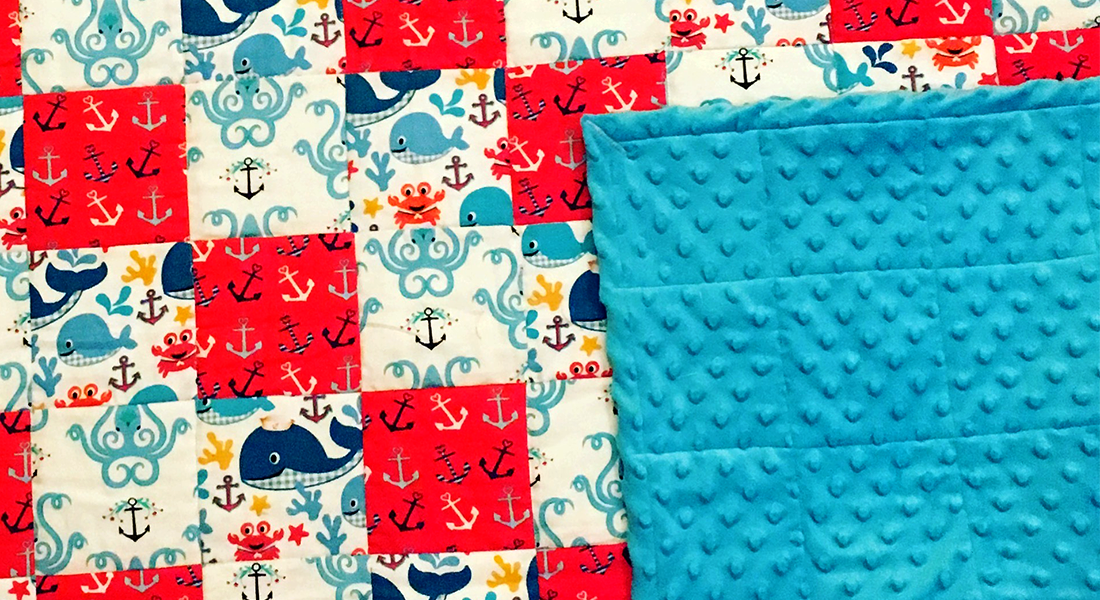
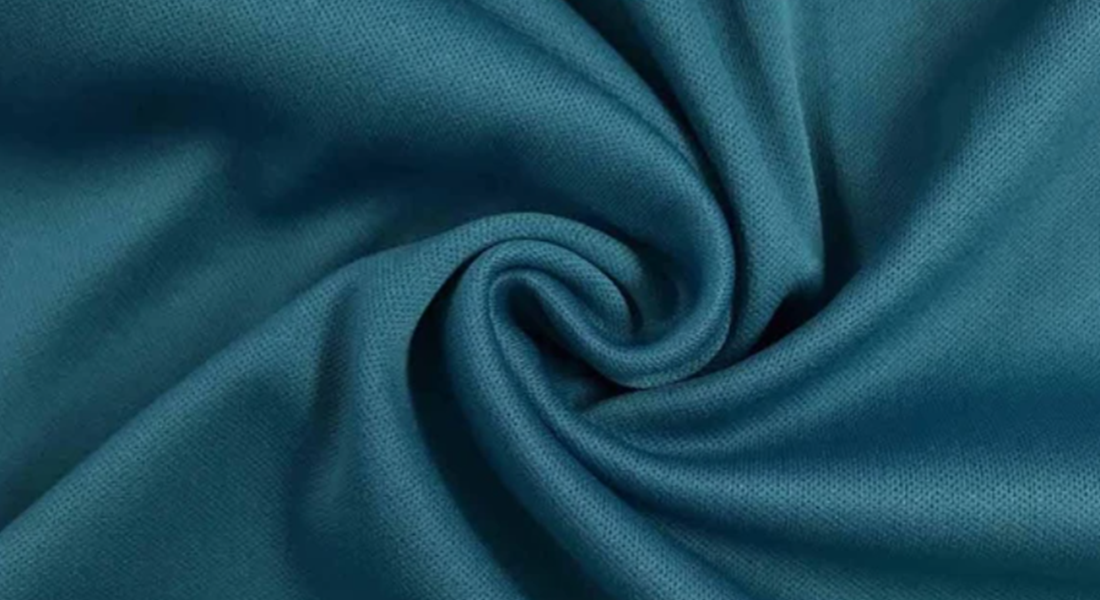
These designs should be stitched on a medium to heavy weight woven fabric. I stitched mine on Essex Linen Canvas, which is about a 6.5 oz canvas. For comparison, standard quilting cotton is typically 4 to 5 oz, popular cotton/linen blend canvases are about 7 oz, and duck cloth can range from 8 oz to 16 oz. I recommend stitching on fabric that it between 7 and 9 oz in weight. If your fabric is lighter than that, you will want to include an additional stabilizer fused to the wrong side of the fabric, like OESD Fusible Woven or Fusible Polymesh.
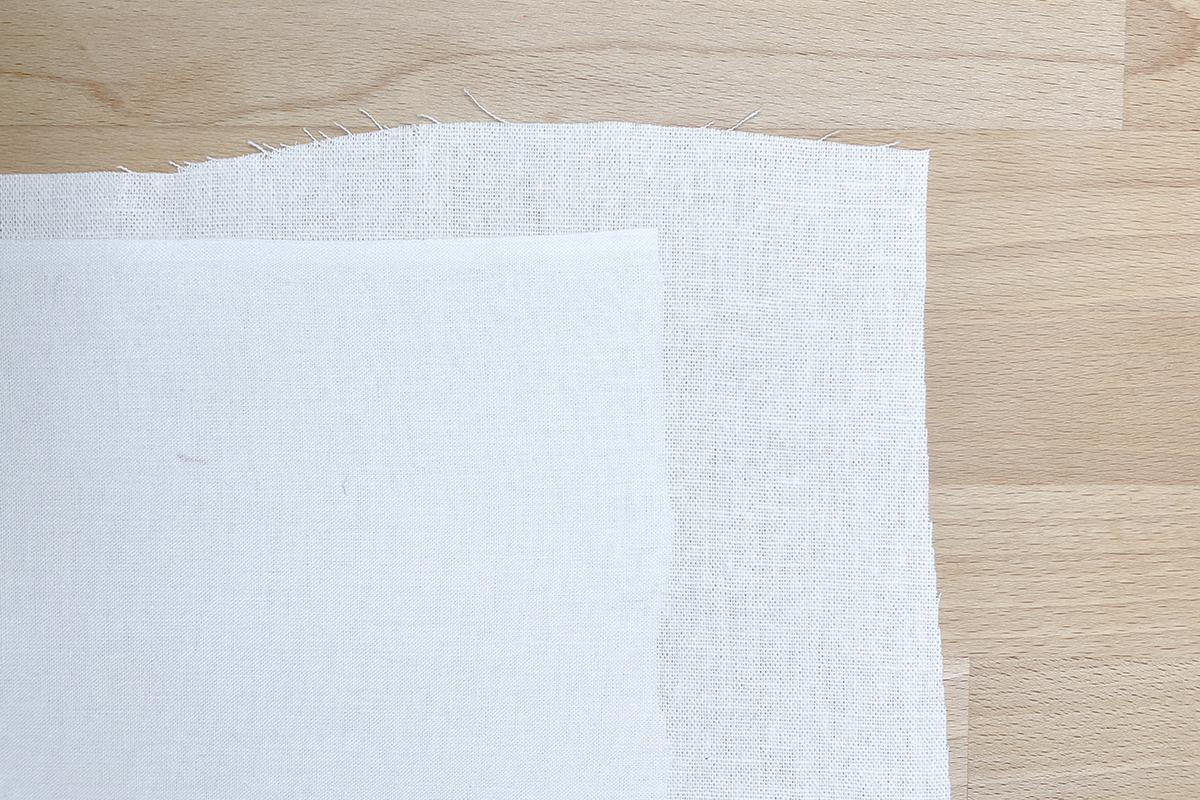
I highly recommend stitching these designs on a piece of fabric much larger than the finished block. As the block finishes at 13 1/2″ square, I recommend stitching on at least a half yard cut of fabric and then trimming down as needed once finished.
Iron your fabric smooth before adding stabilizer with the help of spray starch or starch alternative. Note: if you are adding a fusible stabilizer, press your fabric with starch before adhering the fusible. Then follow the manufacturer’s directions to fuse to the wrong side.
Tip #2: Proper stabilization
To support the hundreds of thousands of stitches involved in these designs, you need a lot of stabilizer. Proper stabilization will not only improve the finished product but it will make design positioning with multi-hooping much easier as you’ll have cleaner lines and fewer puckers.
We recommend using StabilStick TearAway, a medium weight sticky-backed tear away stabilizer, followed by Heavy Weight TearAway.
On the wrong side of the fabric, adhere a piece of StabilStick TearAway at least 15” x 18”. In order to cover the whole block seamlessly, you will need rolls of stabilizer at least 15” wide. Be sure there are no wrinkles or puckers in the fabric after adhering your StabilStick.
Next, spray the wrong side of your fabric/stabilizer with 505 Spray Adhesive. Adhere a piece of Heavy Weight TearAway, again at least 15” x 18”, to the StabilStick. Your fabric should now be quite stiff, with the fabric on top, followed by StabilStick, and Heavy Weight TearAway on the bottom.
Tip #3: Start with your general design position
Again, I highly recommend stitching these designs out on a large piece of fabric and then trimming down to size. Even though in doing this, we don’t need to align the whole design to a precise point, I suggest marking out the general position and block outline, as a reference guide for your multi-hooping process.
Traditionally with embroidery, you might mark a center crosshair on your fabric to use for aligning your design. However, these cross-stitch designs are comprised of four unequal tiles, laid out as follows:
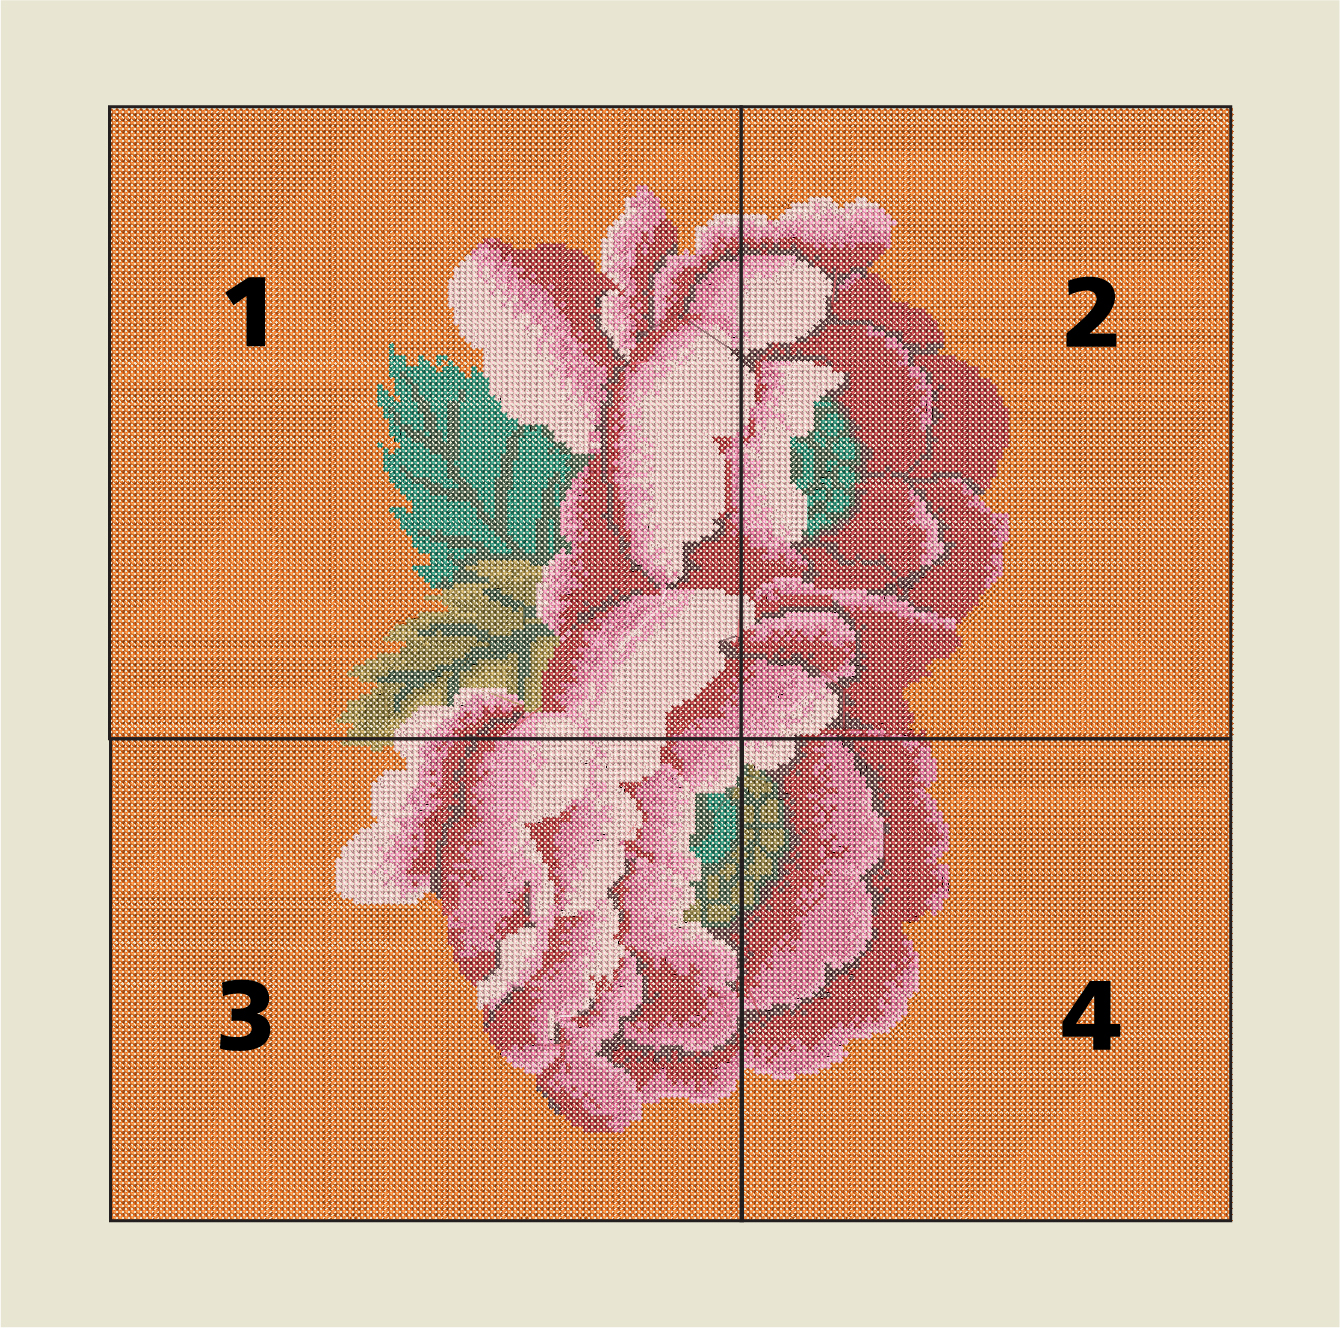
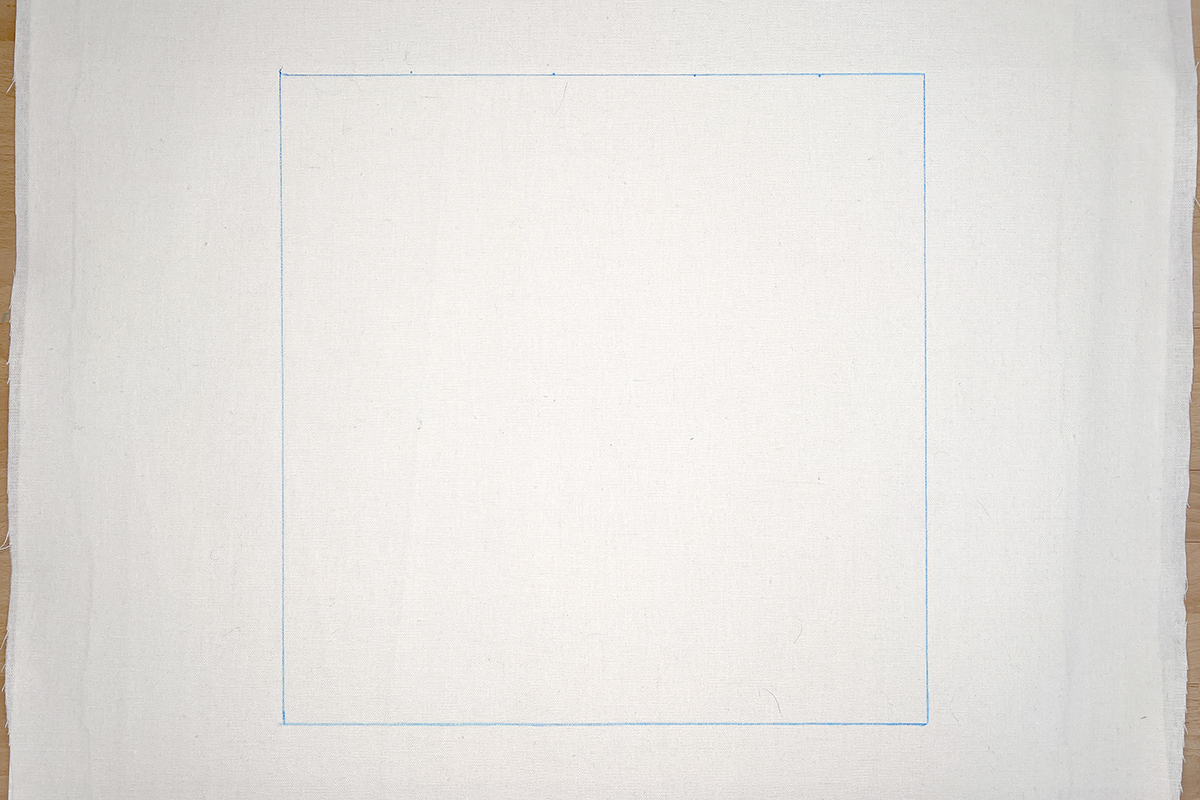
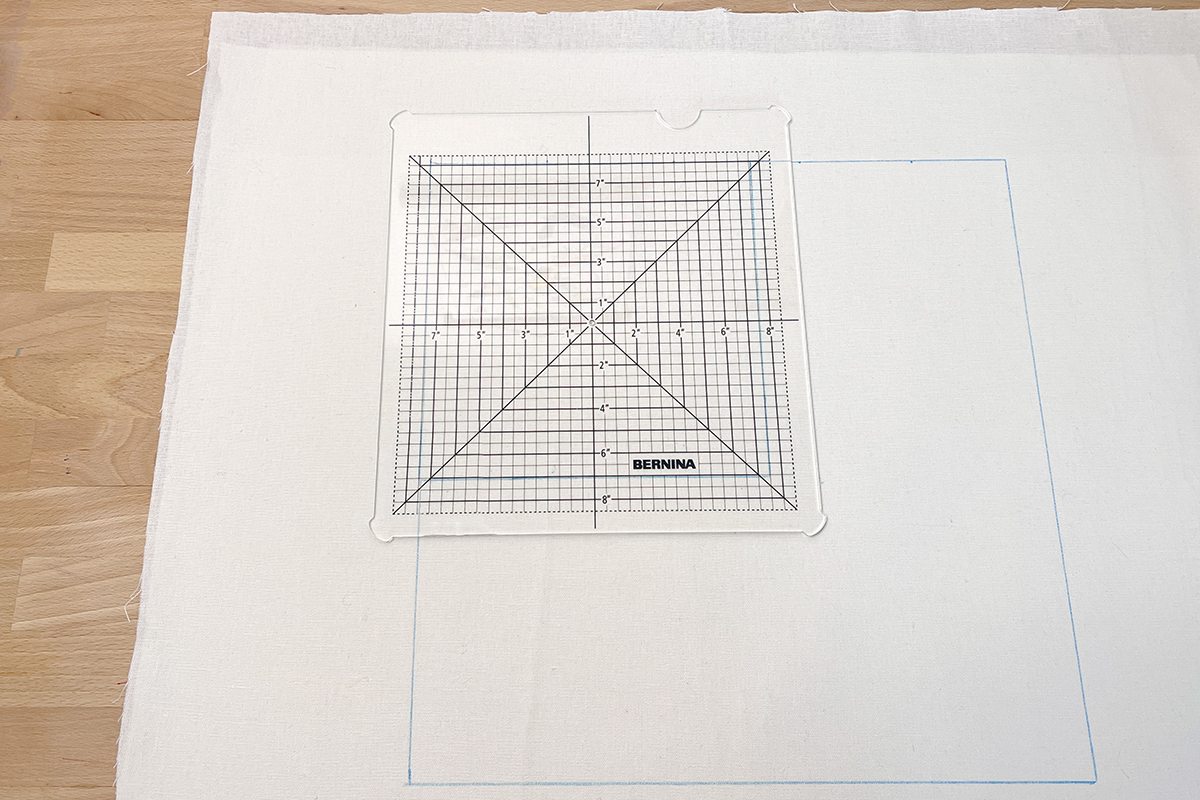
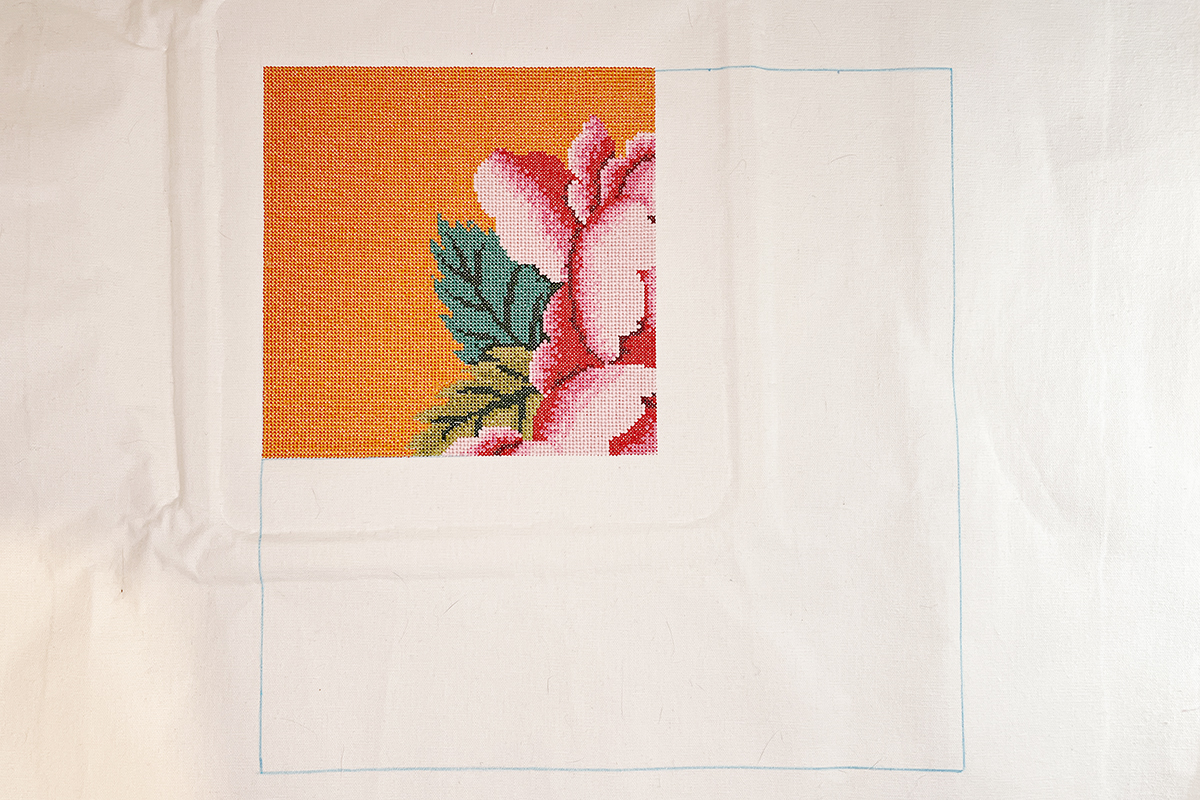
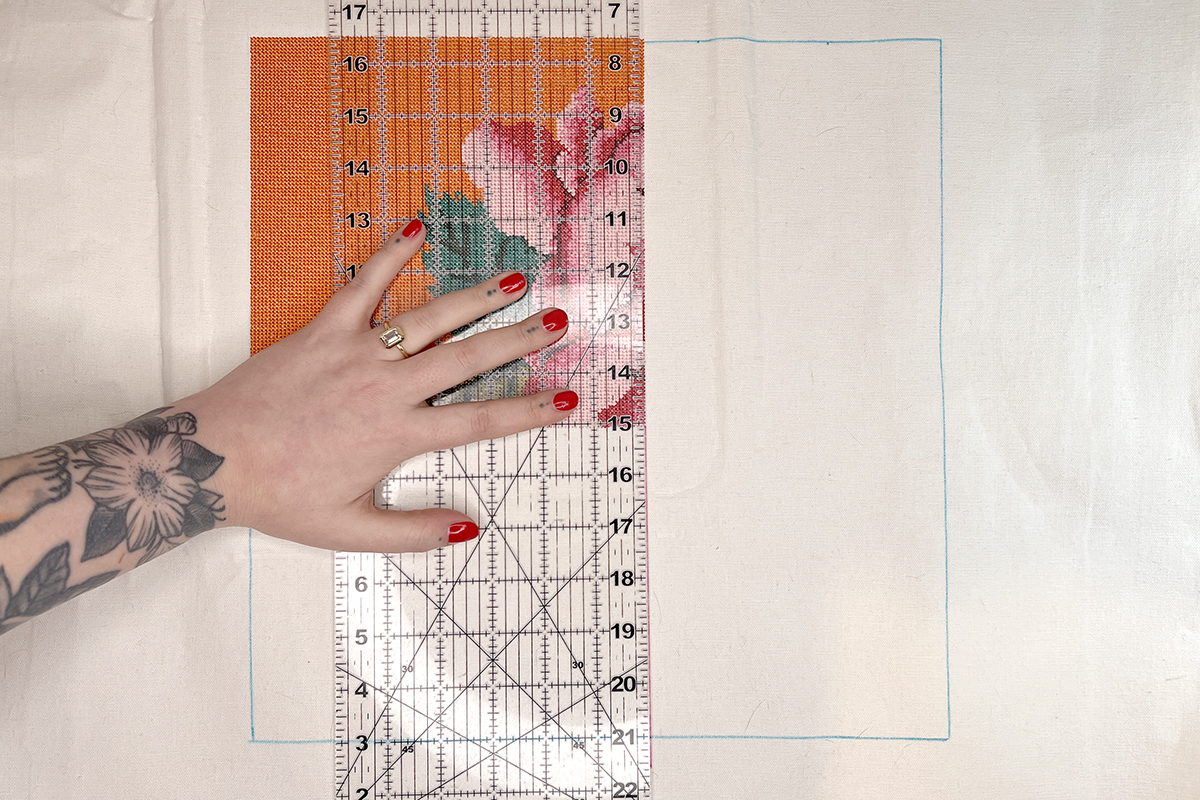
If we simply use a center crosshair for alignment, our design may not end up centered on the fabric. To make sure the finished block is centered on the fabric (and ensure the whole block fits on your fabric), instead mark out a 13 1/2” square using your fabric marker and a ruler.
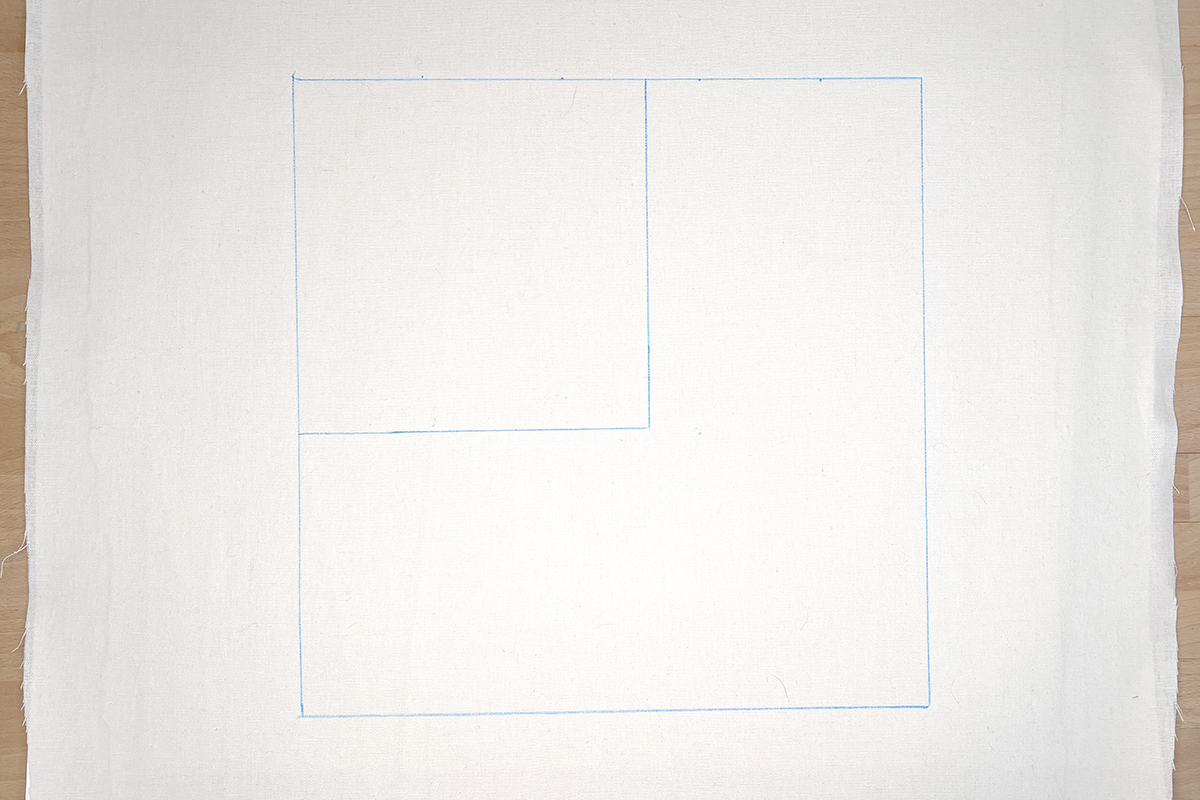
Next, mark a 7 1/2” square within your larger block, starting at the upper left corner. This will roughly outline section #1 of our design.
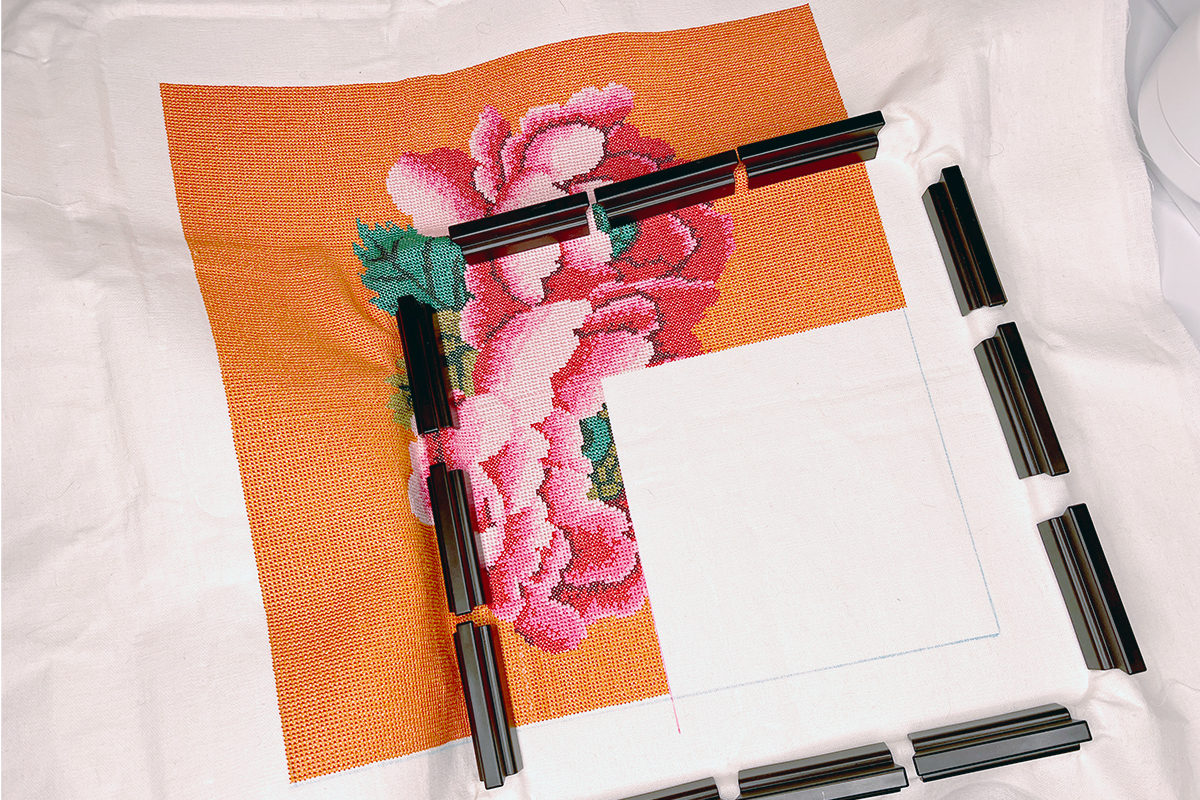
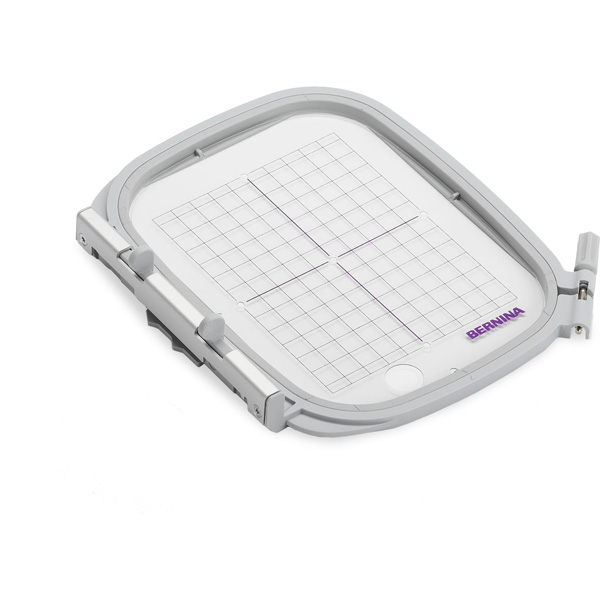
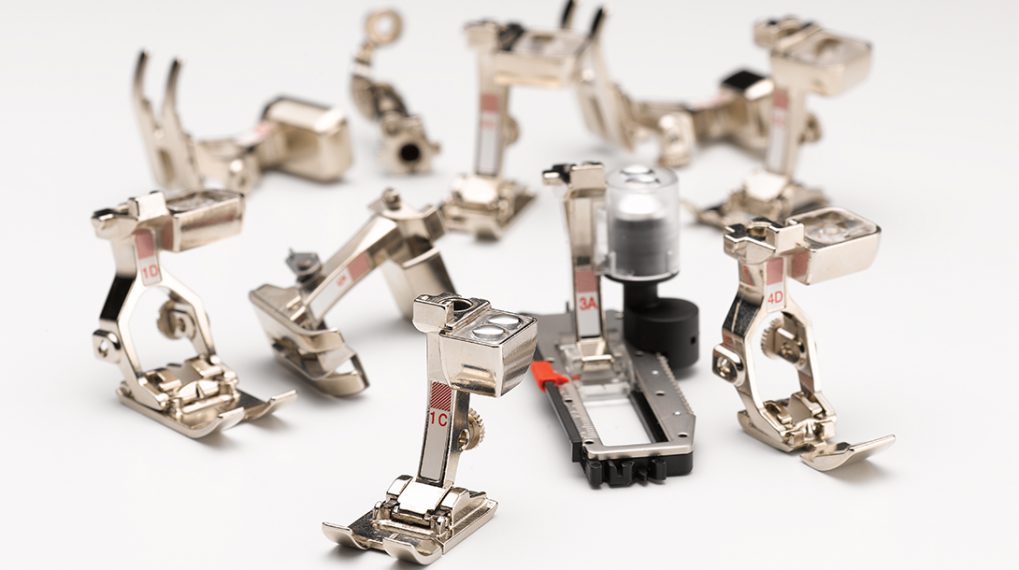
Tip #4: Use the Medium Clamp Hoop
I highly recommend using the Medium Clamp Hoop for this project for two reasons—it is the smallest hoop that can fit each of the four sections of the design and it is very easy to use for multi-hooped projects. The Medium Clamp Hoop comes with a stiff, acrylic template (similar to a quilting ruler) and 12 clamps that are used to secure the fabric to the hoop itself.
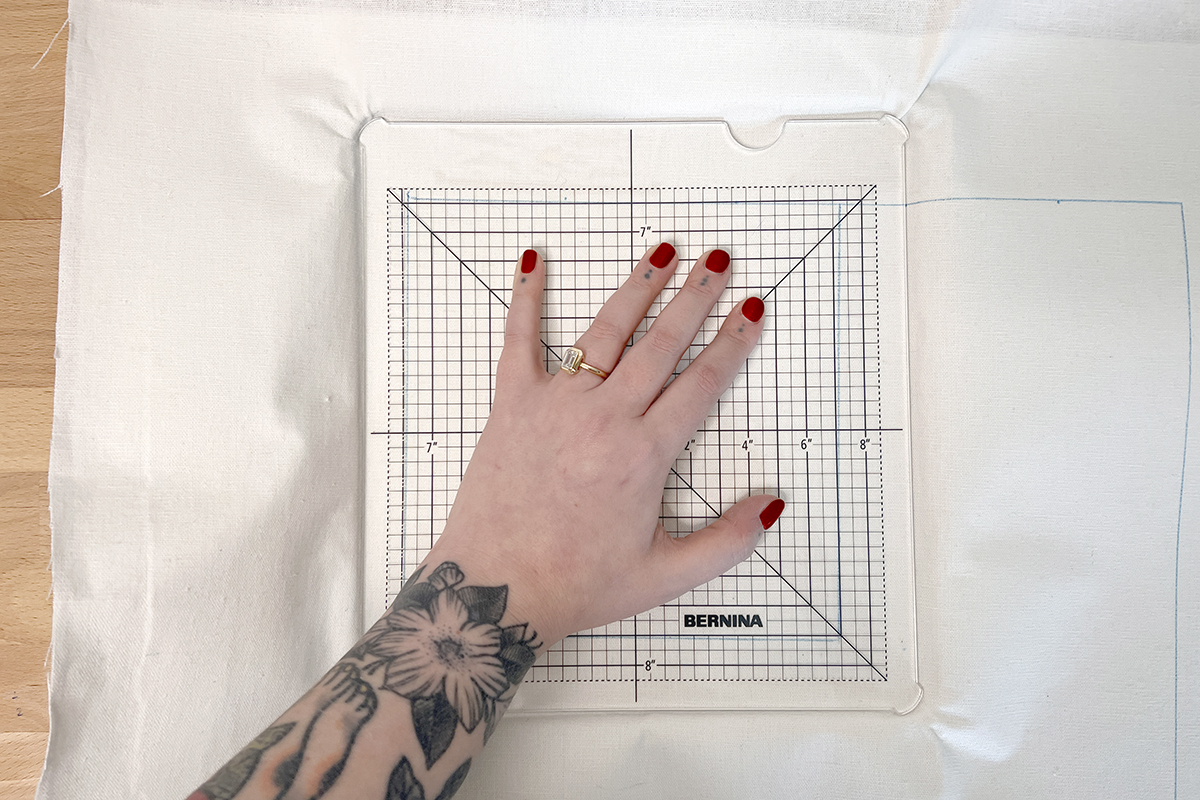
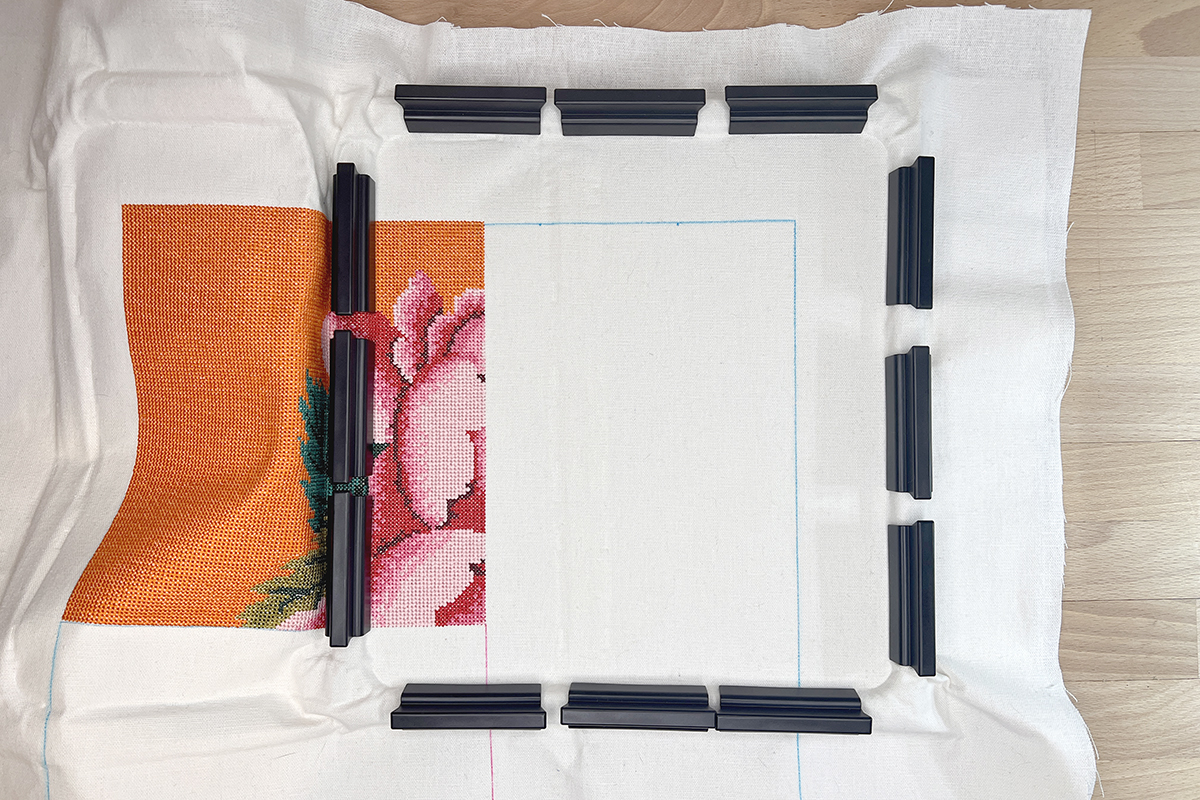
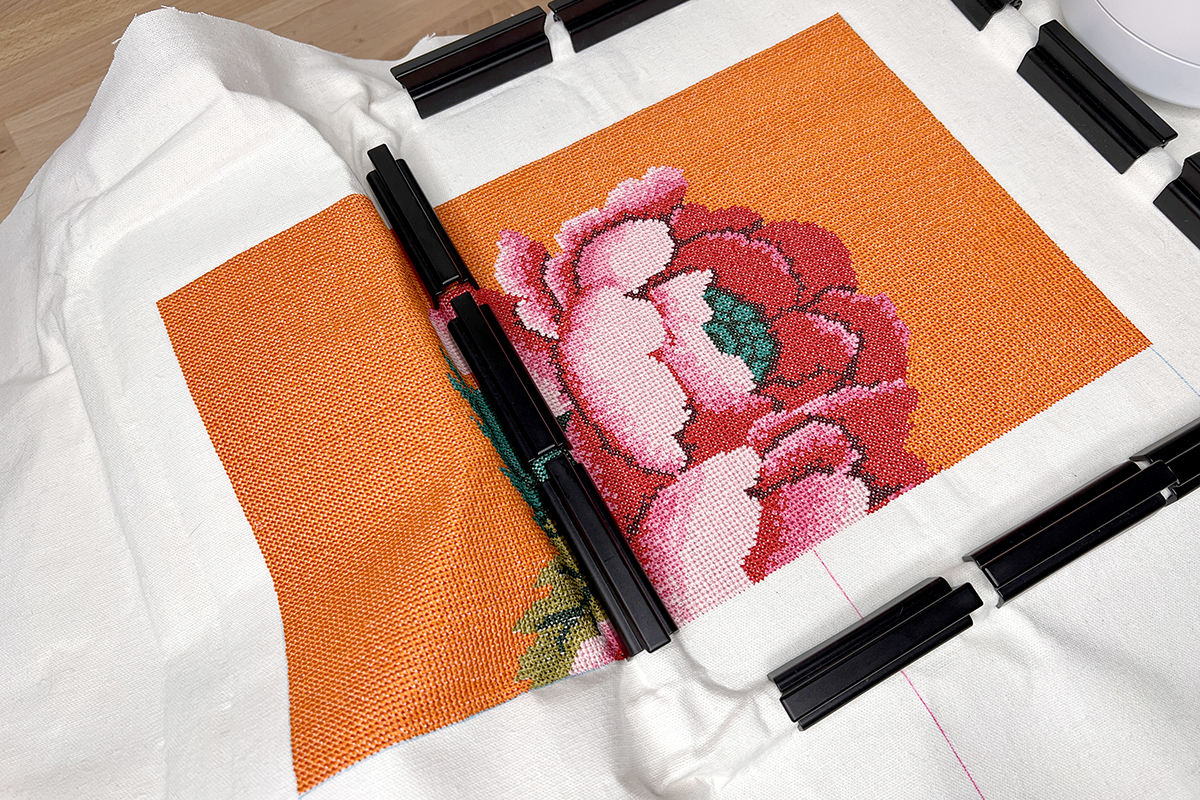
Lay the template on top of your fabric, roughly centering the 7 1/2″ marked square with the markings on the template.
Then, grab the fabric and template together and lay them on top of the hoop. Use the template to press the fabric into the hoop. This should feel similar to how you would typically hoop fabric using the inner and outer rings of a traditional hoop.
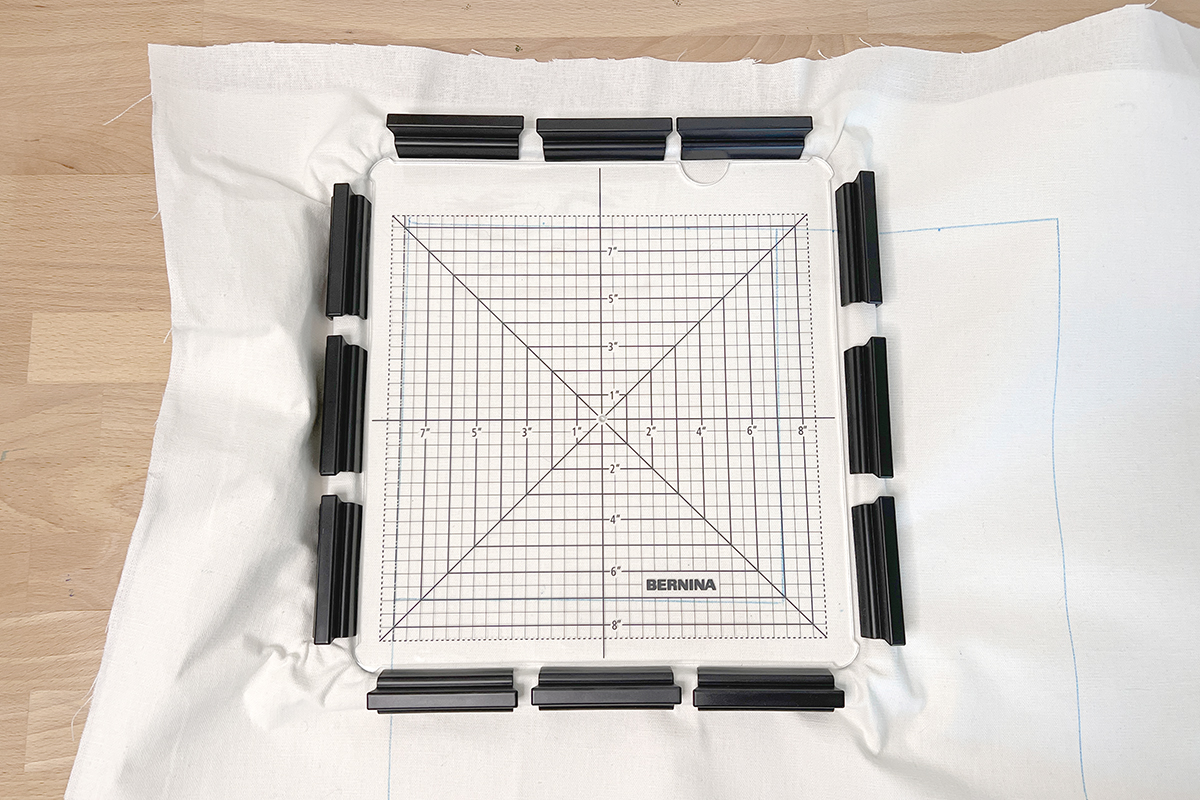
Now, secure the fabric in place by pressing the clamps down over the fabric onto the hoop. To get even tension, I like to alternate sides for each clamp—one on the left, then one on the right, one on the top, then one on the bottom.
For this project, it is strongly suggested to use all 12 of the included clamps. All sides of the fabric must be securely held to the hoop. If you do not use all of the provided clamps, you run the risk of your fabric shifting, creating puckers, and having challenges with alignment.
When you have your fabric hooped, you can remove the template from the hoop.
Tip #5: Simple placement for first section
Because we have a blank canvas to start our design, we can keep placement of the first section very simple. Everything stitched after this will need to be carefully aligned but for section #1, we don’t need to be too nit-picky.
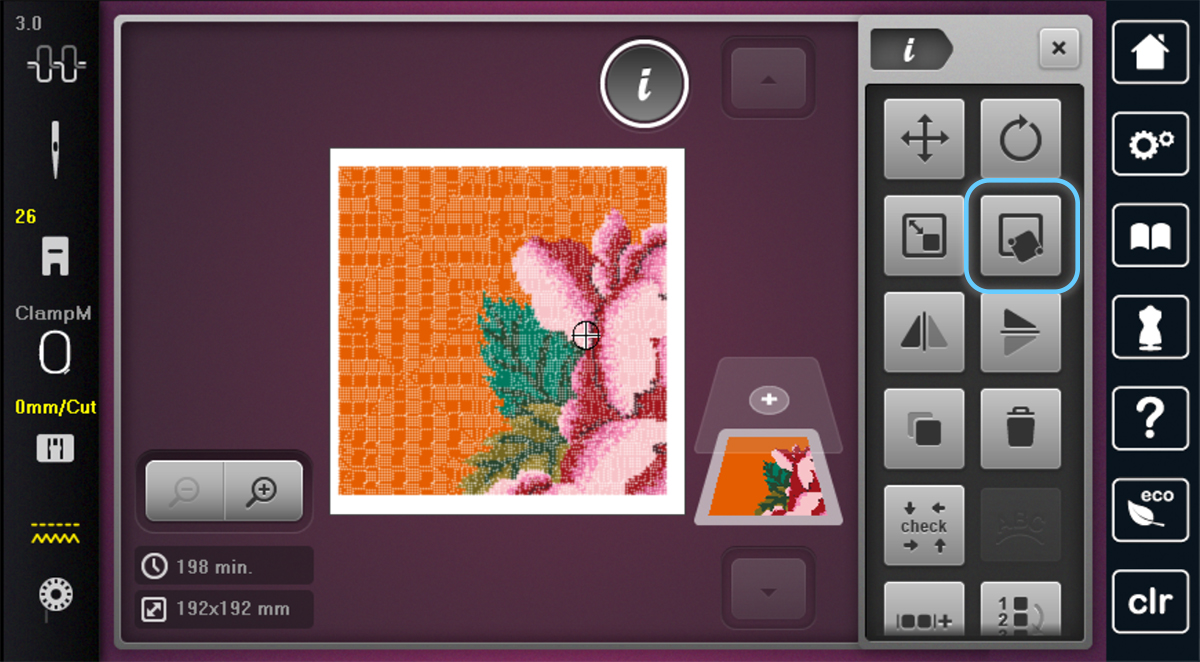
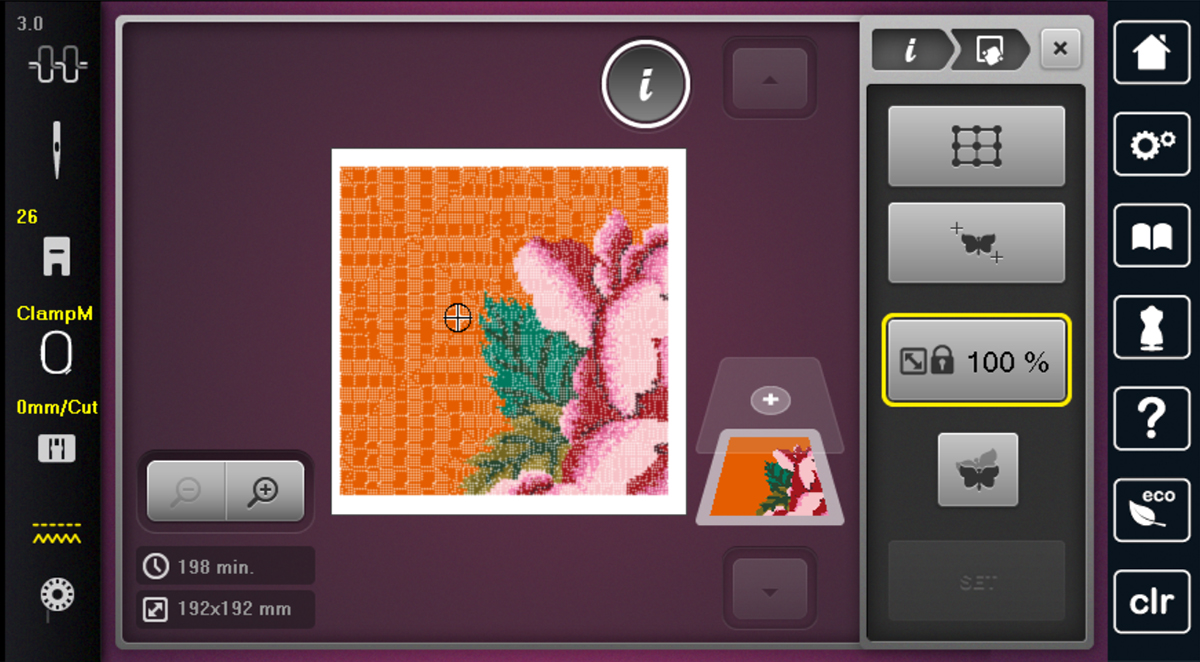
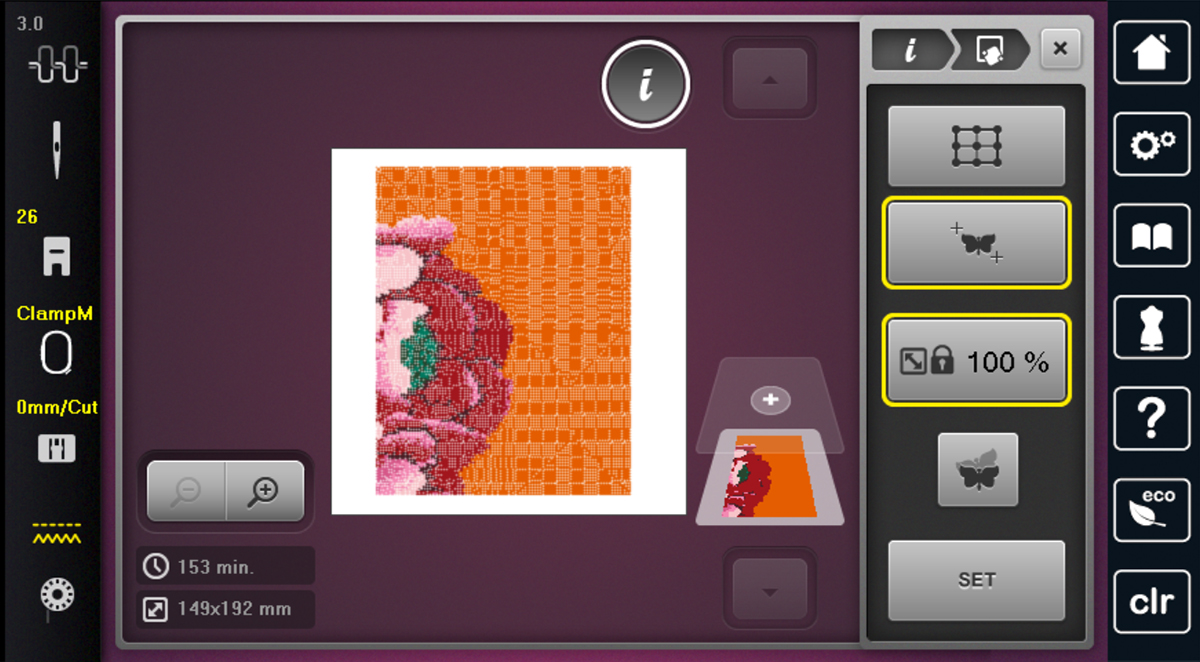
With the file for section #1 open on your machine, select the Information Menu and then open Pinpoint Placement.
Your machine will prompt you to attach the hoop to your machine.
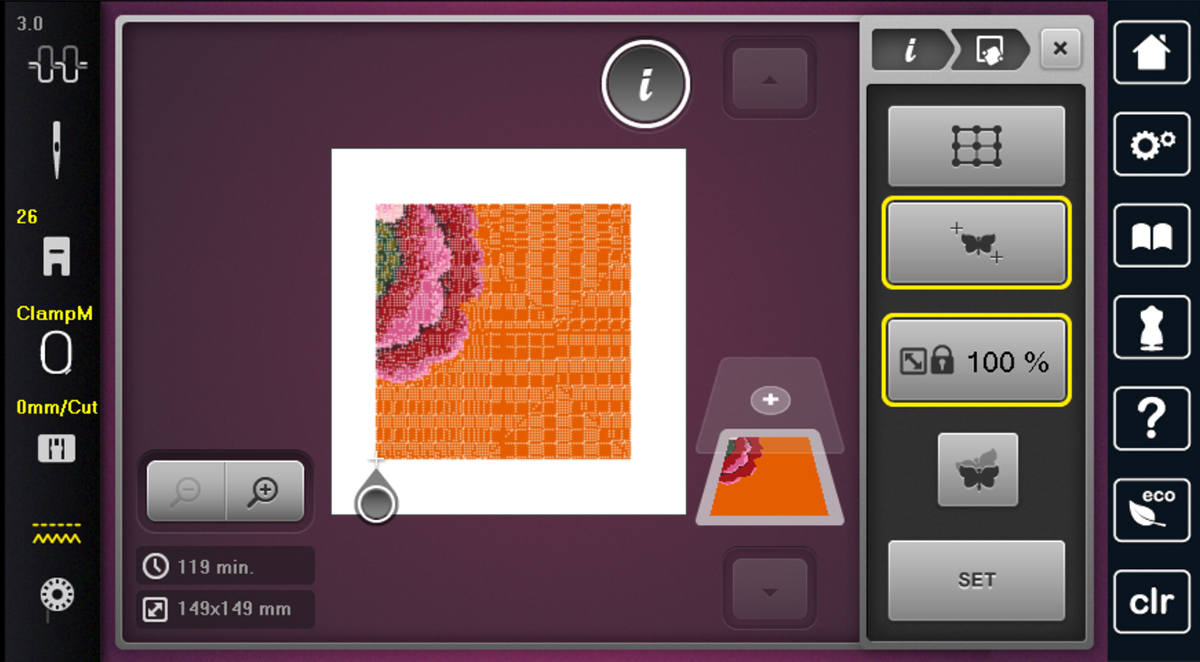
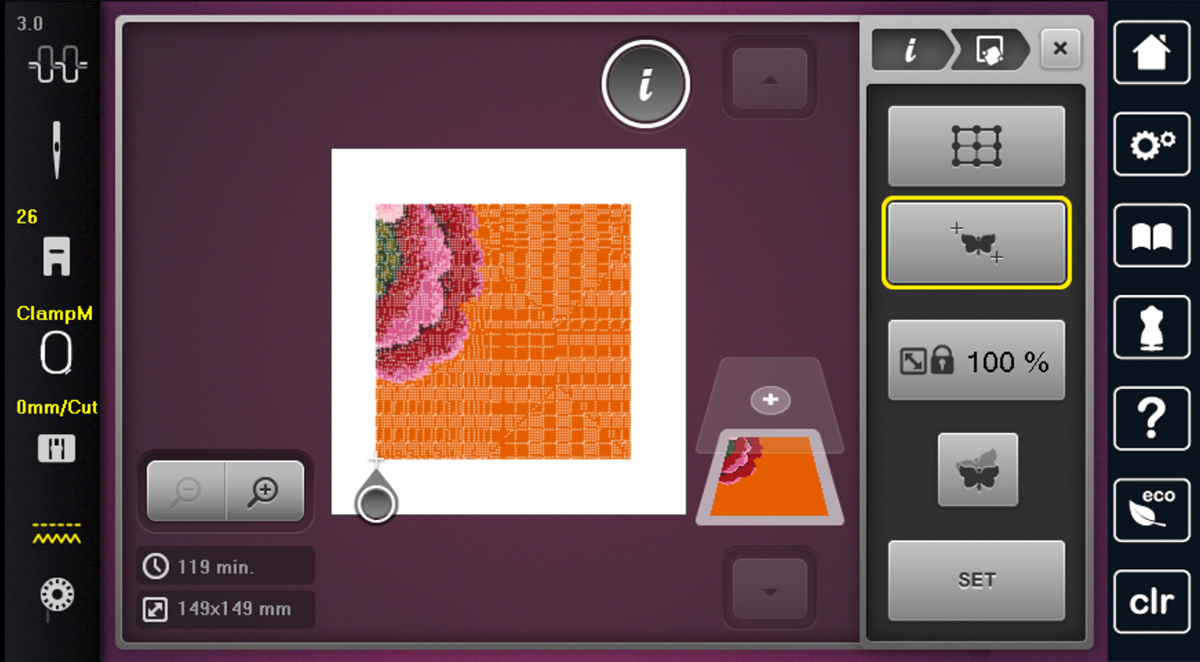
Once Pinpoint Placement is open, we first want to activate the Lock Proportion. This will prevent our design from stretching during the placement process and we will do that every time we use Pinpoint Placement to create this project.
Select the Grid function. Then, select the upper left corner node on the design.
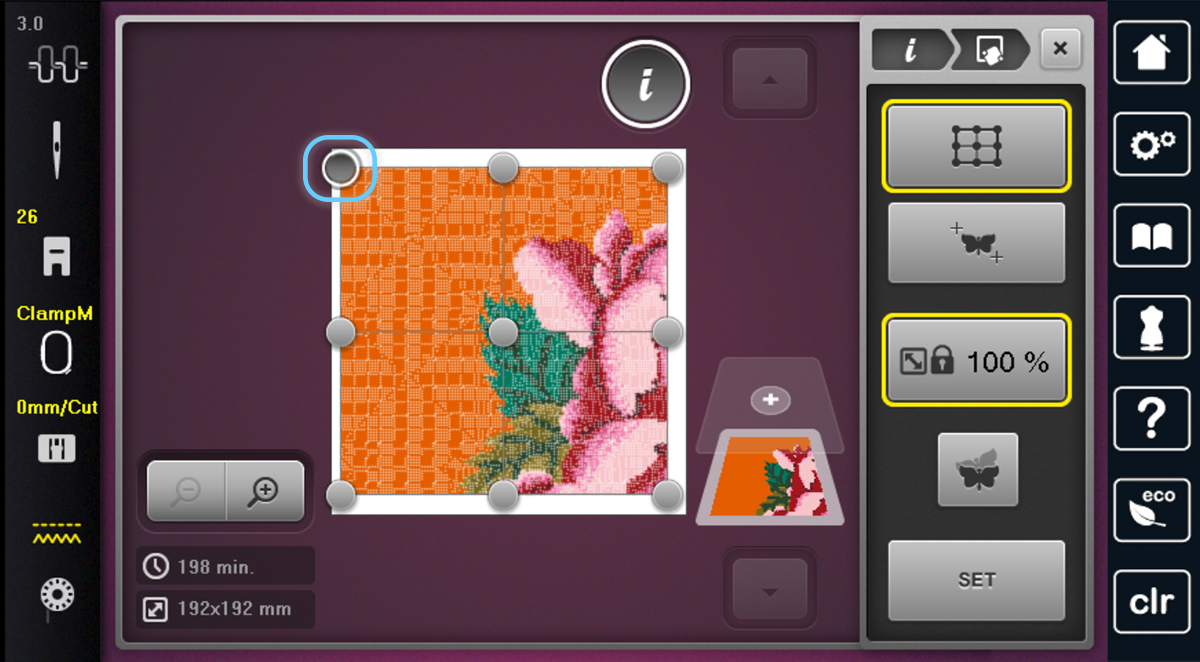
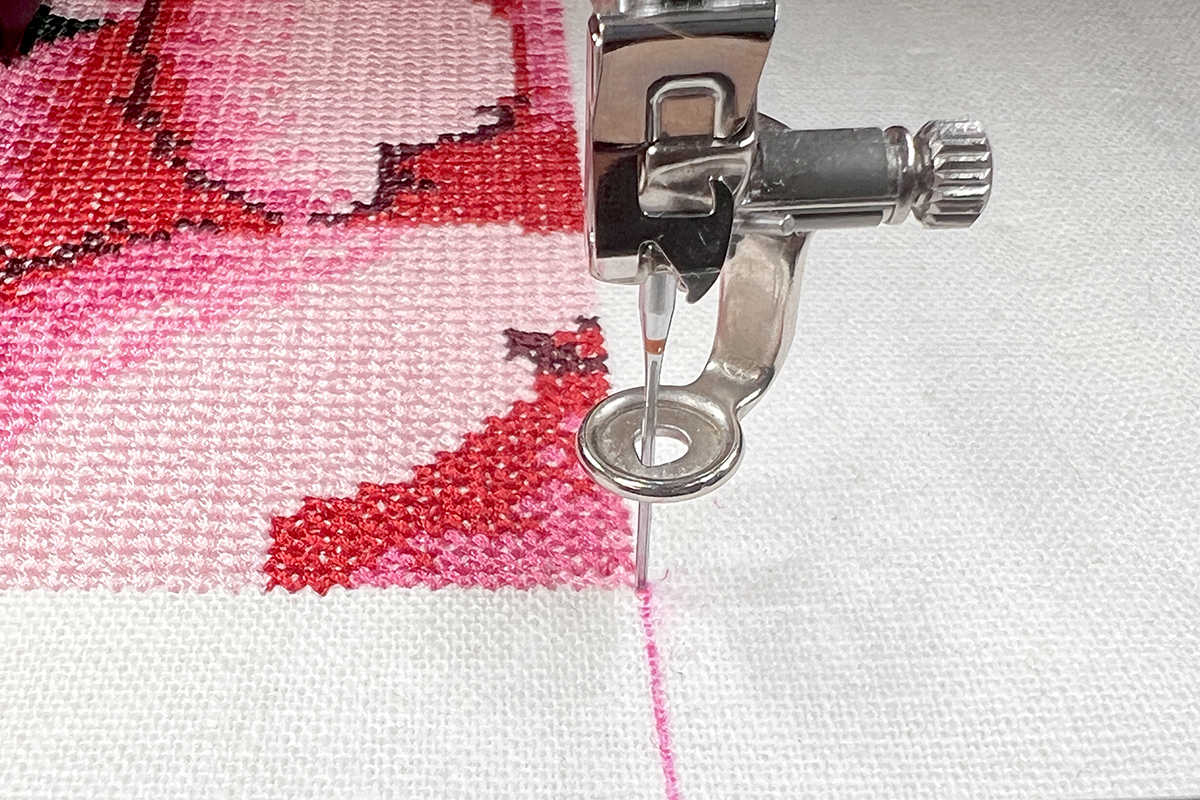
Use the Multifunction Knobs to move the upper left corner of the design to upper left corner marked on your fabric. As you turn the knobs, the hoop will move to align the needle with the point you have selected on screen. Use the handwheel to check your needle position.
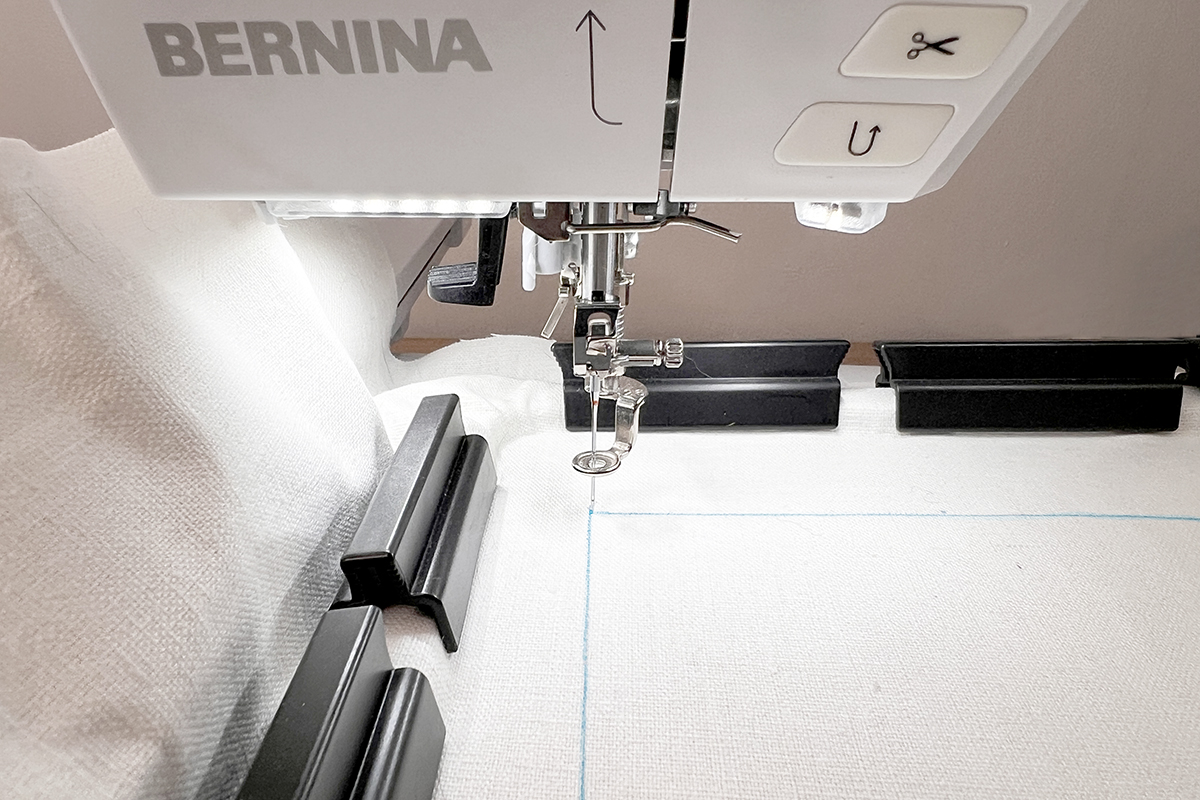
When the selected point and needle are aligned with the corner marked on your fabric, select Set on screen.
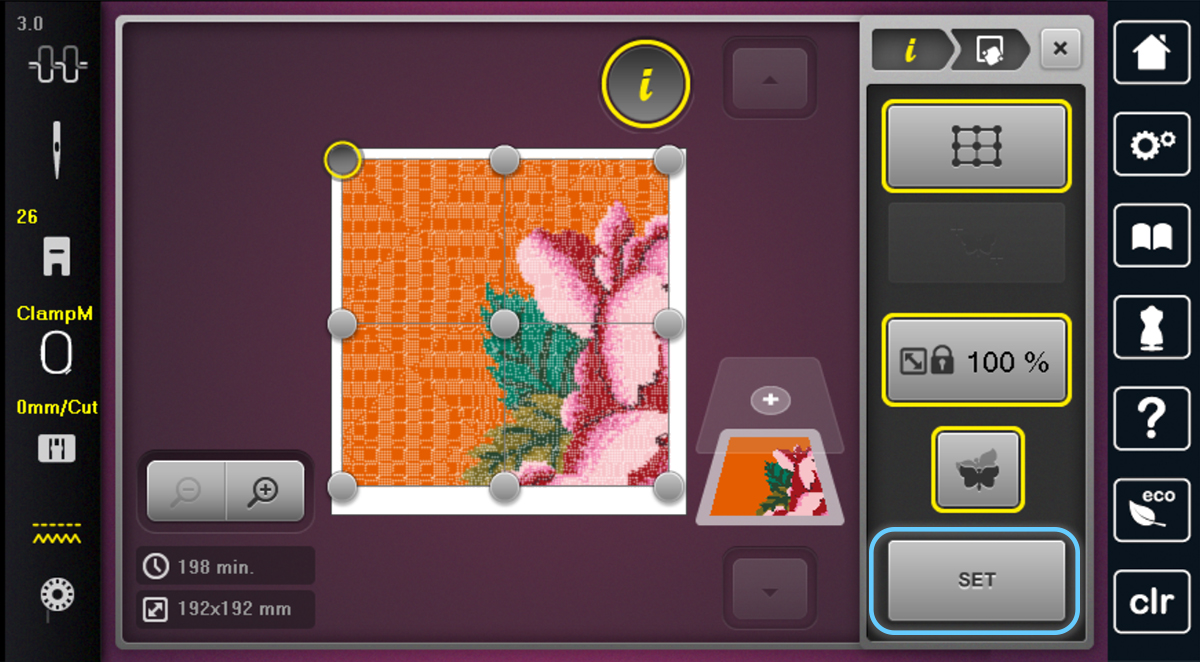
Next, select the upper right corner of the design.
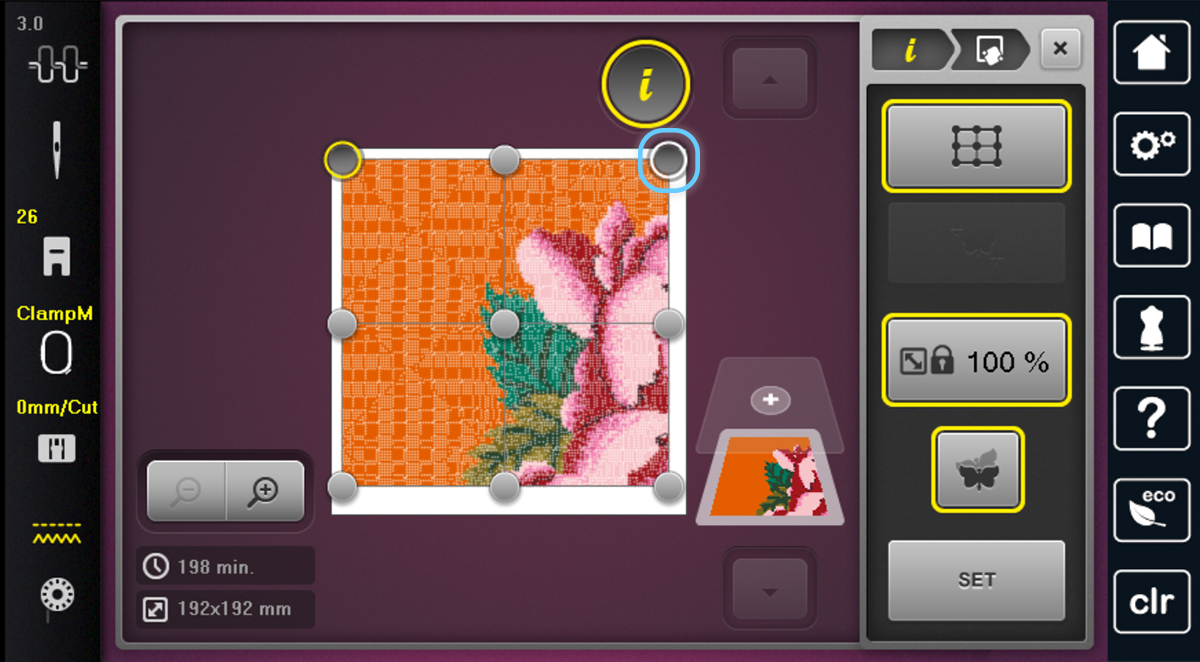
This time use the Multi-function Knobs to move this point to land on the top marked boundary of your block. This should be at about the 7 1/2″ marking—the design is technically about 7.6” square so it may fall just a bit to the right of that marked line. When you have adjusted as needed, select Set.
Tip #6: Using Thread Away
There are quite a few thread cuts in these designs. The peony has 160, the dahlia has 225 and the cat has 248! Those leave a lot of threads to manage and I personally don’t have the patience to cut that quantity of jump stitches myself. It may also be tricky to come back and access those jump stitches because of the full-coverage nature of these designs. Thus, I trust my machine to take care of all that for me!
With Thread Away active, the machine will use a combination of a swiping motion with the hoop and a small clamp down in the bobbin area to make sure that my thread tails are all neatly pulled to the backside and secured at the beginning of stitching and with the thread cut at the end.
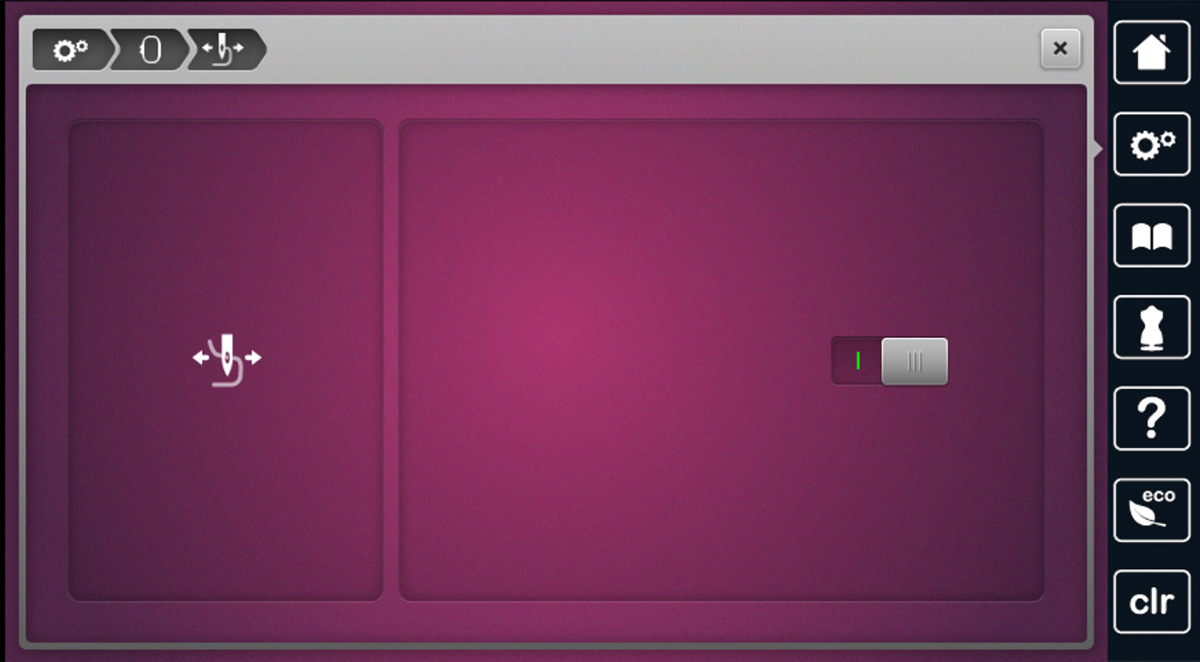
This feature is active by default but to make sure it is active, navigate to your Machine Settings.
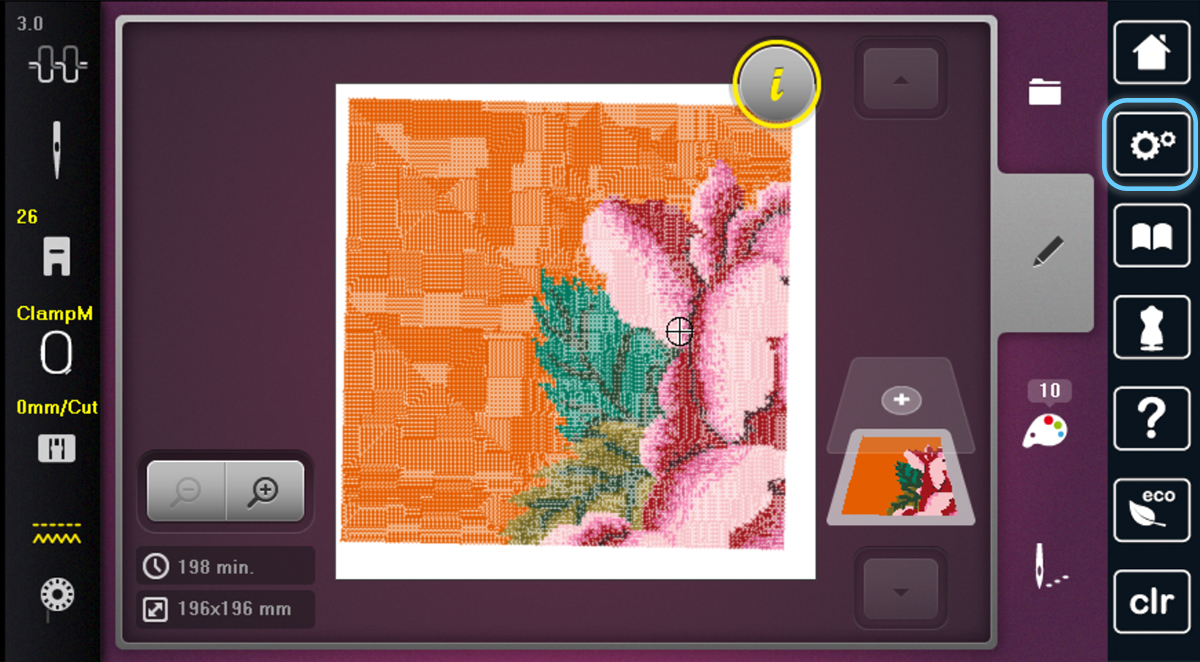
Then select Embroidery Settings.
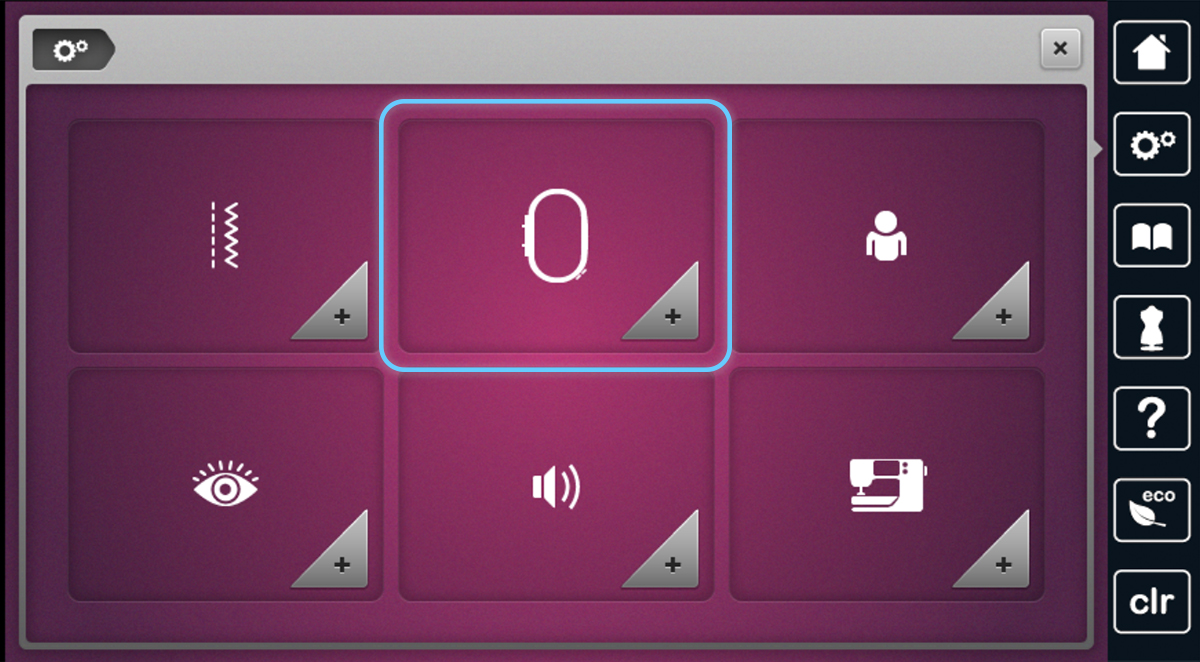
Then select Thread Away. This is in the middle row on the right side.
![]()
If the toggle shows green, it’s active!
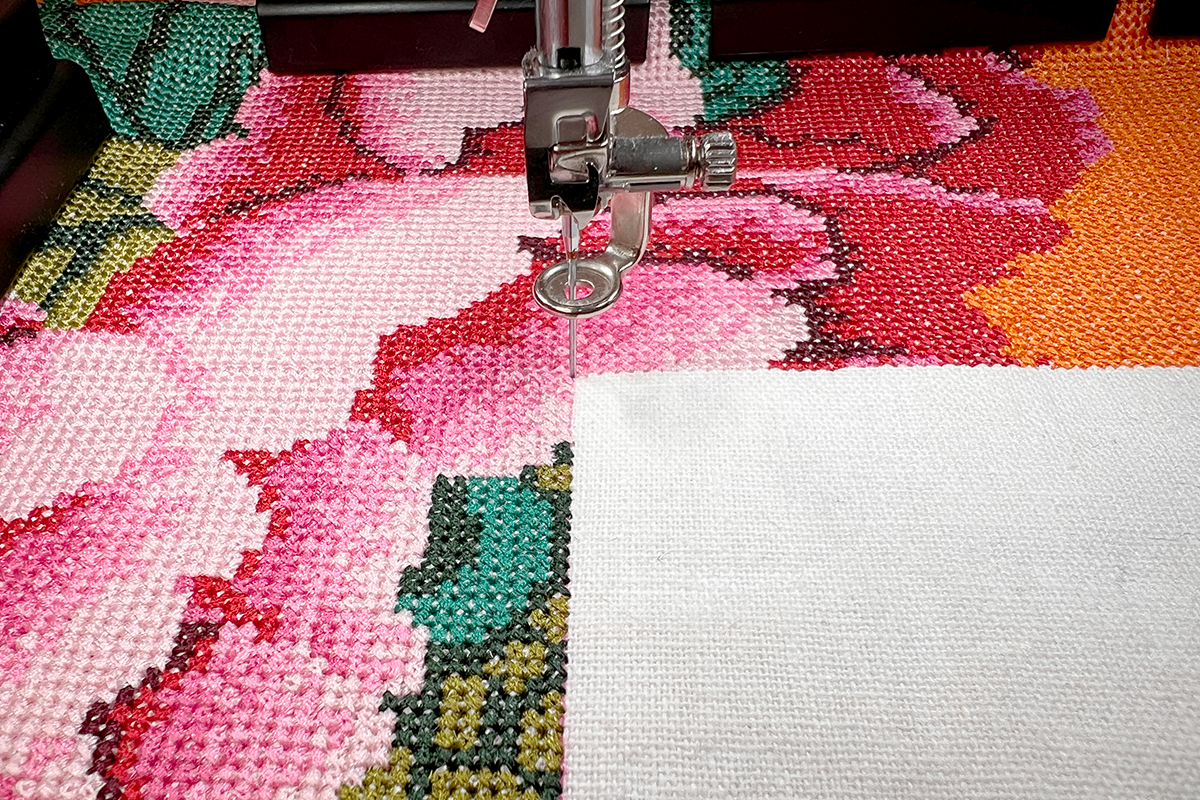
Now you can stitch out your first section, following the thread color changes on screen as prompted.
Tip #7: Re-hooping and Precise Alignment
Stitching the design is the easy part—it’s re-hooping and alignment that feels intimidating! But I promise with a little patience, it is much less challenging than it seems.
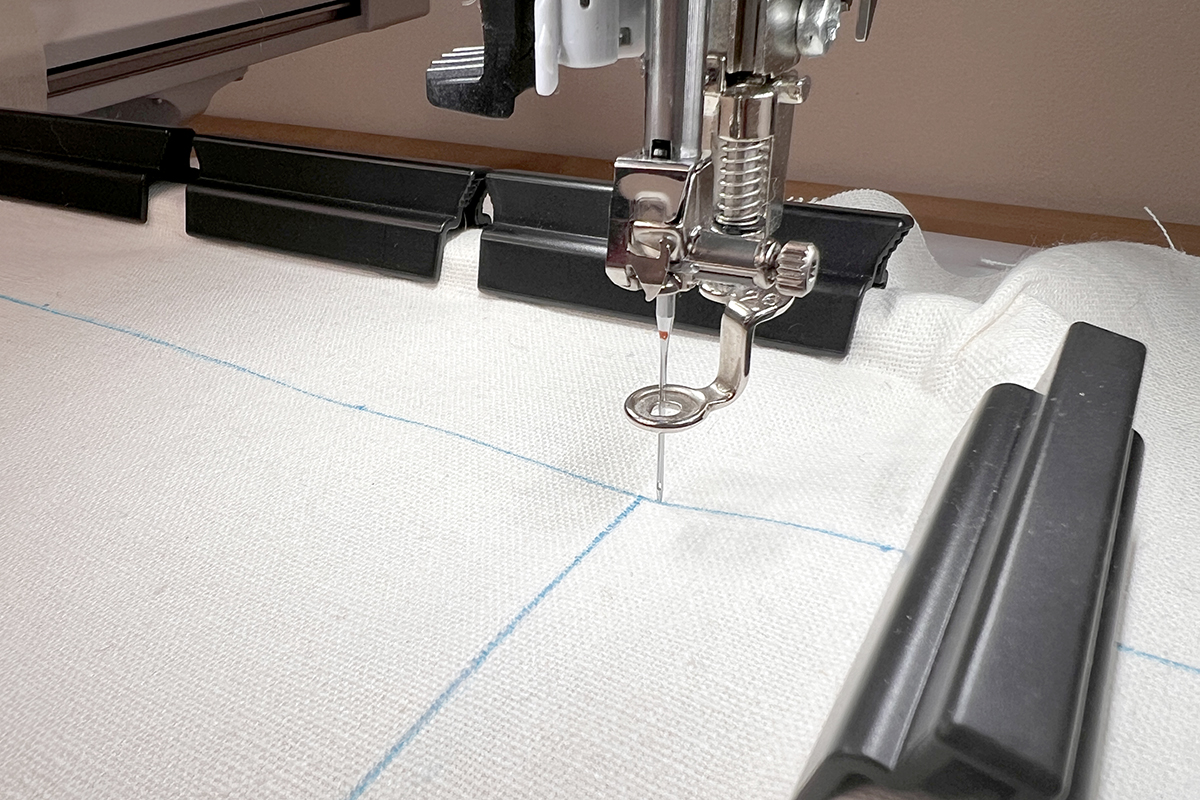
First, remove the clamps from the hoop and lay the fabric flat. Use your hands or an iron to smooth out any lines from hooping. Just be careful with heat if you used a heat-erase pen for marking your lines!
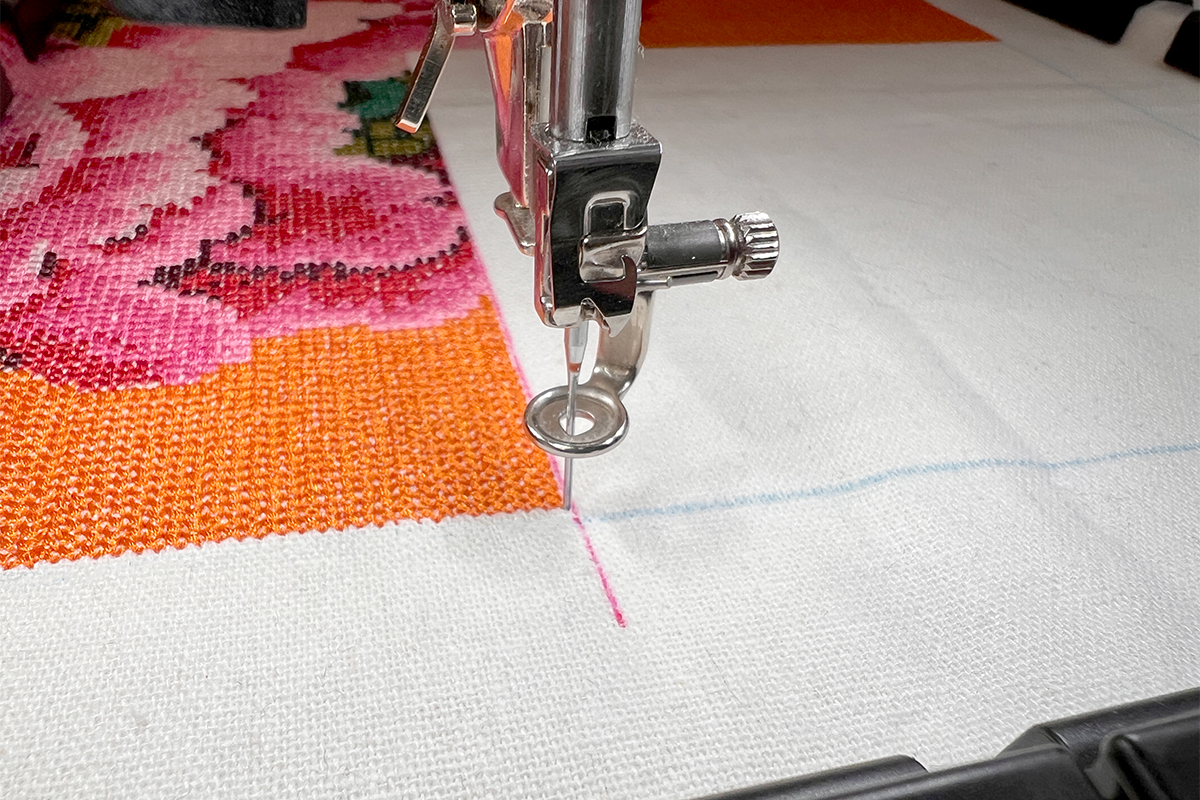
Use your fabric marker and a ruler to draw a line extending from the right edge of the first section down to the bottom block boundary. This will give us an additional reference point for stitching sections #3 and #4. We want to mark this now because if we correctly position section #2, they will come together so seamlessly that we won’t know where #1 stopped and #2 begins!
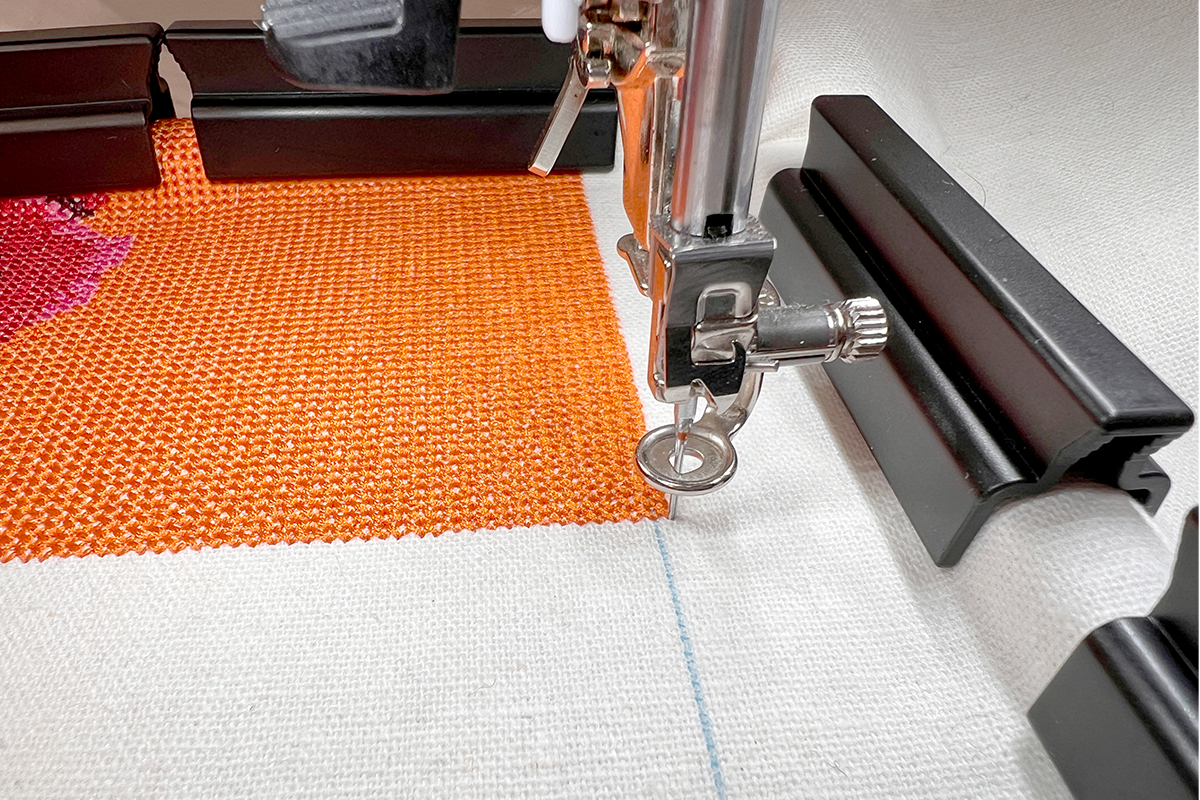
Now again place the acrylic template on top of the fabric, roughly centering the area where section #2 will stitch. Pick up the fabric with the template and place the fabric on the hoop. Press the fabric down into the hoop and secure all sides with clamps.
Placing the clamps over the stitched edge will require a good amount of pressure—we have a lot of thread and stabilizer to clamp down! But it’s important that this edge is just is secure as the rest.
When all four sides are securely clamped, remove the template and open the second section of the design on your machine.

To align section #2, we will again use Pinpoint Placement. With the file for section #2 open, again select Pinpoint Placement from the Information menu.
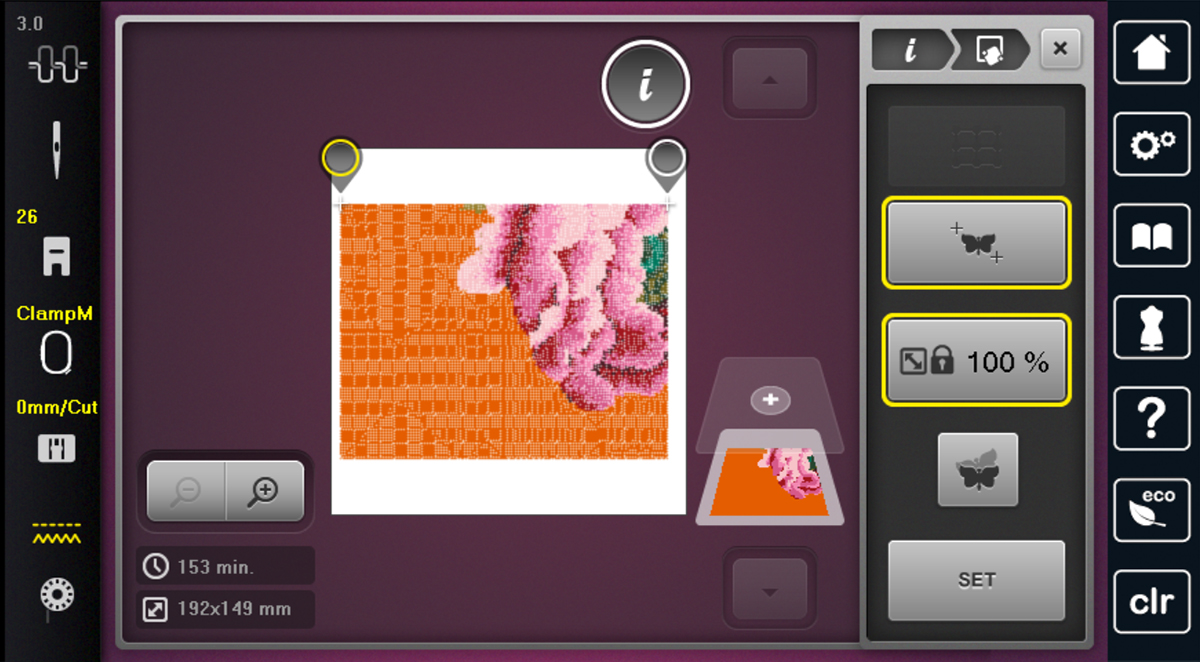
Be sure that the Lock Proportion tool is activated. When active, it will be outlined in yellow.
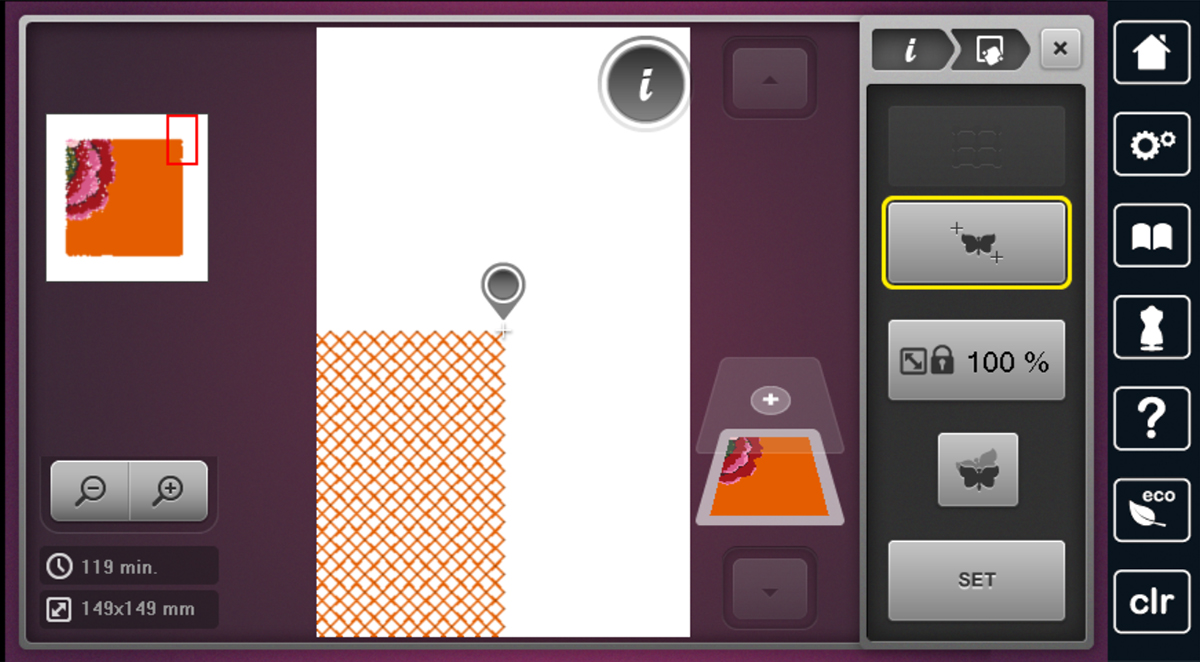
For this round of placement, I suggest using Free-Point Selection. As opposed to the Grid method we used in the first section, Free-Point lets us choose specific stitches in the design to use in placement. Activate Free-Point Selection by selecting the icon under the grid, a butterfly with two plus signs.
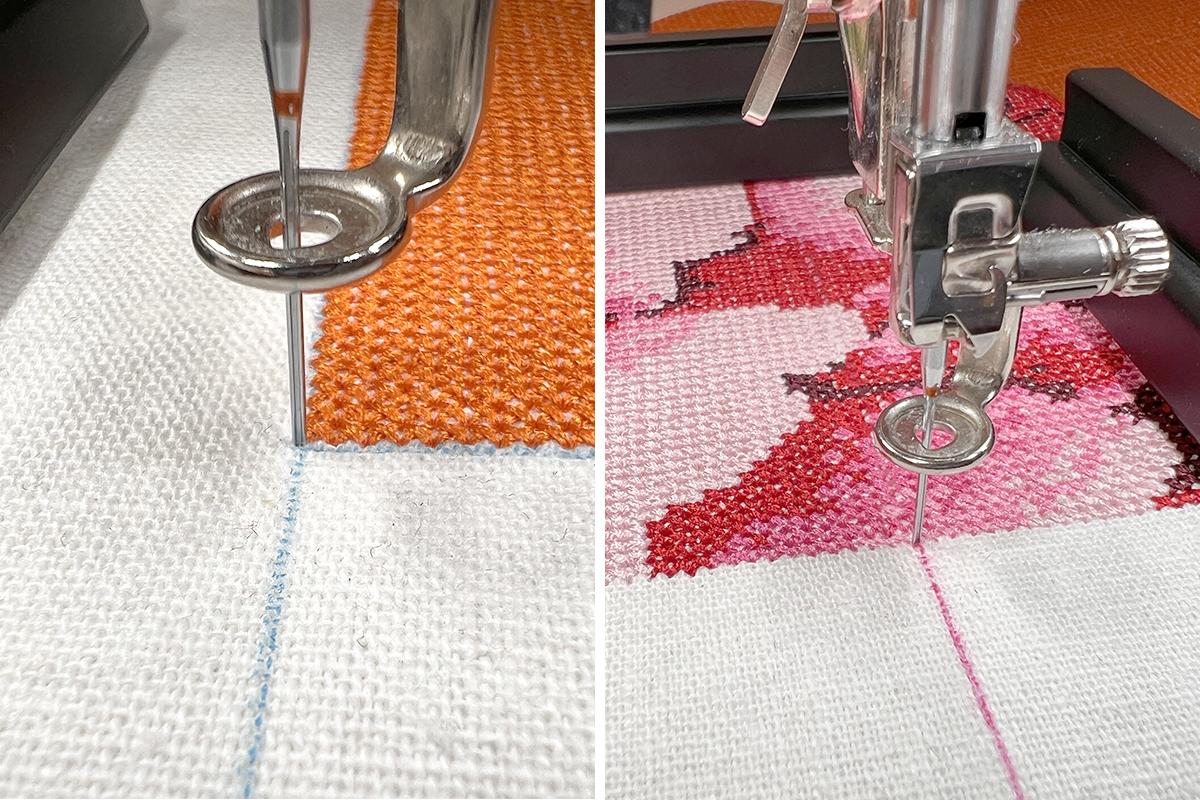
Zoom all the way in to the upper left corner of the new section design. Select the stitch that falls exactly at the corner of the design.
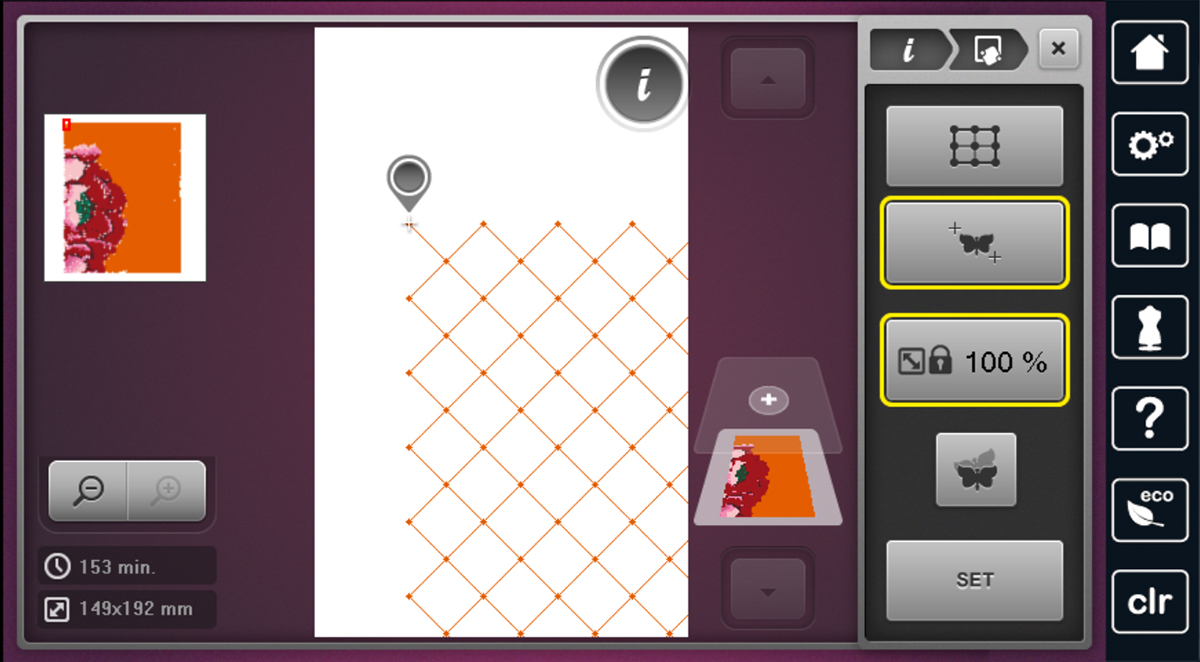
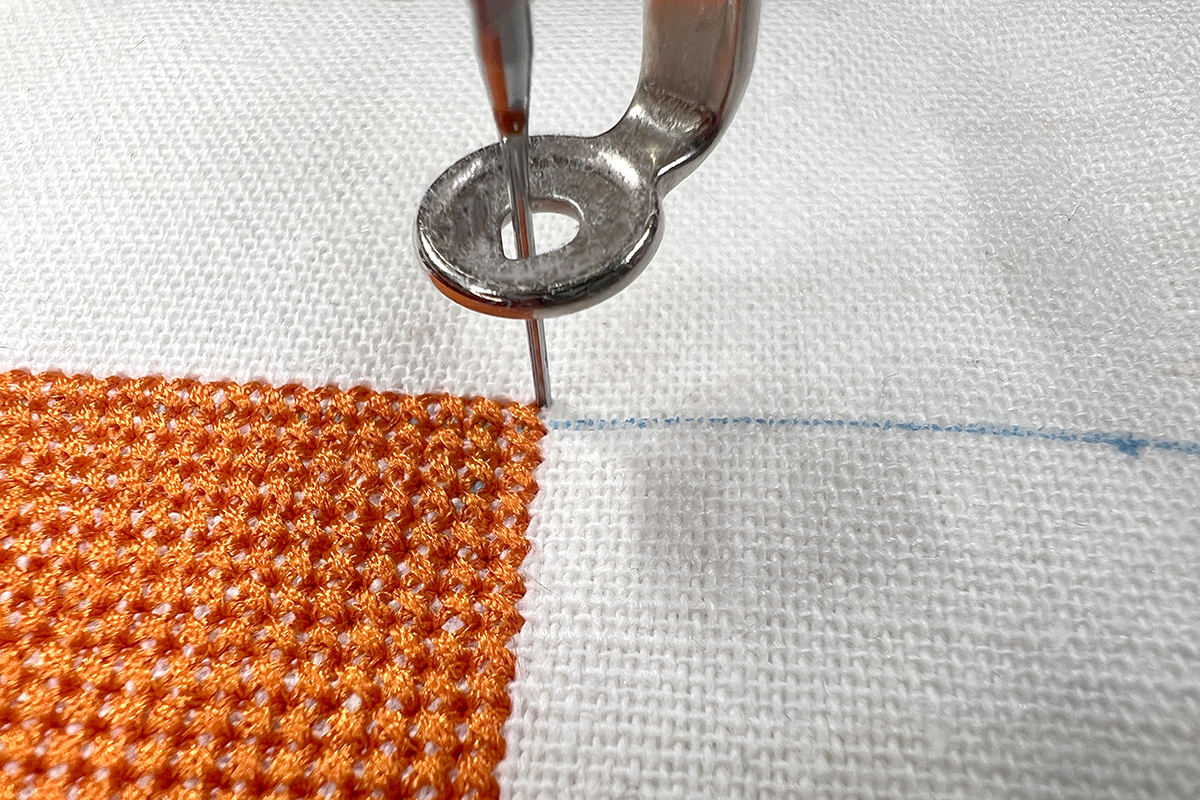
Use the Multi-function Knobs to move the design so that this stitch will pass through the fabric exactly at the same point as the top right corner of the section you have already stitched. Use the handwheel to rock the needle down into the fabric. The selected stitch should pass through the same hole in the fabric. Select Set.
Now we need to choose the second point for alignment. This time, choose the stitch at the very bottom left corner of the design. Zoom out or in as needed to make sure you have the right stitch selected.
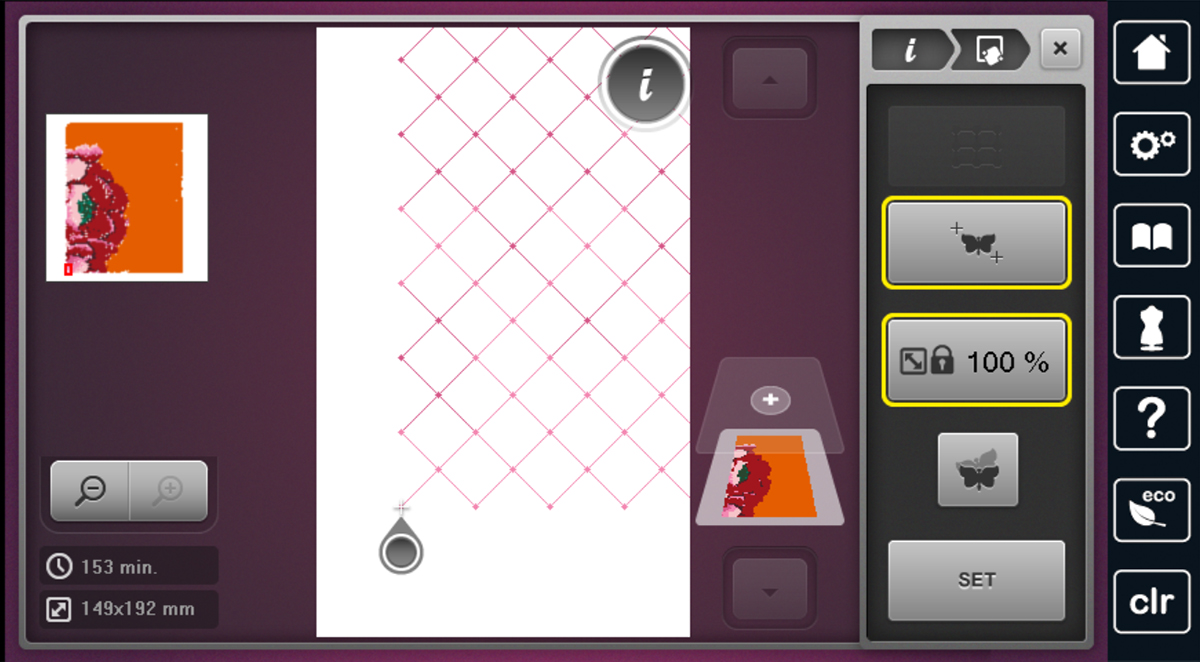
Use the Multi-function Knobs to move this point to line up with the bottom right corner stitch of the already stitched design. Again, the needle should pass through the same hole. Select Set.
Now stitch out the second section of the design!
When you get to section #3 (the lower left portion of the design) use the upper left and upper right corners, aligning to the bottom left corner of the stitched design and the line you drew between sections #1 and #2.
We’re most of the way done now! Time to rehoop one more time.
Section #4 will be the trickiest. Start by selecting the upper left corner stitch of design #4. Then match it into the corner of the stitched design and set that point.
Then select the bottom left corner stitch of the design. Match it to the bottom right corner of the stitched section #2. Set that second point.
Now, because this time I have two stitched edges to align to, I need to check the top edge before I stitch. I will repeat the Pinpoint Placement process, this time incorporating the upper right corner.
After I have set two points in Pinpoint Placement, I can start again with any two points I want to use for alignment and my starting position of my design is the position I just set.
For my second pass of Pinpoint Placement, I will start by selecting the lower left corner. This is the exact same point that we just previously set in place.
Without touching the Multi-function Knobs or moving this point at all, select Set. We just position this point—I know it is where I want it!
Before selecting the second point, deactivate the Scaling Lock. When placing the first three sections of the design, that lock is important because it ensures that each of our sections stays square and proportional. Having that active should set us up for the best success of our final piece here fitting into place. But I also have the power to deactivate it which will allow me to fit the design exactly how I need to for it to visually line up.
Now select the upper right corner of the design. Be sure to zoom in to make sure you have that precise stitch selected!
Before moving anything, check where your needle lands. In my case, my needle was just about 1mm to the right of where I wanted to stitch out which is a great sign! I used my upper Multi-function Knob to nudge that point a tiny bit over to the left. The small movements are almost imperceptible but can make a big difference in the stitch-out!
Now, we can stitch out that final section of our design.
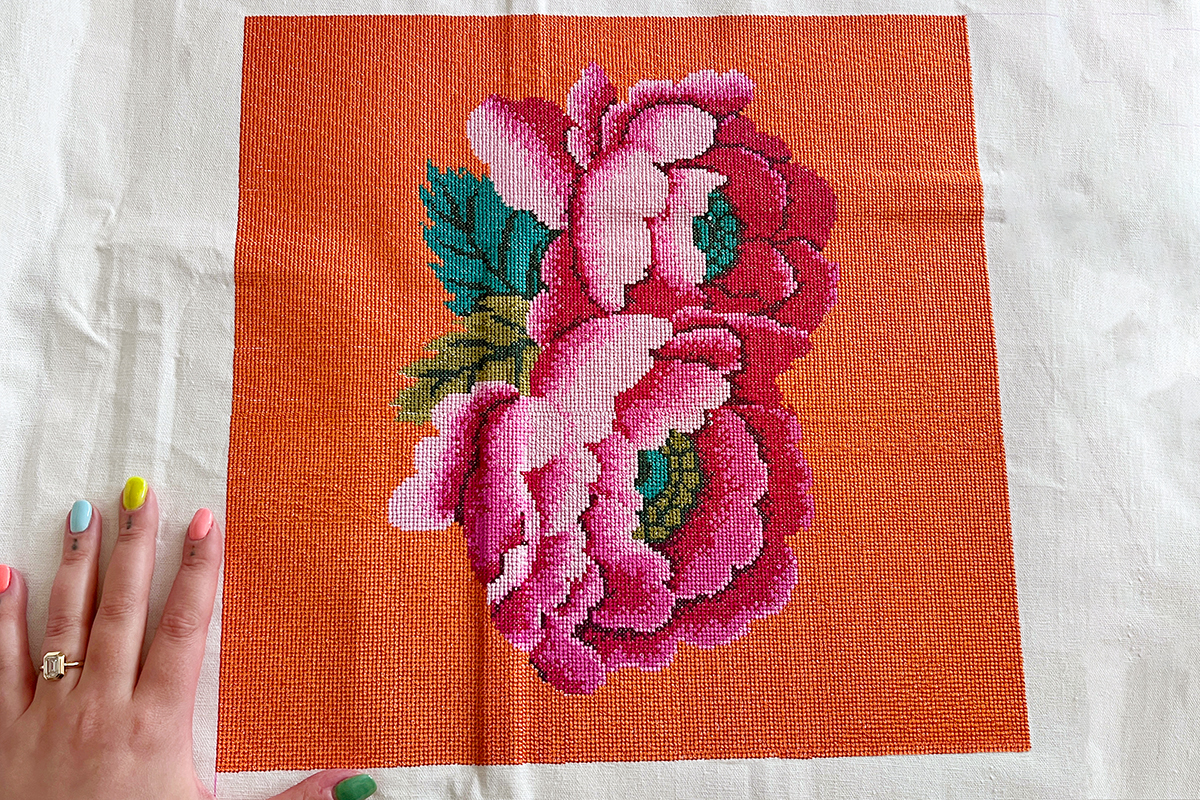
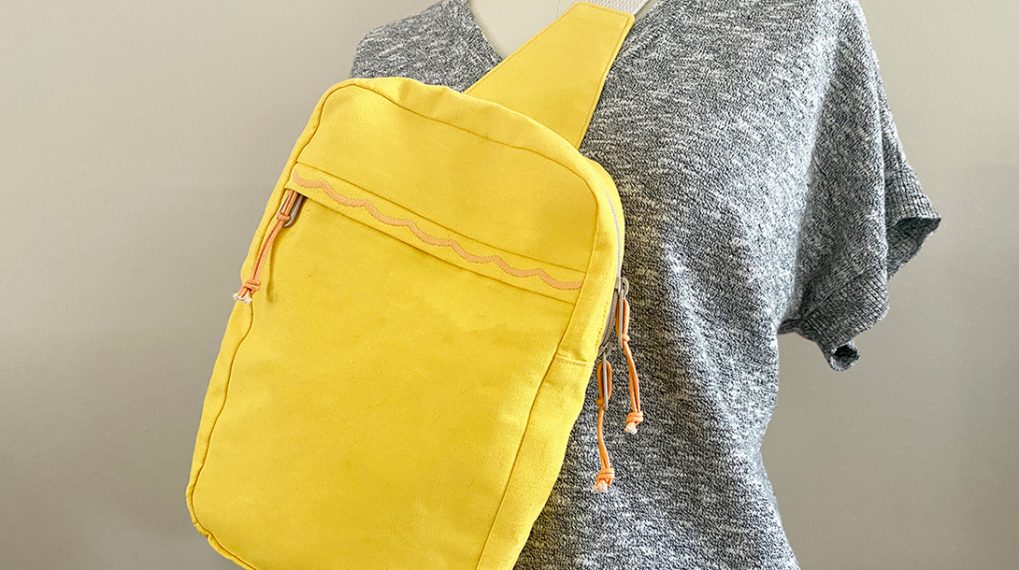
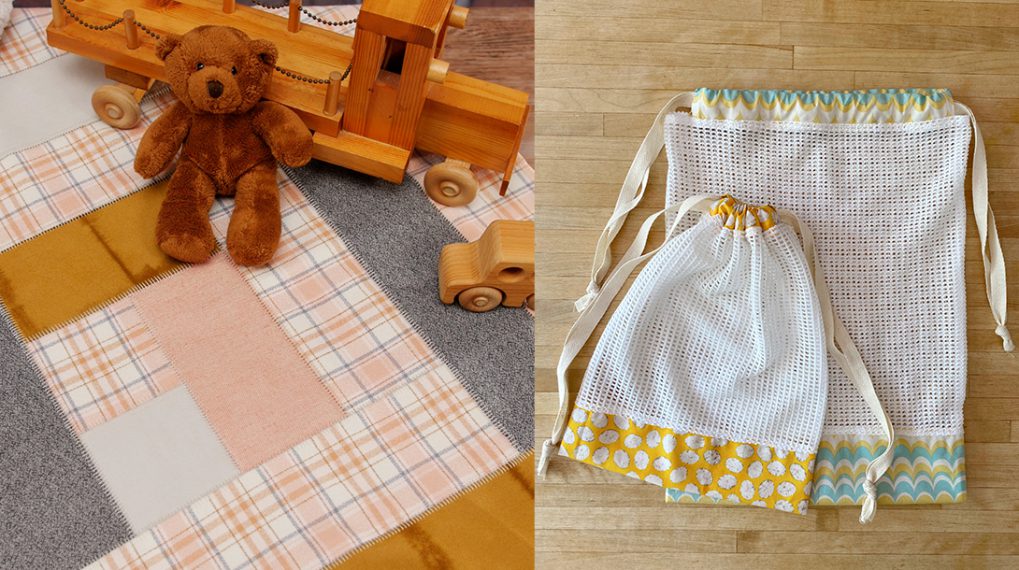
Now trim away that excess fabric and use it! These blocks make beautiful throw pillows but can also be turned into a fun tote back or zipper pouch project bag.
Used Products

What you might also like


2 comments on “Kaffe Cross-Stitch Tips & Tricks”
-
-
Hi Jacky! Yes! I used Isacord color #1310 and it uses almost one entire 1000m/1100yd spool. It’s quite a lot of thread but one spool should be enough 🙂
-
Leave a Reply
You must be logged in to post a comment.

Hello
Can you tell me for one color (per example the orange) isacord is 1 spool 1100 yards of yarn enough?
Jacky?