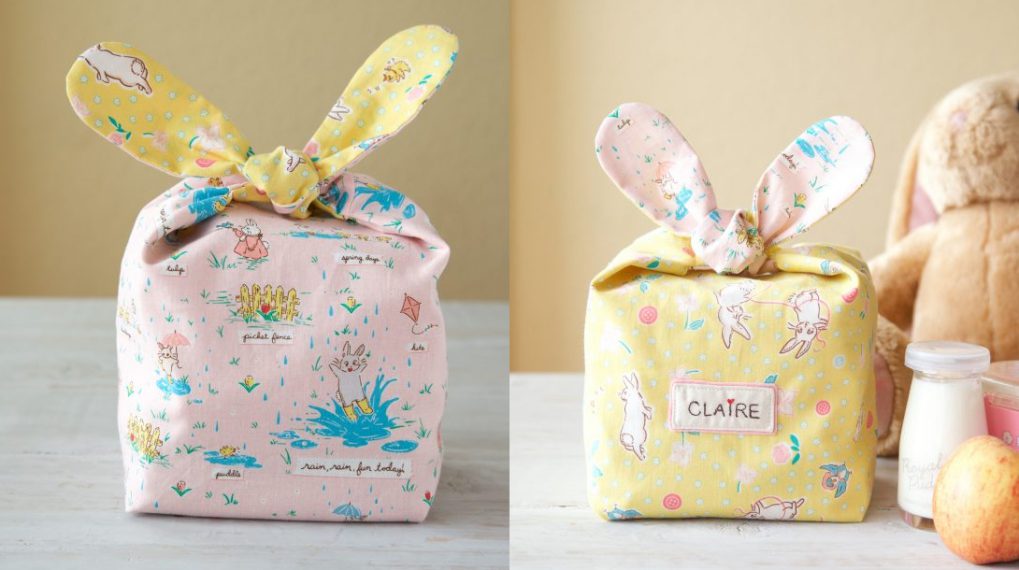
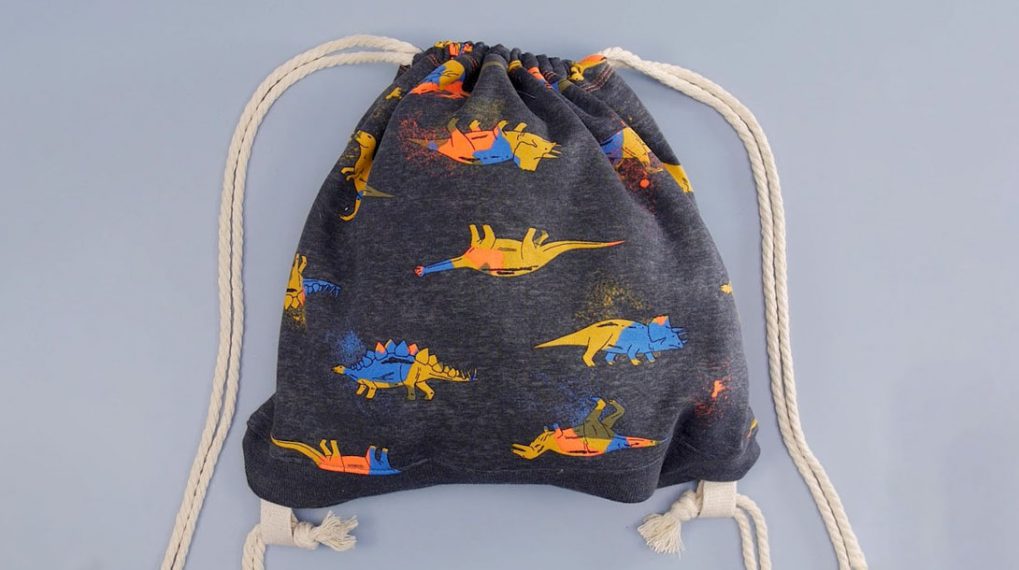
Drawstring Bunny Bags
Hi everyone, I’m Ashley from Make It and Love It. SO happy to be here today….sharing something perfect for spring!
Ahhh…spring is my absolute favorite time of year! The sun is staying out a little longer, trees are starting to bloom, new grass is pushing its way through, and I start getting an itch to add more color to everything! Easter is also right around the corner and thank goodness it is, because my kids have been asking since Christmas ended, when the Easter bunny was coming! 😉
Today I’m sharing these simple Drawstring Bunny Bags that are really quick to sew up…and are perfect for this time of year!
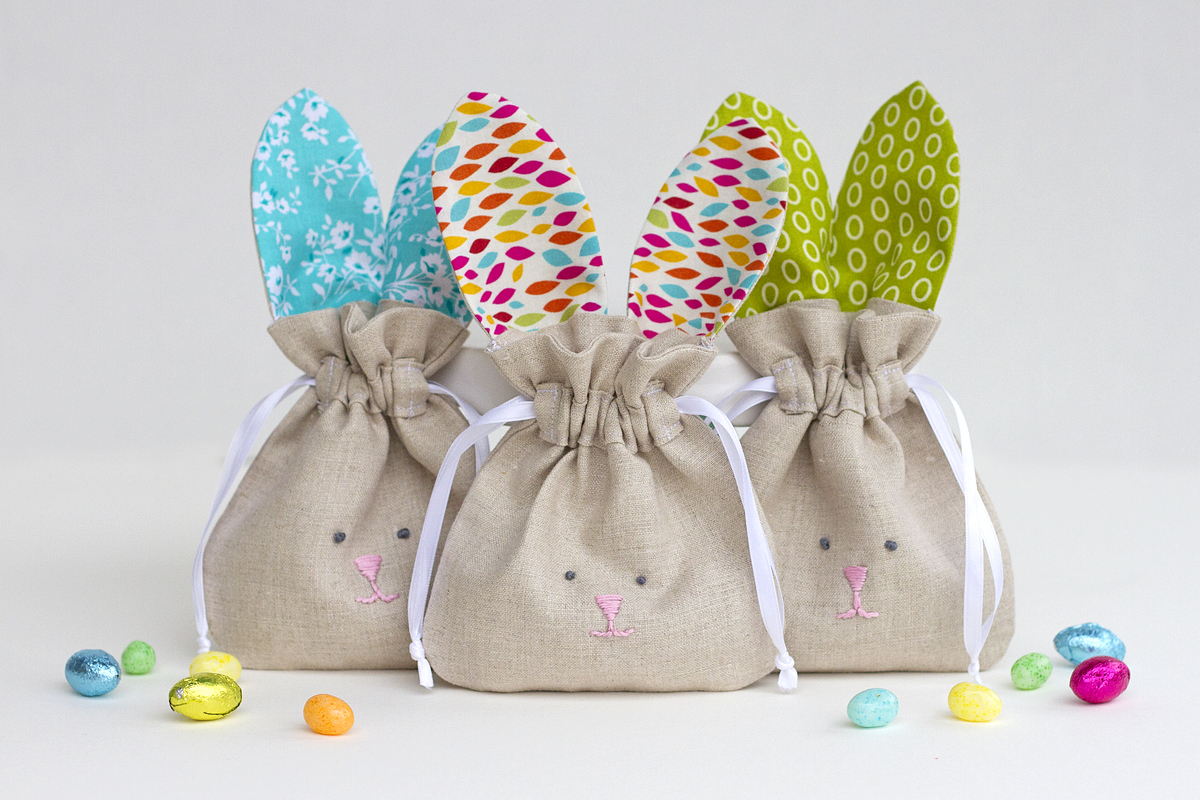
We have 3 pet bunnies at our house and my girls (ages 9 and 5) adore them…so everything in their lives revolve around their favorite fluffy pets! So not only can these bags be used as fun little treat bags, I know my girls will love storing necklaces and toys inside…or even money that they’ve earned! But I was also thinking they would be such a cute gift for a friend, stuffed with nail polish, a gift card, or even some sewing notions! Because everything is cuter stuffed in a little Bunny Bag, right?! 😉
Let’s get started…
Materials to make a Drawstring Bunny Bag
- Fabric for bag and outer ears (a woven cotton works best)
- Contrasting fabric for inner ears (a woven cotton works best)
- 1/4 inch ribbon or rope for drawstring
- common sewing supplies
- Bunny Bag Template
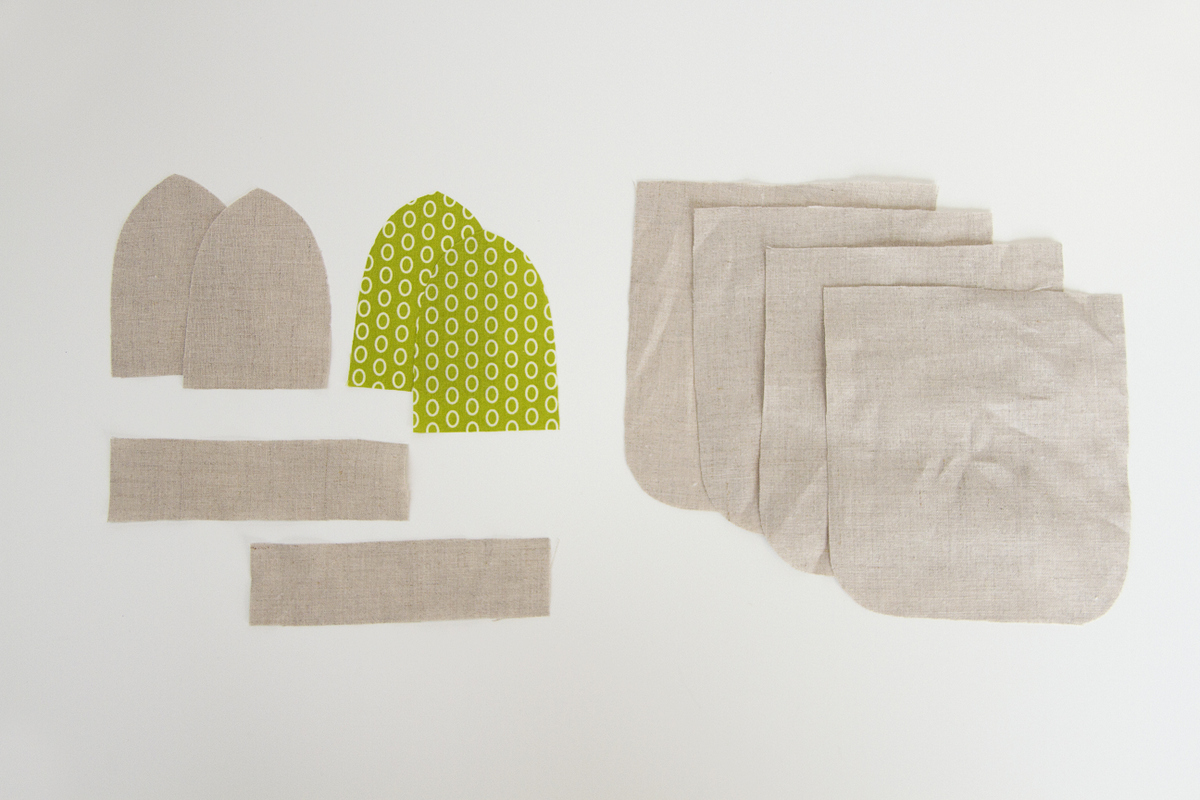
Click on the link in the supply list above and print out the template pieces for your bunny bag.
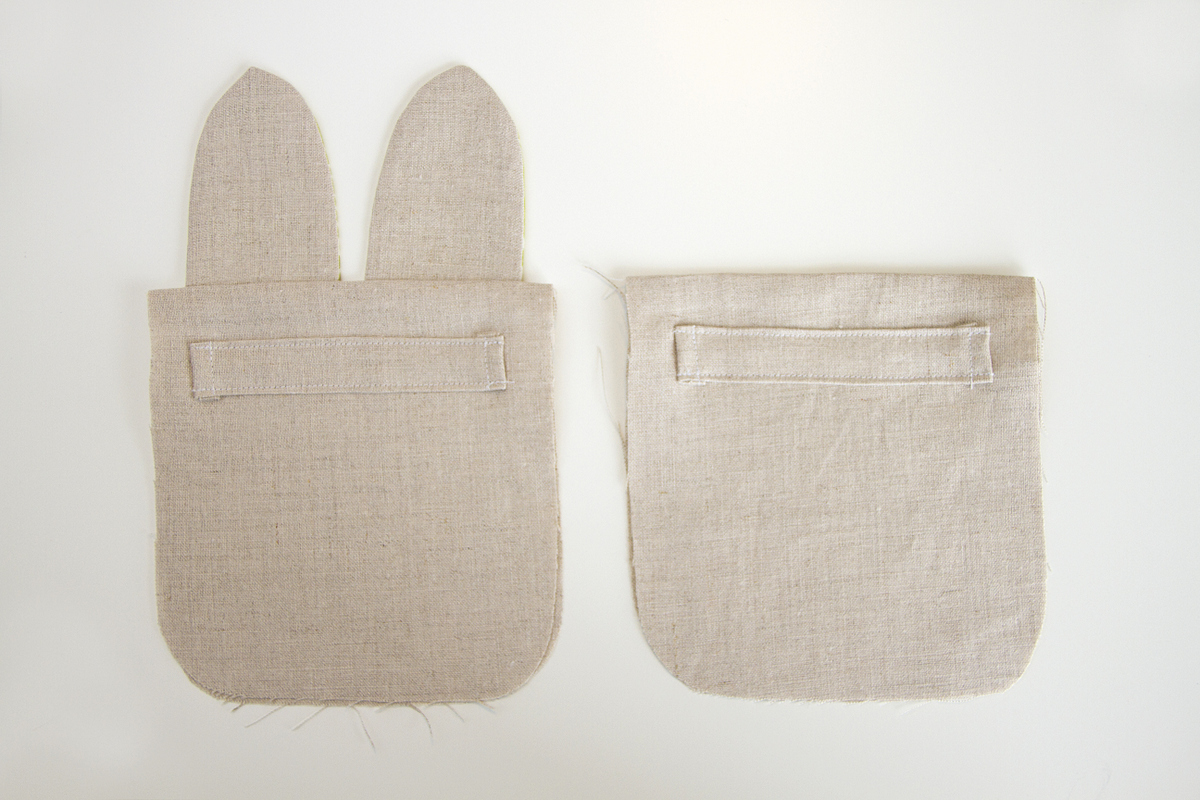
Now, cut 4 of the “Main Bag” pieces and 2 of the “Bunny Ear” pieces, in the same color fabric. Then cut 2 rectangle pieces out of the same fabric (for your ribbon guides) that are 6.5 x 1.5 inches. Lastly, cut 2 of the “Bunny Ear” pieces out of a contrasting color.
Place one of the main ear pieces together with one of the contrasting ear pieces and match them up with RIGHT sides together. Using a 1/4 inch seam allowance, sew up one side and down the other.
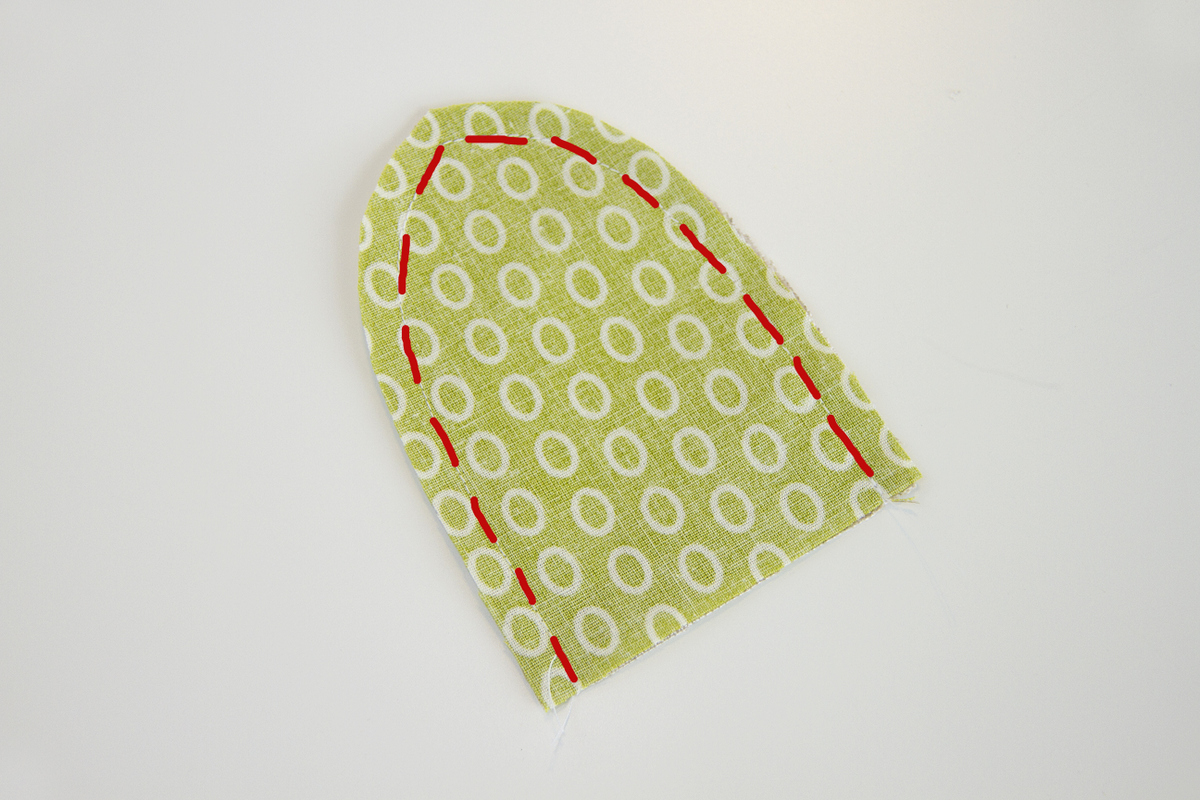
Trim a little excess fabric off the curve and tip, to reduce some of the bulk.
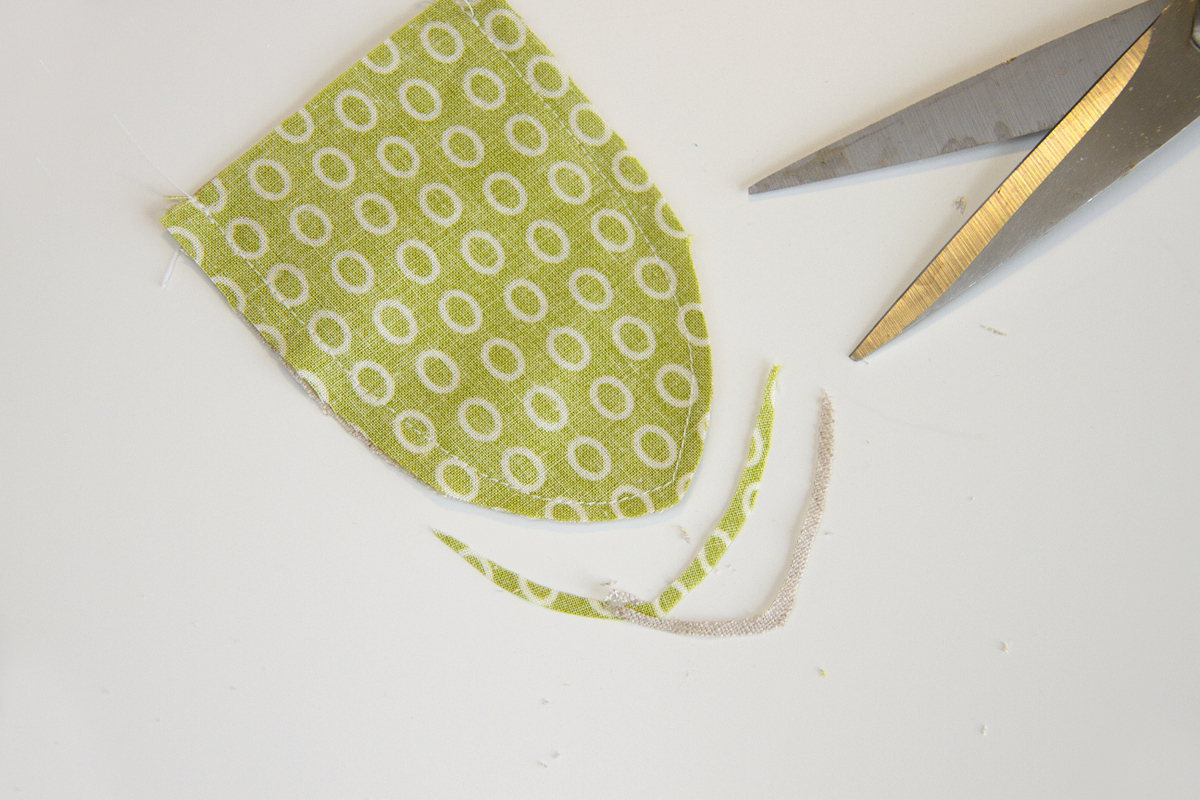
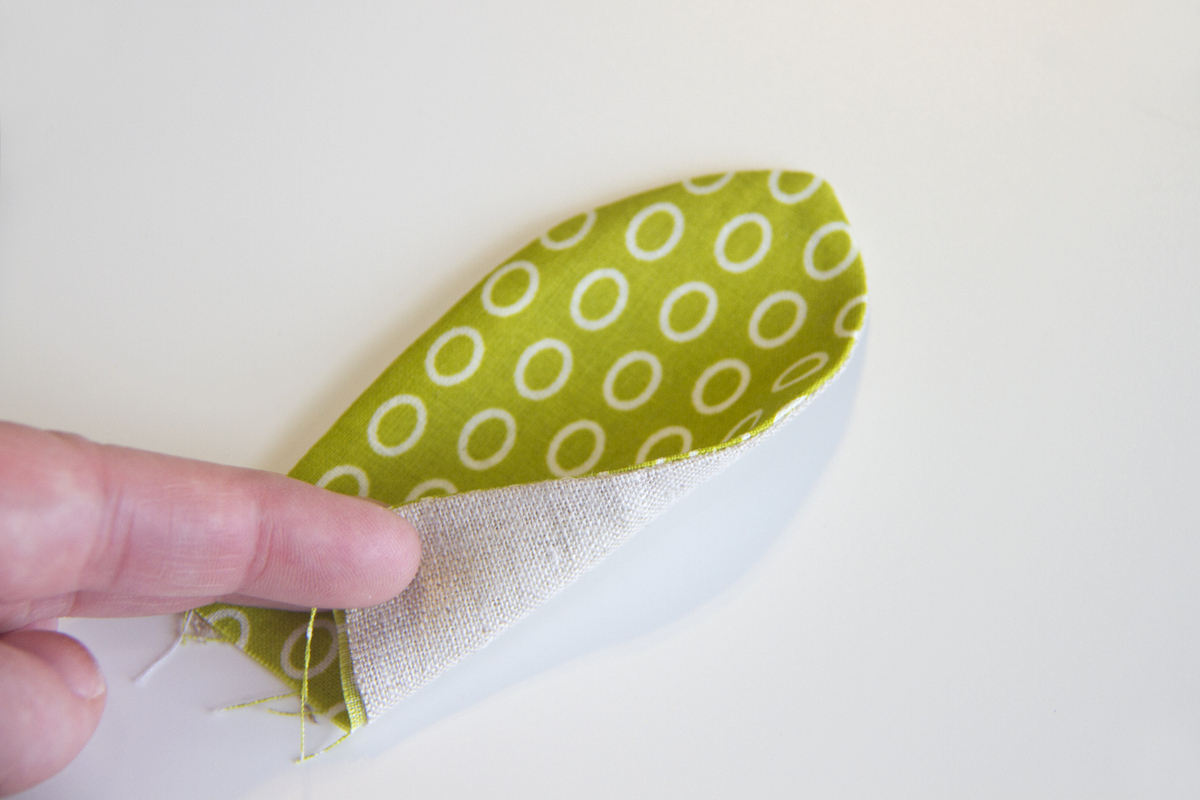
Turn right side out and iron flat. Repeat with the other 2 ears pieces.
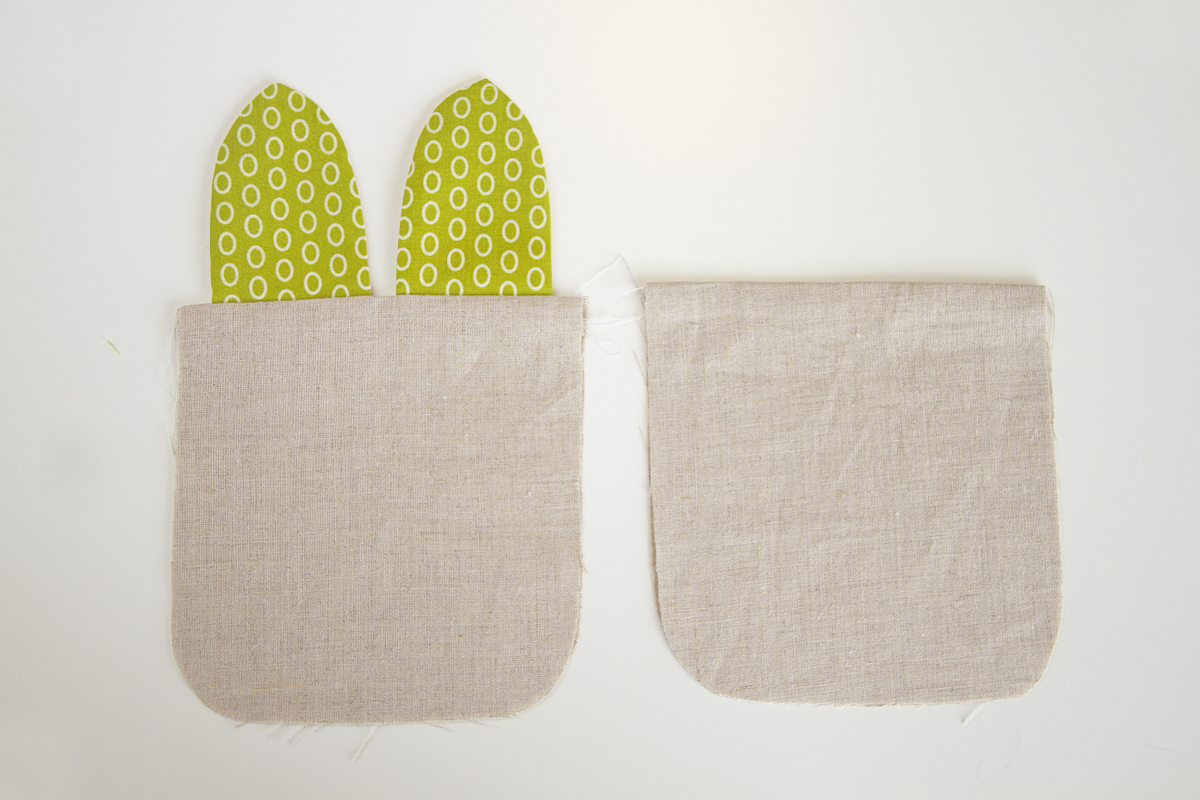
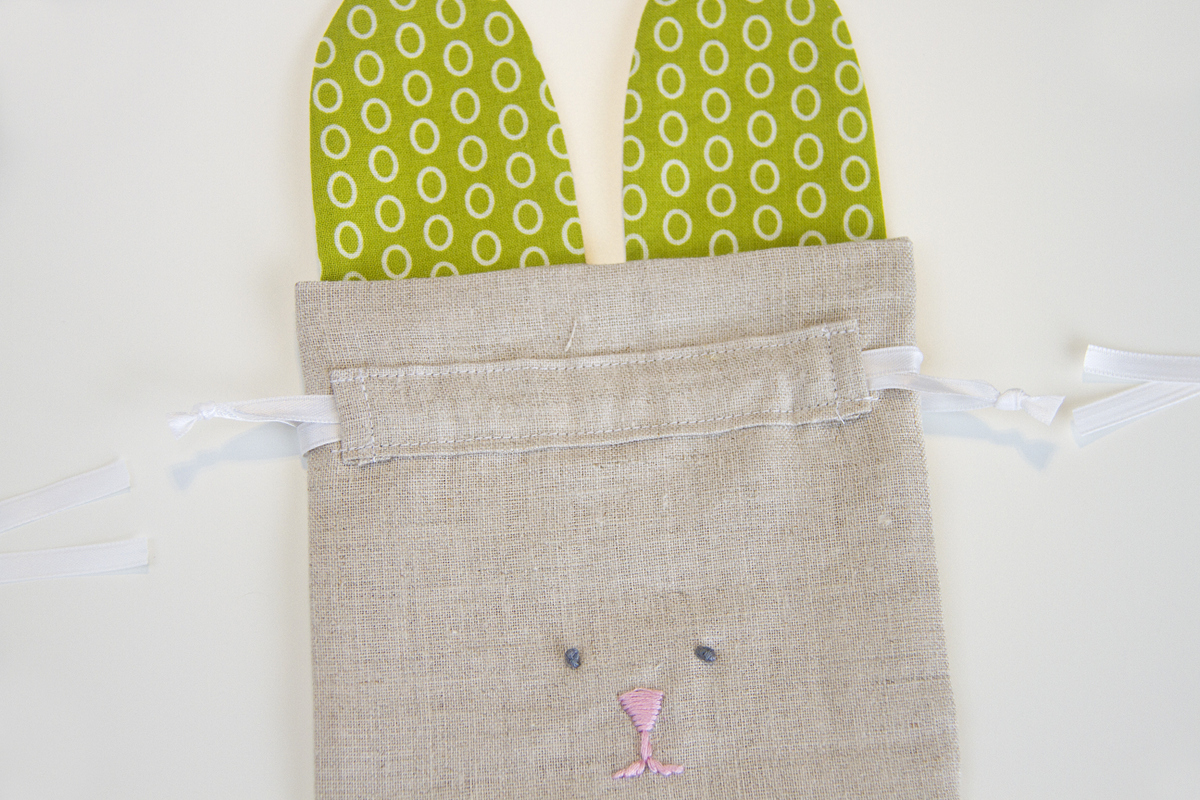
Place one of your “Main Bag” pieces in front of you with the RIGHT side facing up. Place the 2 finished ears on top, with the contrasting fabric facing down. Place the 2 ears 3/8 inch apart, lining up the raw edges of the ears with the upper straight edge of the “Main Bag” piece. Using a basting stitch, attach the ears using a 1/4 inch seam allowance.
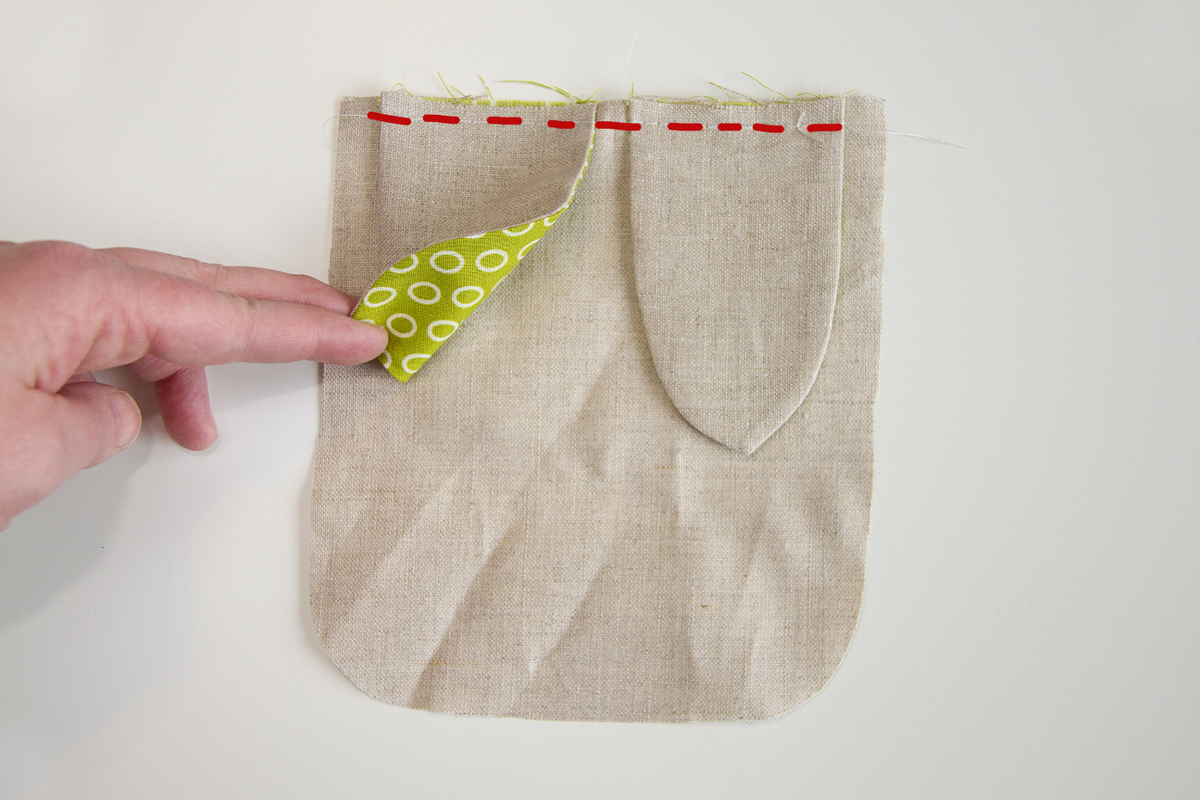
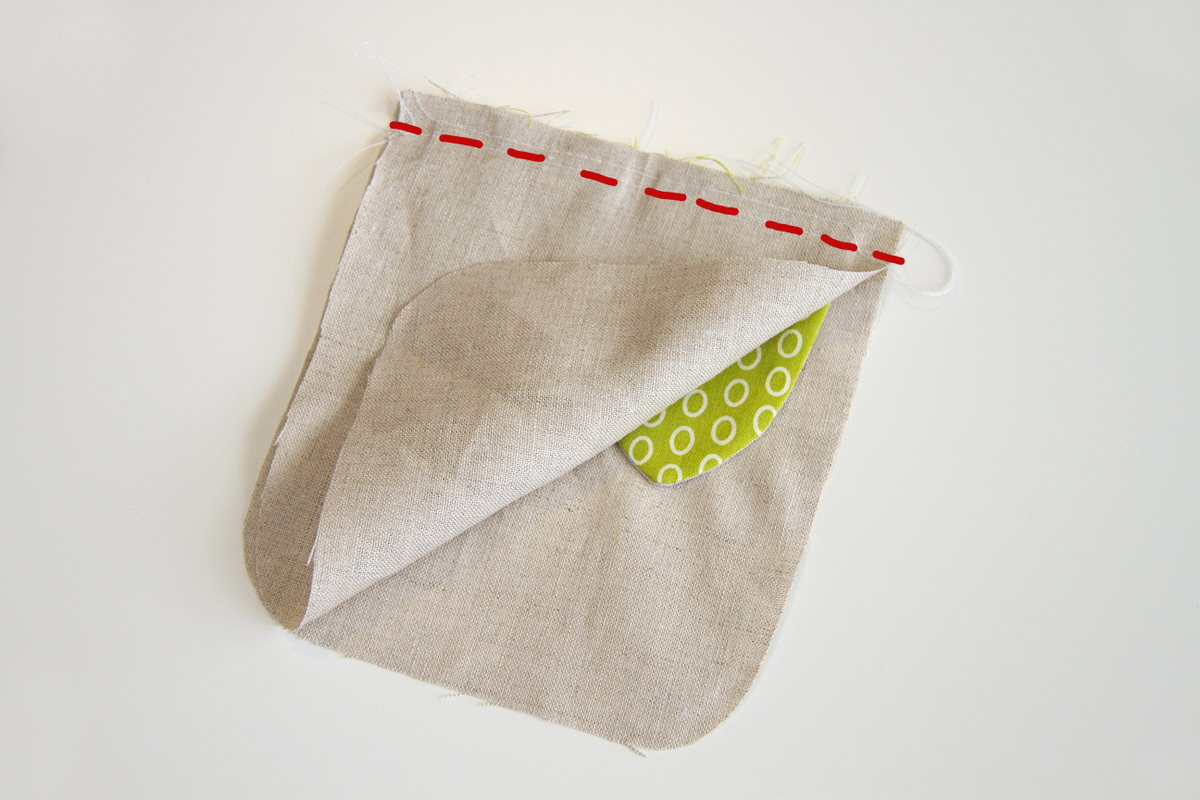
Place one of the other “Main Bag” pieces right on top, with the RIGHT side of the fabric facing down…and match up all the edges.
Sew along the upper edge, using a 1/2 inch seam allowance. Place the other 2 “Main Bag” pieces together the same way (without the ears) and sew along the top straight edge as well.
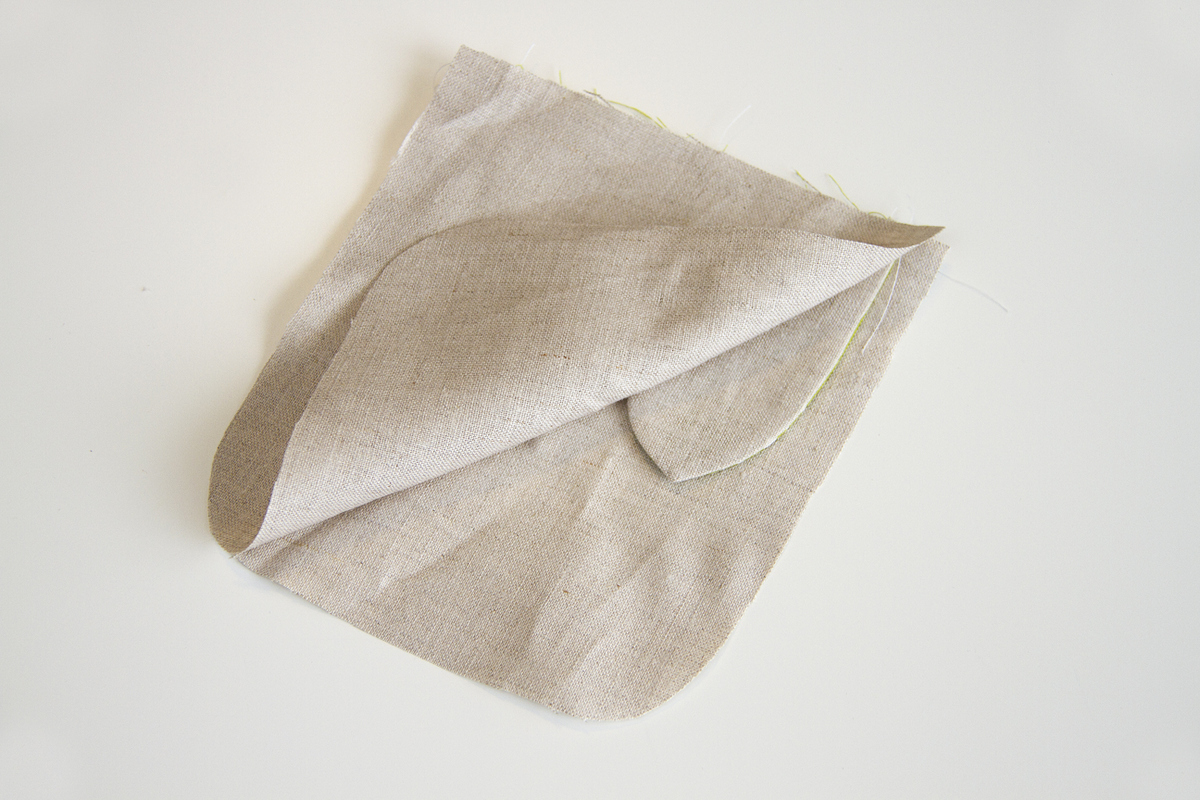
Flip these piece right side out and iron flat.
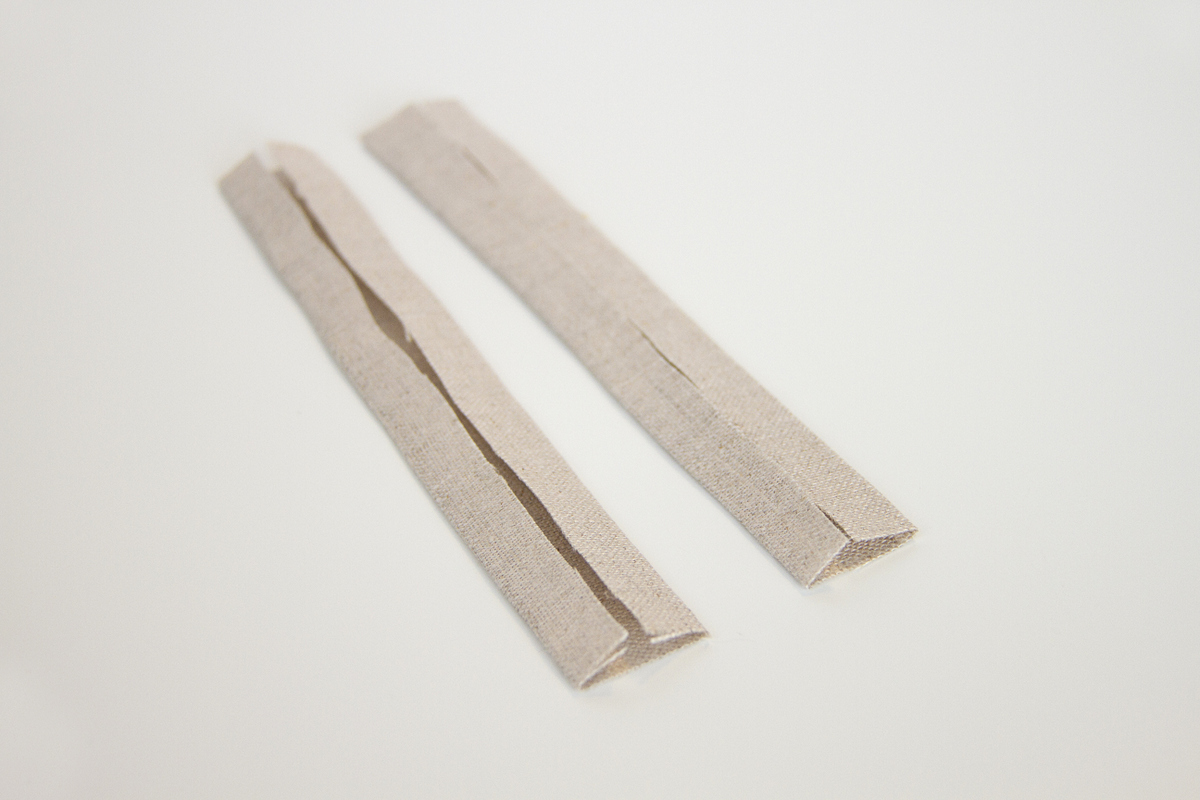
Lay your 2 rectangle ribbon guide pieces down in front of you with the RIGHT side of the fabric facing down. Fold each long edge in towards the center and iron flat.
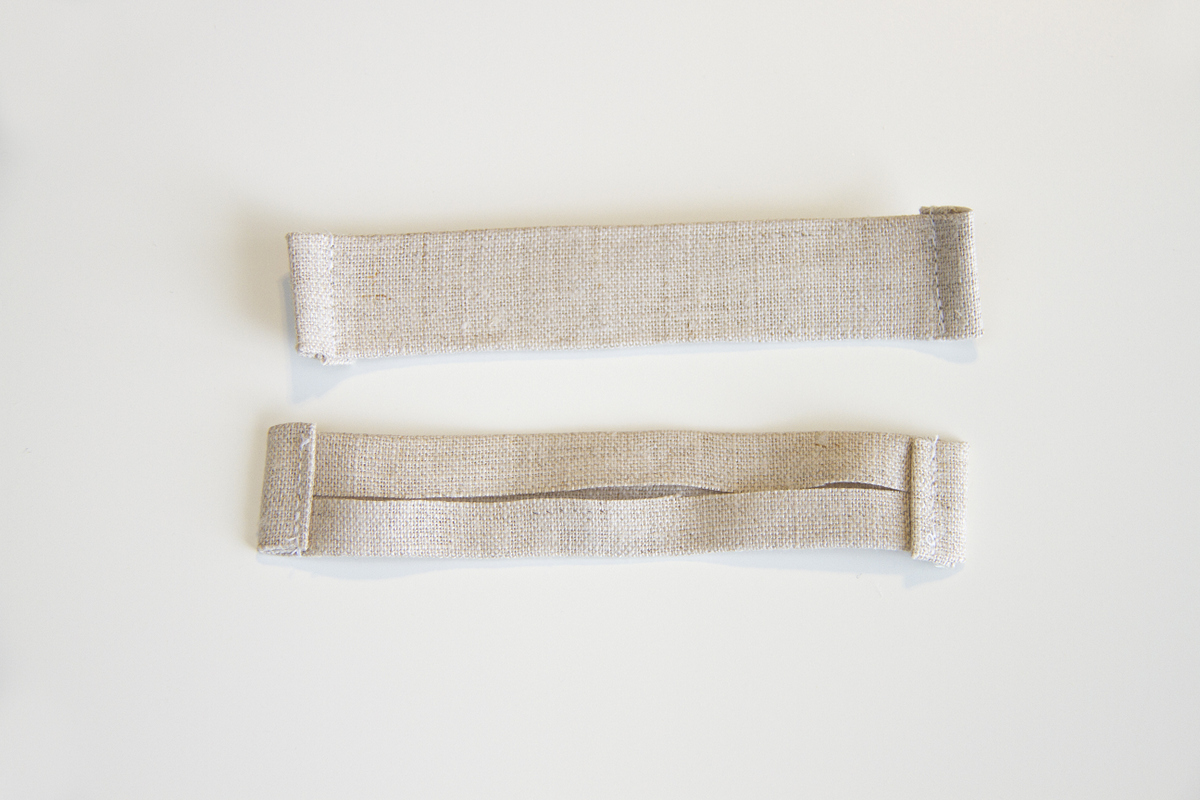
Fold over each end 3/8 inch towards the WRONG side, then another 3/8 inch, press flat with your fingers, and then sew in place.
Now, place the 2 bag pieces in front of you again and turn the piece with the ears attached over so that the contrasting color is facing down. Place the 2 ribbon guides on top of the bag pieces (this will be the OUTSIDE of the bag), centering them right to left. Adjust each ribbon guide so that they’re 1 inch from the upper edge. Sew along the upper and lower edges of each ribbon guide, leaving each end open for the ribbon to slide through.
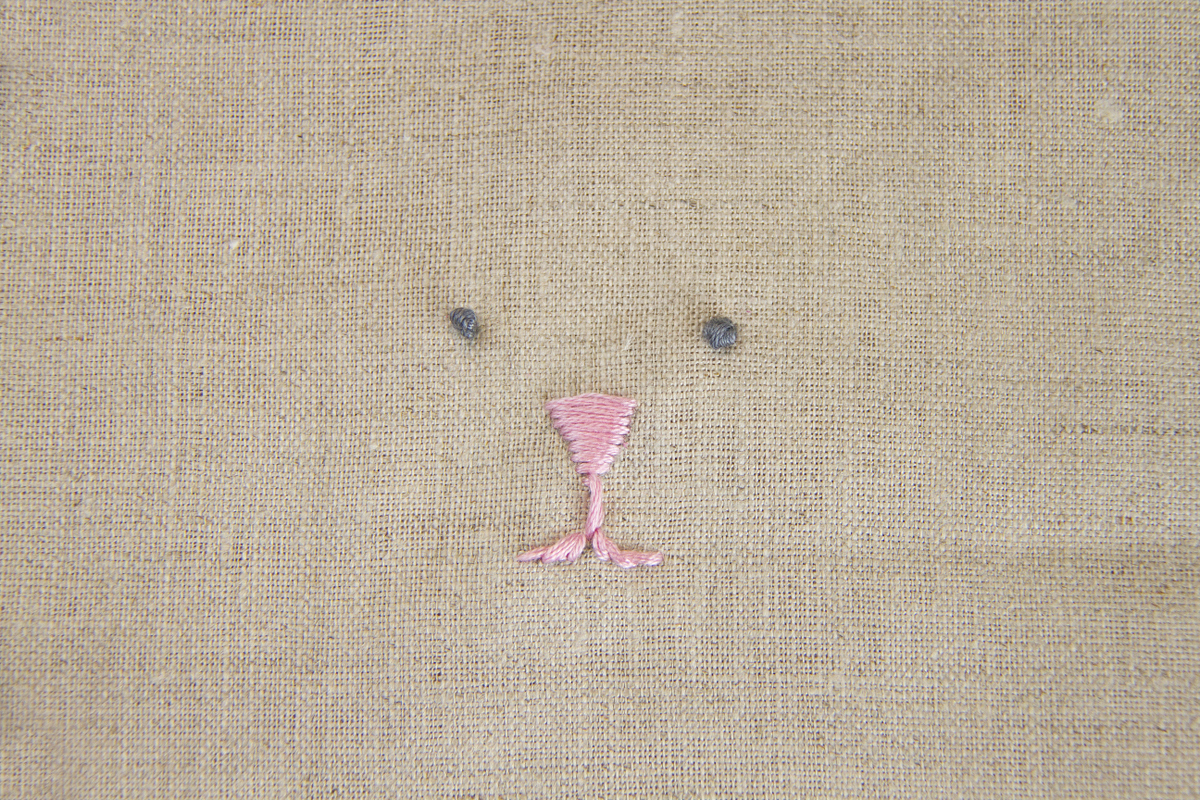
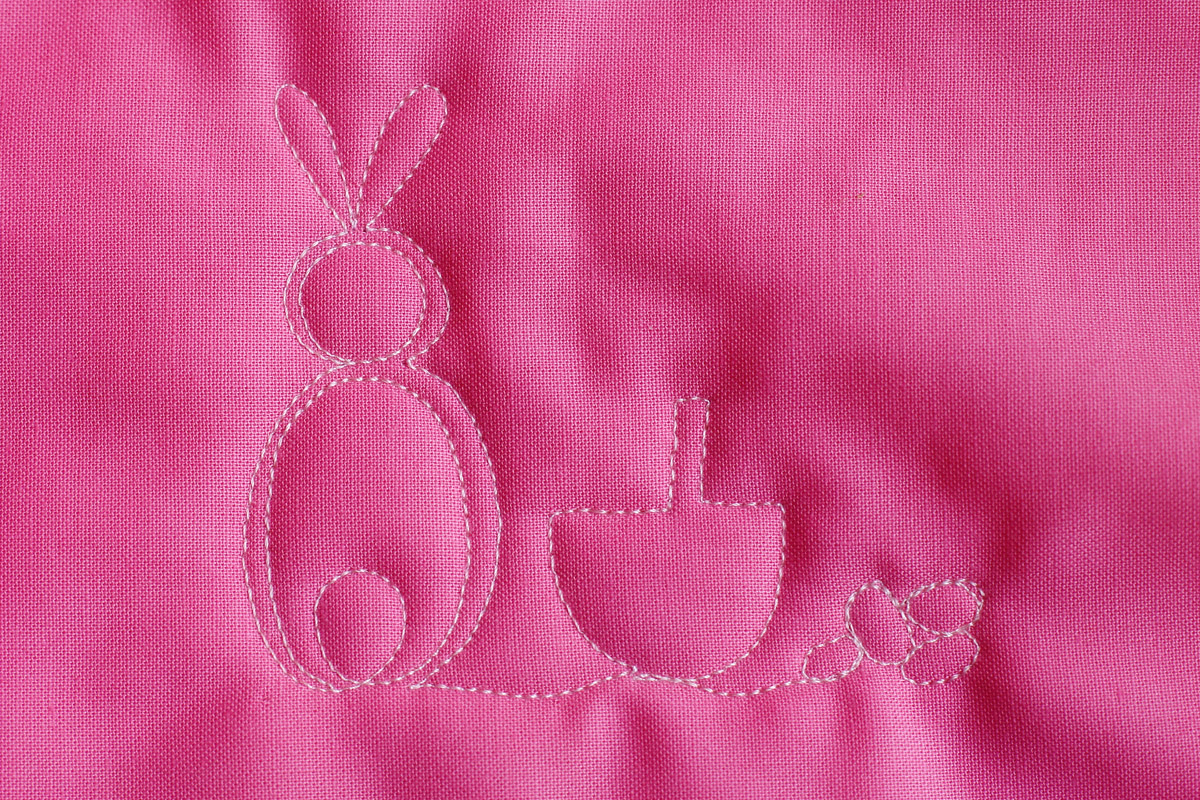
The next few steps are optional but if you really want to make your bag darling, add a simple little face to it! The easiest way is to use a pencil to draw on the face exactly how you want it. (Be mindful to not draw it too low, because there will be a seam allowance subtracted down below.)

You can add your face with whatever stitches suit you best but I just used a quick whip stitch for the main portion of the nose and then to create the lines for the mouth, I used the same instructions as this Fabric Doll Tutorial HERE. For the eyes, I created a simple French Knot like THIS. (Be sure you’re only sewing through the top layer of fabric, to hide the thread and knots.)
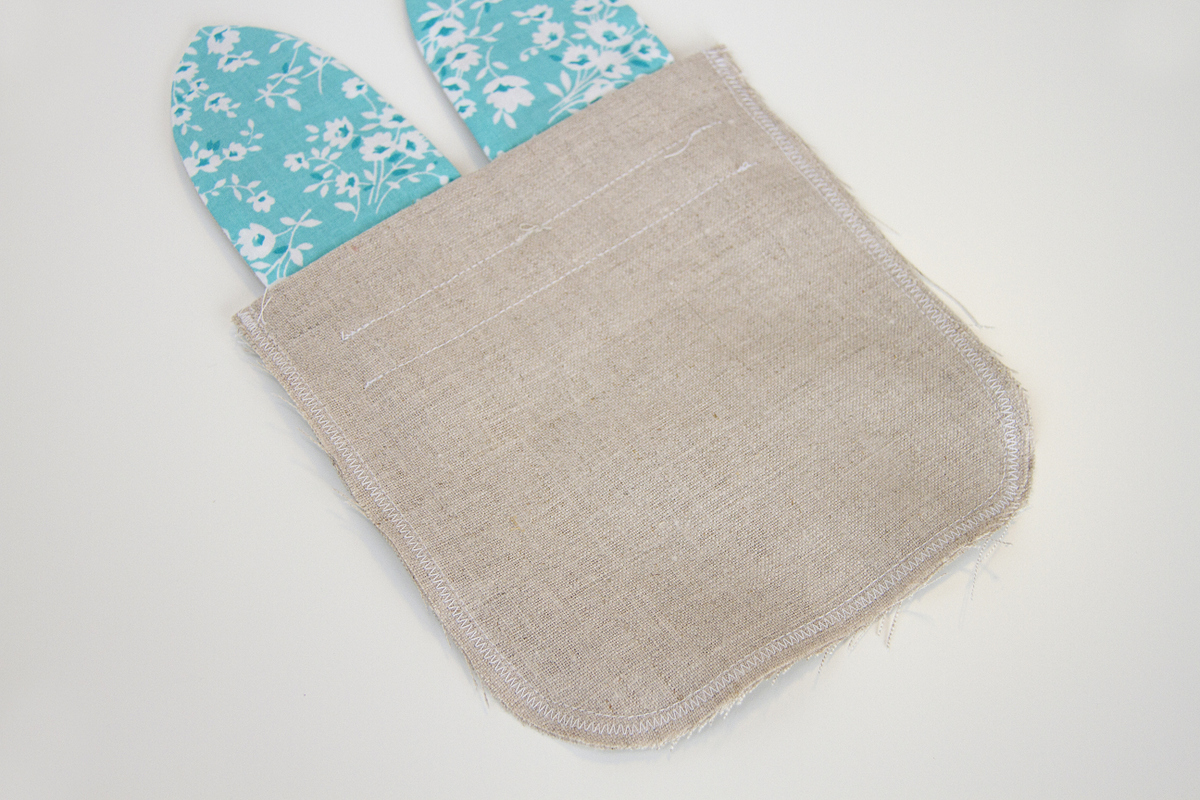
Now, place the two bag pieces together with RIGHT sides together and stitch along the sides and bottom, using a 1/4 inch seam allowance. Then, add a zig-zag stitch to add some extra reinforcement.
Trim away the excess fabric if needed.

Turn the bag right side out and iron flat.

Use a safety pin to help you thread a 20-inch long piece of ribbon through the front ribbon guide from right to left and then continue through the back ribbon guide from left to right.
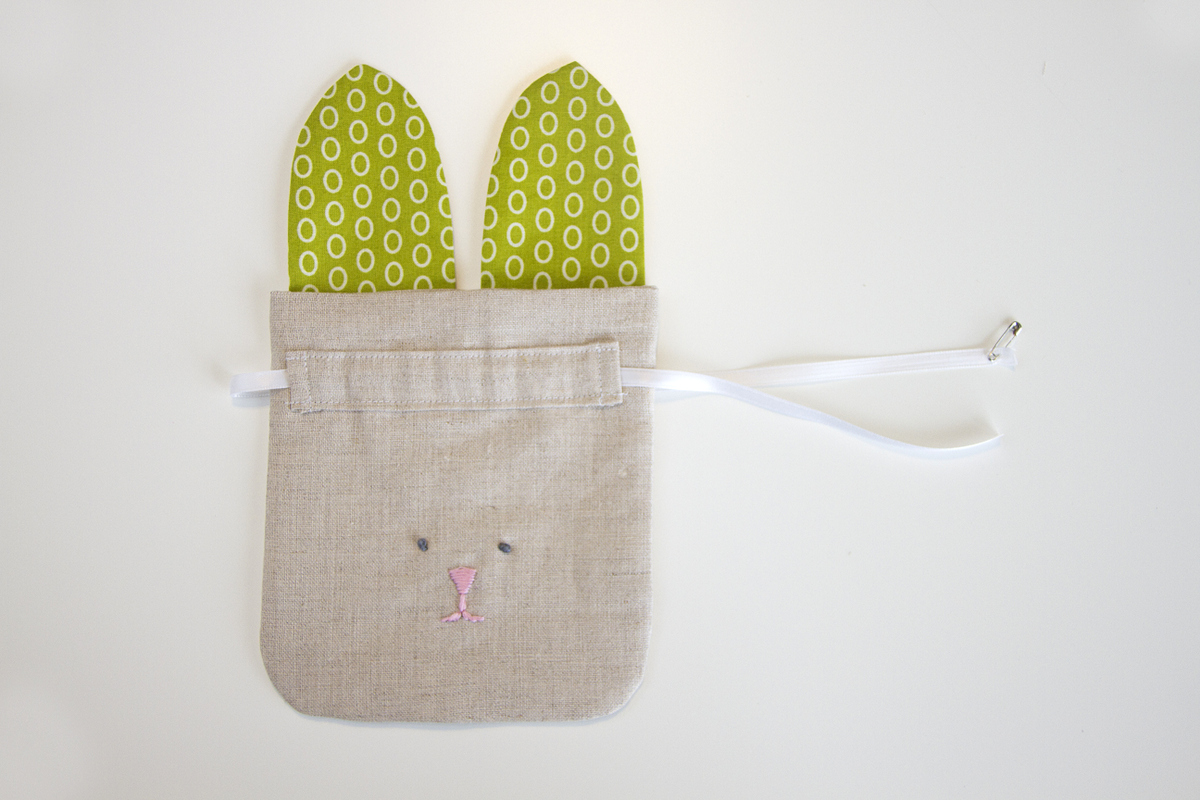
Grab a second 20-inch long piece of ribbon and thread through the front ribbon guide from left to right and then continue through the back guide from right to left.
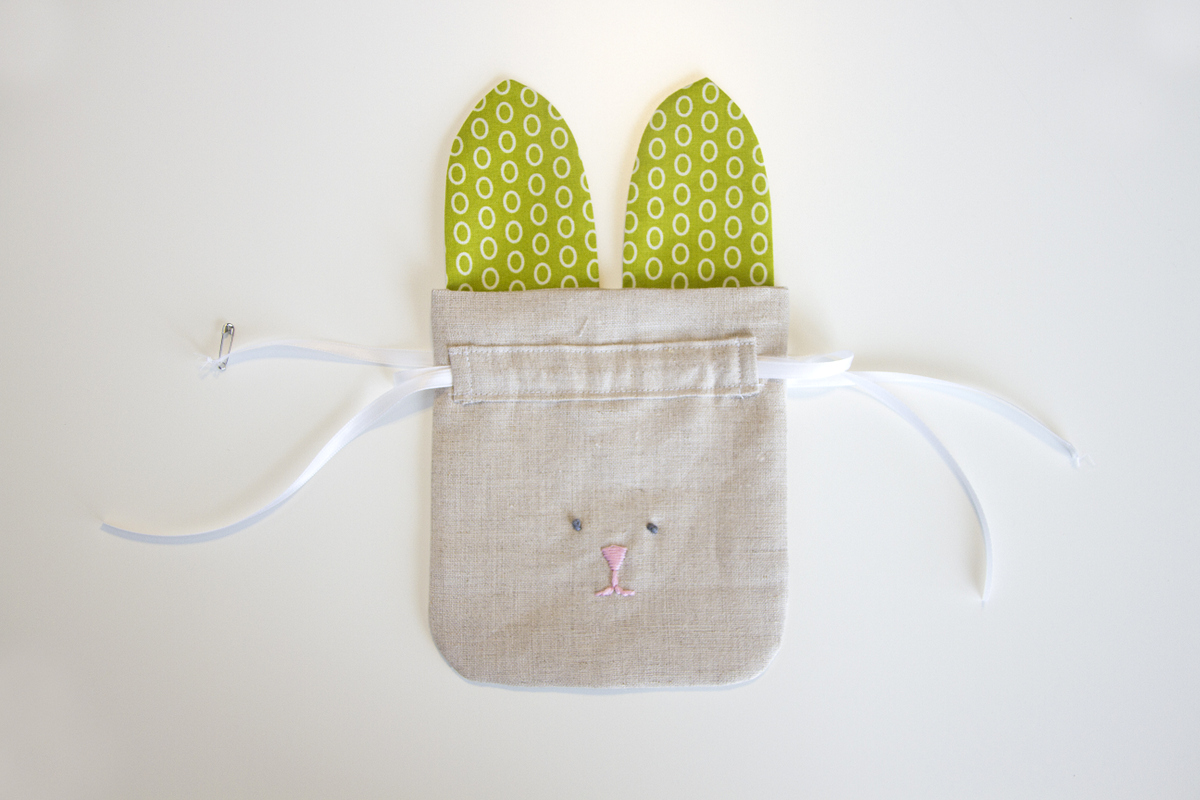
Pull each ribbon so that it’s pulled evenly. Then tie a knot into the ribbon ends on each side. Cut off excess ribbon.
Now, if you pull the ribbons at each side, the bag will cinch right in!

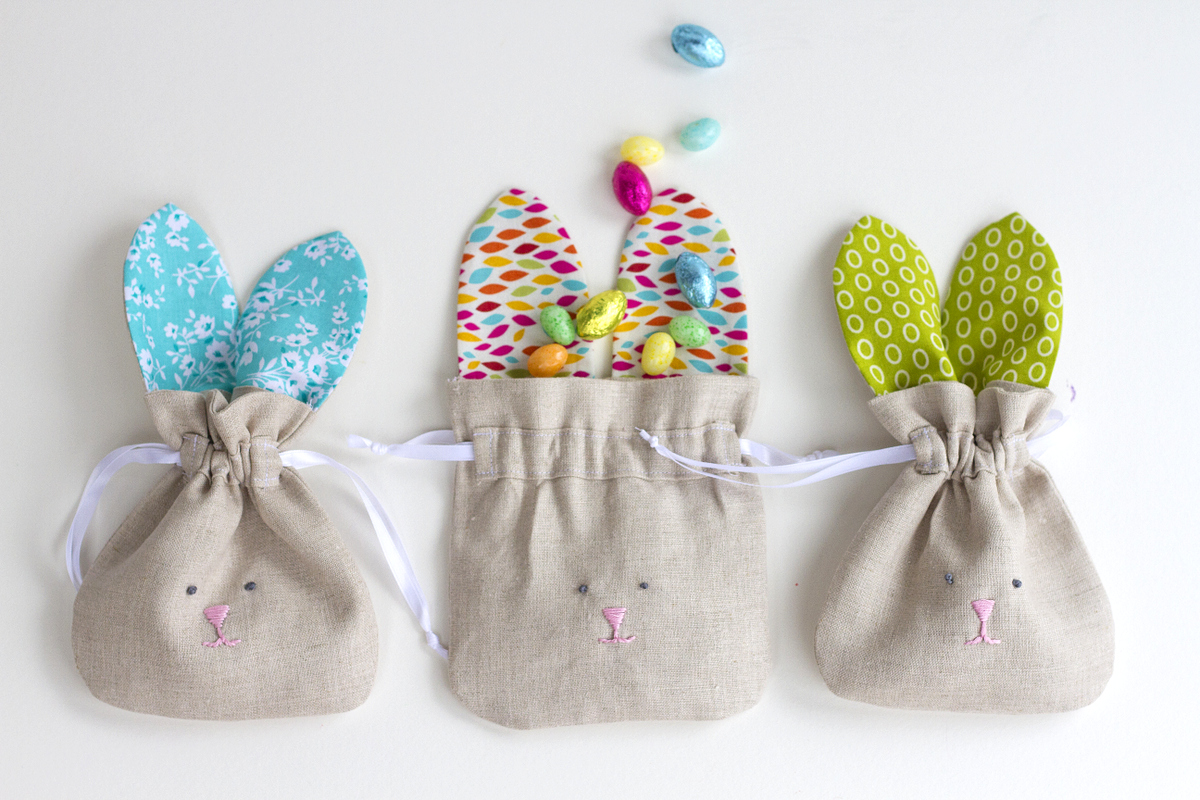
And that’s it! Now fill with candy, toys, coins, or whatever…..and enjoy your cute little Bunny Bags!
Thanks so much for having me here on We All Sew today!
-Ashley


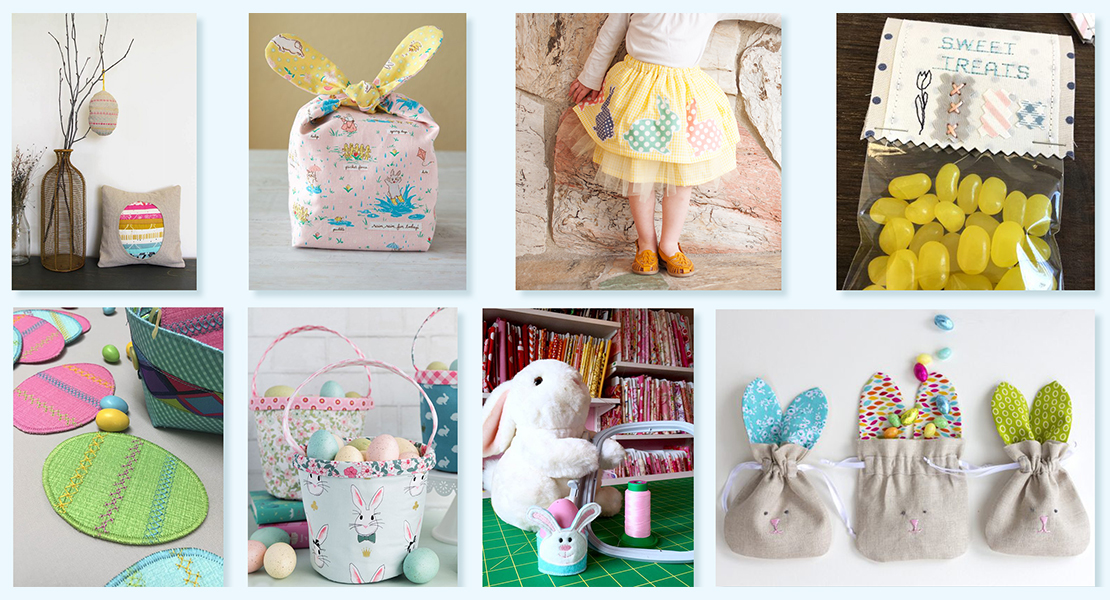
What you might also like

20 comments on “Drawstring Bunny Bags”
-
-
You’re very welcome! Enjoy! 🙂
Ashley -
This is a very cute little bag, I made 2 and the second one I put medium weight interfacing in the ears so they would stand up. Thanks.
-
-
Thank you very much for the tutorial, Ashley. 🙂 I’ll sew the Bunny Bags for my grandchildren.
-
These bags are adorable! Thanks so much, I’ll have to make them for my sweet 3 year old great-niece!
-
Thank you Ashley. I have made eight of these little bags just love them they are so cute. All my great nieces and nephews will love them.
-
Pingback: Frohe Ostern! « AHkadabra
-
Thanks so much for this project! I had fun making two this morning, and I know my granddaughters will love them!
-
These are so cute, I would love for the little bunny face to be digitized so that I could make many of these at one time for my nephew’s classmates. Thanks for the fun project-I’ve pinned it for next year.
-
There are some digital faces on Etsy..I bought one!
-
-
When I saw these adorable little bunny bags I really wanted to make some. They are so cute and easy to make with your excellent directions. Thank you for a great quick project.
-
Hi Ashley, thank you for such a great tutorial, I had a lot of fun creating my own bunny bags and they were an absolute hit with my nieces! I have referenced your tutorial in one of my blog posts on http://lesterlost.com, cheers!
-
Hi. Thank you for sharing this project to us. We included it on our round-up post here, http://sewuber.com/make/easy-kids-sewing-projects/
Please feel free to contact us if you want to add something.
Cheers,
Sandra -
These are ADORABLE!!!! My daughter loves bunnies and has wanted to learn how to se. I believe this will be the perfect project for her to start on!! Thank you so much for sharing it with us!
-
I made them with bunny material, fussy cutting so a bunny was on the center front. They are adorable.
-
I made these last Easter and they turned out adorable. Thank you so much for the pattern and tutorial.
-
Is there a pdf of these instructions?
Thanks
Linda-
Hello sewfine!
Our WeAllSew blog content is posted in an open format.
If you wish to print the post, you can easily print your tutorials from the WeAllSew blog.
If you attempt to print directly from the screen, a pdf will be generated for your convenience.
Please give it a try.-
I tried this but couldn’t get it to print. I even tried to email it to myself and still couldn’t get it to print.
-
-
-
Thanks so much for the inspiration and clear tutorial. I sized it up a bit so it’s large enough for the little bunnies and carrots crafted from upcycled sweaters, made for my granddaughter. Can’t wait to give them to her for Easter.
Leave a Reply
You must be logged in to post a comment.

I LOVE this! Thank you for the clear tutorial!