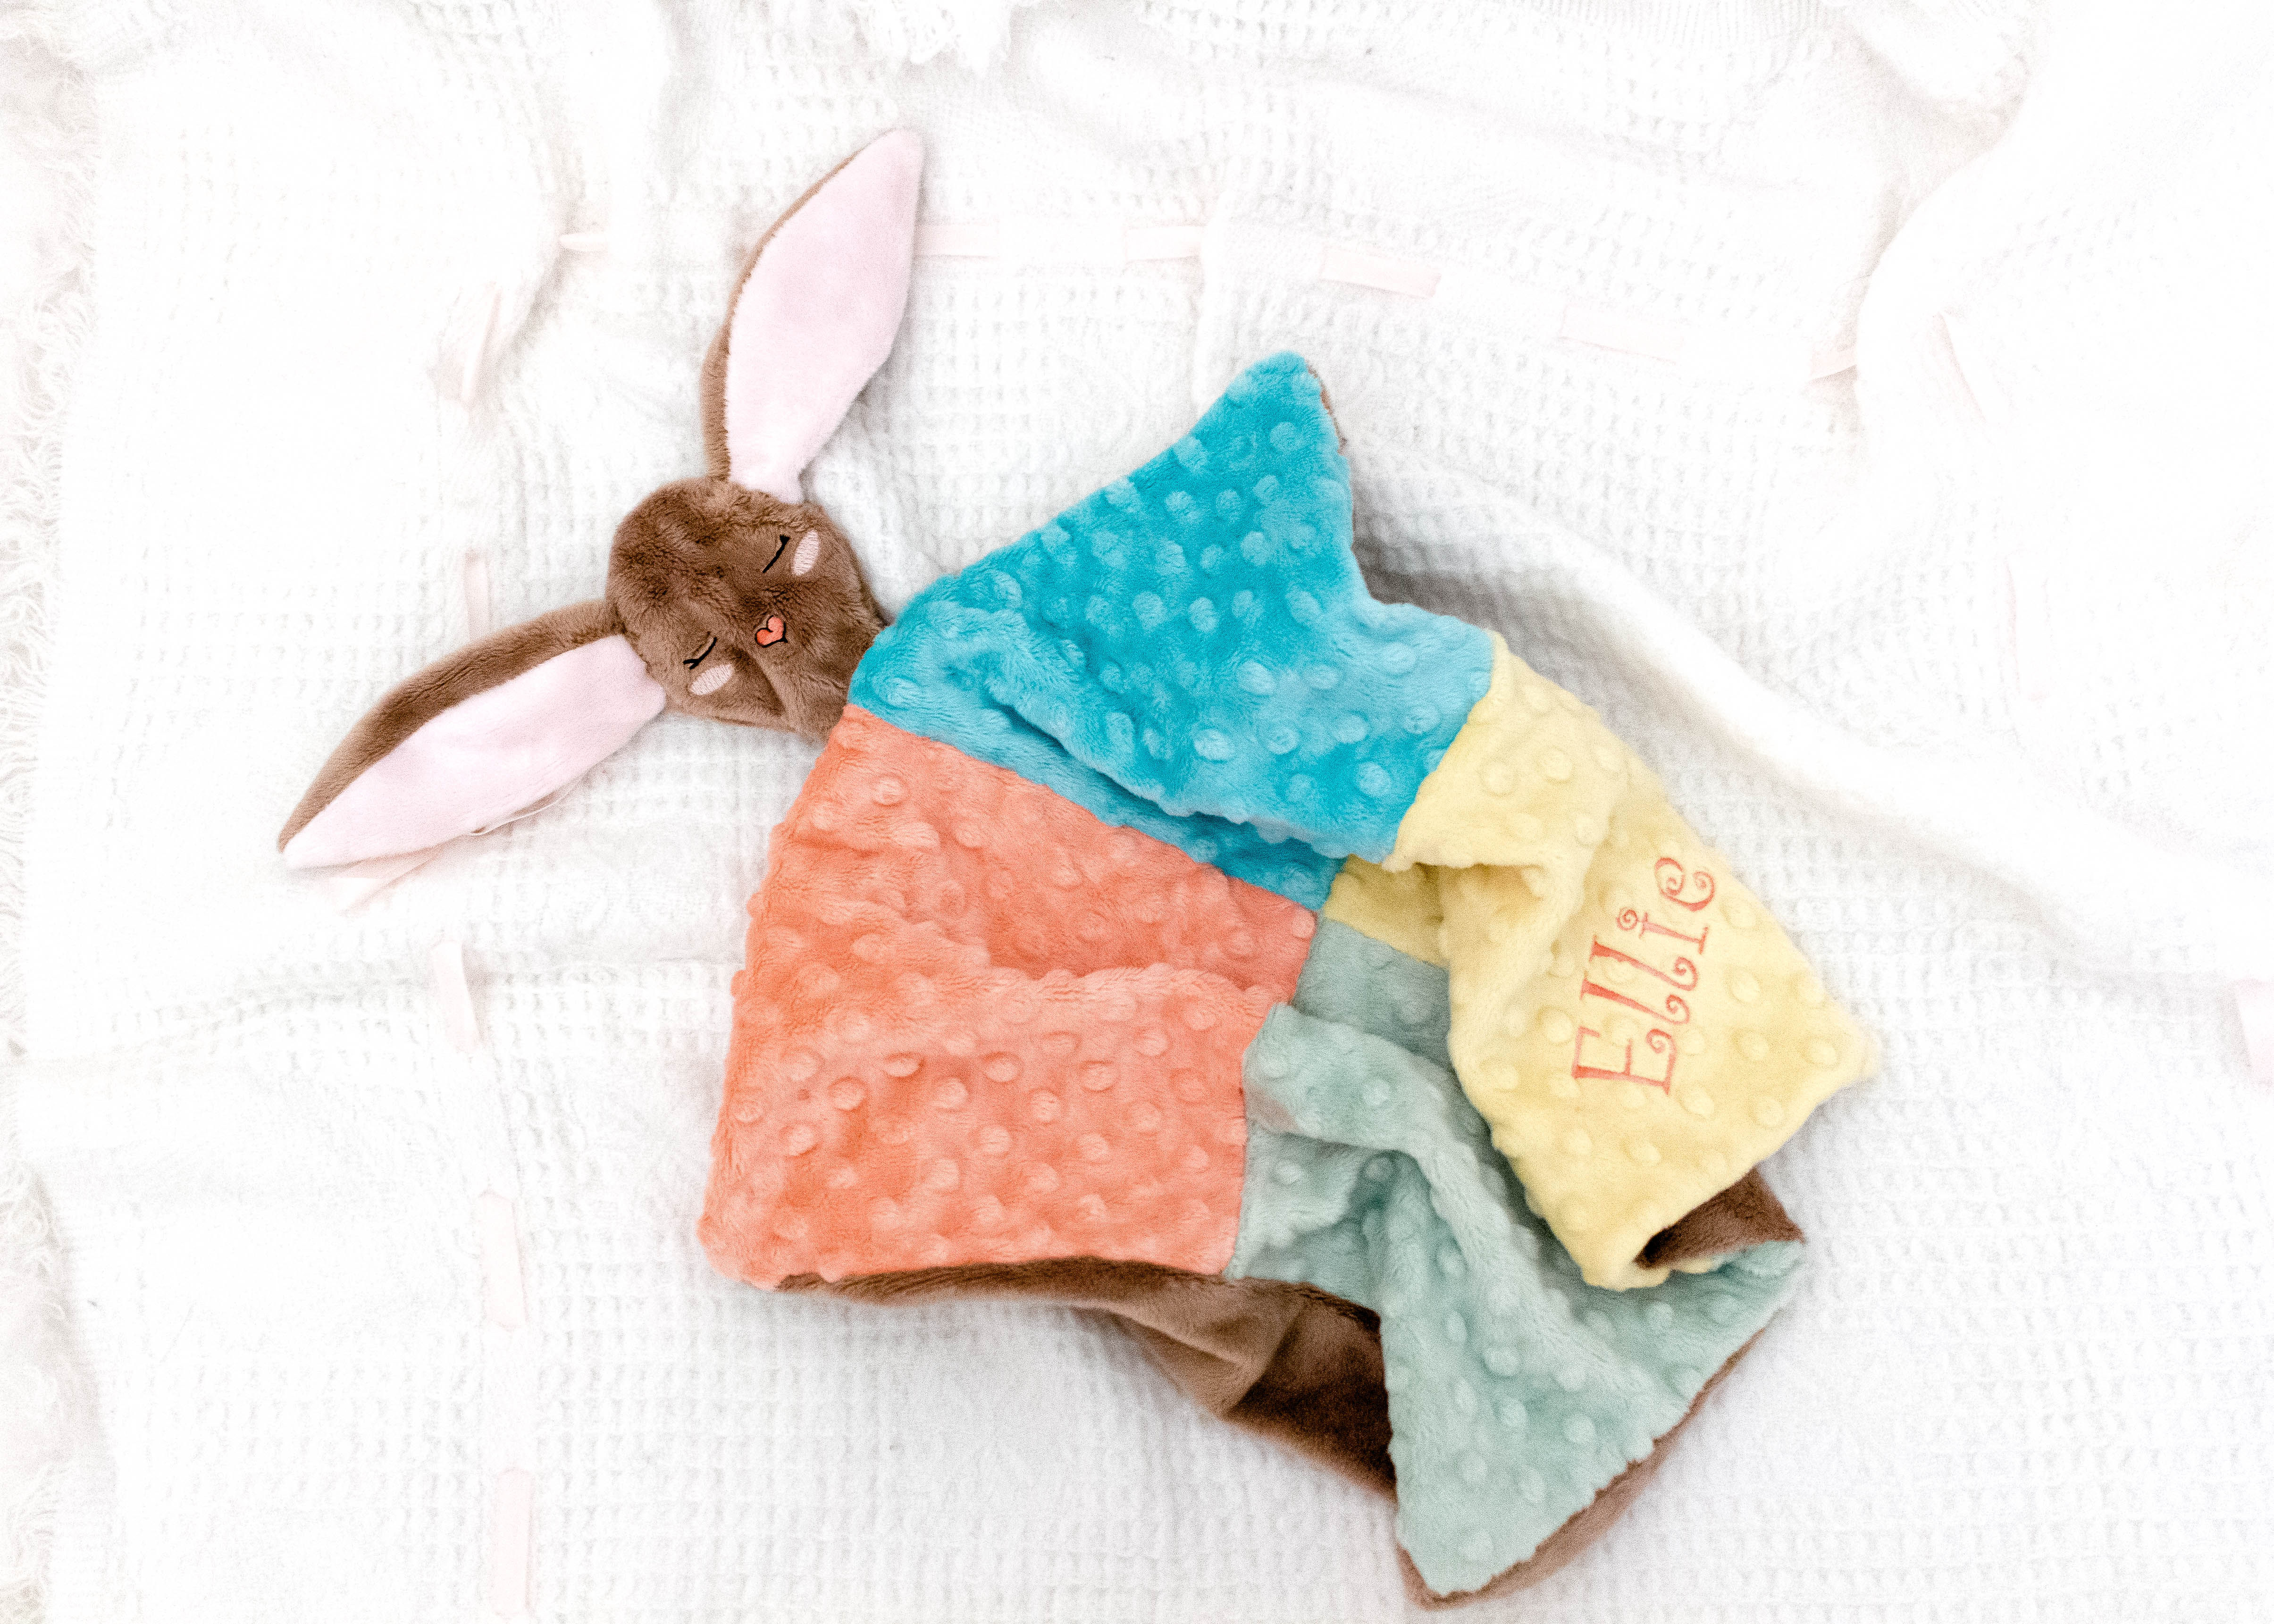
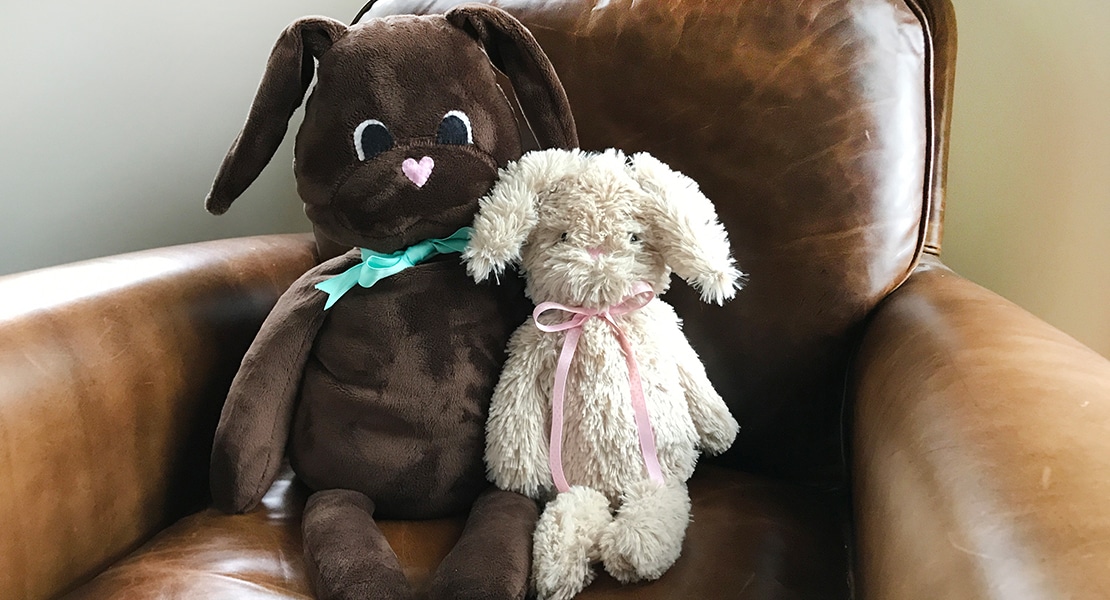
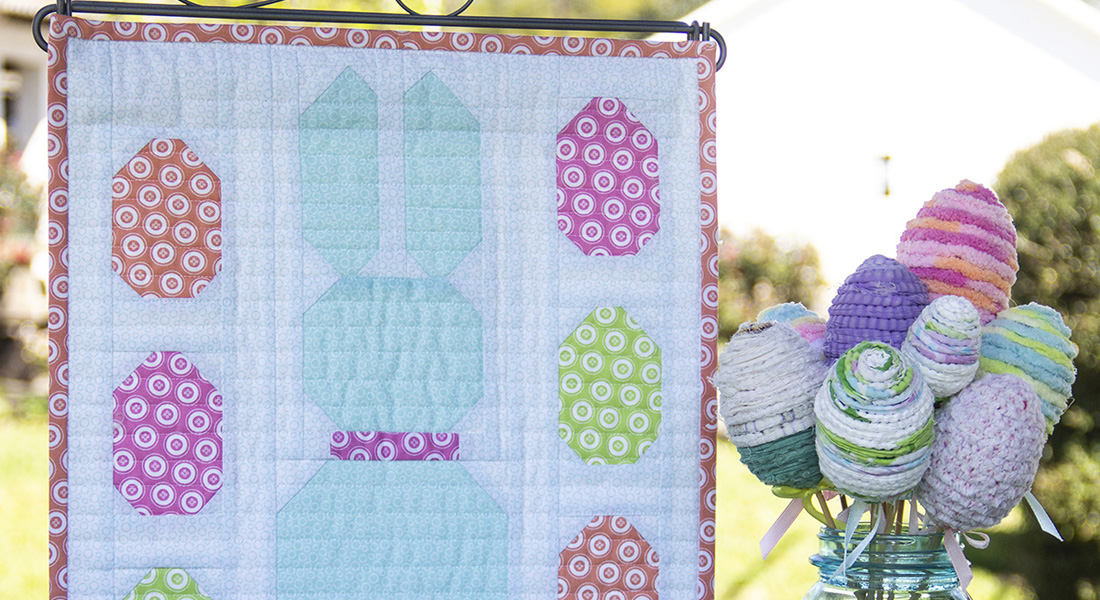
Machine Embroidered Minky Cuddle® Bunny
Hi! I’m Kate Toney from Tough Kitten Crafts and I empower sewists to move from frustrated to fearless with machine embroidery via online education. I have a passion for helping BERNINA owners better understand their BERNINA machines and embroidery modules. Today I wanna show you how to make a machine embroidered Minky Cuddle® bunny.
I love introducing embroiderers to new fabrics to use for their machine embroidery whether that be toilet paper (yes, toilet paper) or velvet or this Ultra Plush Minky Cuddle® from Shannon Fabrics! Embroidery on Cuddle® is a fun and cozy project that embroiderers of any skill level can enjoy. So let’s make a wonderful little bunny lovey just in time for spring!
A lovey is the best gift because it’s 50% stuffed toy, 50% blanket, 100% cuddly goodness, which will make it an instant fave for anyone you give it to! The fabric really makes this adorable in-the-hoop bunny stand out. I’m thinking I need to make myself a little cuddle bunny too, I haven’t had a blankey or stuffed toy in ages but it was so cozy and comforting and I think we all need a little more of that in our lives.

The head and ears of this cuddle bunny are made in the hoop, meaning we do all the sewing with our embroidery machine! This cuts down on the amount of sewing you have to do with the Minky fabric making it much easier to create the smaller parts of the bunny. This is great skill building for newbies to machine embroidery!
Here’s how you can sew your own little cuddly bunny for your loved ones.
Supplies to Make a Machine Embroidered Minky Cuddle® Bunny
- Bunny Head & Ears Embroidery Designs
- Download the designs here (available formats: ART, DST, EXP, HUS, JEF, PES, SEW, VIP, VP3, XXX)
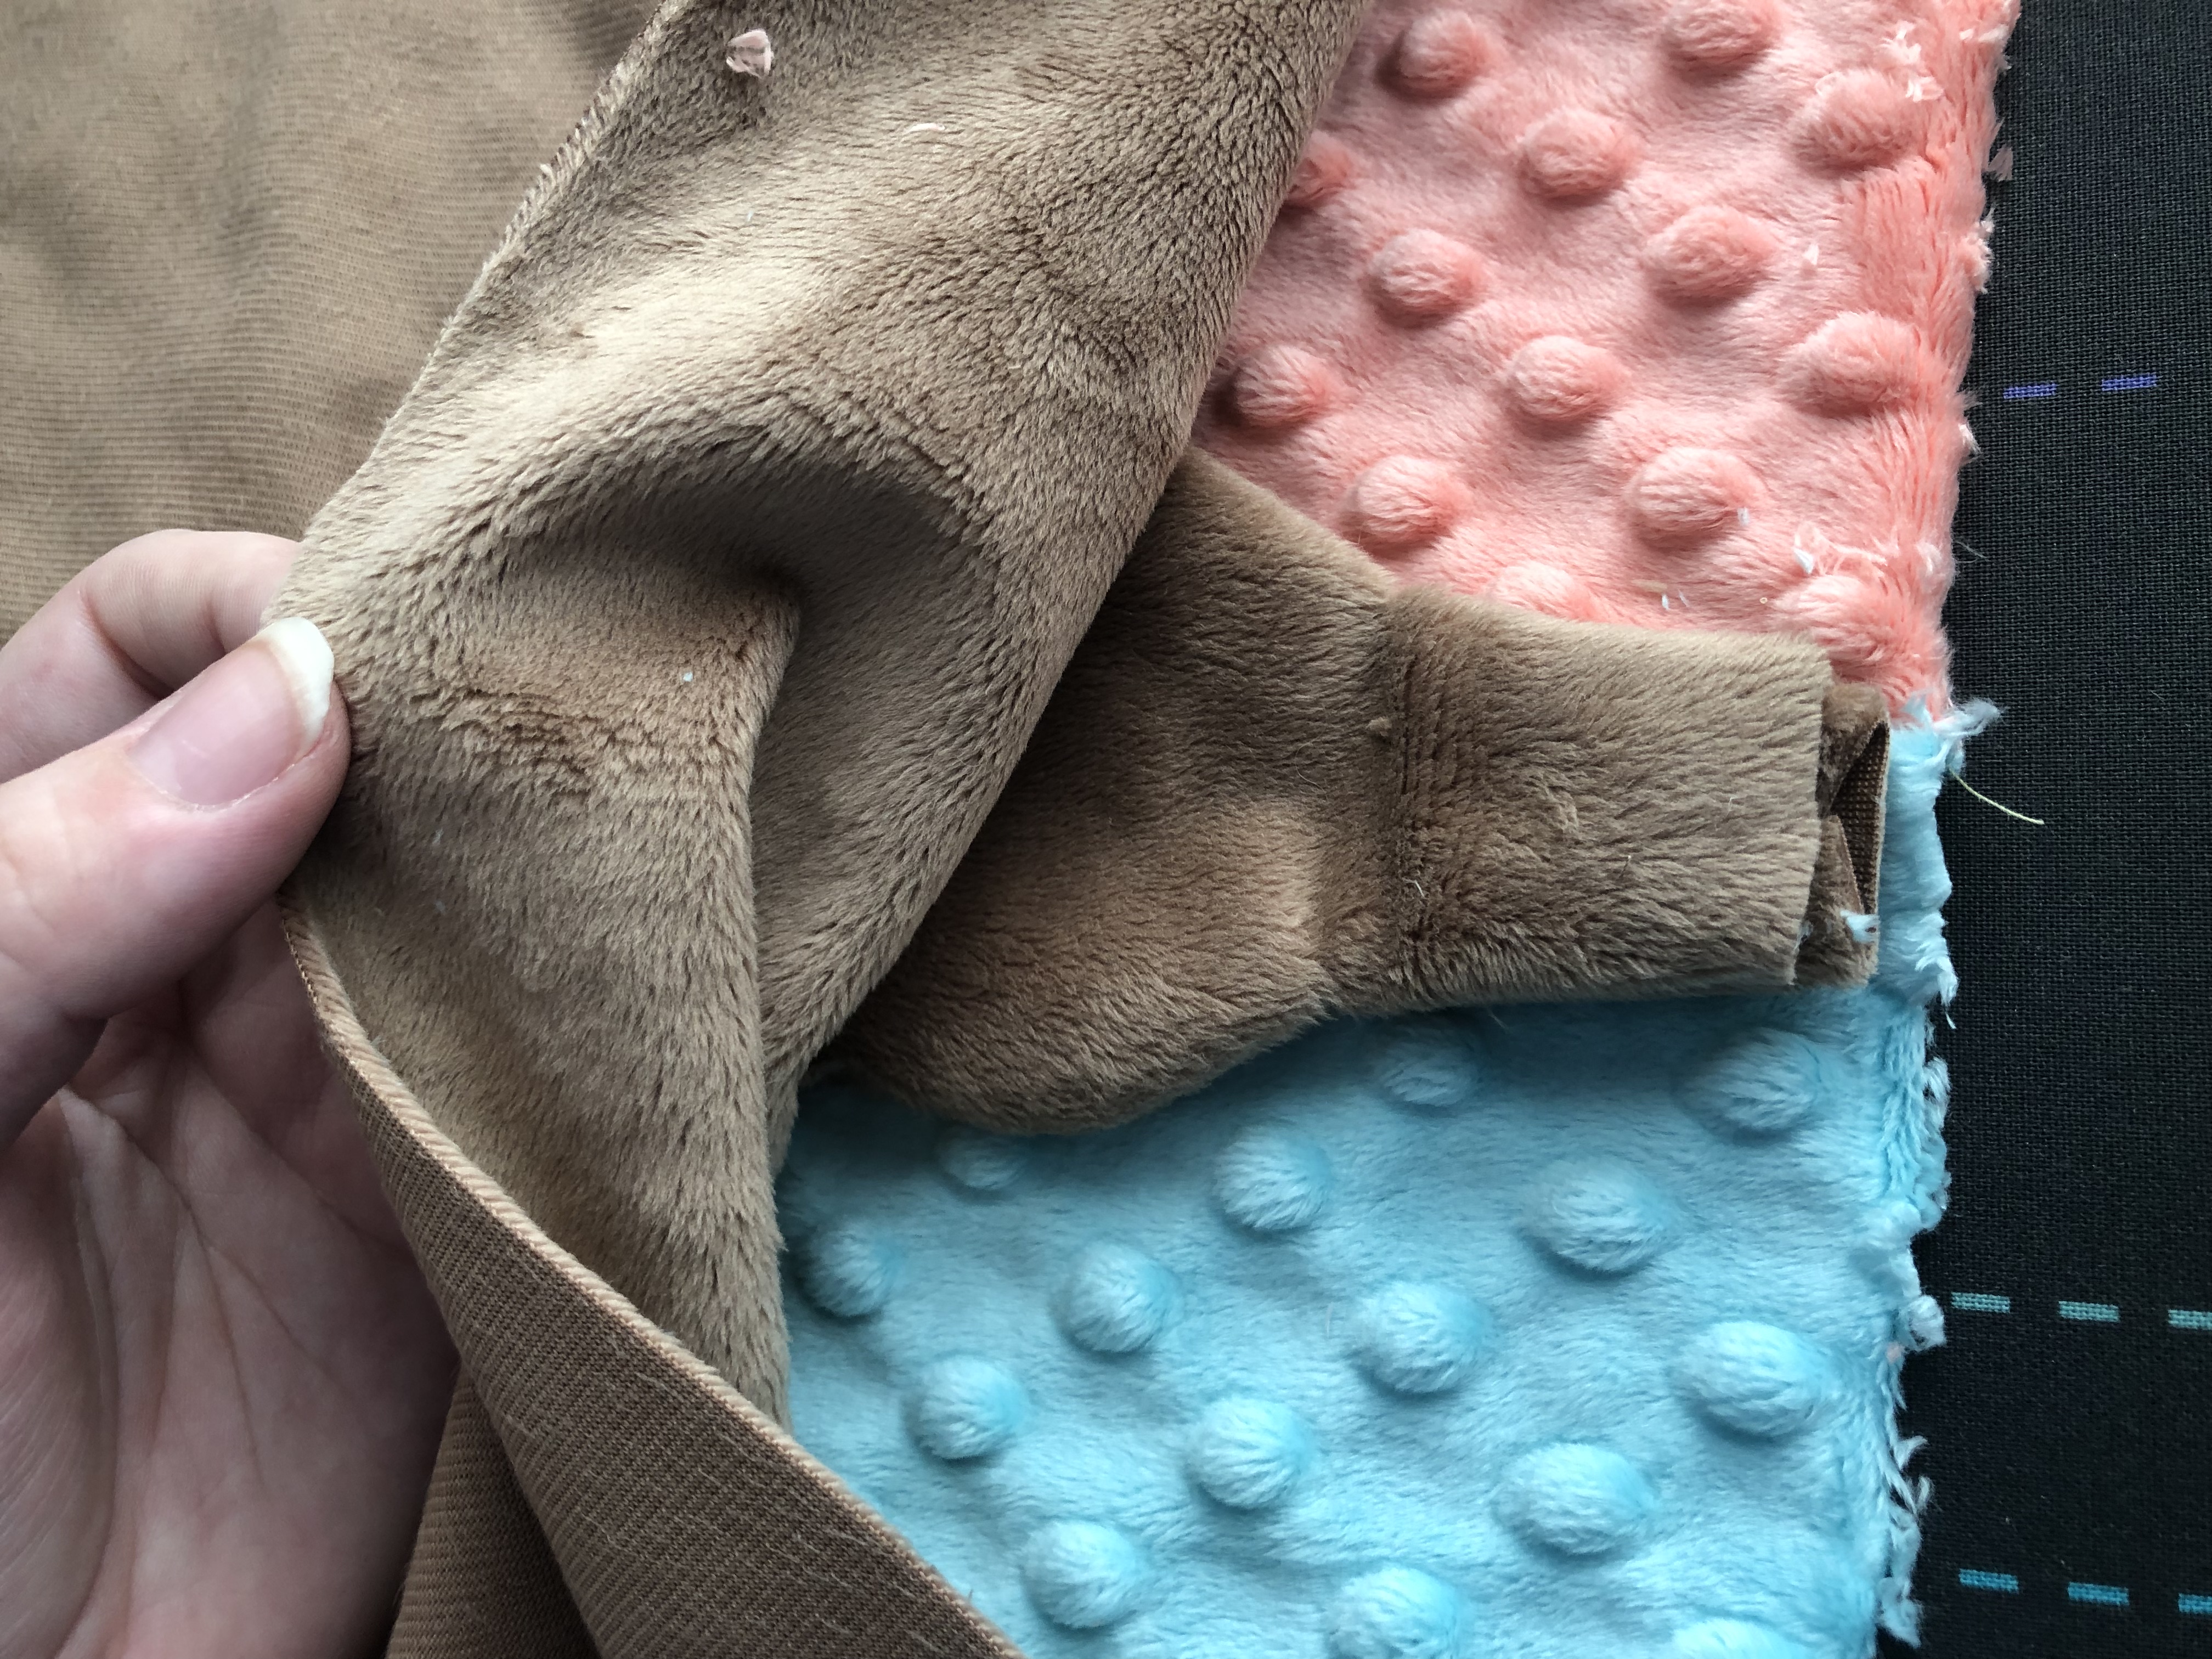
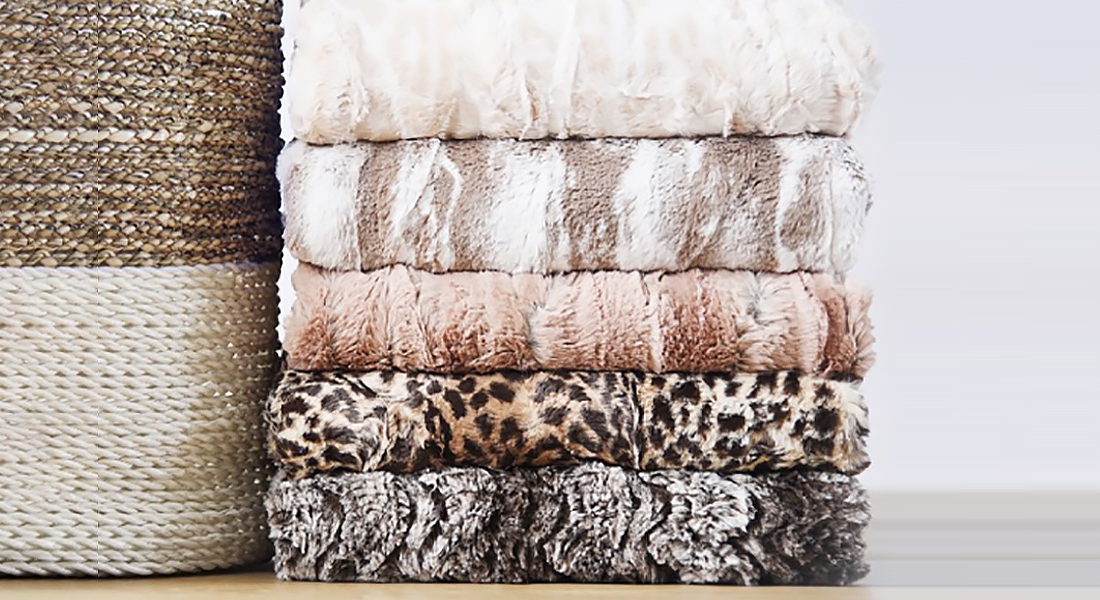
- 1/2″ Yard Shannon Cuddle Fabric in Cappuccino (Bunny body; I used 2 Fat quarters*)
- 9″ x 9″ Shannon Cuddle Fabric in Baby Pink (Inner ears)
- 8.5″ x 8.5″ squares of Shannon Dimple Dot Cuddle Fabric in the following colors:
- Papaya
- Aruba
- Banana
- Sage
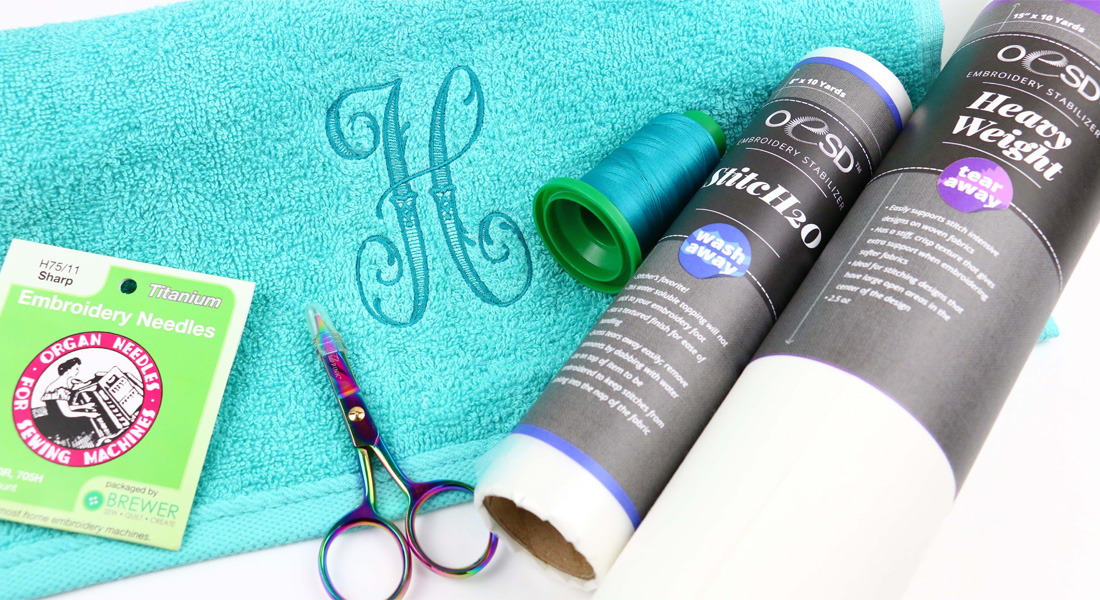
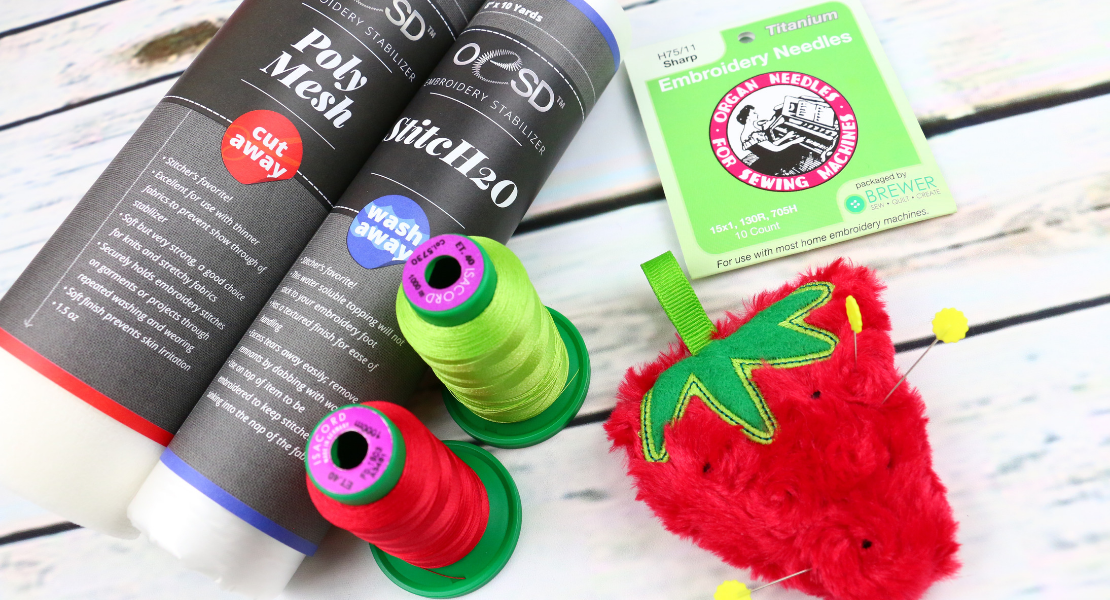
- 75/11 Ballpoint Embroidery Needle
- Embroidery Thread (I used Aurifil 40 wt)
- Black (eyes, outline)
- Baby Pink (cheeks)
- Pink (Nose)
- Taupe (To match bunny fabric)
- Serger thread (3 cones)
- OESD Expert Embroidery Bobbin thread
- OESD Medium Weight Tear Away Stabilizer
- OESD Medium Weight Cut Away Stabilizer
- OESD StitcH20 Wash Away Stabilizer
- Spray Baste
- Wonderclips or fabric pins
- Sookie Sews EZ Point and Turner
- Embroidery Tape (Optional)
- Medium Hoop
- Large Oval Hoop

Notes About Cuddle® Fabric Before Getting Started
- Light a lavender candle, put on some soothing tunes, do breathing exercises, do whatever calms you down before tackling a project with Cuddle®. When working with Cuddle®, I let all perfectionism and controlling behavior go out the window because it only makes the process unnecessarily frustrating. Cuddle® is slippery and can be a little befuddling the first couple of times you work with it but it’s also pretty forgiving in the final result! So don’t stress, trust the process and enjoy . . . it’s gonna be so cute!
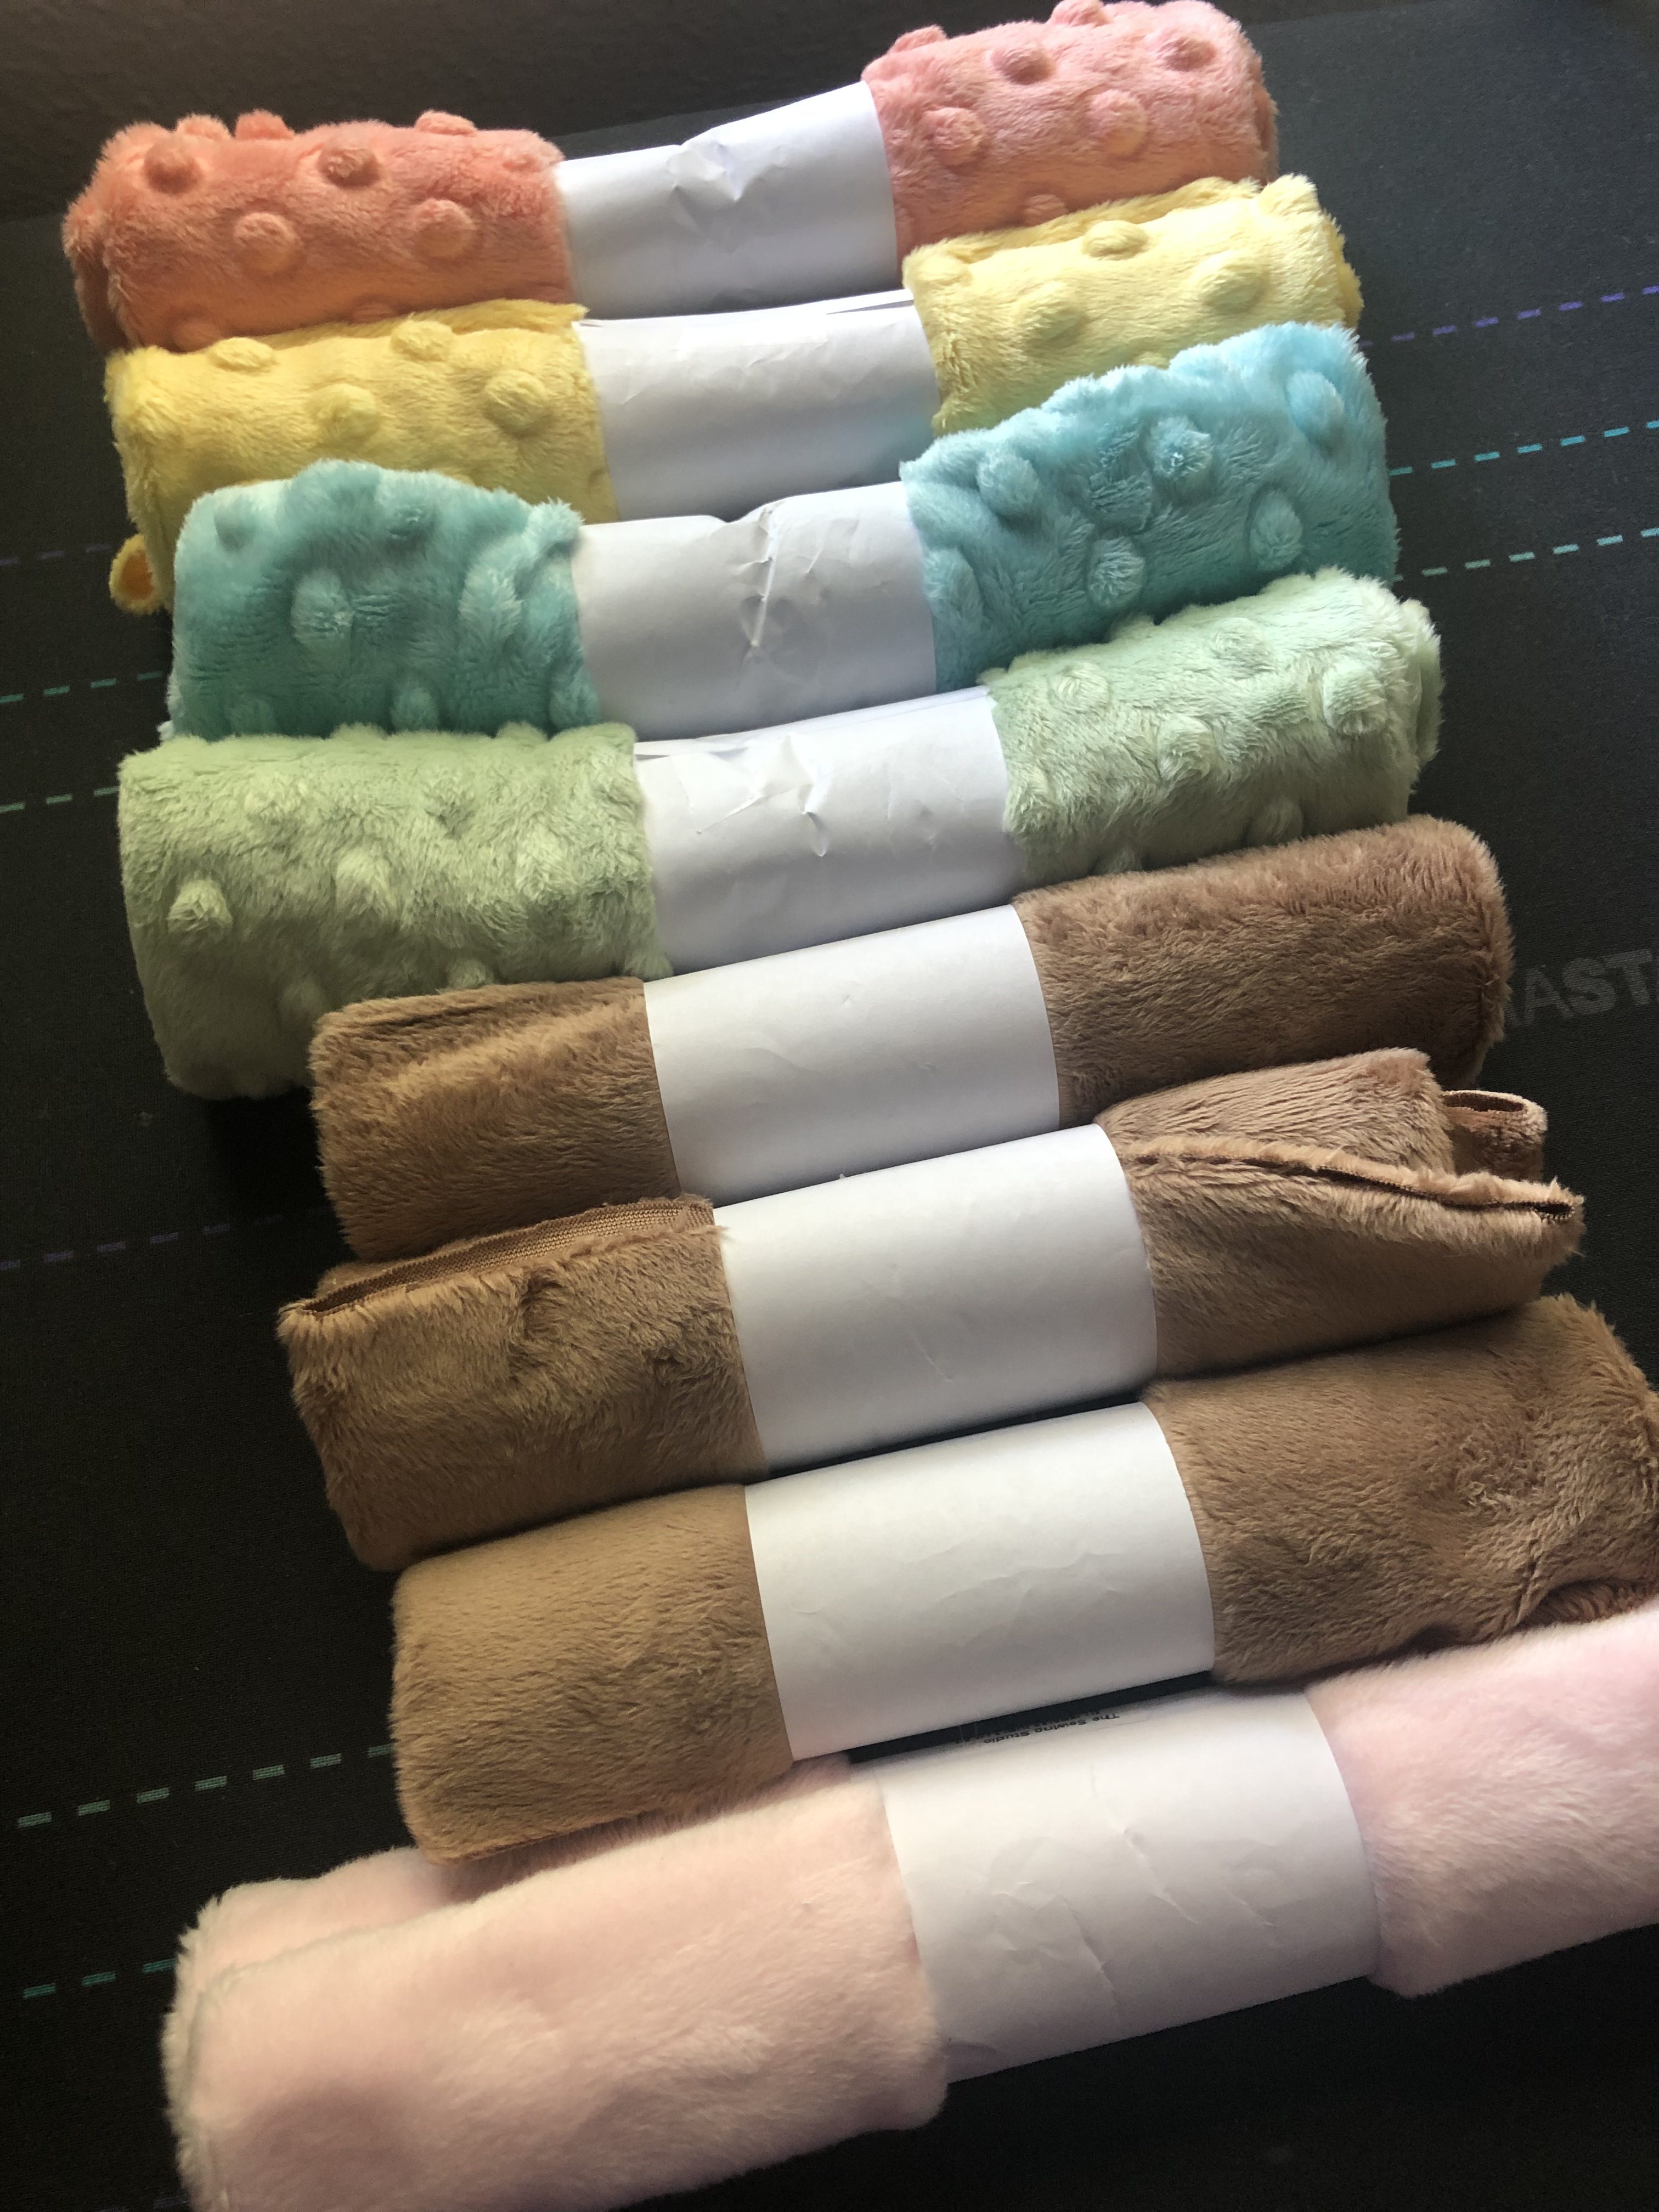
- My local shop sells 15″ X 15″ squares of cuddle fabric, so not quite fat Quarters. I used 2 for the bunny head/body and one of each of every other color. I didn’t cut the pieces from my cuddle square, I worked from the intact square as much as possible to minimize cutting and therefore minimize cuddle dust

- As we work on this project, be aware of which direction the nap of the fabric is going. While having the nap go different ways throughout the project won’t affect the construction, it could affect the final look of the project.
- Cuddle® fabrics will shed on the cut edges. Because of this, I popped mine in a low/no heat dryer for 10 minutes to remove the fluffies, this can also remove any creases you may have in your fabric. Be careful if you have dotted fabric like I do, as too much heat can remove the dots entirely.
Instructions to Make a Machine Embroidered Minky Cuddle® Bunny
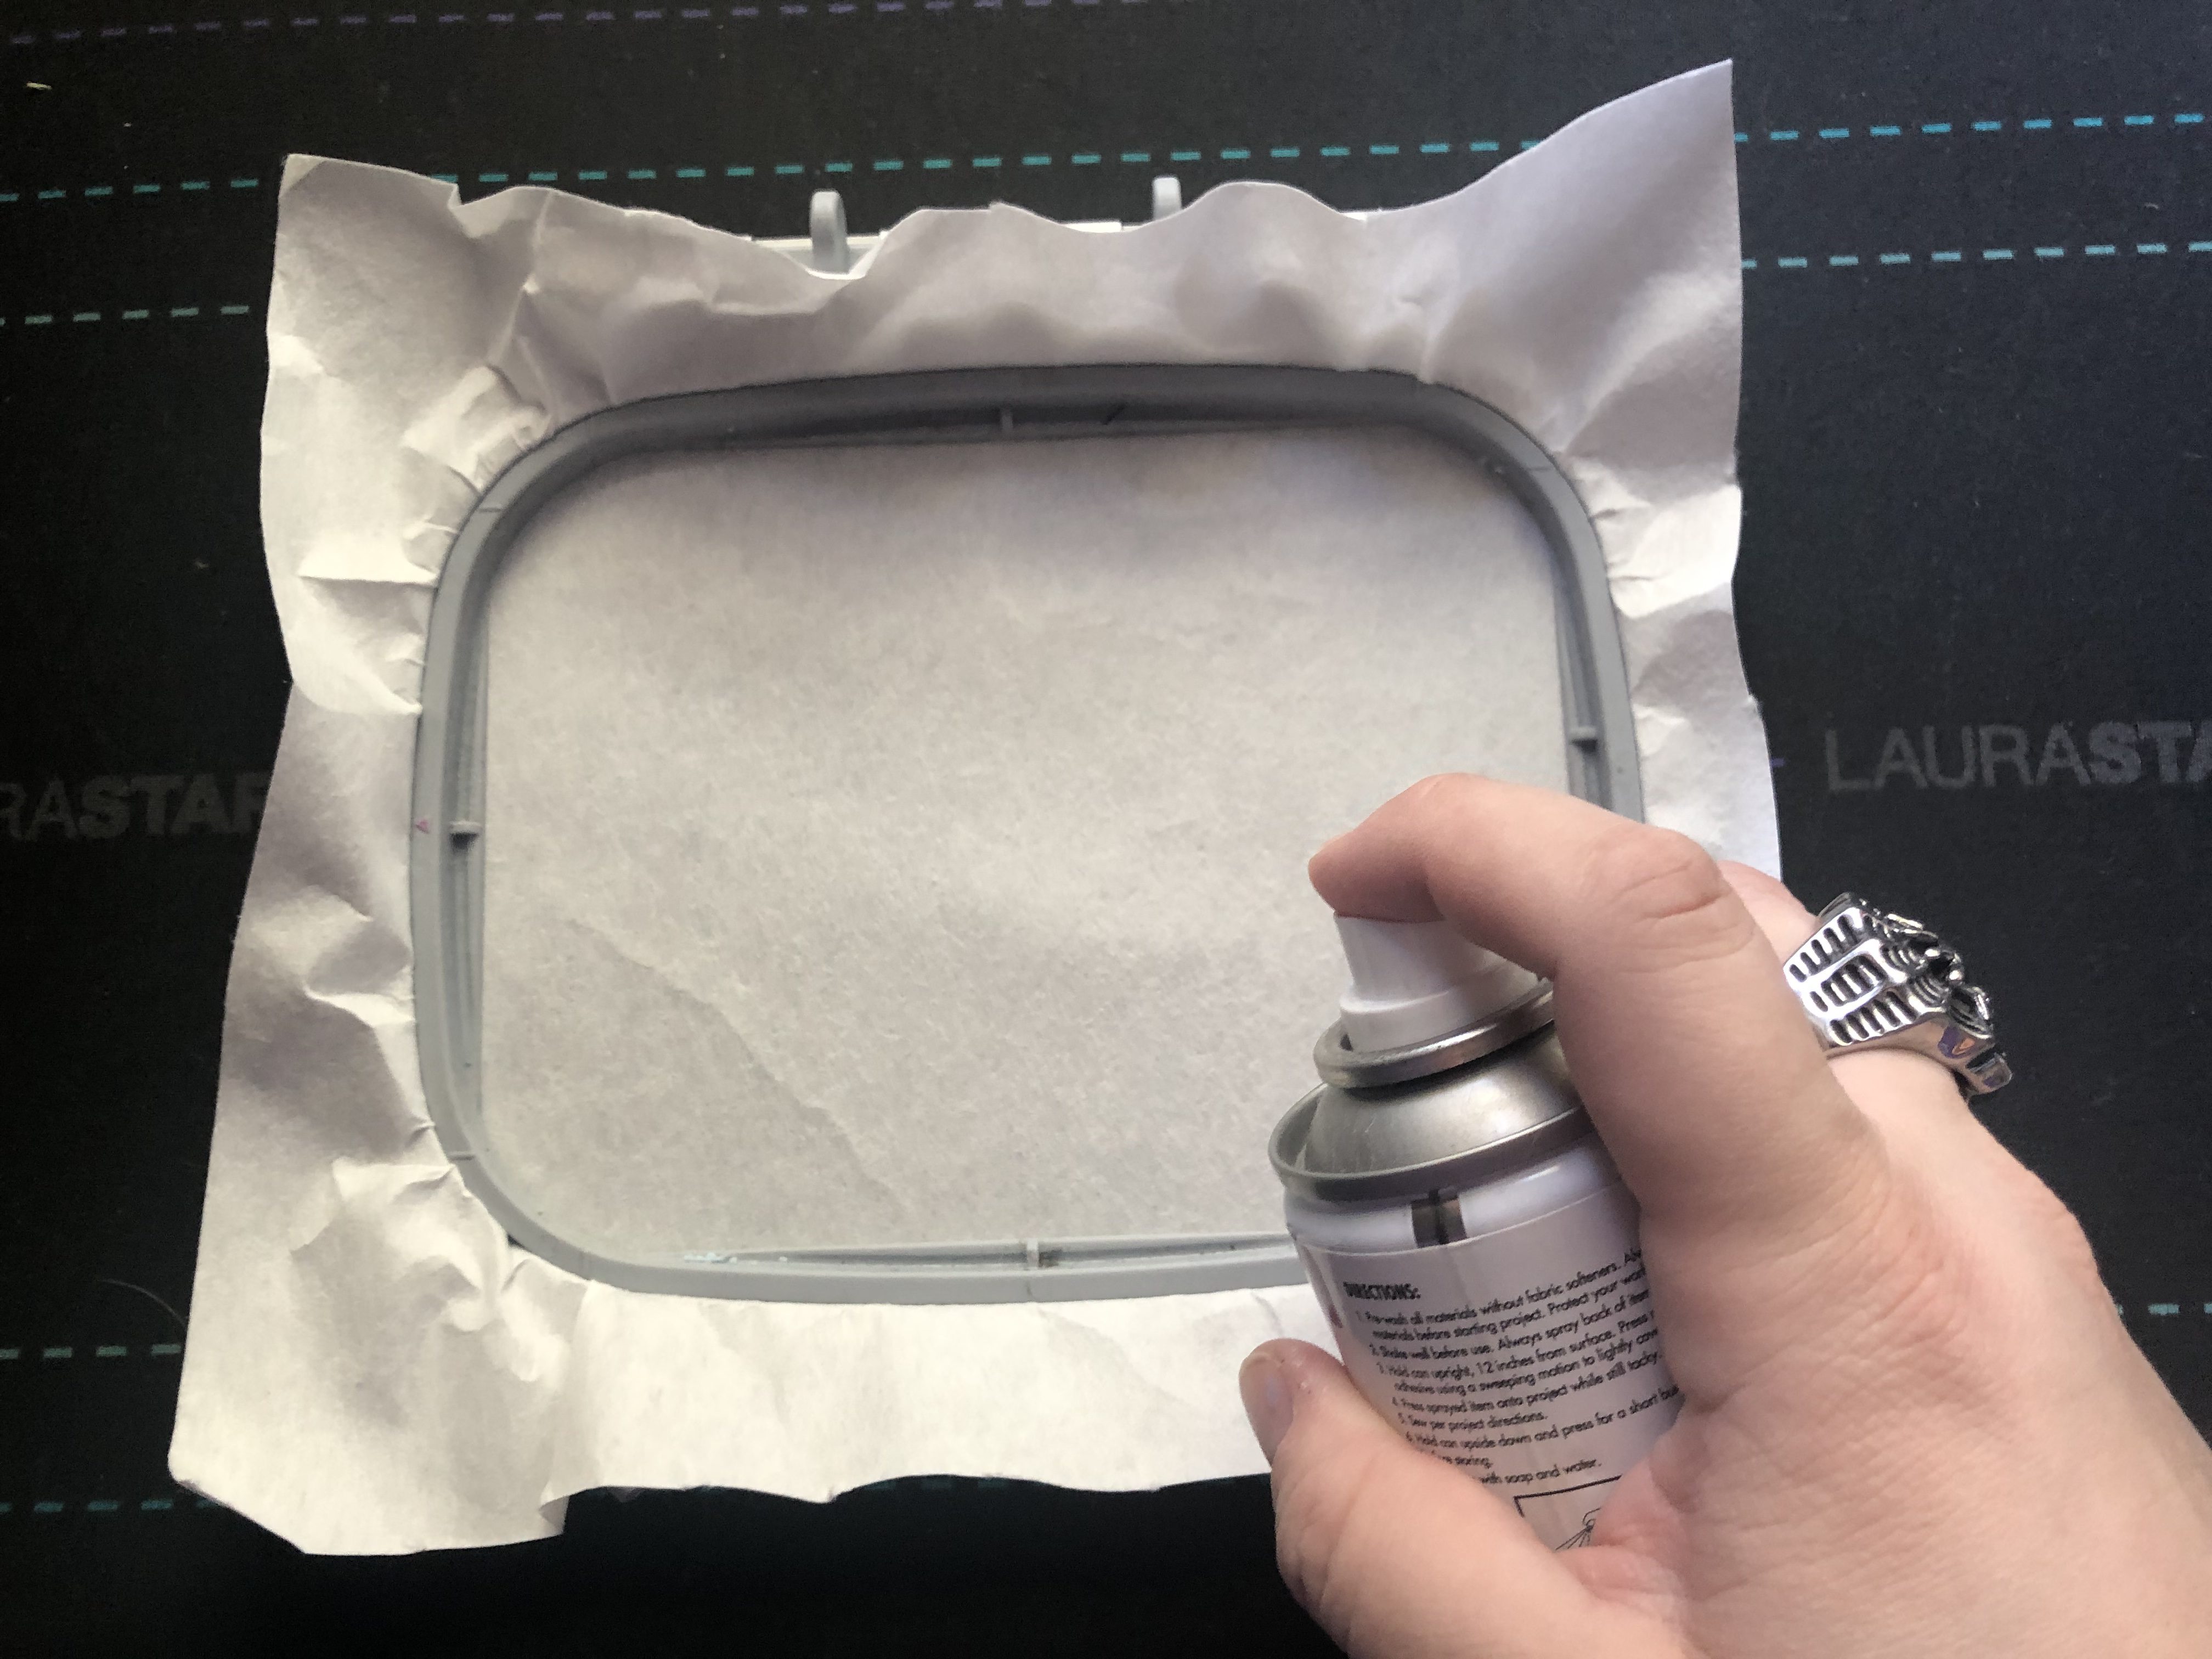
Cut two pieces of Medium Weight Tear Away stabilizer, one to fit the medium hoop and one to fit the large oval. Hoop the stabilizer by itself in the medium hoop and lightly spray the stabilizer with spray baste.
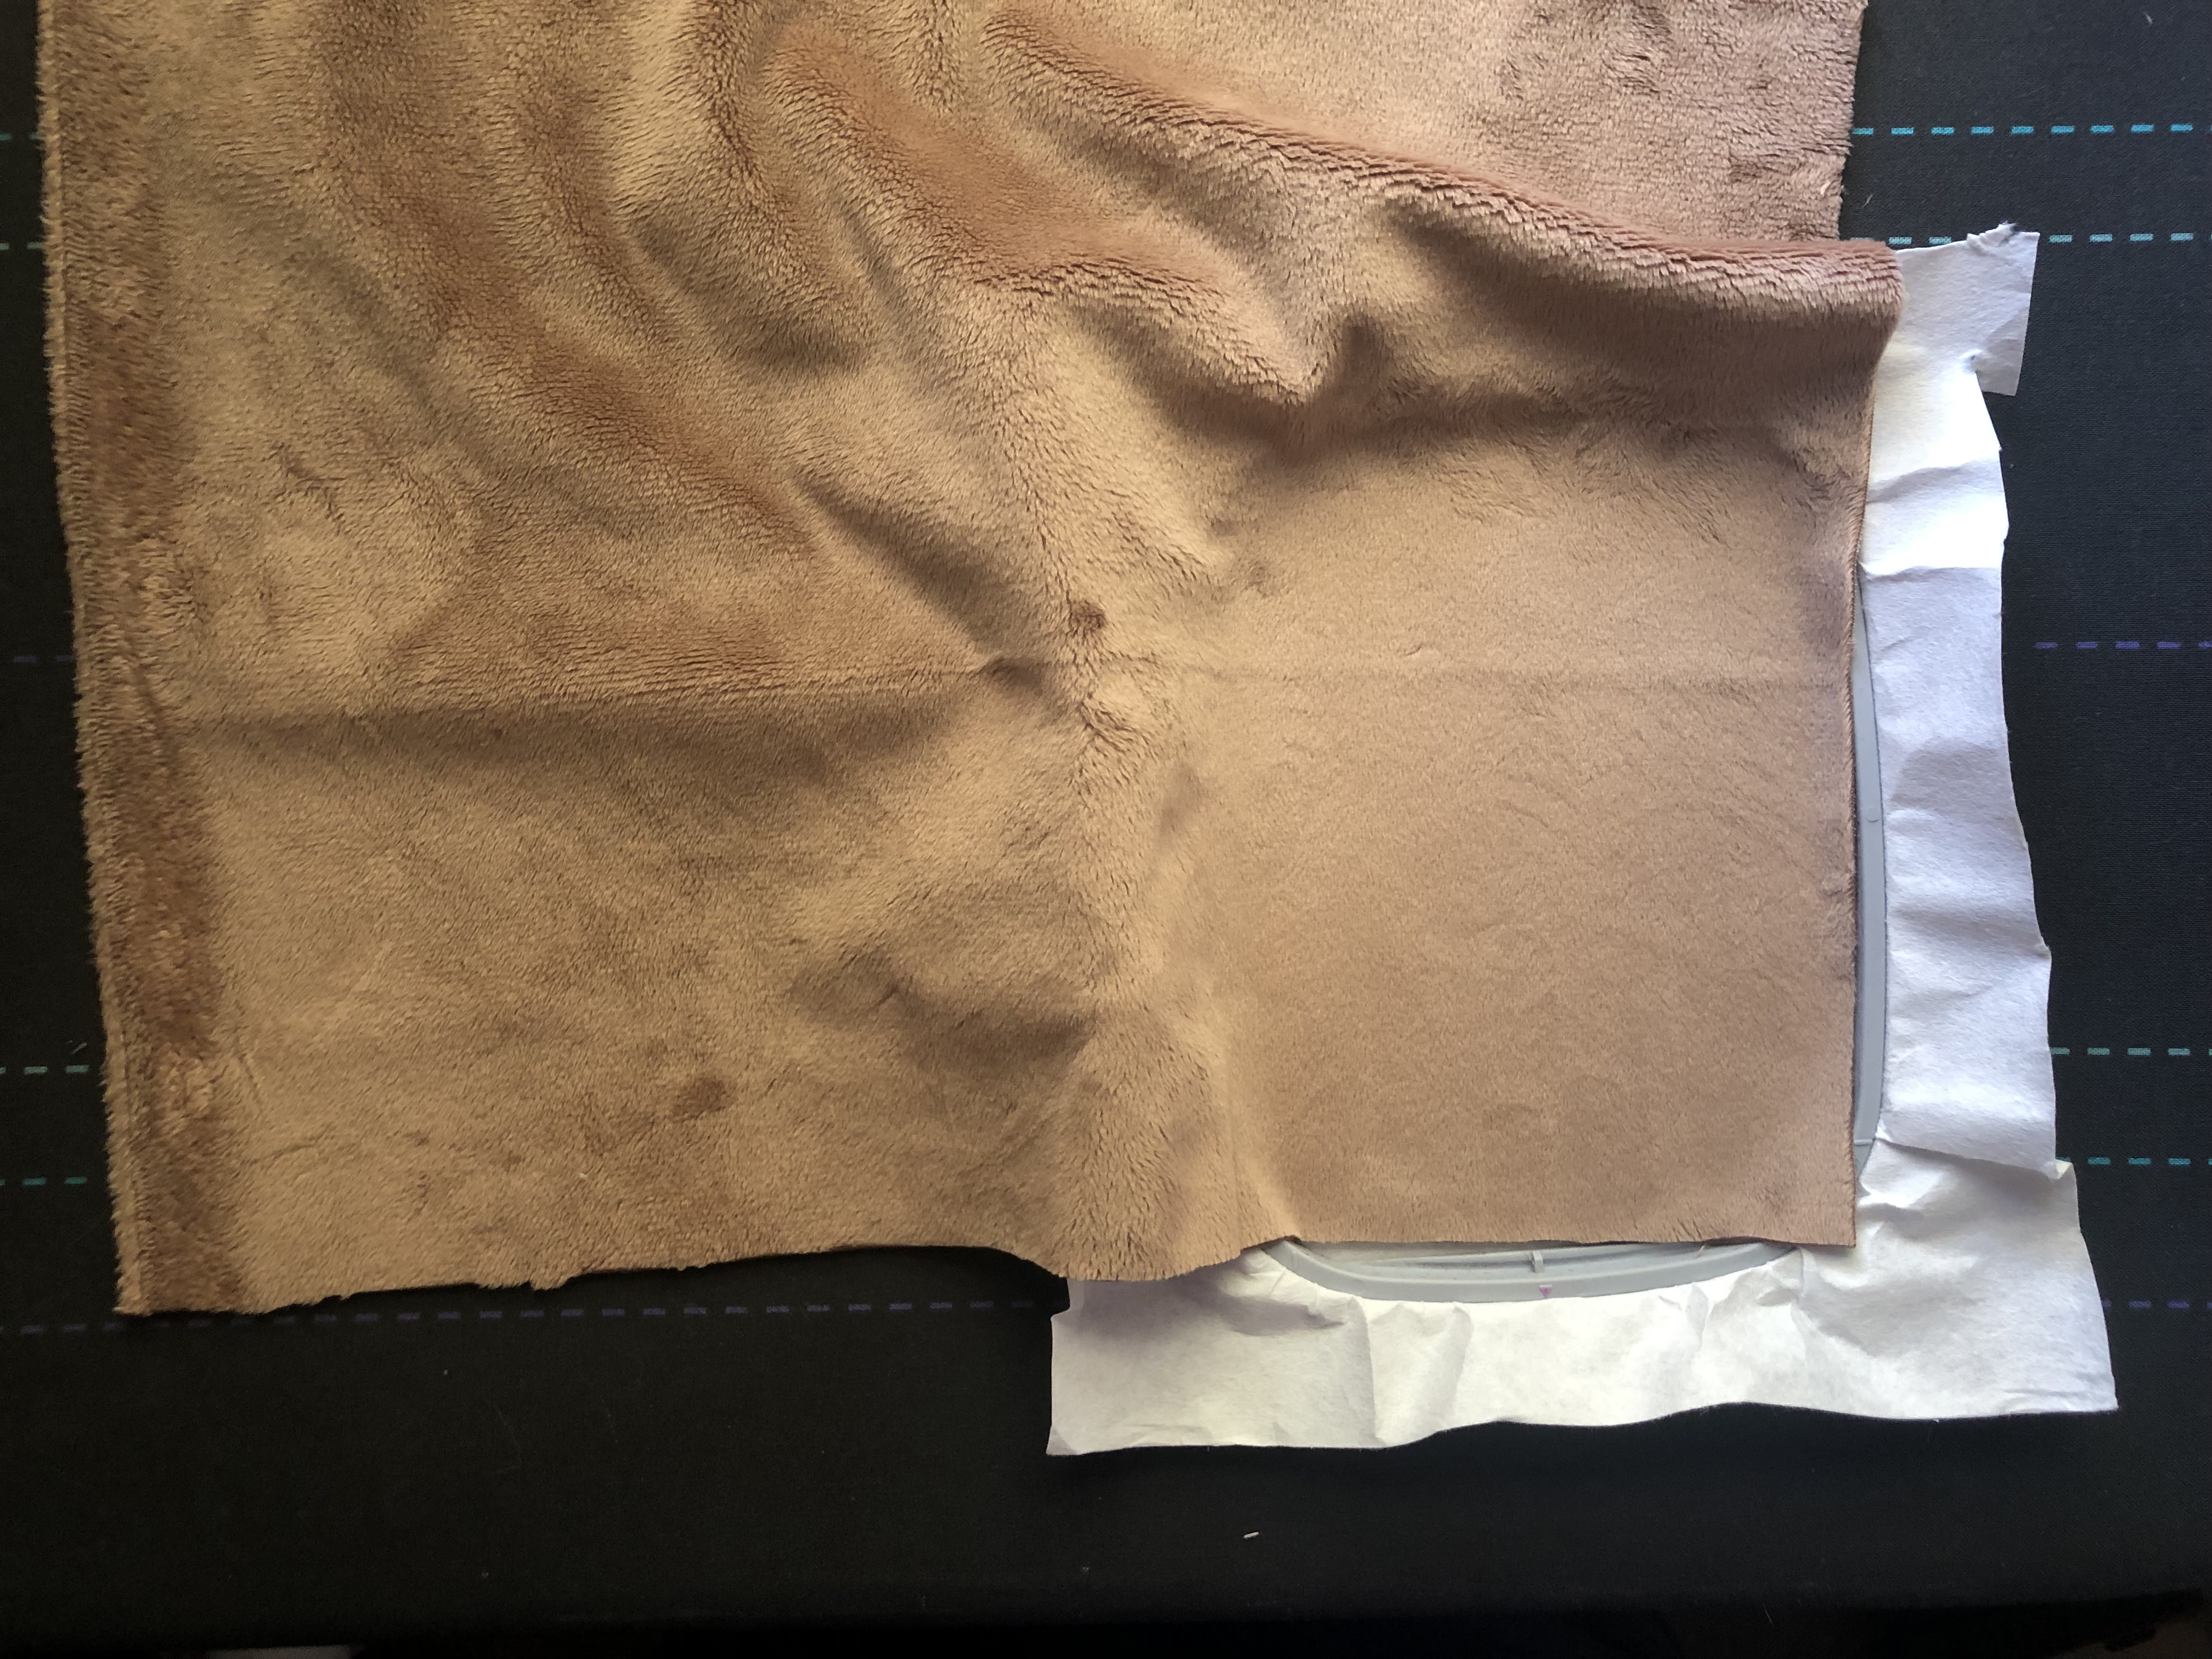
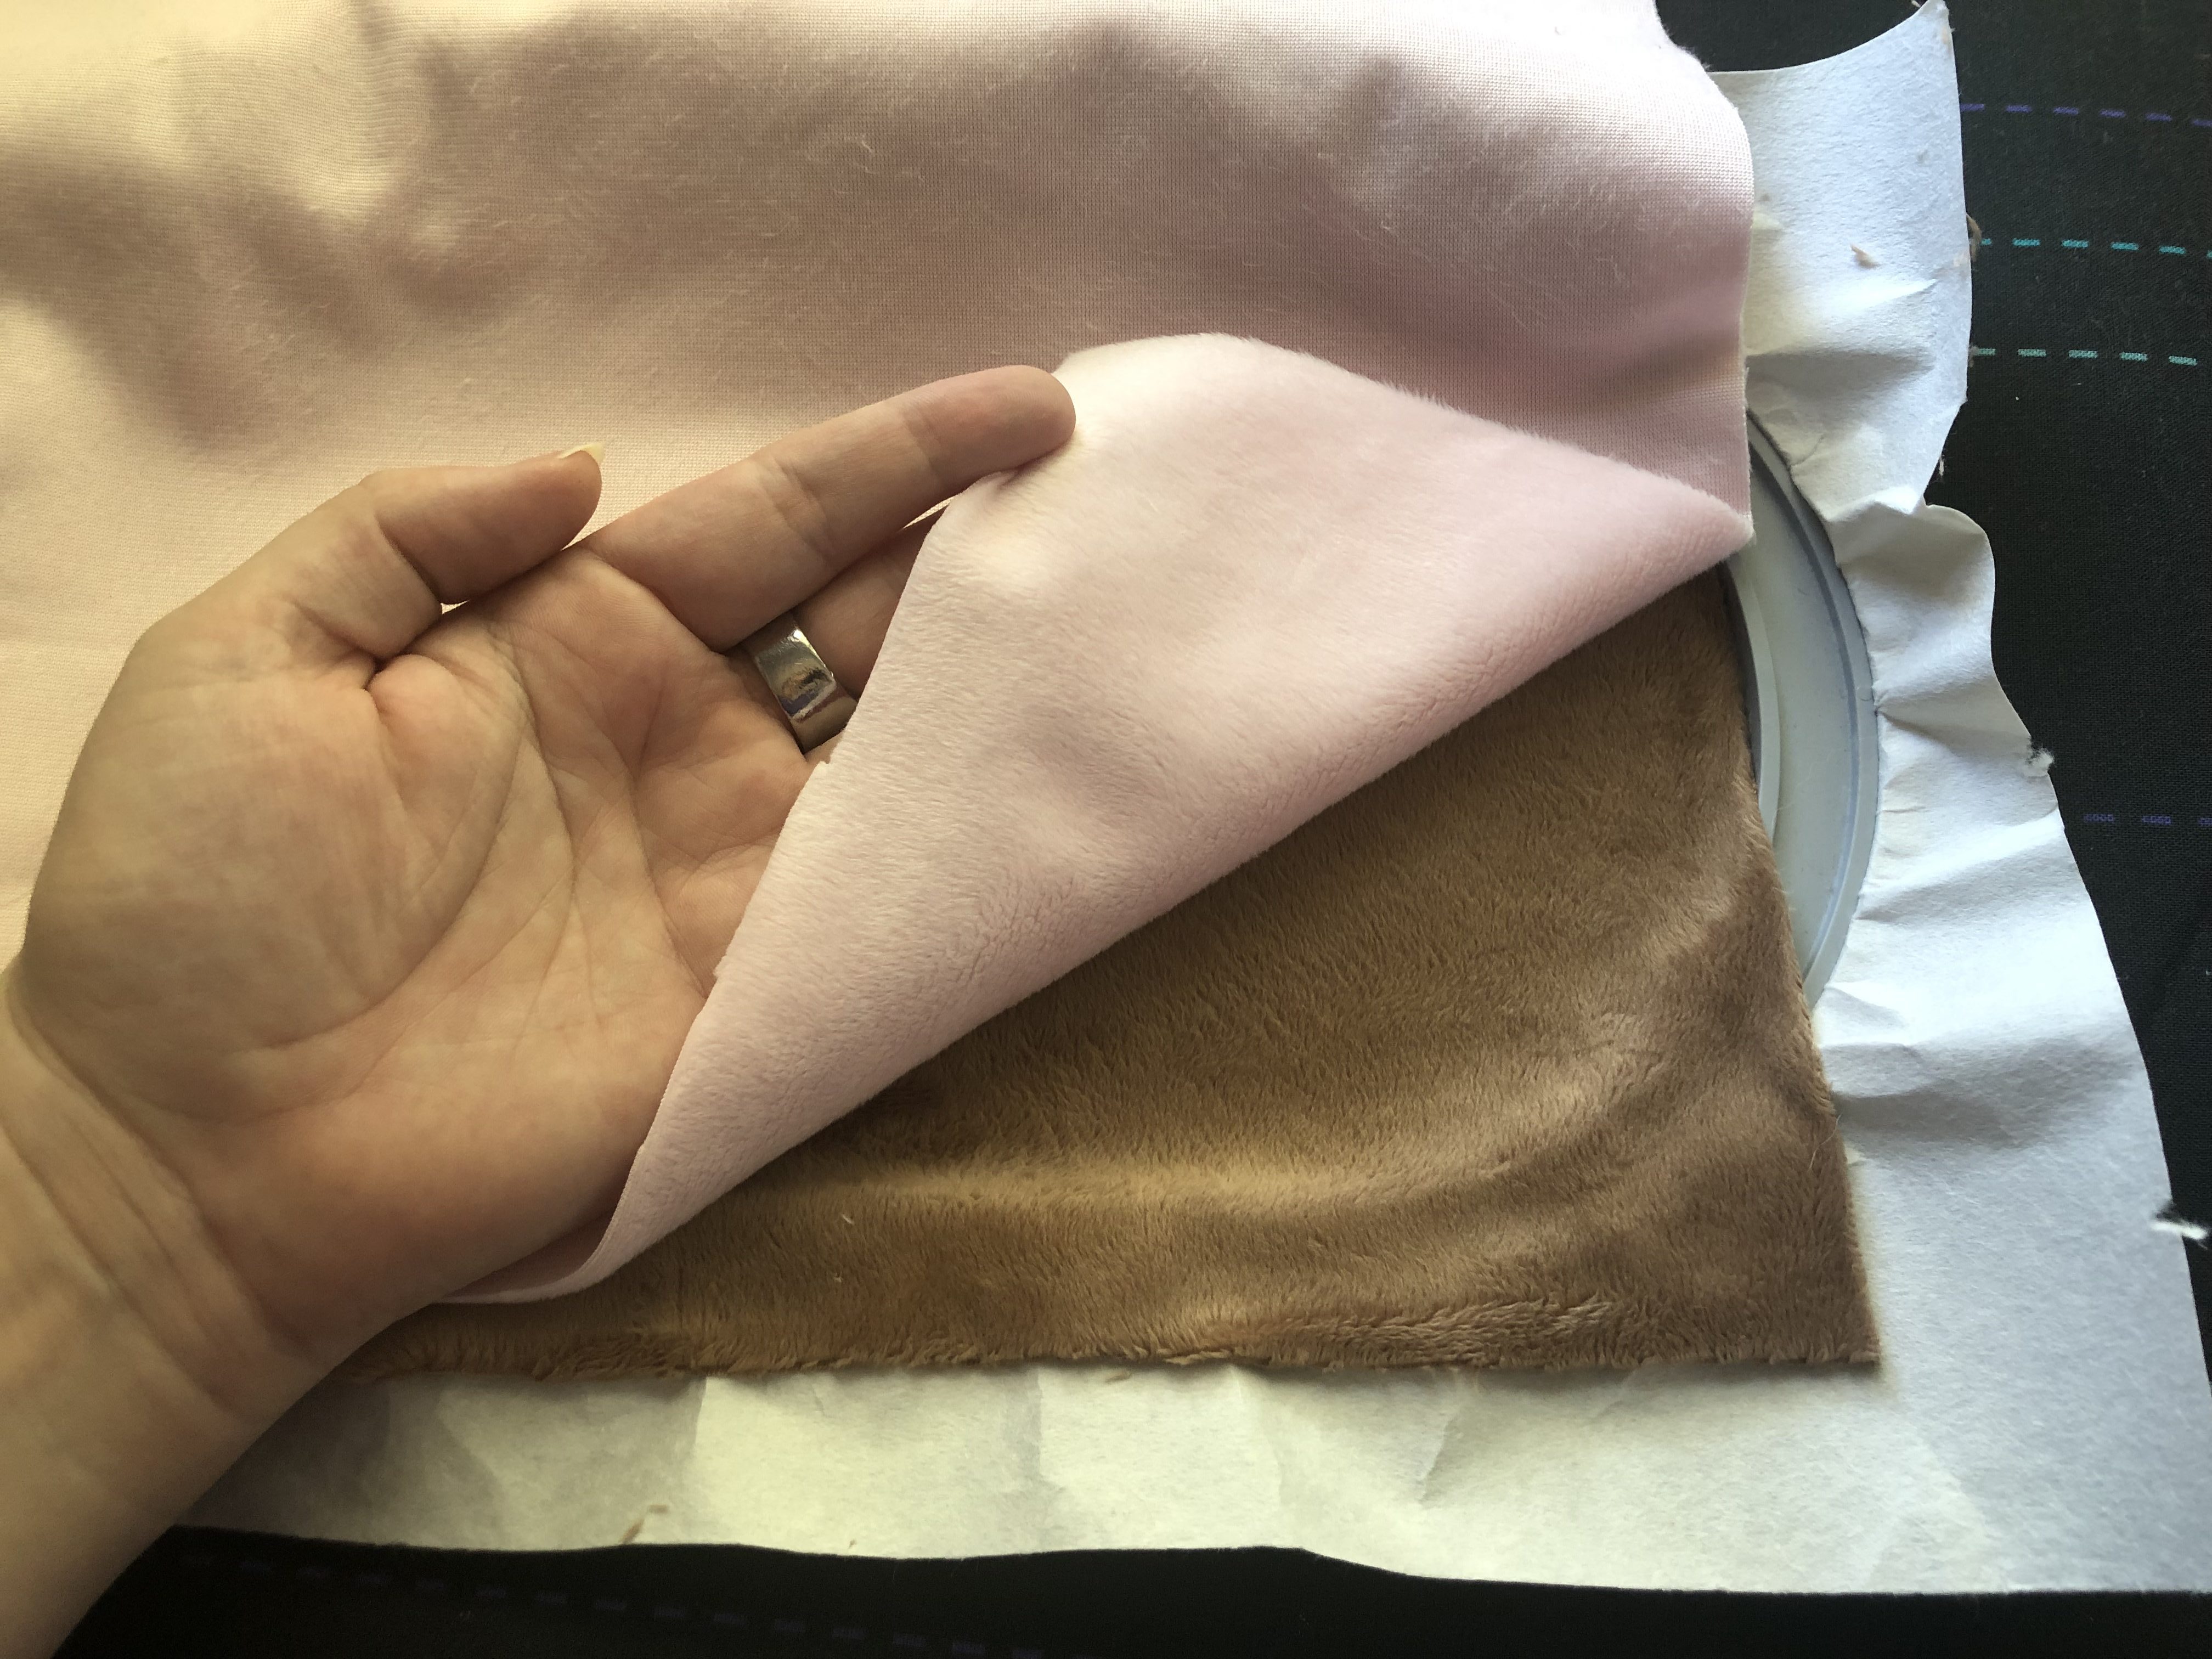
Place your bunny fabric right side up in the hoop, smooth it to the spray baste. Be sure not to stretch the cuddle in the hoop. In an attempt to cut my cuddle fabric as little as possible, I used the corner instead of the FQ cutting out a piece of the fabric, this will help minimize your Cuddle® dust.
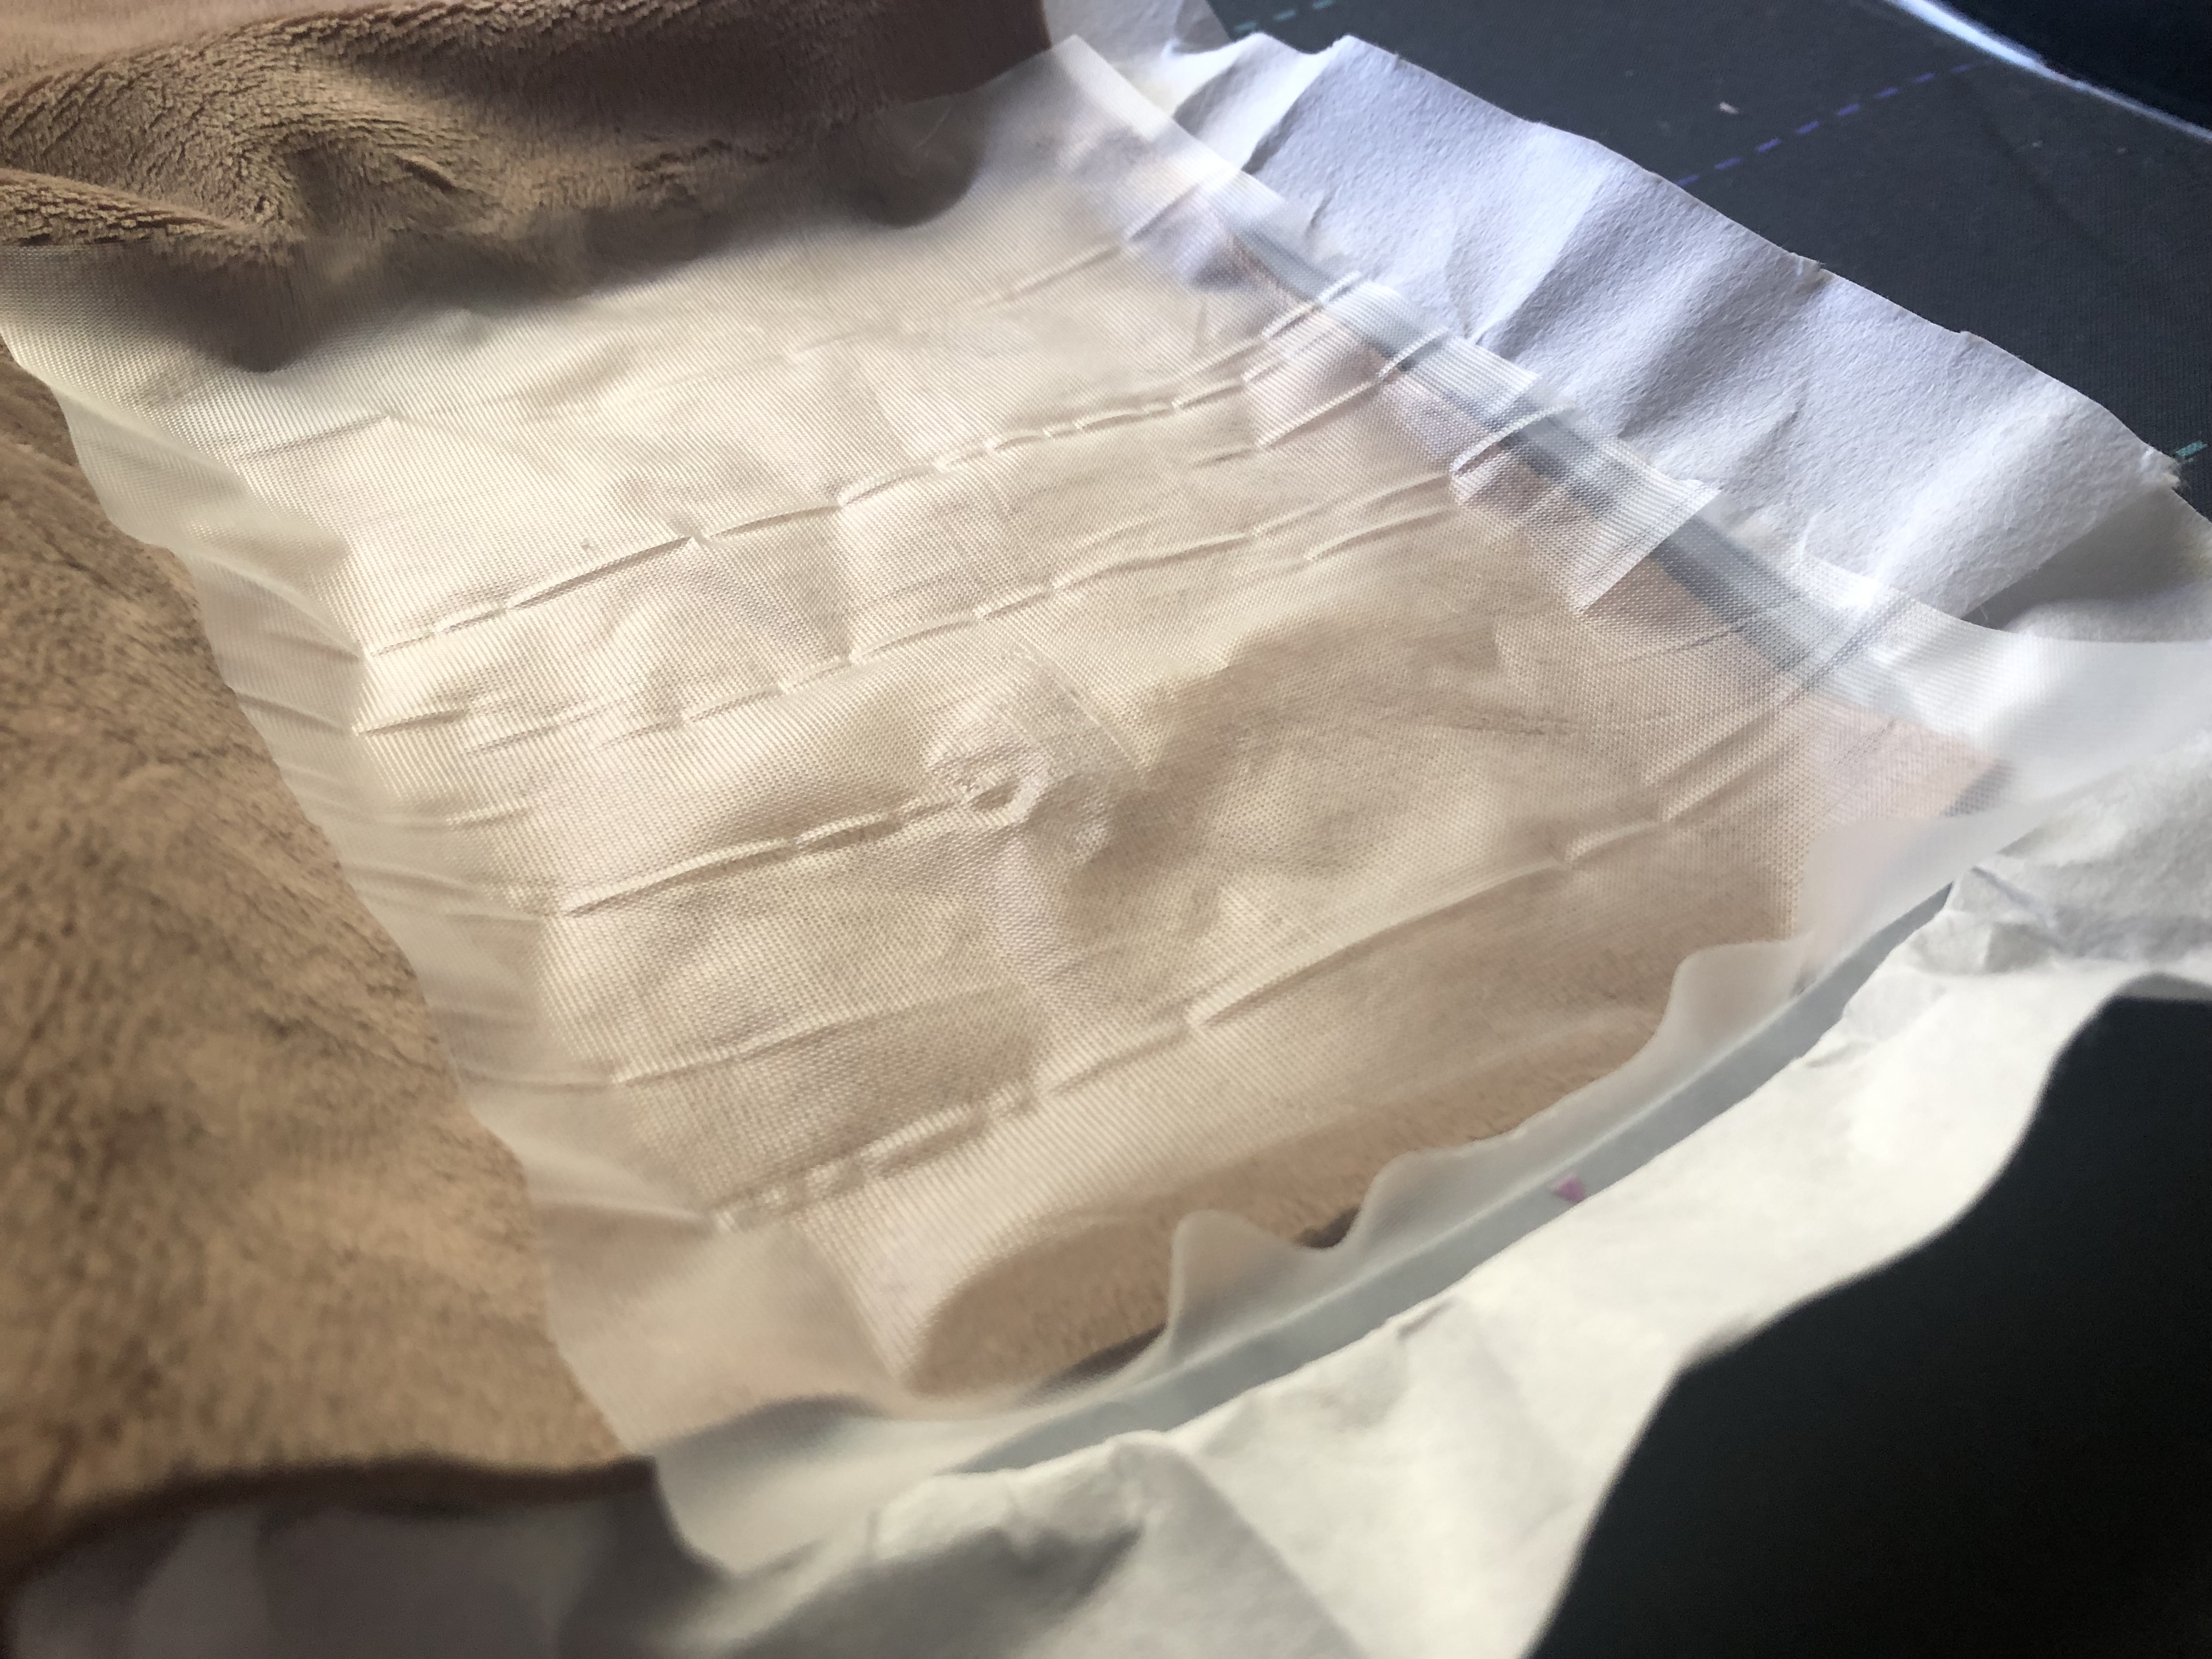
Cut a piece of StitcH20 the size of the inner hoop (despite what the picture shows you don’t have to put in in your hoop yet; it’s easier to put it over your fabric just before stitching).
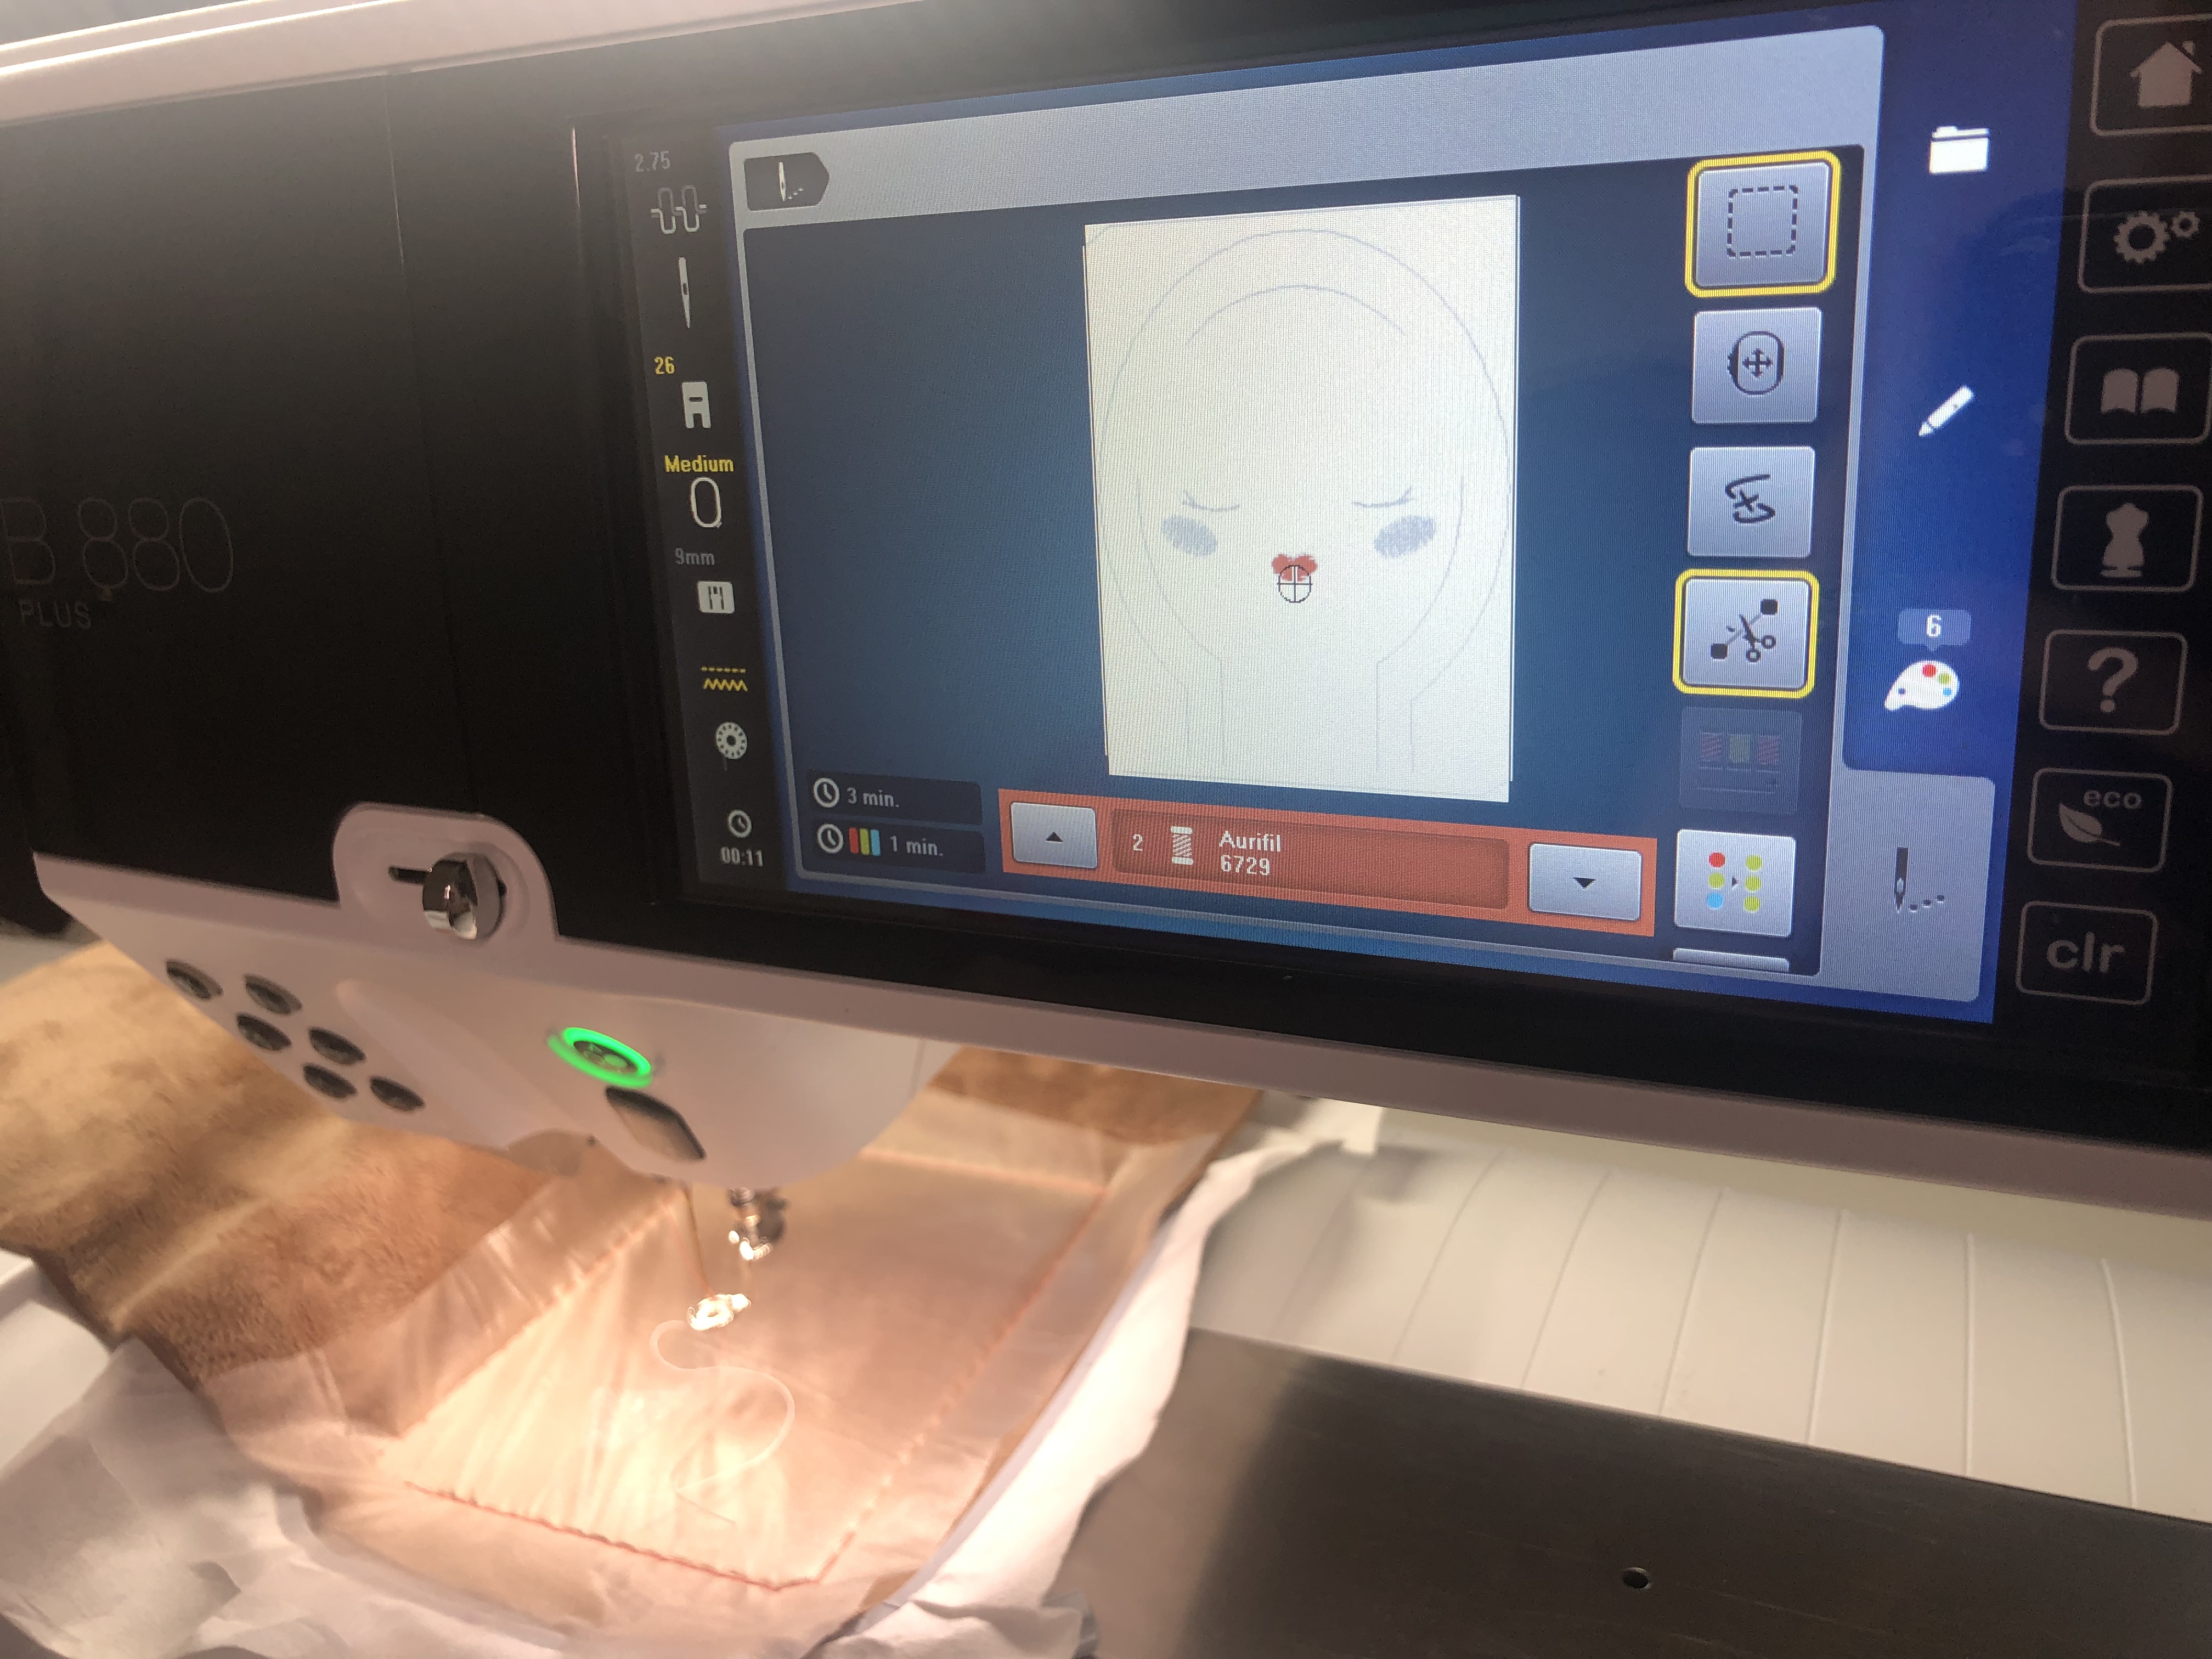
Set up your machine for embroidery. Set up your machine with the Bunny Head Design. Install a 75/11 ballpoint embroidery needle with OESD Expert Embroidery Bobbin thread in the bobbin and your bunny nose thread up top.
Place the StitcH20 over the fabric. Go to the OK embroidery screen, select the basting stitch option.
Tip: Use the foot pedal to stitch out the basting stitch. I like using the foot pedal and stitching out the basting stitch slowly so I can stop in an instant and adjust the StitcH20 as necessary.
An Reminder in Earnest: Never put your fingers with in the hoop while the machine is running, even when it’s just doing a basting box. You can use a stiletto, tweezers or tape to hold your topper in place but please, oh please don’t use your fingers to hold fabric in place while the machine is running. It just takes on sudden movement of the machine for this powerful BERNINA to catch your finger.

Stitch out the face only. Do not stitch out the outlines yet.
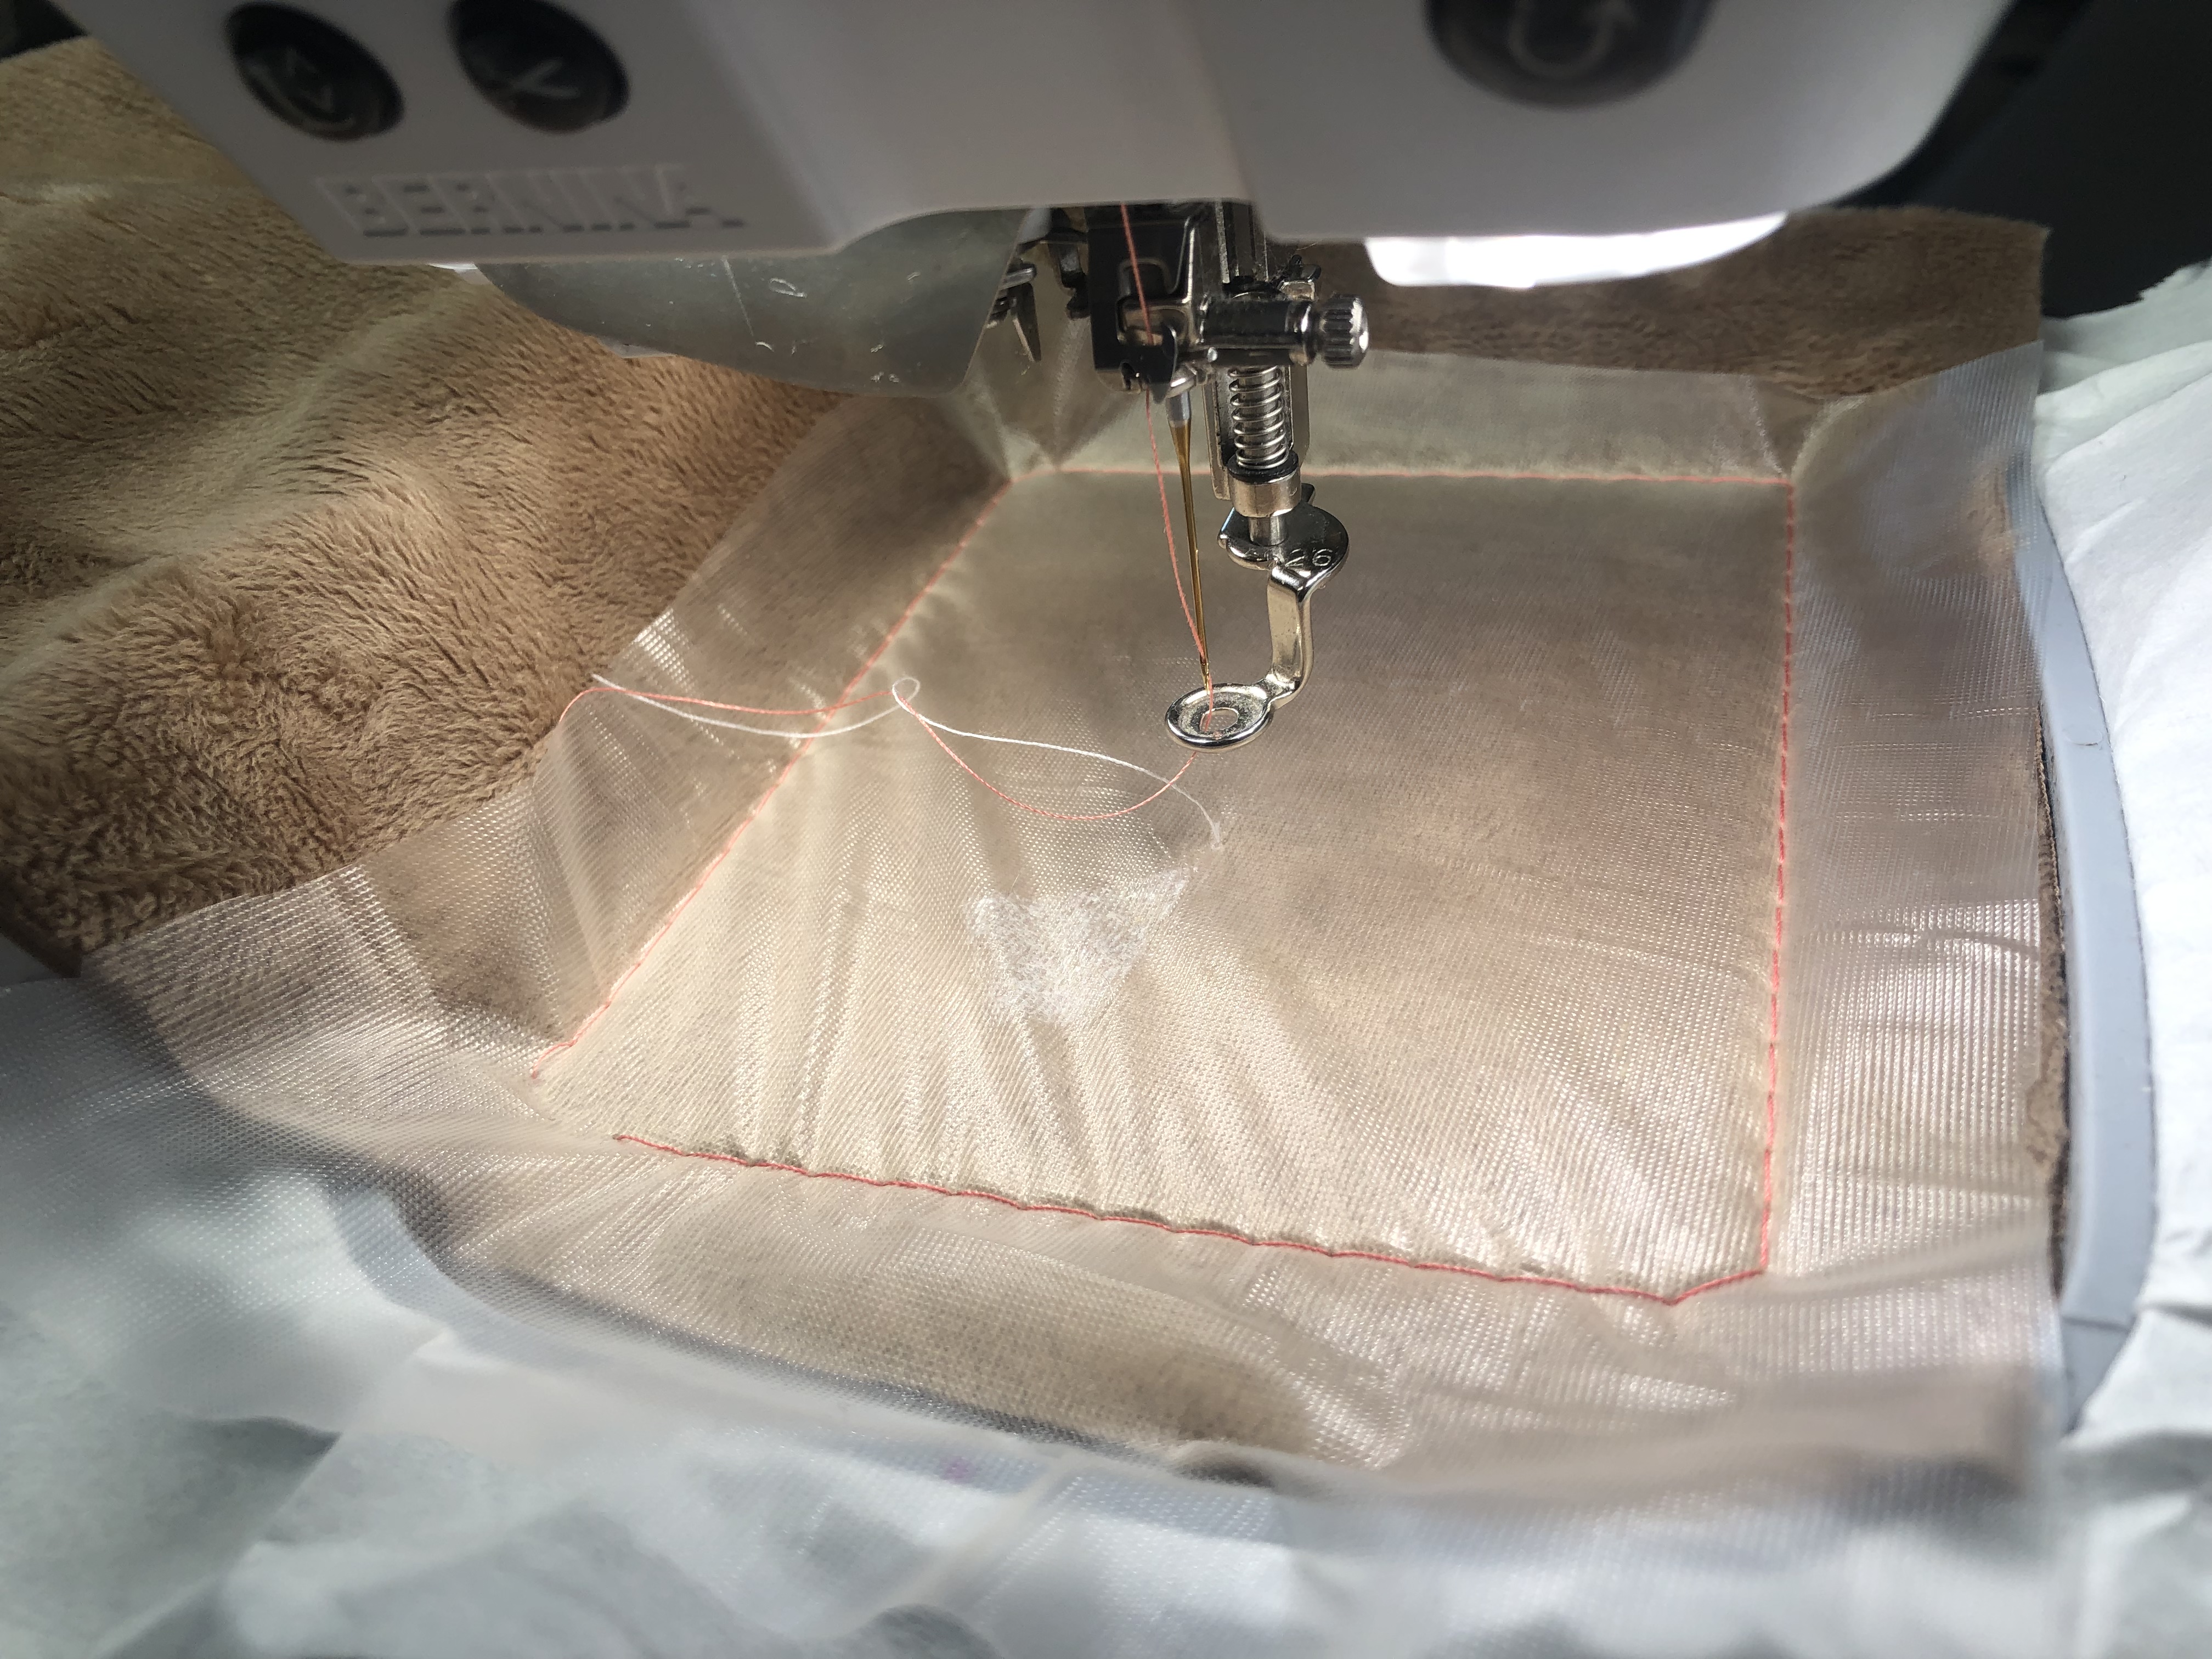
Take another piece of your bunny fabric and place it on top of your hoop, right sides together. Secure with tape. (It will be very slippery and want to move around on your but don’t be tempted to hold it with your fingers.)
Change the thread to match your bunny fabric, stitch out the last color of the design (outlines)
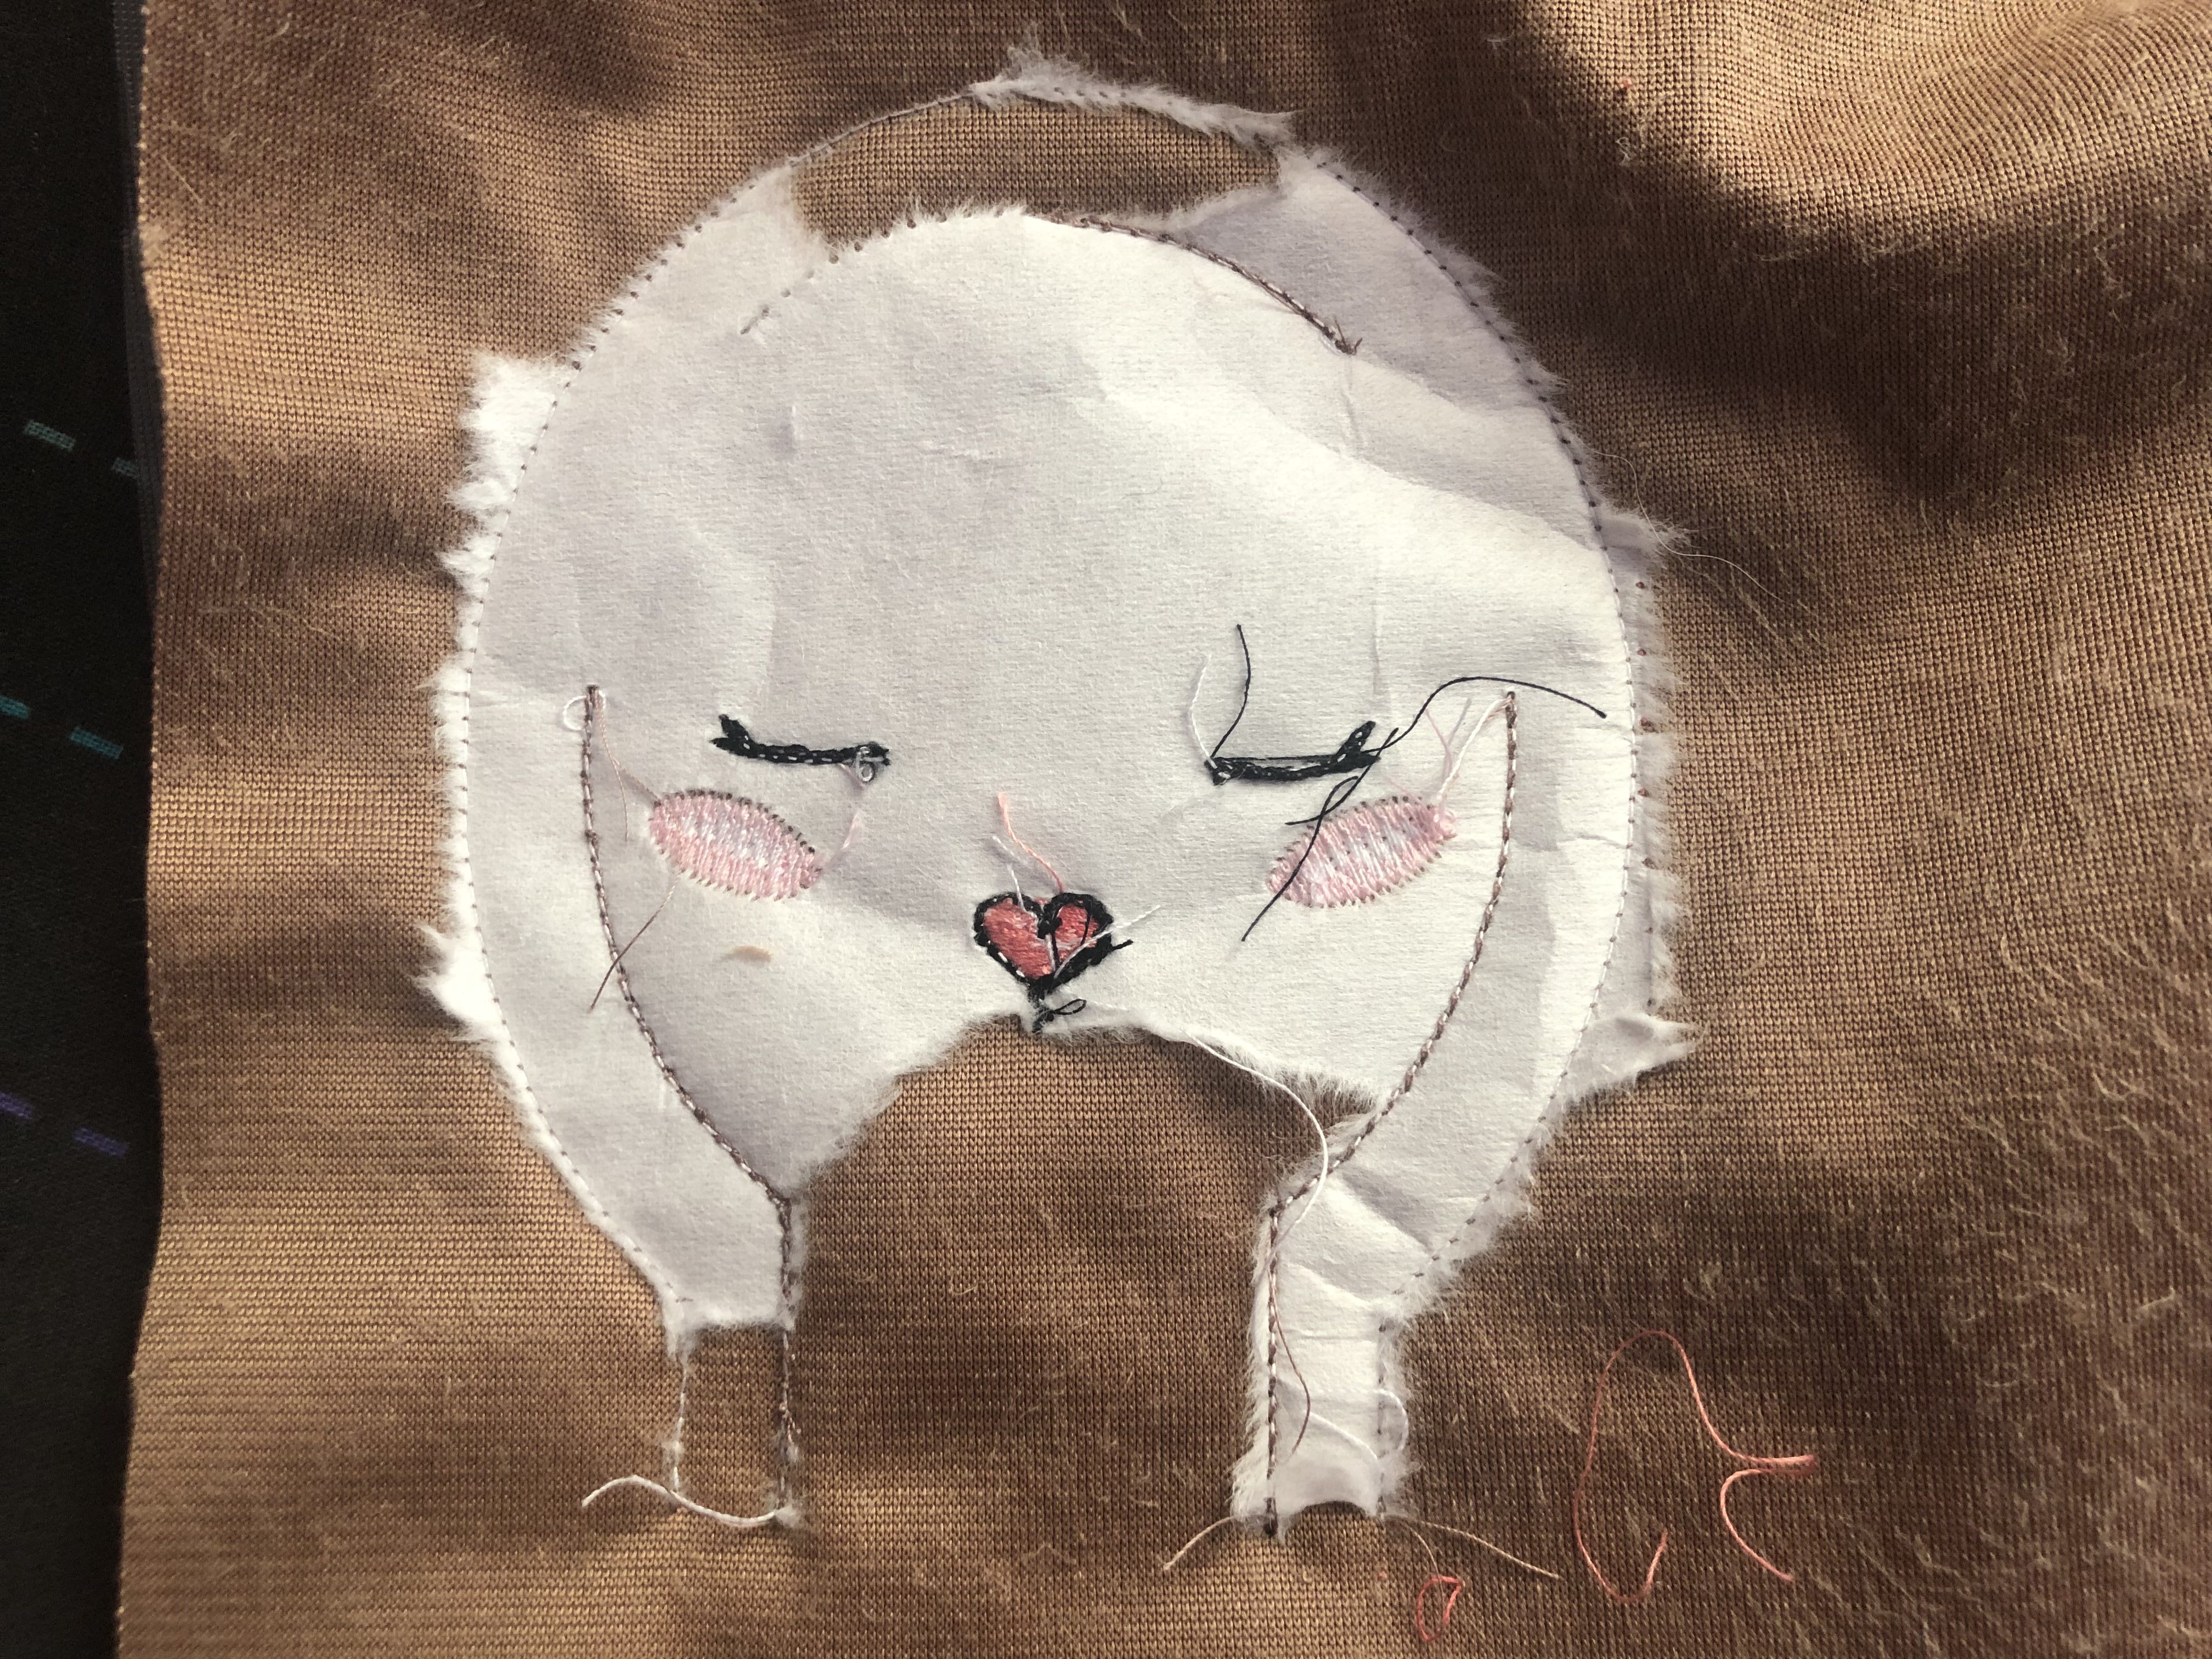
Once finished, unhoop your fabric and support the seam stitches and remove all the tear away stabilizer from the bunny head, it’s okay if some tiny fibers stay behind, just focus on the big pieces.
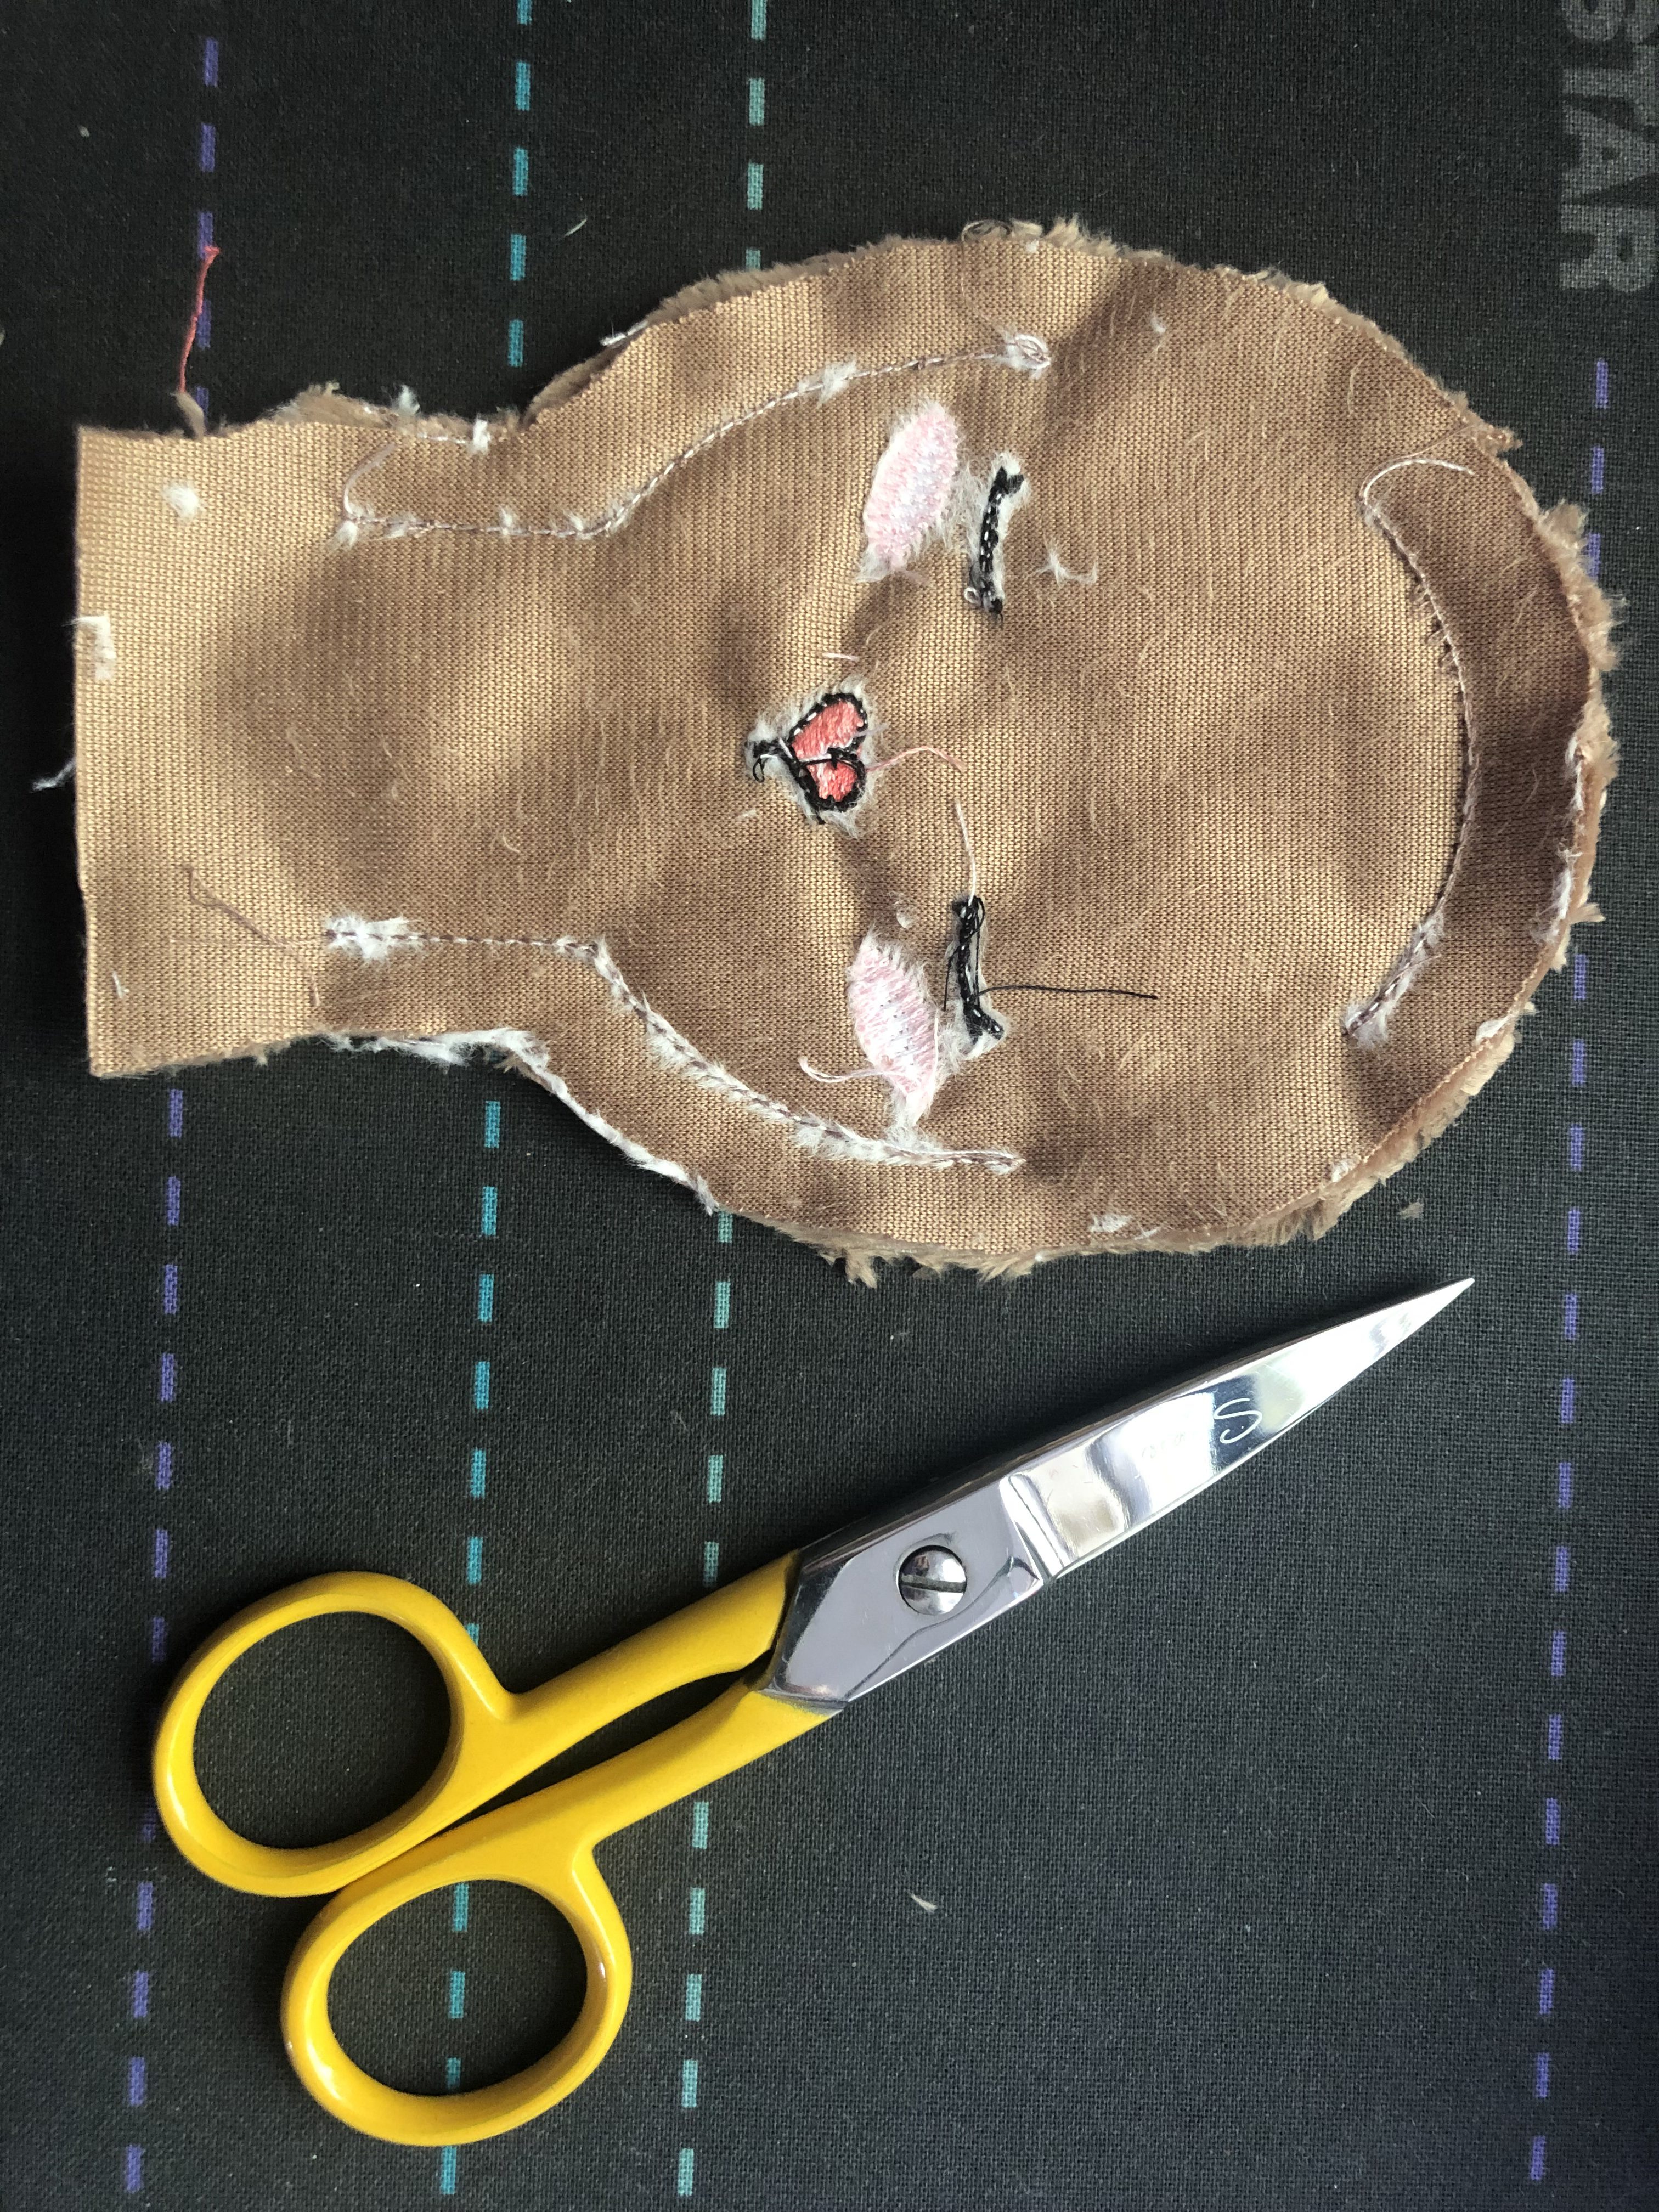
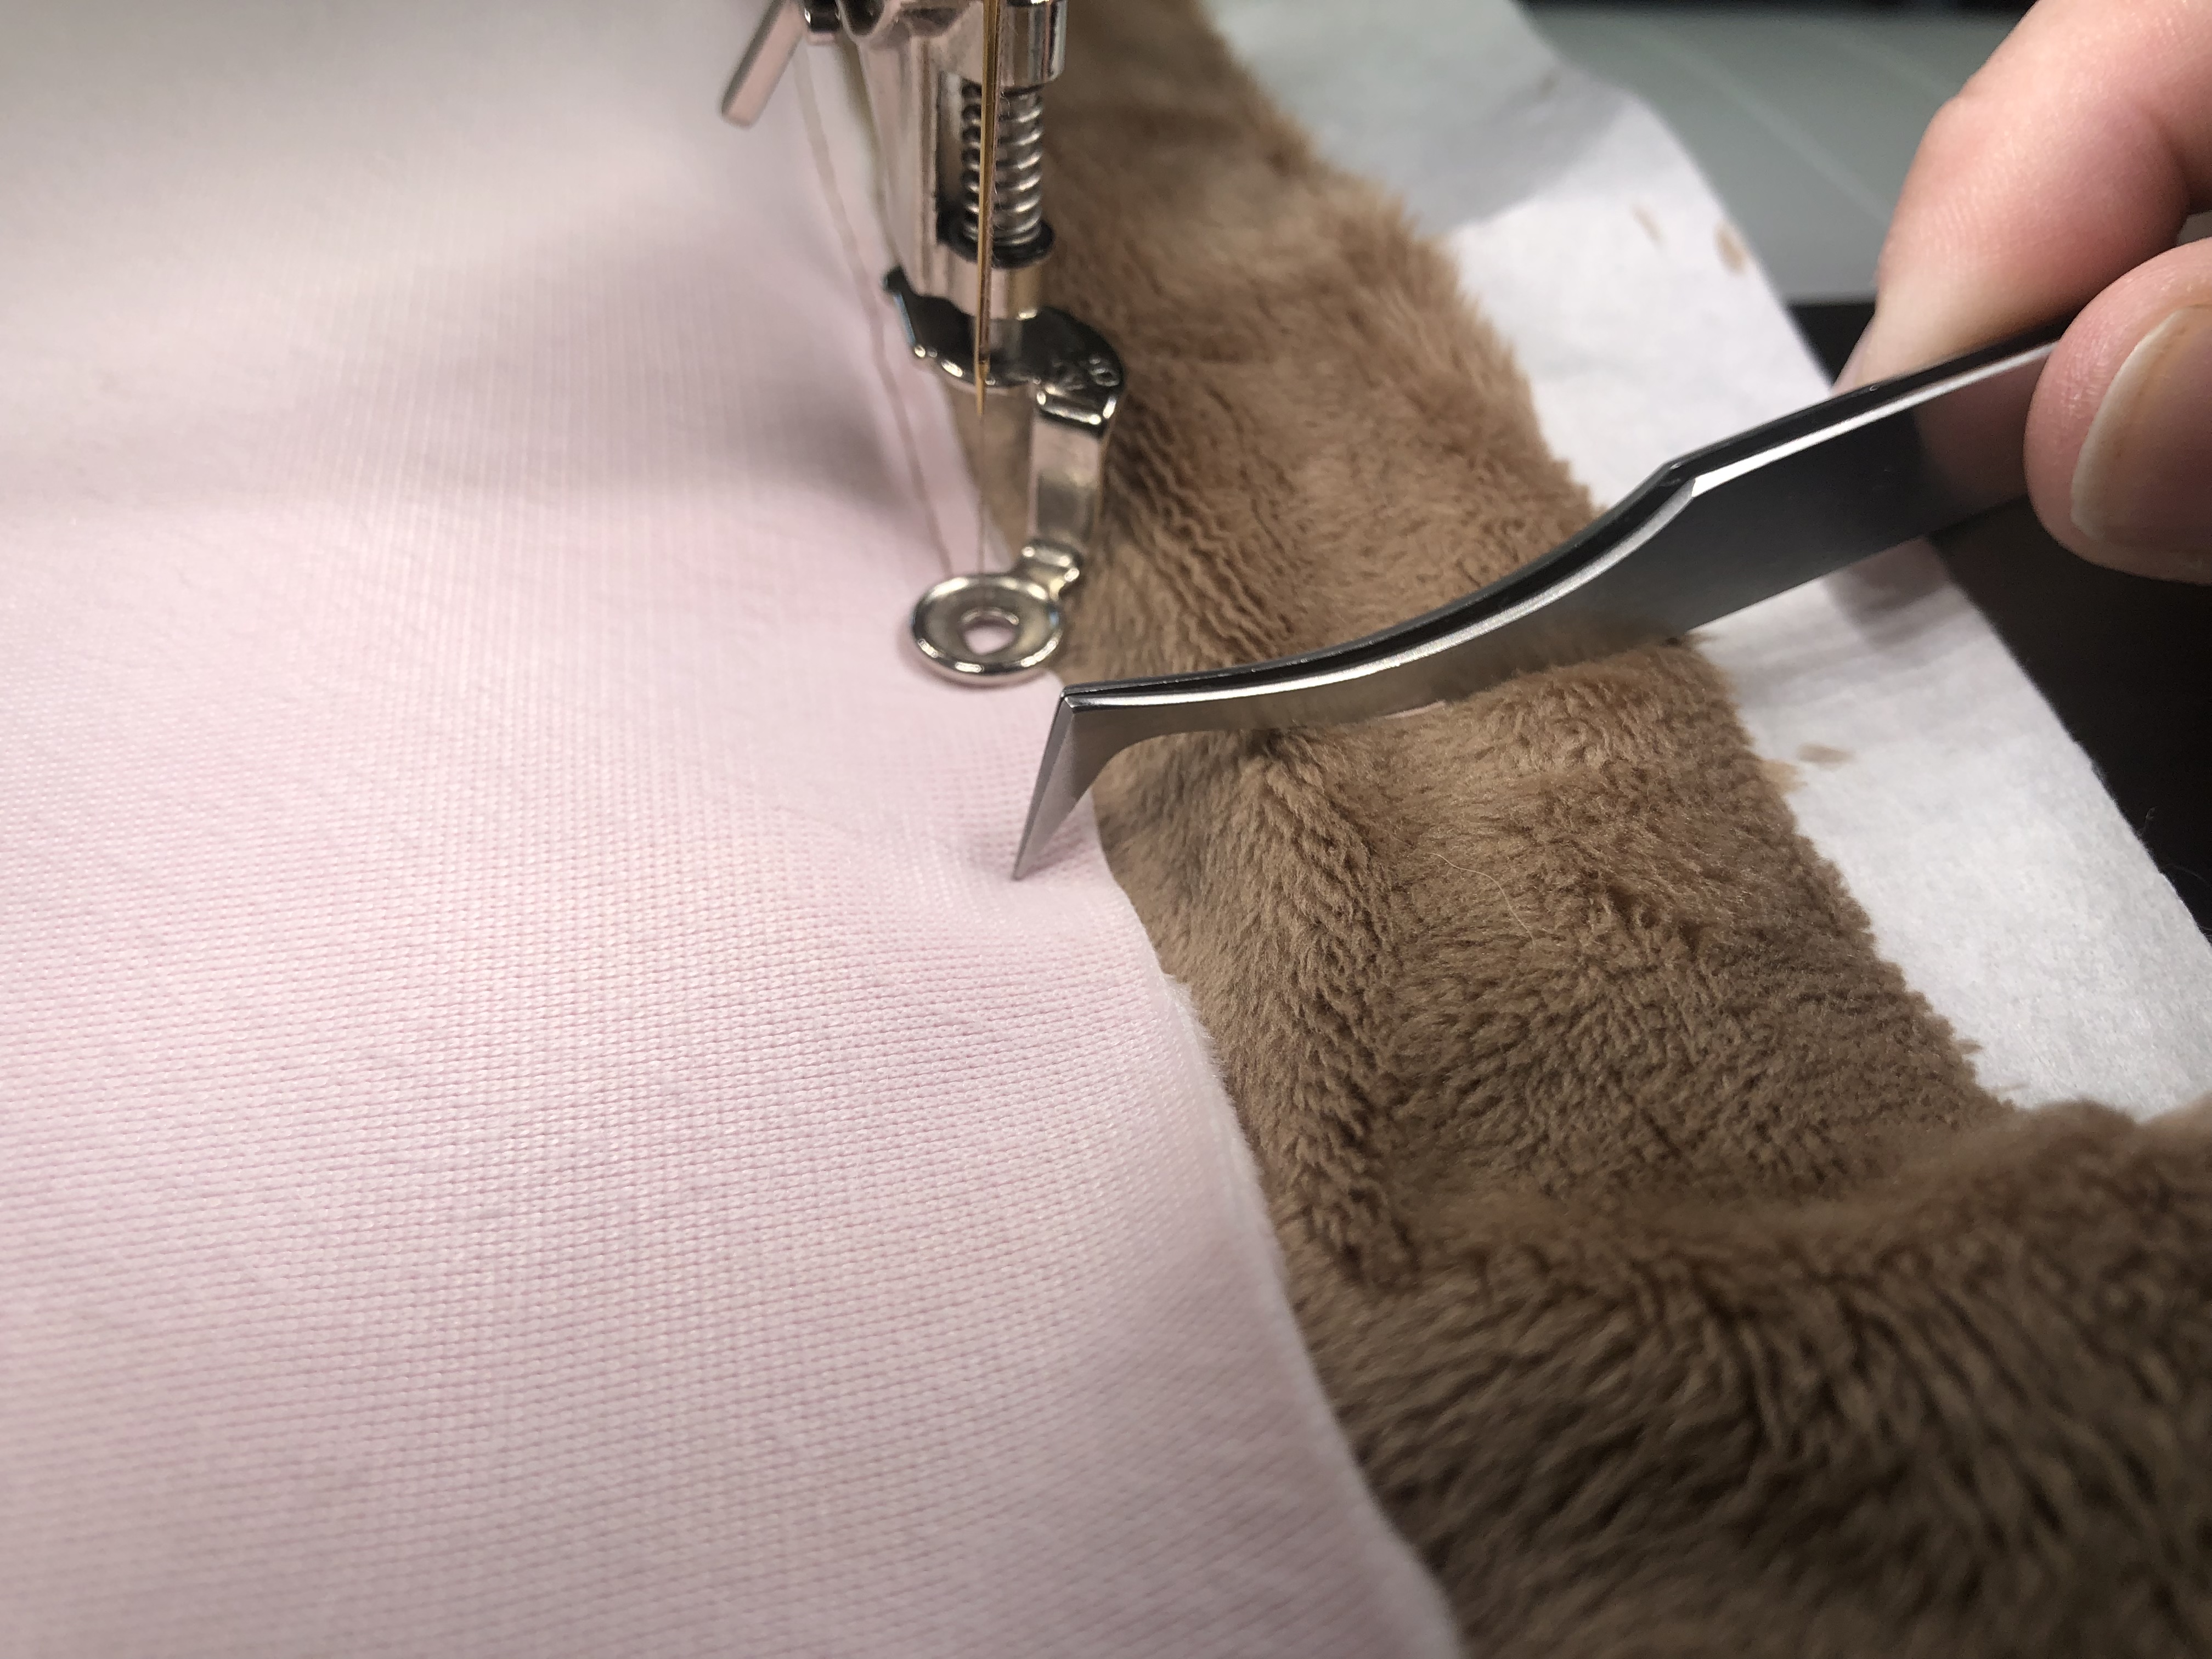
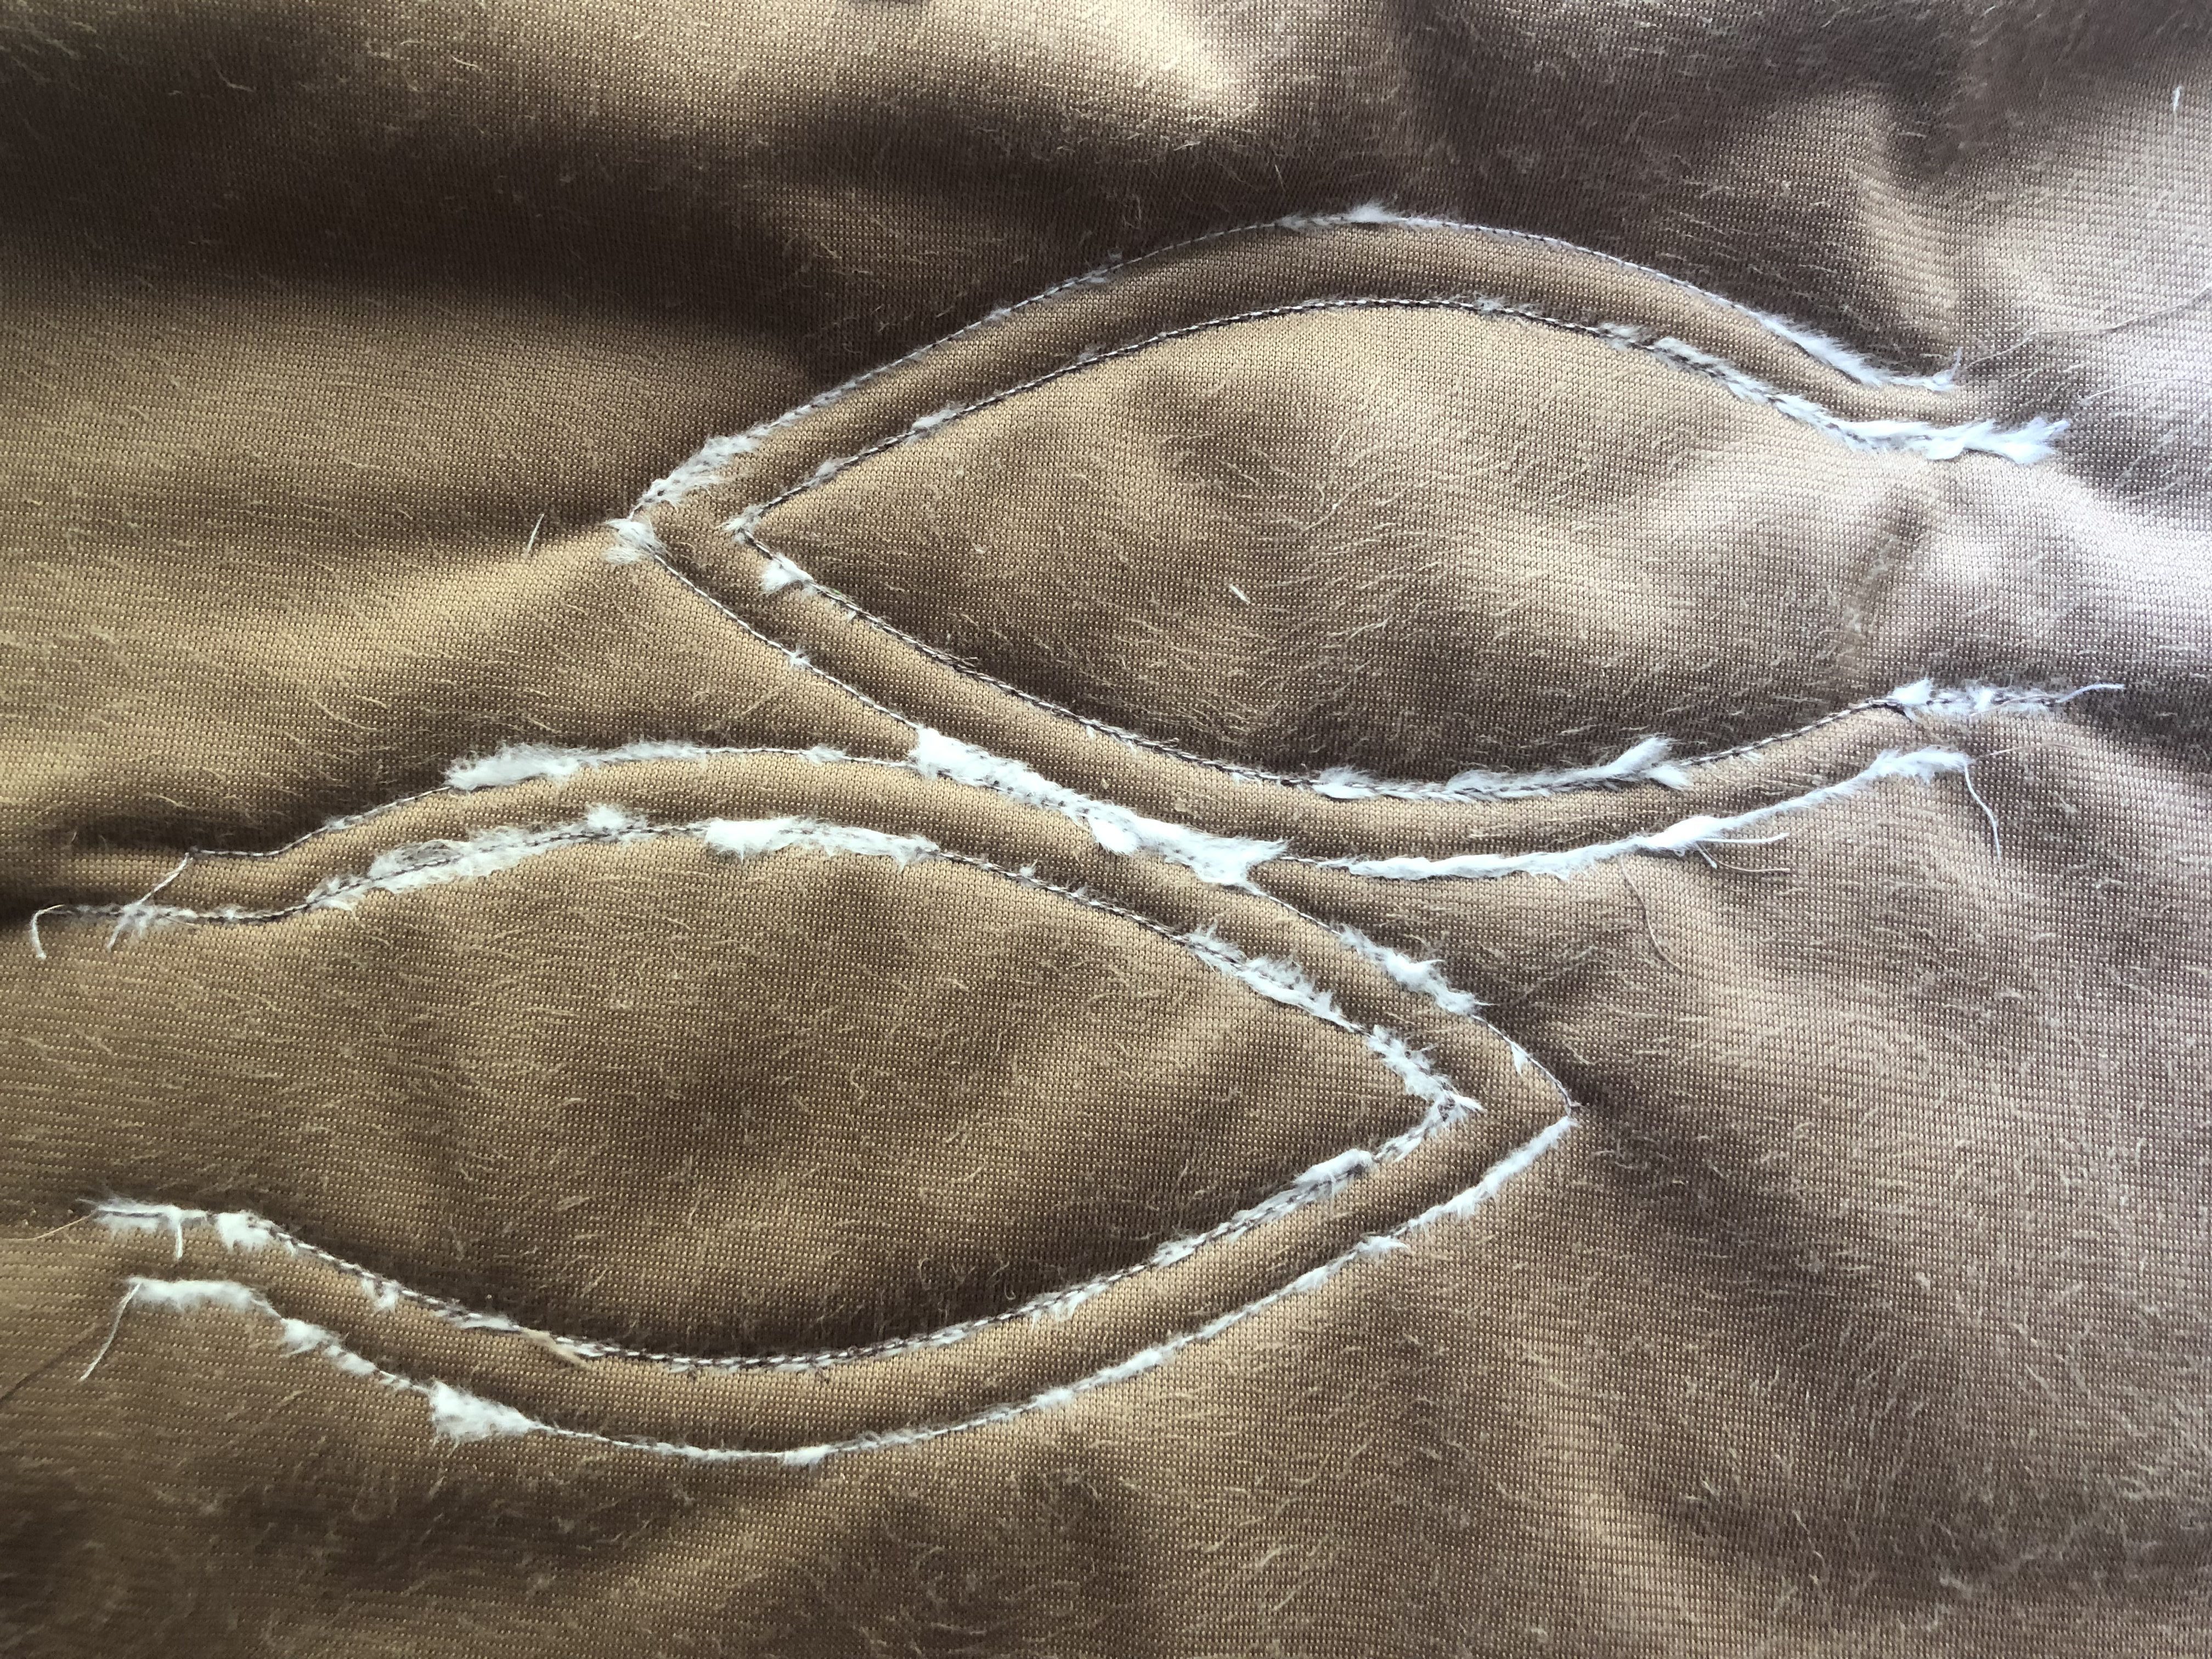
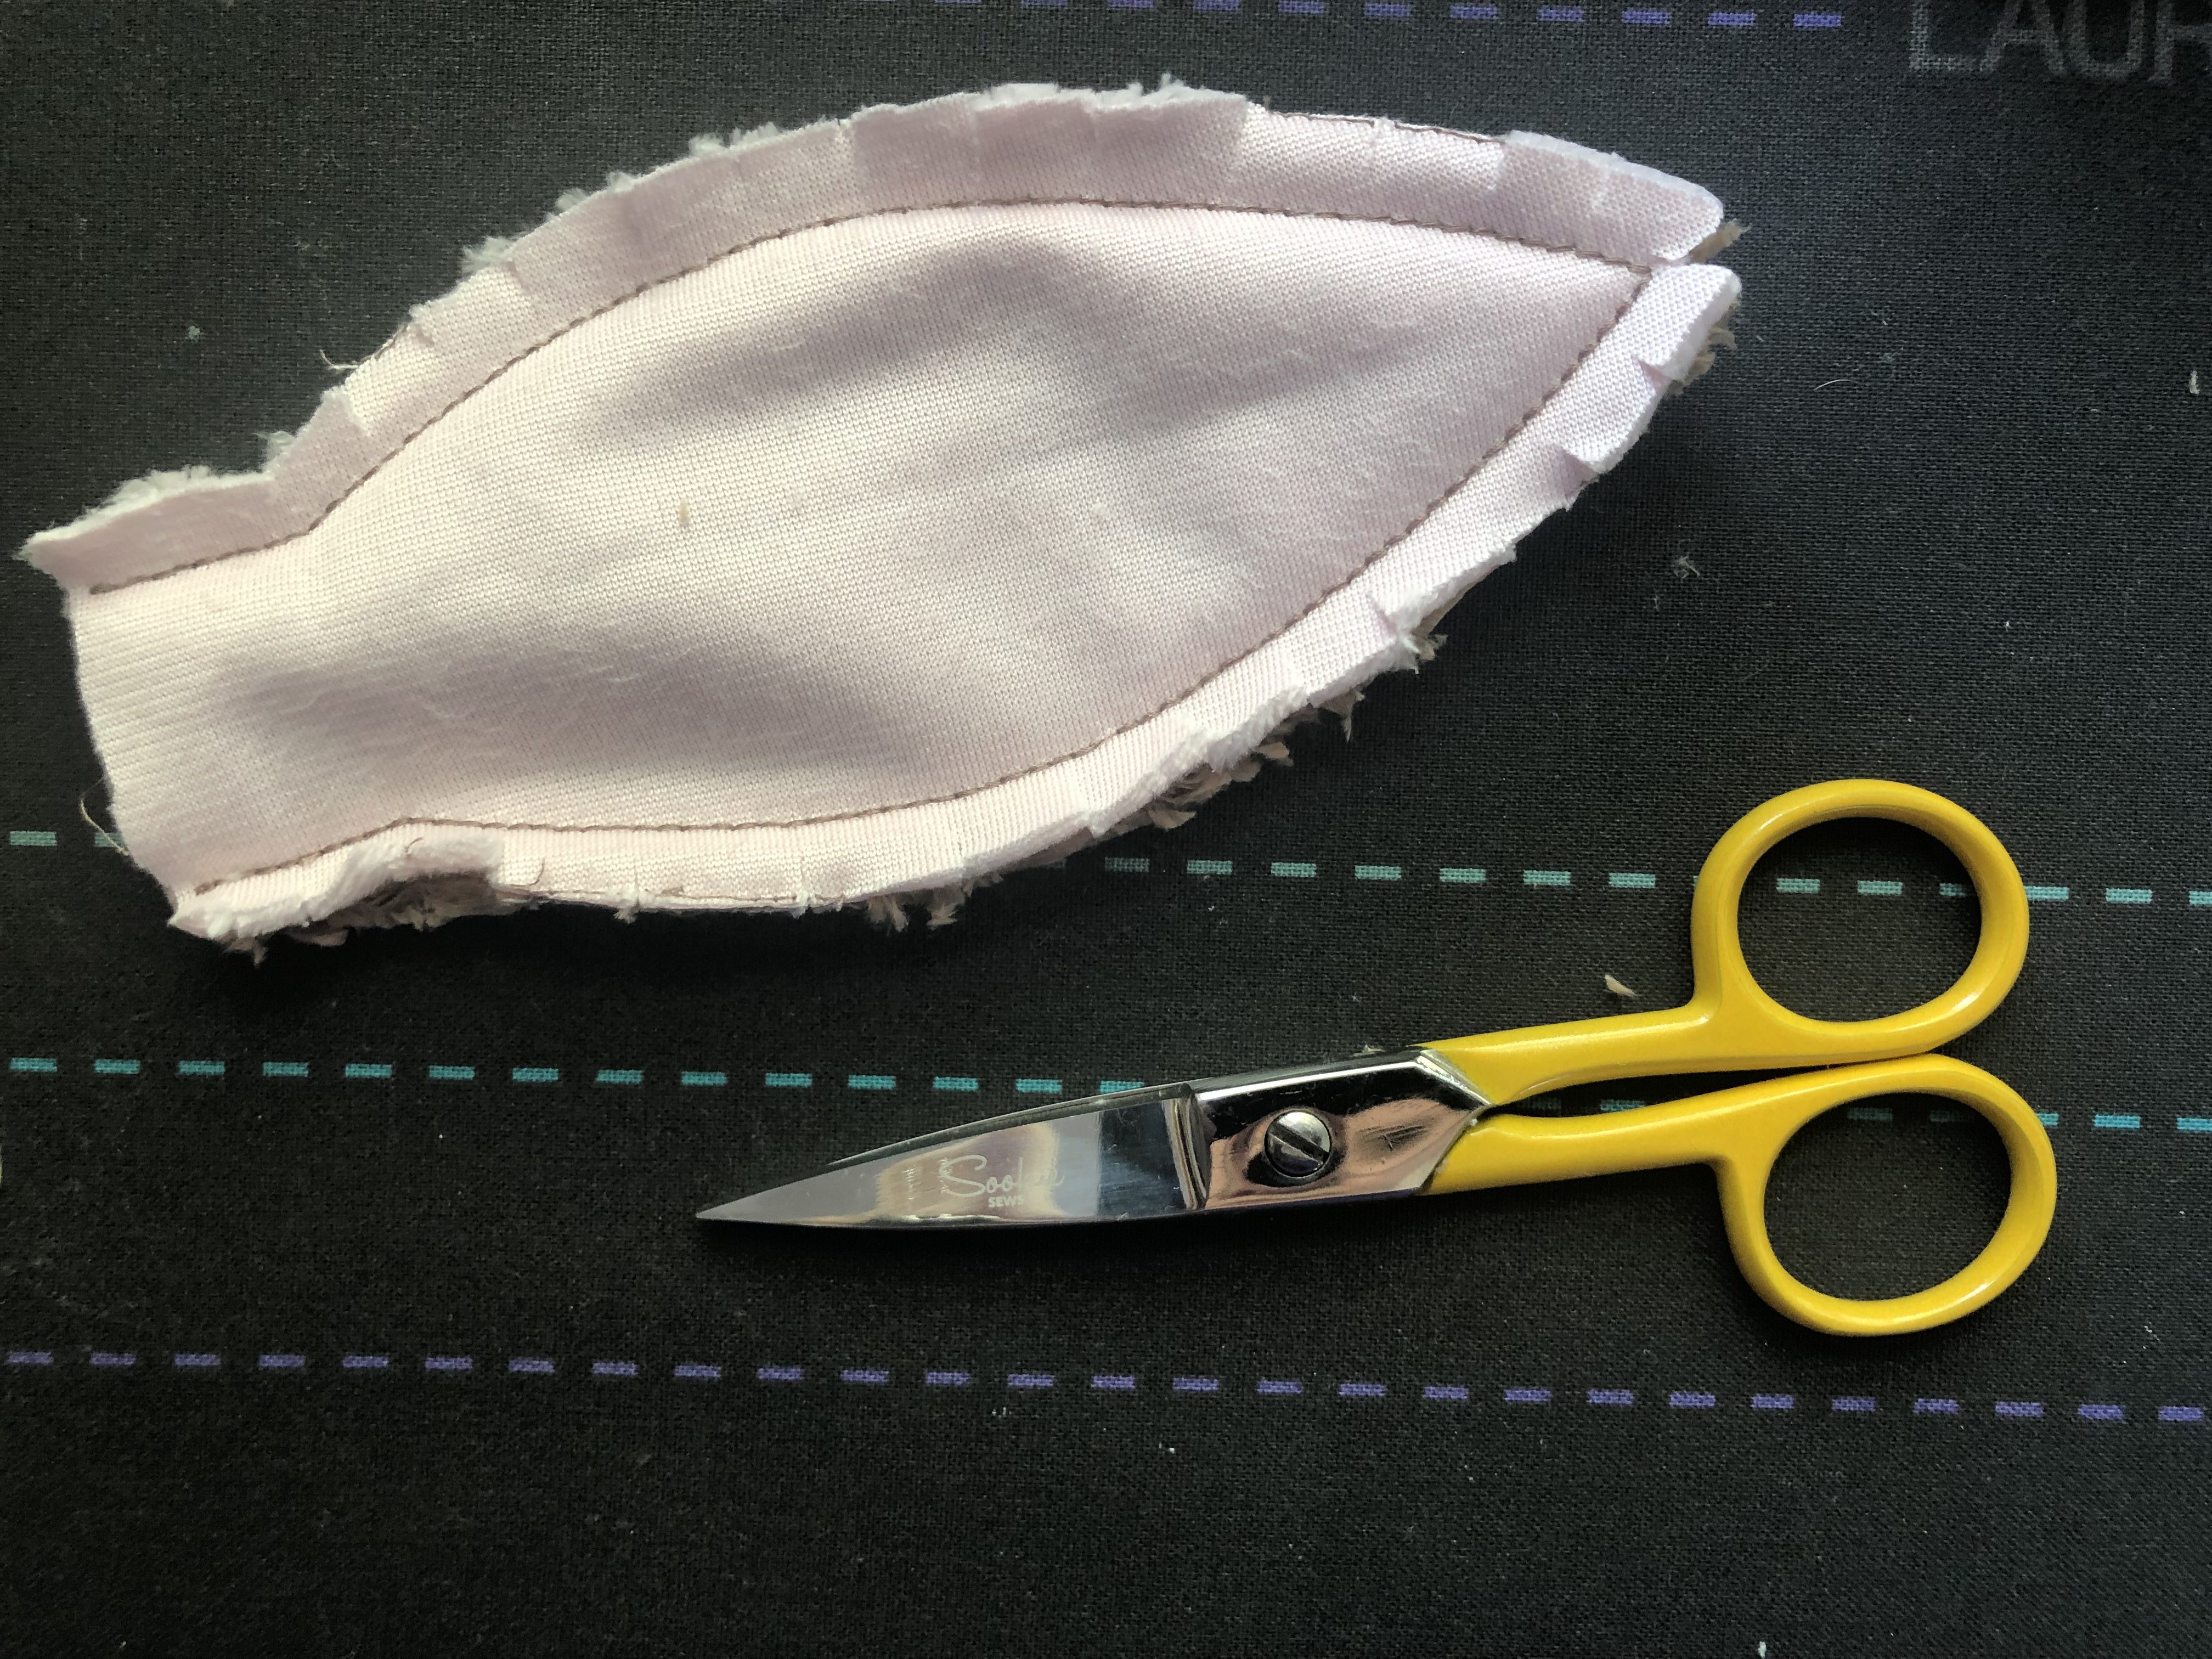
Cut out the bunny head along the outer stitch line and across the bottom stitching line. Snip the curves of the head to assist in turning your bunny head.
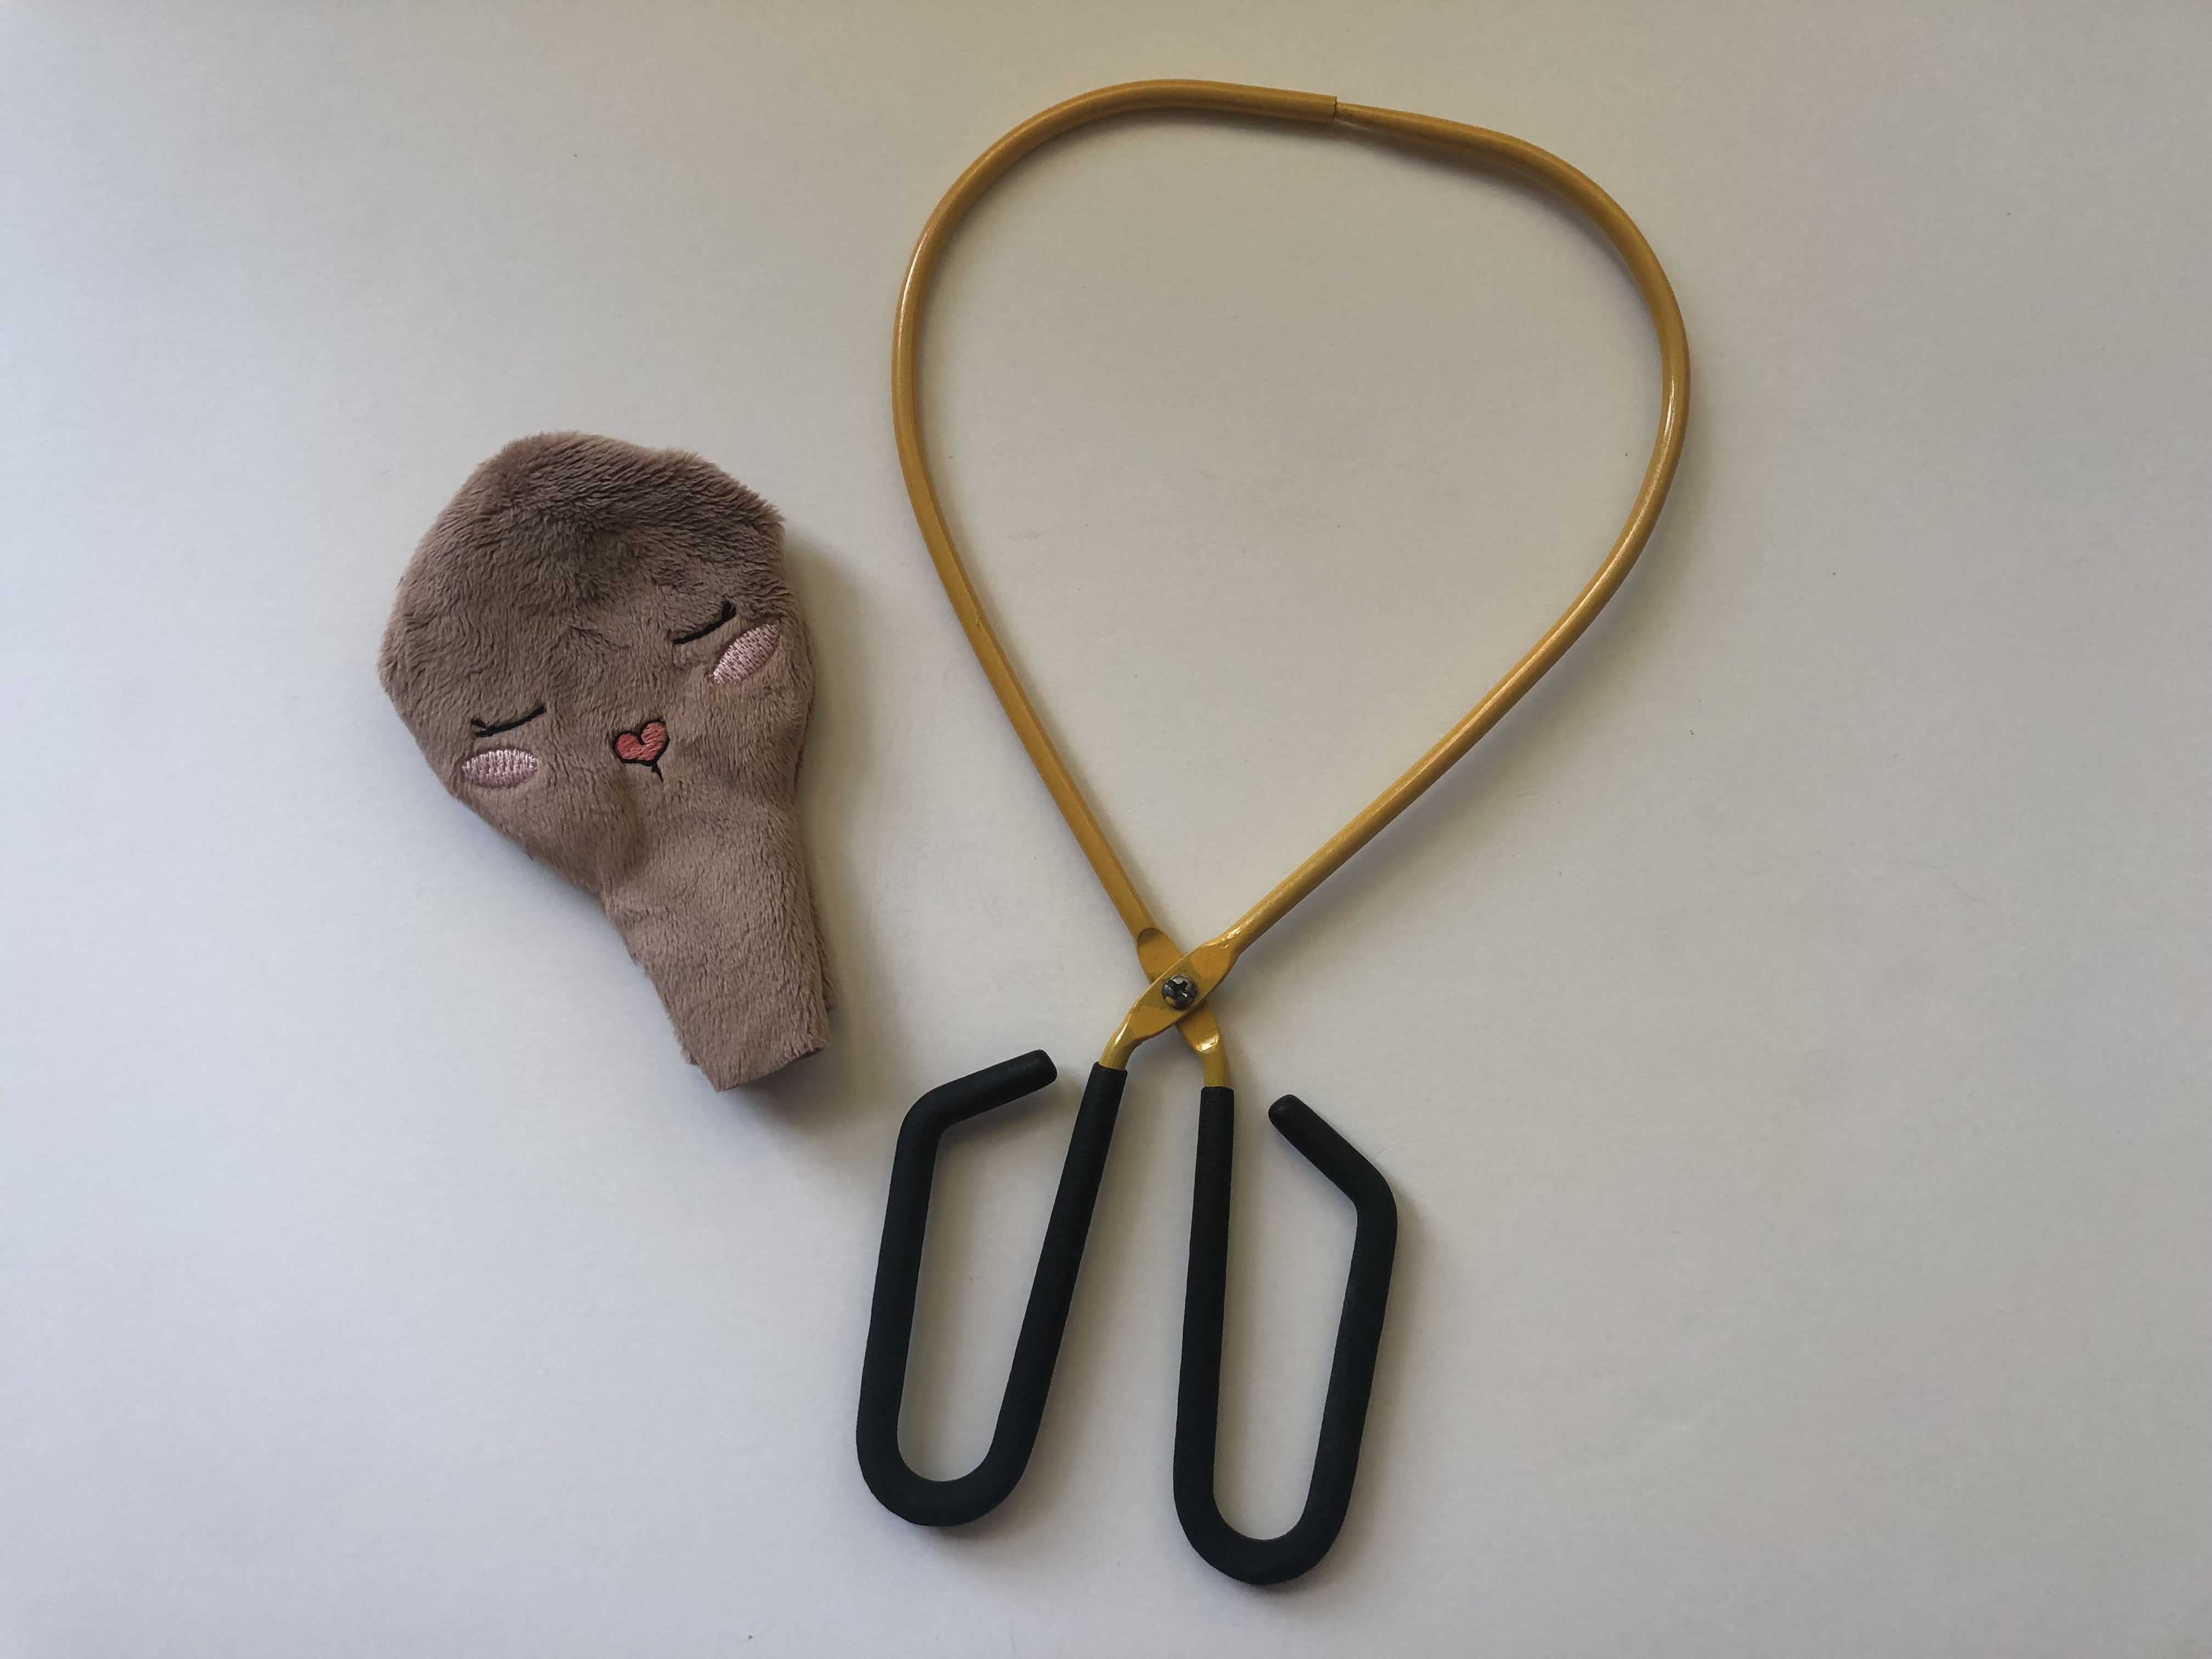
Using the EZ Point and Turner, turn the bunny head right side out. The opening in the bunny head is very small and will feel pretty impossible to turn right side out without the use of a turning tool; the EZ Point and turner makes it go really fast and easy. Set aside your bunny head for now so we can make the ears.
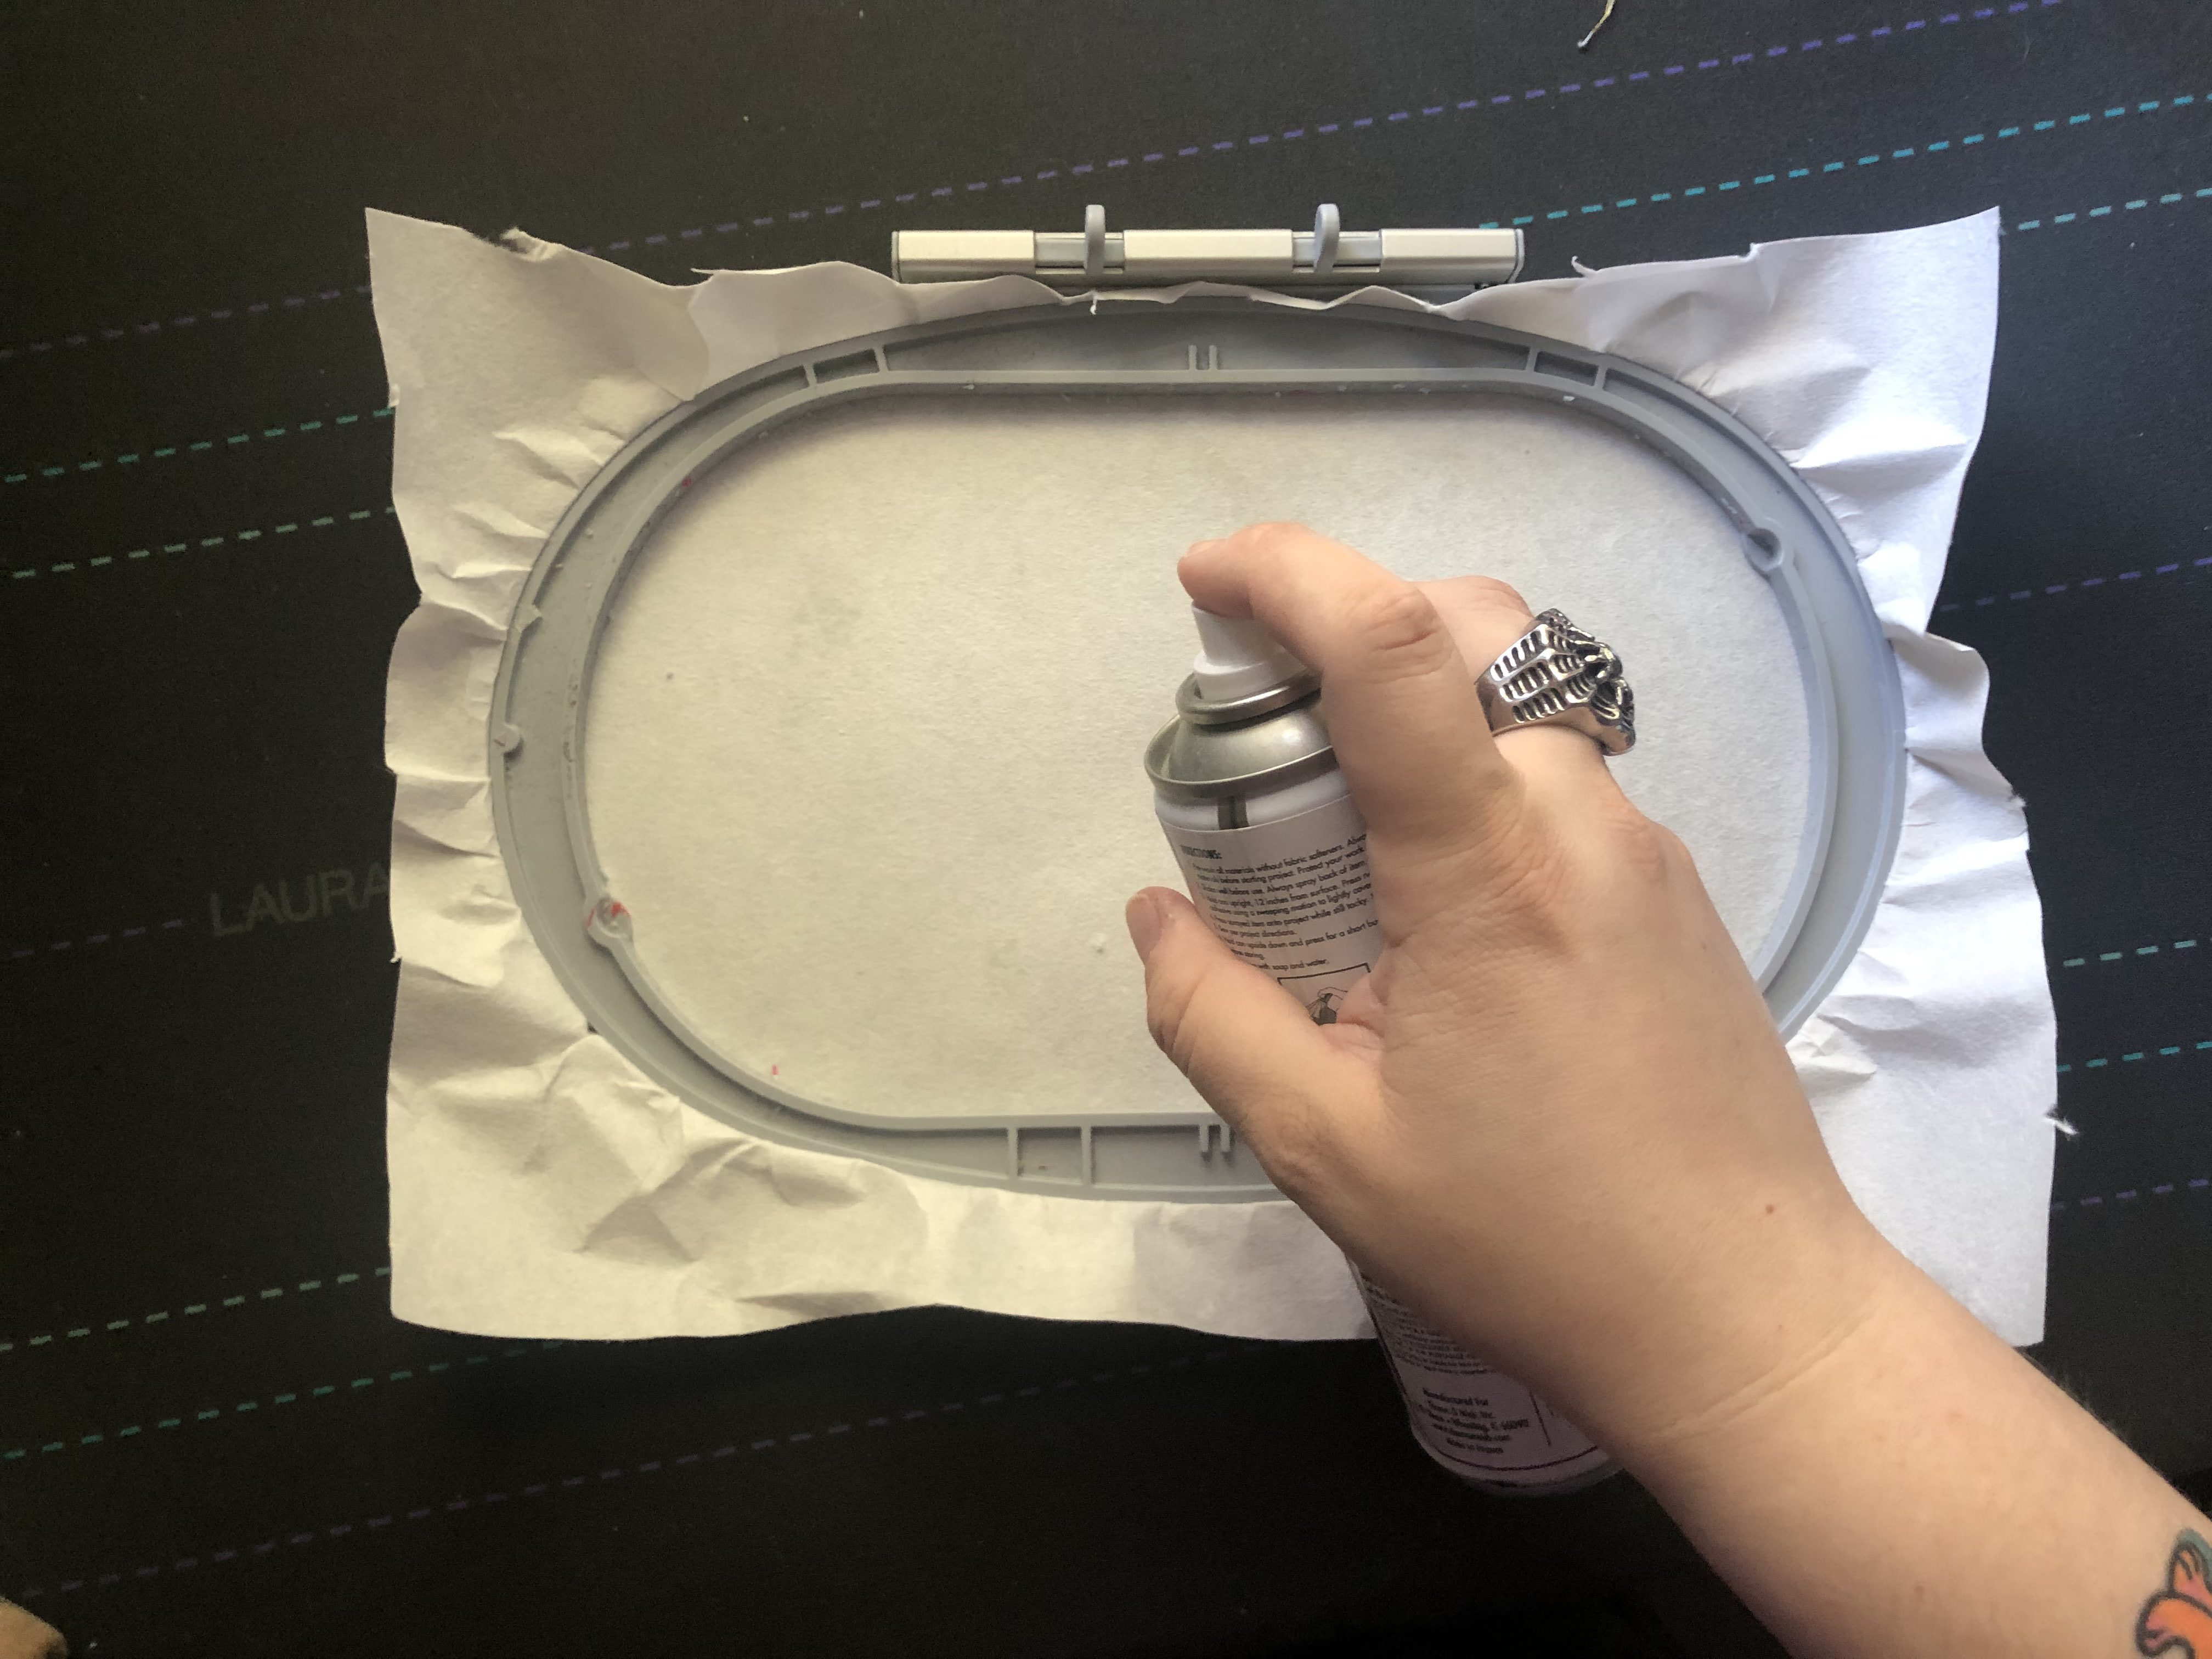
Hoop the stabilizer by itself in the large oval hoop and lightly spray the stabilizer with spray baste.
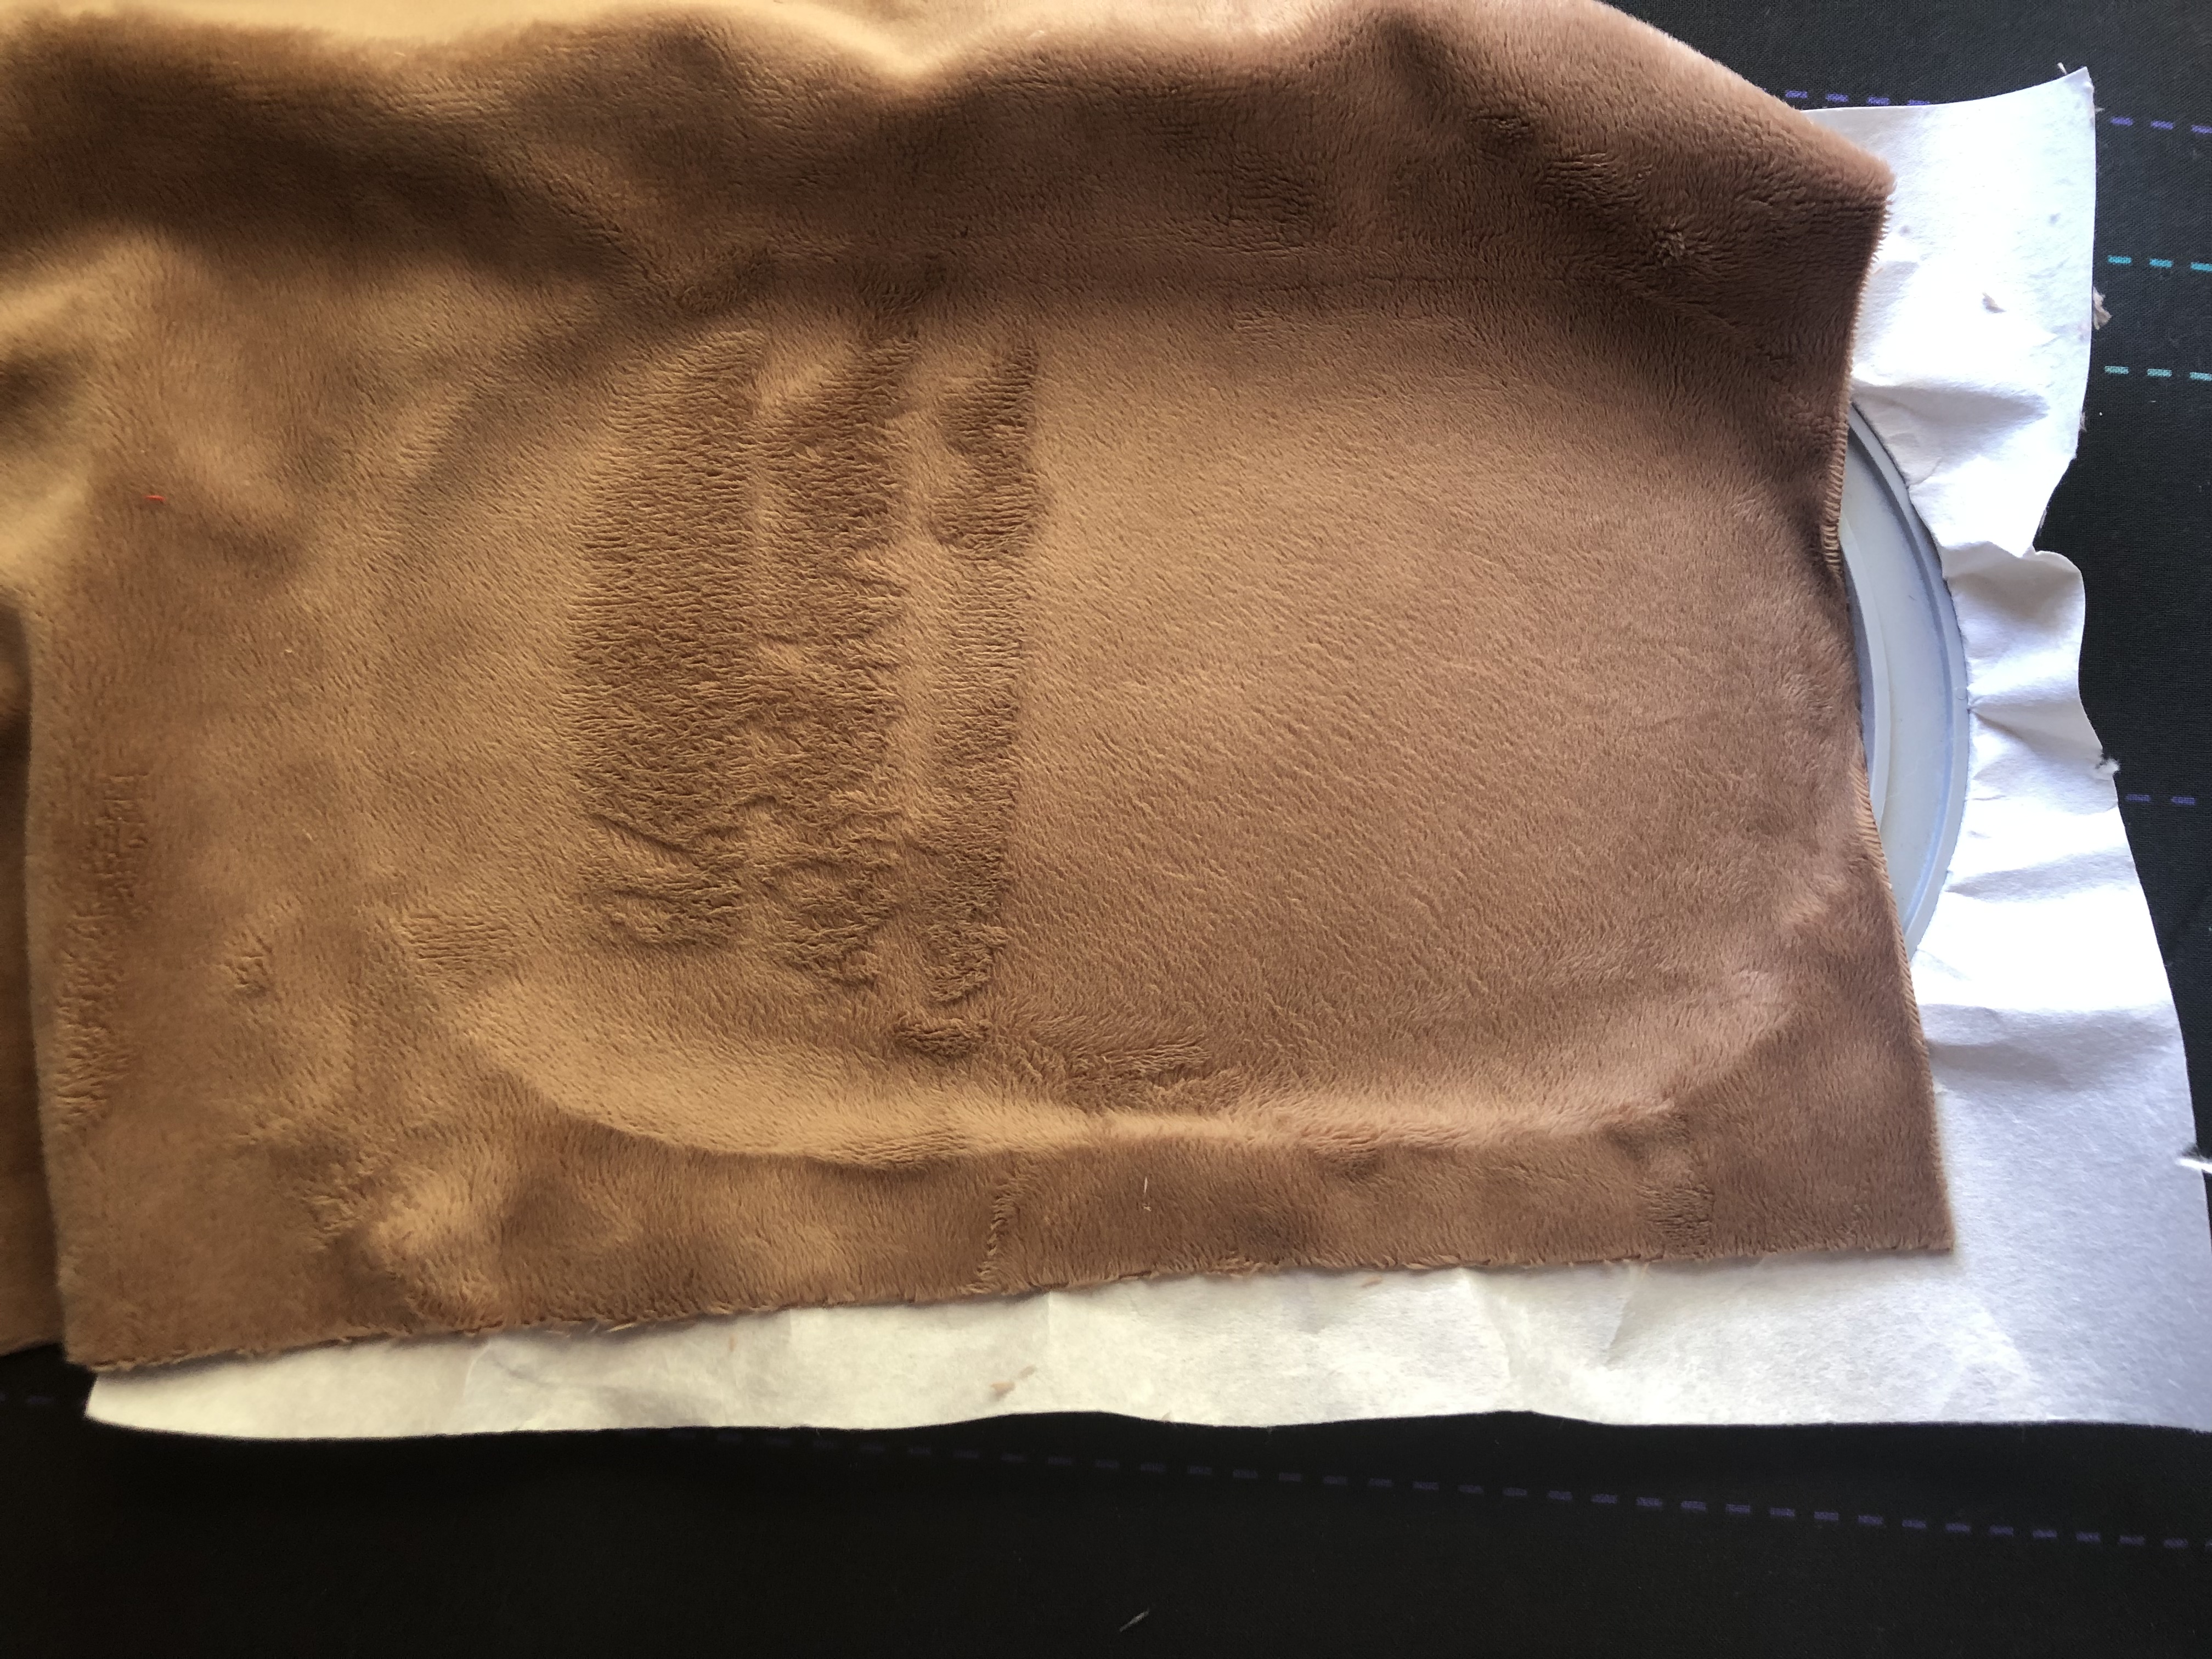
Place your bunny fabric right side up in the hoop, smooth it to the spray baste. Be sure not to stretch the cuddle in the hoop. I made the pile of the fabric go left to right.
Place the inner ear fabric on top, right sides together, you may secure the top piece with tape to help with the slipping.
Run a basting stitch around the bunny ear fabric. Mine cut it close, but that’s okay! I used my tweezers to hold the fabric and the foot pedal to run my basting box nice and slow.

Stitch out the ears.
Once finished, unhoop your fabric and remove all the stabilizer.
Cut out the bunny ears along the outer stitch line and across the bottom stitching line. Snip the curves of the ears to assist in turning right side out. Using the EZ Point and Turner, turn the bunny ears right side out.
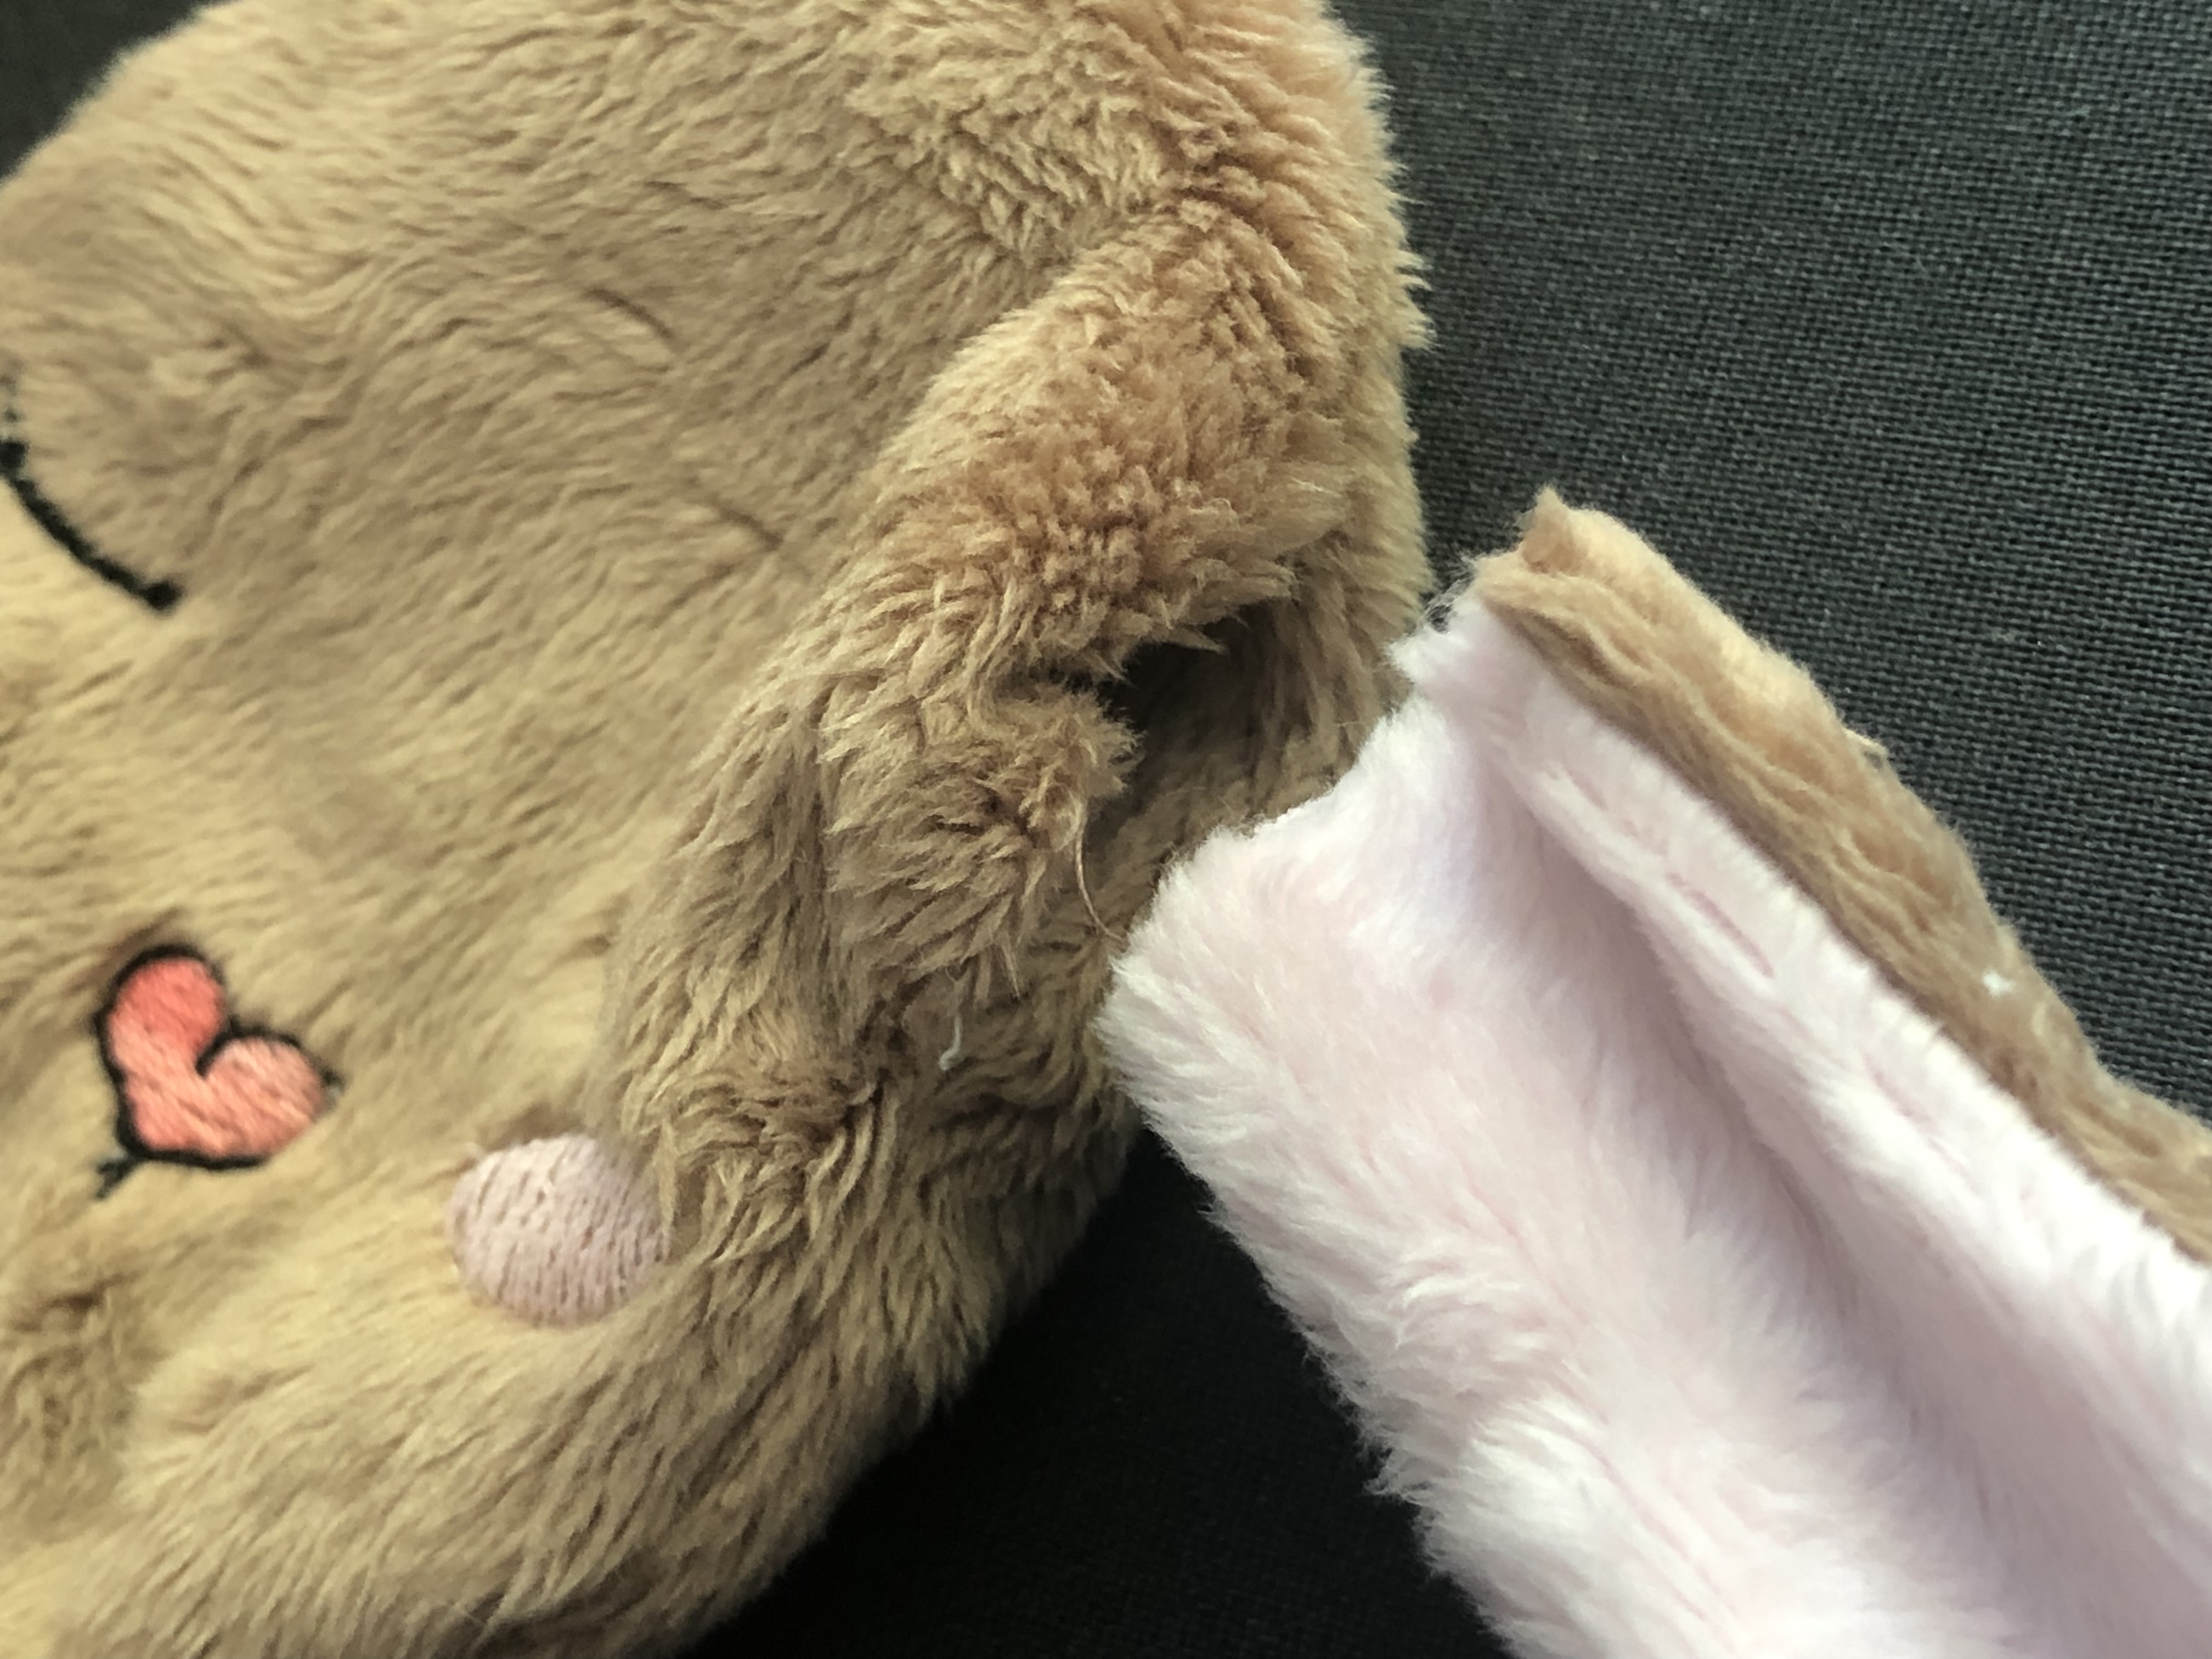
You will notice that the bunny head has two holes on either side of it’s head, these are for the ears. Place the ears inside the hole and secure with hand stitching. Take your time to play with placement and see what you find cutest.
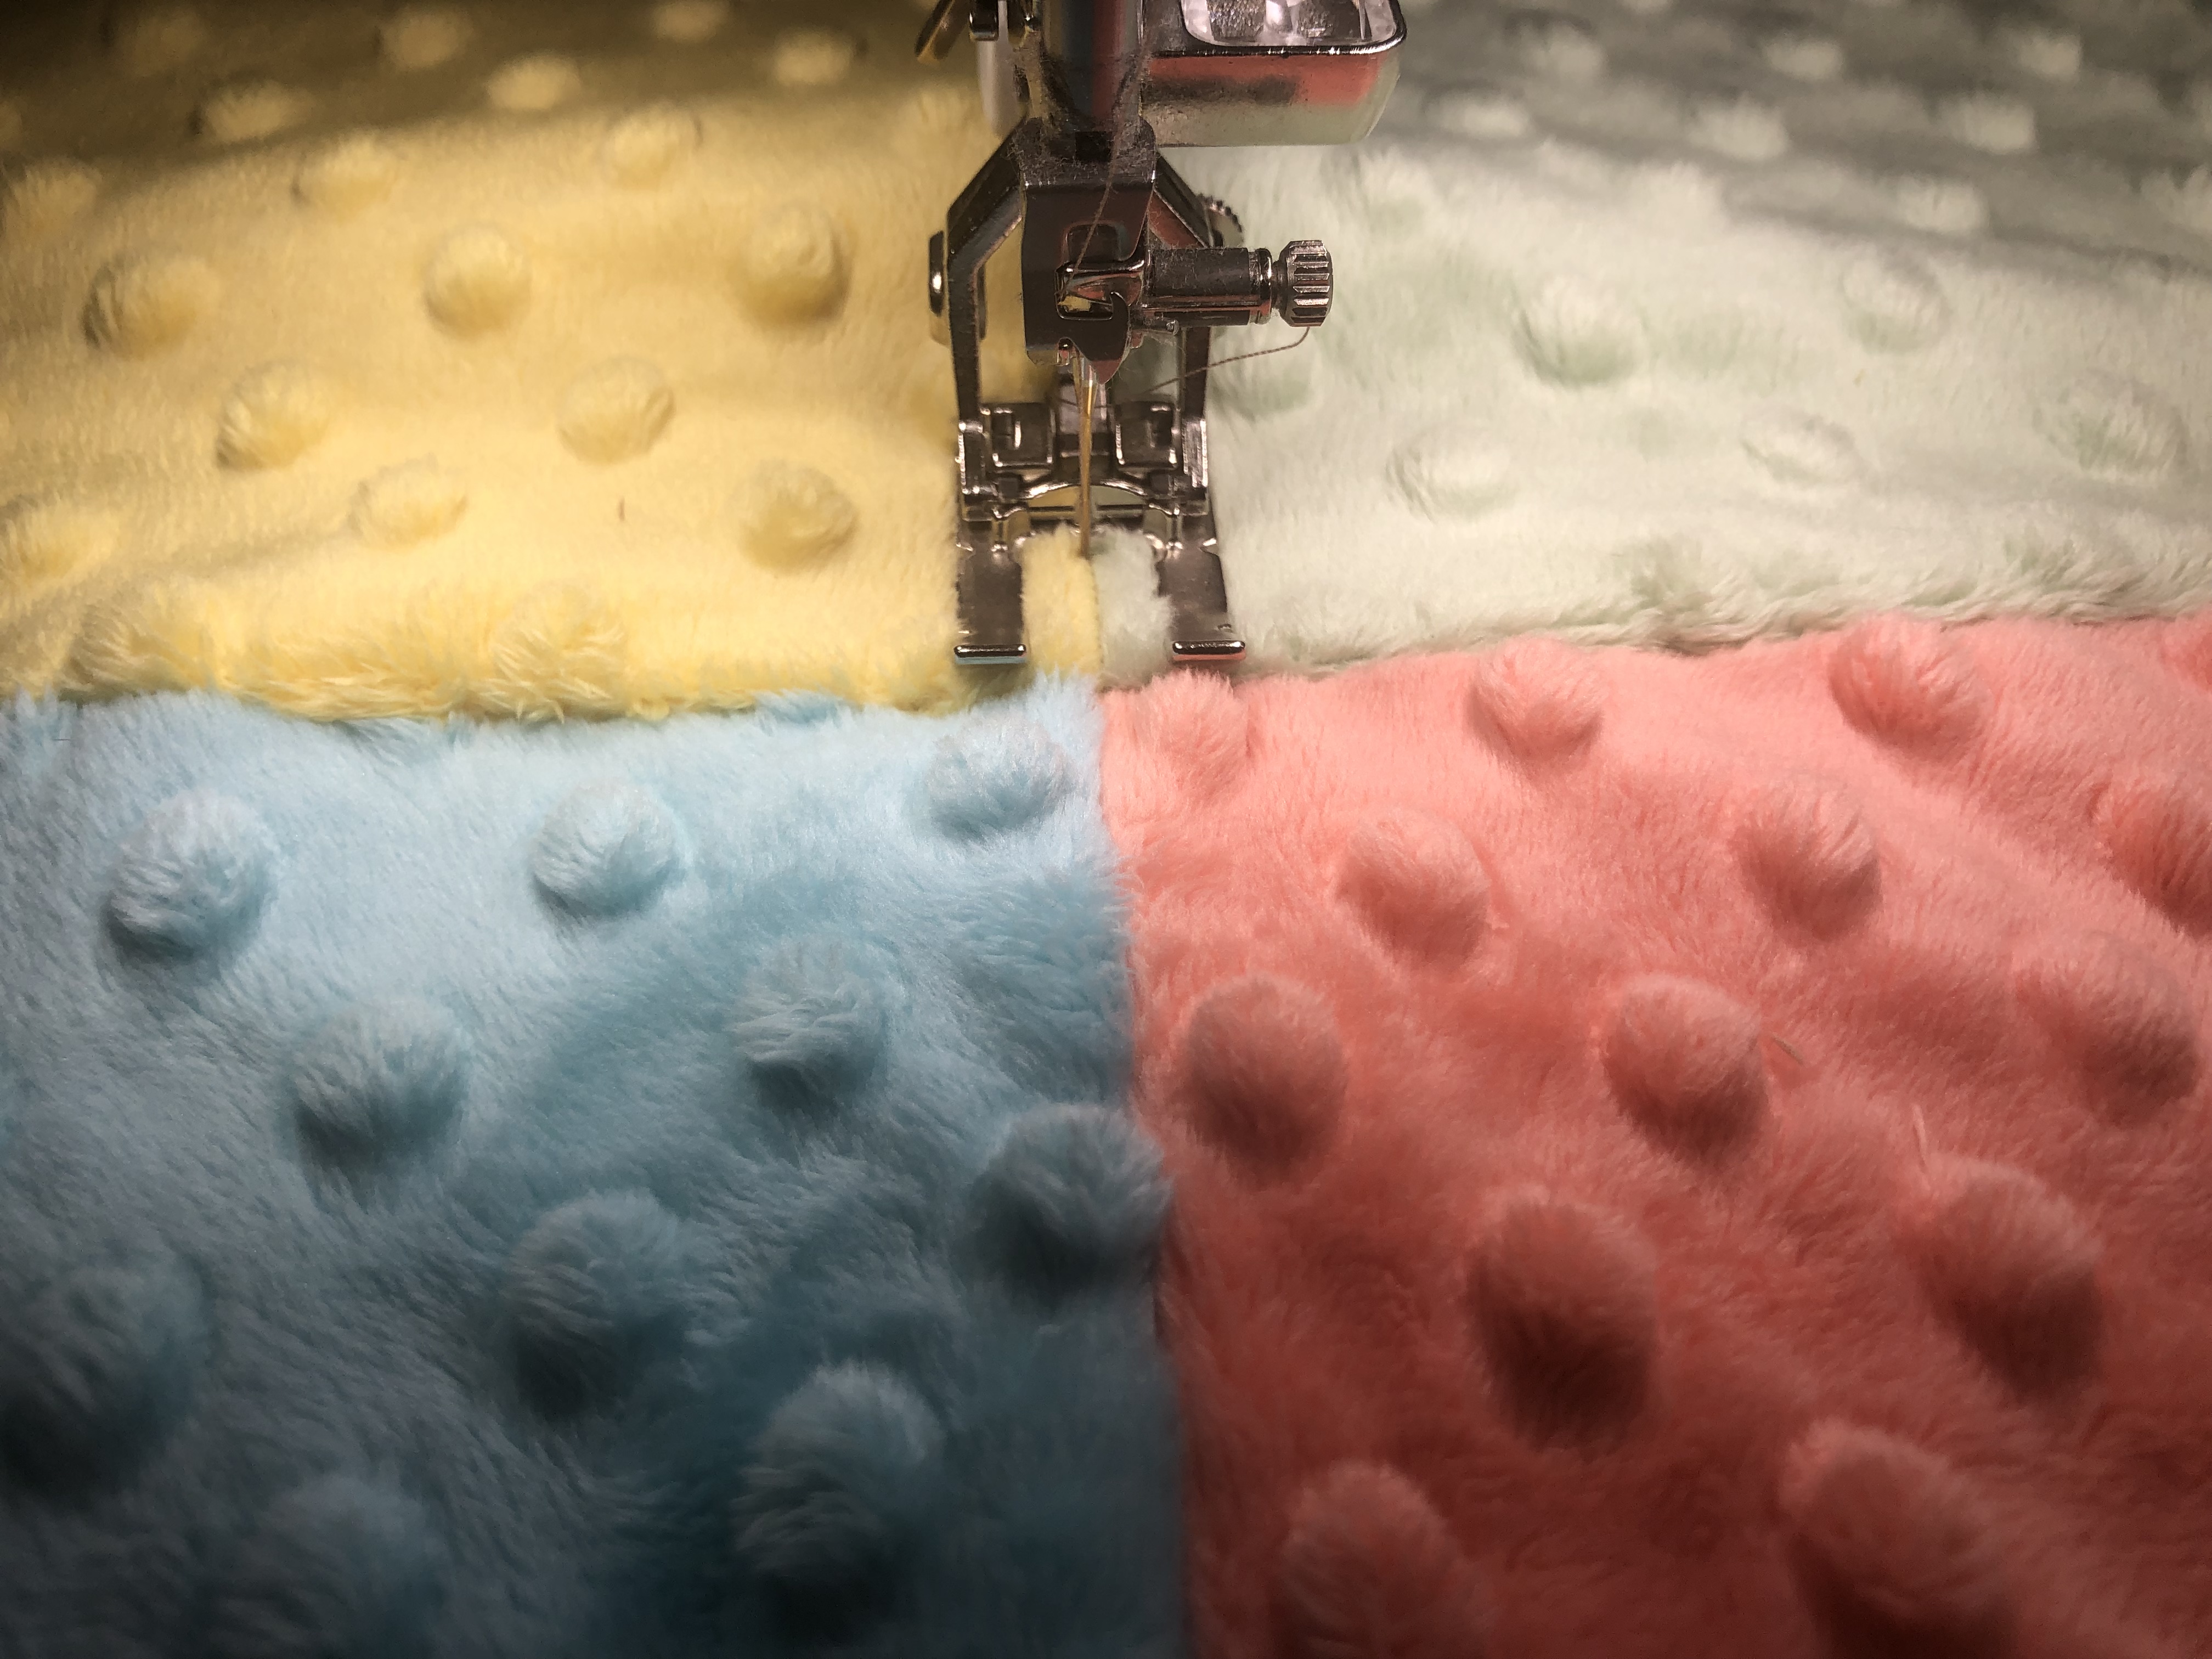
Cut each of the dotted cuddle fabrics into 8.5″ x 8.5″ squares. We will use the serger to make a four patch. Arrange the fabrics as you like and pin in pairs.
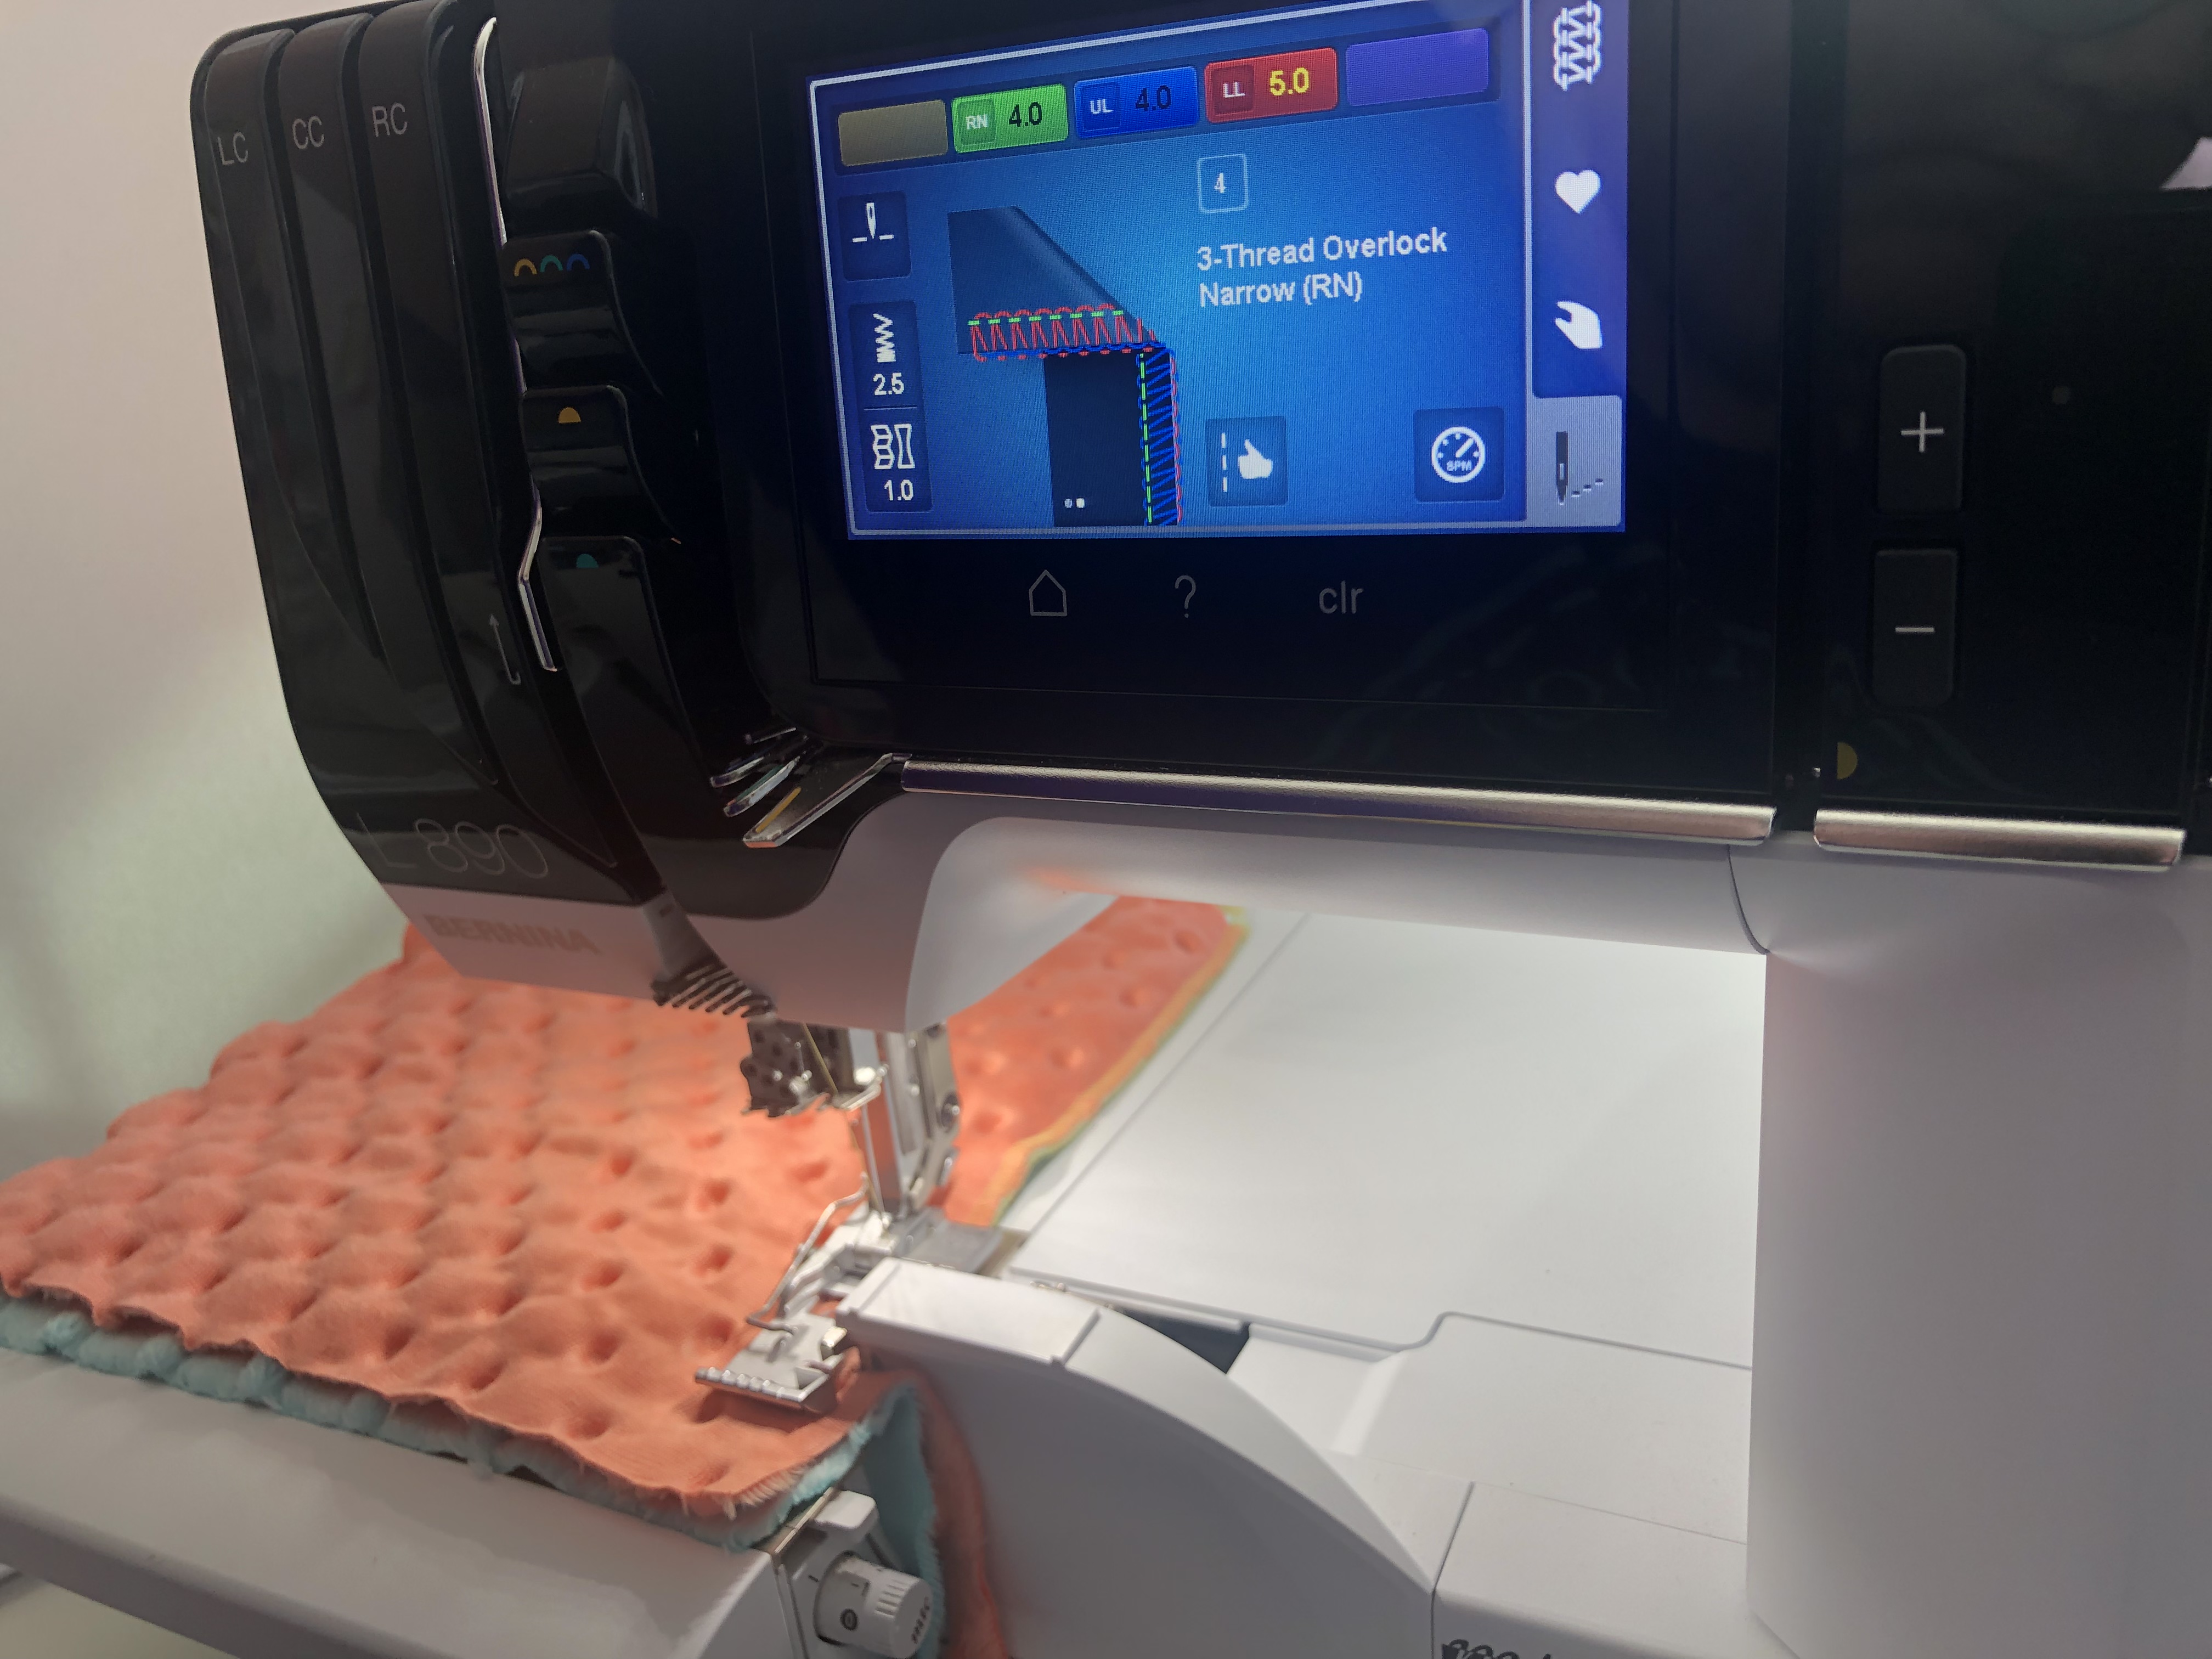
Set up the BERNINA L 890 for a 3-thread Overlock Narrow (stitch #4) and lower the presser foot pressure (manual lever on top left of machine) . I love using the setup wizard to walk me through the steps for setting up my machine. When I get excited about projects I tend to skip steps by accident but this machine helps me keep everything in line.
Grab the first two fabrics and align them with the side of the stitch plate and serge the edge. Repeat with the second pairing. From here, serge the two pairings together to complete the four patch.
Cut a piece of the cut away stabilizer to fit the medium hoop. Hoop the fabric and spray with spray baste.
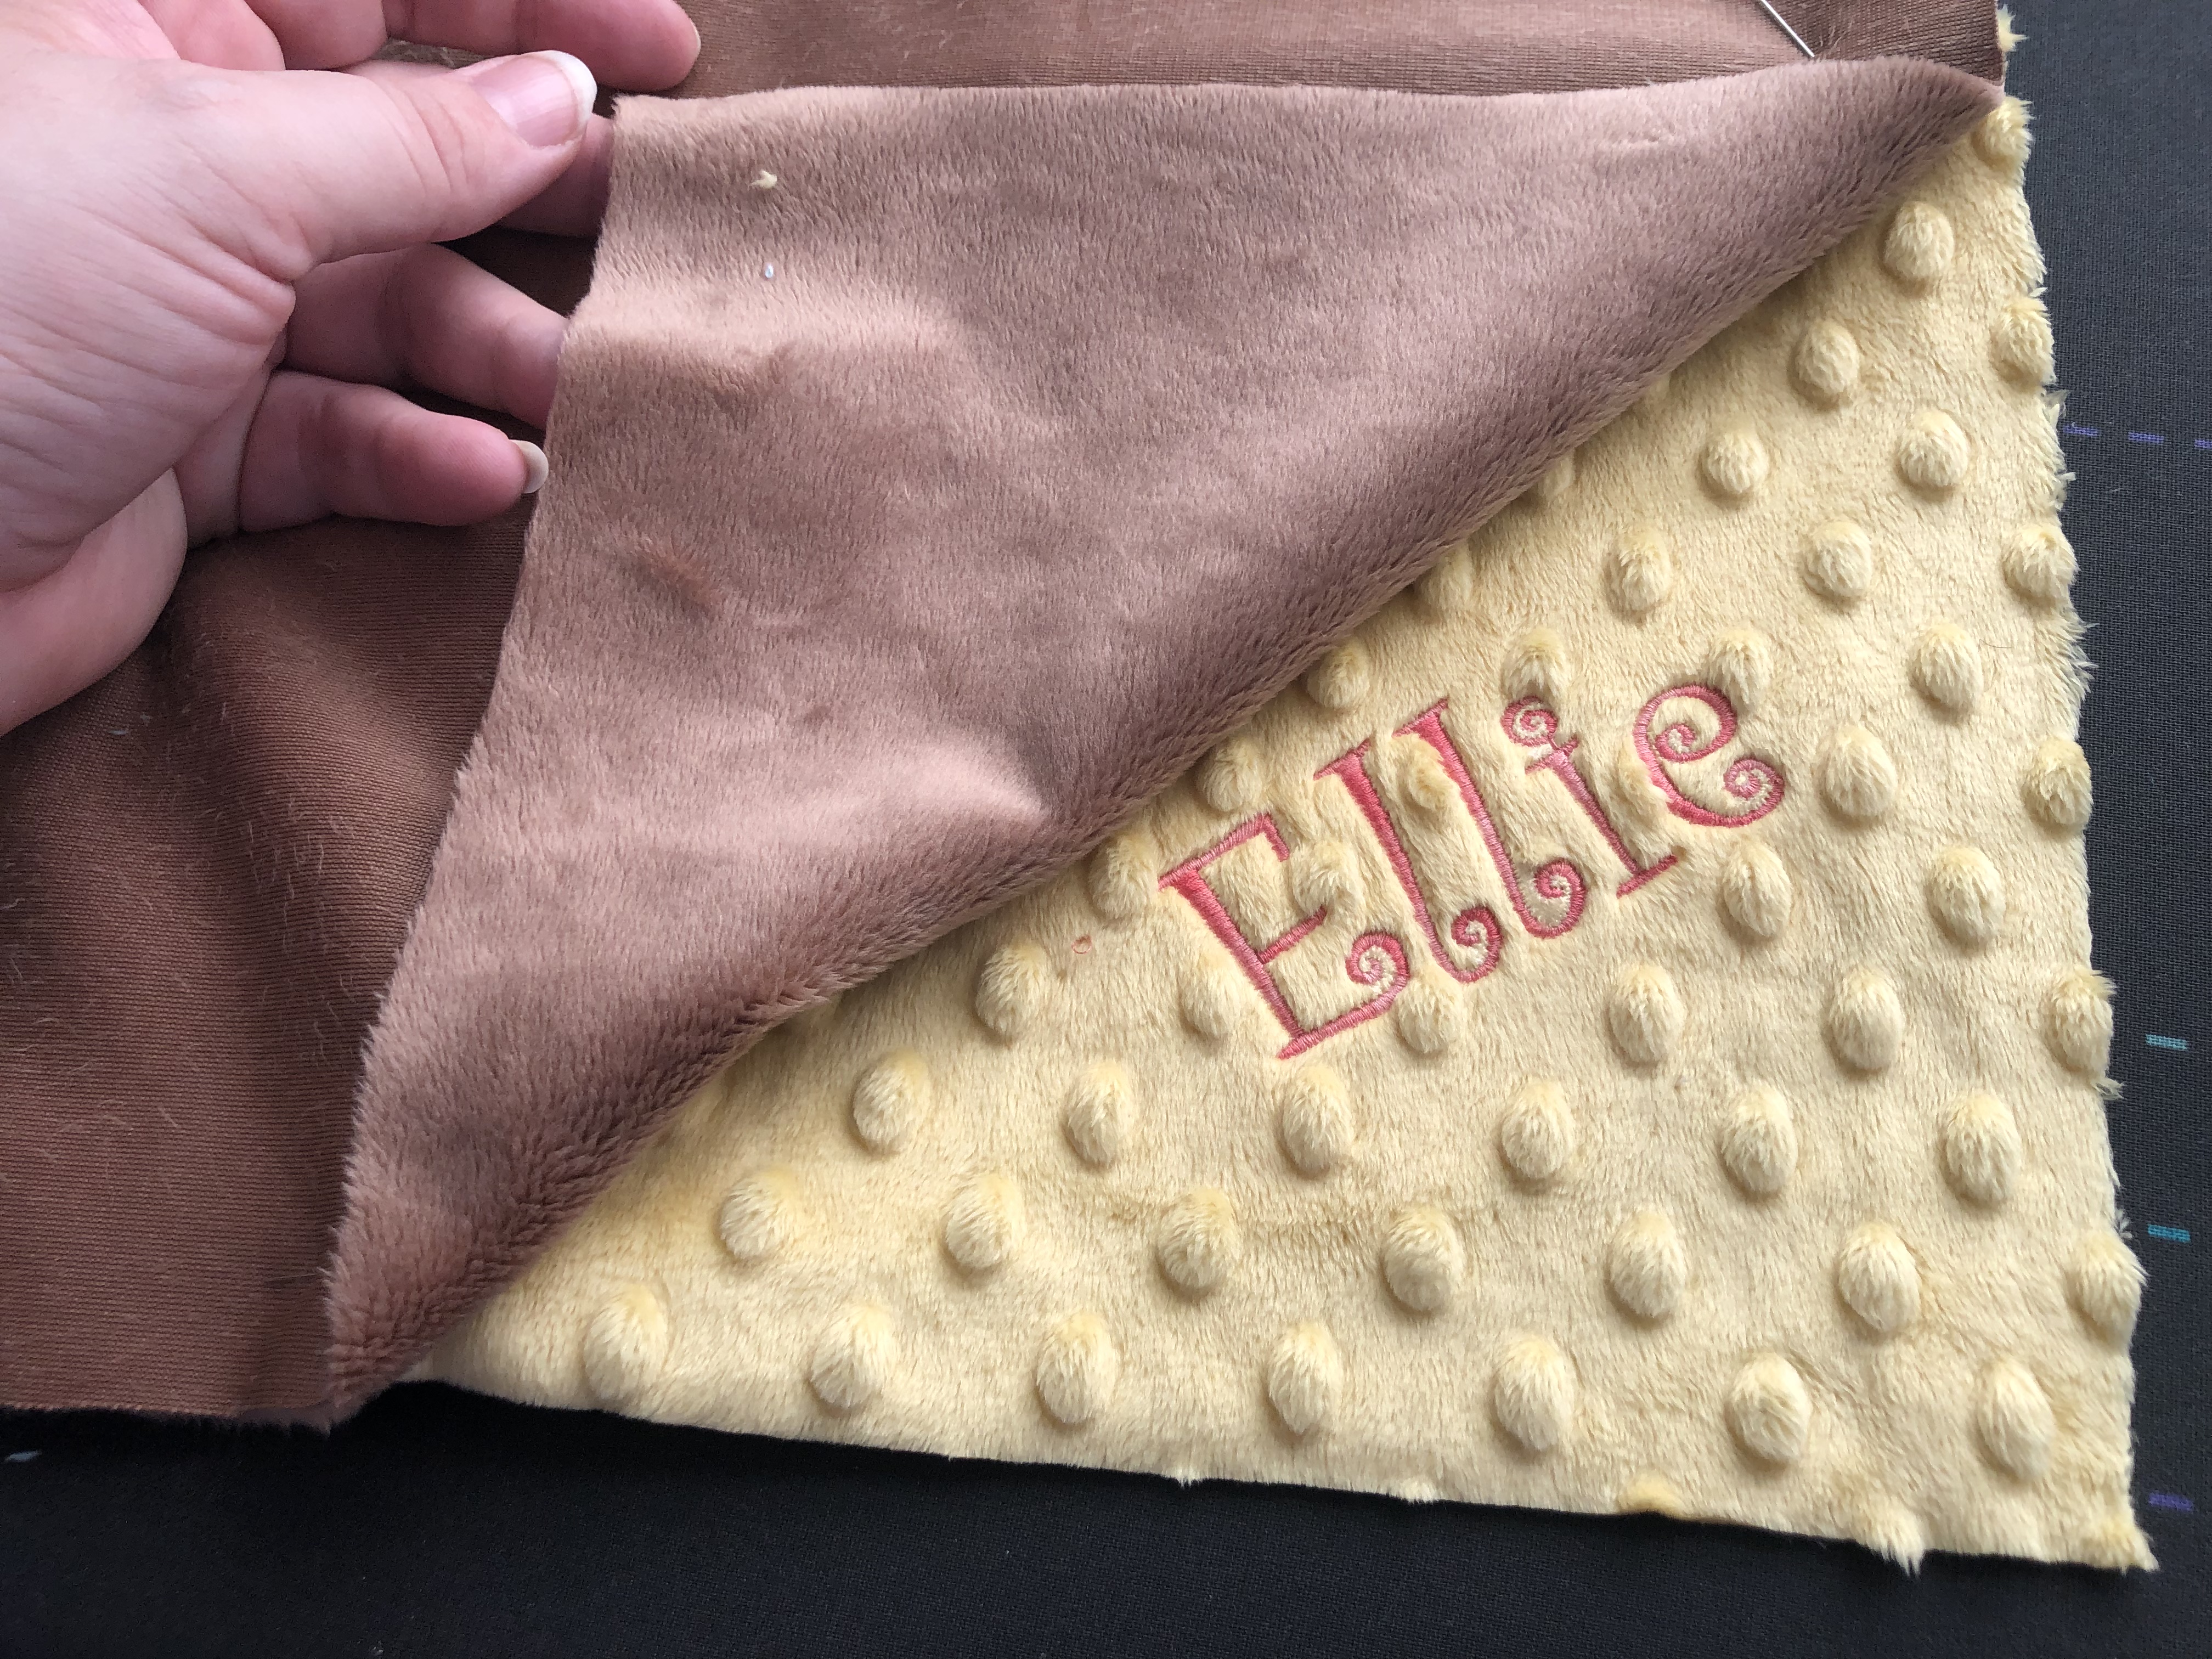
Decide where you would like to personalize the bunny. Place the cuddle four-patch on the stabilizer, centering the spot where you would like the embroidery.
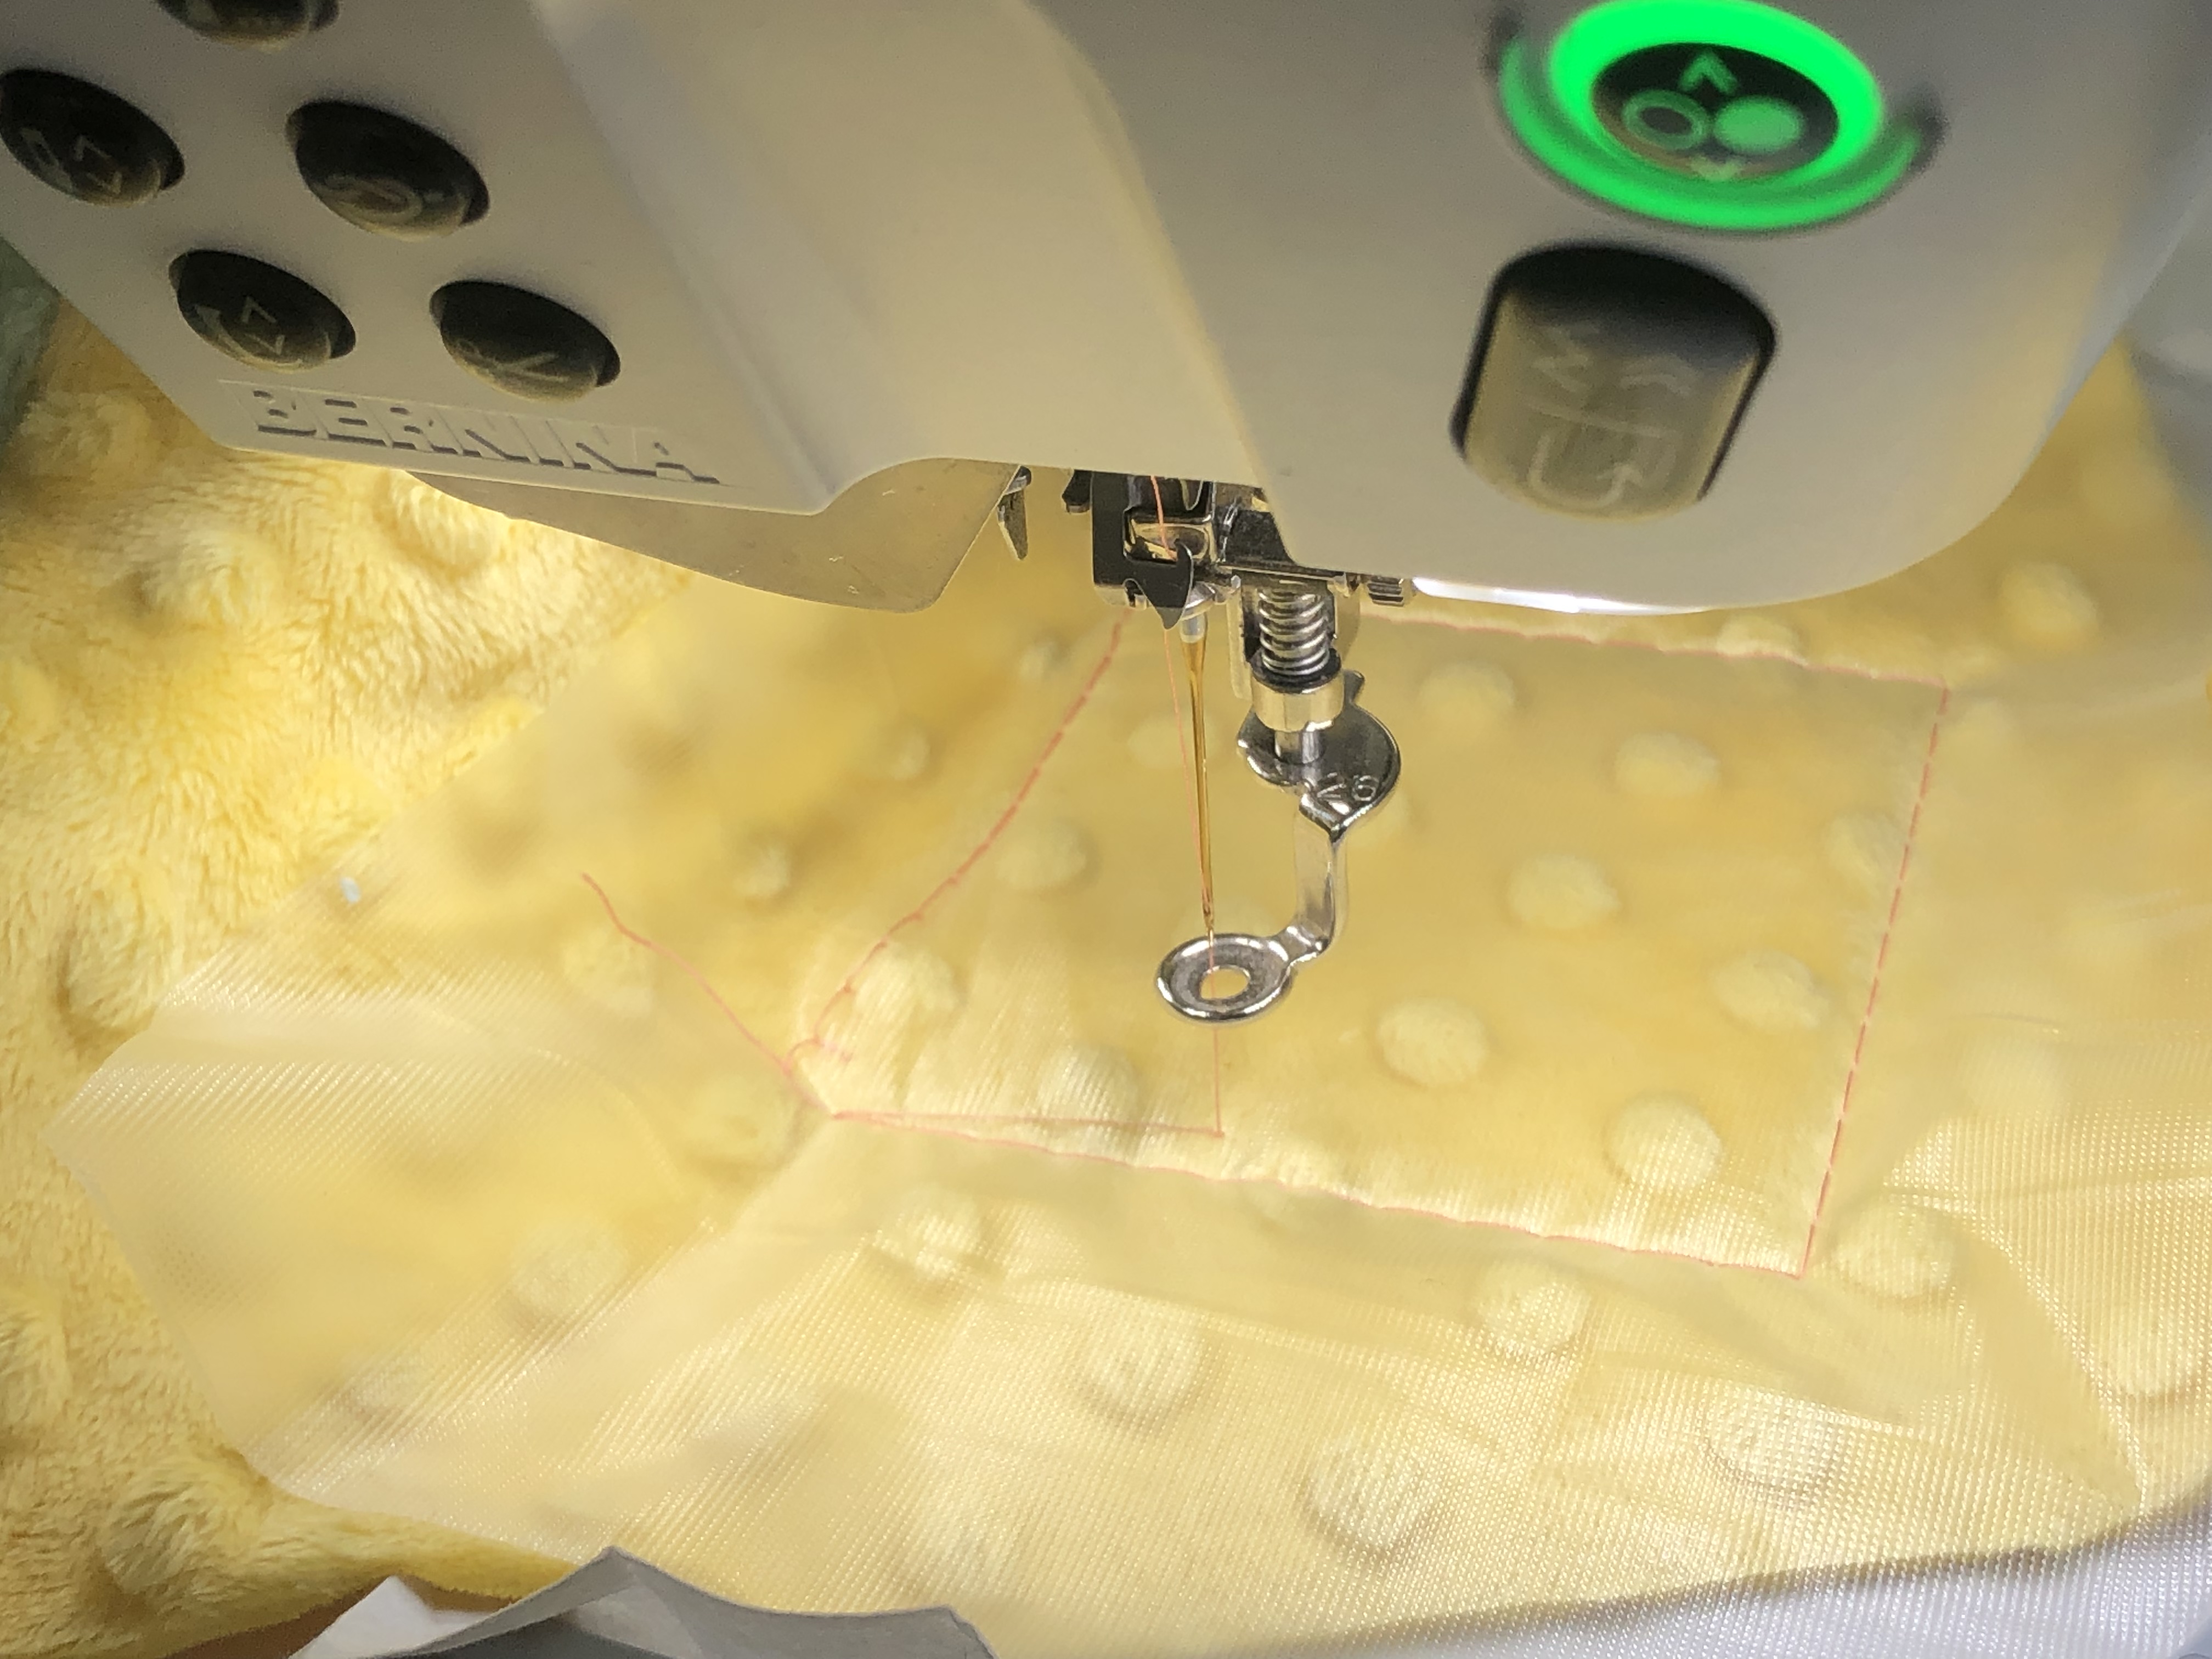
Cut a piece of StitcH20 the size of the inner hoop.

Using the alphabets in the machine, type out the name you’d like to embroider.
I used pinpoint placement to perfectly position my embroidery in the corner. Place your name anywhere you like.
Prep your machine with the proper thread and place the StitcH20 over the fabric. Go to the OK embroidery screen, select the basting stitch option. Stitch out the design.
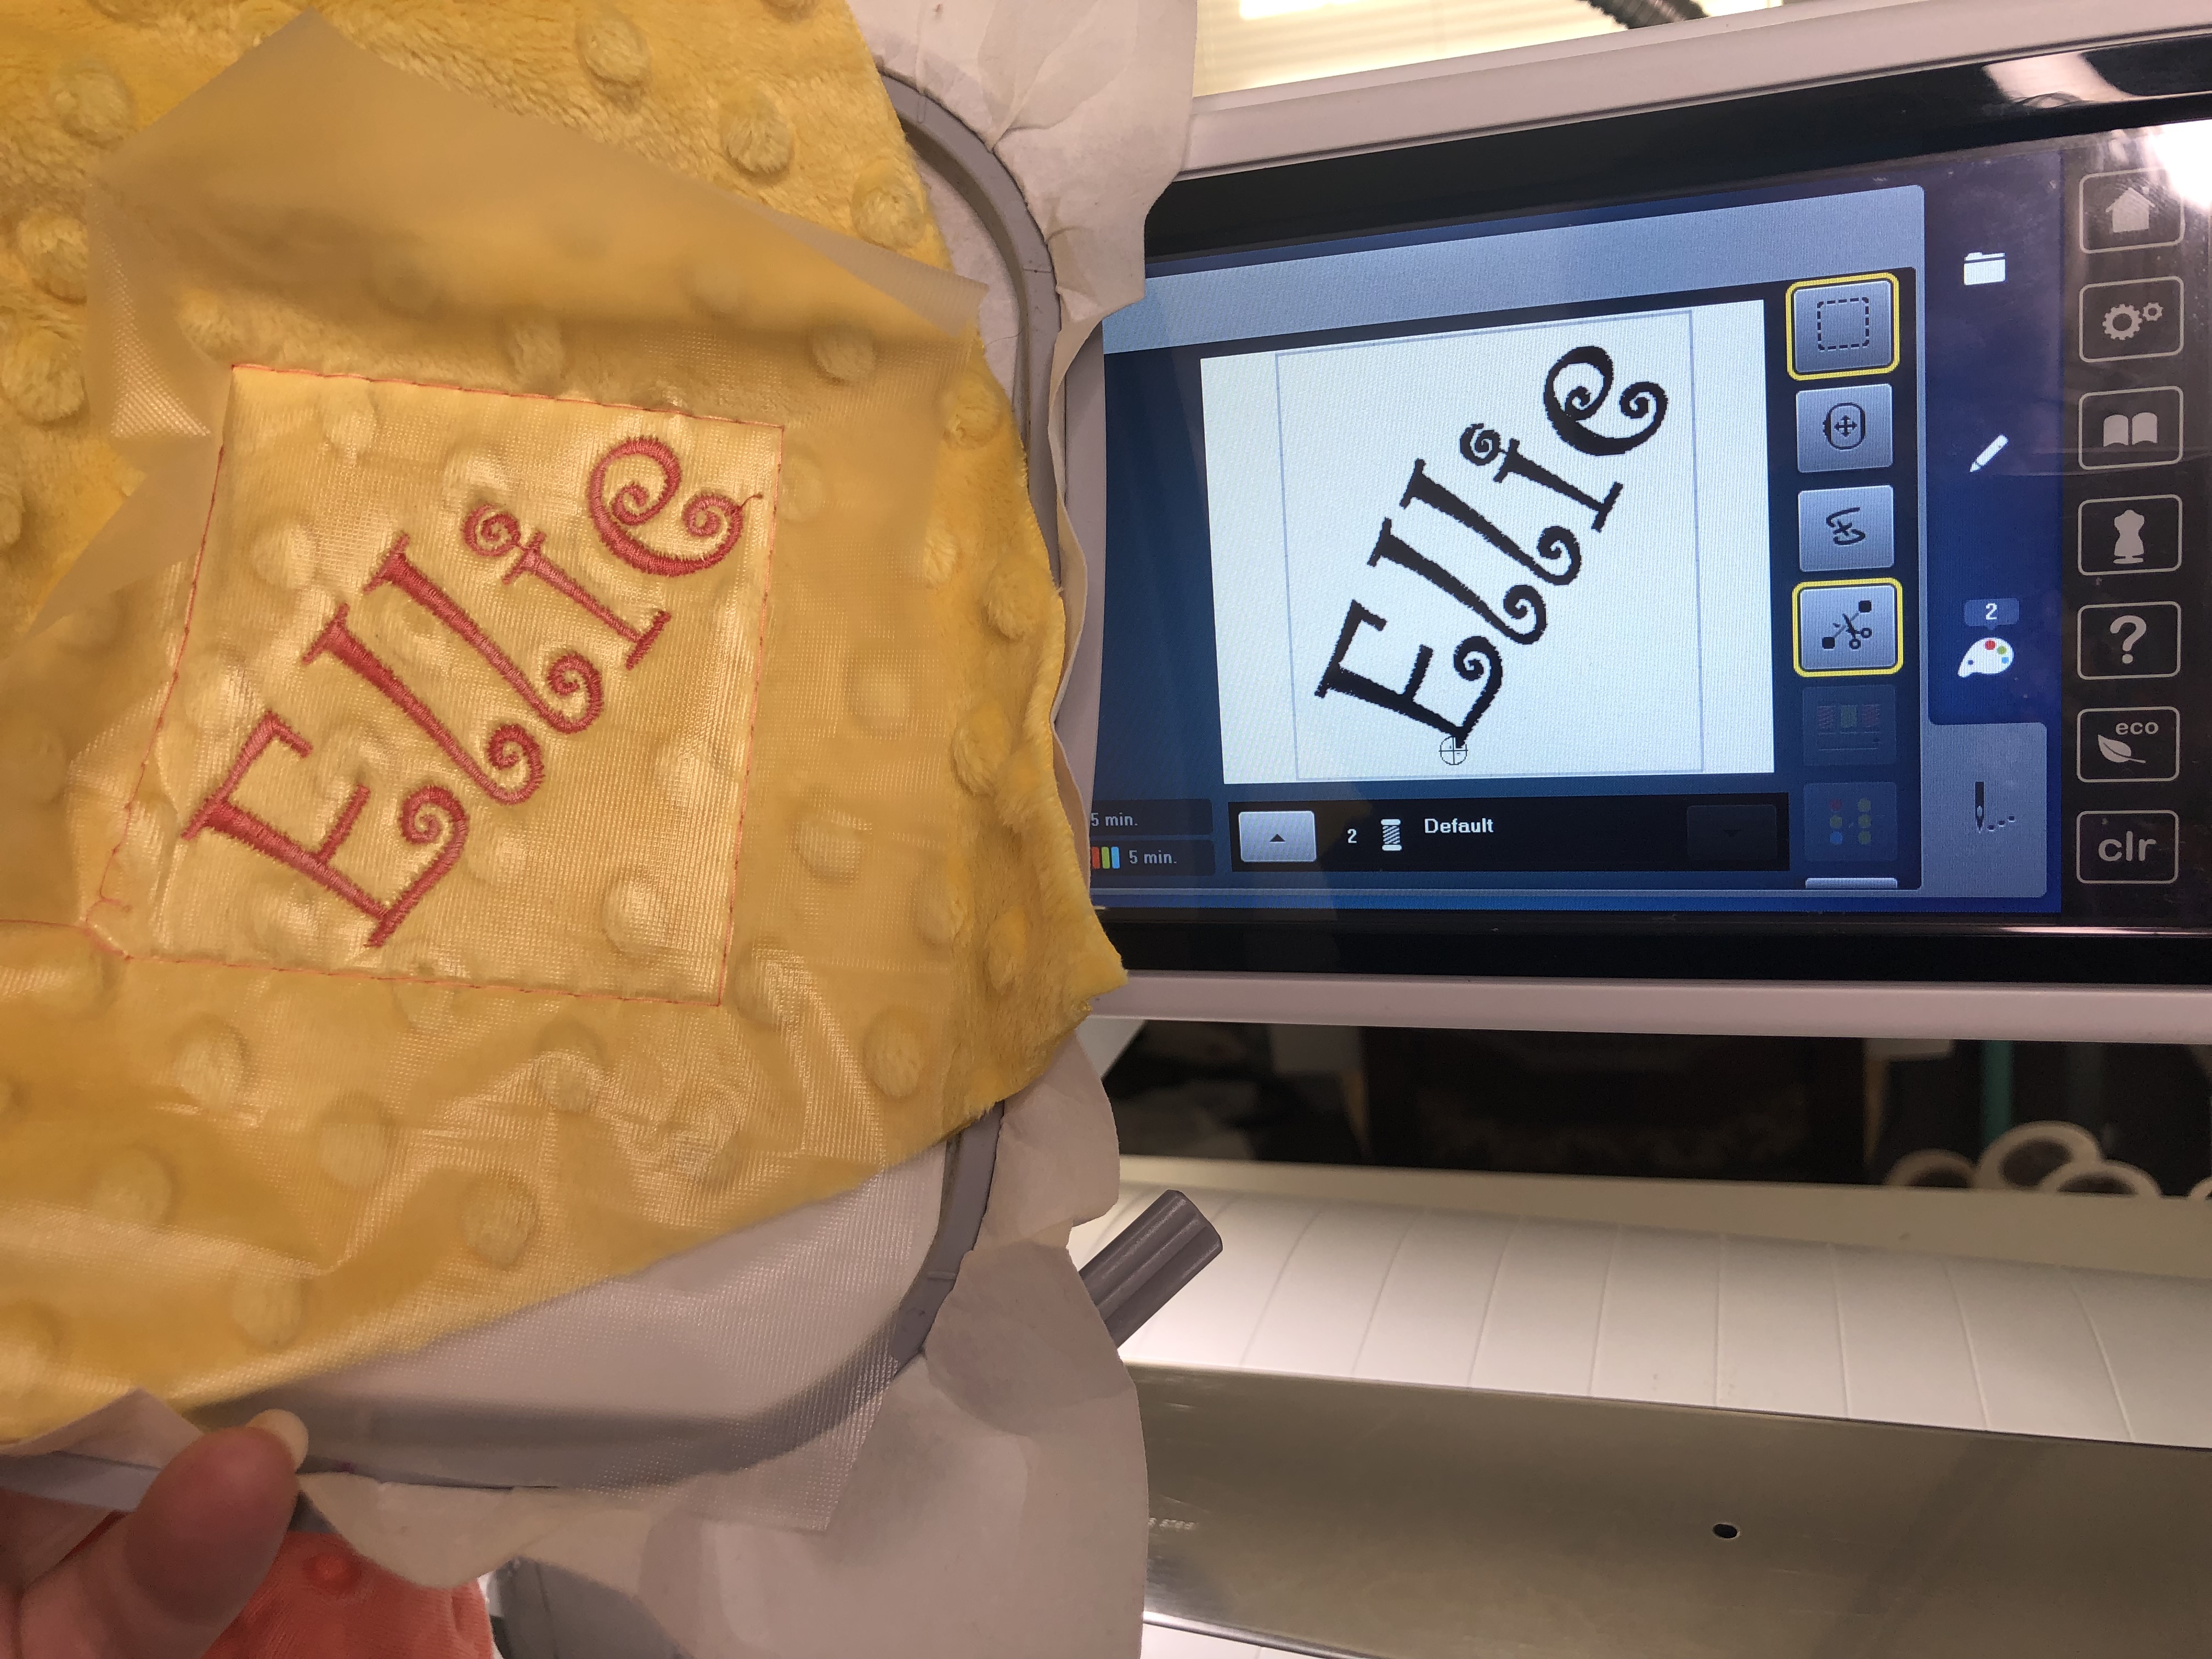
Once the design is finished unhoop it, remove the basting stitch and remove the StitcH20. Using warm water, you may rinse away any excess stabilizer and set aside your project. Cut away the backing stabilizer so it is roughly 1/2″ away from the edges of the design.
Cut a 15″ x 15″ square of the bunny fabric. Trim the patchwork to ensure it also measures 15″ x 15″.
Take the patchwork piece and center your bunny head face down and baste in place.
Place the body fabric over the top of the patchwork square and clip the fabrics together. Serge the fabrics together, leaving a 4″ opening to turn right side out.
Turn the bunny right side out and hand stitch the opening closed.
Stitch in the ditch in the center of the 4 patch. I did about two inches on either side of the center. I’m an agent of chaos so I didn’t measure, but feel free to do as you like just remembering everything you do on the front…

Will show on the back, so be sure you’re happy with it.
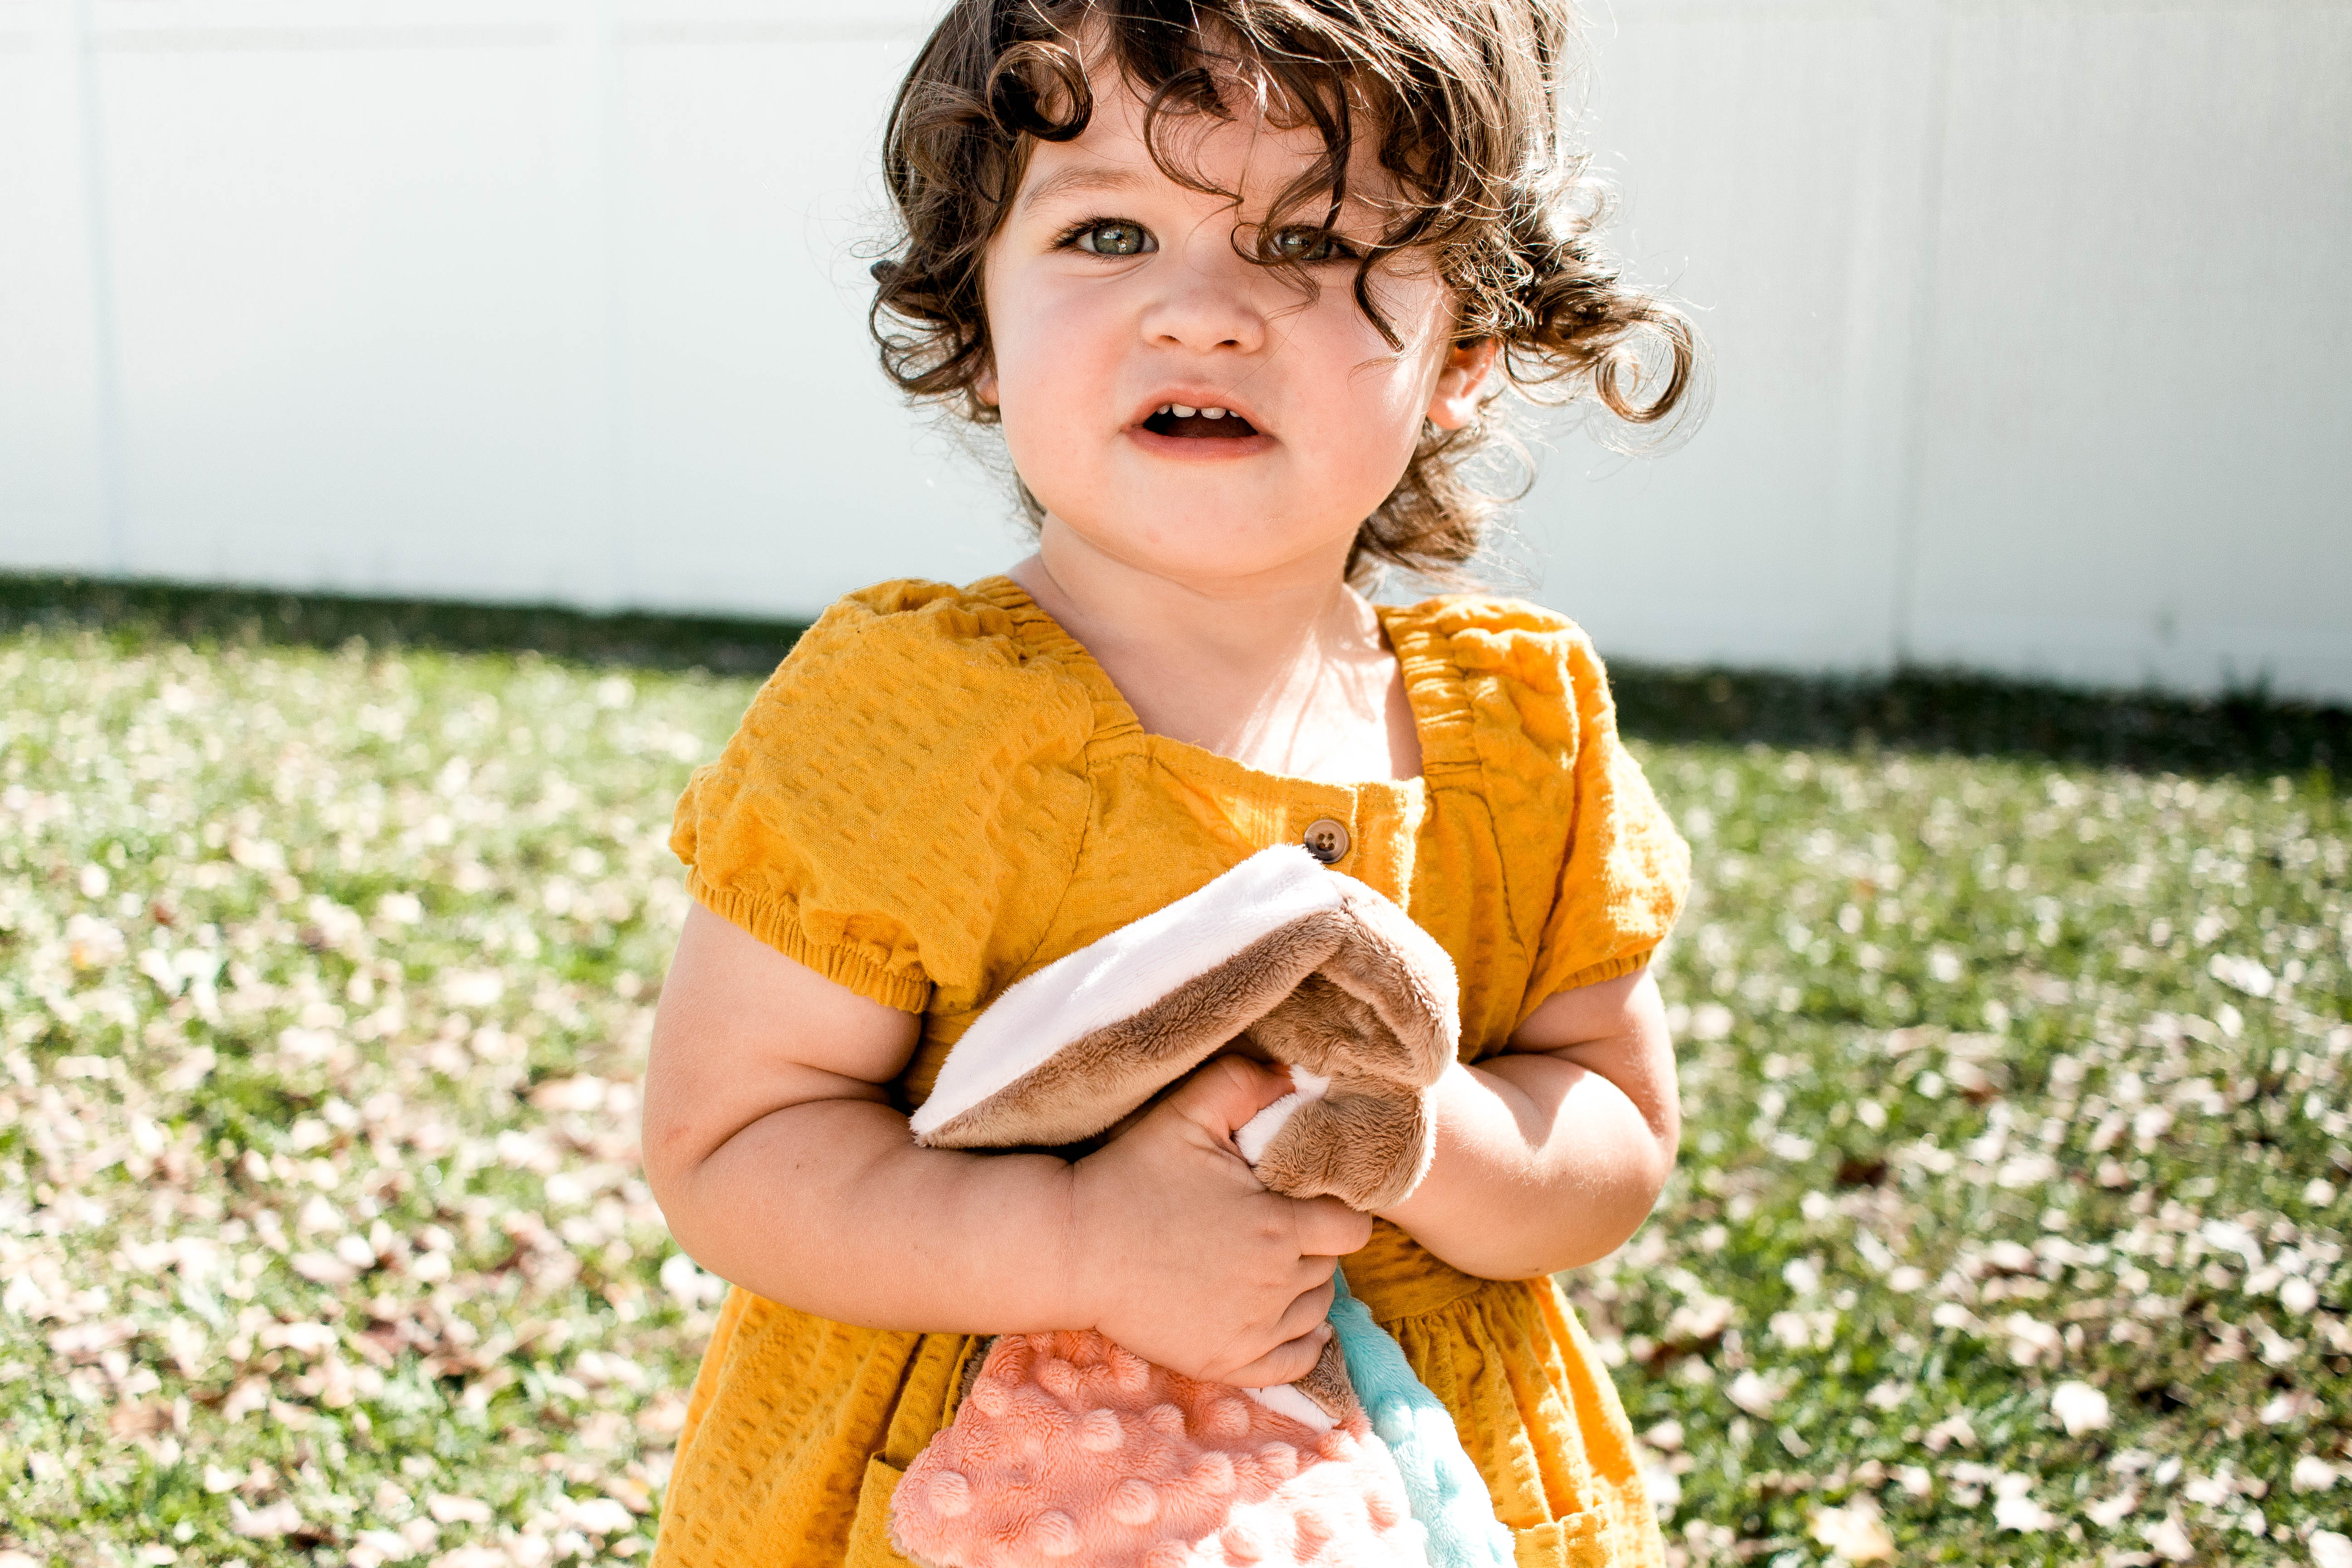
And with that you’re adorable little cuddle bunny is finished! Make sure you give it to someone special who will immediately check the quality and strength of the hand sewing like little Ellie did.
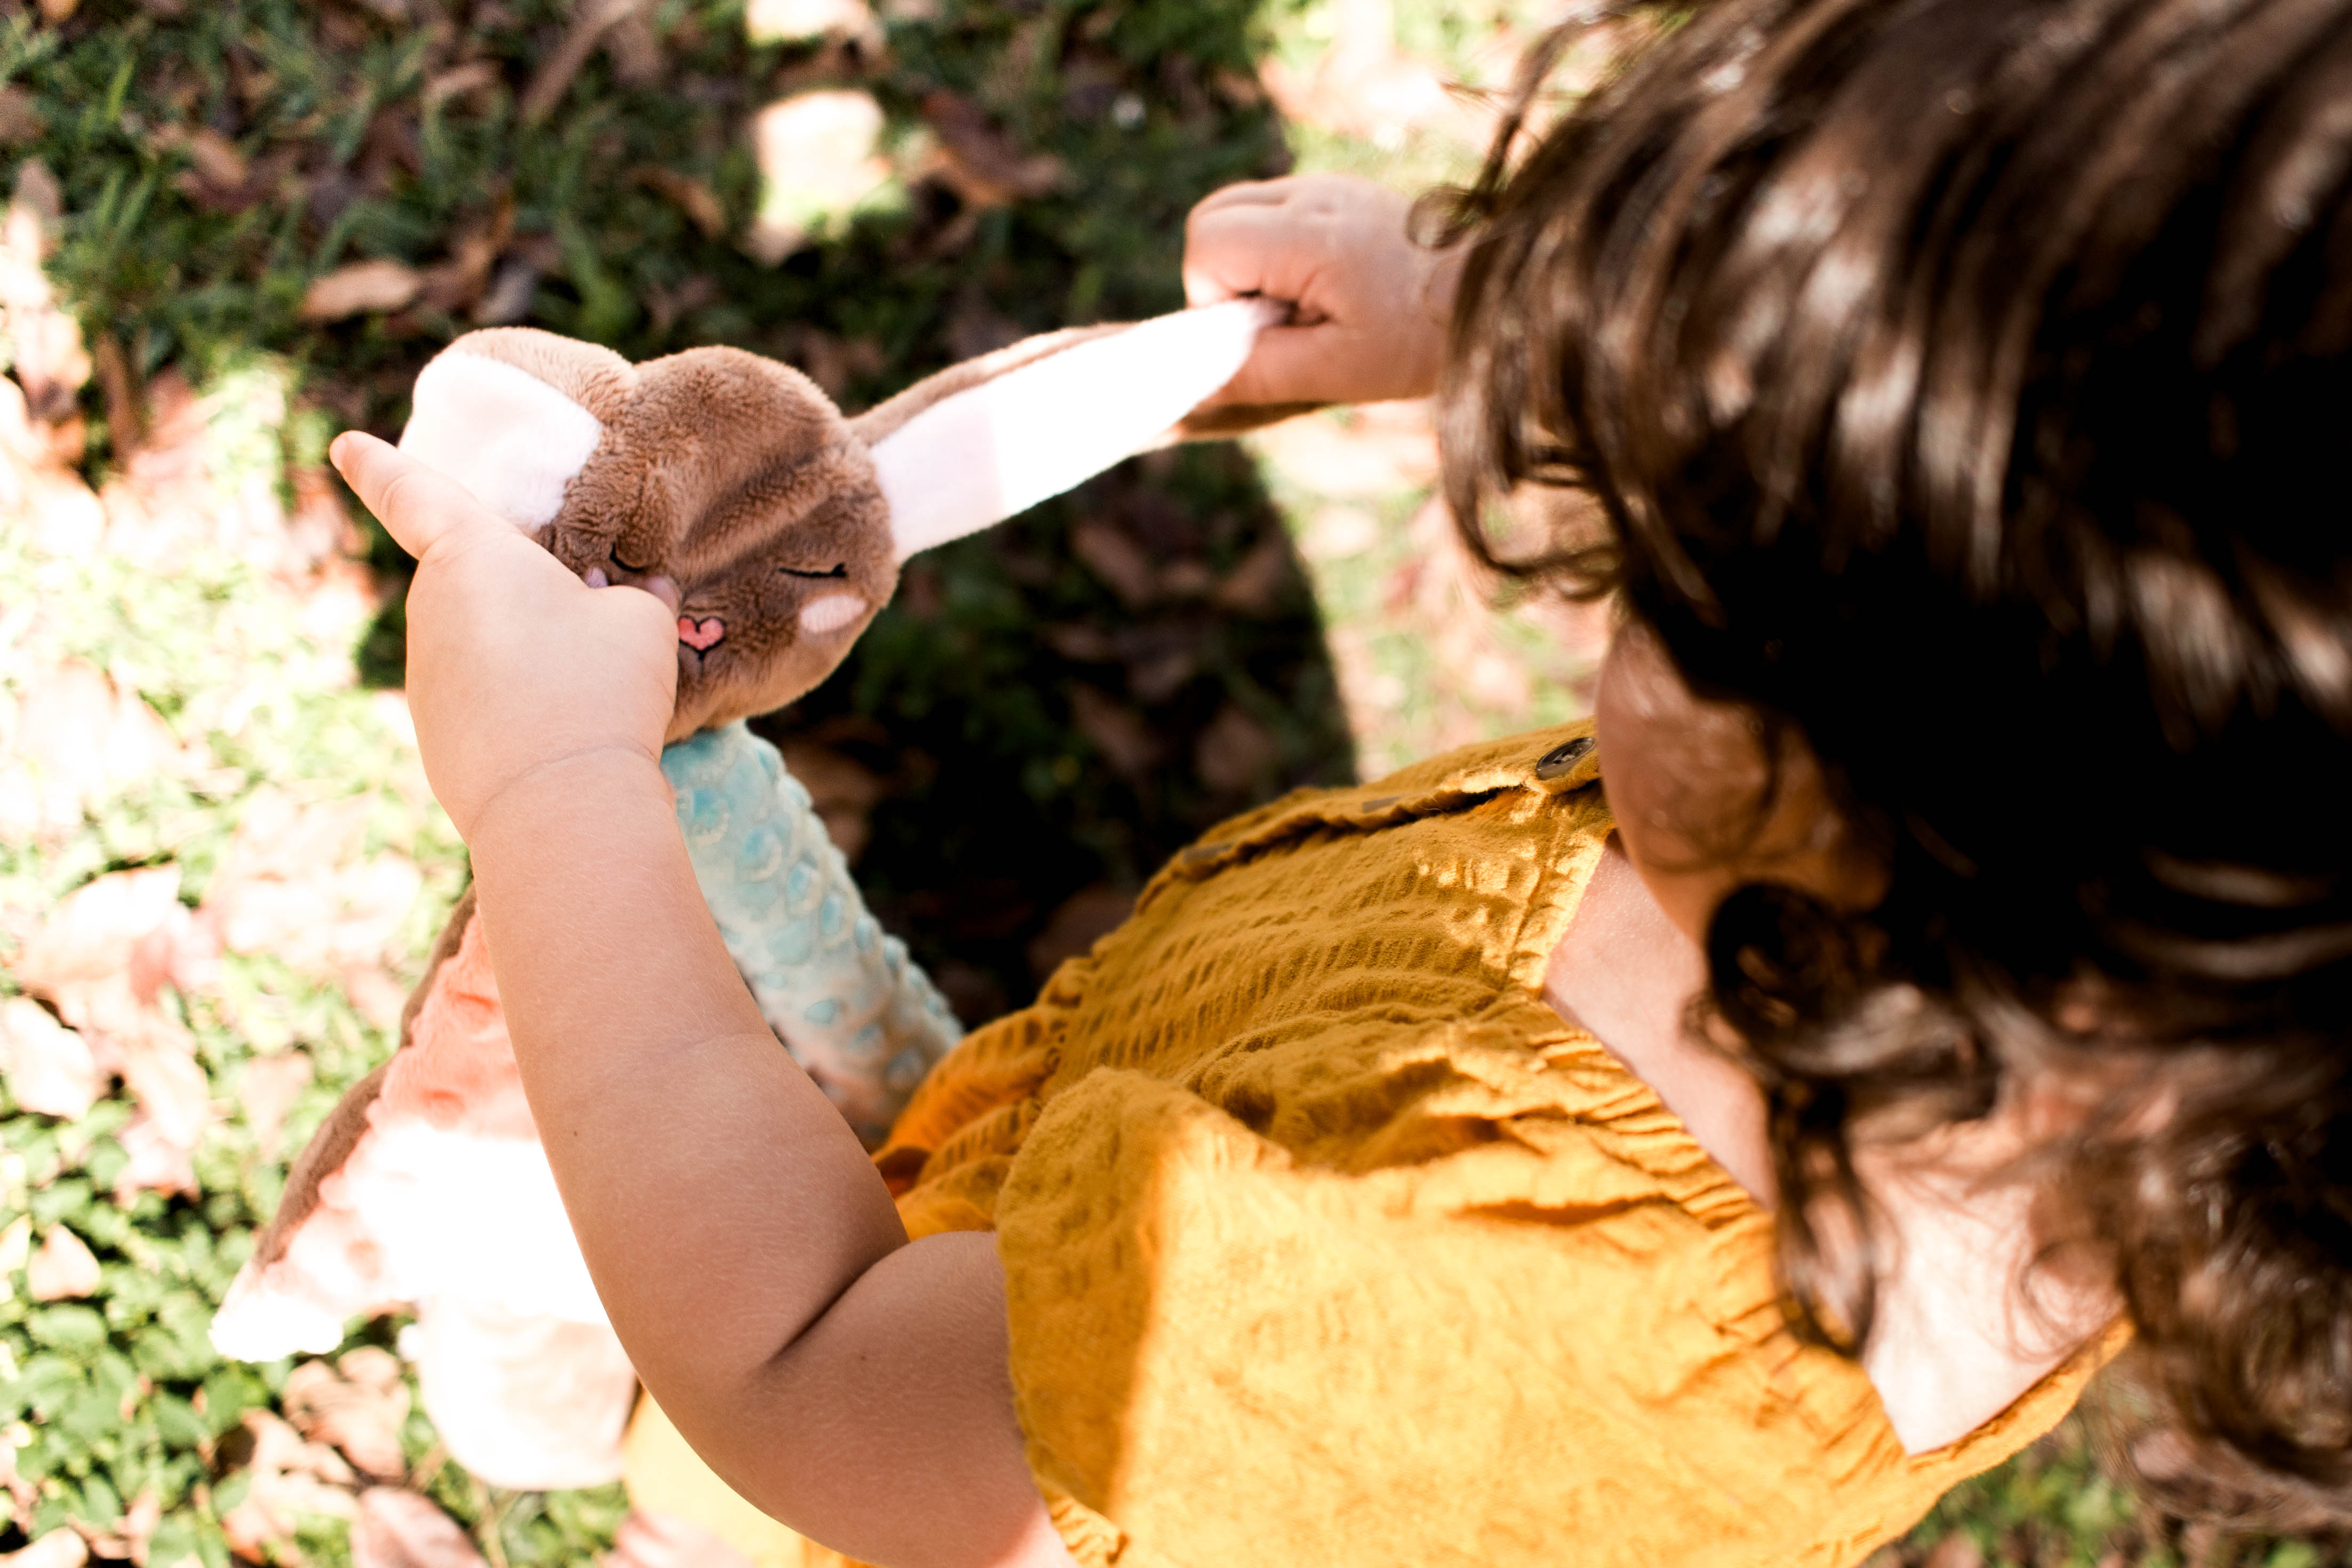
Squeeze tests are also a must as the final inspection.
And that’s it! An adorable little bunny for some bunny special in your life.
Want to learn more about machine embroidery? Join my machine embroider-a-long: The Orange Peel M.E.A.L.! In this 6-week machine embroider-a-long we will create a fun and easy tiling project! This machine embroider a long (Or M.E.A.L. as I like to call it) is appropriate for every skill level from scared newbie to confident embroidery expert and will feature many ways to finish your embroidery project. The Orange Peel M.E.A.L. will have lots of live events, guests hosts and over a dozen giveaways from beloved sewing brands OESD, Aurifil, String and Story, Paintbrush Studio, Daylight and Schmetz!
Follow @ToughKittenCrafts on Instagram for more information on how to win and sign up for the M.E.A.L. right here to ensure you don’t miss a single Instagram live or sponsor giveaway.
Don’t forget to tag @BERNINAUSA and @ToughKittenCrafts if you make this bunny and share it on Instagram. I love seeing your versions my projects and I love re-sharing them on my Instagram.
Can’t wait to see what you make!
Used Products


What you might also like


One comment on “Machine Embroidered Minky Cuddle® Bunny”
Leave a Reply
You must be logged in to post a comment.

Hey Kate!!
I love this project. It’s so cute, and I have some cuddle that I should use and not hoard, LOL!! Thanks for this project.
Kymona