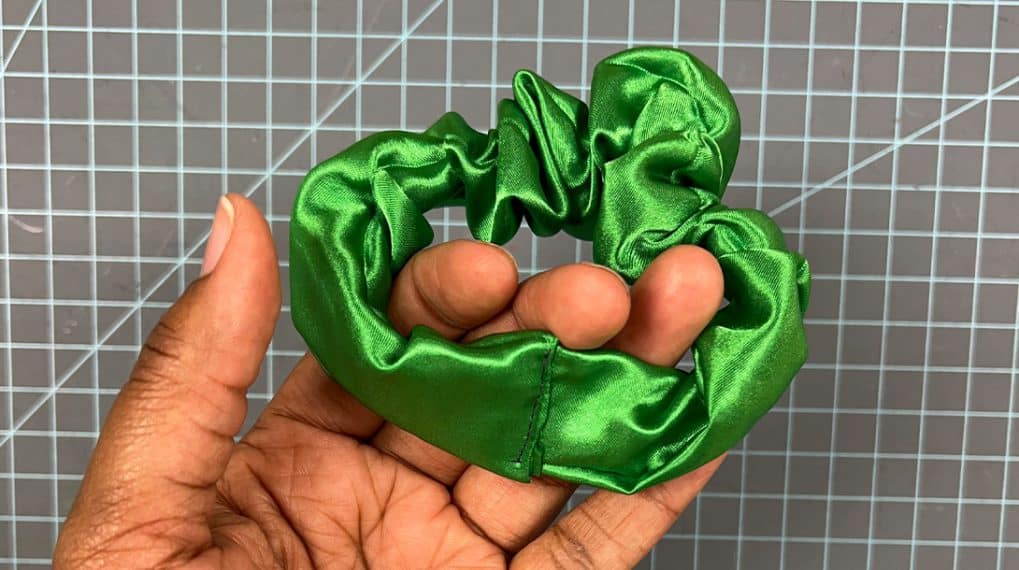
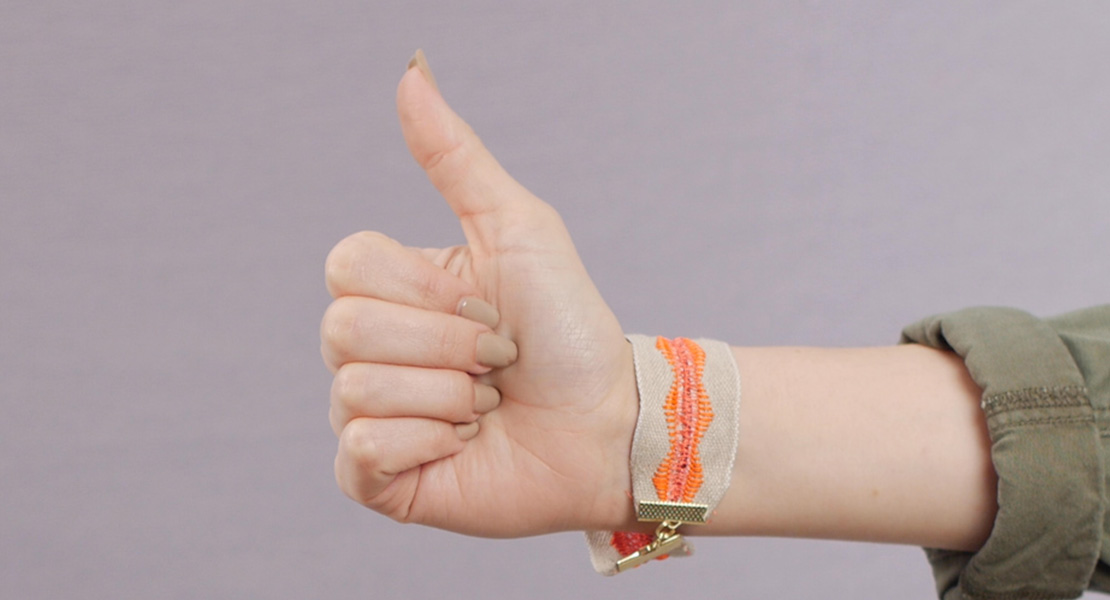
Holiday Hair Gifts, Part 1: DIY Heatless Curling Ribbon
With the holidays just around the corner, it’s a great idea to start stitching for friends, family, and even craft fairs. This two-part series is designed for gift giving to your friends with long hair. Part one is a super easy serger project that doesn’t look like much just sitting by itself, but it magically transforms straight hair to wavy overnight. Today I am teaching you how to use your serger to make a heatless curling ribbon.
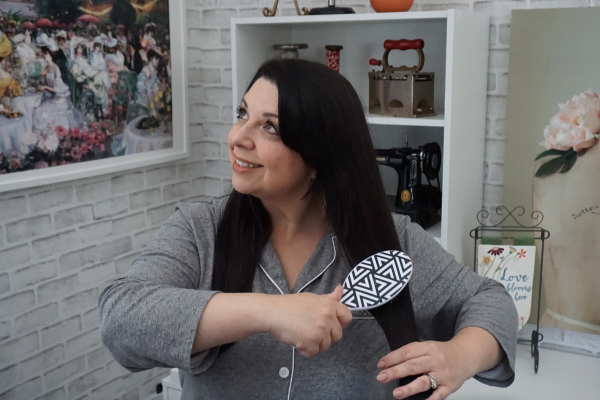
Hello my Sewing Bees, my name is Sue O’Very owner of Sookie Sews and BERNINA Expert. You can find me on Instagram at @SookieSews and my website SookieSews.com where I have hundreds of machine sewing patterns, embroidery designs, and In-the-Hoop projects. Ok, let’s get stitching.

What is a Heatless Curling Ribbon?
A soft plush strip of material you wrap slightly damp hair around at night, sleep on it, wake up, unwrap, and have a head full of mermaid wavey hair. The plush material we are going to be using is Shannon Fabrics Luxe Cuddle®. There are all sorts of different embossed versions on this, the one I’m using is the Rose emboss. I love this material. It is fun to sew, serge, and even embroider—try it, you’ll love it too.
Materials and Supplies to Create a DIY Heatless Curling Ribbon
Measurements are Width by Height
- (1) 5″ x 60″ (or width of fabric) Shannon Fabrics Luxe Cuddle®
- (4) Mettler Seracor serger thread
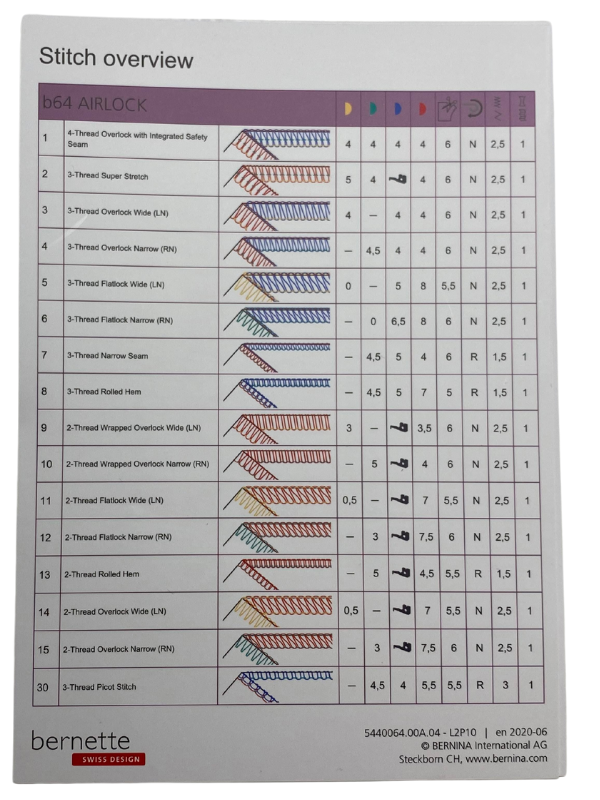
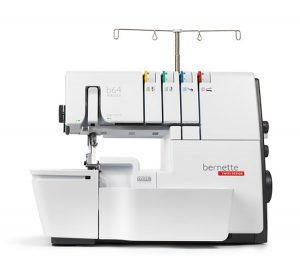
- Serger (I used my bernette 64 AIRLOCK)
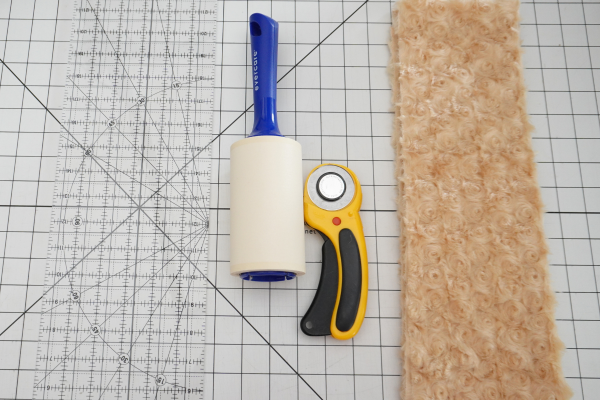
- Rotary cutter
- Ruler
- Mat
- Thread snips – Sookie Sews
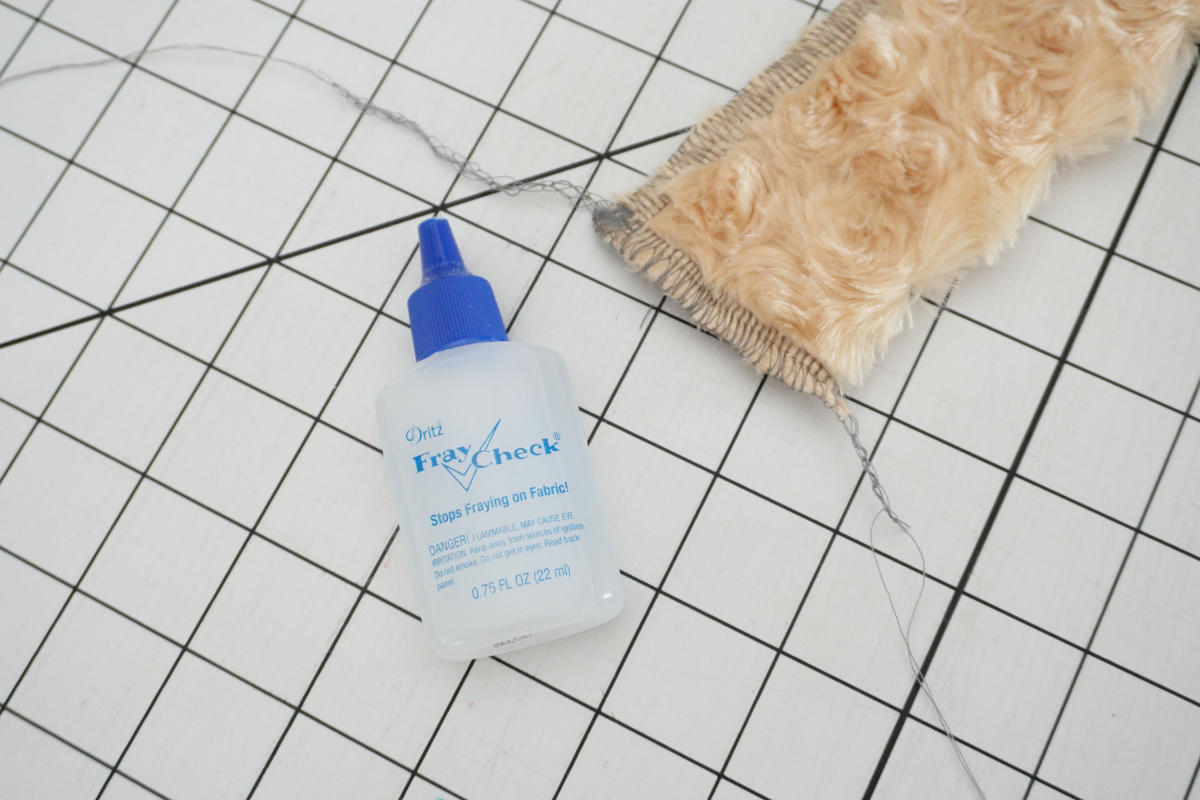
- Fray check
- Lint Roller
- Optional Lint Magnet
- (2) Bobby Pins
- (2) Ouchless elastic hair ties
Instructions to Create and Use a DIY Heatless Curling Ribbon
Steps to Serge
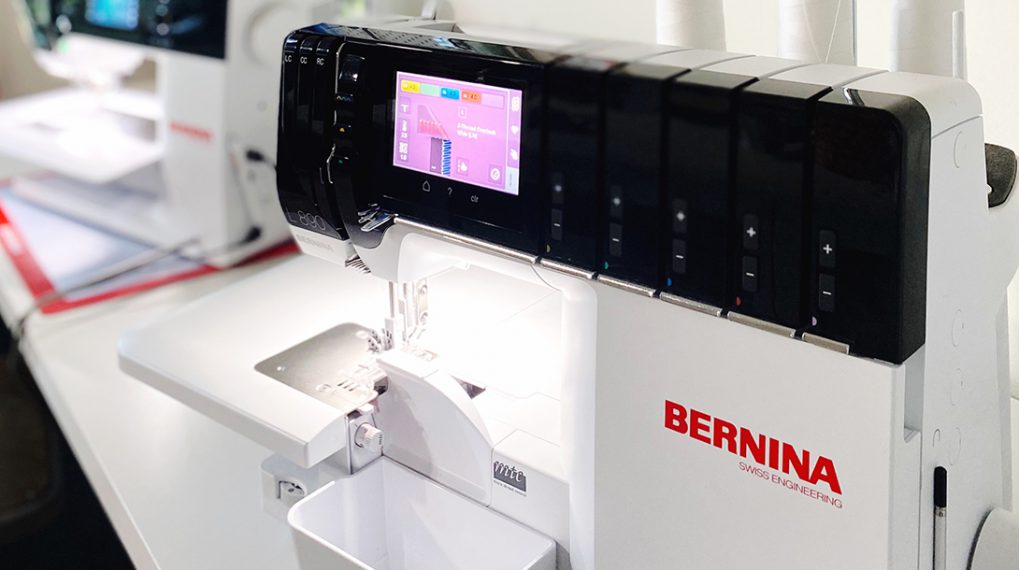
- Set serger up with a 4-Thread overlock with serger thread in the loopers and needles, width at 6.0, length 2.5, differential feed to 1, and tensions all at 4 except the lower looper is at 4.5. Check the user manual for how to thread.
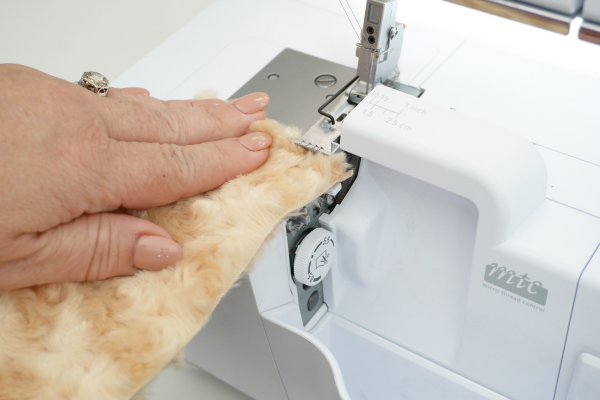
- Test the stitch with two pieces of fabric with wrong sides together and place on the edge of the throat plate cutting off just a little of the raw edge, about 1/8″. Adjust tensions, length, and width as needed. Mine was perfect on the first try.
- Cut the fabric from Luxe Cuddle®. Use a rotary cutter, ruler, and mat. When cutting, use a lint roller to clean up the cutting mat and your workspace. You can also try out the Lint Magnet to clean up the rotary mat.
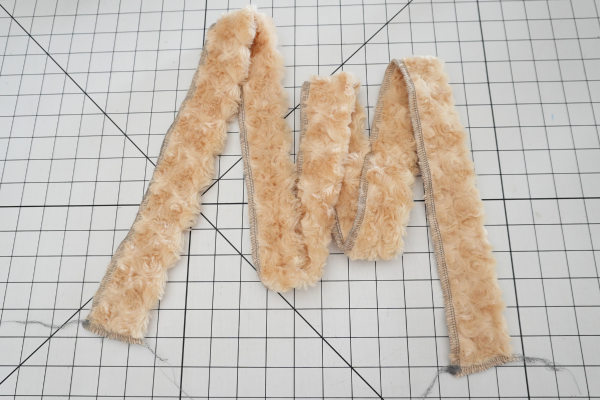
- Fold the long piece of Luxe Cuddle® in half wrong sides together lengthwise and serge a little of the raw edge, about 1/8″, the entire length of the fabric strip, and clip threads at the end.
- Serge the two short ends and clip threads at the end.
- Put a dab of Fray Check on all four ends and let dry, refer to bottle for the time it needs to properly dry.

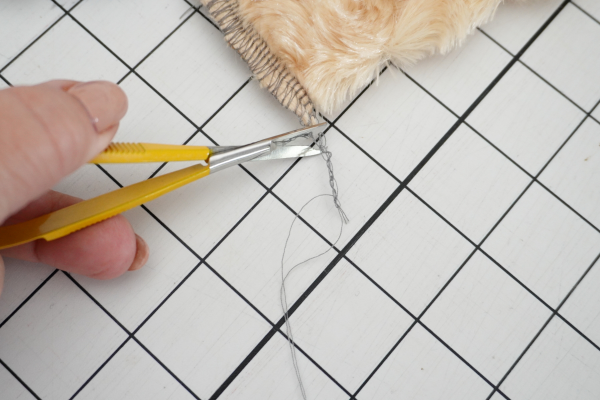
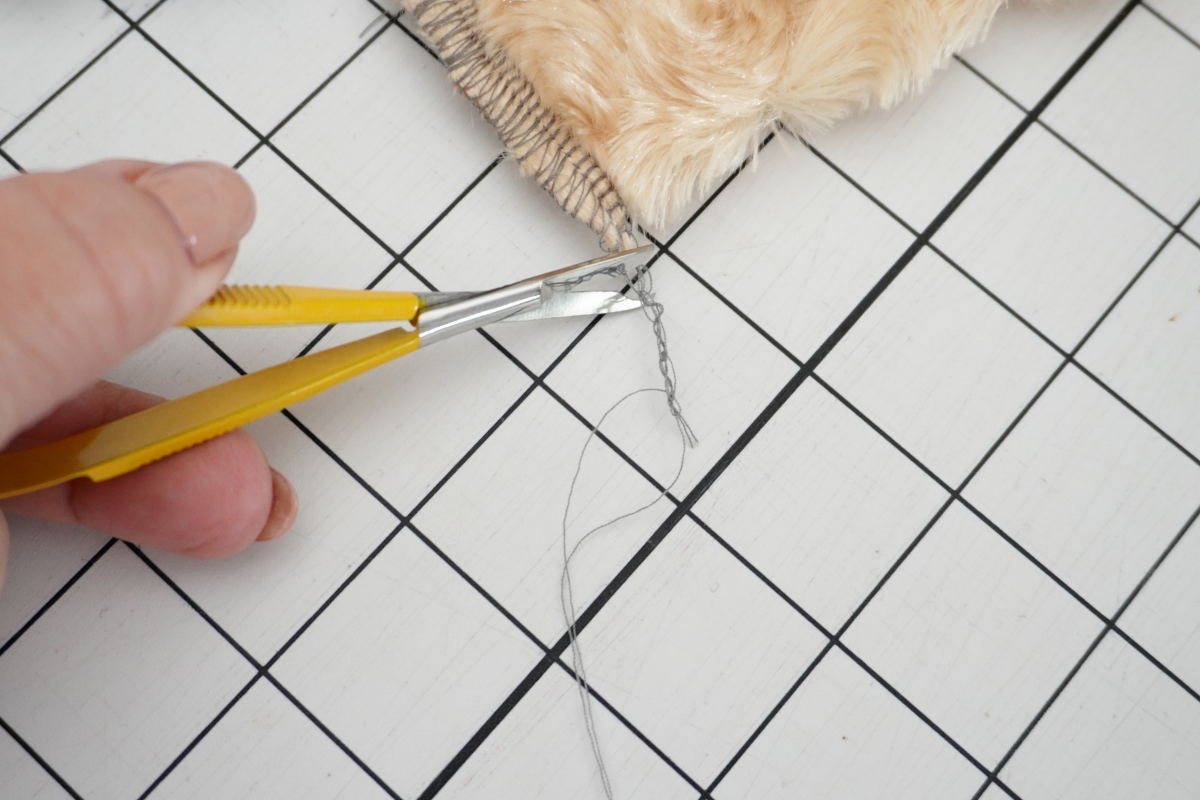
- Clip the thread tails. Great, you have just made a Heatless Curling Ribbon, now to learn how to use it and get lovely wavey hair.


Steps to Use a DIY Heatless Curling Ribbon
Now that you have the Heatless Curling Ribbon stitched up, here is how you use it.
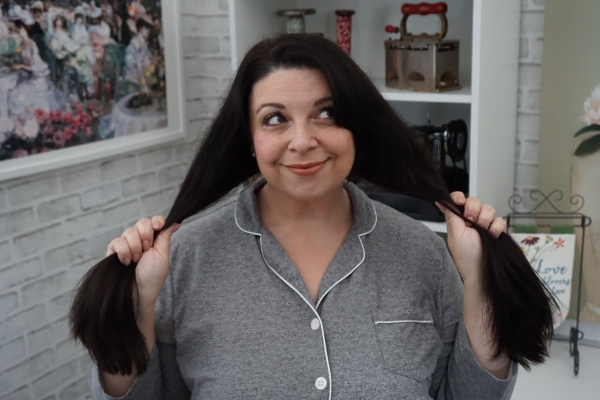
- Dry hair until it is slightly damp and brush smooth.
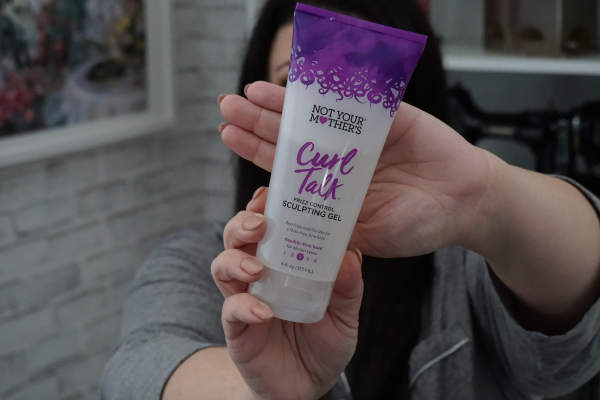
- If you would like to add some curling gel, use a dime-size amount from the roots to the ponytail level but not on your scalp.
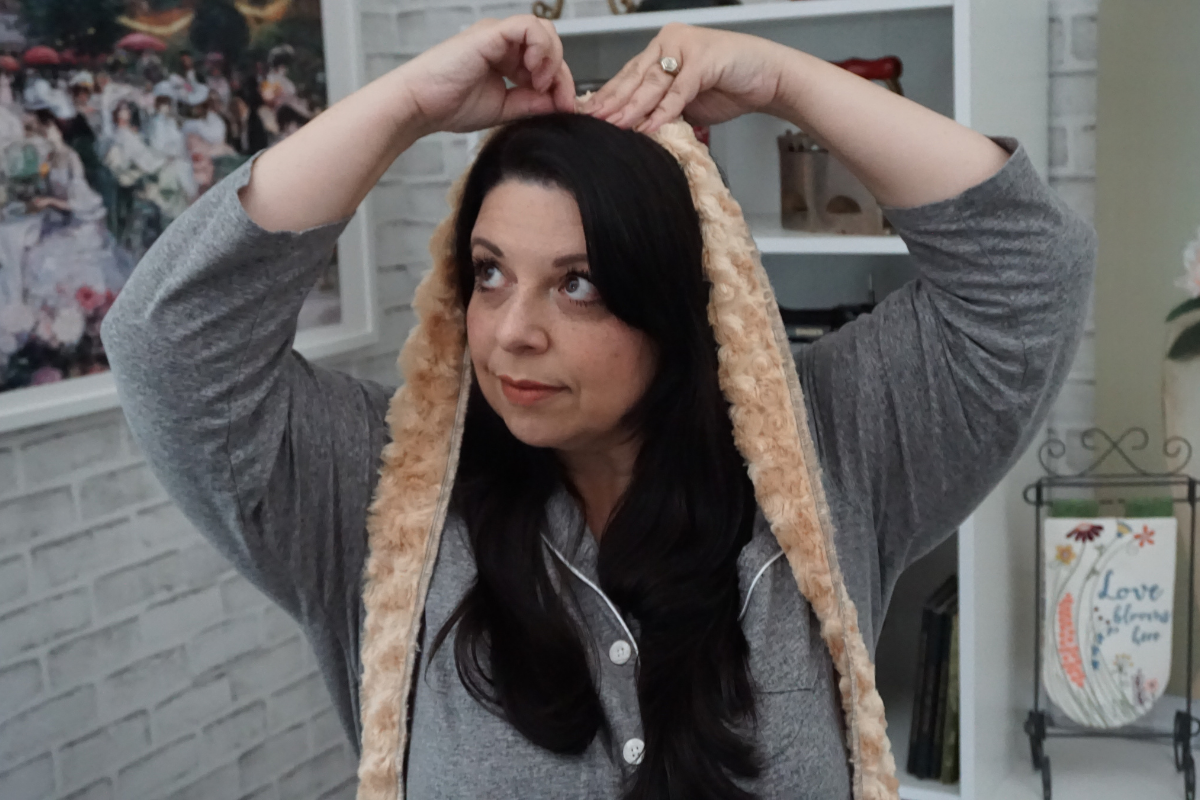
- Section your hair in two parts and place them towards the front of your shoulders.
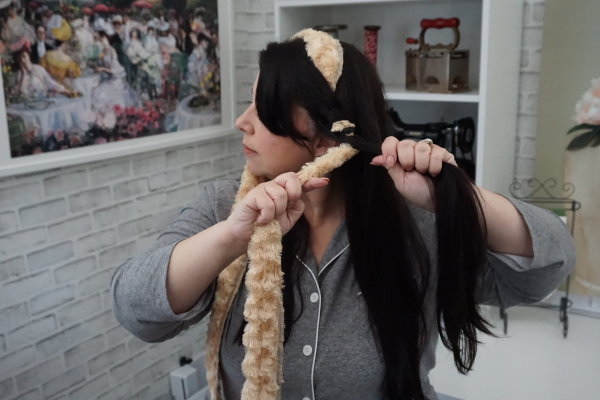
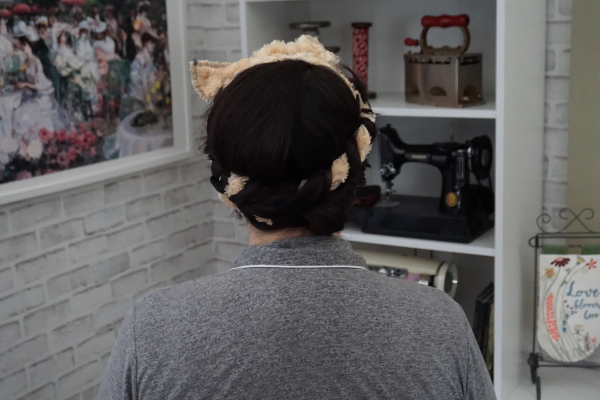
- Place the center of the Heatless Curling Ribbon on top of your head and criss-cross
Bobby pins to hold it in place.
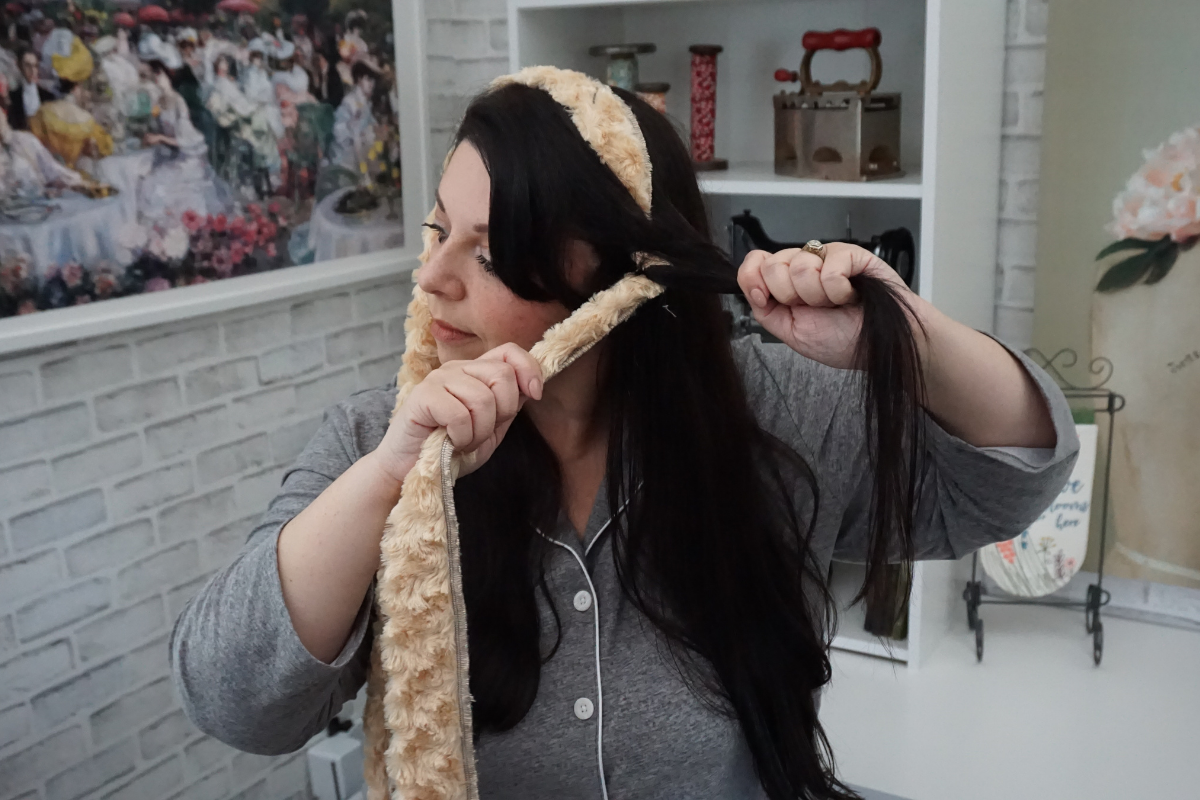
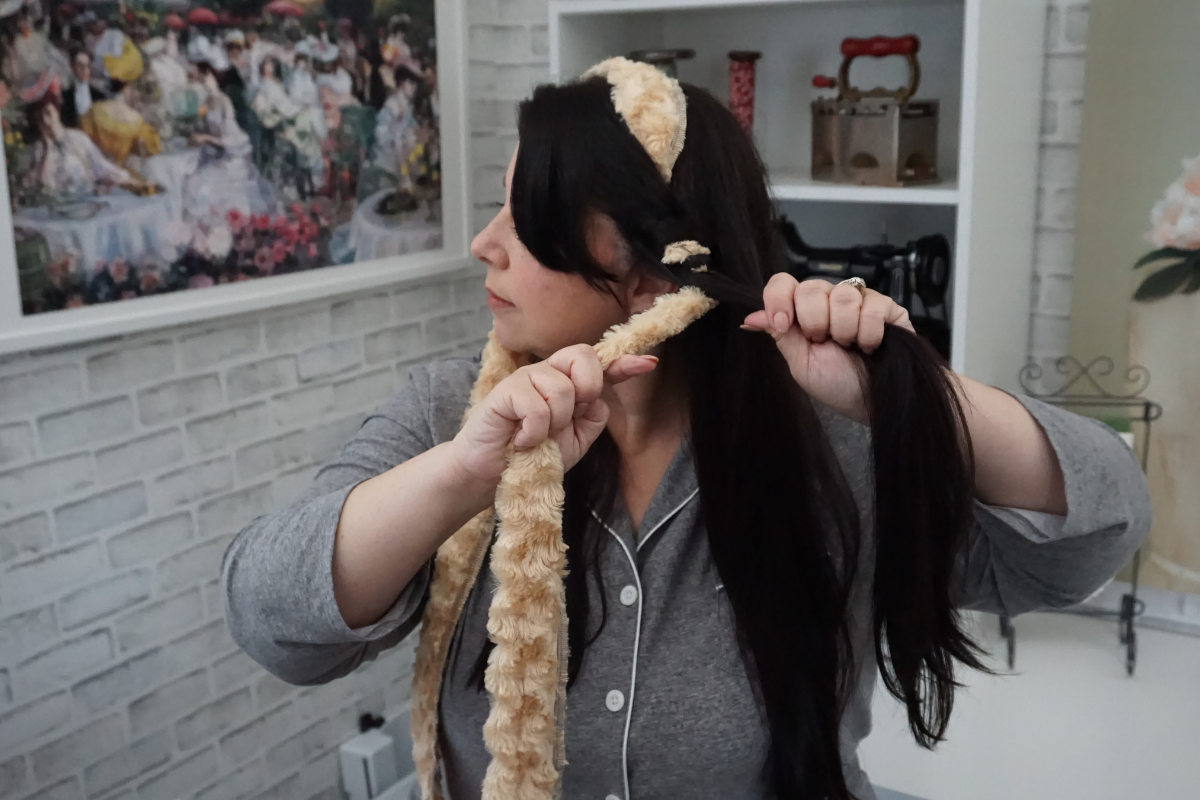
- Choose one side to start off with. Select about a 1″ section at the top of your head and wrap it around the Heatless Curling Ribbon one full rotation from the front to the back to the front again.

- When you reach the front with the first section at the front, select a second section, about 1″ wide, and add it to the first section wrapping from front to back to the front again.
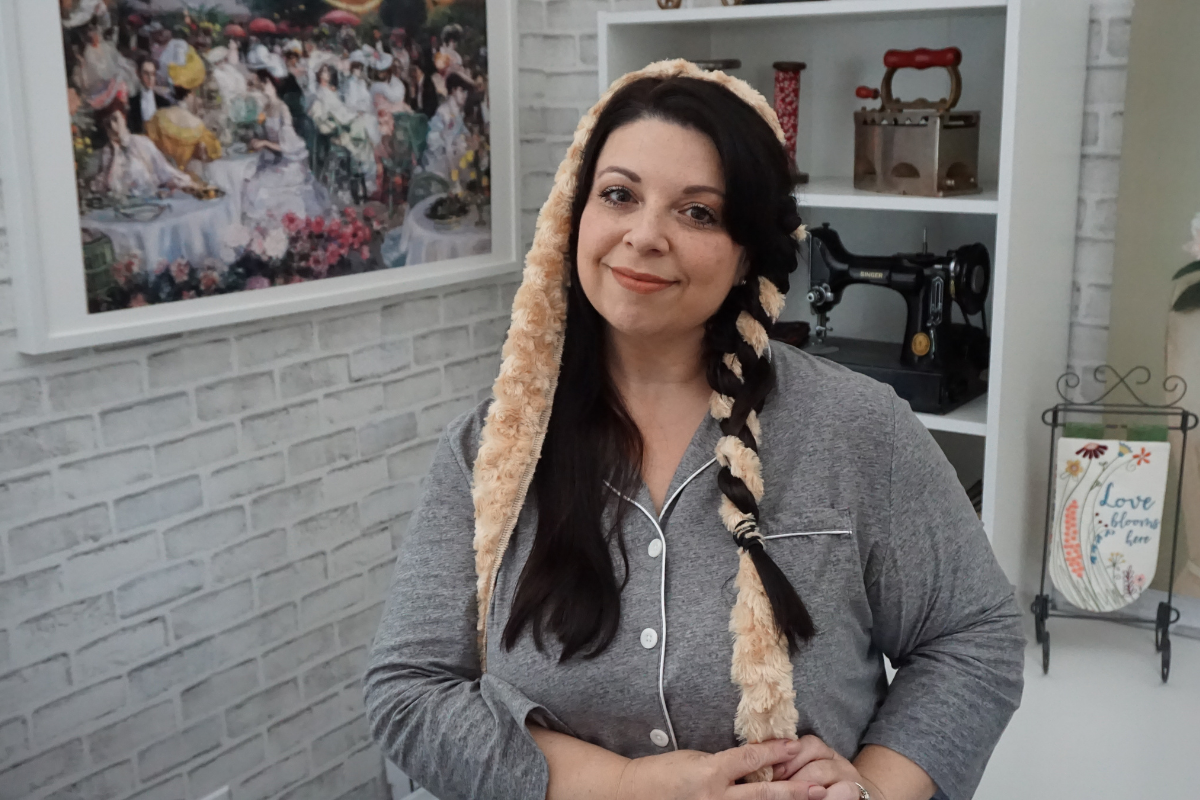
- When you reach the front with the first/second section at the front, select a third section, about 1″ wide, and add it to the first/second section wrapping from front to back to the front again. Keep repeating this process until you are at the bottom and wrap with a hair tie around the Heatless Curling Ribbon and remaining hair.
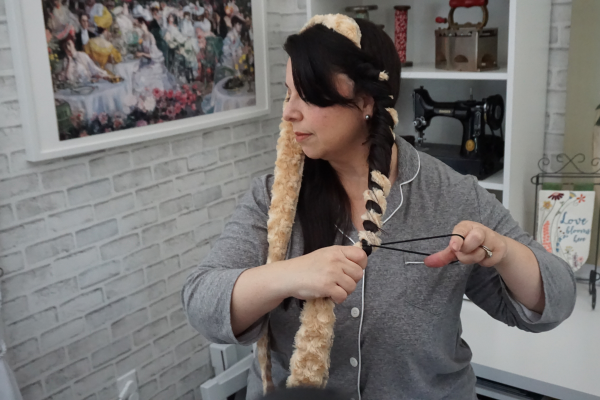

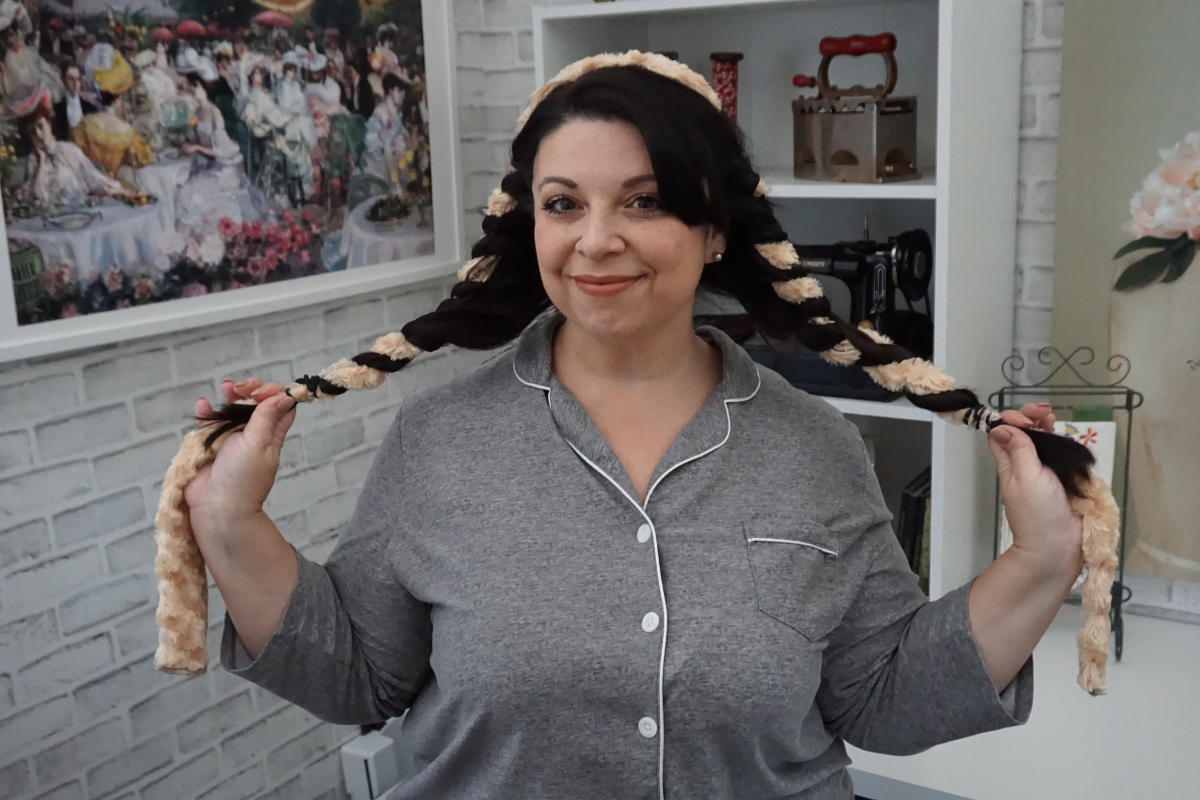
- Now on to the other side of your head, repeat the same steps as above until your hair is all wrapped and there is a hair tie around the bottom securing it.

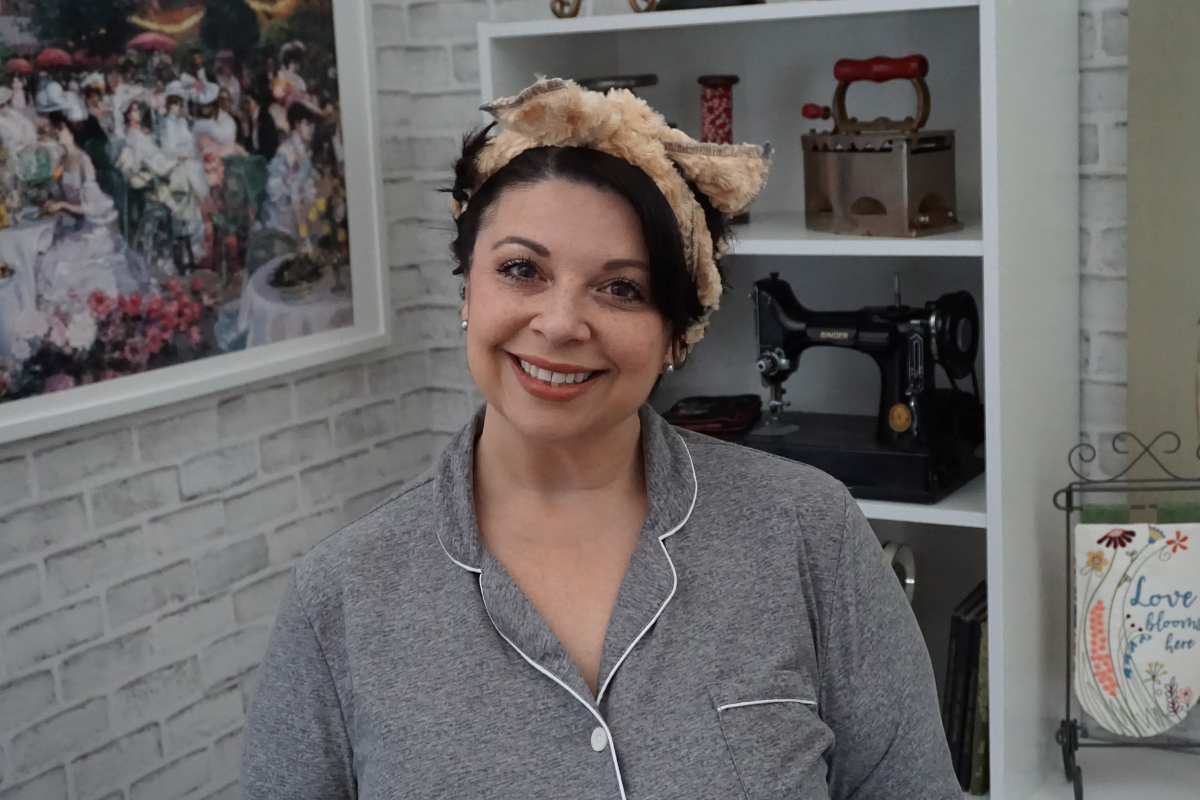
- When you are finished and both sides are wrapped and tied at the bottom you can either leave them to hang while you sleep or tie them in a bow at the top of your head, this will depend on how long your hair is. I find that tying them in a bow at the top of my head is most comfortable while sleeping. Now, lights out, it’s time to sleep.

- When you wake up, untie the bow and remove the hair ties at the bottom and the Bobby pins at the top.
- Gently pull on the center of the Heatless Curling Ribbon at the top of your head to release your hair. You’re all finished, now style your hair as desired.


Watch the video to see it in action!
I hope you enjoyed this easy serger project and got some lovely curls. Keep in mind that everyone’s hair is different give it a try and do some trial and error. The first time I used mine, it took a couple of tries to get really comfortable with it. When you make yours, please snap a before and after shot of your hair and tag me @SookieSews and @BERNINAUSA!!
Used Products
What you might also like


101 comments on “Holiday Hair Gifts, Part 1: DIY Heatless Curling Ribbon”
-
I’ve been sewing several memory pillows for friends who’ve lost loved ones this past year, but as soon as I’m done with them, I’m going to make a heatless curling ribbon like Sue’s! Love those easy curls!
-
🙂 Can’t wait to see yours. Have a happy holidays
-
I have been making ByAnnie bags, the pattern Easy Does It, for Christmas gifts. I have also been making Christmas gnomes.
-
Just finished a hexagonal quilted table topper.
-
At the moment I am making Christmas decorations. And together with my 6 year old granddaughter we are maki g a silent clock book.
I embroider de click and times, and she and I paint nice drawings on the sheets.
After that I sew a baisband all around the double glues pages.
Make 3 buttonholes on each page. And from the same baisband I make loops which go through the buttonholes.
She loves her silent books.
She loves this little helper, and hope we win. -
I embroidered Christmas themed coasters for gifts this Christmas. From OESD with the words Blessed, Wish, Joy, and Merry! They turned out really nice. Thanks OESD! I love free standing lace and embroidery in the hoop.
-
I have been quilting other peoples quilts, but I have made a small Christmas quilt for myself and my Christmas monthly circle for my wall hanging from Shabby fabrics. Also made my mom an Easter runner
-
-
I have many things on my holiday sewing list – fleece hats for charity, placemats for my table, hand puppets for my grandsons; and other non-sewing craft items for my grandsons to make when they come to visit.
-
I’m making lace Angel ornaments and finishing a Christmas table runner. My hair too short for the curling ribbon. :-((
-
For the past 7 years or so I have made a Christmas table runner for my baby sister. This year I decided to dress her holiday table with pretty placemats. It was a good challenge for me and a nice change for her. Merry Christmas! ??
-
I love this blog, so many great ideas for everyday and the holidays. Thank you for all the inspirations!
-
I’ve made “Love Blooms Here” tabletop banners for my three sons and families, personalized Christmas tree ornaments (OESD Holly Jolly Ornaments & Accents Collection #12836) for all 13 family members and adapted “Christmas Rules” (OESD Holly Jolly Embroidery Collection #12836) into an ITH tabletop banner using V8.2 software, also for my three sons. Your tabletop banners are an inspiration for using different embroidery collections and software to create personalized year-long family gifts. Thanks for such a great idea!
-
Awesome Alberta! Good luck on winning and have a wonderful holiday season ~ Sookie
-
-
I’m sewing quilts, mug rugs, stockings… the list goes on. The easier question is “What am I not sewing?” ? I’m sewing everything!
-
I made a Christmas tree skirt for my son. Gave it to him at Thanksgiving so he could take it home and put it around his tree. I have a table runner I need to finish. Love Christmas sewing!
-
I’m making drawstring gift bags, embroidering kitchen towels and making in the hoop tag toys
-
Oh this looks interesting. I’ve been looking for something to do with my hair!
-
Happy Holidays! I just wrapped up the small quilt
called Pirouette Table Topper which I utilized
templates (rulers) to quilt. Next up is Woodsy Noel
which needs quilting which has evergreen trees and Santas. -
Love it! Just Join OESD SPREE CLUB, so I’m making Christmas presents. My nephew is a Dino kid so making Dino the dinosaur.
-
Happy Holidays!
I am embroidering the Christmas Village! -
Sew much to do, so little time ;o) I just finished sewing and embroidering an iPad case on my Bernina 830 yesterday, now let’s hope it fits.
-
I’ve been embroidering coasters and Christmas ornaments using faux leather, sparkly vinyl, cork and fabric which will be gifted. I’ve also got a few quilts in the works. Sew much fun to stitch on my Bernina 770QE!
-
I’m making several ITH trays. One for everyone on my Christmas list!
-
Making sleeping bags for all the kiddos!
-
Christmas napkins and Christmas dress for my granddaughter
-
I’m totally busy embroidering FSL Christmas ornaments. Have to make about 85 to be mailed to all my friends worldwide – many of them in Europe (mostly Germany), many in the USA.
😉 🙂 -
I sewed 20 bookmarks for friends in my knitting group.
-
Working on multiple projects, bowl cozies, Christmas ornaments, and baby item.
-
This year I’m making new place-mats and a table-runner.
-
Ornaments and towels
-
Love this idea. So soft against your head.
I am making pjs, ornaments, and baby dolls.
Would love to win bobbin. -
First up is designing a frozen-like dress for an 18” doll for my great-niece who is 3. Then probably coffee cup cozies for our sewing group.
-
Bobbin the elf is just waay too cute not to make.
-
I actually am taking a break. I organized my sewing room and am relishing how neat it all looks. At least for now 🙂
-
I’m sewing quilts this holiday season.
-
This year was bowl cozy’s. But since I just can’t get into making Christmas gifts in the summer, I have already started next years gifts which are Christmas lap quilts or as my husband called them “tv quilts” the perfect size to keep warm while watching tv
-
I am making a wall hanging for my grandbaby’s room. Also an embroidery growth chart
-
I have been embroidery my first Freestanding Nutcracker!. I had so much fun making pumpkins the last 2 months that I decided a nutcracker would be wonderful to add to my collection this Christmas. If I finish the nutcracker, the freestanding Christmas tree might just get done as well. Having an embroidery Christmas here in PA!
-
I am sewing and embroidering lots of things, but currently mainly stockings.
-
I am working on Christmas gifts, pillows towels, and rug mugs.
-
I have been making lots of mug rugs and pot holders for gifts.
-
I made a table runner for a thanksgiving and working on an embroidery tile scene—maybe I’ll finish in time for next year!
-
I’m sewing a yummy flannel throw for my little brother (age 56!). He lives on the 10th floor and faces the River so he gets pretty cold. He never asks for anything and is generous to a fault. A very Christmas quality I love about him.
-
Free standing lace ornaments
-
I am embroidering sweatshirts and kitchen towels and making a quilt.
-
This year I actually got a head start and gifts to Europe have been shipped and unbelievably were delivered. Now working on some Free Standing Lace ornaments.
-
I’ve been making aprons for my 2 year old grand daughter
-
Been sewing pillowcases this season instead of using wrapping paper for gifts. Only (1) quilt this year for youngest grandson moving out of his crib to twin bed. And have long-armed a few charity quilts Just bought a Bernina 570 with module so need to learn embroidery
-
I am sewing two canvas bags for my daughters and a tote bag for my granddaughter to carry to ballet class. I love the heatless curling ribbon and may have to add those as stocking stuffers for all of my girls!
-
Love Bobbin the Elf. Working on quilting a quilt and piecing another top. Need to work on several stockings.
-
Finishing 3 quilts for Christmas gifts and a donation quilt to be raffled for our local Children’s museum!
-
I’m sewing some reuseable bags for grocery shopping, a yarn bag, aprons, oven mitts and Bobbin the Elf, at least that’s what I’m planning. 🙂
-
I love the hair embellishments. I think my granddaughters would love them. I’m sewing and quilting quite a bit, as always, for the season. I’m completing a new baby quilt that’s to be gifted Christmas Day. I am sewing and embroidering a saying on 5 reading pocket pillows, again for grandchildren. I am making mugrugs and coasters. Actually, I’m doing all the prep work and then when I’m at my daughters house the week before Christmas, her 9 year old and I will complete them for her to give as gifts. Her sewing machine was a gift last year and she has learned so much. Thank you for the opportunity to win the elf project!
-
For the holiday season I have been sewing hot pads to give as gifts. I also have sewn 2 quilts for Christmas gifts. I love my 790 plus
-
I’ve used my V8 software to create personalized Christmas Stockings to give to family & friends. I’m hoping Santa will bring me V9.
-
I’m mostly making embroidered ornaments but I’ll be making time for this curling ribbon!
-
Holiday wall hangings and mug rugs!!
-
I have been very busy! I have embroidered the entire Christmas Village!
-
This year I am trying to finish several long overdue UFO’s that are for Christmas presents. But I sneak in time for a few Christmas ornaments for me! ????
-
I have been making lace Christmas ornaments for Christmas presents for several years now and am just finishing mine this week.
-
I am making several OESD “Warm and Cozy” mug rugs for gifts, they are fun to make and adorable.
I would love to make the Elf!, saw him in person at my local Bernina dealer and he is too cute.
It’s been a few years since I have made anything for the holidays and I am having so much fun.
Thanks for the giveaway! -
I am working on a table runner and a small door quilt with embroidery. Love to make gifts at Christmas time. ????
-
I’m sewing bowl cozies and my 770 is handling all the layers beautifully!
-
I am making stockings, baskets, and aprons for my family.
-
I am making a few aprons and wine bags.
-
PaintWorks Christmas Cards. They are all done now. Happy Holidays!
-
Hi All, I have the Bernina 590 with embroidery. I am making cork fabric wristlets with a key ring. Personalizing with embroidered names of the recipients. Found iridescent cork fabric at my local quilt shop. Fun!
-
I love this project. I have long hair that is as straight as a yard stick.
I’m sewing table runners, stockings, journal covers, aprons, and on and on.
I think Bobbin the Elf is soooo cute, Great for Elf on the shelf! -
I am using my L890 to do a rolled gem around potholders & tablerunners & hot plates. Works beautifully! Also making lap quilts with a Christmas panel. Fun gifts!
-
I am making ornaments, Christmas trees, and table runners and having a blast!
-
I’m sewing Christmas ornaments, gifts for friends, Christmas placemats.
-
I’m working on a big quilt and some small gifts… not many projects this holiday season, but a big one for sure
-
I’m a beginner at embroidery. I need a project to jump start from. Maybe this will be the one!
-
I’m sewing lots of coasters and trivets for the season!
-
I love making FSL ornaments. So much fun!
-
I’m working on OESD “Starry Night”. I just got my new improved embroidery module. It is fantastic! This is the perfect project for it.
-
My daughter and I both have long hair and the heatless curling ribbon will be great for both of us! What fun and so easy! Thanks!
(And we really need an elf around our house!) -
Making pj bottoms, doll clothes, and doing machine embroidery.
-
Great tutorial! Thanks. I have been making some pot handle holders on my embroidery machine, easy and fun to make. I have also been making some mug rugs, purses and ornaments all on my embroidery machine.
Thanks for the opportunity to win this cute little elf. -
I’m working on 3 movie night quilts for nieces and nephews and running short on time! Love this heatless curling iron project!
-
making table runners and matching napkins. Learned these in a Bernina L890 class!
-
I am using my 770 embroidery machine to make various designs- such as dogs, coffee designs, Christmas themes and a whole myriad of designs; Put in an embroidery hoop of various sizes, decorate the edges, embellish, etc. Making for gifts and decorating. OESD is awesome!
-
I made lap quilts for my grandchildren’s teachers. My grandchildren loved this because I embroidered little messages from them to their teachers.
-
I am making a Christmas quilt. Had the OESD Silhouette pattern for a long time. Just transformed a sweatshirt with embroidery patterns from the OESD Cozy Christmas collection for a friend’s birthday. Unfortunately, there are never enough hours in the day!
-
I’m making ornaments & table runners. Thank you.
-
I made two sets of fabric baskets (three sizes) as gifts for family. I plan on finishing a dog bed that’s a cube. I just bought the nativity play set and 31 days of Christmas from OESD and am very excited to get started. Can’t wait for my vacation days! 🙂
-
I’m making Tool Wraps to put in cars in case of emergencies. They may also be used as makeup wraps, if ladies decide to use it that way.
-
Im making playing card holders for a family gift exchange. Thanks for the chance to win Bobbin!
-
I an making pillowcases on my serger and a tied blanket. I also have plans on serging a Christmas top for my Grandson
-
I am sewing embroidered stuffed ornaments. But after reading this post I’ll be making at least three of those mermaid hair curling ribbons !!
-
I am making Christmas pajamas for my first grandchild and making a quilt for her dad.
-
love we all sew, so many great ideas and how to instructions
-
I love this idea. It is so simple to make too! I will be making at least 25 to give to my granddaughters and a few friends. Thanks for the simply wonderful idea.
-
What I am sewing this holiday season is duck canvas drawstring gift bags that are lined. Also sewing up some fleece slippers for my granddaughter. Have Machine embroidered some T Towels for Santa’s Cocoa Bar and if time permits some PJ bottoms. So many ideas- never enough time! Enjoyed your curling ribbon tute- it’s always nice to have a fast easy project to add to your sewing list.
-
I’m sewing a play mat, a fleece blanket, a baby soft ball and a mantle scarf–if I can manage to stay on track!
-
I’ve been making donation quilts for vets in cooperation with my guild, and few Christmas items like Santa’s placemat for the milk and cookies we leave for him.
-
Thanks so much for posting these two projects. I know I will be making the curling iron holders for those on my list. Also may make the heartless curling ribbon—what a great idea! Mug rugs are also on my list!!
-
Cork purse for mom, fleece throw for grandma, 2 of these heatless curl wraps for my girls
-
I am sewing mermaid dresses for my two great nieces and their new dolls. I am also making a young friend an apron in her favorite colors. If time permits I am going to finish a tree skirt for one of my daughters-in-law.
-
Hello,
Learn more quilting techniques. Thanks ?
Leave a Reply
You must be logged in to post a comment.

Bobbin the Elf WeAllSew Giveaway
This giveaway is now closed. Thank you to all of our WeAllSew fans who entered! The winner(s) are being informed and will be announced soon.