DIY Wire-edged Ribbon

Did you know that you can make your own wire-edged ribbon using your overlocker? The process is pretty simple once you learn how to manage the wire through the machine. Use this technique and your leftover strips of fabric to create structured bows to decorate for all the seasons!
Materials to Create a DIY Wire-edged Ribbon
- BERNINA L 460
- Standard Overlocker Foot (with adjustable tape guide)
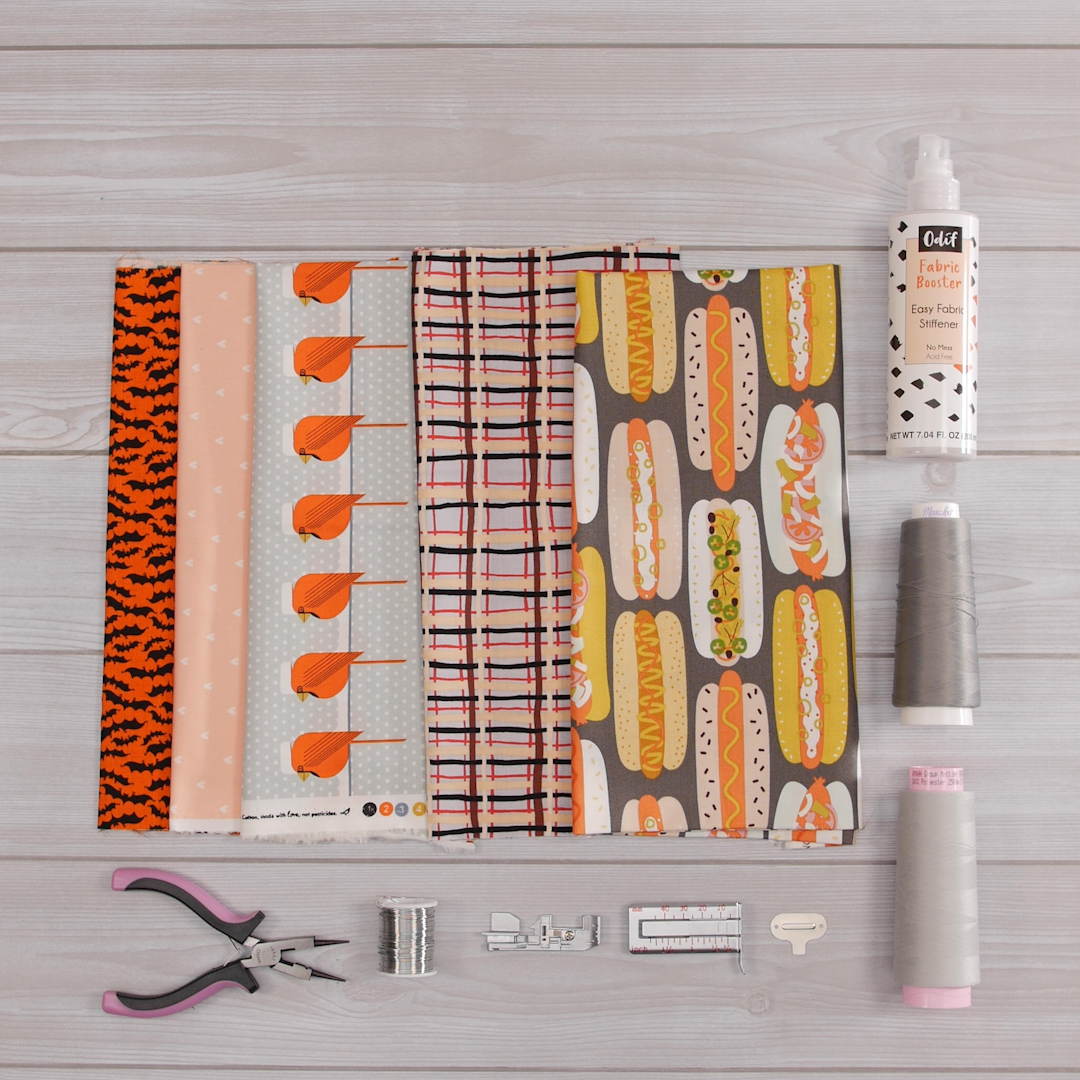
- Fabric: Cut 2 strips 2 to 3”wide x WOF (width of fabric)
- Jewelry making wire (or floral wire)
- Wire plyers/cutters
- Seam Guide
- Serger Thread
- Decorative Texturized Nylon Serger Thread (Maxi-lock Stretch)
- Odif Fabric Booster
- Parchment Paper or Press Cloth
- Iron
- Scissors
Steps to Create a DIY Wire-edged Ribbon
Step 1. Cut and Prepare Fabric
Cut your fabric into strips. (2) 2-3” x WOF (width of fabric)
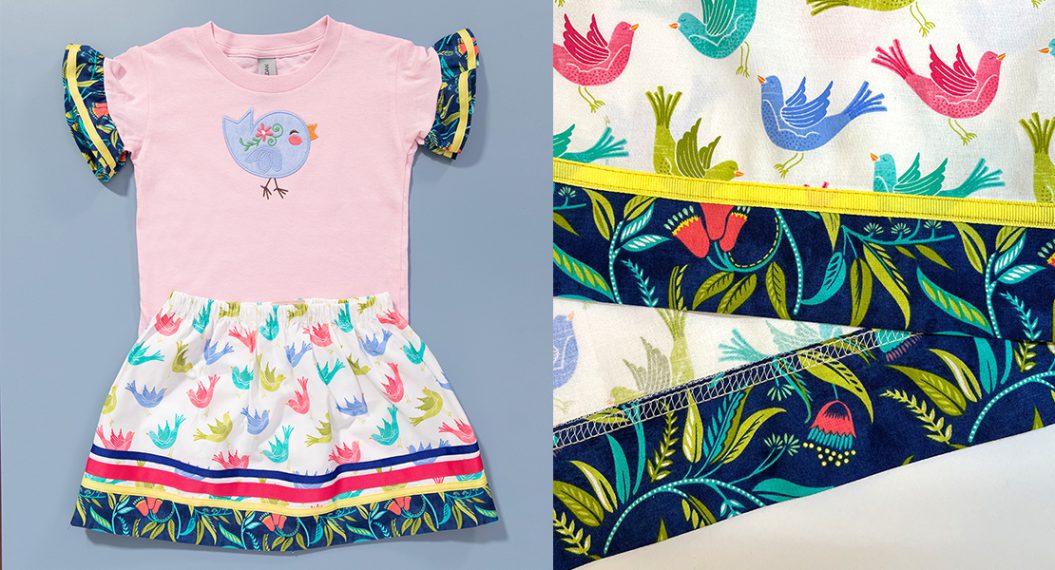
The width of the ribbon is up to you. For some of my fabrics, I determined the width based on the fabric design. You could totally use scraps for this too and could even patchwork some pieces together. Work with lengths no longer than the width of your fabric. You can use multiple pieces together to make a nice looking bow. When making these bows, I used one strip that was the width of fabric (approximately 42”), and another for the bow tails (approximately 18”).
The key to adding wire to a fabric edge is working with a nice stiff fabric, otherwise the fabric tends to gather over the wire while you are sewing. This is also the reason that I recommend working with lengths no longer than the width of fabric—it’s just so much easier to manage. I recently tried a new product, Odif Fabric Stiffener, which is similar to starch but makes the product much more stiff. I was impressed with the results of using this for this type of project. If you can’t find this product, use your favorite starch or even terial magic.
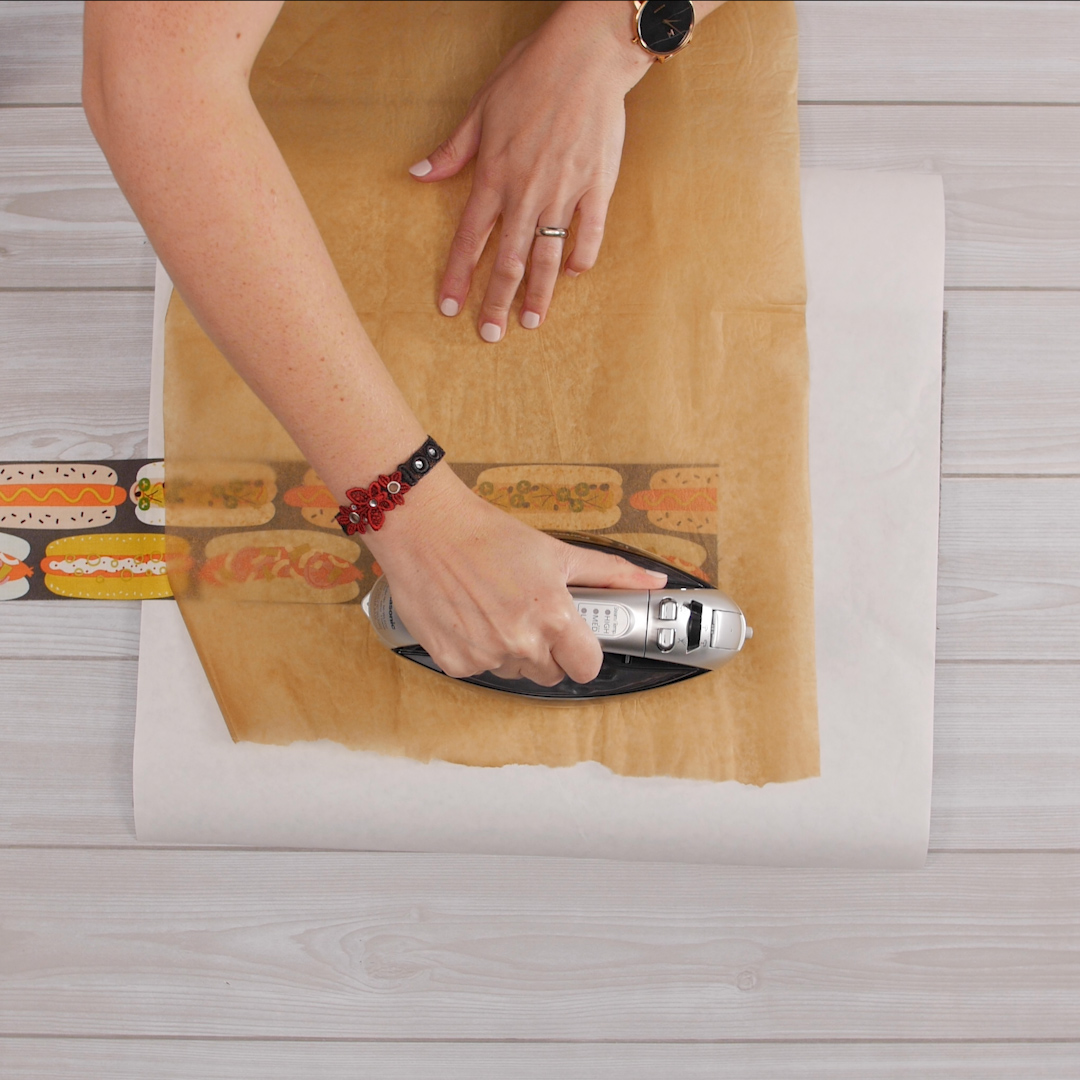

The fabric booster sprays onto the fabric and then can be set using an iron. I covered my pressing mat with parchment paper to not saturate it with the stiffener. Then I used parchment paper as a pressing cloth to protect the surface of my iron. The directions on the fabric booster tell you to do this. The result was a nice stiff fabric to add wire to and create a shapely bow.
Step 2. Set-up Overlocker
Now that your fabric is ready, it’s time to set up the overlocker. For this technique I recommend a 3-thread overlock, using a decorative thread in the upper looper. Textured nylon or polyester thread looks great in a rolled hem and so does your fun variegated threads for a striped effect. If you are using a textured thread, like Maxi-Lock Stretch, it is easiest to tie the thread to the upper looper thread already in the machine and pull it through the machine and out the looper eye.
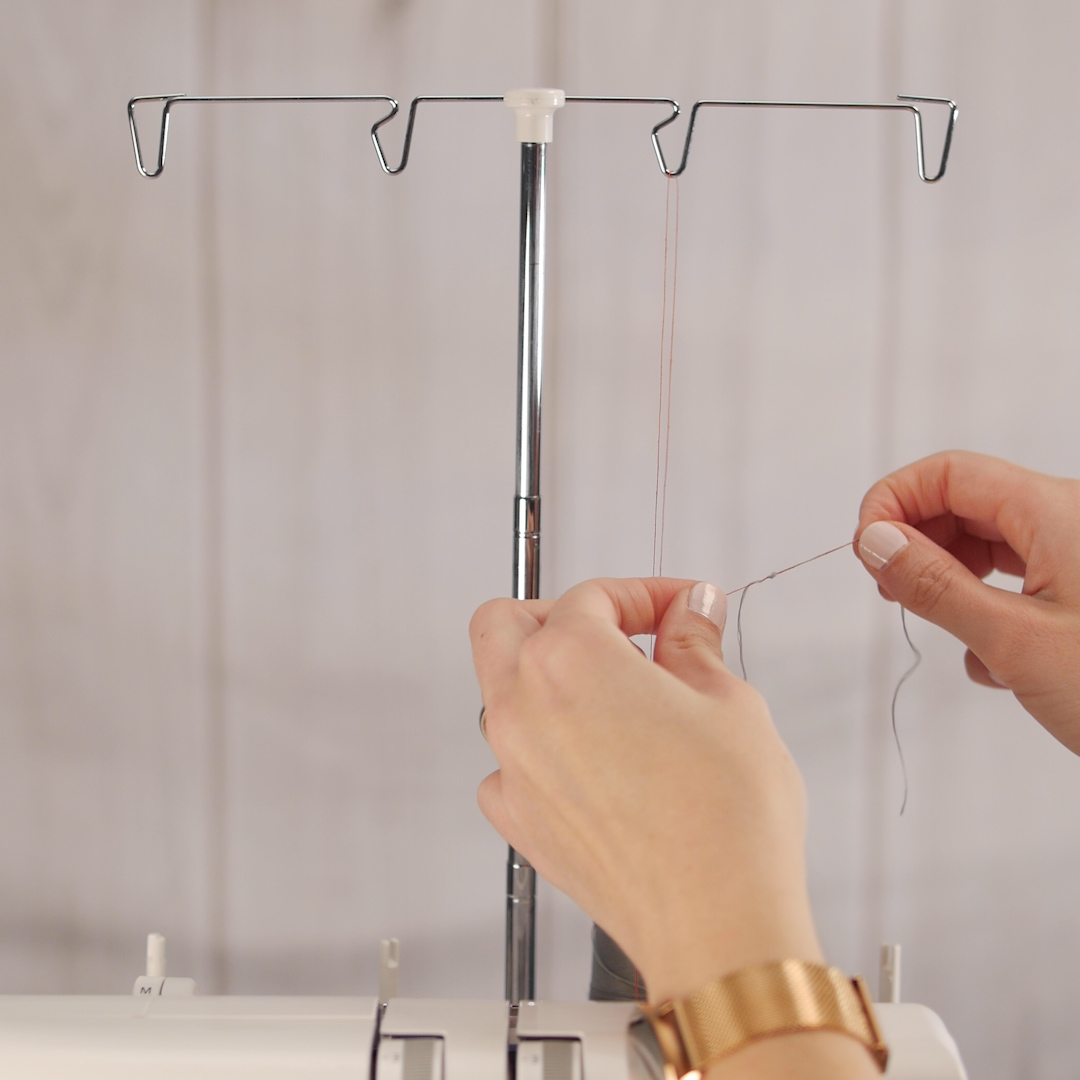
Thread your lower looper and right needle with a matching regular serger thread, like Seracor or Maxi-Lock.
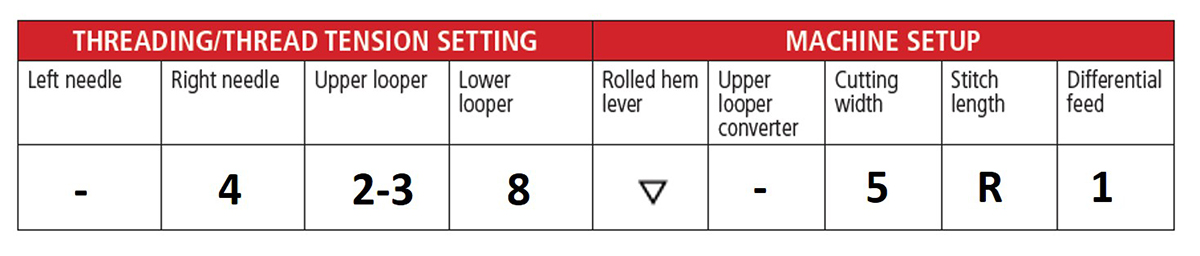
Adjust your machine settings for a 3-thread rolled hem.
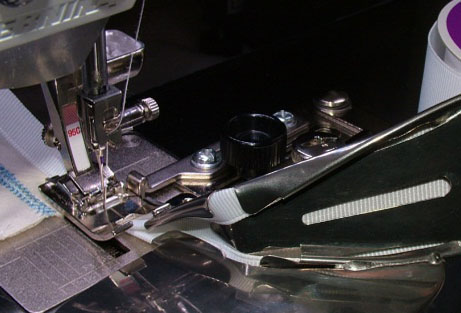
Step 3. Set the Presser Foot
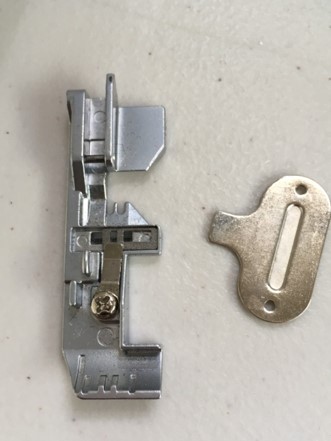
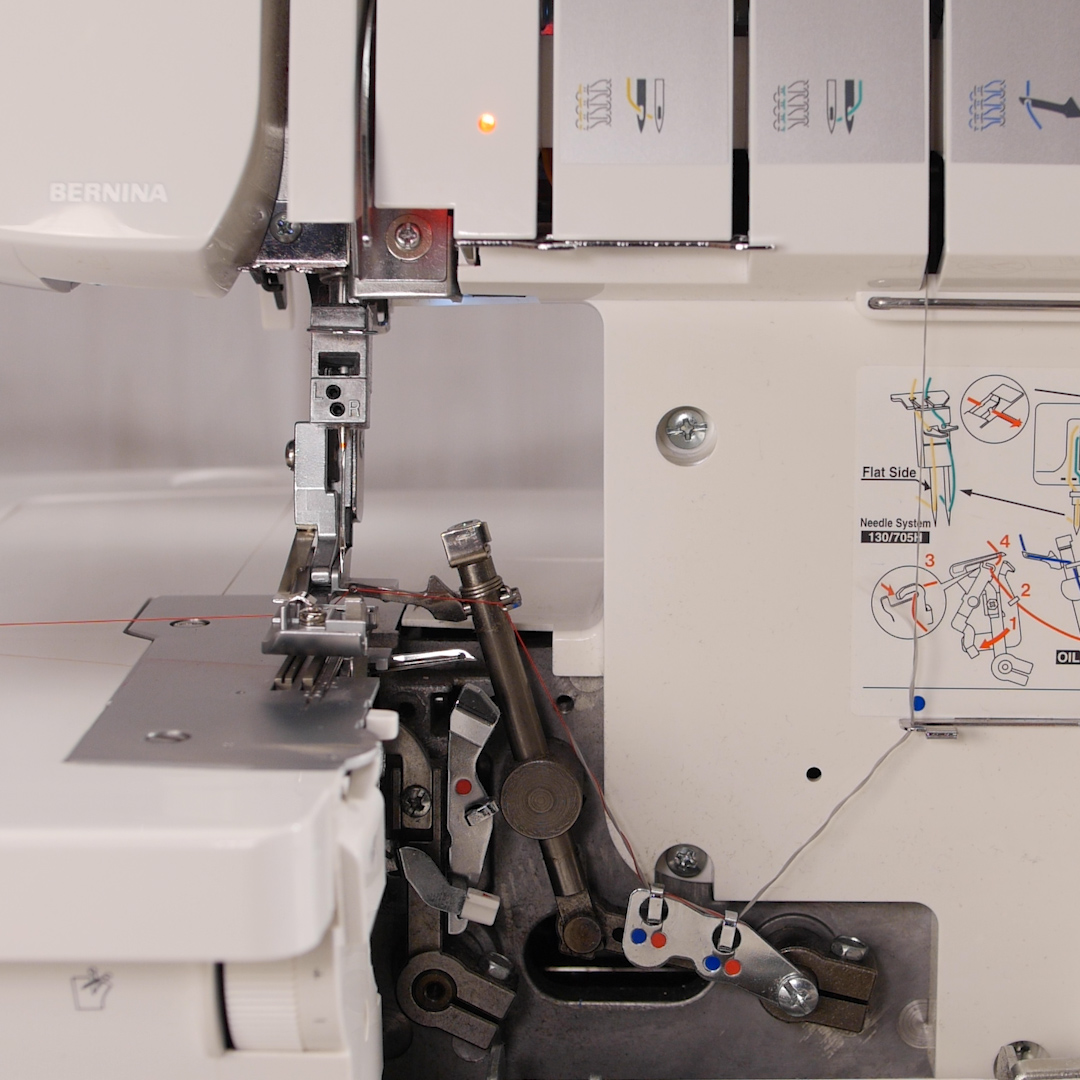
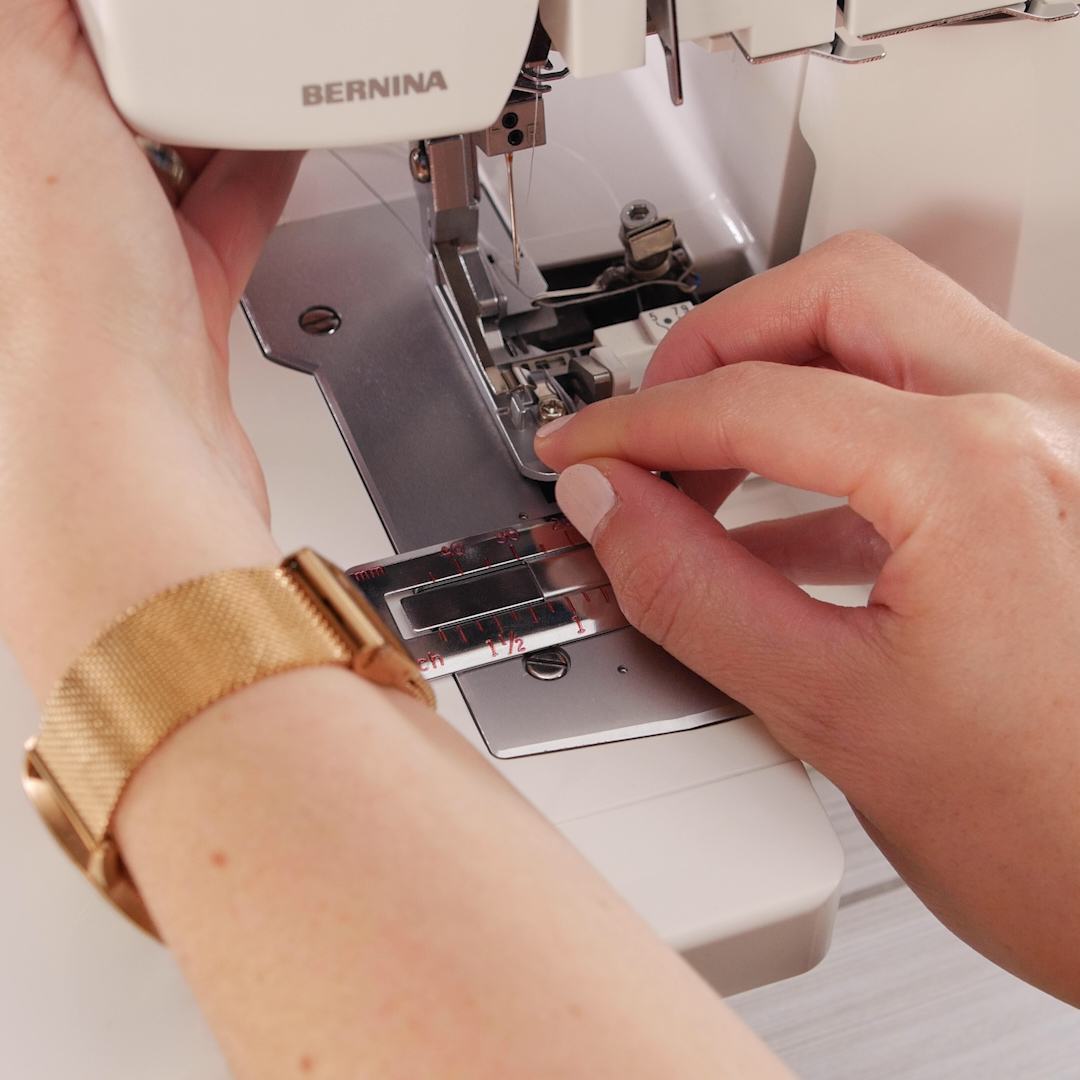
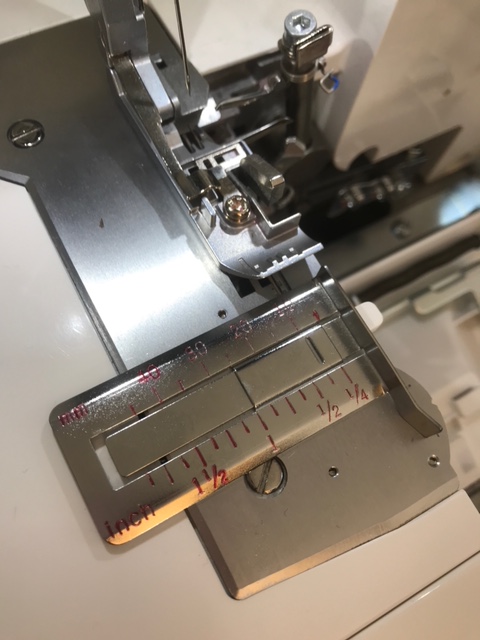
The BERNINA L 460 and L 450 machines, come with the standard overlocker presser foot that has a built in guide. This guide is particularly helpful for adding twill or narrow elastic into a seam for added security, but it can also be used to add wire or fishing line into a rolled hem stitch.
To adjust the tape guide, simply loosen the screw enough that the guide can move easily. Move the guide until a narrow opening, aligned with the right needle, is visible.
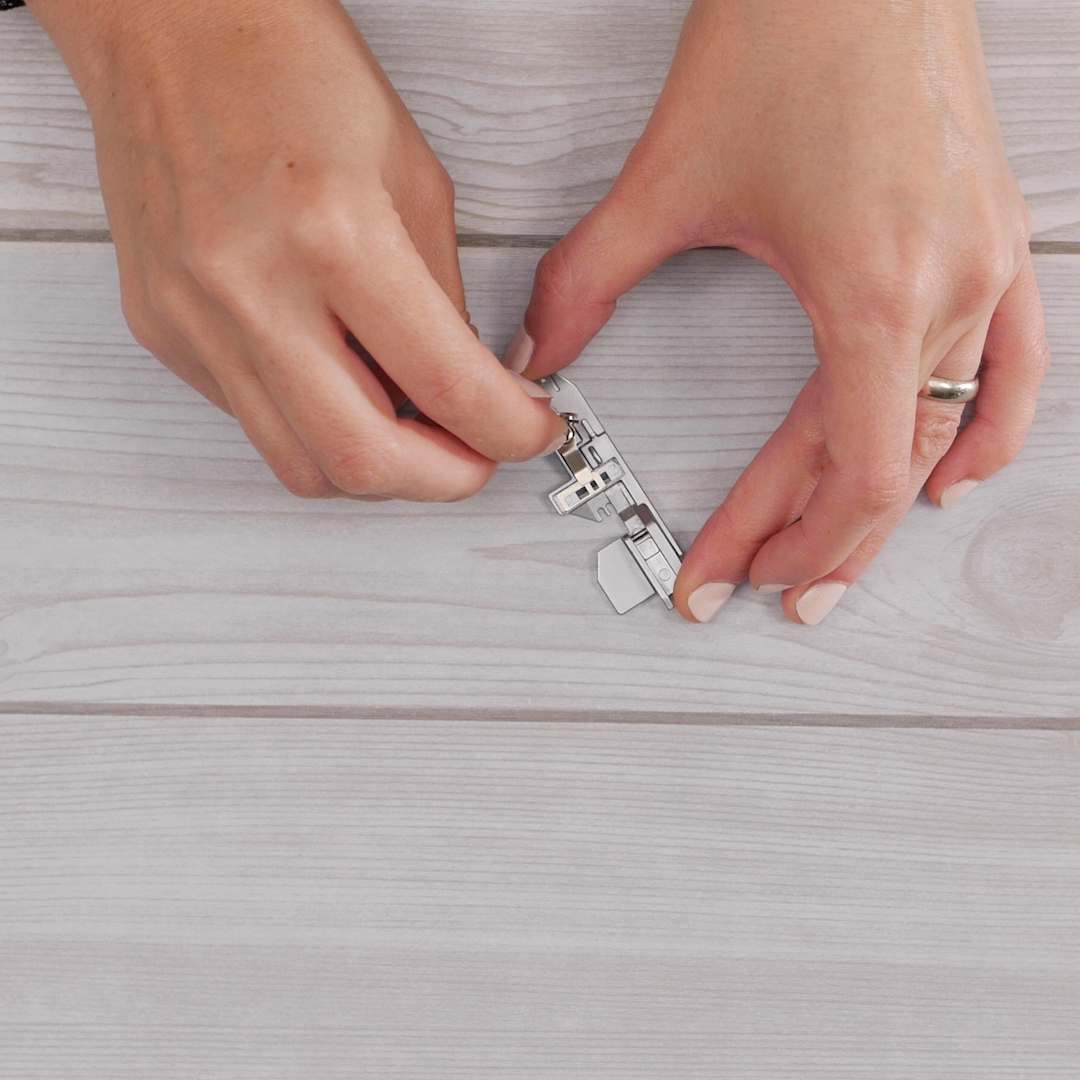
Thread the wire into this opening. With about 6” of wire underneath and behind the foot, place the foot onto the machine. It is much easier to attach to the machine with the wire in place than to try to thread the wire into the opening while the foot is attached to the machine.
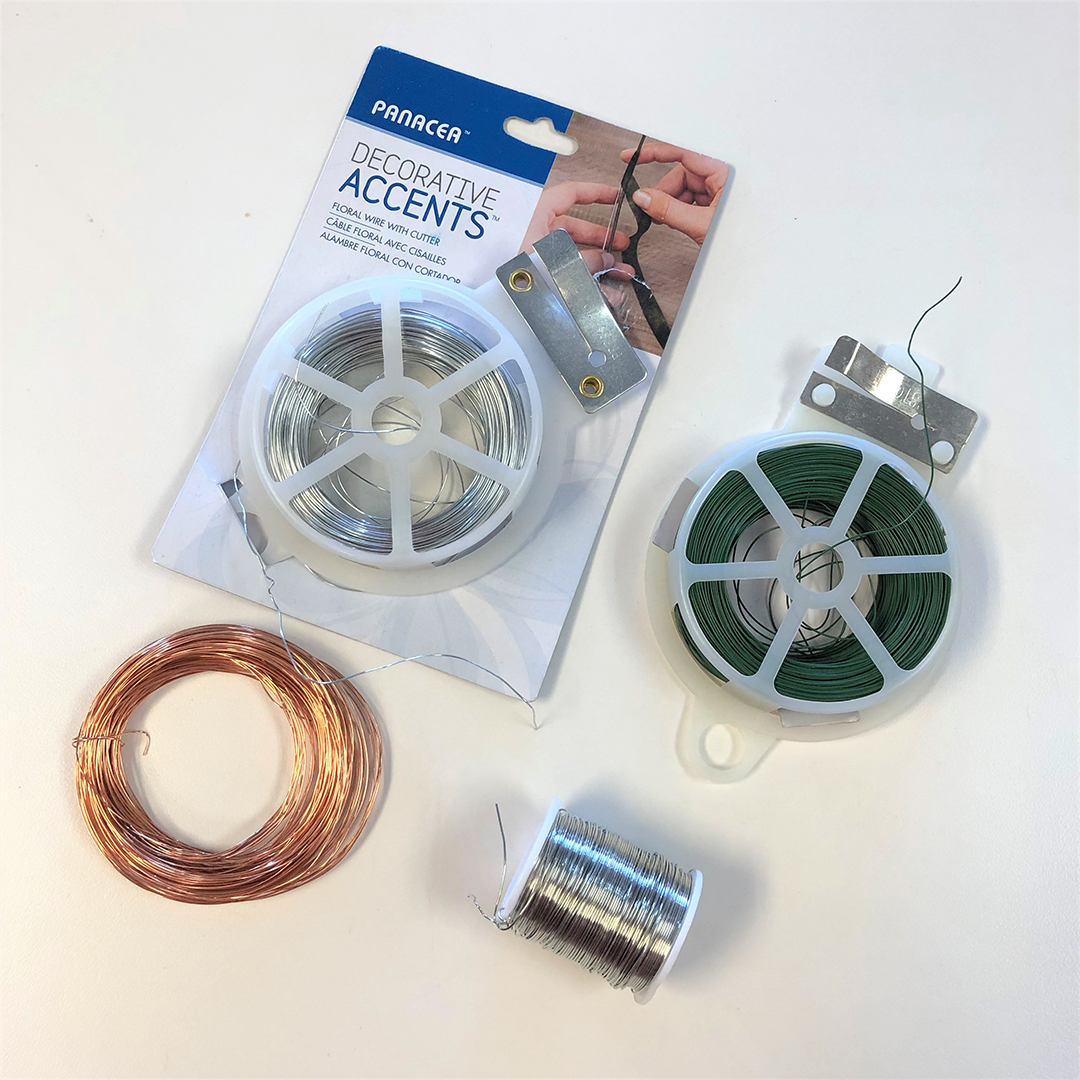
I have found that floral wire or jewelry wire works well for this application. You can find most of these types of wire at any craft store.
Tip: I recommend leaving the screw loose enough that you can move the guide, but you don’t have to loosen/tighten it each time you move it.
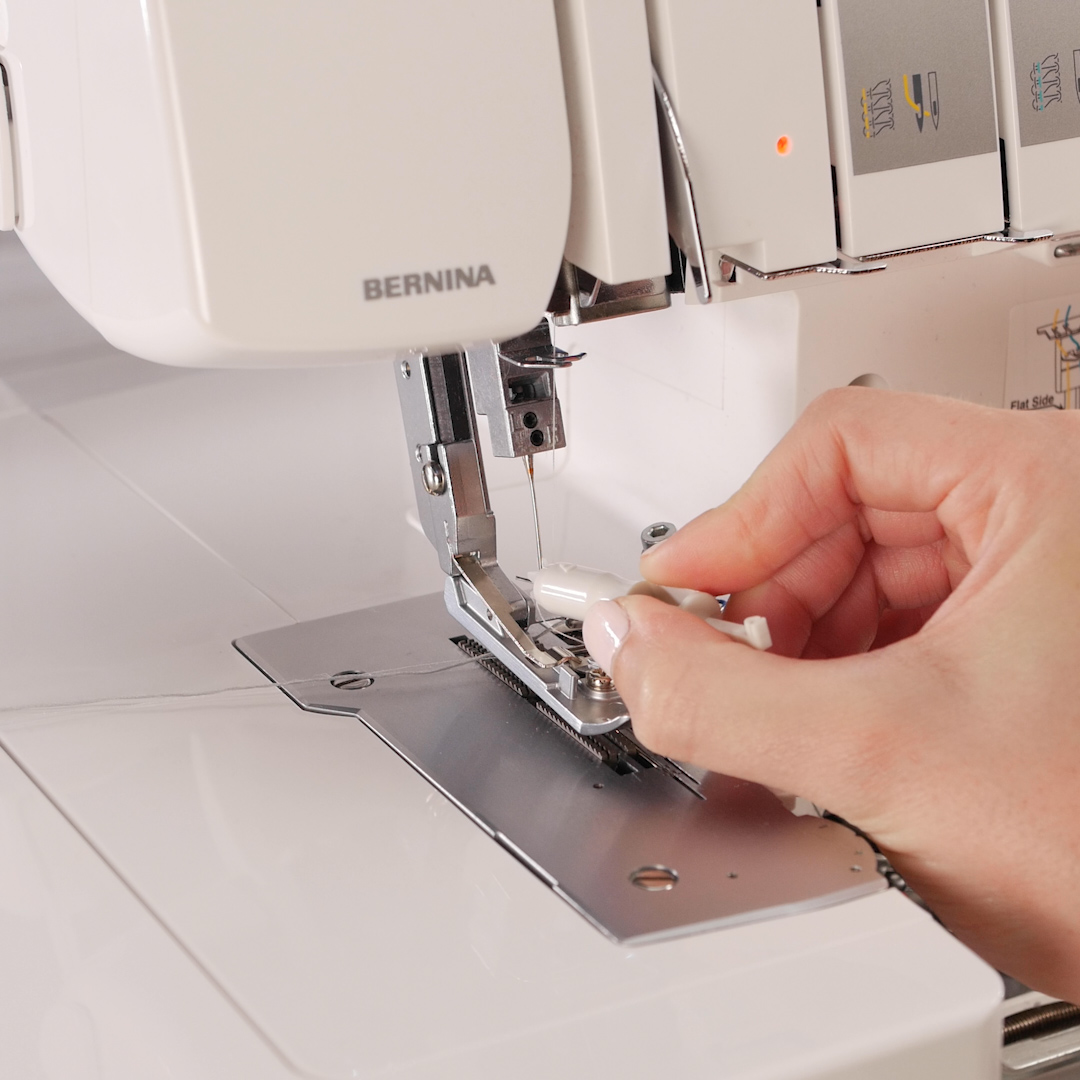
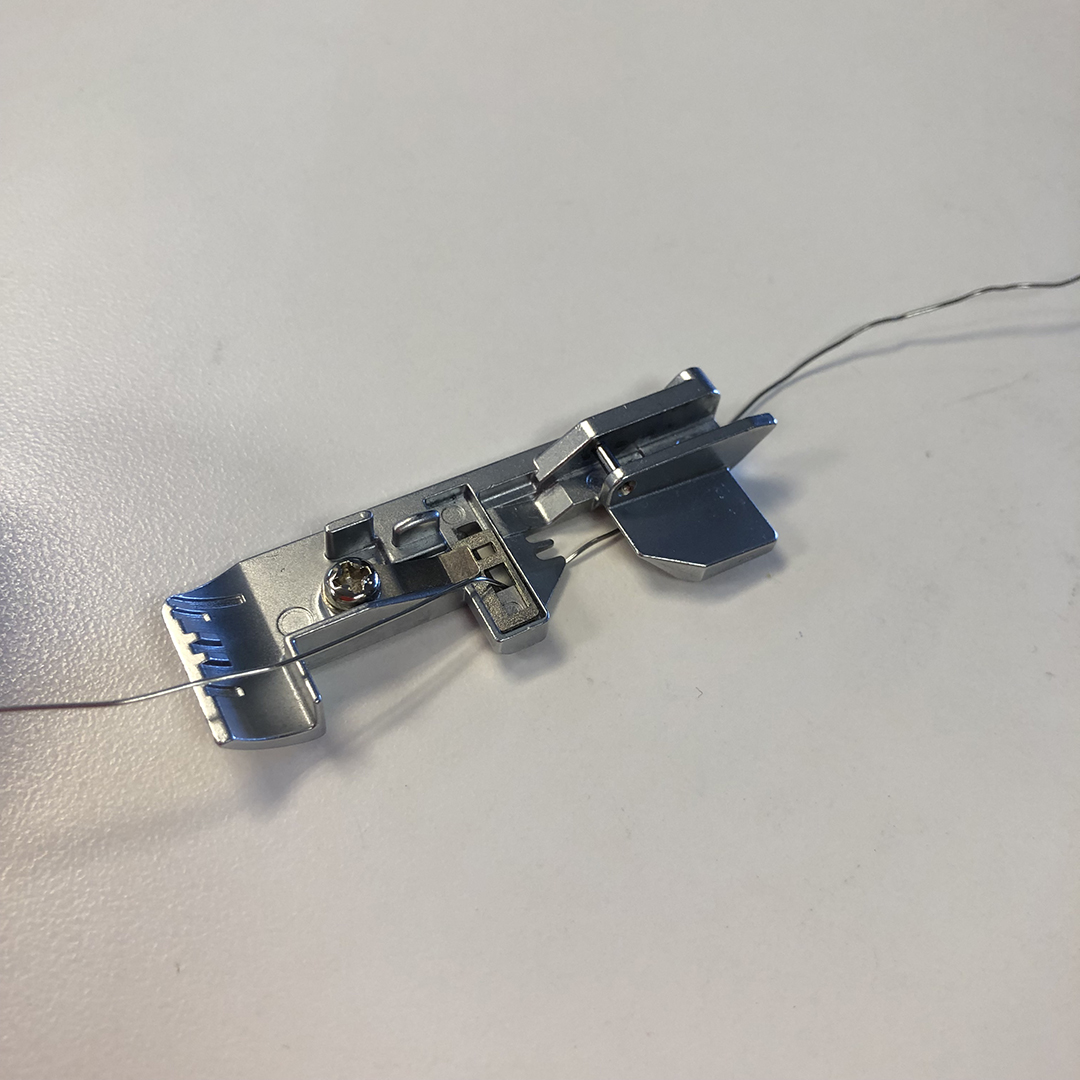
Step 3. Sew the Wire Edge
Once the foot, with the wire threaded, is on the machine, sew the rolled hem stitch before you add any fabric. This will allow you to ensure that the stitch and foot setting are working correctly.
Add the seam guide to the machine to help you keep the fabric going into the machine straight. Your hands will be doing a lot of work to keep the wire feeding smoothly and you will be watching to make sure the thread is catching the wire, so having a little help from the seam guide makes keeping the fabric straight easier.
Set your seam guide at a setting that is comfortable to you, making sure that the machine is trimming some fabric from the edge for the best result.
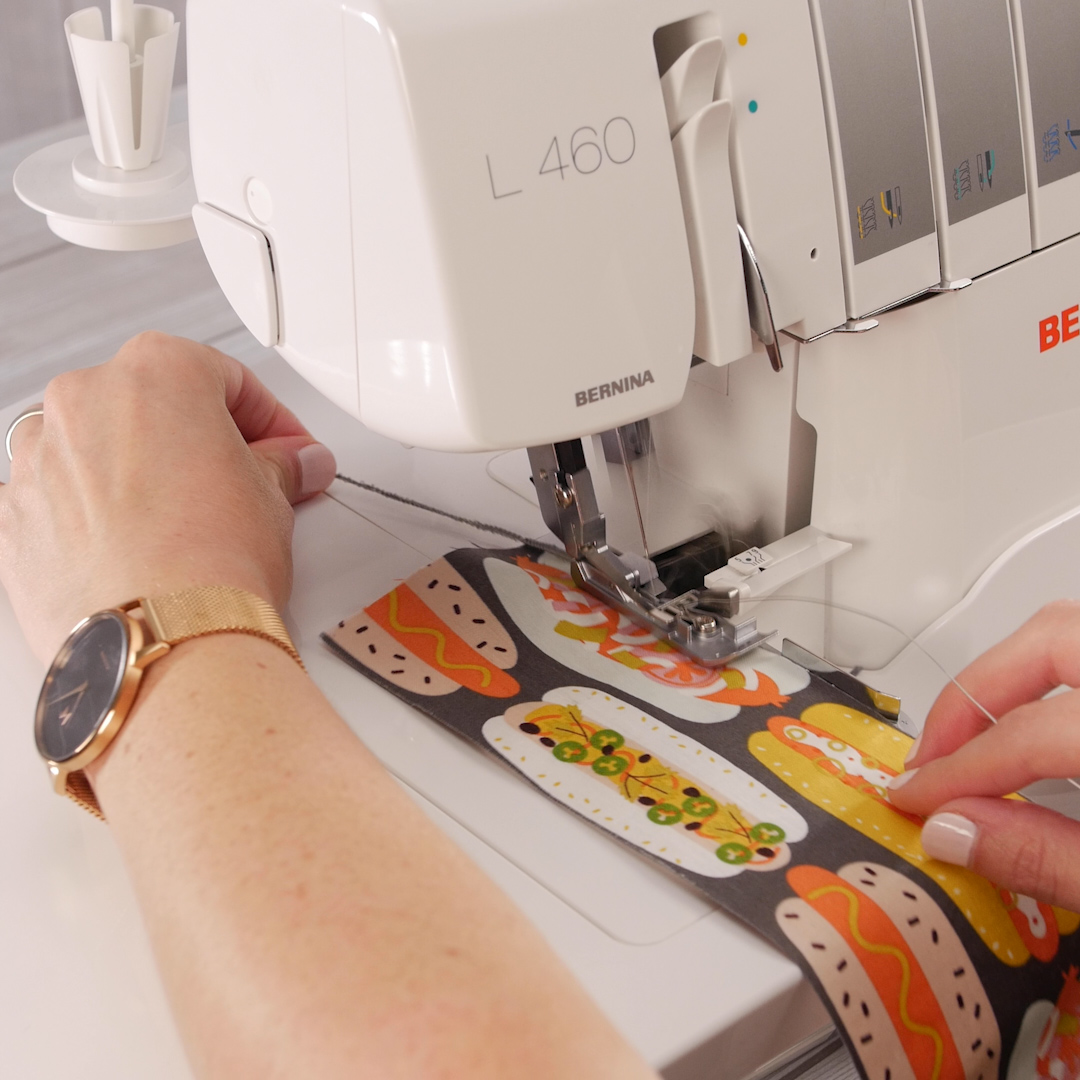
Add your fabric under the presser foot. As you sew, watch to make sure that the rolled hem stitch is catching both the wire into the stitch, as well as catching the fabric edge. You will need to help the machine move the wire, so stop and adjust as you need to. Hold onto the end of the wire as the stitch is being made. As I mentioned before, the fabric will tend to gather along the wire edge. Starting and ending with a long wire tail will allow you to smooth out any fabric gathering that might occur when you finish.
Sew the wire edge along both sides of your fabric strip with the right side of the fabric facing up—you want the pretty side of the rolled hem to show after all.
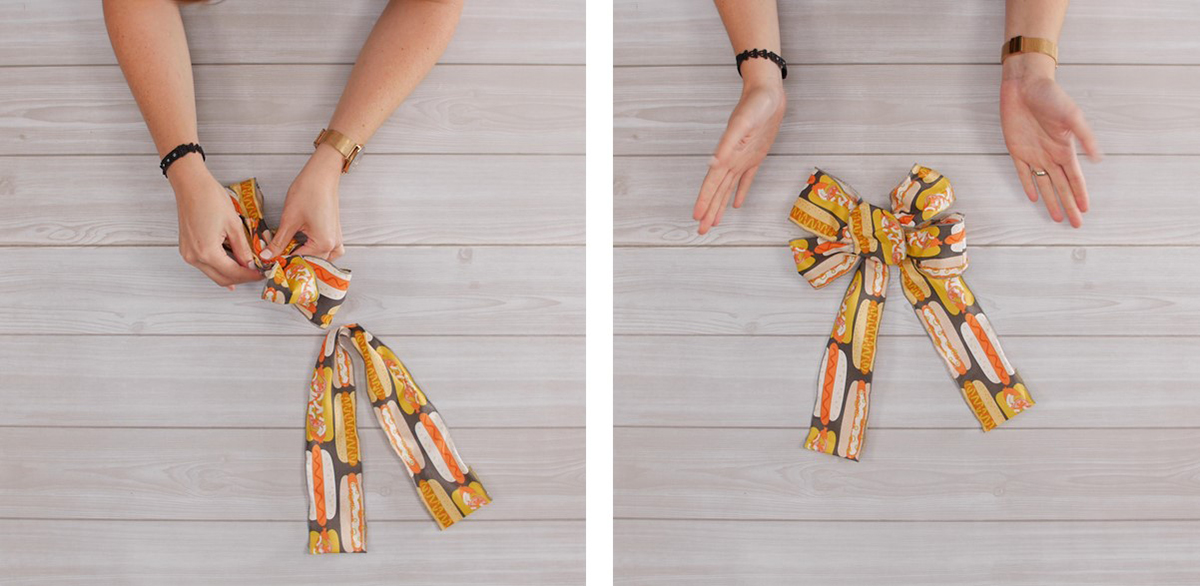
When both sides are complete, smooth out the fabric. Trim the wire portion a little longer than the fabric. I recommend simply folding under the bottom edge with a basic double fold. For most projects, this is a fine way to secure the wire and finish the edge. If you want a tidier finish—I recommend doing the same folded edge but sewing it down with your sewing machine.
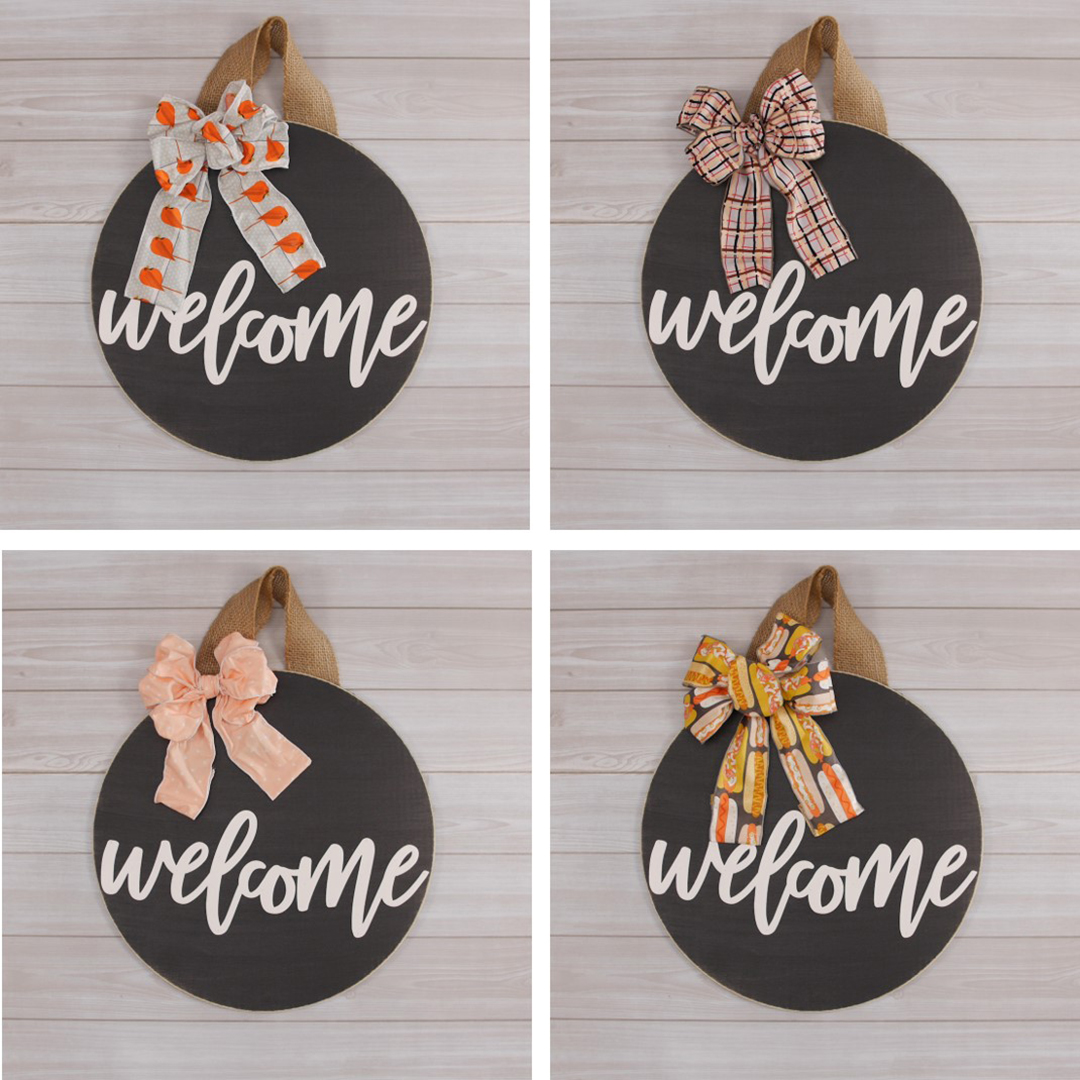
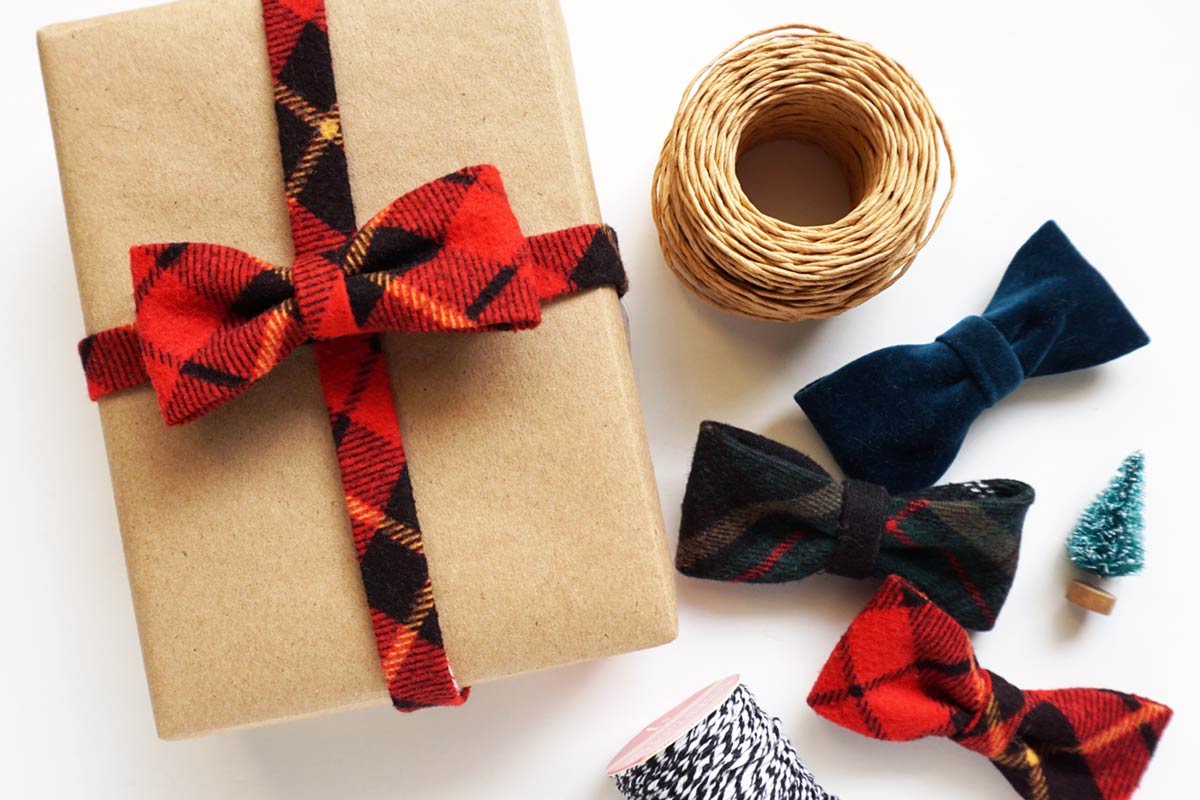
Now you all you have to do is perfect your bow making skills. Use some left over wire to join the bow loops to the tie tails and you will be an expert bow maker in no time!
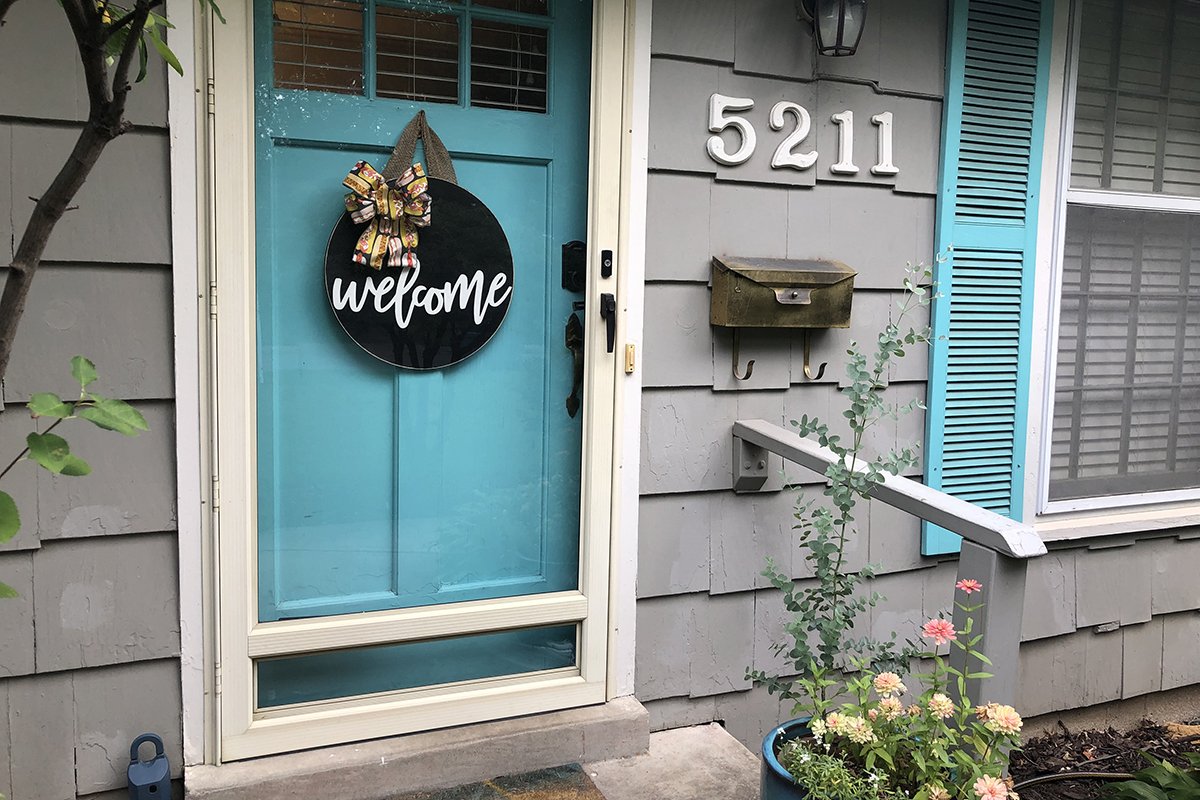
Make as many bows as you want and you can have a simple way to change your décor for the season. I made several options to add to this fun modern door wreath that I purchased on Etsy from a maker in Nebraska, Brick House Design Company.